

Isn’t it a beauty?
Now available as a free video tutorial!
This is the easiest, fastest, and cleanest-looking pillowcase method I’ve tried. So easy, so fun…and excellent for stash busting!


Honey Bee Quilt Store is participating in American Patchwork & Quilting’s 1 Million Pillowcase Challenge. The first batch of gorgeous handmade pillowcases that Honey Bee has collected is going to the Texas Baptist Children’s Home, located in Round Rock, Texas.
I knew as soon as I heard about it that I wanted to participate.
Read more on the Honey Bee Blog.
I was asked by the store owner to share instructions online so they could easily direct customers to them. This is my version. I hope you enjoy the tutorial, make lots of pillowcases, and give them to friends or charity! (Oh, okay, you can keep one or two for yourself!)
You’ll need:
Three lengths of fabric in three coordinating colors. Makes one standard-size pillowcase.
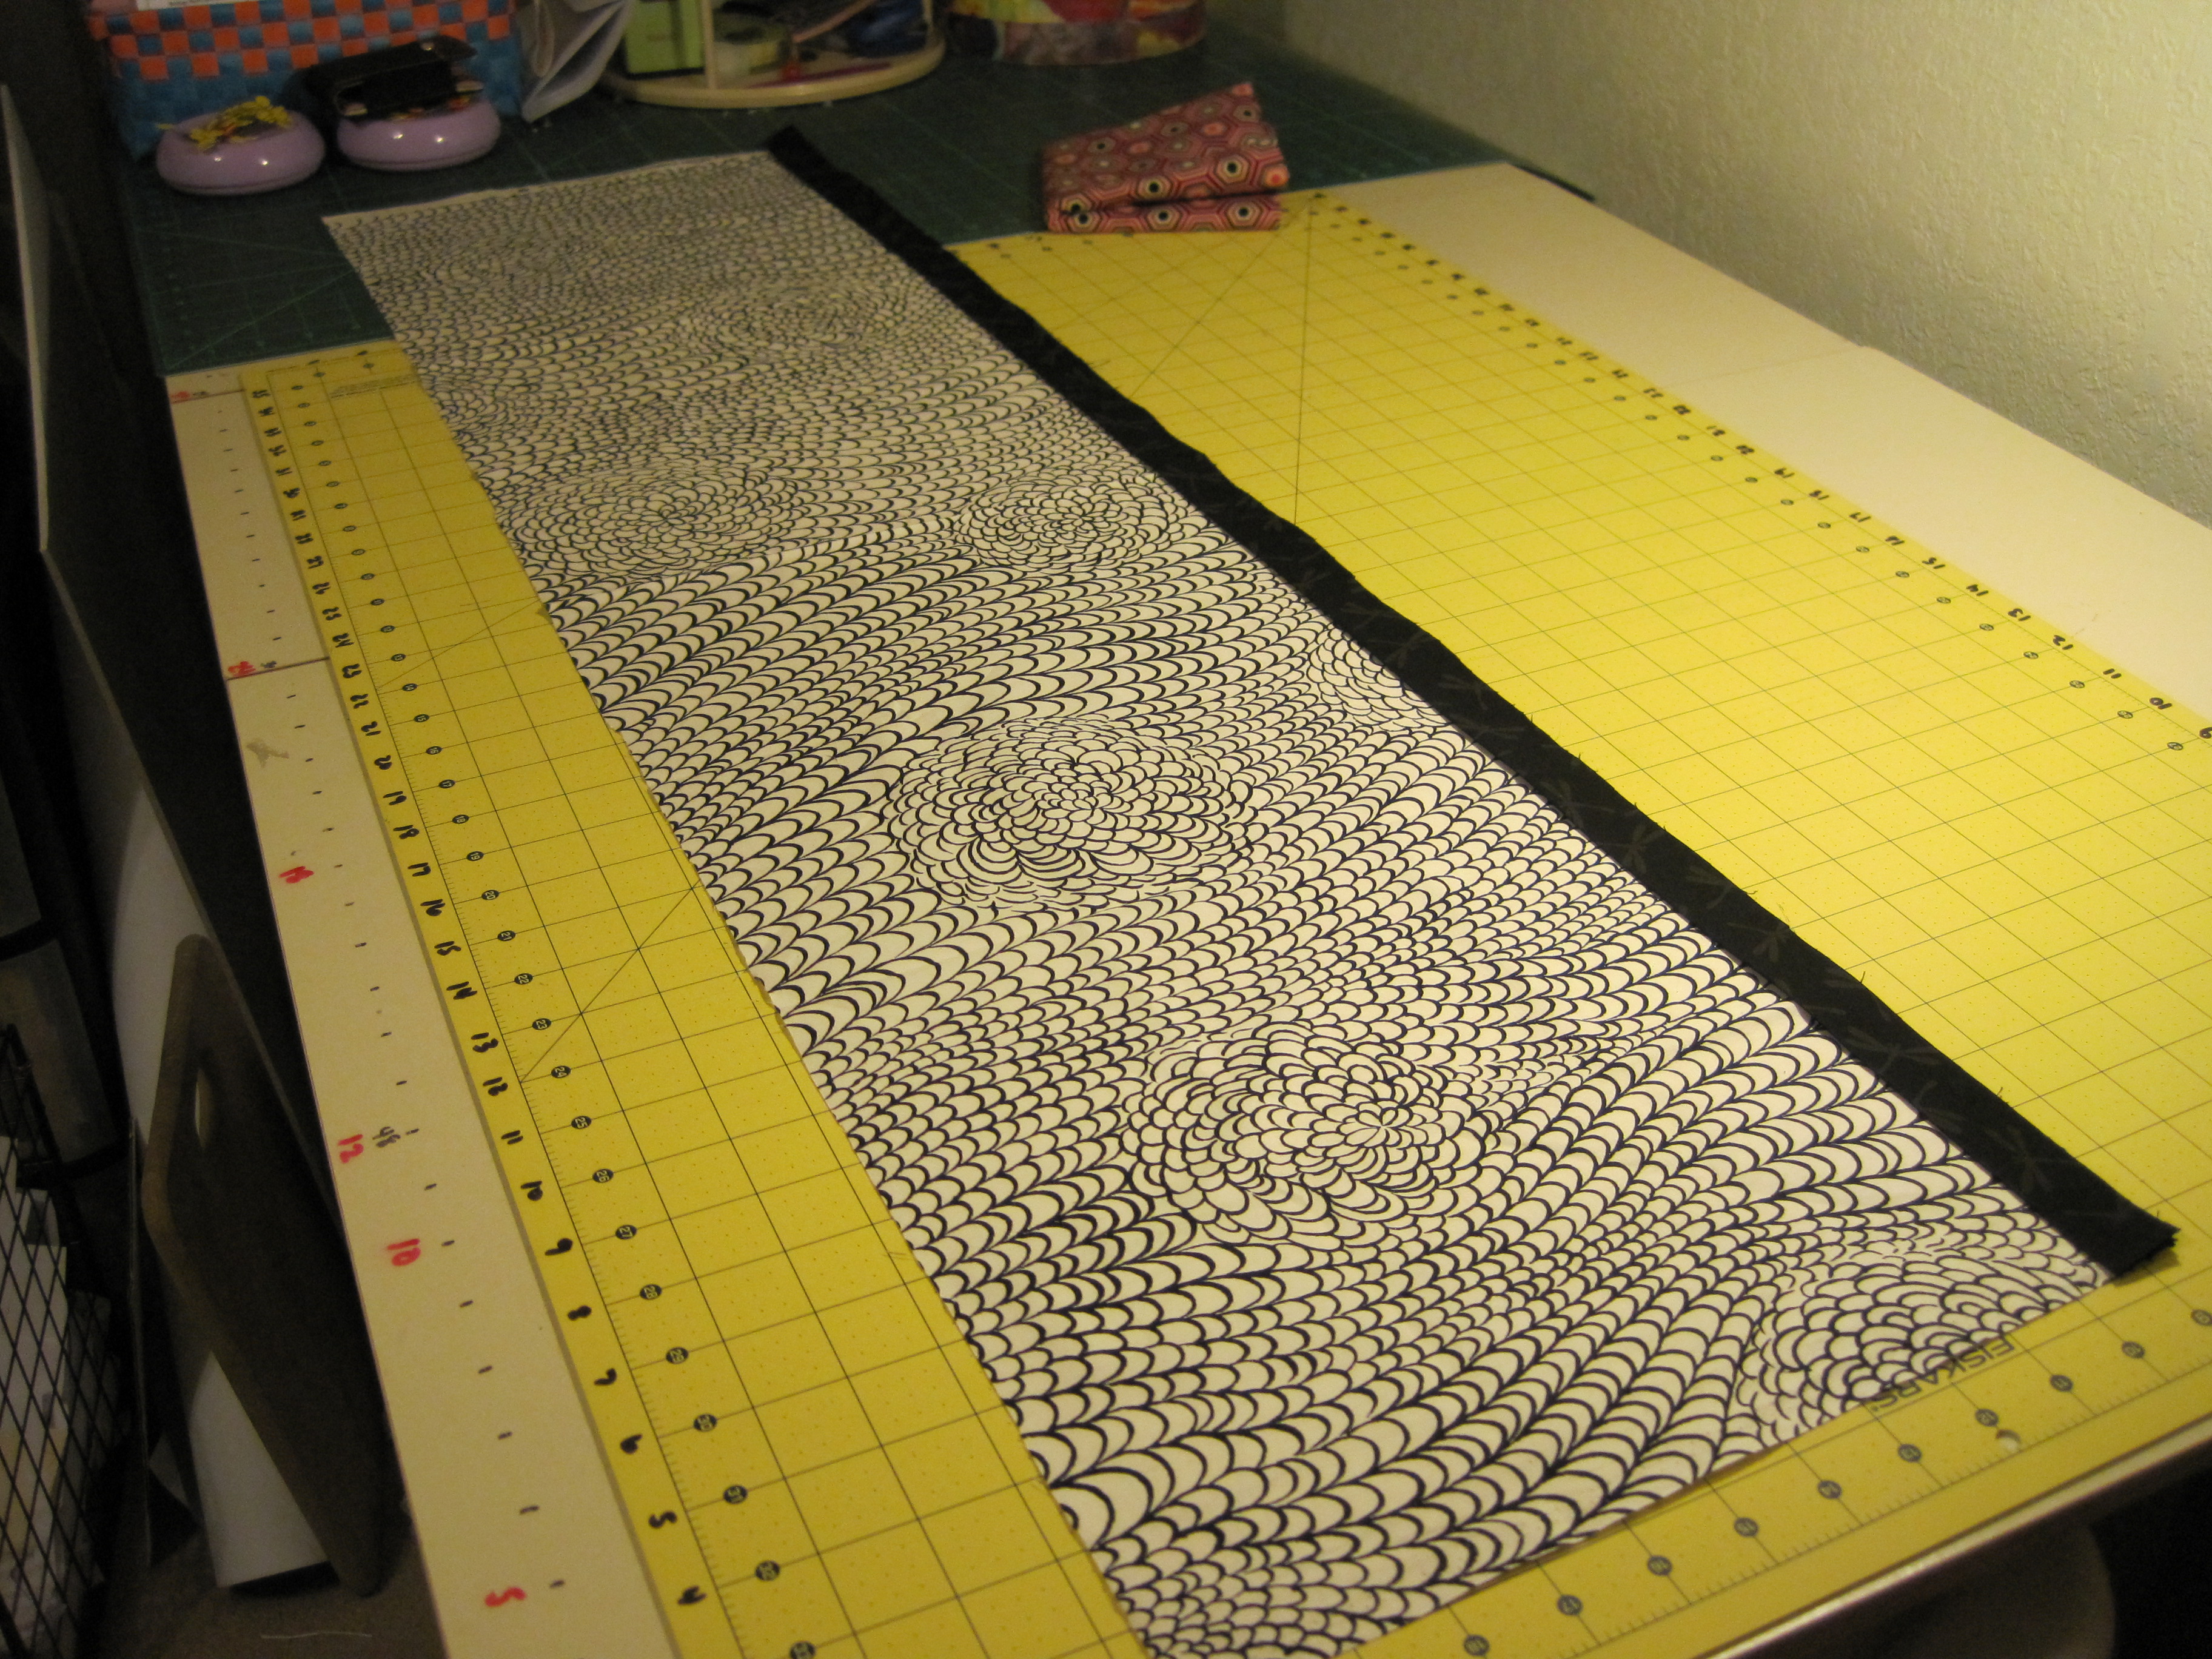
- BUN (cuff) – 12″ x WOF (width of fabric ~ 44″)
- MUSTARD (flange) – 2″ – 3″ x WOF (optional)
- HOT DOG (body) 24″ – 26″ x WOF (for longer pillowcases, lengthen here)
You can vary the bun/hot dog size up or down, just make sure that the total yardage between those two is 36″ – 38″. 9 – 12″ for the bun is ideal.
If you use two yards of coordinating fabric, plus 6″ of a third, you can make two coordinating pillowcases with opposite colors!

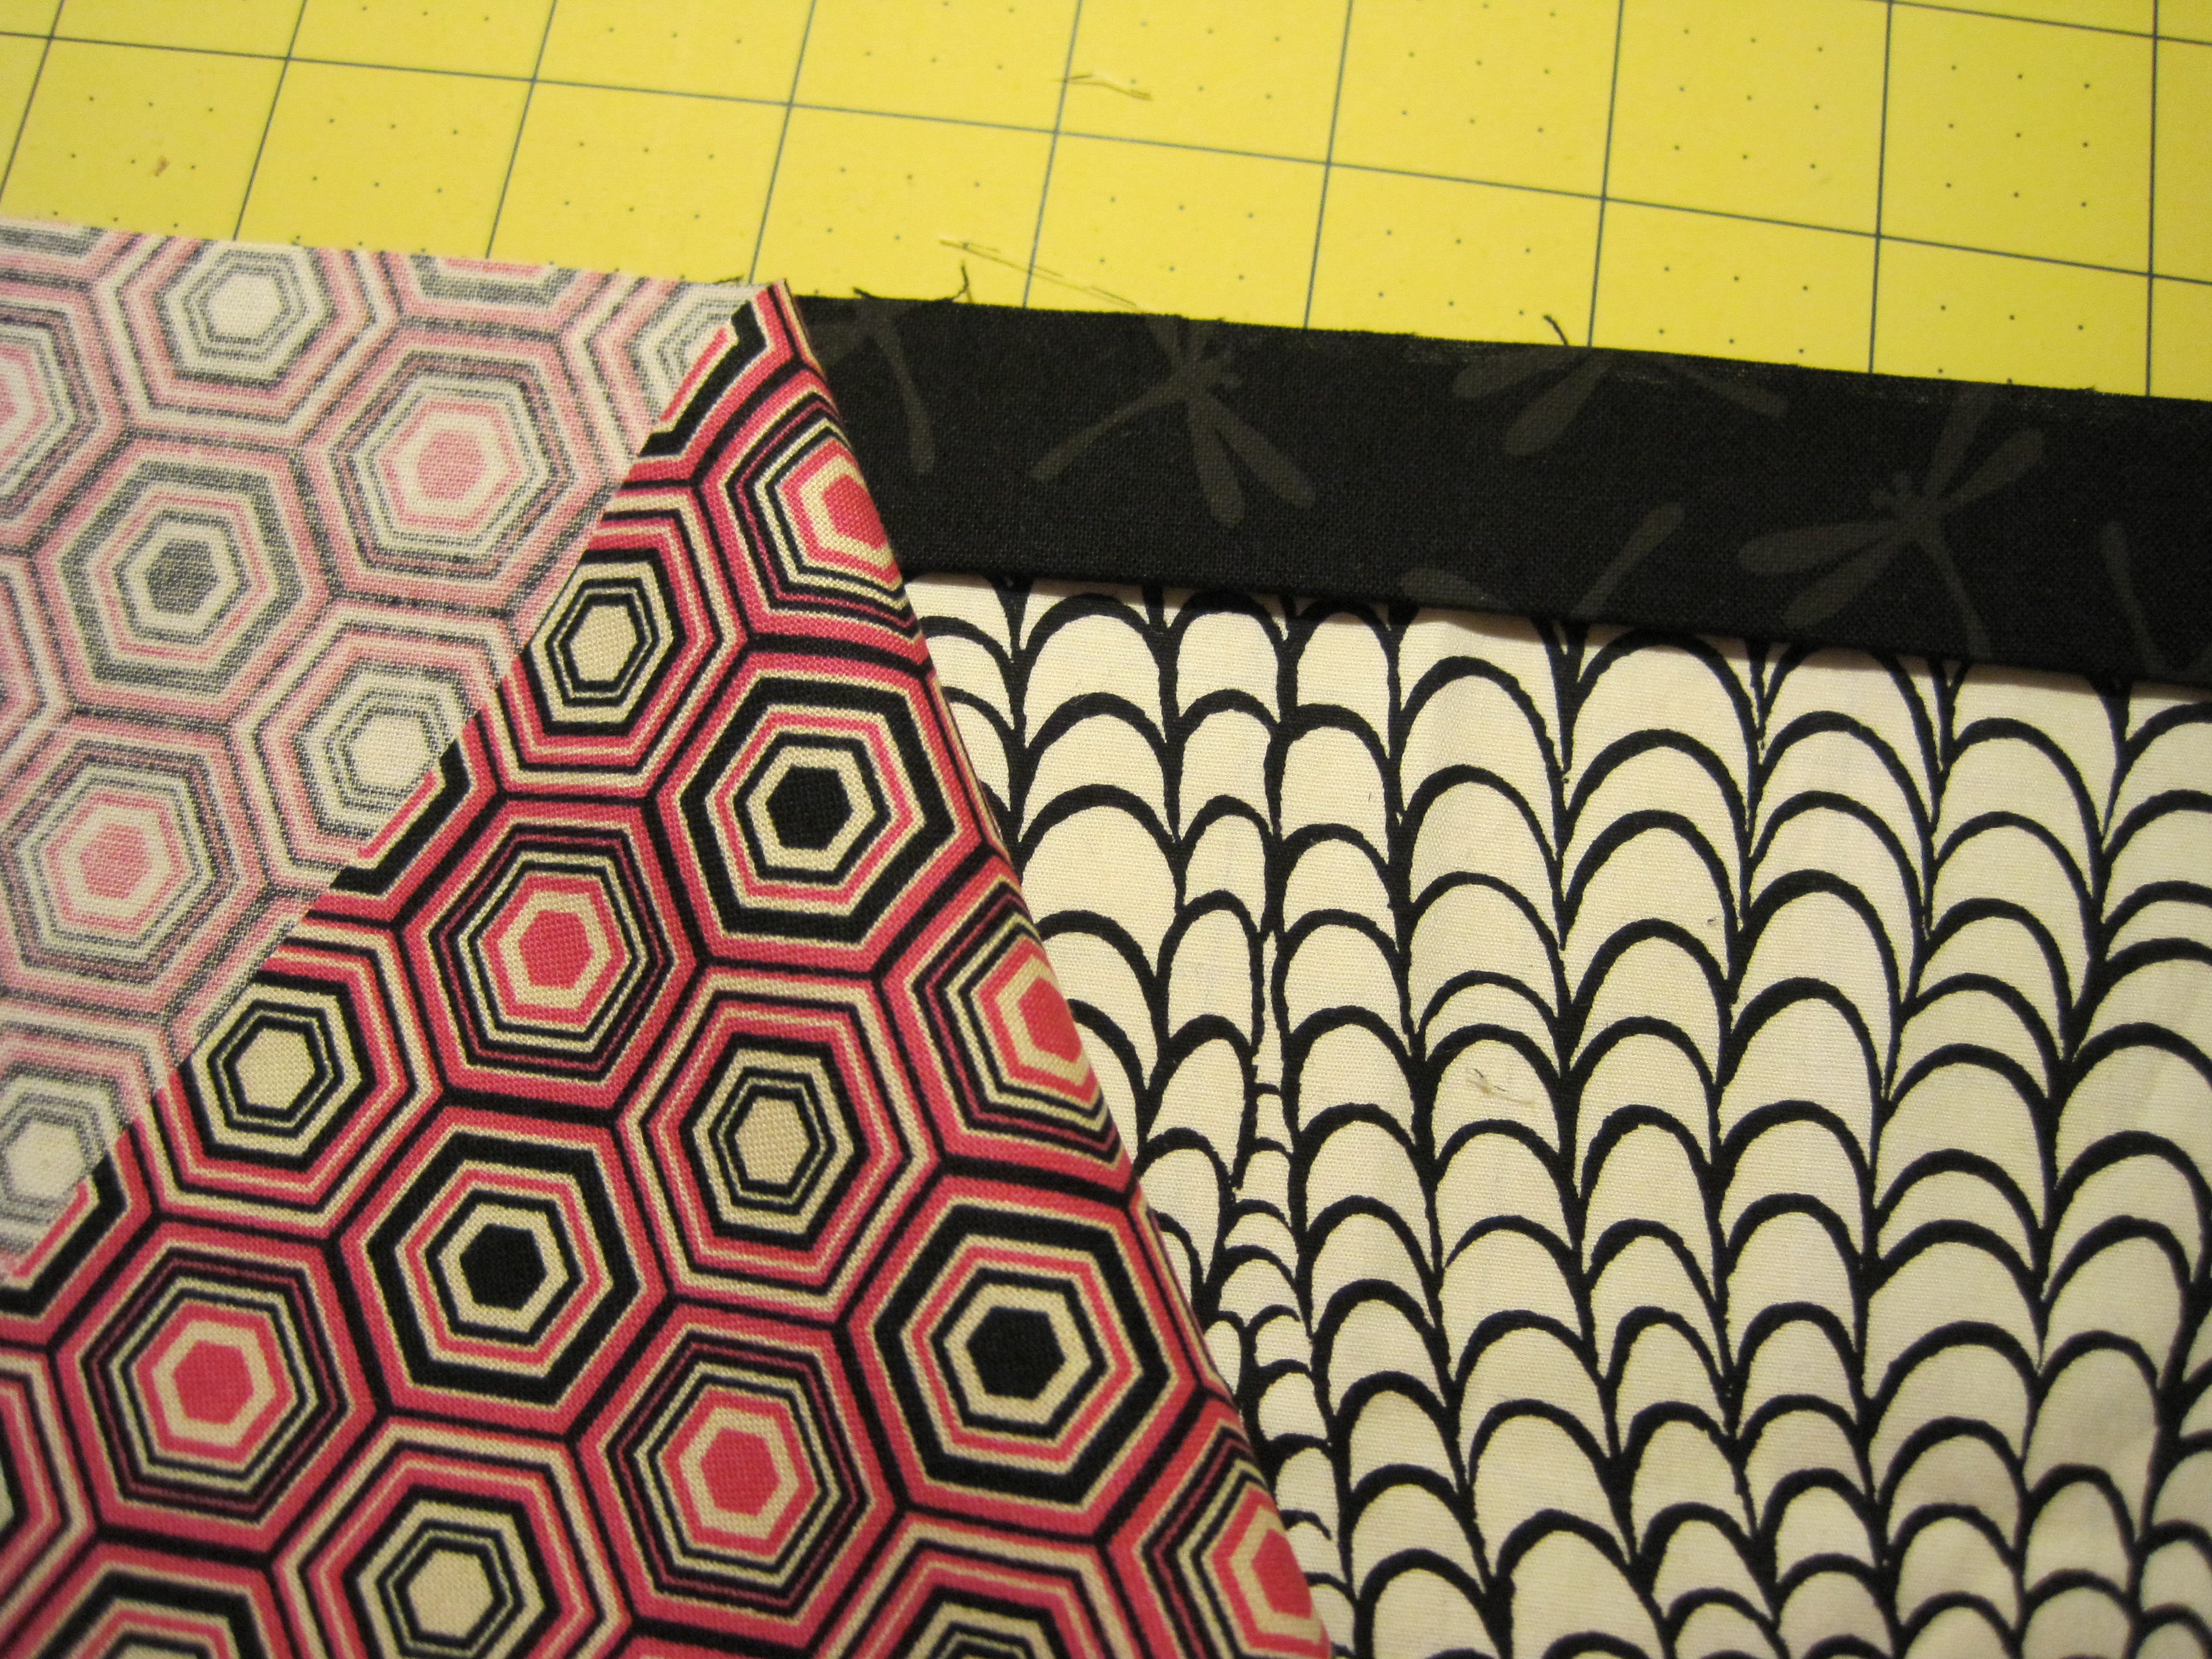
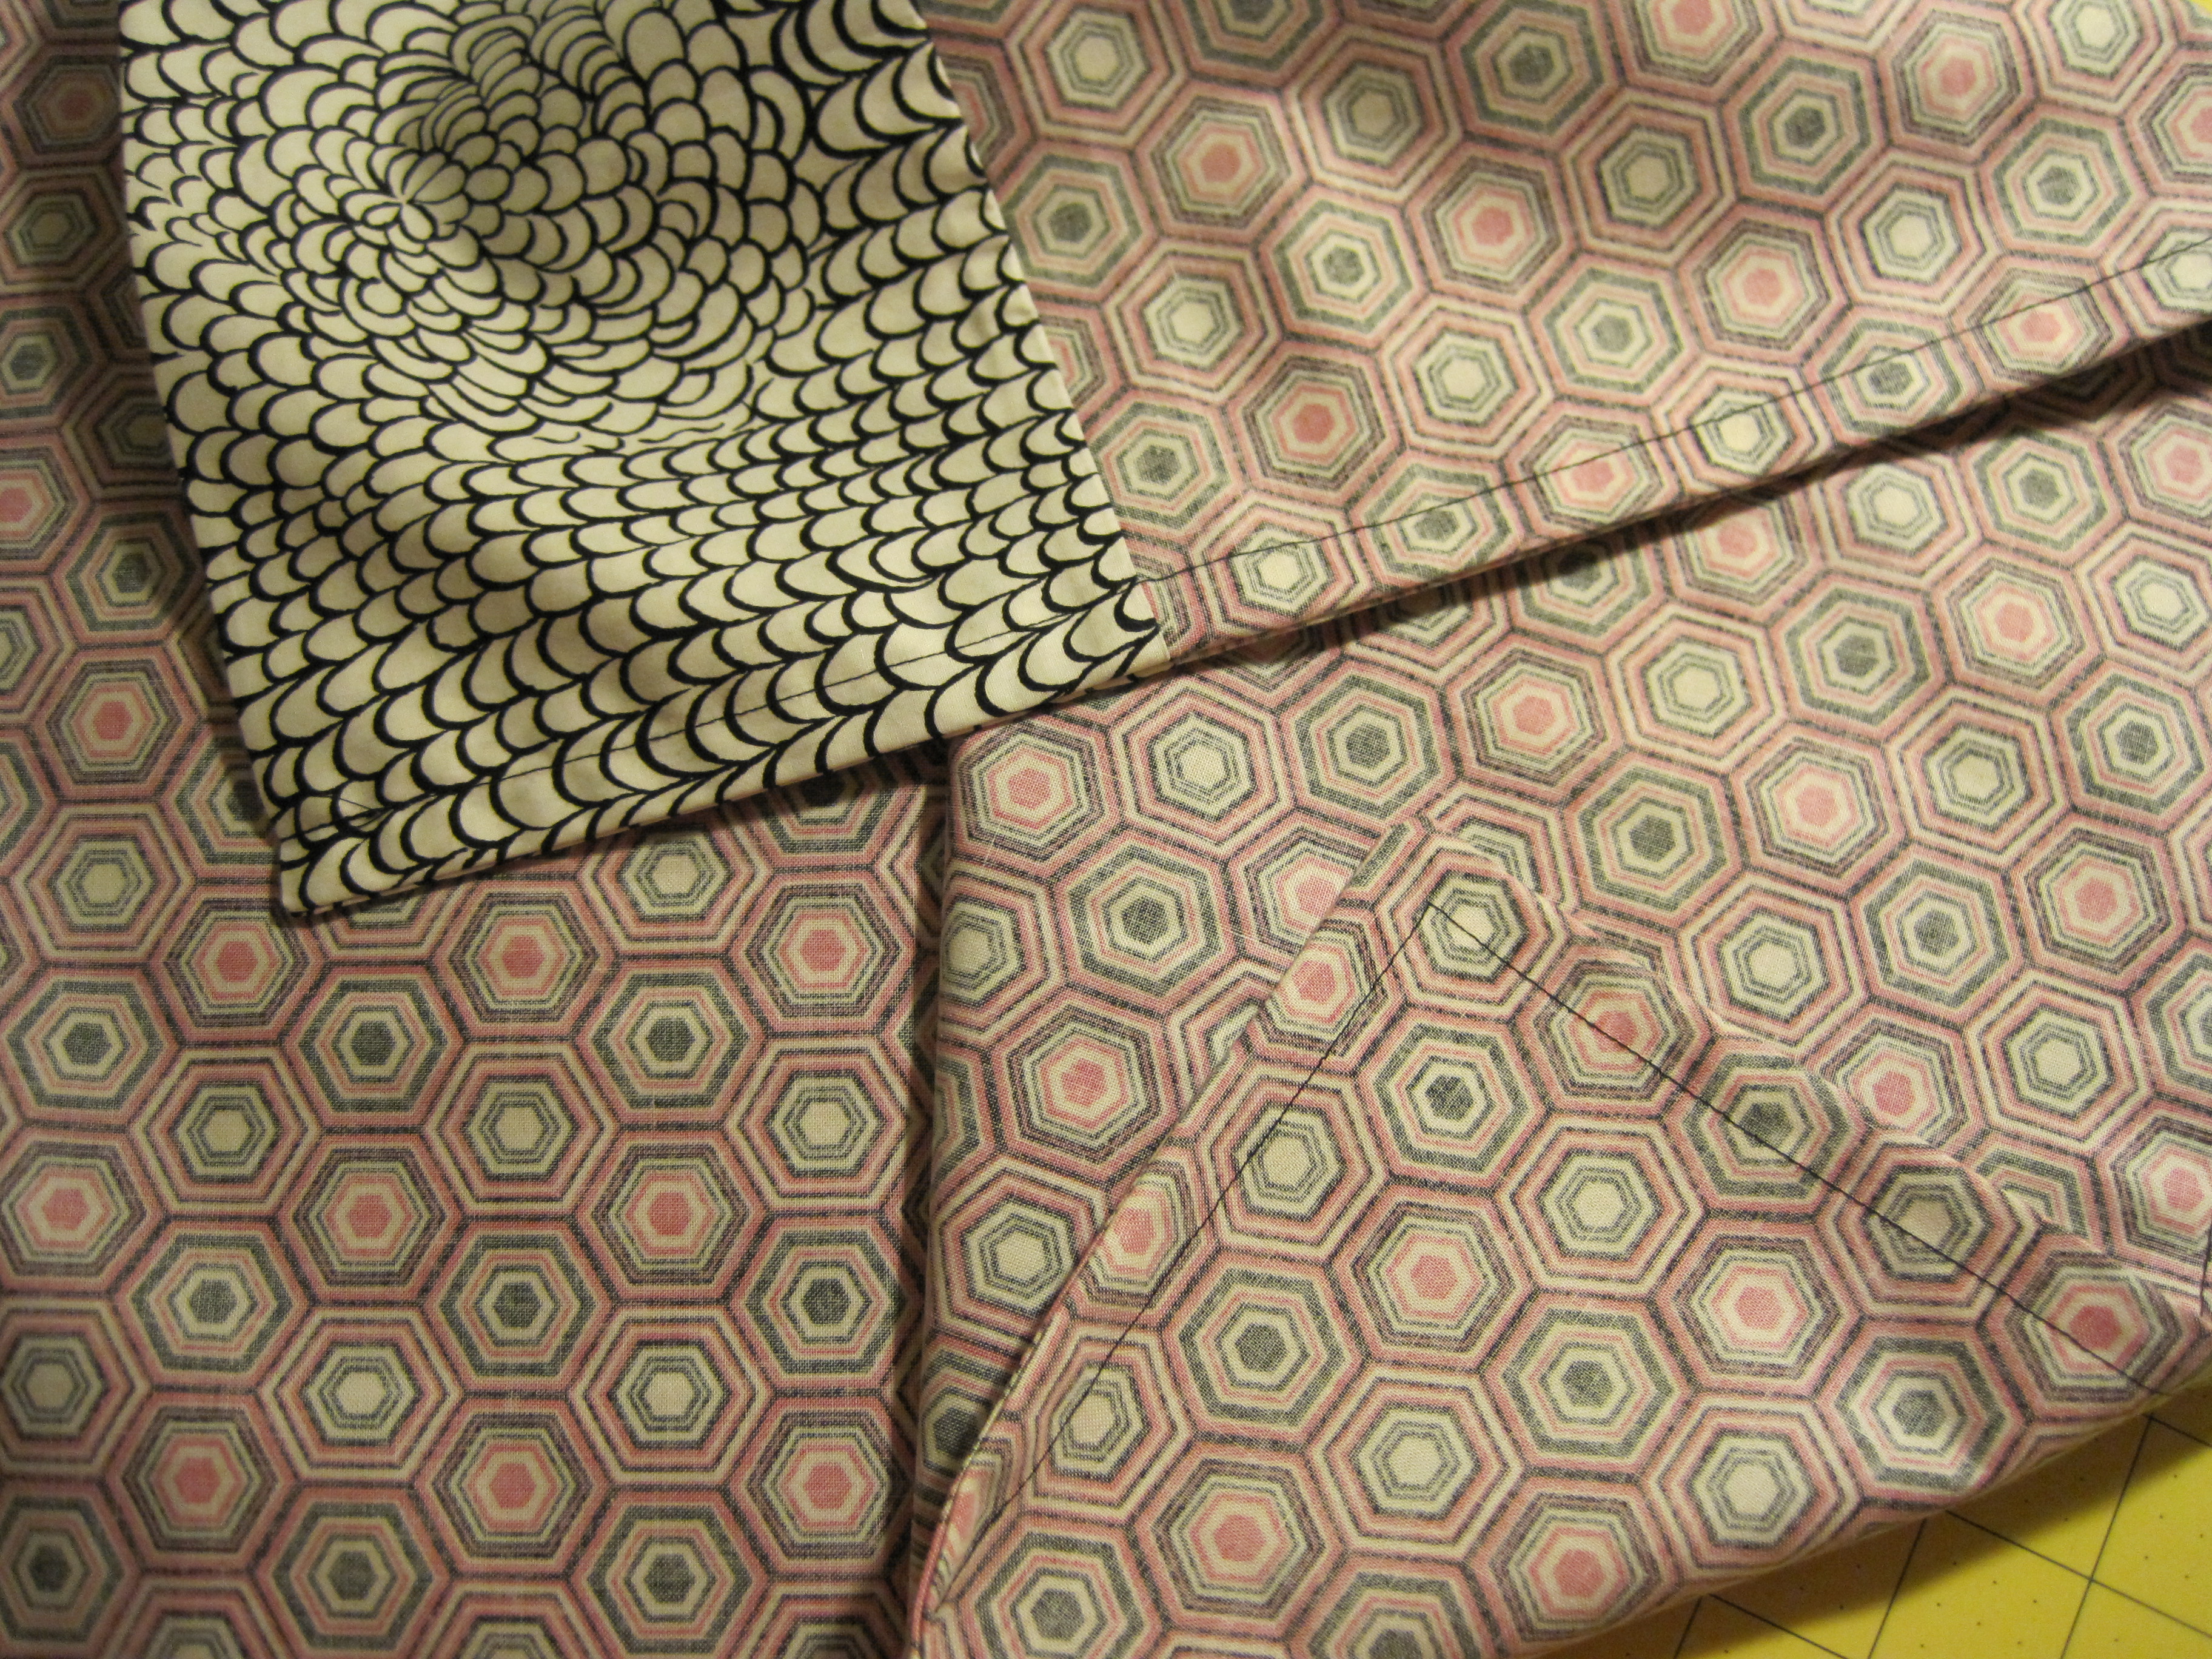
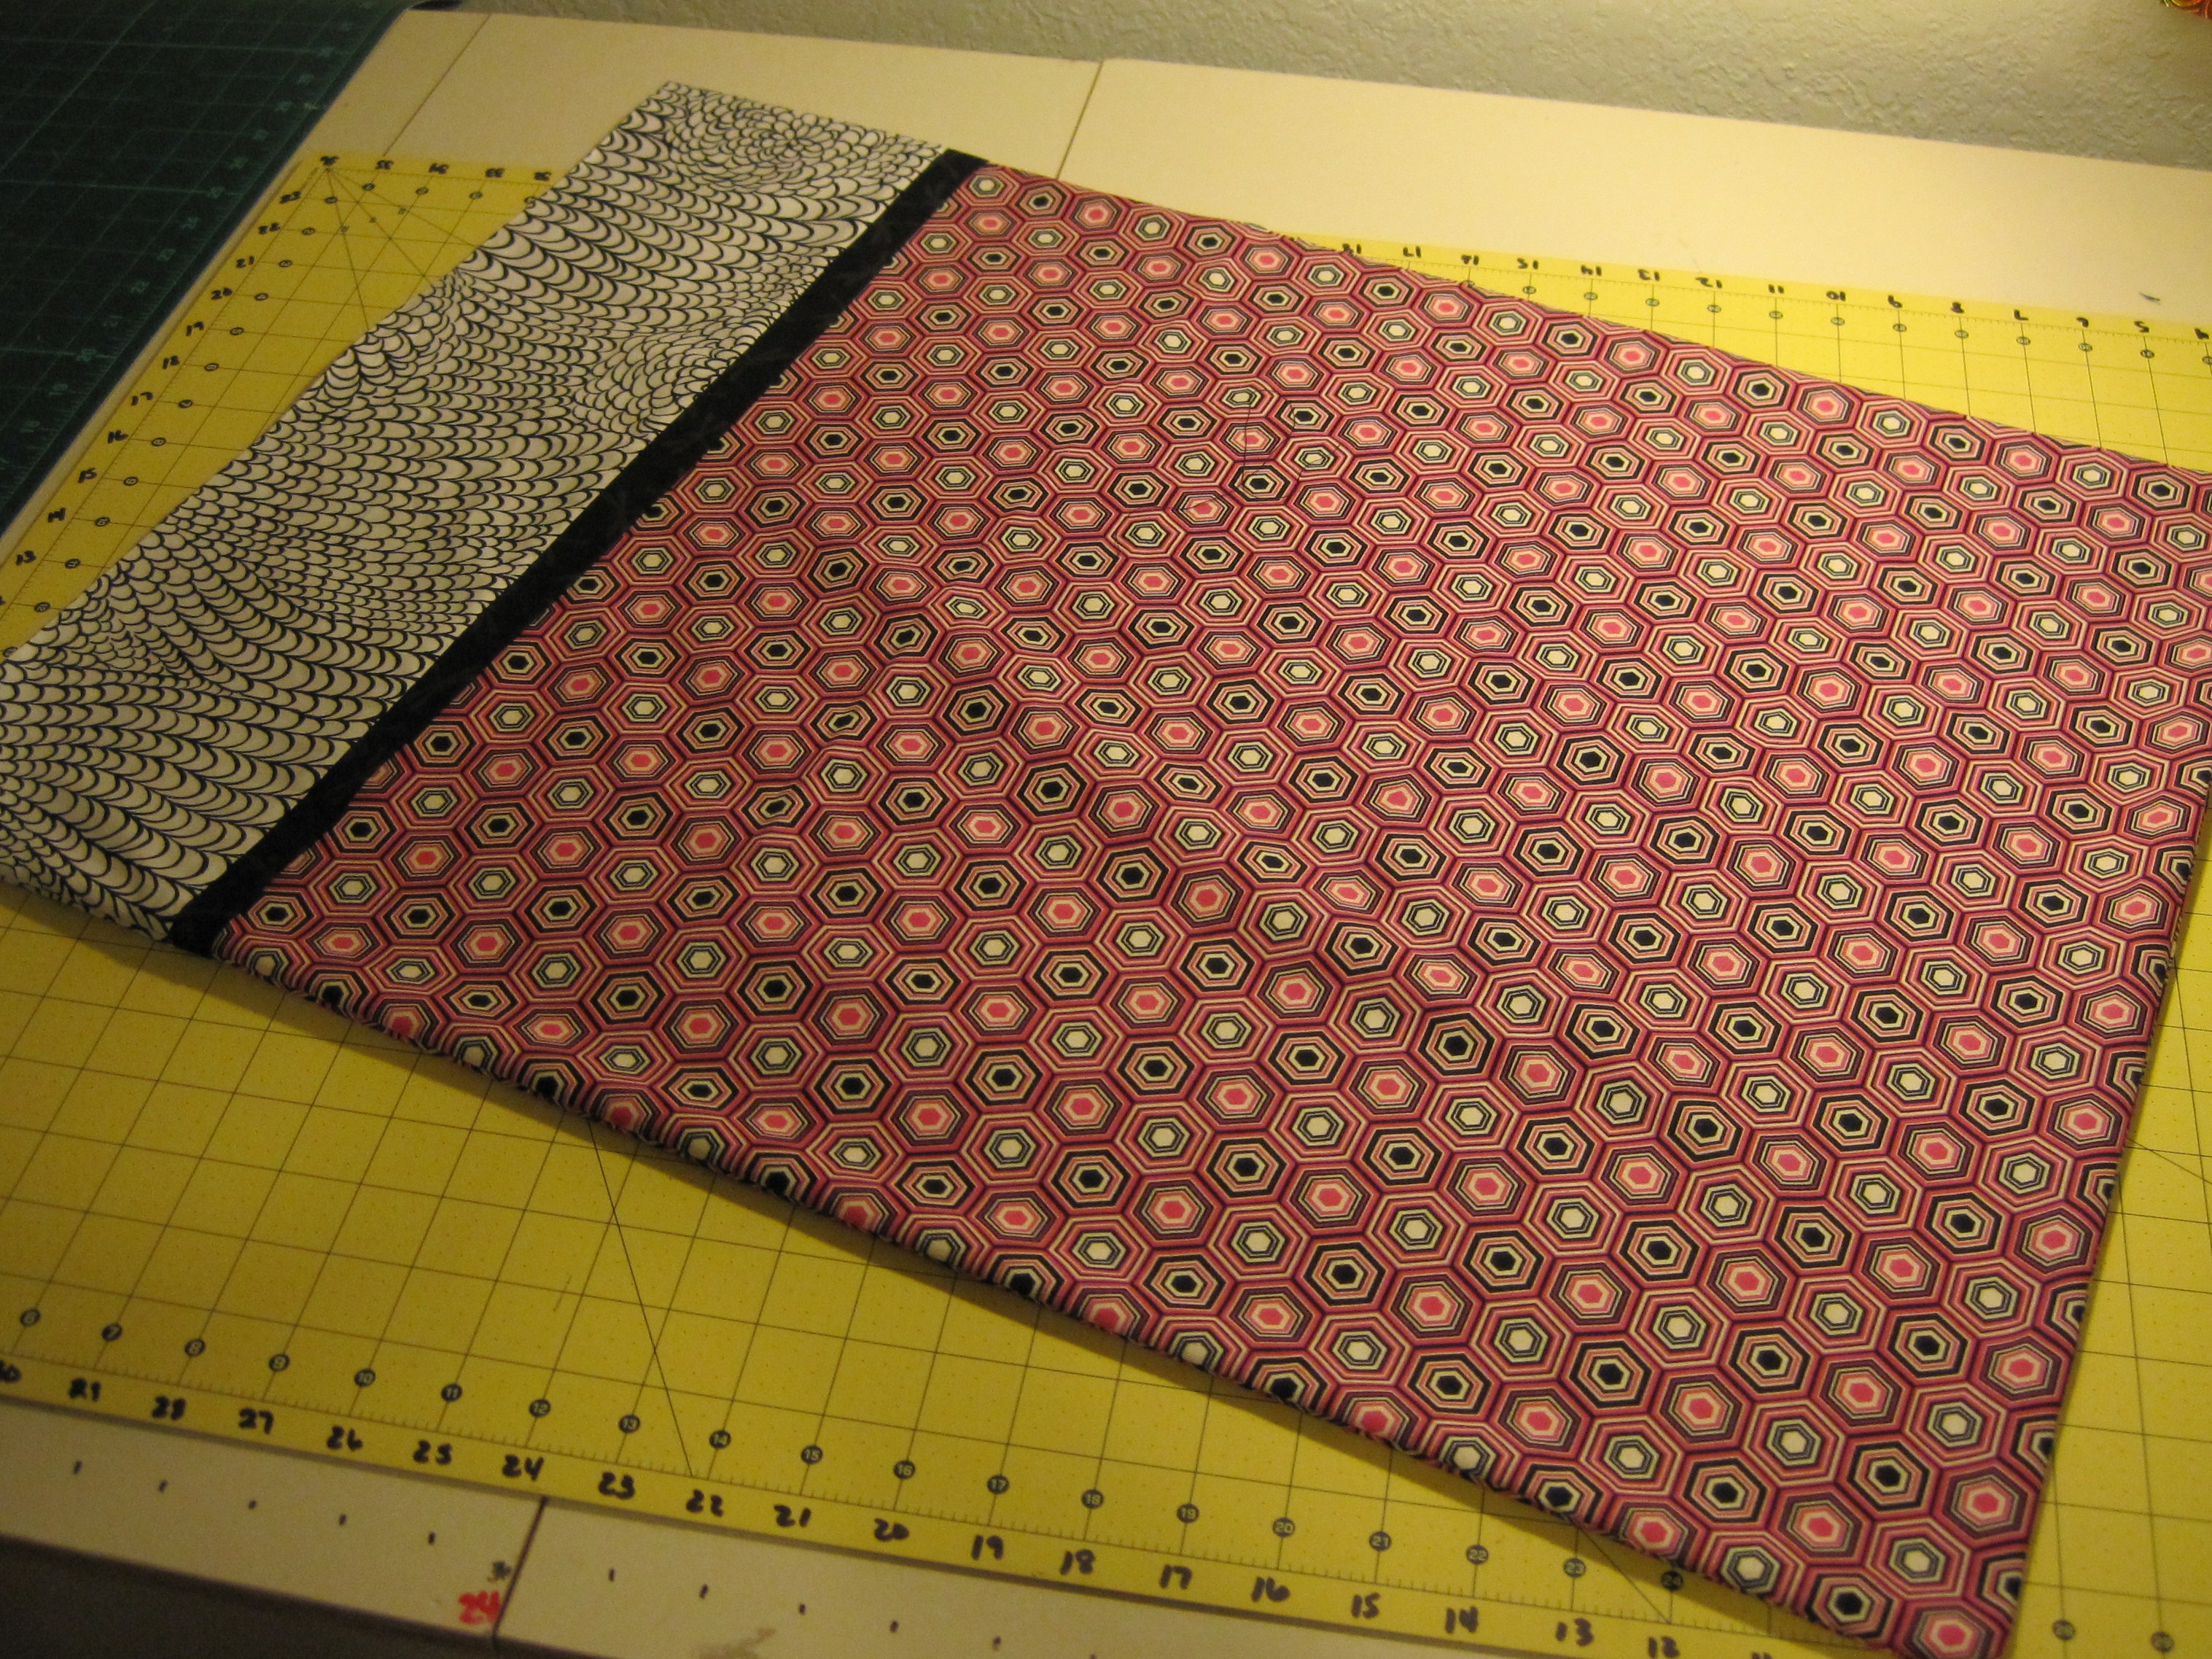
My colors for this tutorial – a pre-cut kit from Honey Bee. Isn’t the fabric just delicious?

Hot Dog, Bun & Mustard! Once your fabric is cut and pressed and you’re ready to go!

Roll out your BUN, right side up.

Press the MUSTARD in half

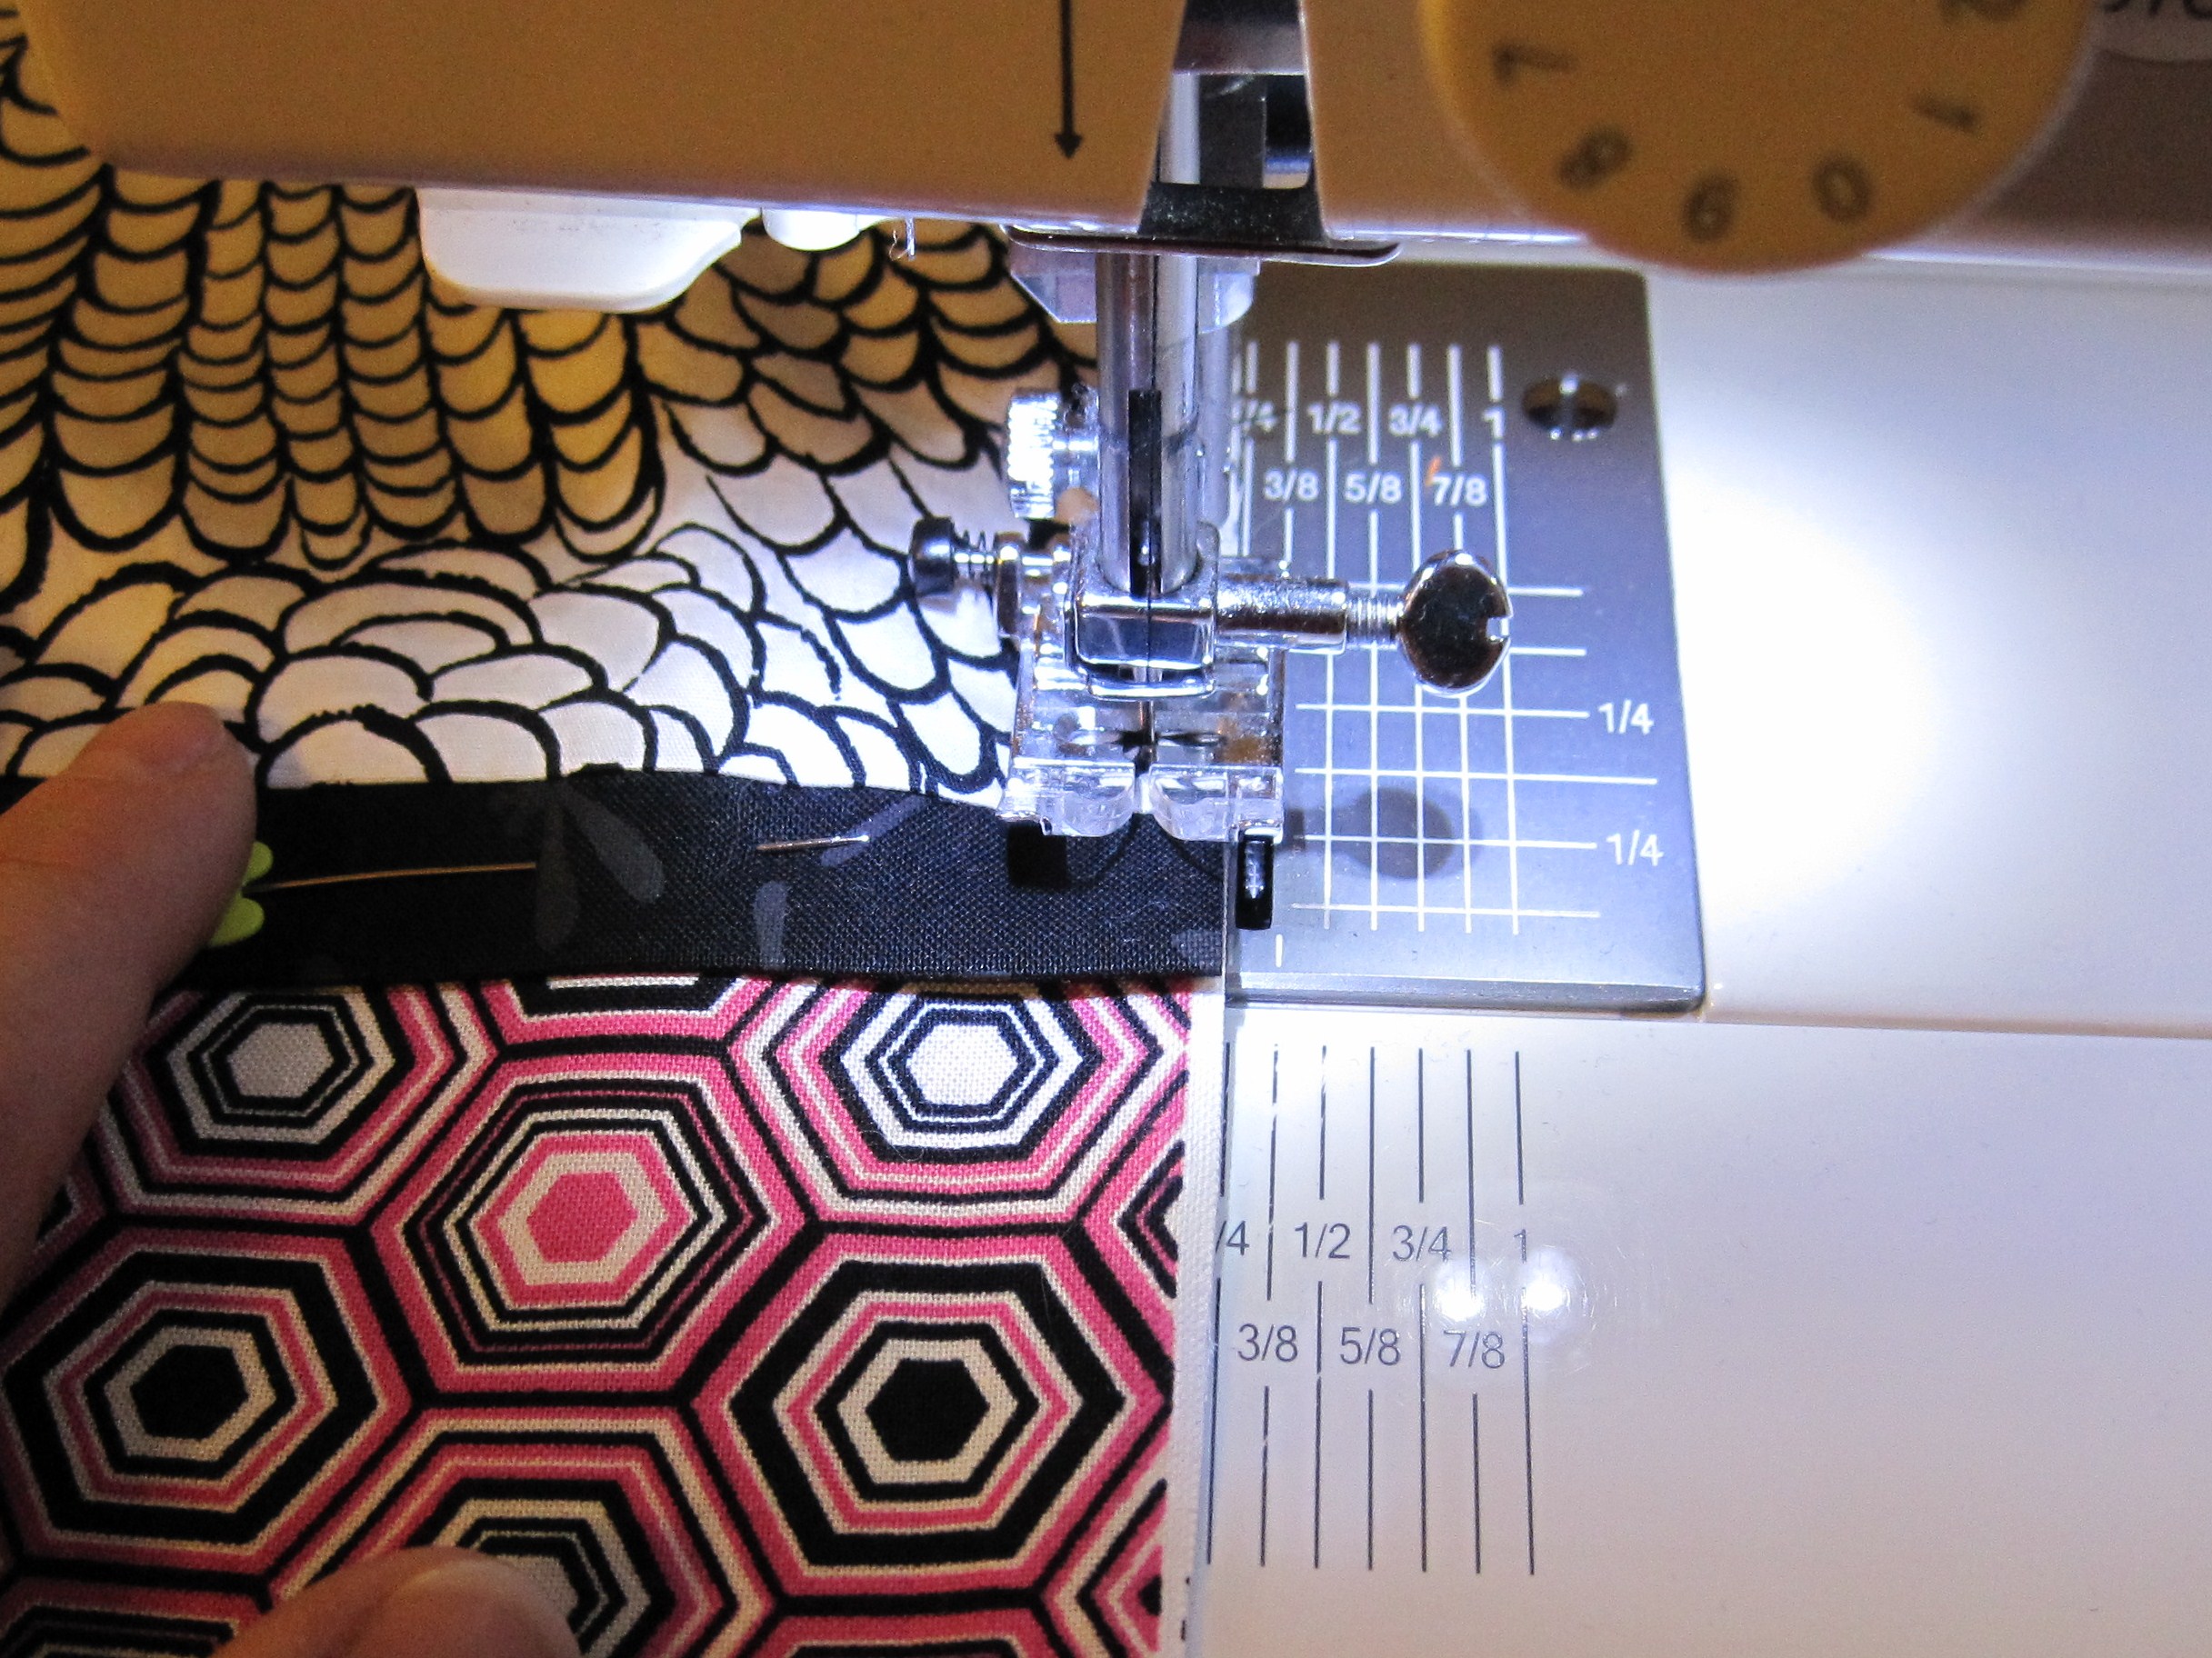
Place MUSTARD with raw edges matching along one side of the BUN.
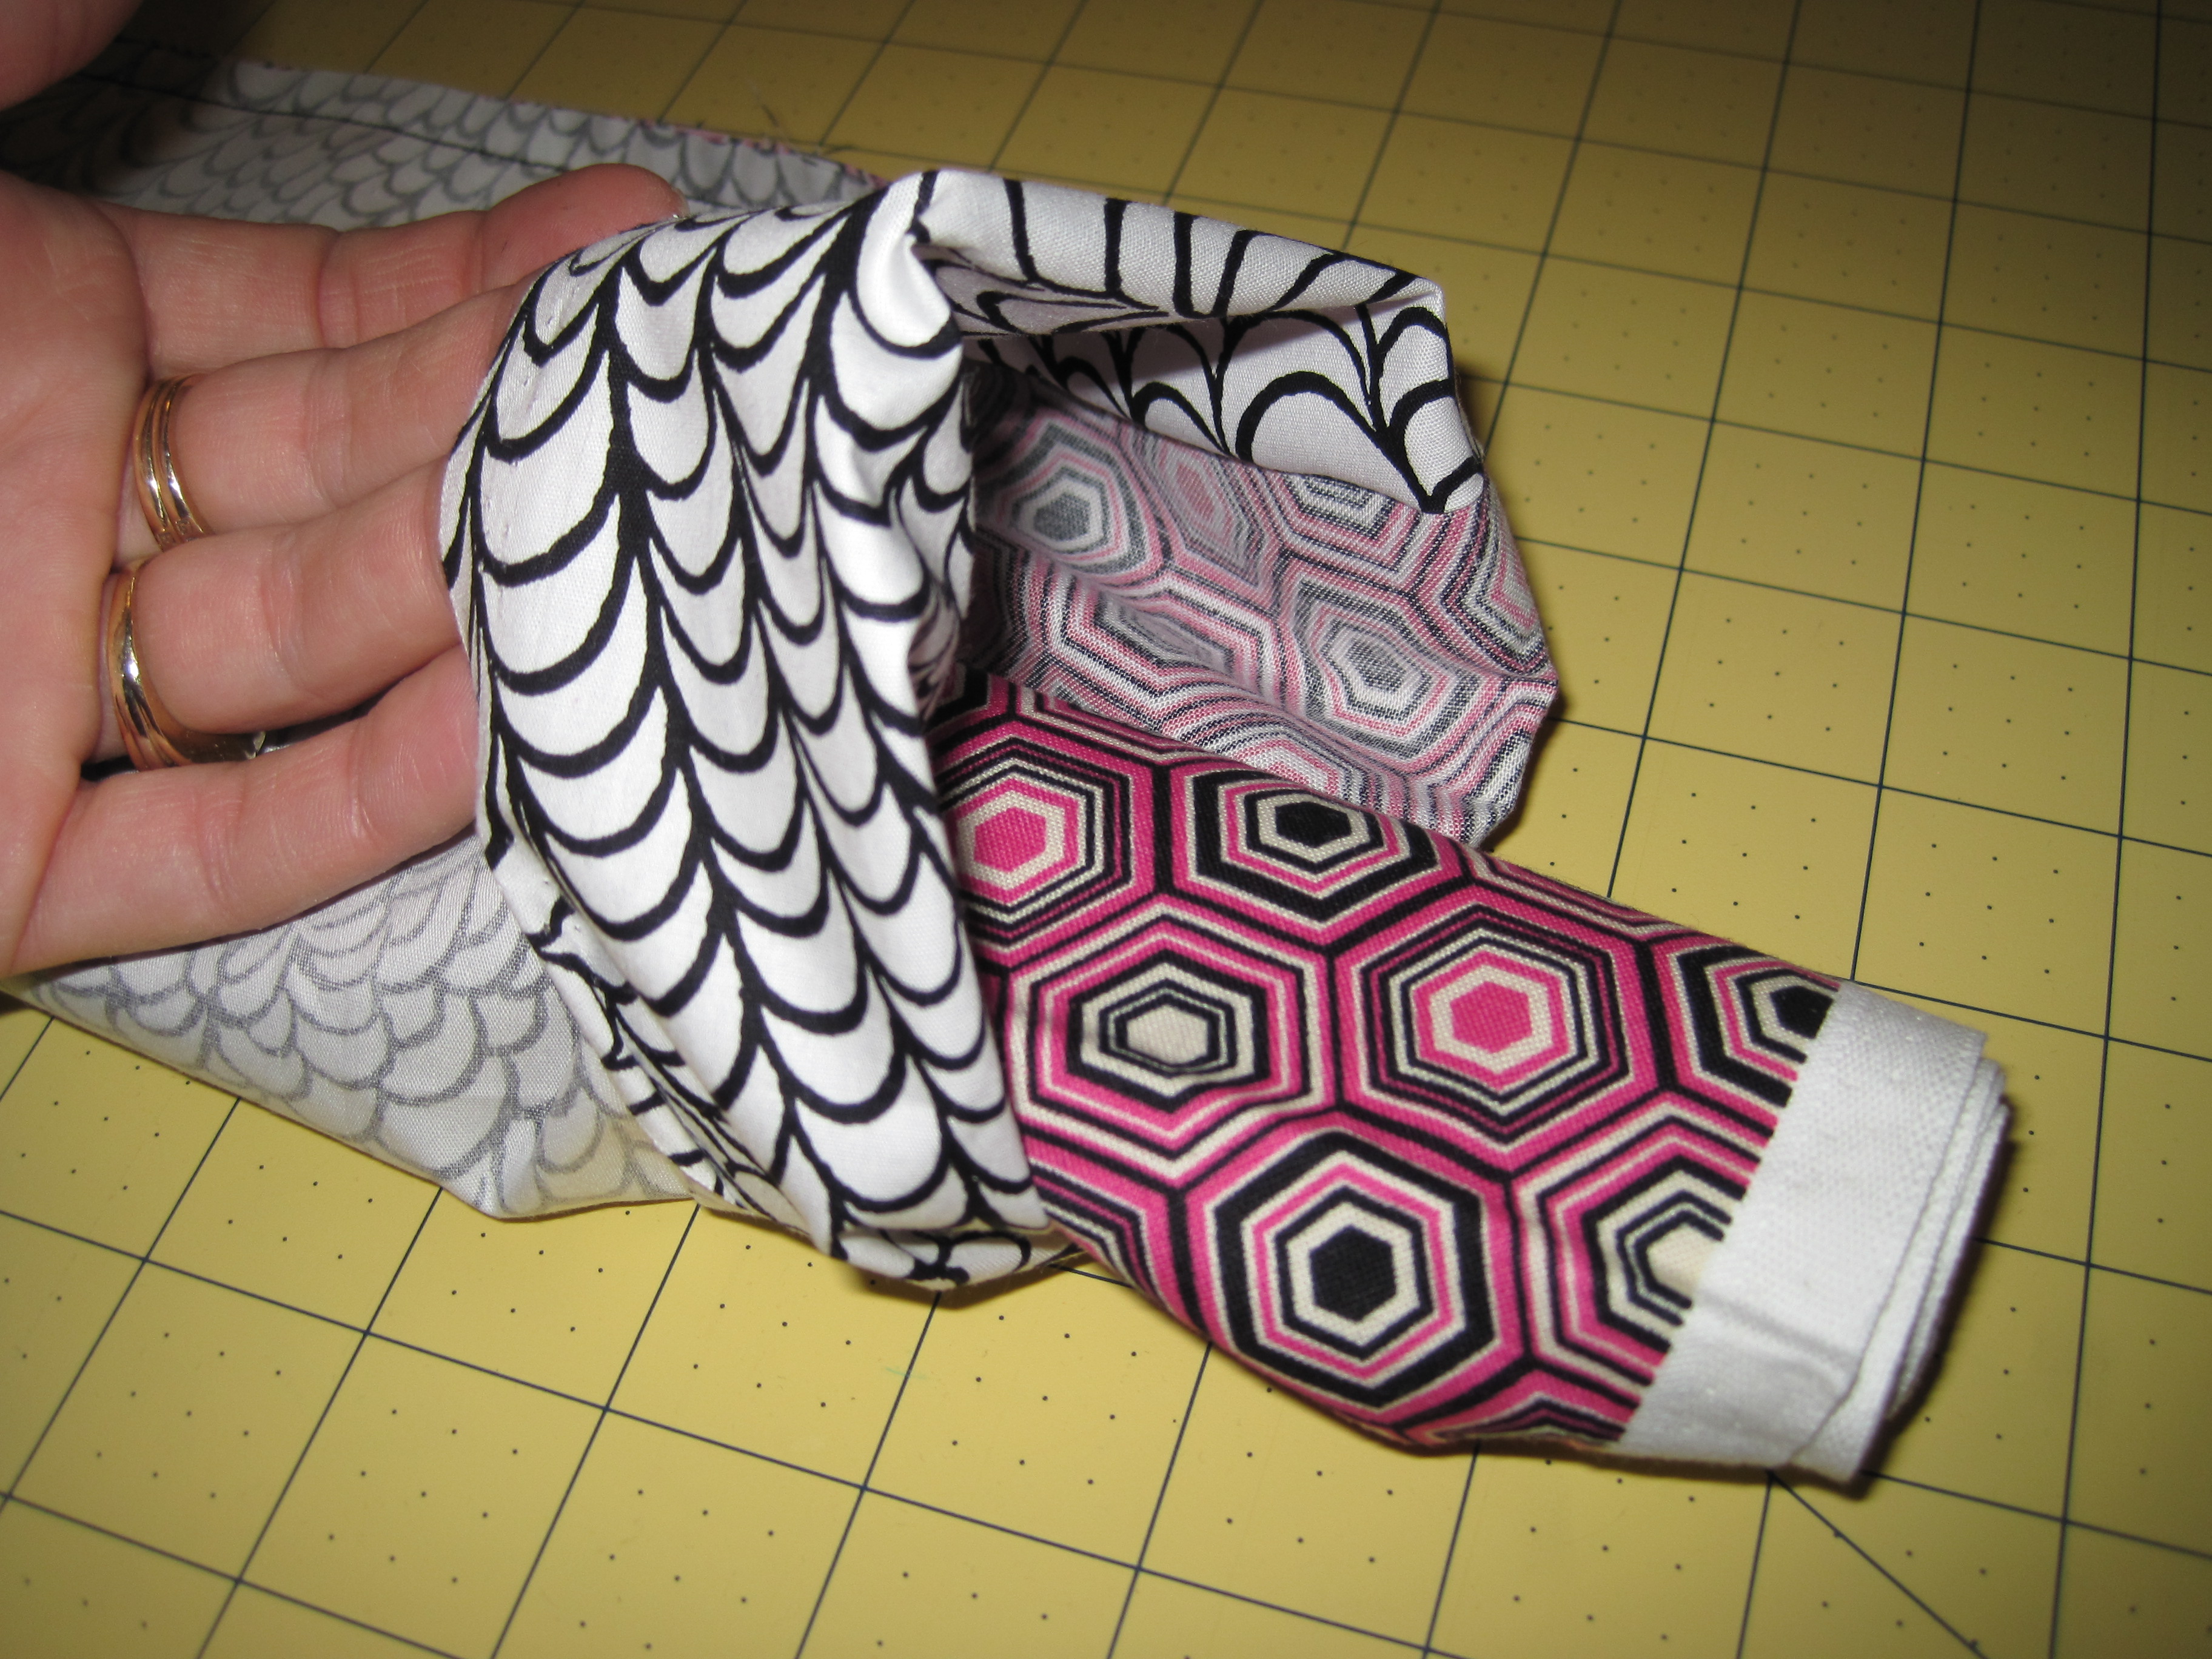
Place HOT DOG on top of MUSTARD, face down. Align raw seams. Add a few pins to hold in place.
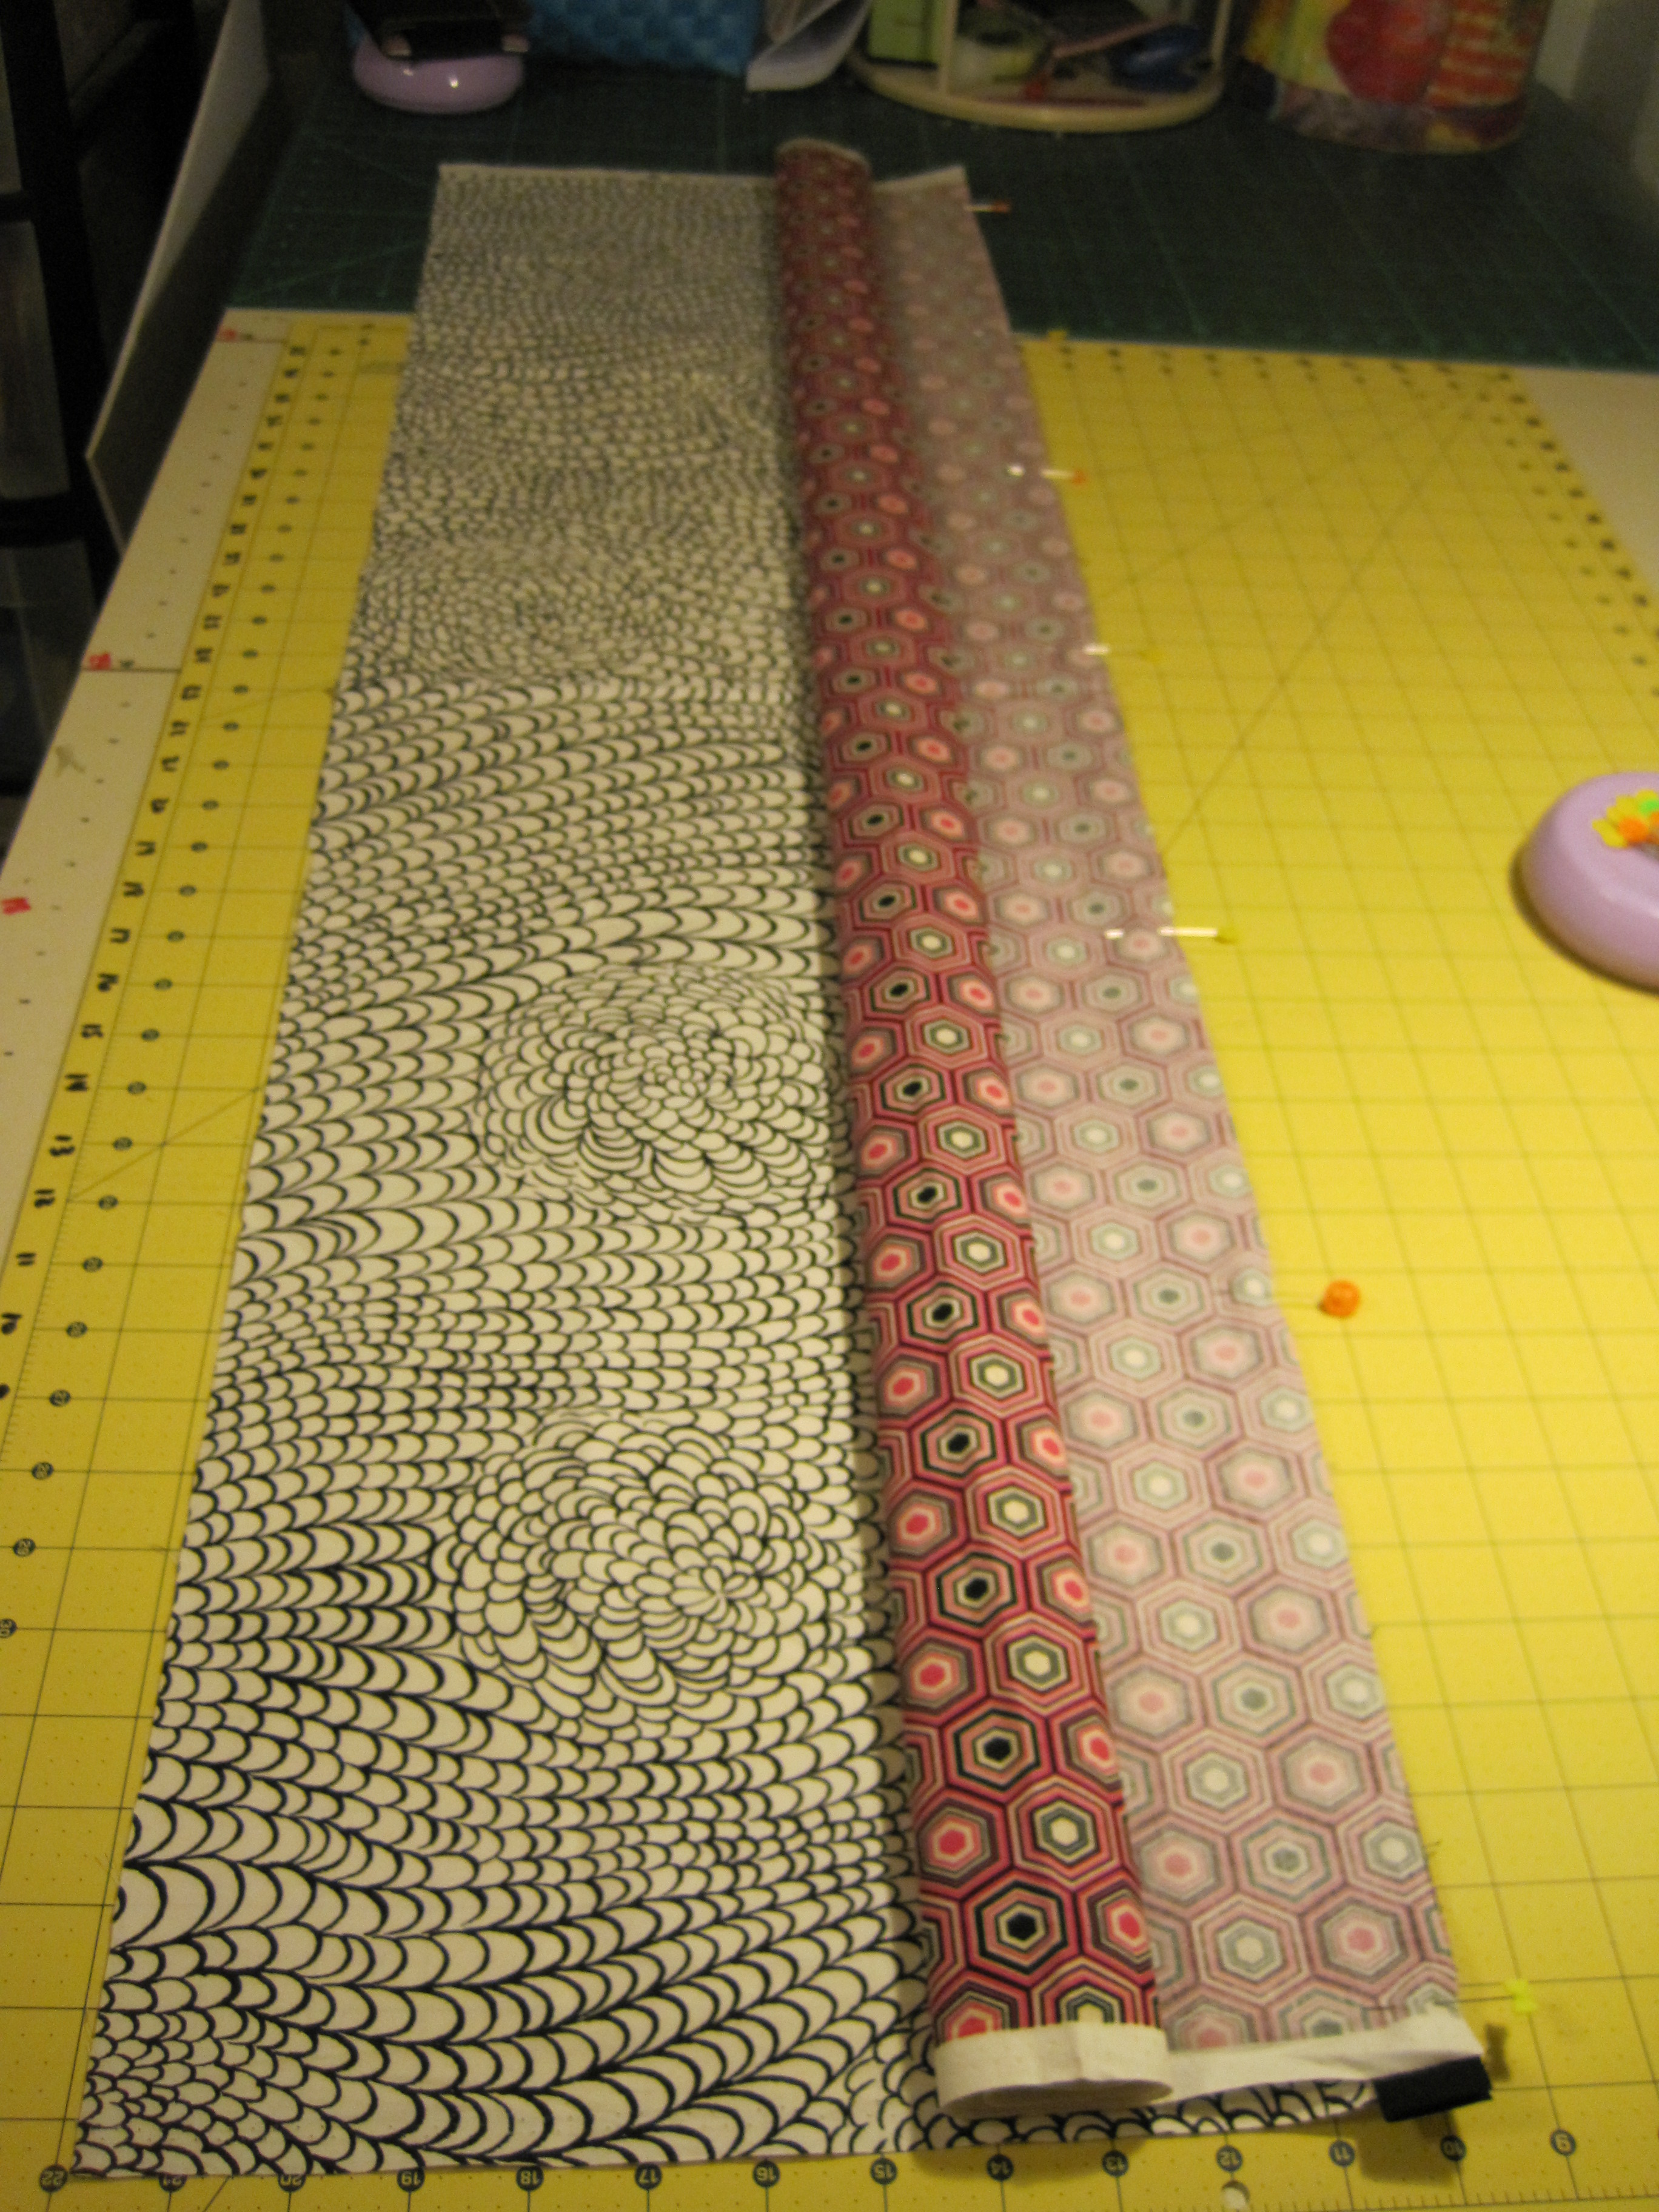

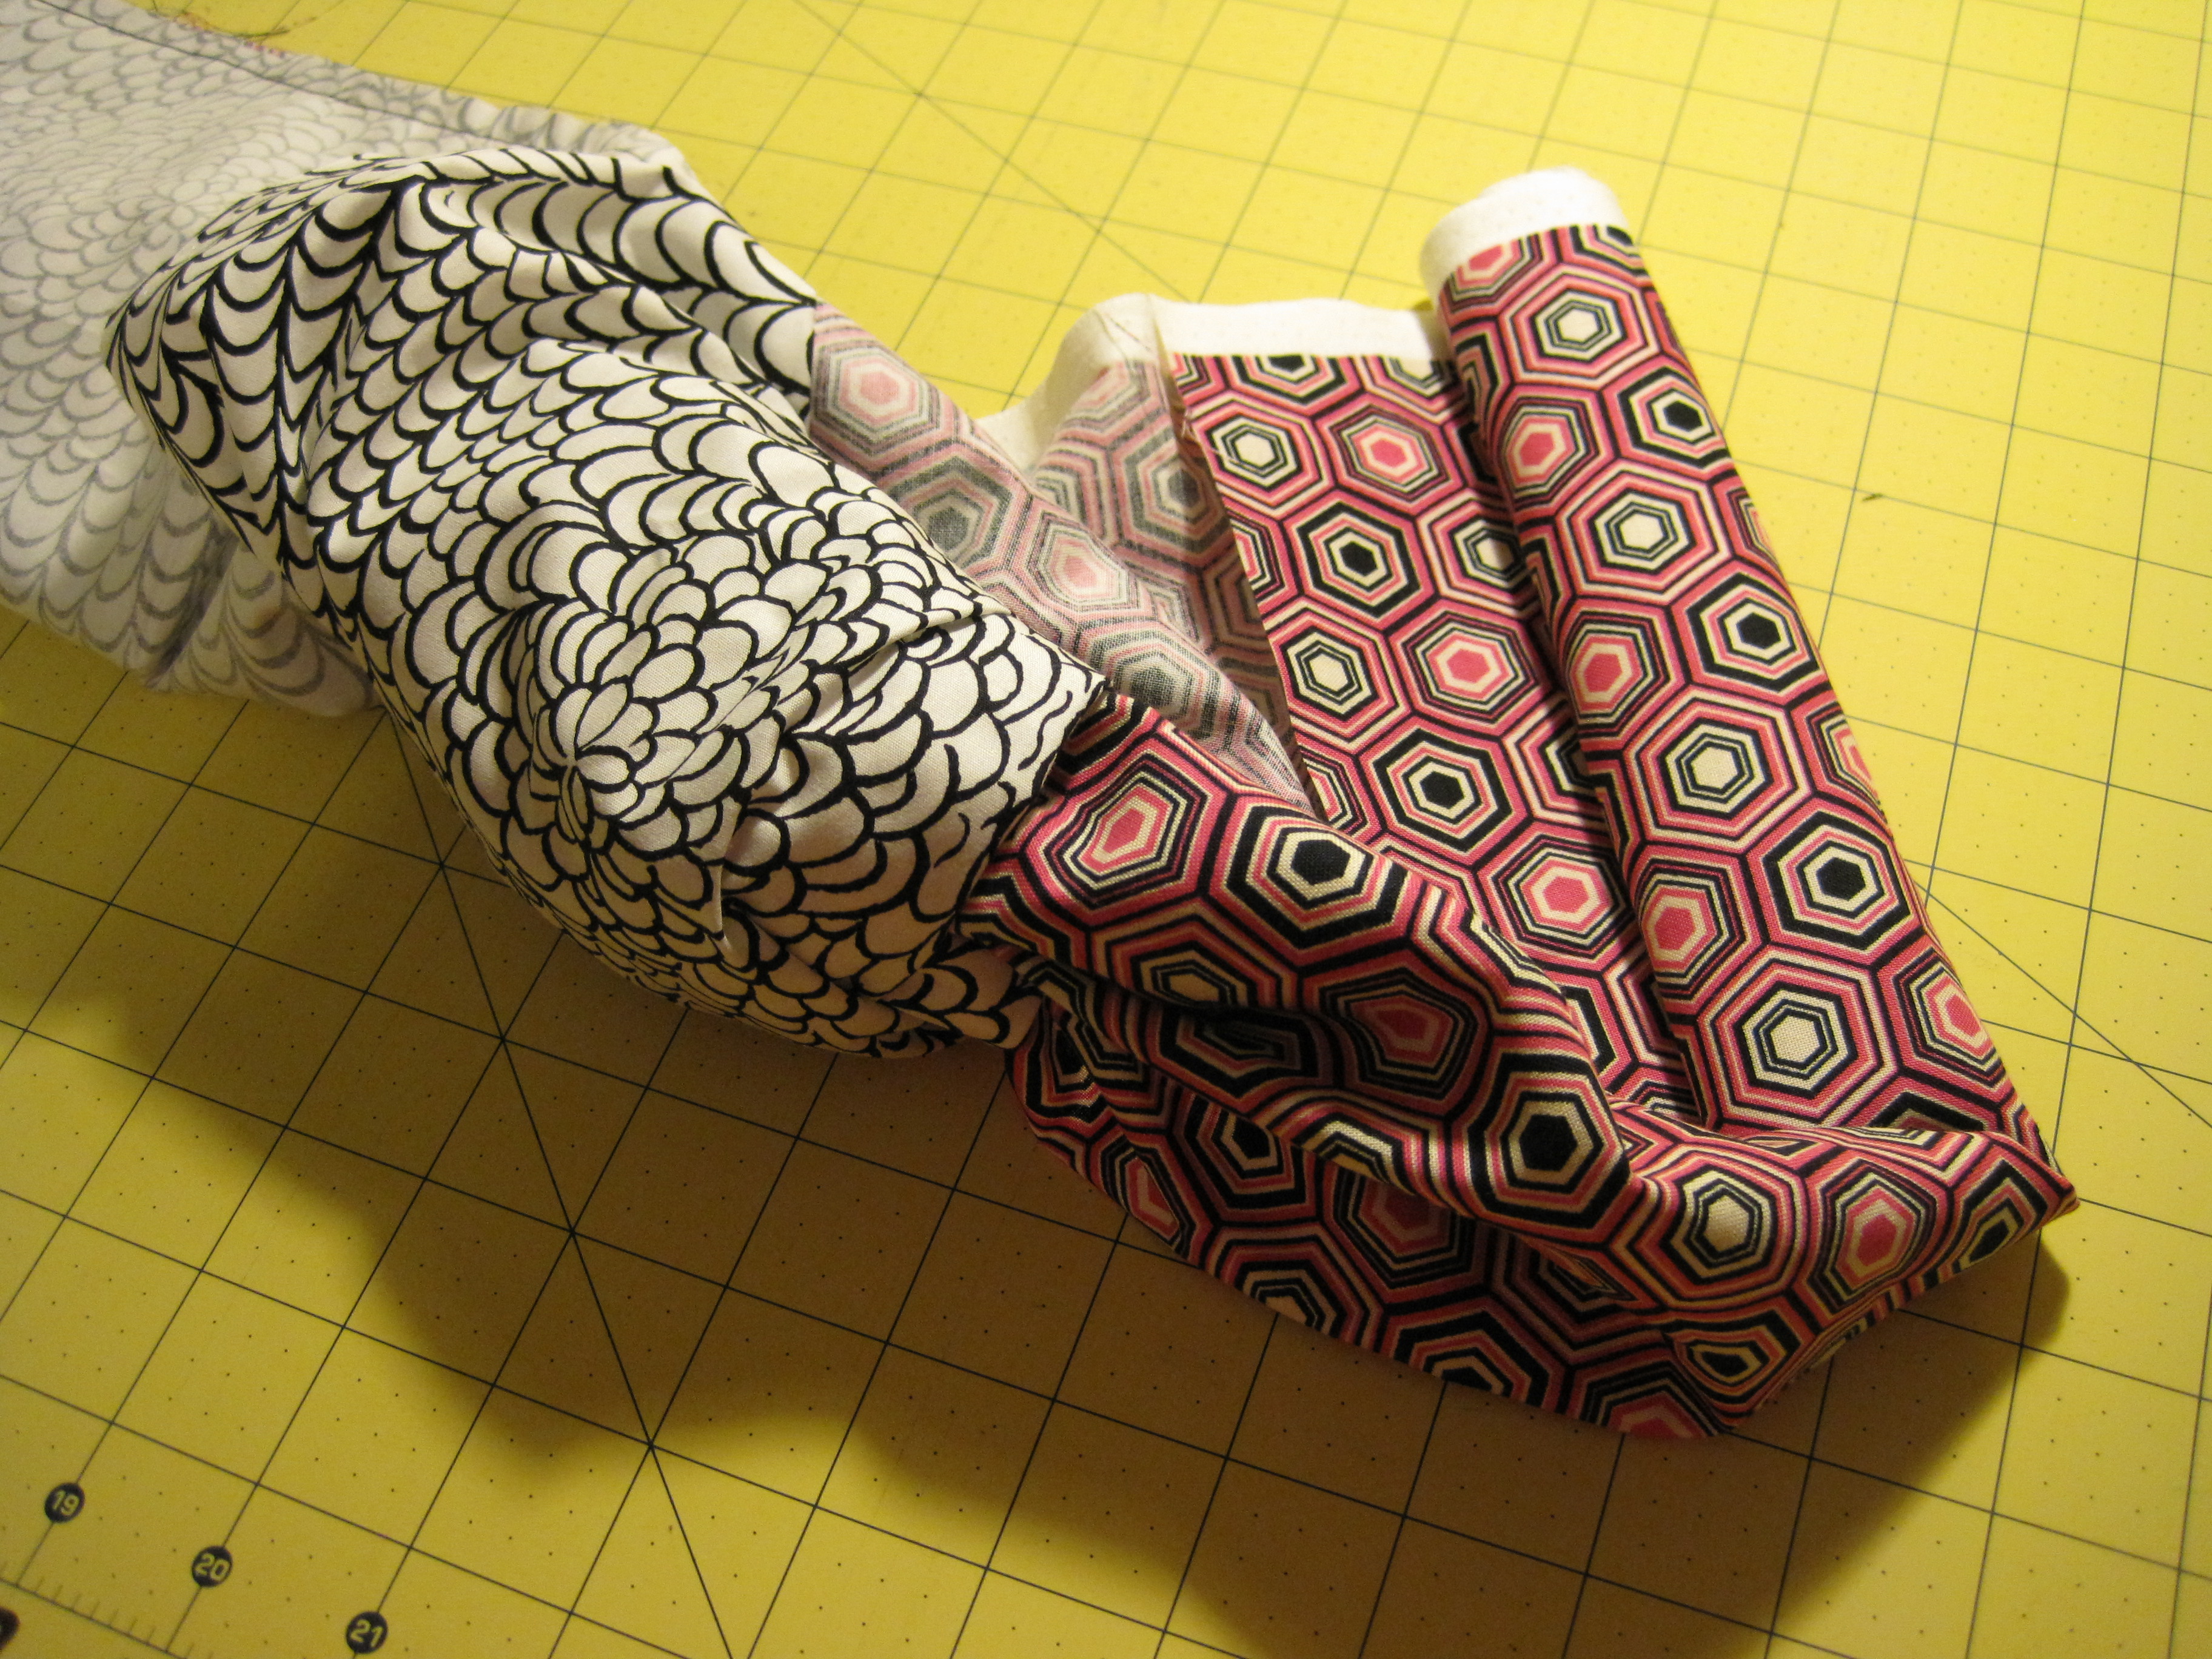
Roll the HOT DOG (hey, now it looks like a hot dog!) to within a few inches of the pinned edge.


Fold the BUN over the HOT DOG and pin along the raw edge, making sure to catch all layers of fabric.
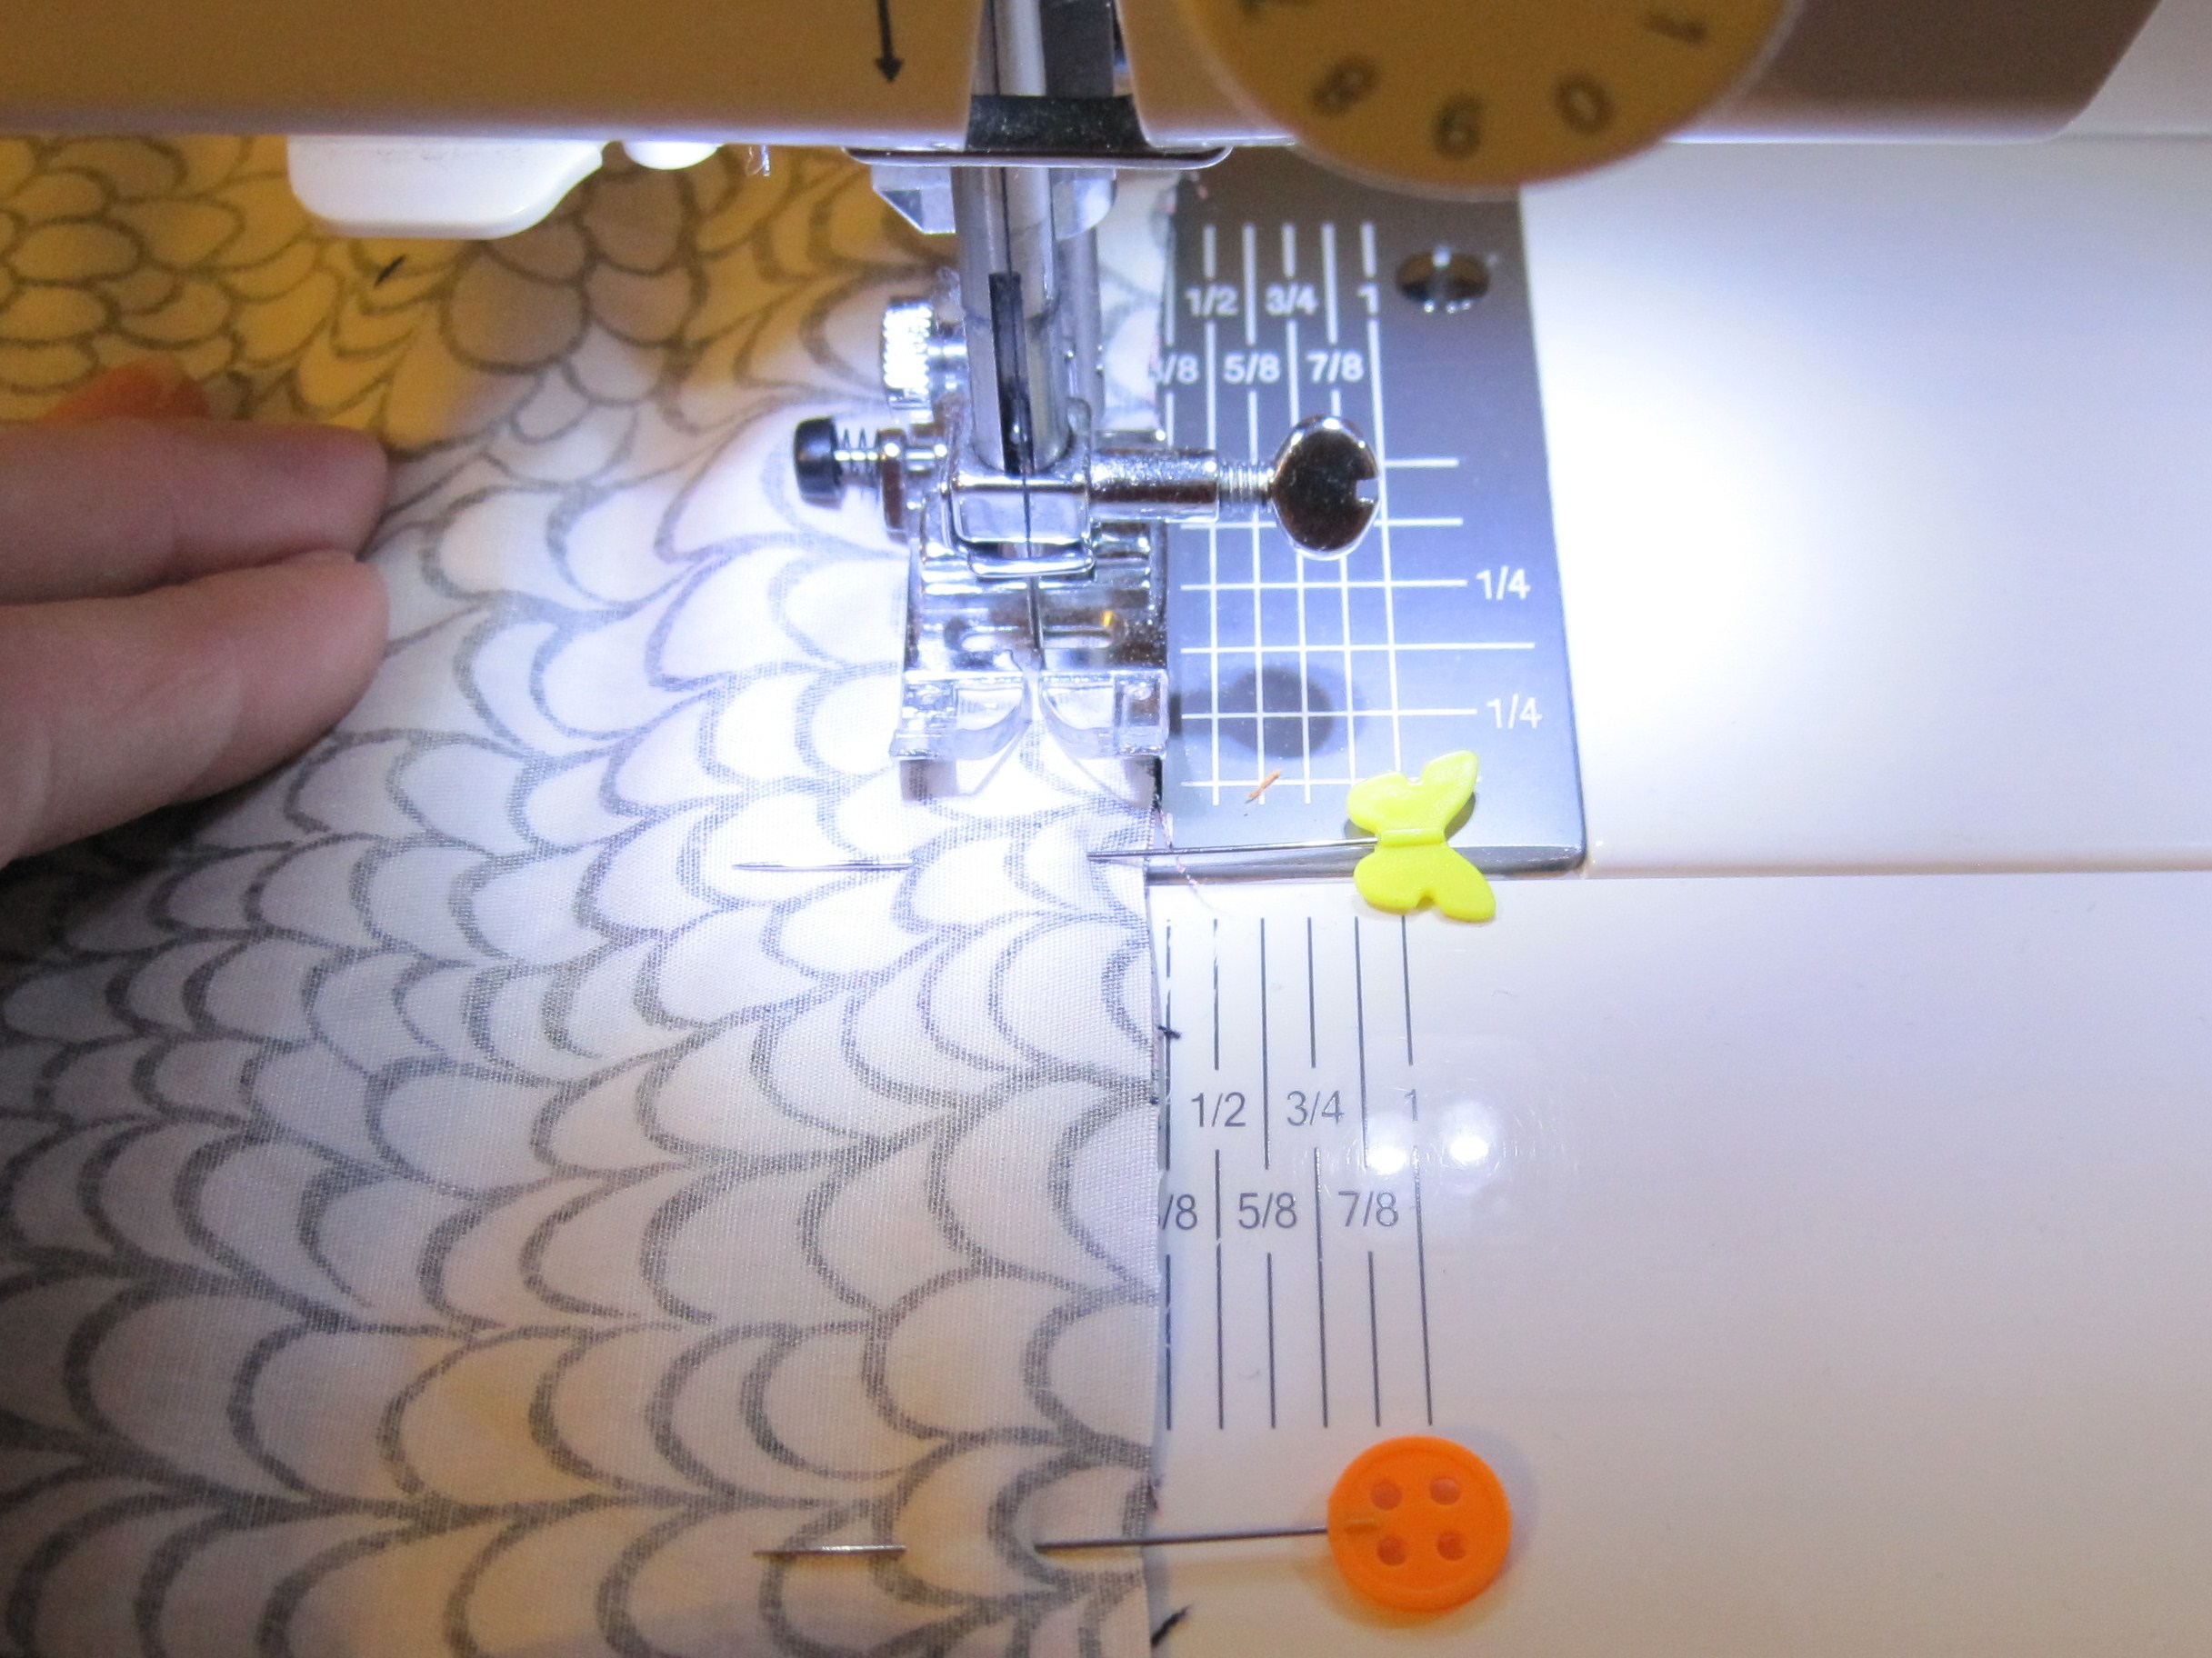

Stitch along the raw edge using a 3/8″ (or scant 1/2″) seam allowance.

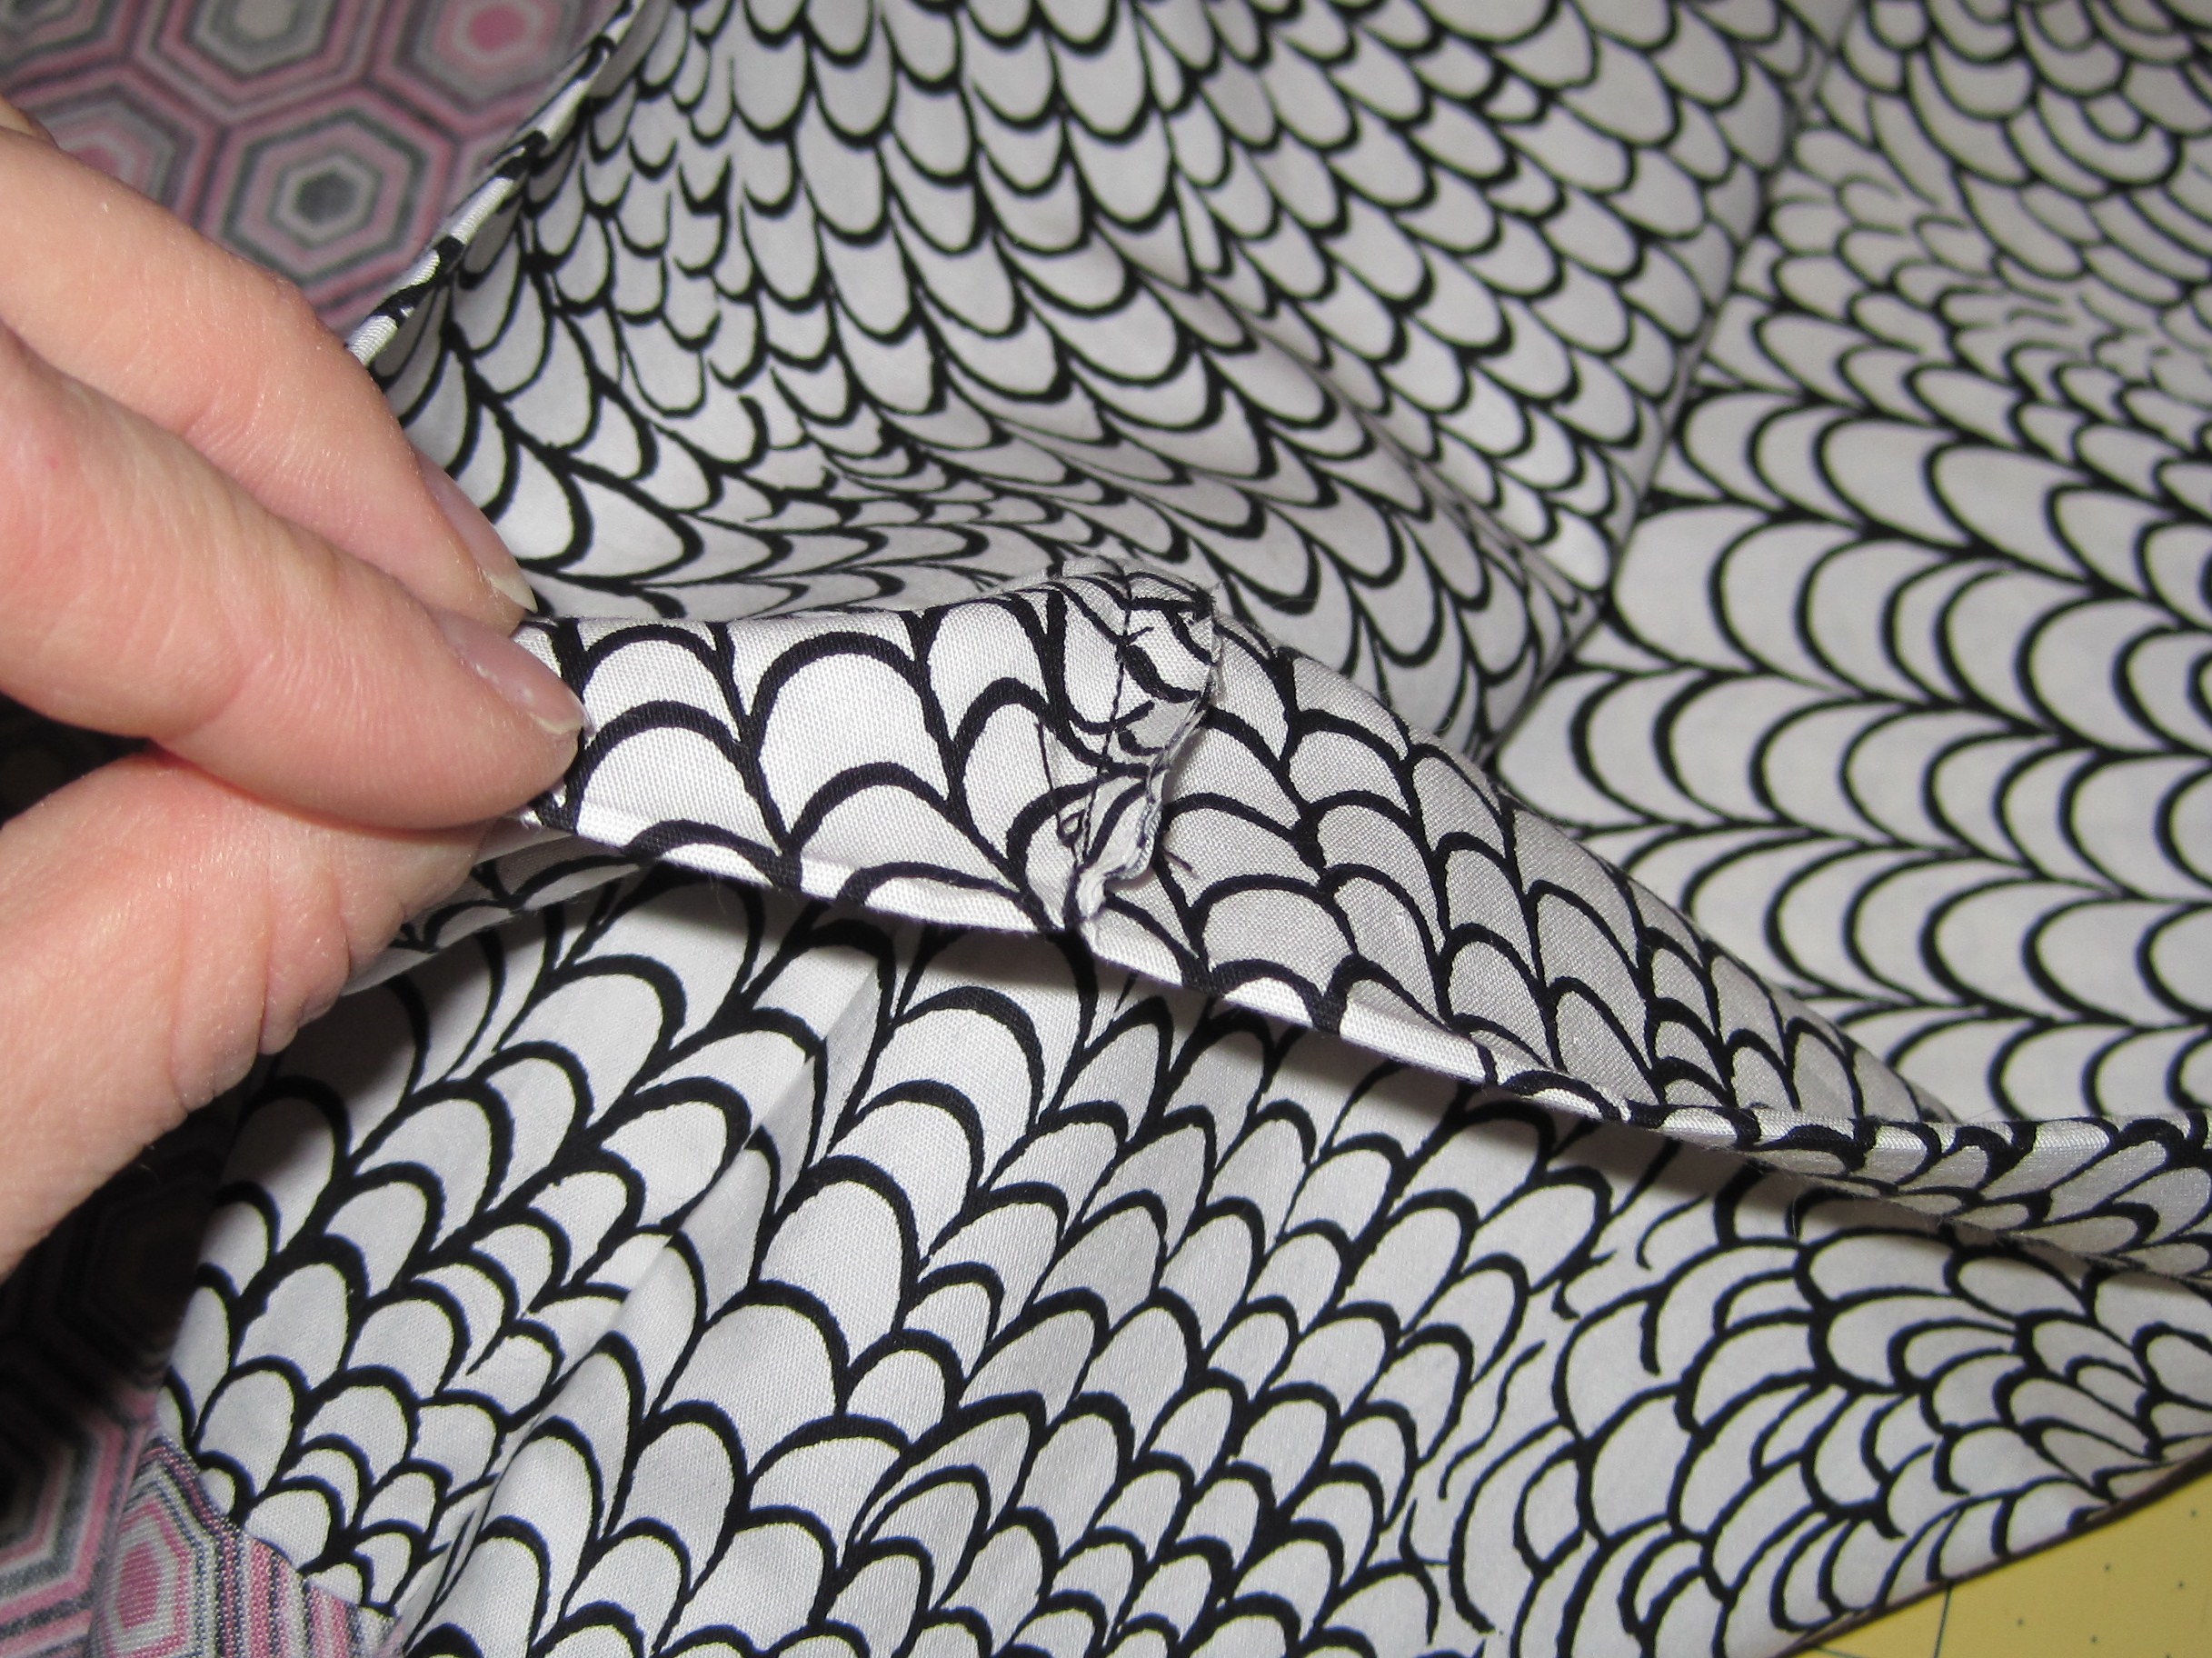
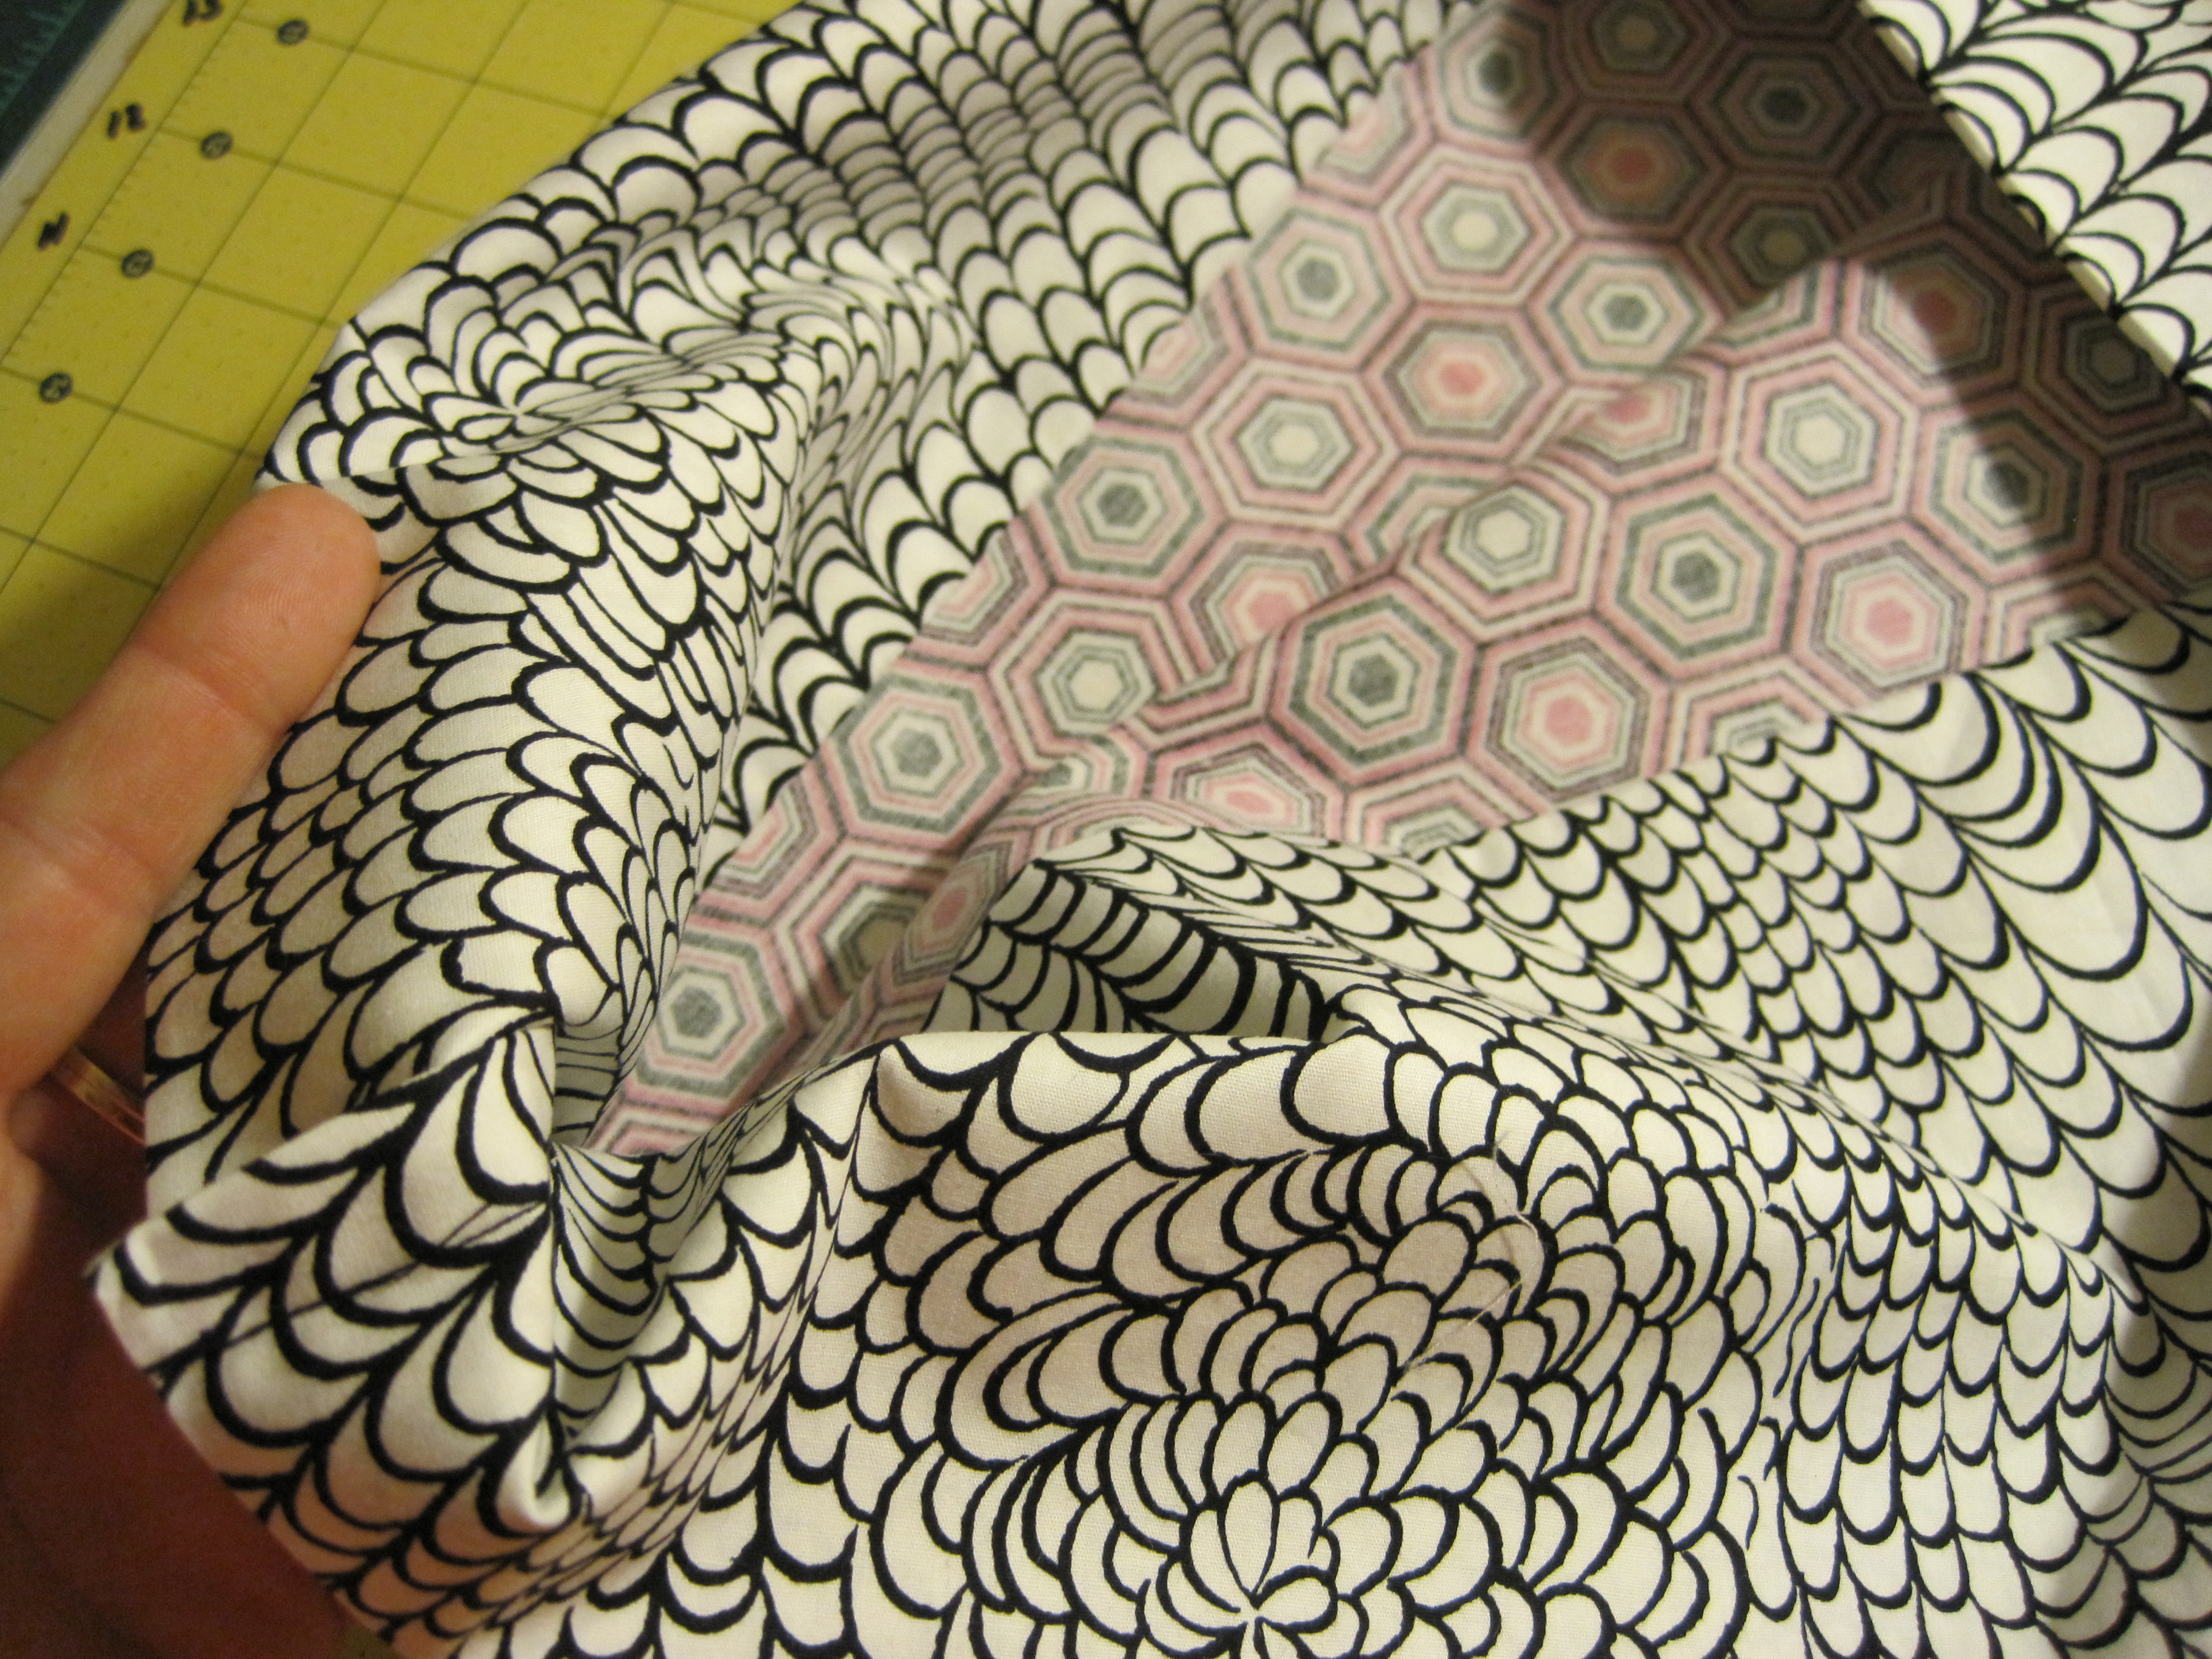
Remove any pins and birth your HOT DOG! Roll BUN back, gently tugging the HOT DOG out of the center.
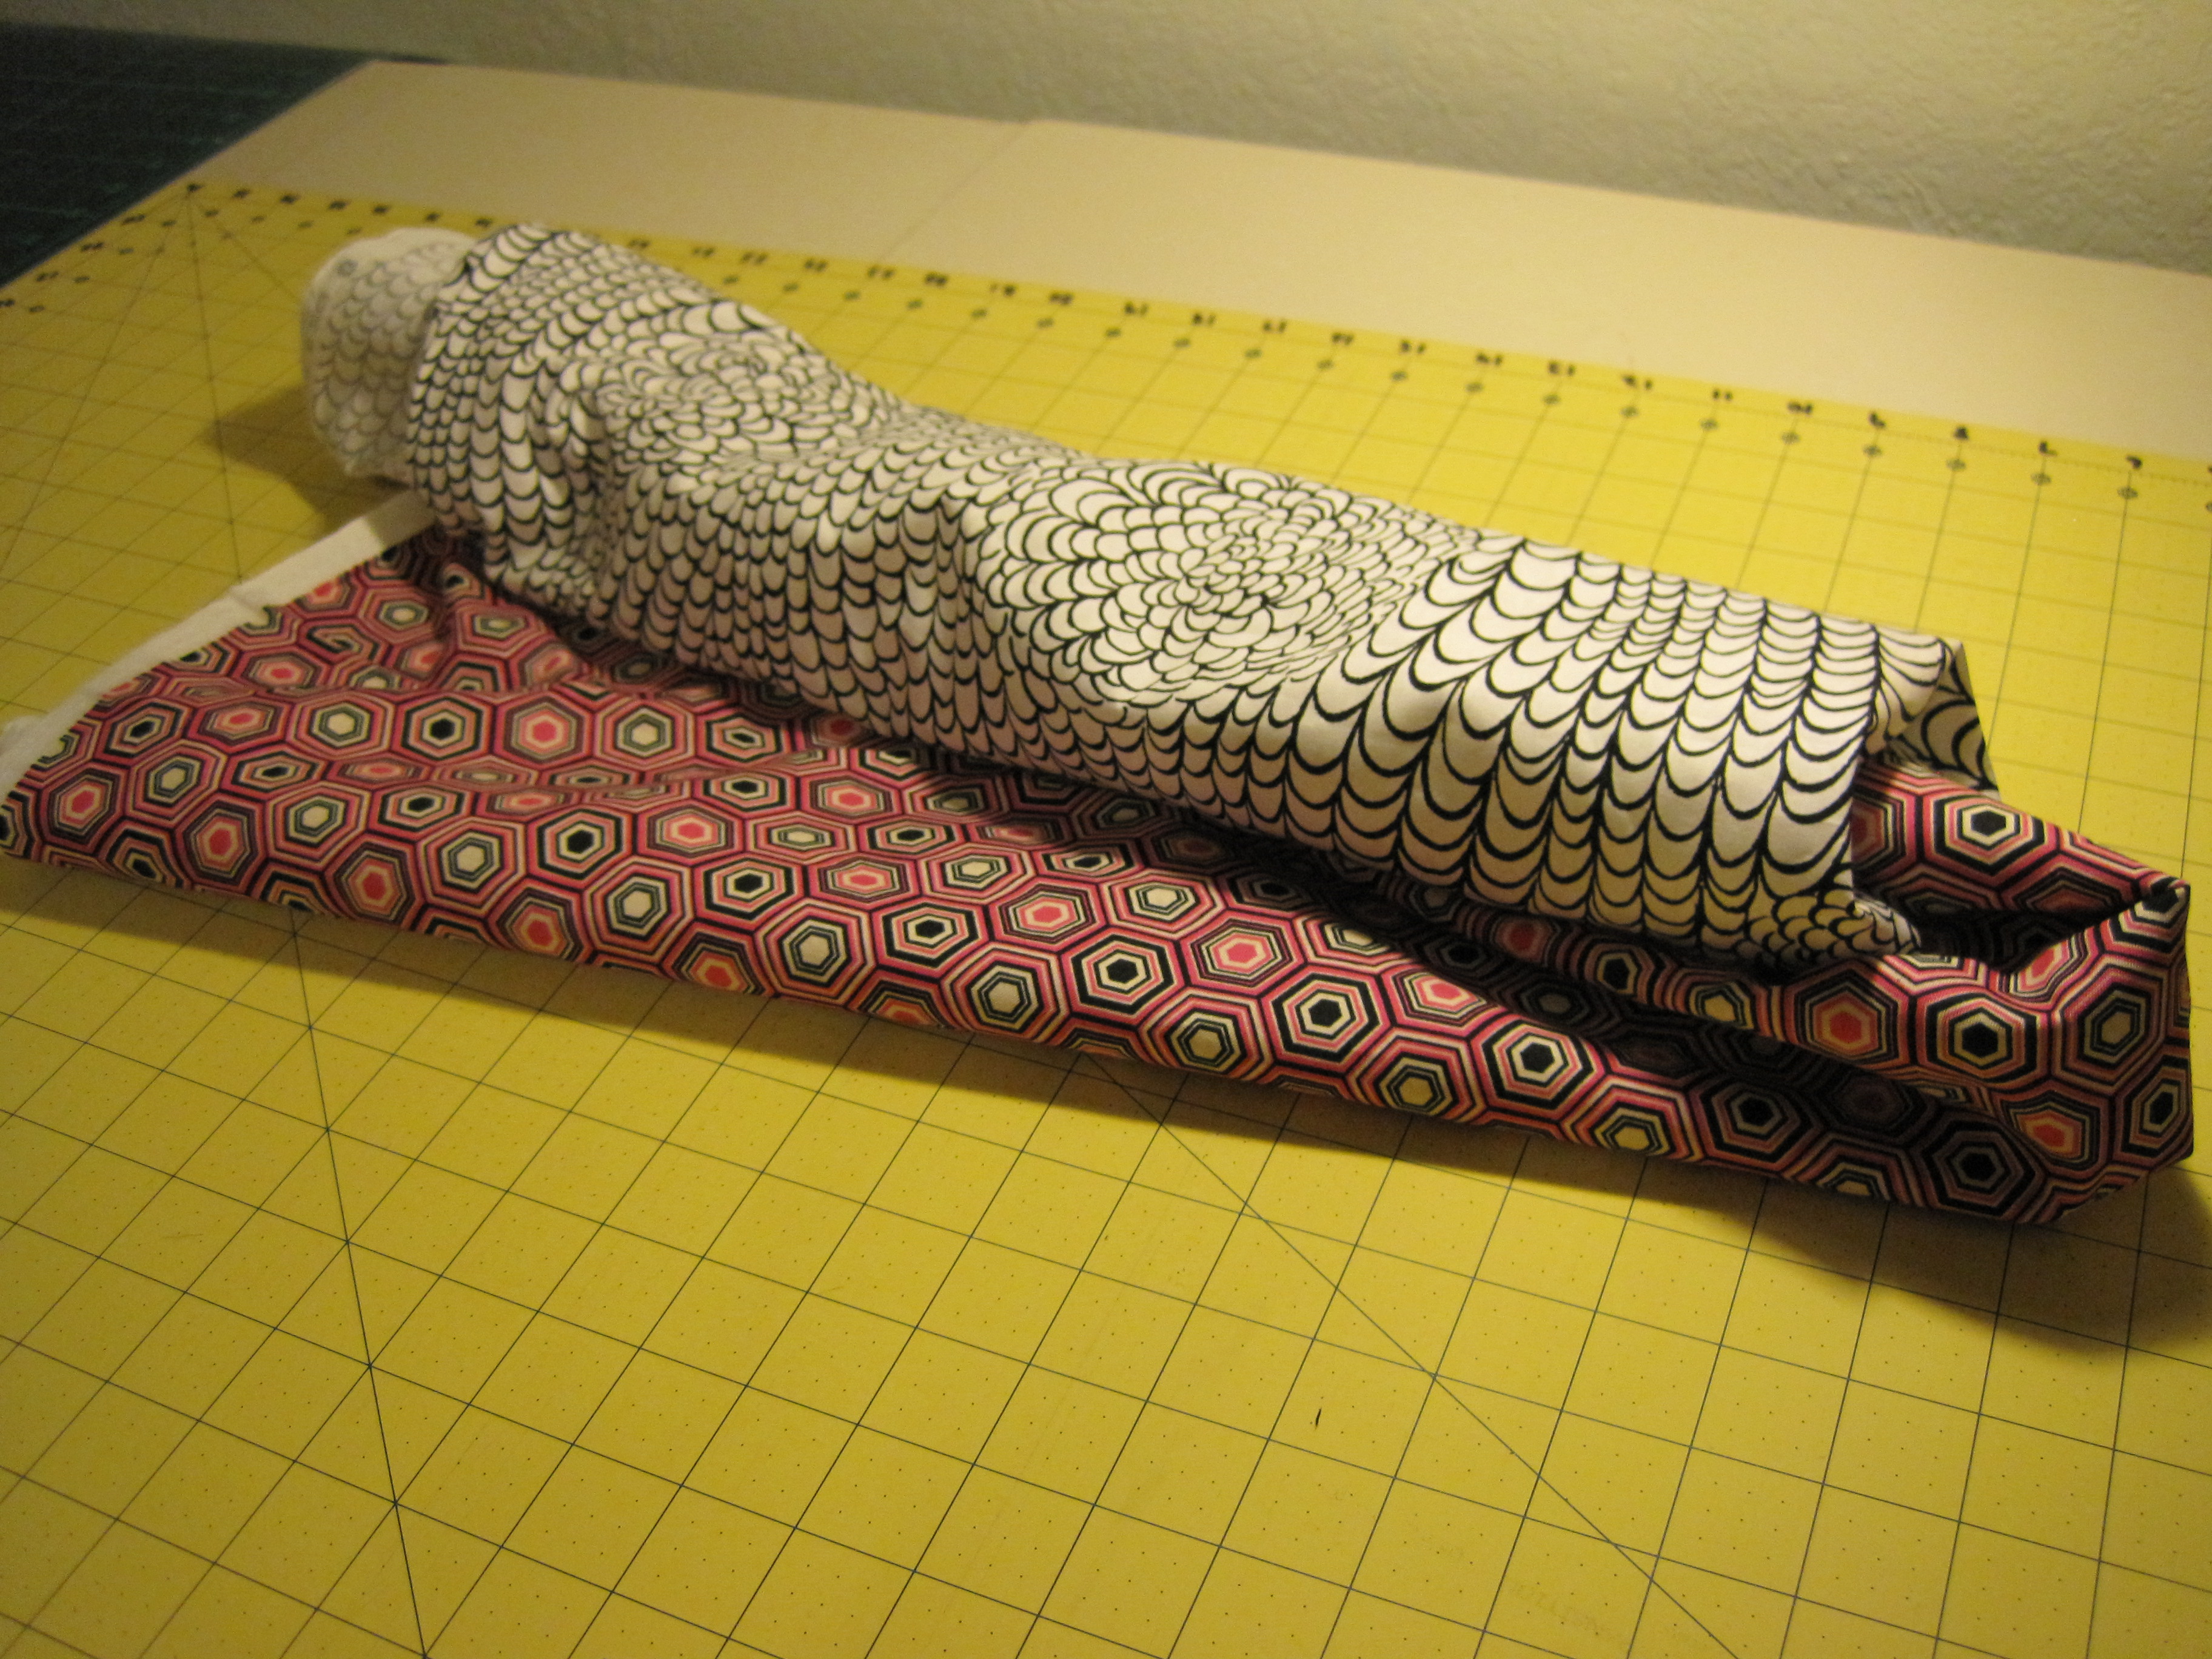
Continue tugging and rolling until the HOT DOG is all the way out.

Your pillowcase should now look something like this.


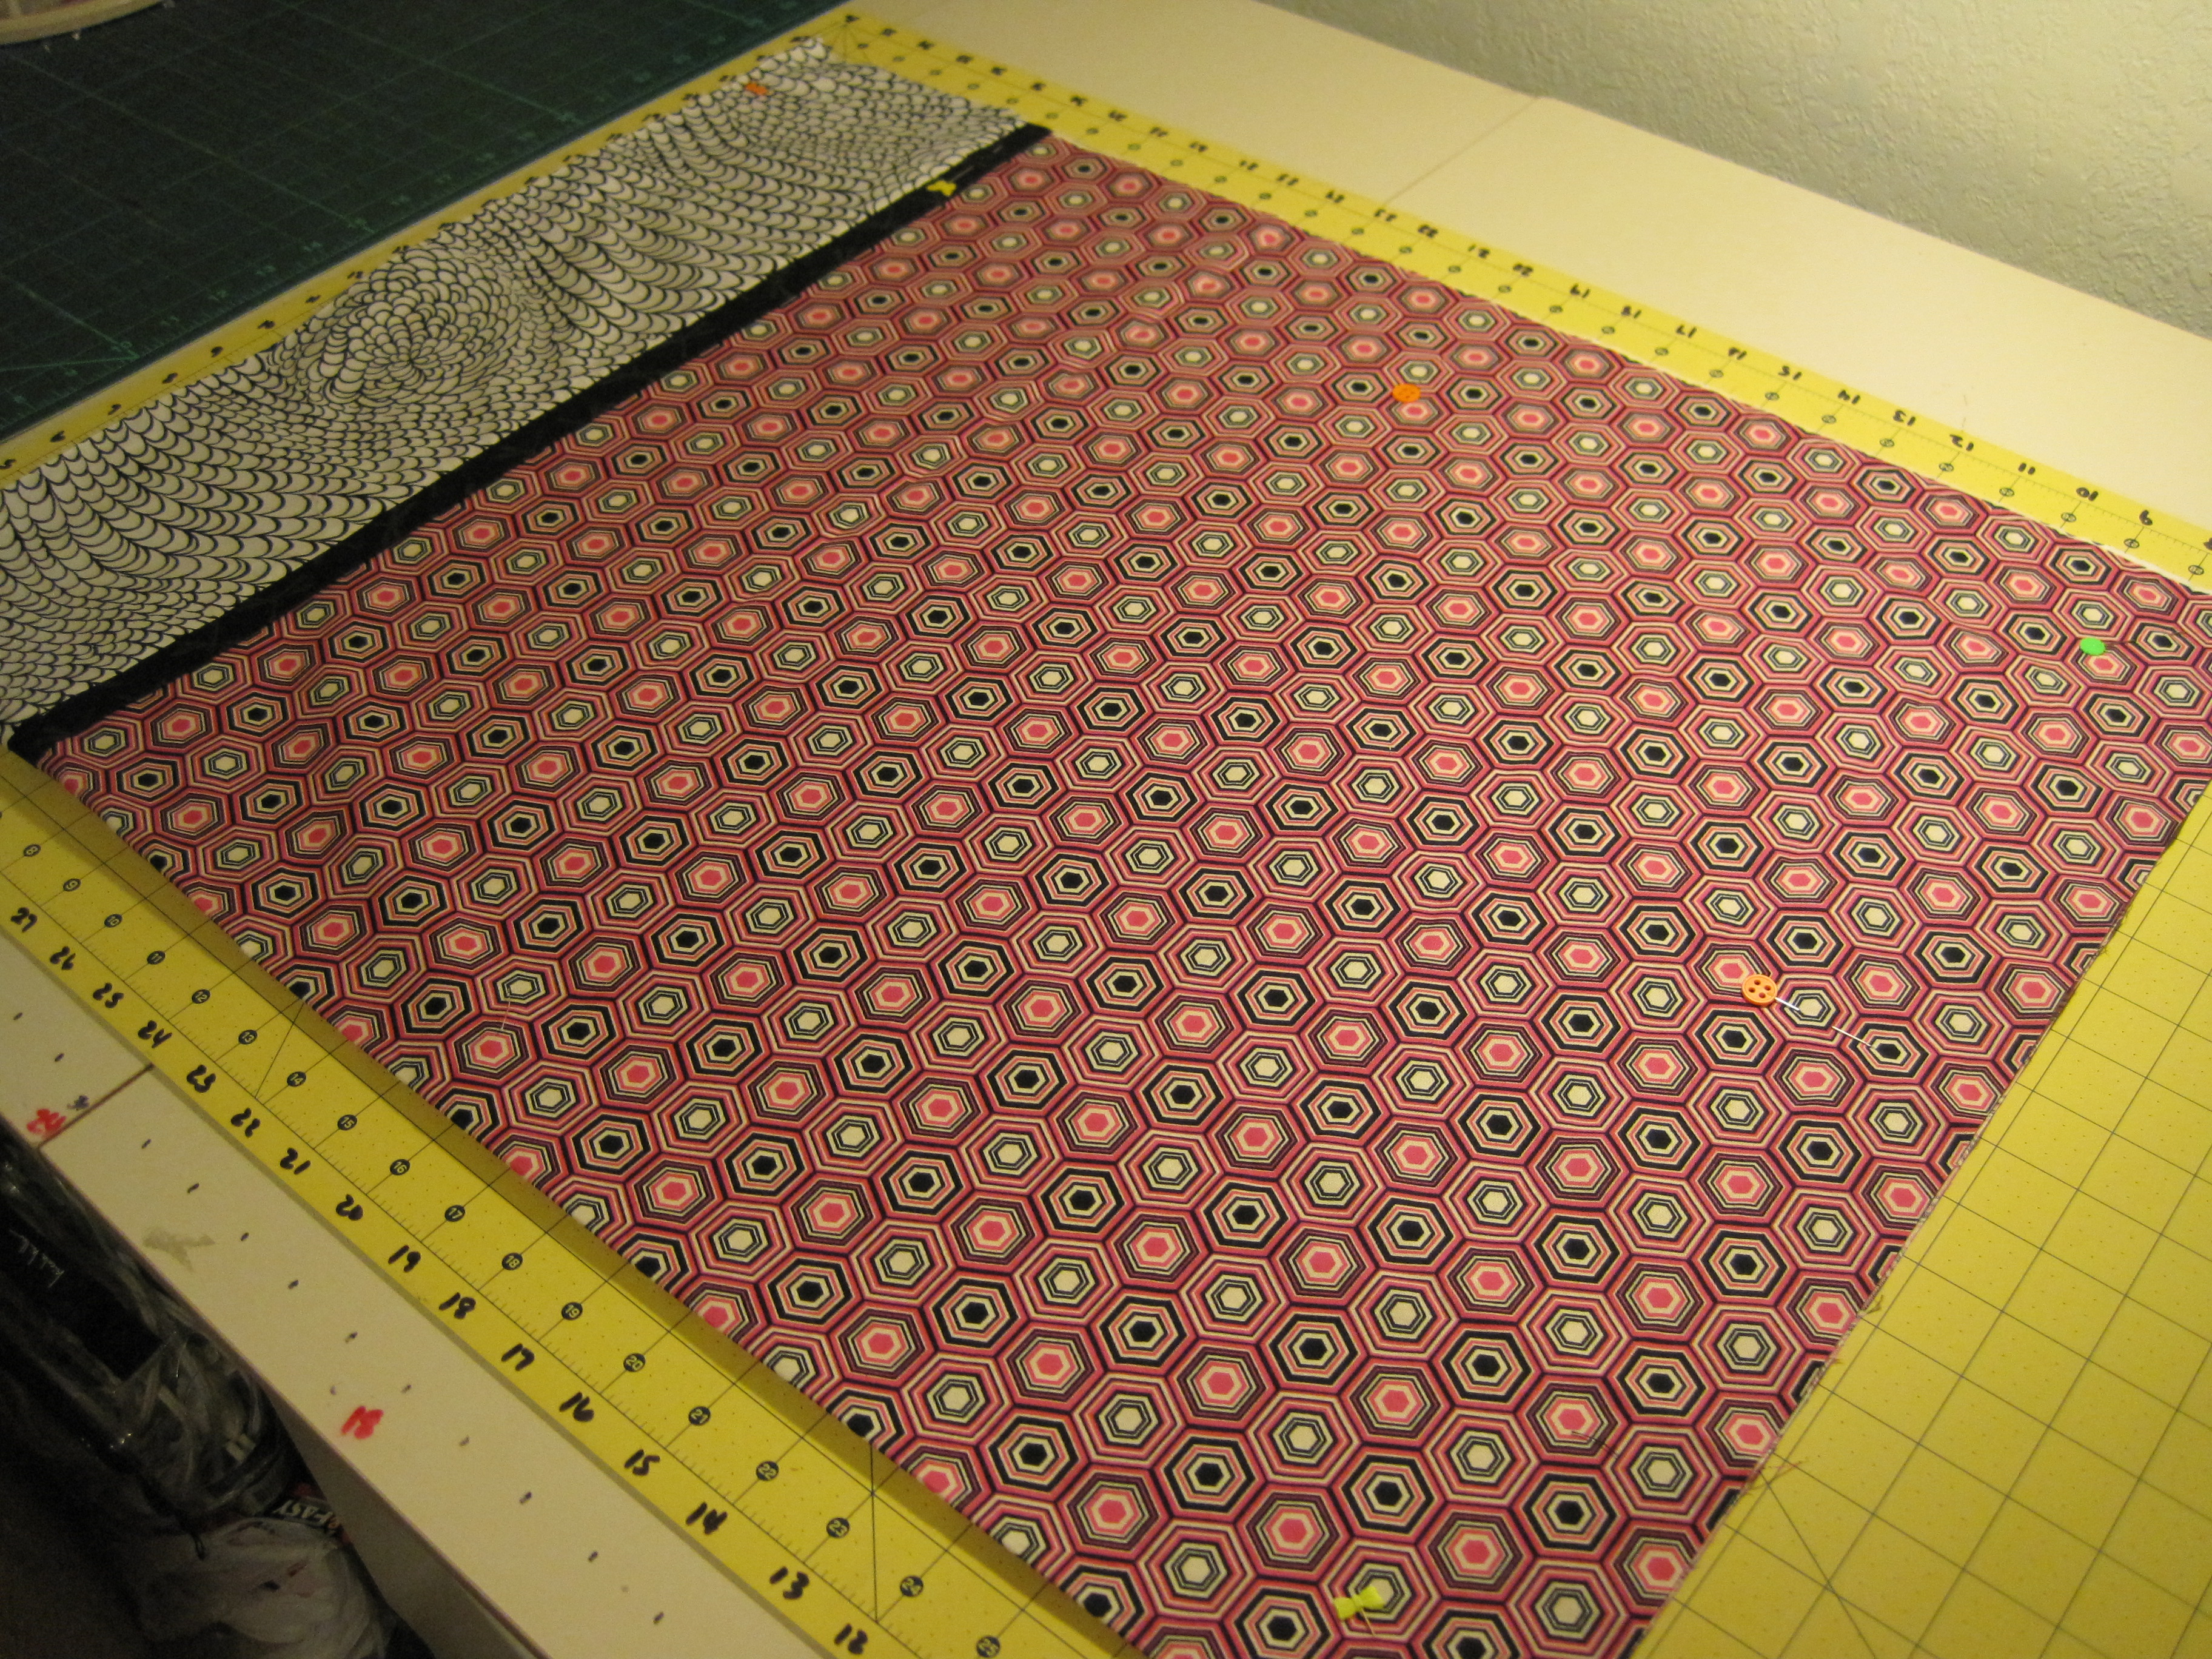
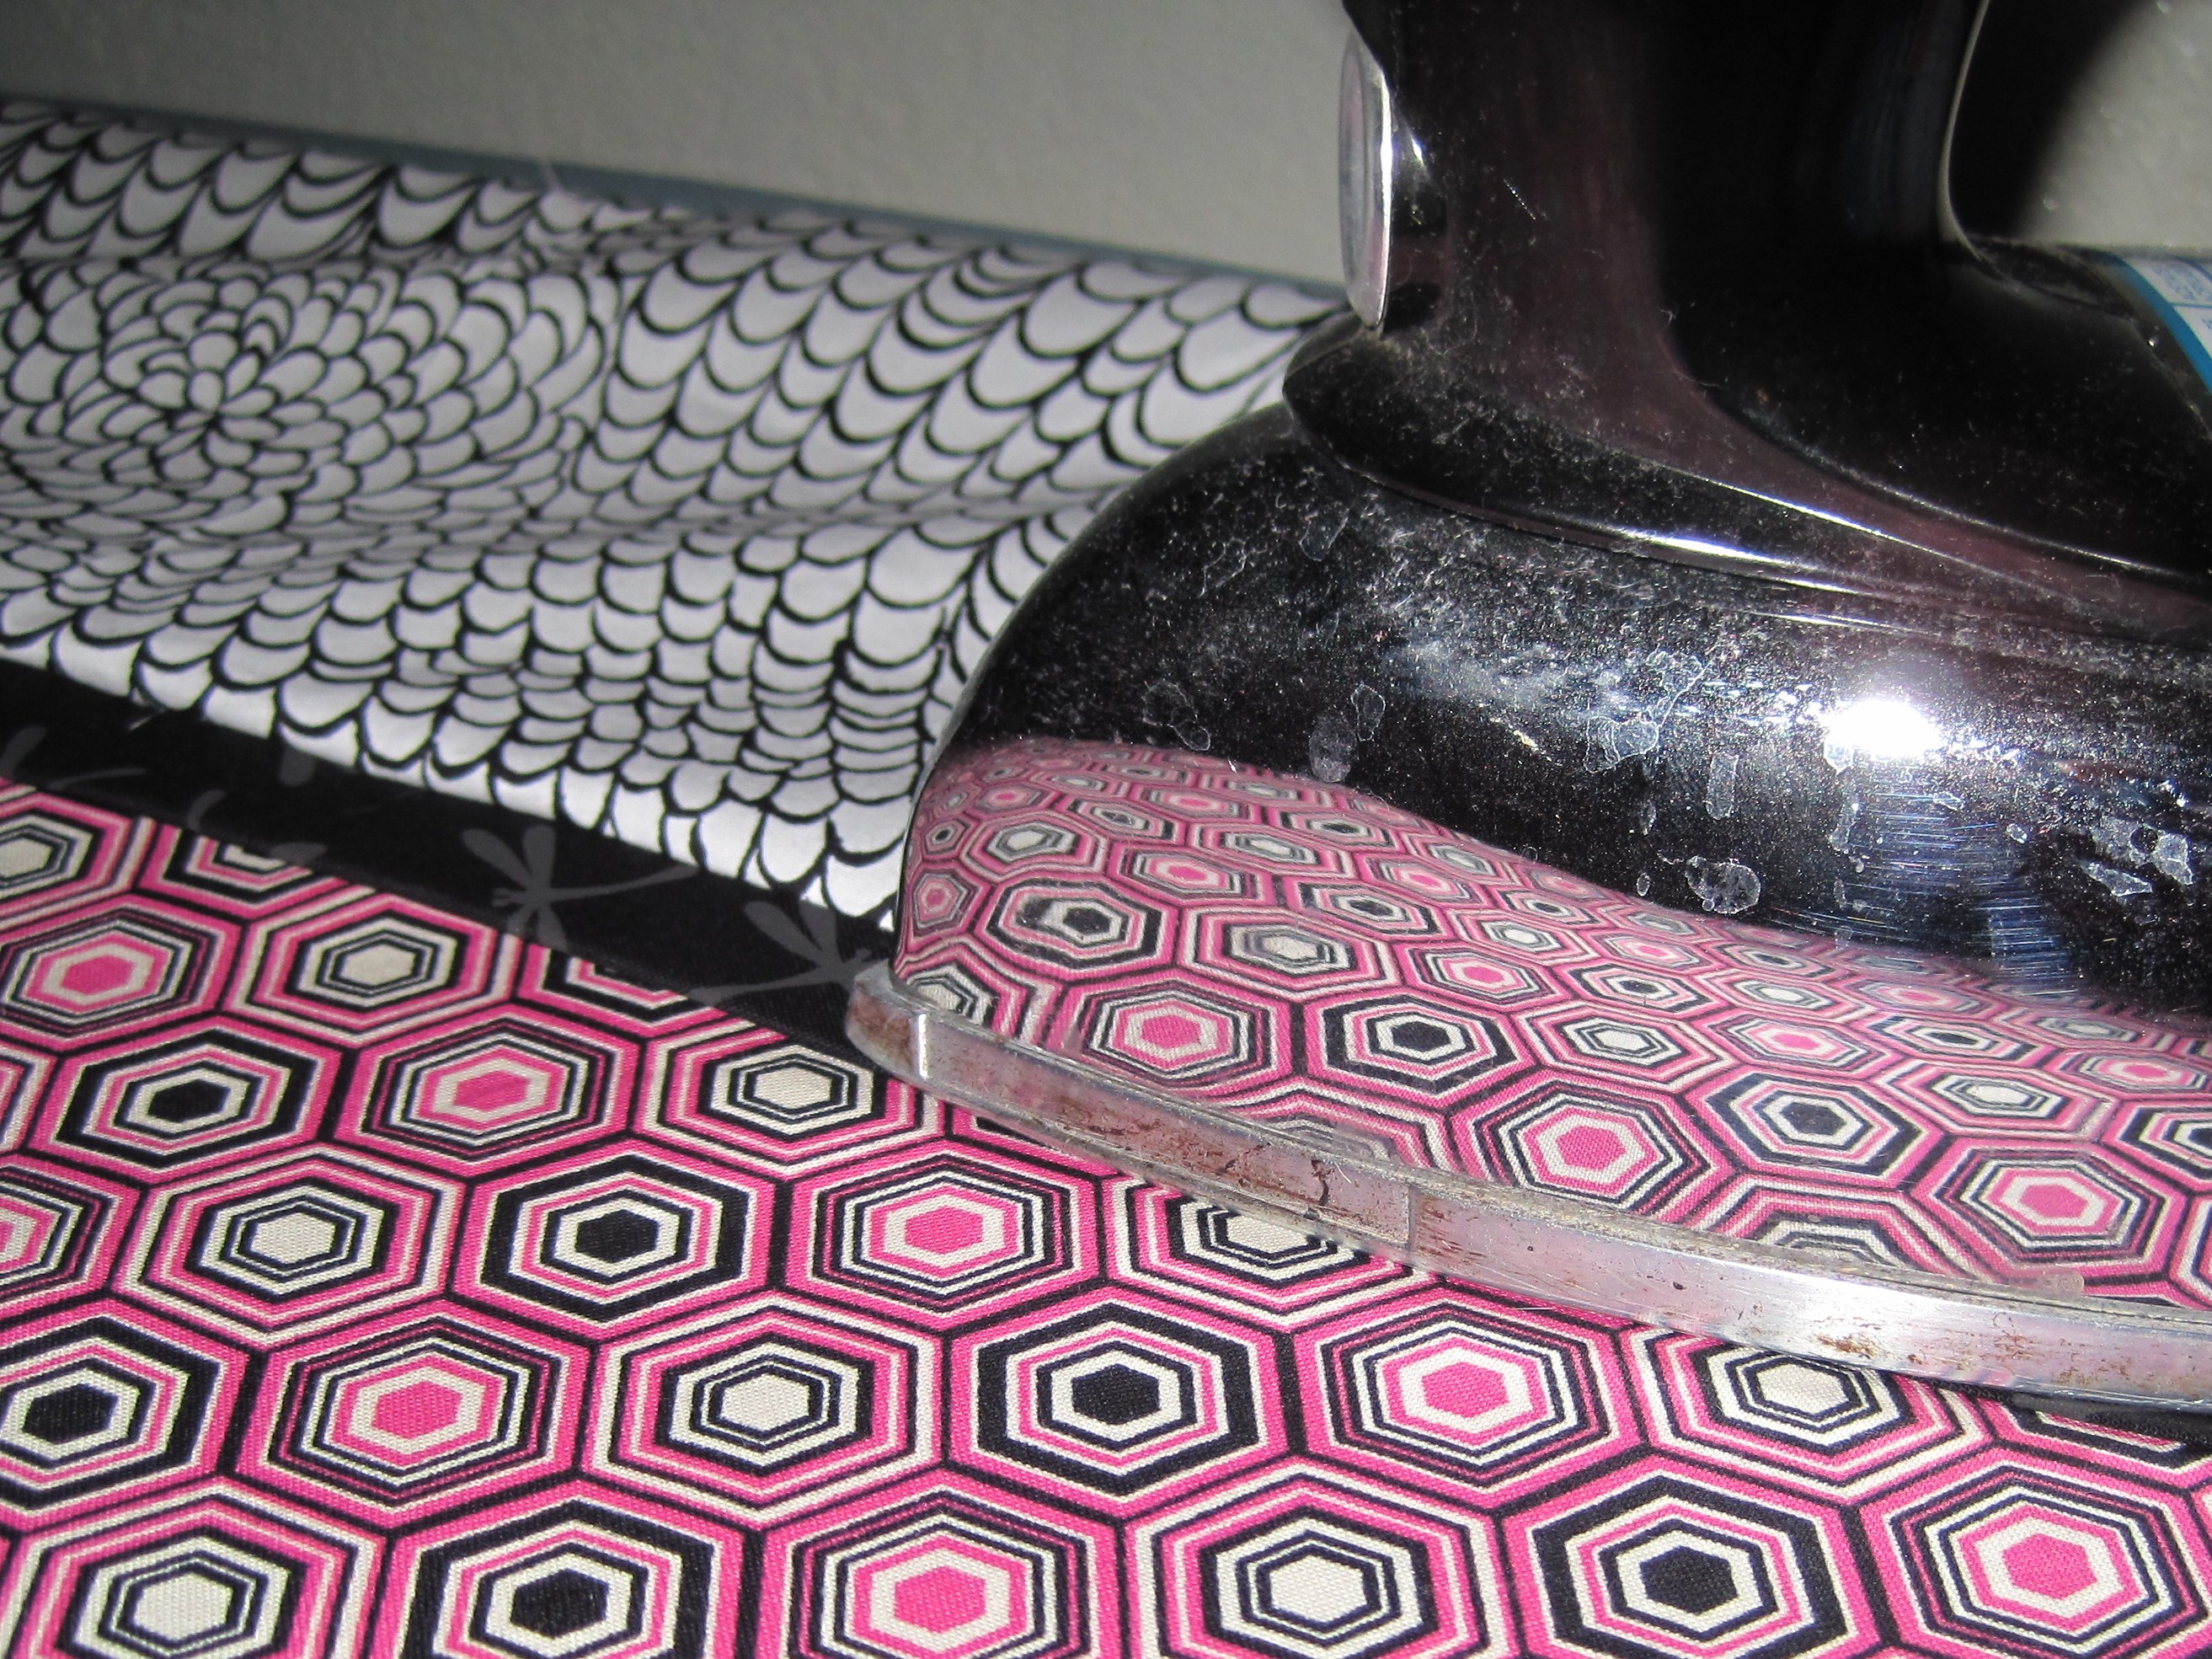
Smooth out the fabric, then press the BUN and MUSTARD, tugging gently so it’ll lie flat. I like to press on both sides.

Square up your pillowcase by removing the selvage.

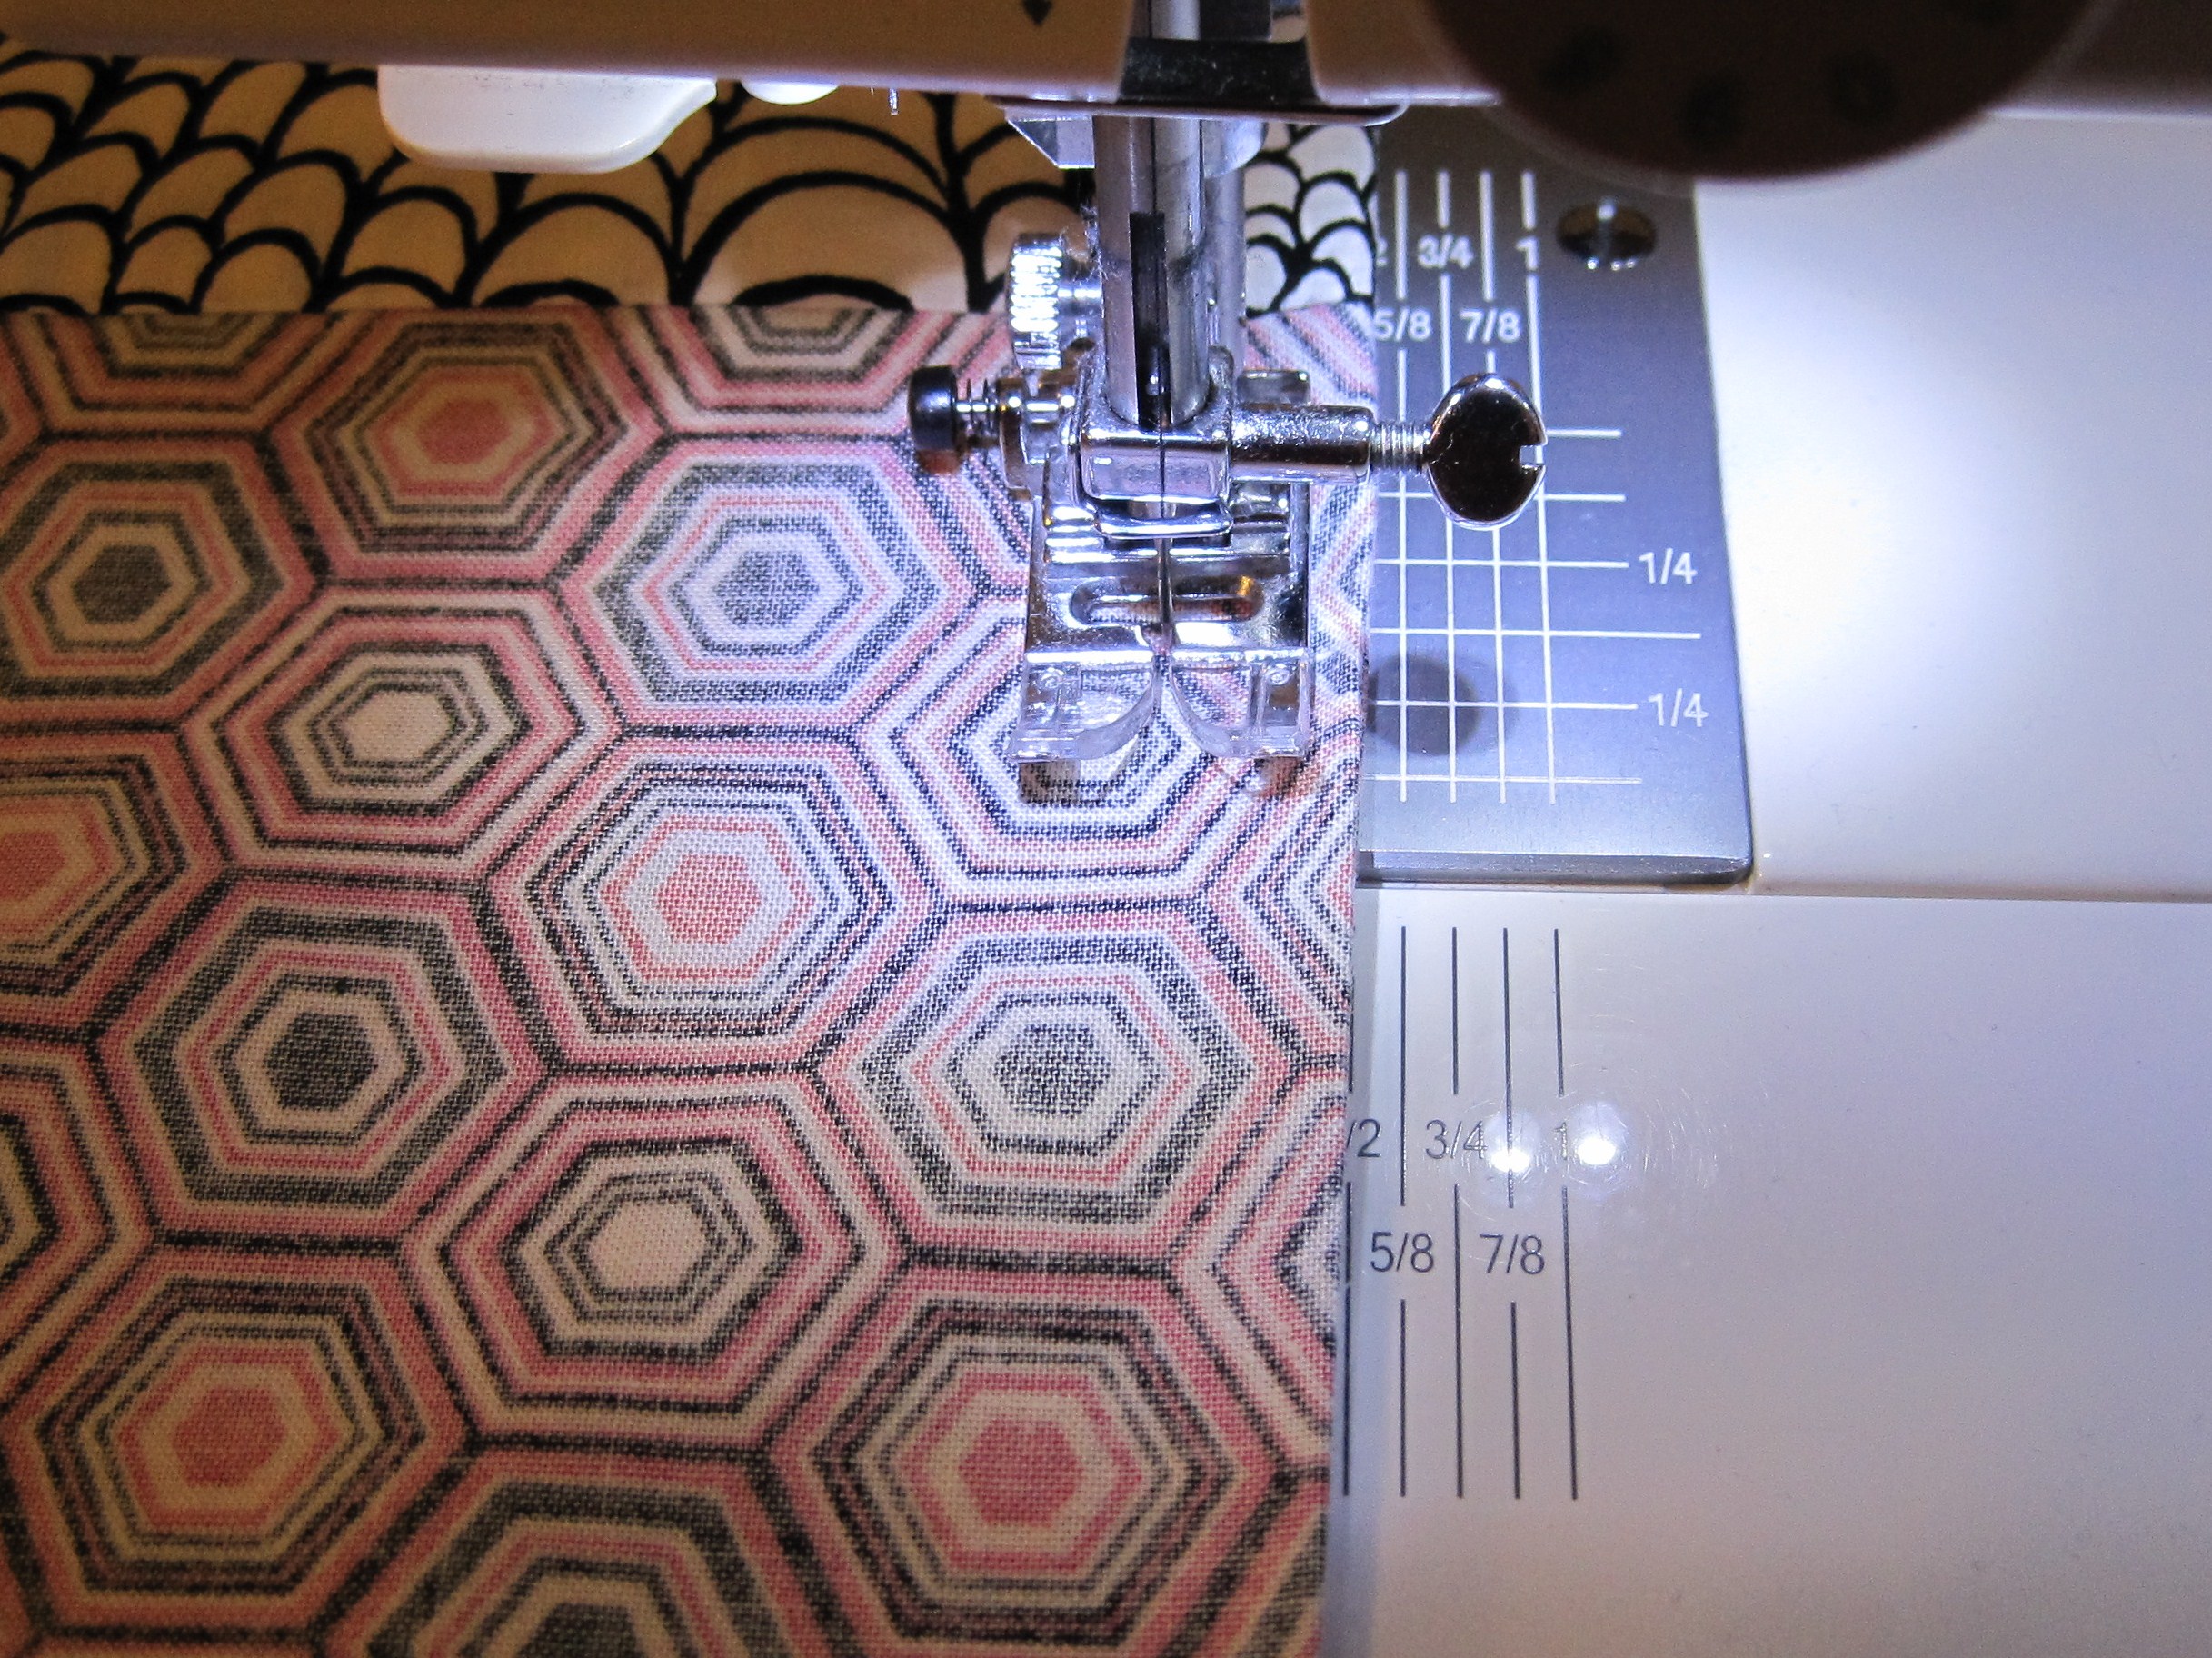
With WRONG SIDES together, align the MUSTARD and corners of the pillowcase.
Pin in several places.
Stitch around raw edges using a 1/4″ seam allowance (yes, yes, really, right sides out, wrong sides together!).

Turn the corner and sew across the bottom.


Trim corners (raw edges only, please!).
Turn the pillowcase wrong-side out.
Look how nice the BUN looks next to the HOT DOG!
Press the side and bottom seams flat.

Stitch using a 1/2″ seam allowance.
Look at that, you made French Seams…no raw edges!
Turn right side out and press.

See how nicely the MUSTARD lines up? Did you notice that your condiment made a lovely little flap, too?
It looks good outside and in!

Delicious!
Now, let me know if you’re as addicted to these as I am! This beauty is number 11 and I know I’ll make more. In addition to donating to the 1 Million Pillowcase Challenge, they also make great gift bags for quilts!
Need a hard copy? Printable PDF Tutorial!
Find my free patterns on Sewhooked & Fandom in Stitches.
♥ Jennifer O
Posts on this blog may contain affiliate links to help cover the cost of my website. I thank you for your generous support. ♥

Jennifer, This is awesome!!! You did a great job.
Will pass this on to my niece.
Thanks, Osie! I can’t wait to hear if she tries it!
Jennifer
Too cute. I’ve seen the challenge. Maybe I’ll make one, too.
These are so easy and fun, you should give it a try!
Hey Jennifer! It’s me, Debbie, from Honey Bee, you did it again — awesome job with the pillowcase! I am learning so much from you!! tks!
Thanks, Debbie! I’m totally addicted to making these things!
Jennifer
this was way more clear to me than the other ones i read. thanks for this. well done!
Thanks, Pren! It’s so much fun to do, you know I had to spread the love. 😀
YOU ROCK -as always
I was having trouble with the hand out
I need to see it!!
LOVE IT!!
THANX
Sheila
aka Witchblade070502
Ah, you’re making me blush!
I get what you’re saying, I need to see it, too! I had the advantage of having a demonstration. 🙂
Jennifer
Thanks so much Jennifer! I’ve made 10 so far and am hooked! Your tutorial was the best! I had written instructions but couldn’t wrap my brain around it until I saw it layed out step by step! All my family and my chosen charities are benefitting from your post and they love the pillow cases and have commented on how well done they are…Thanks again, this is so much fun! I love picking fabric out too! Lesley
Oh, it’s my pleasure! Seeing it done made all the difference for me, too! I’m thrilled to hear how much you’re enjoying it. If you take any photos, I’d love to see. 🙂
Jennifer
I love making these pillowcases. Will make some as Christmas presents.
Oh, great idea for Christmas!
Jennifer
Thanks so much for a wonderful tutorial. I just made my first. I am going to use it as wrapping for a gift quilt. It was so easy!
My pleasure, Pat! This is my absolute favorite way to make a pillowcase. 🙂
Jennifer
LOL This is the one we call the burrito pillowcase. This is the most awesome pillowcase method in history, no matter what you call it!!! “A rose by any other name still smells as sweet.”
Oh, absolutely! Burritos smell pretty darn good, too! 😉
P.S. This was THE best how-to I’ve seen for this one on-line!
Thanks! That’s really how this came about. I wanted to share with some friends and couldn’t find a good how-to anywhere.
Thanks for a great tutorial! I used it to finish my pillowcase – I have photos on my blog if you’re interested 🙂
(You should be able to click on my name to see them.)
Wow, the pillowcase is amazing! So glad you found the tutorial helpful. It’s one of those word of mouth kinds of things and is too fun and easy not to share!
Jennifer
I lost my original directions for this pattern. Could not believe when I “googled” “hotdog in a bun pillowcase pattern” that I found this. Your directions are the ones I had but yours are great because of the pictures. Thanks for posting this awesome pattern. I have made over 25 so far. Great to match when making charity quilts too!
Hi Laurie,
It’s great to hear you found just what you’re looking for! Like I say in my directions, this is definitely not my idea, but it’s too good not to share. I was shown by a friend…who was shown by friend! It’s great to keep something so fun and easy to make going. 🙂
Jennifer
You are right, I’m hooked. I’ve completed 6 since last night and have 7 almost complete and still plan to make 5 more for a charity sale on Saturday. I’ve had a demonstration for pillowcases shown in a class but the edge on the casing was unfinished so I was dissapointed. This is exactly what I wanted to do a year ago. Sweet! Thanks-I’ll be sharing too.
I’m so glad this was what you were looking for, Shirley. Good luck with your goal for the charity sale!
Thank you for this tutorial – I had to do quite a bit of math and diagramming to get my paper-pieced block situated properly in my “hot dog,” but once I had that set it flew together, thanks to your clear instructions and photos. I especially loved “(yes, yes, really, right sides out, wrong sides together!)” – I would have totally had trouble with instructions like that in a less-clear tutorial!
Woo, you are welcome! I guess you can see why these would be so very addictive. 😀
Jennifer, I have heard great things about this pattern, and I am excited to make several of these. I am wondering if you have measurements that you can pass along so that I can make a king size pillow case? Or should I just measure one of my store bought king size pillow cases and make the hot dog (body) fabric longer than your 24″ measurement and do everything else the same way?
I think you it exactly right! I’d measure the body of your king size and extend the body fabric. That should work great!
That is so funny! I have always called it a burrito. I like the bun, mustard, hotdog one, though.
I’ve heard burrito, too. Hot dog is how I learned, and I’ve stuck with that! 🙂
Hi- I am new to the “sewing world”, and trying to make pillow cases for my son. Today is the day. I have researched different ideas, and your explanation actually makes sense to me! Thanks- my on concern is the width of my fabric: Will I be ok if the width is only 38? I will let you know how it goes! Thanks again!
38″ would make a bit of a skinny pillowcase. You could definitely add a strip of fabric to the end to get the width you need, otherwise I’m not sure a pillow would fit!
Thanks for the comment, Jennifer. As this was my first sewing project, it was really hard to picture in my head. The pillow came out amazing- as far as the beautiful fabrics coming together- yes, too skinny! But now I know! I was able to play around with the different stitches also, so it was a great learning experience. I also now need to learn to sew a straight line. I will let you know what happens today, as I attempt it again!!!
The more you practice, the better you get! I’m happy to hear that your experience has encouraged you to keep going!
Do you have measurements for a travel size pillow case?
Hi Jennifer, it’s me Carolyn Z,, I’ve taken your wonderful paper piecing classes. Tonight I shared your pillowcase instructions/french seams with my sister in law from Maryland and you made it SEW easy. I heard your location is changing, wherever you go I know you will well because you always help others. I hope I hear from you. Gods blessings
I’ve made many pillowcases for my 7 grandchildren for their birthdays and every holiday, too. My cases are 3/4 yard or 27″ long, with the cuff being 1/4 yard or 9″ long. I do put a contrasting/complimentary flange, prairari point, lace, piping, etc. When I use a flange, it is 2 1/2″ or as little as 1 1/2″ wide. I sew the folded side down using a straight stitch or decorative stitch before I make the French seam.
I’ve also made many pillowcases for wedding gifts, too!
I just downloaded the pattern. I have king sized pillowcases as well as standard. Can you tell me how many additional inches I should add to make a king size? Looking forward to making the first.
I’ve only made a few King sized pillow cases, myself. I make usually standard size pillowcases for special occasions, seasons, etc.
When I worked at Cozy Quilt Shop in El Cajon, CA, we’d sell the following to our customers:
King Size Pillowcase
1 yard main fabric for each pillowcase
1/4 to 1/3 yard (same as for any pillow case) for the cuff
Optional: 2 1/2″ strip folded length wise for decorative contrast/complimentary flange.
Standard Size Pillowcase:
3/4 yard main fabric for each pillowcase
1/4 to 1/3 yard for cuff
2 1/2 ” strip folded lengthwise for flange
Pillowcases are a wonderful way to celebrate a special occasion. Wedding, birthdays, seasonal, just because.
Just tone on tone fabric pillowcases are elegant, using different tone on tones for each part of the case.
All pillowcases fit the fluffiest pillowcase sold on the market. I’m usually referring to Costco,.
Sharreen
Jennifer, I just wanted to let you know I have been using your directions and directing people to your site for a couple of years now. The photos are just perfect. I have made these for family and friends but more importantly have done them with groups for charity.
Tomorrow a group of us are going to do a real sweatshop sew in. We have pinners, pressers and sewers all lined up to go. Another gal and I have 113 kits cut and ready to go to make pillowcase for several local social service agencies. Often when they have to take children from homes they have to use garbage bags to collect some things from the home for the children. The case officers can easily carry a number of pillowcases and use them for sacks to carry the children’s things. This group has done them before without the trim and extras but I have convinced them with your directions we can add those extras to really make these special.
Thank you for taking the time to take photos as you did this and posting them. It makes the directions so much clearer to everyone I have ever done these with.
KJill
I’m absolutely thrilled to hear that you’re using my tutorial to such awesome effect! Thank you so much for sharing how you’re using the pillowcases for good. If you happen to have taken pictures during your sew in, I would love to see.
Jennifer
Nice demo w sharp illustrations! Would like travel size measurements too.
I have watched several tutorials and yours is one if the best! Actually taught a friend the other day to make these. I like 27″ hot dog with 9″ bun! We are Ohio State fans so made hubby and I each one for football season.
Thanks, Beverly! I’ve altered the size now and then to work with the fabric I have or to make them for bigger (and smaller!) pillows. Sometimes I leave the mustard out…it’s really a versatile project!
One of me favourite things to sew…I have made many of these pillowcases. Your tutorial is one I recommend to my friends!
How fun, thank you for sharing! 🙂