

Crack open the WAY BACK MACHINE for today’s 31 Days of Halloween!
Today we have a fast, easy costuming option for the Harry Potter fans out there.


Originally created in 2006 for a Craftster Swap, I’m breaking this tutorial out today for anyone that might not have a costume in mind, or, like me, might need something a wee bit cooler to wear come Halloween!
The best part about this project is that you can sew it by hand if you don’t have a machine or use a serger to finish it even faster!
You’ll need:
- 1 red t-shirt
- 1 black t-shirt in the same size and style as the red t-shirt
- Rotary cutter, 24″ rotary ruler & cutting mat
- OR a straight edge, pencil and sharp scissors
- Seam ripper
- Pins
- Sewing machine, serger or needle and thread
- Freezer Paper, cut into 2 8 ½” x 11” sheets (print Hogwarts Crest Stencil & Potter/Star Stencil on these sheets)
- fabric paint in red, green, blue, yellow, white and gold
- foam paintbrushes
Instructions
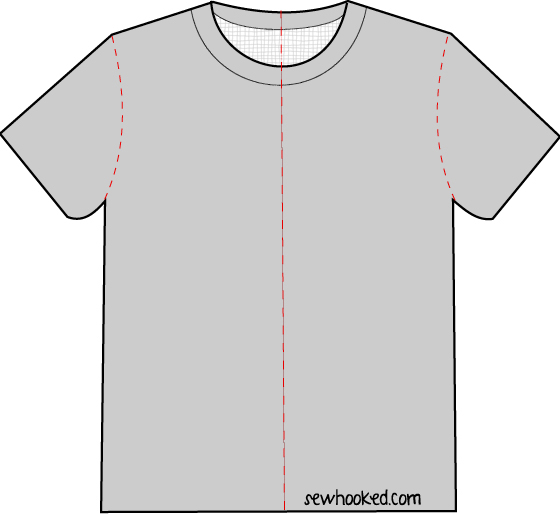

- Find the center of each shirt by folding in half towards the front and matching the sleeves.
- Mark the top and the bottom with a pin.
- If using a rotary cutter, this is your cutting line.
- If using a straight edge, draw a pencil line from top to bottom.
- Cut as straight as possible.
Sleeve Reconstruction

- Select the red shirt right (right side when the shirt is worn) and black shirt left and carefully remove the sleeves from each side of the shirt using a seam ripper. Be very careful to not stretch the fabric.

- Swap the sleeves so that red sleeve is with black shirt piece and the black sleeve is with red.
- Turn the shirt half you are working on inside out and place the sleeve, right side out inside the
- sleeve hole (right sides will be together), matching the top and bottom creases. Pin the sleeve in place, being careful not to stretch the fabric.
- Using a serger or a stretch stitch on your sewing machine, stitch in a 1/4″ to 1/2″ seam all the way around.
- If stitching by hand, take small stitches.
- Repeat for second sleeve.
Shirt Body Reconstruction

- Place one shirt half inside the other, right sides together so that the wrong sides of the seam lines will be on the outside. You will have two seams, a front seam and a back seam.
- Carefully pin every few inches starting at the t-shirt ribbing and work your way down, trying not to stretch the fabric.
- If the bottoms hems do not meet, pin the bottom edges together and ease along the middle of the shirt (t-shirts can be really wonky, but you can make it work!).
- Carefully stitch along this line as for the sleeves.
- Snip the corners of the inside seams on the diagonal.
- Turn the shirt right side out.
Stenciling the front (Hogwarts Crest)
- Cut out the four sections of the Hogwarts Crest stencil.
- Place cardboard or newspaper inside the t-shirt to protect from bleed through.
- Using a warm iron, carefully place the stencil on the upper left side of the shirt (the black
- side).
- Stencil the upper left section red, the upper right section green, the lower left section yellow and the lower right section blue*.
- Gently peel stencil away and allow to dry.
- Optional: Paint a cursive “H” over the four sections in gold paint.
Stenciling the back (Potter & Star)
- Cut out the Potter and Star stencil.
- Optional: Create a stencil with your own name using a Sans Serif font OR use purchased iron on letters.
- Place cardboard or newspaper inside the t-shirt to protect from bleed through.
- Using a warm iron, carefully place the stencil in the middle of the back of the shirt, matching center lines.
- Stencil the name and star with red paint.
- Gently peel away and allow to dry.
*I recommend testing your paint on dark fabric before you start. Some paints will need multiple layers. If the paint doesn’t cover, you can start with a white base coat.
Need more information on stenciling? Check out my post from last week!
![]()
LAST DAY: As a special bonus for my readers, get 50% off Machine Quilting: Free Motion & More until October 15, 12015! Original price is $39.99, get it now for $19.99! Offer good until 10/15/15 @11:59pm MT.
Are you making projects from 31 Days of Halloween? Share your photos with my flickr group! There will be a fun surprise after Halloween for one lucky winner!


Even thought I’m not participating, I love seeing all the patterns and ideas you come up with! You definitely found “one” of your callings!! Have a great week! Julia Webb
Ah, thank you! I’ve been digging through all of my projects and notes and I have soooo many Halloween projects to share!
I have been waiting for this one to be rebooted! I have my tee shirts ready to go…bought a Hufflepuff badge…just need to make a “Diggory” stencil! Glad to see this tutorial back up again (I was wondering if you had a special treatment for the collar, and I’m glad to see you just sew right through the ribbing.)
This tutorial has been in draft mode waiting for an update practically forever. I’m so glad you found it useful, that makes the effort completely worthwhile!
Pingback: 31 Days of Halloween – Potions Book | Sewhooked