

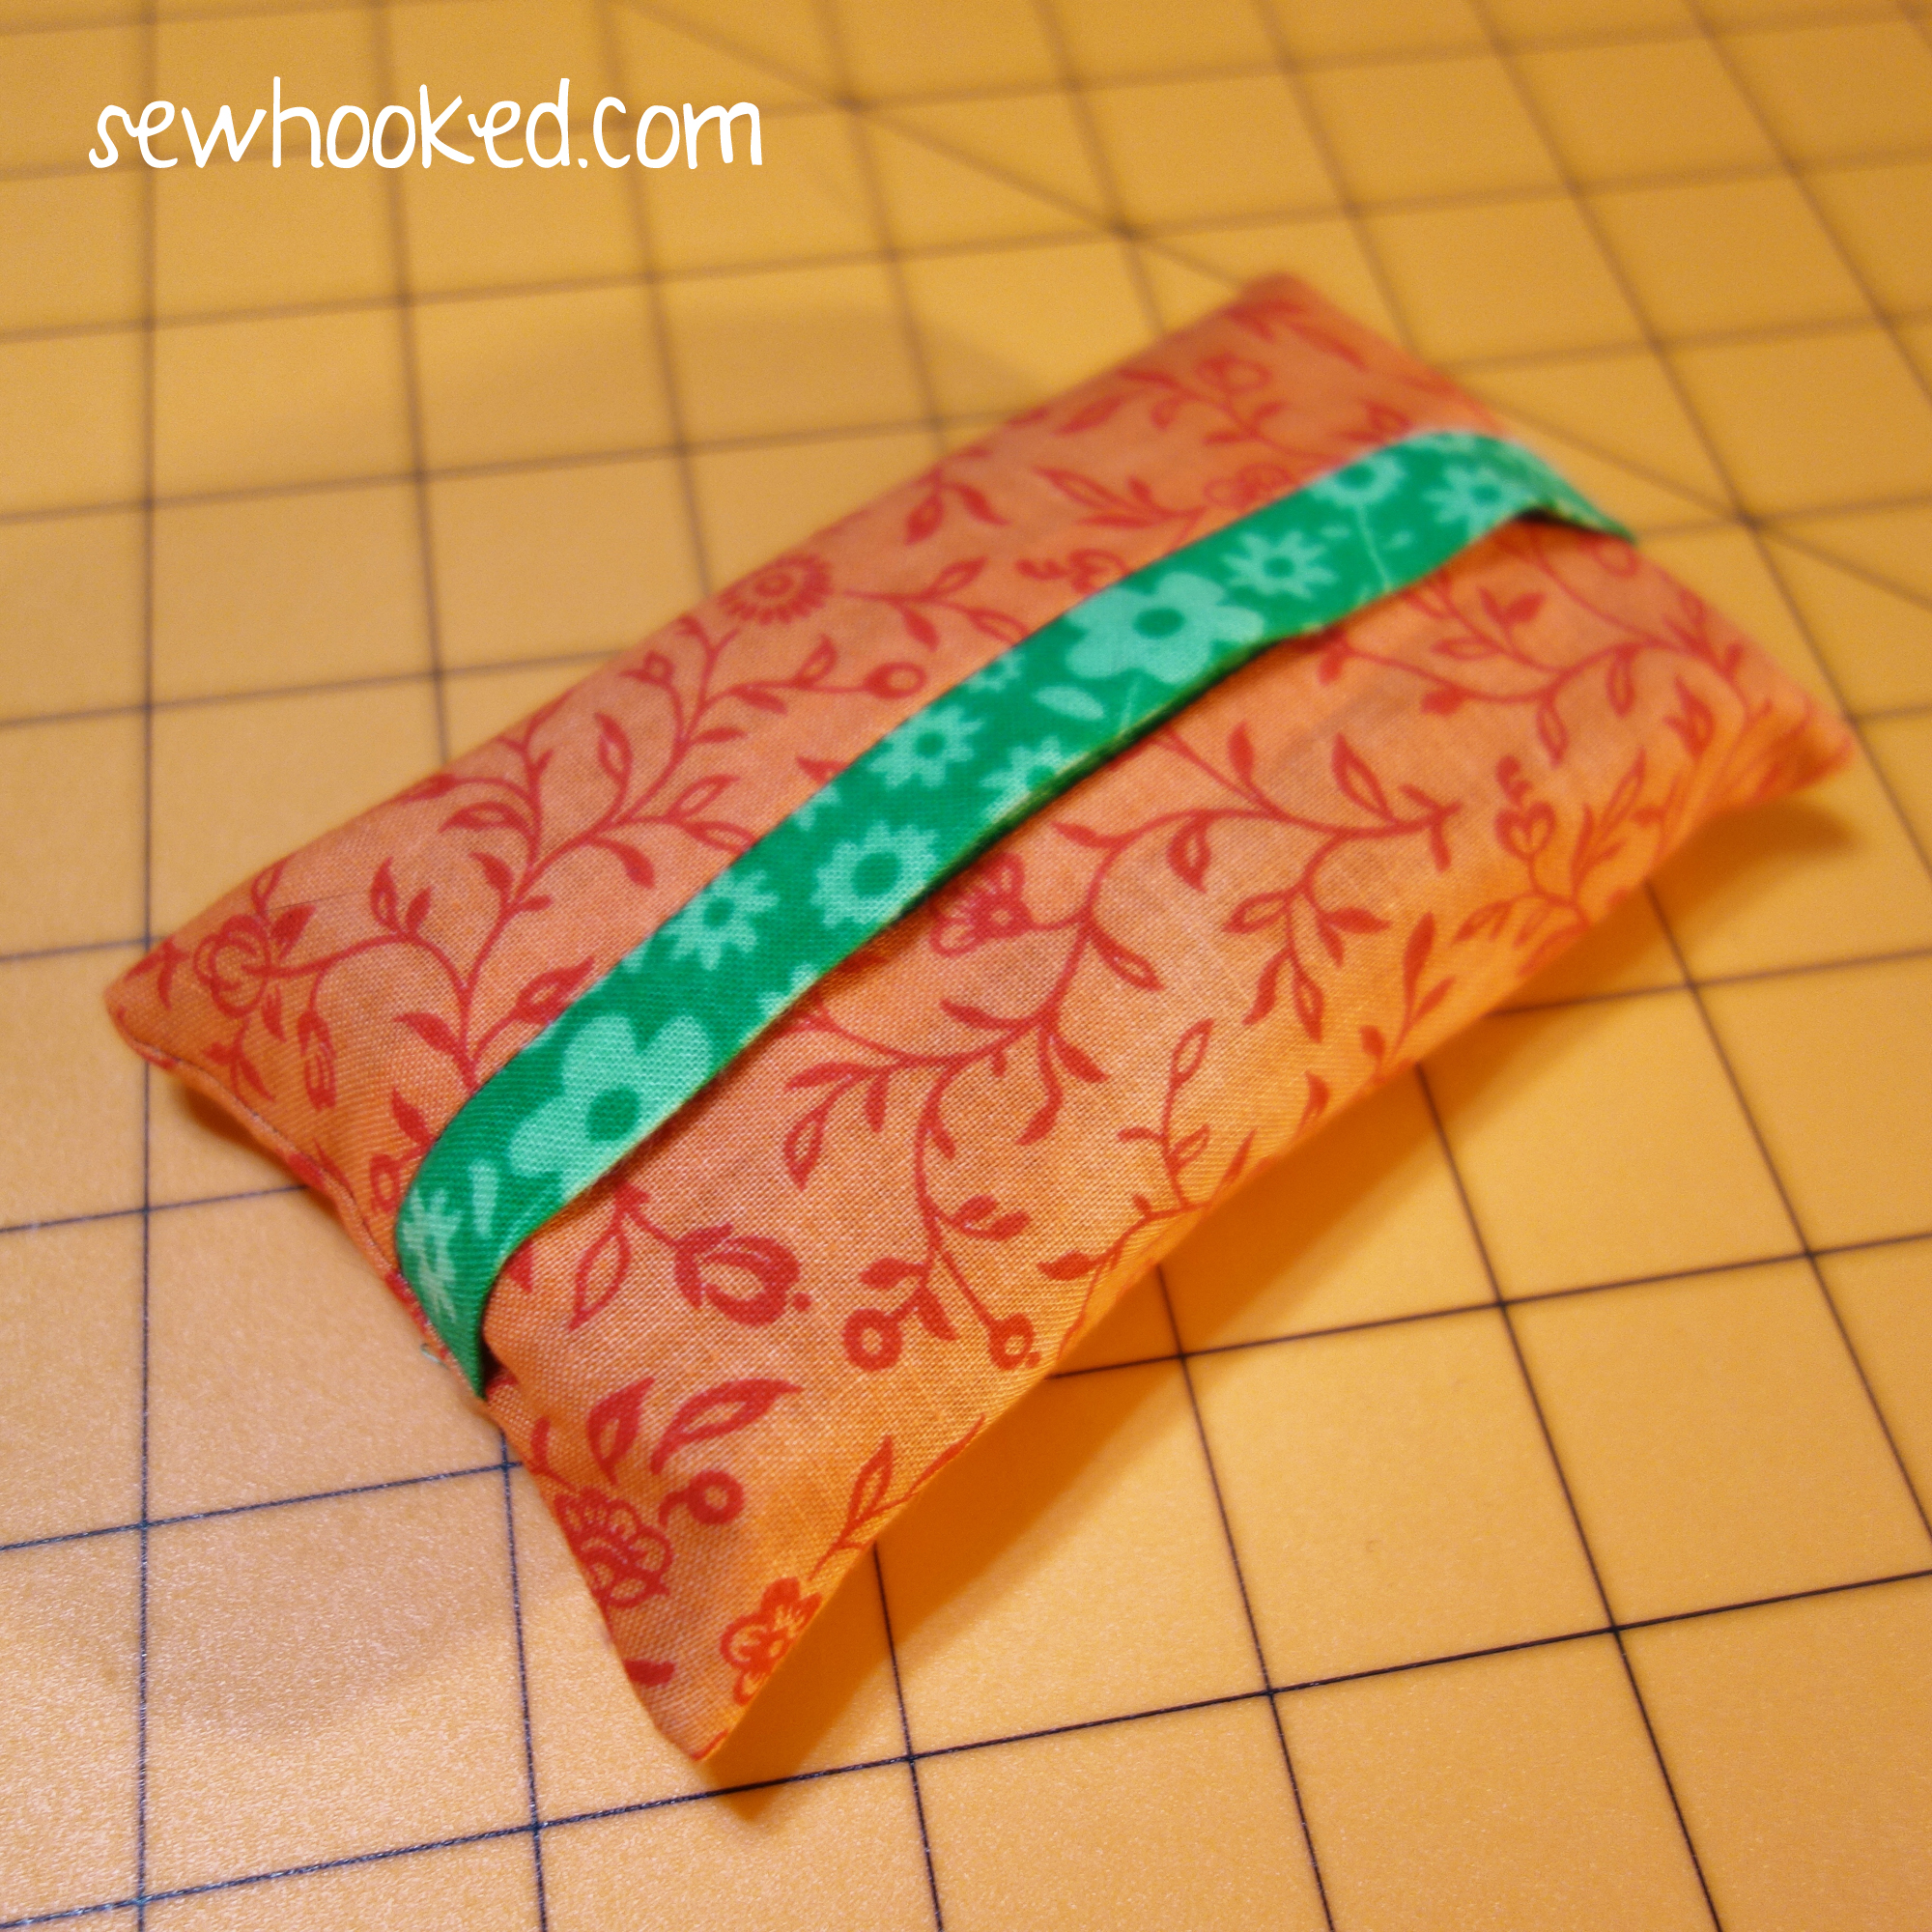
As promised several Talk to Me Tuesdays ago, we have a super simple tutorial to make a self-trimmed tissue packet cover.
Don’t want trim? I have instructions for that, too!
Please note that this tissue cover is sized to fit Kleenex Facial Tissues. Mine are a generic version but are the same size as the Kleenex. Use the brand works for you.
Adjust the dimensions if needed. You can also play with quilt blocks and directional fabric as desired.
These little packets make great gifts, swap additions, and are perfect for keeping your tissues clean and safe in your bag or purse.

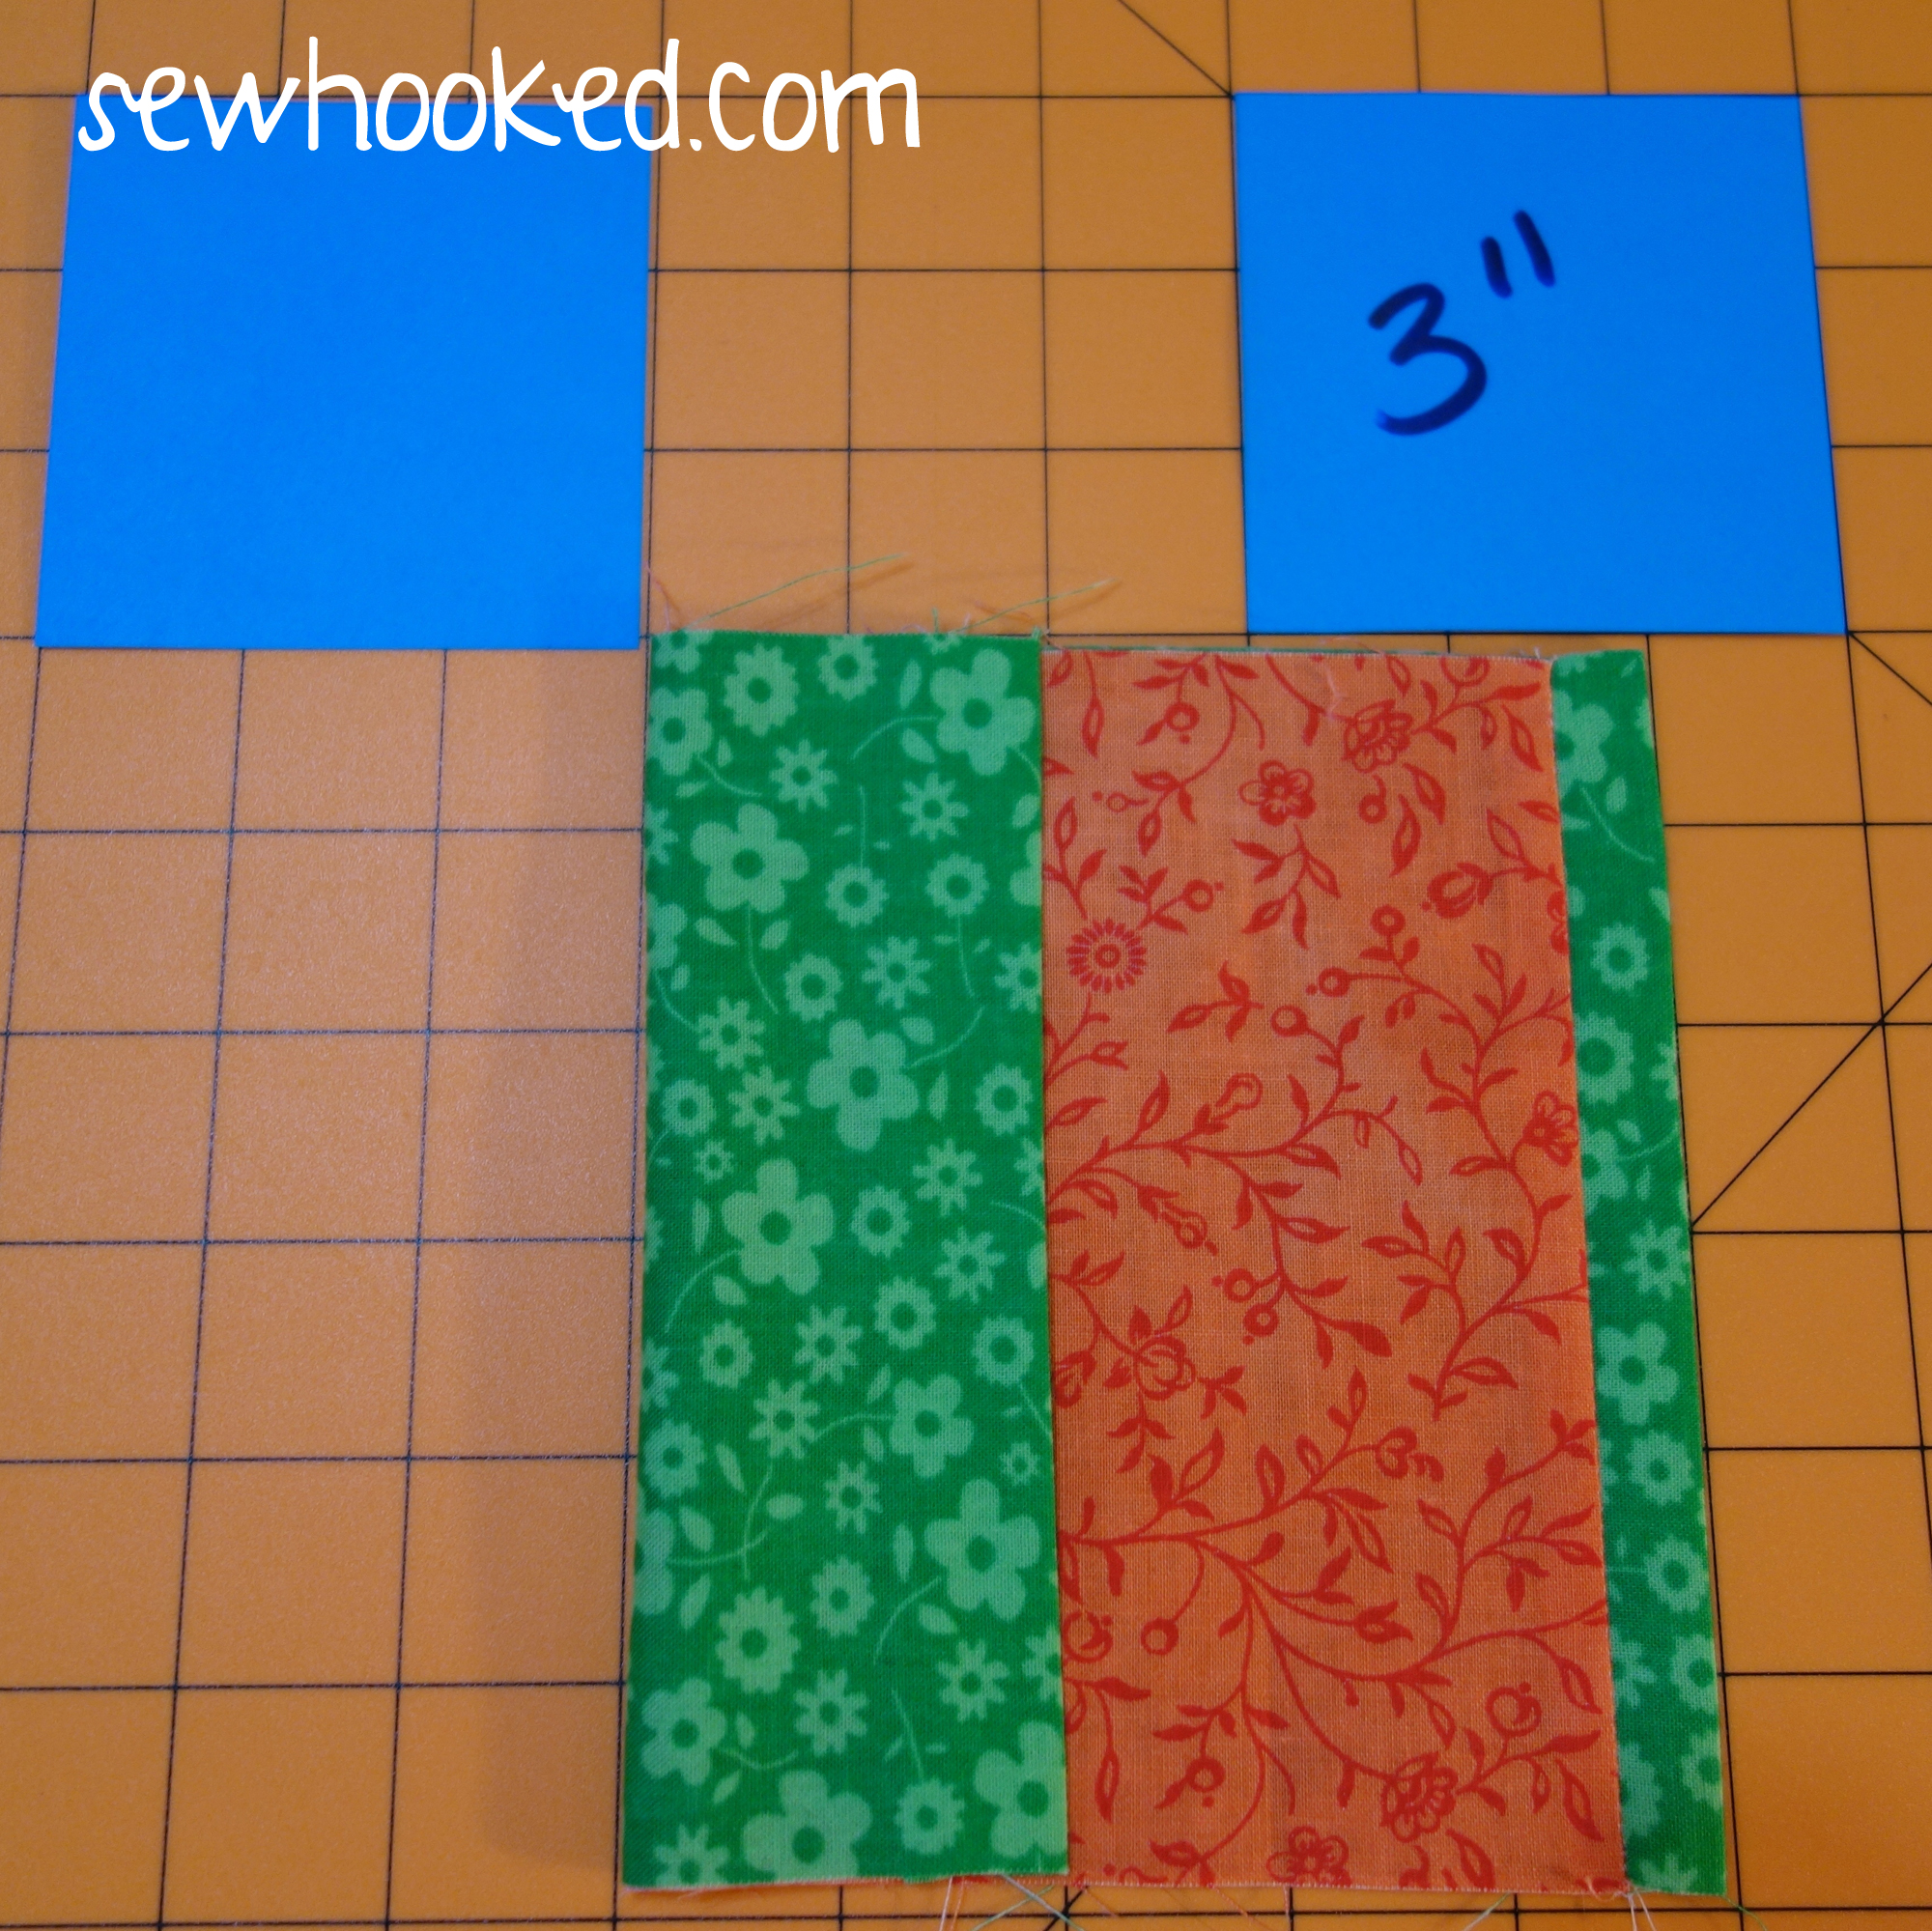
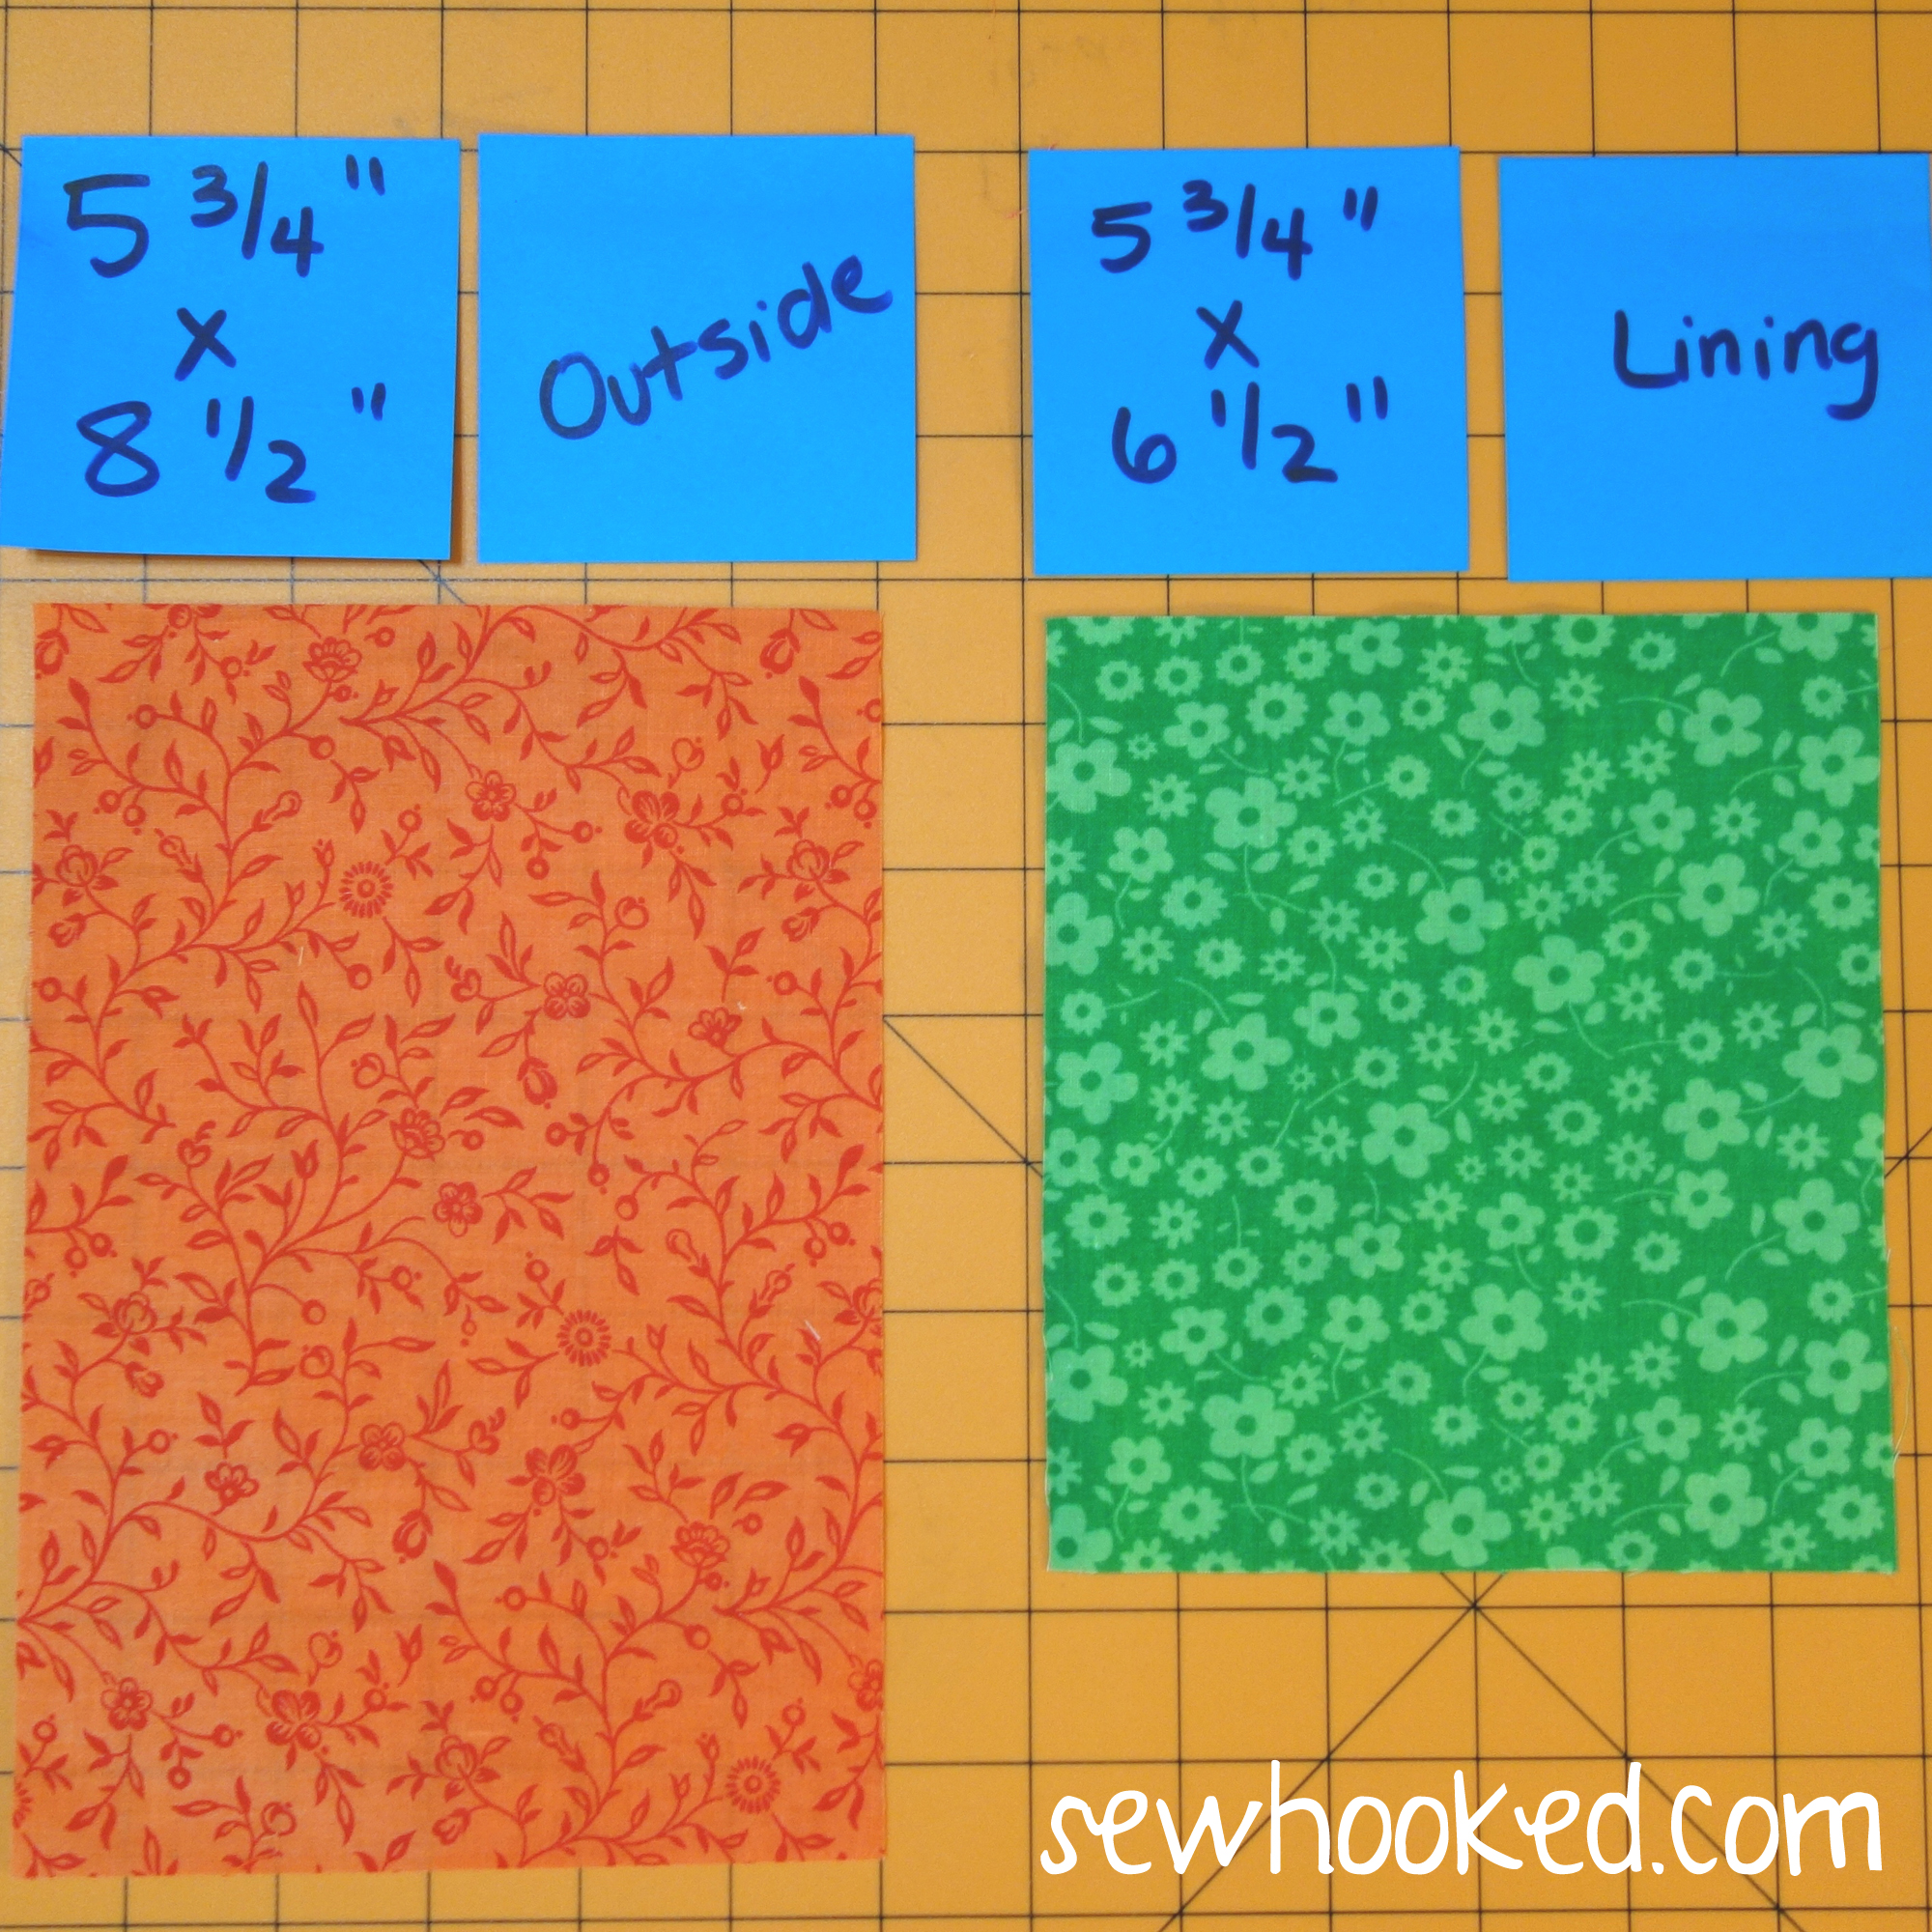
You’ll need fabric in two colors. I’m using contrasting colors to make the lining and outside very obvious. For both the trimmed and non-trimmed version, the outside will be orange.
For TRIMMED Cover:
- Lining/Trim – 5 3/4″ x 8 1/2″
- Outside – 5 3/4″ x 6 1/2″
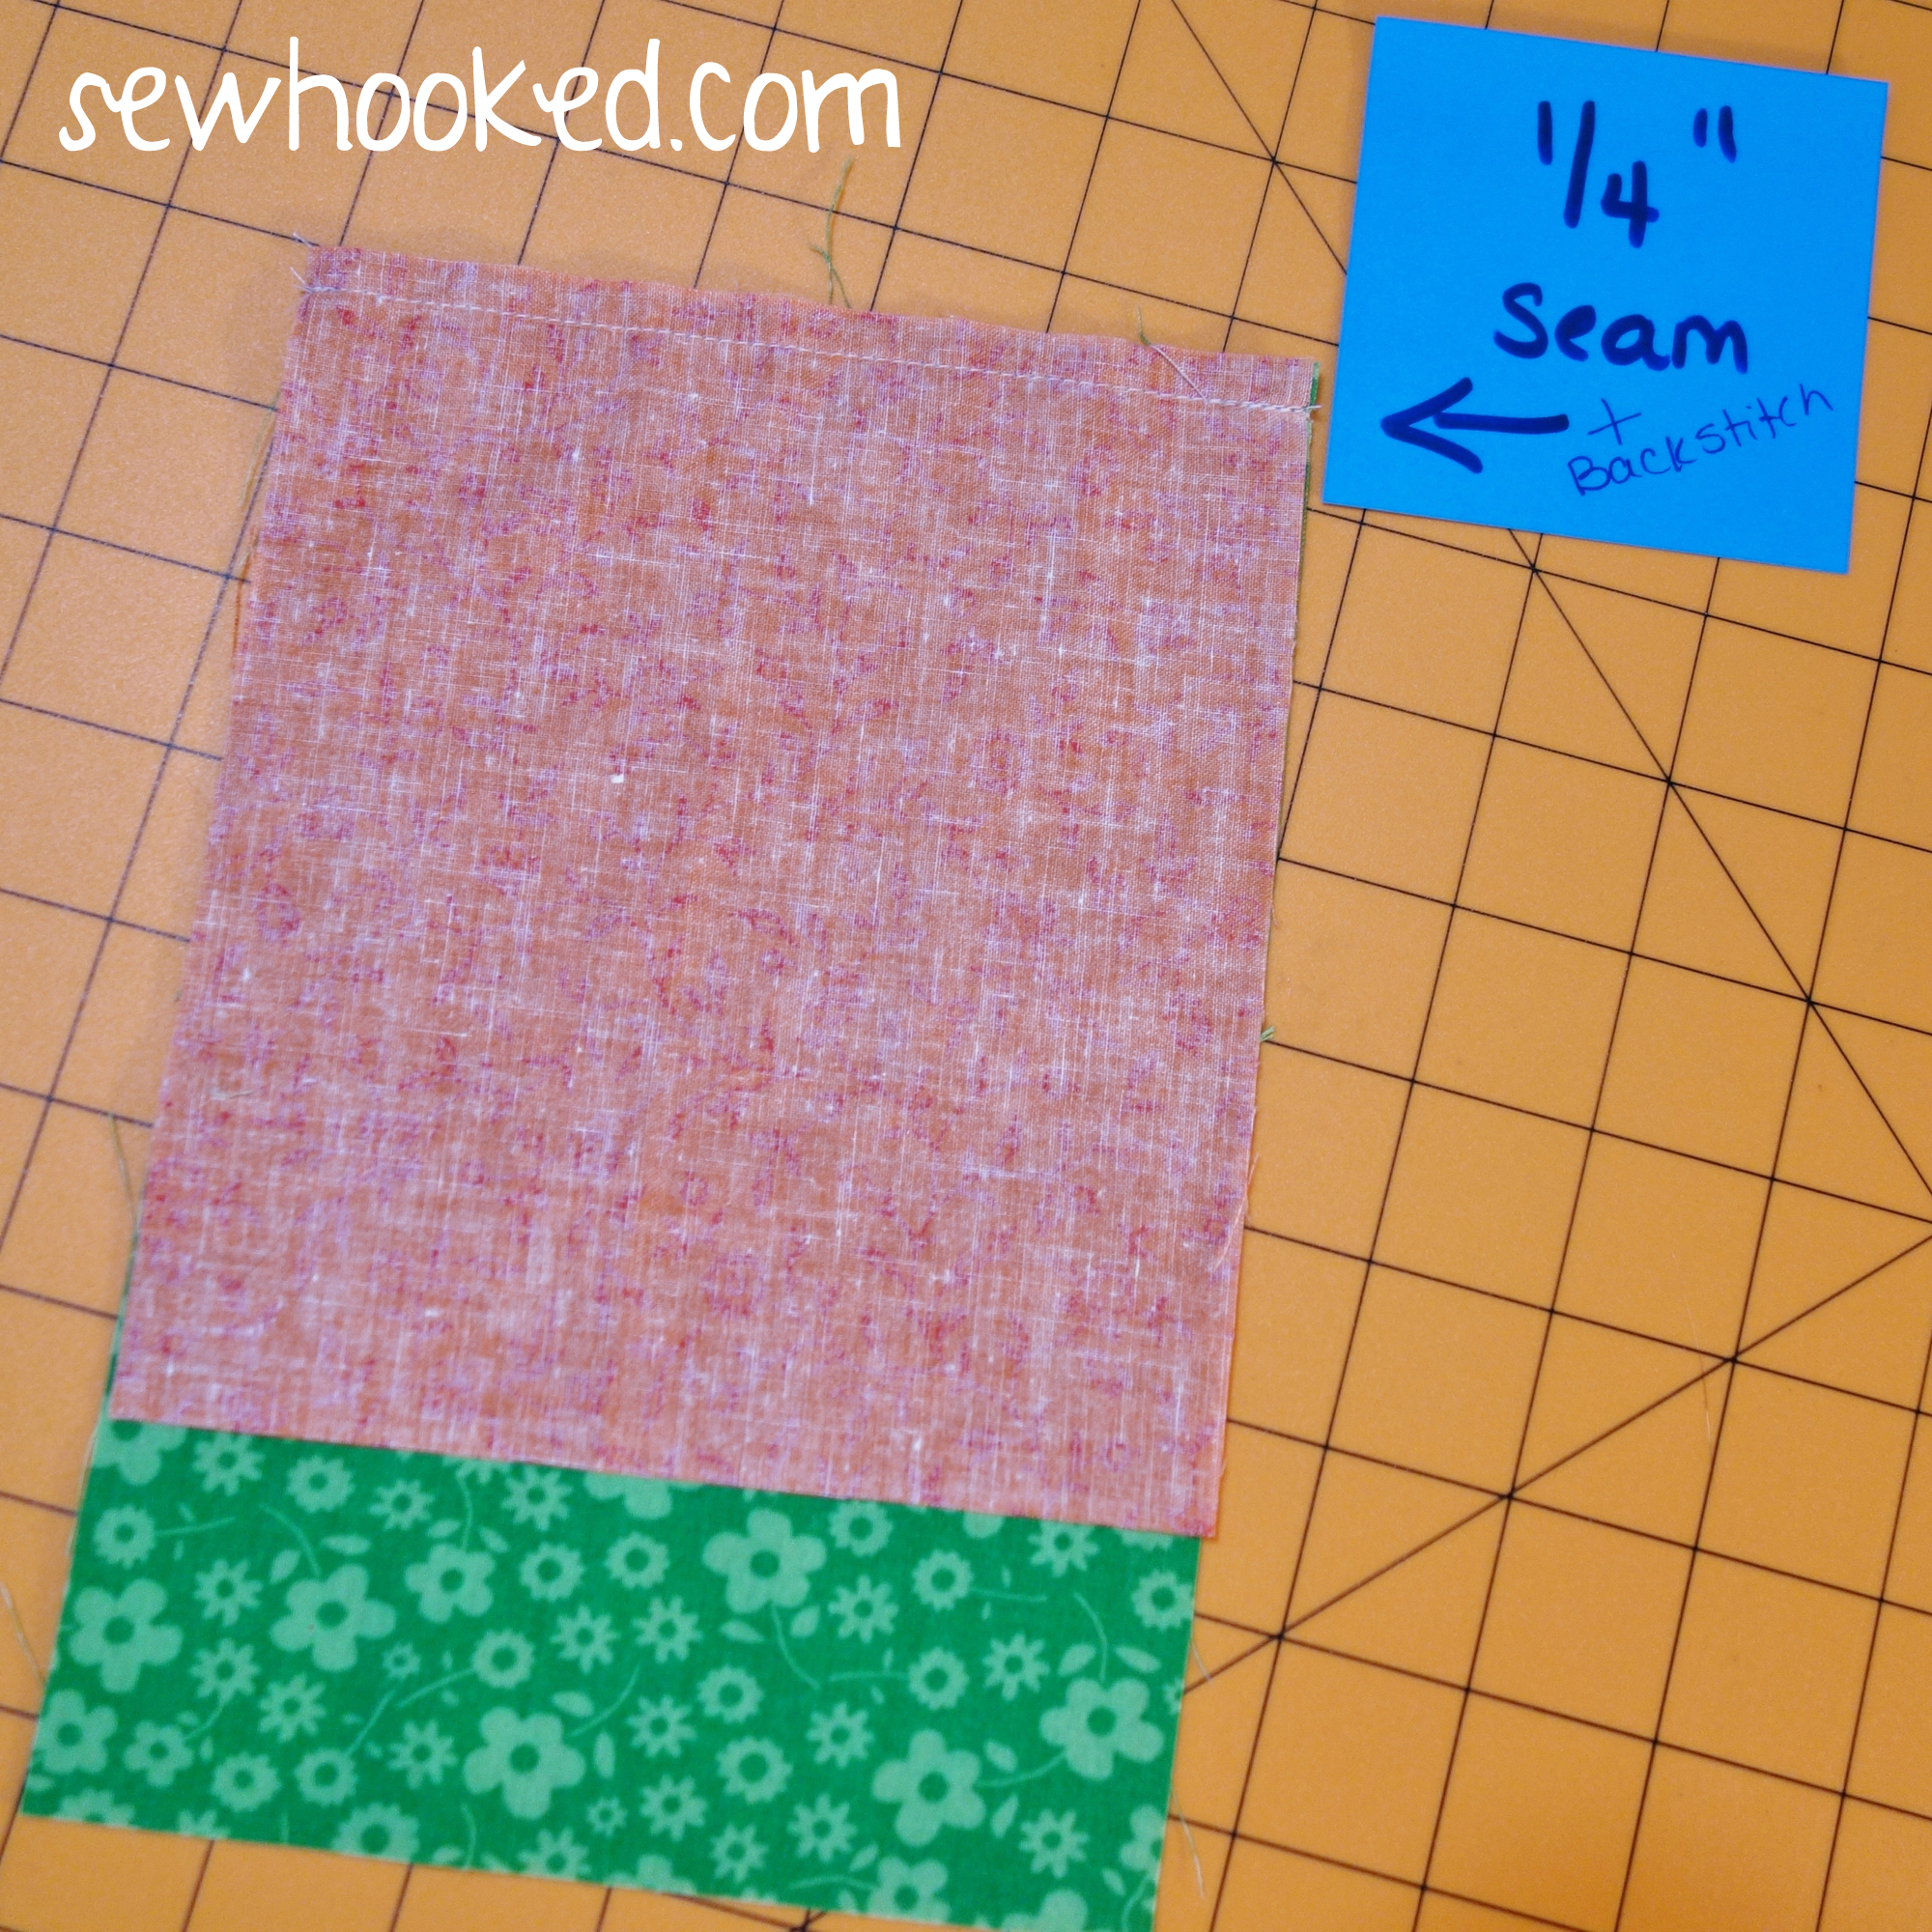
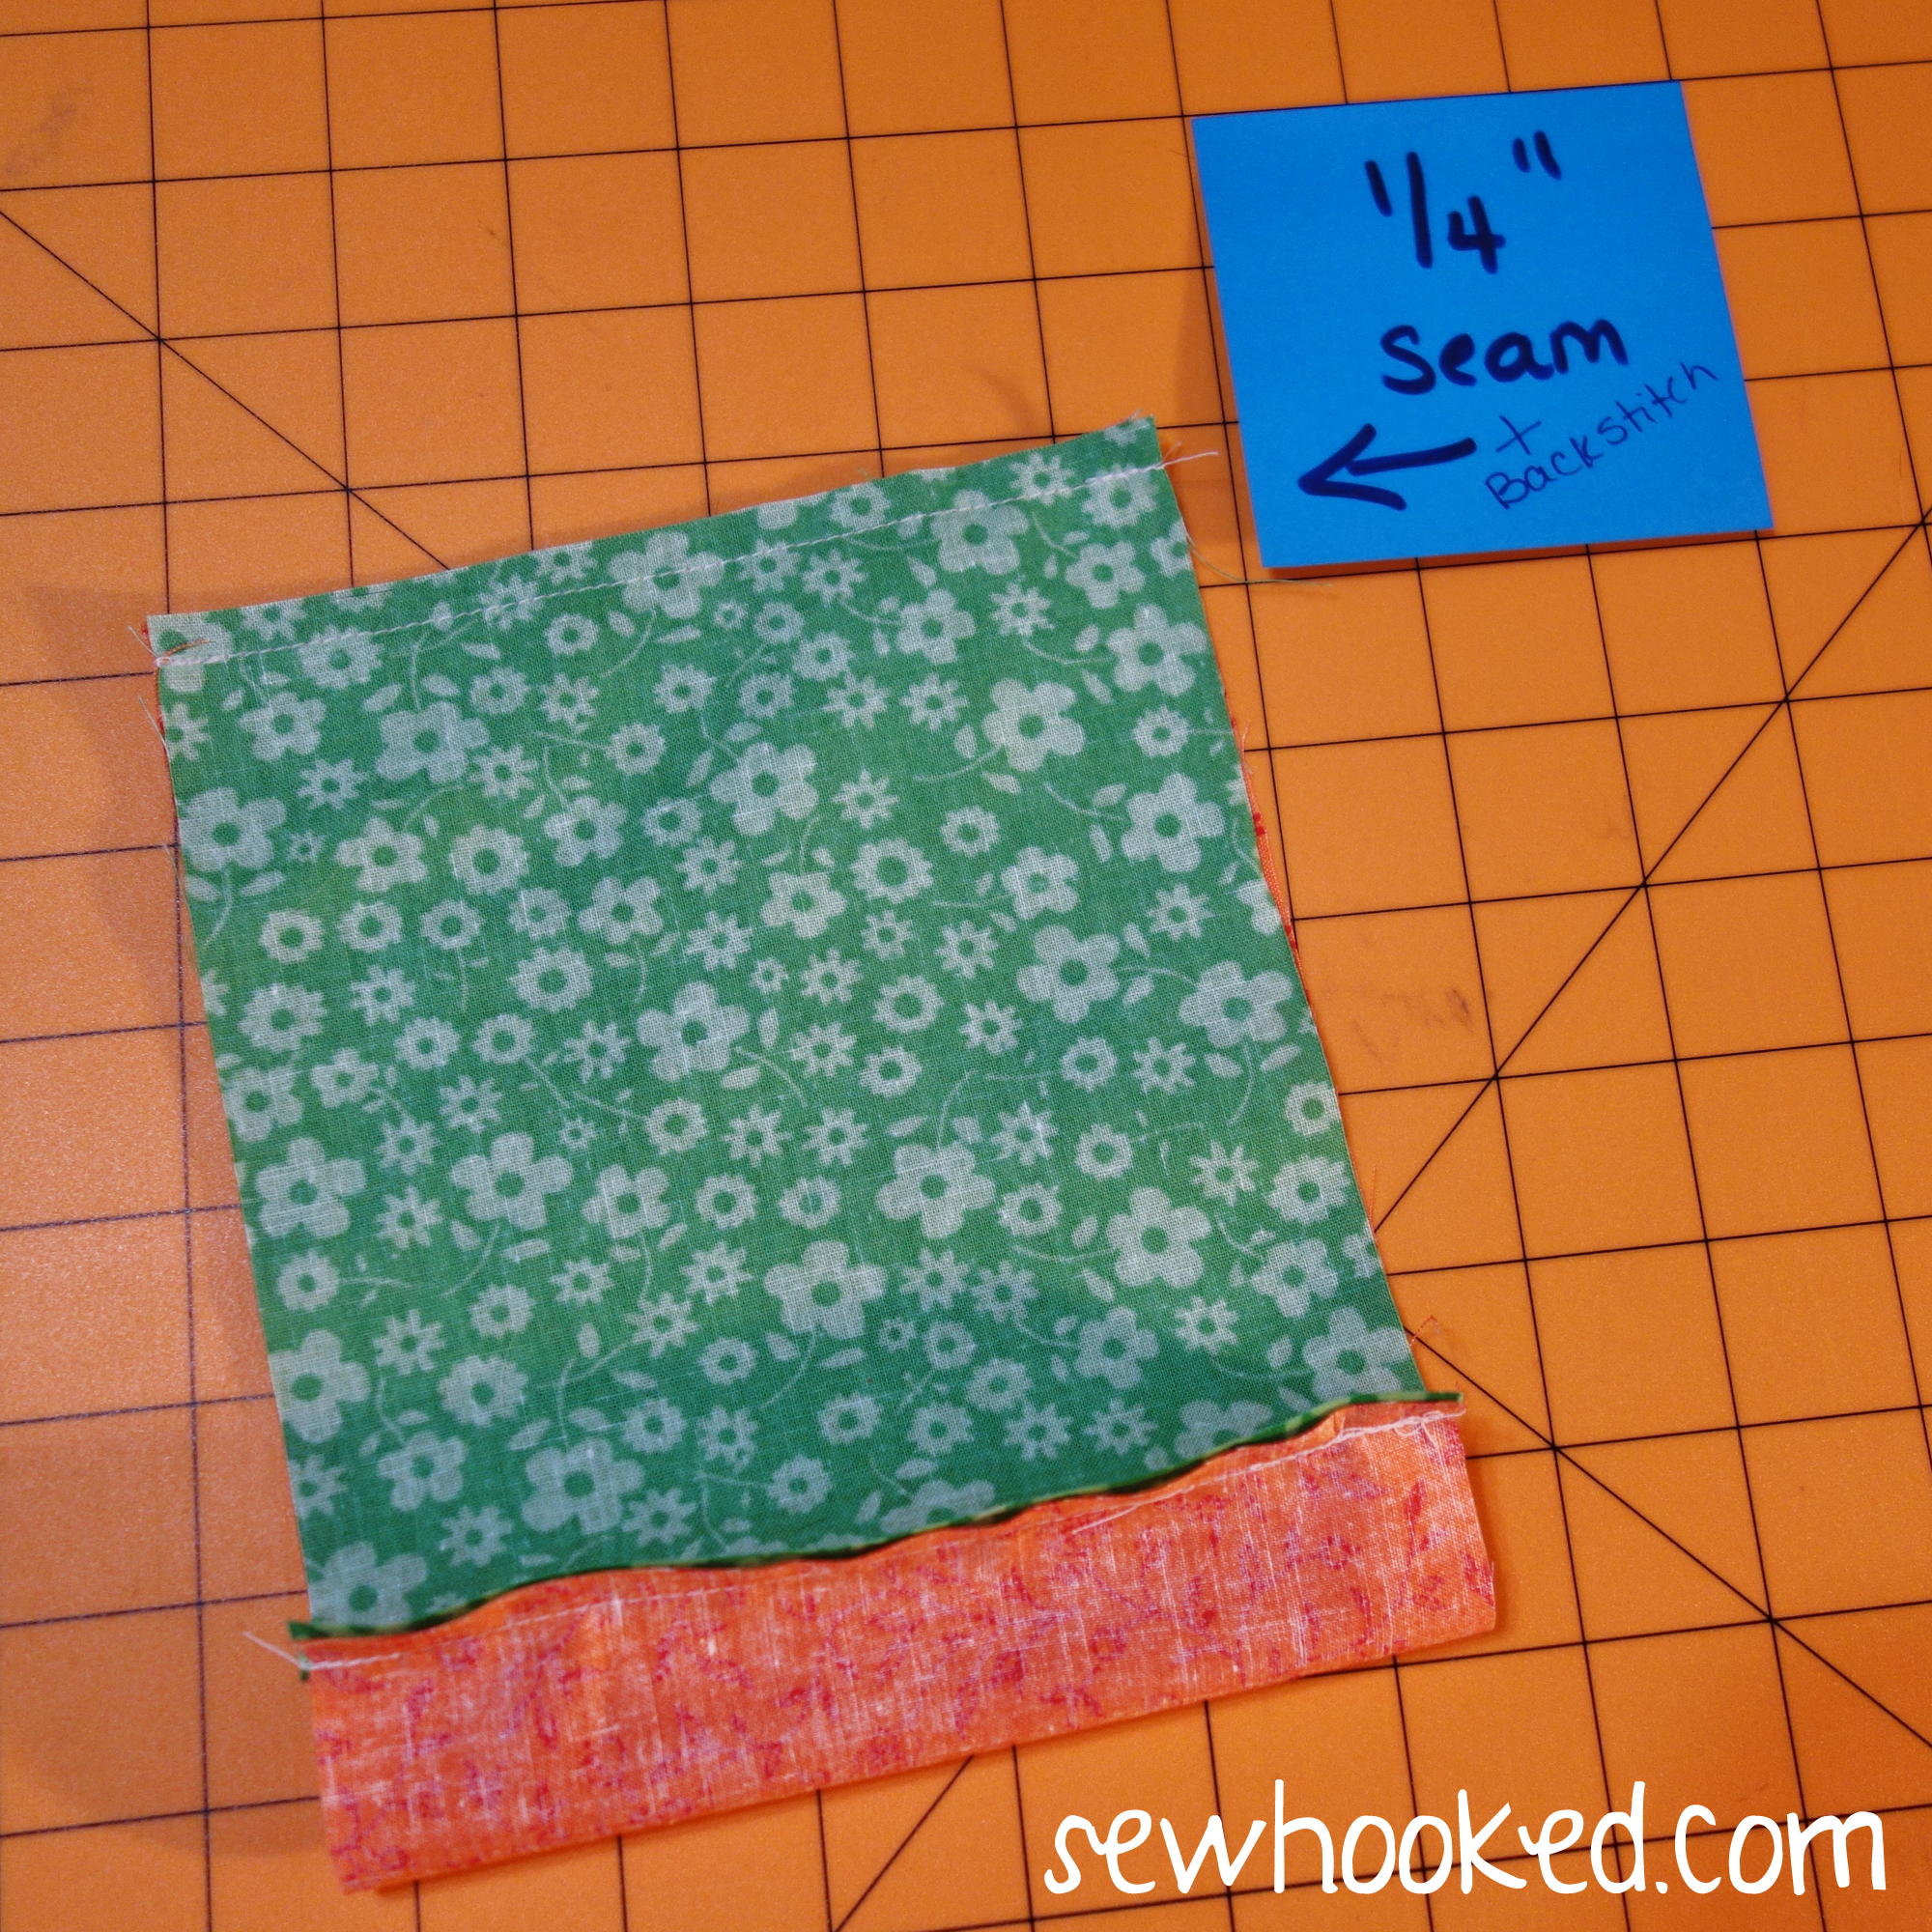
With right sides together, line one end of OUTSIDE to one end of LINING/TRIM on the side that measures 5 3/4″.
Stitch a 1/4″ seam with backstitching at both ends.
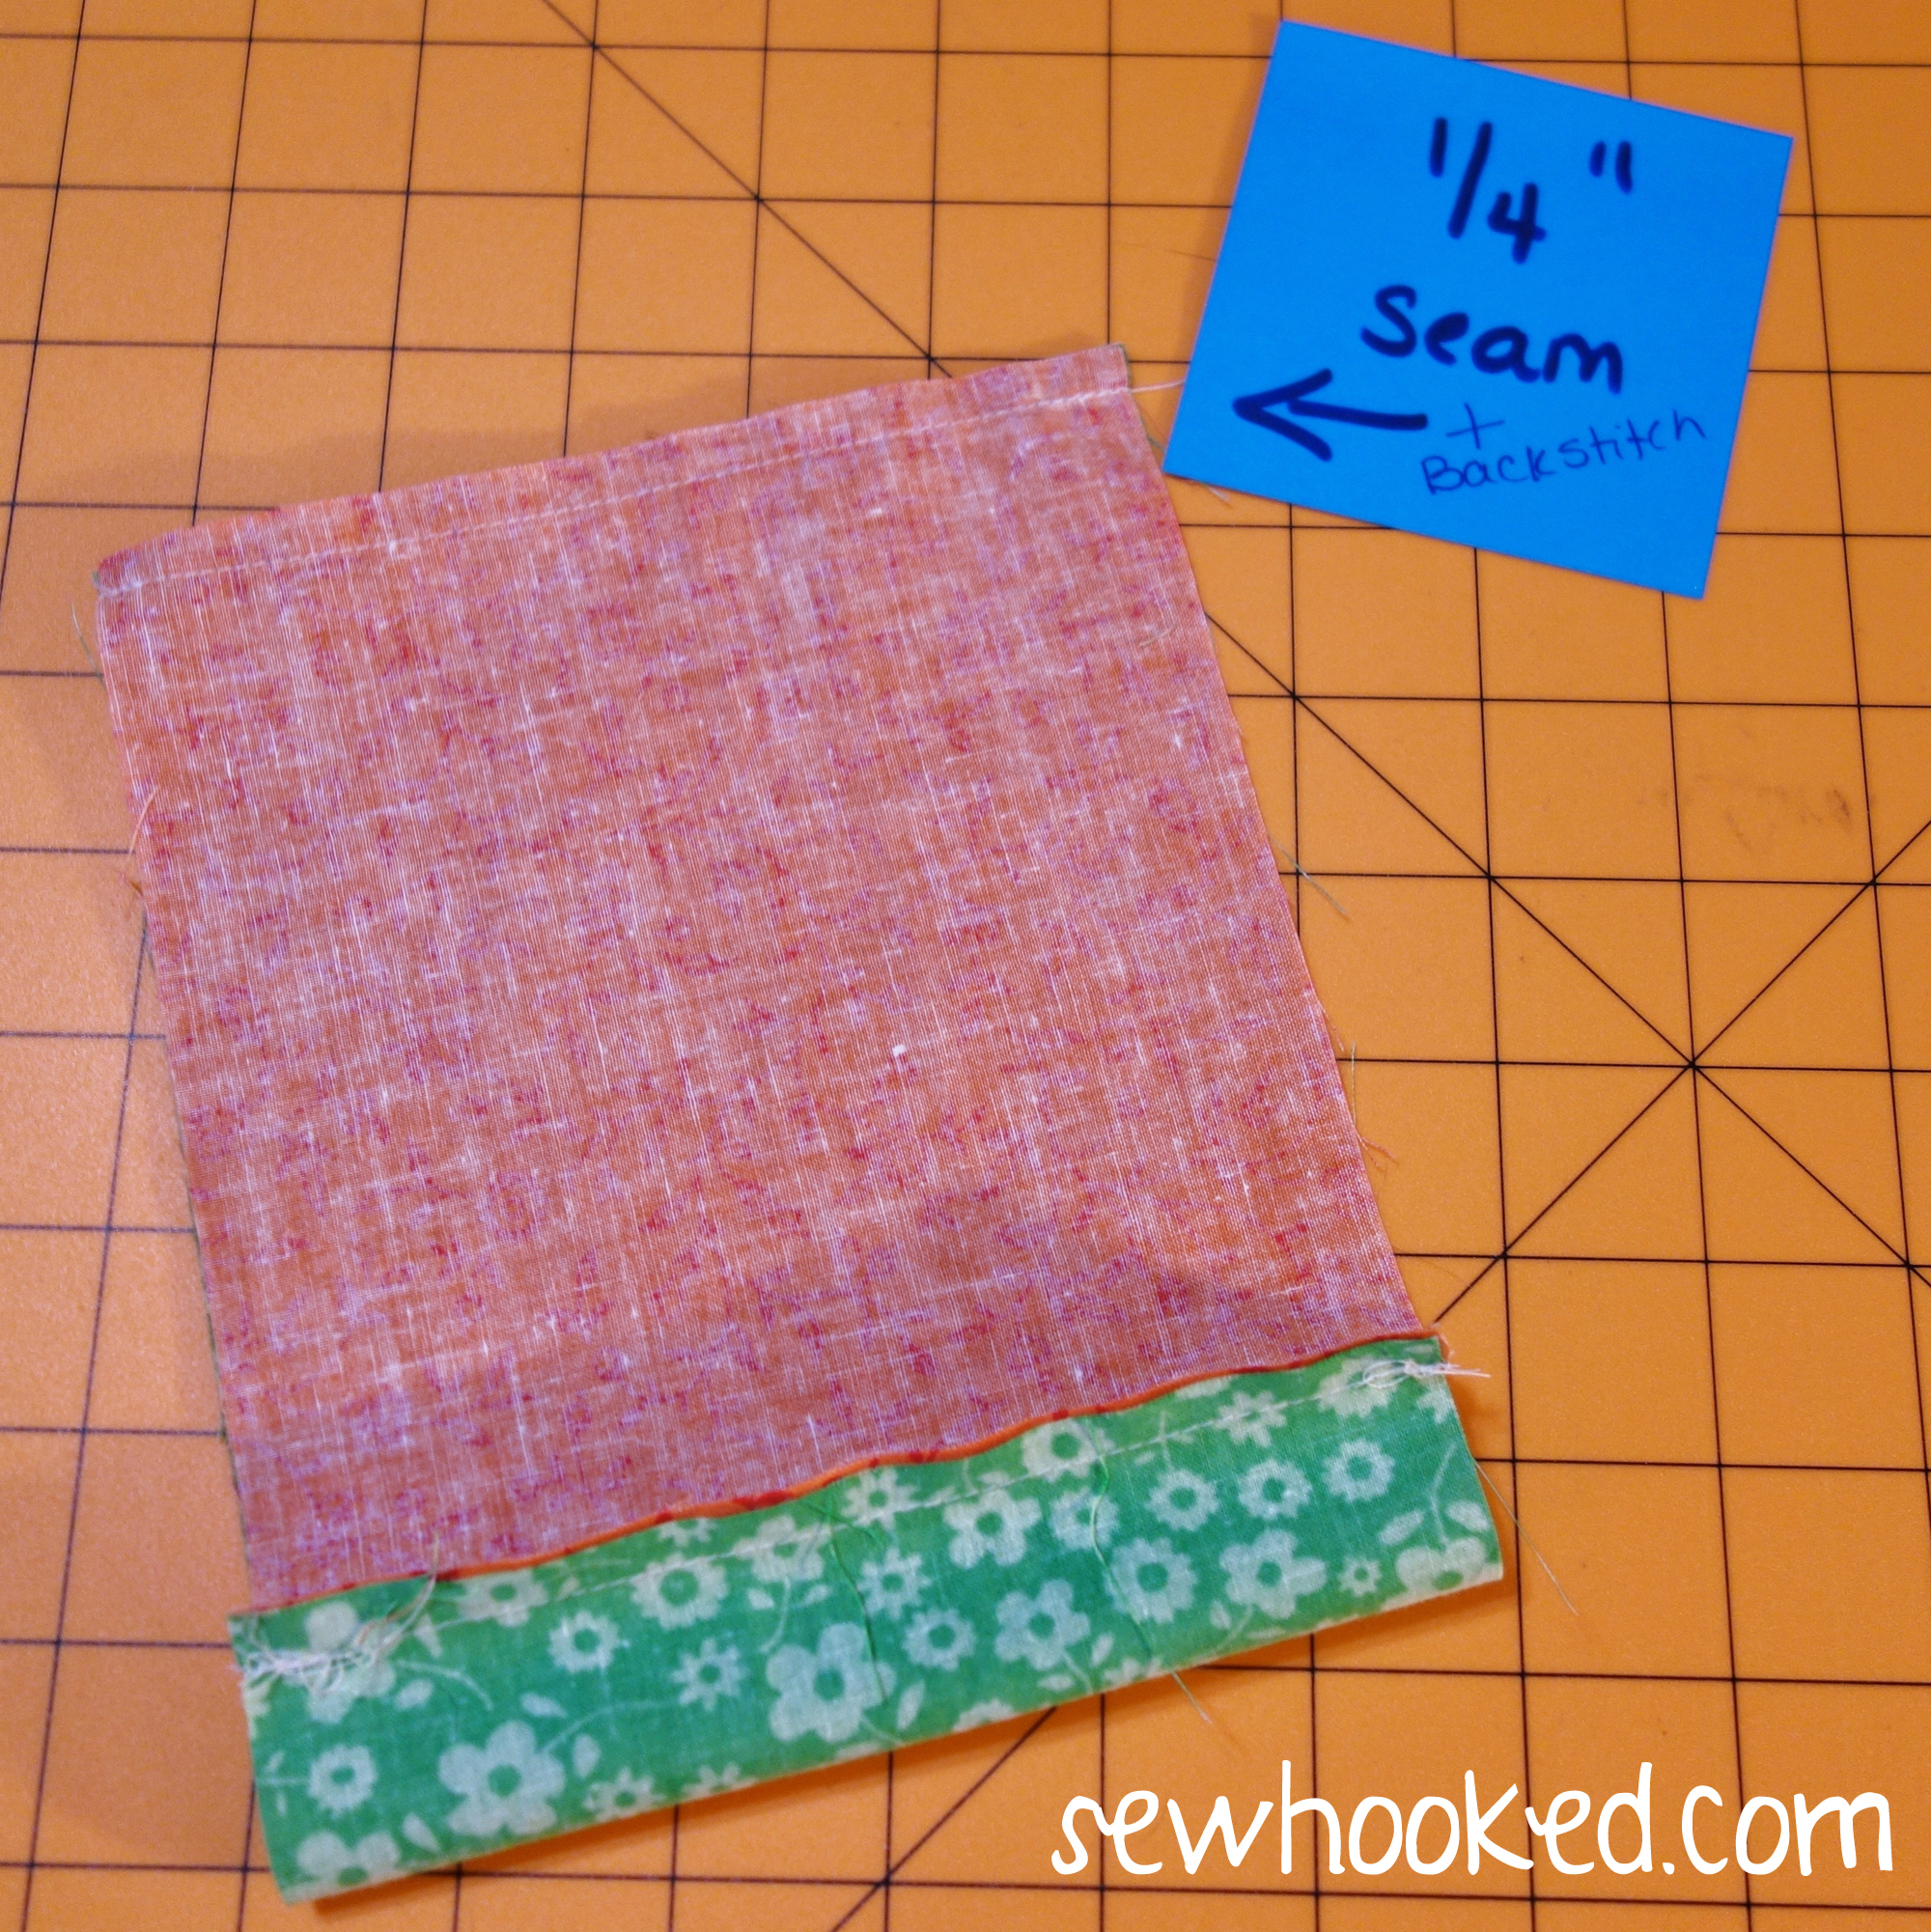
Line up opposite ends and repeat the 1/4″ seam with backstitching along the other 5 3/4″ side.
Turn so that wrong sides of the fabric are together. Adjust so that each end of TRIM is approximately the same size.
Press.
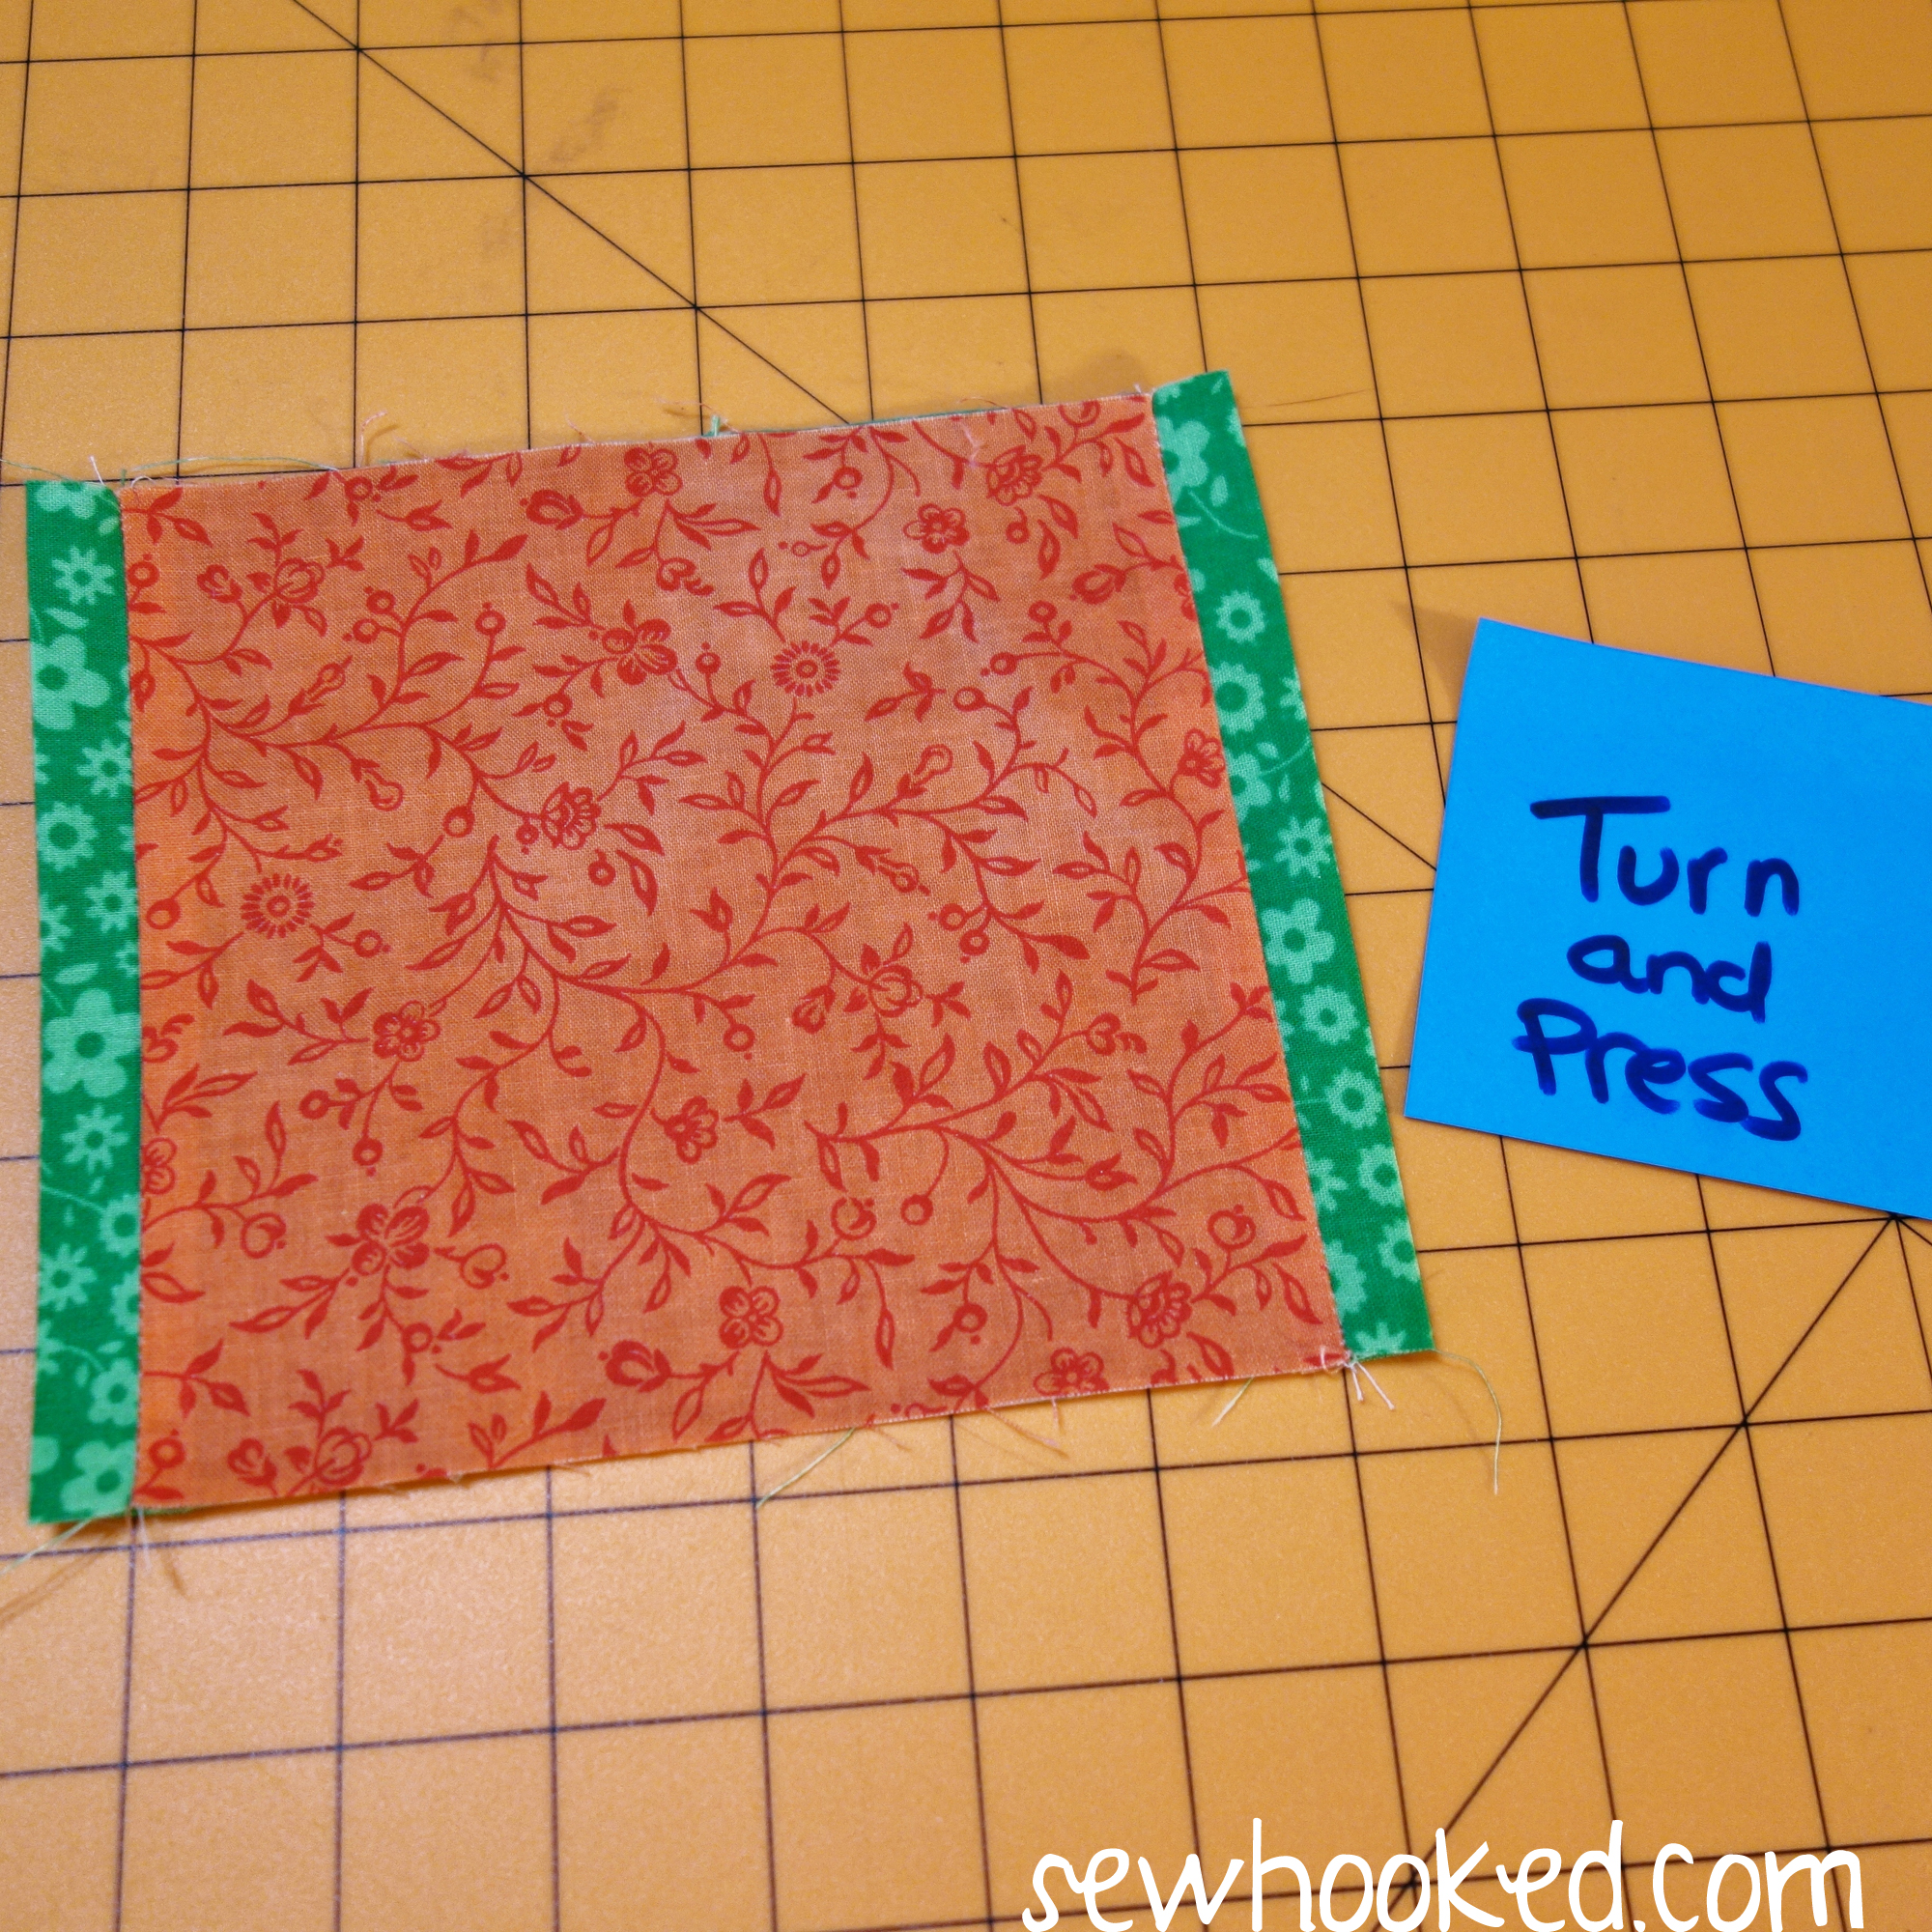
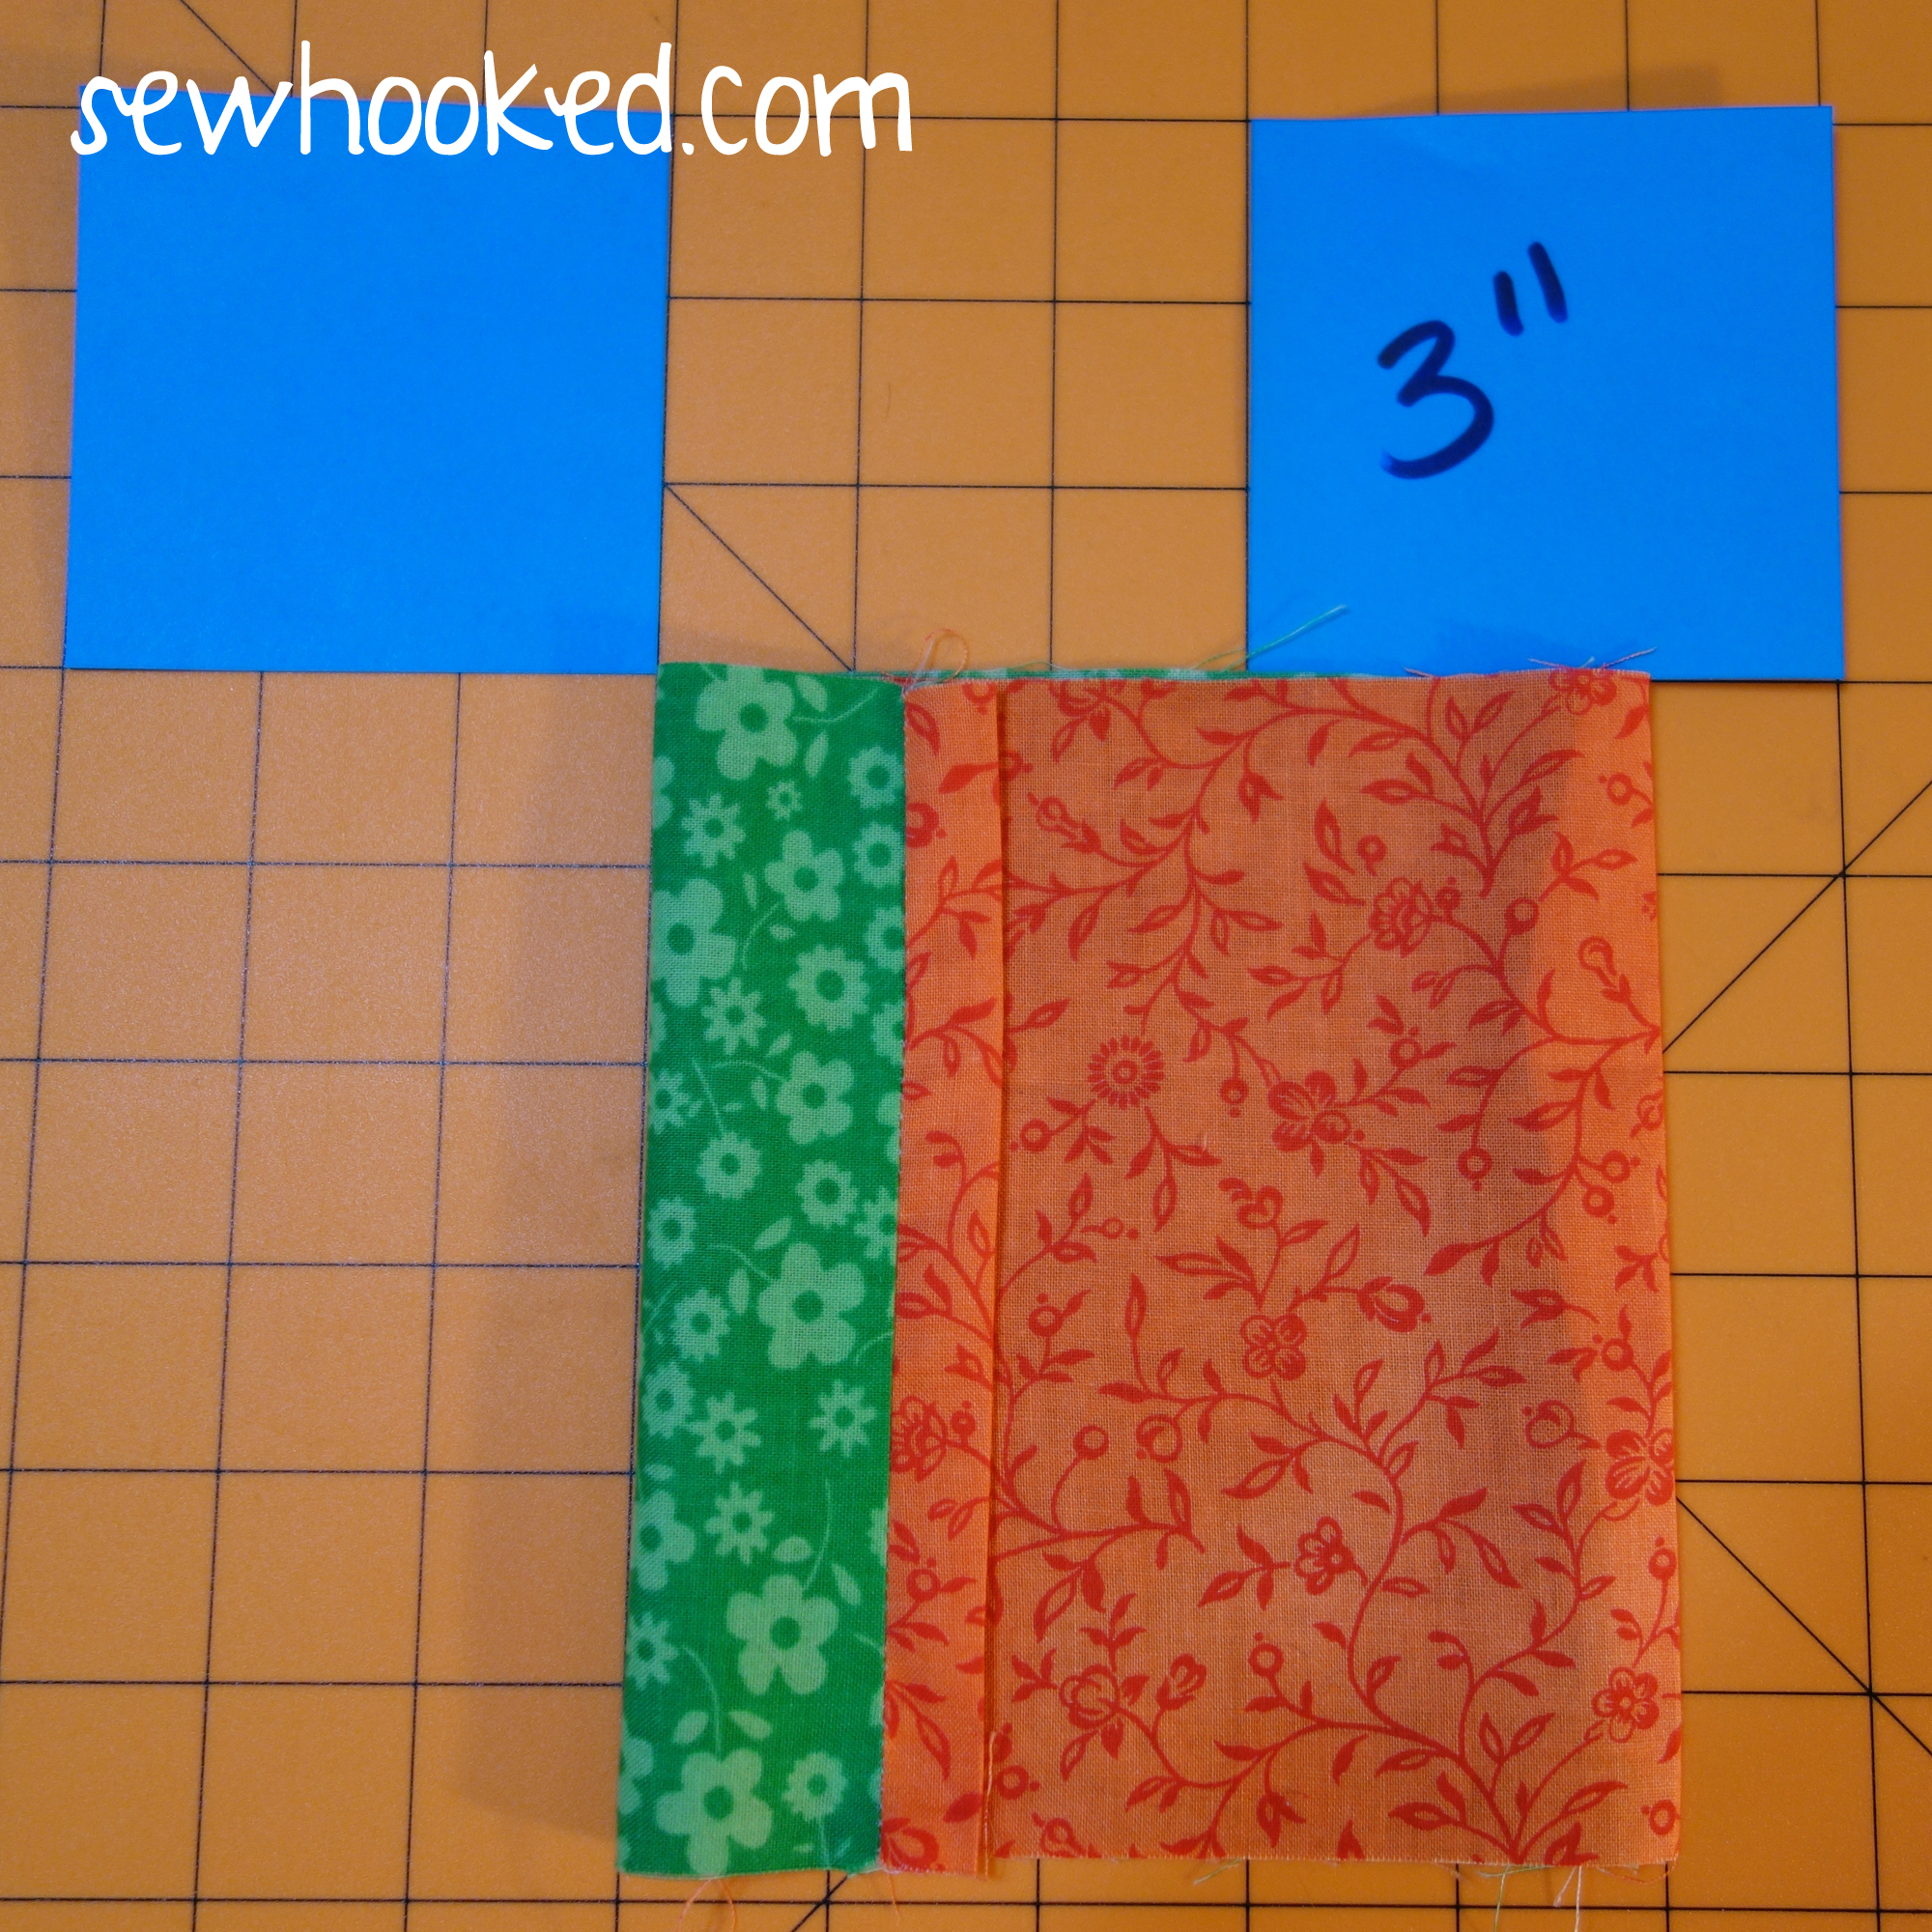
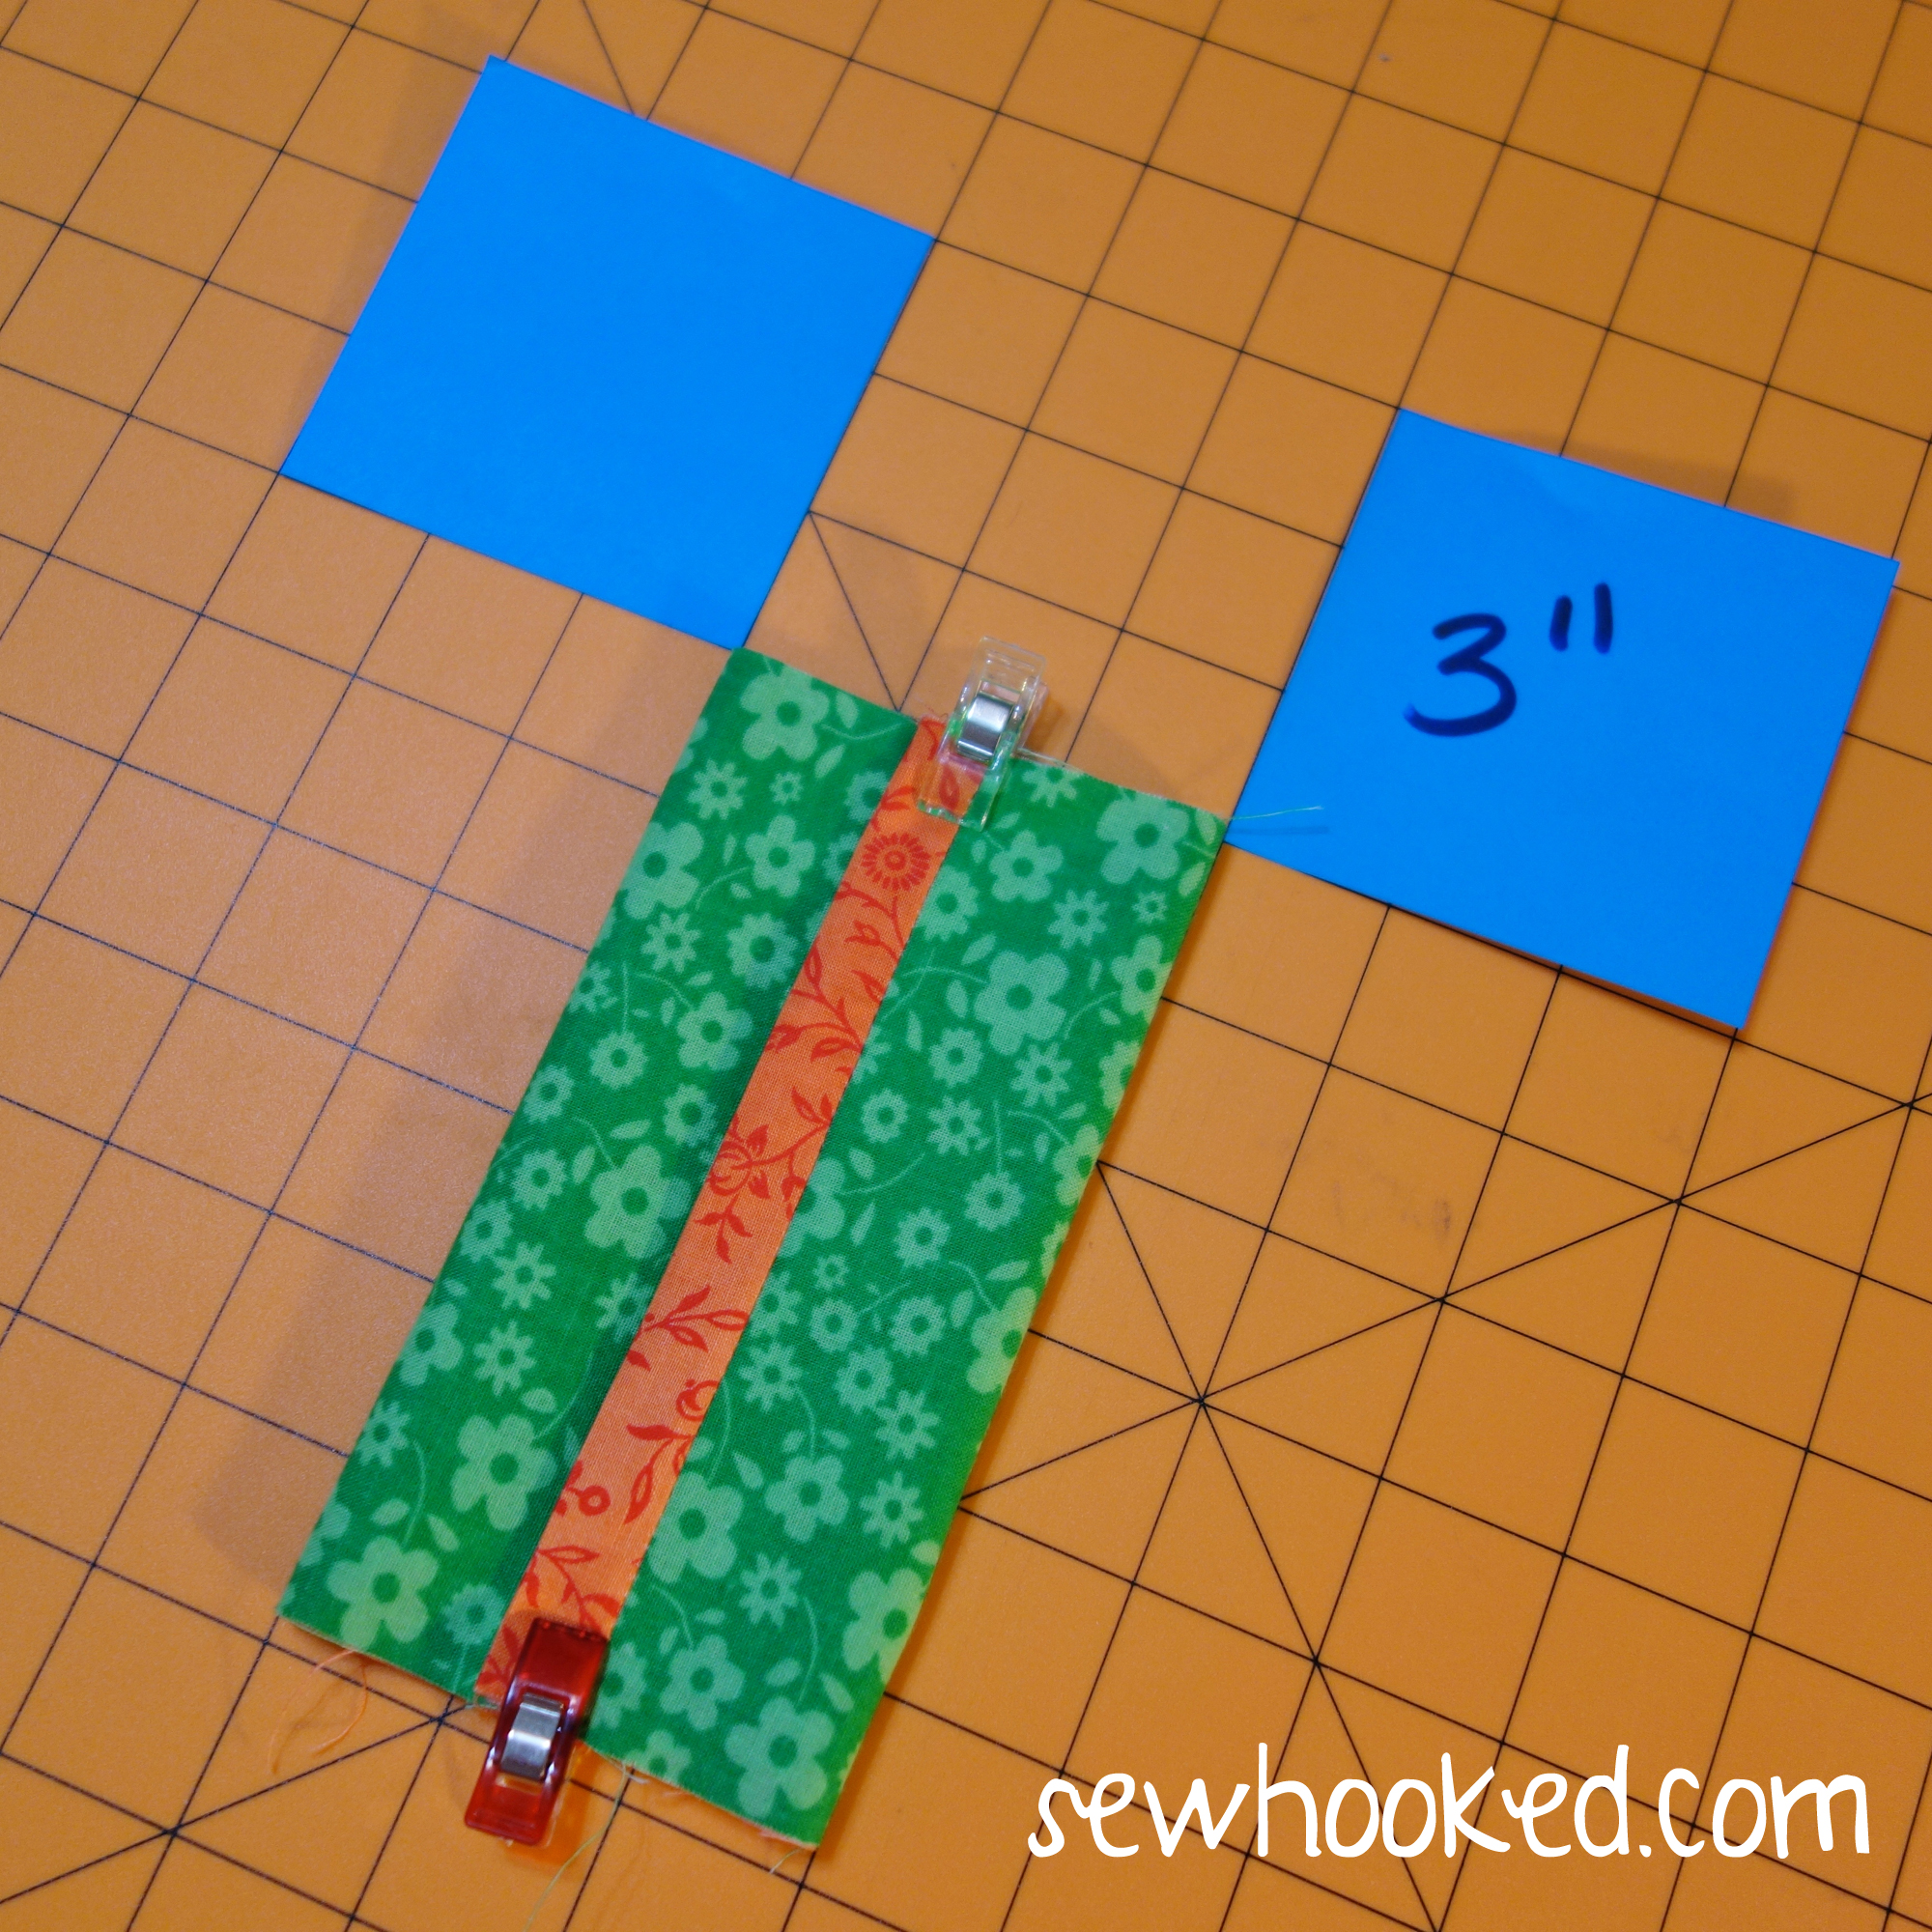
Using a ruler or rotary mat, fold right sides of the OUTSIDE together so that it is 3″ wide. If you’re using a rotary mat, you can align easily use the markings on your mat for this part. Edges should overlap in the approximate center.
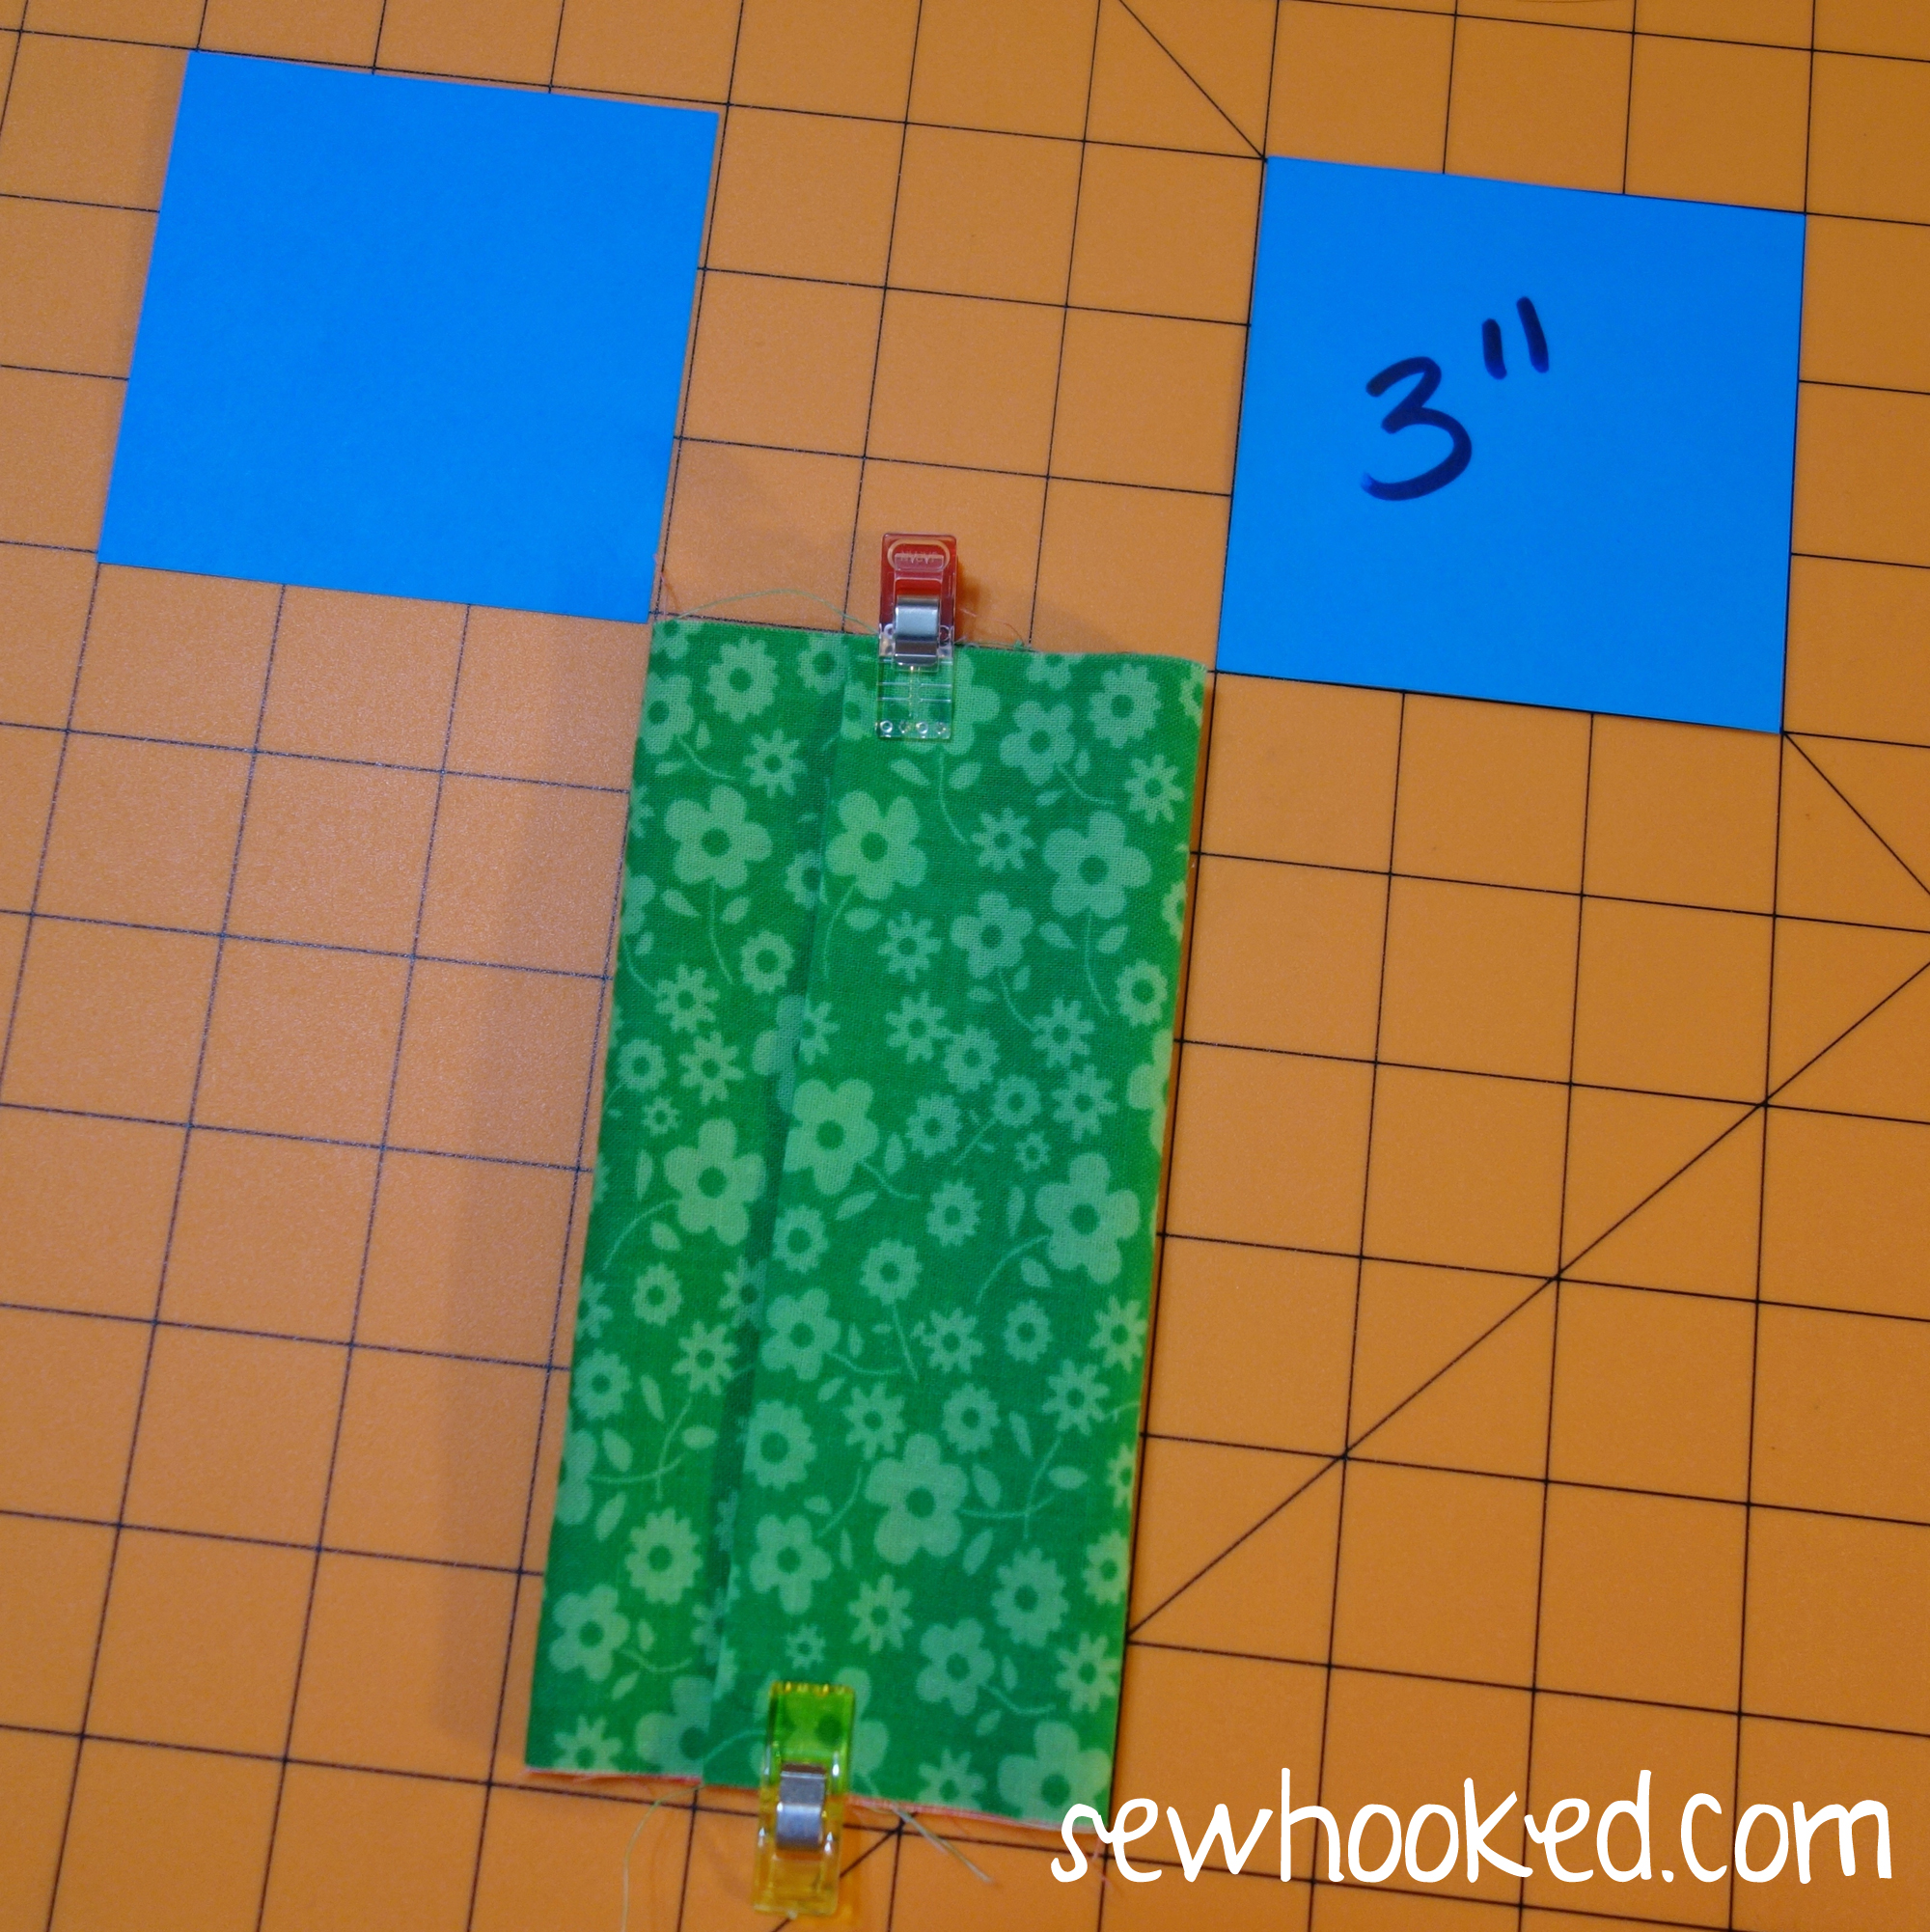
Once adjustments have been made to your liking and the width is 3″, pin or clip with sewing clips. Wonder Clips or Magic Clips work great. (I have both.)
Because this version has TRIM, you will not see the overturned edge during this step.
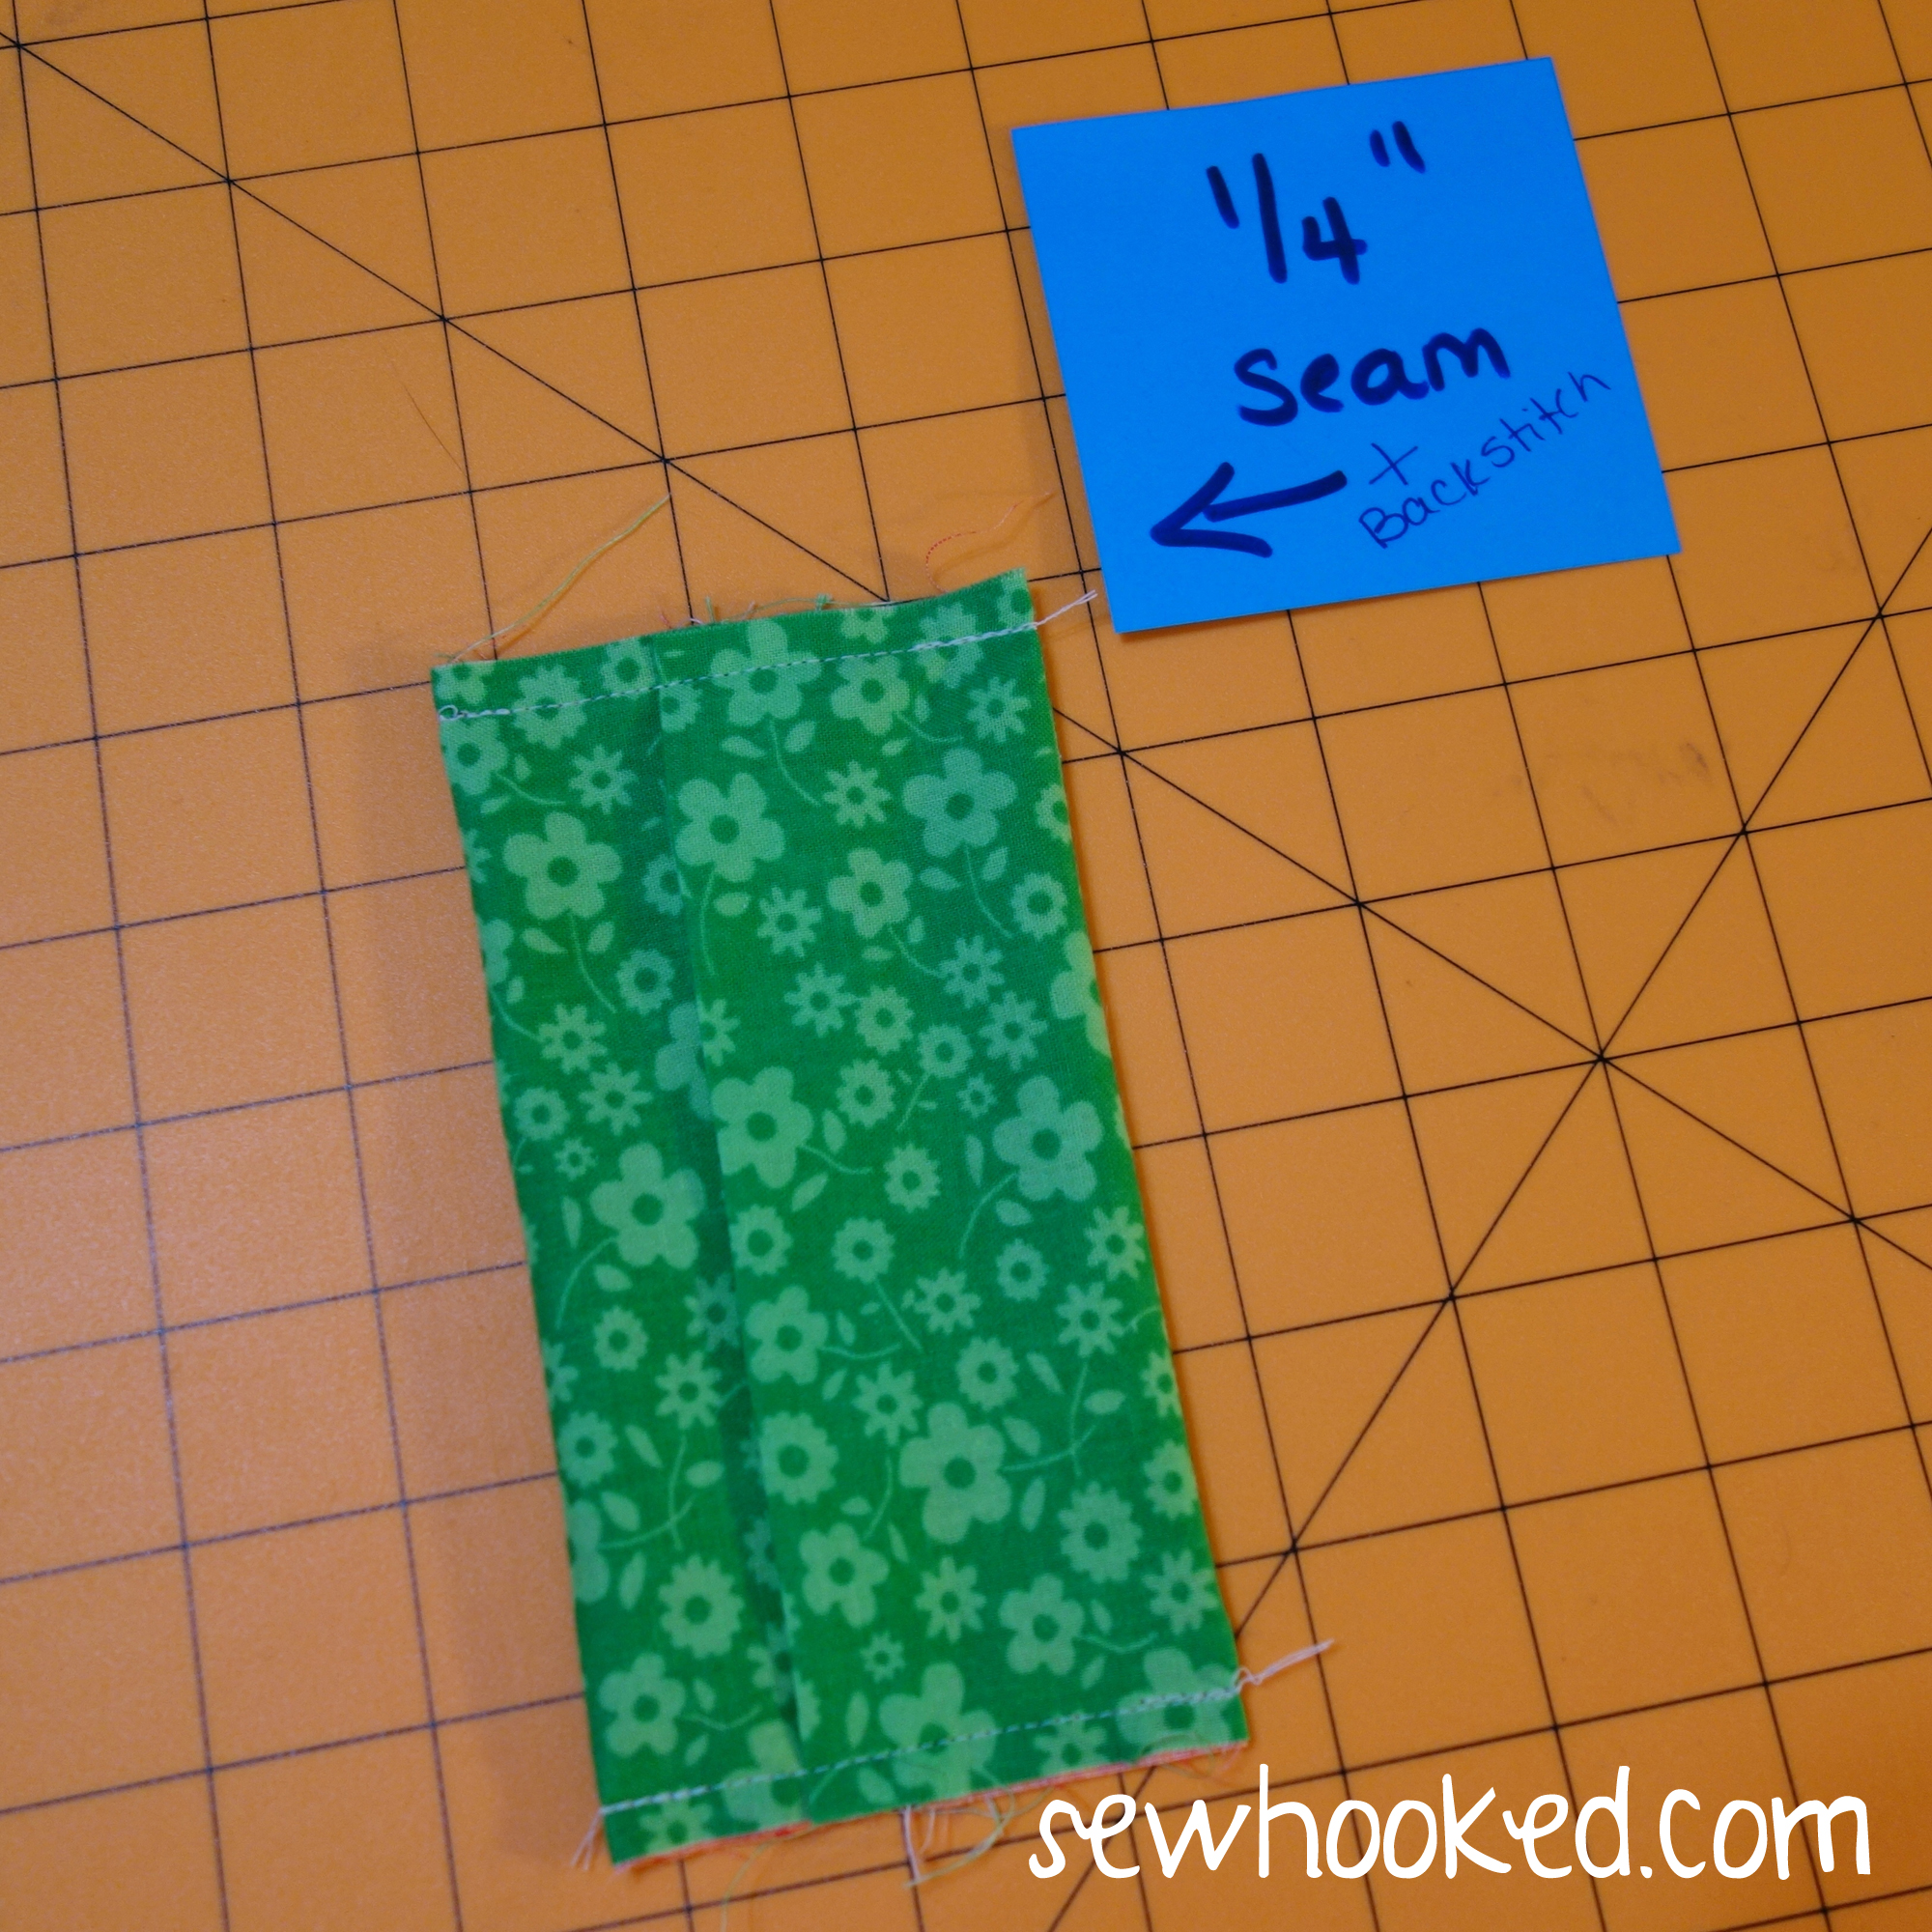
Sew each end with a 1/4″ seam allowance, backstitching at the beginning and end.
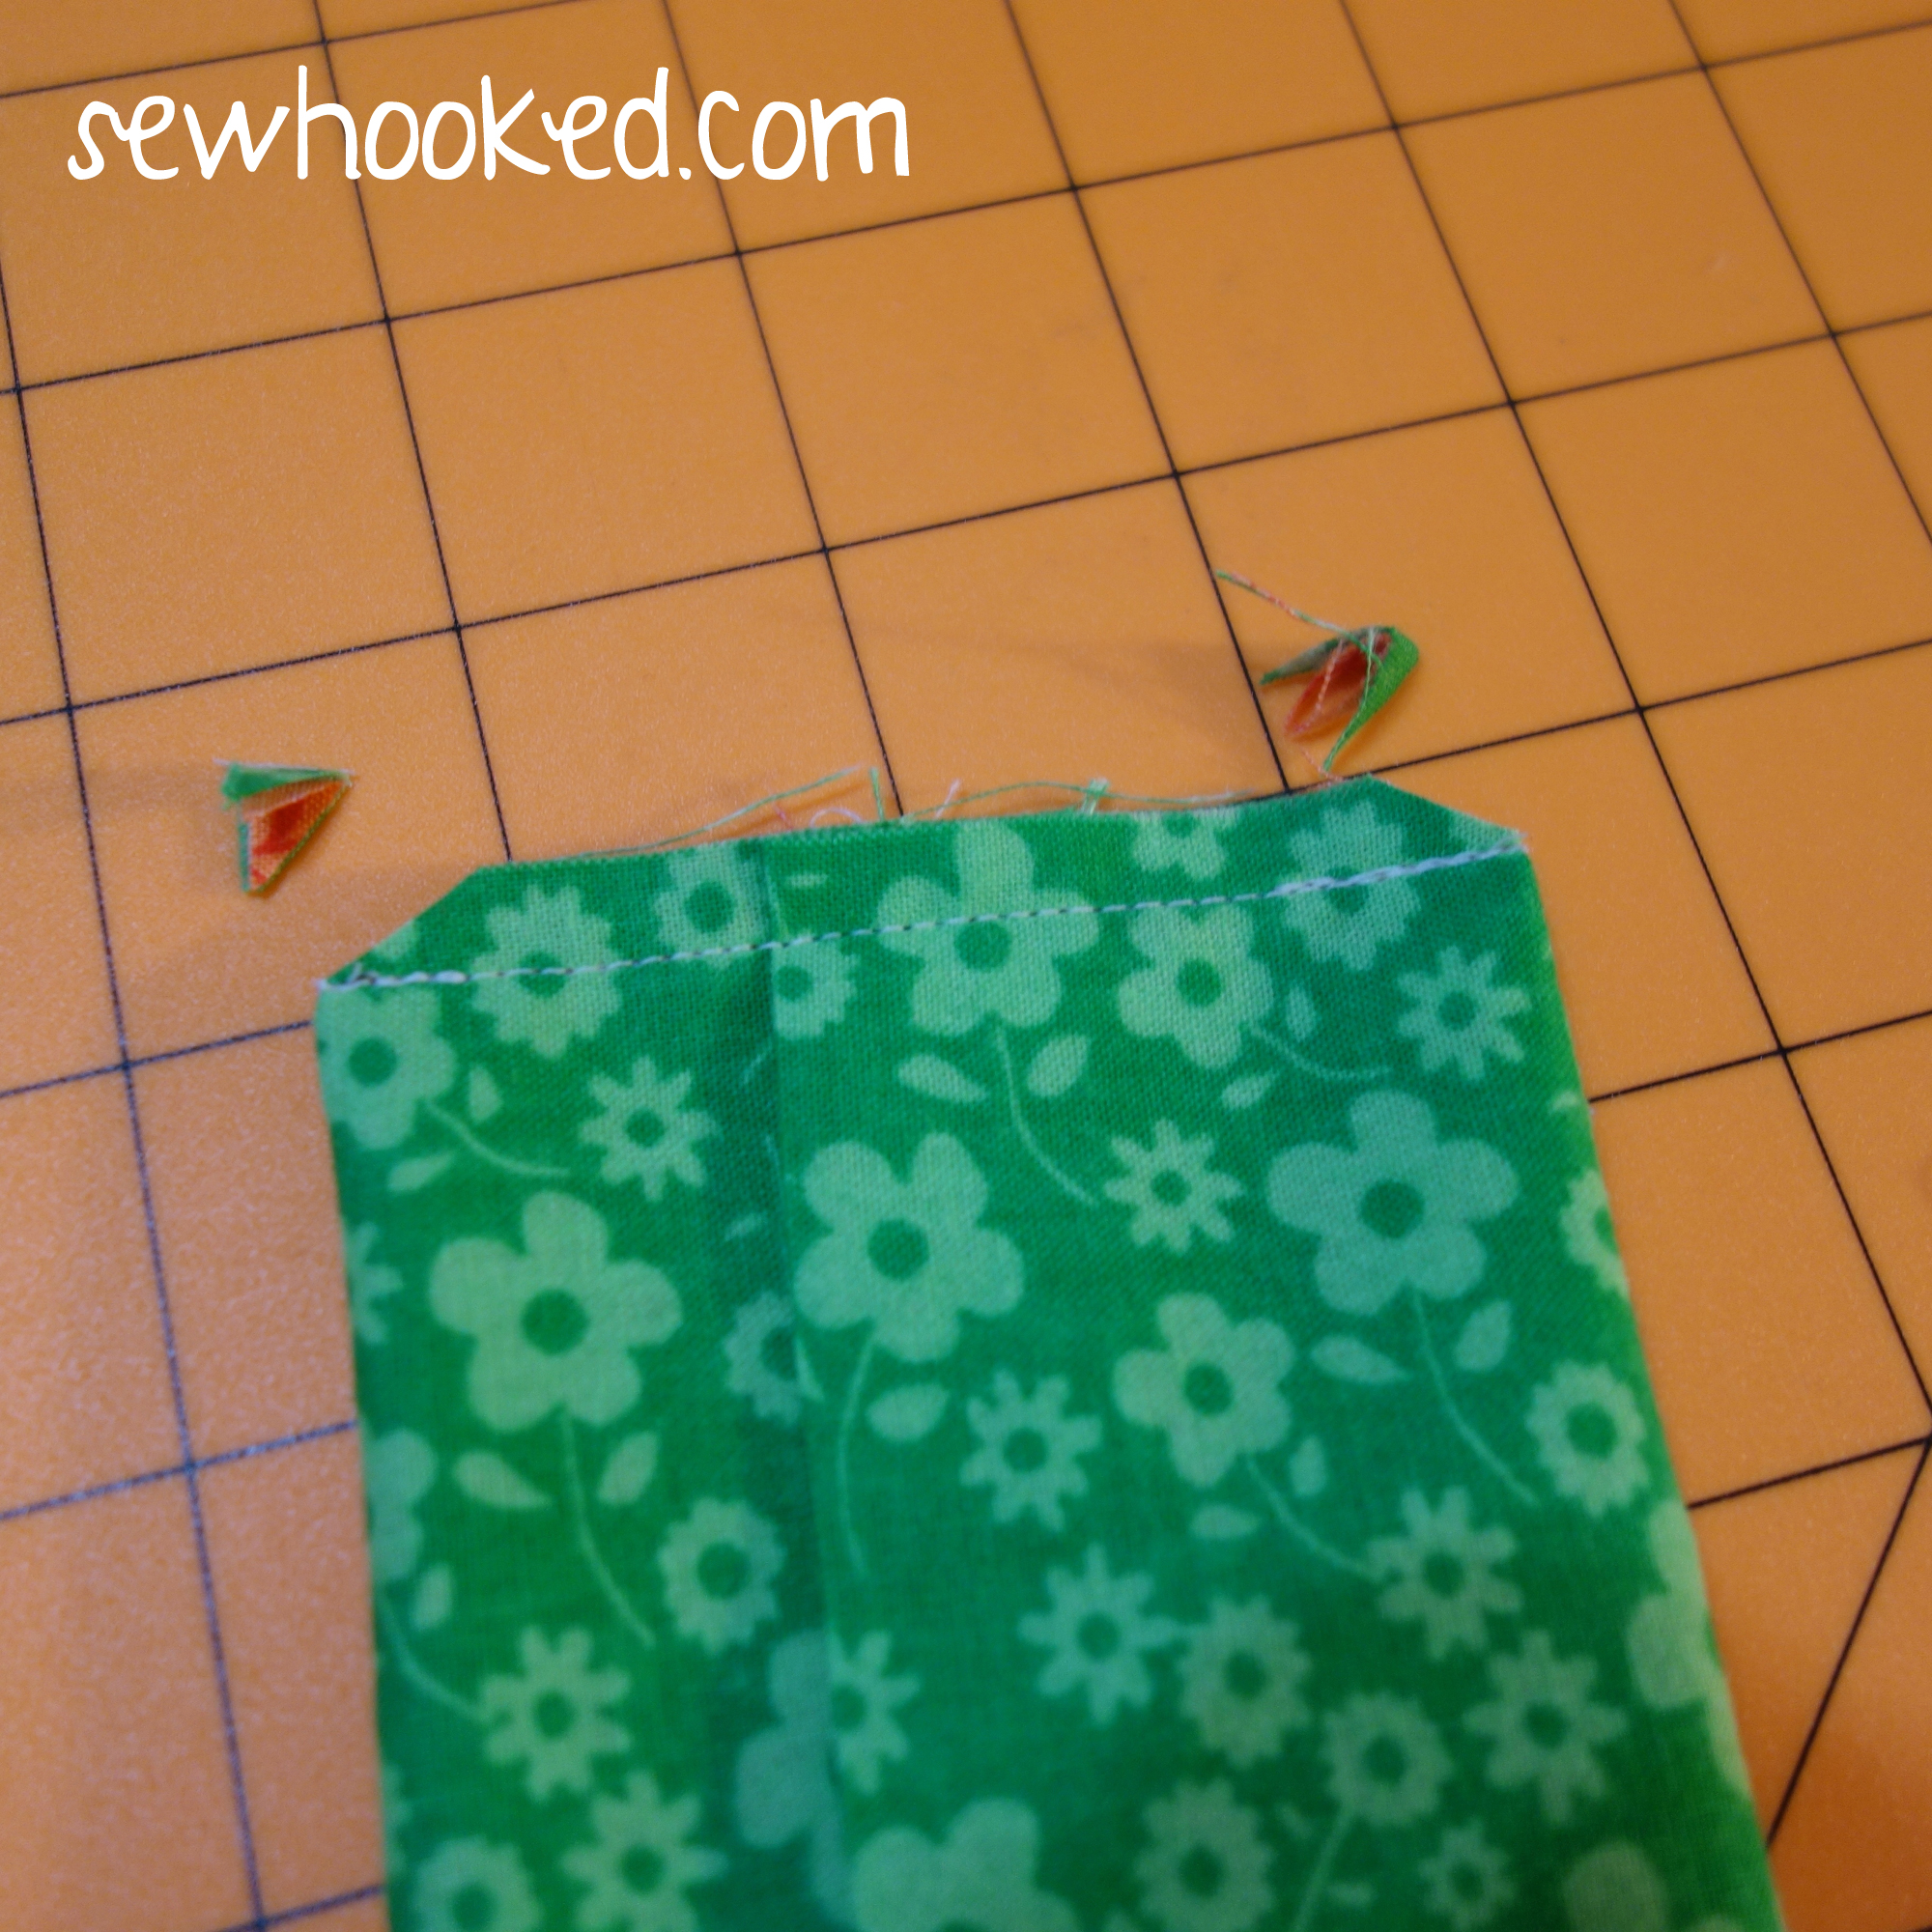
Clip corners & turn.
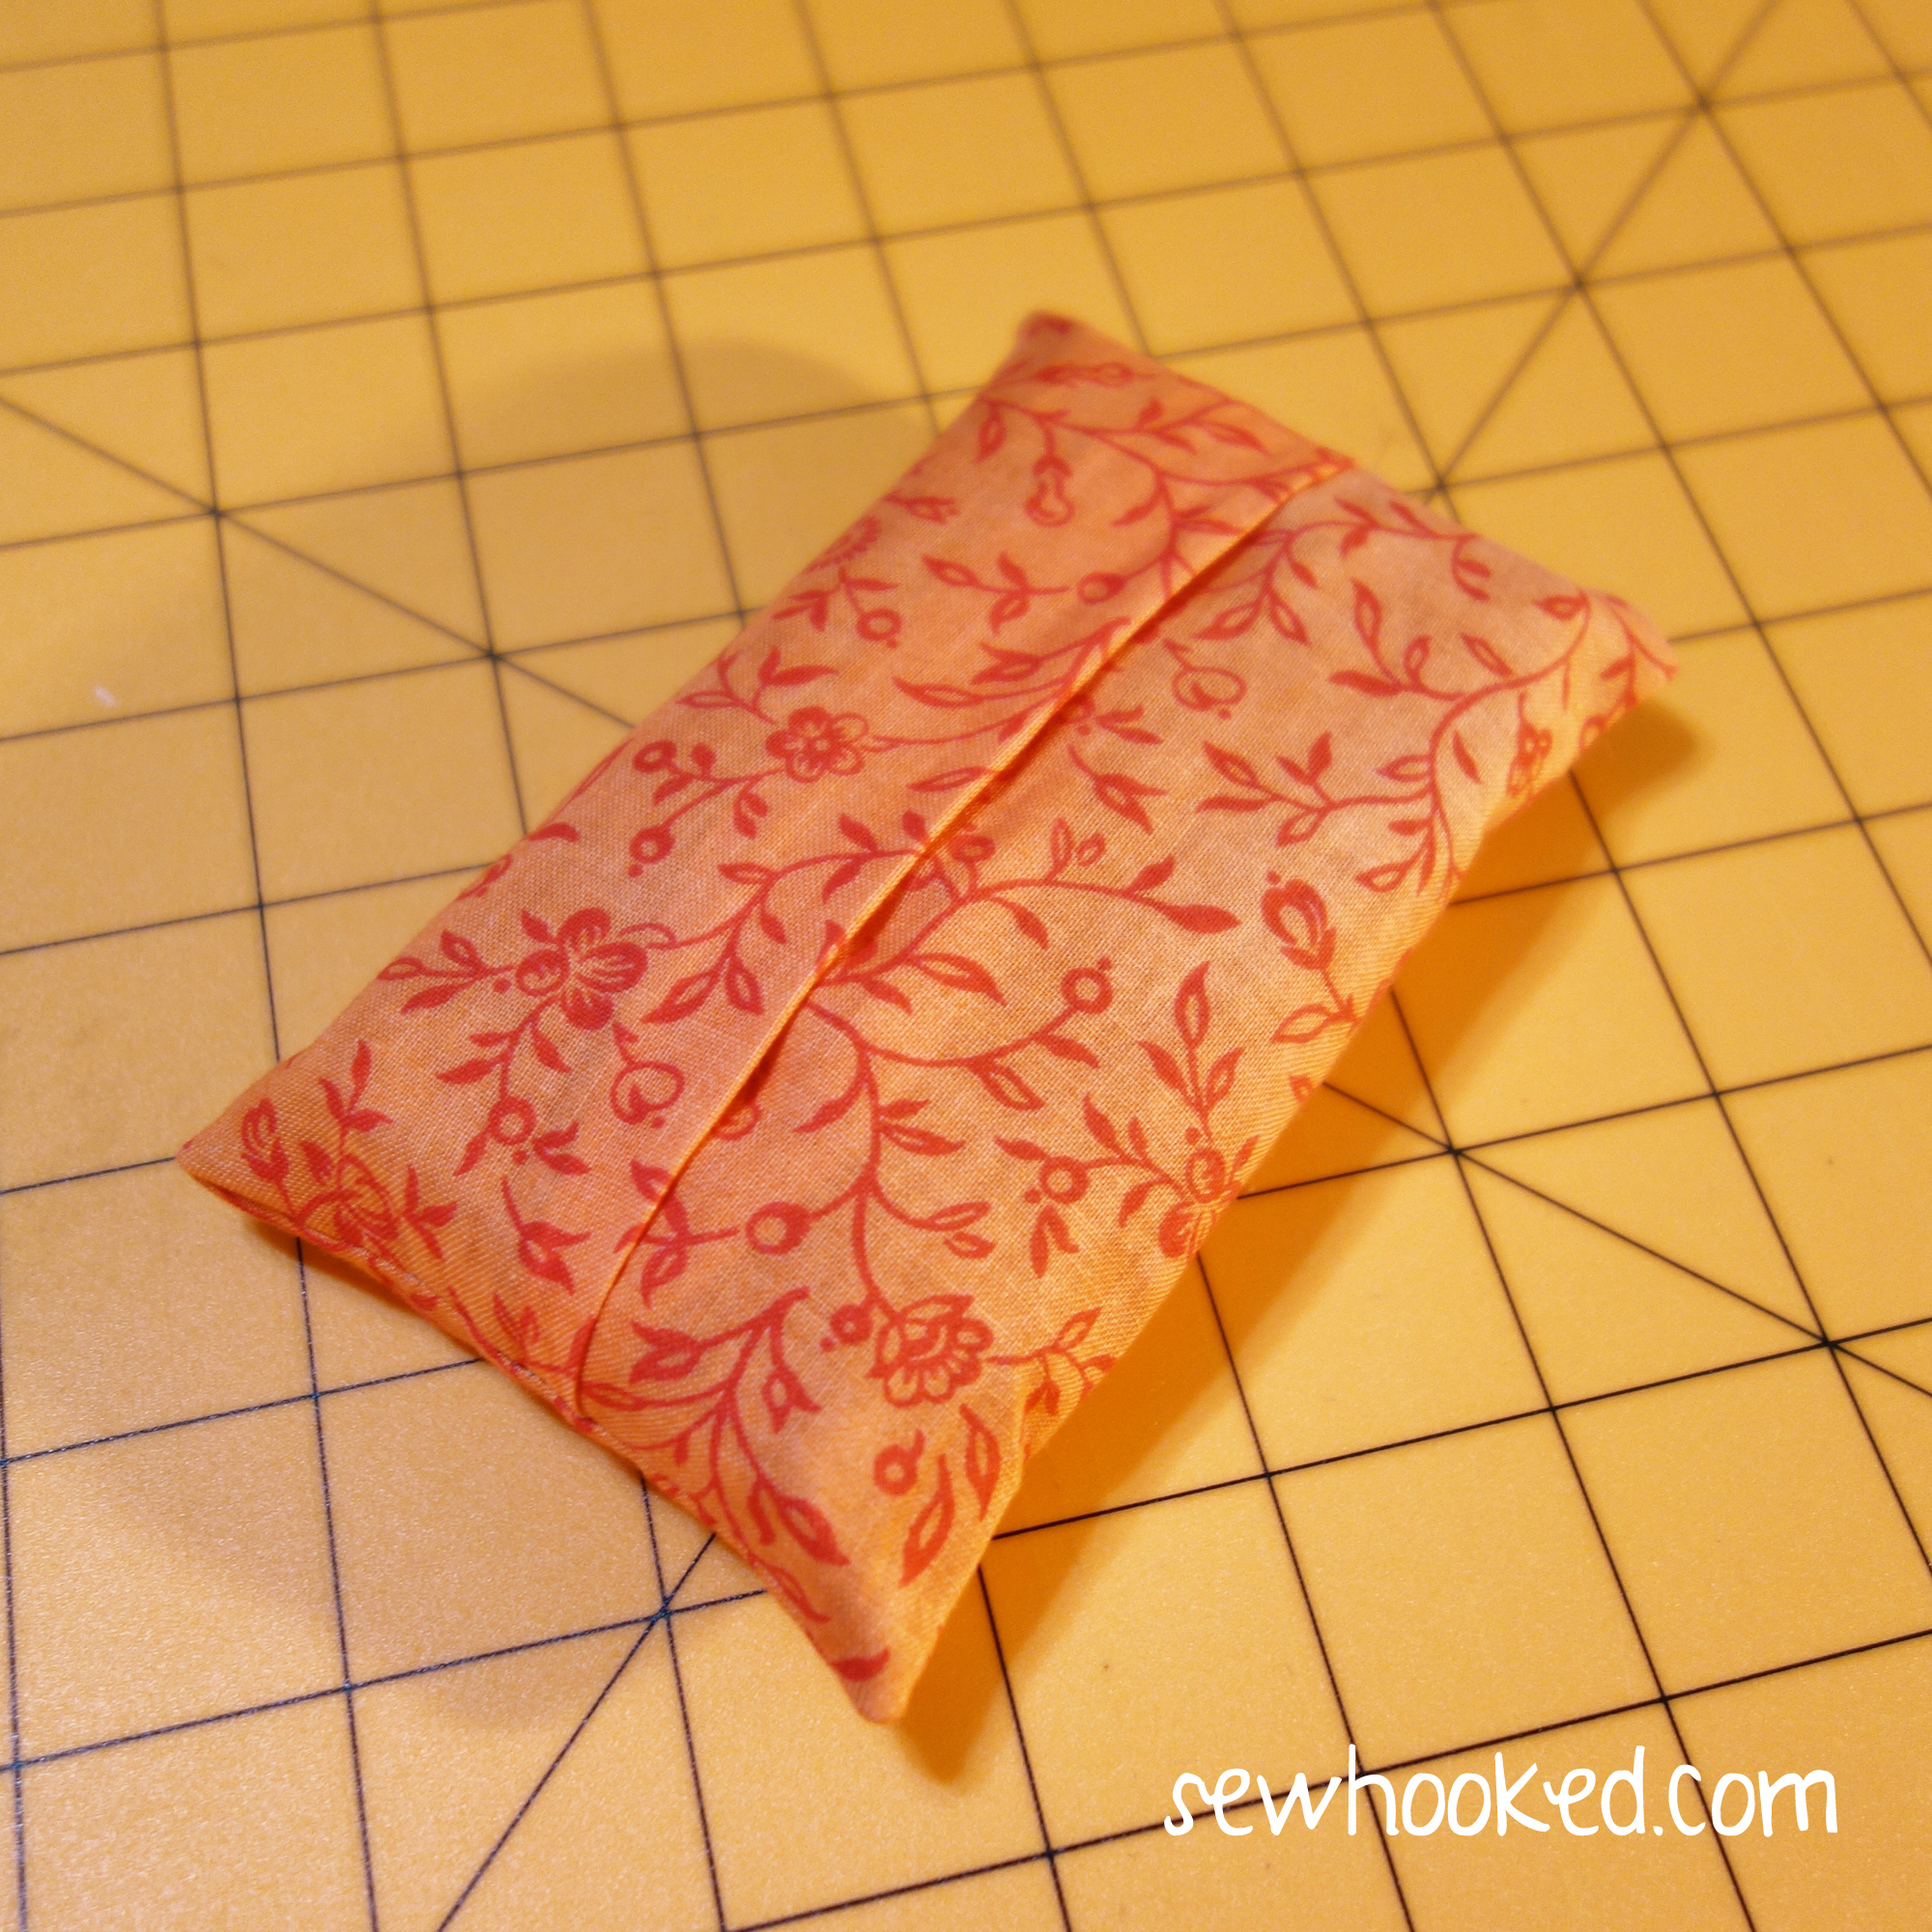
Done!
See how the Lining/Trim makes a lovely accent? You can have fun playing with stripes, dots or other fun fabrics.
Now, let’s make one that isn’t trimmed. We’ll use the same technique, but the fabric sizes will be reversed.
You’ll need fabric in two colors. Just as before, the orange fabric is the OUTSIDE.
For UN-TRIMMED Cover:
- Outside – 5 3/4″ x 8 1/2″
- Lining – 5 3/4″ x 6 1/2″

With right sides together, line one end of LINING to one end of OUTSIDE on the side that measures 5 3/4″.
Stitch a 1/4″ seam with backstitching at both ends.
Line up opposite ends and repeat the 1/4″ seam with backstitching along the other 5 3/4″ side.

Turn so that wrong sides of the fabric are together. Adjust so that each end is approximately the same width.
Press.
Using a ruler or rotary mat, fold right sides of the OUTSIDE together so that it is 3″ wide. If you’re using a rotary mat, you can align easily use the markings on your mat for this part. Edges should overlap in the approximate center
Once adjustments have been made to your liking and the width is 3″, pin or clip with sewing clips.
Because this version doesn’t have TRIM, you’ll see the overturned edge during this step.

Sew each end with a 1/4″ seam allowance, backstitching at the beginning and end.

Clip Corners & Turn.
Done!

Stop by tomorrow for Free Pattern Friday for my weekly featured FREE quilt pattern!

Happening now on Fandom in Stitches!
♥ Jennifer O
Posts on this blog may contain affiliate links to help cover the cost of my website. I thank you for your generous support. ♥

