
As I mentioned in yesterday’s Talk to Me Tuesday, we continue with the fun of 31 Days of Halloween by sharing a new tutorial!
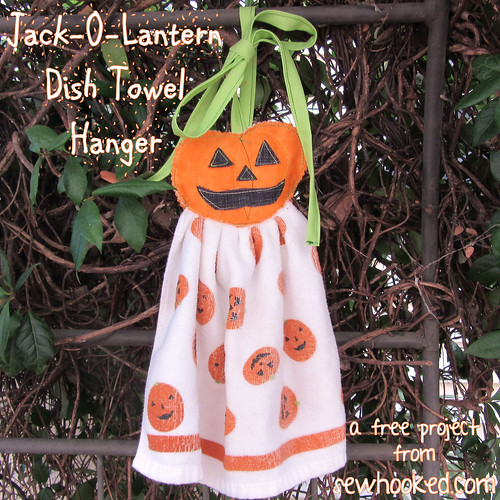
Hot off the sewing machine, a festive, Jack-O-Lantern Dish Towel topper!

You’ll need:
- Pumpkin Template (free download)
- Dish Towel of your choice
- small amount of batting
- small amount of orange fabric
- scrap of black fabric
- 2 – 2″ x 22″ strips of green fabric (fat quarters work great or you can sub-cut a WOF)
- fun thread color (optional)
- pinking shears (optional)
- sewing machine
- iron
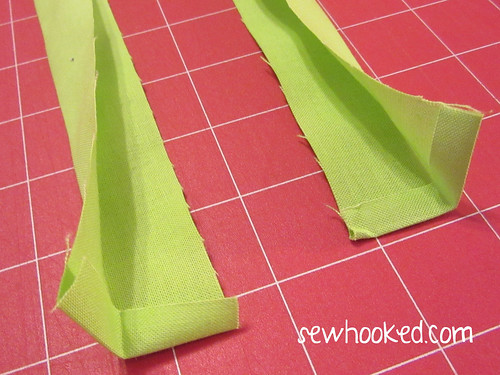
Press both 22″ strips in half, pressing one end of each strip under 1/4″. Press in half again.
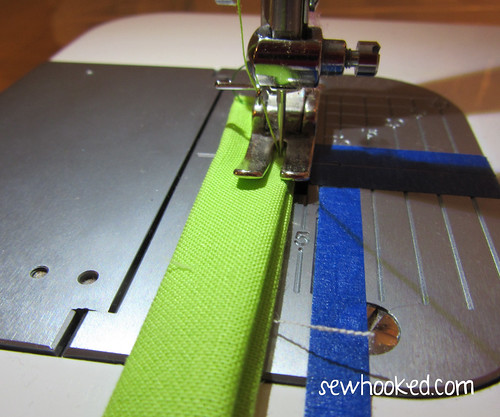
Stitch across the turned under end and down the length of each green strip.
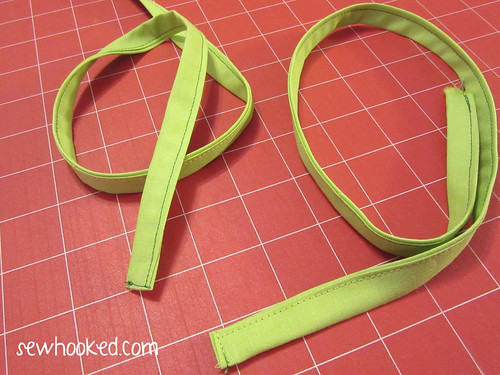
Now you’ll have this!
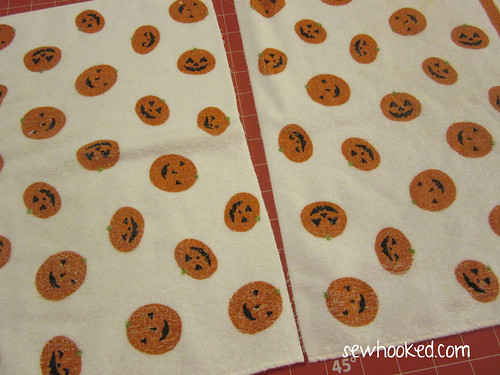
Depending on the size of your towel, you may need to cut it in half. My towel was 23″ long. If you don’t cut your towel in half, then cut the seam allowance off the top end.
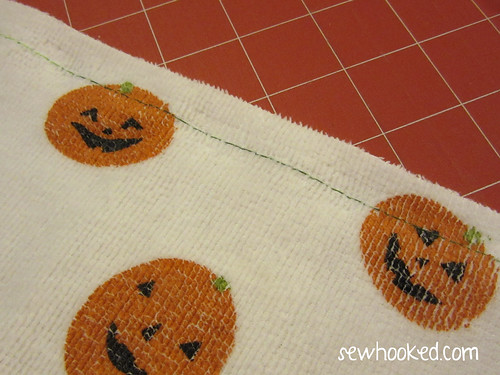
Run a long basting stitch along the raw edge, being sure to leave long tails on each end.

Use the basting to gather the towel. Now, set aside for the fun part!

Cut your orange fabric into two pieces approximately 7″ square (mine was a little wider, so I just left it). Cut out and trace the Pumpkin Template onto the right side of one piece of orange fabric with an erasable fabric pencil. I used my white Sewline pencil.
I marked a four inch space to help with the opening later on. This is optional.
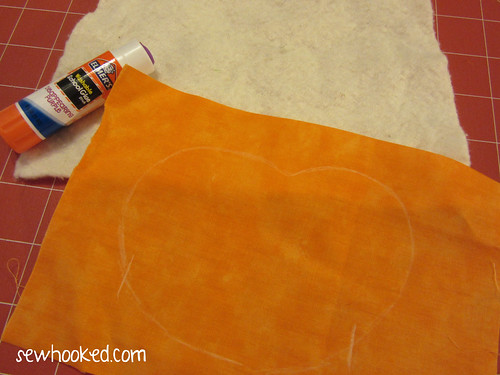
Baste the orange fabric you just traced on to the batting with a few dots of washable school glue.
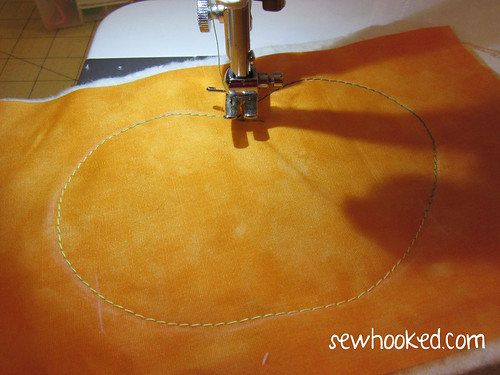
Using your fun thread and a wide stitch (I used a 3 on my Juki), trace the pumpkin line.
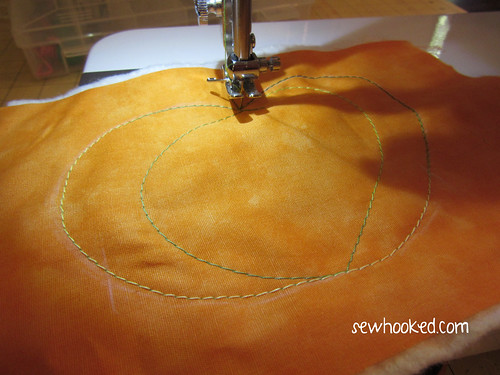
Starting at the top of the pumpkin, echo the shape an inch or so inside the line. You don’t have to be perfect here, every pumpkin is unique!
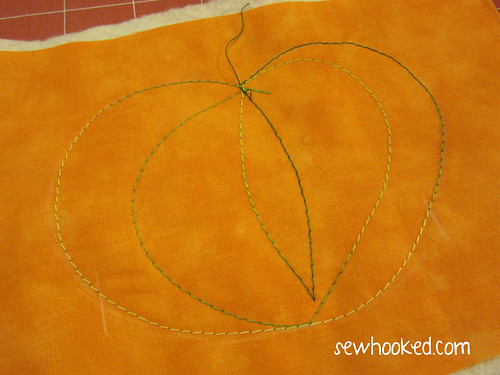
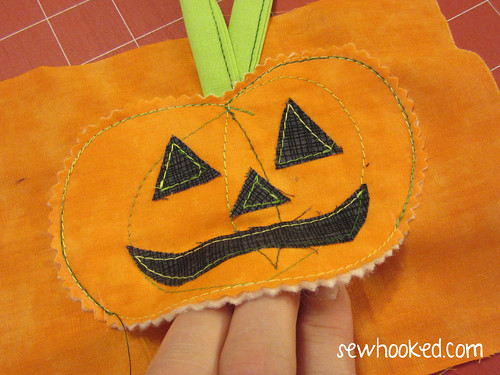
Mine looks like this.
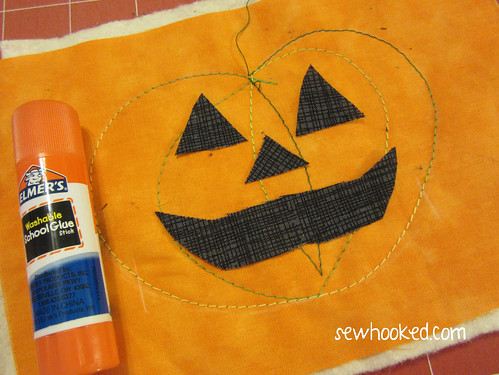
Using your black fabric scraps and a pair of scissors, cut out the face you’d like for your Jack-O-Lantern. I decided to go super simple, trimming as needed until it was just the way I wanted.
Baste these pieces on with the washable school glue. Hit it for a few seconds with your iron to dry the glue.

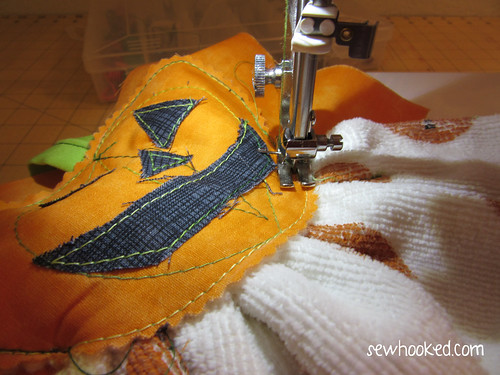
Using the same stitch as before, stitch around each facial feature, being sure to back stitch as needed.

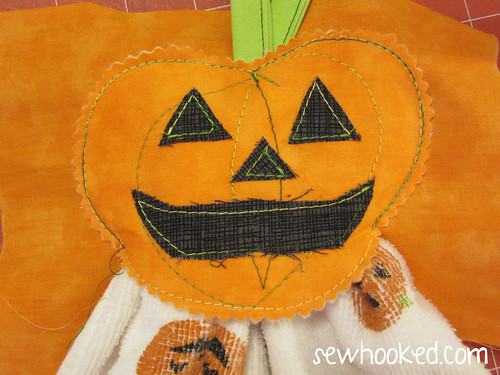
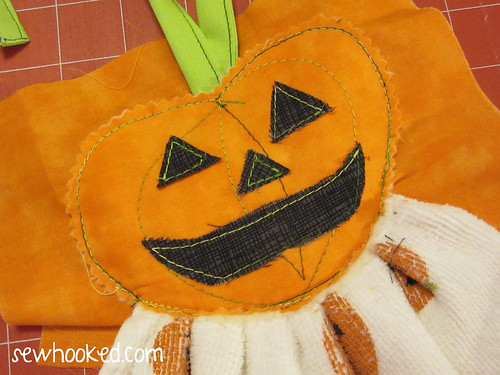
Trim the entire thing with pinking shears. The face is done, yay!
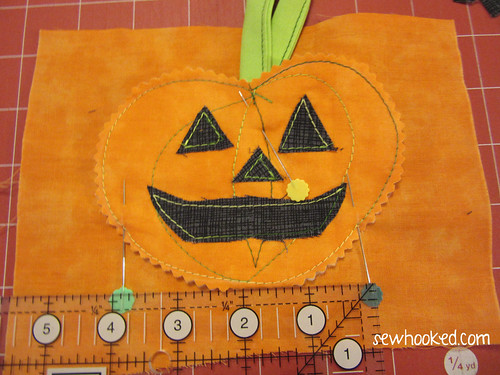
Place the completed face right side up on the remaining piece of orange fabric.
Slide the unstitched ends of the green ties into the top center and secure with a pin.
Measure a 4 inch opening at the bottom (this is what those marks were for back when I was tracing), Mark each side with a pen or erasable fabric pencil, marker, etc.
Sew around, on top of the original stitch, leaving the 4″ opening at the bottom. Back stitch at the beginning and end.
Insert the previously prepared towel in the opening (the back fabric is still untrimmed).
Adjust as needed until it is as even as possible.
Sew the opening closed. Depending on your machine, you may need to raise your presser foot or use a walking foot. You know your machine best, so do what works best for you.
Now, it’s time to trim off the back! Use scissors or your pinking shears to trim close to the stitching, being sure not to cut the front fabric.
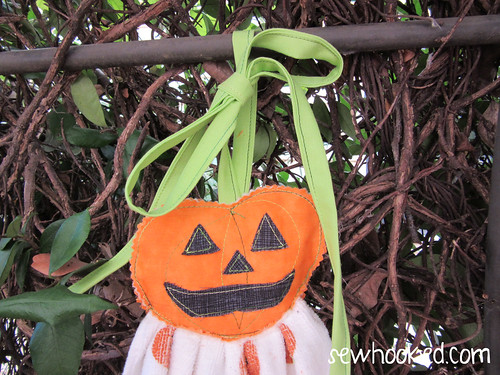
Here we go, all done! What a happy Jack!
Are you making projects from 31 Days of Halloween?
♥ Jennifer O
Posts on this blog may contain affiliate links to help cover the cost of my website. I thank you for your generous support. ♥
