
Foundation pieced quilts, sometimes called paper pieced quilts, are made by sewing pieces of fabric onto a temporary or permanent foundation.
— quilting.about.com
Paper Piecing. It’s what I do. I play at crafts and I crochet to relax, but paper piecing is what motivates me, inspires me, and makes me want to keep creating. It’s addicting, frustrating, and incredibly rewarding. I love to design, to piece, and, when I get the opportunity, help others learn, too. I hope you enjoy it as much as I do!

Watch my 2012 STITCHED Workshop, Paper Piecing Art: Beginner & Beyond for free. 🙂
Print Waiting for Rain, the pattern used in the video above.

How To Paper Piece
- ALL MY PAPER PIECING VIDEOS ON YOUTUBE
- Learn to Paper Piece with Sweet Skating Sue – written by yours truly! This 23-page tutorial is full of photos and includes the pattern above in one convenient printable PDF.
- Complete How-To Paper Piece Tutorial on Sewhooked for those wanting to paper piece using scissors instead of a rotary cutter.
- A short tutorial on piecing those crazy angles! (Scroll past the free pattern)
- Adding seam allowance to a pattern that doesn’t have it
Other Tutorials (leave this website)
- Practice Paper Piecing from Quilter’s Cache
- Paper Piecing Tutorial from Such A Sew & Sew
- Paper Panache How To Paper Piece
- Basics on About.com
- How to Paper Piece video in Italian by Gaya
Removing the paper.
Tools I Love for Paper Piecing (this section includes affiliate links)
- Add-A-Quarter 6″ Ruler* – for trimming seams to 1/4″ as you go.
- Add-A-Quarter 12″ Ruler* (the 12″ is by far my most used ruler)
- Add-A-Quarter Plus 6″ Ruler* – Includes straight edge for folding your pattern (instead of a postcard)
- Add-A-Quarter Plus 12″ Ruler*
- Add-An-Eighth 6″ Ruler* – for grading seam allowances
- Add-An-Eight Plus 8″ Ruler*
- My Homemade Spray Starch OR Mary Ellen’s Best Press* – use sparingly if the paper is still attached to your block or you will end up with a soggy mess!
- Steamfast Mini Iron – this is my go-to iron for pressing when I paper piece. Since 2018, I’ve struggled with an RSI, and this tiny lightweight iron has been a huge help!
- Black & Decker Classic Iron – Use without steam to press when piecing. I also like the Hamilton Beach Retro Iron. It’s nice and simple and gets the job done.
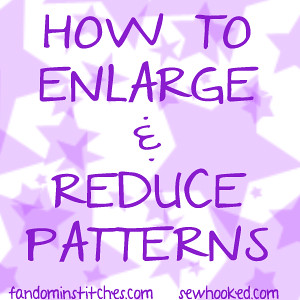
Easily enlarge & reduce paper pieced patterns with this simple tutorial!
Designing Your Own Patterns
- Electric Quilt 8 – (also called EQ8) for-purchase quilt design software, my design software of choice.
- Quilt Assistant – Free Quilt Design Software (please read the user agreement carefully, this software is for sharing free patterns only).
- Inkscape – An Open Source vector graphics editor, with capabilities similar to Illustrator, CorelDraw, or Xara X, using the W3C standard Scalable Vector Graphics (SVG) file format. Excellent for designing embroidery designs.
- Inkscape Tutorials
- GIMP – GIMP is the GNU Image Manipulation Program. It is a freely distributed piece of software for such tasks as photo retouching, image composition, and image authoring. Great for editing.
- LibreOffice – Open Source office software includes Writer, the word processor, Calc, the spreadsheet application, Impress, the presentation engine, Draw, drawing and flowcharting application, Base, database and database frontend, and Math for editing mathematics.
- Thoughts and suggestions on designing with graphics software: Drawing A Patchy Heart from Sewhooked (please note that this is an old tutorial and I no longer design my patterns in Photoshop)
My Original Paper Pieced Patterns
You are welcome to use any pattern or project for personal or charitable use or add links on your own website. If you have any questions, please contact me. ~Jennifer
- My published work (scroll down past Instructor information to see all of my published work)
- Free Quilt Patterns on Sewhooked, includes patterns designed by myself and Guest Designers
- Free Fandom Patterns – my non-Harry Potter patterns that can also be found on Fandom In Stitches
- Free Harry Potter Patterns right here on Sewhooked (also available on FiS)
- The Project of Doom – A Block of the Week Harry Potter Mystery Quilt (also archived here on Sewhooked and here on Fandom In Stitches.
- Fandom In Stitches – a collection of Fandom patterns designed by myself and the FiS Designers
- My Etsy Shop is now closed as I no longer sell patterns. I apologize for the inconvenience.
Paper Piecing Hints
- Use 100% cotton, good quality quilting fabric.
- Use lightweight paper when printing, as it tears off easier. I like recycled printer paper. You can also try products like Carol Doak’s Foundation Paper or Newsprint. I strongly encourage recycling your paper after removing it from your quilt blocks.
- All Sewhooked patterns have a 1/4″ seam allowance. Sizes are noted on each pattern.
- For best printing, set PDF printing to “no scaling”
- A Note to International Visitors – The patterns on Sewhooked are formatted for the standard paper size in the United States. U.S. A4, is 8.5″ x 11″ while the ISO A4 is 210 × 297mm or 8.3″ × 11.7″. You might occasionally find that a pattern designed by a U.S. designer such as myself won’t quite fit on a sheet of paper. There are a couple of options to get around this problem. If your printer format allows it, you may also wish to print the pattern over multiple pages. You can use larger paper, ISO A3, for example. If neither of these is an option for you, use “scale to fit” in your PDF options. Please note that if the pattern size is reduced, you will need to add a small border to the block for it to be the proper finished size.
- My tutorial for Enlarging & Reducing Patterns
- All Sewhooked patterns are mirror images. The image will be correct AFTER you piece it.
- To make sure your blocks align perfectly, find adjacent corners of two pattern pieces, push a pin through the exact corners of each to match the two. Pin or hold the pieces in place for sewing. Check out the tutorials mentioned above for more details.
- Colors used on patterns are just a guide for fabric placement, the selection is up to you. You can always print in grayscale.
- Leave the paper attached to the block until you sew it in its final place, whether it be a quilt, purse, etc. That will keep the bias edges from stretching.
- Accuracy is very important. If you’re new to paper piecing, just take your time and practice, practice, practice!
- Suggested uses… quilts (of course!), handbags, banners, pillows, totes… use your imagination!
(c) respective designers as listed on individual patterns, websites, etc.

I am Looking for the paper piecing pattern for the New York Beauty……Have been finding everything but it. I know there are free patterns out there, but where? Help
Hi there! While I don’t have any New York Beauty blocks of my own design (the ones you’ve seen here are from a class I teach using an Alex Anderson book), you can find some really great free NYB patterns online.
There are quite a few over at Ulas’ website. There are also several here that are designed by Donna Duquette.
I hope one of these works for you!
Jennifer
i am looking for paperpiecing patterns for baked goods
Are you looking for any baked good in specific? Muffins, cookies, pies, that sort of thing?
Jennifer
How do you store your projects so you can easily pick them up, take them with you and work on them?
I’m a big fan of plastic shoe boxes and zip top bags for in-progress projects. I don’t usually paper piece on the go, but if I’m taking a project to work on somewhere other than home, I bag it up with all it’s parts before heading out.
I’m making a paper pieced Shoemakers Puzzle, but when I got to put the block together the center doesn’t match right. Not sure what I’m doing wrong. Could you please help. Any suggestions would be appriciated.
Whenever I match up the units of a block, I like to use a pin to find each corresponding corner. For a block like Shoemaker’s Puzzle, I’d match from the point in the center.
You can see more images on my paper piecing tutorial page.
Hi Jen, Attended the Tucson Quilters Guild 34th Annual Quilt Show. A HARRY’S BOOKCASE quilt was entered. It was not the complete PROJECT OF DOOM. Your name was on the tag discribing the quilt. The quiter was Karen Porter. Your work is now in Tucson AZ.
That is wonderful to hear! I hope I get to see photos of the quilt at the show.
Jennifer
Do you do requests? I would like something Pittsburgh Steelers and UNC if possible. Lots of us Steeler fans in NC. Thank you so much.
I don’t generally do sports patterns, but some of my designers on Fandom In Stitches do. We have a small, but growing Sports page and you can leave requests right here. Fandom In Stitches has designers from all over the world, so chances are we’ll have someone that will be interested in making what you’re looking for. 🙂
Hello – I’m new to blogging – so, hopefully I do and say the right things. I’m attempting to find out if it’s totally OK to download the cosman.nl Quilt Assistant Program to my home computer. I’m fearful to download freebies and just need to know if there’s a way to know if it’s OK. I have plenty of reason to be unsure. I’ve had my whole system crash to the point I had to replace my computer with this one and I just don’t want this to happen again. Can you tell me if the EQ 7 works the same as the Quilt Assistant Program? I absolutely loved using the Quilting Assistant before my computer crashed. I’ve not been back on since. If it’s possibly unsafe – then, I guess I’ll have to save up to buy a program. Are there other great programs out there than can scan a picture or whatever you have and let you design your own foundation piecing pattern, like I was able to do with the Quilt Assistant Program? Any information you can share will be appreciated. If the QA Program is safe – I’d be really happy. Thanks! Sheryl
Hi Sheryl,
While I can’t personally vouche for the download site, I had absolutely no problem with my download or the software itself and I know multiple other people that also use it with no problem whatsoever. If you have anti-virus software, you can check and make sure it’s set to scan your downloads just to make sure.
EQ is much more complex software than Quilt Assistant doing a whole variety of things. EQ is for designing blocks as well as entire quilts, applique and much more and where QA is free, EQ runs about $200 for the software. It was a business investment for me, and I use it all the time, so it was worth it for me. I would very much recommend doing some research to make sure EQ would be right for you.
I sure hope that helps!
I’m in the market for a new all in one printer can anyone recommend one that prints well on thin paper my Epson Artison 835 won’t feed the paper and jams.
Thanks
I am looking for patterns for New York Beauty Quilt blocks. Any suggested sites?
Thank you!
There are quite a few individual free ones floating around out there. My best suggestion is to google “free new york beauty pattern” and see what you come with. This site has quite a few and this is a good basic pattern. Good luck!
Julie, there was a NYB quilt along last year with several patterns progressing in difficulty, here’s the start page – http://www.amylouwhosews.com/2012/02/new-york-beauty-quilt-along.html
Hi Jennifer,
I’ve been using Quilt Assistant for a few months now, and while it gets the job done, I’m getting frustrated that I can’t change the output font or place the patterns on the print layout. This makes the cleanup process SO LONG, because I’ve got to redo all the text and re-place the pieces within a document. I have been thinking about getting EQ7 but I was wondering if you could tell me if you can do these things when outputting a PP pattern from EQ7: use any font, (I already found you can move the pattern pieces around in the print layout), and when it needs to cut up a pattern to fit multiple pages does it do it any better than Quilt Assistant? Thanks!!!
You can do these things in EQ. When prepping to print, you can print with or without numbering and you can change the font. You can also move around or delete pieces so they are placed where you want them. Sometimes I use both softwares and export files from QA to EQ to complete. I don’t like the way either software numbers, etc., print patterns without numbering from EQ to a PDF and then number them myself in Photoshop. It’s a little tedious, but then the patterns look exactly the way I want. Hope that helps!
Wow, fantastic weblog structure! How long have you been
blogging for? you make running a blog glance easy.
The entire look of your web site is wonderful, as smartly as the content!
I started this paper pieced project several years ago from a magazine and now I cannot find the pattern again. I have half of the project paper pieced, but need the photo so I can see where all the pieces go. it is called Holiday with Family and shows a large farmhouse with smoke coming from the chimney — large sleigh drawn by a couple of horses on the snow. If anyone has the name of the magazine where it came from, perhaps I can then find it online. Would appreciate it.
I think this is what you’re looking for.
https://equiltpatterns.com/Holiday-with-Family-Quilt-Pattern
The only pattern I can think of is in the book , Paper Piecing the Seasons , the authors are Liz Schwartz and Stephen Seifert. The book is published by Martingale
I am having a hard time with the Giraffe 2012 paper pieced pattern. Is there a trick to putting the pieces together? Are there two colors of the shading. Maybe I didn’t get all the instructions or information. Should I get the old version?
I have been searching for a batik on black quilt pattern. I keep finding a close up of a block that takes me to you. Do you have an idea which quilt that might be? Where I can purchase the pattern? Thanks
Nancy
Hi Nancy,
I’ve made several quilts that are batiks on black. If you can share the link of what you’re seeing, I’ll do my best to help you out.
Jennifer.
I cannot get to the pattern for ASL I Love You anywhere
You can find two versions of the ASL pattern on my Free Page: https://sewhooked.com/free-quilt-patterns
I love your site. Thank you for all the patterns. Do you have any idea where I could find any golf themed paper pieced patterns?
Thanks, Brenda! Unfortunately, I do not. None of the designers I’m aware of have created any golf themed patterns. Good luck with your search!
Do you create paper piecing patterns from art work for others? I’m working on a fundraising quilt and need our art designed into a paper pattern. Thanks Erin
Hi Erin,
Can you email me the details at sewhooked@gmail.com? I am not currently taking commissions, but I might be able to put you in touch with someone that can help.
This page truly has all of the information I wanted about this
subject and didn’t know who to ask.
I hope I can ask this question here…loved your paper piecing tutorial, always referring to that, and all your tutorials for that matter. You “turned me on” to paper piecing, and it has become my favorite method. I wonder if you could do a tutorial on free motion quilting. Once the quilts are basted, what comes next before the binding.
Thank you.
Hi Gwen,
While I do free motion quilt, I definitely don’t claim expert status. What I will do is give you links to some of my favorite tutorials. I hope that helps!
I especially enjoy Amy Johnson’s videos. They tend to be short and cover and to the point and she covers a lot of fmq topics.
Love the Waiting for Rain pattern, and foundation piecing can certainly be addicting! We did a post http://www.quiltingfocus.com/2015/04/foundation-paper-piecing-made-easy on Foundation Paper Piecing with a short…ish tutorial on paper piercing 😉 check it out, and happy quilting!
I love making the paper pieced blocks, especially the fandom patterns. My question is how to quilt them after putting them together. It seems that quilting on top of the patterns would change them and detract from the pictures.
Hi Vicki,
I have quilted my fandom quilts in a variety of ways. Some of them are free-motion quilted with outlines, sometimes stitch-in-the-ditch. I’ve even used a neutral thread and done an all over quilt job right on top of the blocks. How I decide to quilt really depends on what it is that I’m quilting. My favorite way is free motion quilting around and inside the blocks. Is there a particular project you’re working on that you’re thinking about?
I’m working on the Dr. Seuss blocks, The largest ones are 12 inches one at least one side, so I’m enlarging the smaller ones to that size.I’m waiting to finish everything before deciding on the layout.
I have seen several of the POD quilts with a folded map and another with Luna’s glasses. I cannot find these particular blocks. Can you guide me of where I might find these blocks.
Thank you for this quilt. It excites and inspires me.
The folded map is something someone in our Facebook group did and shared as a download for printable fabric: https://www.facebook.com/groups/projectofdoom/
You can find Luna’s glasses on the Fandom in Stitches page for The Project of Doom. It’s further down the page in the section of patterns contributed by FiS Designers: http://www.fandominstitches.com/2015/07/harry-potter-bookcase-quilt-along.html
Happy sewing!
I am a little new to paper pieceing, but understand the process. I have used regular printer paper, reynolds freezer paper, tracing paper and carol doaks foundation paper. the Carol Doak product gave the best outcome, but in all cases when I remove the paper, the thread from my seams is visible. I don’t feel like I am tugging hard when I remove the paper, I’ve used sharp and universal needles, and have a stitch length of about 18-20 stitches per inch. Any suggestions?
P.S. I love the fandom in stitches site!
It sounds like you’ve covered all of your bases. The only other thing I can suggest is that it could be thread thickness. You might try a lighter weight thread specifically for piecing. Aurifil is a popular choice, but there are a number of brands available depending on your own tastes.
I have a Mac and none of the quilt programs will work on my computer. I have found Quilt Pro for macs. Have you or anyone else used it before? I can’t find a free program like the Quilt Assistant for Mac either.
I have heard that Electric Quilt now supports Mac, but I don’t know about any free software. Sorry I can’t be more helpful.
I will look into it! thanks!
This is the video I especially loved. I did not even know paper piecing existed and I will be using it for a quilt for my daughter and her husband. You spoke so clearly and I understood you so well. So Thanks again!
My pleasure! I am so happy you found it helpful and genuinely hope you enjoy paper piecing. Happy stitching!
Hootie Hoo! Jennifer,
I own a very small quilt store in Nashville Indiana. We do a Facebook Live in the mornings at 9 am. A little coffee, a little fabric and lots of chit chat. I sometimes use a free pattern to show the ladies, and this month I’m featuring hearts, for Valentines Day. I saw your Broken Heart on a different blog and I want to use it to show the girls how to paper piece. A little E-learning for the morning. I always give credit to the author and I put a link in to your pattern and website. Join us if you can that would really be nice. The Yellow Door Quilt Store on Facebook at 9 am Thursday Feb. 11. Thank you so much for your awesome art. — Mary Beth
Hi, Mary Beth! How lovely, I am flatterer by the invitation! Unfortunately, I have another obligation or I would certainly join you. Have a fun chat!