DIY: Mirror of Erised Mural

mirror of erised updateMirror of Erised Mural
edited to maintain my daughter’s privacy

This could really be called a Way Back Craft, but I’ve done so much updating, I’m going to stick with DIY.

Six years ago, when my daughter was turning 8 years old, she wanted a Harry Potter room.  All those years ago, we created the most magical room we could manage for her, and she’s loved it ever since.

On the back of her door, I created a Mirror of Erised just for her using a basic 4′ wall mirror.  It’s been one of the highlights of her the HP theme, and what girl doesn’t need a mirror in her room?

Way back then, I never imagined she’d someday be taller than me.  As she grew, it was clear that the Mirror of Erised mural I created for her was going to have to be adjusted for her lengthening height.  Just last week, I did what I needed to do to so she could see herself in her mirror.

The original tutorial has been on every variation of my website for six years now.  It’s posted on The Leaky Cauldron’s Crafts section and was mentioned, uncredited, in Entertainment Weekly in reference to Leaky Crafts.  That original tutorial is below, with edits for the updated version of the mirror.

What You’ll Need

  • Basic rectangular wall mirror, with or without frame
  • Mirror Clips, if not included with the mirror
  • Pencil or chalk
  • Masking tape
  • Newspaper
  • Fine sand paper
  • Soft cloth
  • Spray paint (primer & gold)
  • Gold acrylic craft paint
  • Gold or silver paint pen or metallic Sharpies
  • paint brush of your choice (to paint mirror body)
  • Level (optional)
  • Measuring tape

Instructions

Measure the mirror. Save the dimensions for later.

The Mirror

for frame-less mirror, skip to the mural instructions

Lightly sand the frame of the mirror. Wipe clean with a soft cloth. Cover mirror with newspaper, taping carefully around the edges of the mirror without covering the frame.

In a well-ventilated area, use spray primer to prime the frame. Follow manufacturer’s instructions.

Follow up with 2 coats of gold spray paint.

The Mural

While the mirror is drying, determine where it will hang.

Using the dimensions taken earlier, mark a space 1” smaller than the mirror dimensions on each side.

Use masking tape to tape the area where the frame will be.

Use pencil or chalk to draw the outside edge of the mirror.

This can be done freehand, or using the mirror from the Philosopher’s/Sorcerer’s Stone movie as a reference. Add clawed feet to the legs.  The mirror shown was drawn freehand, as were the updates.

Paint with gold craft paint.

After the mirror is completely dry, remove newspaper and masking tape.  Mount to painted mural frame.

Using a paint pen or metallic Sharpie, write Erised stra ehru oyt ube cafru oyt on wohsi across the top
of the mirror.

Using a paint pen or metallic Sharpie, ad details like swirls and stars.

Touch up if needed.

The Mirror of Erised
the original mirror, before enlarging

For more Harry Potter DIY, check out the HP Bookcase Mural, the Fat Lady Mural (pdf), and the Hogwarts House Canopies!

If you make a Sew Awesome Craft or any pattern, craft or recipe from sewhooked, I’d love to see a photo. Email me or add it to the sewhooked flickr group.

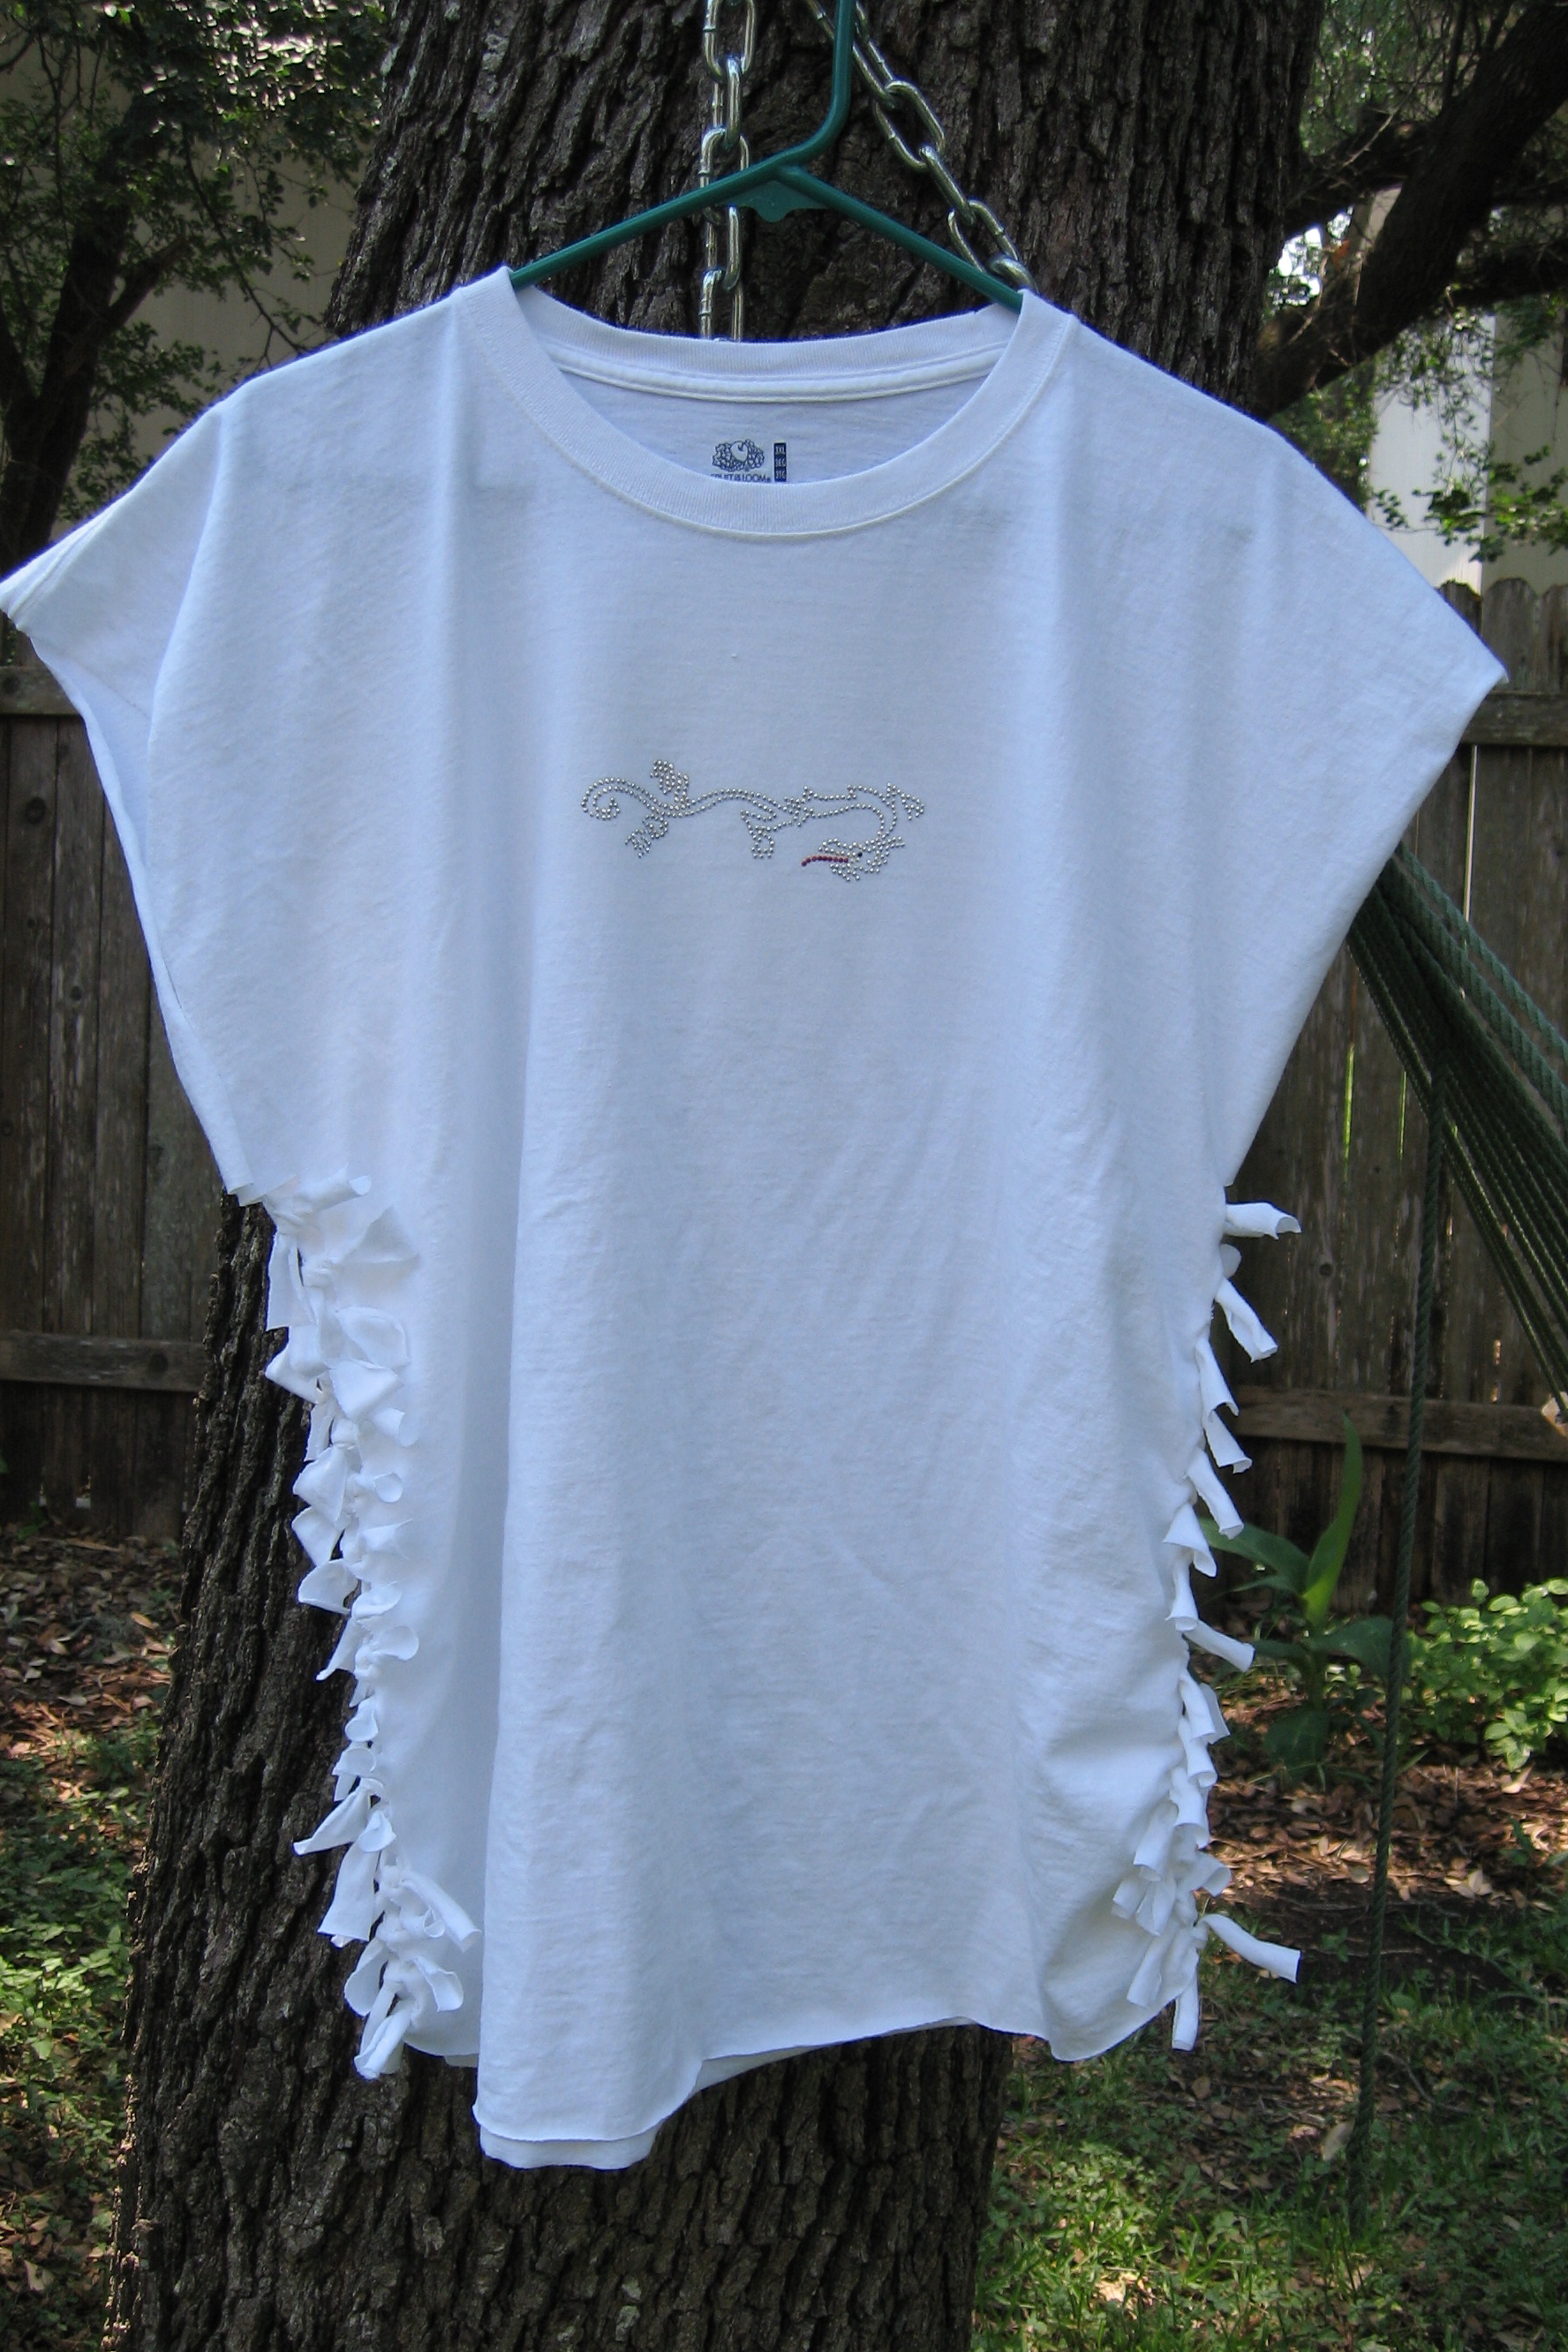
Recon: No Sew Swim Shirt

No Sew Swim Shirt (80s style!)

My 14 year old heads off for a week of orchestra camp on Saturday. During the week, they get the chance of swimming in the river near the college where the camp takes place. My kiddo is pale and freckled, the worse kind of complexion to spend a day in the sun.

Well, what’s a Gen X mom to do? How about we rock this party 80s style?!

Enter the No Sew Swim Shirt.

This is the second version of this shirt I’ve made, the first having done it’s duty honorably for several summers now.  The sides are nice and open so the water will flow through your shirt and not weigh you down.  A must for any super-sun-sensitive human.

There really is no sewing and you only need a couple of supplies and you’ll have your own No Sew Swim Shirt in about 10 minutes!

You’ll need:

  • 1 t-shirt, at least 2 sizes too big, in a light color to reflect the sun
  • a pair of scissors
  • a large ruler OR yardstick
  • cutting mat OR masking tape with 1″ intervals marked to about 20″

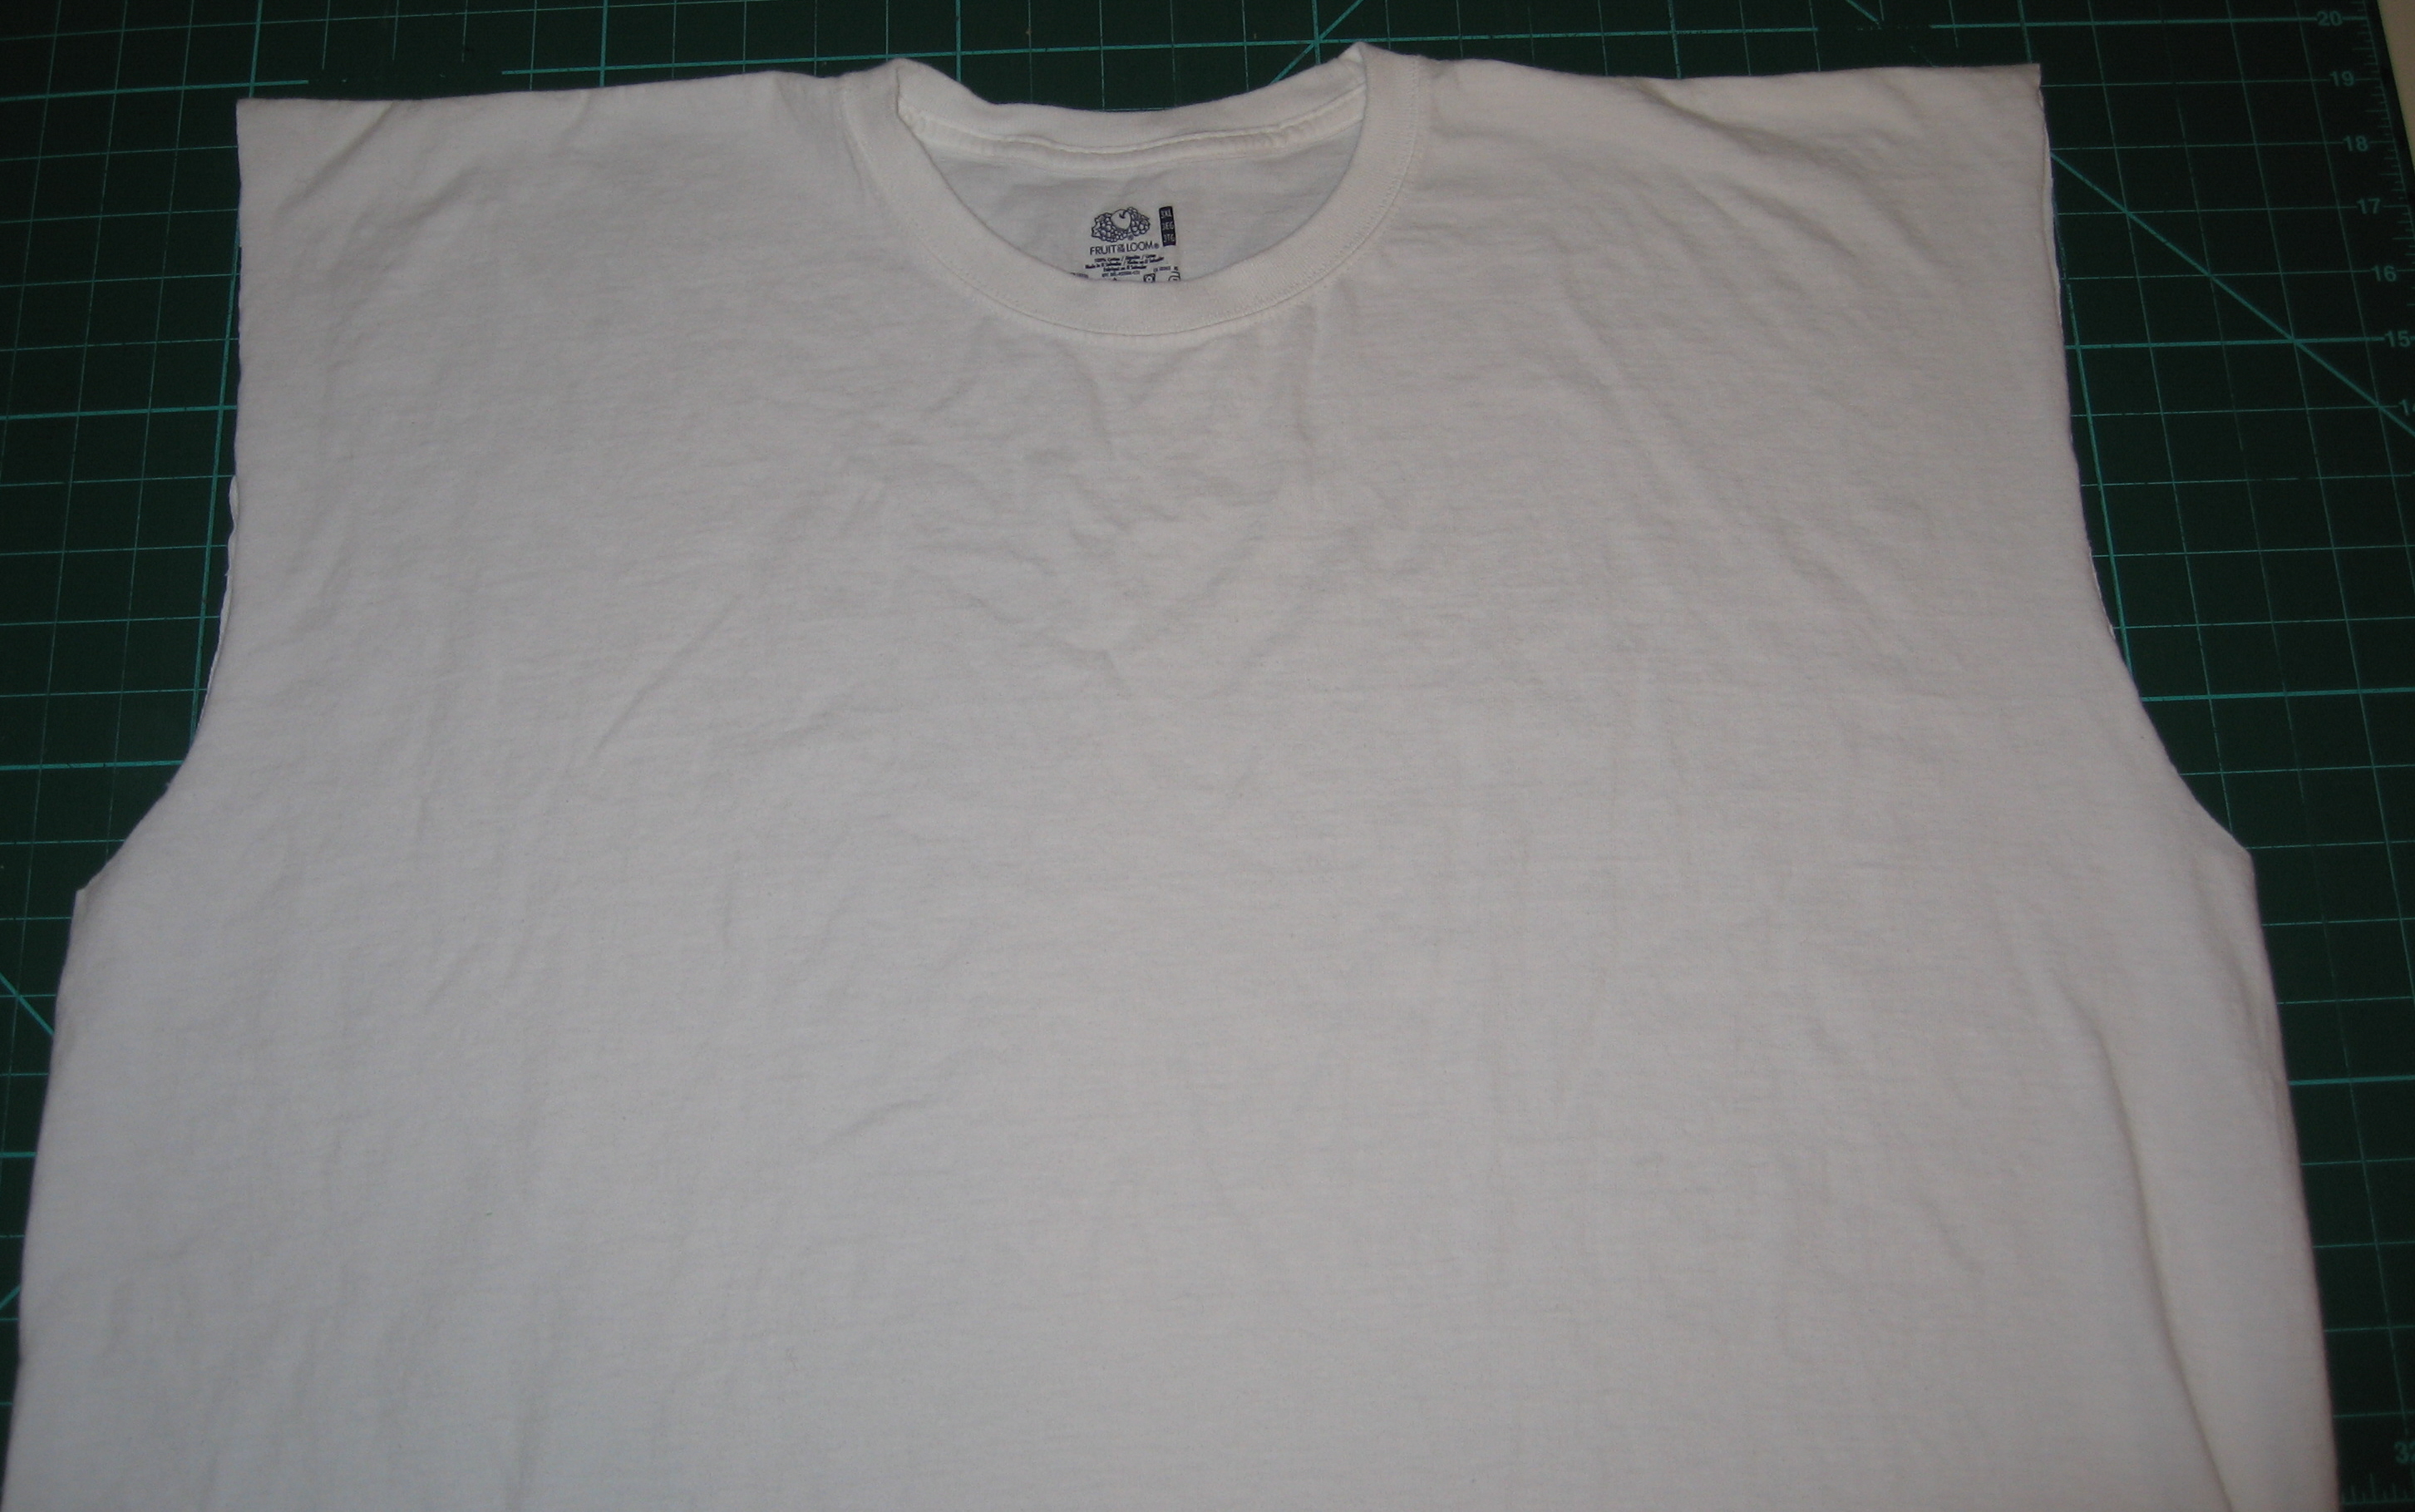
spread the t-shirt out, making sure the top and bottom are nicely aligned

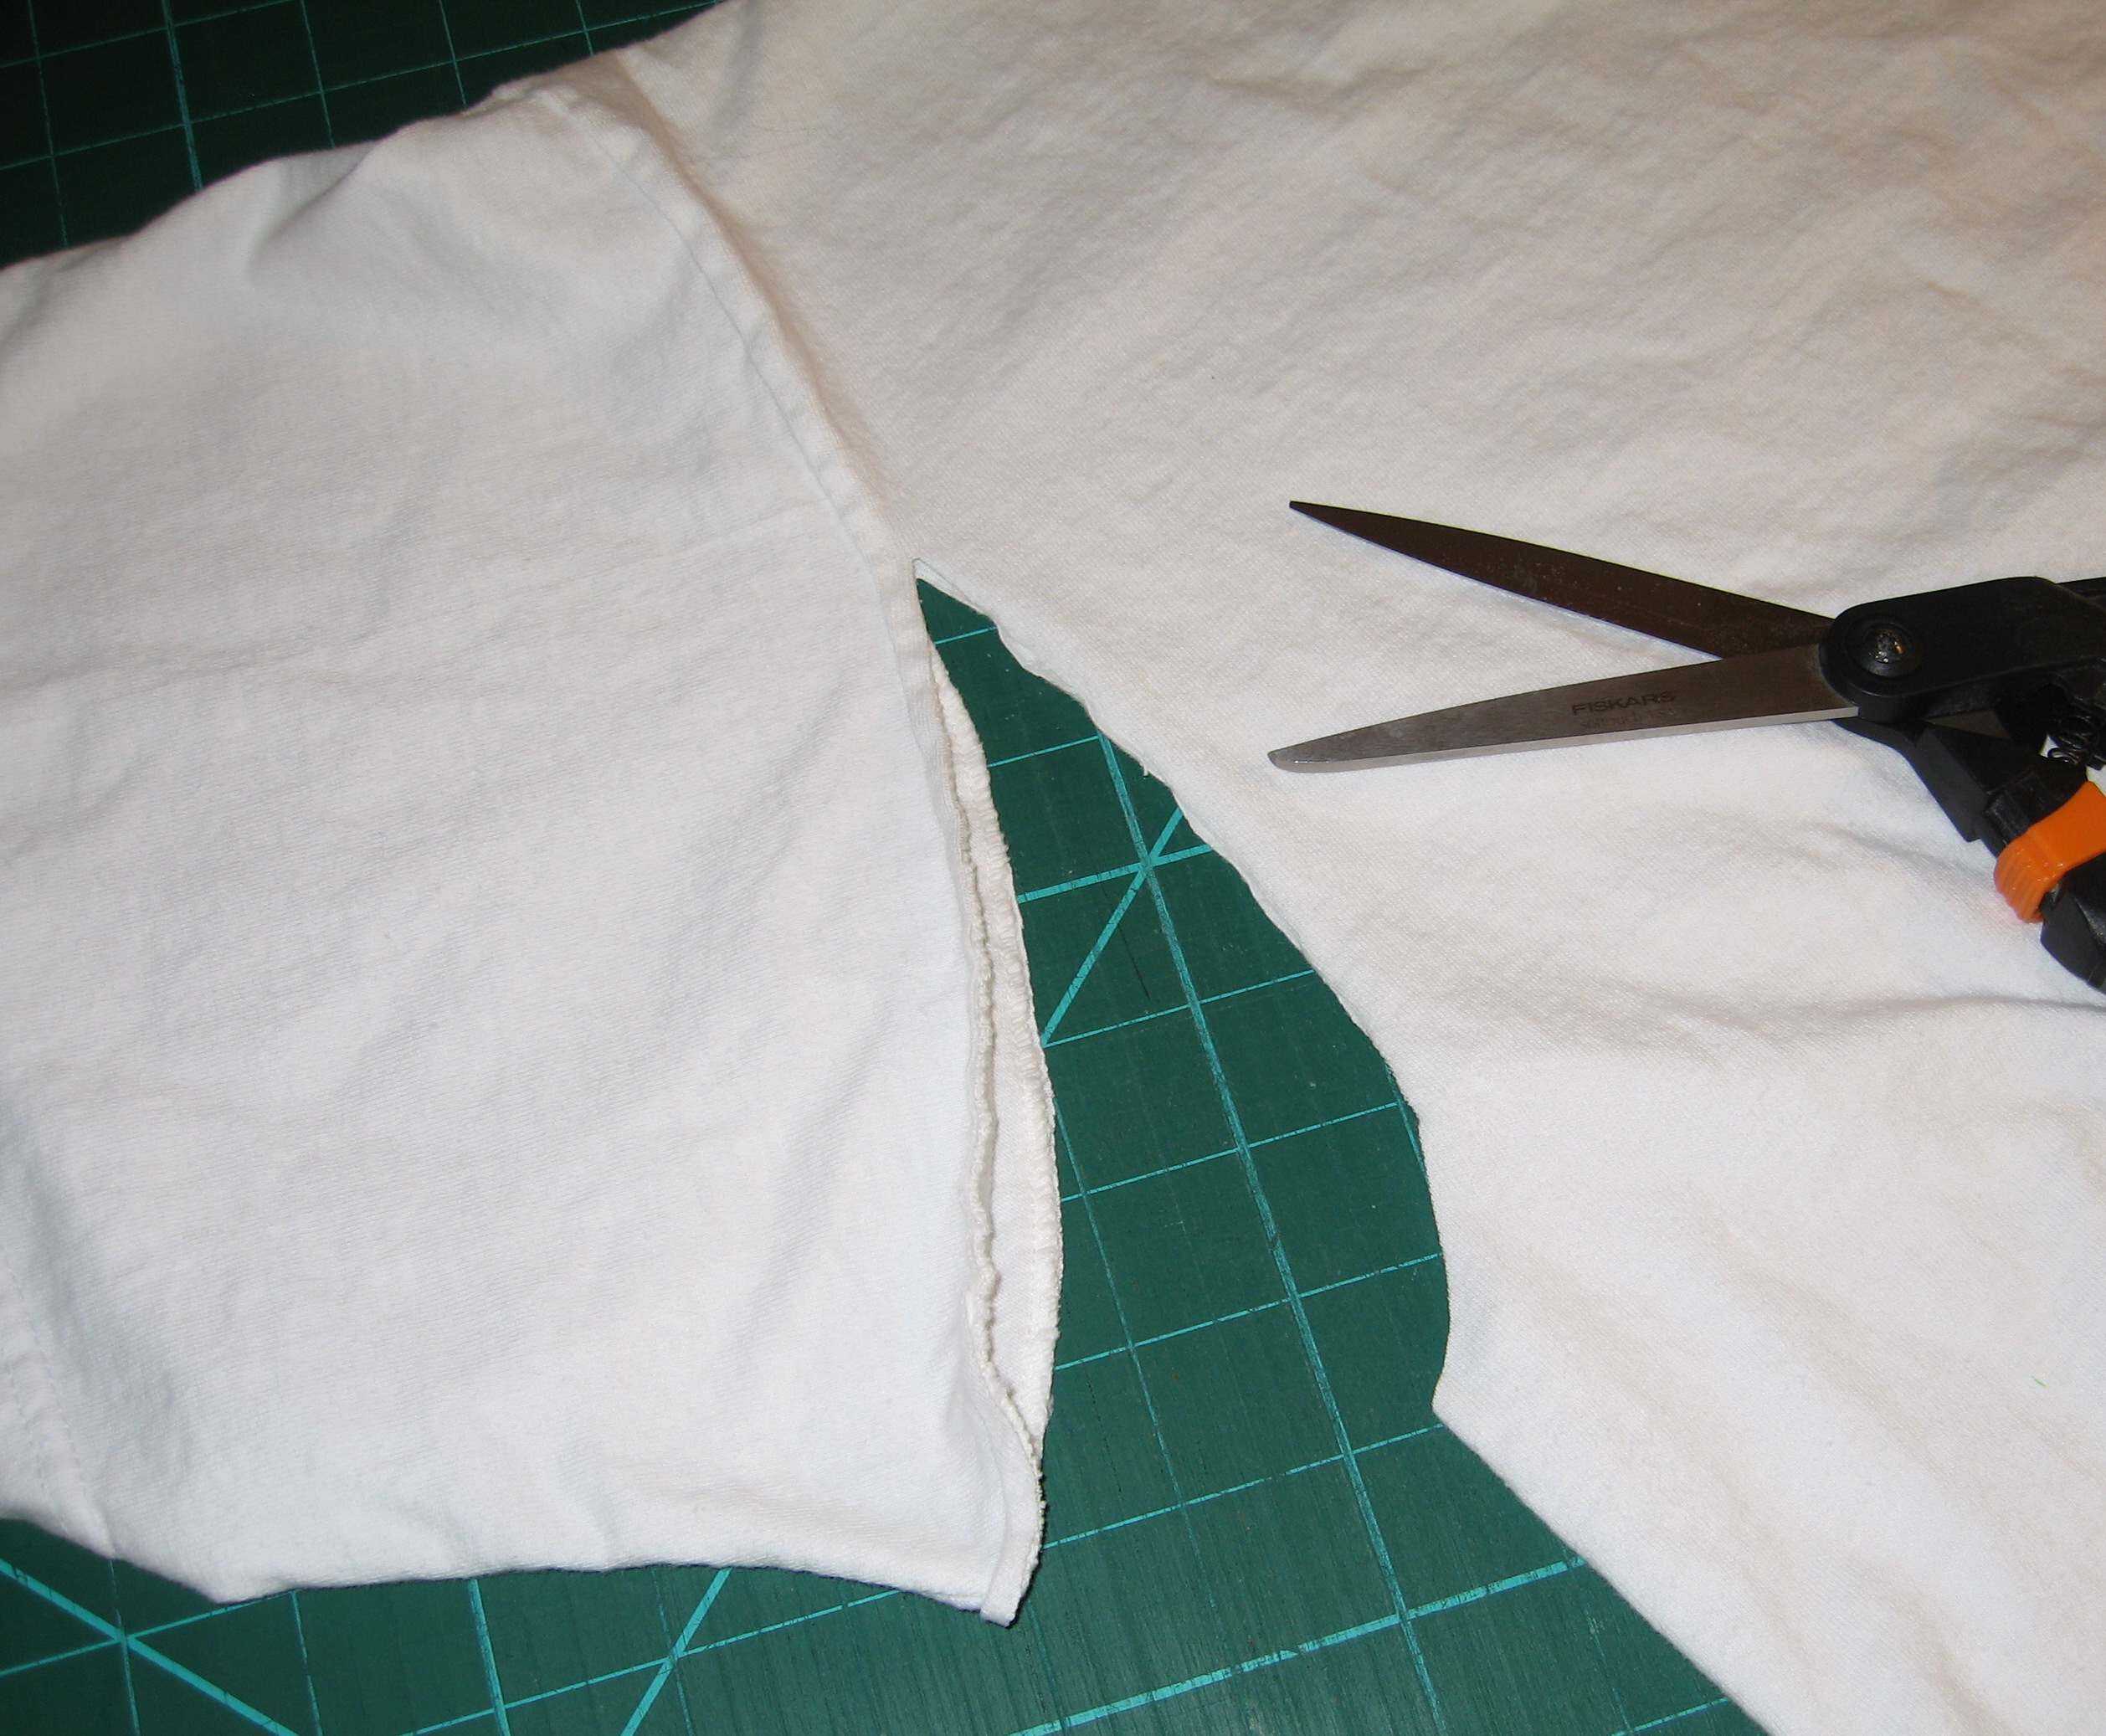
cut off sleeve just inside the seam line, save for another project

repeat for second sleeve

slice up sides of t-shirt

remove bottom hem

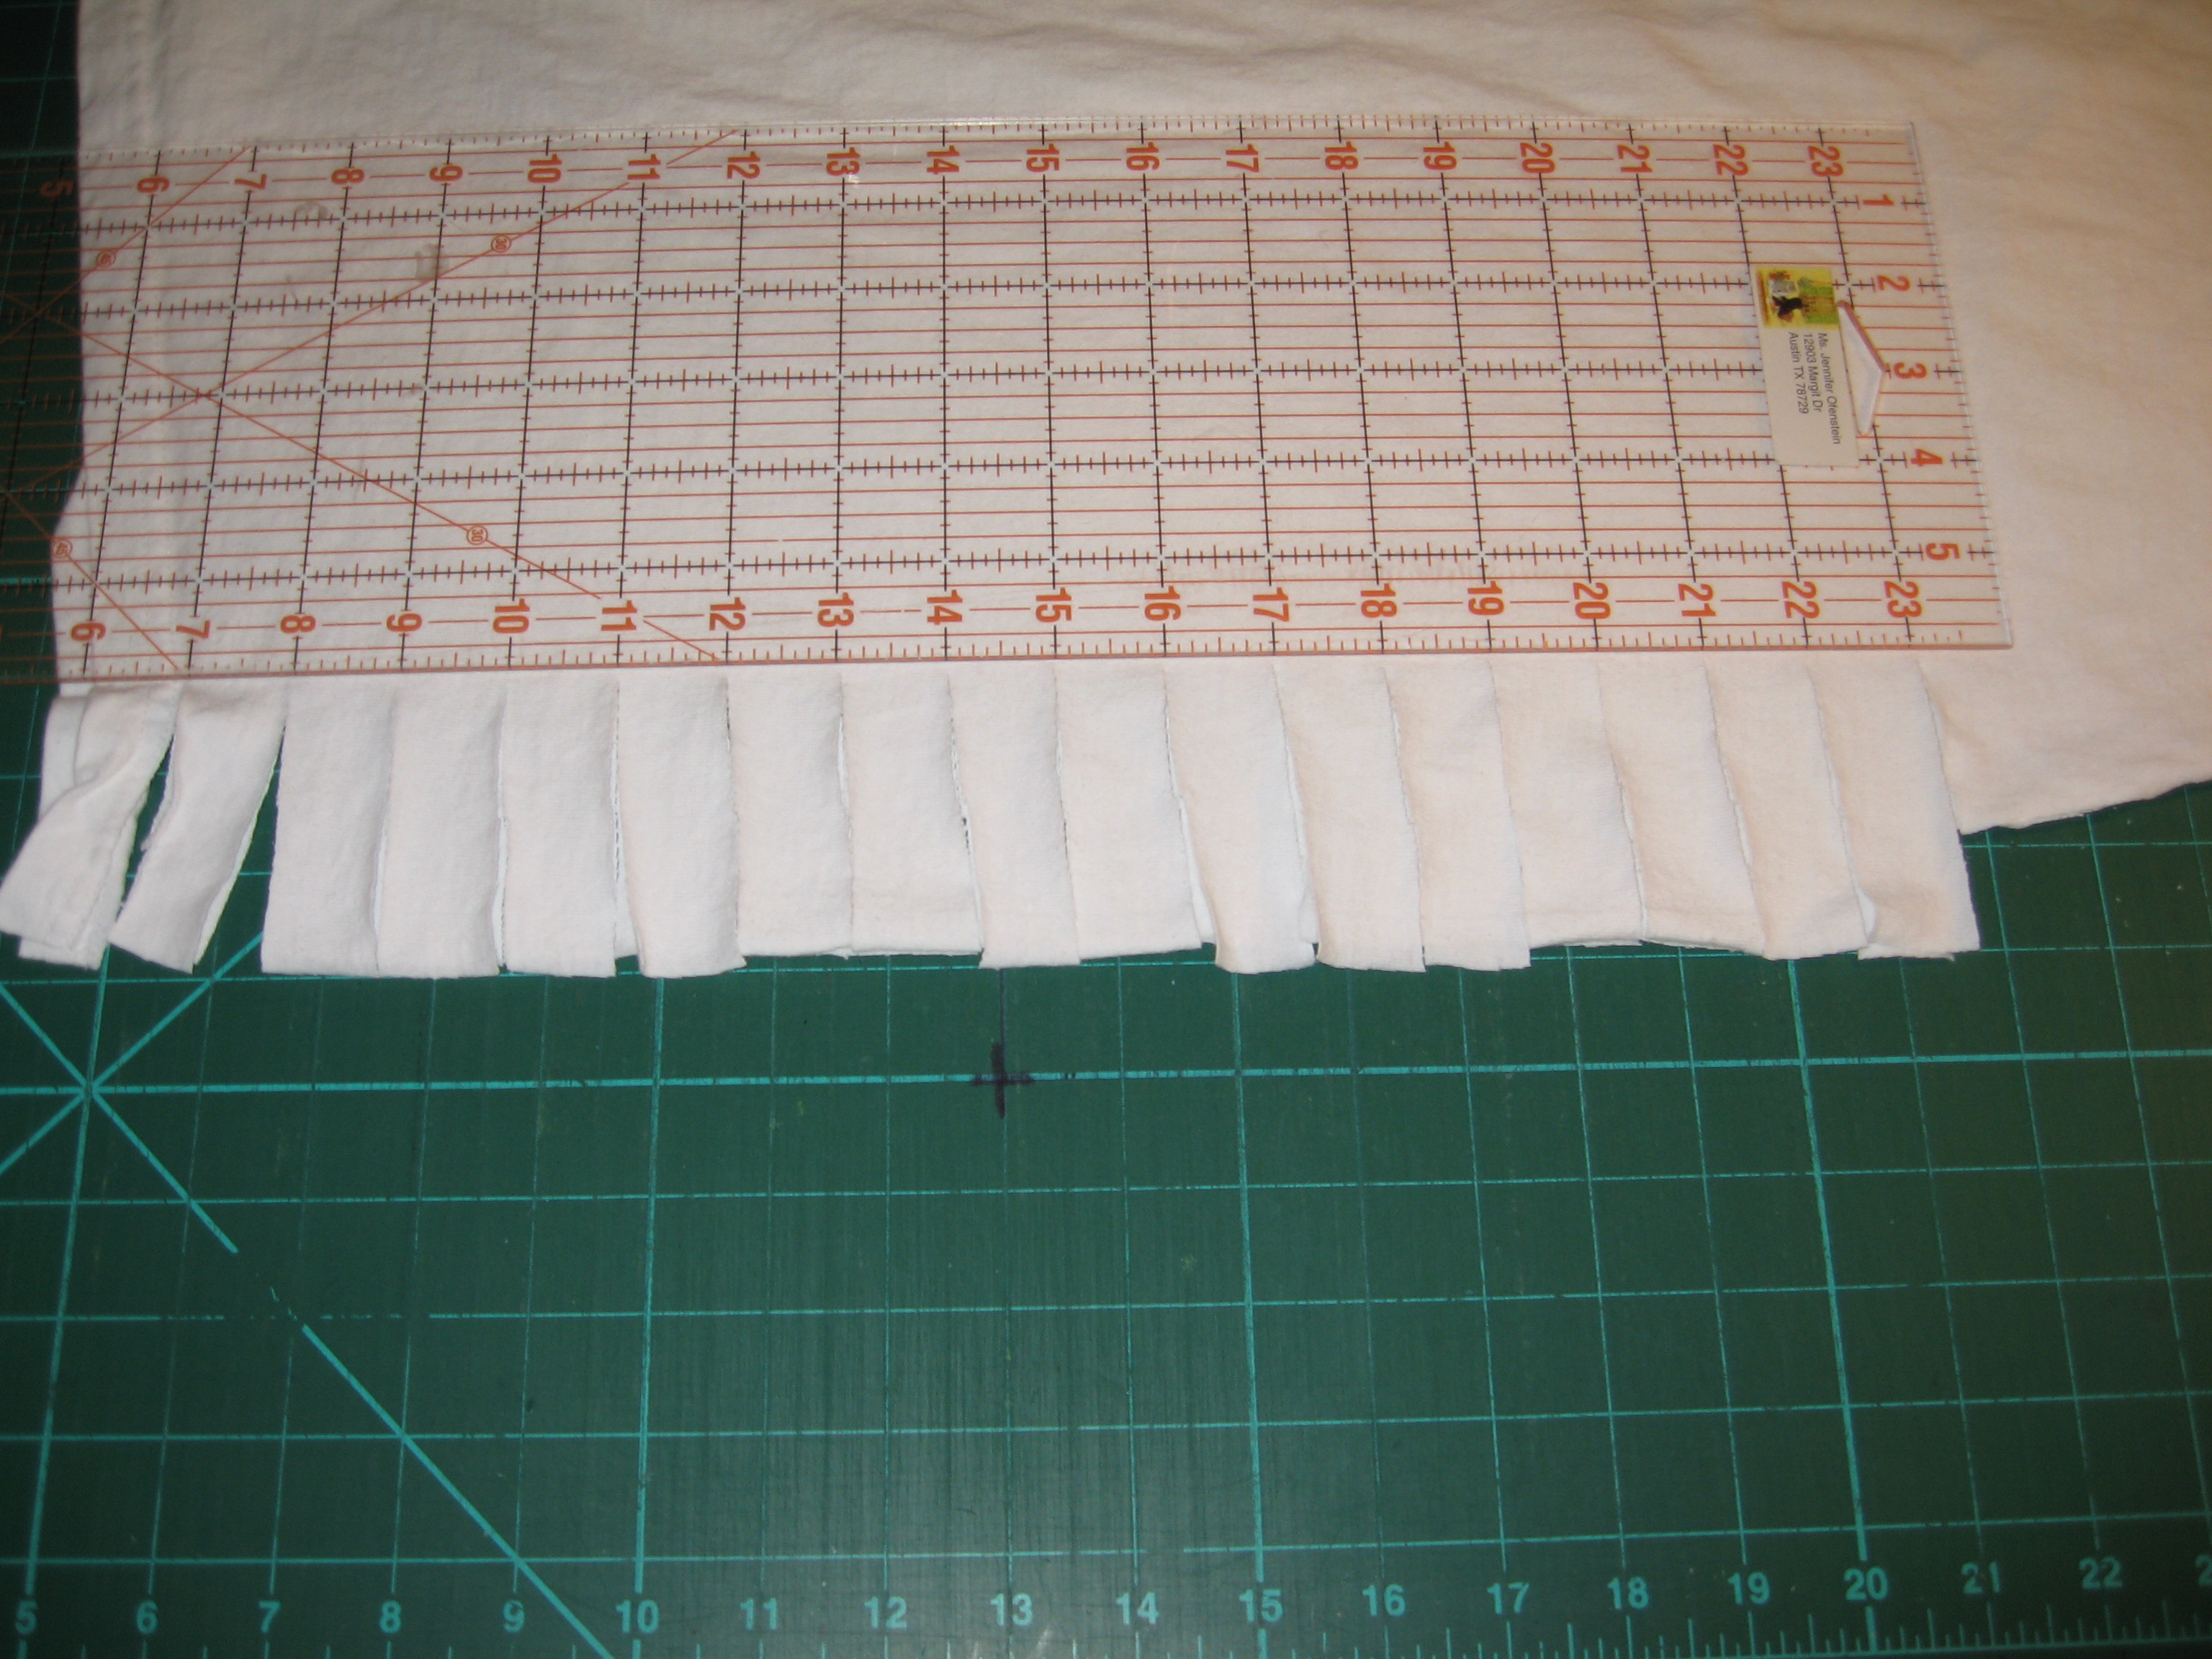
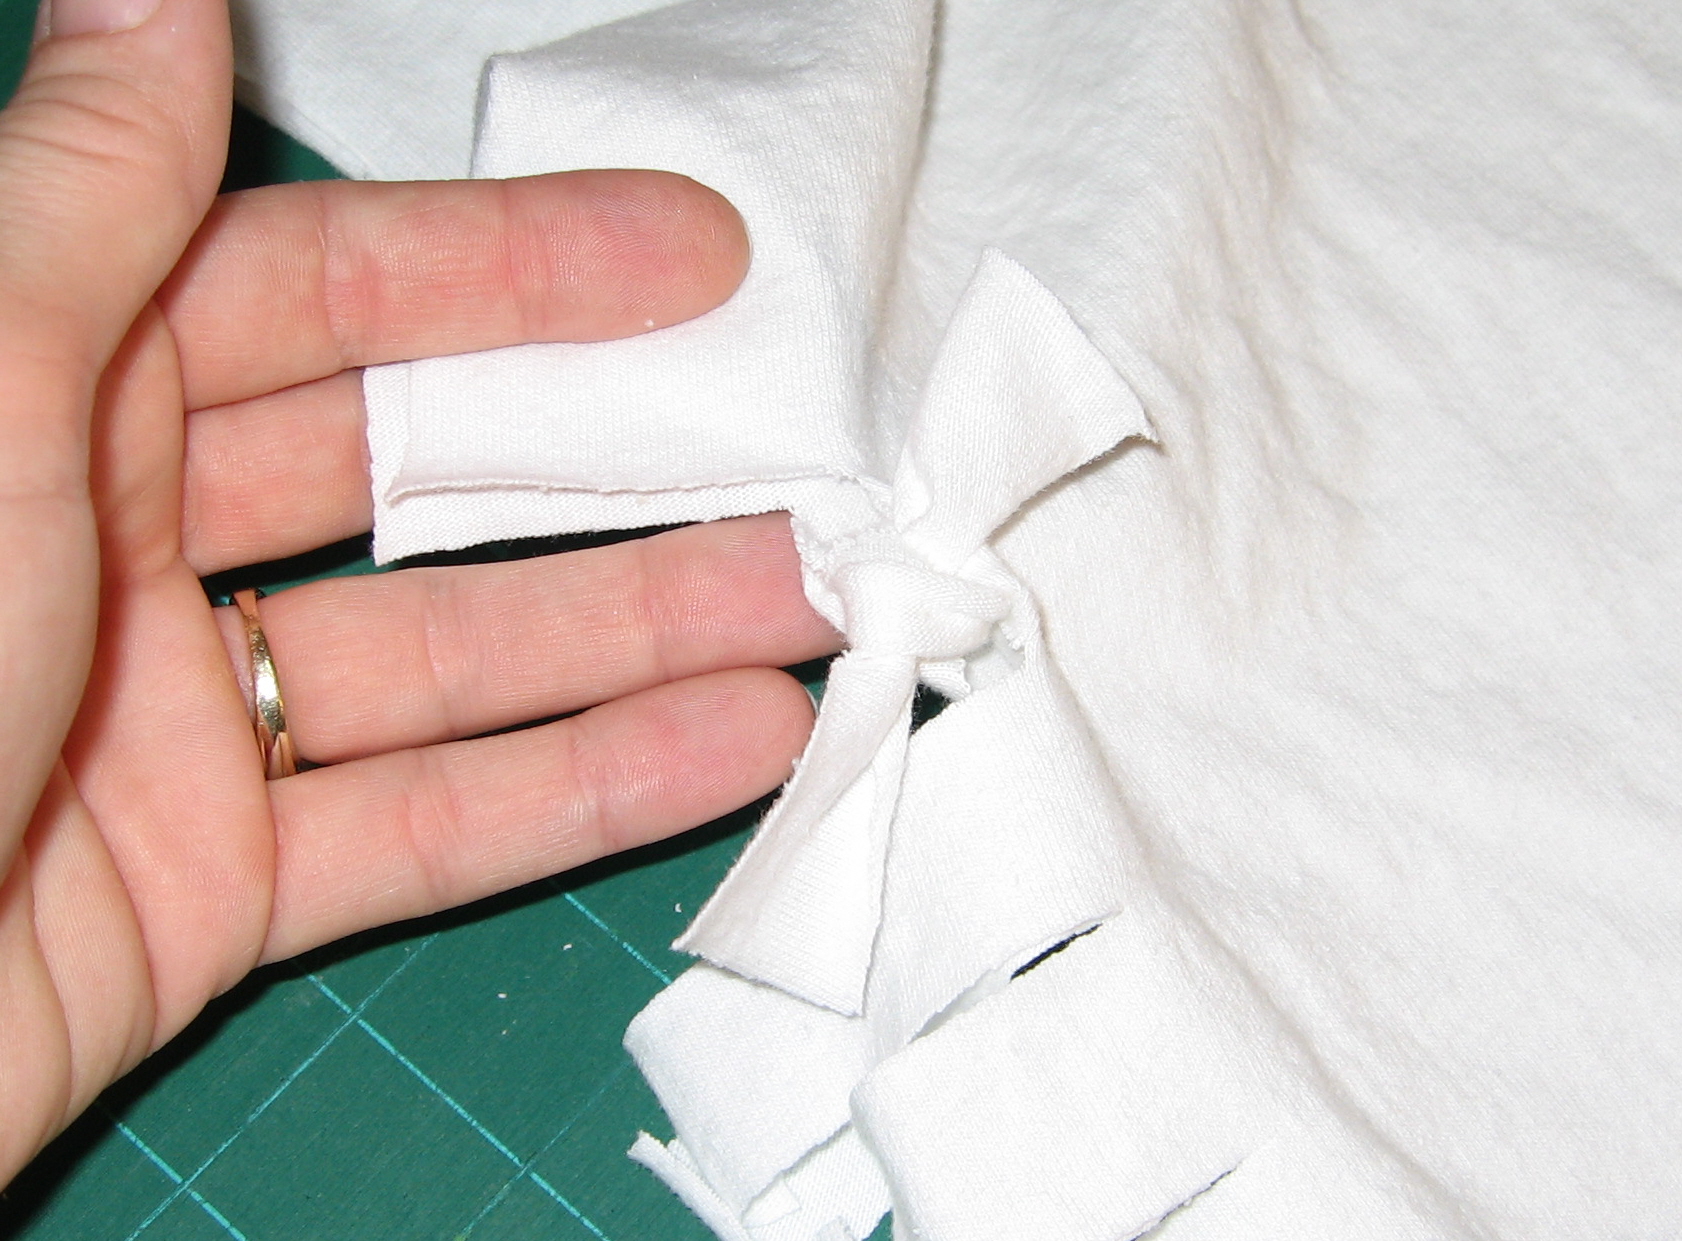
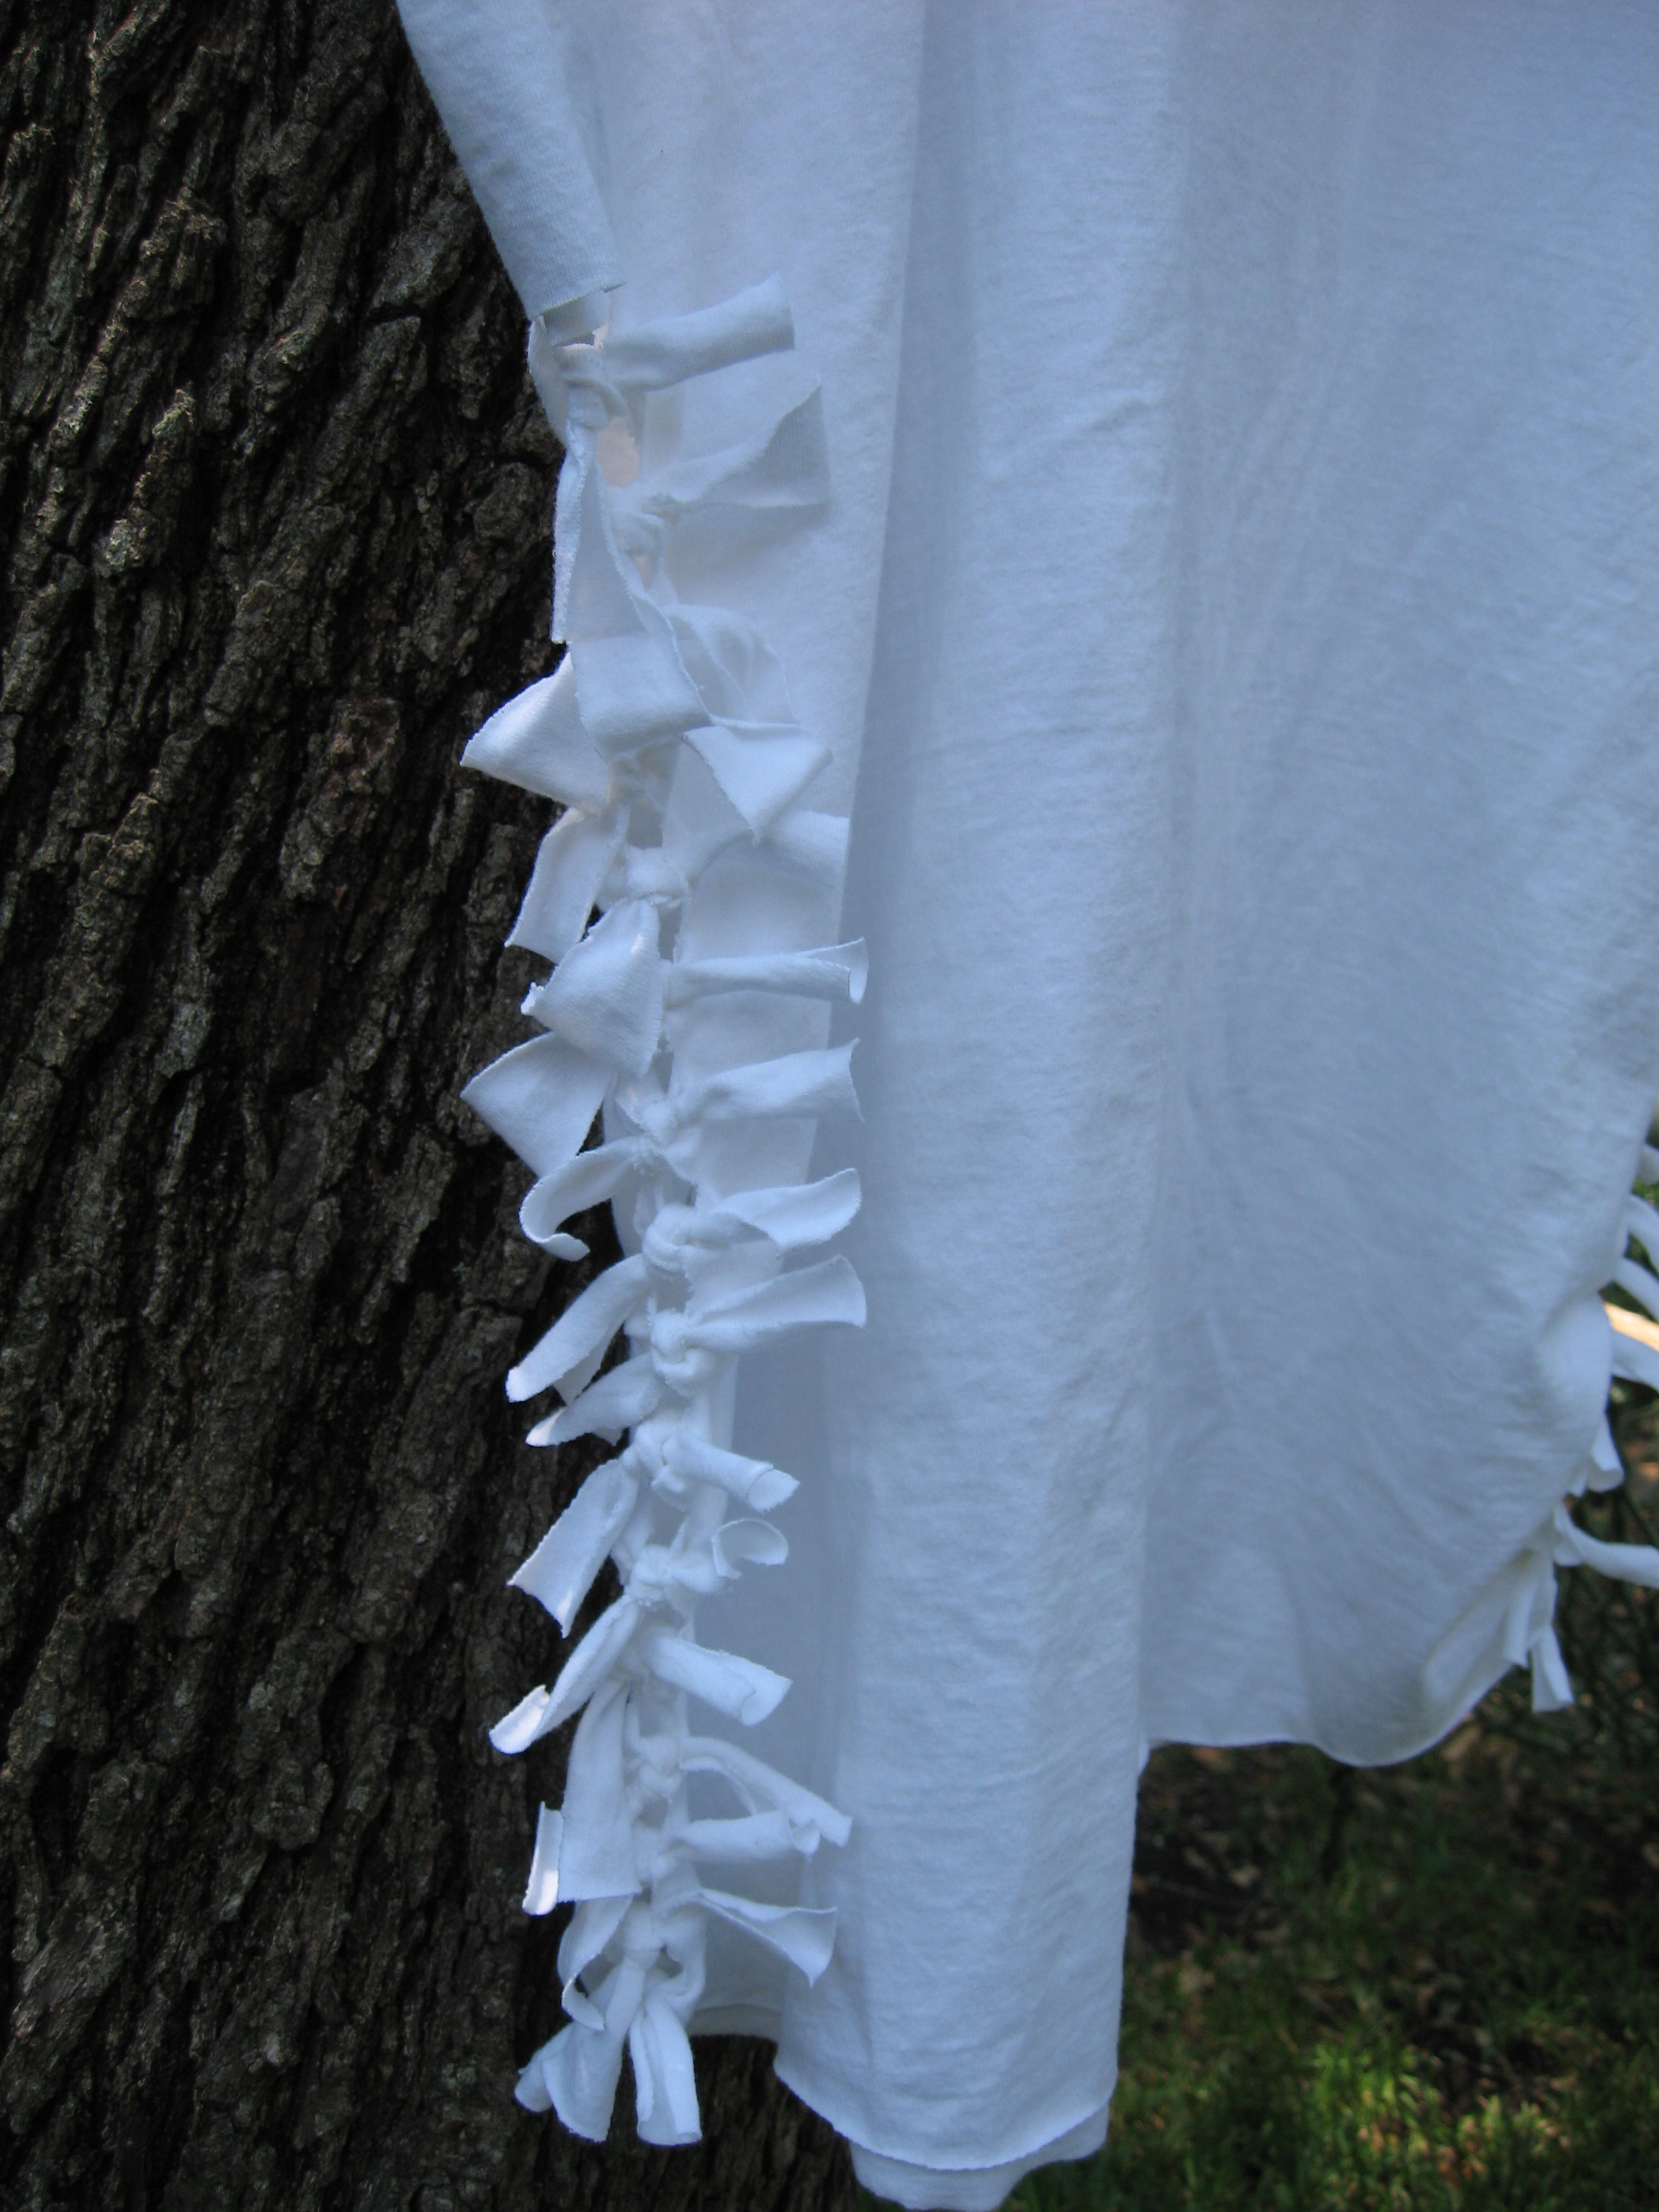
smooth out the side of the t-shirt, using either the cutting mat and a ruler (shown) OR a yardstick and masking tape, measure 3″ from the cut edge along the shirt sides, cutting up those 3″ at 1″ interval

repeat on both sides, stopping before the sleeve area

snip off the bottom curve of the sleeve

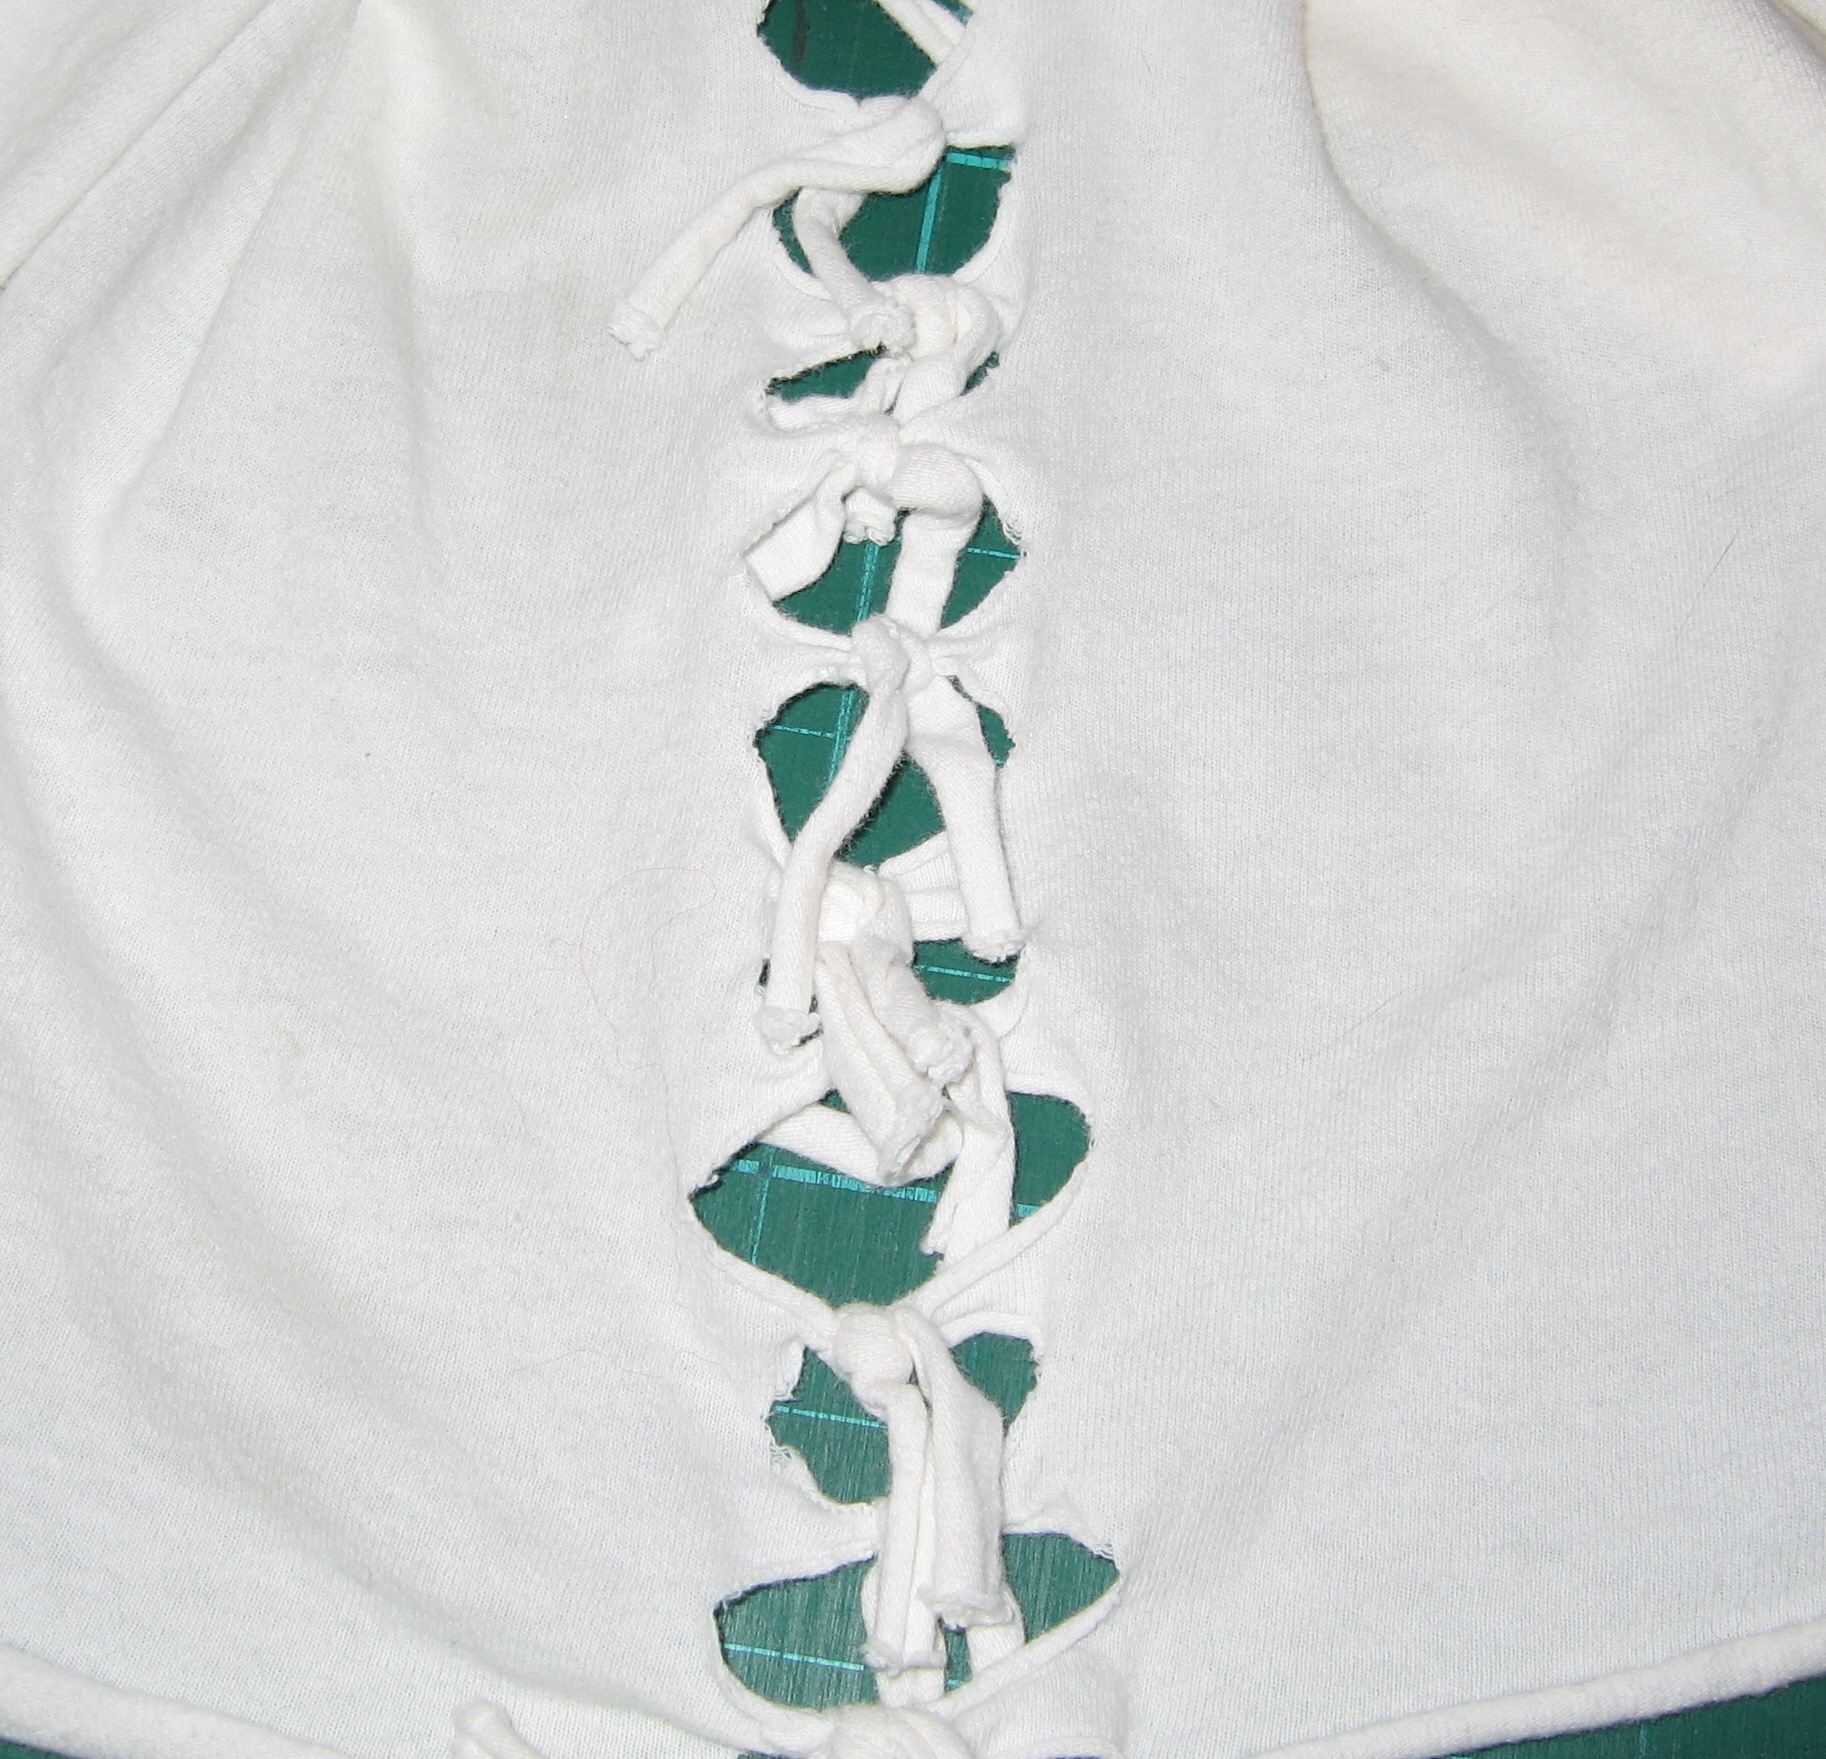
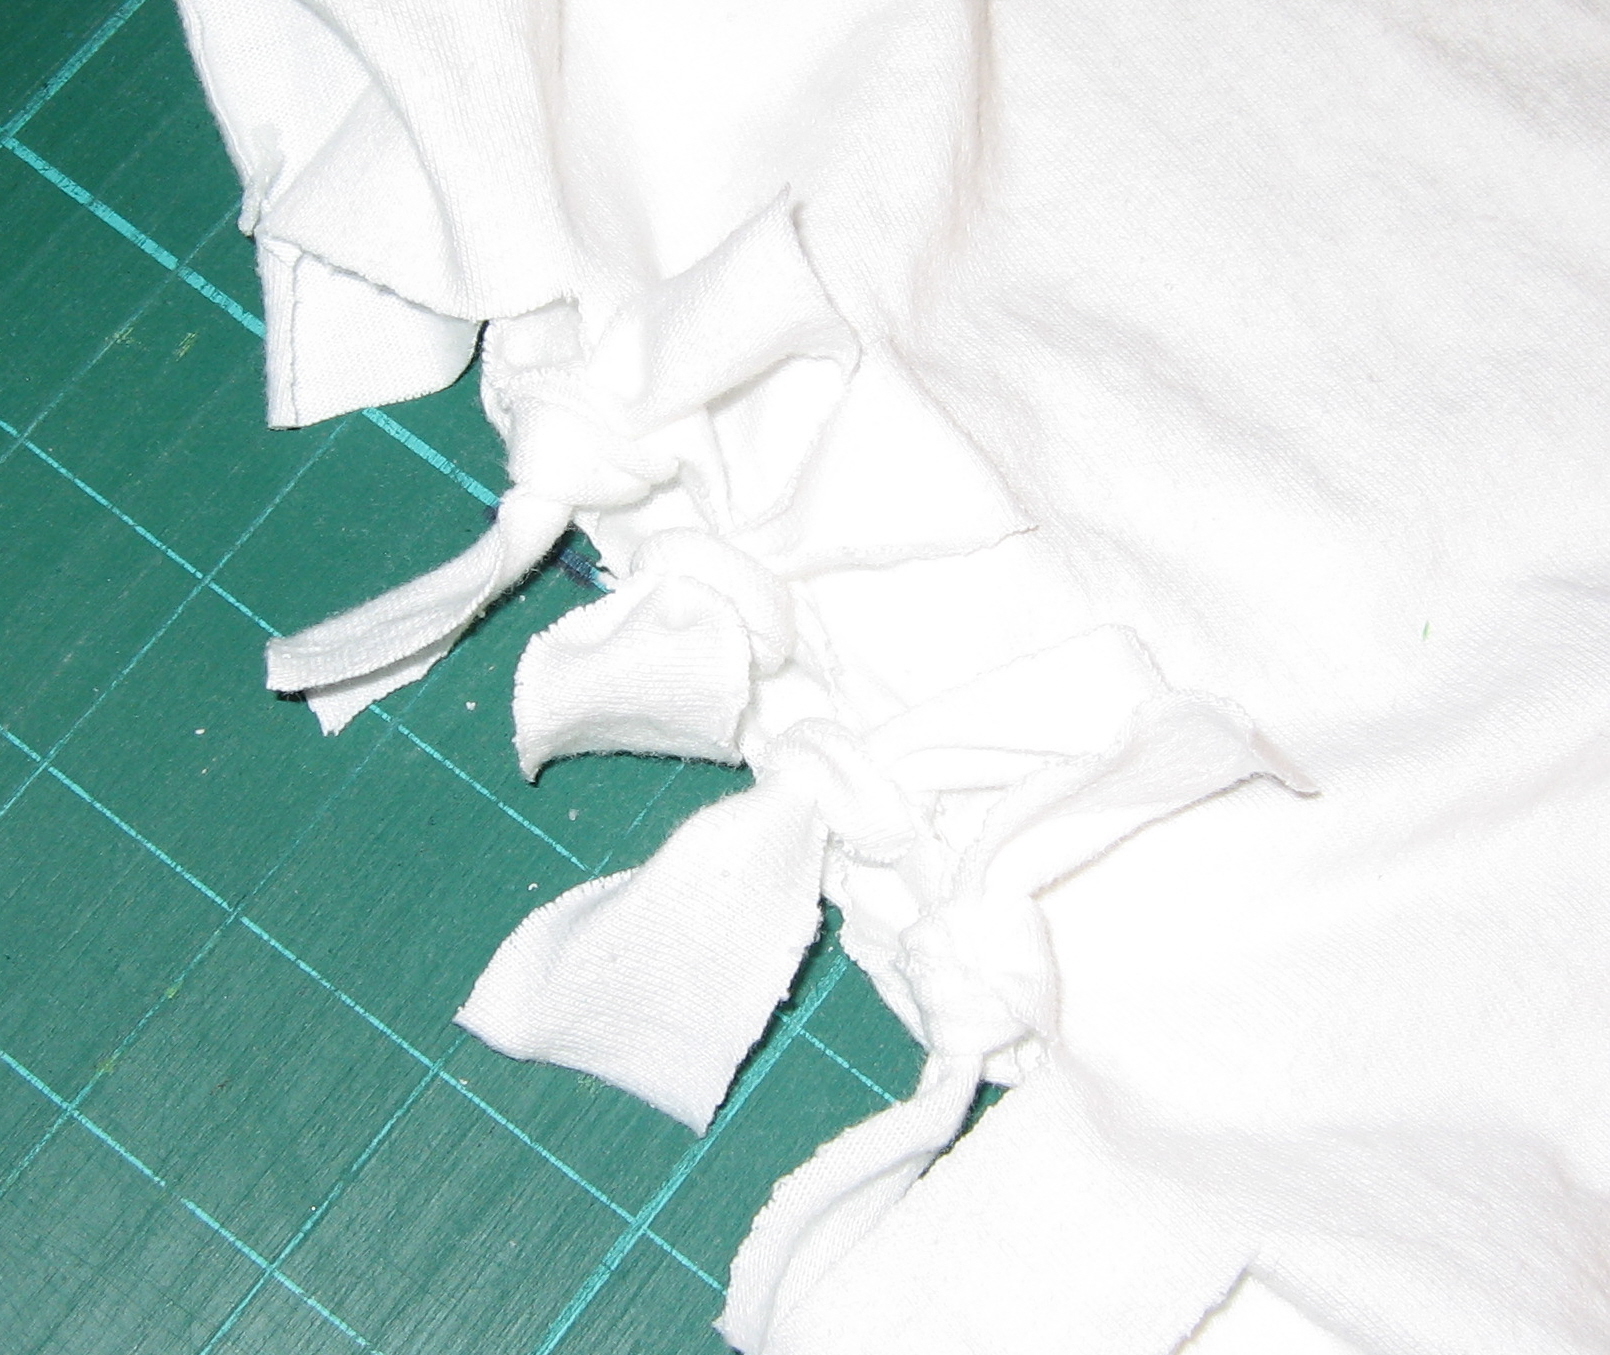
starting at the top of one side, tie together front and back 3″ pieces

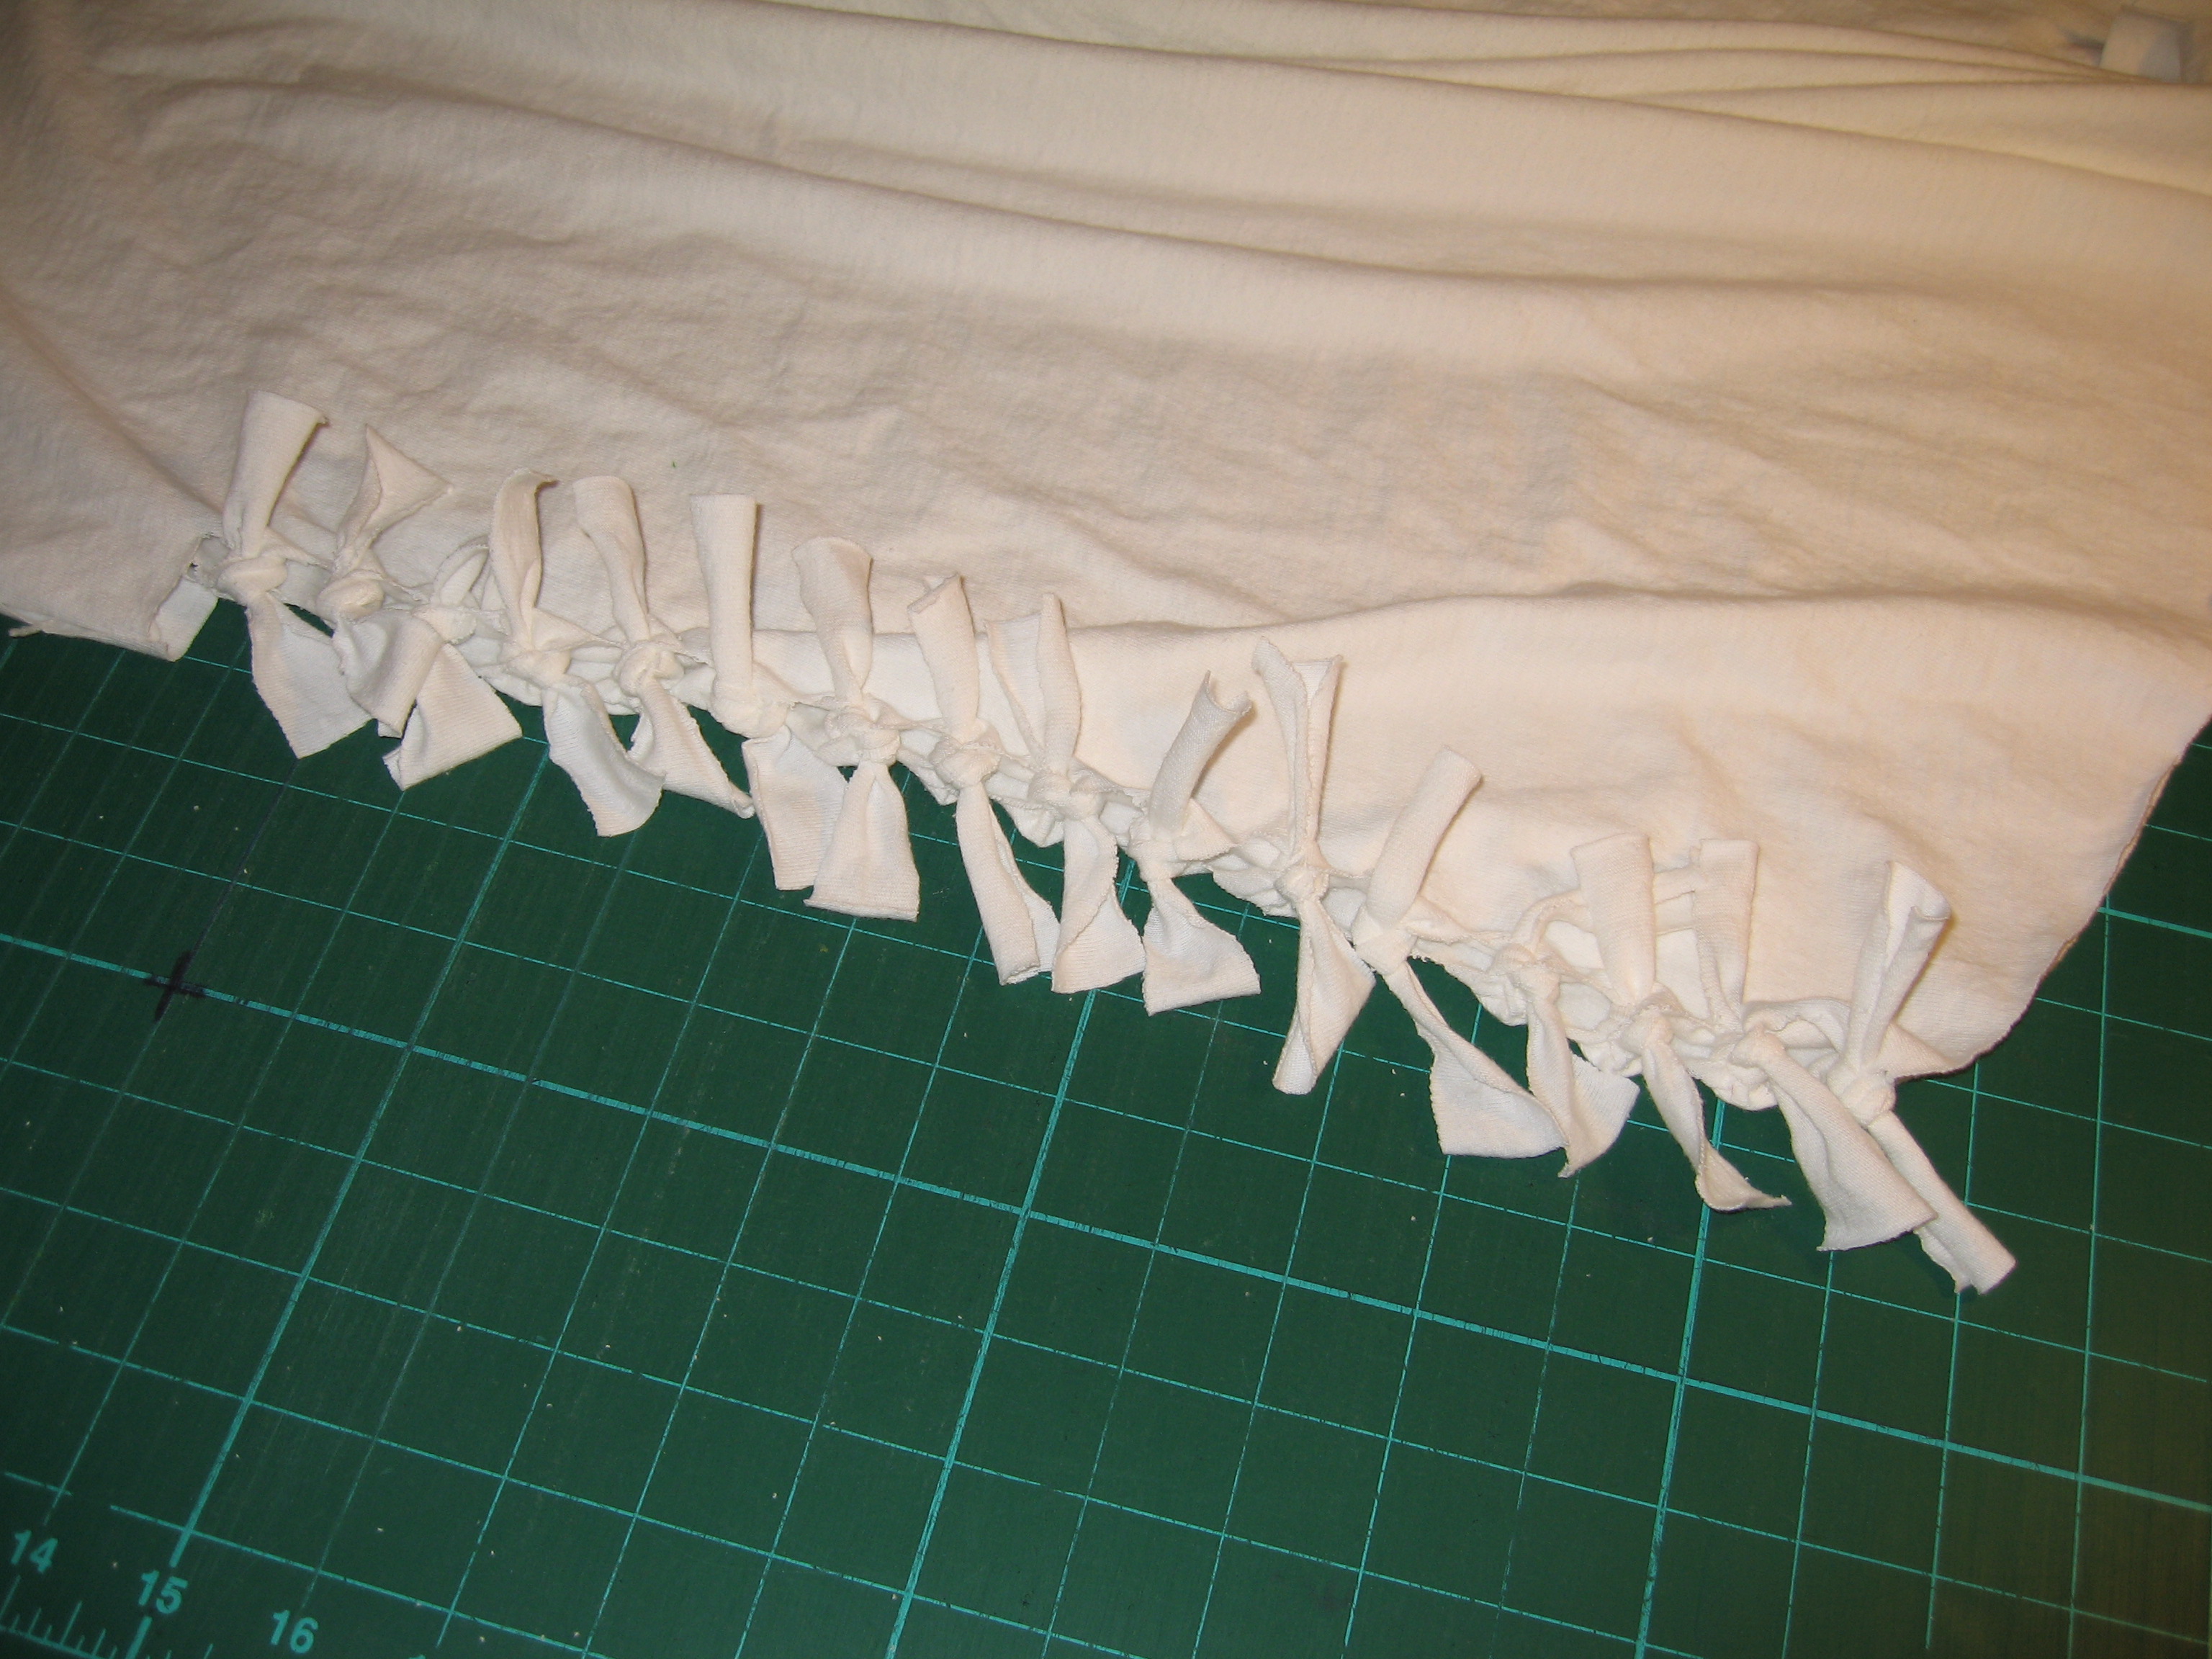
repeat for all 3″ pieces

repeat on the second side of the shirt

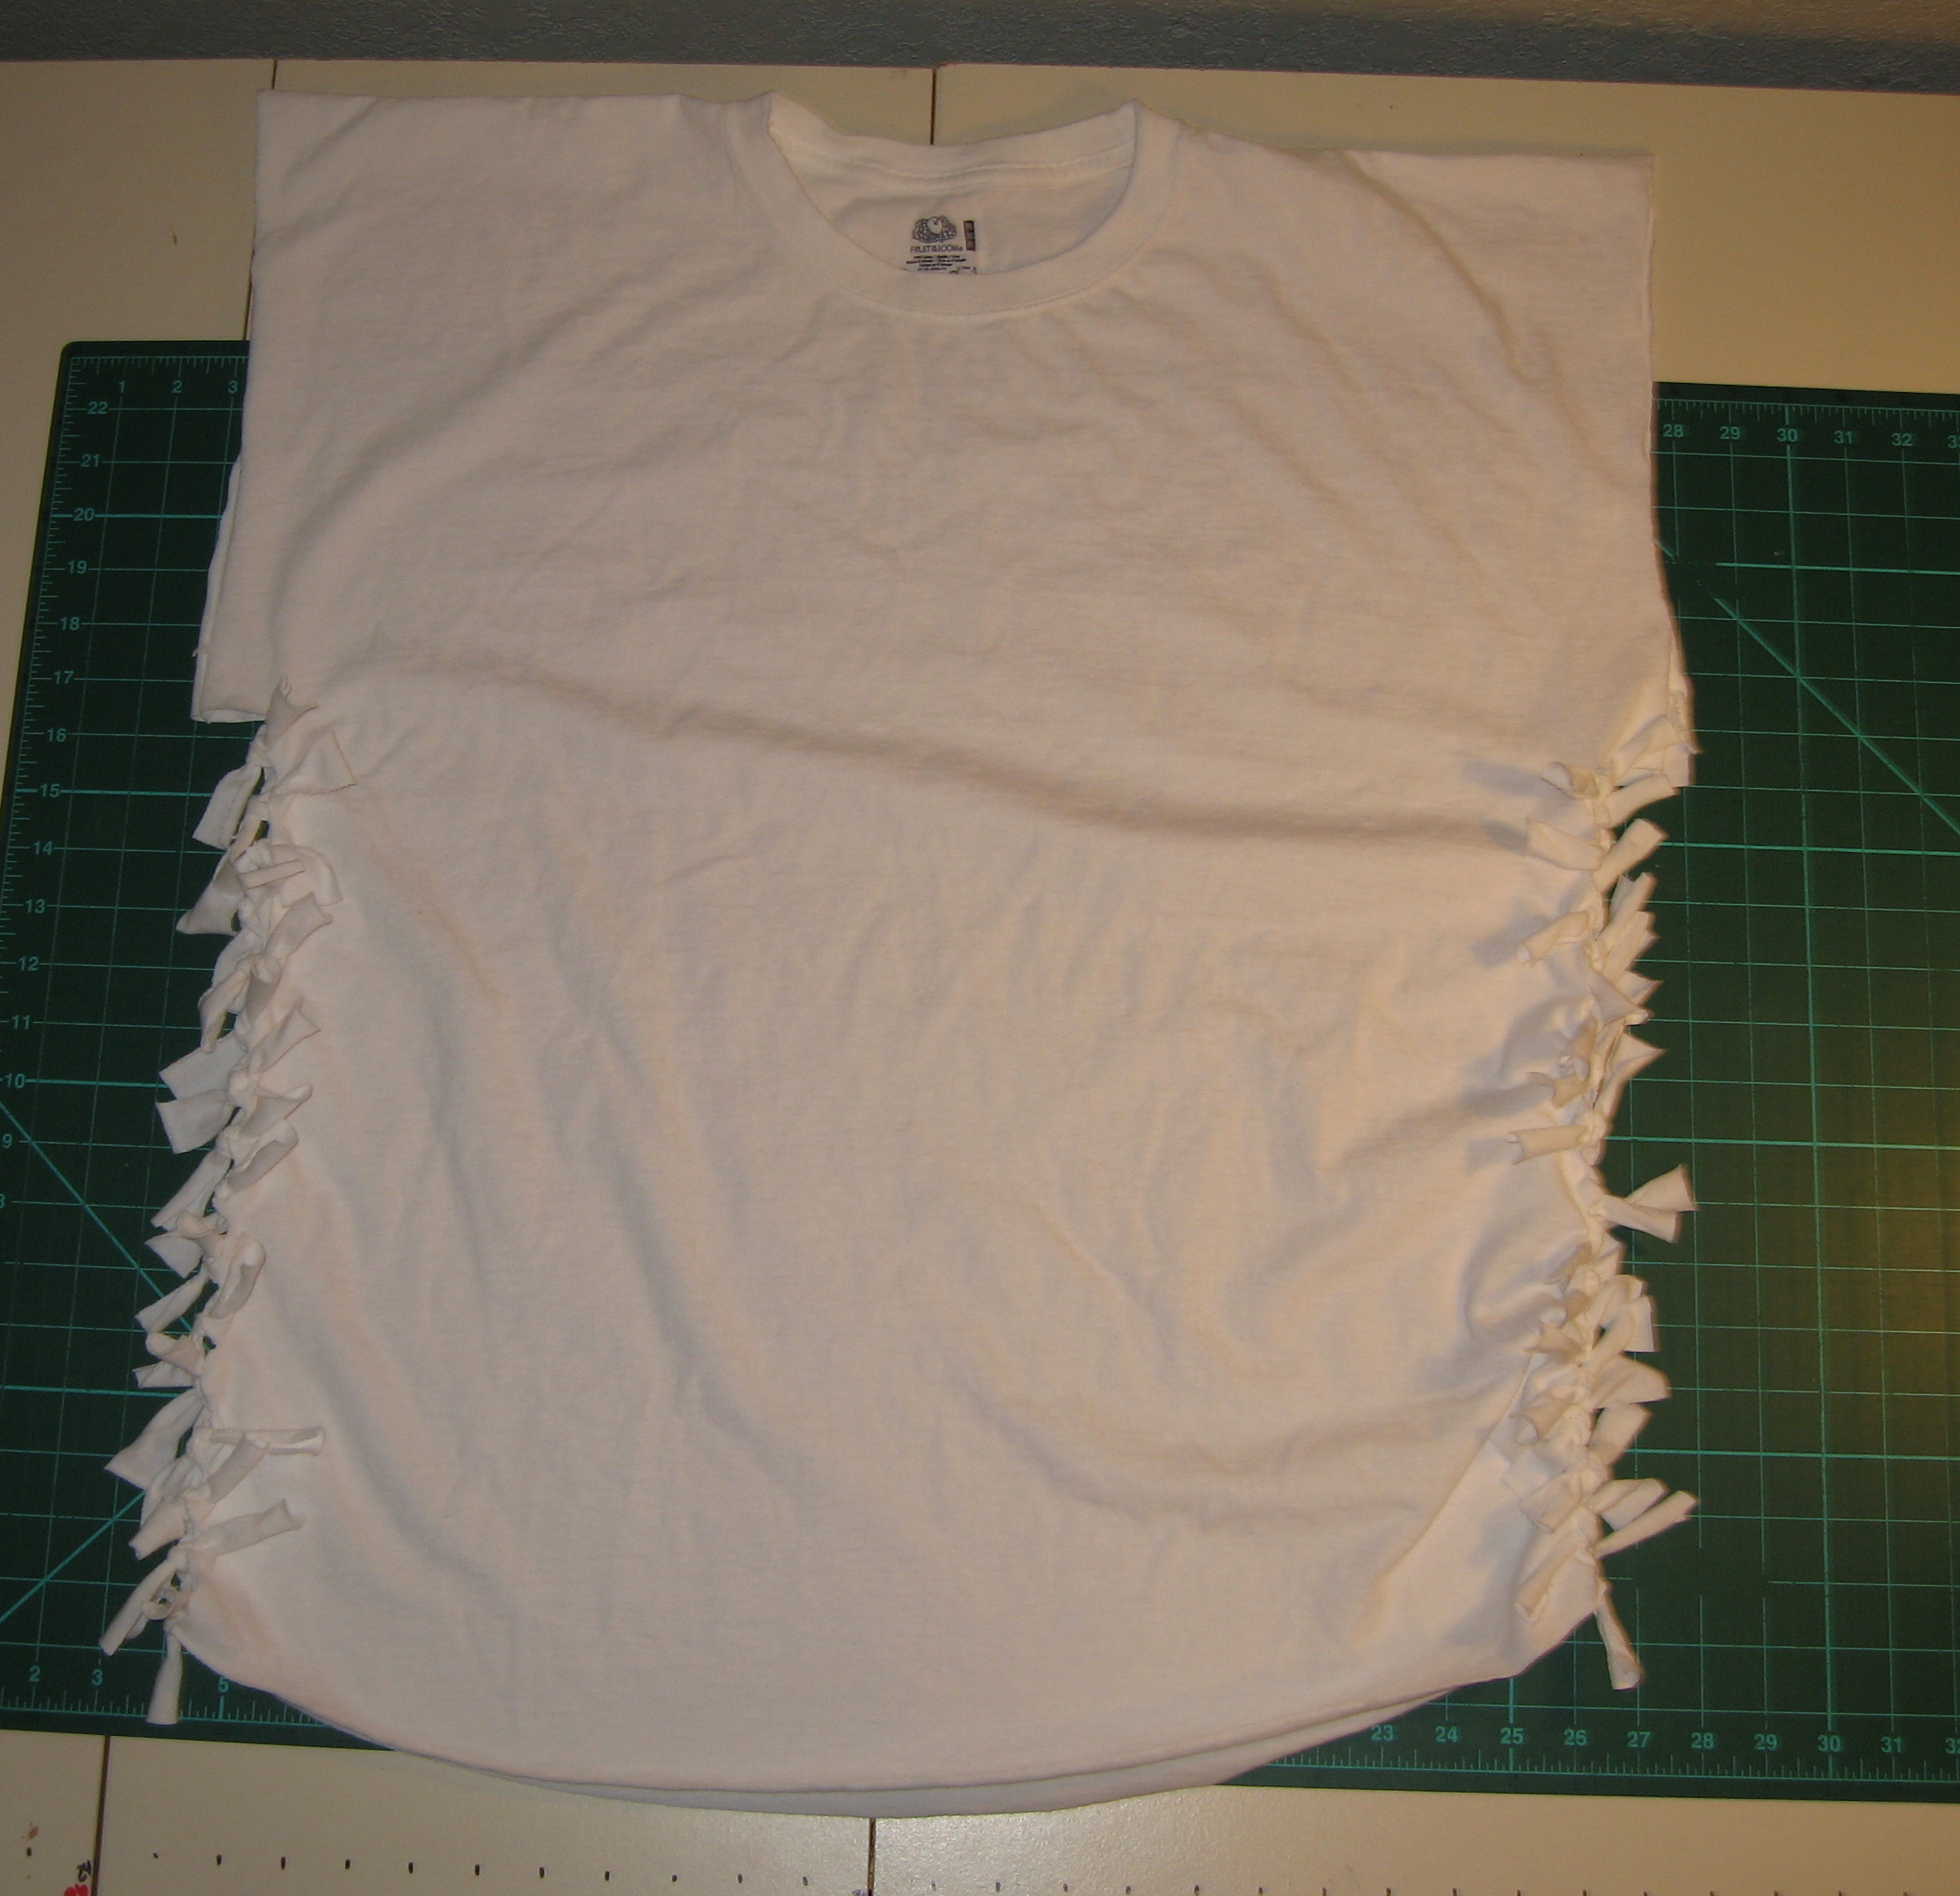
Finished side

And Done!


Because this was a blank shirt, I added an iron-on dragon to jazz it up a bit.

side close up

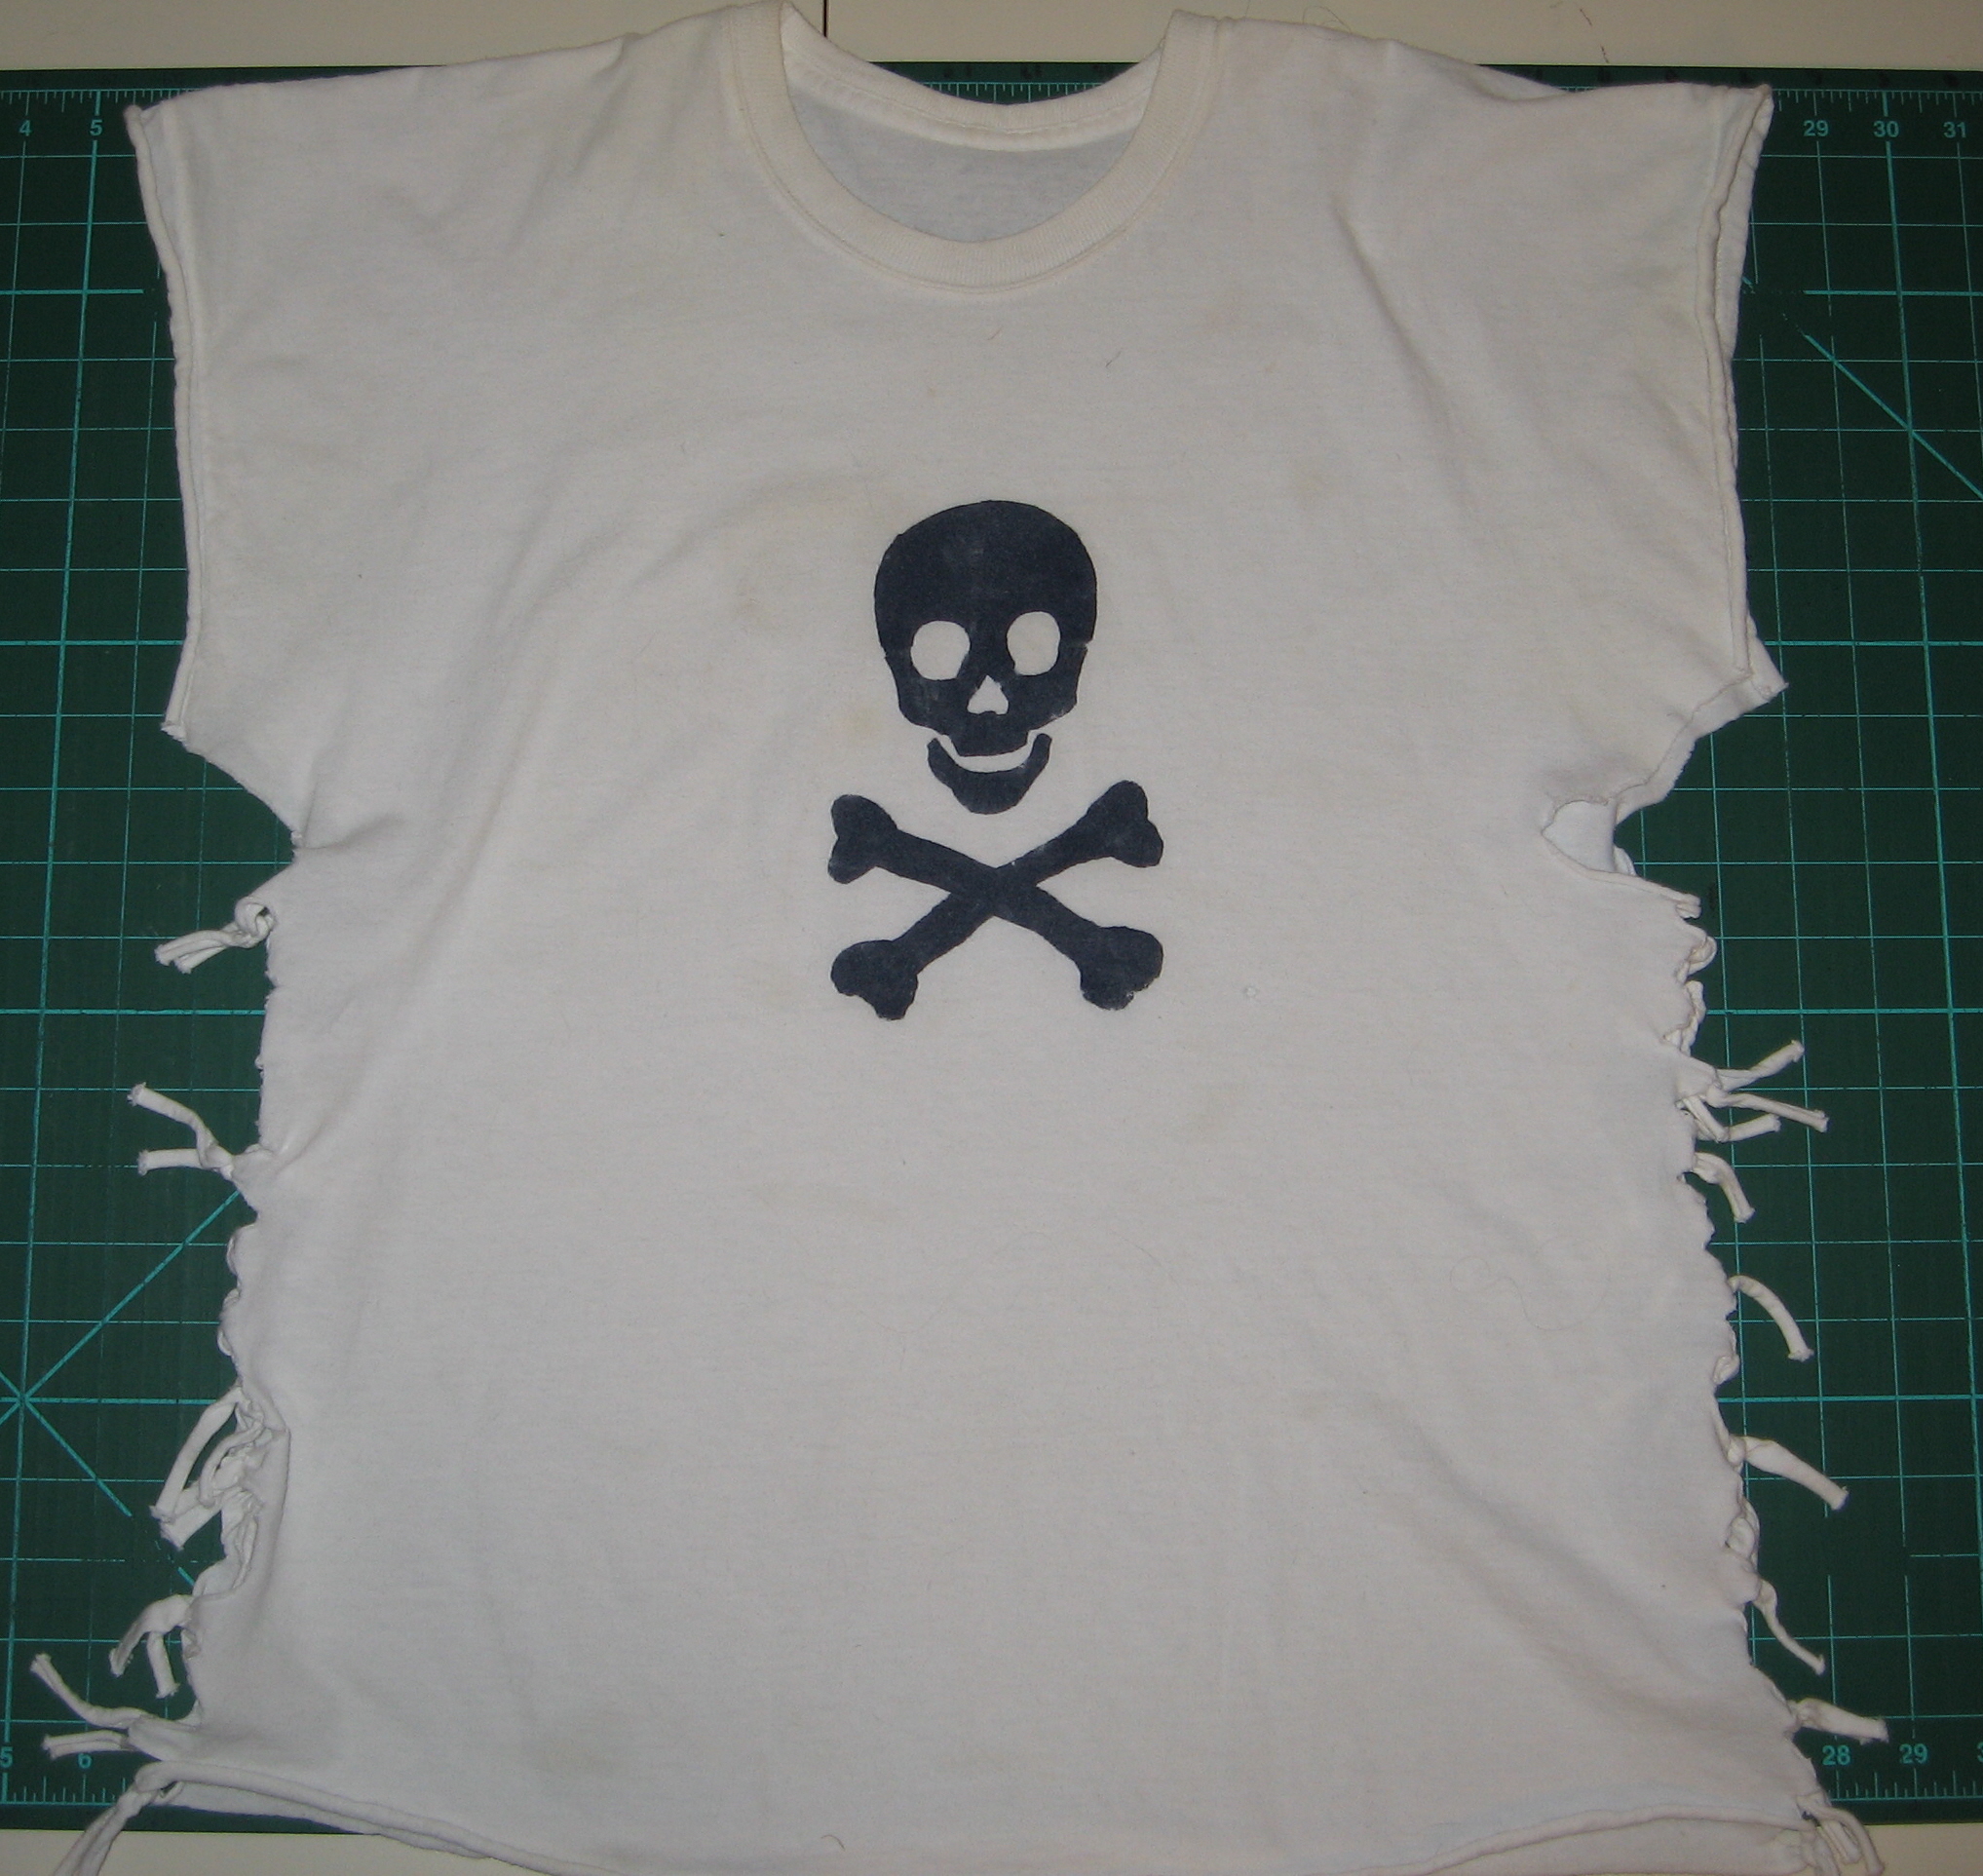
And older tee that was well-loved before being retired! This one was stenciled using acrylic paint and a pirate stencil I made myself.

Find my free patterns on Sewhooked & Fandom in Stitches.

♥ Jennifer O

Posts on this blog may contain affiliate links to help cover the cost of my website. I thank you for your generous support. ♥

vlog: TTMT A Whole Lot of Harry

Check out some of my fun flickr craft-related groups!

If you make a Sew Awesome Craft or any pattern, craft or recipe from sewhooked,  I’d love to see a photo.  Email me or add it to the sewhooked flickr group.

Recipe Review: Chocolate Balls

Truffles:  Chocolate Balls

I belong to a fun group of friends over on Live Journal called My Flist Cooks. We post recipes to share with each other. While there aren’t loads of recipes posted on a regular basis, what is posted is usually really tasty!

One of my favorite things about My Flist Cooks is the opportunity to try recipes from friends around the world.  Many of the recipes are family favorites and come highly recommended.  I love knowing that people I know and like enjoyed a recipe enough to post it on MFC.

As a treat for my family, I tried ‘s hardhatcat’s Chocolate Balls from her Truffles post.

Chocolate Balls
by hardhatcat

  • 250g packet plain biscuits, crushed (from Cat:  I crush mine in the blender, but a plastic bag and rolling pin will do the same thing)
  • 1 cup desiccated coconut
  • 2 tbsp cocoa powder
  • 400g tin of condensed milk
  • extra coconut

Add dry ingredients to bowl and blend well.  Add condensed milk and mix well.  roll into balls and roll in extra coconut.  Store in airtight container.

Jen’s notes:

  • I Americanized my batch a bit by using most of a 12 oz box of Vanilla Wafers in place of the plain biscuits.   I did weigh them out so that I had 250g and I’d estimate there were about 10 cookies left in the package when I was done.
  • The sweetened condensed milk I bought came in 396g cans.  I didn’t adjust the recipe for that, but it didn’t seem to hurt anything, on the contrary, they were really moist.
  • I crushed the cookies in my food processor and then added all the ingredients right to the processor.
  • Having killed my last cookie scoop, I used a teaspoon to scoop out the mixture and roll it in coconut. I think it was a little too sticky because they went flat and looked more like cookies than truffles. After some time in the fridge, I was able to roll them into a nice ball shape.  If I make them again, I’ll pop them in the fridge first, and then roll out the balls.

My family LOVED them. They’re super rich and very yummy!  Thanks for sharing the recipe, Cat!

more recipes

Add your Sewhooked-related photos to my flickr group and you might be featured in a future post.

Photobucket

 
Sewhooked Shop | FB | SHFB | Flickr | Twitter | Bloglovin

stencil: Bite Me

Fangtasia stenciled tee

True Blood season 2, it approacheth.

To honor the awesomeness of the show based on Southern Vampire Series by Charlaine Harris, how about a new stencil with the name of everyone’s favorite vamp bar emblazoned across it?

Thanks to the fabulous Pren for trying out the stencil sharing her photo.  She added the cute fang marks and the gem to dot the “i”.  Love it!

Get it here!

***

Fangtasia – the bar with the bite

***

Fangtasia t-shirt for my sistermy version, made for  my sister

For more on stenciling, visit the Crafts page, right here on Sewhooked!.

Add your Sewhooked-related photos to my flickr group and you might be featured in a future post!


Photobucket

crochet: Mystery CAL

caitirin's Mystery CAL - first instructions

What can it be now?

I’m participating in caitirin’s Mystery Crochet Along (you remember caitirin of Baby Mandrake fame?)

How on earth could I resist a CAL that includes eyes and stuffing?!

Above you see part one made from the first set of instructions.

Yarn for caitirin's Mystery CALcollected scrappy yarn for my CAL

I can’t wait for the next step to see what we’ll be making out of these lovely yo-yos!