In which I wax about old things and show you some new ones, too!
If you make a Sew Awesome Craft or any pattern, craft or recipe from sewhooked, I’d love to see a photo. Email me or add it to the sewhooked flickr group.


In which I wax about old things and show you some new ones, too!
If you make a Sew Awesome Craft or any pattern, craft or recipe from sewhooked, I’d love to see a photo. Email me or add it to the sewhooked flickr group.

Strawberry Ice Cream Baby Blanket, made by Knit Picks
Some days, the good news can’t get any better!
On Friday, Knit Picks, a site that any yarn lover will know, published one of my crochet patterns, Strawberry Ice Cream Baby Blanket!
How exciting is that!?

Download the pattern free from Knit Picks

The original Strawberry Ice Cream Baby Blanket was donated to The Linus Connection in March 2009, blogged.
Thank you Knit Picks, for publishing my pattern and making my day! Thanks to Stacey for making it easy as ice cream!

What, you might ask, does this vinyl Christmas tablecloth have to do with a design wall? Well, let me tell ya!
A little birdie told me that I could use a flannel-backed tablecloth for a design wall. Okay, it was Marge (hi, Marge!), who has one in her sewing room, and it works great for her.
The idea has been at the back of my mind for months, but I didn’t have a spare wall. After debating with myself, and lots of cleaning and re-arranging in my sewing/craft room (including giving up a table…GASP!), I am the proud owner of an absolutely free design wall, courtesy of an upcycled tablecloth pulled out of my Christmas stuff!

I love that I’ve been able to put the otherwise unused tablecloth to good use!
The tablecloth was very wrinkled, so I put my iron on the lowest setting and gently ironed the flannel side, leaving the iron on the fabric as little as possible. It smoothed the tablecloth out great, now it has no wrinkly bits!
I applied the tablecloth to the wall just like you’d cover a frame or a seat cushion. One pin in the top and the bottom, then one in each side, smoothing and pinning around until it was taut. It was literally about a 5 minute job.

New design wall shown with donated orphan blocks.
Fun, huh? This is not my idea, but it’s easy and inexpensive, and every quilter needs a design wall, so I had to share!
In which I ramble about ATCs, awesome Linus donations and publishing!


Designed by Mary Groesbeck
This week’s Guest Designer Profile brings you a brand new paper pieced designer. So far, sewhooked only hosts one of Mary’s designs, but it’s lovely, as I’m sure you’ll agree!
Name and where you’re from:
I am Mary Groesbeck. I am from Louisiana (just the first 20 years). Does that make me sound old? I now have two homes. We live in Las Vegas on school days and in a 120-year old farm in Minnesota the rest of the time. No website, store, or anywhere else (except I like to put my photos on my facebook).
How long have you been paper piecing and/or quilting?
I made my first quilt in high school (a very large cathedral window made entirely by hand). I first paper-pieced about 12 years ago, and havemade entire queen-size quilts from paper-piecing, but nothing like the HP one I’m working on.
What do you use own your block designs for?
I am making two (yes, two) identical king-size quilts for my daughters. BTW, nobody tell my youngest that there are Twilight squares! Some are my own design, most are from sewhooked, and some are appliqued. I put my daughters on the Hogwart’s Express with Harry, and each quilt with have the initials “HP” along with my daughter’s initials.

When did you start designing?
Although I have designed quilts before, I never “designed” my own paper-pieced pattern until a few weeks ago. I have done really diverse paper-piecing, from large pictorials with tiny pieces to very simply blocks. But, Jennifer’s tutorial inspired me, and I thought, “I have a coloring book site, I have Photoshop, why not?” BTW, I am a digital scrapbooker also, so Photoshop comes naturally.
Was there a particular inspiration to draw your first pattern? Do you remember what your first design was? Do you have a favorite among your own designs?
My first paper-pieced design was the Engine of the Hogwart’s Express. Then the passenger car. Then Crookshanks. I’m on a roll now. My favorite so far is Crookshanks, mainly because I’m really a cat person.
How has the online community changed the way you craft/quilt/design, etc.?
I have one hour to myself every morning. I either quilt or scrap. Since I joined this community [Harry Potter Paper Piecing], I haven’t made ONE page for my scrapbook! My goal is either one page for the scrapbook or one quilt square per day.
Anything else you’d like to add?
I do have a full-time job, second to being a mom. If I could just quilt all day, I would be in heaven. I have a husband (21 years) and two daughters (16 and 13), who both play competitive volleyball and hope to be in the olympics (preferably before I die or run out of training money). I have a long-arm quilting machine at the farm that I’ve practiced on but never really had to guts to use–but still believe I will any day now.
I love the feeling of creating something. I very seldom just make something as designed. I like adding my personal touch (often so subtle that no one notices). For instance, on my Hedwig, the white-on-white fabric for her wings has a snowflake pattern–because she’s a snow owl. This makes me happy, even if no on else knows. My knight bus has tractor wheels….to bring a little of the farm to it….just for fun, not because a knight bus particularly needs tractor wheels.
Watch for more of Mary’s designs on sewhooked!
Happy Quilting!
Just over a year ago, I made a Monk’s Bag from Purl Bee’s tutorial (sadly Purl Bee no longer exists as of 2023).
I used the heck out of that bag, so much so that the strap and bottom of the bag frayed through in places.
What I discovered over the course of the year I carried this bag was that I loved the shape and the length of the strap but that I needed a bit more. I need a bigger bag with more pockets. I also need a sturdier bag that holds its shape a bit better without the fabric wearing through.
When my daughter asked for a school bag to carry her supplies in that could do double duty as a purse, I once again turned to the Monk’s Bag pattern. This time, I made changes to the bag so it would hold up to her day-to-day life as a high school student. She also needed a bigger, sturdier bag, so I plotted changes that would work for both of us.
The construction of the Monk’s Bag is ideal for pockets that are built right into the lining, which is what I do here. I think you’ll find these pockets both easy to add and very sturdy! I’ve also added interfacing to the outside bag pieces, which gives the bag more body and will (hopefully!) help avoid the wear that developed in my original Monk’s Bag.
The basic idea of this tutorial is the same as the Purl Bee bag, but there are quite a few additional steps as well as a number of construction changes.
The words below are all my own, but in an effort to make this easy to understand without disrespecting the original tutorial, I’ll mark any instruction or supplies that I have not changed with an asterisk*.
You will need:
Fabric 1: 1 yard, cut in the following pieces(in the sample, this is the golden brown fabric)
Fabric 2: 1 yard , cut in the following pieces (in the sample, this is the black patterned batik)
Lightweight Fusible Interfacing:
All seam allowances are 1/2″ except where noted.*
Fold and press the 2.5″ x 6.5″ (inside side loop) in half. Fold in the two sides in to the center and press again. It should look like what you see above.
Use a decorative or heavy stitch and stitch down the length of the fabric at least three times. This is a loop to hang keys and pens from, so it’s important that it be sturdy. I use a triple straight stitch in the example.
If you’d like to stencil a design on the front of your bag, it’s easier to do it before assembly. I took a photo of the pattern on the black batik, then increased the size slightly and printed that onto the matte side of a piece of freezer paper. For more on freezer paper stenciling see this text tutorial or this video.
Collect your bag pieces and sort them into outside and lining pieces.
Iron the 6.5″ x 34″ (outside handles) pieces of interfacing to the 2 – 6.5″ x 34″ (outside handles) pieces of fabric. Interfacing tends to be less wide than fabric, so piece it if necessary to get the correct length.
Repeat the process for the outside center panel pieces. You should have seam allowance outside the interfacing on the side edges of of the center pieces, but not on the top and bottom.
Pin one handle to each side of the center panel. Mark 1/2″ at the top of each side. Stitch down each side, taking care not to stitch past the 1/2″ mark on the top of each center panel.
Press the seam allowance toward the bag handles. Press a 1/2″ seam allowance on the inside of the handles and along the center panel. I find this much easier to do at this step than after the bag is assembled.
Attach handles to opposite center panel, also marking 1/2″ from the top. Repeat pressing seam allowance along handles and top of center panel.
Fold the bag in half with center panels matching. Stitch across the bottom of the bag.*
Unfold seam allowance on end of handles. Pin together and stitch.*
Press the center open, then re-press 1/2″ seam allowance.
The outside of the bag is complete! Now, on to the lining, which is a bit more involved.
Collect your inside pocket pieces.
Fold each pocket piece in half across the width of the pocket. Press and stitch across the top. I used a combination of stitches just for fun!
Place the center panel pocked on the right side of the inside center panel. Pin and baste with a 1/4″ seam allowance along the raw edges. If desired, you can add additional stitching lines to break up the pocket. I left one full size and put a center stitching line down the other. The full sized pocket is great for magazines or papers and the split pocket is great for my checkbook, calendar, cell phone, camera, etc.
Repeat the process with inside handle pocket 1 and 2. Position the inside side loop even with the top of handle pocket 1. Pin each side. I use the longer pocket to carry my glasses case and the smaller pocket for gum and miscellaneous small items.
Baste pockets and loop in place.
Iron 6″x6″ fusible interfacing to the back of the loop. On the front side, secure on each side approximately 2″ from the outside edges.
Inside pieces, all basted and ready to go.
The inside is assembled identically to the outside. You can see here that after the handles are attached to the inside center panel, the sides of the pockets have been secured in place.
Repeat all steps for bag assembly using a 1/2″ seam allowance on all pieces except for joining the two straps. Use a 5/8″ seam allowance there. Remember to press the straps and top of the center panel in 1/2″, just like on the outside of the bag.
Here’s the lining all assembled. You can see that the bag could easily be reversible!
Place the lining inside the bag, with wrong sides matching. I wanted the loop inside the bag to be towards the front side when I carry it so I could easily hook my keys on it, so I put the bag on my preferred shoulder for bag carrying to make sure the loop was just where I wanted it.
Match all seams and pin, pin, pin! Top stitch close to the edge. I tried to stay about 1/8″ in. Remove the pins and you’re done!
My finished Monk’s Bag 2.0. This is the third Monk’s bag I’ve made and I carry it every day. I’m constantly getting compliments and questions about the bag, which makes it even more awesome to carry!


Action shot! Can I just tell you, I love the heck out of that loop for my keys! It’s easy to reach and I never lose them anymore. I liberated the hook from one of my kids old backpacks. You can also find them in all sizes in the rope section of any hardware store.
My bag (L) and my daughter’s bag (R). What a difference fabric makes!
Thank you Purl Bee for the awesome original bag tutorial! I hope you take this tut in homage, as it’s intended. 🙂

Posts on this blog may contain affiliate links to help cover the cost of my website. I thank you for your generous support. ♥

I’ve finished the very first Go Get Granny afghan for for The Linus Connection. All the blocks for this blanket were donated by members of the Livejournal community Starknuts, who decided to have their own block drive in support of Go Get Granny!.
The ends aren’t woven in yet, but I’ll get that done tonight and then it’ll go out with other donated blankets this coming Saturday.
It includes blocks by dragonsinger954, archerpren, hpfan_poa and ladyoflosttimes. (I hope I didn’t miss anyone!). Thank you all so much!
Shameless Plugs:
If you make a Sew Awesome Craft or any pattern, craft or recipe from sewhooked, I’d love to see a photo. Email me or add it to the sewhooked flickr group.

Isn’t it a beauty?
Now available as a free video tutorial!
This is the easiest, fastest, and cleanest-looking pillowcase method I’ve tried. So easy, so fun…and excellent for stash busting!


Honey Bee Quilt Store is participating in American Patchwork & Quilting’s 1 Million Pillowcase Challenge. The first batch of gorgeous handmade pillowcases that Honey Bee has collected is going to the Texas Baptist Children’s Home, located in Round Rock, Texas.
I knew as soon as I heard about it that I wanted to participate.
Read more on the Honey Bee Blog.
I was asked by the store owner to share instructions online so they could easily direct customers to them. This is my version. I hope you enjoy the tutorial, make lots of pillowcases, and give them to friends or charity! (Oh, okay, you can keep one or two for yourself!)
You’ll need:
Three lengths of fabric in three coordinating colors. Makes one standard-size pillowcase.
You can vary the bun/hot dog size up or down, just make sure that the total yardage between those two is 36″ – 38″. 9 – 12″ for the bun is ideal.
If you use two yards of coordinating fabric, plus 6″ of a third, you can make two coordinating pillowcases with opposite colors!

My colors for this tutorial – a pre-cut kit from Honey Bee. Isn’t the fabric just delicious?

Hot Dog, Bun & Mustard! Once your fabric is cut and pressed and you’re ready to go!

Roll out your BUN, right side up.

Press the MUSTARD in half
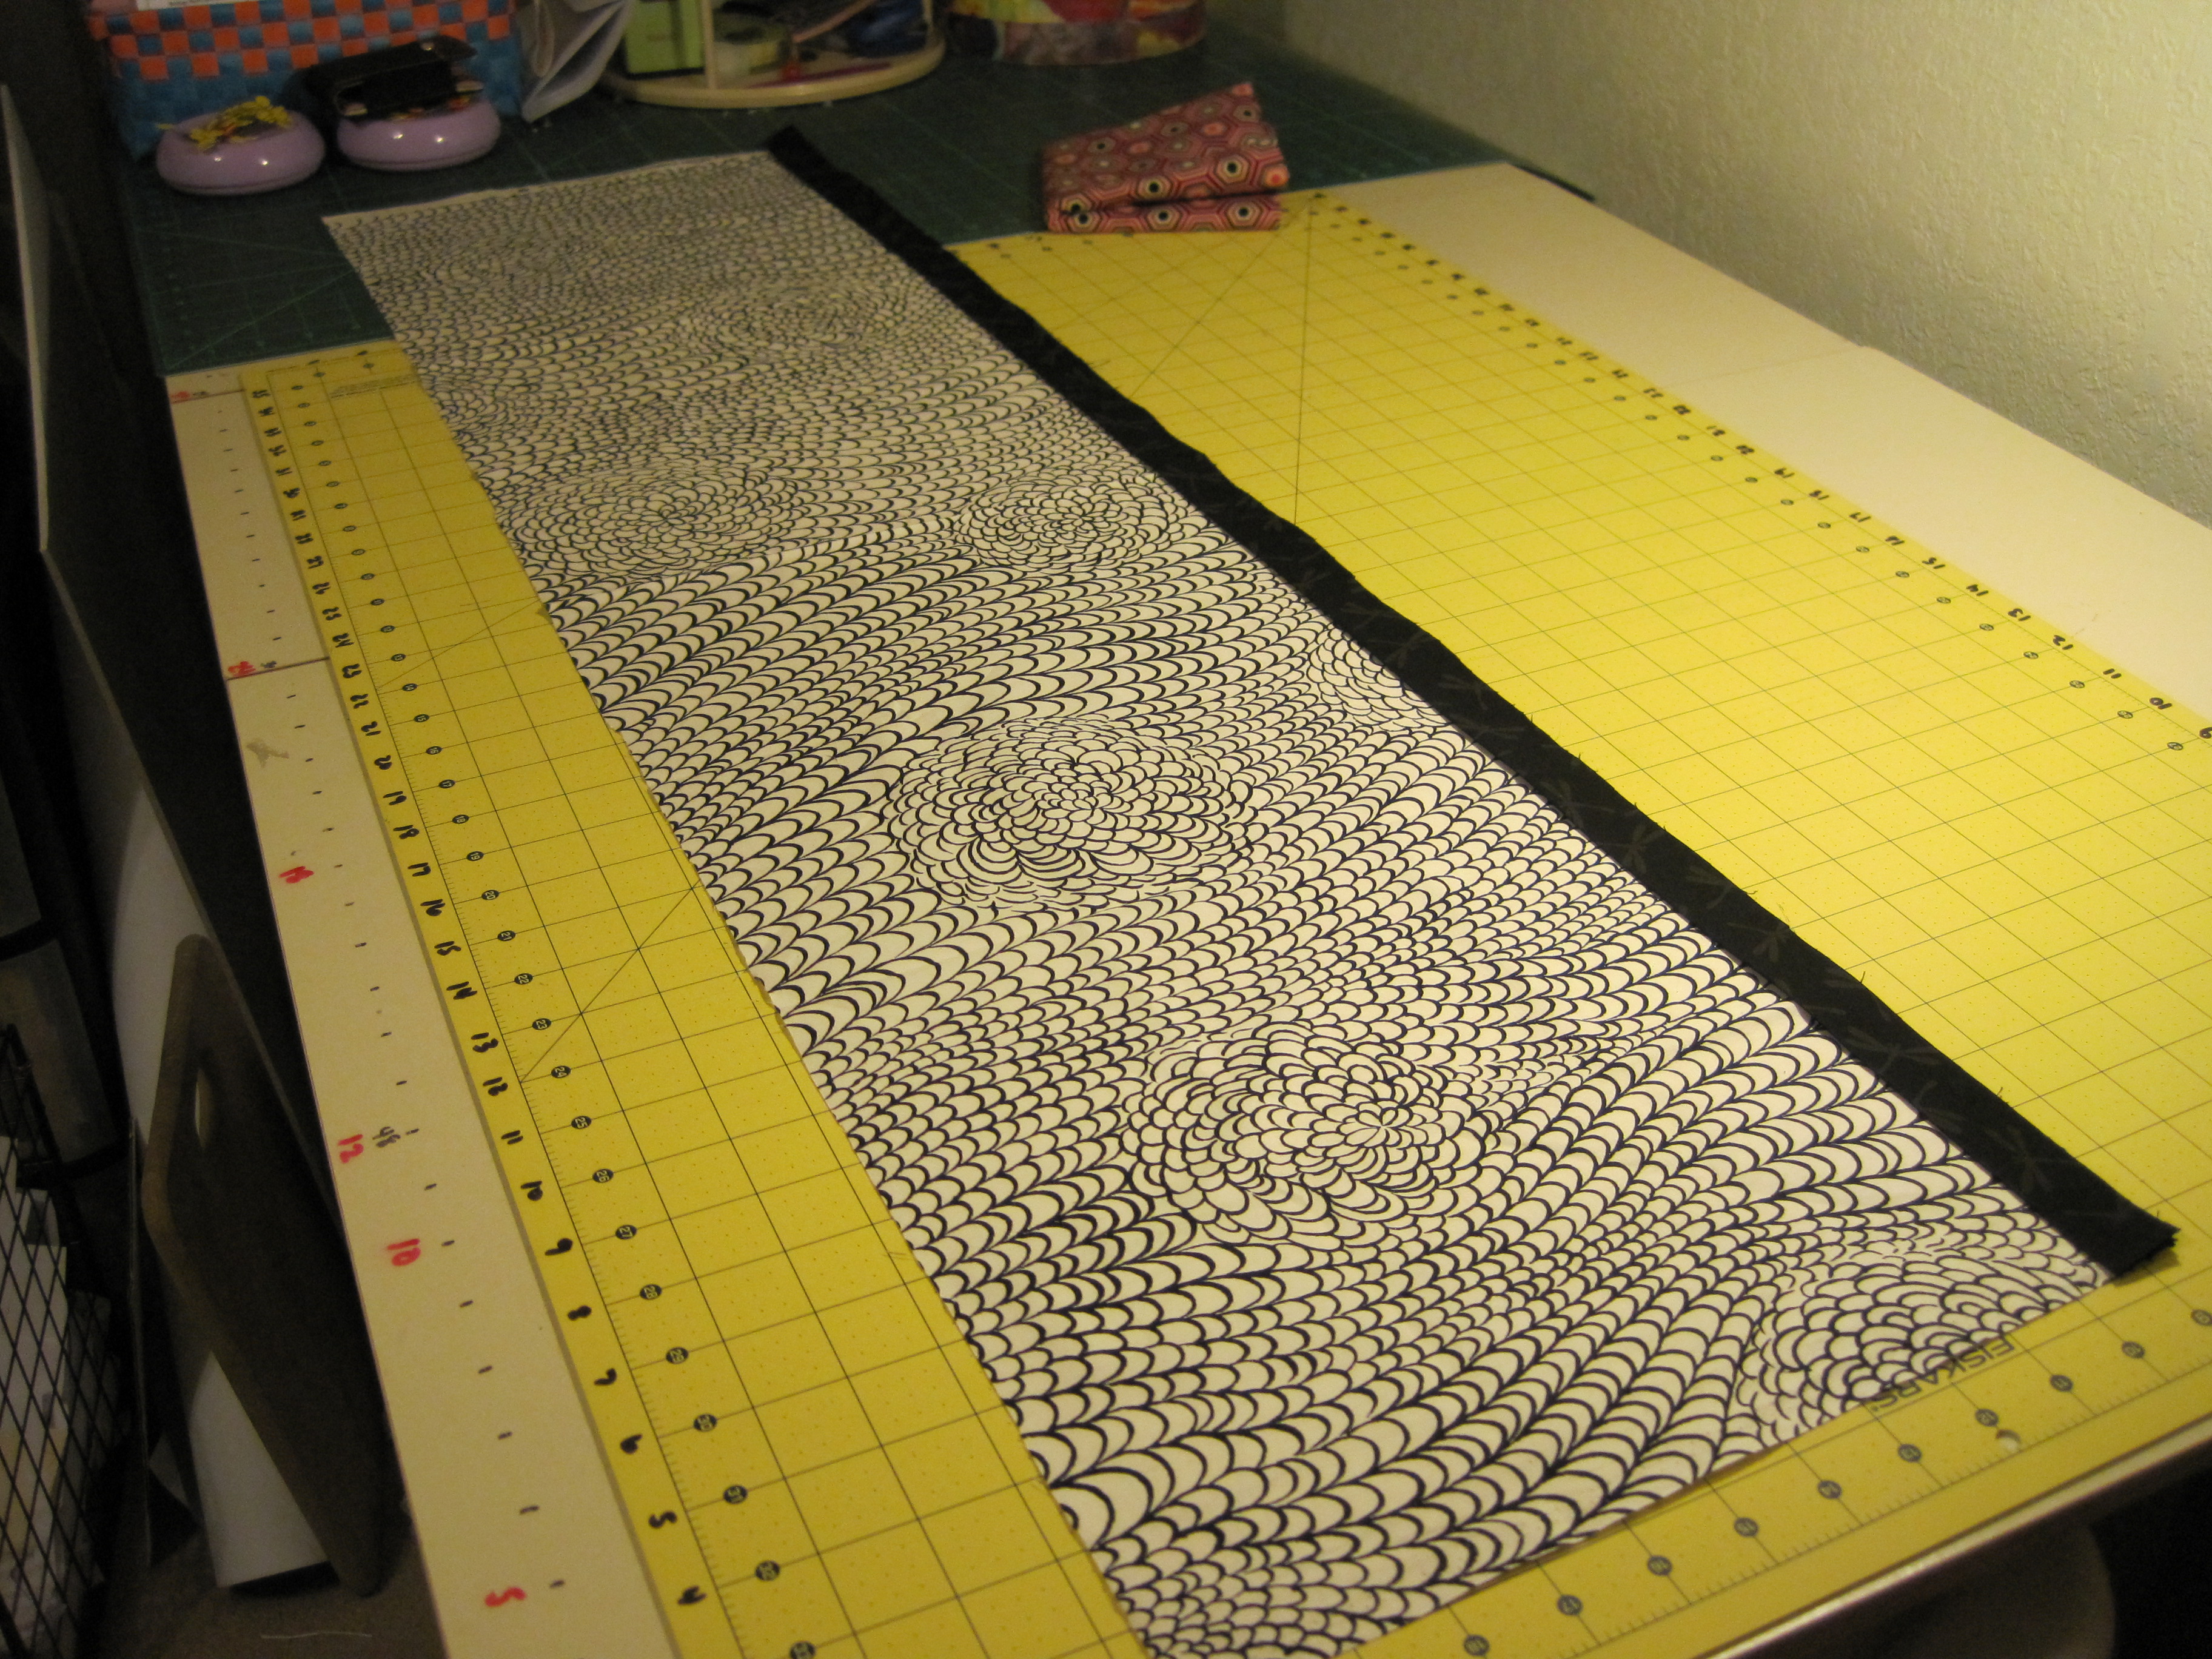

Place MUSTARD with raw edges matching along one side of the BUN.
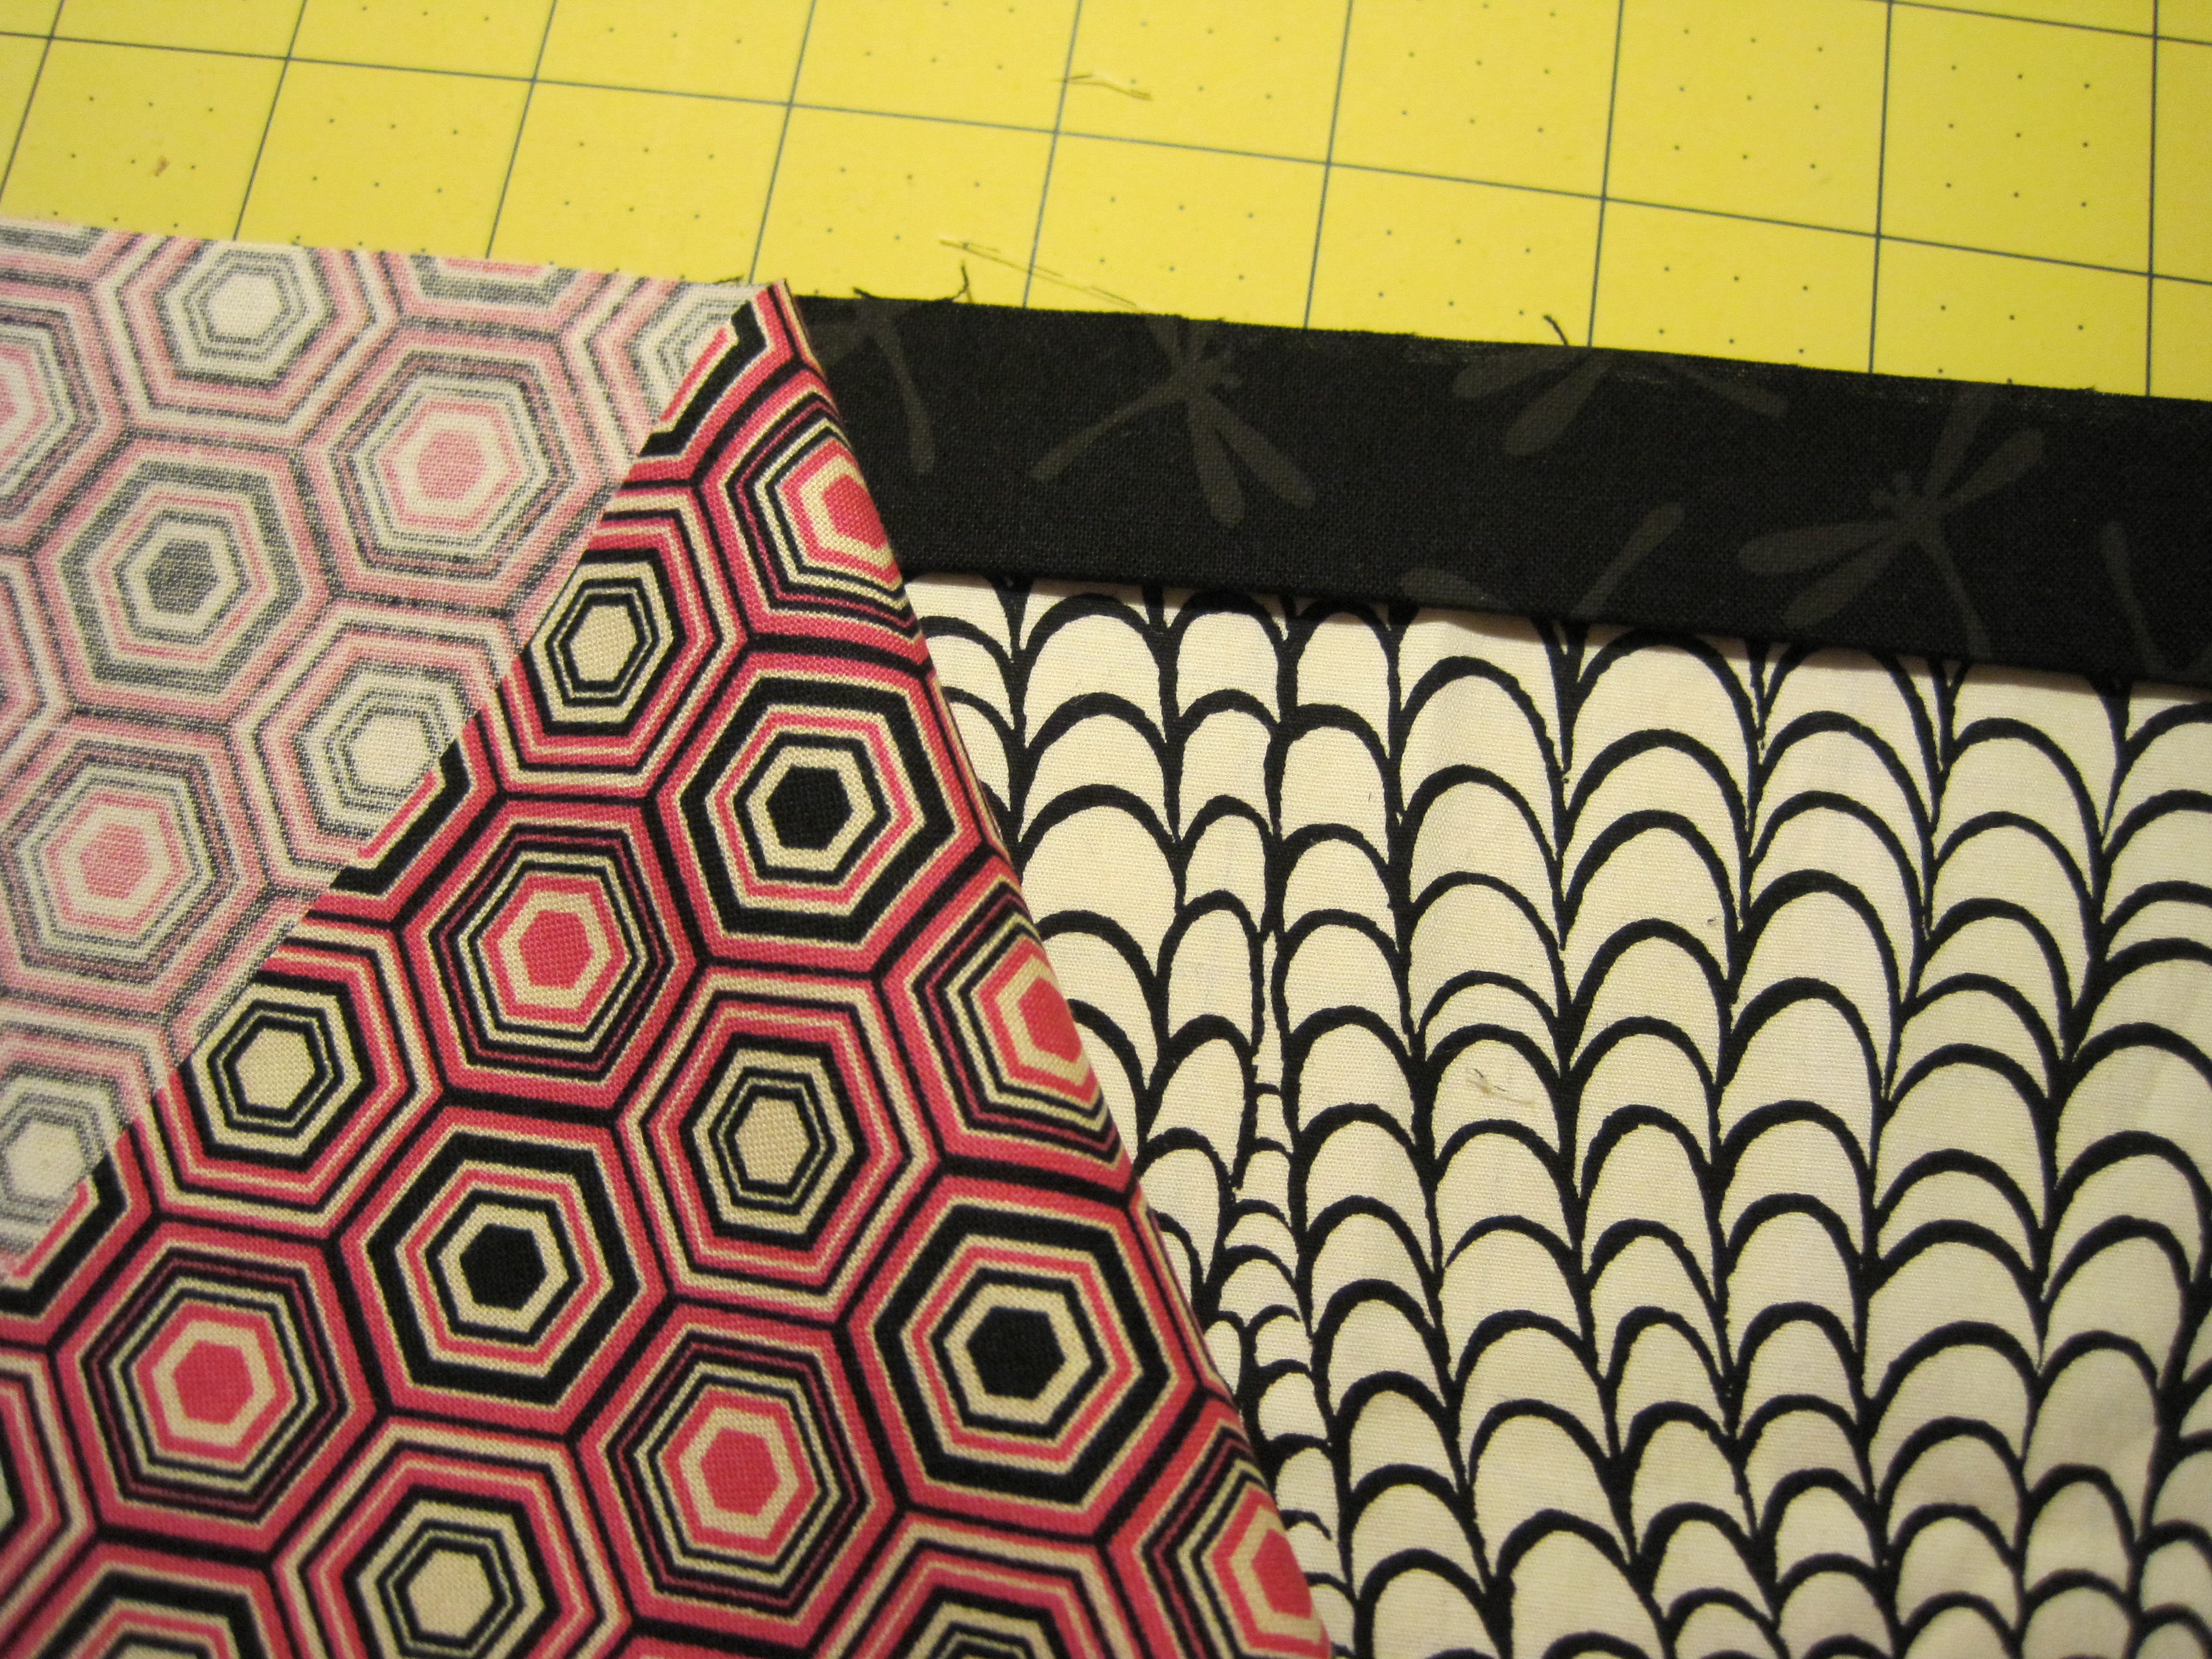
Place HOT DOG on top of MUSTARD, face down. Align raw seams. Add a few pins to hold in place.
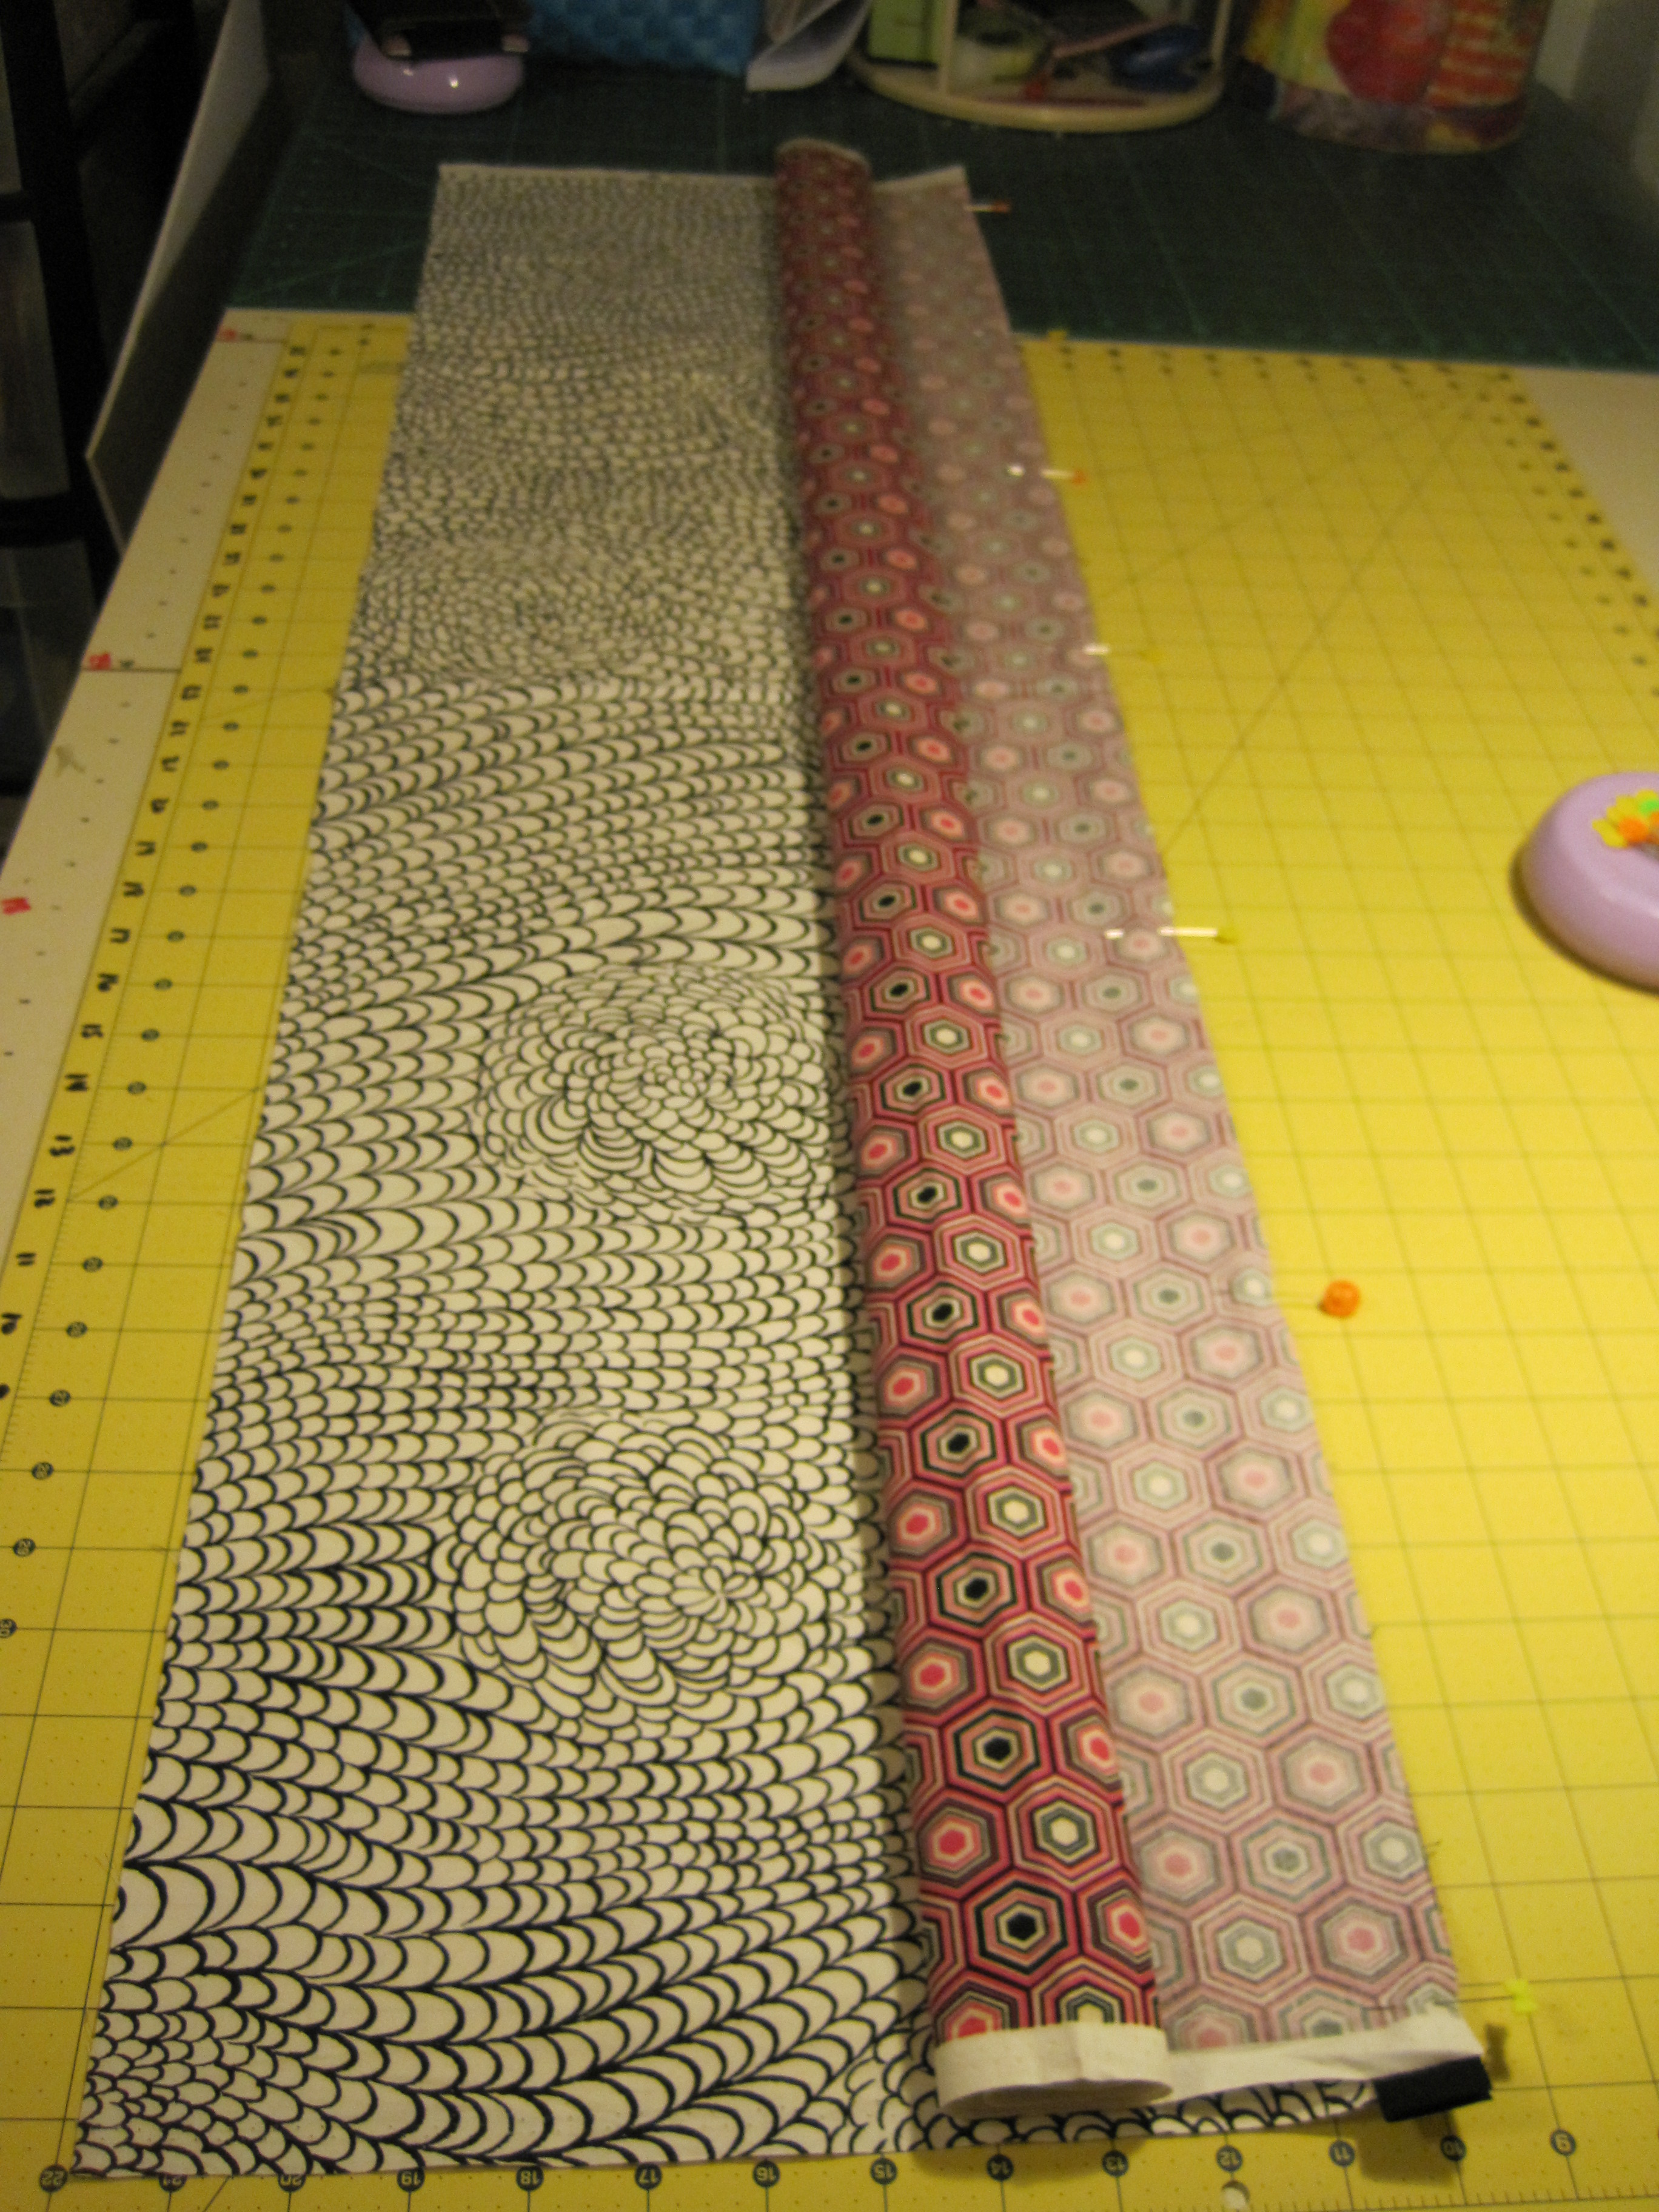

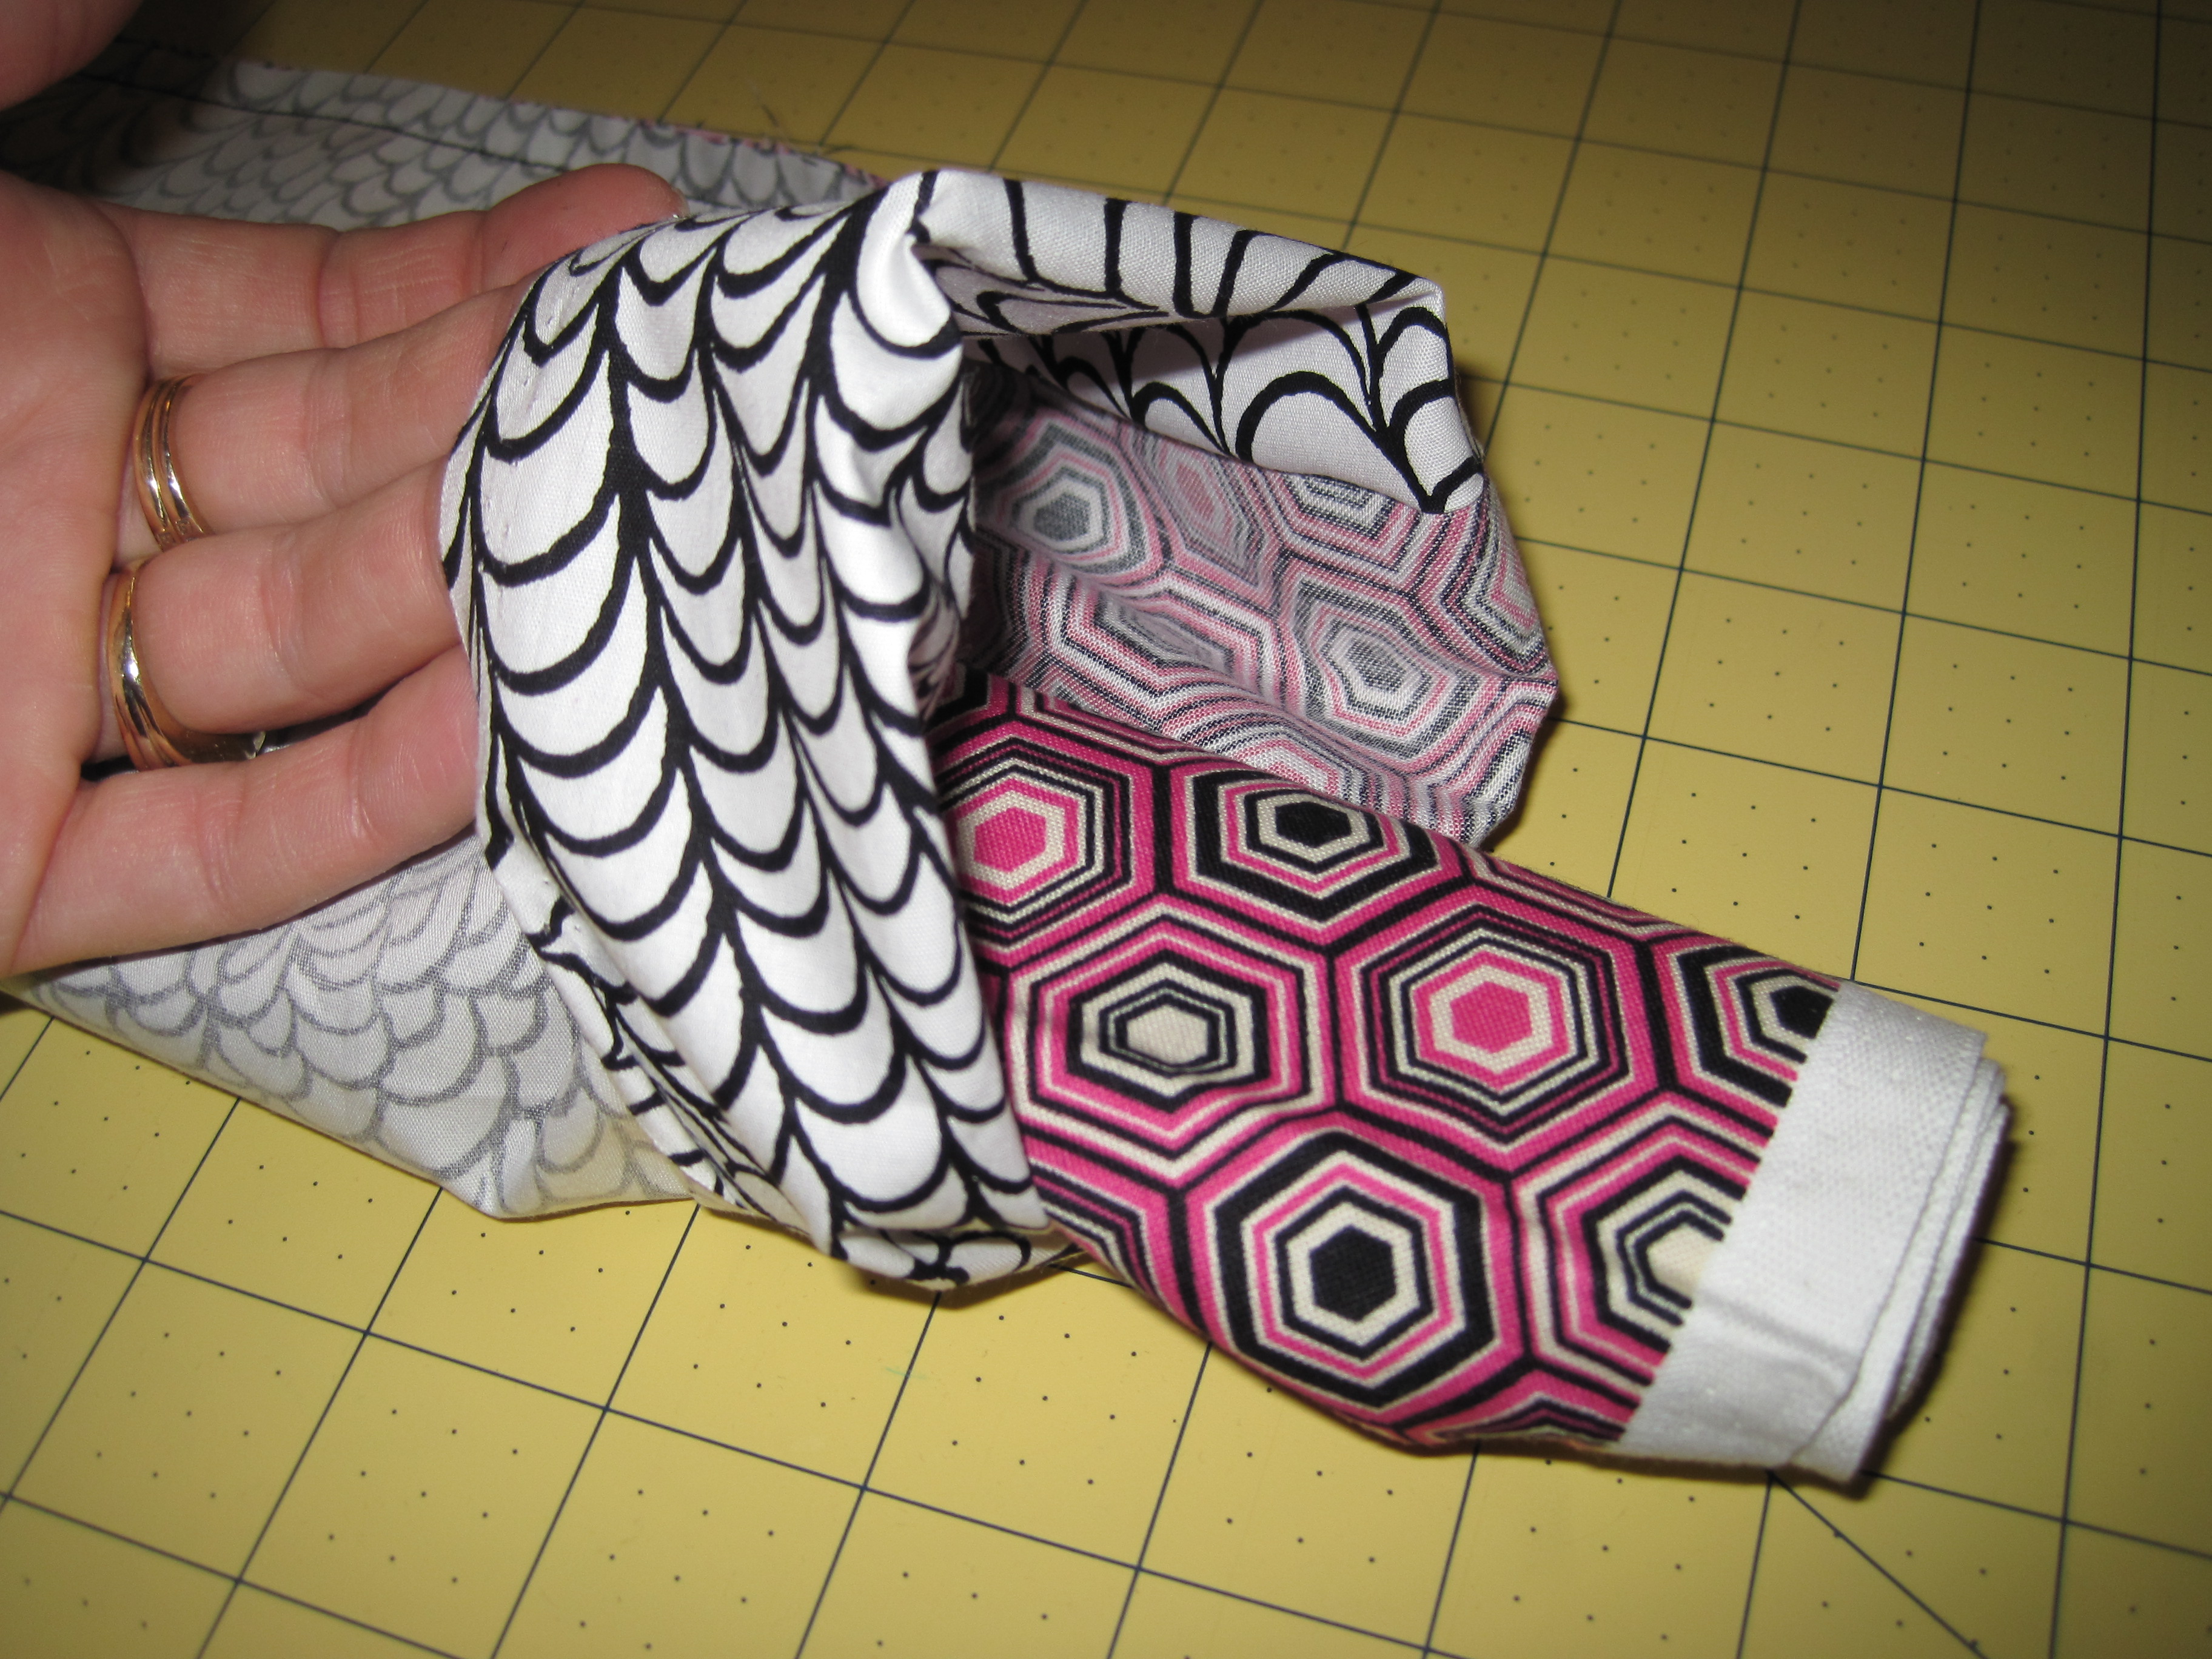
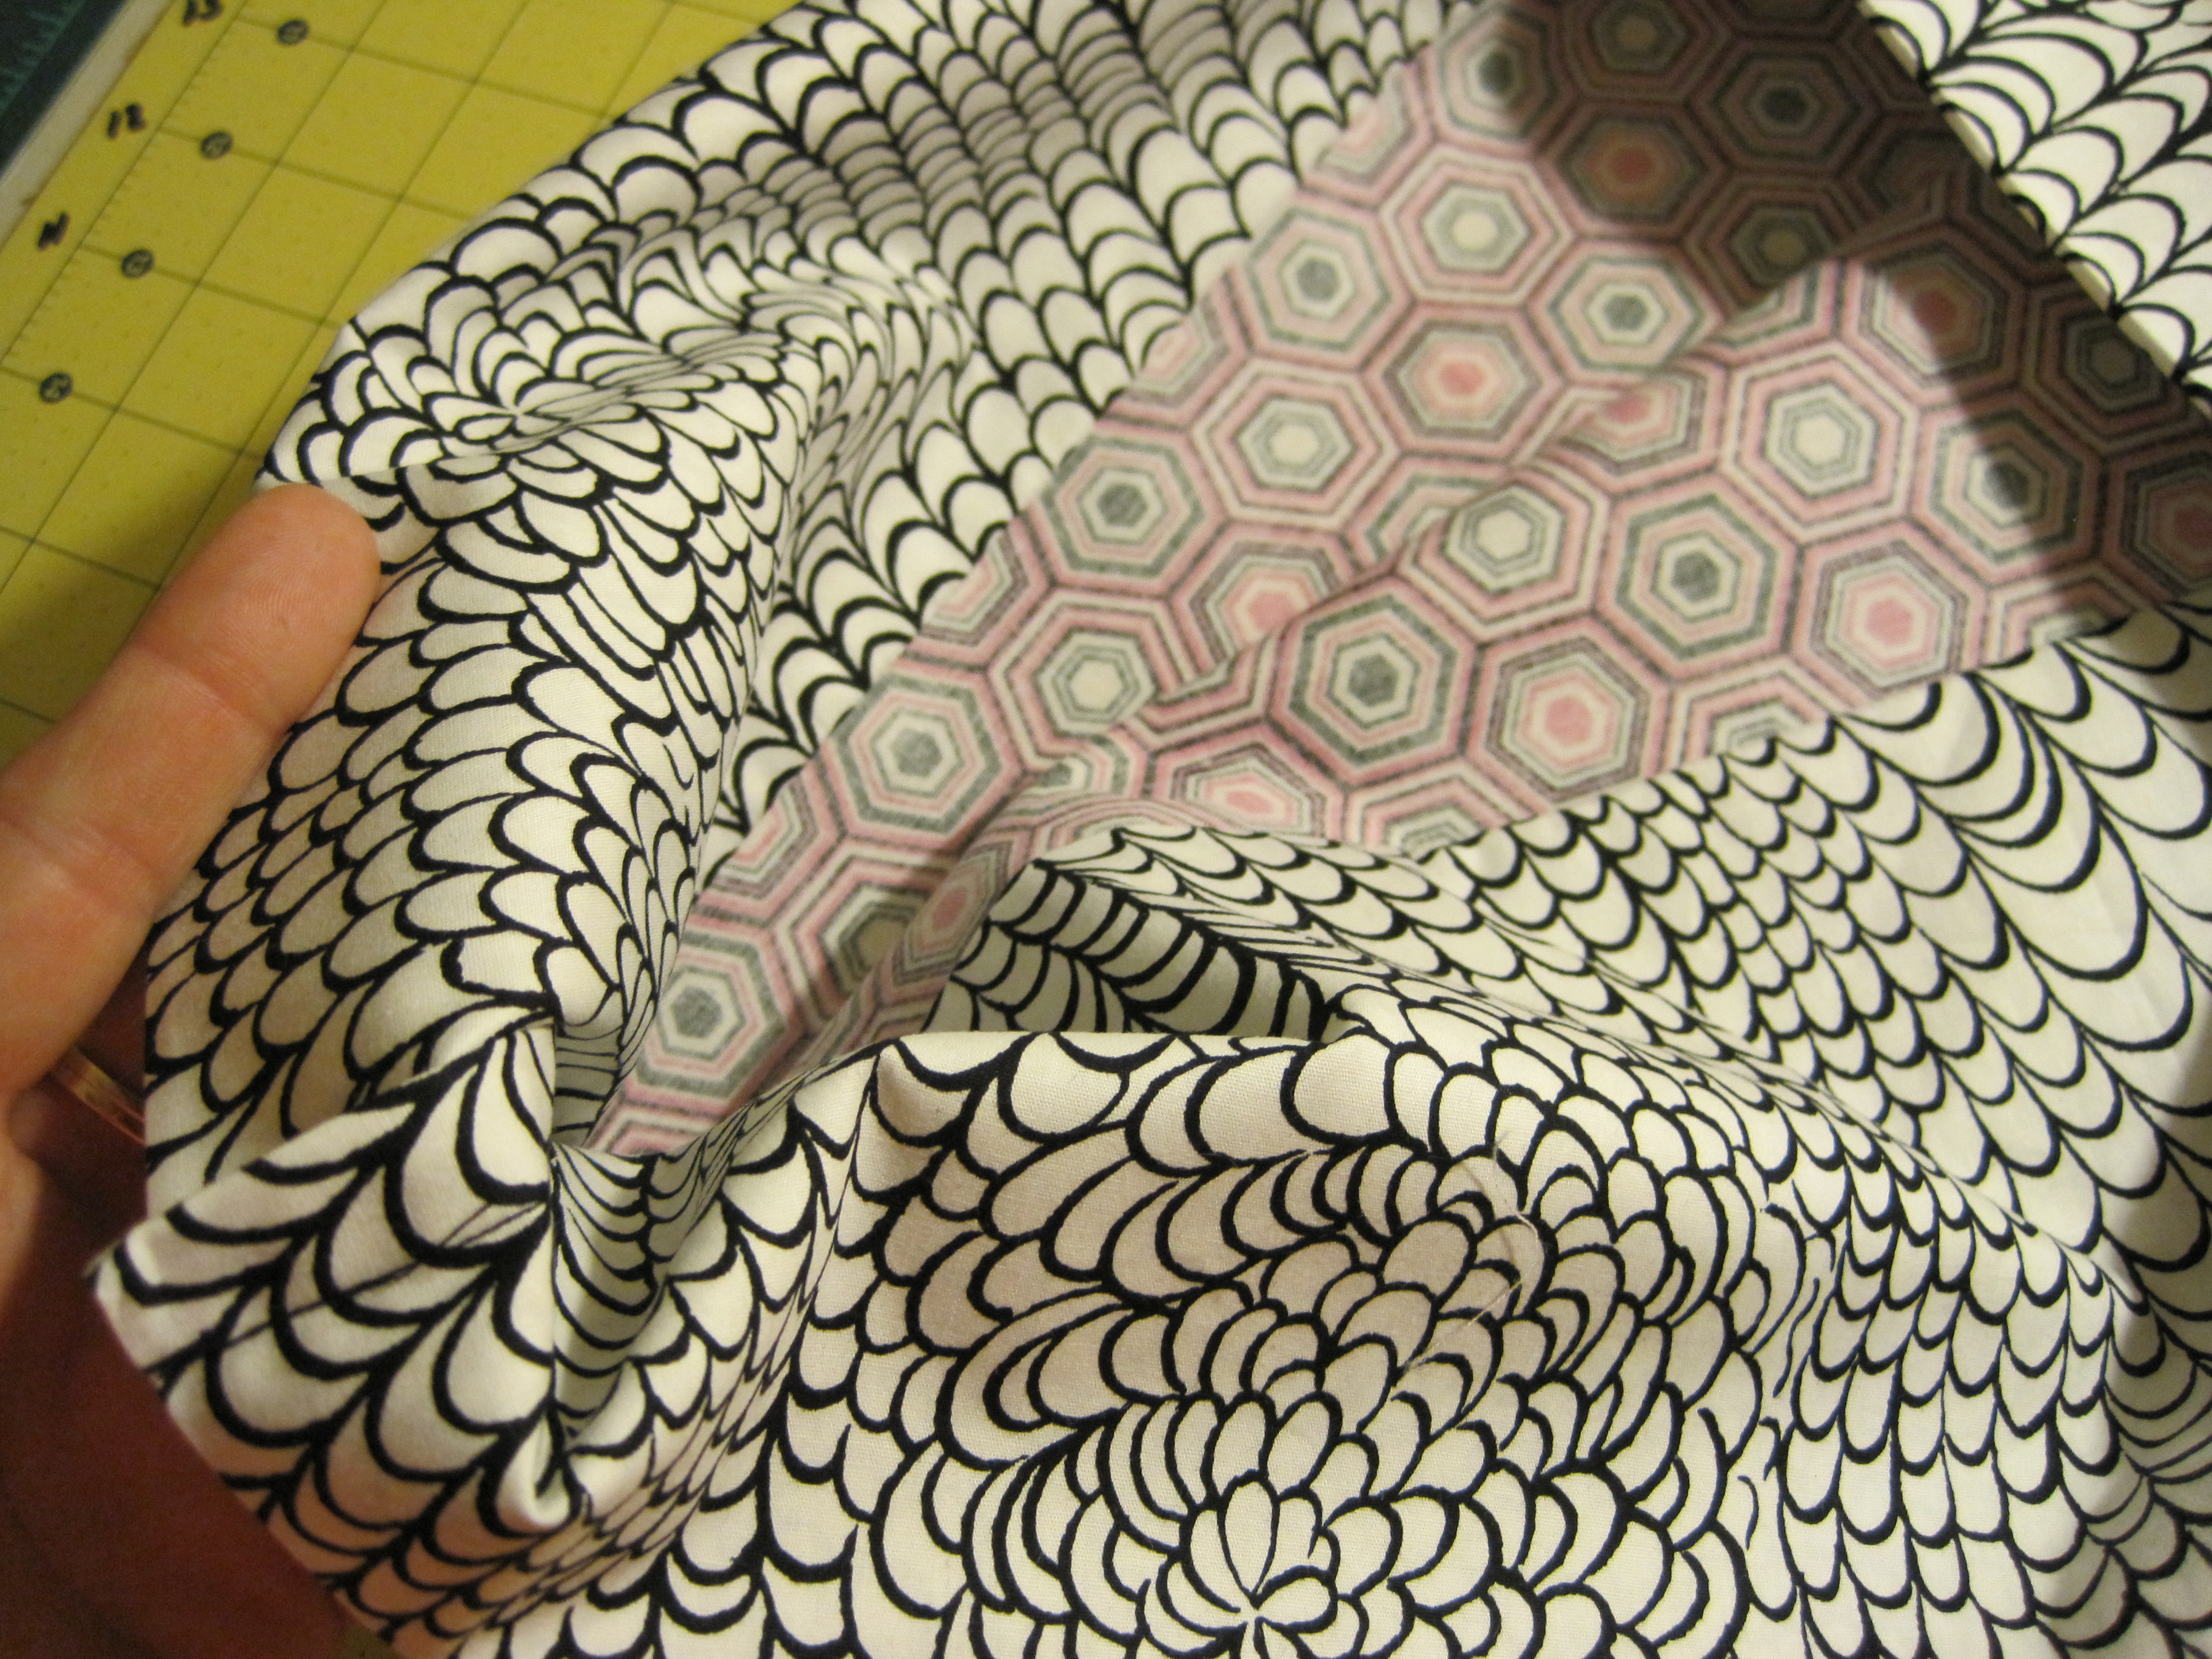
Roll the HOT DOG (hey, now it looks like a hot dog!) to within a few inches of the pinned edge.


Fold the BUN over the HOT DOG and pin along the raw edge, making sure to catch all layers of fabric.
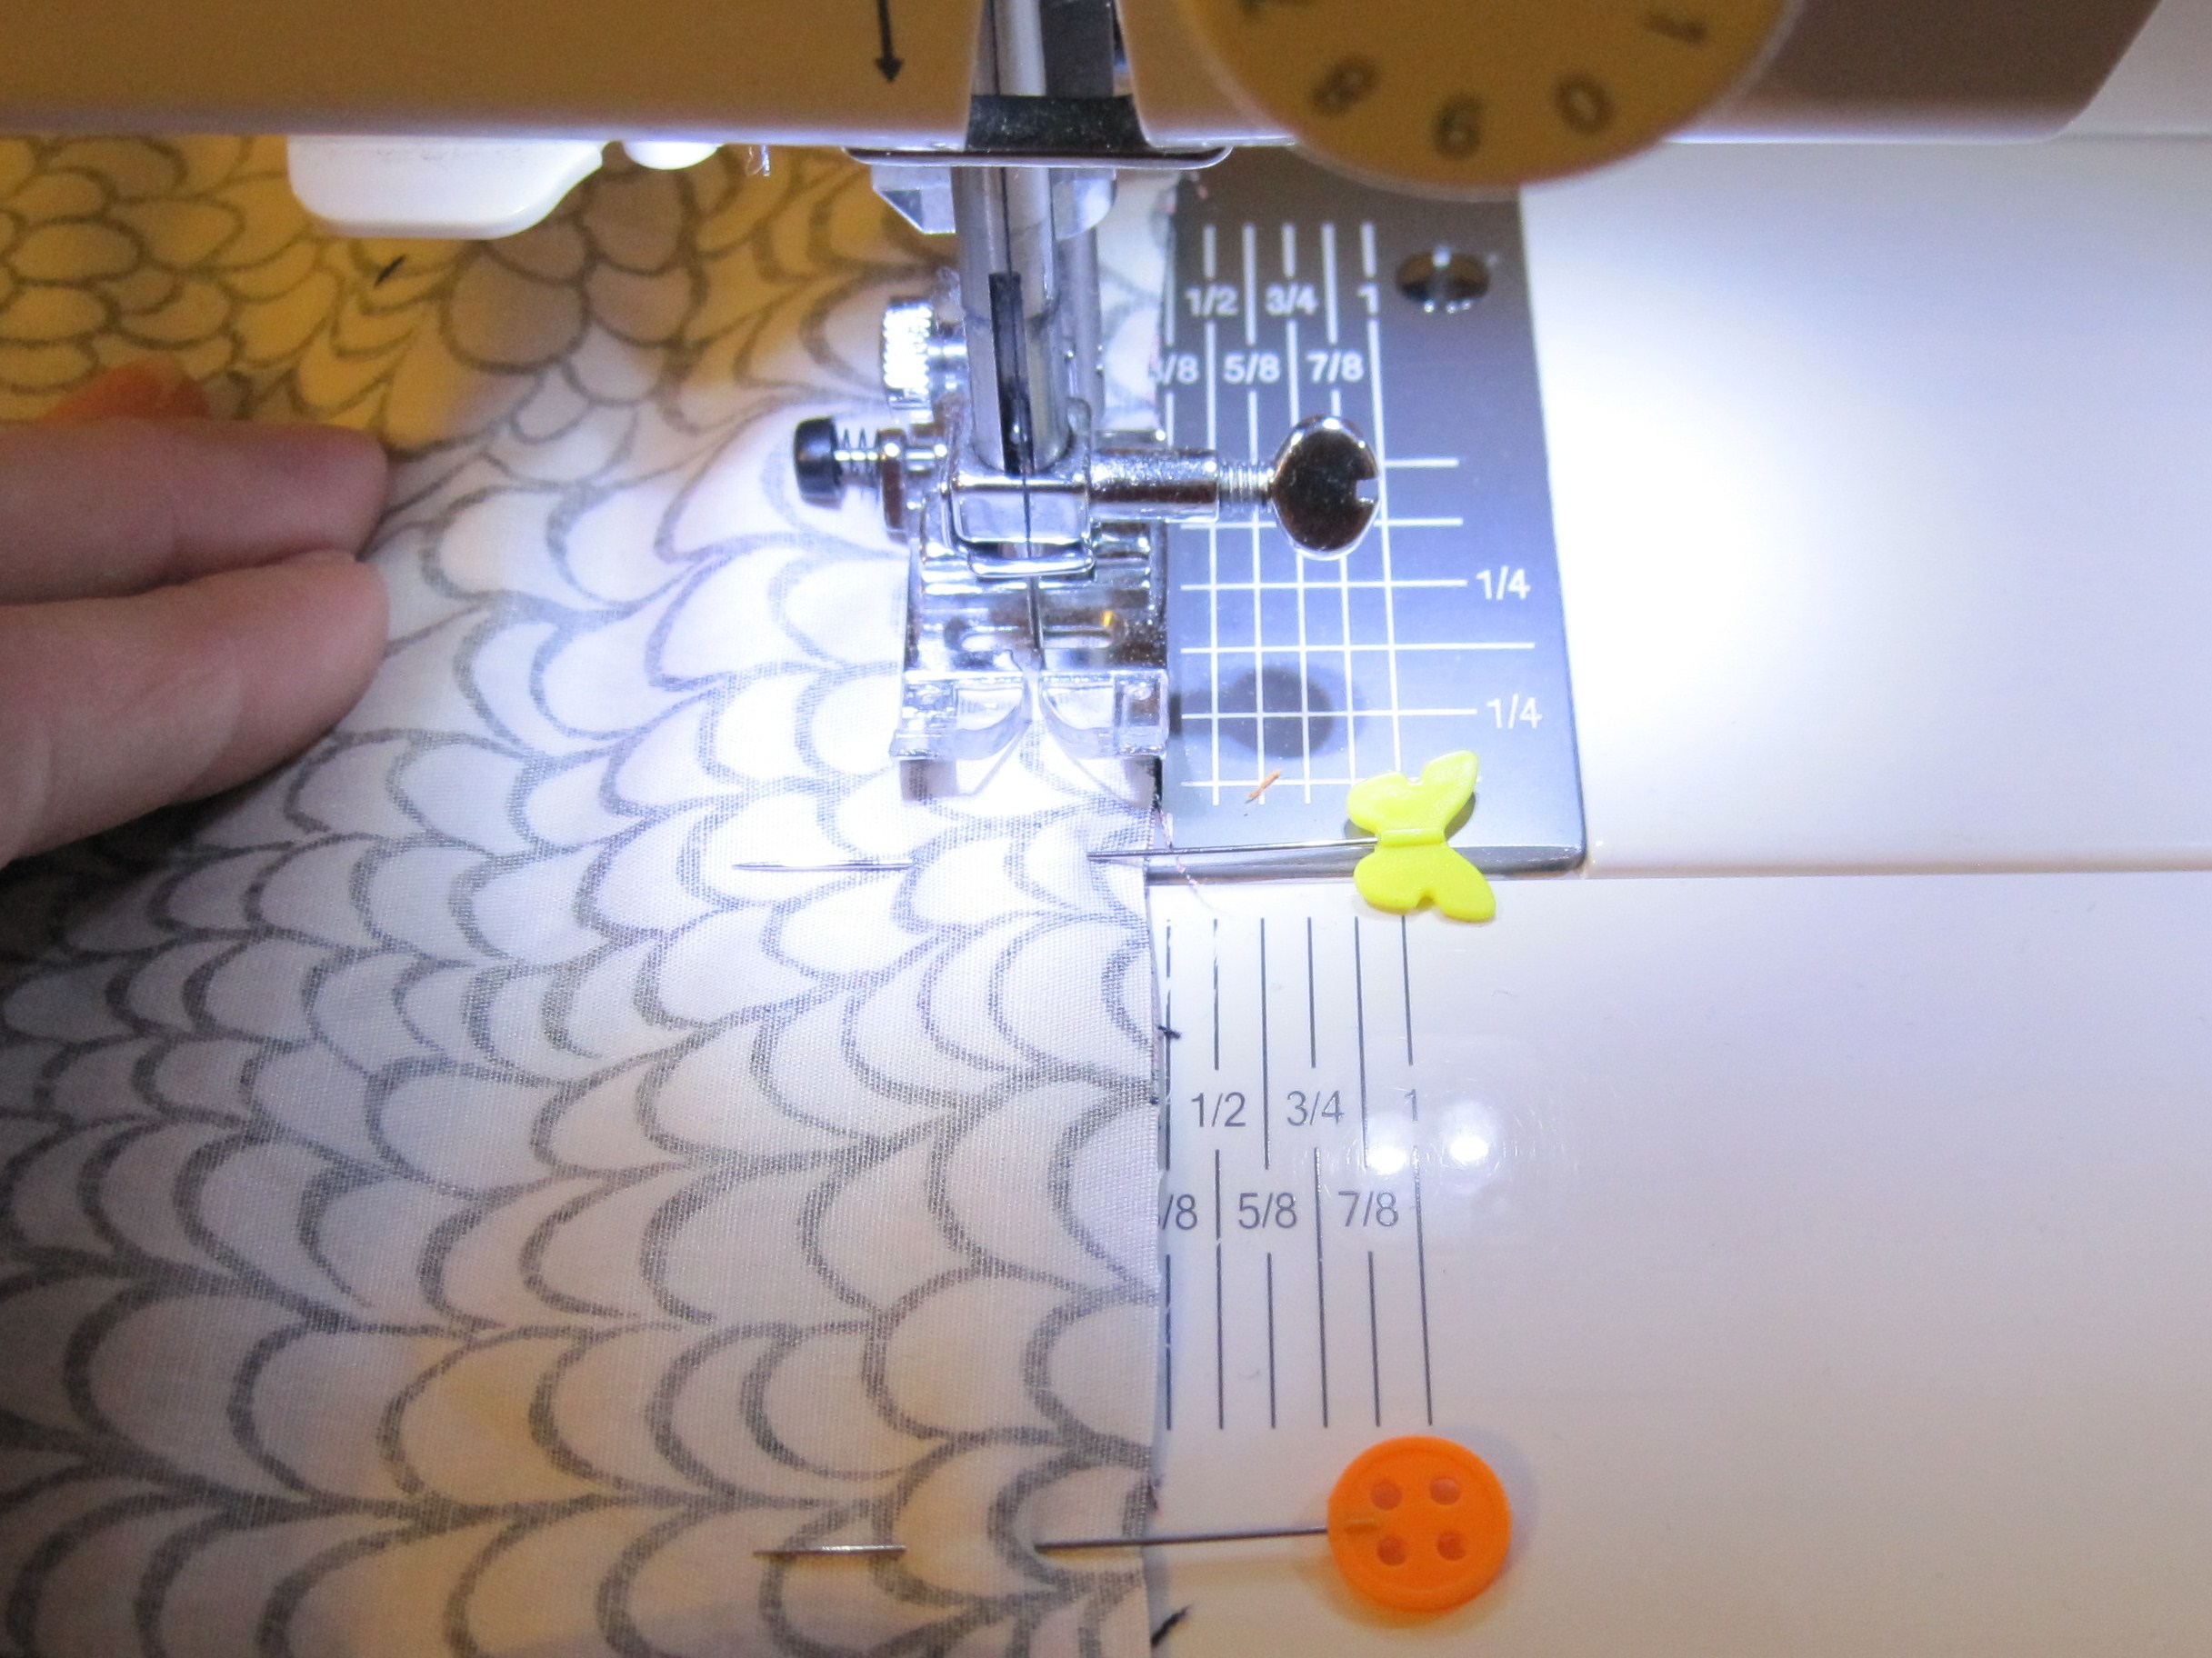

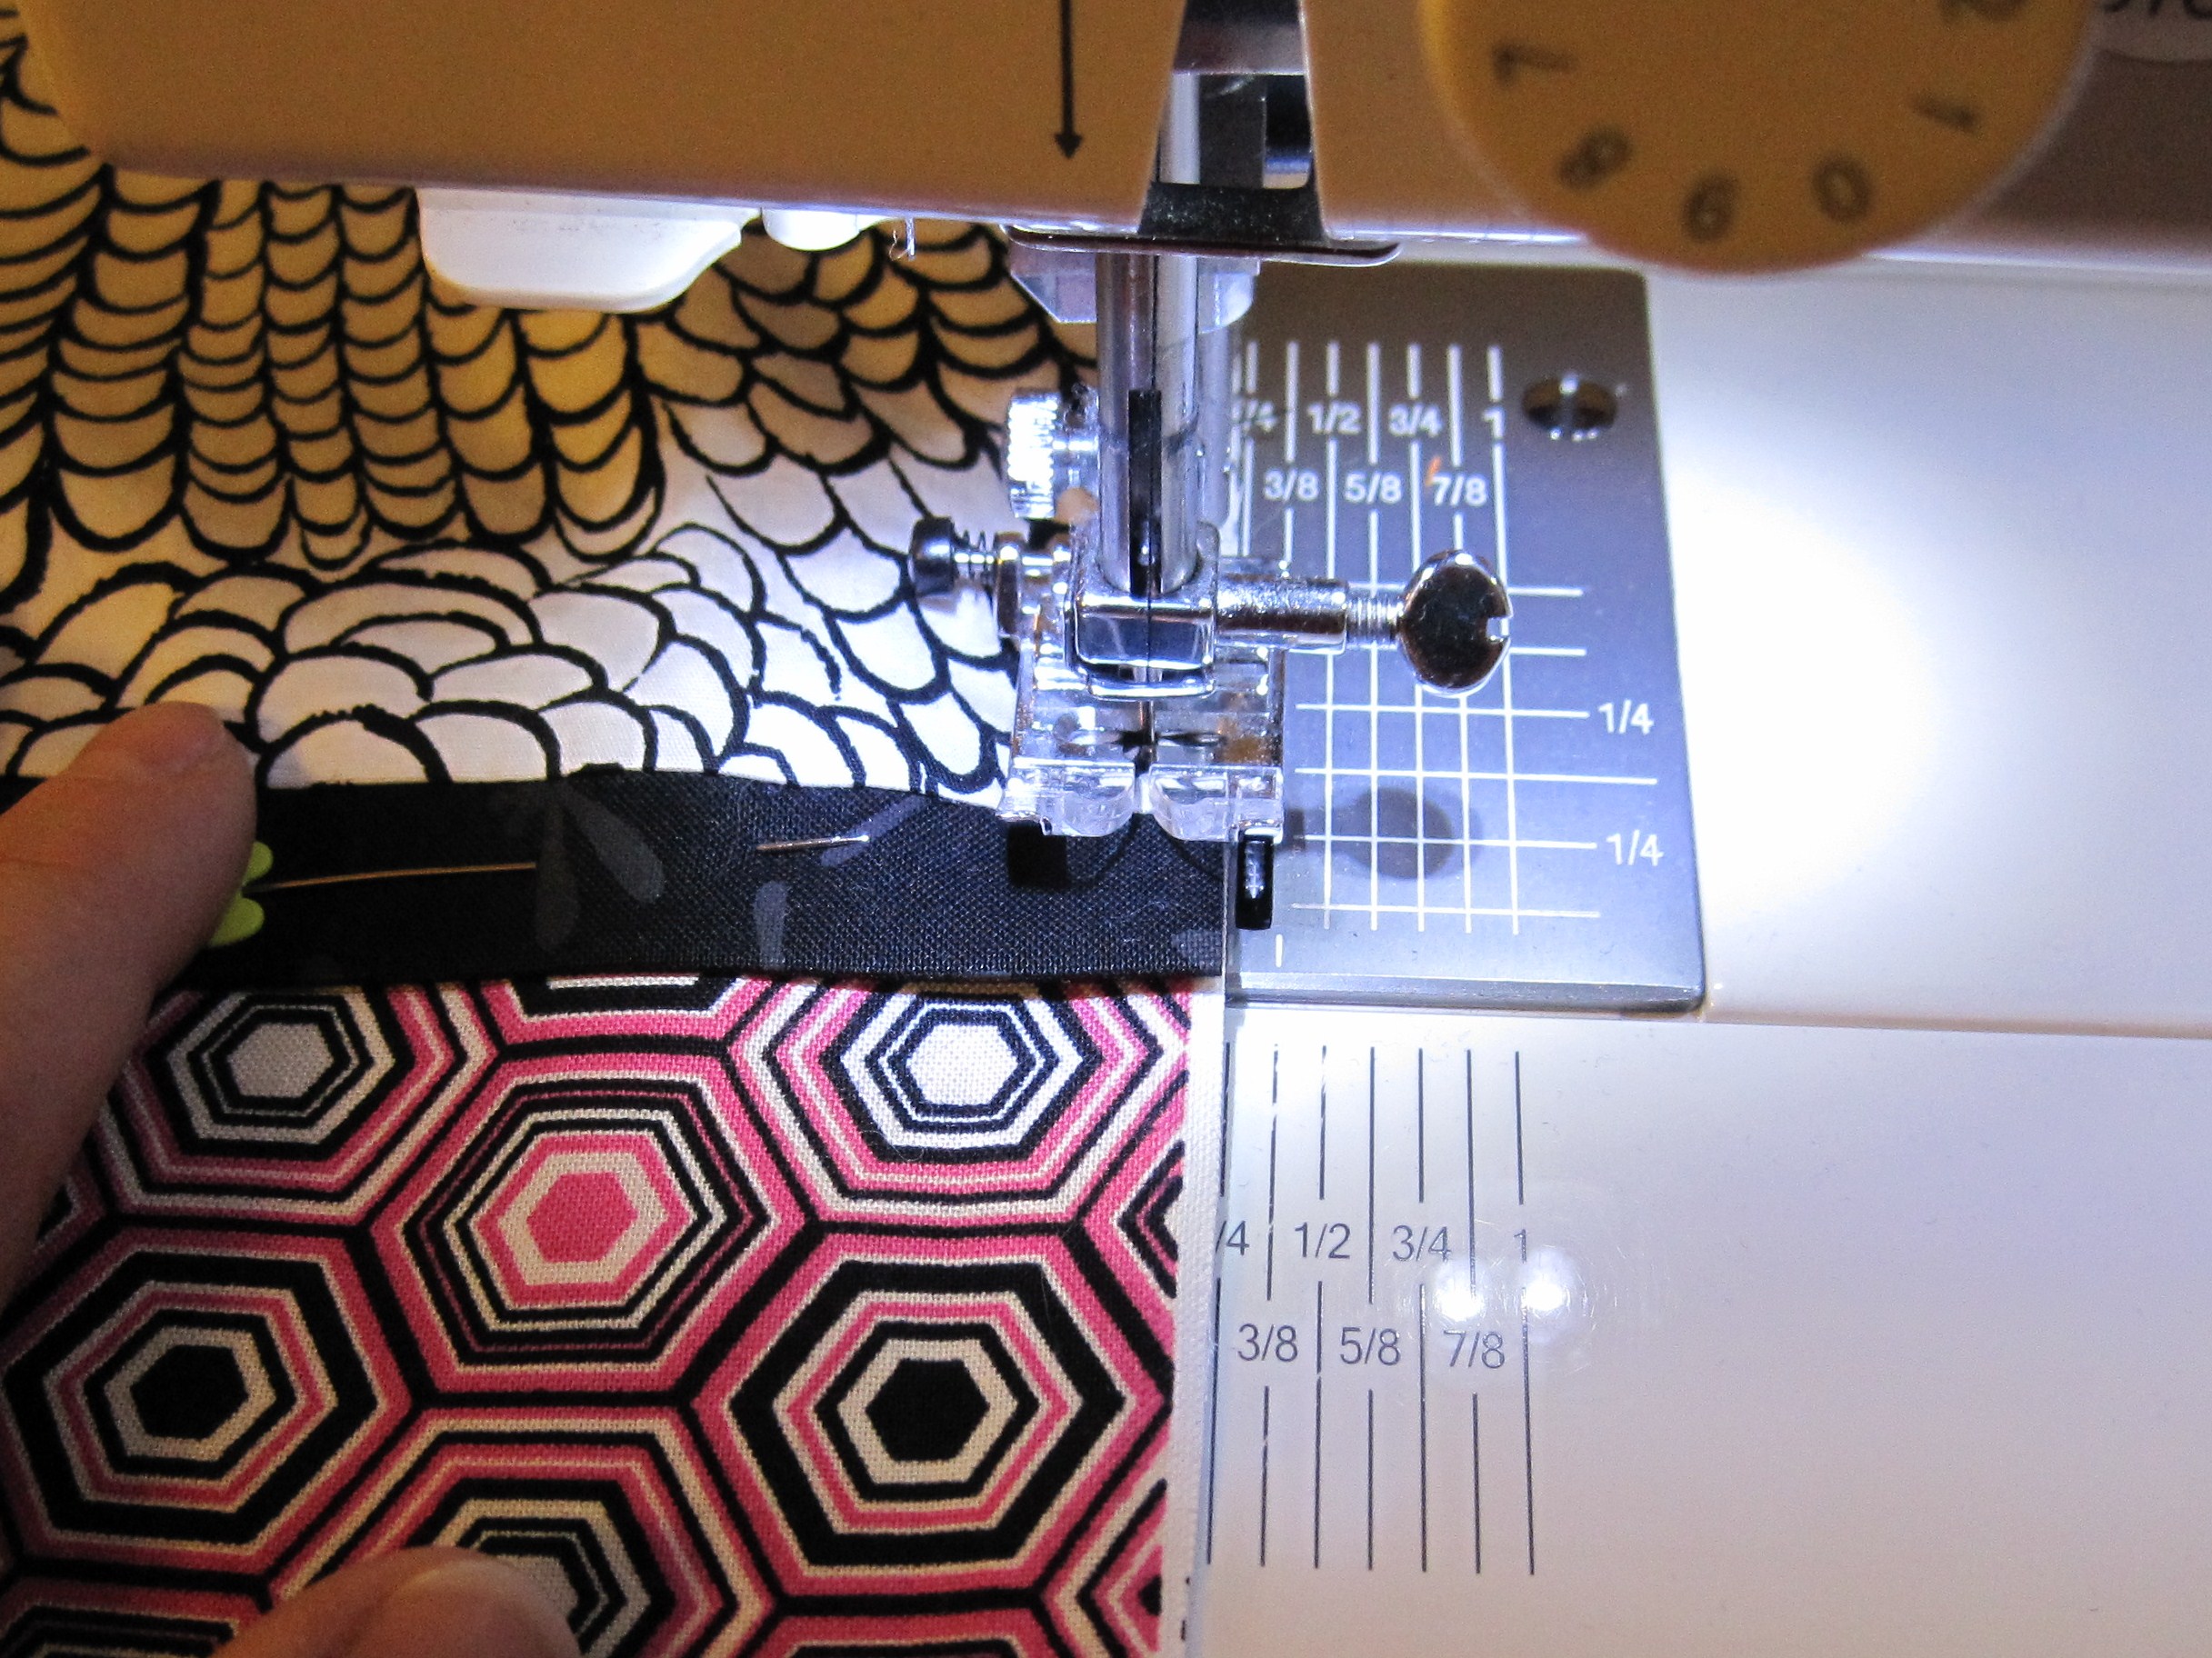
Stitch along the raw edge using a 3/8″ (or scant 1/2″) seam allowance.

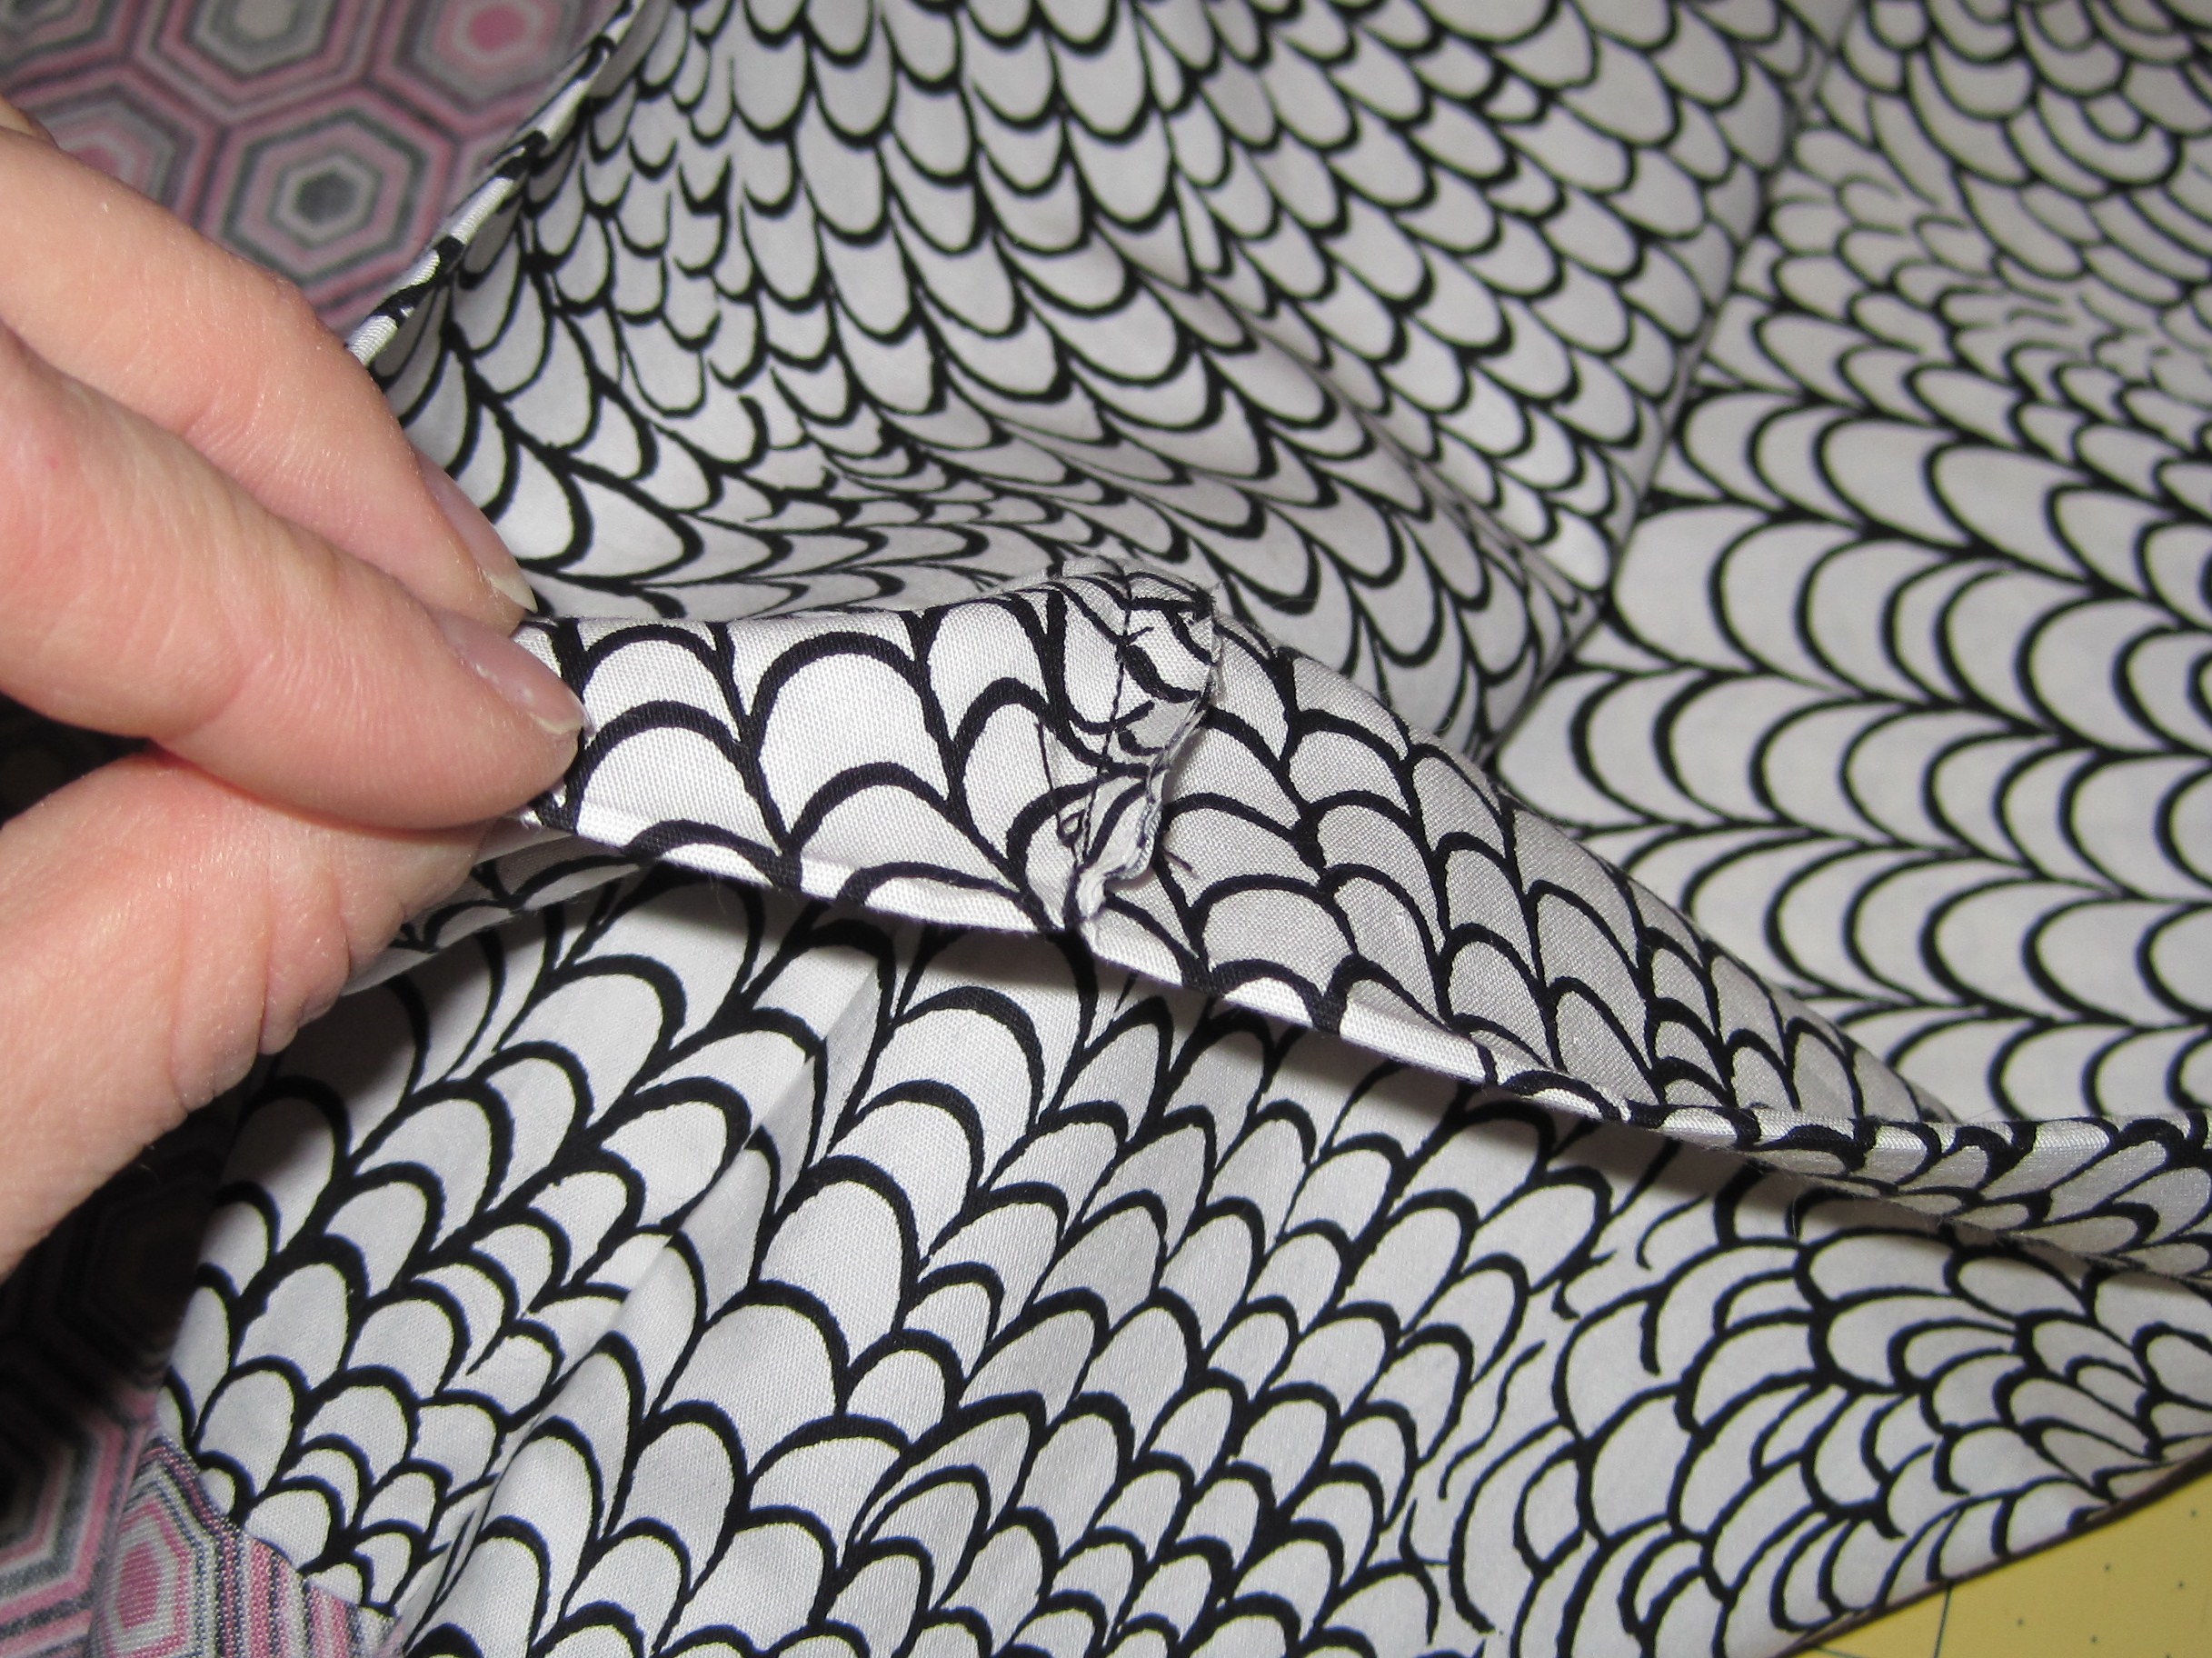
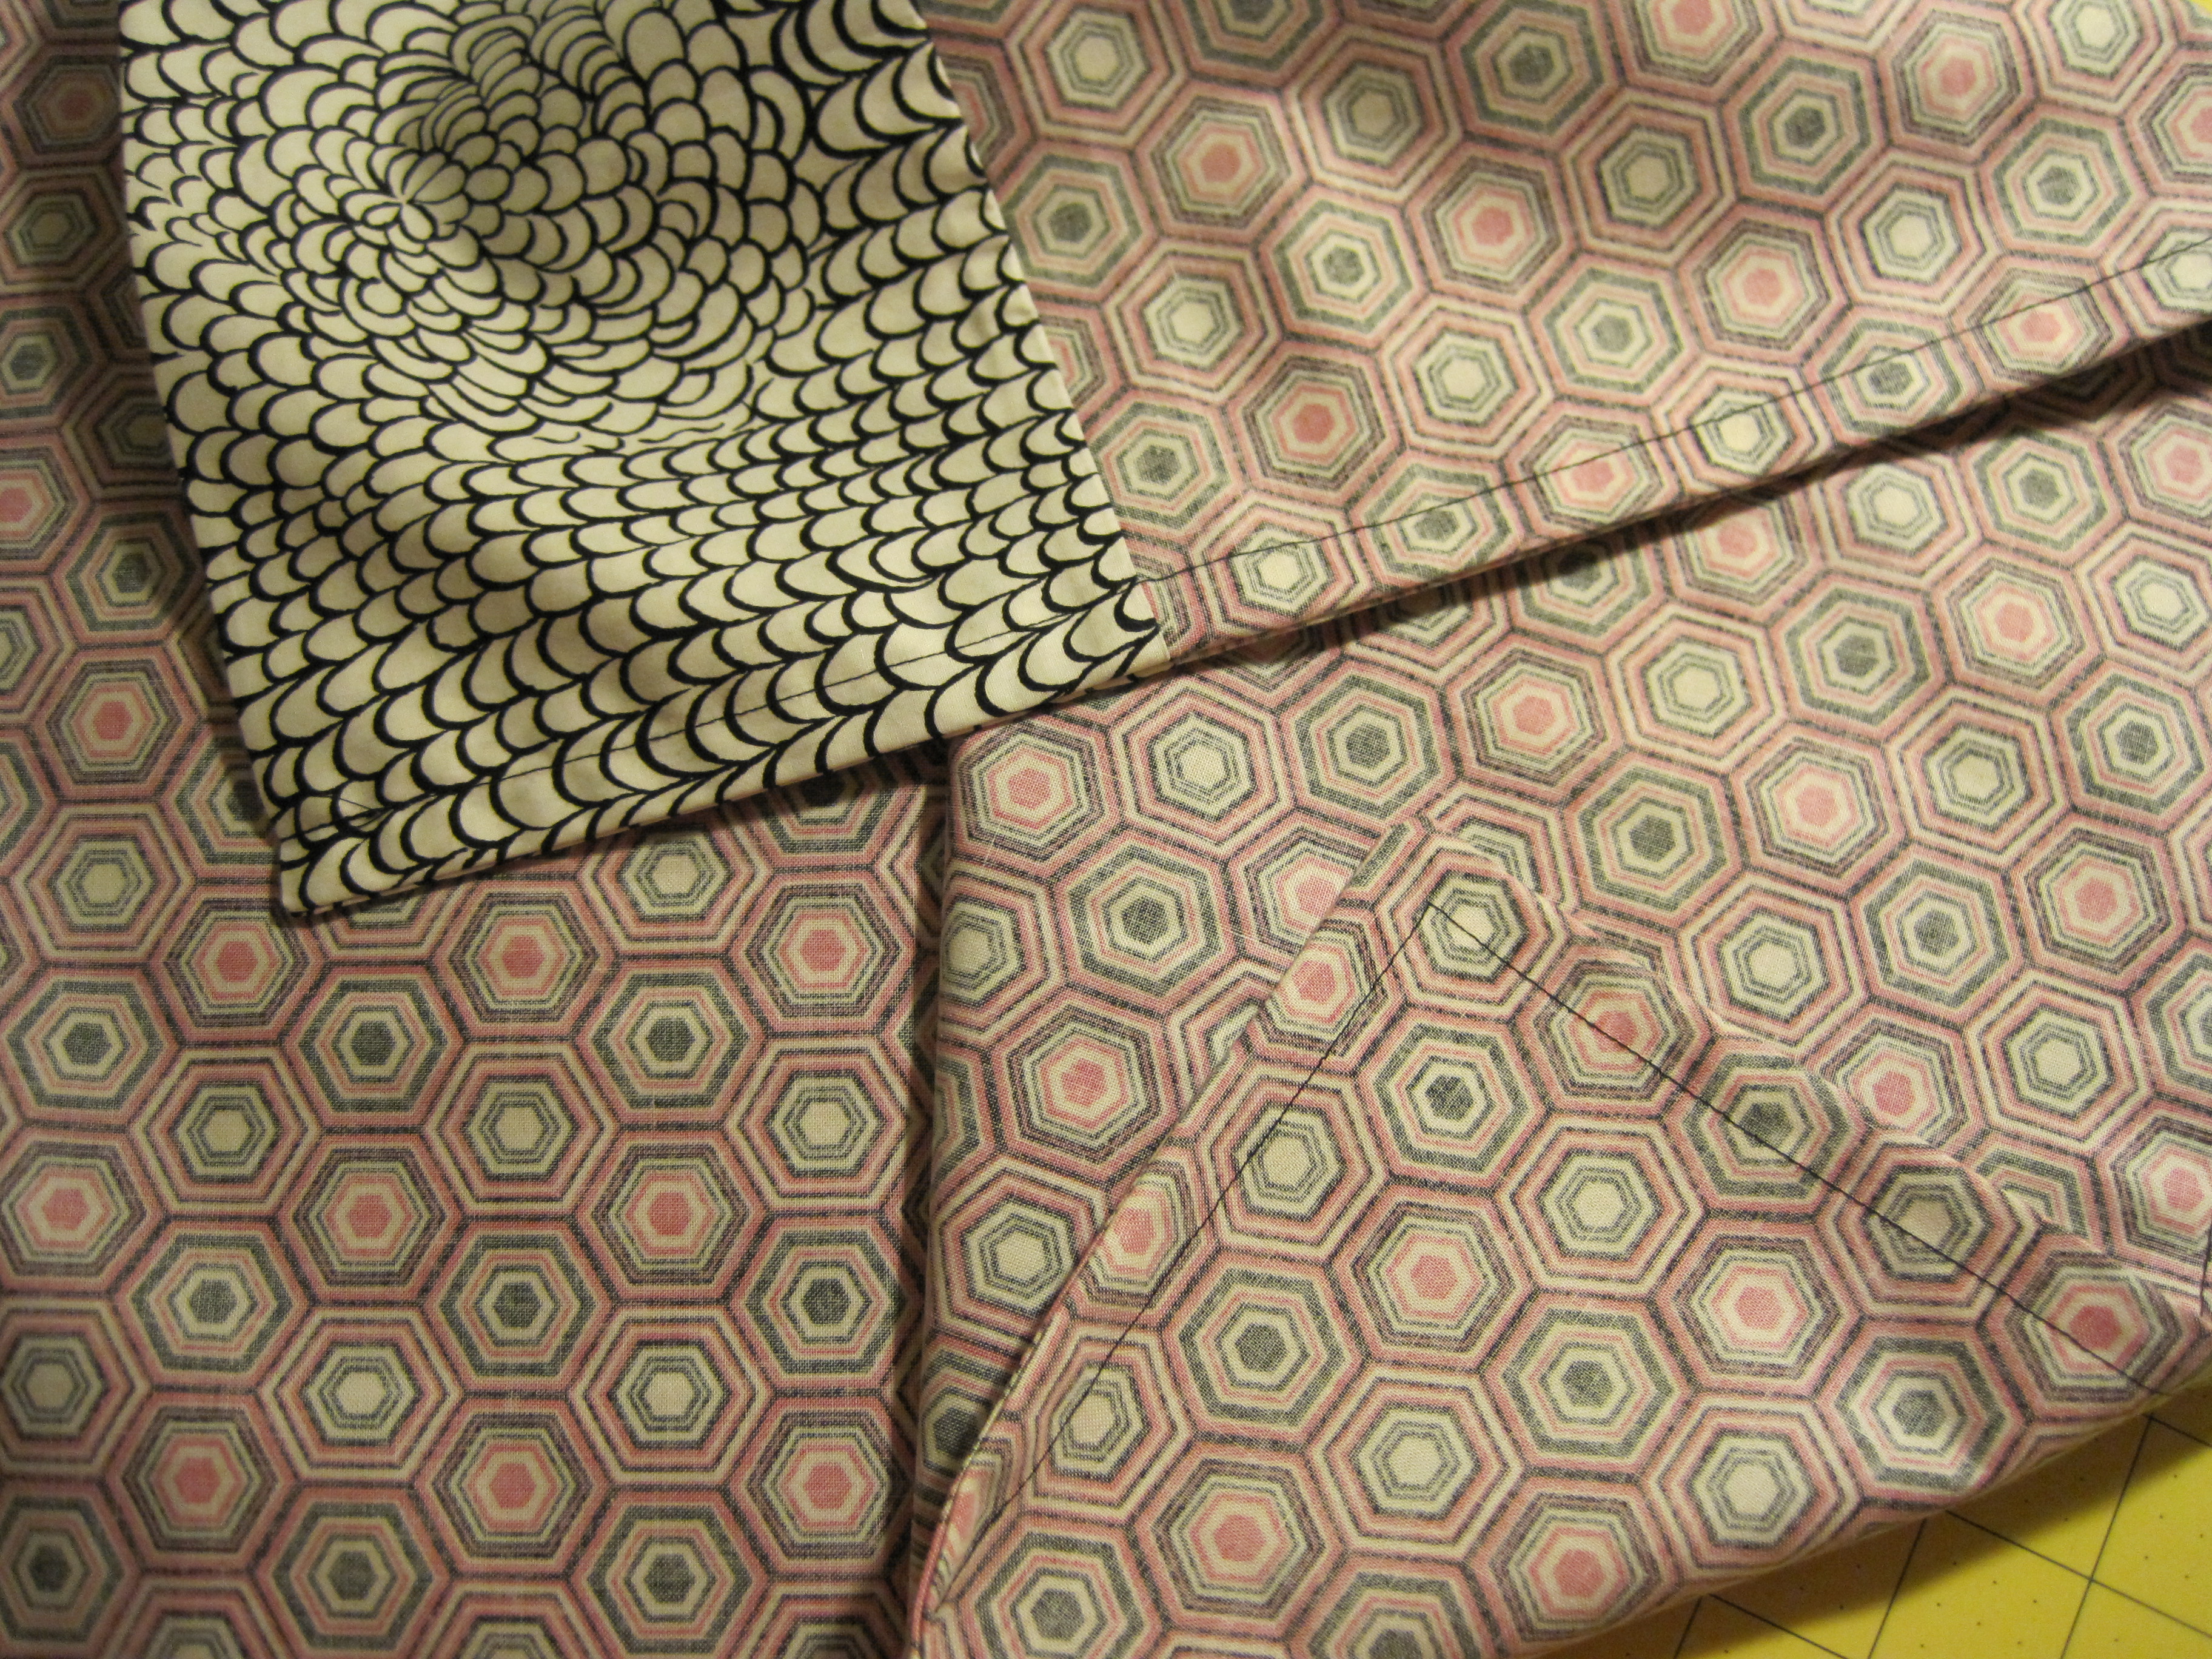
Remove any pins and birth your HOT DOG! Roll BUN back, gently tugging the HOT DOG out of the center.
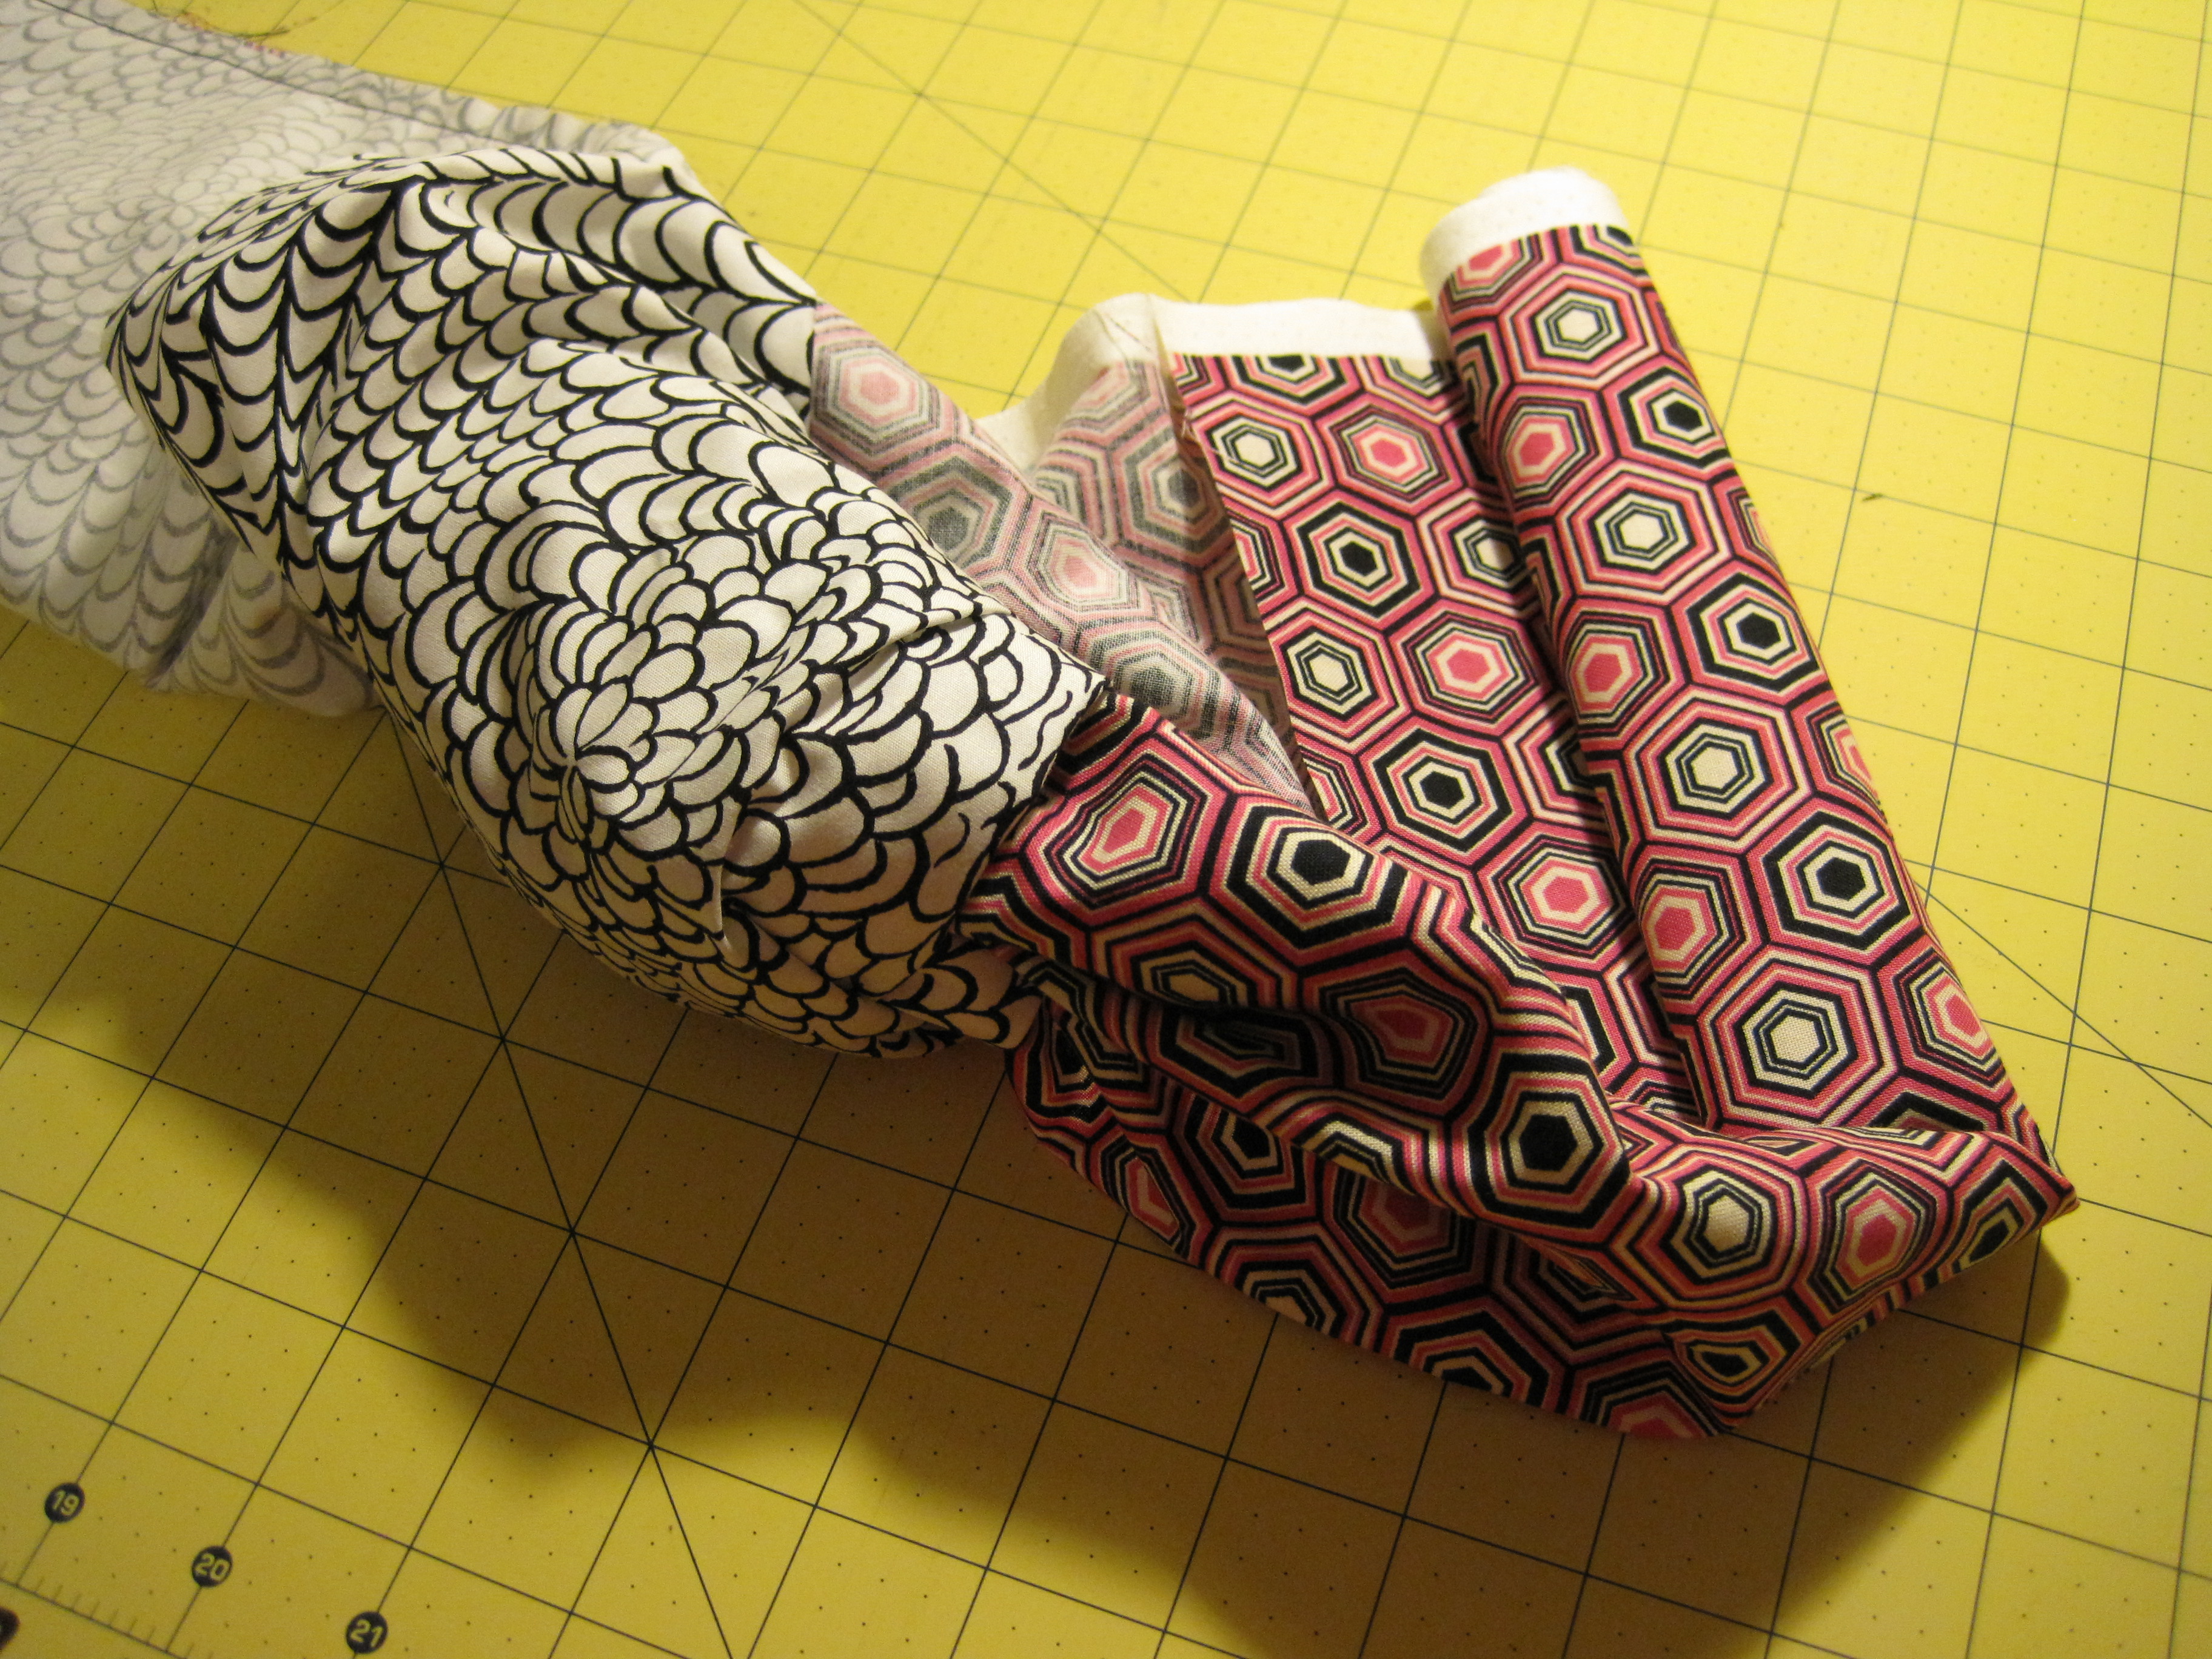
Continue tugging and rolling until the HOT DOG is all the way out.

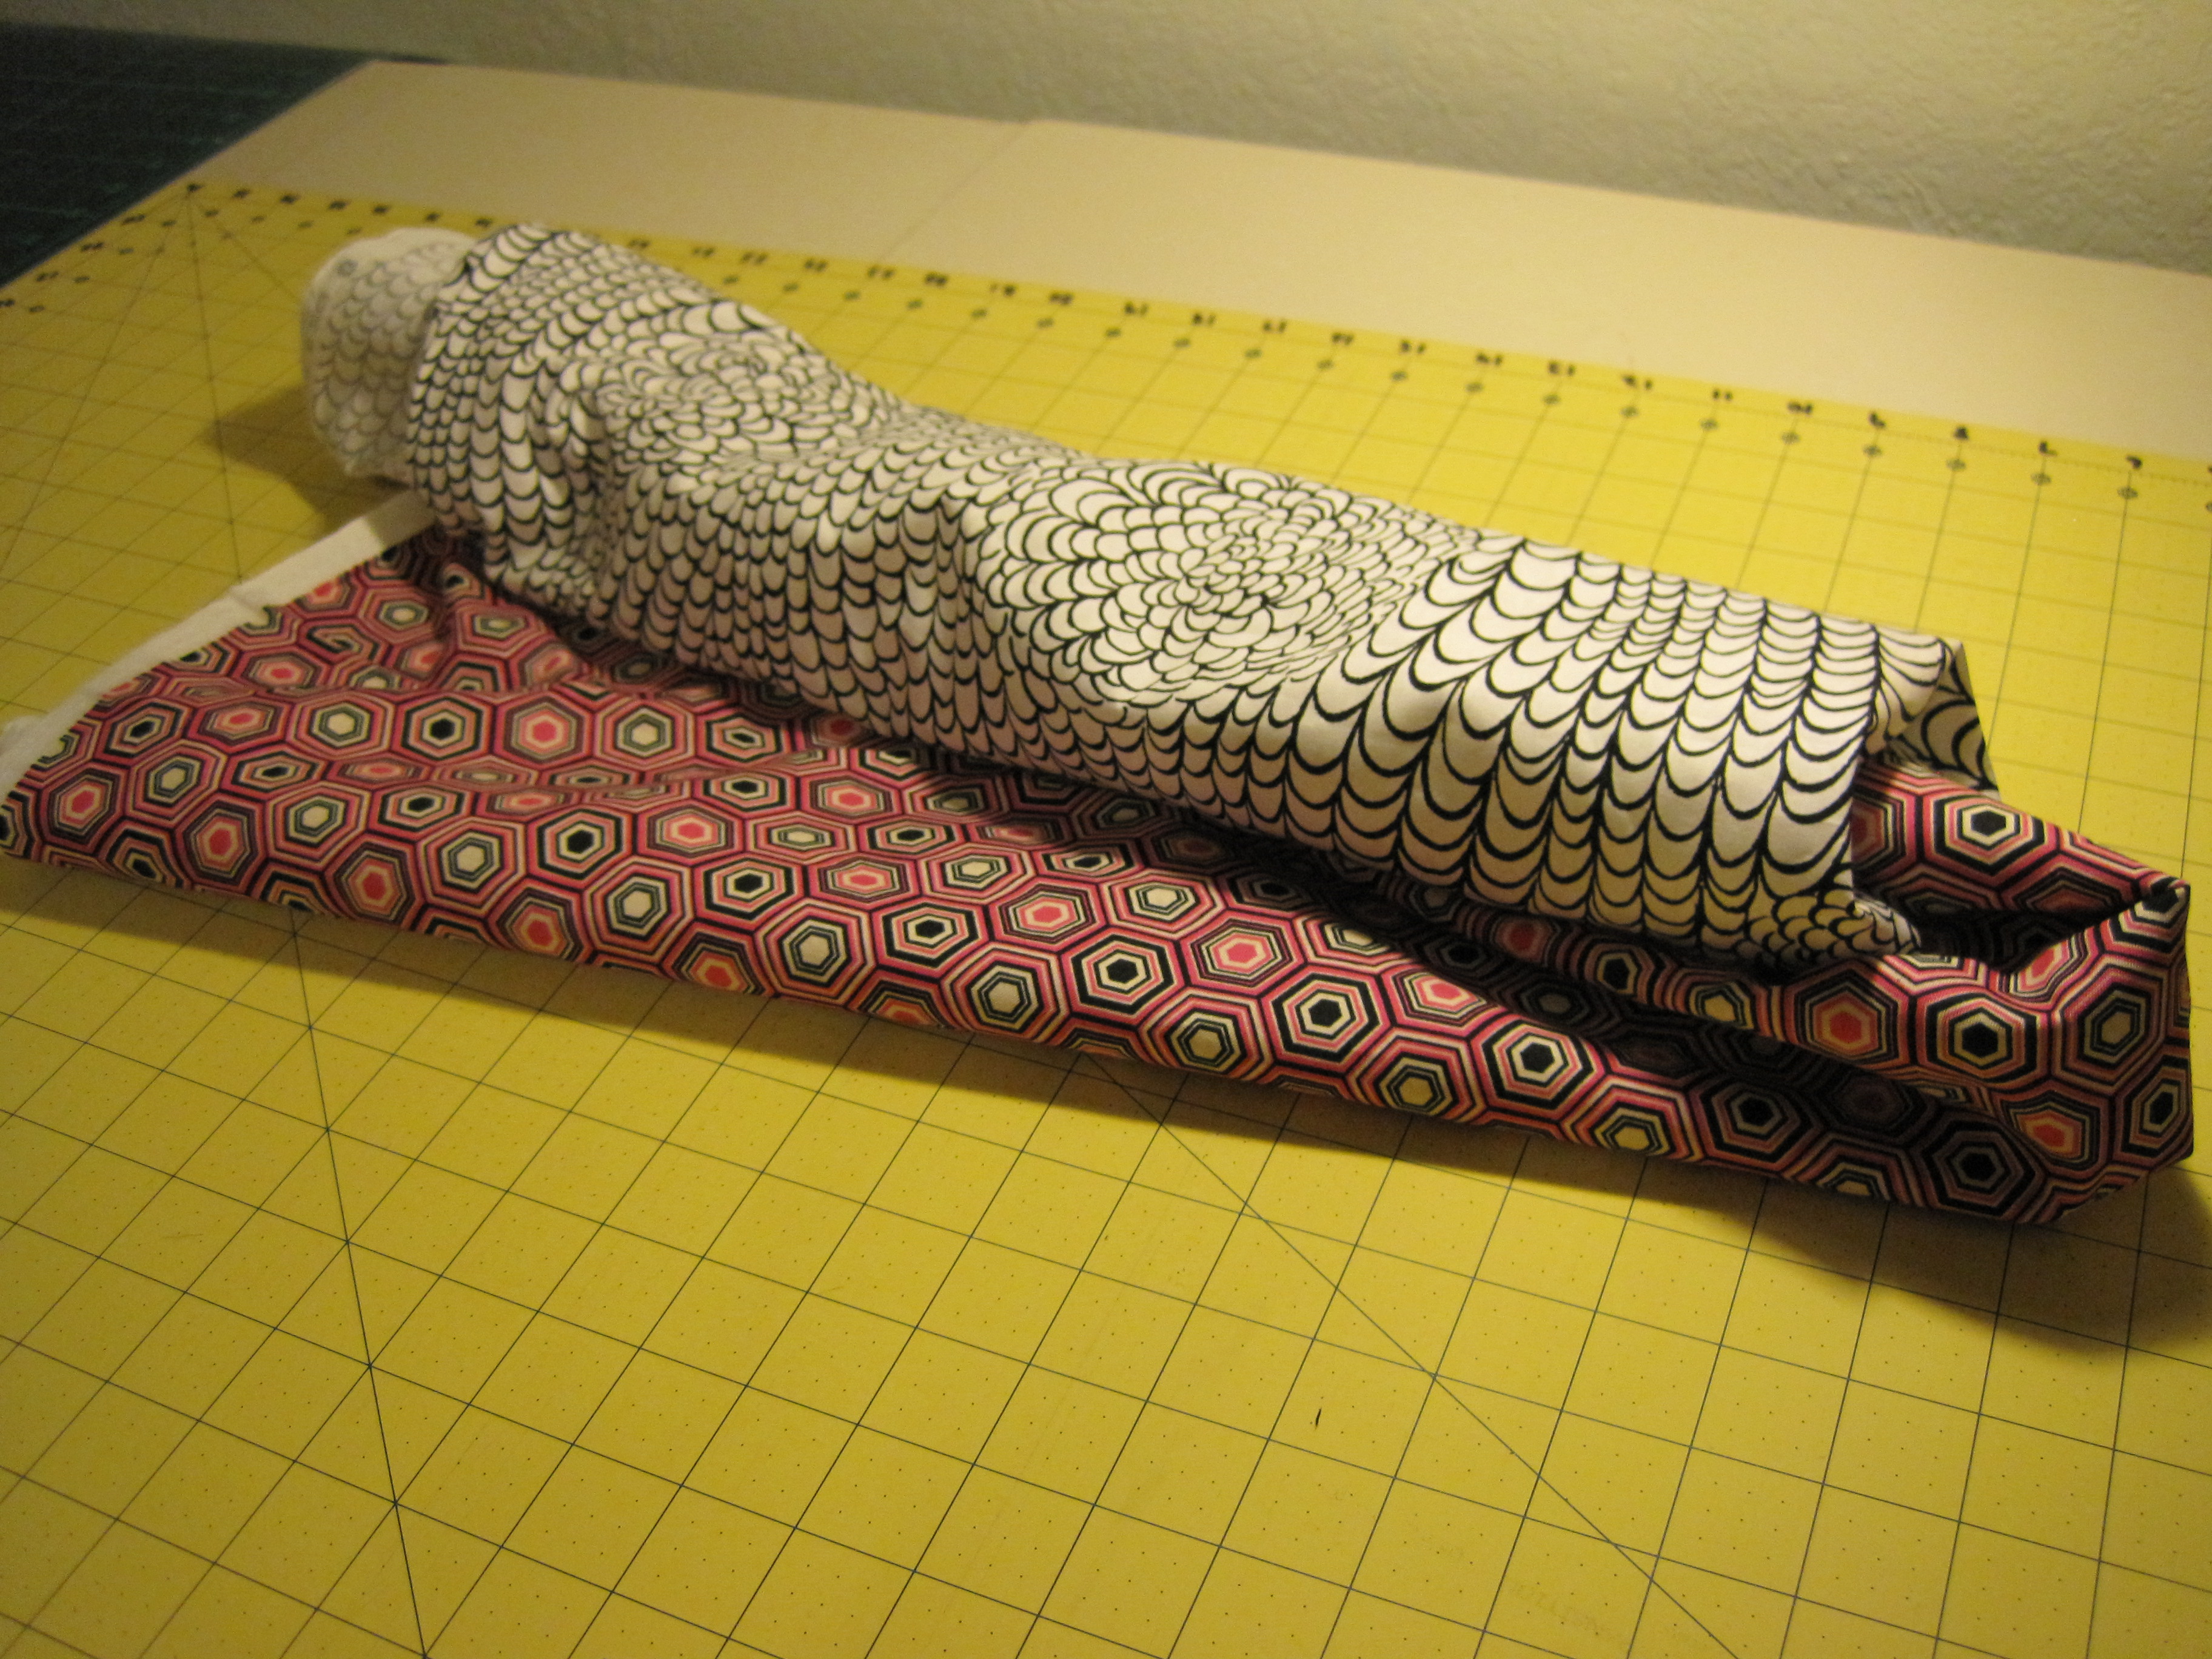
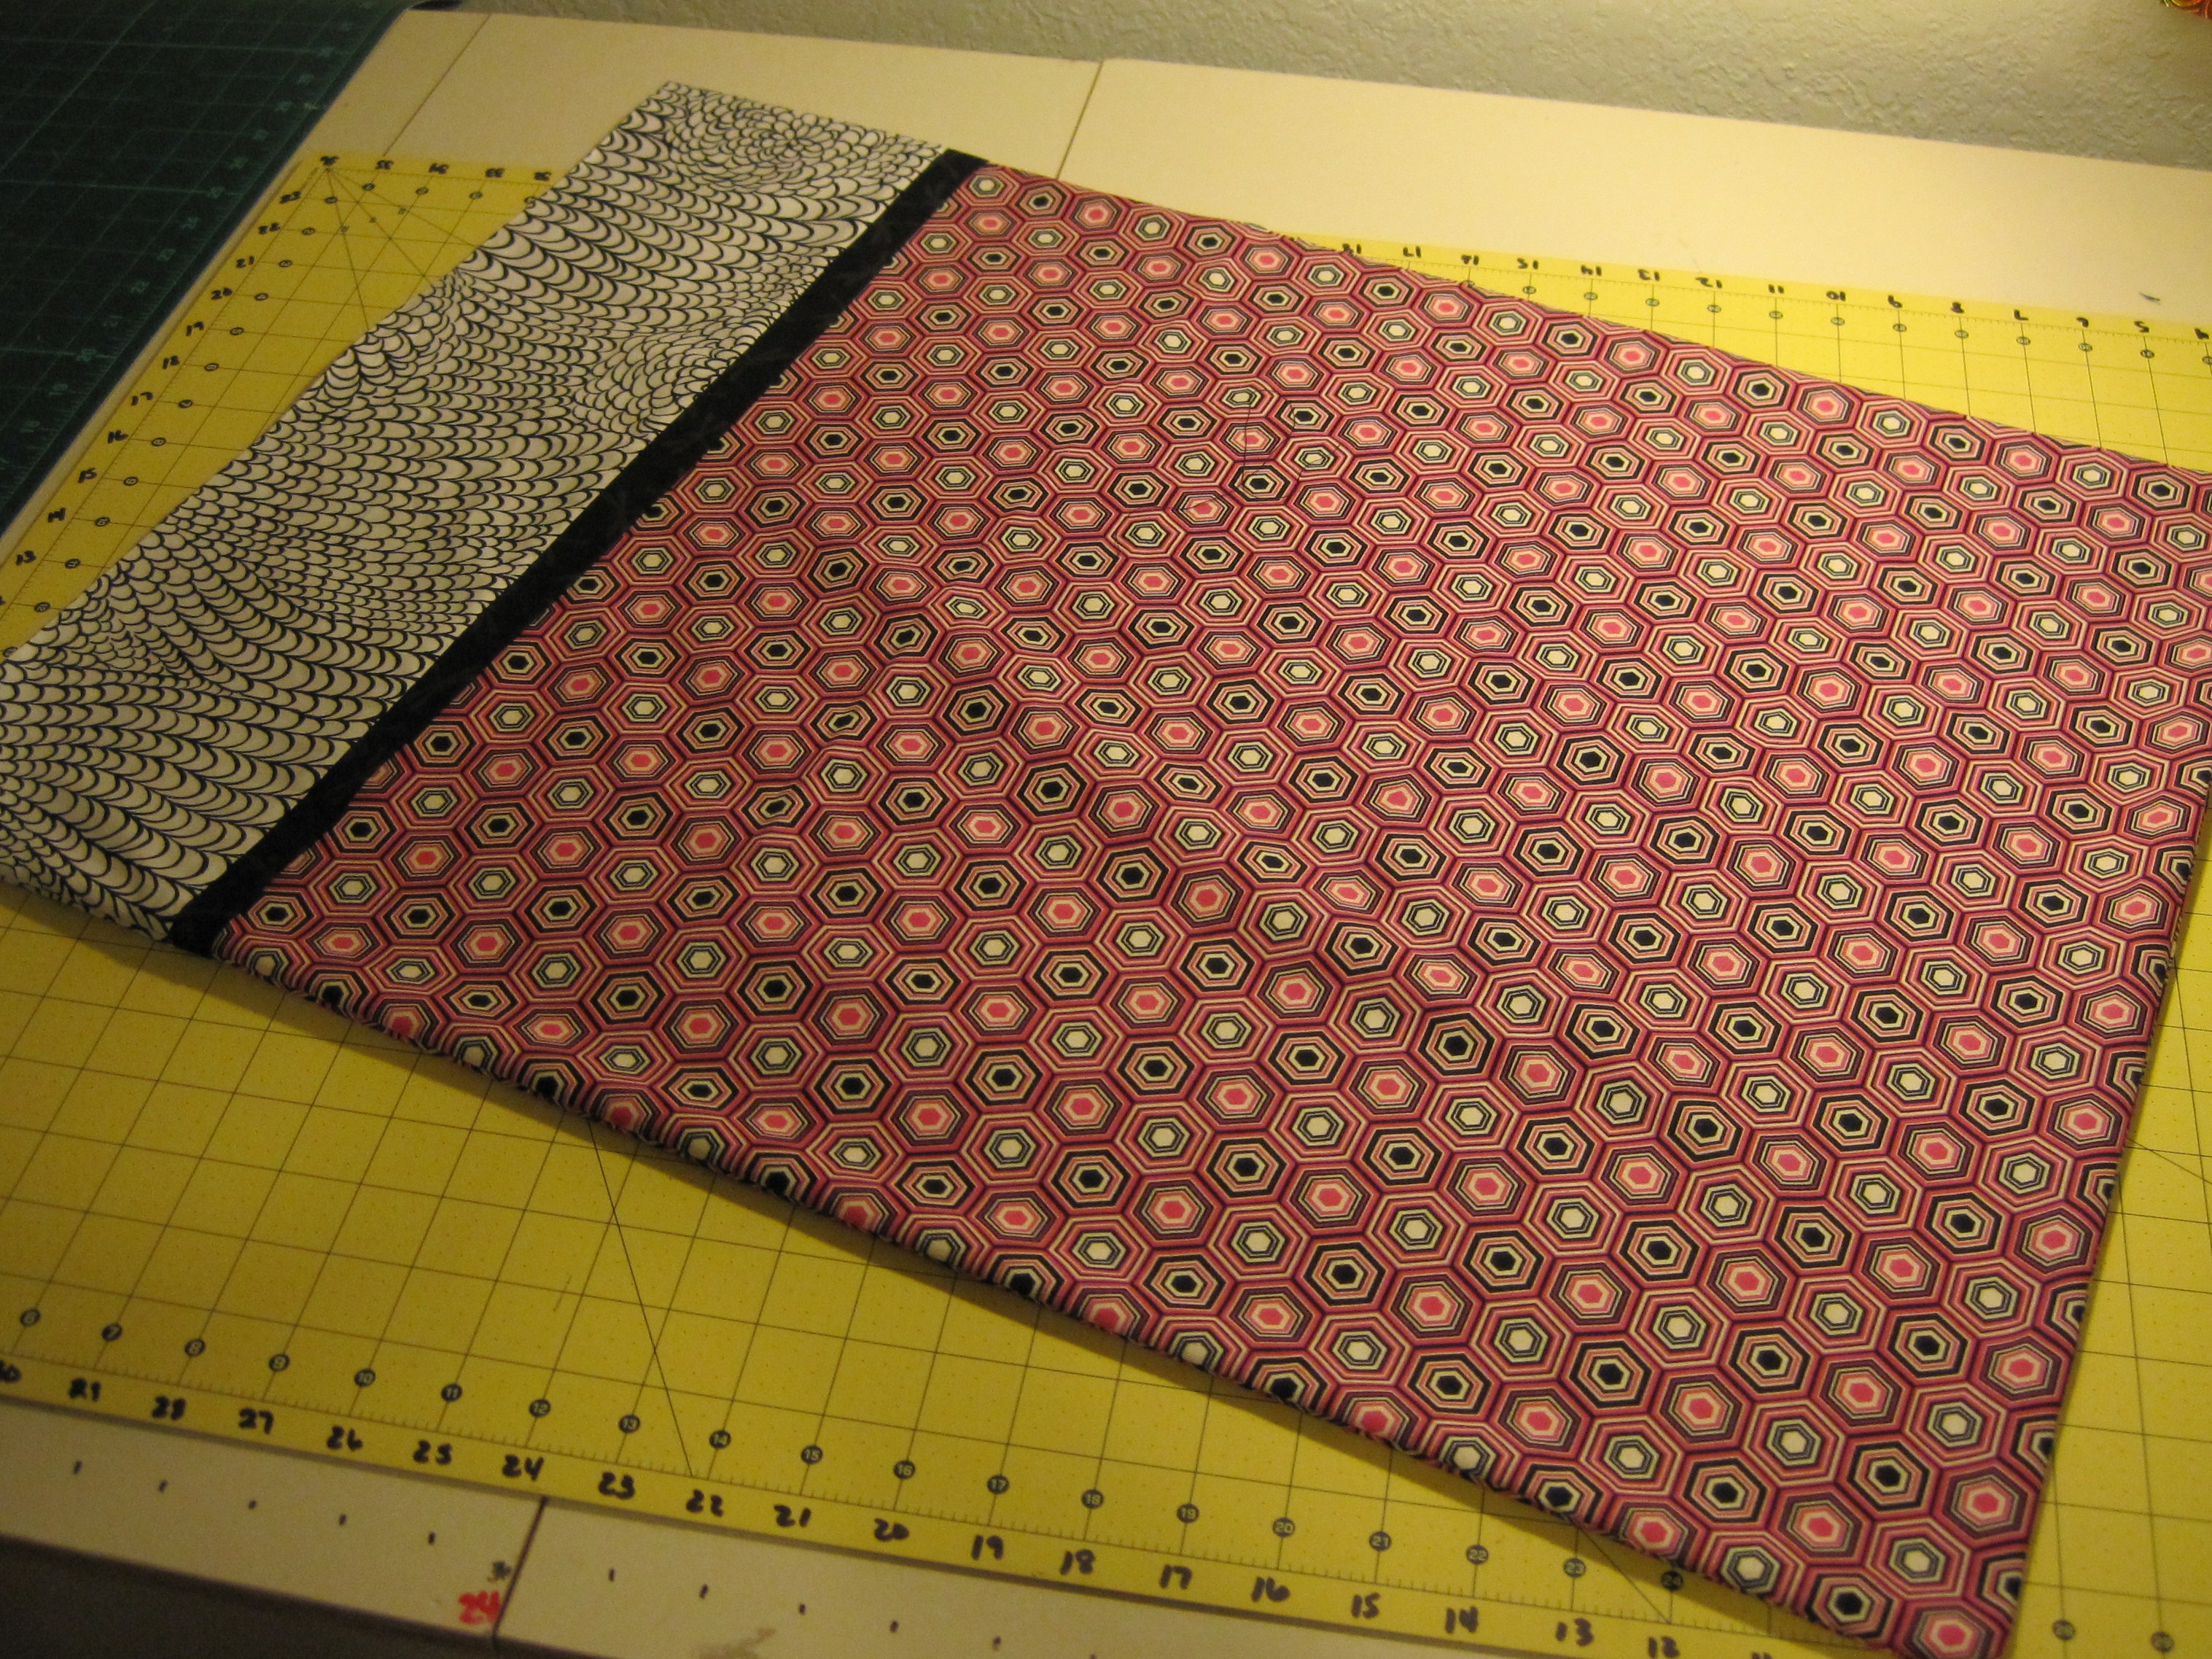
Your pillowcase should now look something like this.


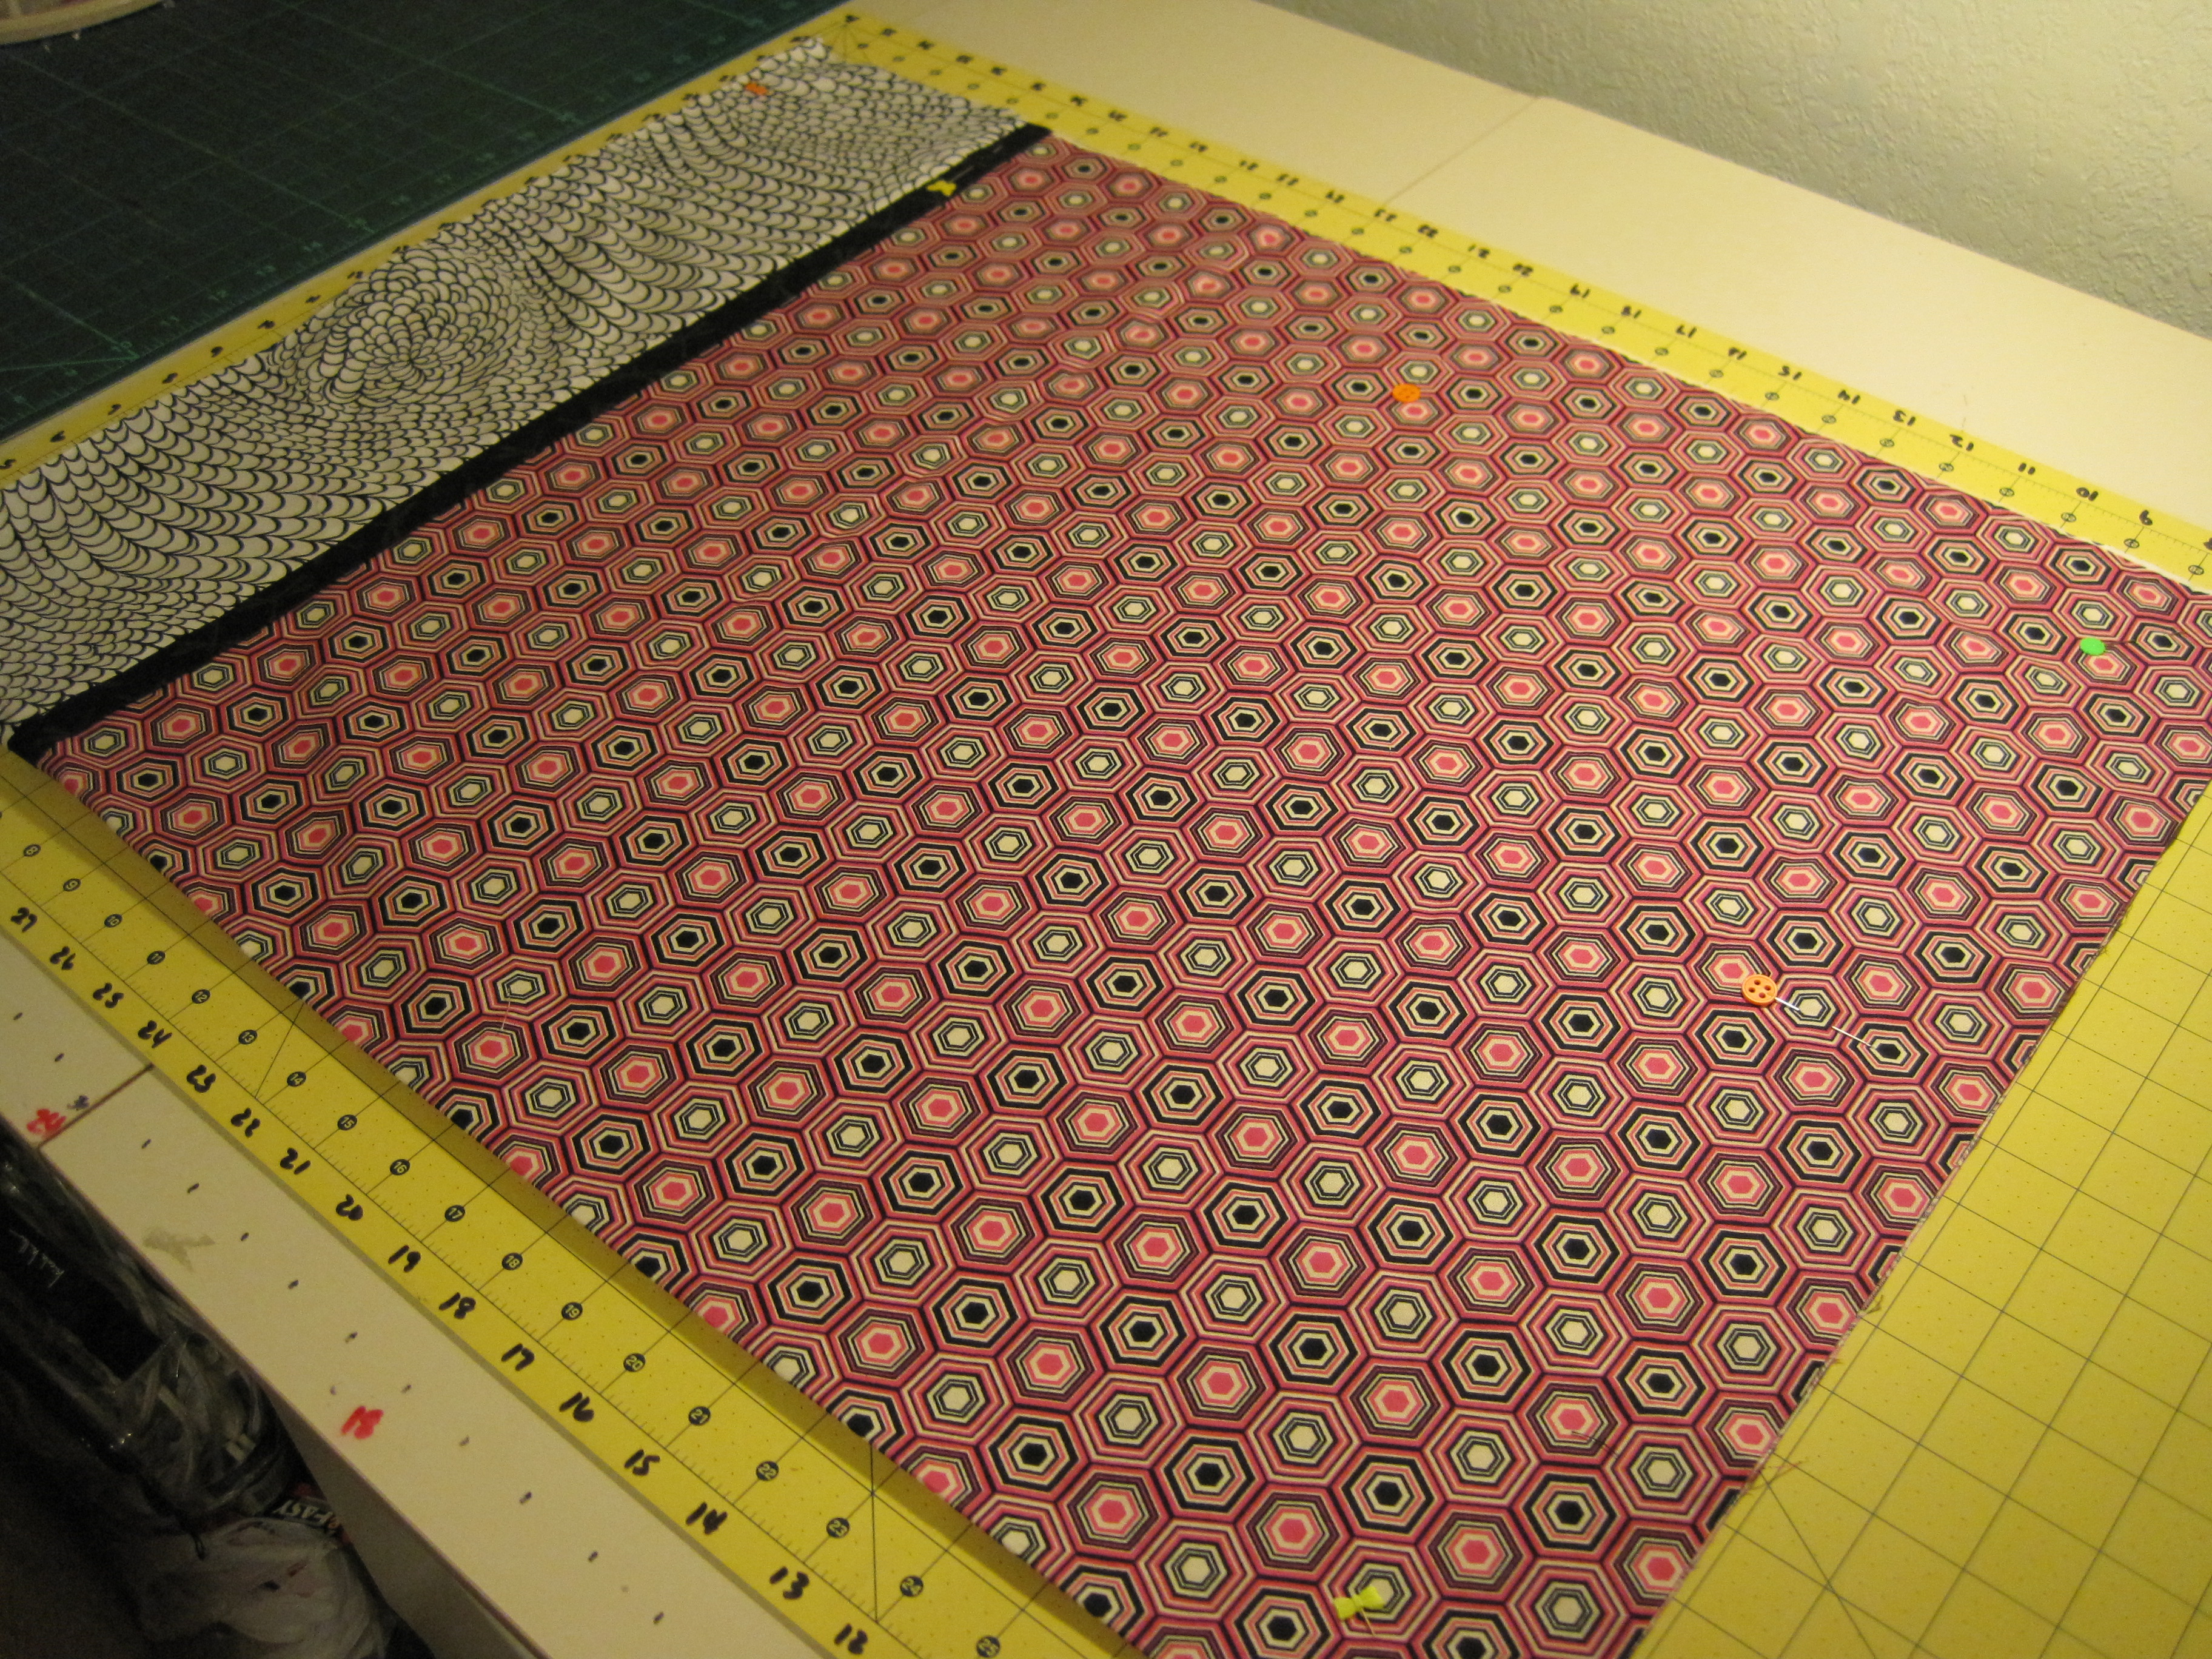
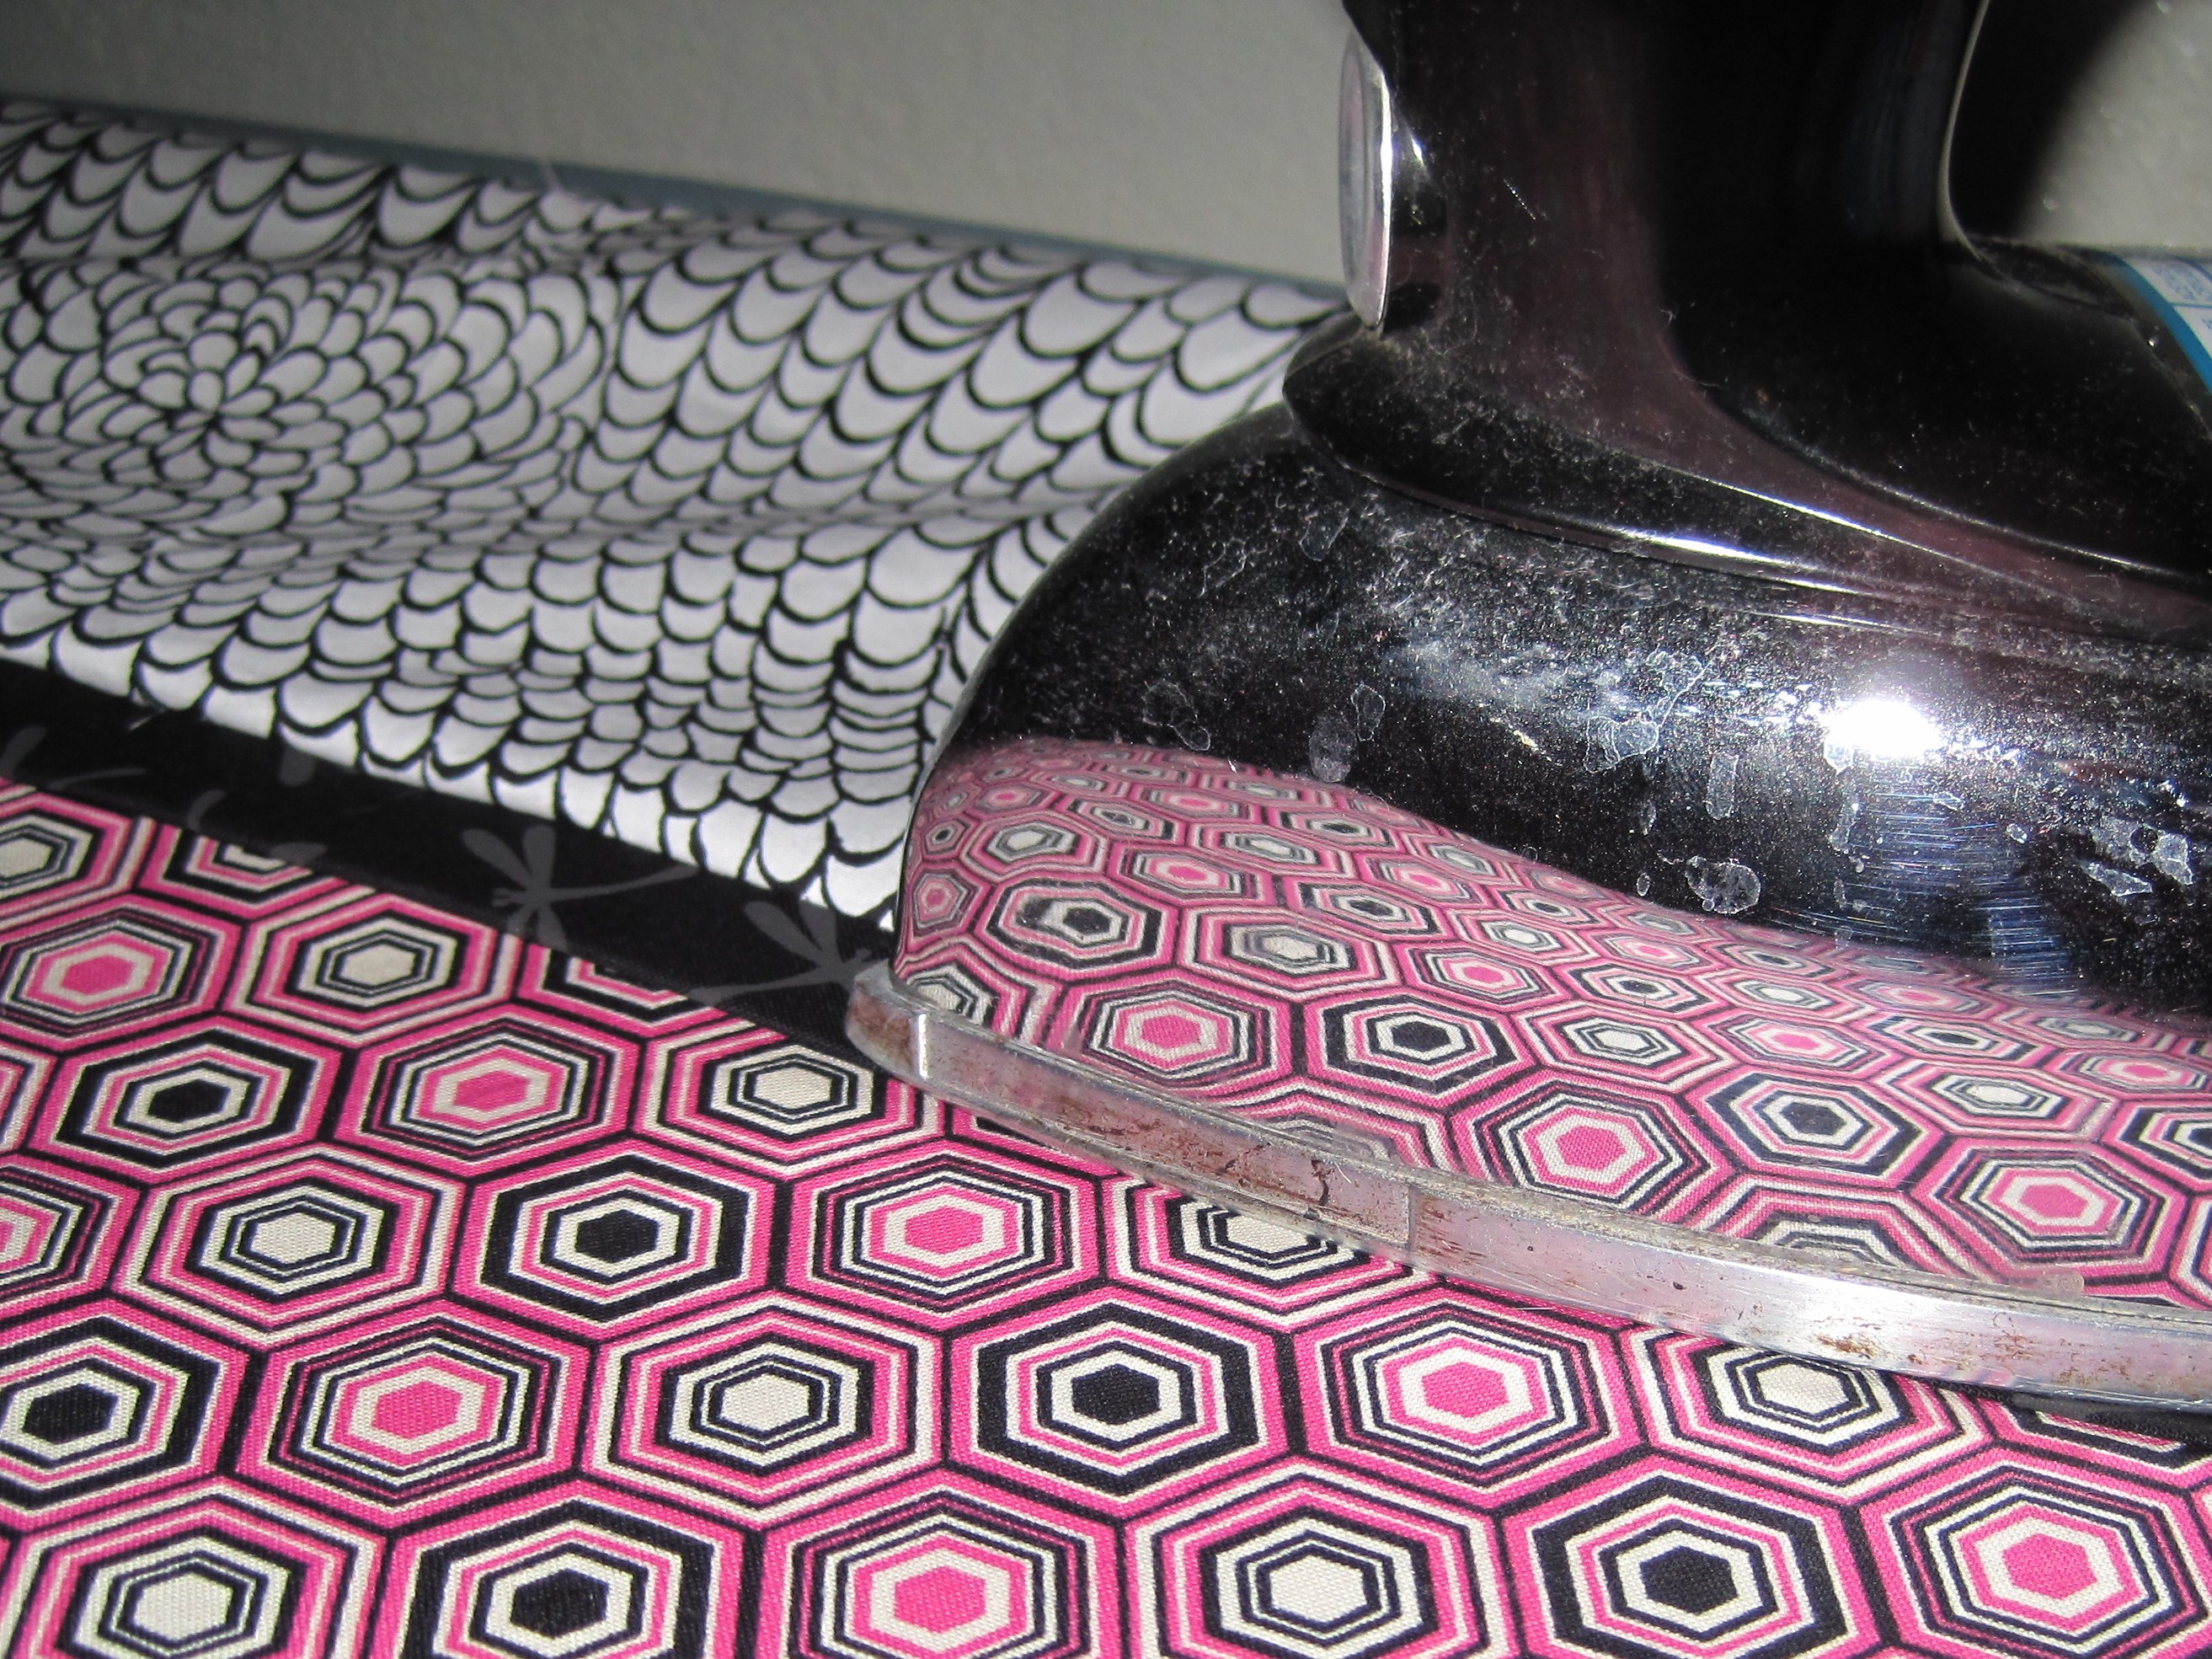
Smooth out the fabric, then press the BUN and MUSTARD, tugging gently so it’ll lie flat. I like to press on both sides.

Square up your pillowcase by removing the selvage.

With WRONG SIDES together, align the MUSTARD and corners of the pillowcase.
Pin in several places.
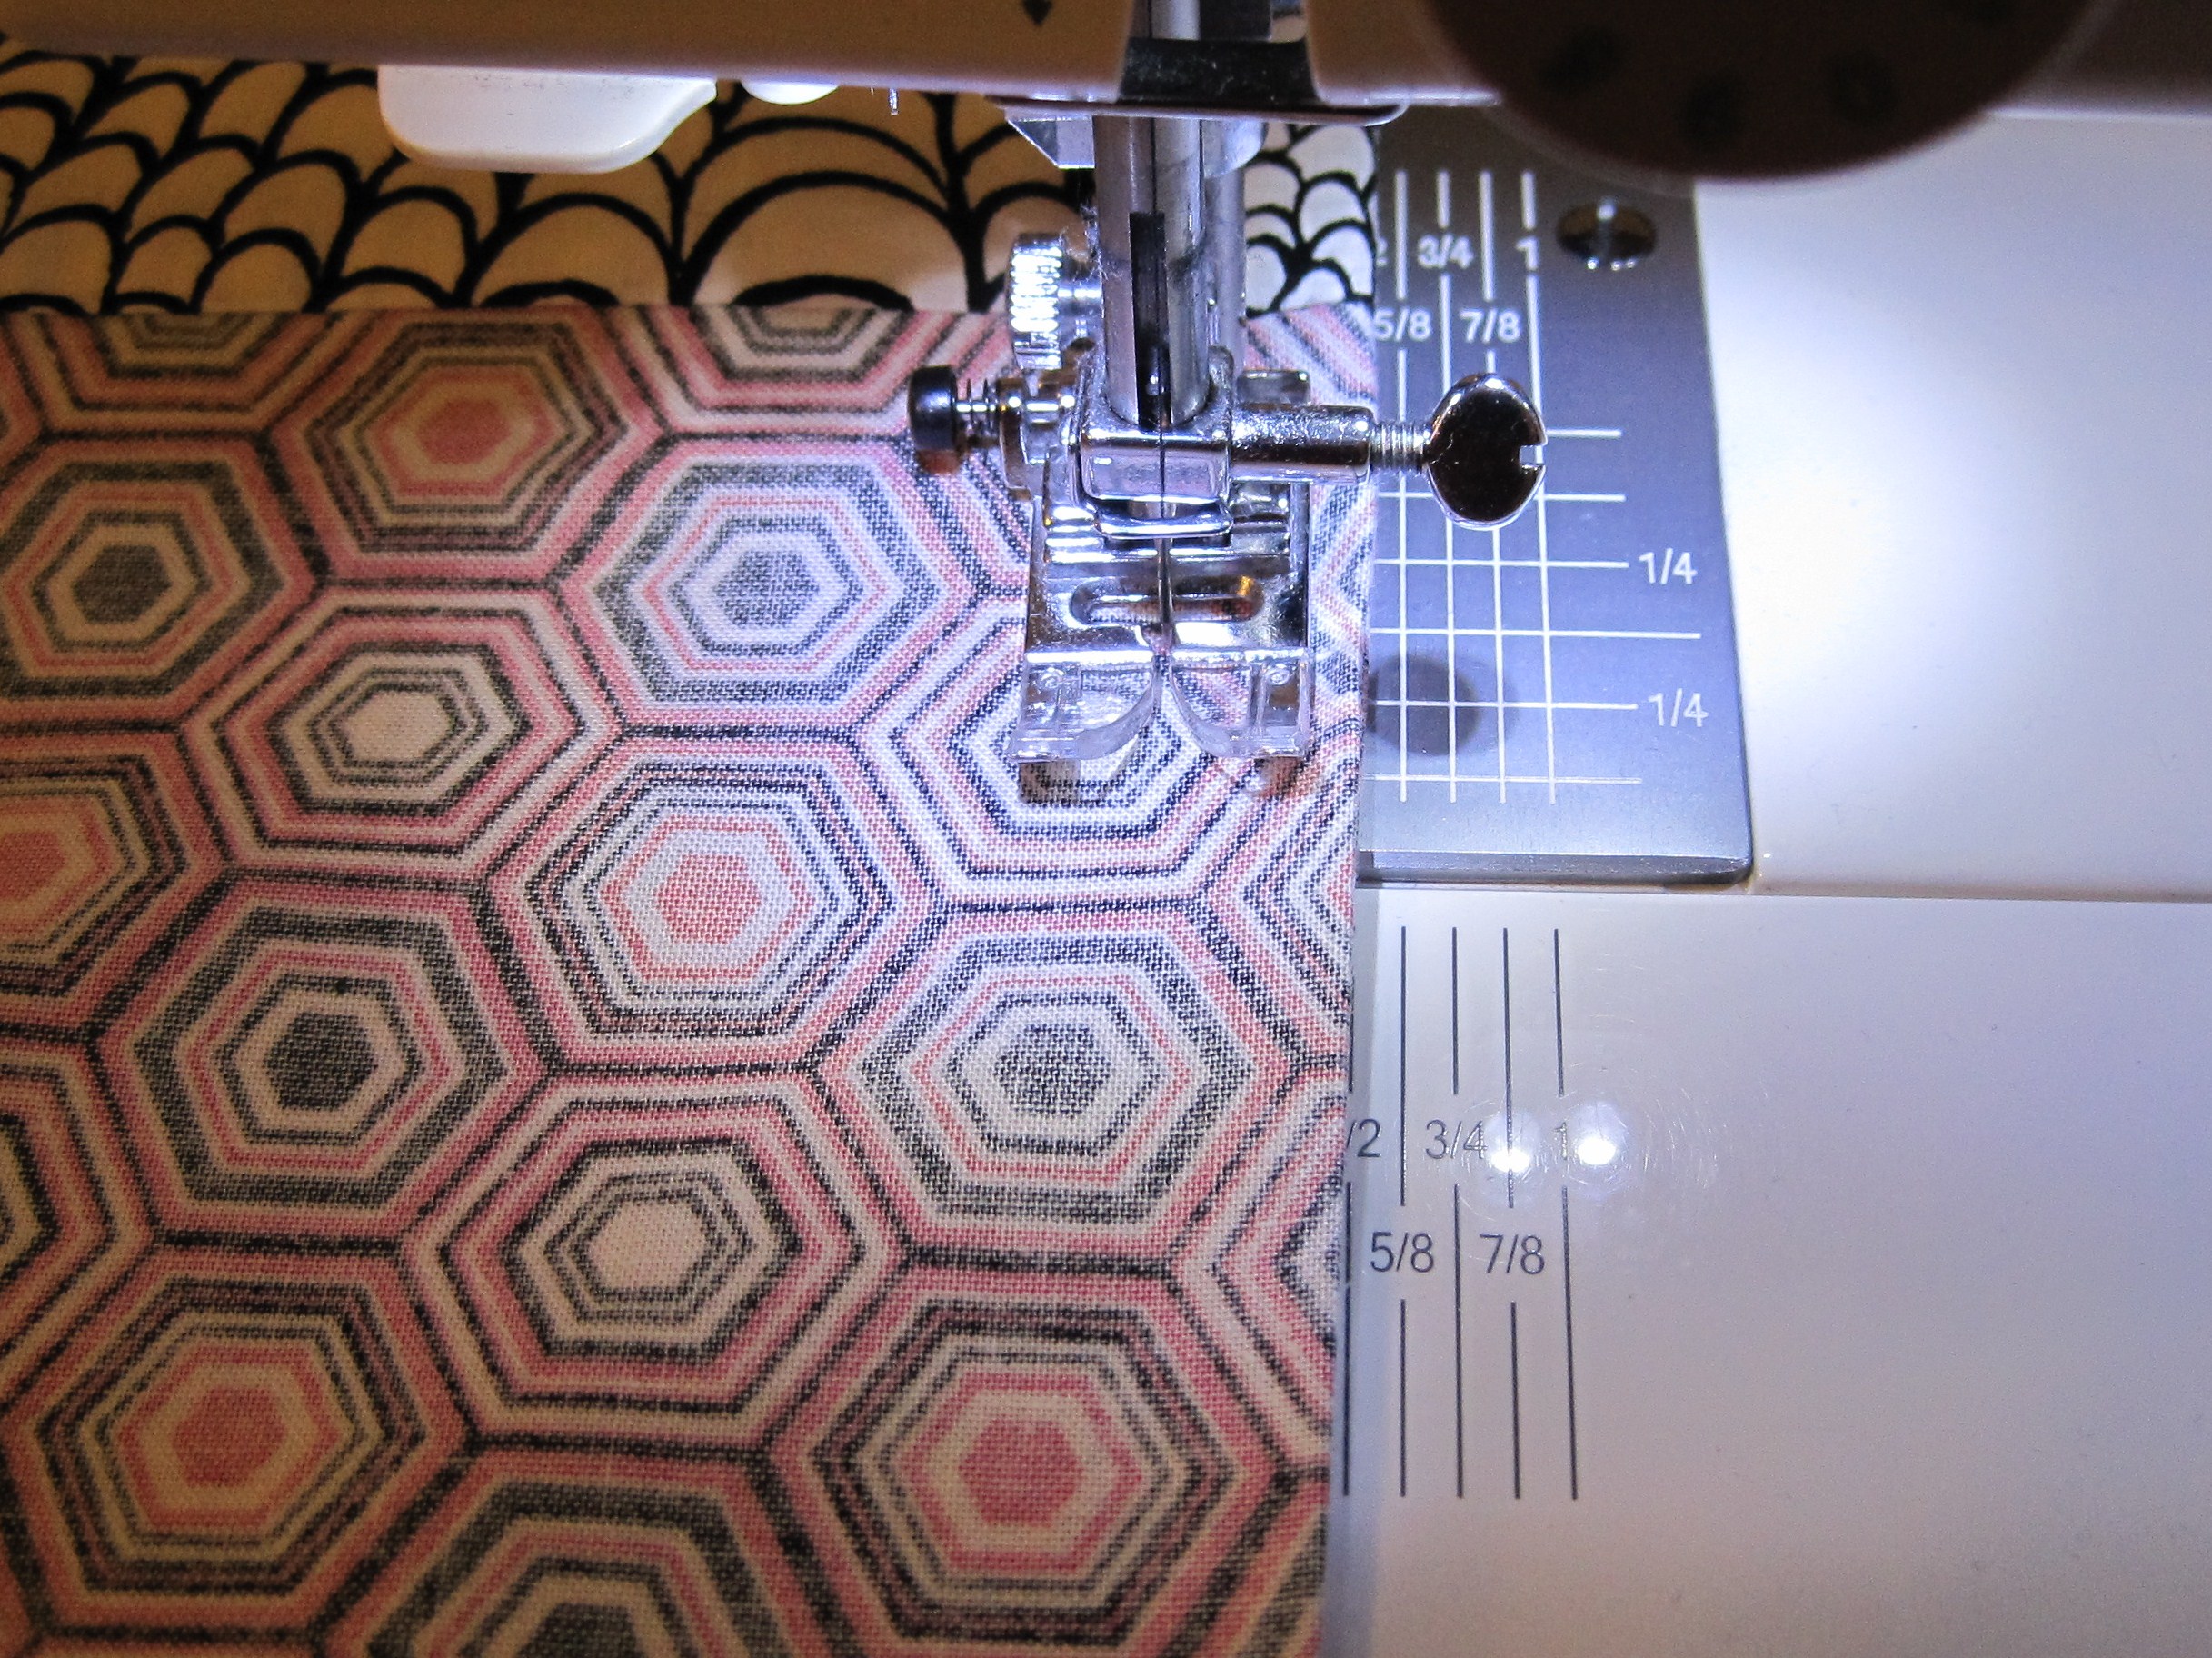
Stitch around raw edges using a 1/4″ seam allowance (yes, yes, really, right sides out, wrong sides together!).

Turn the corner and sew across the bottom.


Trim corners (raw edges only, please!).
Turn the pillowcase wrong-side out.
Look how nice the BUN looks next to the HOT DOG!
Press the side and bottom seams flat.

Stitch using a 1/2″ seam allowance.
Look at that, you made French Seams…no raw edges!
Turn right side out and press.

See how nicely the MUSTARD lines up? Did you notice that your condiment made a lovely little flap, too?
It looks good outside and in!

Delicious!
Now, let me know if you’re as addicted to these as I am! This beauty is number 11 and I know I’ll make more. In addition to donating to the 1 Million Pillowcase Challenge, they also make great gift bags for quilts!
Need a hard copy? Printable PDF Tutorial!
Find my free patterns on Sewhooked & Fandom in Stitches.
Posts on this blog may contain affiliate links to help cover the cost of my website. I thank you for your generous support. ♥
For more information about The Linus Connection, please visit our website or blog orbecome a fan on Facebook.


