This week, I’m celebrating 5,000 subscribers with a special project, showcasing a new thrifted blouse makeover, discussing how to mend pajama pants, and showing off the new strap for the X-Men messenger bag I shared last week.
This week’s Show & Tell is all about Repair & Reuse. I chat about an upcycled Switch case, the T-Shirt quilt rescue project, and a new repair project for an old bag, as well as some odds and ends.
I am continuing to make updates to my website, especially the pattern and tutorial archives. Lots of older patterns and tutorials have already been added back to the archives with lots more on the way!
Posts on this blog may contain affiliate links but I have no control over “sponsored posts” which are the price I pay for a less expensive website. Thank you for your understanding & support. ♥
Something I’ve been sitting on for quite some time until it was released on Fandom In Stitches is The Black Gate. I took a bit of artistic licensed with the design, because as any Tolkien reader will know, you can’t actually see Mt. Doom from The Black Gate. But hey, I really wanted the mountain in my quilt, so there it is!
In other related Fandom In Stitches goodness, the #tfios Design Challenge is underway! If you’re a John Green reader and enjoy designing, please do check it out! We’d love to have you participate and share your designs inspired by The Fault in Our Stars, which I would venture to say is one of the best books I have ever read.
On a personal crafty note, I finished a project for myself that I’ve been wanting to tackle for a while. This spiffy little bag was made for a special reason and was created entirely out of fabric I had on hand, some of which were just scrappy bits and pieces. It fills a need for me that I’ve wanted to do something about for quite some time. I’ll talk about it more on next week’s TTMT!
Have you made any of my patterns? I’d love to see them! Share a link or better yet, add them to the Sewhooked flickr group!
Just over a year ago, I made a Monk’s Bag from Purl Bee’s tutorial (sadly Purl Bee no longer exists as of 2023).
I used the heck out of that bag, so much so that the strap and bottom of the bag frayed through in places.
What I discovered over the course of the year I carried this bag was that I loved the shape and the length of the strap but that I needed a bit more. I need a bigger bag with more pockets. I also need a sturdier bag that holds its shape a bit better without the fabric wearing through.
When my daughter asked for a school bag to carry her supplies in that could do double duty as a purse, I once again turned to the Monk’s Bag pattern. This time, I made changes to the bag so it would hold up to her day-to-day life as a high school student. She also needed a bigger, sturdier bag, so I plotted changes that would work for both of us.
The construction of the Monk’s Bag is ideal for pockets that are built right into the lining, which is what I do here. I think you’ll find these pockets both easy to add and very sturdy! I’ve also added interfacing to the outside bag pieces, which gives the bag more body and will (hopefully!) help avoid the wear that developed in my original Monk’s Bag.
The basic idea of this tutorial is the same as the Purl Bee bag, but there are quite a few additional steps as well as a number of construction changes.
The words below are all my own, but in an effort to make this easy to understand without disrespecting the original tutorial, I’ll mark any instruction or supplies that I have not changed with an asterisk*.
You will need:
rotary cutter & ruler
coordinating thread
iron & ironing board
stencil & paint (optional)
pins
fabric marking pencil, pen or chalk
Fabric 1: 1 yard, cut in the following pieces(in the sample, this is the golden brown fabric)
2 – 11″ x 14″ (outside center panel). OPTIONAL – Stencil a coordinating design on one of the outside center panels. More on that in the instructions.
2 – 6.5″ x 34″ (inside handles)*
2 – 11″ x 21″ (inside center panel pockets)
1 – 2.5″ x 6.5″ (inside side loop)
Fabric 2:1 yard , cut in the following pieces (in the sample, this is the black patterned batik)
2 – 11″ x 14″ (inside center panel)
2 – 6.5″ x 34″ (outside handles)*
1 – 6.5″ x 21″ (inside handle pocket 1)
1 – 6.5″ x 15″ (inside handle pocket 2)
Lightweight Fusible Interfacing:
2 – 11″ x 14″ (outside center panel)
2 – 6.5″ x 34″ (outside handles)
1 – 6″ x 6″ (inside side loop reinforcement)
All seam allowances are 1/2″ except where noted.*
Fold and press the 2.5″ x 6.5″ (inside side loop) in half. Fold in the two sides in to the center and press again. It should look like what you see above.
Use a decorative or heavy stitch and stitch down the length of the fabric at least three times. This is a loop to hang keys and pens from, so it’s important that it be sturdy. I use a triple straight stitch in the example.
If you’d like to stencil a design on the front of your bag, it’s easier to do it before assembly. I took a photo of the pattern on the black batik, then increased the size slightly and printed that onto the matte side of a piece of freezer paper. For more on freezer paper stenciling see this text tutorial or this video.
Collect your bag pieces and sort them into outside and lining pieces.
Iron the 6.5″ x 34″ (outside handles) pieces of interfacing to the 2 – 6.5″ x 34″ (outside handles) pieces of fabric. Interfacing tends to be less wide than fabric, so piece it if necessary to get the correct length.
Repeat the process for the outside center panel pieces. You should have seam allowance outside the interfacing on the side edges of of the center pieces, but not on the top and bottom.
Pin one handle to each side of the center panel. Mark 1/2″ at the top of each side. Stitch down each side, taking care not to stitch past the 1/2″ mark on the top of each center panel.
Press the seam allowance toward the bag handles. Press a 1/2″ seam allowance on the inside of the handles and along the center panel. I find this much easier to do at this step than after the bag is assembled.
Attach handles to opposite center panel, also marking 1/2″ from the top. Repeat pressing seam allowance along handles and top of center panel.
Fold the bag in half with center panels matching. Stitch across the bottom of the bag.*
Unfold seam allowance on end of handles. Pin together and stitch.*
Press the center open, then re-press 1/2″ seam allowance.
The outside of the bag is complete! Now, on to the lining, which is a bit more involved.
Collect your inside pocket pieces.
Fold each pocket piece in half across the width of the pocket. Press and stitch across the top. I used a combination of stitches just for fun!
Place the center panel pocked on the right side of the inside center panel. Pin and baste with a 1/4″ seam allowance along the raw edges. If desired, you can add additional stitching lines to break up the pocket. I left one full size and put a center stitching line down the other. The full sized pocket is great for magazines or papers and the split pocket is great for my checkbook, calendar, cell phone, camera, etc.
Repeat the process with inside handle pocket 1 and 2. Position the inside side loop even with the top of handle pocket 1. Pin each side. I use the longer pocket to carry my glasses case and the smaller pocket for gum and miscellaneous small items.
Baste pockets and loop in place.
Iron 6″x6″ fusible interfacing to the back of the loop. On the front side, secure on each side approximately 2″ from the outside edges.
Inside pieces, all basted and ready to go.
The inside is assembled identically to the outside. You can see here that after the handles are attached to the inside center panel, the sides of the pockets have been secured in place.
Repeat all steps for bag assembly using a 1/2″ seam allowance on all pieces except for joining the two straps. Use a 5/8″ seam allowance there. Remember to press the straps and top of the center panel in 1/2″, just like on the outside of the bag.
Here’s the lining all assembled. You can see that the bag could easily be reversible!
Place the lining inside the bag, with wrong sides matching. I wanted the loop inside the bag to be towards the front side when I carry it so I could easily hook my keys on it, so I put the bag on my preferred shoulder for bag carrying to make sure the loop was just where I wanted it.
Match all seams and pin, pin, pin! Top stitch close to the edge. I tried to stay about 1/8″ in. Remove the pins and you’re done!
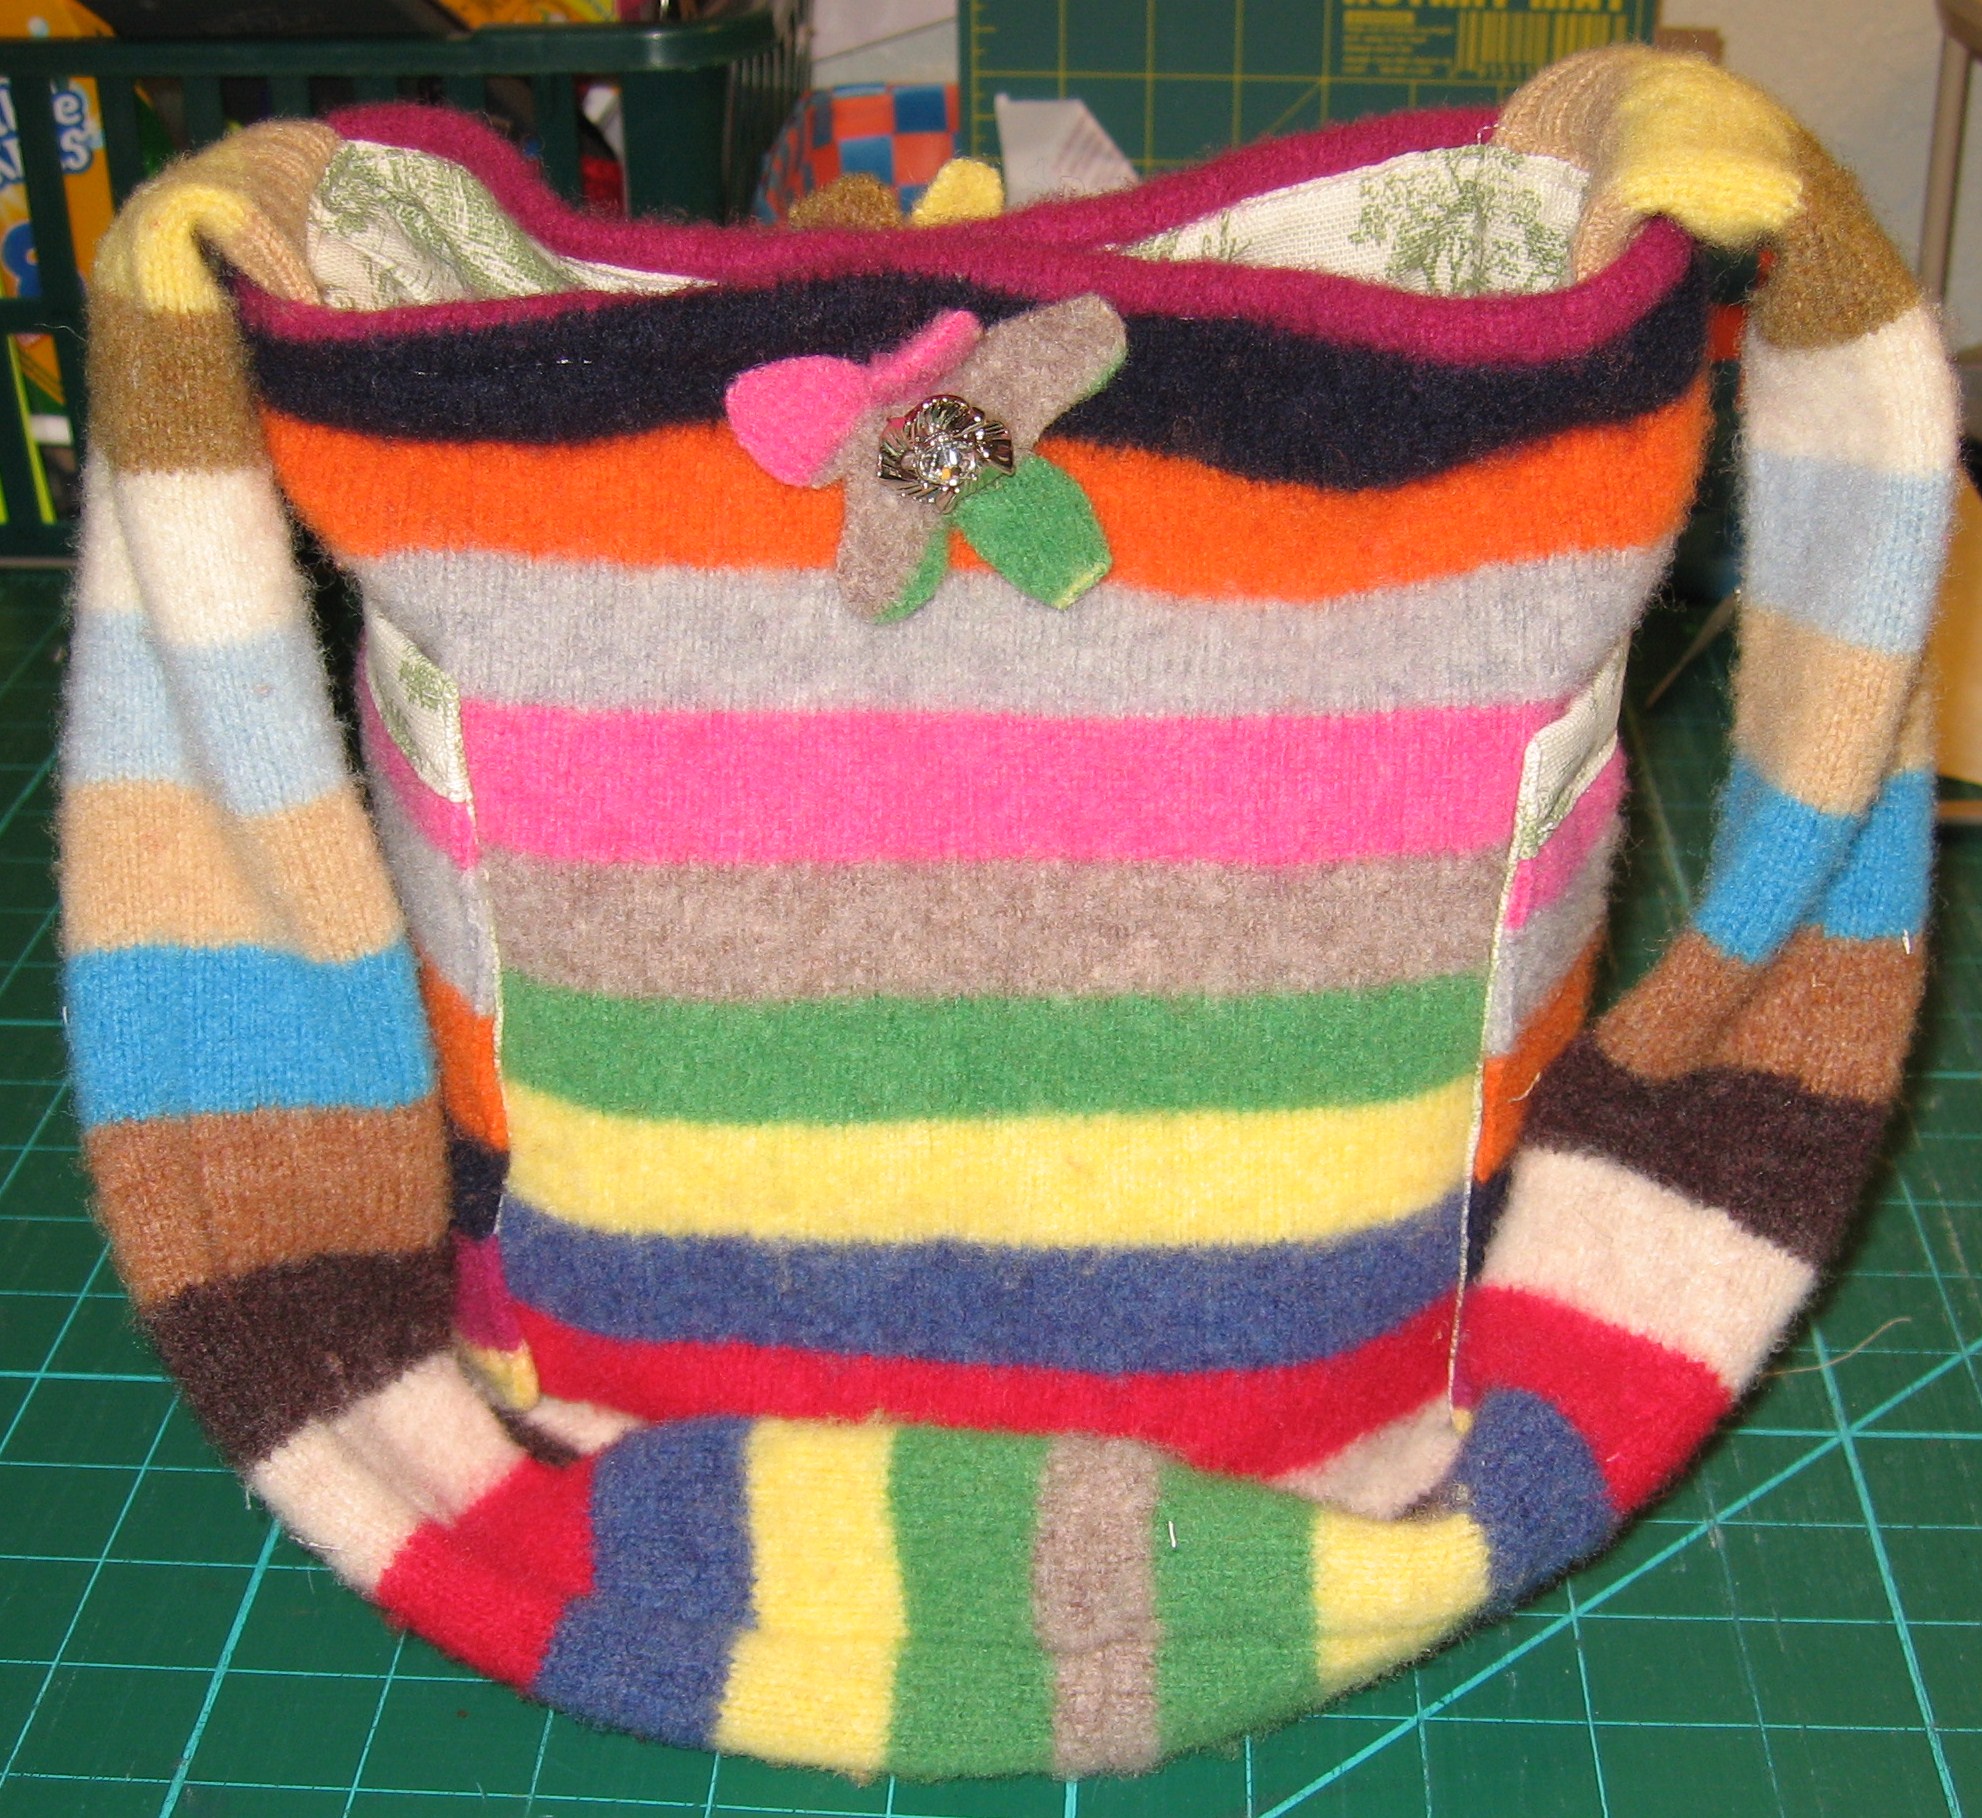
My finished Monk’s Bag 2.0. This is the third Monk’s bag I’ve made and I carry it every day. I’m constantly getting compliments and questions about the bag, which makes it even more awesome to carry!
Action shot! Can I just tell you, I love the heck out of that loop for my keys! It’s easy to reach and I never lose them anymore. I liberated the hook from one of my kids old backpacks. You can also find them in all sizes in the rope section of any hardware store.
My bag (L) and my daughter’s bag (R). What a difference fabric makes!
Thank you Purl Bee for the awesome original bag tutorial! I hope you take this tut in homage, as it’s intended. 🙂
Posts on this blog may contain affiliate links to help cover the cost of my website. I thank you for your generous support. ♥
This fun little bag was a way for me to use up all those odds and ends of yarn that were too small for much else. Because of the random nature of the yarn colors, it’s very forgiving. I used two different base colors because I ran out of the first, and it still worked out perfectly!
The best part? No ends to weave in!
First thing’s first, take your tiny, mismatched yarn bits and tie them end to end, making one big random yarn ball.
You’ll Need:
Odds & Ends Yarn Ball (see above)
Dark worsted yarn
K Hook
Notes:
work with two strands throughout, one of the dark worsted yarn and one of the Odds & Ends
try to keep all the yarn ends on the outside of the bag
Ch 3 = first DC throughout
Ch 24 (chain more or less for a bigger or smaller bag)
Round 1: dc into the 3rd chain from hook 7 times, dc in each ch across, dc in last ch 8 times, working on the back side of the foundation ch, dc in each loop across. sl st to the top of the first st. Mark the center of each end (between the 8 dc) with a stitch marker or piece of yarn.
Round 2: Ch 3, working in the back loop only of each stitch, dc in each stitch around, sl st to the top of ch 3 to join.
Round 3 – 14: Ch 3, dc in each stitch around, sl st to the top of ch 3 to join. Do not finish off.
Strap:
Use the stitch markers on Round 1 to find the centers on either side of the top of the bag. Starting three stitches to the right of center, join yarn with a sl st.
Row 1 – 37 : Ch 3, dc in each of the next five stitches.
Cut yarn, leaving about 15″. Starting three inches from center, whipstitch strap in place, knotting the yarn at the end.
Optional Pocket:
ch 15
Row 1: dc in 3rd chain from hook and each ch across.
Row 2 – 8: ch 3, dc in each stitch across.
Cut yarn, leave about 1 yard attached to pocket. Position where desired (inside or out) and whipstitch three sides of the pocket. Knot off yarn.
Finishing:
Making sure all yarn joins are securely knotted, trim to approximately 1″, leaving ends visible.
Add your Sewhooked photos to my flickr group and you might be featured in a future post!
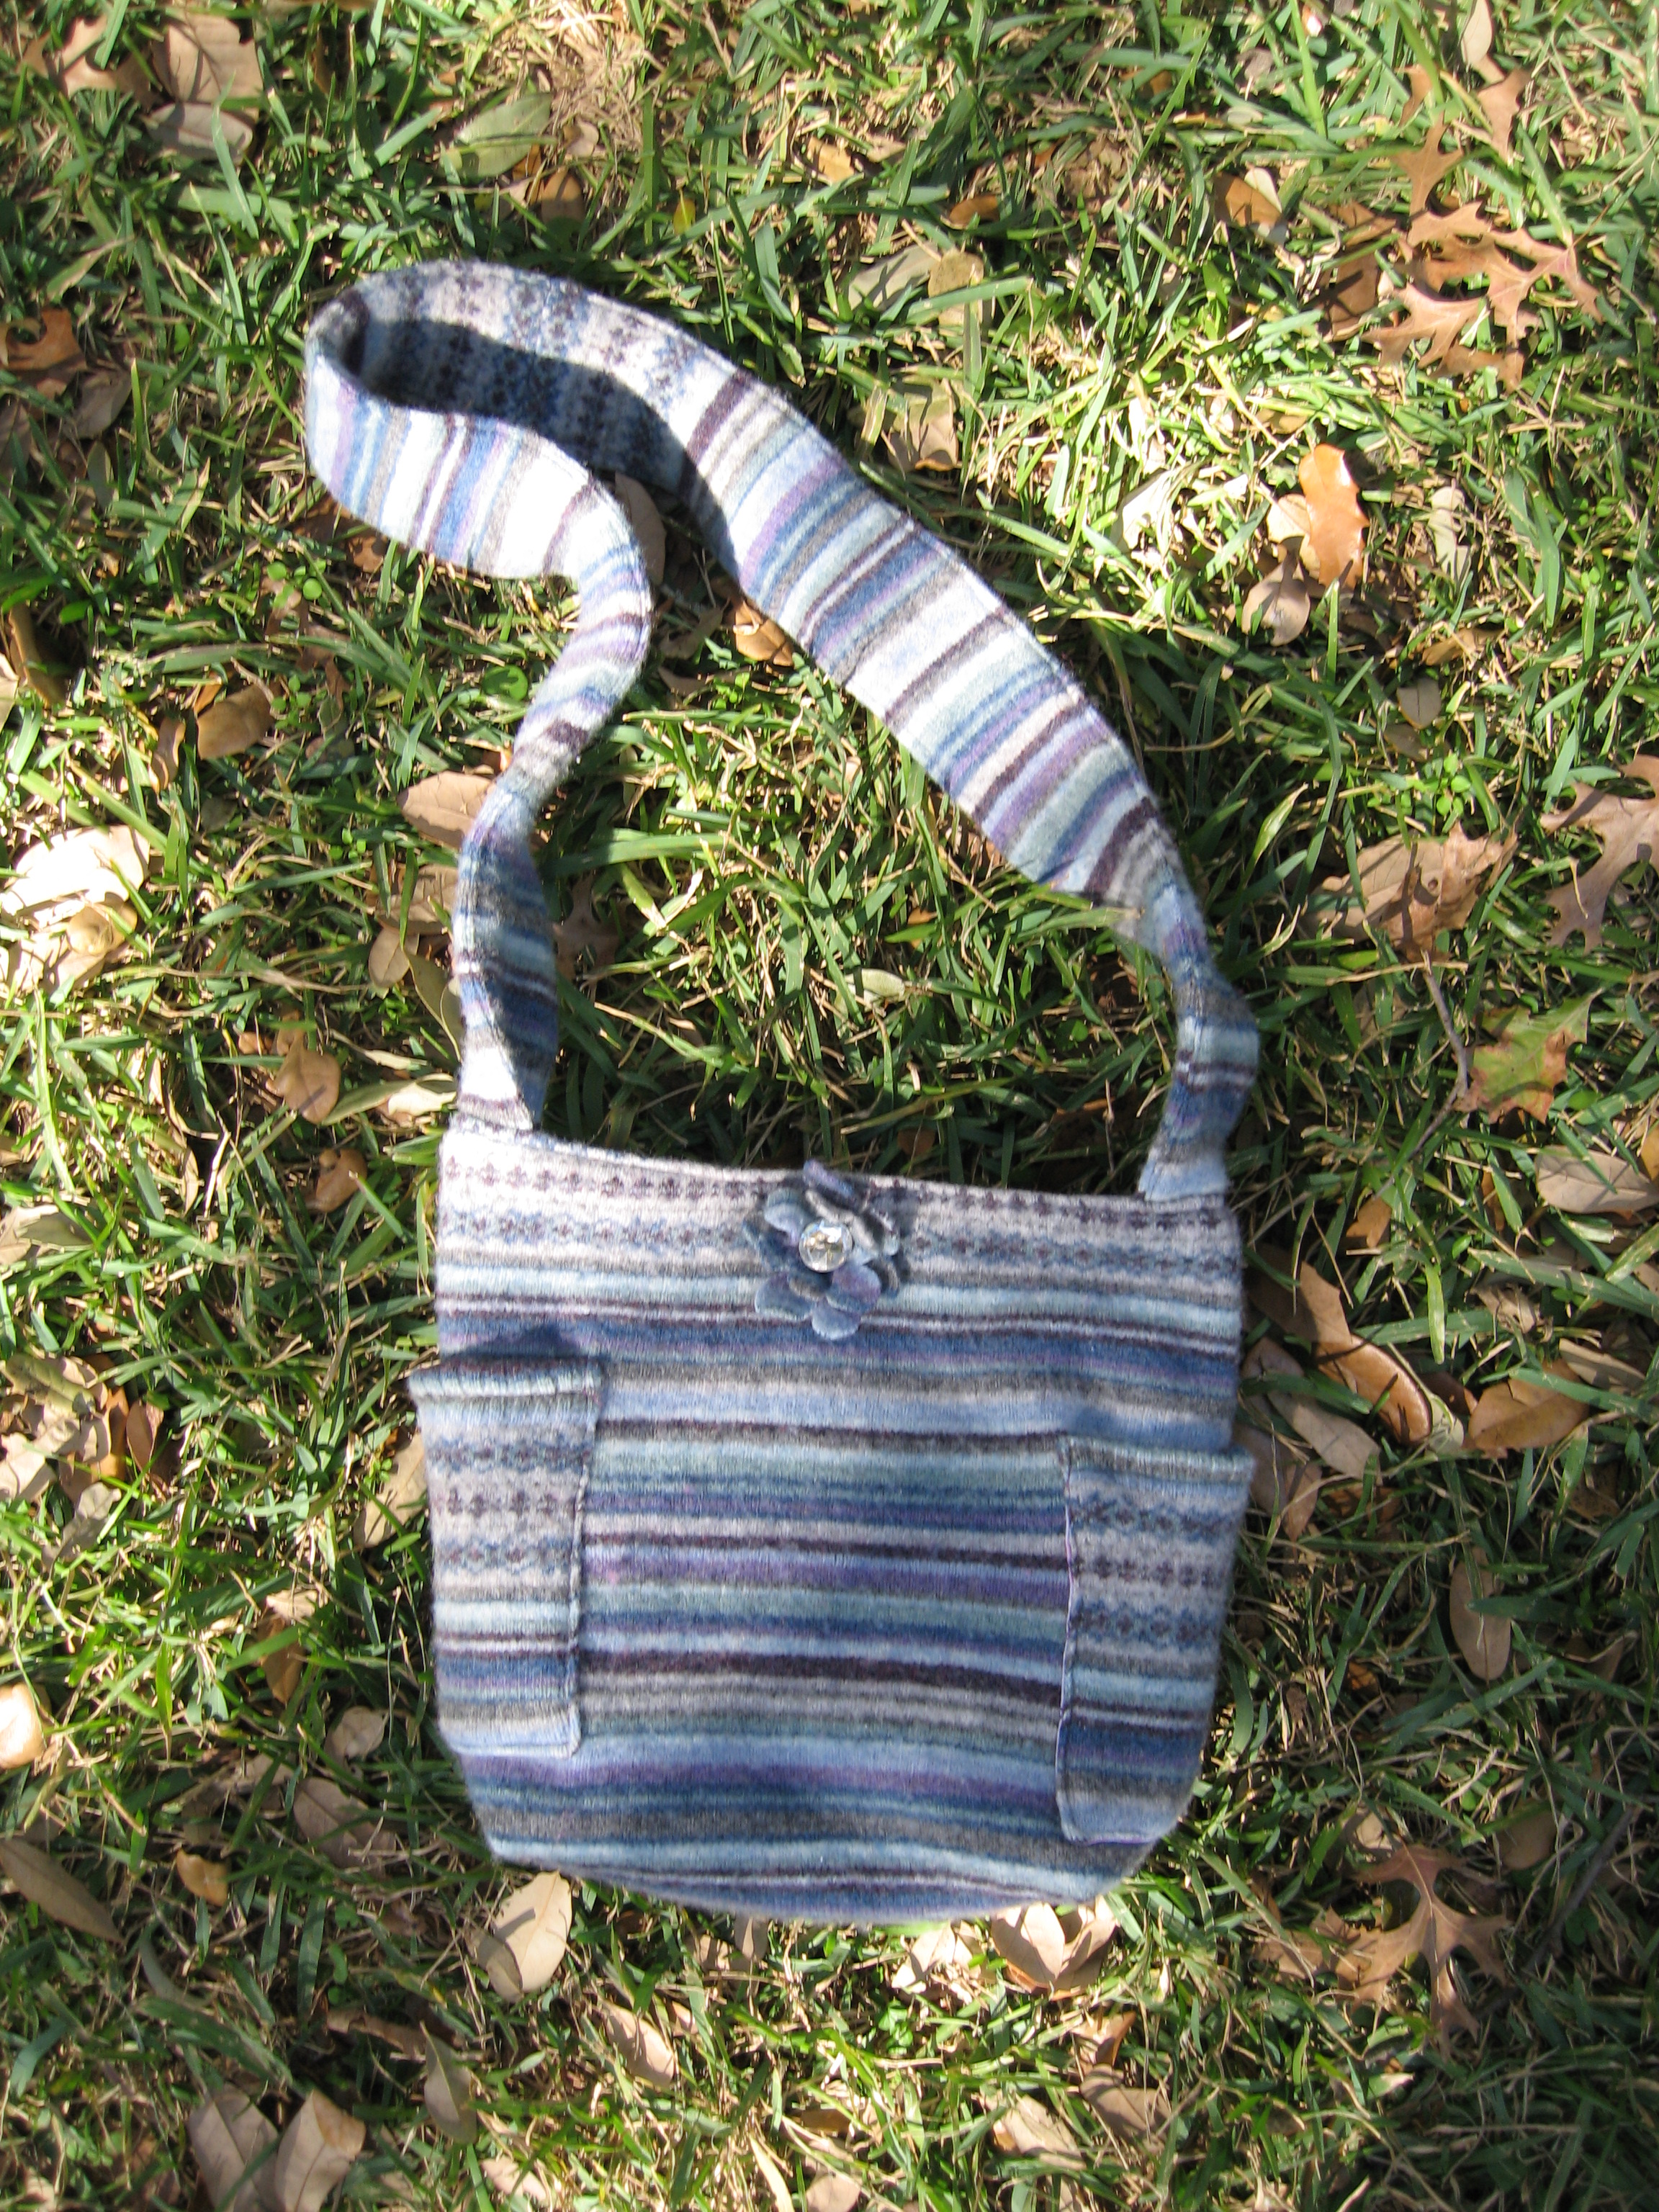
The Recycled Sweater Bag isn’t quite old enough to be considered a Way Back Craft. I first started making this bag last year. It works great with a felted thrift store sweater, but you can also make this bag out of denim, upholstery fabric, or just about any other heavy duty material.
The bag size will vary based on the size of your sweater.
Do I need a reason to make a new bag? Not really, but recycling is a darn good incentive!
Use the written instructions below or watch the video. (Please note this video tutorial was posted in 2008, and the quality reflects that).
You will need:
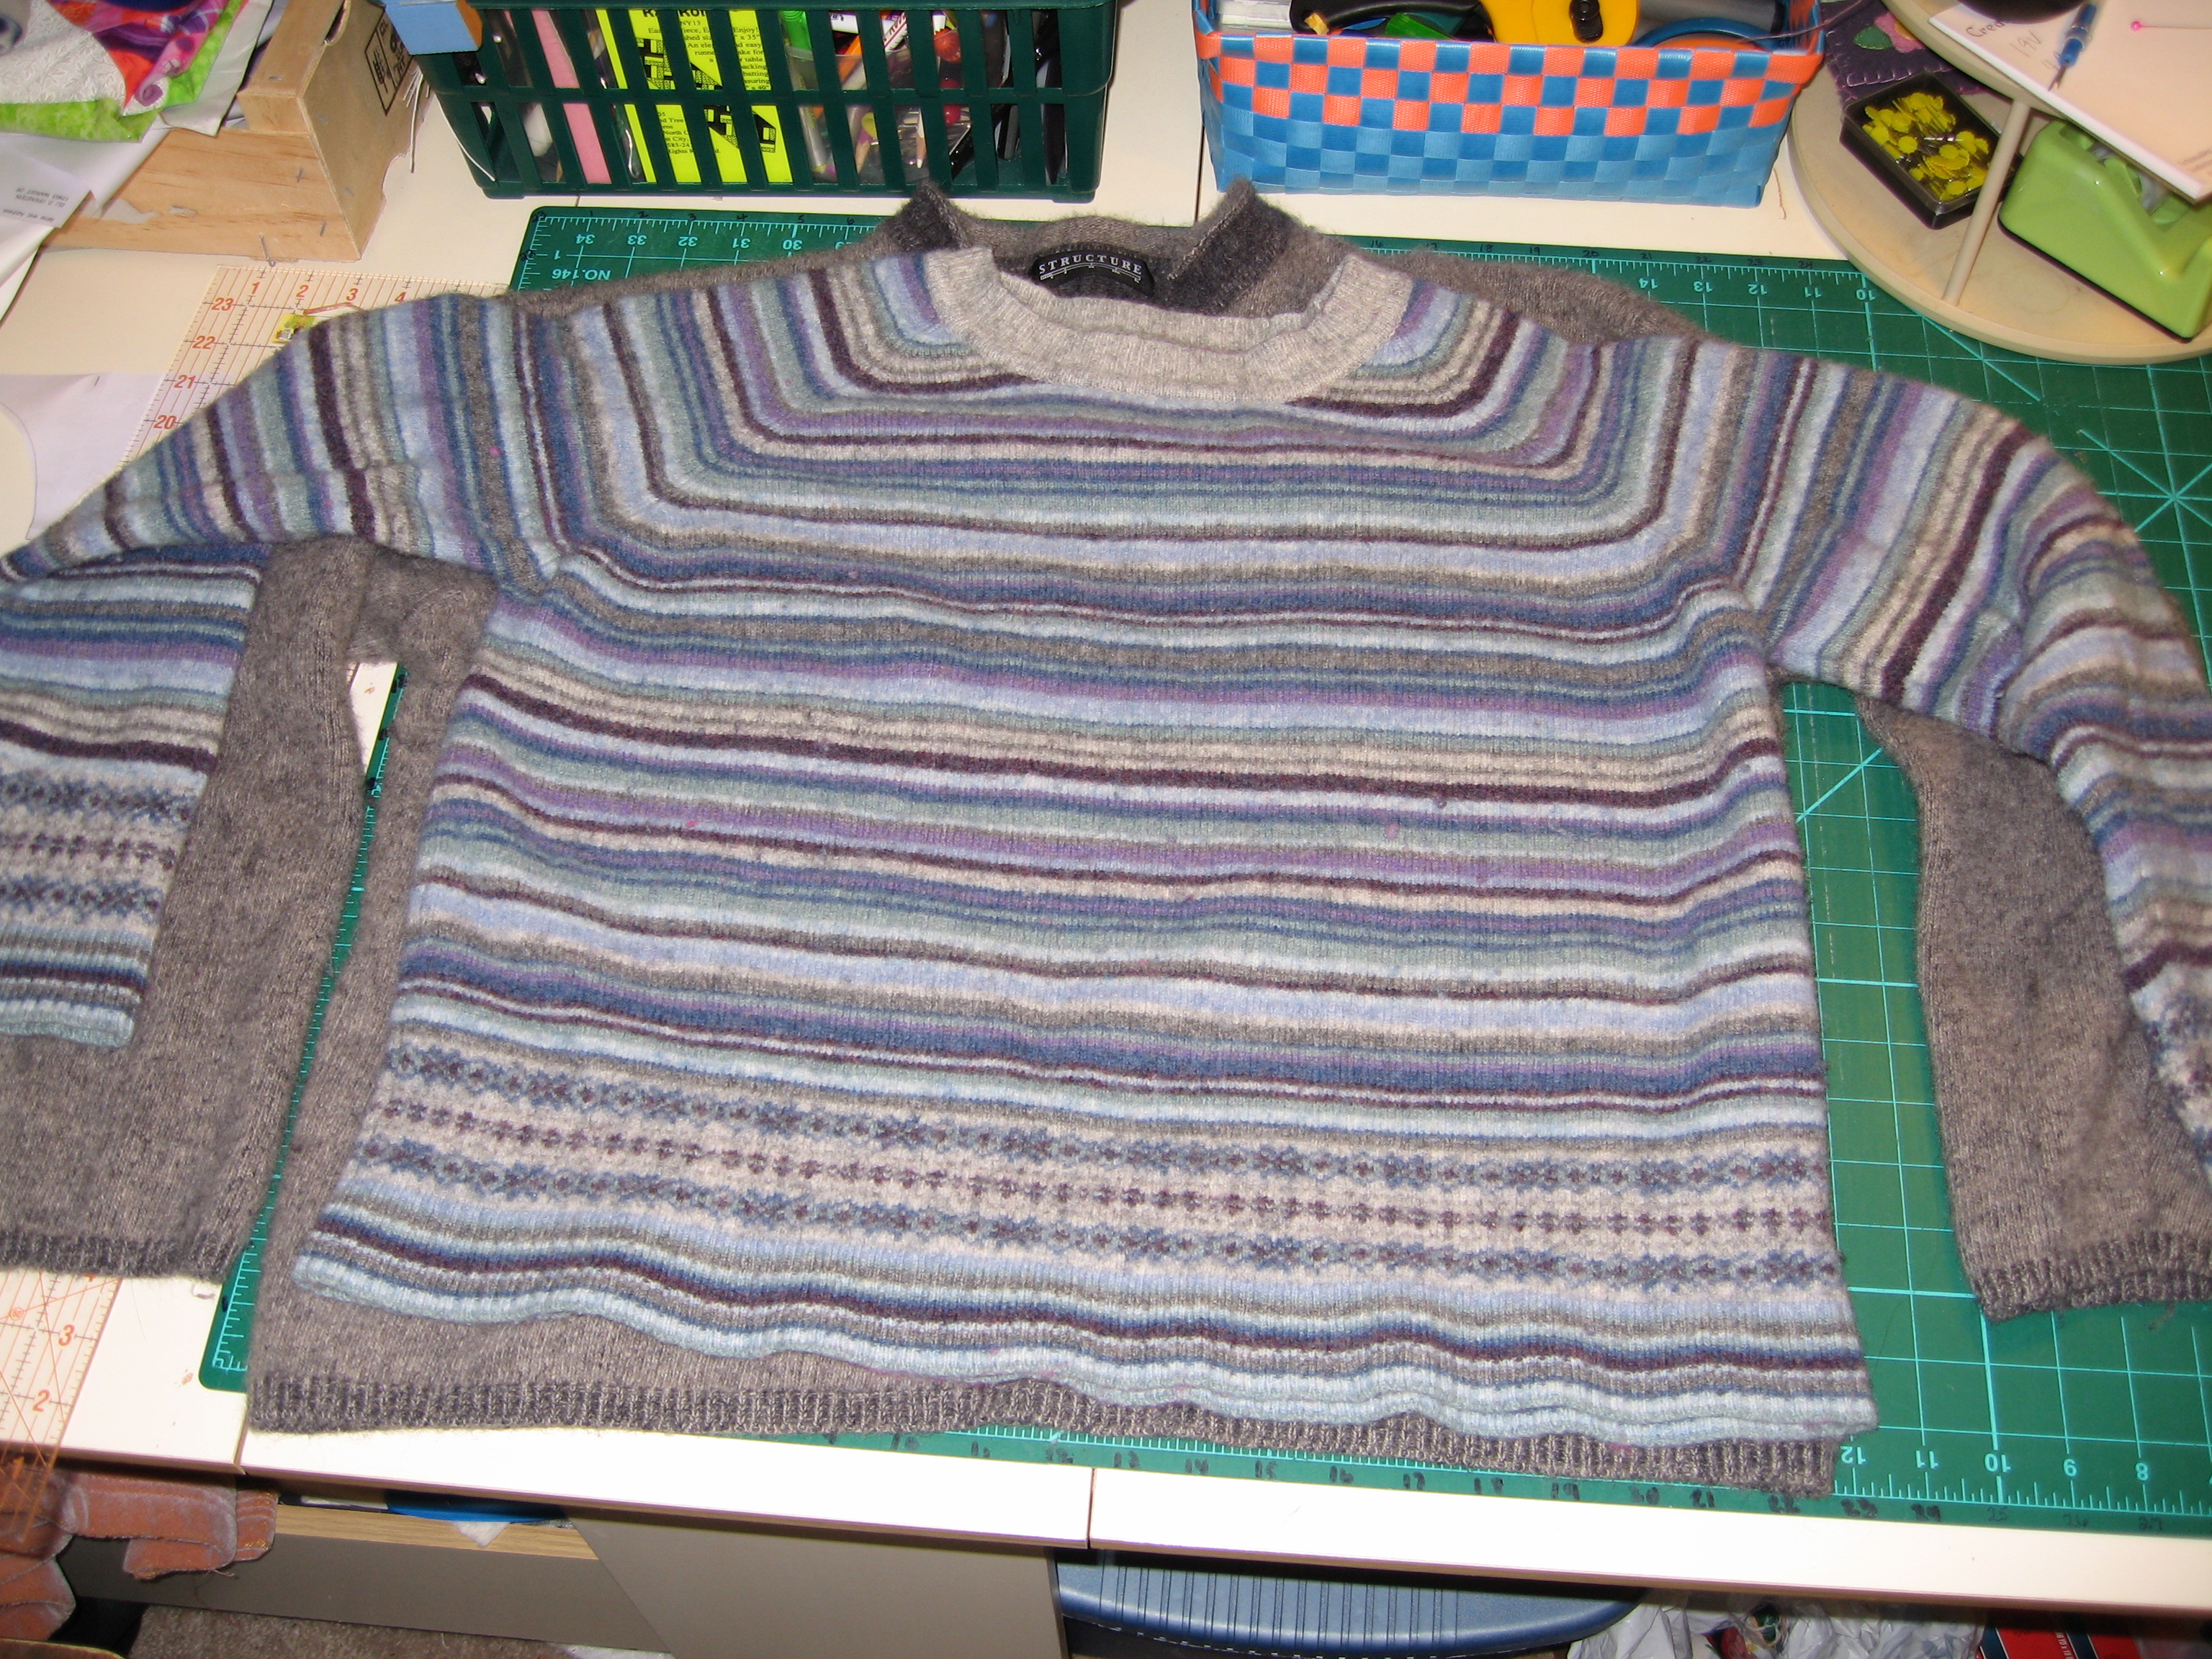
1 old (or thrift store) 100% wool sweater – felted
fabric for lining & pockets
magnet purse snap
2 buttons
sewing machine
thread
scissors
chalk
pins
rotary cutter (optional)
walking foot (optional)
I used a 1/2″ seam allowance throughout. If your sweater is bulkier, go a little wider or use what works for you.
First up – let’s prep our fabrics!
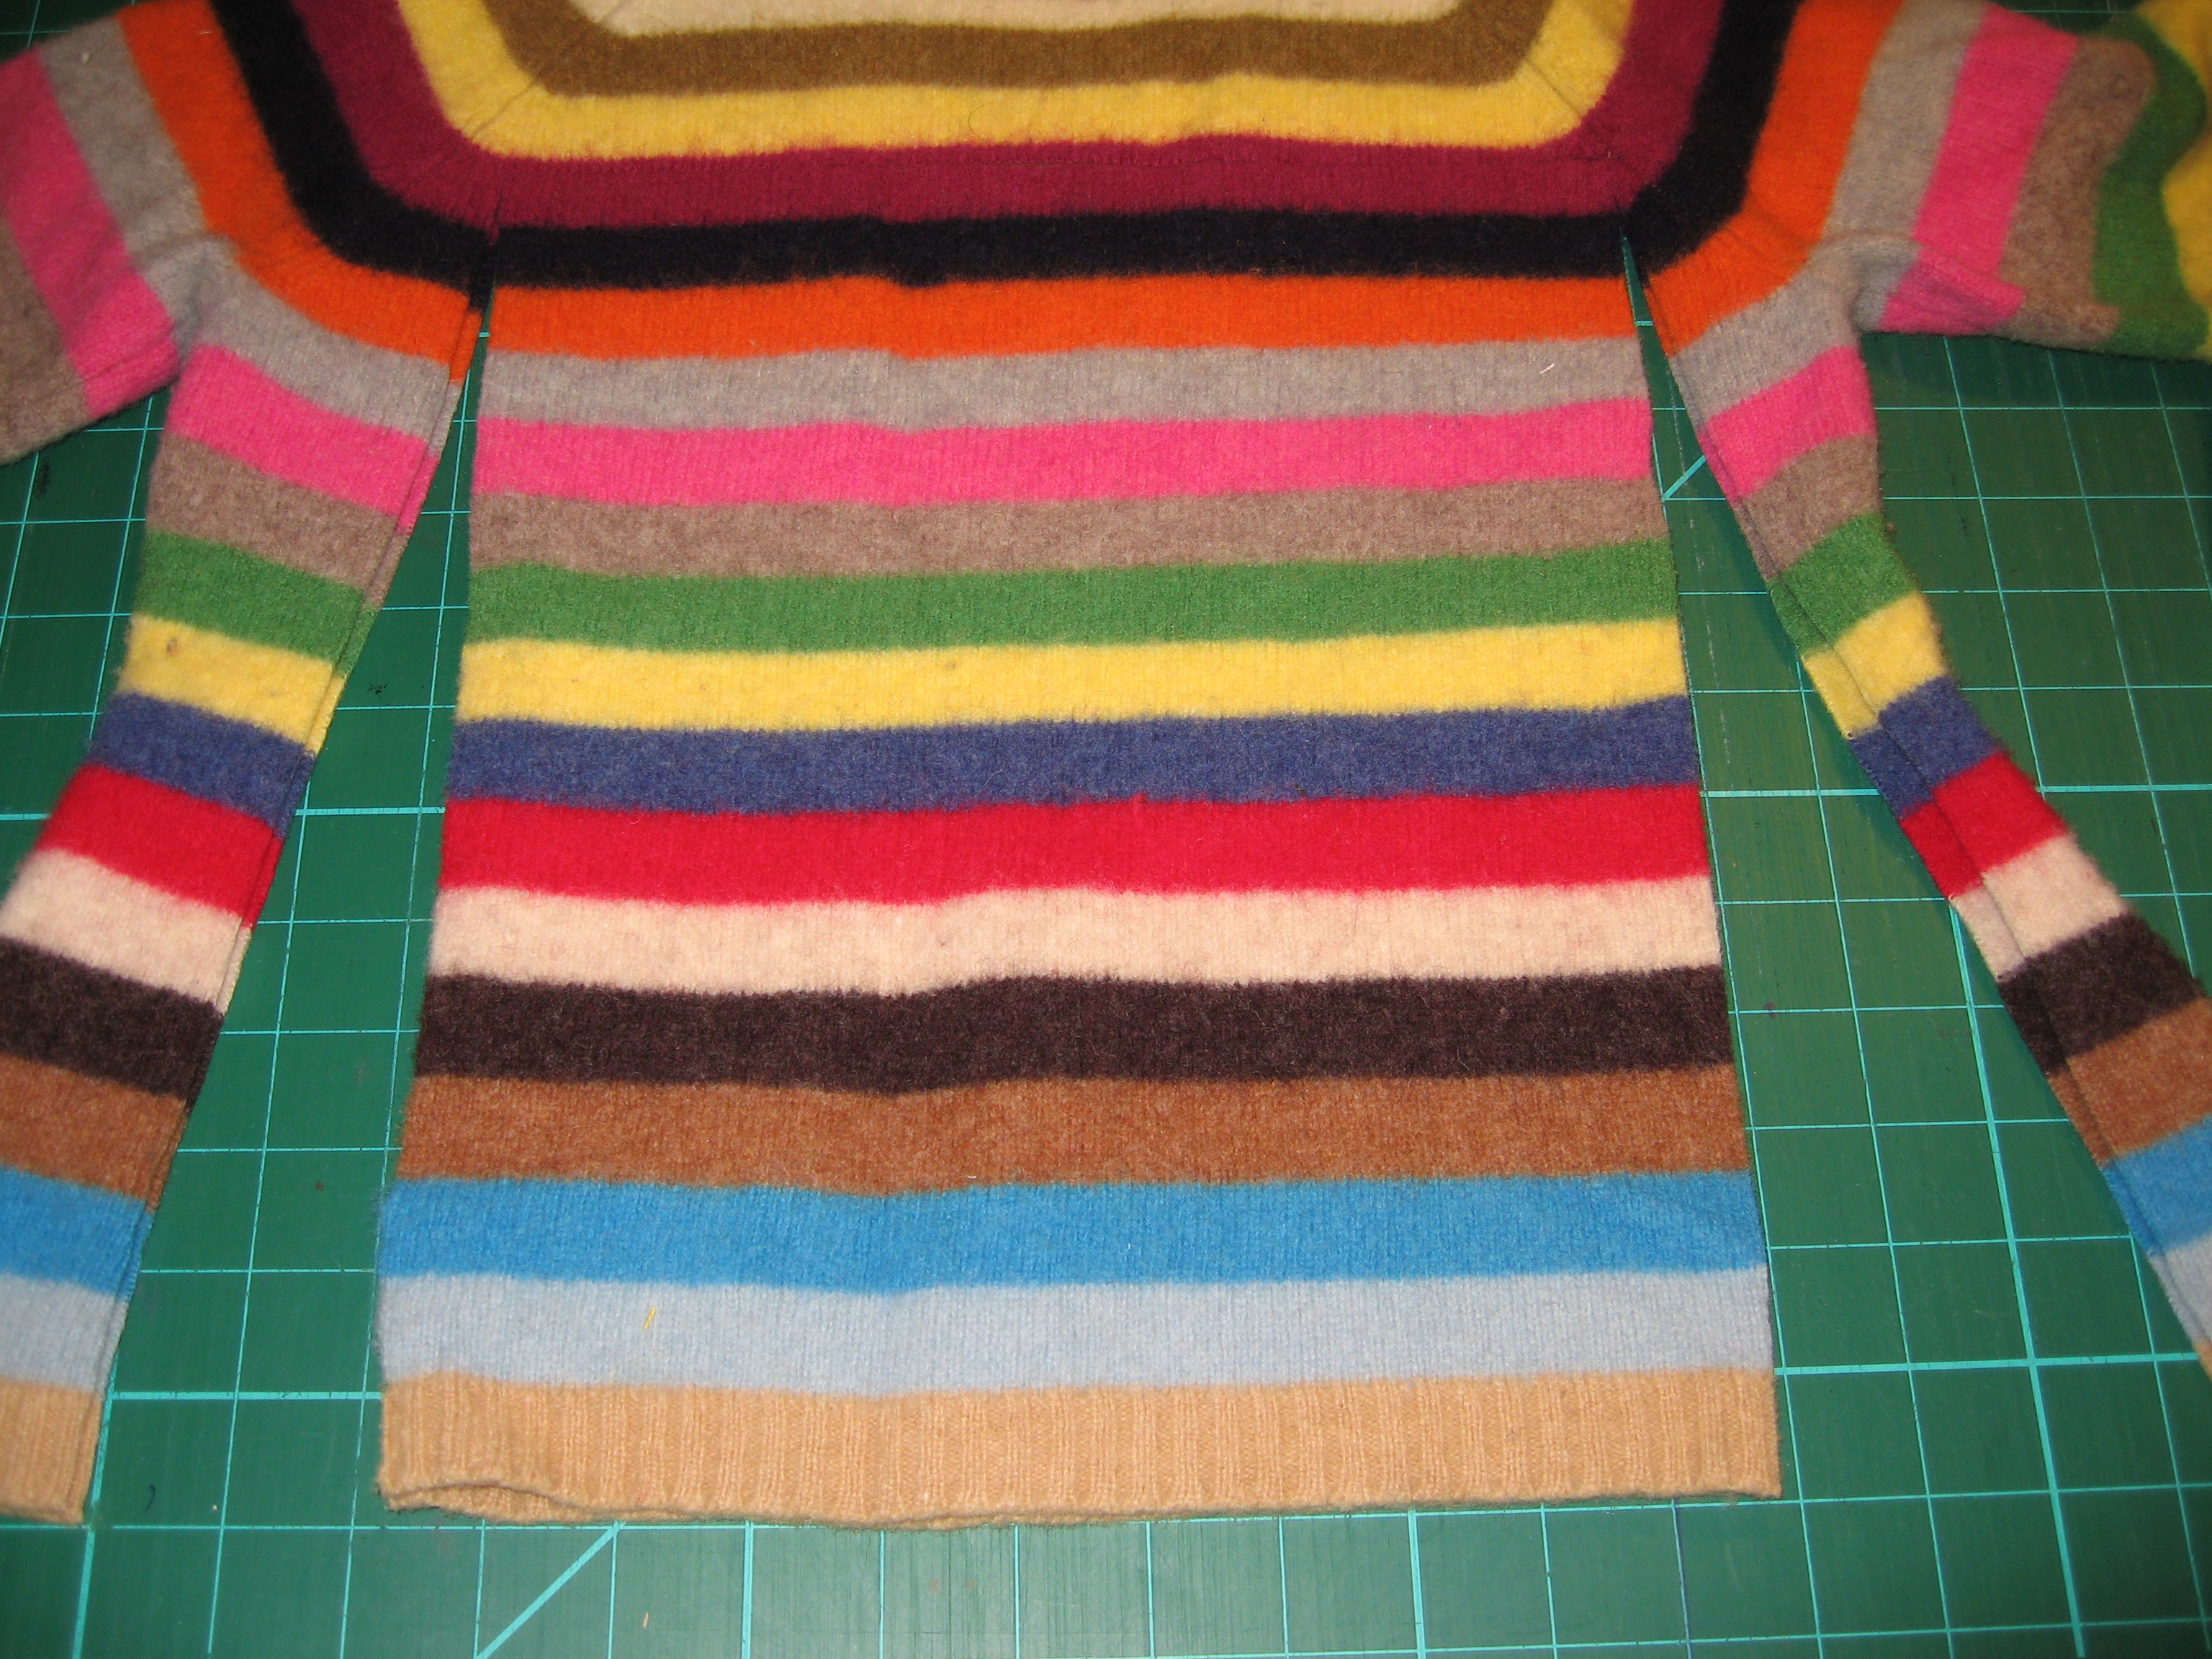
Cut a square or rectangle out of the body of the sweater, cut the same dimensions from lining fabric, remove sweater arms.
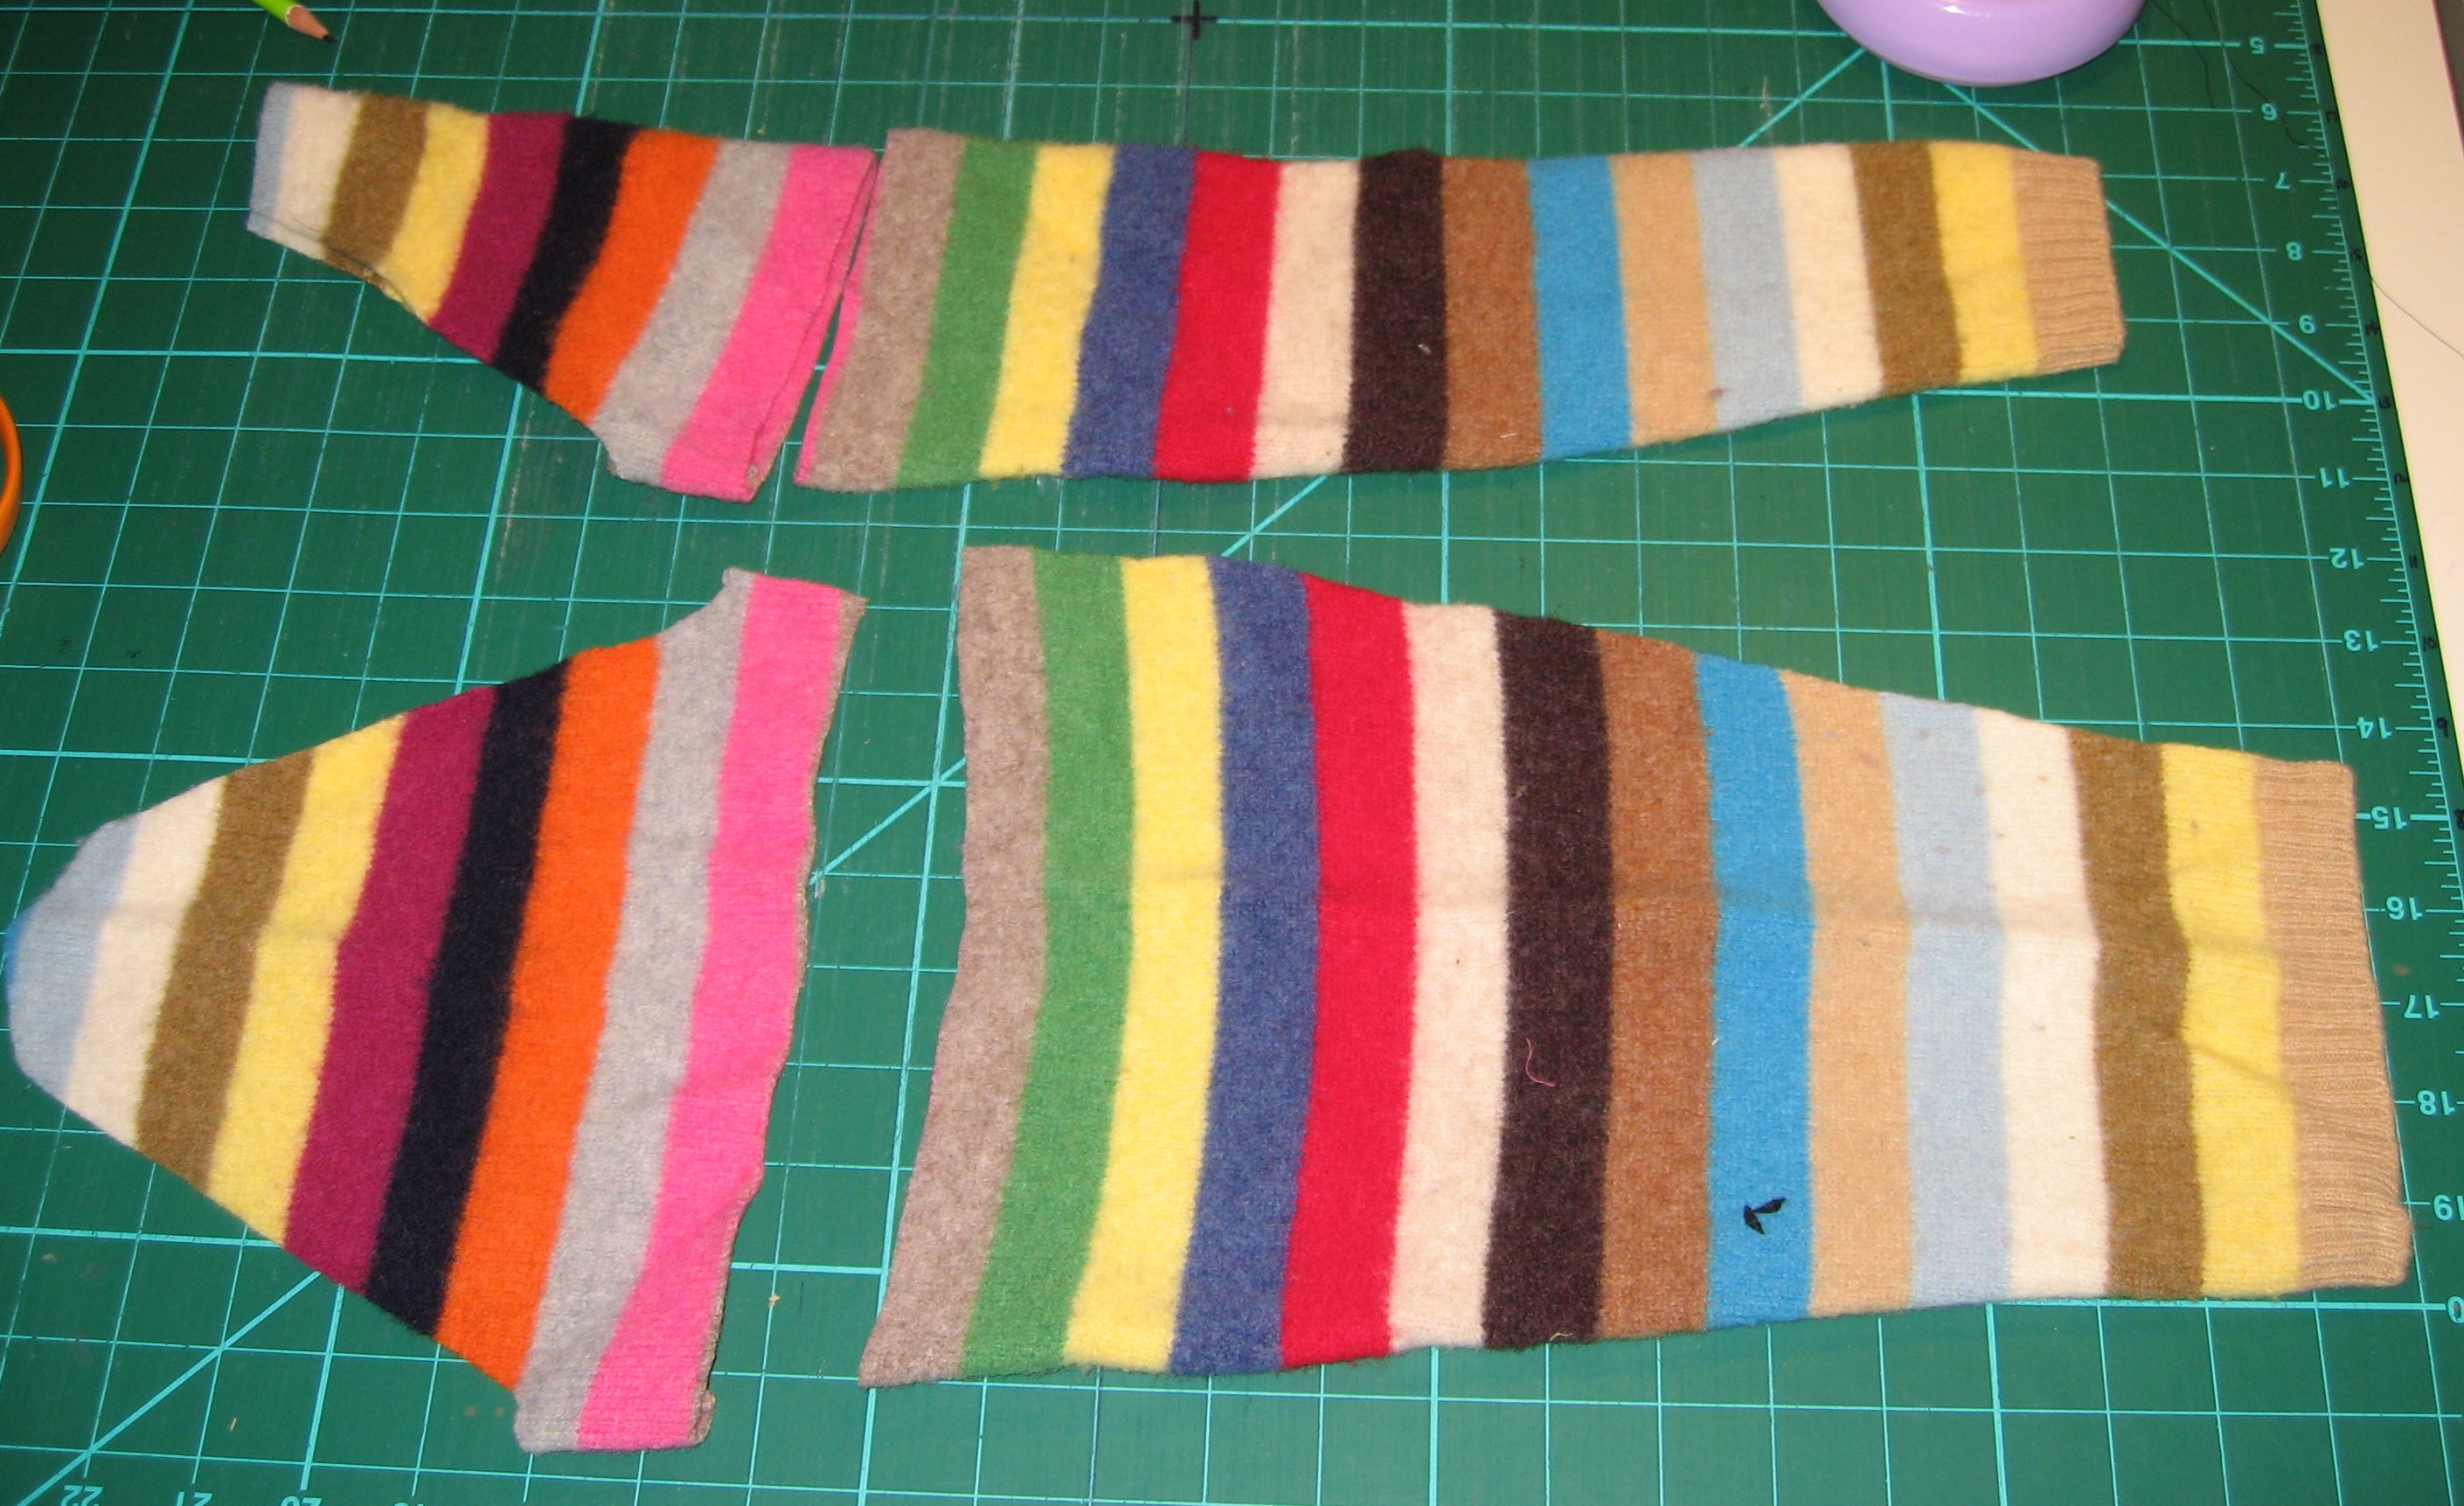
Split sleeves up seam and cut off the tops for pockets.
Cut rectangles out of the sleeve tops, cut same dimensions +1.5″ in length for lining.
Using the remaining scraps, cut out 2 circles and trim the circles into free-form flowers.
Cut 2″ squares out of the bottom left and right, repeat for lining fabric.
Now, let’s make the lining!
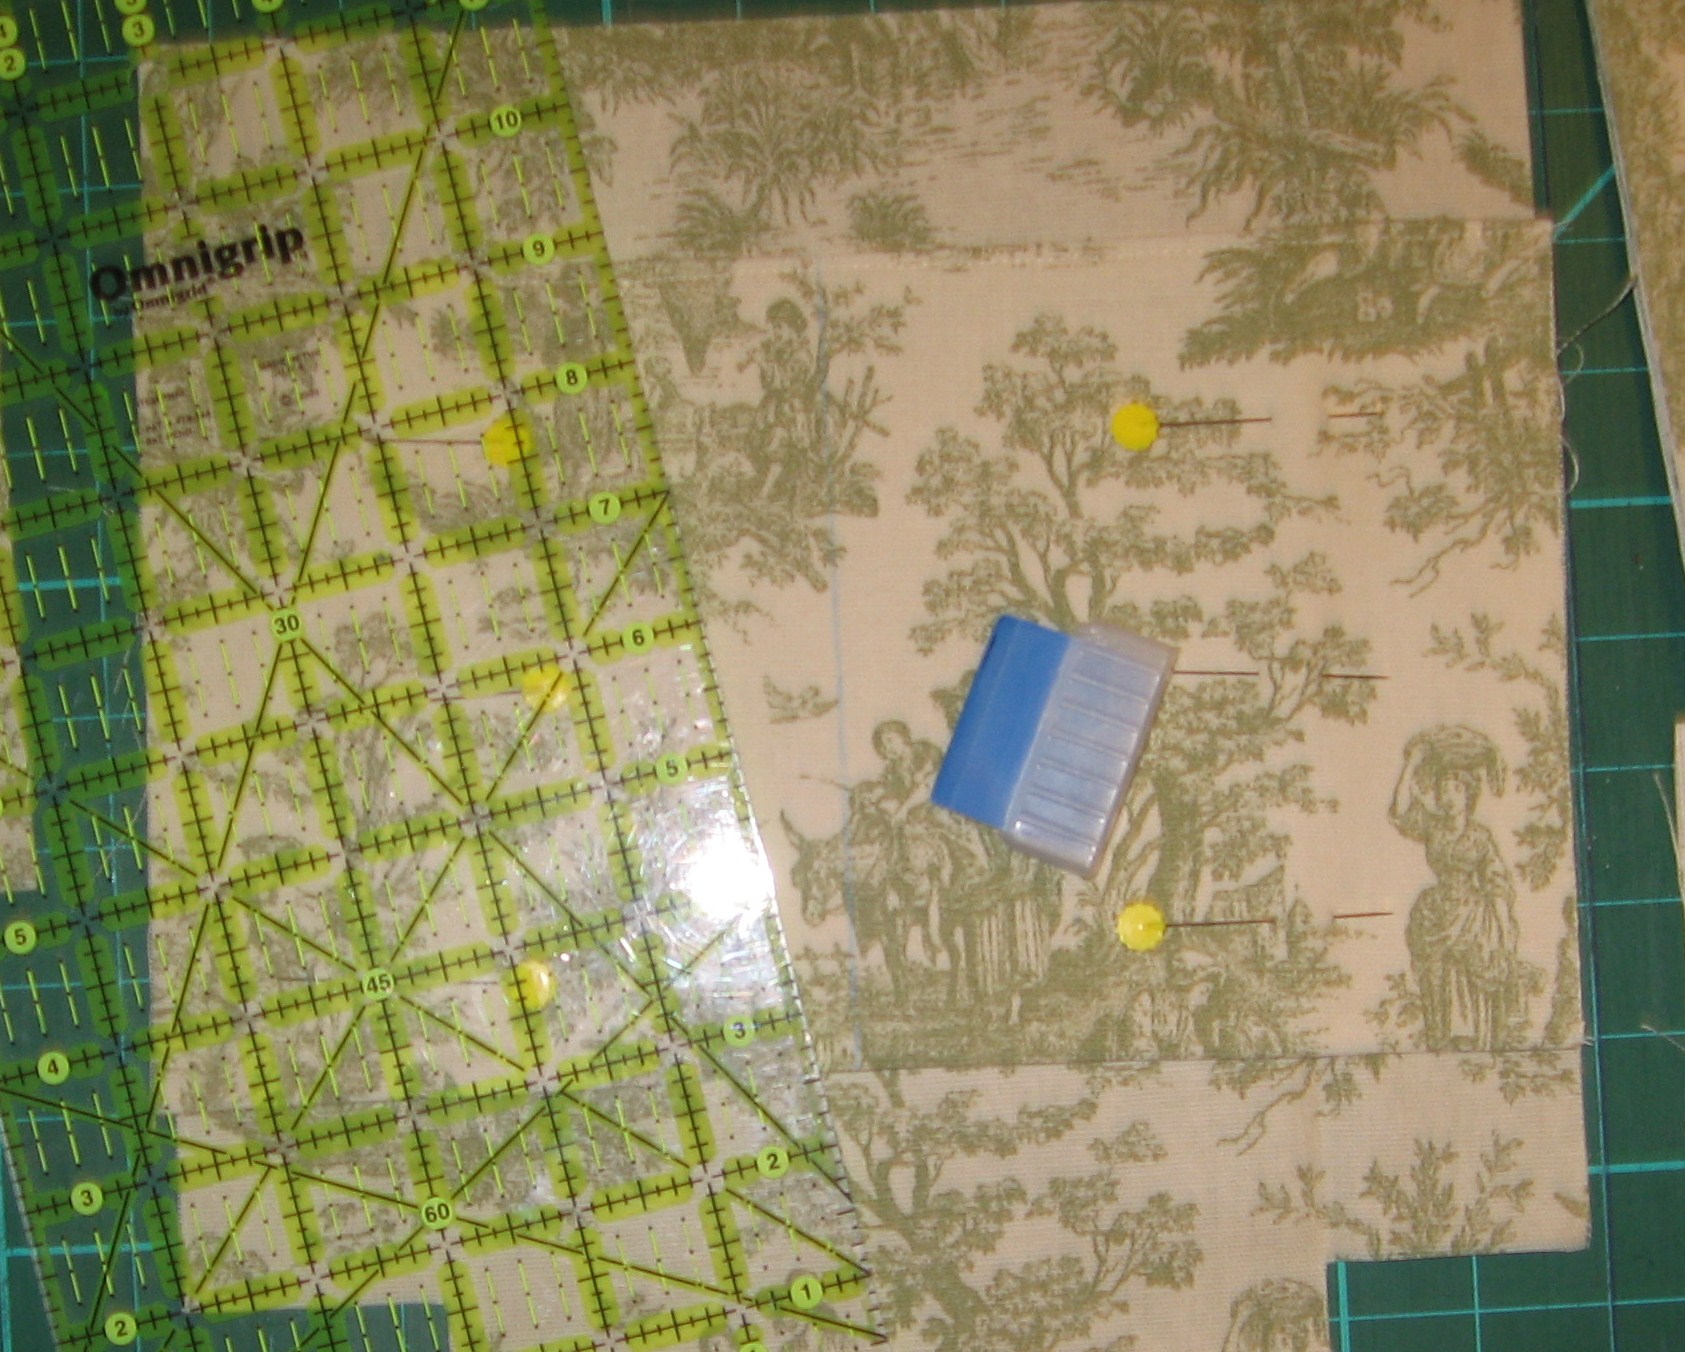
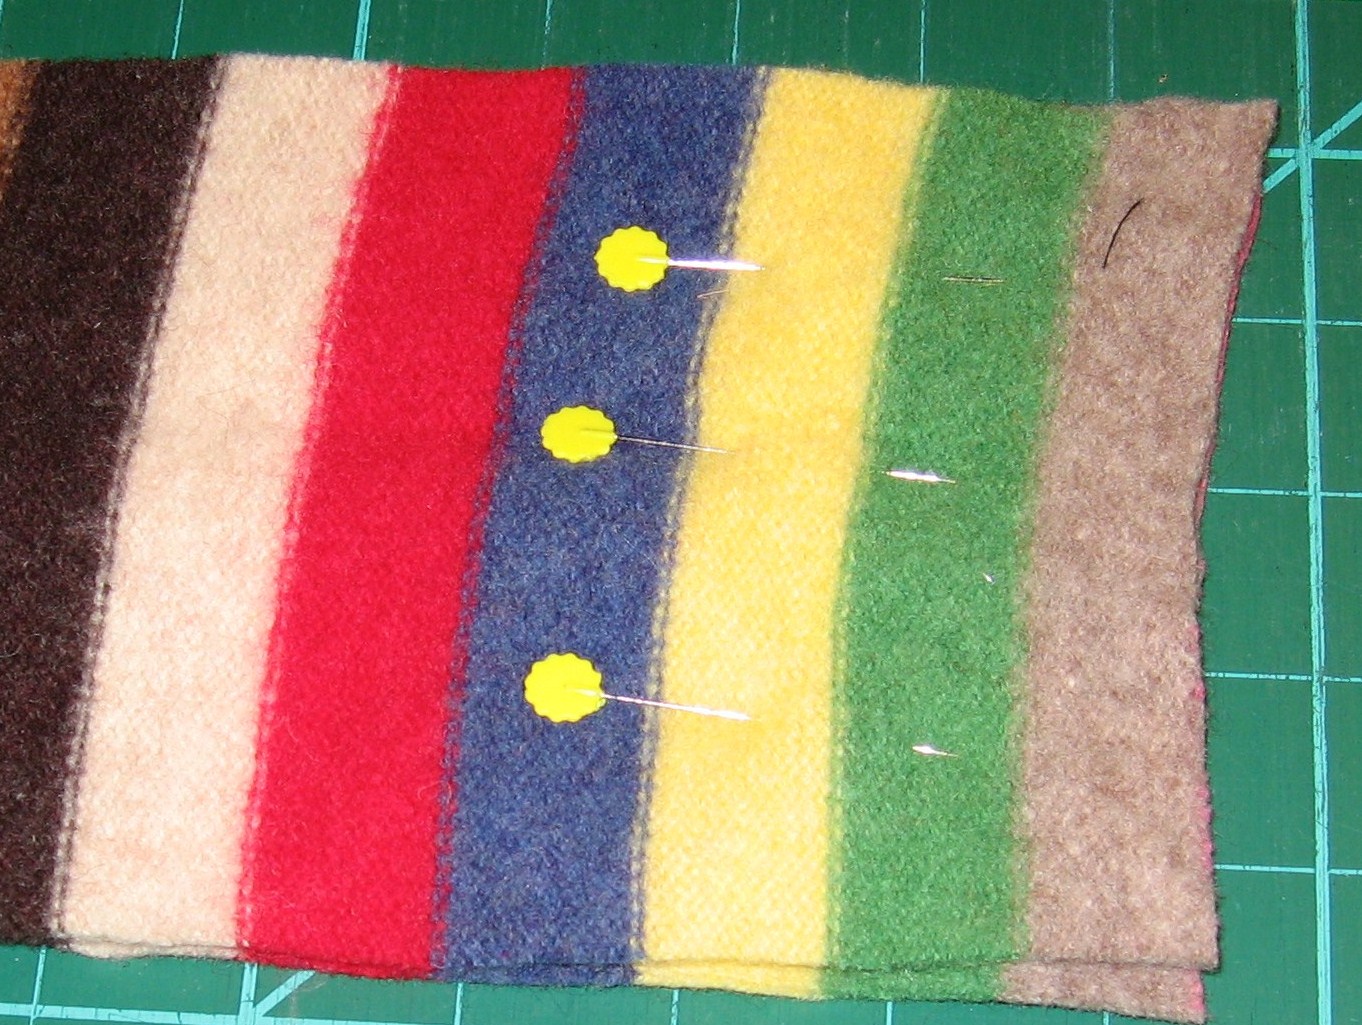
Cut a square the same width and length from lining fabric for inside pockets. Fold in half and stitch along the fold.
Pin pocket to inside and mark center with chalk for stitching line.
Pin sides and bottom of lining, stitch, leave 2″ corners open, leave opening in the side or bottom for turning.
Match boxed corners (the notches in the bottom of the bag), pin & stitch.
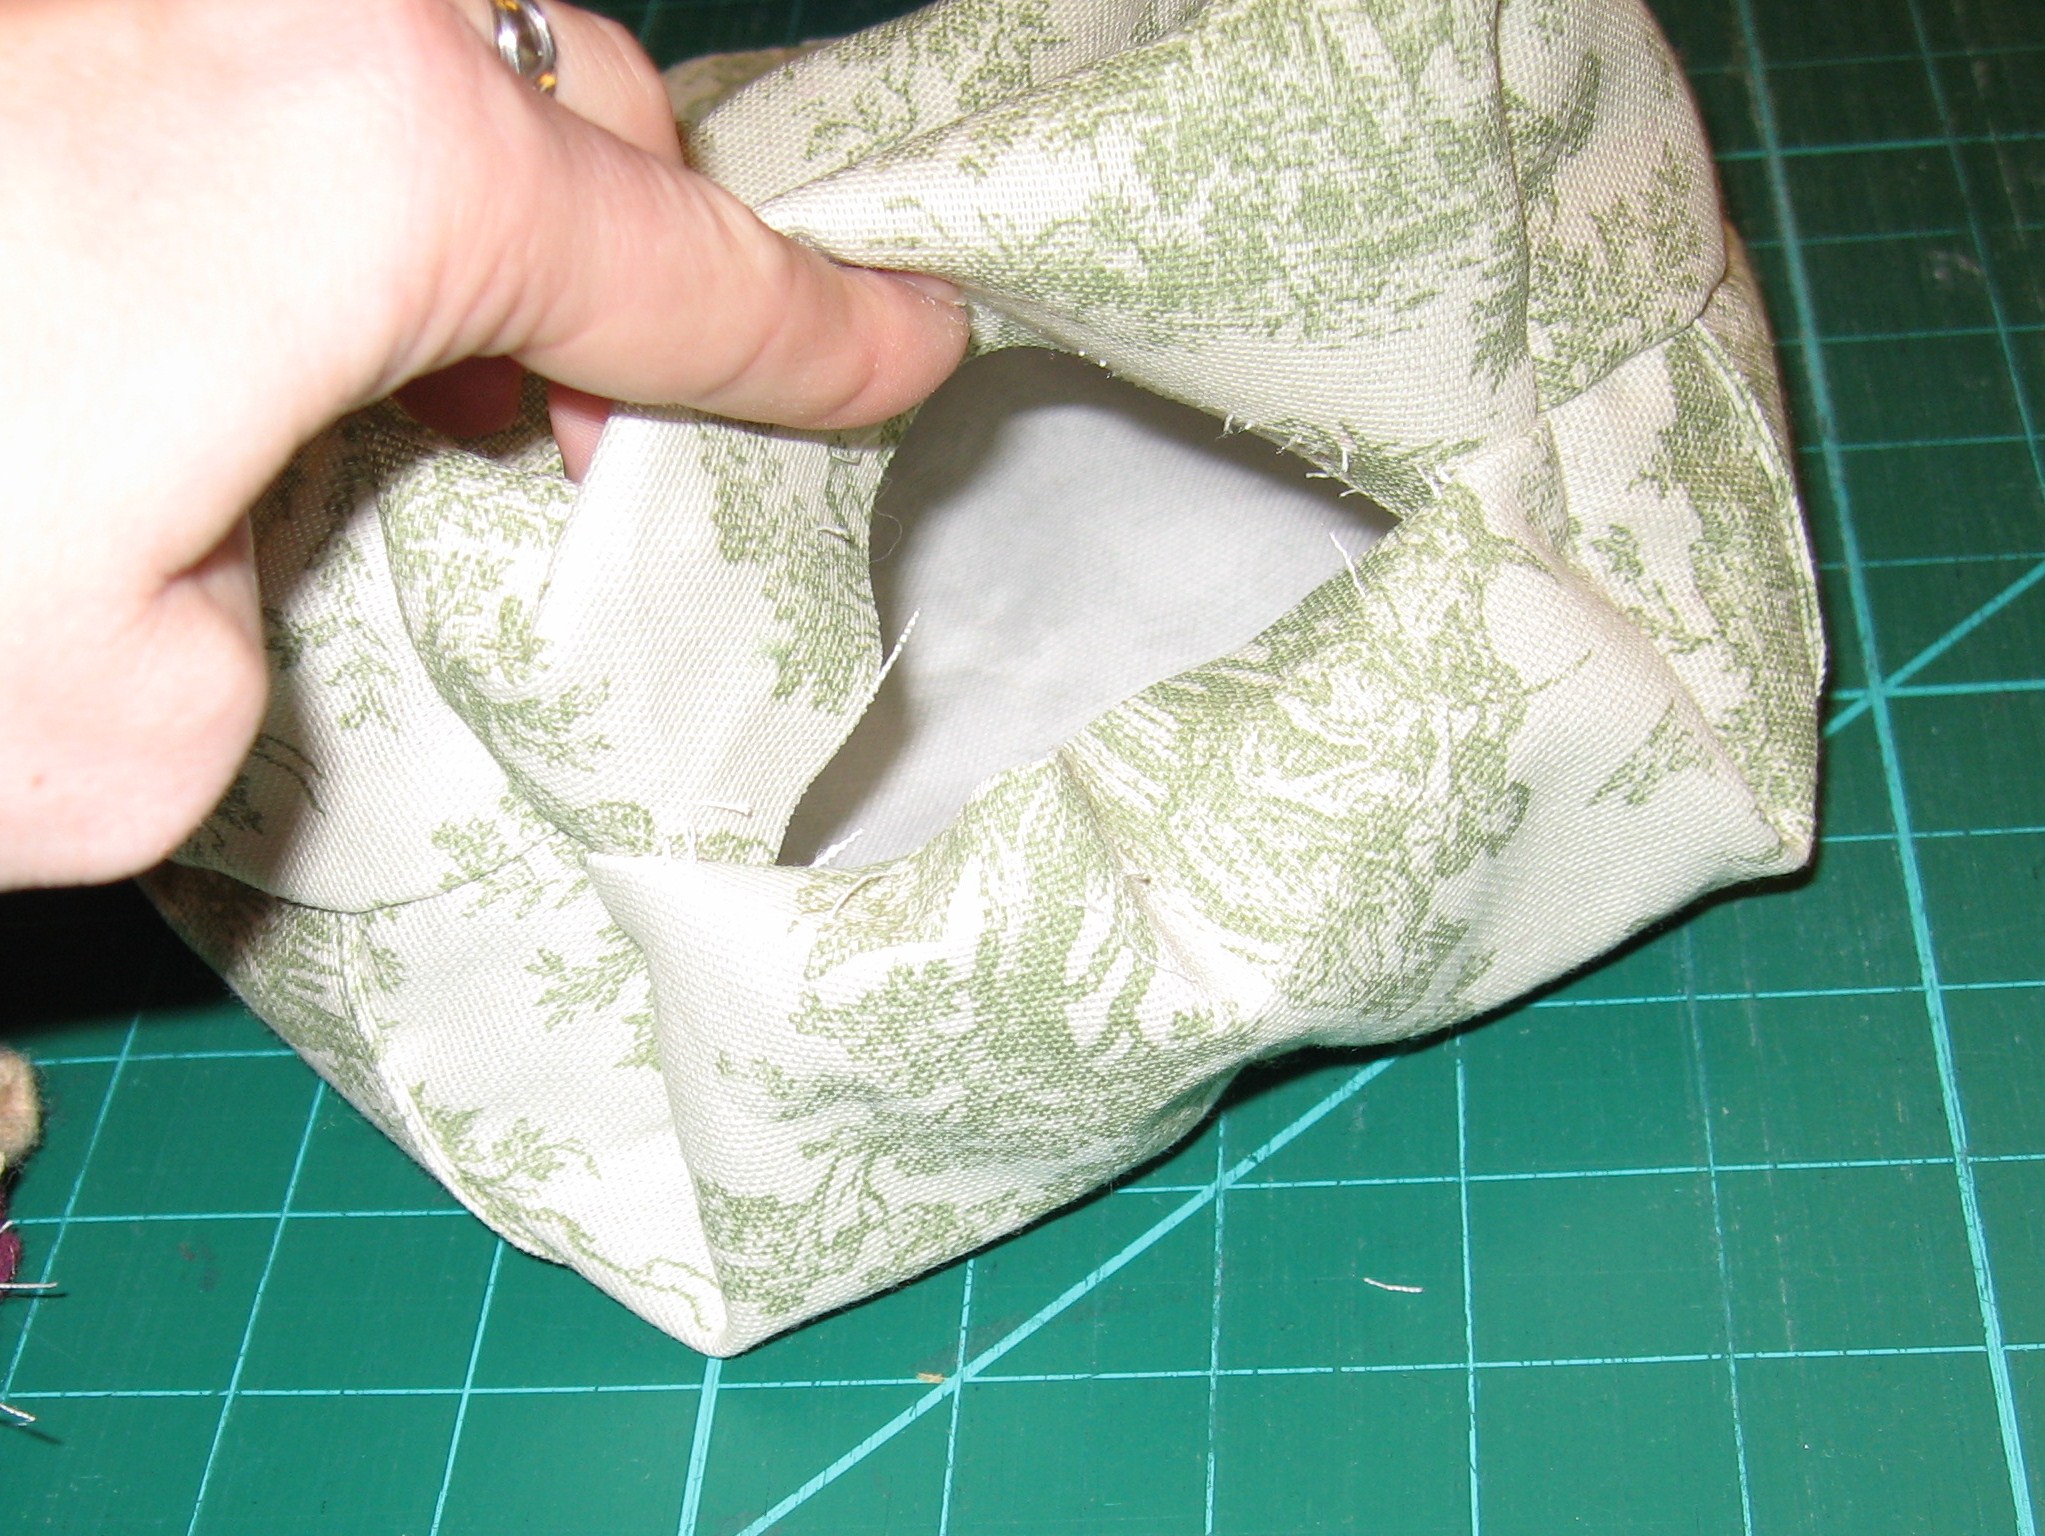
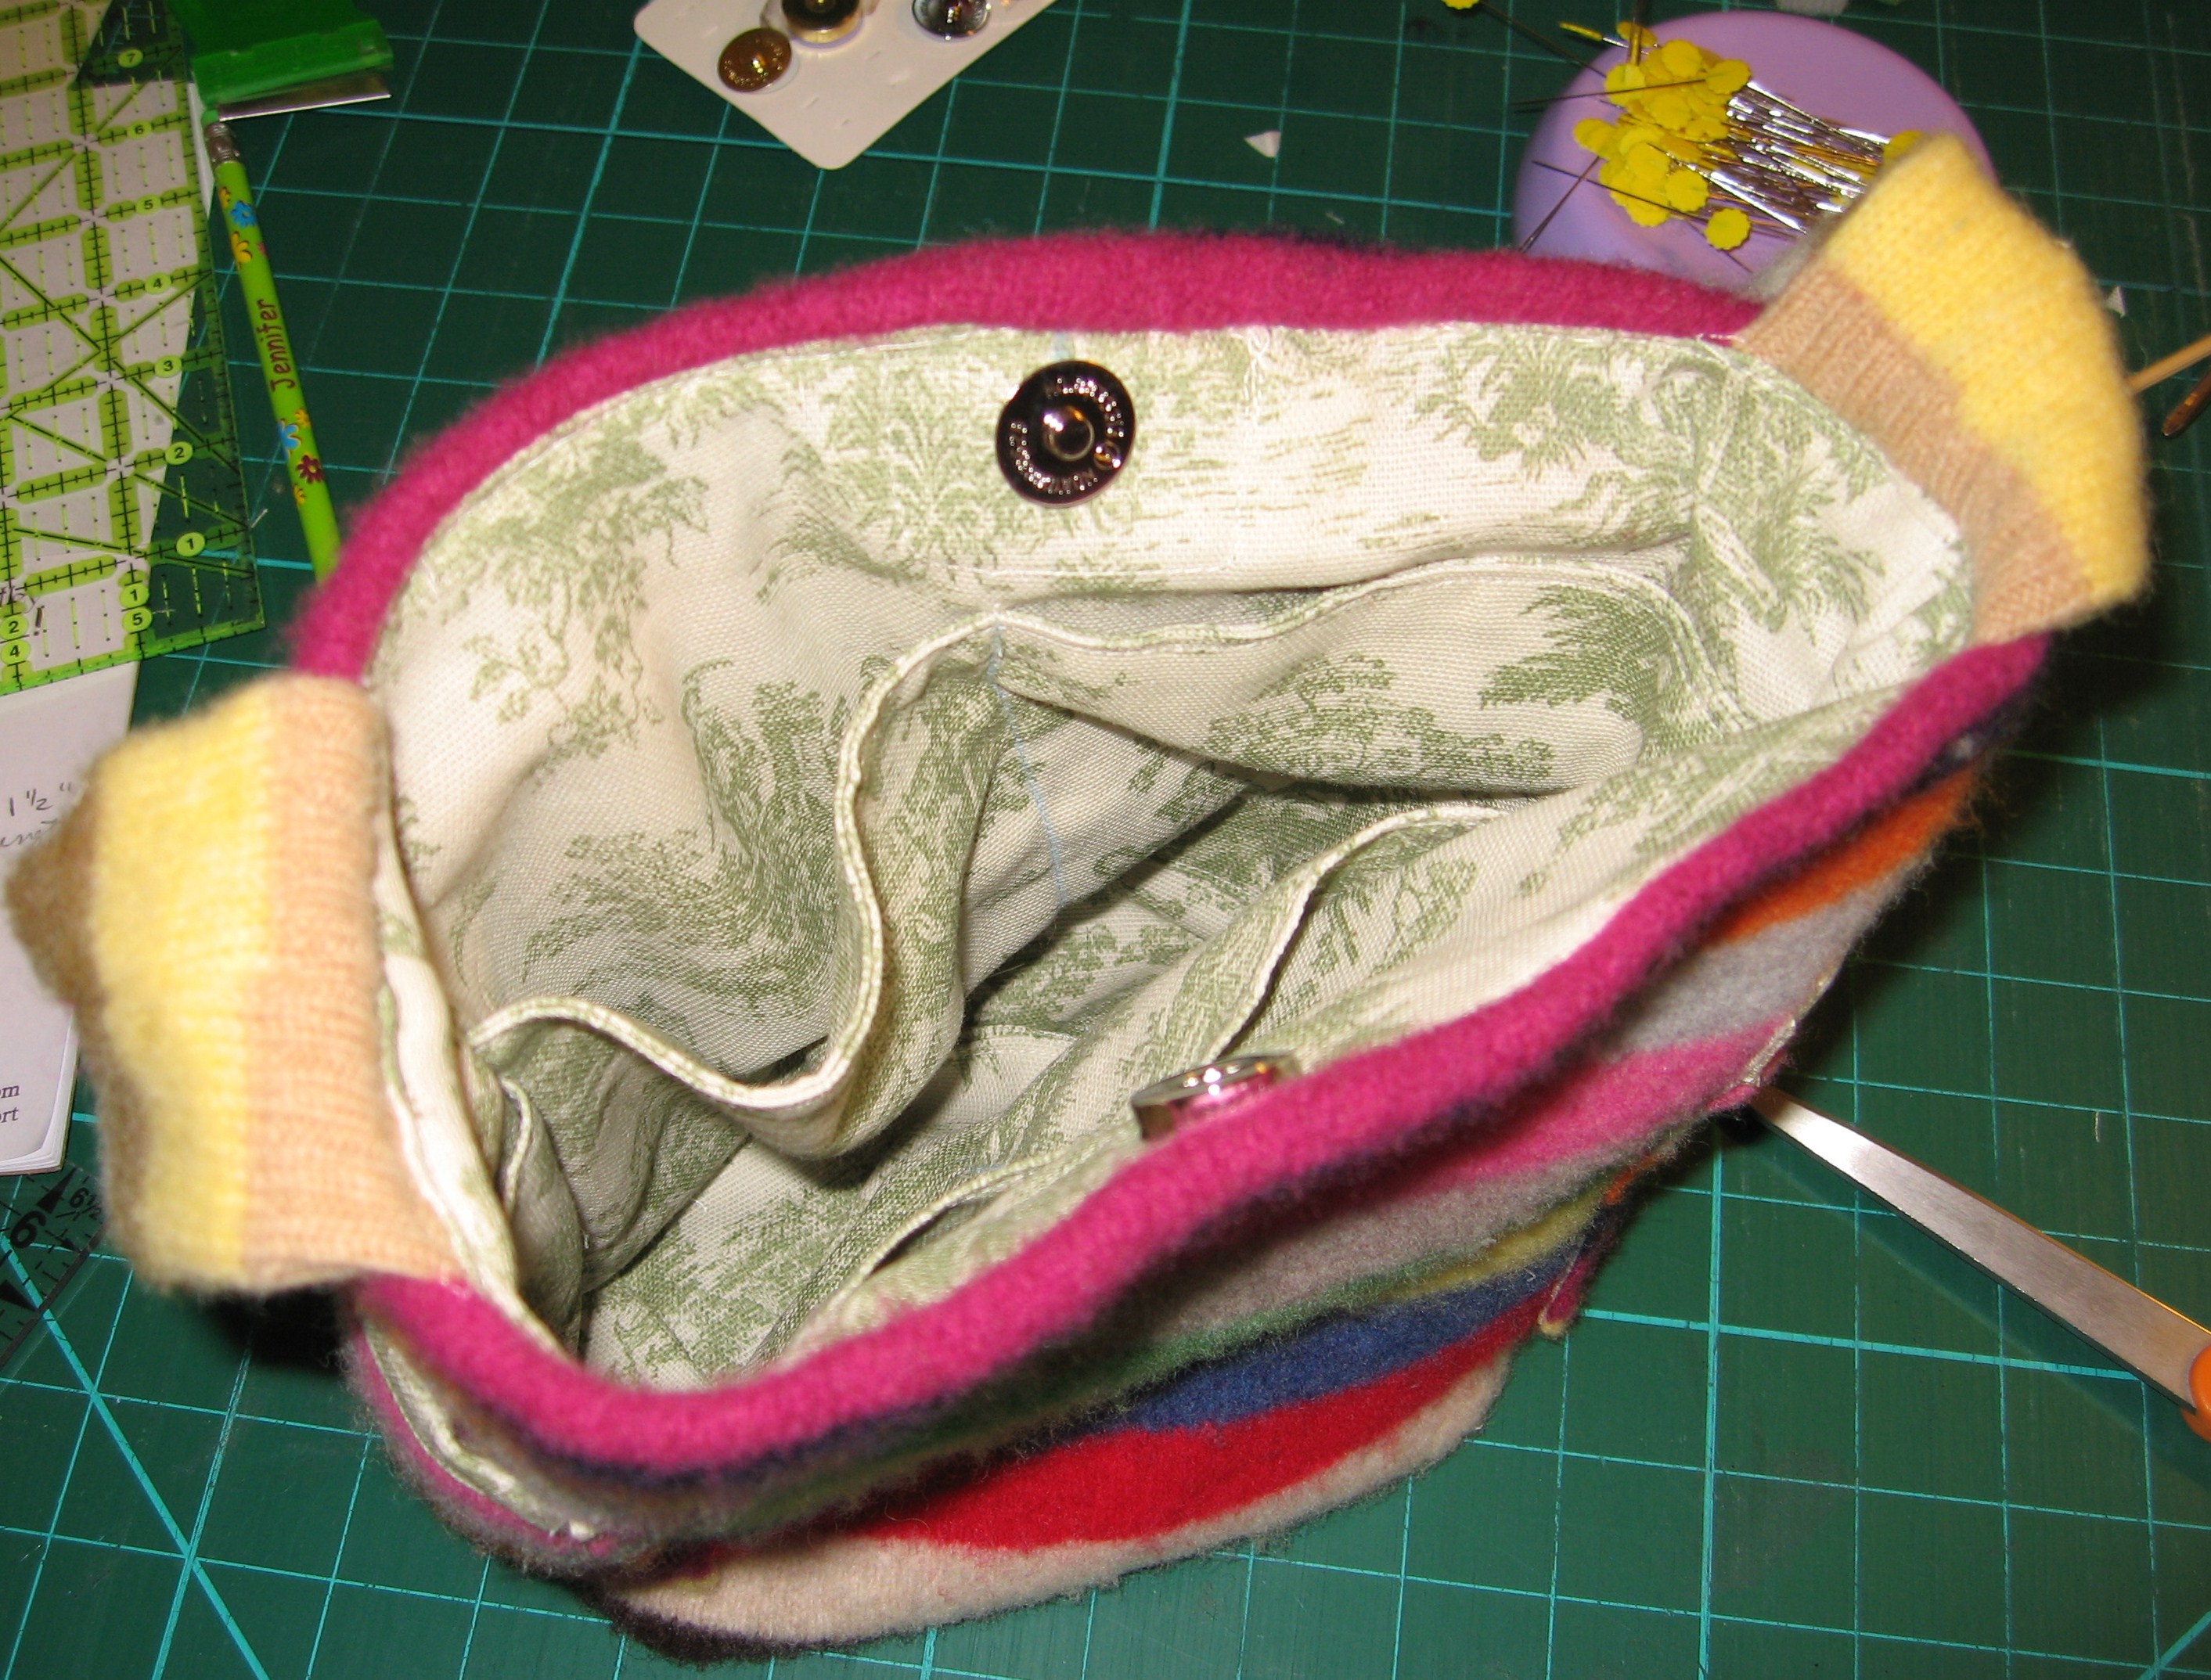
Press seams then turn right side out. The bottom and pockets of your lining should now look like this.
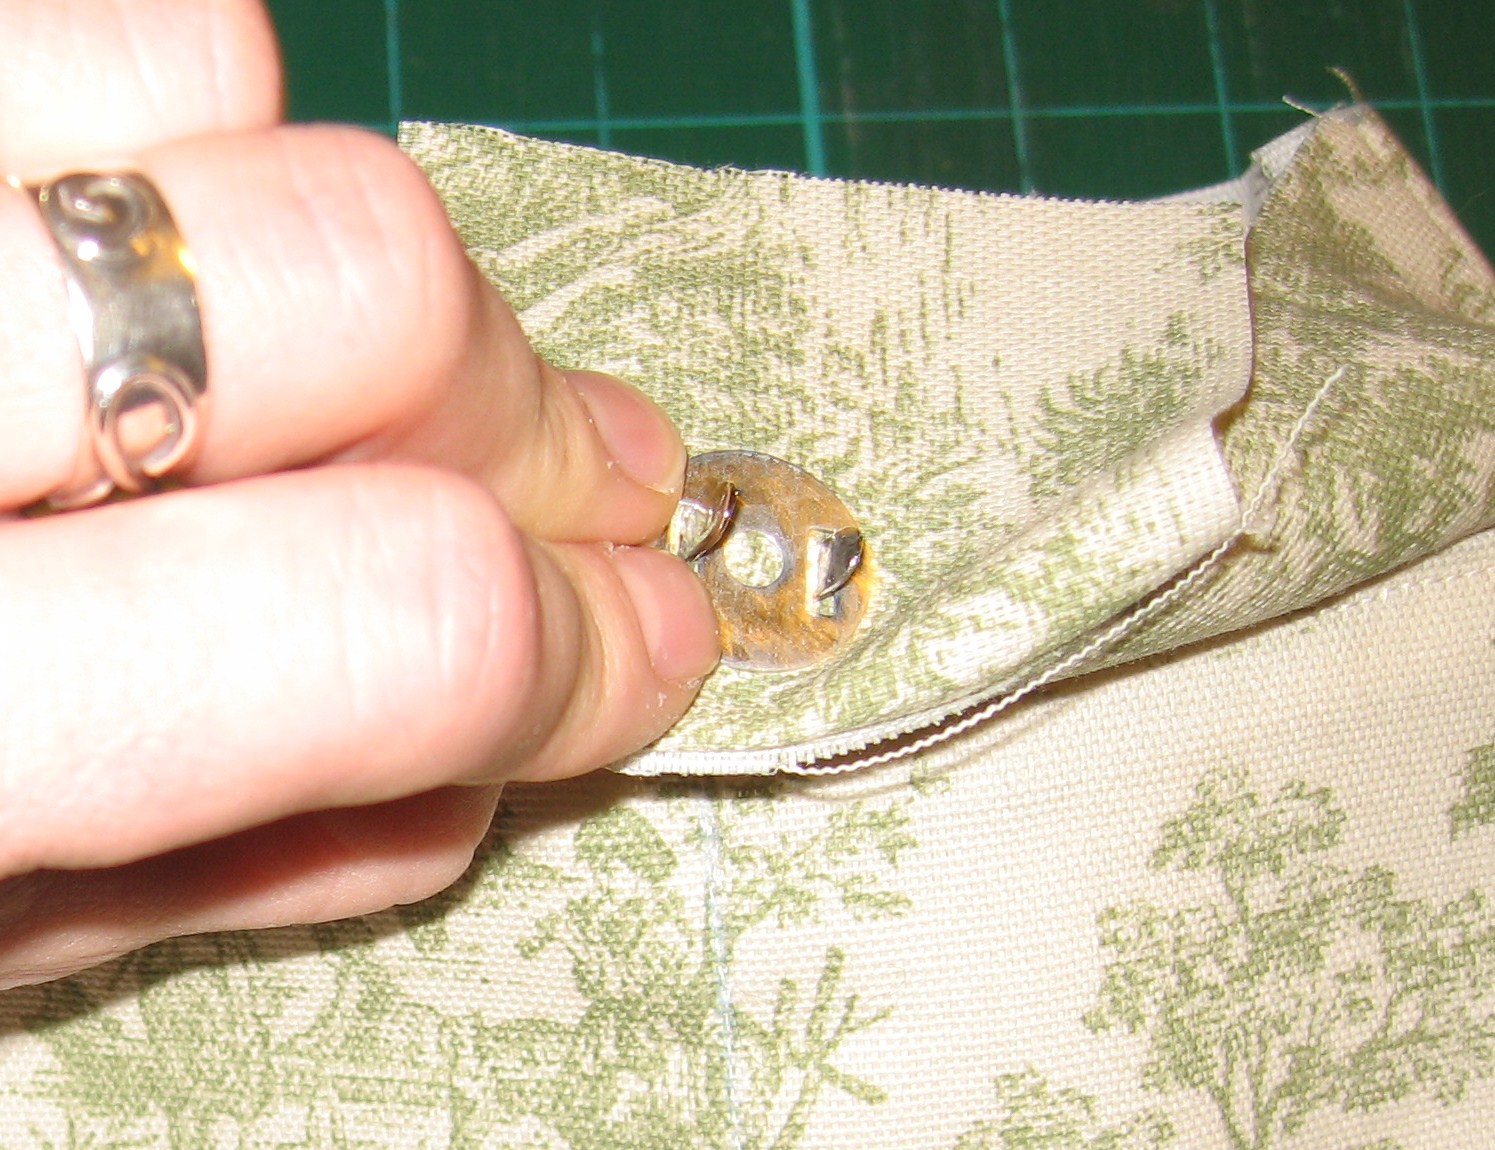
Add magnetic snaps to your lining following the manufacturer’s directions. Leave enough seam allowance at the top for stitching around. I recommend 1″ or more of space. Add a folded piece of scrap fabric to the back to reinforce the snap. Stitch around the snap to reinforce extra fabric.
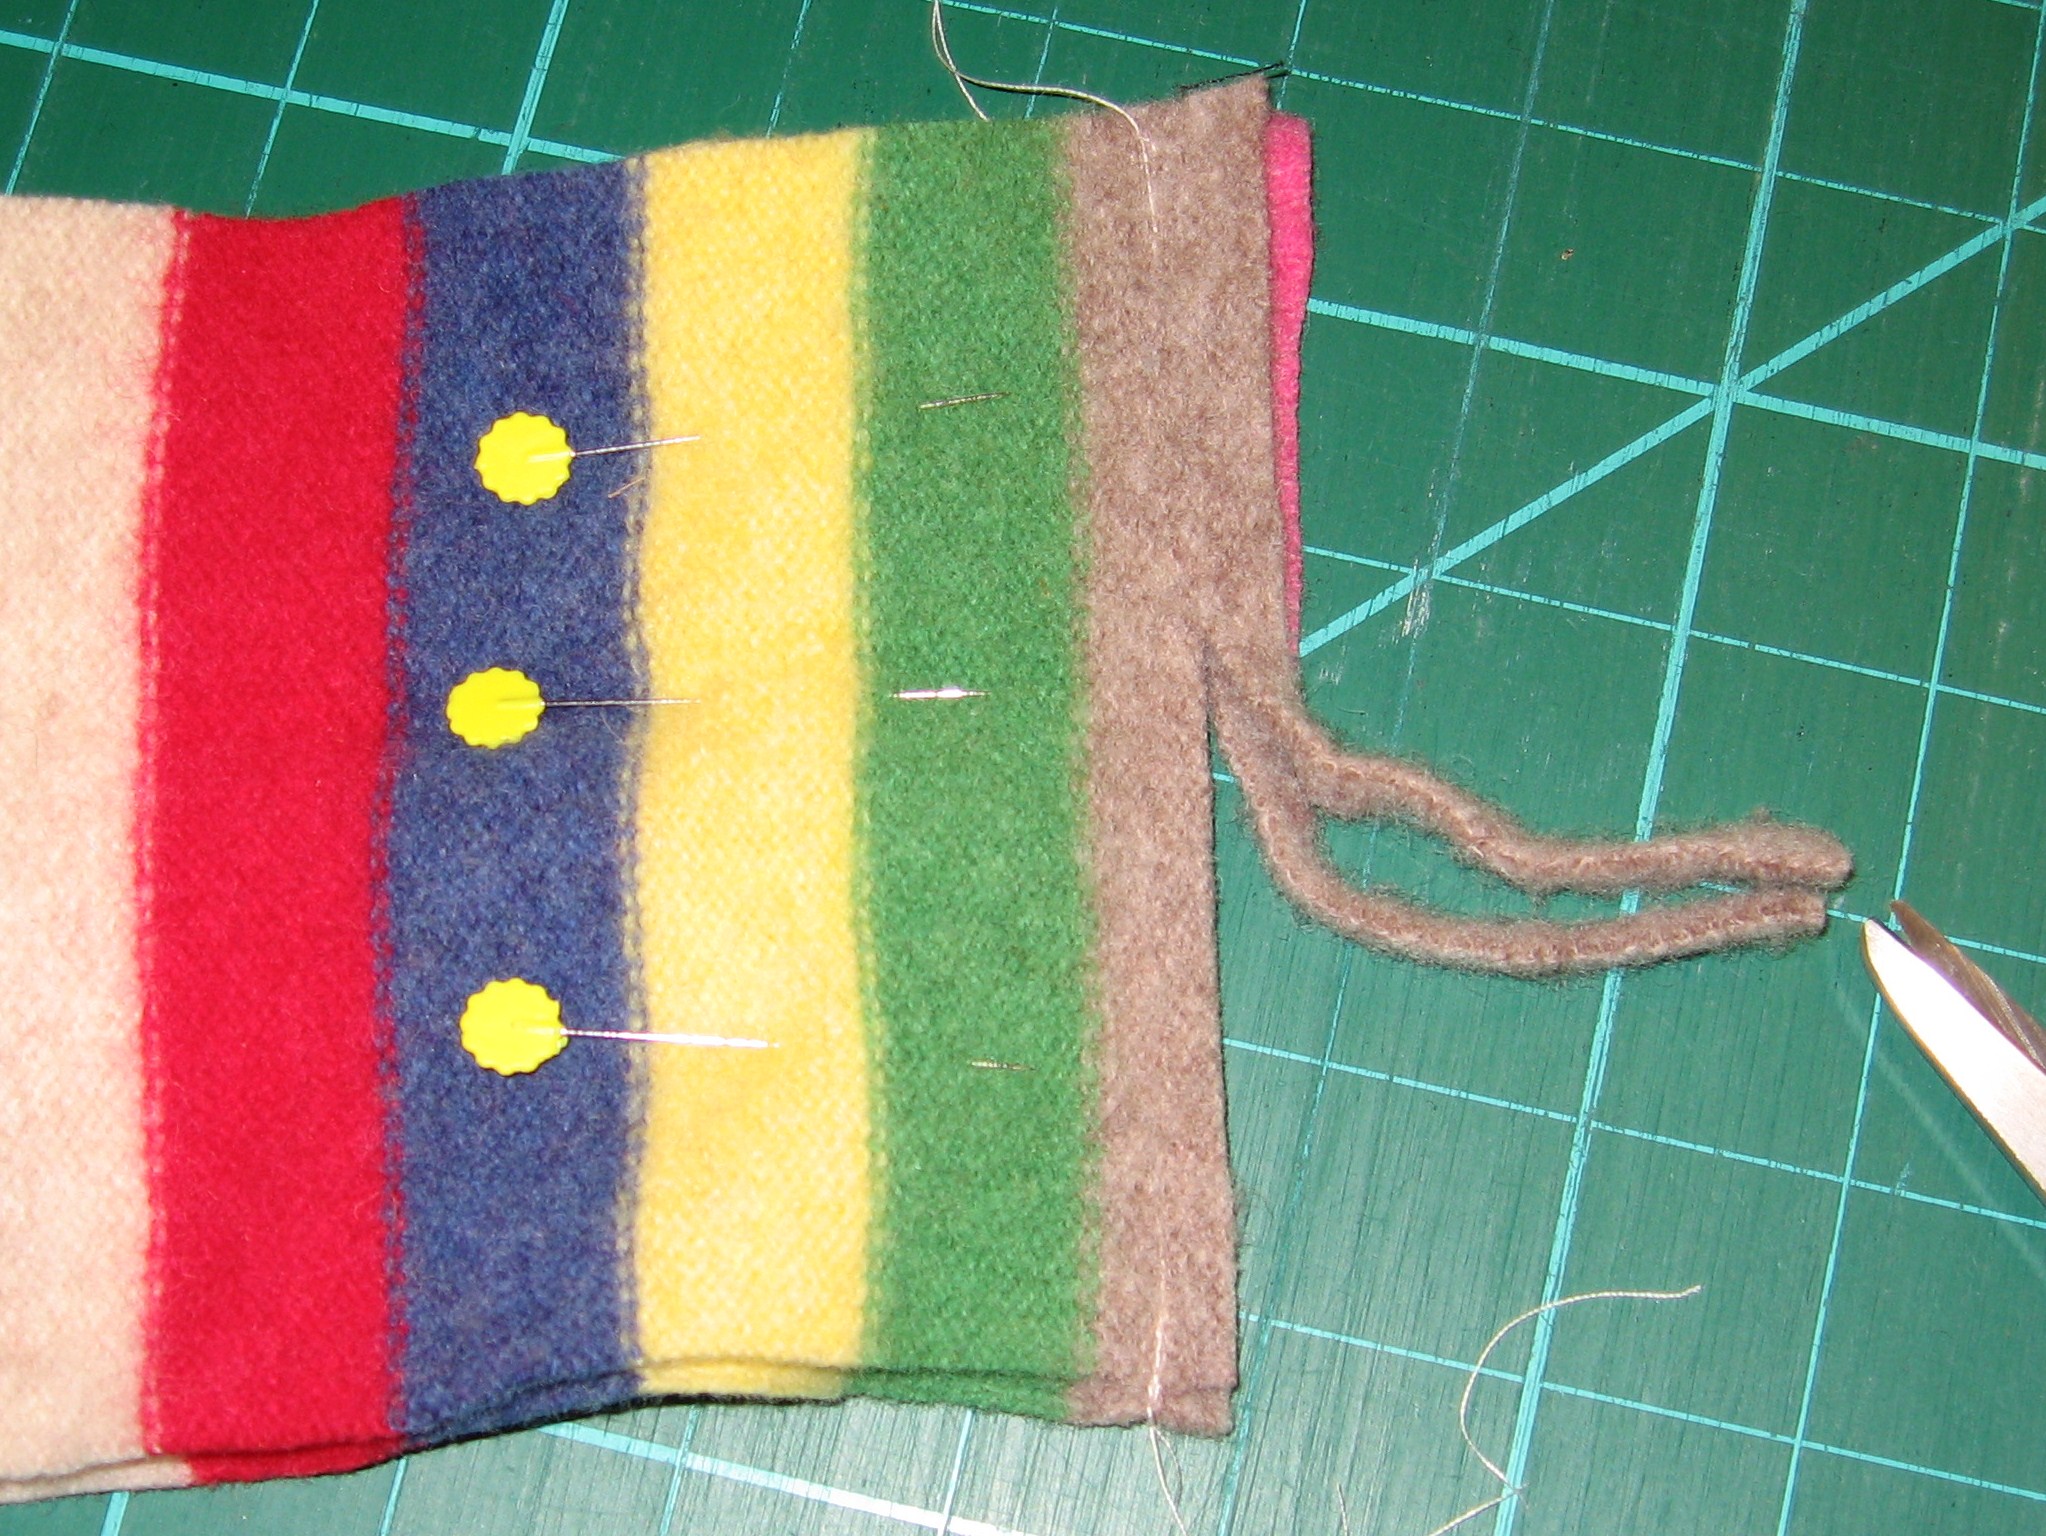
Time to work on the outside sweater pieces!
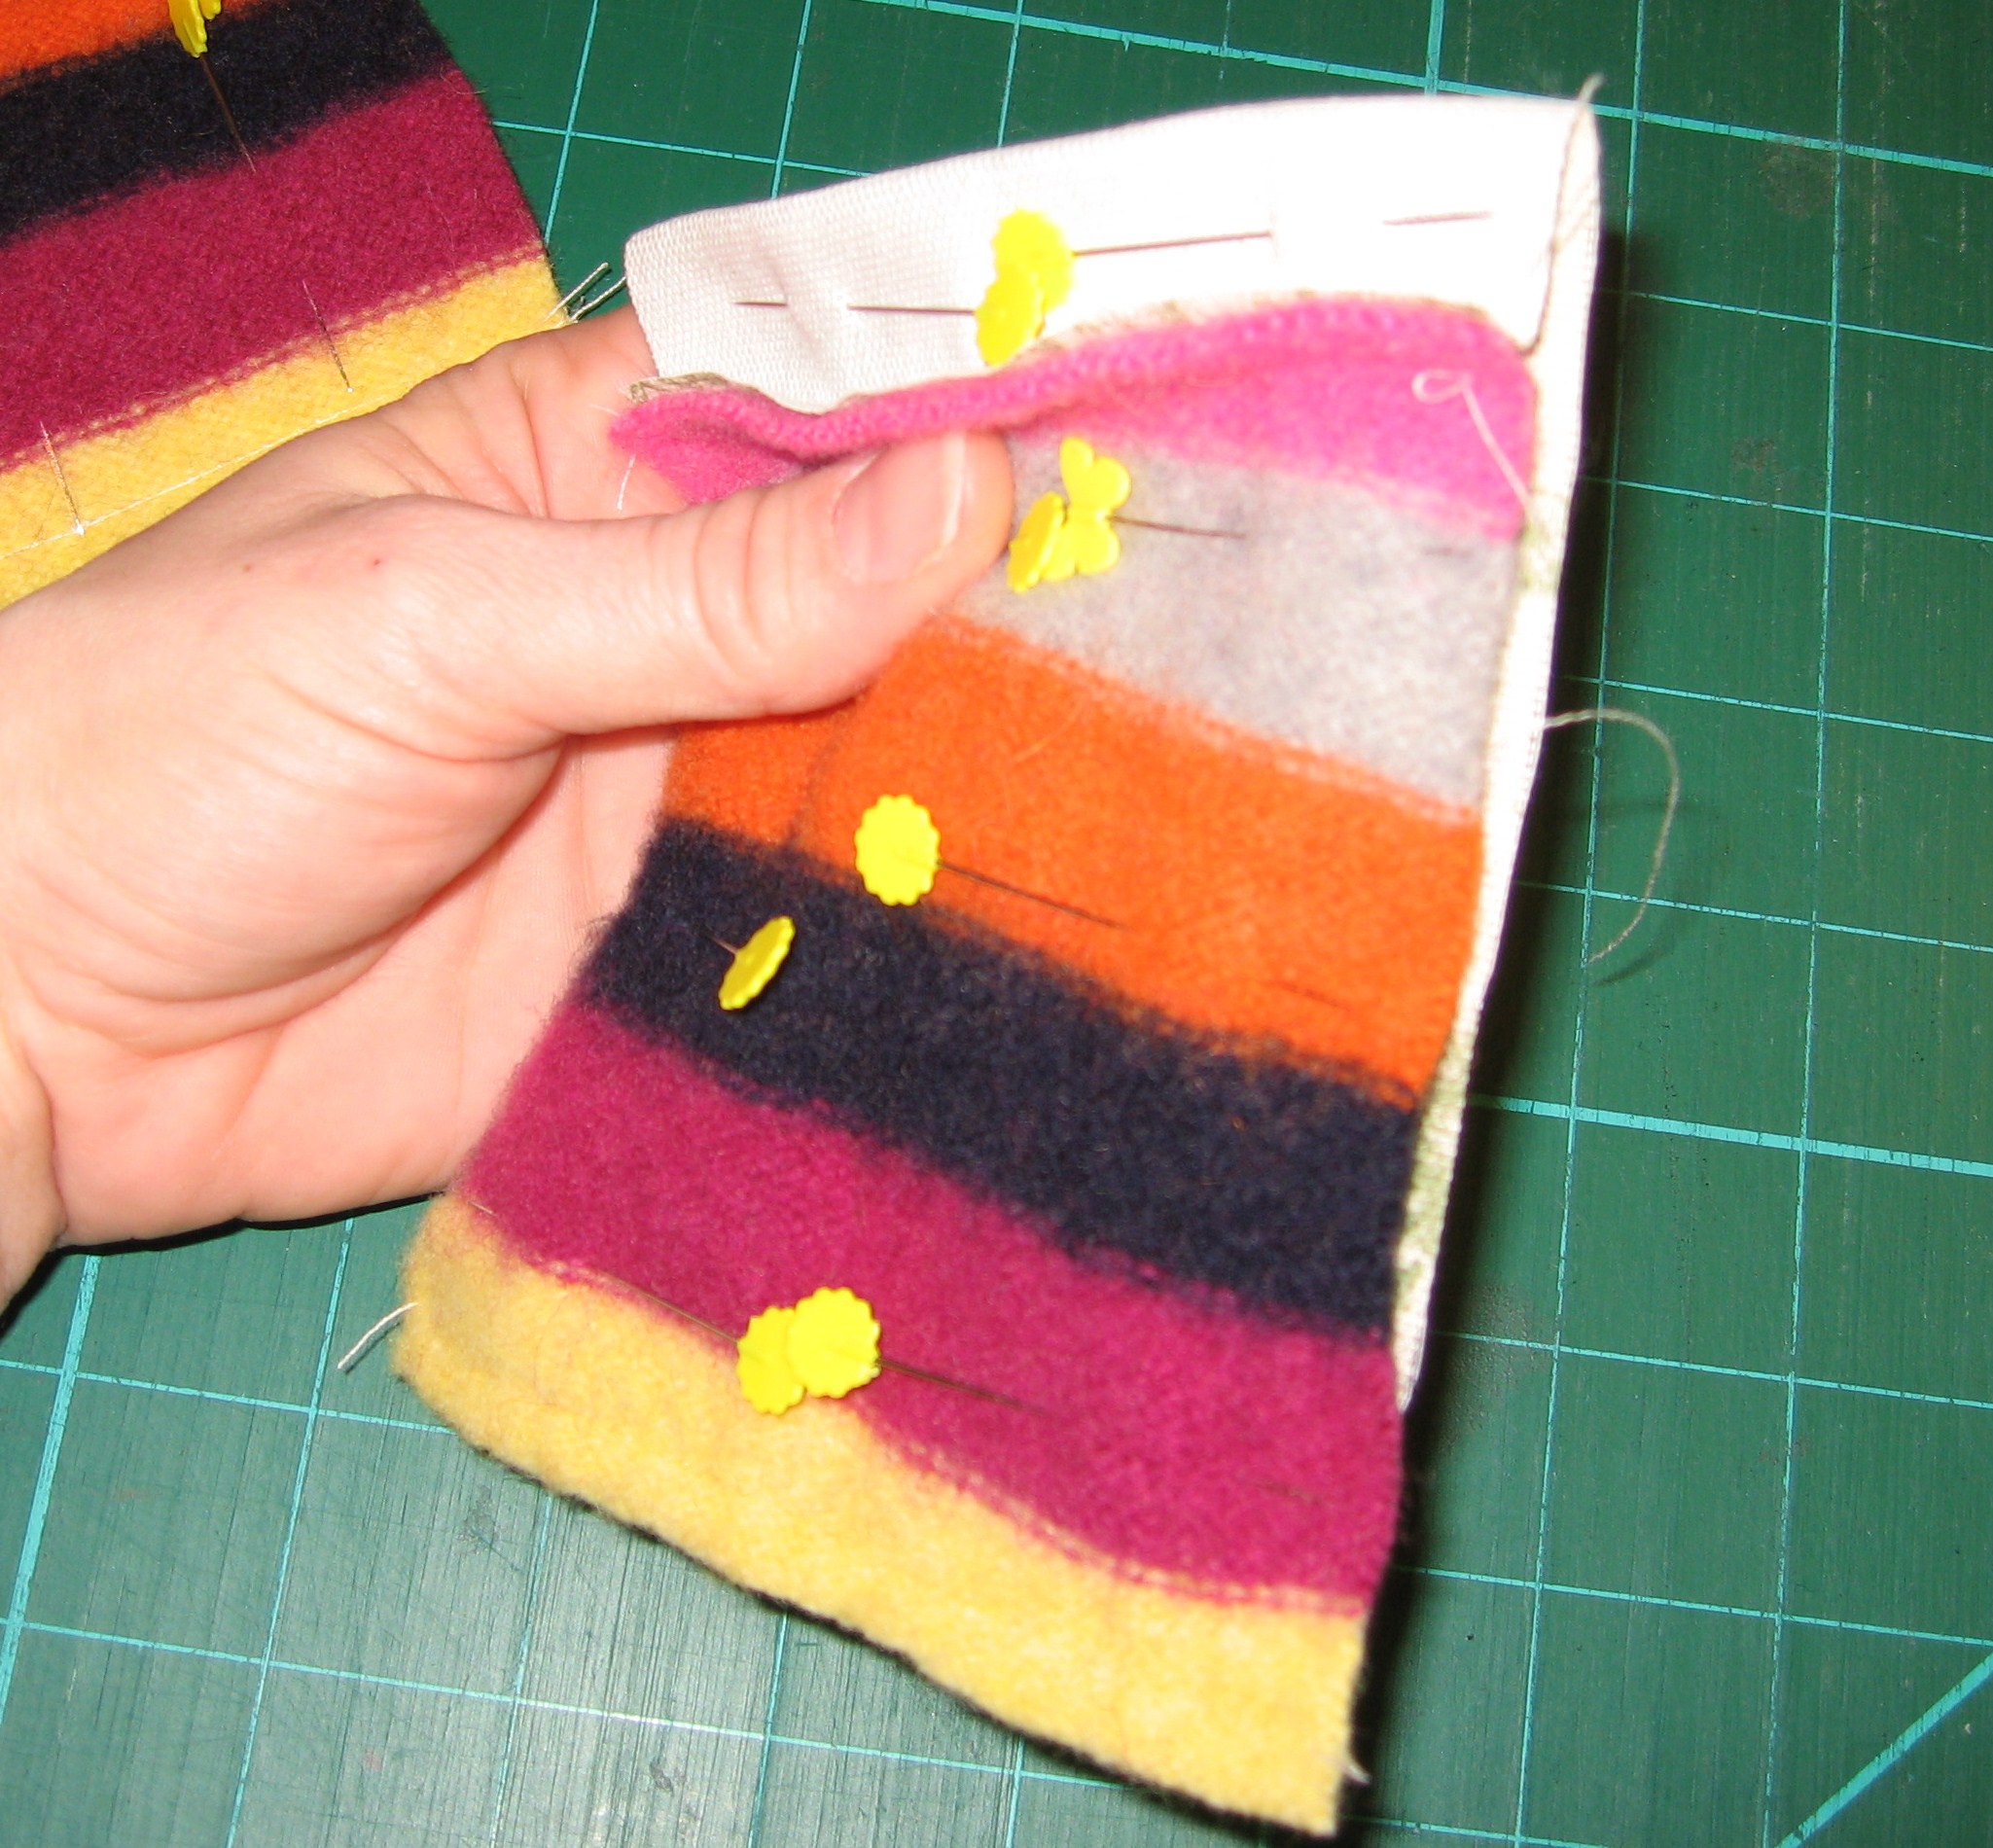
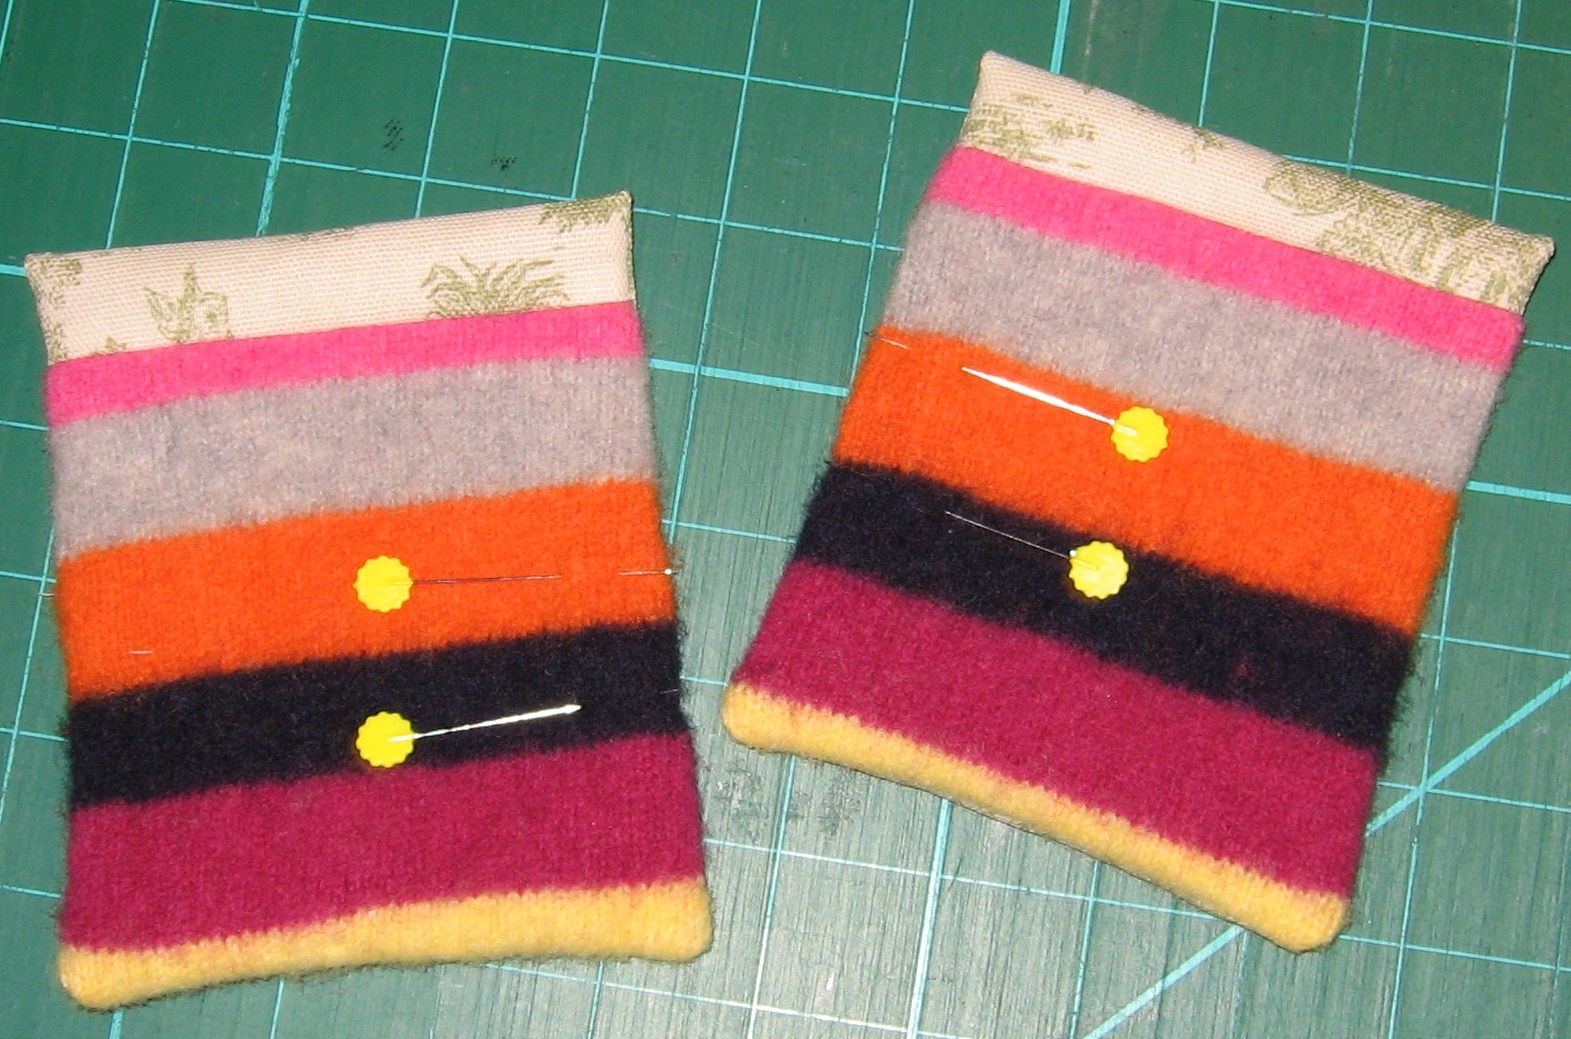
Pin sweater pocket piece to lining pocket piece, right sides together (lining should be 1.5″ longer), stitch ends.
Line up bottom of pocket, pin, then stitch sides. Leave an opening for turning.
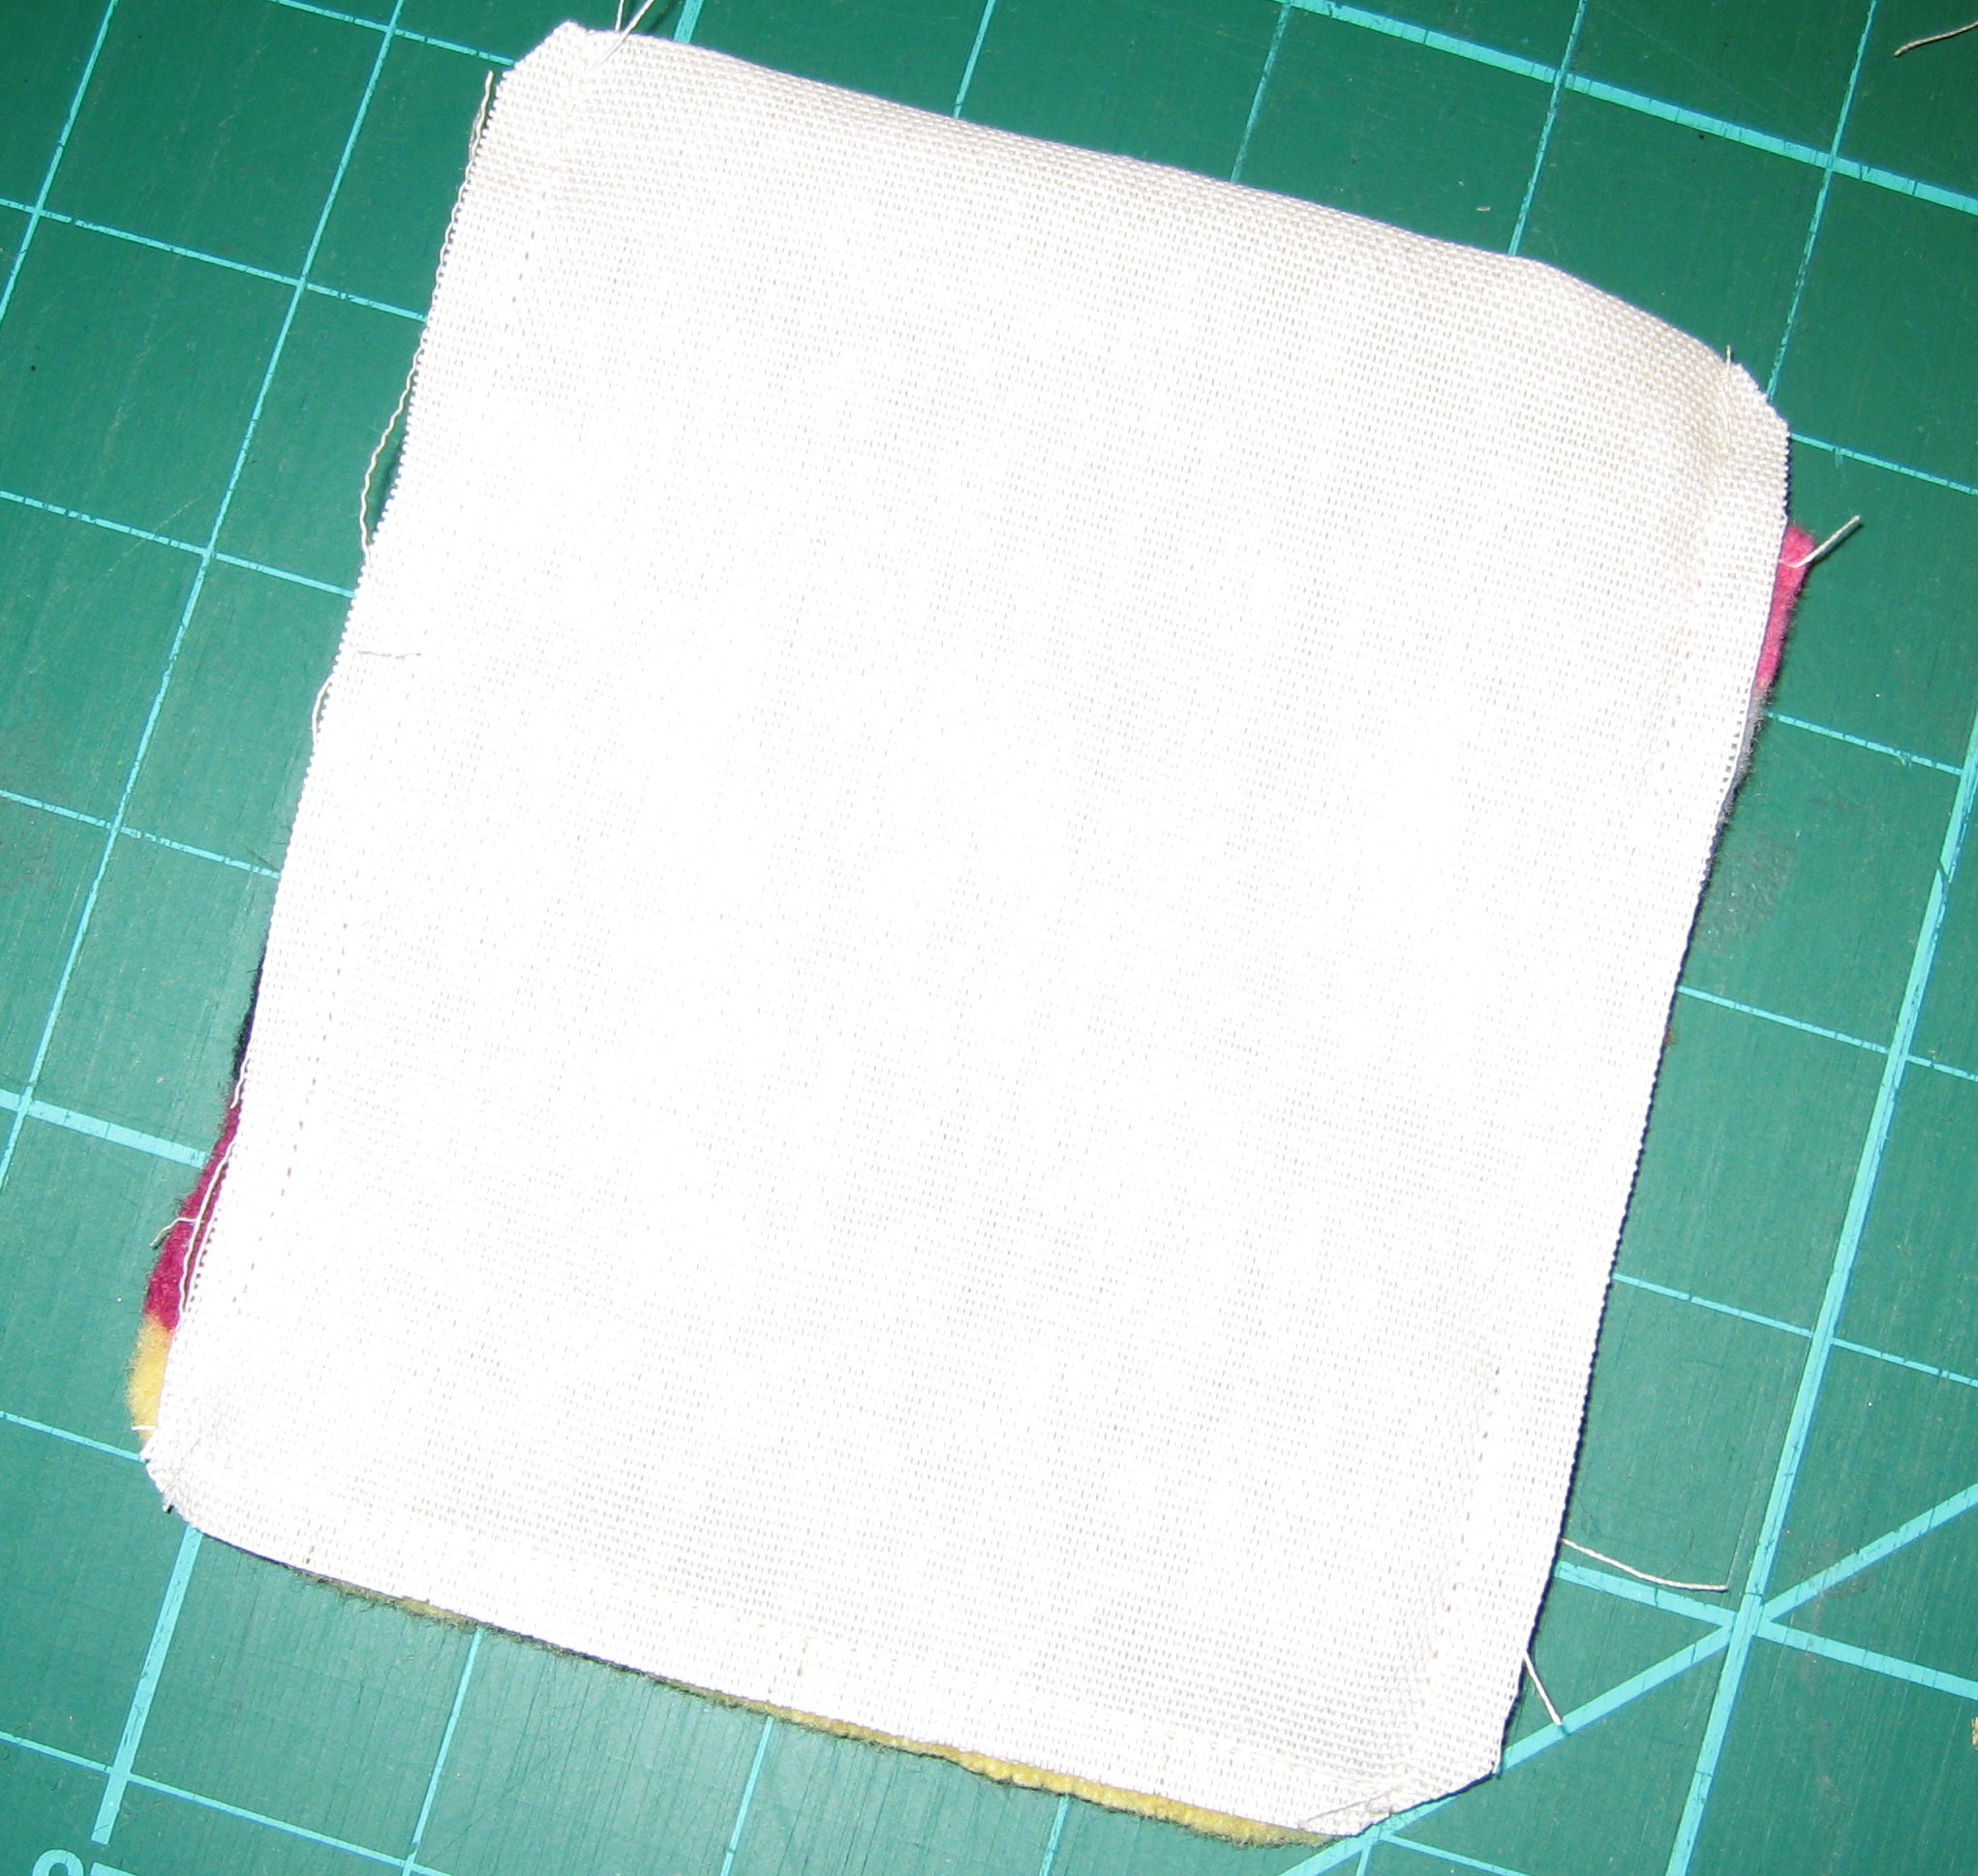
Trim corners, turn pocket and pin openings.
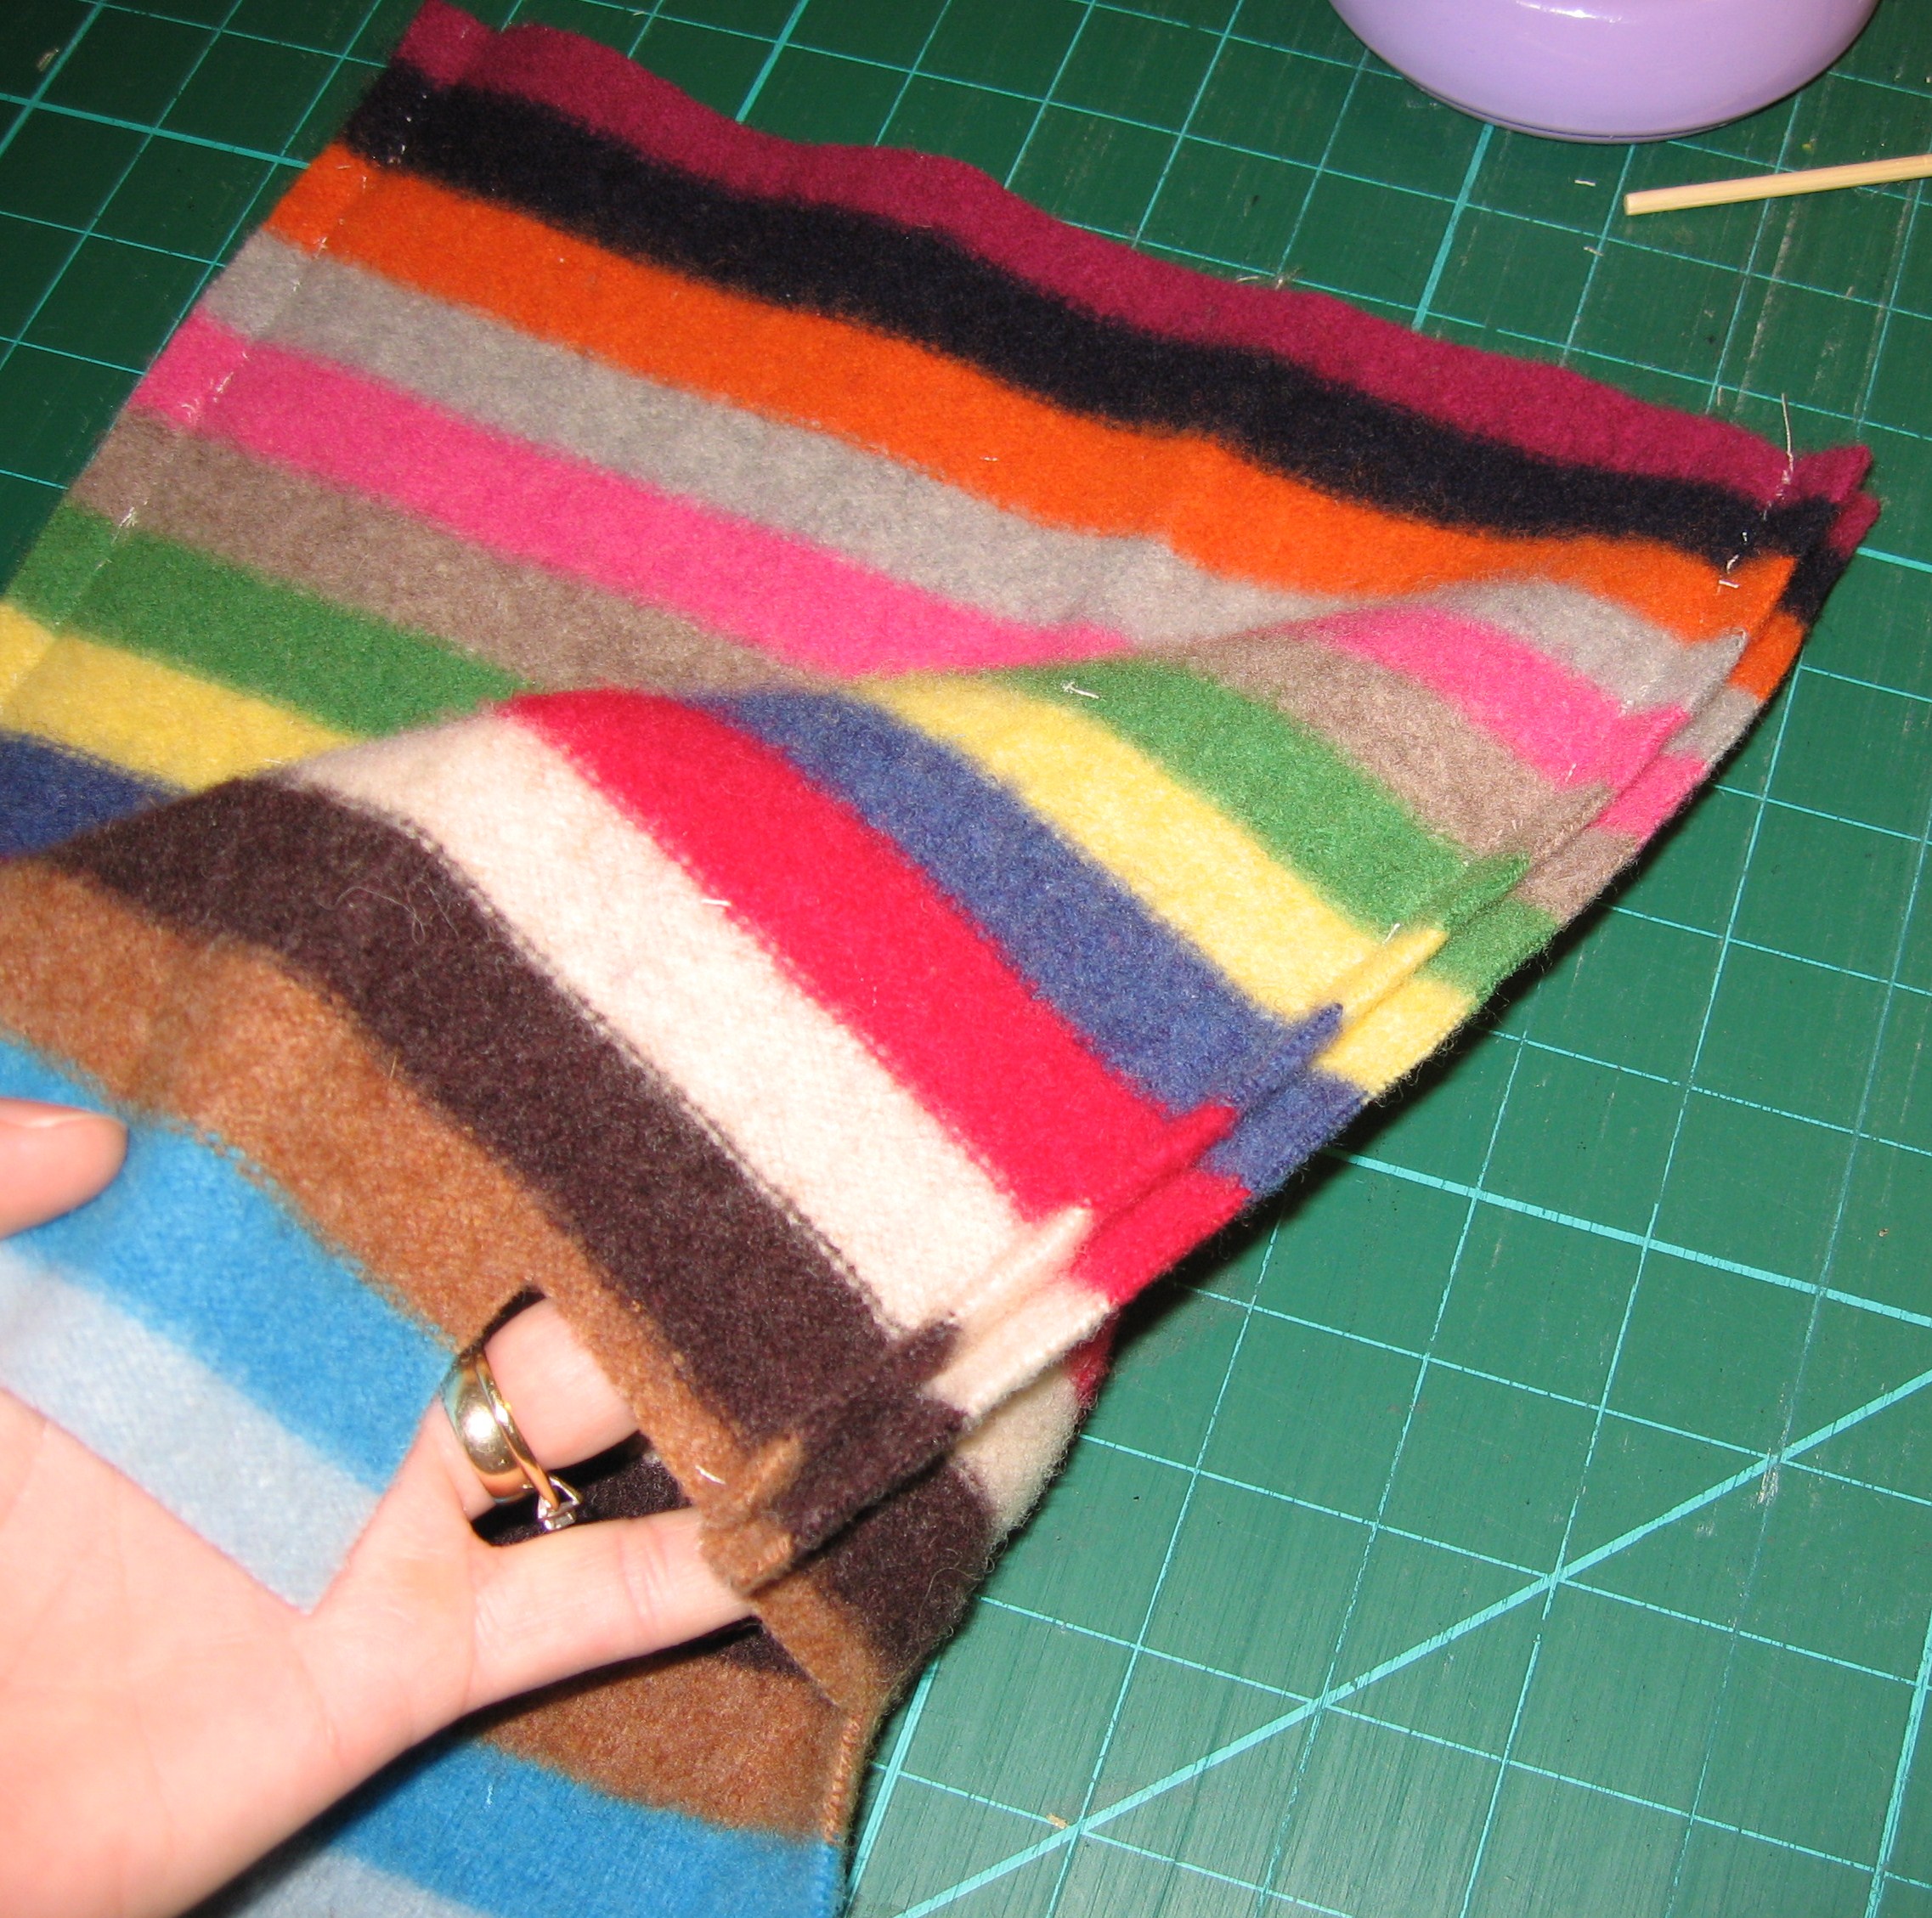
Stitch side seams of bag, leaving bottom open.
Turn the sweater bag body right side out, matching seams. Pin pockets over the side seams, then stitch to attach.
With right sides together, stitch across sweater bag bottom.
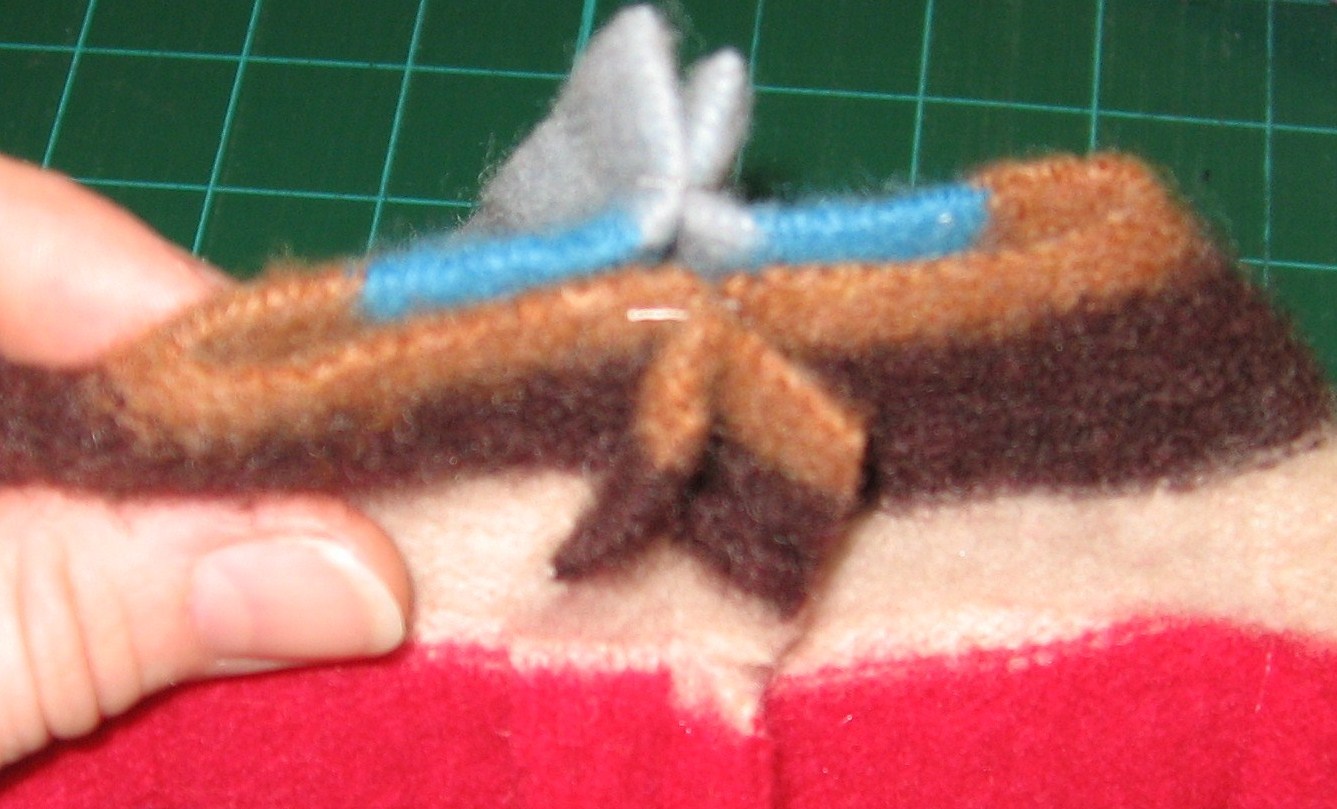
Fold in boxed corners, matching side & bottom seams, pin & stitch.
The inside bottom should look like this.
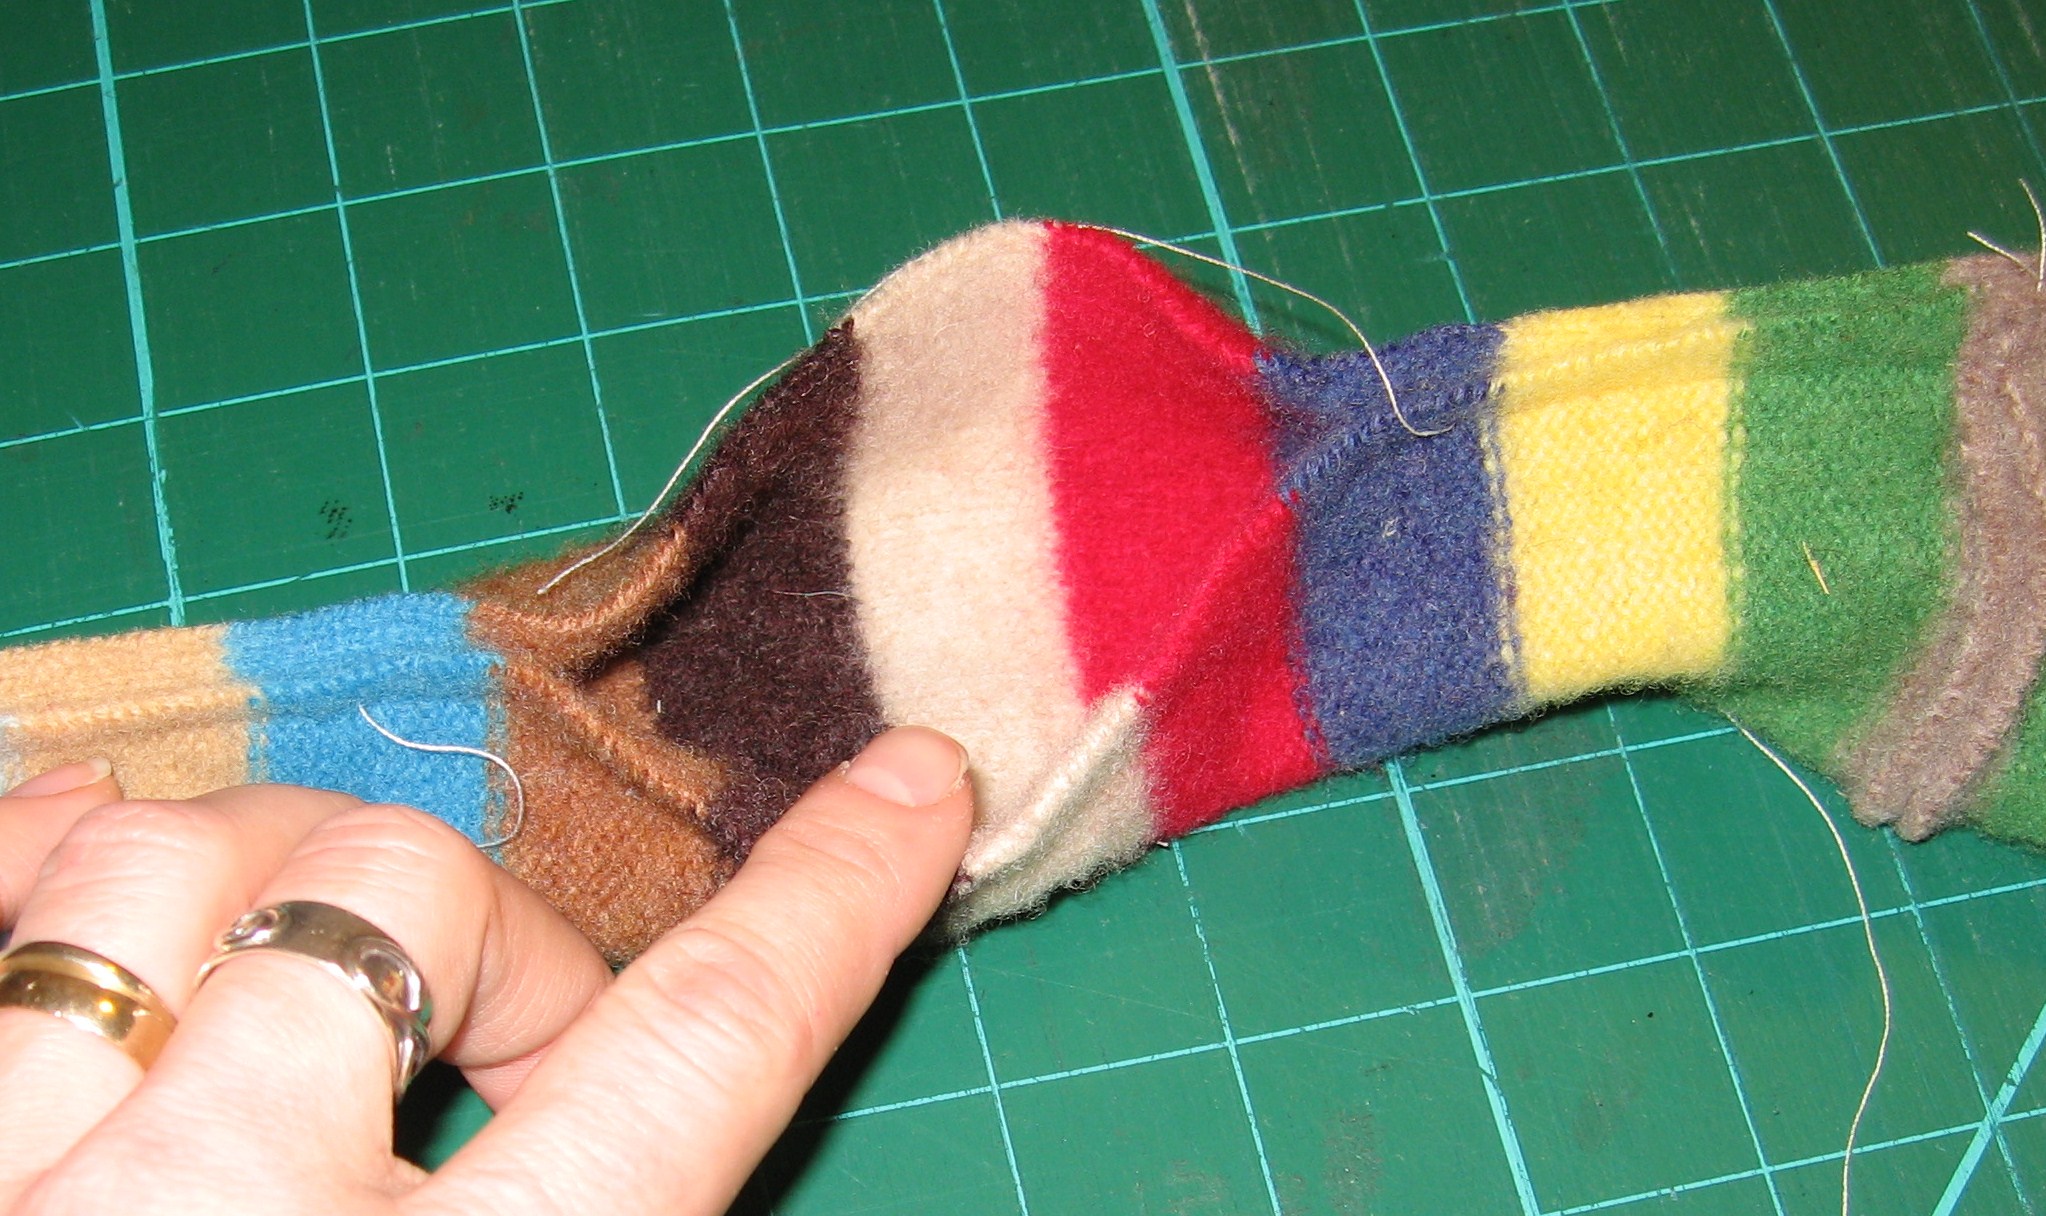
Time for Sleeves!
Trim sleeves to desired width for strap, I like a wider strip so tend to cut about 5″. This includes seam allowance. Remember, this is your bag, and this width will vary based on your sweater, so the dimensions are all yours!
Pin ends of two sleeves together, stitch and trim seam.
Fold lengthwise, stitch, leaving approx. 6″ open for turning
Turn right side out and smooth opening.
Stitch closed with a tight whip stitch.
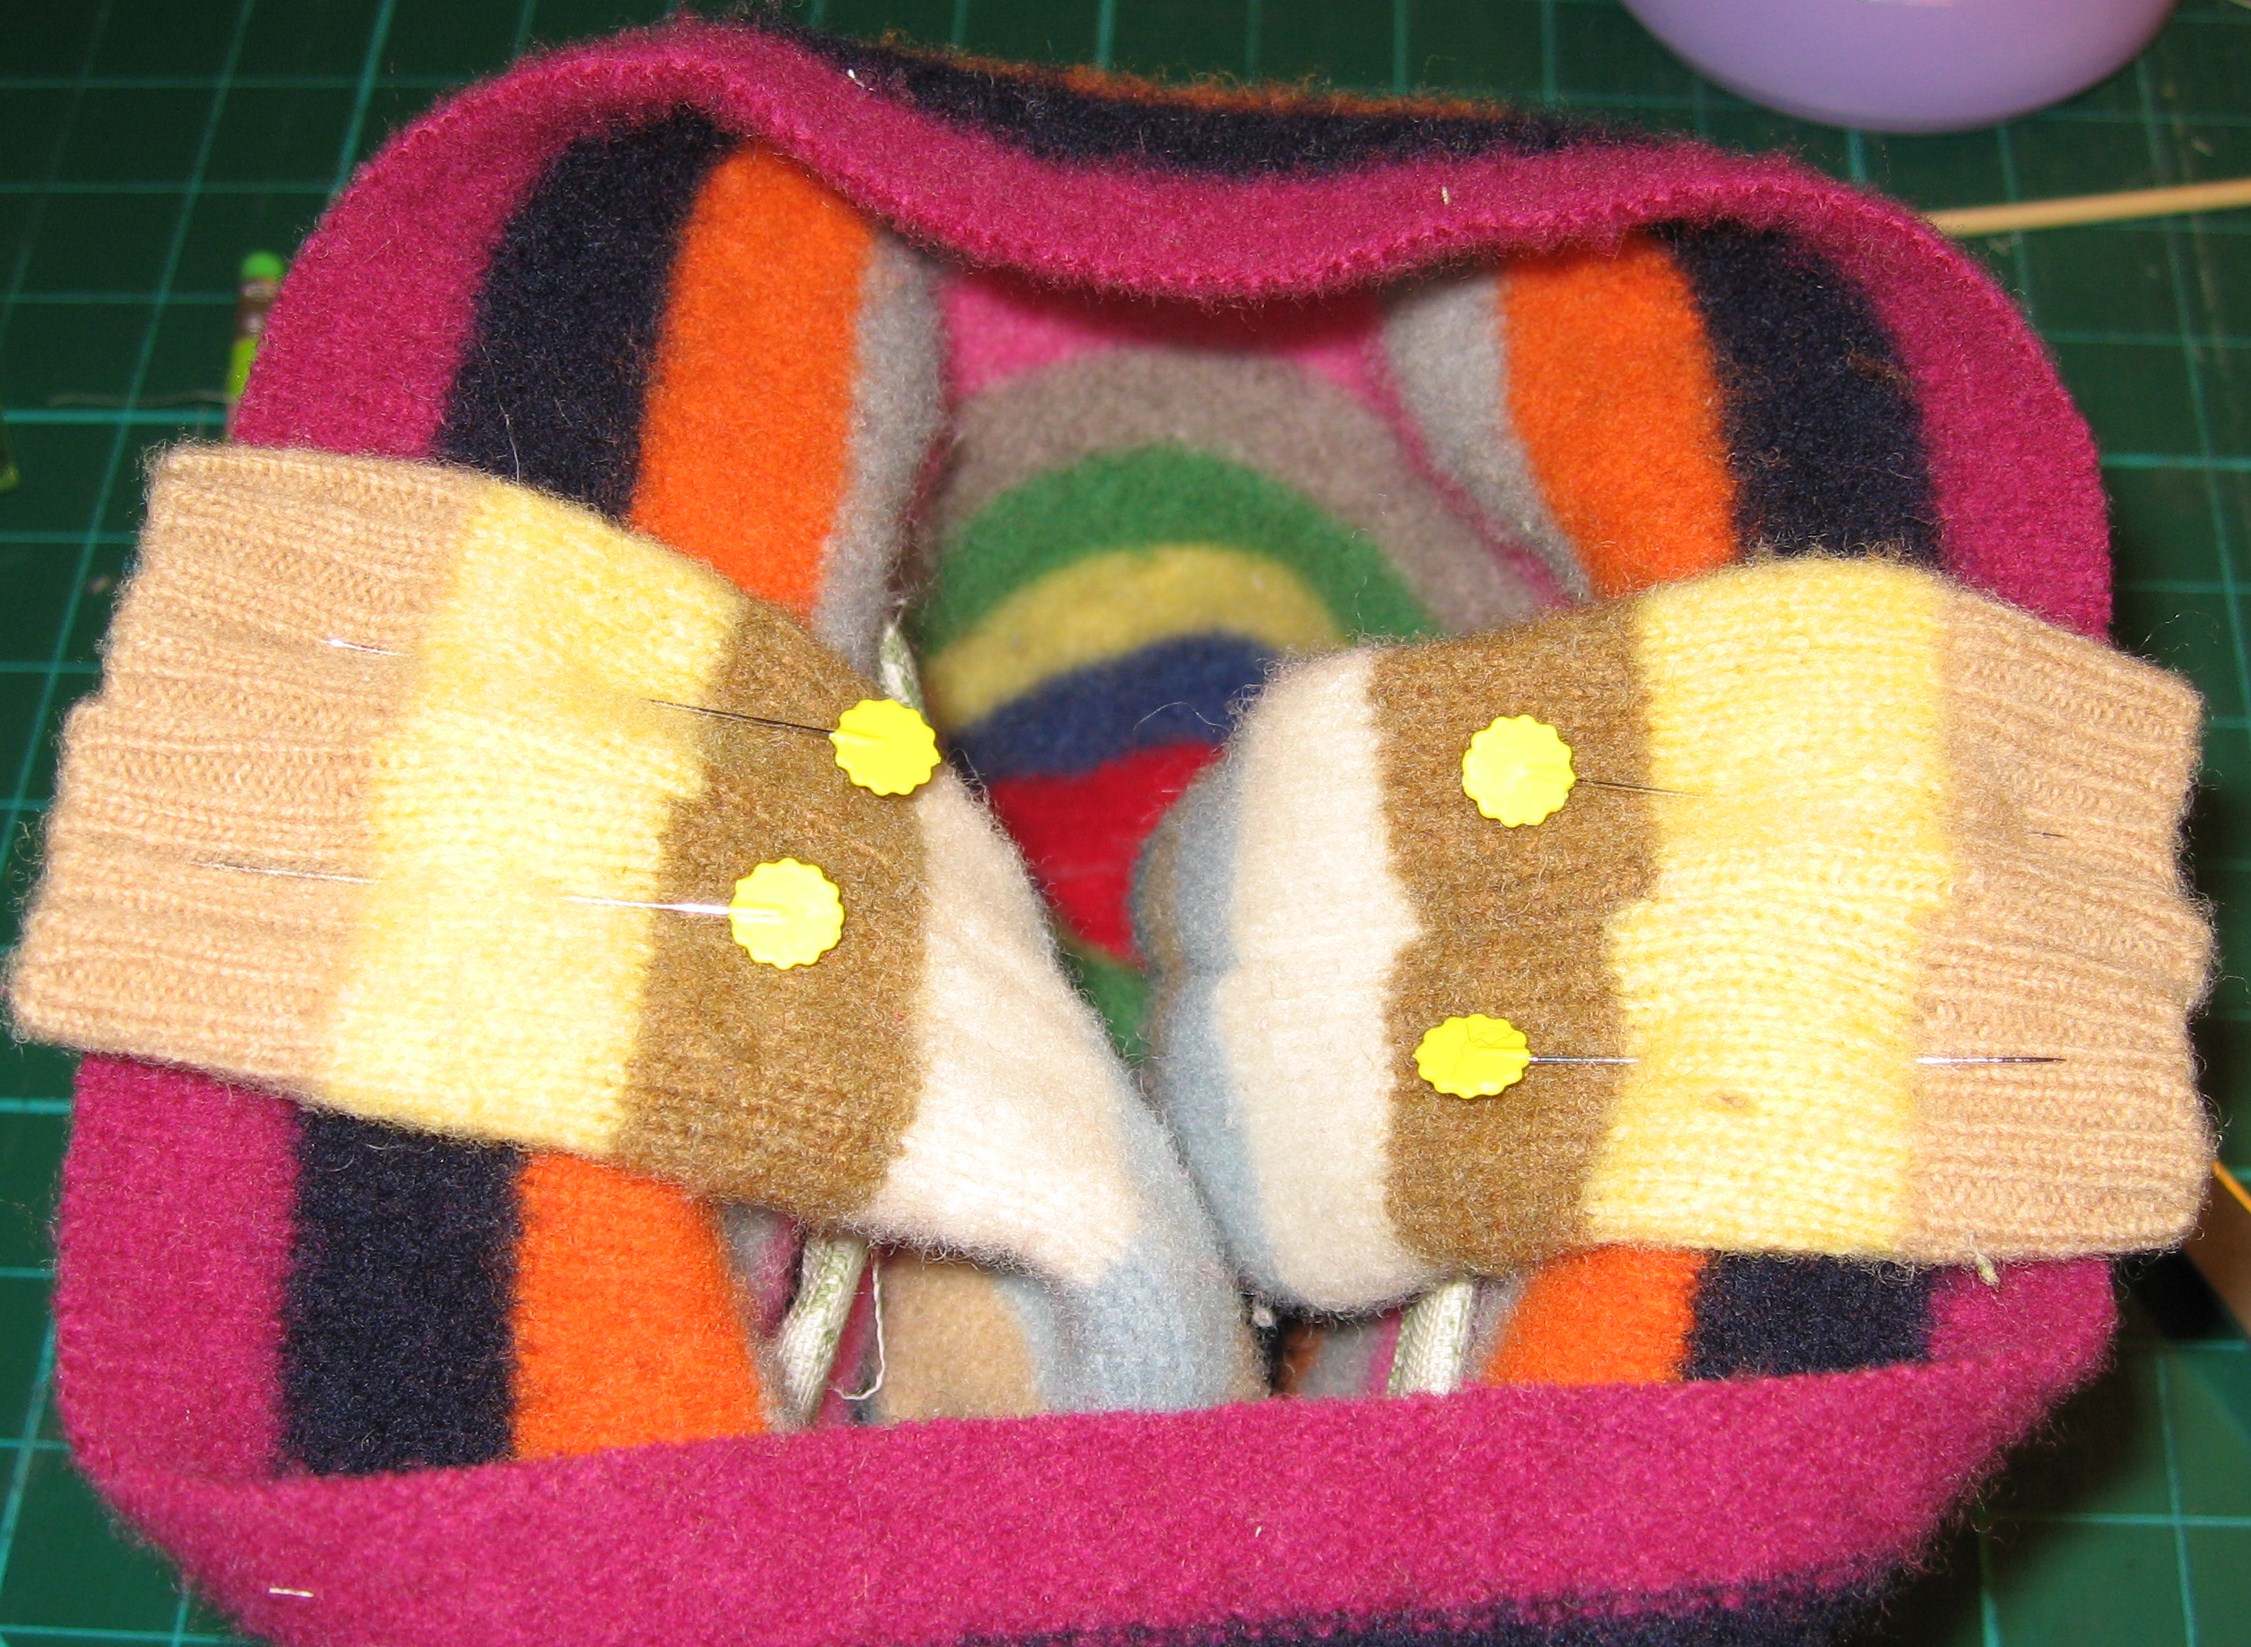
Center and pin straps to side seams, being sure to match right sides. Stitch in place.
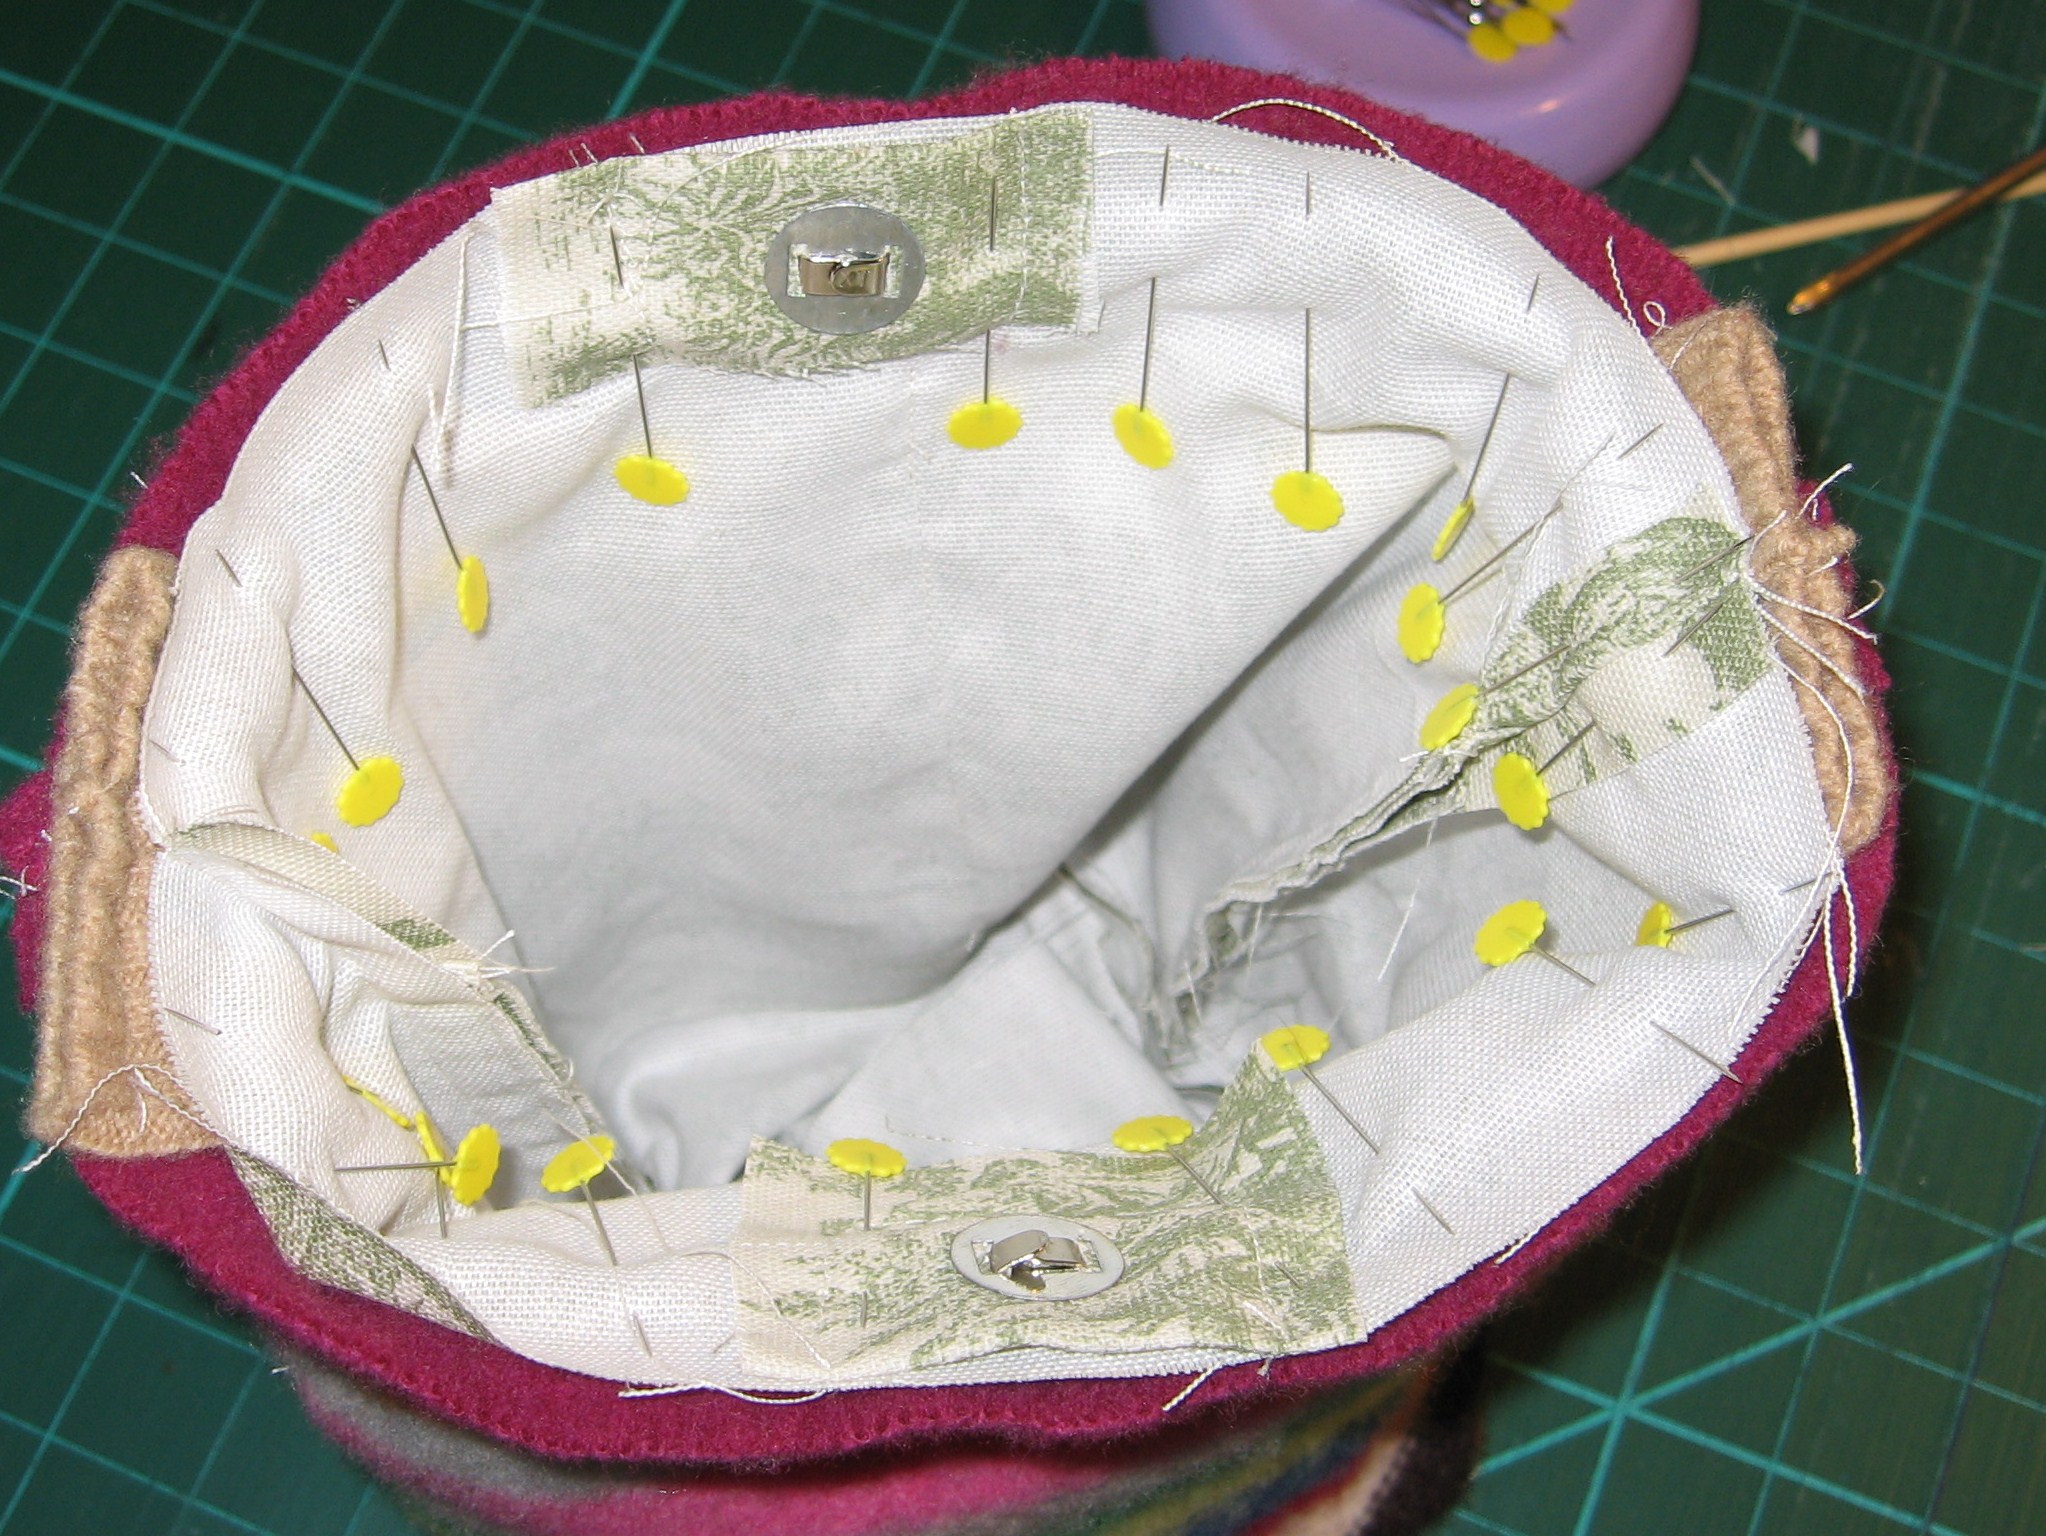
Ensure the straps are inside and pin the lining to the sweater (outside of the bag), right sides together. Stitch around the top.
Turn the bag right side out through the opening in the lining.
Pin opening in lining. Stitch closed.
Turn lining inside, smooth and pin. Top stitch.
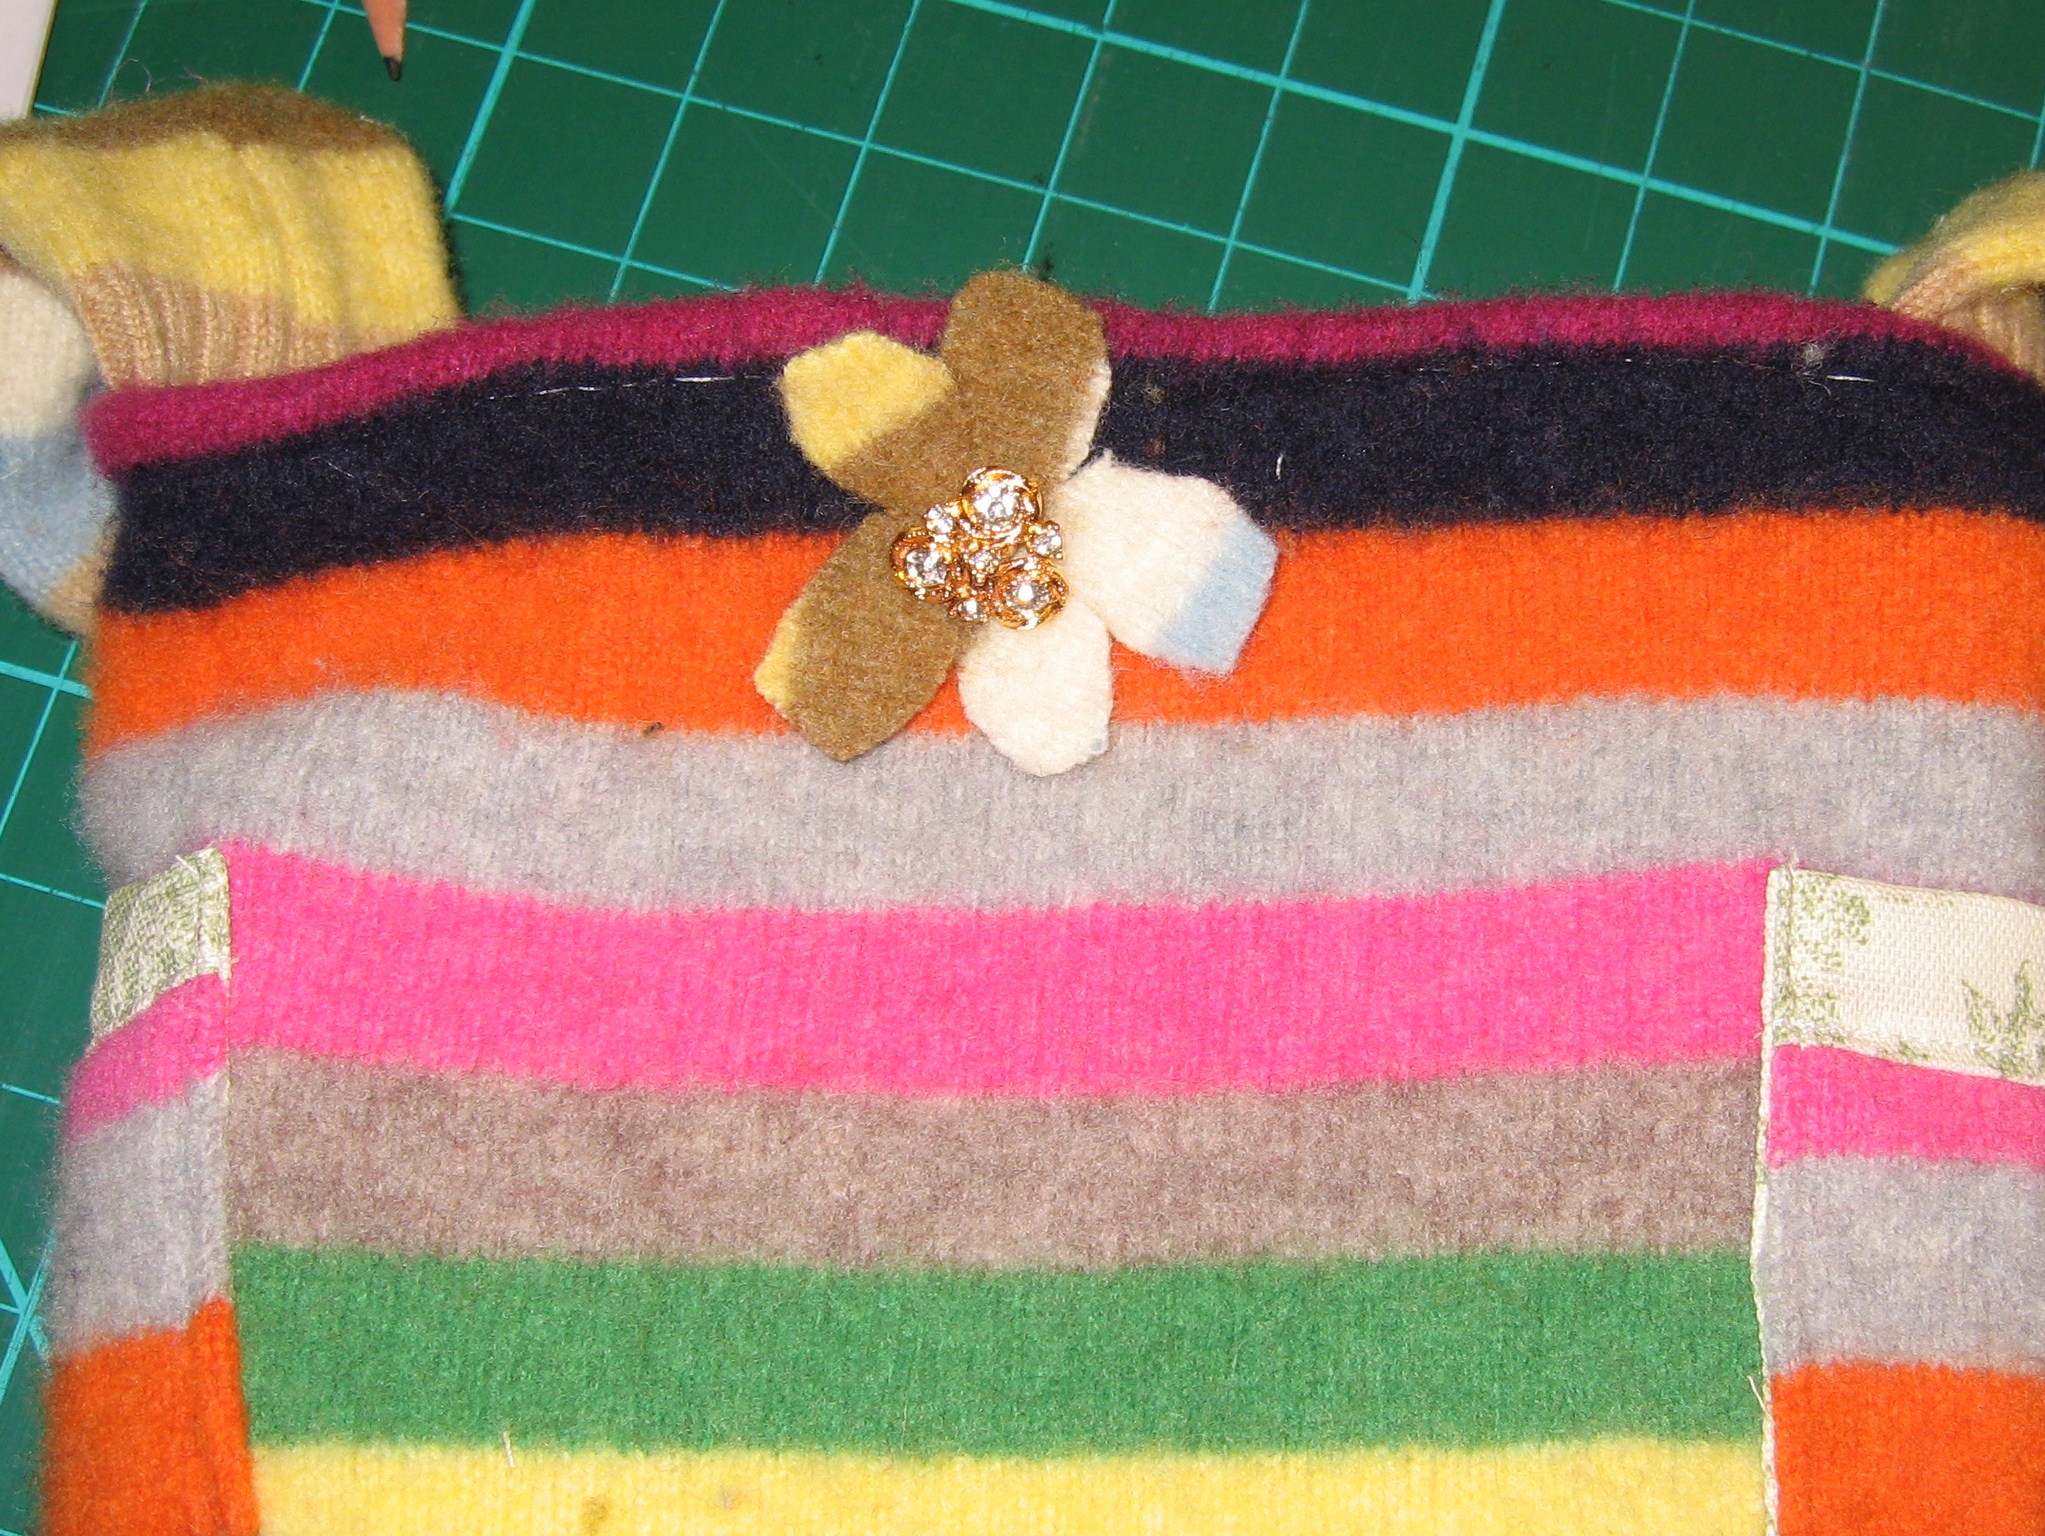
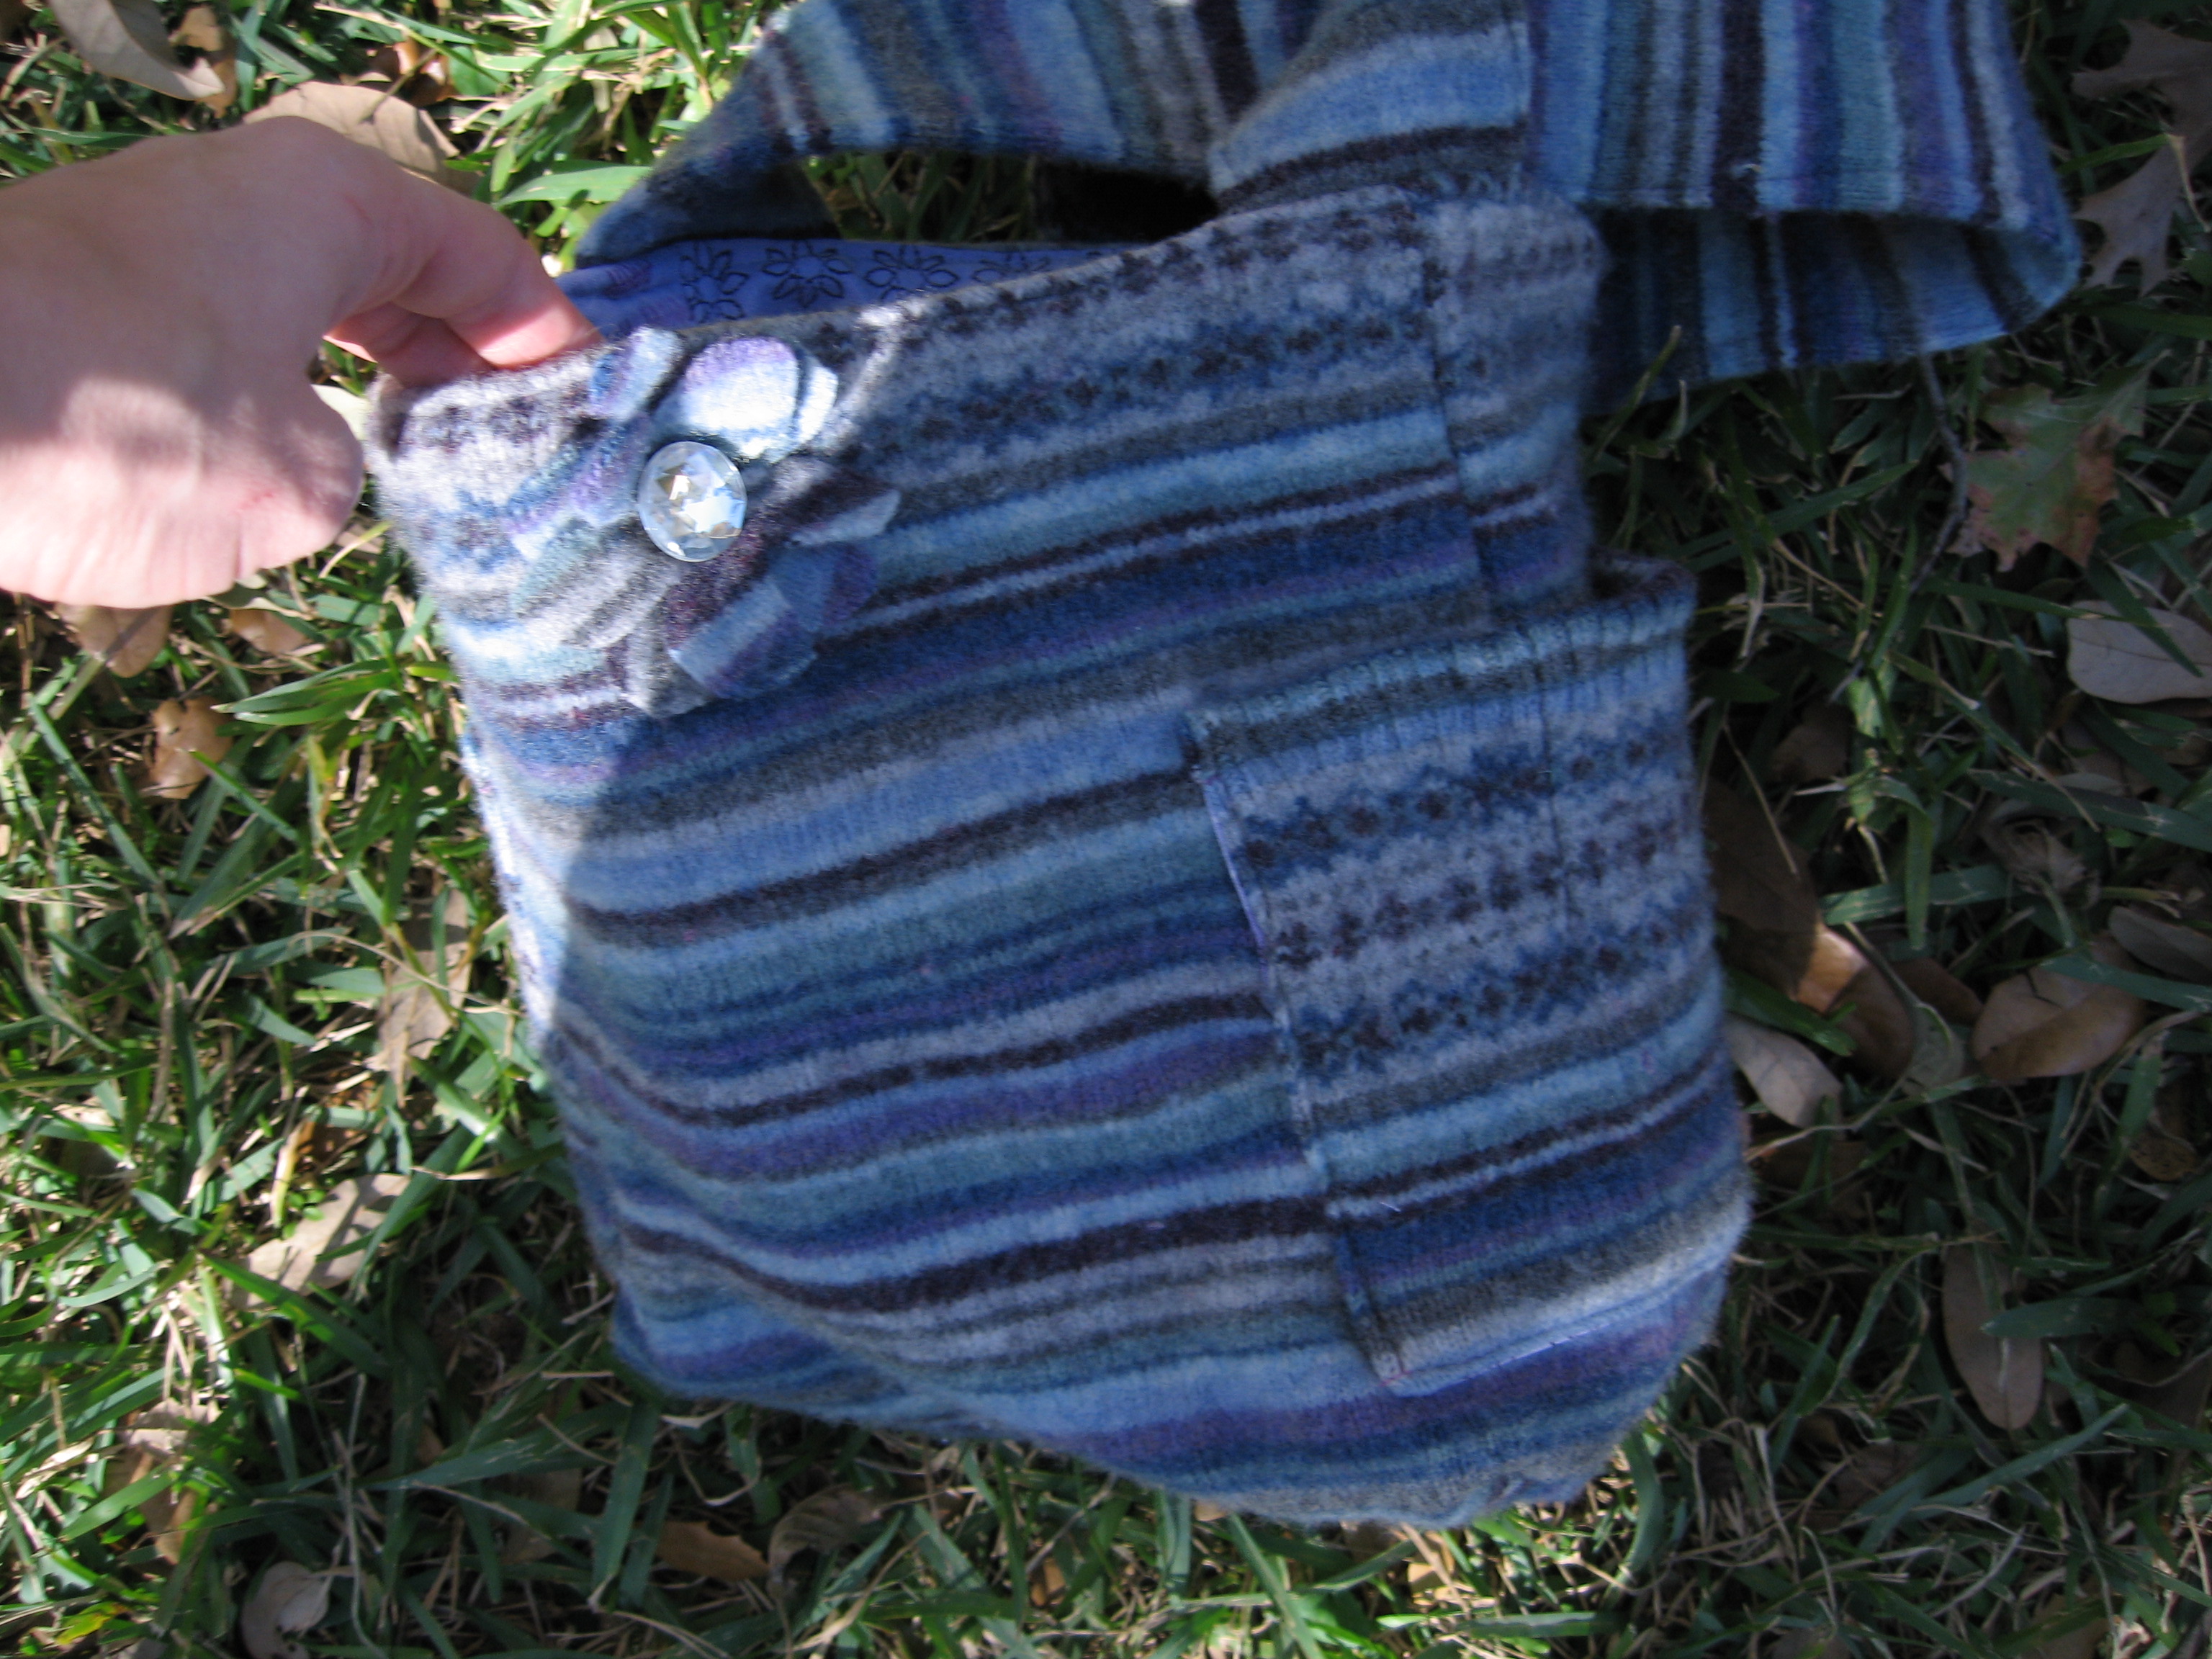
Stitch flower to center of each side over snap, stitch button on top. We are DONE!
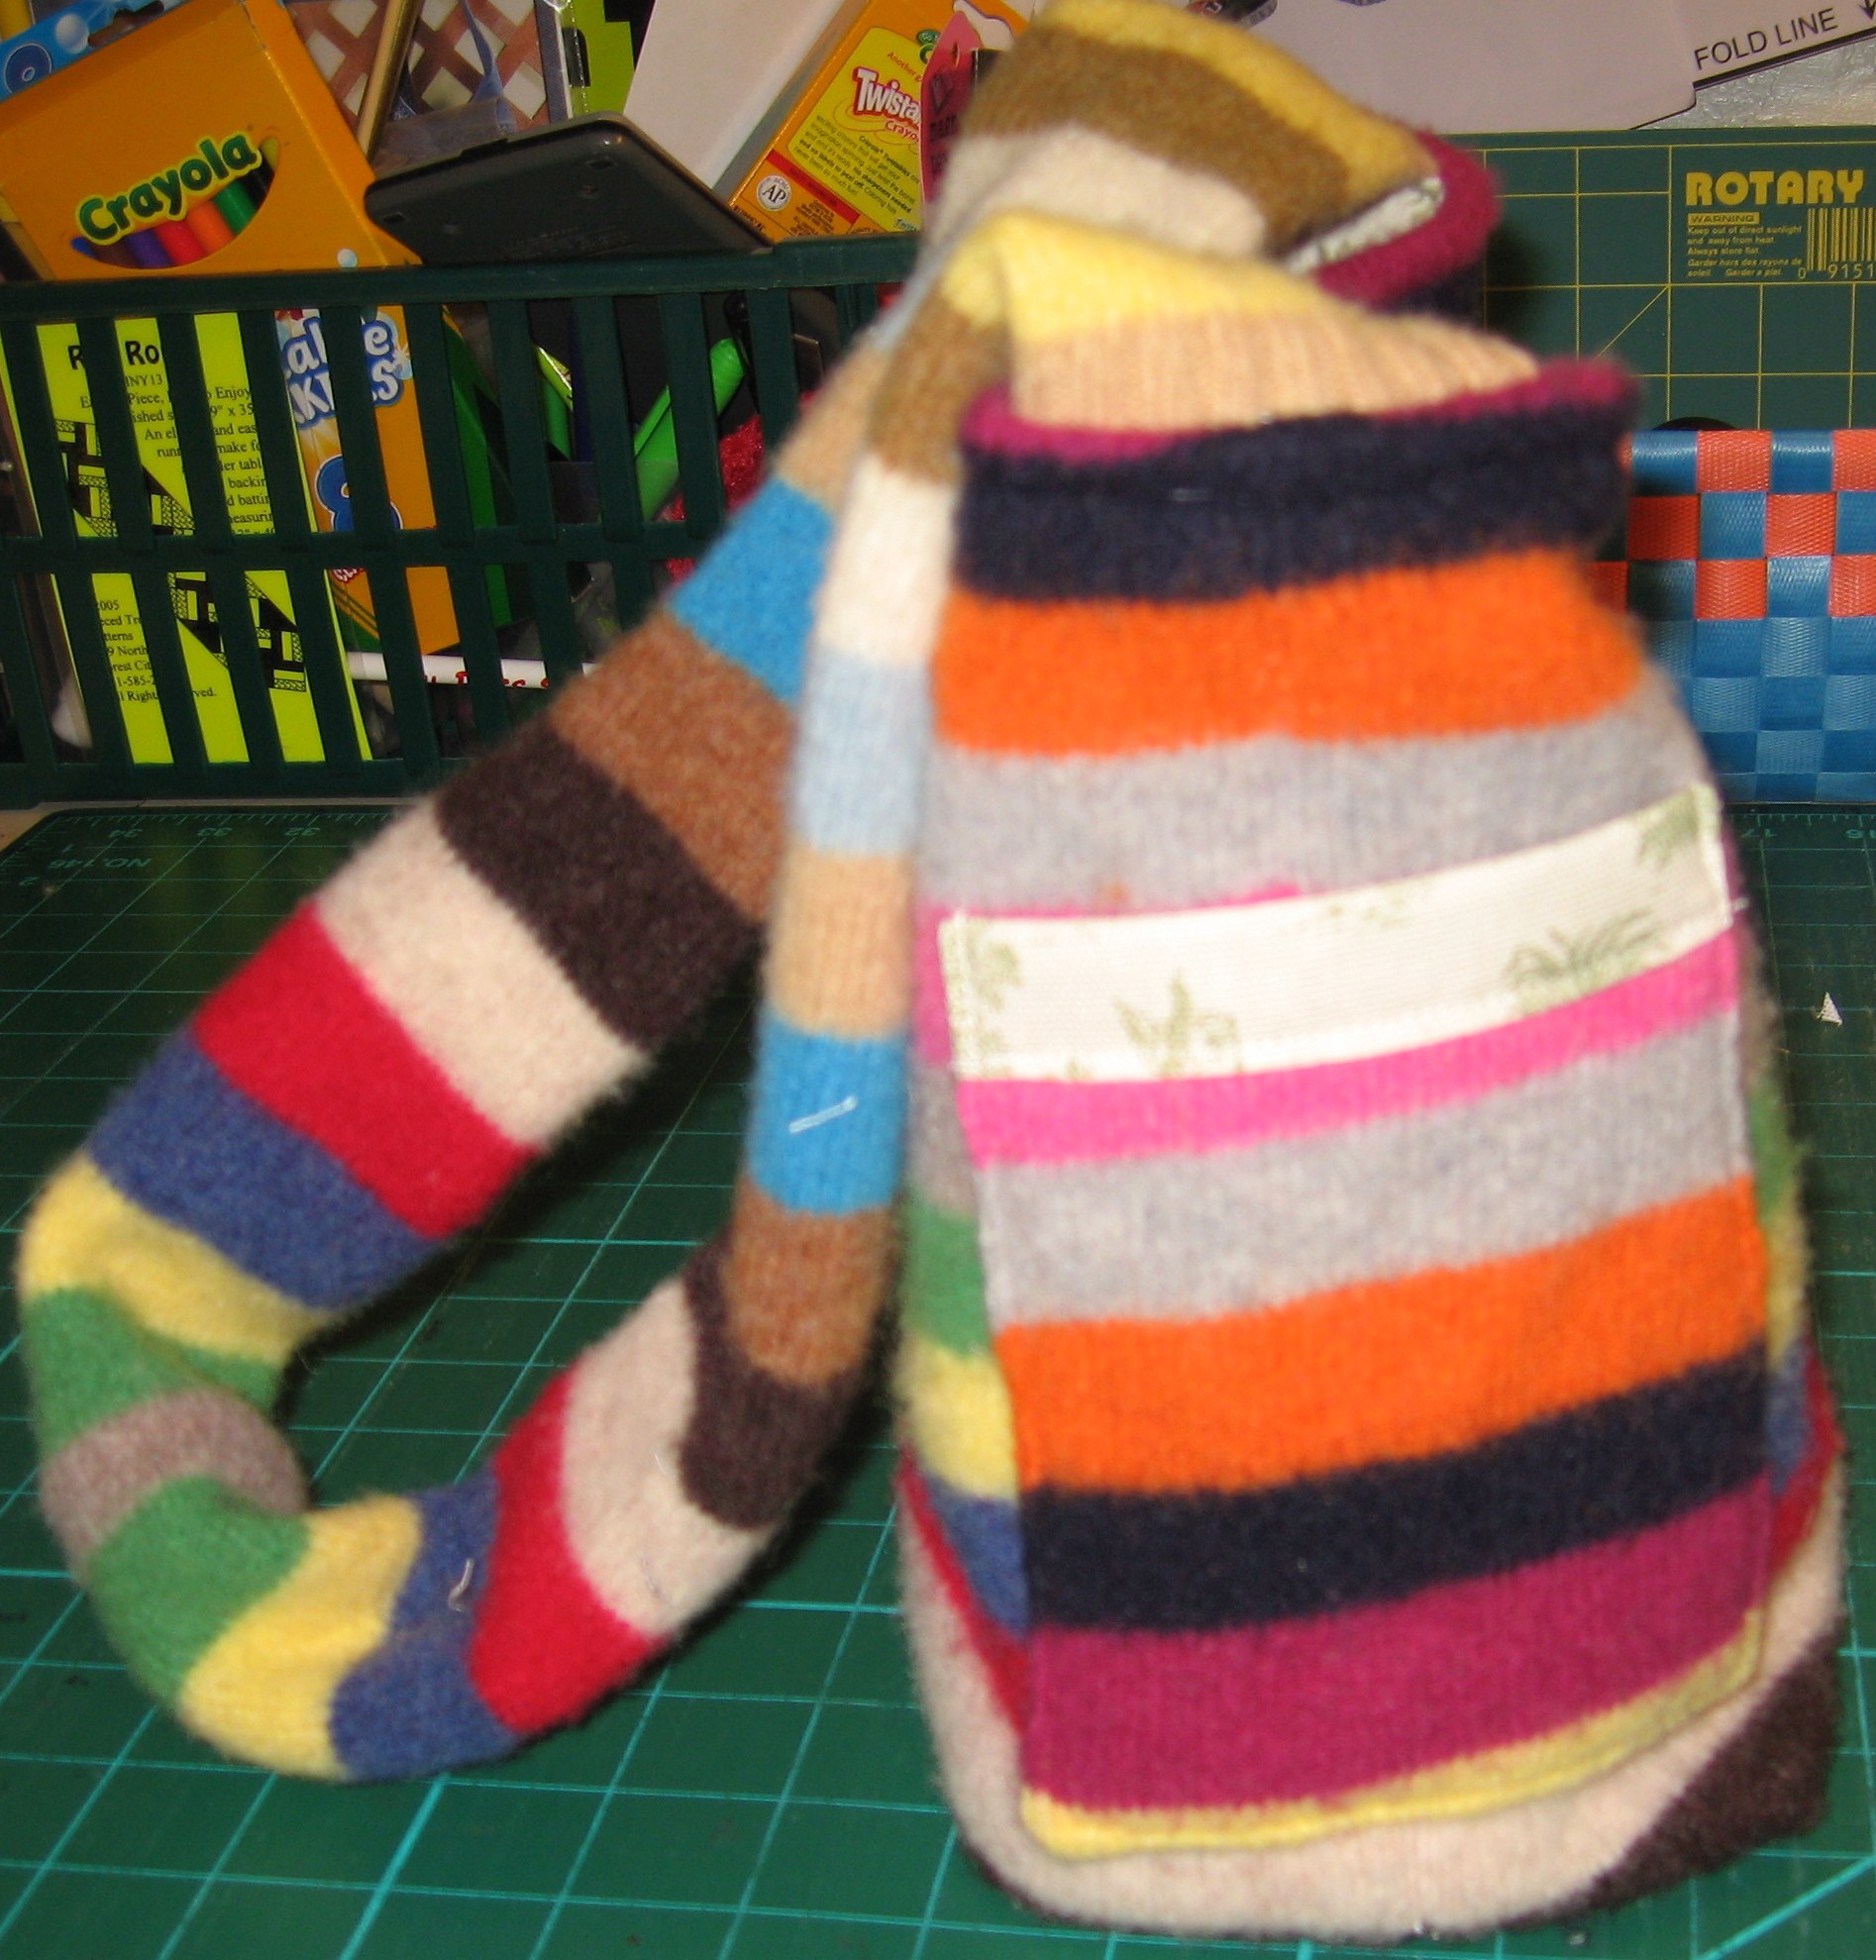
What a fun way to recycle an old sweater!
Here’s a fun one I made with a cute purple sweater!
From the Way Back Vault today, I have one of my old fabvorites.
The Crochet Granny Handbag dates back to September 29, 2003.
I don’t remember who received the original, but I’ve made several as gifts since then. It’s a quick and easy pattern and makes a sturdy little bag, especially when it includes the optional lining.
You’ll need
Small amount of 2 Worsted colors (listed as A & B). Shown are Red Heart Country Blue (A) and Windsor Blue (B).
I Hook
for optional lining: fabric, needle, thread, zipper
scissors
tapestry/yarn needle
(Note – all stitches after the first round are in the back loops except on the corners, when you crochet over the chain.)
Front/Back (make 2)
Round 1 – With Color A, ch 4, join with sl st. Ch 3 2 dc, ch 2 in ring. (3 dc, ch 2) 3 times, sl st into starting ch 3. Do not turn.
Round 2 – Ch 3, dc in BACK LOOPS to corner ch 2 sp (2 dc, ch 2 2dc in corner sp, dc in back loops across), rep to beg ch 3, join with sl st. Break off Color A. Do not turn.
Round 3 – Join Color B in any ch 2 sp. Ch 3, dc, ch 2, 2 dc, (dc in back loops across, 2 dc, ch 2 2 dc in corner sp) around, join with sl st in beg ch 3.
Round 4 – Join Color A, rep pattern of round 3.
A close up of the strap side, using single crochet to join.
Strap
Ch 120, hdc in 3rd ch from hook, hdc in each chain to end, finish off. Starting in the center stitch on one front/back square, join strap by sc through the back loops only of the strap and the square. Sc in first 25 st to join strap, continue sc st in back loop of front/back square across top of bag. Sc in last 25 st of strap from the 2nd ch in the corner of the square back to where you joined. Join with sl st. Sl st ends of strap then around to back loop on opposite side of strap, crochet around same as for opposite side.
Lining (optional)
For a sturdier bag, line with a scrap of coordinating (shown) or contrasting fabric of the same size. Hand-stitch inside the bag below the sc round (round 4).
To add a zipper, sew it to the lining before you stitch the lining in the bag, then stitch whip-stitch on the lining seam to inside of round 4.
Other Options
For a longer strap, or bigger bag, simply add stitches or rounds to suit your needs, taking into account how many stitches you will need to get the strap all the way around the bag. For more depth, make the strap two or even three rows wide before attaching to the granny squares.
Sue Upton, of PotterCast, receiving her Hufflepuff gift bag
during Lumos in Las Vegas, July 2006.
While I love all crafts, paper piecing is my One True Craft. (bold, capitalized, giant font ONE TRUE CRAFT). I love designing, making and sharing. The ideas come faster than I could ever possibly get them all down.
While paper piecing is definitely a quilting technique, quilting is definitely not just for quilts. I love using quilt elements in bags, pillows, clothing and art pieces.
I thought it would be fun to do a photo round up of some of the bags in which I’ve used paper piecing and other quilting elements.
All bags and block patterns were designed by me. Many of the patterns are available for free on sewhooked (see links below).
Hufflepuff Gift Bags (as seen above)
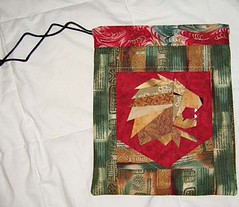
Gryffindor Gift Bag, made for Melissa Anelli of PotterCast (gifted at Lumos 2006).
Slytherin Gift Bag made for John Noe of PotterCast (gifted at Lumos 2006)
Gryffindor Messenger Bag, made for Hope, 2006
Ravenclaw Messenger Bag, this one is mine all mine! Made in 2006.
Ravenclaw mini-messenger, made for Josée, 2006. Gryffindor Pencil Bag made for E, 2006
Hufflepuff bag made for Delana, 2007.
Jolly Roger Computer Bag (this one is mine, too!), 2007.