Tag Archives: stenciling

31 Days of Halloween – All Hallow’s Eve

31 Days of Halloween on sewhooked.com

We’re back again with another fun and free project for 31 Days of Halloween!

Get ready to hold your breath, because we’re going way outside my comfort zone today!

It’s…

*gasp*

APPLIQUE!

All Hallow's Eve by Jennifer Ofenstein (2)

That’s right, friends, today we’re turning our paper piecing brains towards applique.

You see, many years ago, my hubby and I were on a super tight budget with one toddler and a baby on the way.

In an effort to make our little home festive for Holidays, I would make decorations for our front door out of supplies I had on hand.

All Hallow's Eve 1997

In this case, those supplies included my little sewing machine, black felt and, no kidding, orange denim.

I remember painstakingly sketching a witch on a broom onto felt with a piece of chalk I’d sharped as much as possible.

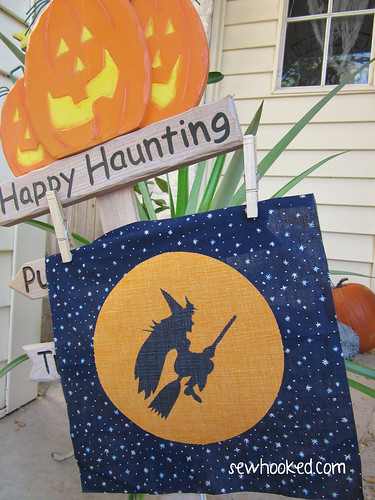
The result was a not-terrible banner that we used for many, many years.

That was 1997.

As you can see, the banner (above) has seen better days!

All Hallow's Eve by Jennifer Ofenstein (1)

Download it here OR get it on Craftsy

Don’t want to applique? You can also hand embroider or even stencil this pattern!

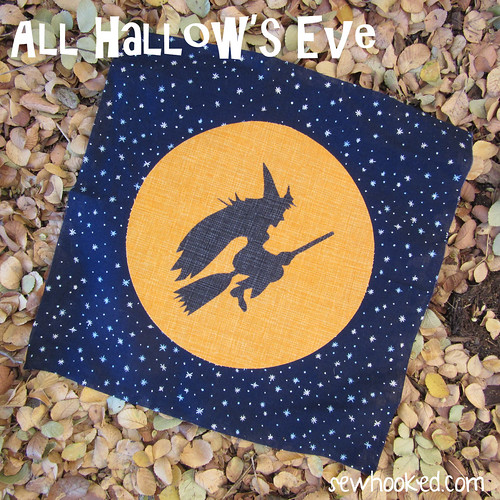
My opinion of the traditional Halloween witch has changed greatly since 1997, so our new friend here is much cuter and definitely curvier. I imagine she’s wearing her Halloween best as she rides her trusty broomstick to a fun party, perhaps in Hogsmeade!

The pattern prints at approximately 7 1/2″. If you want something bigger, try out my tutorial for enlarging/reducing patterns!

Omni Arc for Circles

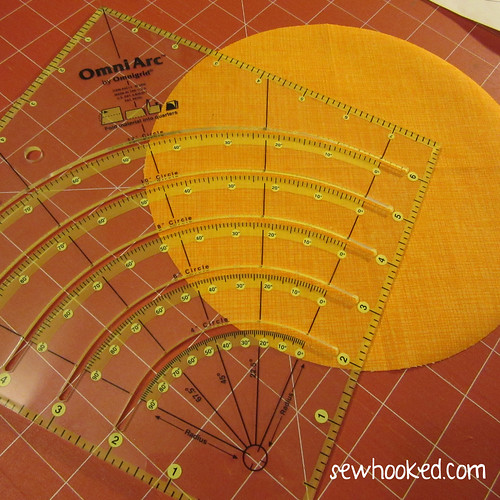
If you are lucky enough to have an OmniArc Ruler, try using the 8″ circle guide to create your moon.

I ironed my fusible webbing in place first and then folded the orange fabric before cutting with my rotary cutter. Follow the instructions as printed on the ruler.

Your moon will be about 1/2″ bigger than the one in the pattern, but it will still work great for, oh, say a 12″ quilt block or fun Halloween cushion!

No such luck? You can also cut around a ceramic plate with your rotary cutter!

Need fusible web? I recommend Misty-Fuse, Steam-A-Seam 2 or Heat’n Bond Light.

Are you making projects from 31 Days of Halloween? Share your photos with my flickr group! There will be a fun surprise after Halloween for one lucky winner!

Photobucket

Craftsy | Etsy

Facebook | Sewhooked FB | Sewhooked Facebook Group

Instagram | Flickr | Twitter | PinterestBloglovin

TTMT #58 – Question 1: Stenciling

If you make a Sew Awesome Craft or any pattern, craft or recipe from sewhooked,  I’d love to see a photo.  Email me or add it to the sewhooked flickr group.

Happy crafting!

Photobucket

FACEBOOK | TWITTER

Photobucket

stencils & stamps: Saving My Shirts


I’m not exactly clumsy, but I am a really busy girl with a tendency to not be careful.

Messy, clumsy, stuff on my shirt…call it what you will!

My favorite shirts all seem to have taken the same abuse.  A paint stain, a bleach spot or an unfortunate tear.  The number of shirts in my closet that weren’t being worn because of one of the above was getting completely out of control.

So, time for some quick and dirty fixes…and to haul out the fabric paint!

Shirt fix #1 – stenciling stars

supplies:

  • sad damaged tee
  • freezer paper
  • marker or pen for drawing
  • Exact-o Knife
  • fabric paint
  • sponge brush
  • cardboard or t-shirt form


My poor Dumbledore’s Army shirt, with a bleach stain right on the tummy. What to do, what to do? I thank my sister for the idea for this fix: stencil some stars on!


Freehand stars on freezer paper, then cut out with the Exact-O Knife – instant stencil!


Iron the stencil on and insert a pieced of cardboard or shirt form inside the tee. Procure some paint and a sponge brush for instant repairs.


Sponge that paint on!


Peel off the stencil after a few minutes and….


Instant shirt fix!


My Evile Crafts tee, made by superfriend Kadi, had a big ole blotch of bleach, too, so it also received the star treatment, along with a little glitter spray paint.

Shirt fix #2 – stamp it!

This second shirt fix was inspired by Stampin’ On Stained Jeans.  Same problem:  A favorite tee gets hit by something that leaves a mark, bleach, paint, or something else that’s super-duper permanent.

You need:

  • oopsie tee
  • fabric paint
  • stamp(s) large enough to cover the spot(s)
  • foam brush
  • cardboard or t-shirt insert


Use the sponge brush to add paint to the stamp.  Don’t dip the stamp in the paint or you’ll end up with a blob of paint on the fabric.


Stamp on the spot that needs to be covered.  It looked awkward to me like that, so I just kept stamping until I felt like I had enough!


Another shirt, back in rotation!

Shirt Fix #3 = mask it!

This fix was a bit more complicated.  I had a cute girly shirt that got caught on something (no idea what) and I ended up with a hole right in the tummy.  After trying to stitch it and not liking the artificial belly button I received for my efforts, I decided to repair it with an iron on.  Great idea, until I realized I went from artificial belly button to giant round dot on my tummy.

For this fix you’ll need:

  • damaged tee (this works for spots, too!)
  • masking tape
  • cardboard or t-shirt form
  • fabric paint
  • foam brush or roller


Giant dot, as illlustrated by my left hand.


Mask out a large triangle with the apex at the top, with the damaged part of the shirt on the inside.  Make sure your cardboard or t-shirt form is inside the shirt.  Fill in the space with fabric paint.

Hint:  If you’re working on a stretchy fabric, iron freezer paper on the inside of the shirt for stability while painting.


Fill in the entire space.  Allow to dry a few minutes and the remove the tape.


And another dead shirt returns to ciruculation!  Pretty cool, too, if I do say so myself.


Allow all your awesomely repaired tees to dry per manufacturer’s instructions and then add them right back in to your wardrobe!

More t-shirty goodness:

If you make a Sew Awesome Craft or any pattern, craft or recipe from sewhooked,  I’d love to see a photo.  Email me or add it to the sewhooked flickr group.

stencil: Bite Me

Fangtasia stenciled tee

True Blood season 2, it approacheth.

To honor the awesomeness of the show based on Southern Vampire Series by Charlaine Harris, how about a new stencil with the name of everyone’s favorite vamp bar emblazoned across it?

Thanks to the fabulous Pren for trying out the stencil sharing her photo.  She added the cute fang marks and the gem to dot the “i”.  Love it!

Get it here!

***

Fangtasia – the bar with the bite

***

Fangtasia t-shirt for my sistermy version, made for  my sister

For more on stenciling, visit the Crafts page, right here on Sewhooked!.

Add your Sewhooked-related photos to my flickr group and you might be featured in a future post!


Photobucket

Ministry of Silly Walks Stencil

Ministry of Silly Walks Stenciled Tee

Here’s a fun stencil that I made for my son.  It’s a fairly simple stencil and a great conversation starter!

My family are huge Monty Python fans, so much so, that I ended up making a shirt for my hubby,too.

From the classic Python sketch, Ministry of Silly Walks:

Supplies:

In lieu of individual photos of the process, take a look at my how-to video for stenciling, which you may remember from this post or from The Cullen Crest post.

  1. Pre-wash t-shirt without fabric softener.
  2. Print stencil (or alternative updated version) onto freezer paper (matte side).
  3. Carefully cut out with an exact-o knife. There are loads of fiddly bits, so take your time and be careful.
  4. Set iron to medium.
  5. Place cardboard or newspaper inside t-shirt.
  6. Place stencil on t-shirt with a piece of blank paper on top (that keeps the tiny pieces in place) then carefully press with the iron.
  7. Use the foam brush to gently paint on the fabric paint.
  8. Allow a few minutes to dry, then carefully remove the stencil. For small pieces, use a straight pin to help get them started for easier removal.
  9. Finish drying according to manufacturer’s directions.

Ministry of Silly Walks stenciled tee #2Black on White Silly Walks

Silly Walk Tee
kirstencan’s Silly Walk tee from the flickr group

Add your Sewhooked-related photos to my flickr group and you might be featured in a future post!


Photobucket

also posted on craftster and cut out + keep

The black Ministry of Silly Walks tee was one of the winners of the Knitted Icons contest on cut out + keep. (Knitted Icons was the prize…the craft didn’t have to be knitted)

Video Tutorial: Freezer Paper Stencils

I love t-shirts. I love them in a BIG way. I love to reconstruct, redo and, most of all, stencil my t-shirts!

Some time ago, I was asked by some friends for a stenciling tutorial. What I ended up posting was a video tutorial covering how to make a basic freezer paper stencil. The shirt shown was for my partner in a Twilight swap I participated in on craftster.

I hope you enjoy the video and give stenciling a try if you haven’t already!

Find my free patterns on Sewhooked & Fandom in Stitches.

♥ Jennifer O

Posts on this blog may contain affiliate links to help cover the cost of my website. I thank you for your generous support. ♥