Welcome back for a new Raggedy Rescue Tutorial! This time I’ll be adding hair to the gal I cleaned up in my last video. If you enjoy this video, please consider liking and subscribing. I hope to see you next time!
BIG thanks to my Ko-Fi members for supporting my content. ♥
I used and/or mentioned a couple of products in this video. I do not have any sponsorships, all items were gifts or purchased by me. Get them at your local shop or find them here:
At the time of this writing, there were a couple of the Raggedy Ann & Andy patterns like I’m showing here available on Etsy.
Today I have a bonus video for you explaining how I clean my Raggedy Ann and Andy dolls for my #raggedyrescue projects. This is prep and cleaning only. If you’d like to see more, drop me a comment!
Please note that this is the way I do it. I strongly believe that Raggedies are meant to be loved and if they can’t be washed, they can’t be given to a child. ♥
BIG thanks to my Ko-Fi members for supporting my content!
I mention several products in this video. I do not have any sponsorships and purchased these myself. Get them at your local shop or find them here:
Seam Fix Seam Ripper (Dritz) Mine is the small size, but I couldn’t find a link for that. You may be able to find it at your local quilt store.
This is a super simple DIY Halloween Cauldron we made in 2021. This is one of my all-time favorite Halloween decorations! I made a very short video to show how it’s done. Enjoy!
Large Plastic Cauldron bought years ago, I think at Party City
Cake cover/bowl from Dollar Tree, holes closed with hot glue, and painted black. This one took some trial and error until I found something that fit correctly. You want whatever you use to hang just inside the cauldron so the mister is up high.
In which a very low-energy me shares what I was up to last week. You’ve got one more week to leave a Picnic-themed quilt name for a (hopefully!) fun prize! Comment wherever you watch, I’m keeping track and will choose a name next week.
In which I share a FINISHED quilt top as well as my brand new Star Wars-inspired design, available on Fandom in Stitches.
I also ask for your help naming my new quilt. I’m looking for a unique name that uses the word “picnic” in the title. Google tells me that this is not a new idea and I would love your help! If I use your idea, I’ll send you a prize (TBD).
In which I share some goodies I made for my daughter’s birthday, heirloom quilt reproduction progress, and a WINNER for the quilter’s boa made by Jeanie Payment!
Find my projects on Cricut Design Space (Please note, some of these are Design Space subscription-only or purchased designs. I do not make money from them. Thanks!)
In which I gush over the fabulous package I received from Jeanie Payment and offer up one of the extras she shared with me for a giveaway! I also talk about working on my scrappy reproduction quilt.
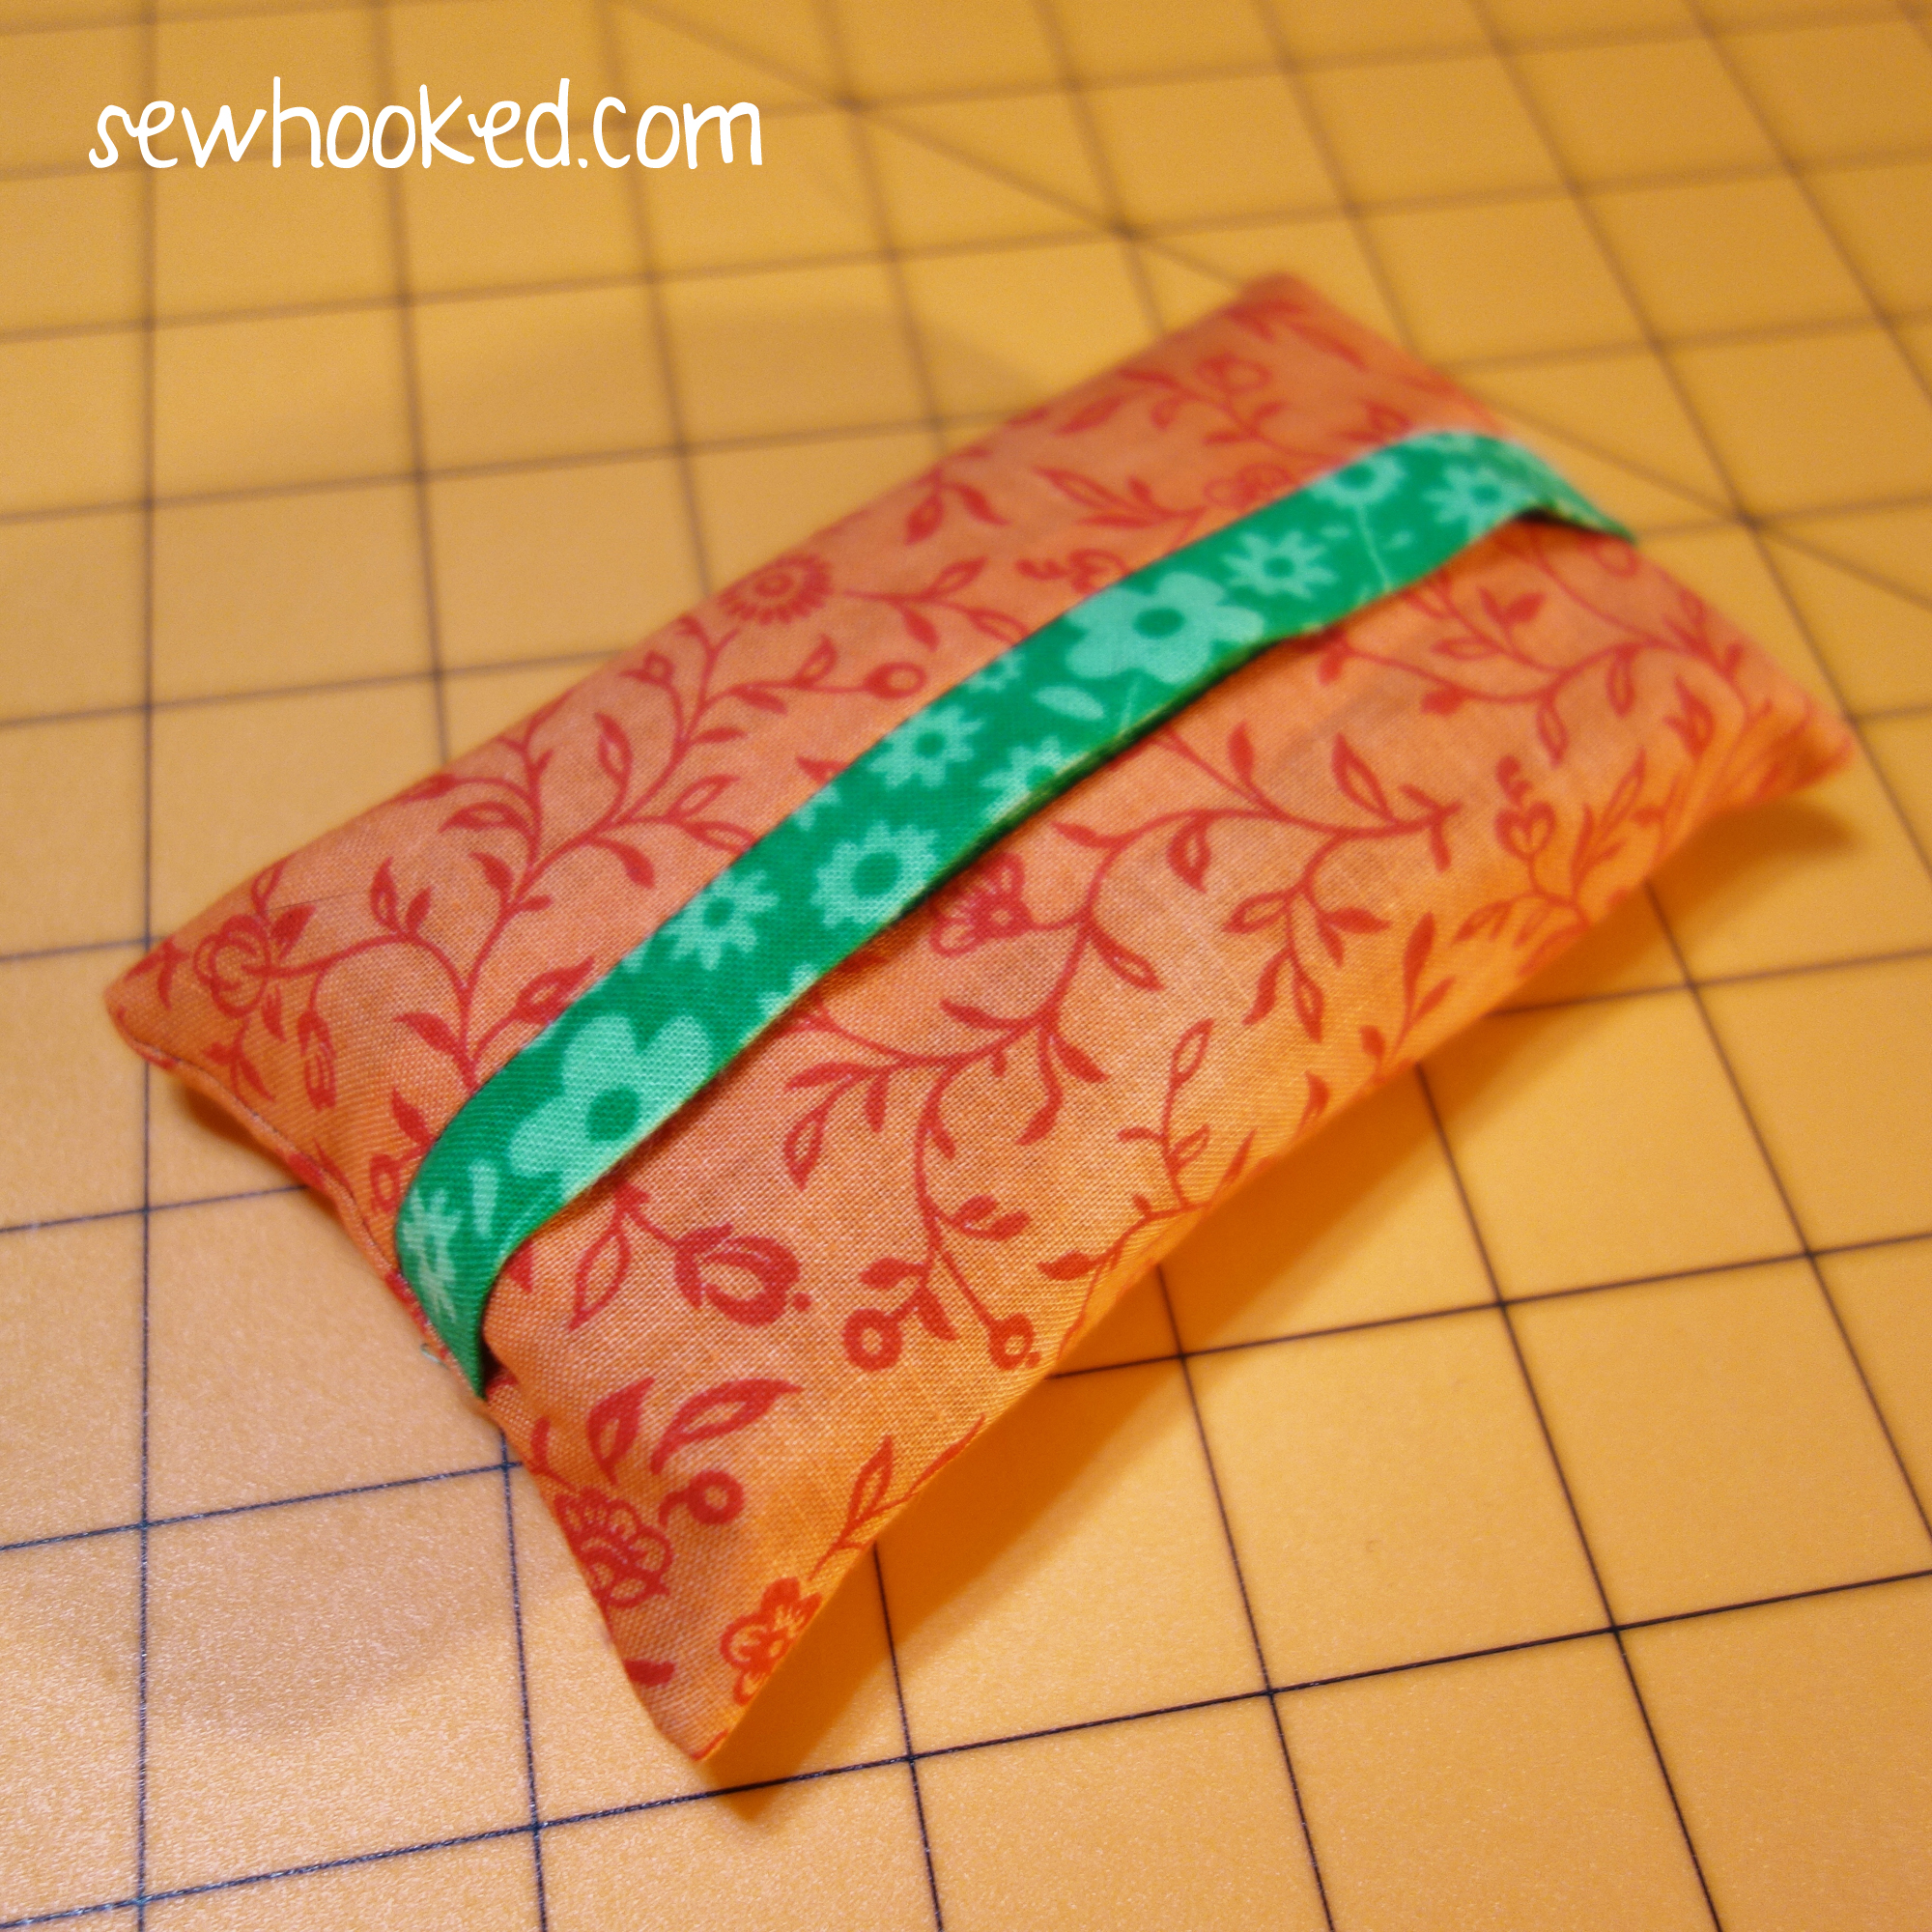
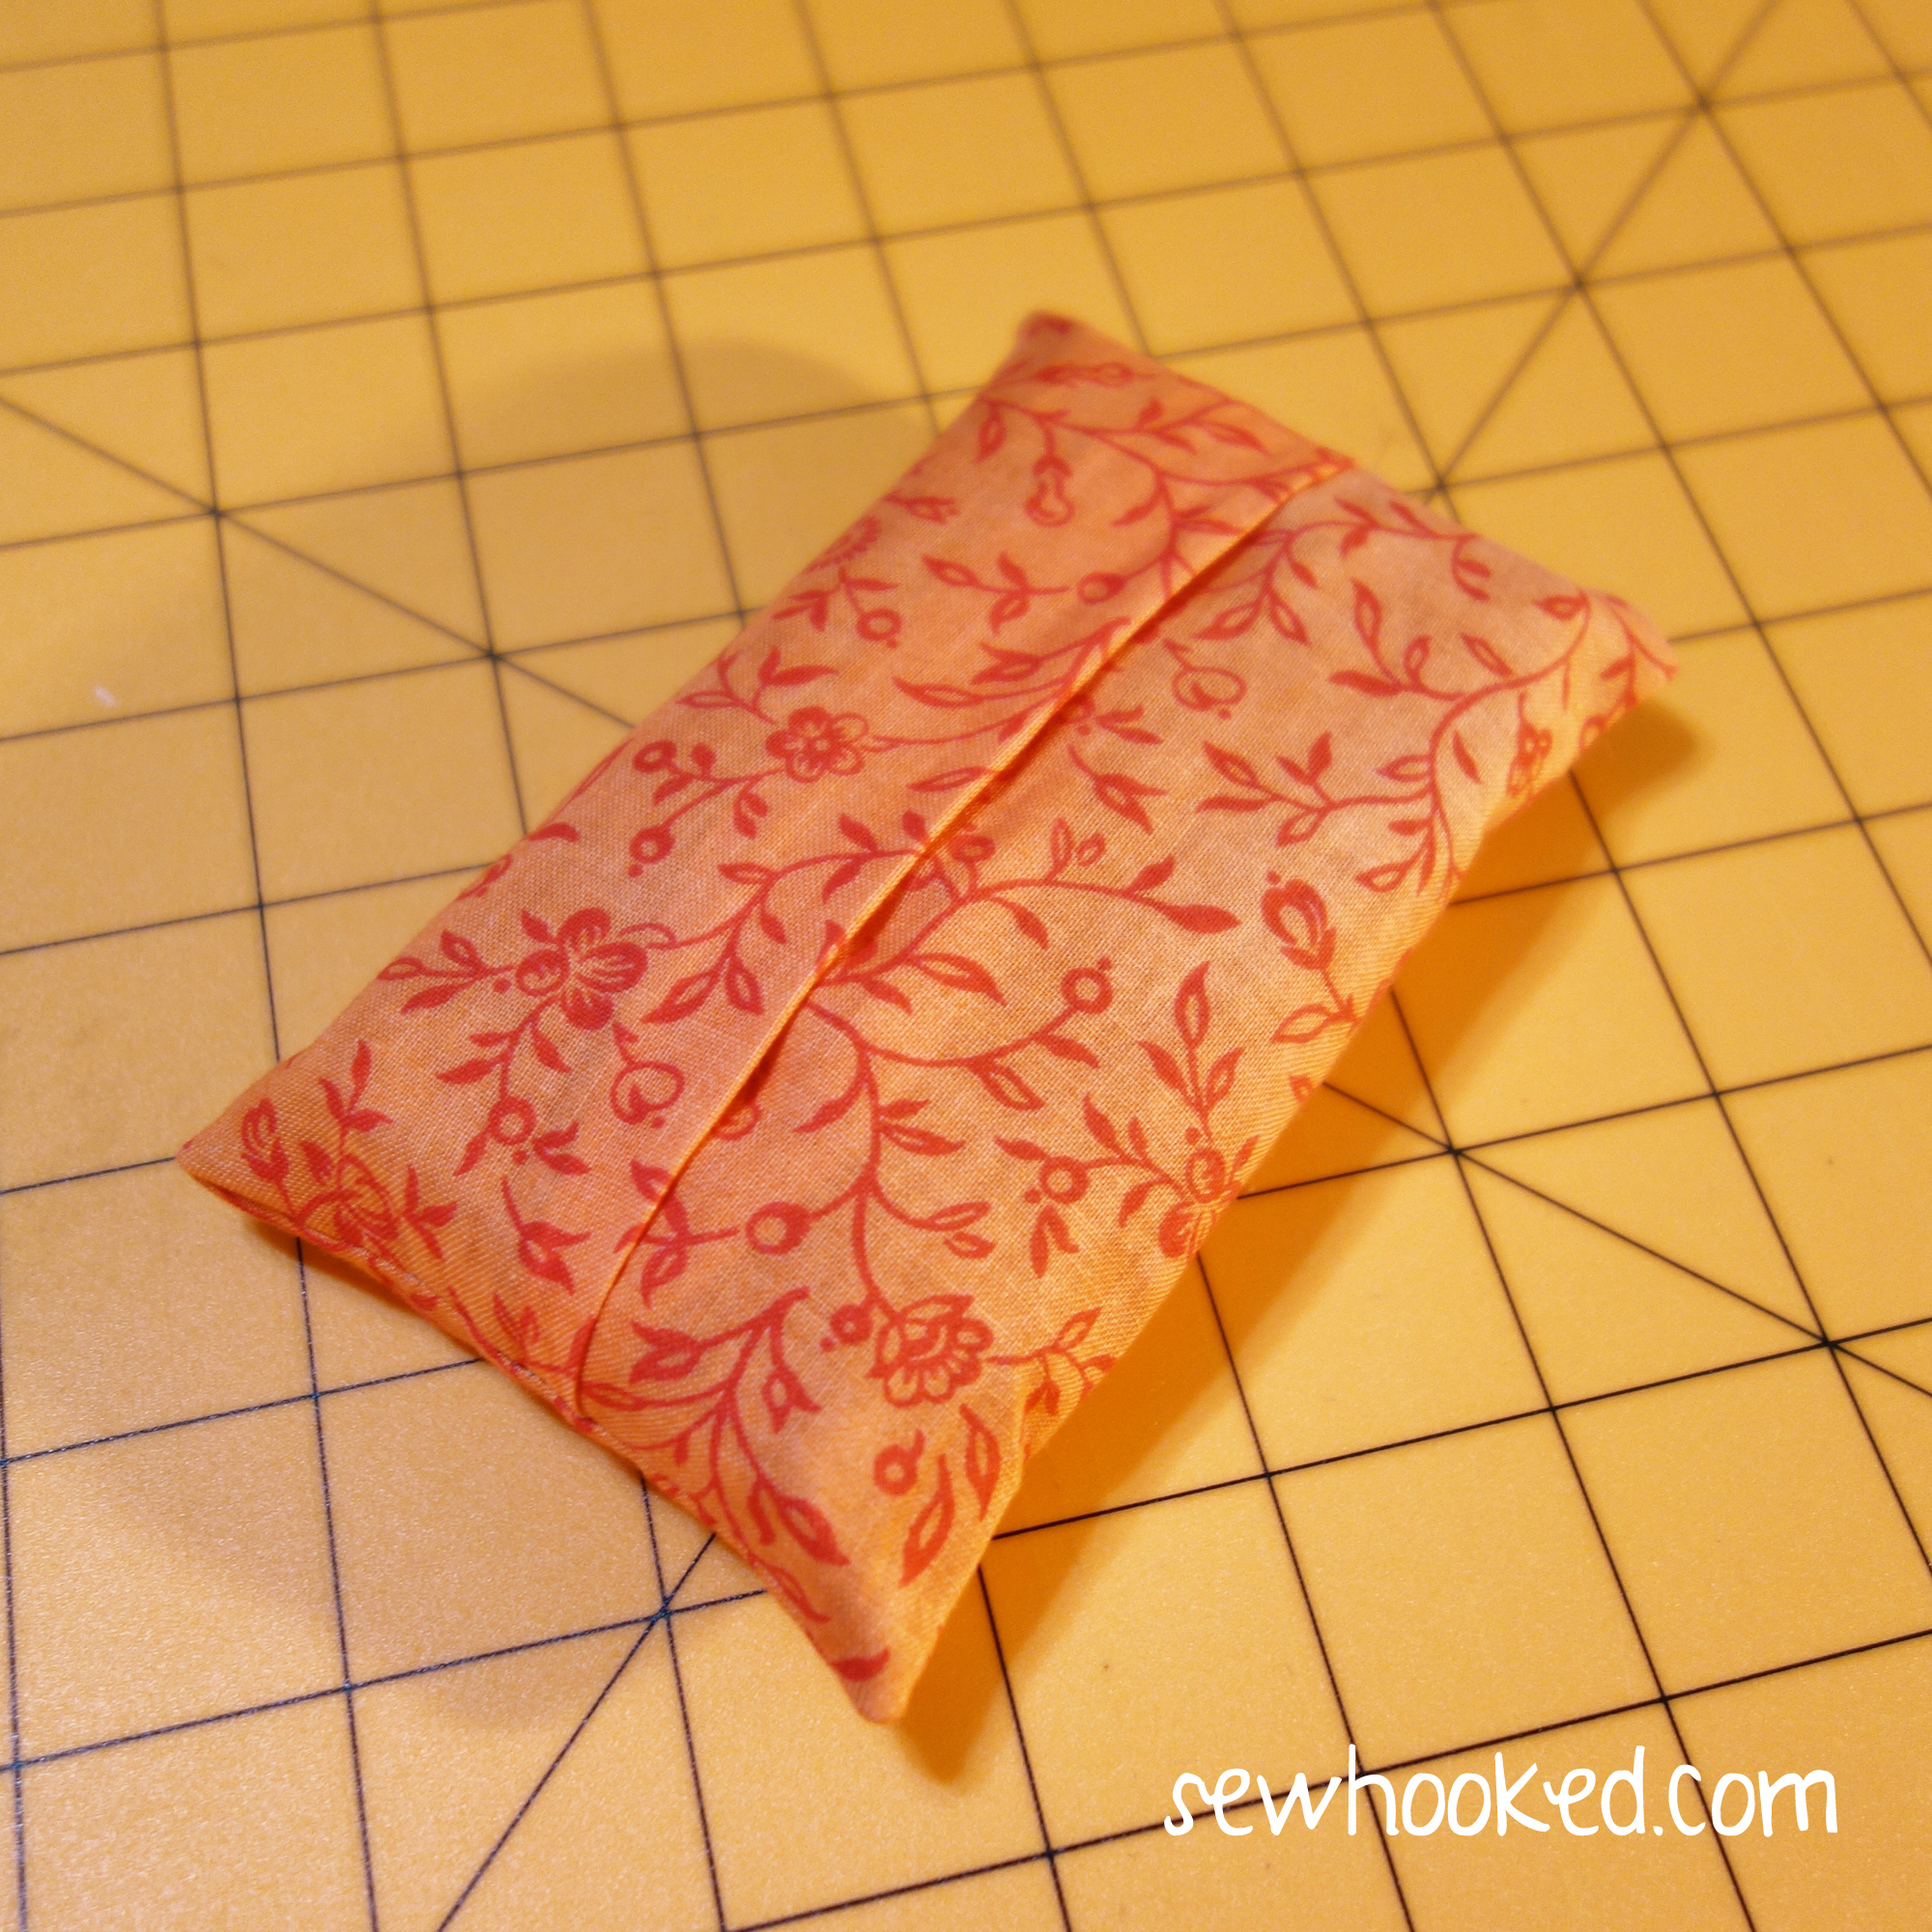
As promised several Talk to Me Tuesdays ago, we have a super simple tutorial to make a self-trimmed tissue packet cover.
Don’t want trim? I have instructions for that, too!
Please note that this tissue cover is sized to fit Kleenex Facial Tissues. Mine are a generic version but are the same size as the Kleenex. Use the brand works for you.
Adjust the dimensions if needed. You can also play with quilt blocks and directional fabric as desired.
These little packets make great gifts, swap additions, and are perfect for keeping your tissues clean and safe in your bag or purse.
First up! Self-Trimming Tissue Cover…
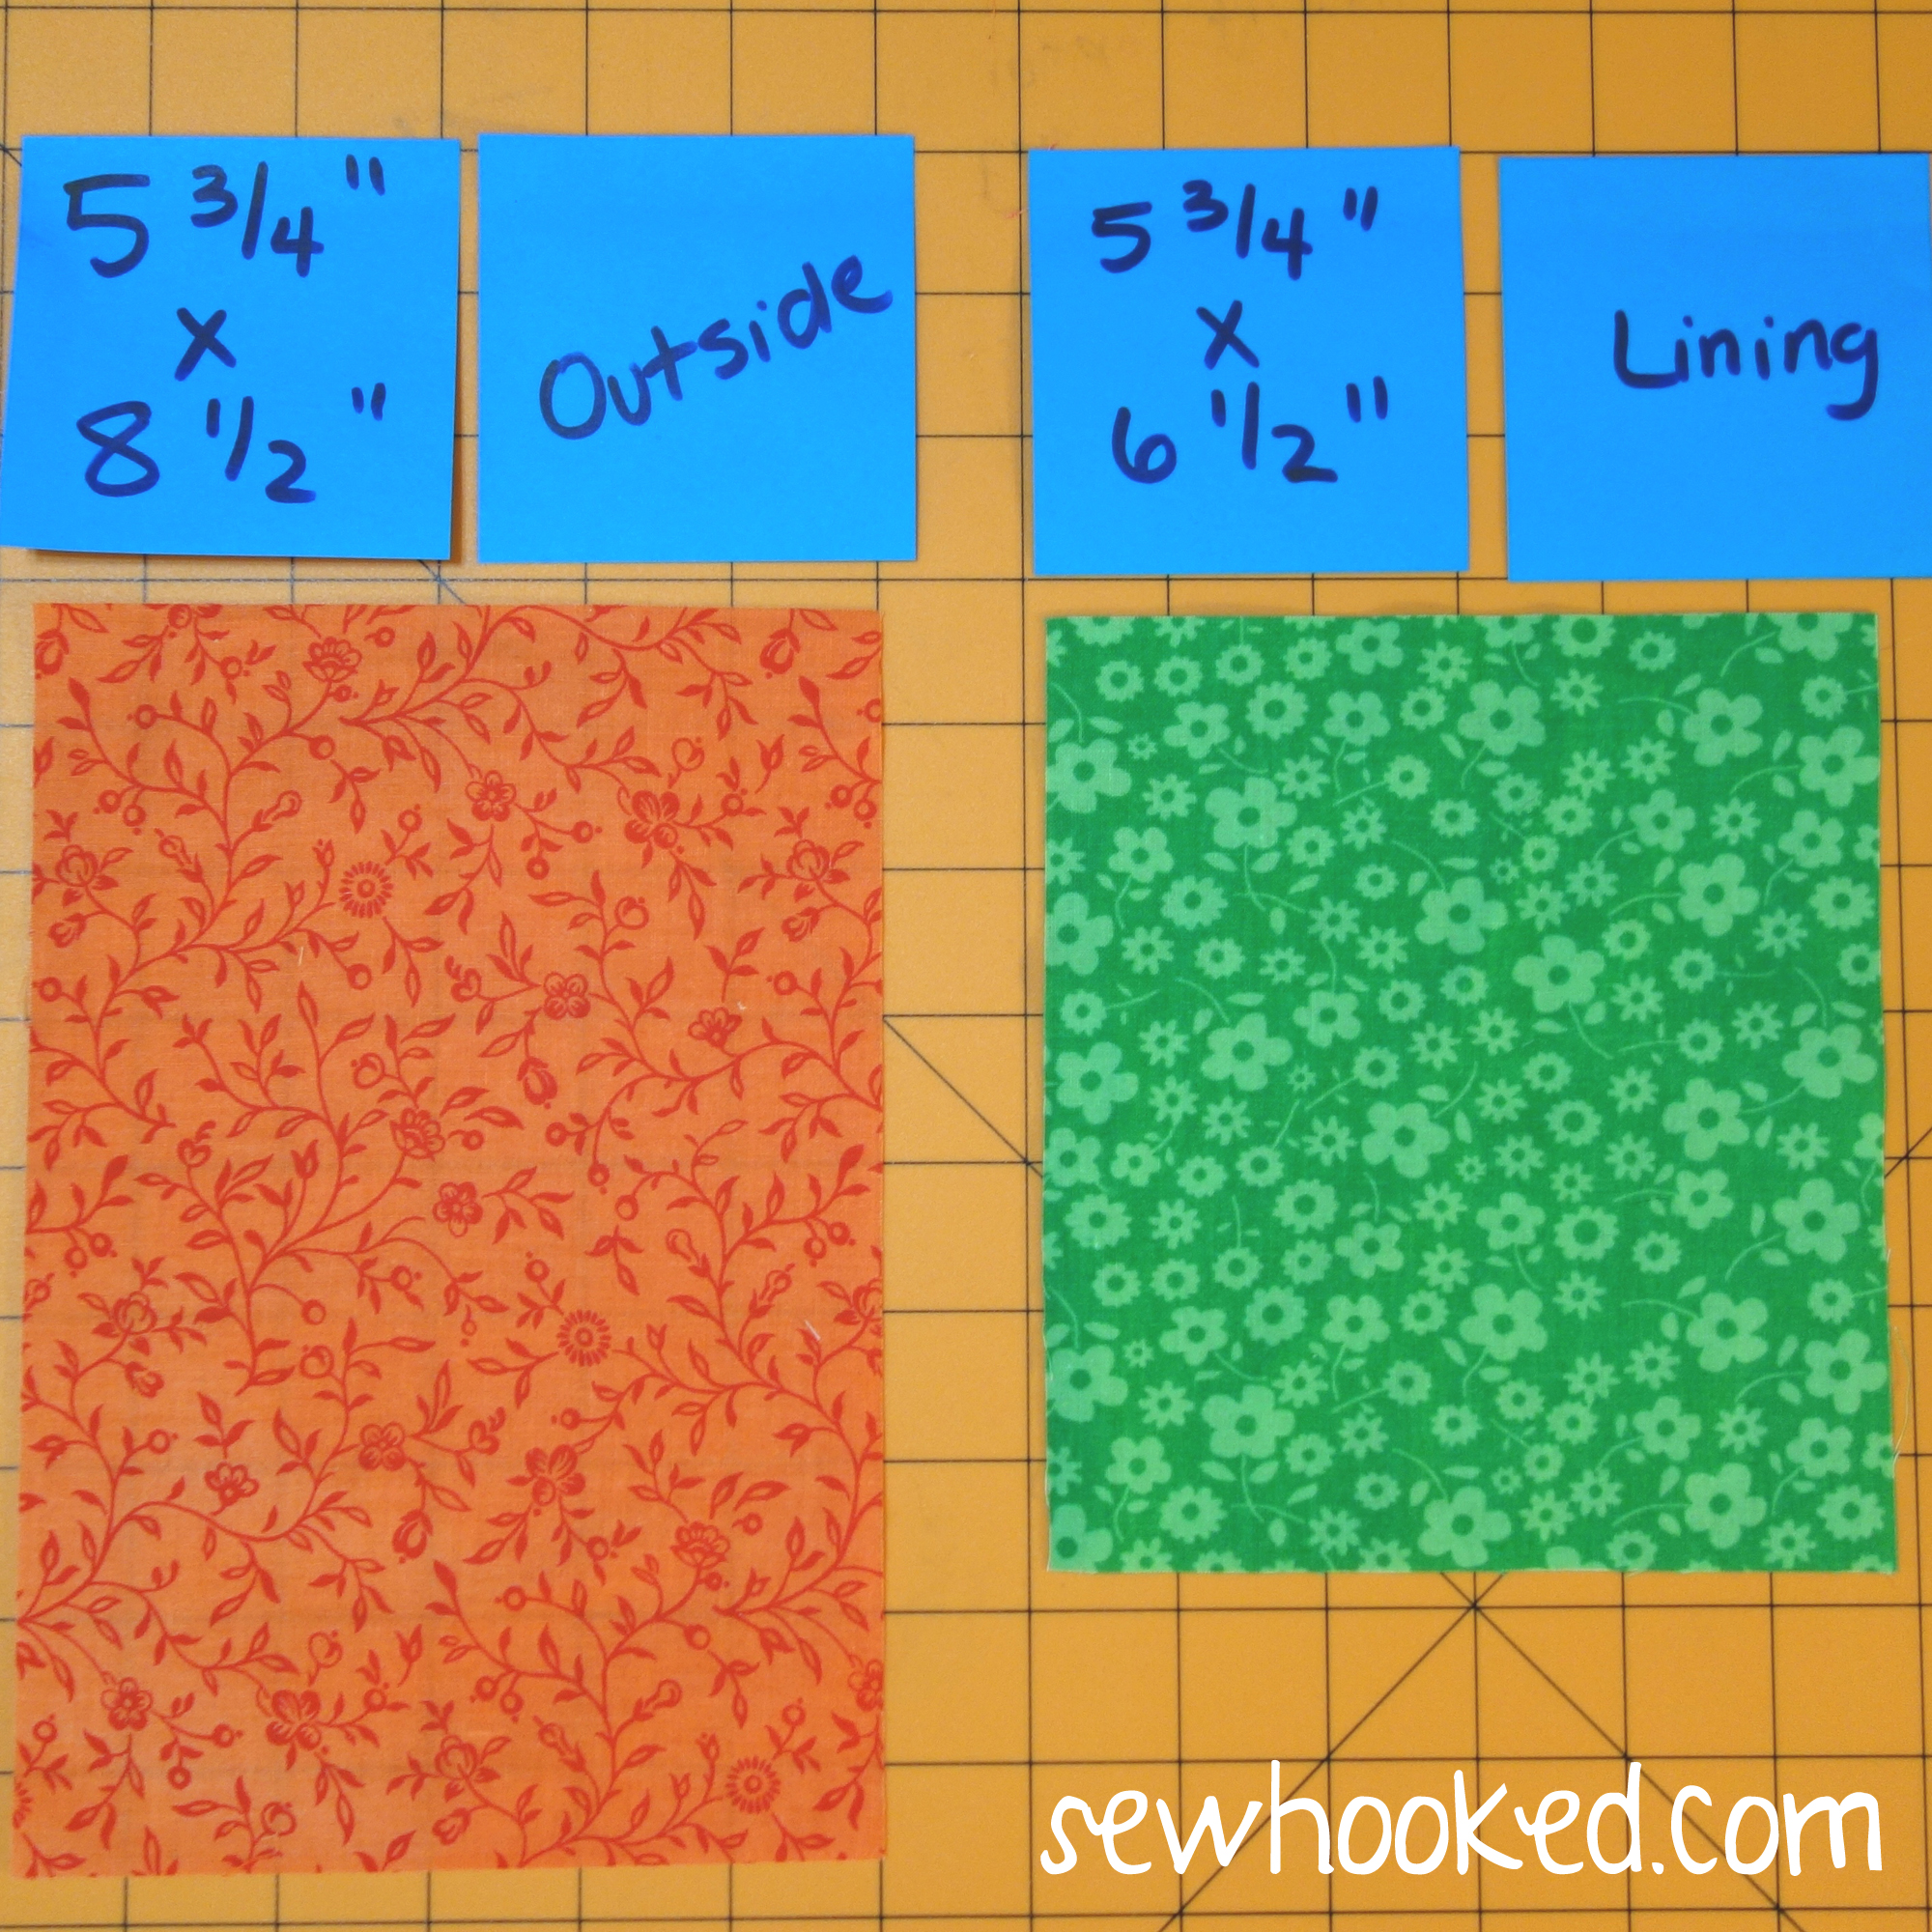
You’ll need fabric in two colors. I’m using contrasting colors to make the lining and outside very obvious. For both the trimmed and non-trimmed version, the outside will be orange.
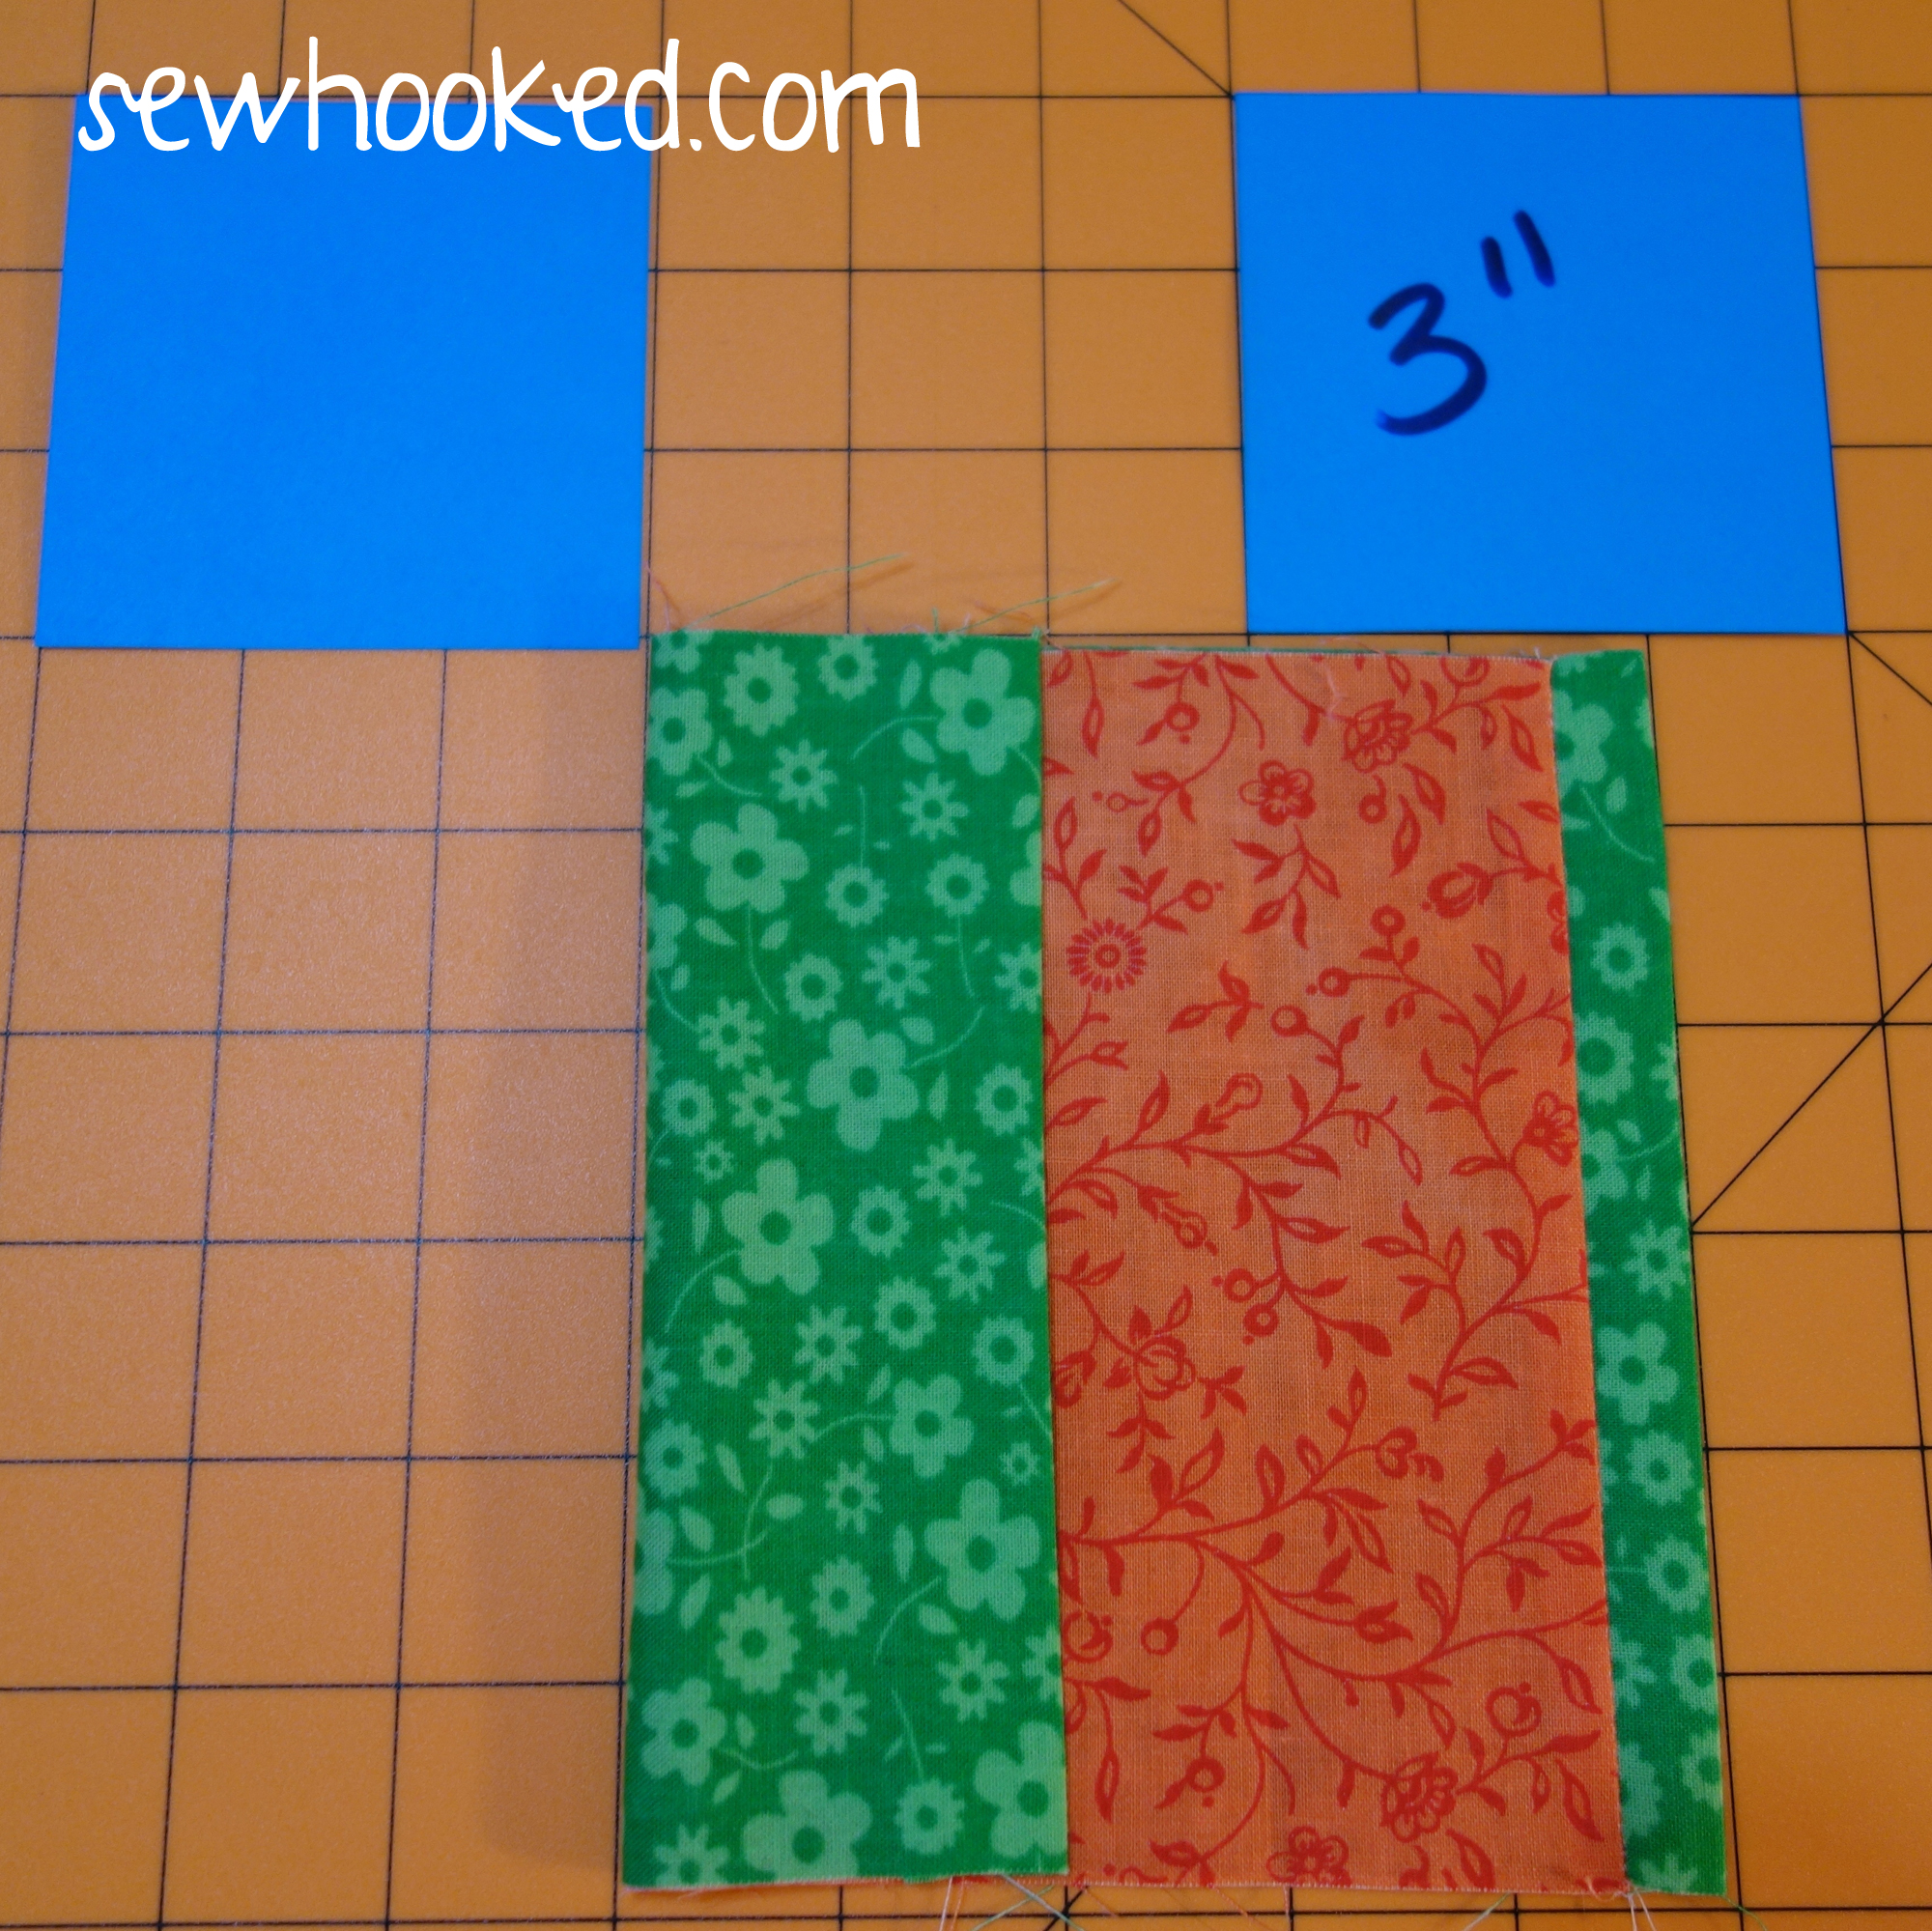
For TRIMMED Cover:
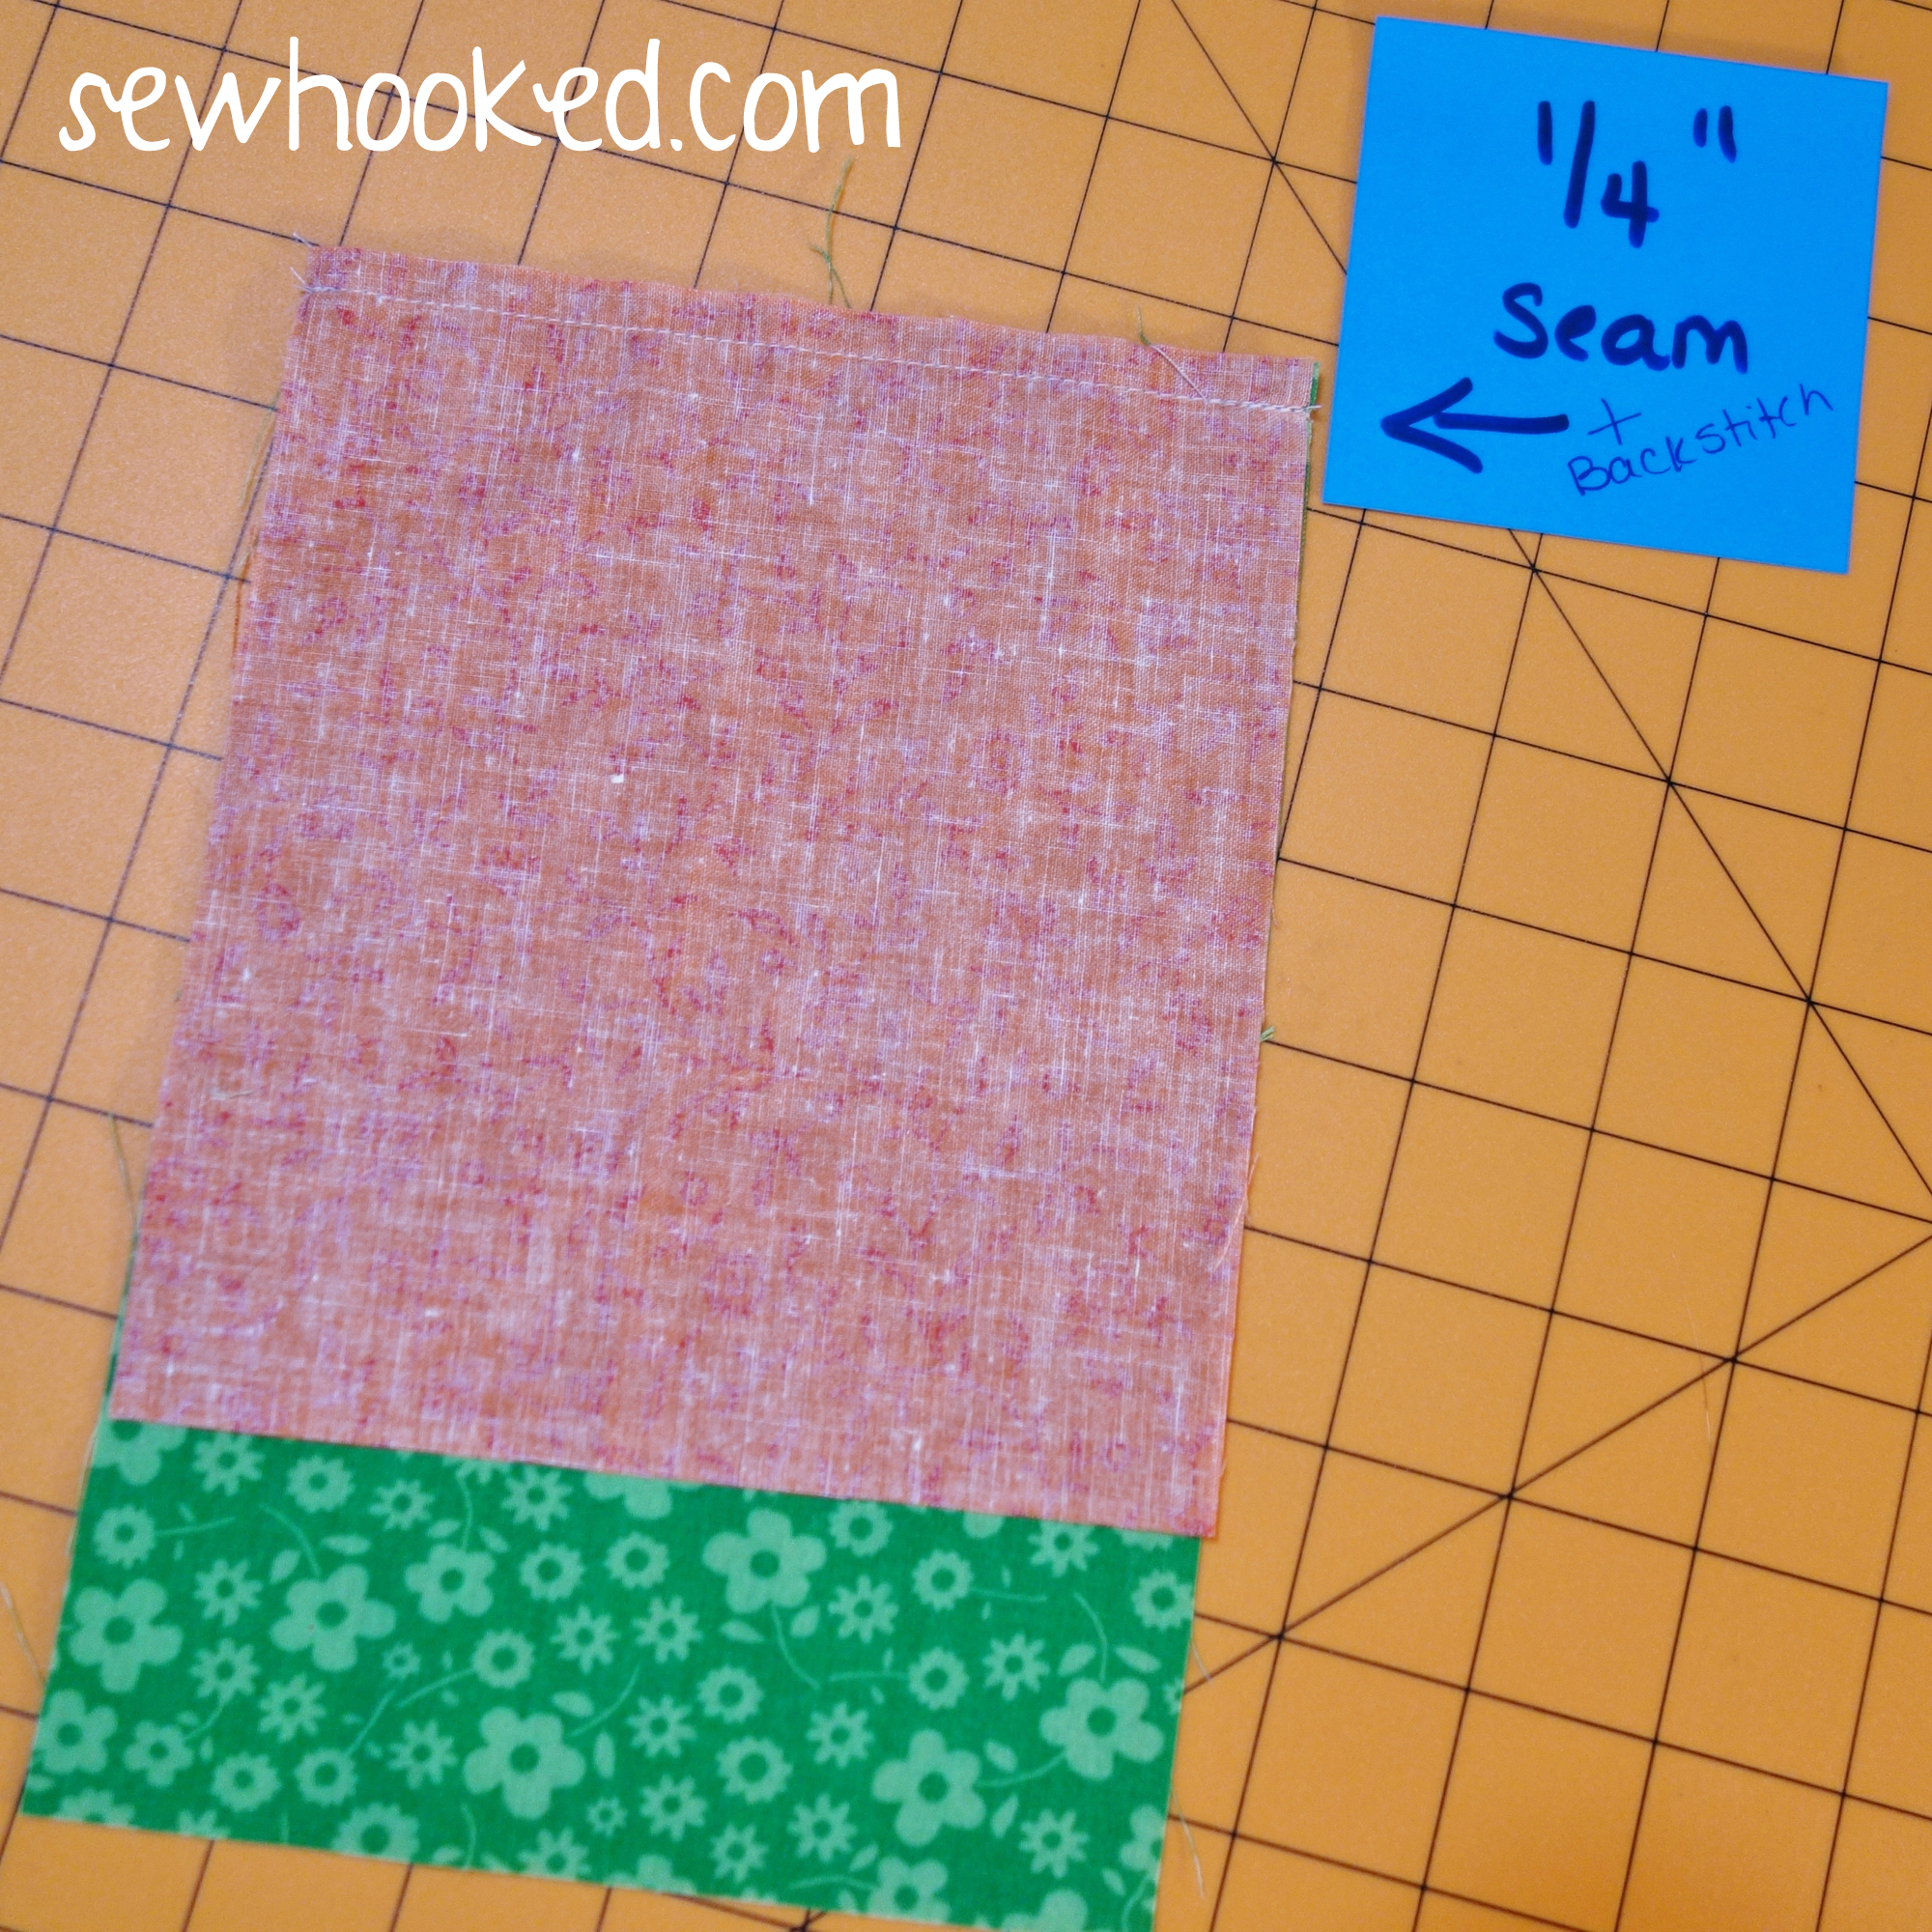
Lining/Trim – 5 3/4″ x 8 1/2″
Outside – 5 3/4″ x 6 1/2″
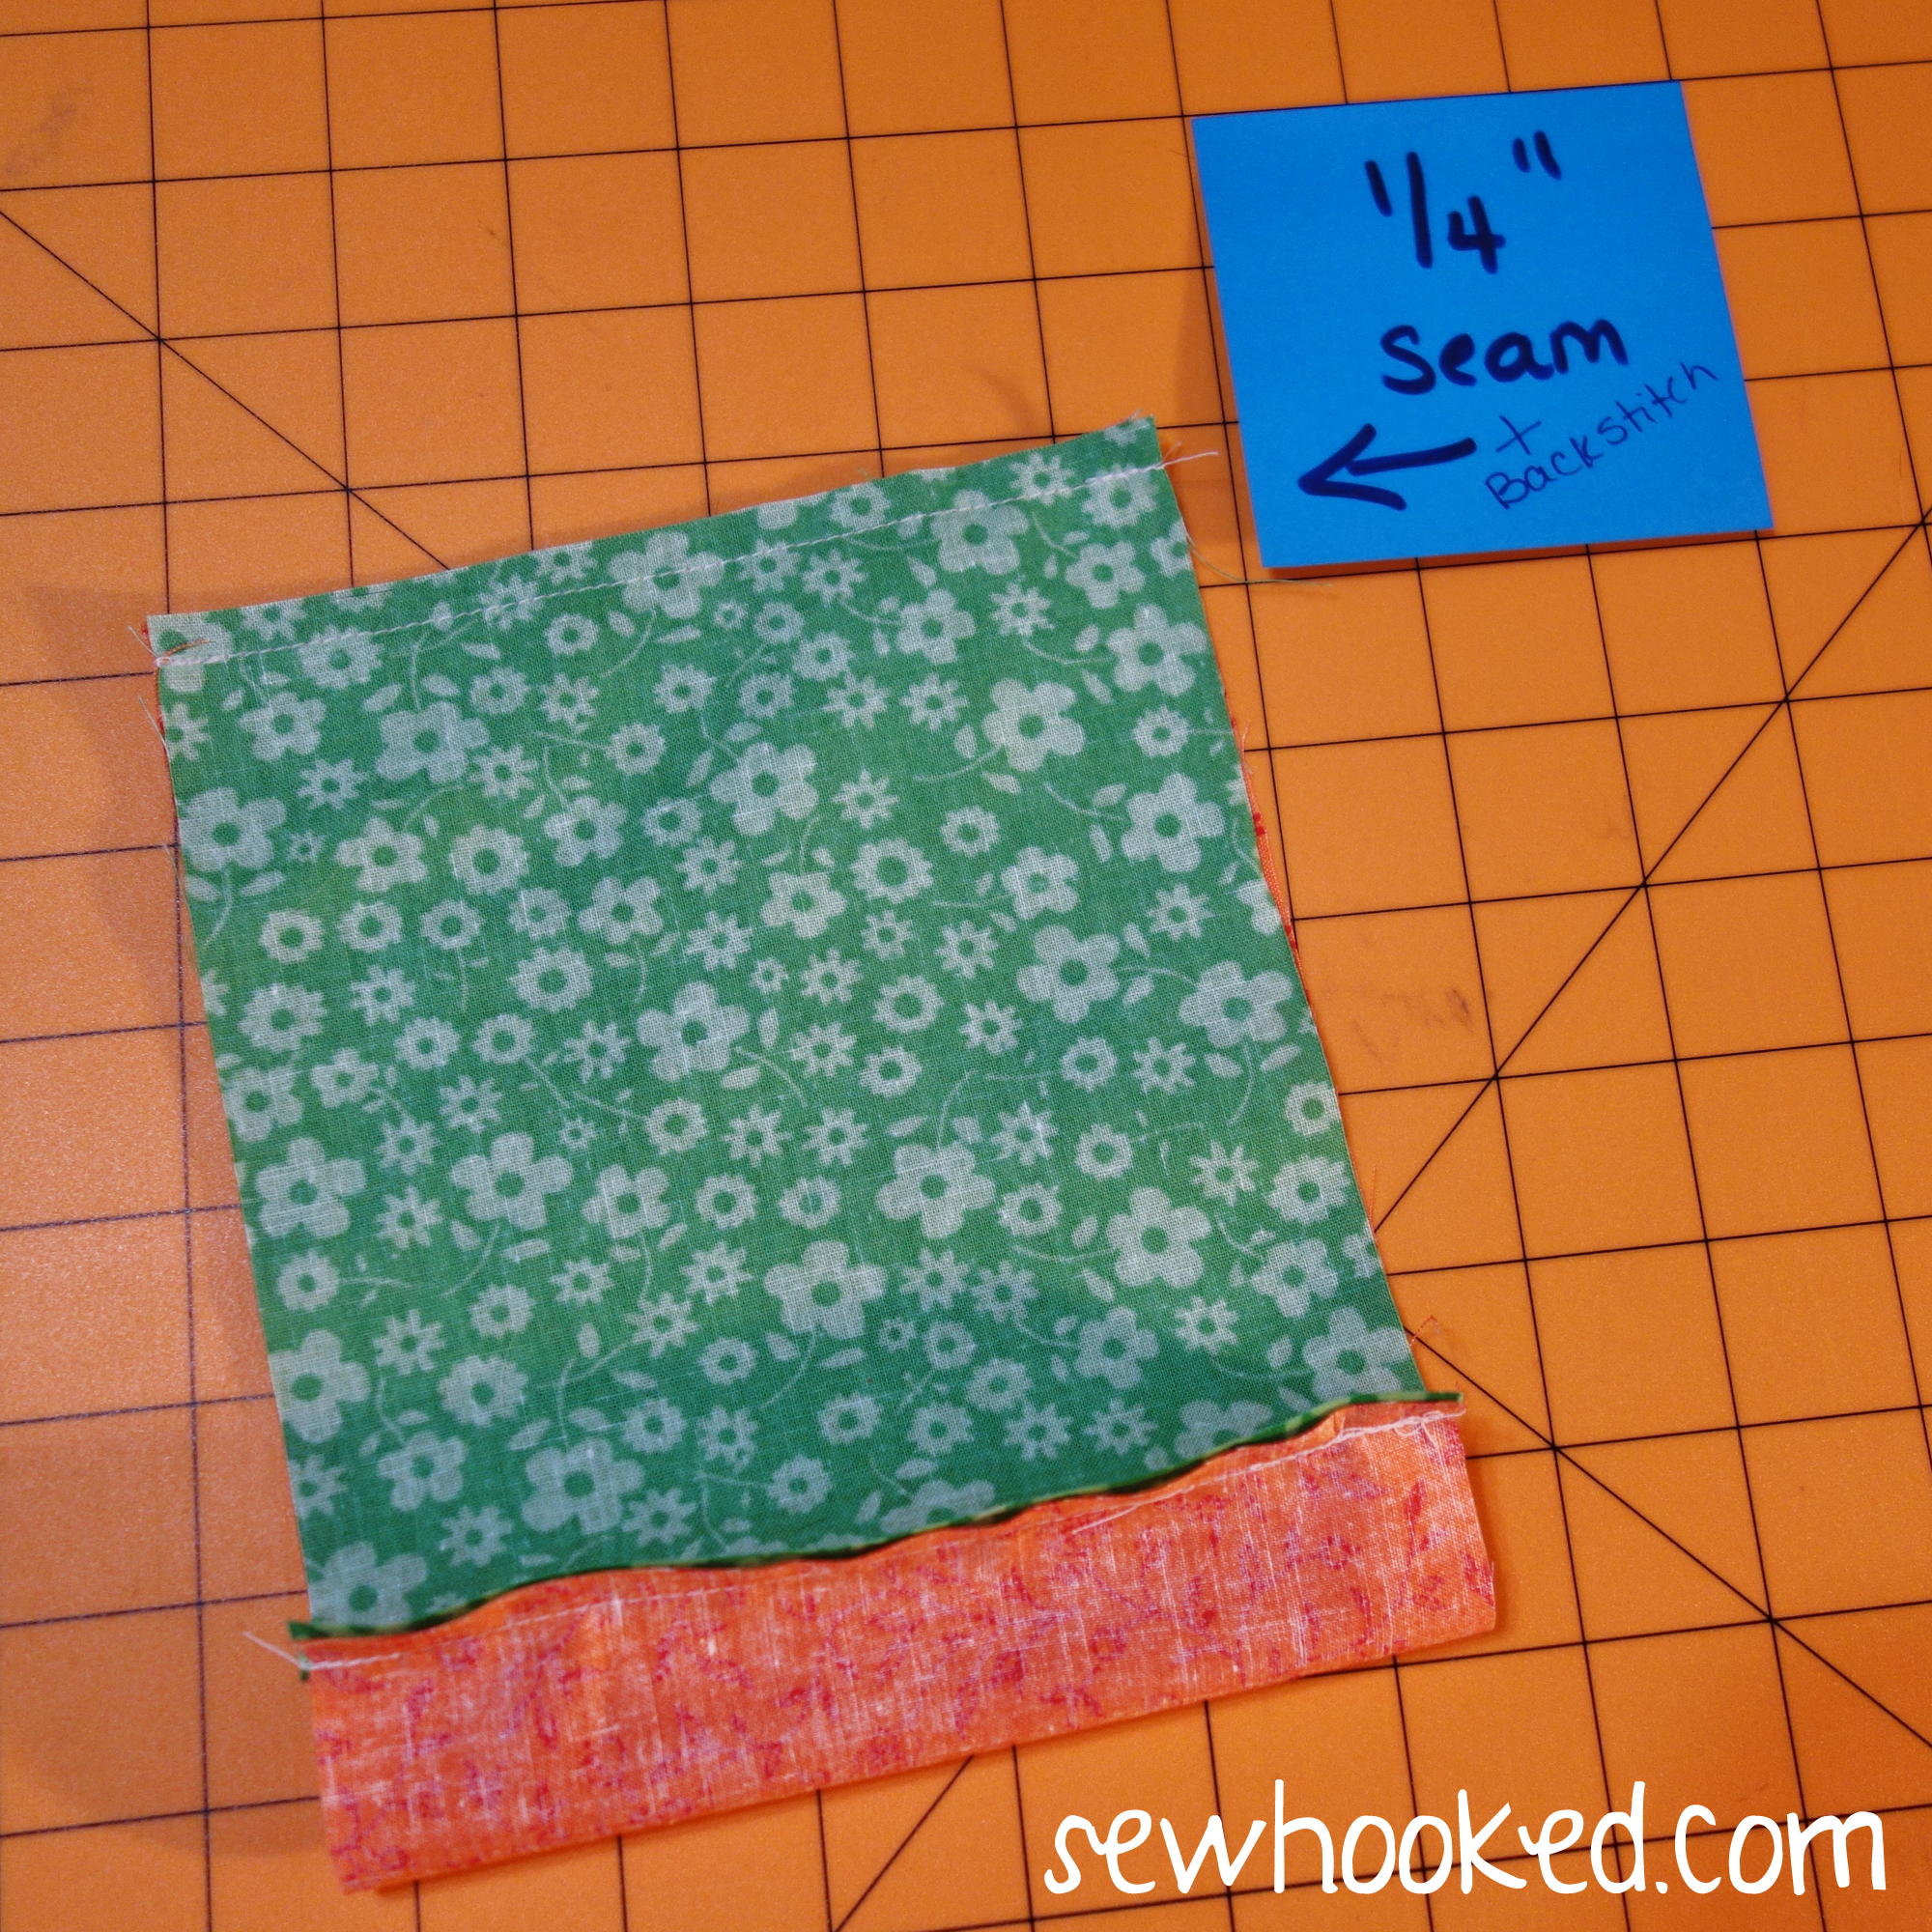
With right sides together, line one end of OUTSIDE to one end of LINING/TRIM on the side that measures 5 3/4″.
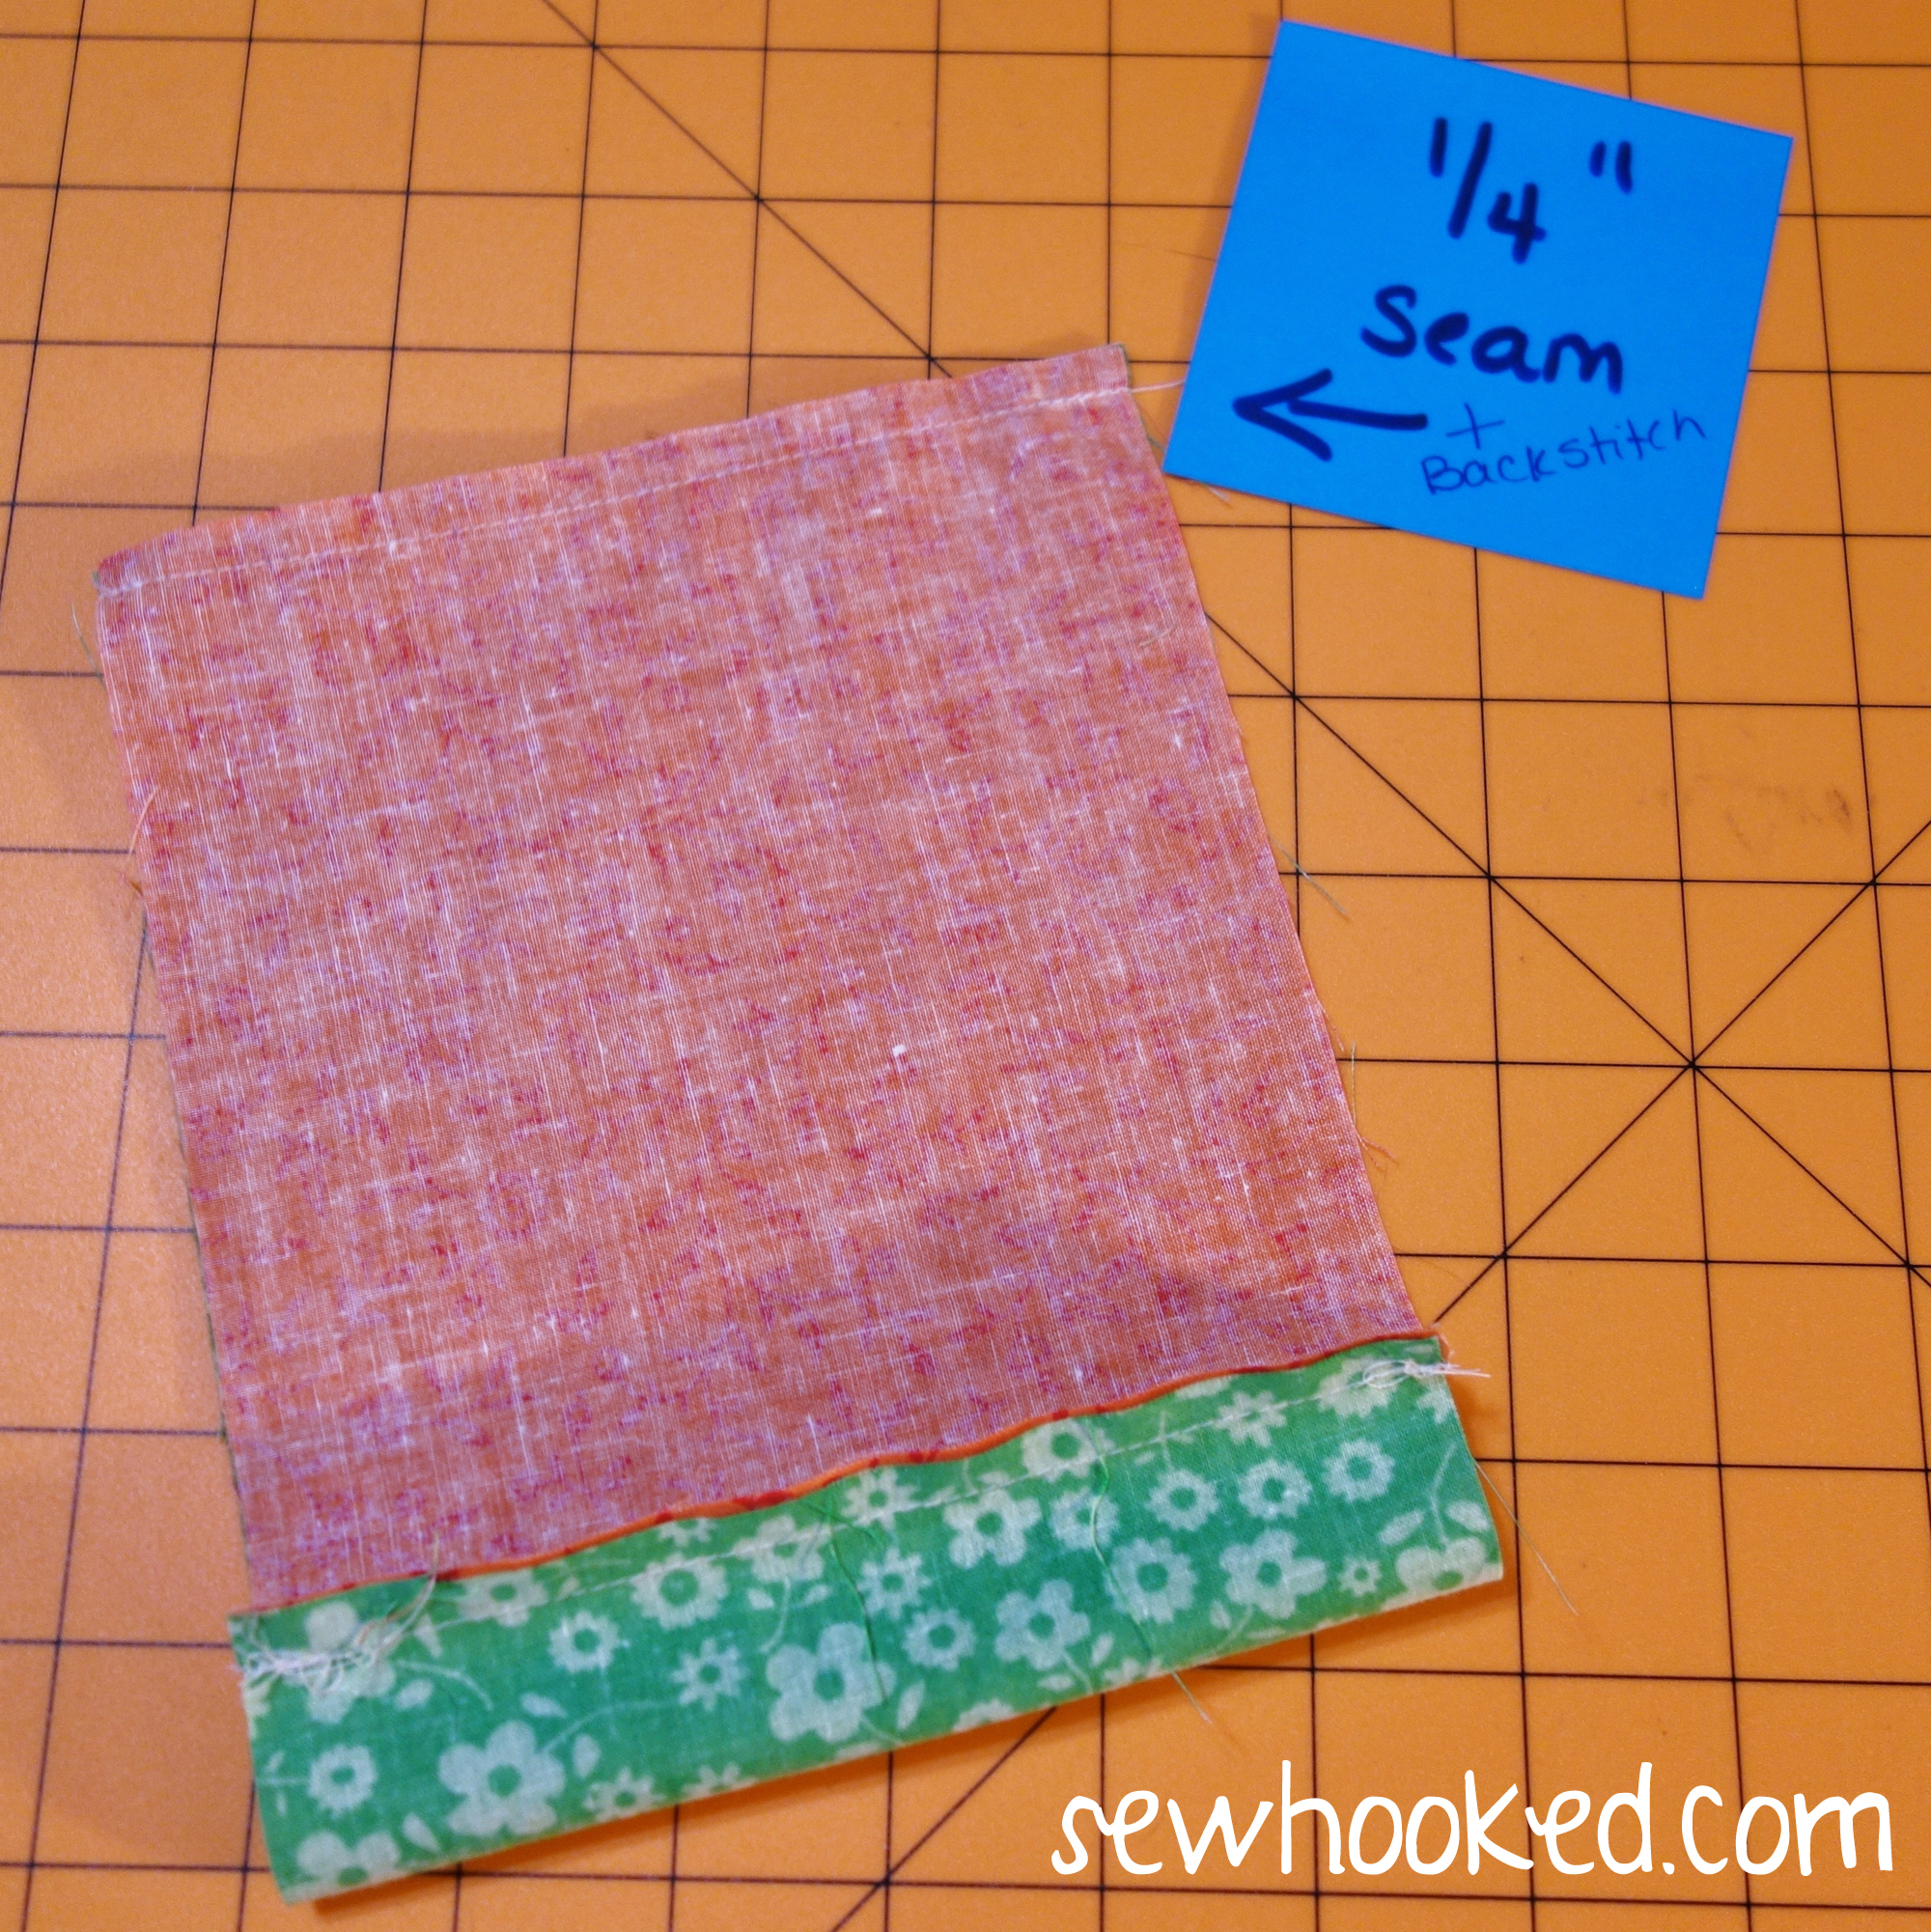
Stitch a 1/4″ seam with backstitching at both ends.
Line up opposite ends and repeat the 1/4″ seam with backstitching along the other 5 3/4″ side.
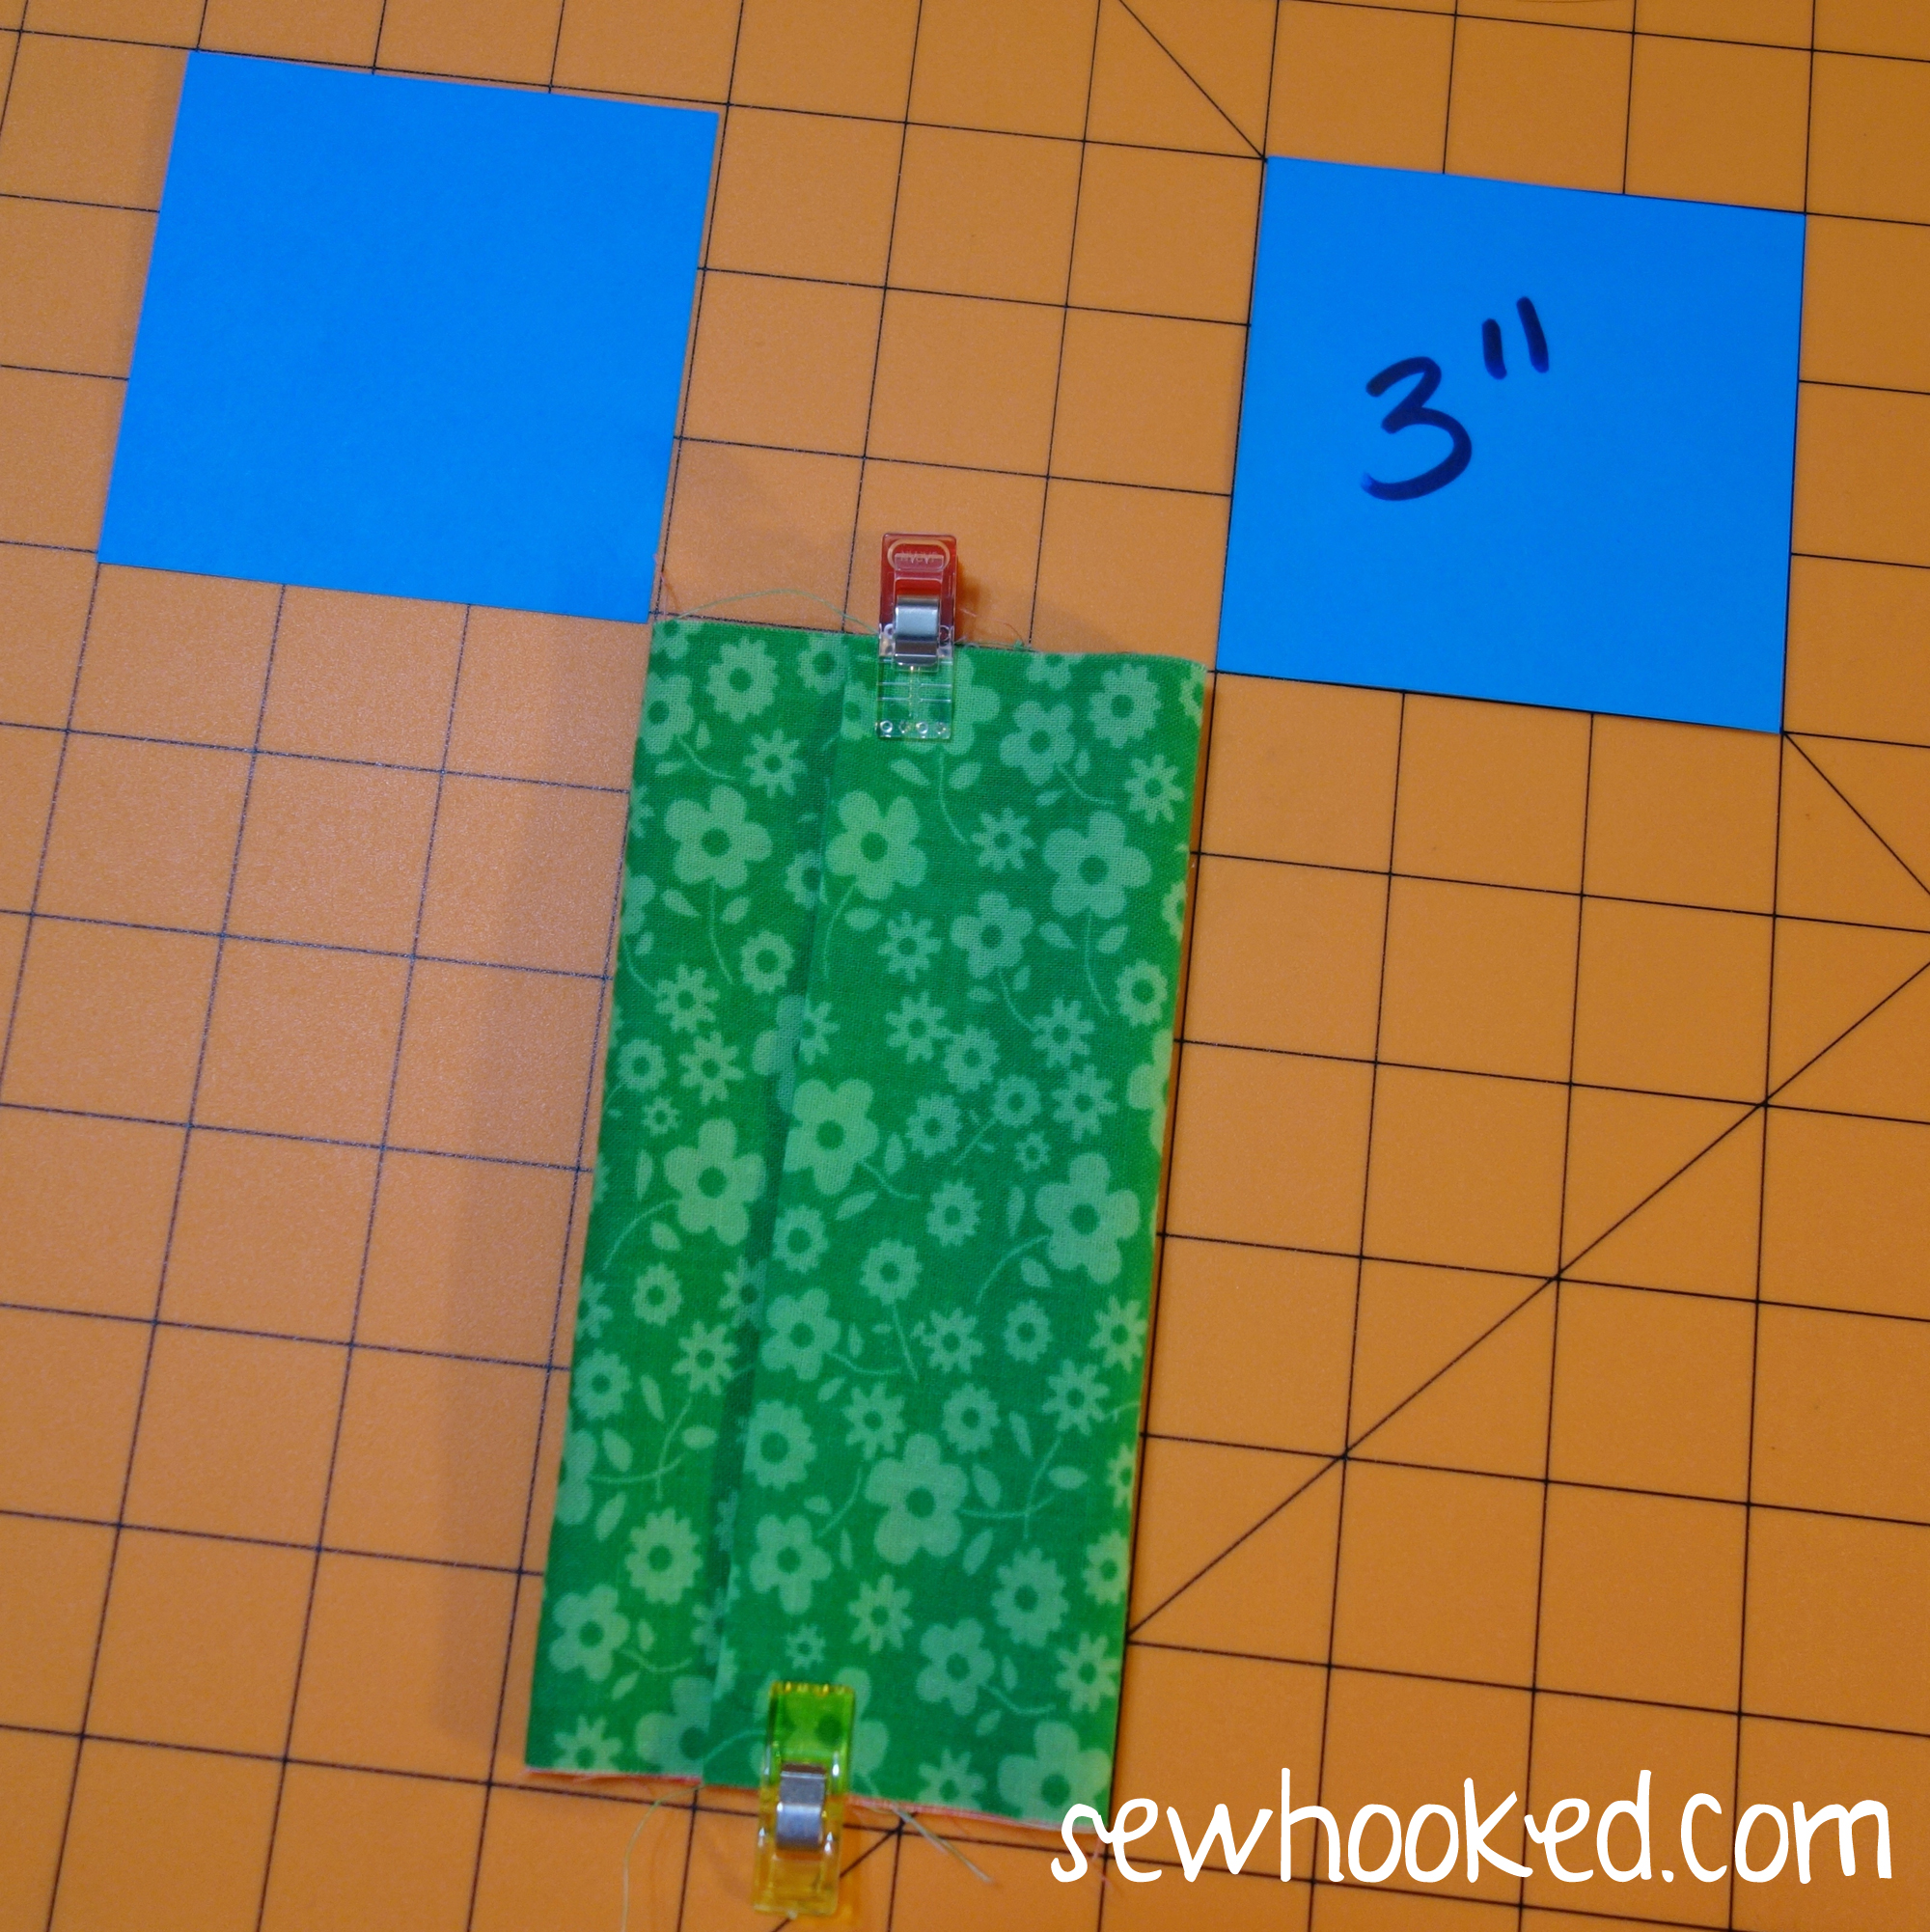
Turn so that wrong sides of the fabric are together. Adjust so that each end of TRIM is approximately the same size.
Press.
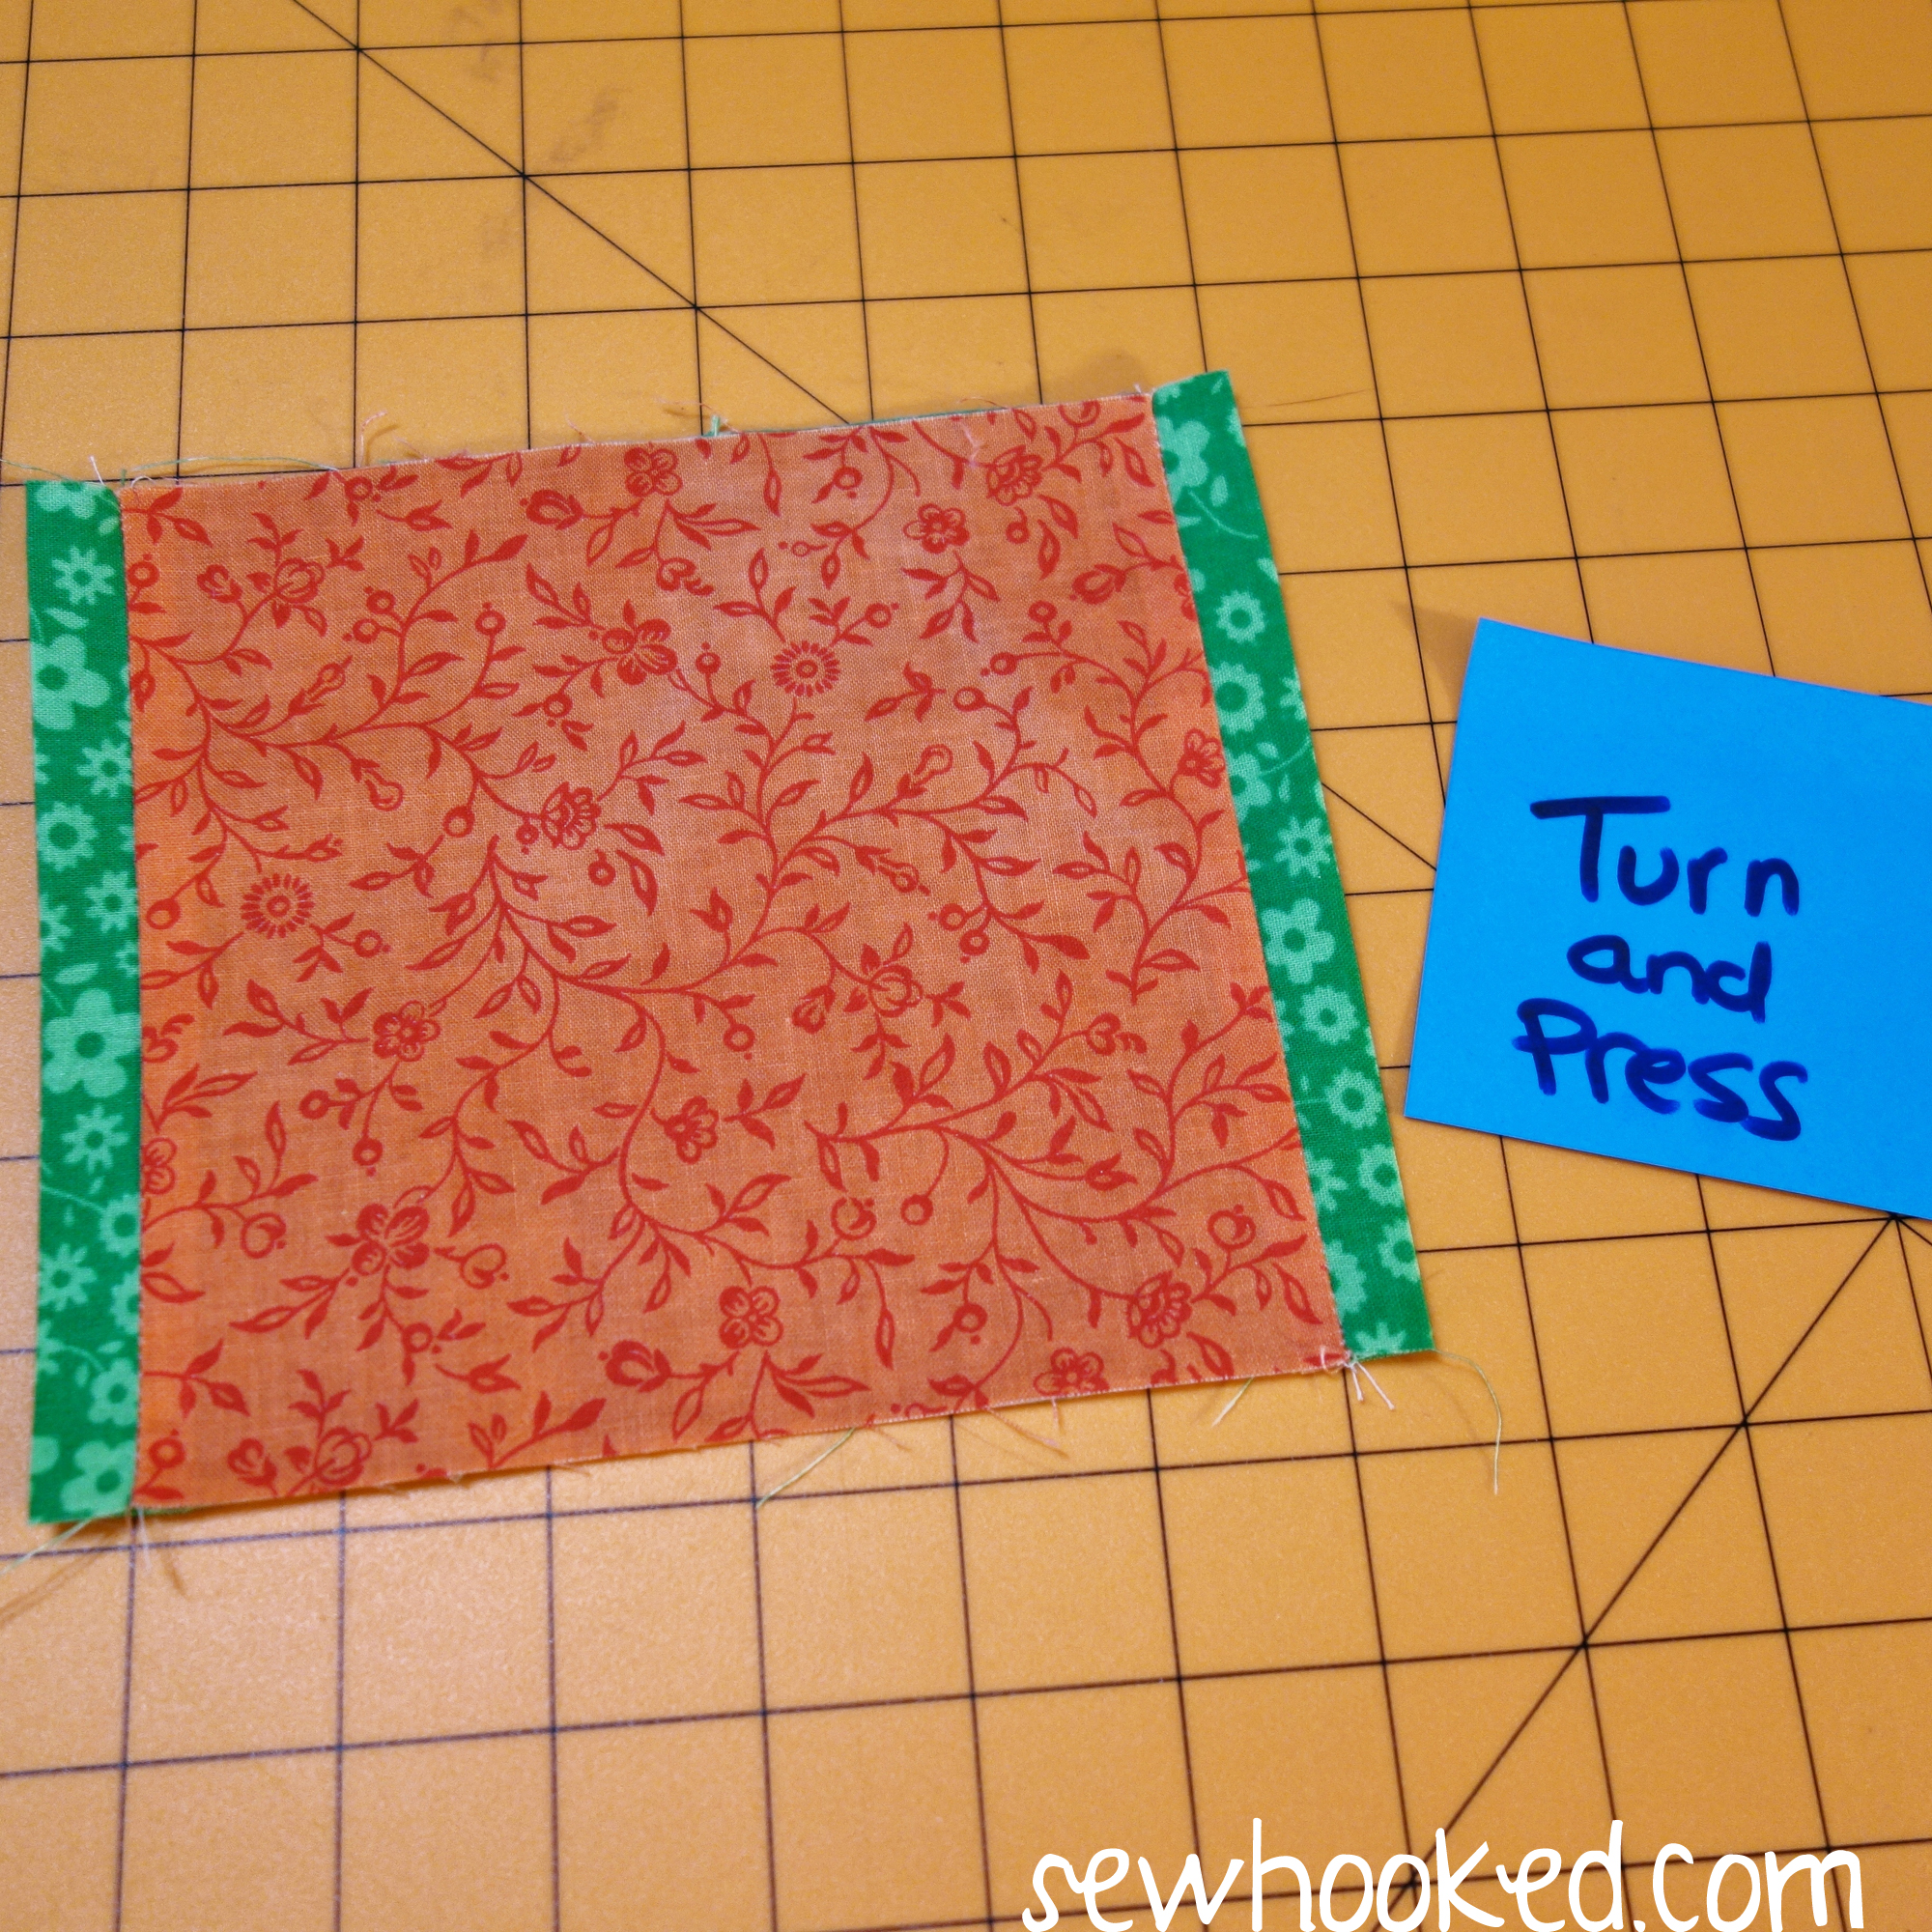
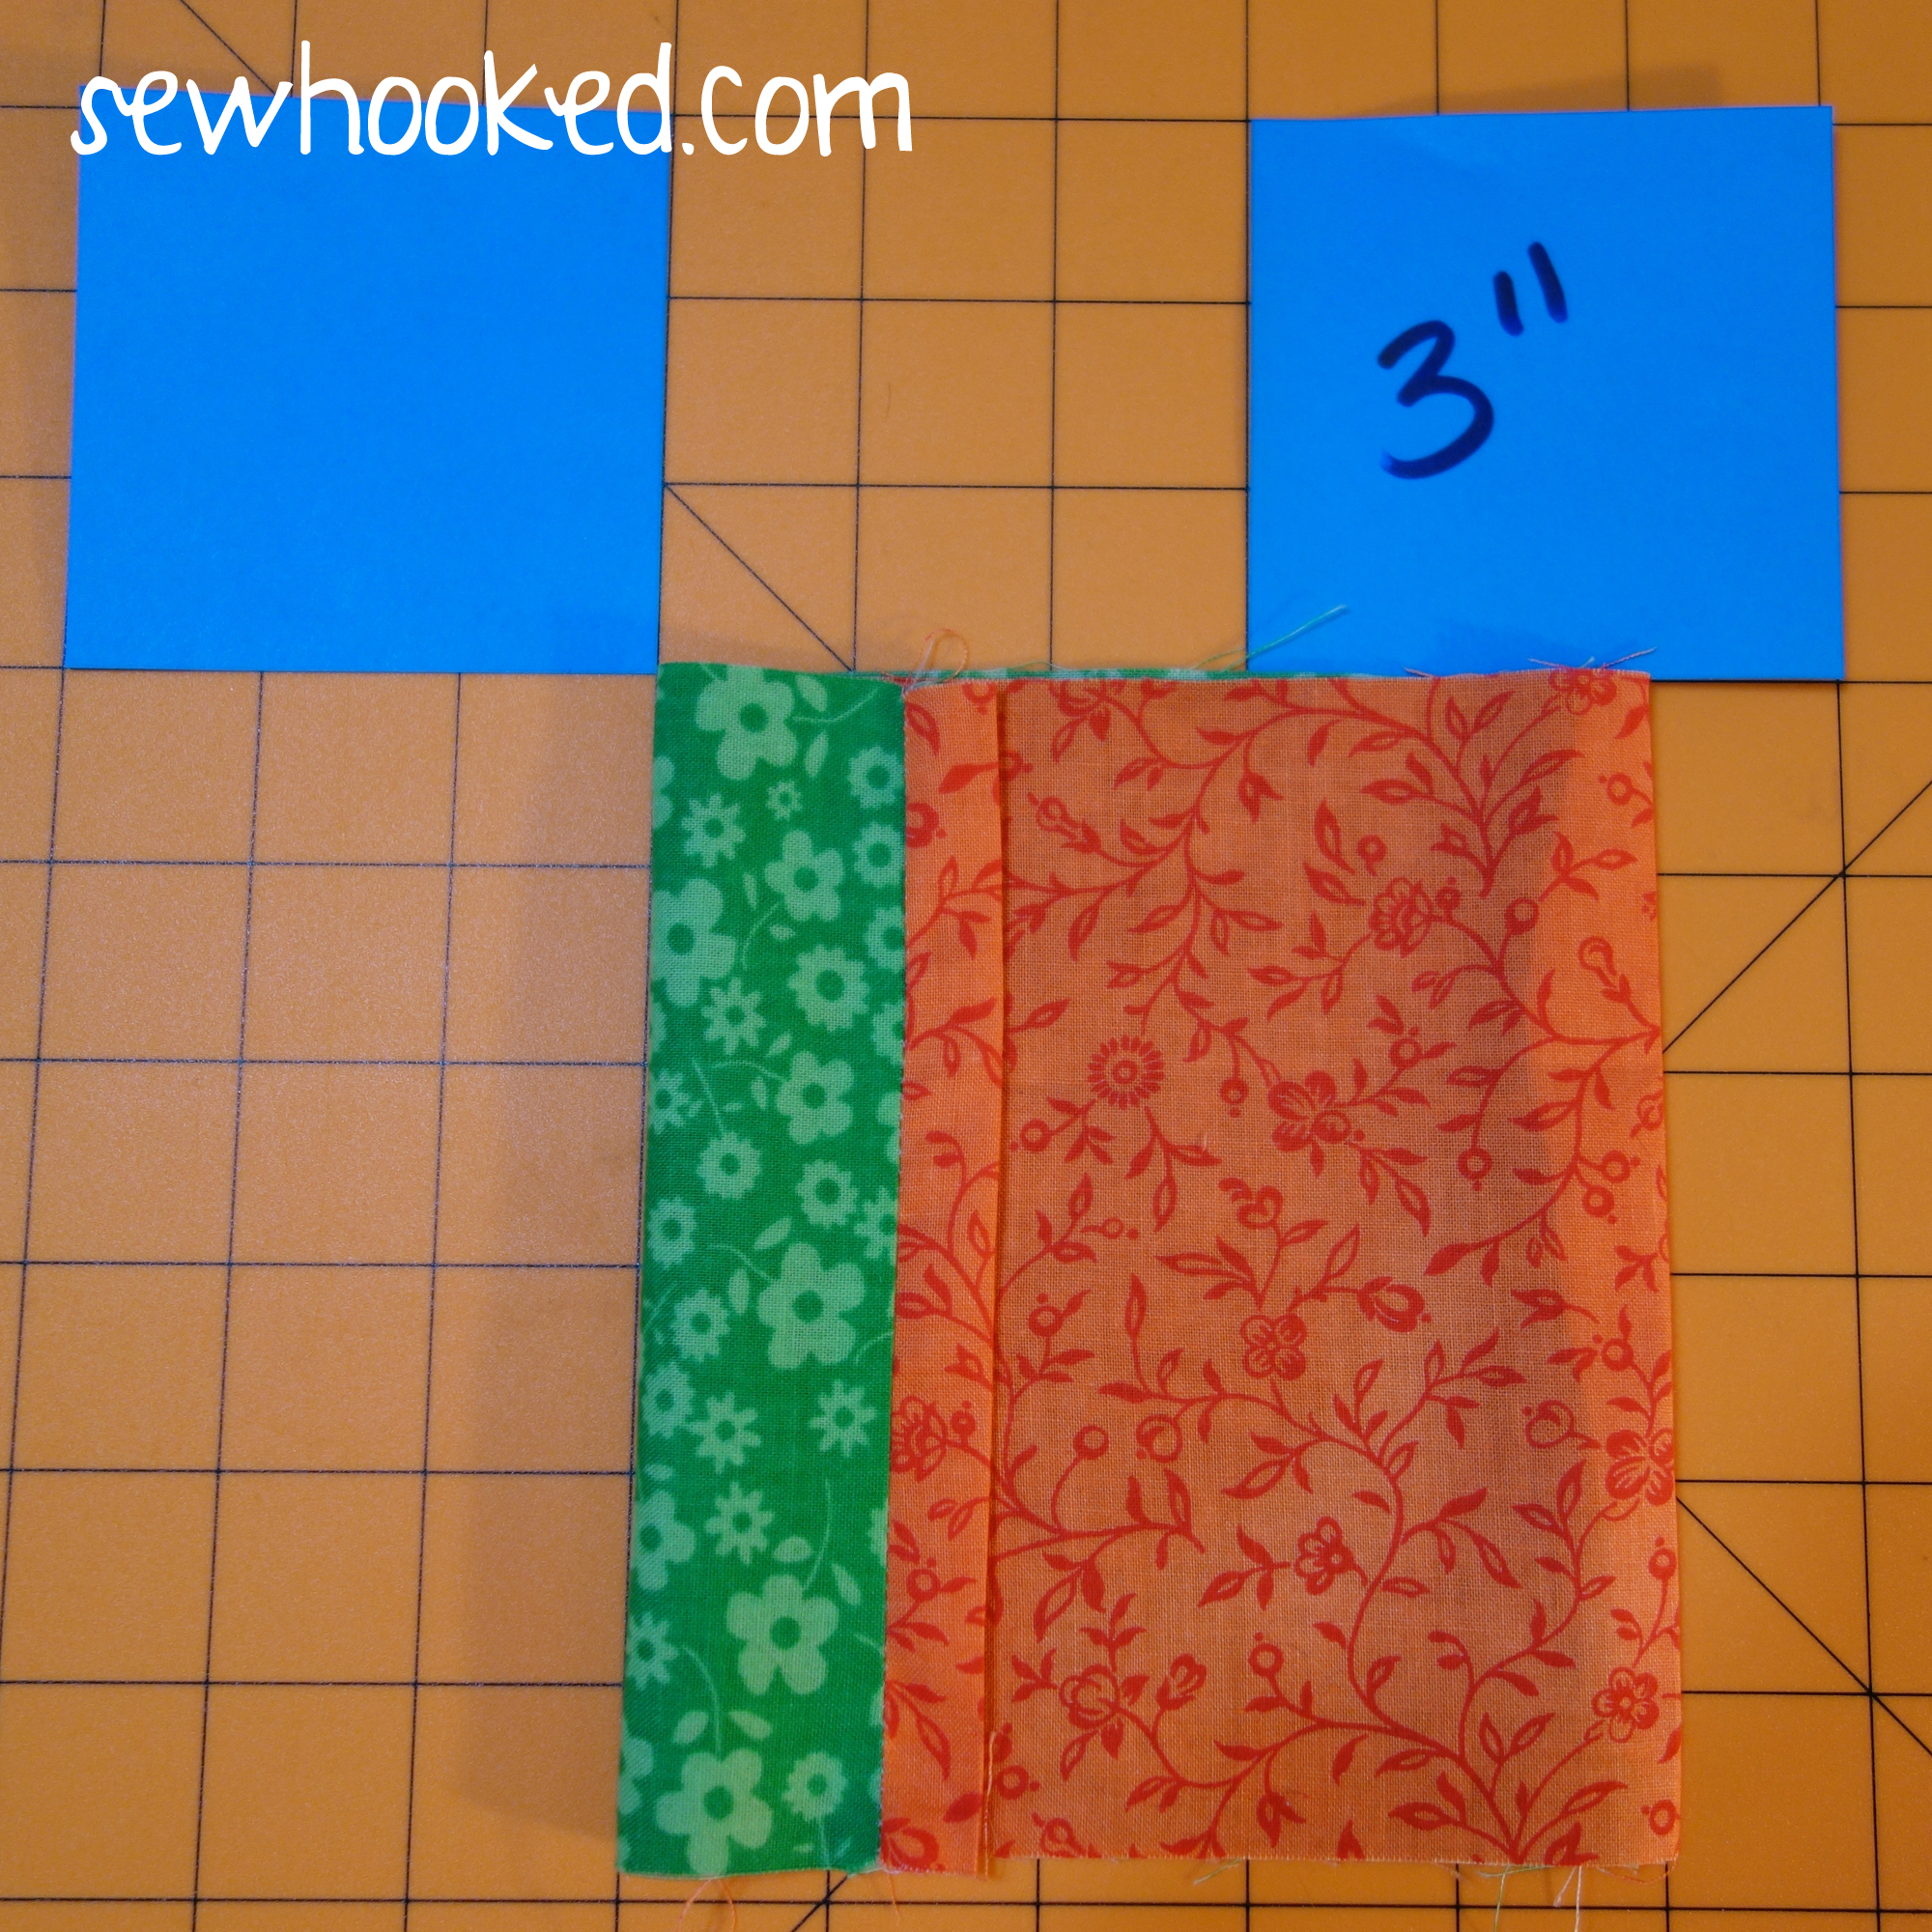
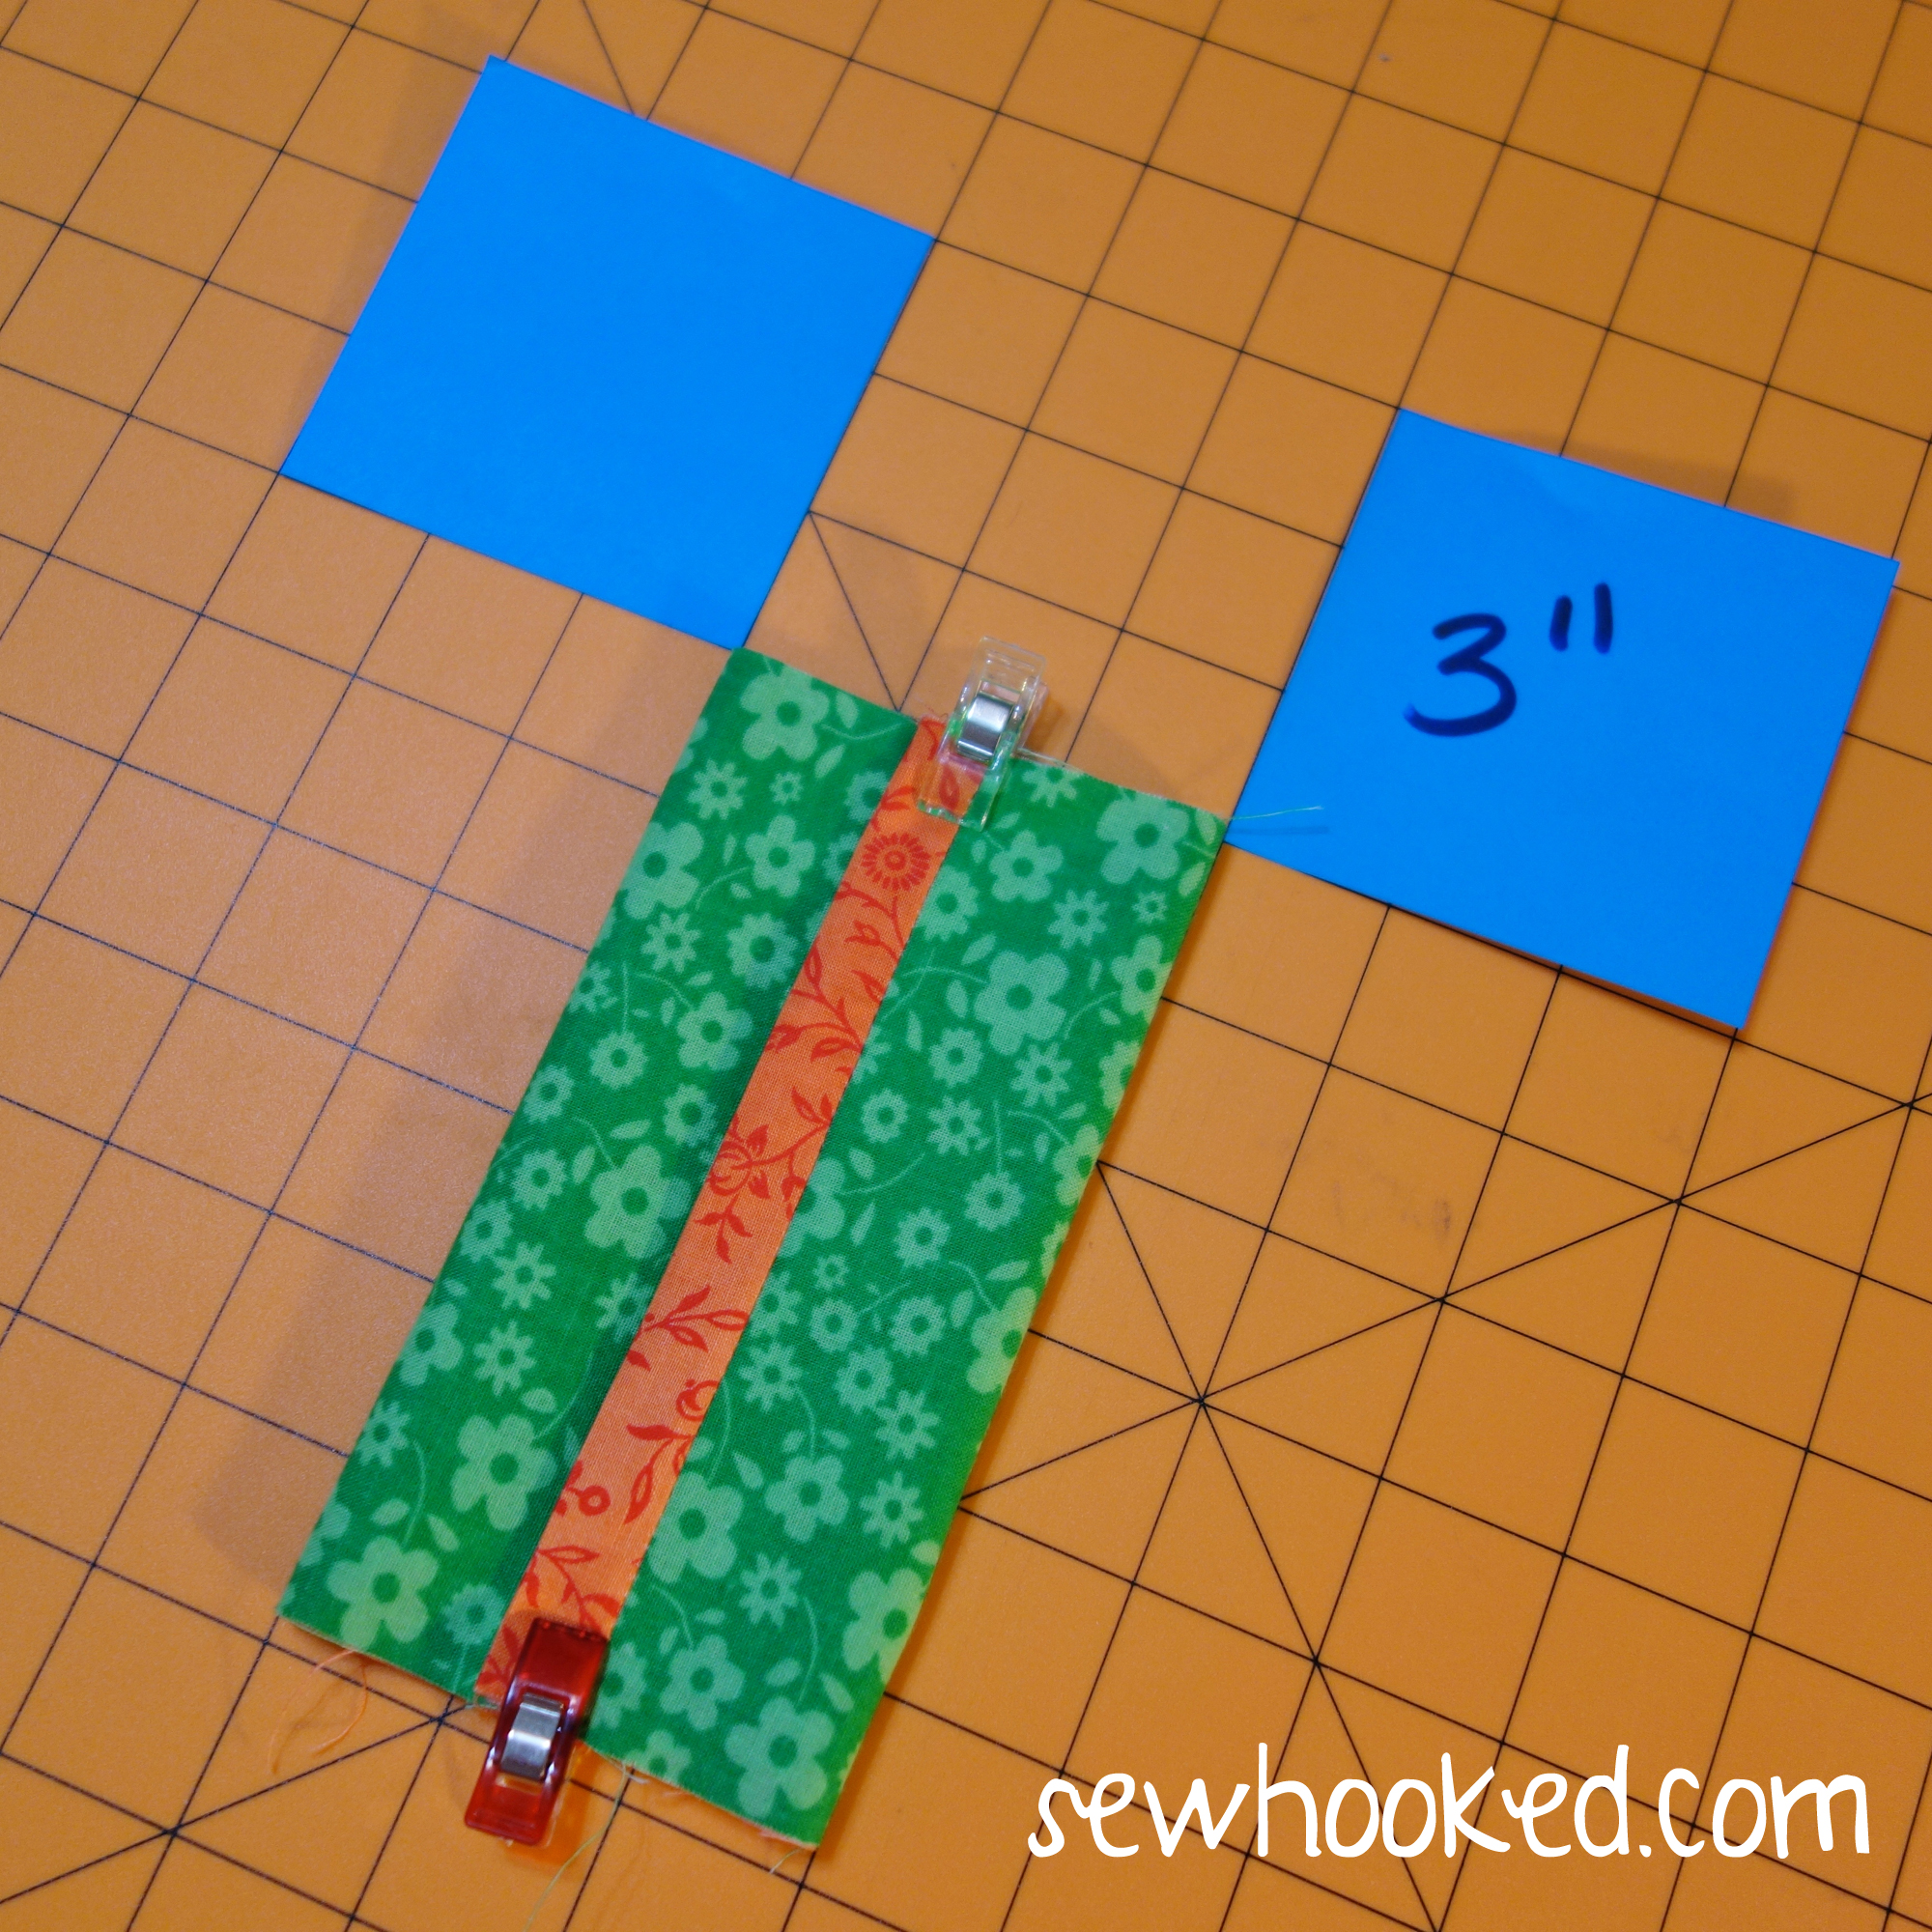
Using a ruler or rotary mat, fold right sides of the OUTSIDE together so that it is 3″ wide. If you’re using a rotary mat, you can align easily use the markings on your mat for this part. Edges should overlap in the approximate center.
Once adjustments have been made to your liking and the width is 3″, pin or clip with sewing clips. Wonder Clips or Magic Clips work great. (I have both.)
Because this version has TRIM, you will not see the overturned edge during this step.
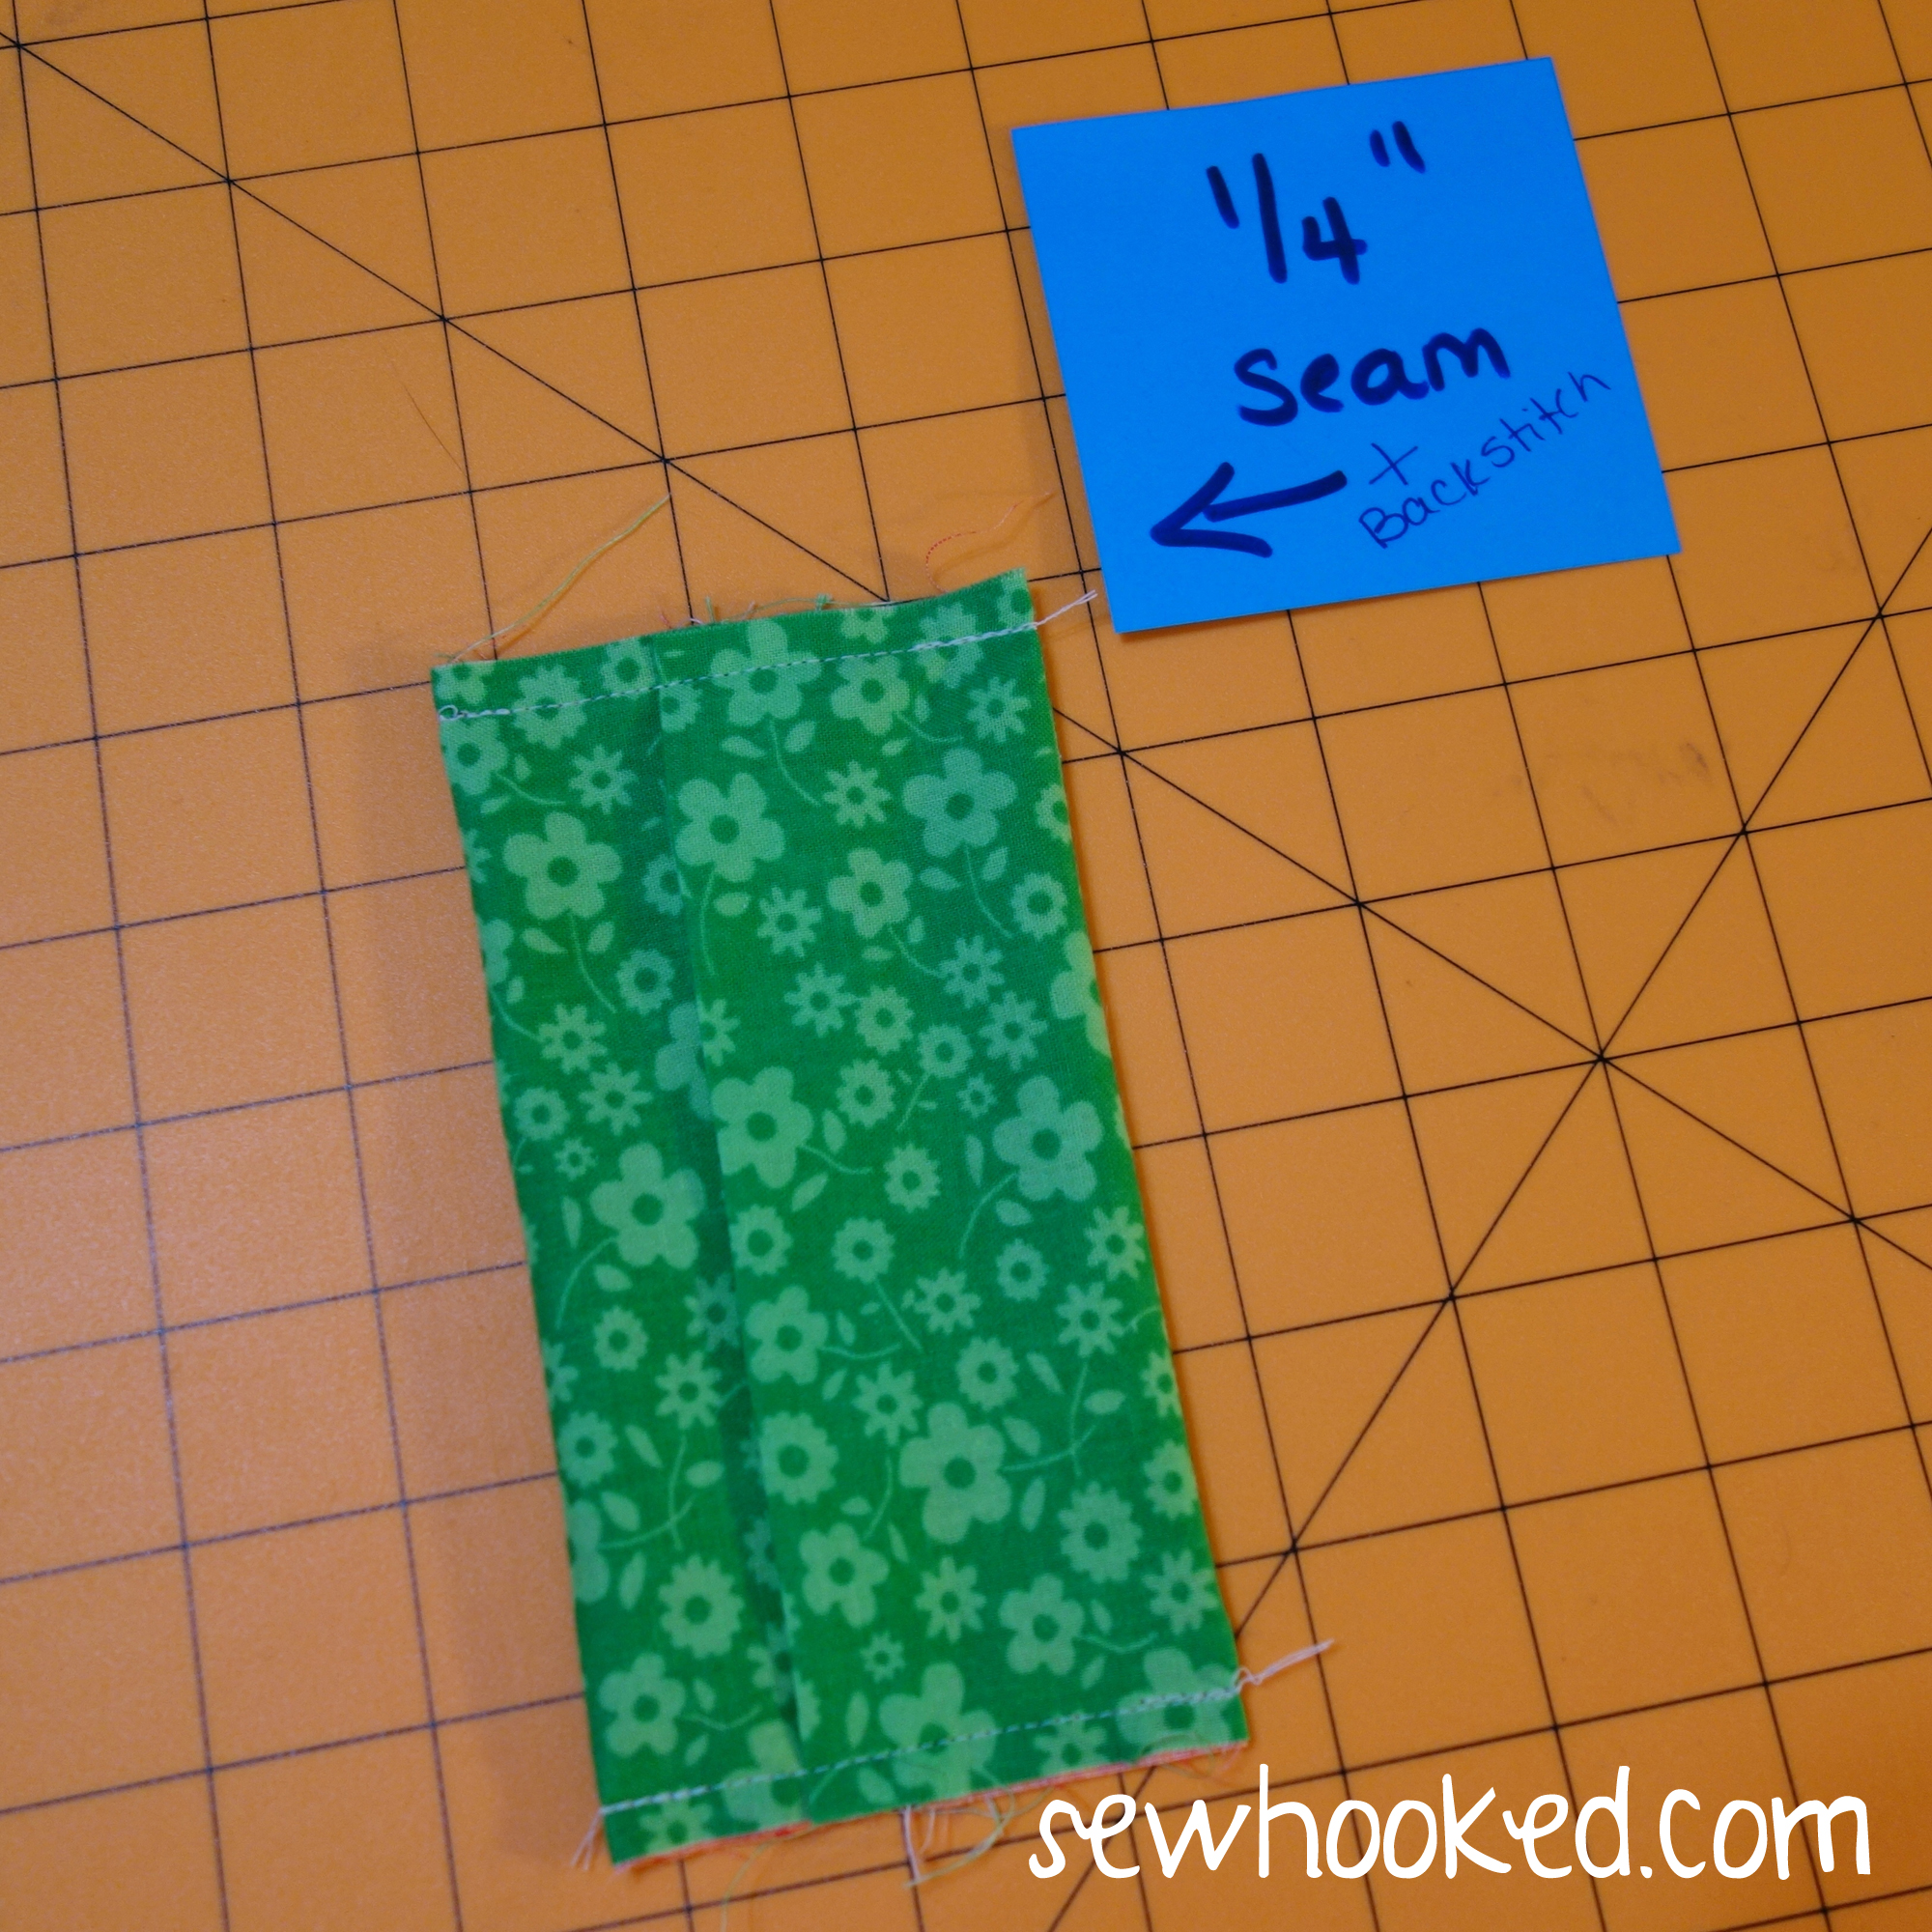
Sew each end with a 1/4″ seam allowance, backstitching at the beginning and end.
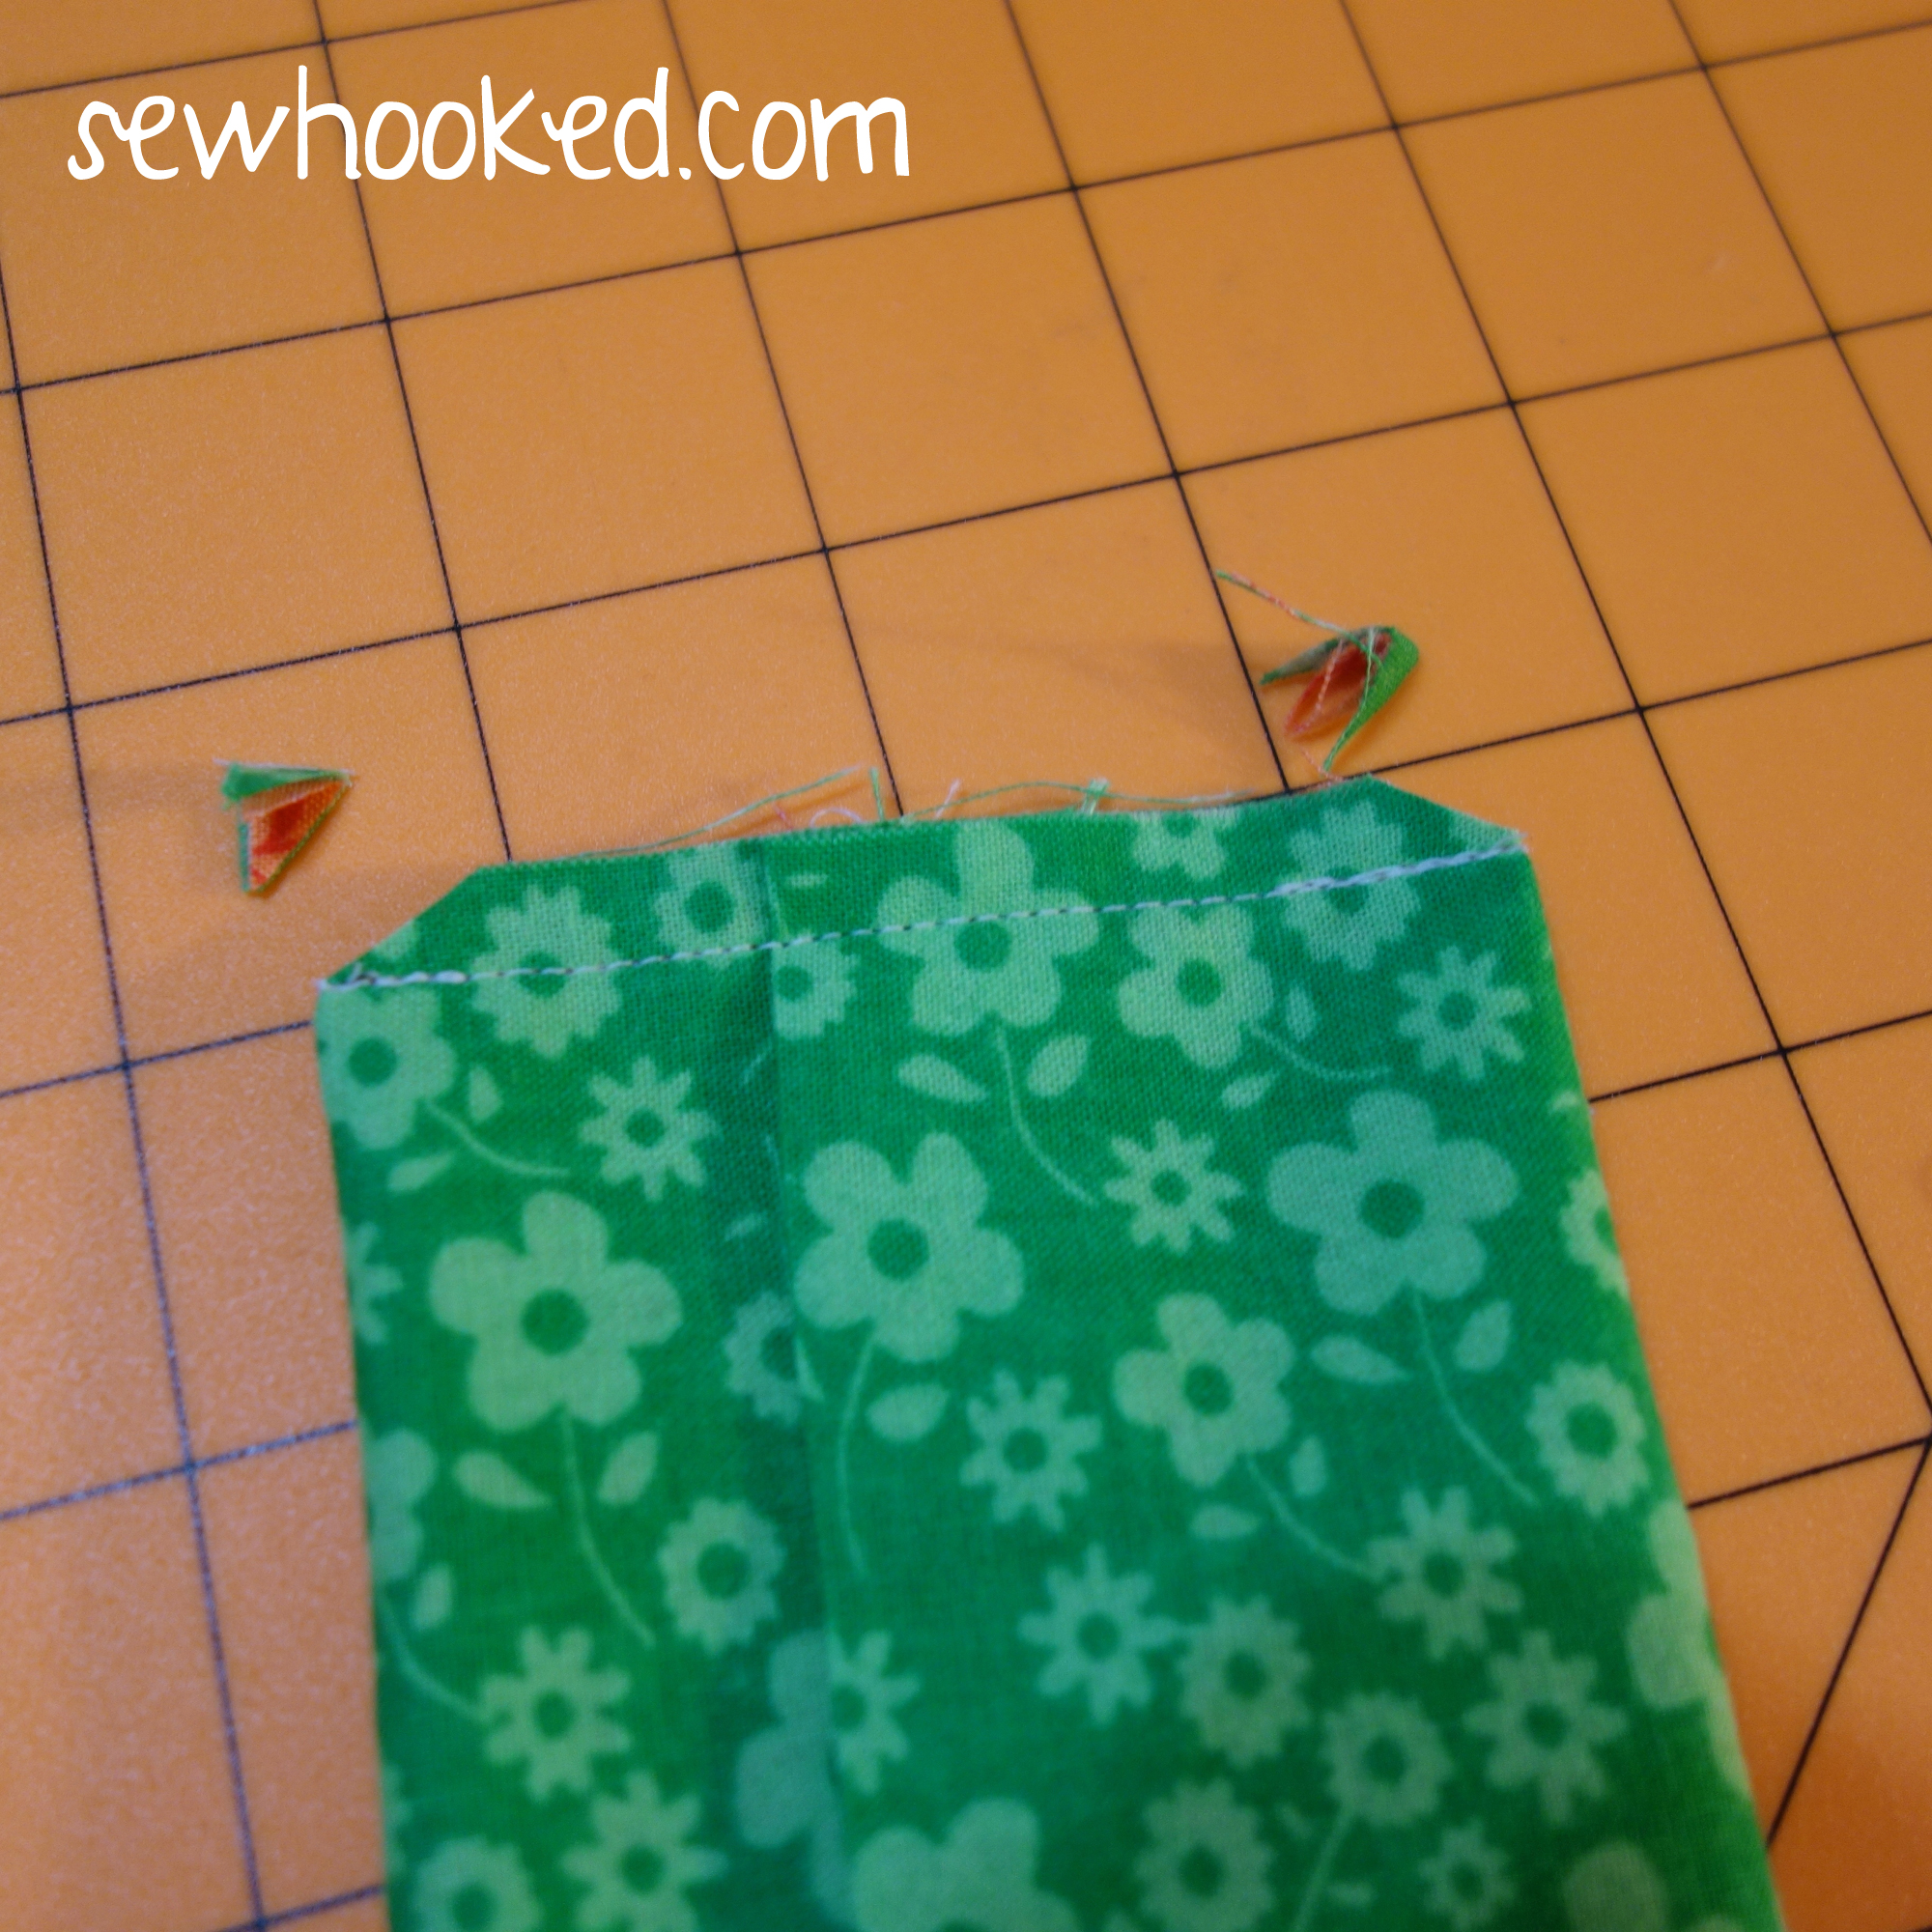
Clip corners & turn.
Done!
See how the Lining/Trim makes a lovely accent? You can have fun playing with stripes, dots or other fun fabrics.
Now, let’s make one that isn’t trimmed. We’ll use the same technique, but the fabric sizes will be reversed.
You’ll need fabric in two colors. Just as before, the orange fabric is the OUTSIDE.
For UN-TRIMMED Cover:
Outside – 5 3/4″ x 8 1/2″
Lining – 5 3/4″ x 6 1/2″
With right sides together, line one end of LINING to one end of OUTSIDE on the side that measures 5 3/4″.
Stitch a 1/4″ seam with backstitching at both ends.
Line up opposite ends and repeat the 1/4″ seam with backstitching along the other 5 3/4″ side.
Turn so that wrong sides of the fabric are together. Adjust so that each end is approximately the same width.
Press.
Using a ruler or rotary mat, fold right sides of the OUTSIDE together so that it is 3″ wide. If you’re using a rotary mat, you can align easily use the markings on your mat for this part. Edges should overlap in the approximate center
Once adjustments have been made to your liking and the width is 3″, pin or clip with sewing clips.
Because this version doesn’t have TRIM, you’ll see the overturned edge during this step.
Sew each end with a 1/4″ seam allowance, backstitching at the beginning and end.
Clip Corners & Turn.
Done!
Stop by tomorrow for Free Pattern Friday for my weekly featured FREE quilt pattern!