I hope you’ll join us!

FB | SHFB | Flickr | Twitter | Pinterest| Bloglovin

Featured Pattern Texas Twofer: Set 1 (Paper Pieced), just $2 on Craftsy

Thank you to every single person that has helped spread the word about the pattern theft that has taken place against Fandom In Stitches and many of my designer friends.
I have taken as many measures as I can to rectify the situation and can now only wait and see what happens. Your support of myself and the online crafty community is much appreciated!

On a more positive note, I mailed off a super secret project this over the weekend. I wonder what it could be?!
And now, a quote from my favorite headmaster:
We are only as strong as we are united, as weak as we are divided. Lord Voldemort’s gift for spreading discord and enmity is very great. We can fight it only by showing an equally strong bond of friendship and trust. Differences of habit and language are nothing at all if our aims are identical and our hearts are open.
~Albus Dumbledore
And, as a happy aside, have you seen Aalia’s wonderful Doctor Who-inspired Prayer Leaf tutorial?
Until tomorrow, my dear friends!
Sewhooked Shop | FB | SHFB | Flickr | Twitter | Bloglovin | Craftsy | Etsy Shop

Featured Pattern: 6″ fleur-de-lis to paper piece, just $2 on Craftsy!

A quick reminder!…The 2012 Summer Challenge is almost over!
Make a project from one of my patterns or tutorials and share a photo with my flickr group.
Full details and deadlines are here.
This is the last weekend to receive 10% off your total purchase from the Sewhooked Shop. Ends midnight, July 1, use coupon code SUMMER2012. Offer valid here on Sewhooked and in my Etsy Shop. Not valid on Craftsy.

 |
12 for 2012, June, is pieced, sans borders!
The non-embroidered blocks, as well as the snowball corners, came from the fabric I treated myself to after my Trunk Show. I say “treat,” but I was really restocking my stash after the frenzy of sewing in April/May. I think I’ll add borders and make this a baby-sized quilt and save it for a gift. Goodness knows I’ve needed enough baby gifts the last few years! Right now, it’s 27″ x 27″. |

Vacation Plans, 15″ x 15″
In addition to creating new designs for Sewhooked and working on 12 for 2012, I’ve been able to squeeze in a little fandom stitchery! There’s no therapy quite like it for me!
Since I’ve had EQ7, I’ve been slowly going through all my old patterns (both fandom and non) and giving them an overhaul. For the most part, my goal has been to simplify the patterns and make them more appealing to others to piece, as well as less color-soaked for easier printing. After all, what’s the point of sharing if no one wants to actually make the pattern?! 😉

This week, I updated my TARDIS pattern. Both the original, and the highly simplified updated version are available for free through Fandom In Stitches.
Click here to see my FiS blog post and for links to the free pattern.

I was particularly happy with the free-motion quilting on this one. I’ve been working hard this year to improve my technique and to expand the variety of patterns I can do.
I can’t wait to see your Summer Challenge photos! The poll will be posted on Monday…as well as a photo of the prize…which has grown a bit since it was originally posted!

Learn to paper piece with my full-length worshop…
STITCHED registration is now only $40! Click for details
Sewhooked Shop | FB | SHFB | Flickr | Twitter | Bloglovin | Craftsy


designs by Lilja Bjork, click image for pattern
It’s been quite some time since we had a Guest Designer Spotlight, and this one is quite overdue! I’m proud to introduce Lilja Bork to you. She has been a Sewhooked Guest Designer since mid-2010. She has an amazing eye for design and had created some stunning pieces!

Lilja Bjork, Slytherin Team Captain!
Name and where you’re from:
My name is Lilja Bjork, on the Internet I’m known as Liljabs. I’m from Reykjavik in Iceland. I also lived in Kuopio in Finland for 6 months in 2003.
I have a brand new website that I just started in January 2011. That is where I post all my patterns. I also have a flickr and my Livejournal.
I started paper piecing in 2007 I think, after I found Sewhooked through the leaky cauldron crafts pages. I never really thought quilting was something young people did. I thought it must be terribly boring, hihi I was so wrong It’s almost all I do these days.
The ones I’ve done so far are meant to be for a Disney quilt for my nephews bed and a multi-fandom quilt for myself. I also made a Christmas wall-hanging witch is the first project I finish that is all mine. I was so proud of myself when I finished that one 🙂

April 12th 2010, I remember it was the day after my birthday
I just really wanted a Tardis for my multi-fandome quilt and I didn’t find one on the Internet. So I thought why not try to make one.
I’m not sure if it was the Tardis or the Doctor who logo but those where my first two designs. I think I even made them on the same day.

Do you have a favorite among your own designs?
Not any one, but the Disney blocks must be at the top. I spent so much time on each of them to get them perfect 🙂
I mostly use Quilt Assistant. Witch is free. And I also use Photoshop.
Rather than changing how I craft it is more that the community inspires me to try new things. Things that I never would have tried, or even things I have never heard of before.
See more of Lilja’s patterns on Sewhooked’s Guest Designer Page
Happy Quilting!
SEWHOOKED SHOP |SCHEDULE | SEWHOOKED FB
JEN FACEBOOK | TWITTER | FLICKR GROUP
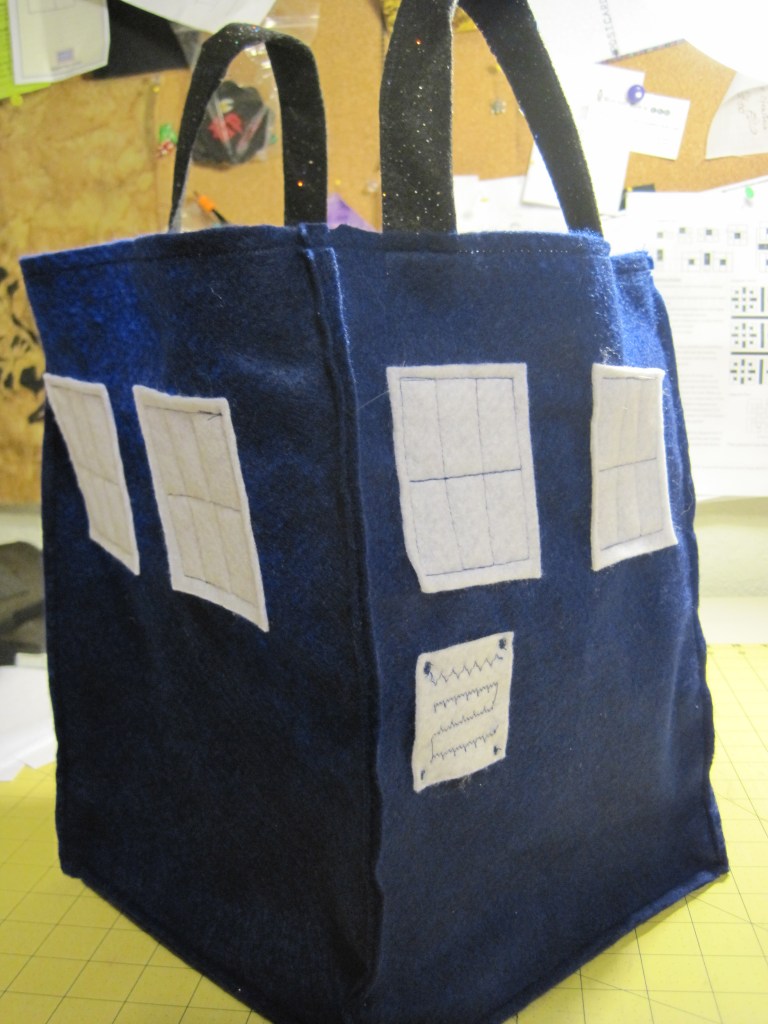
Being the Doctor Who obsessed family that we have become, I suppose it’s no surprise that one of my kids is going as The Doctor for Halloween. My eldest has their Ten costume all ready to go, courtesy of a day of thrifting. Because I can’t not be involved in costume making, I asked if there was anything I could do.
“Mum, can you can you make a TARDIS bag for my treats?”
You better believe I can!
Despite it’s awesomeness, the TARDIS Treat Bag is super simple.
You need:
You can definitely do this project without a rotary cutter and ruler and even without a sewing machine, so those items are optional. If you do hand stitch, make sure you make tight, even stitches and use heavy-duty knots so you don’t lose your candy!
Cutting Instructions:
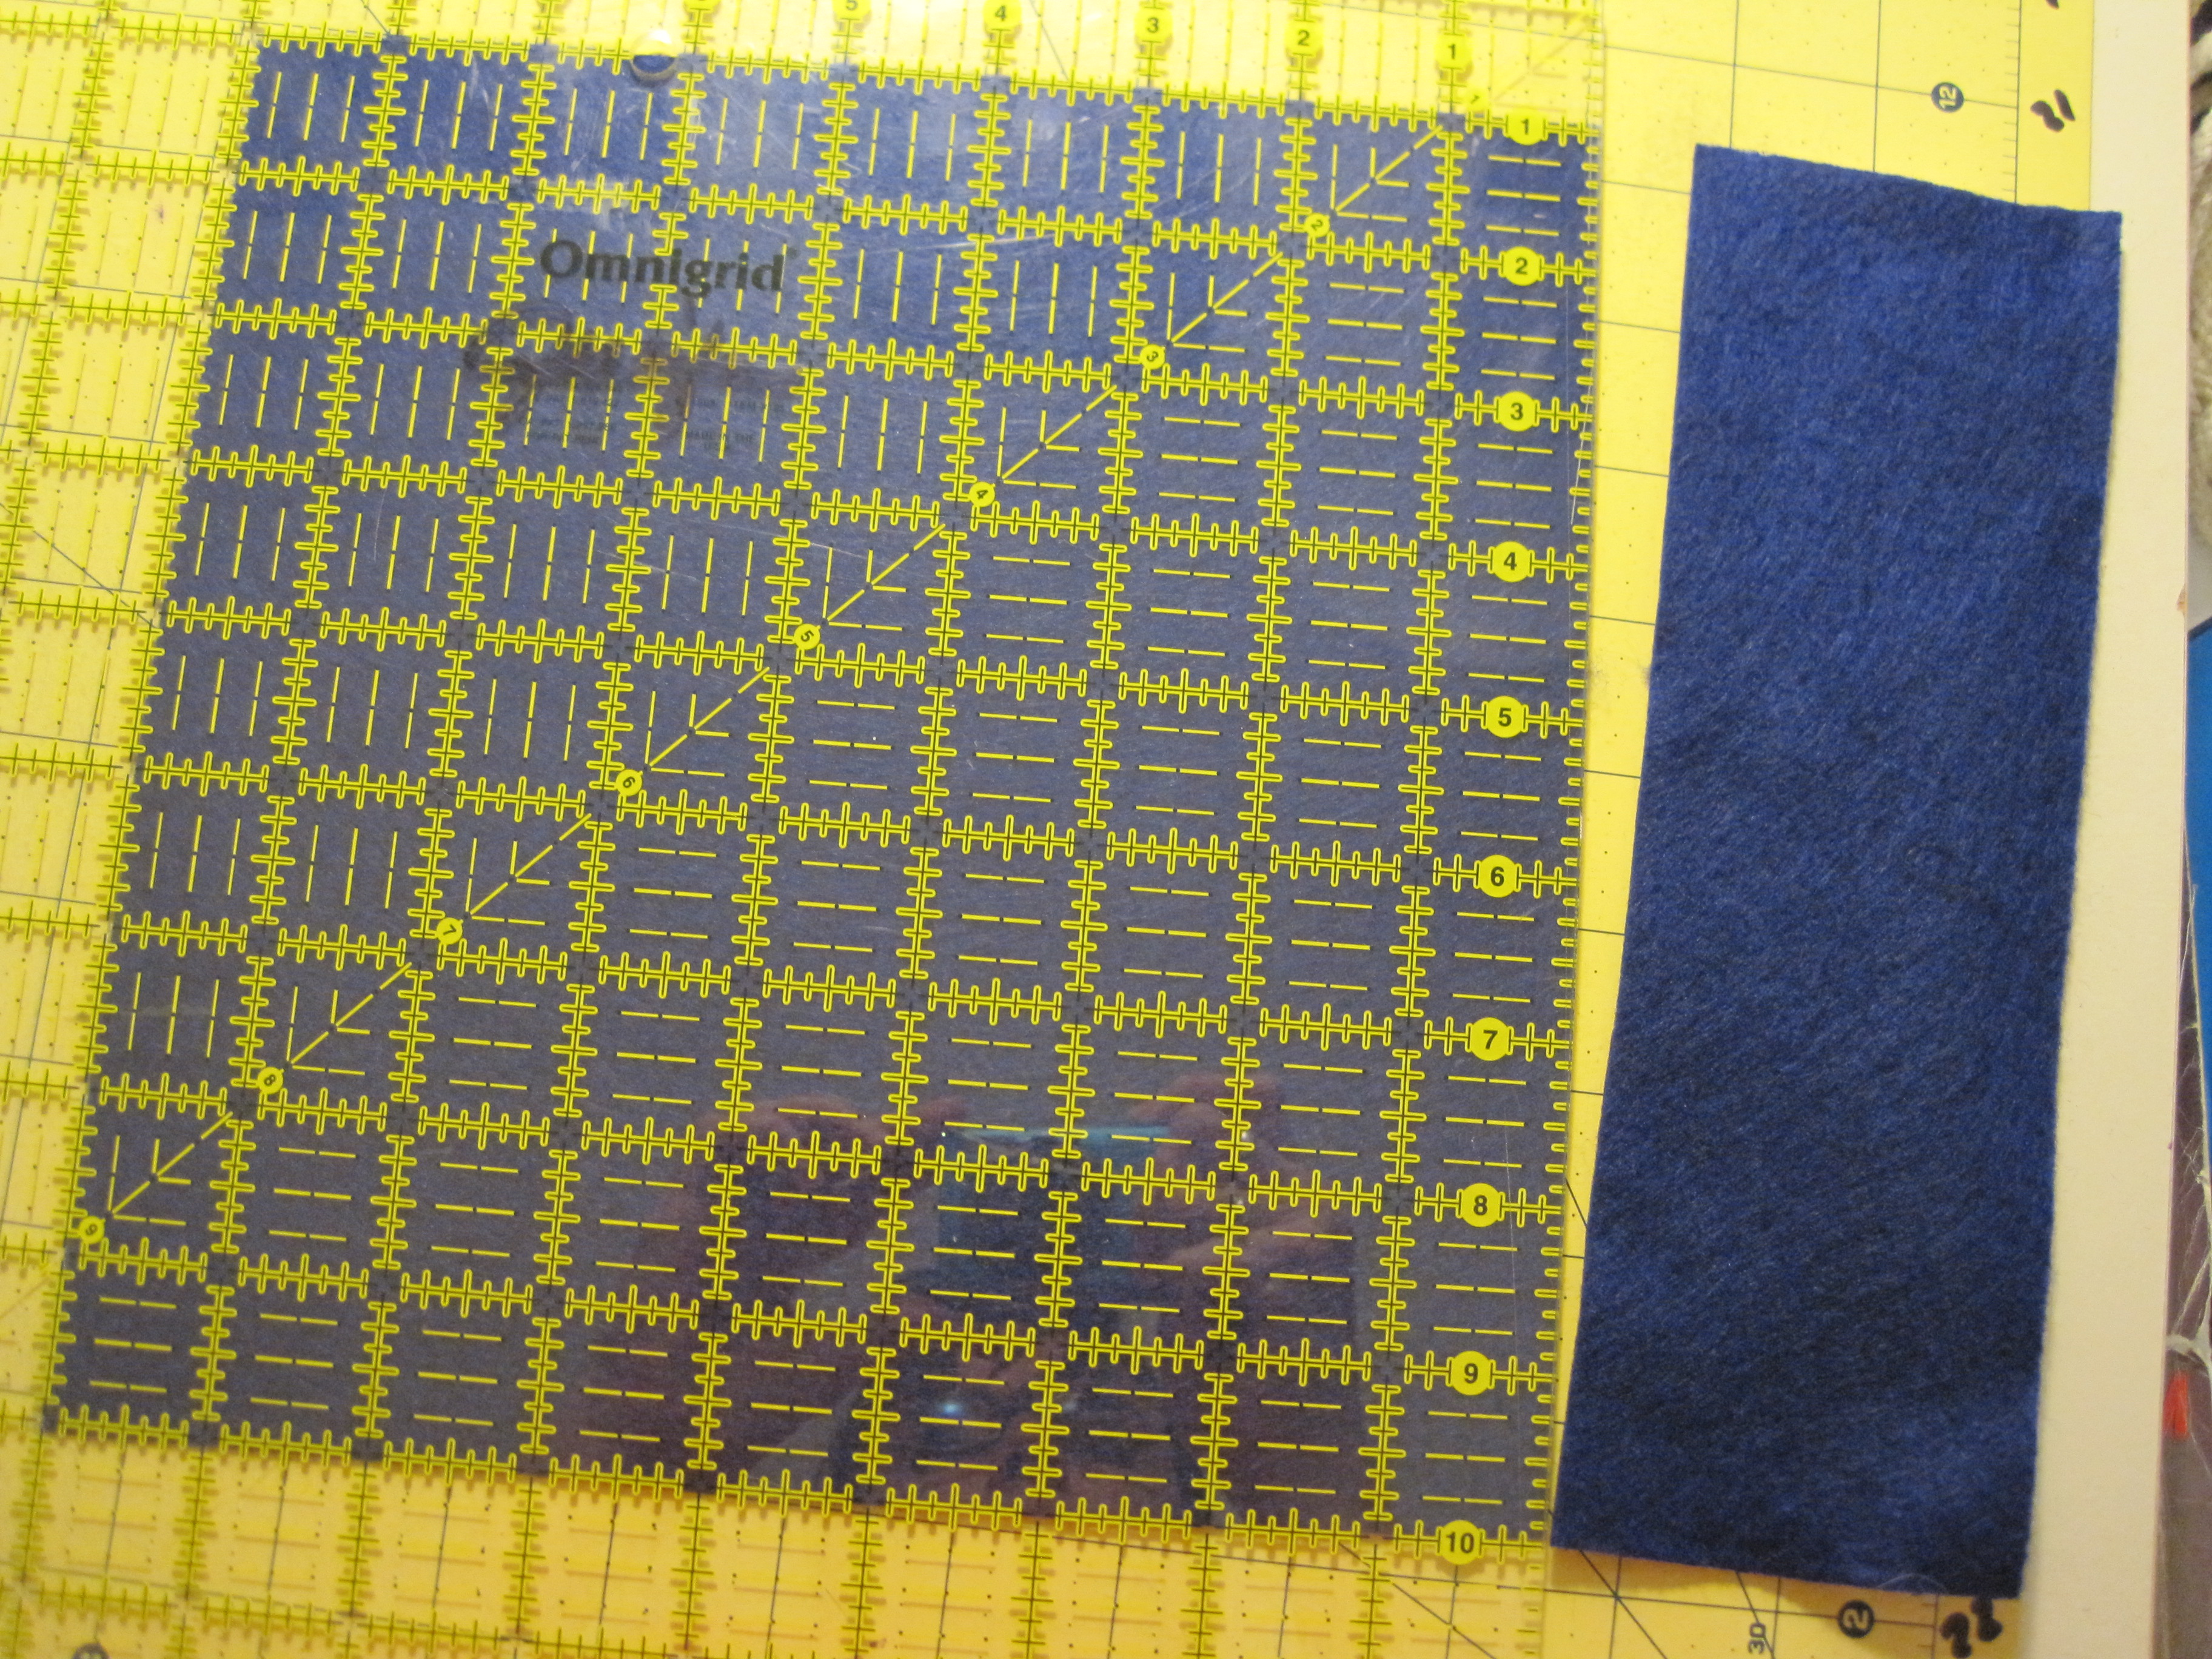
from 1 sheet of blue felt (the other 4 sheets of felt stay 9″ x 12″), cut:
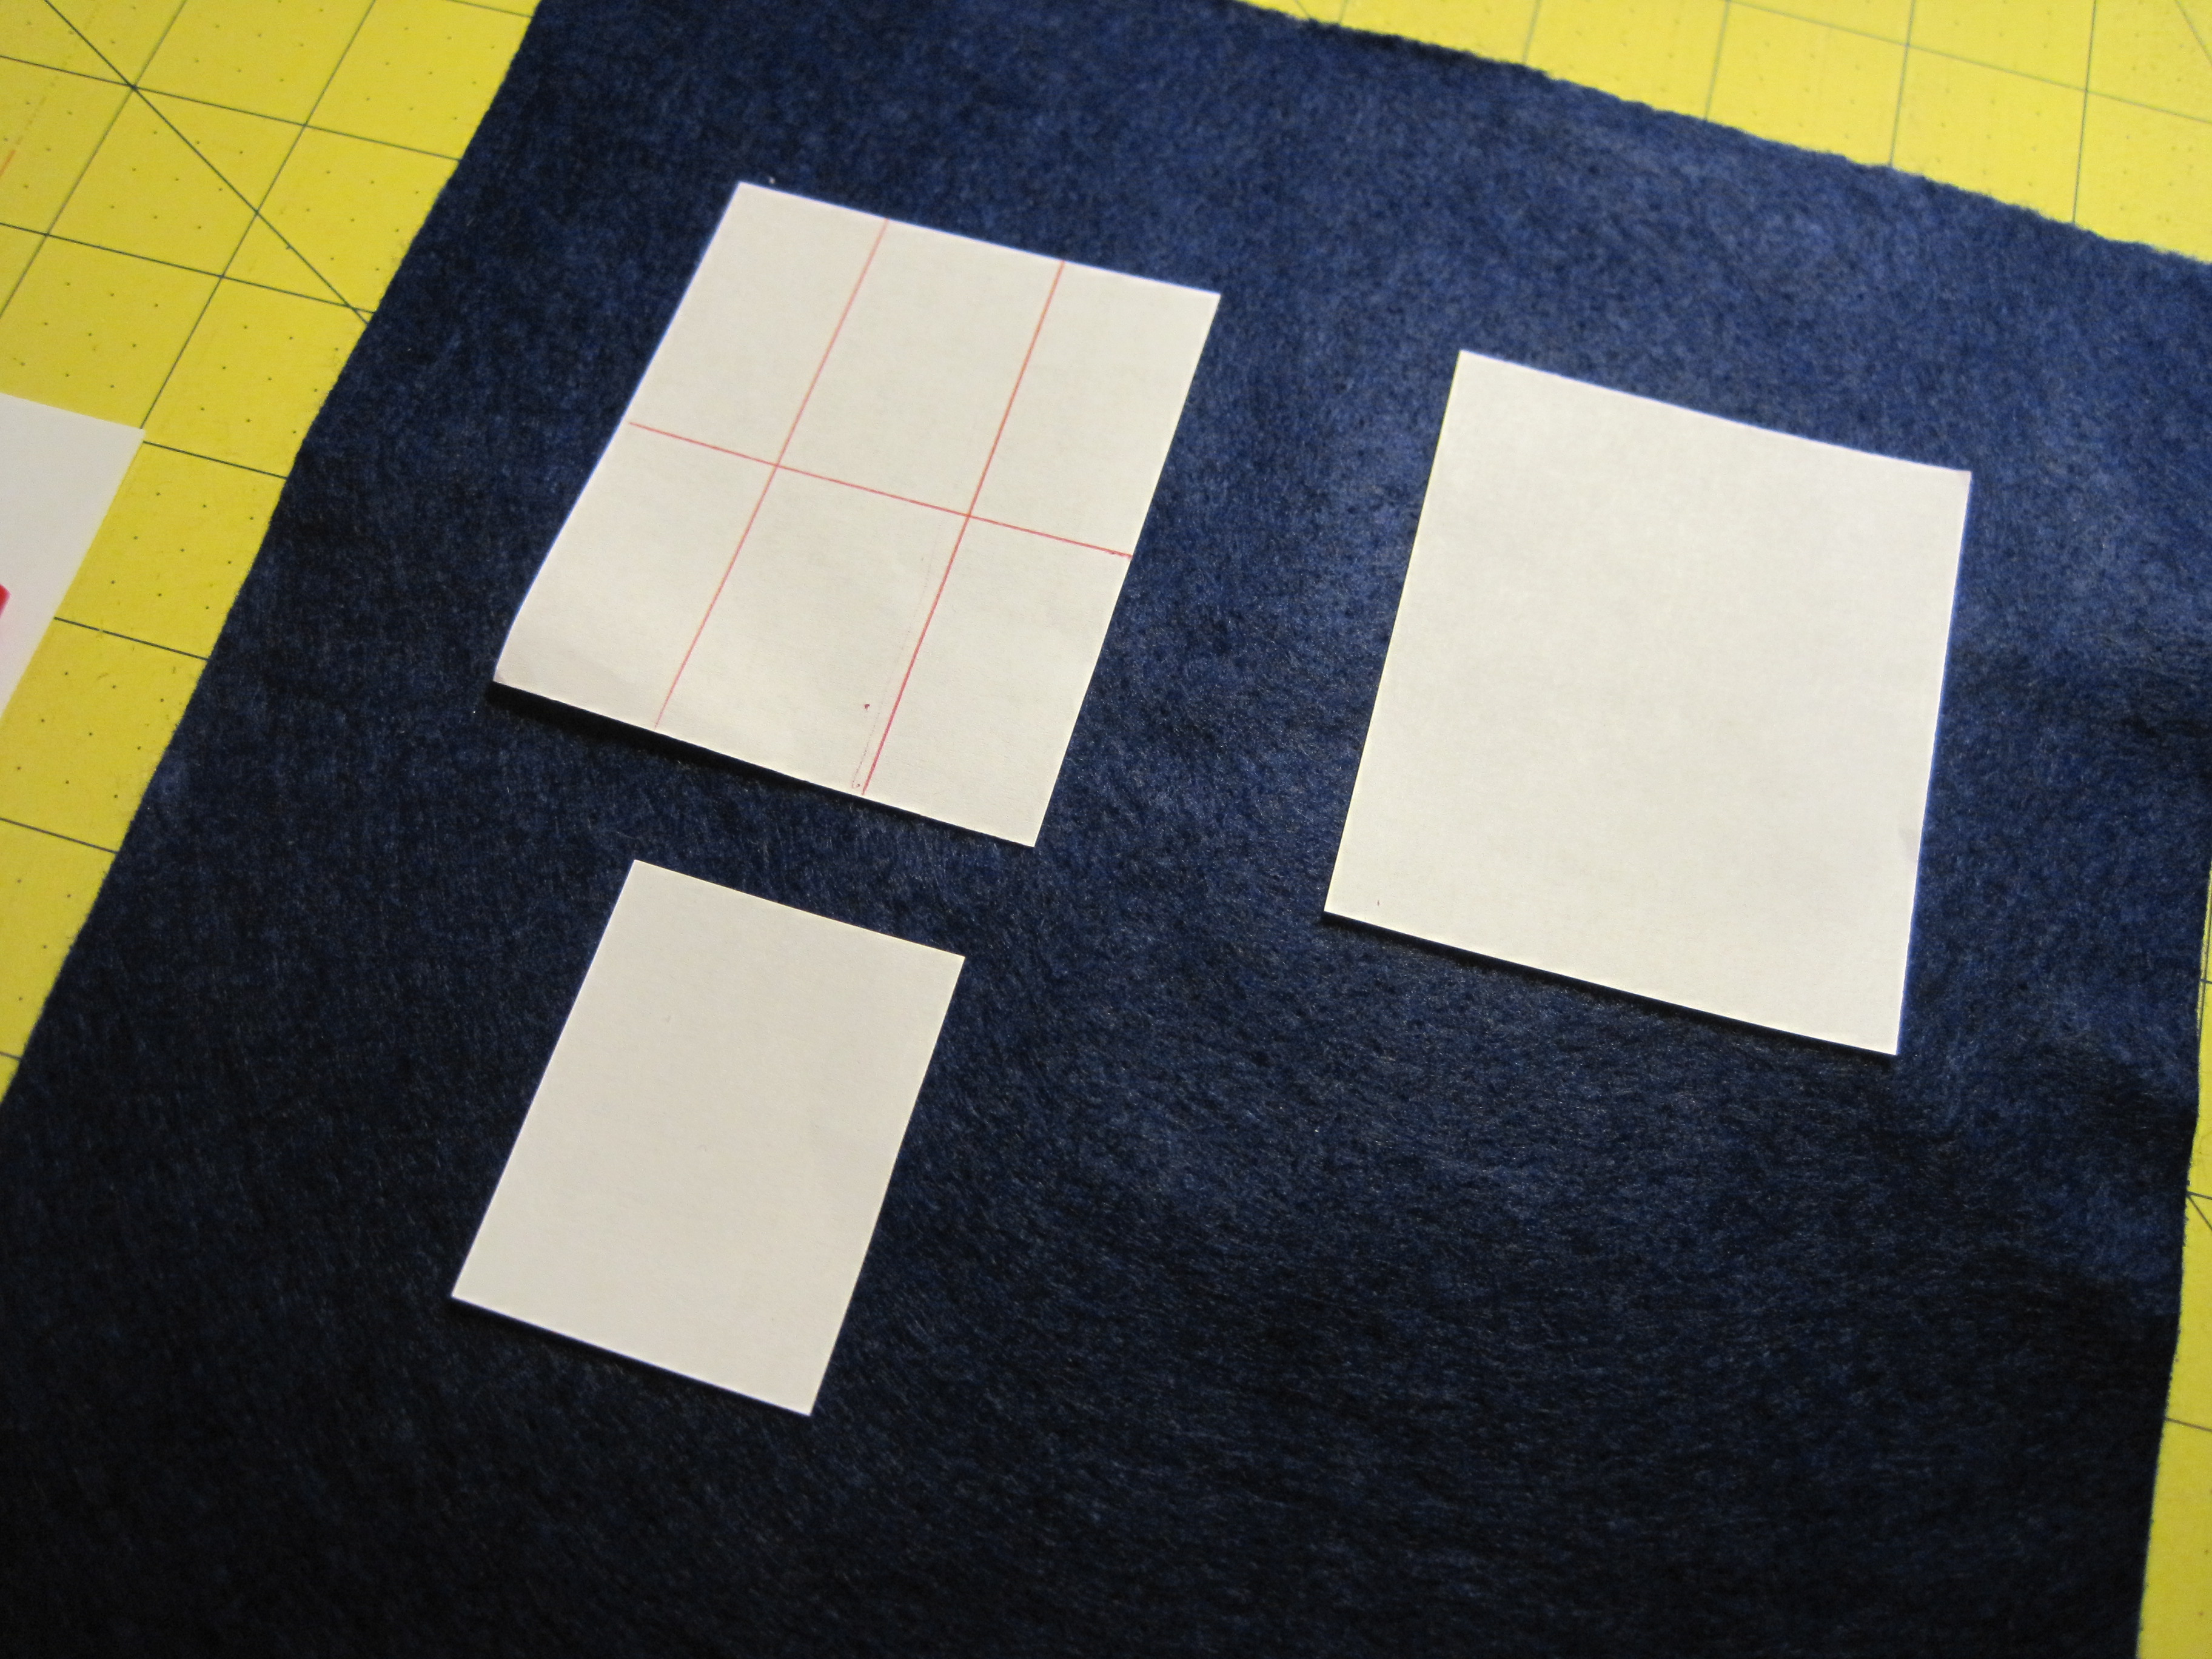
from 1 sheet of white felt, cut:
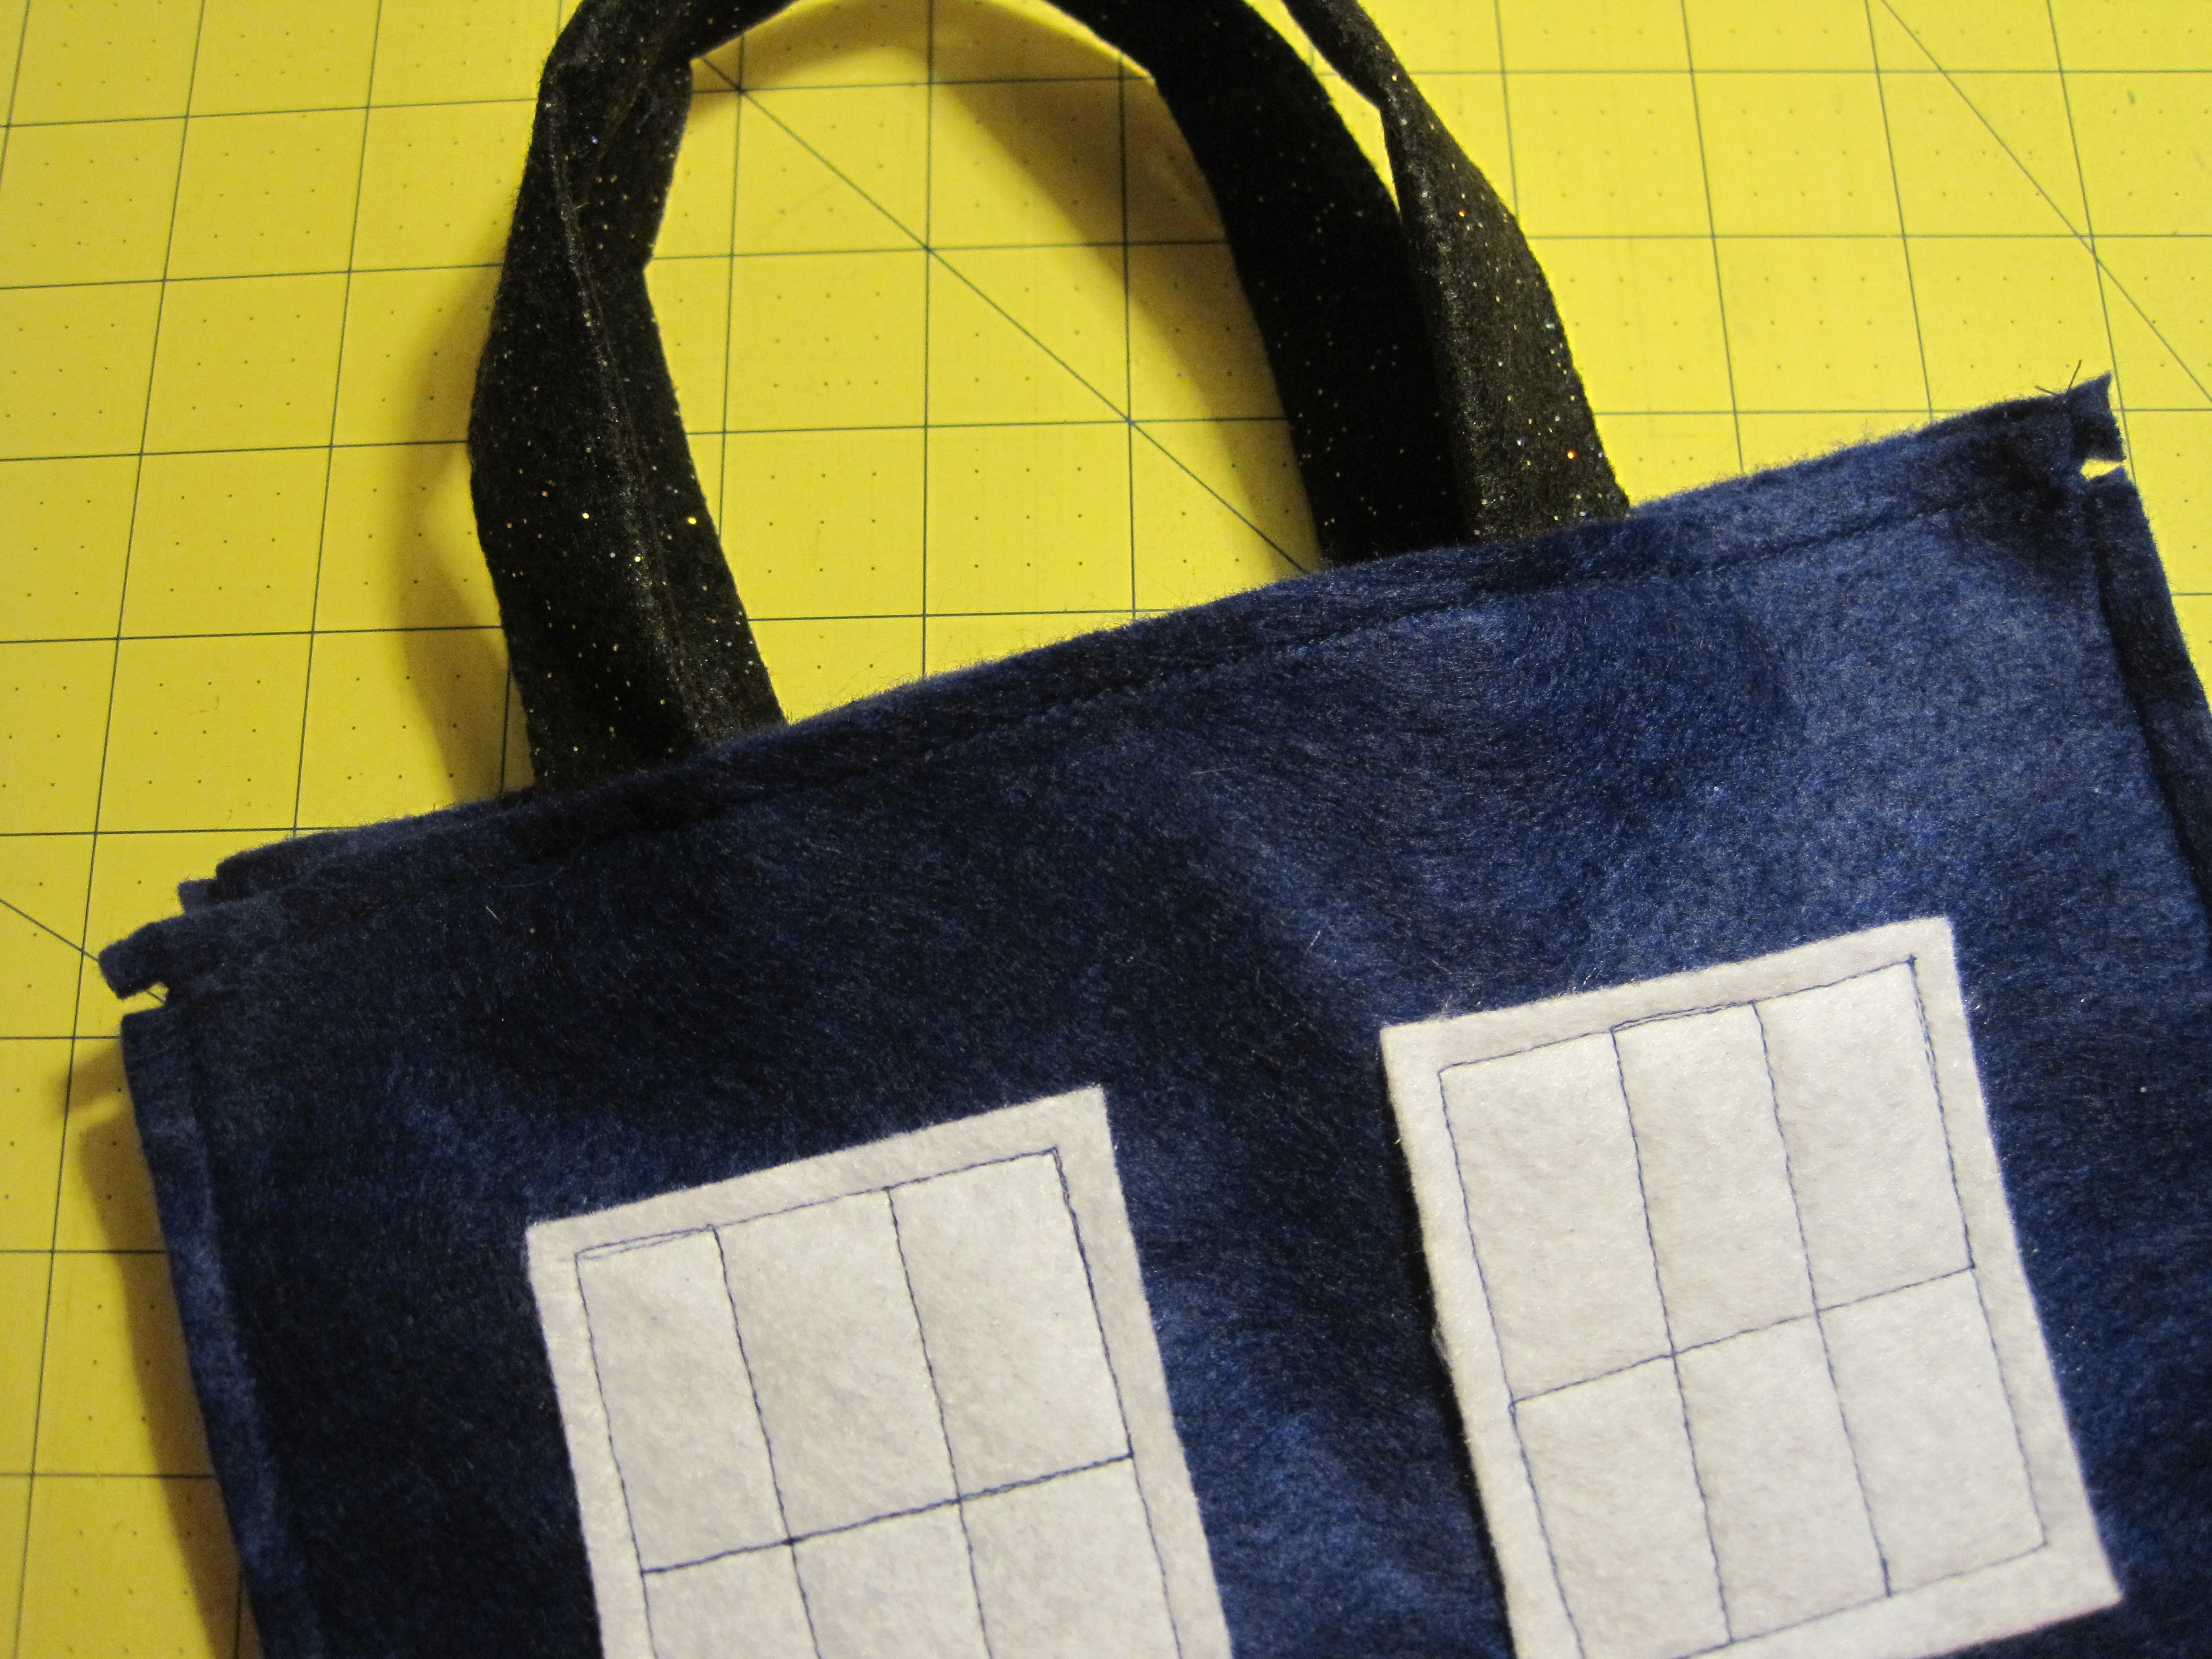
Using your ruler, arrange the window pieces on the 9″ x 12″ sheets of felt so that they are 1 1/2″ in from the sides and 2″ down from the top. For the TARDIS front, center the notice under the left window, leaving about 1/2″ in between.
Arrange window pieces on remaining three 9″ x 12″ blue felt.

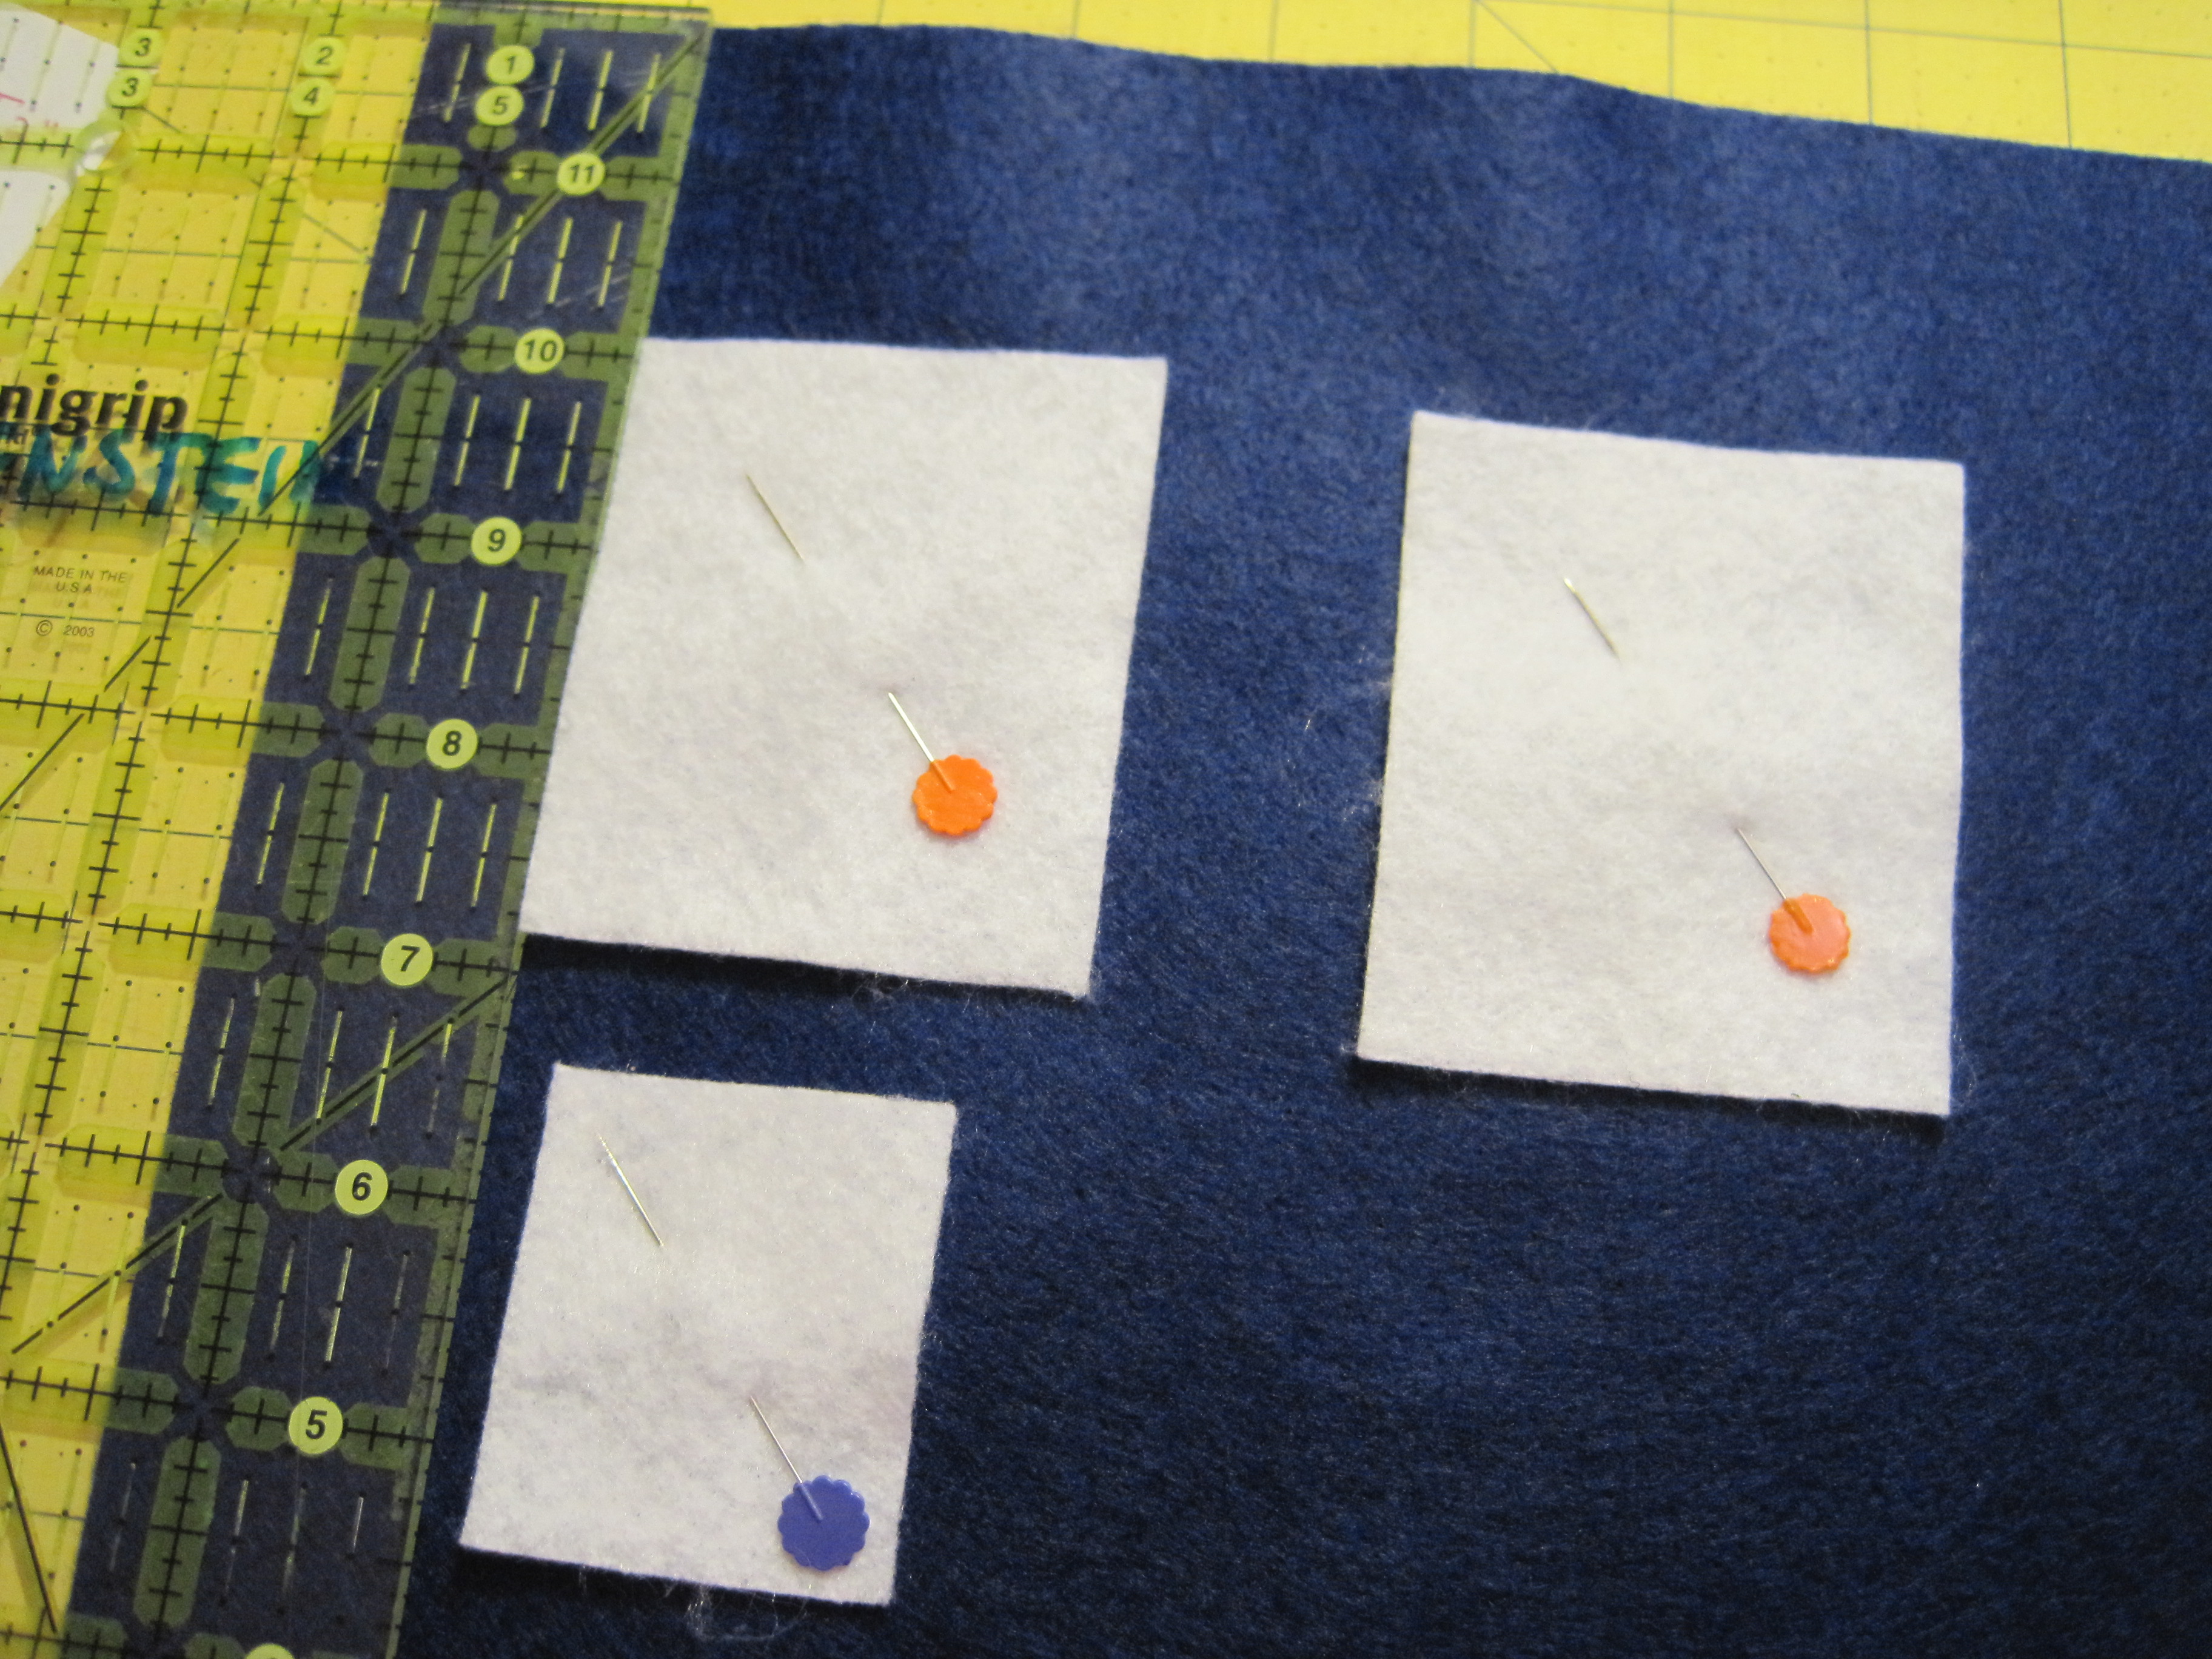
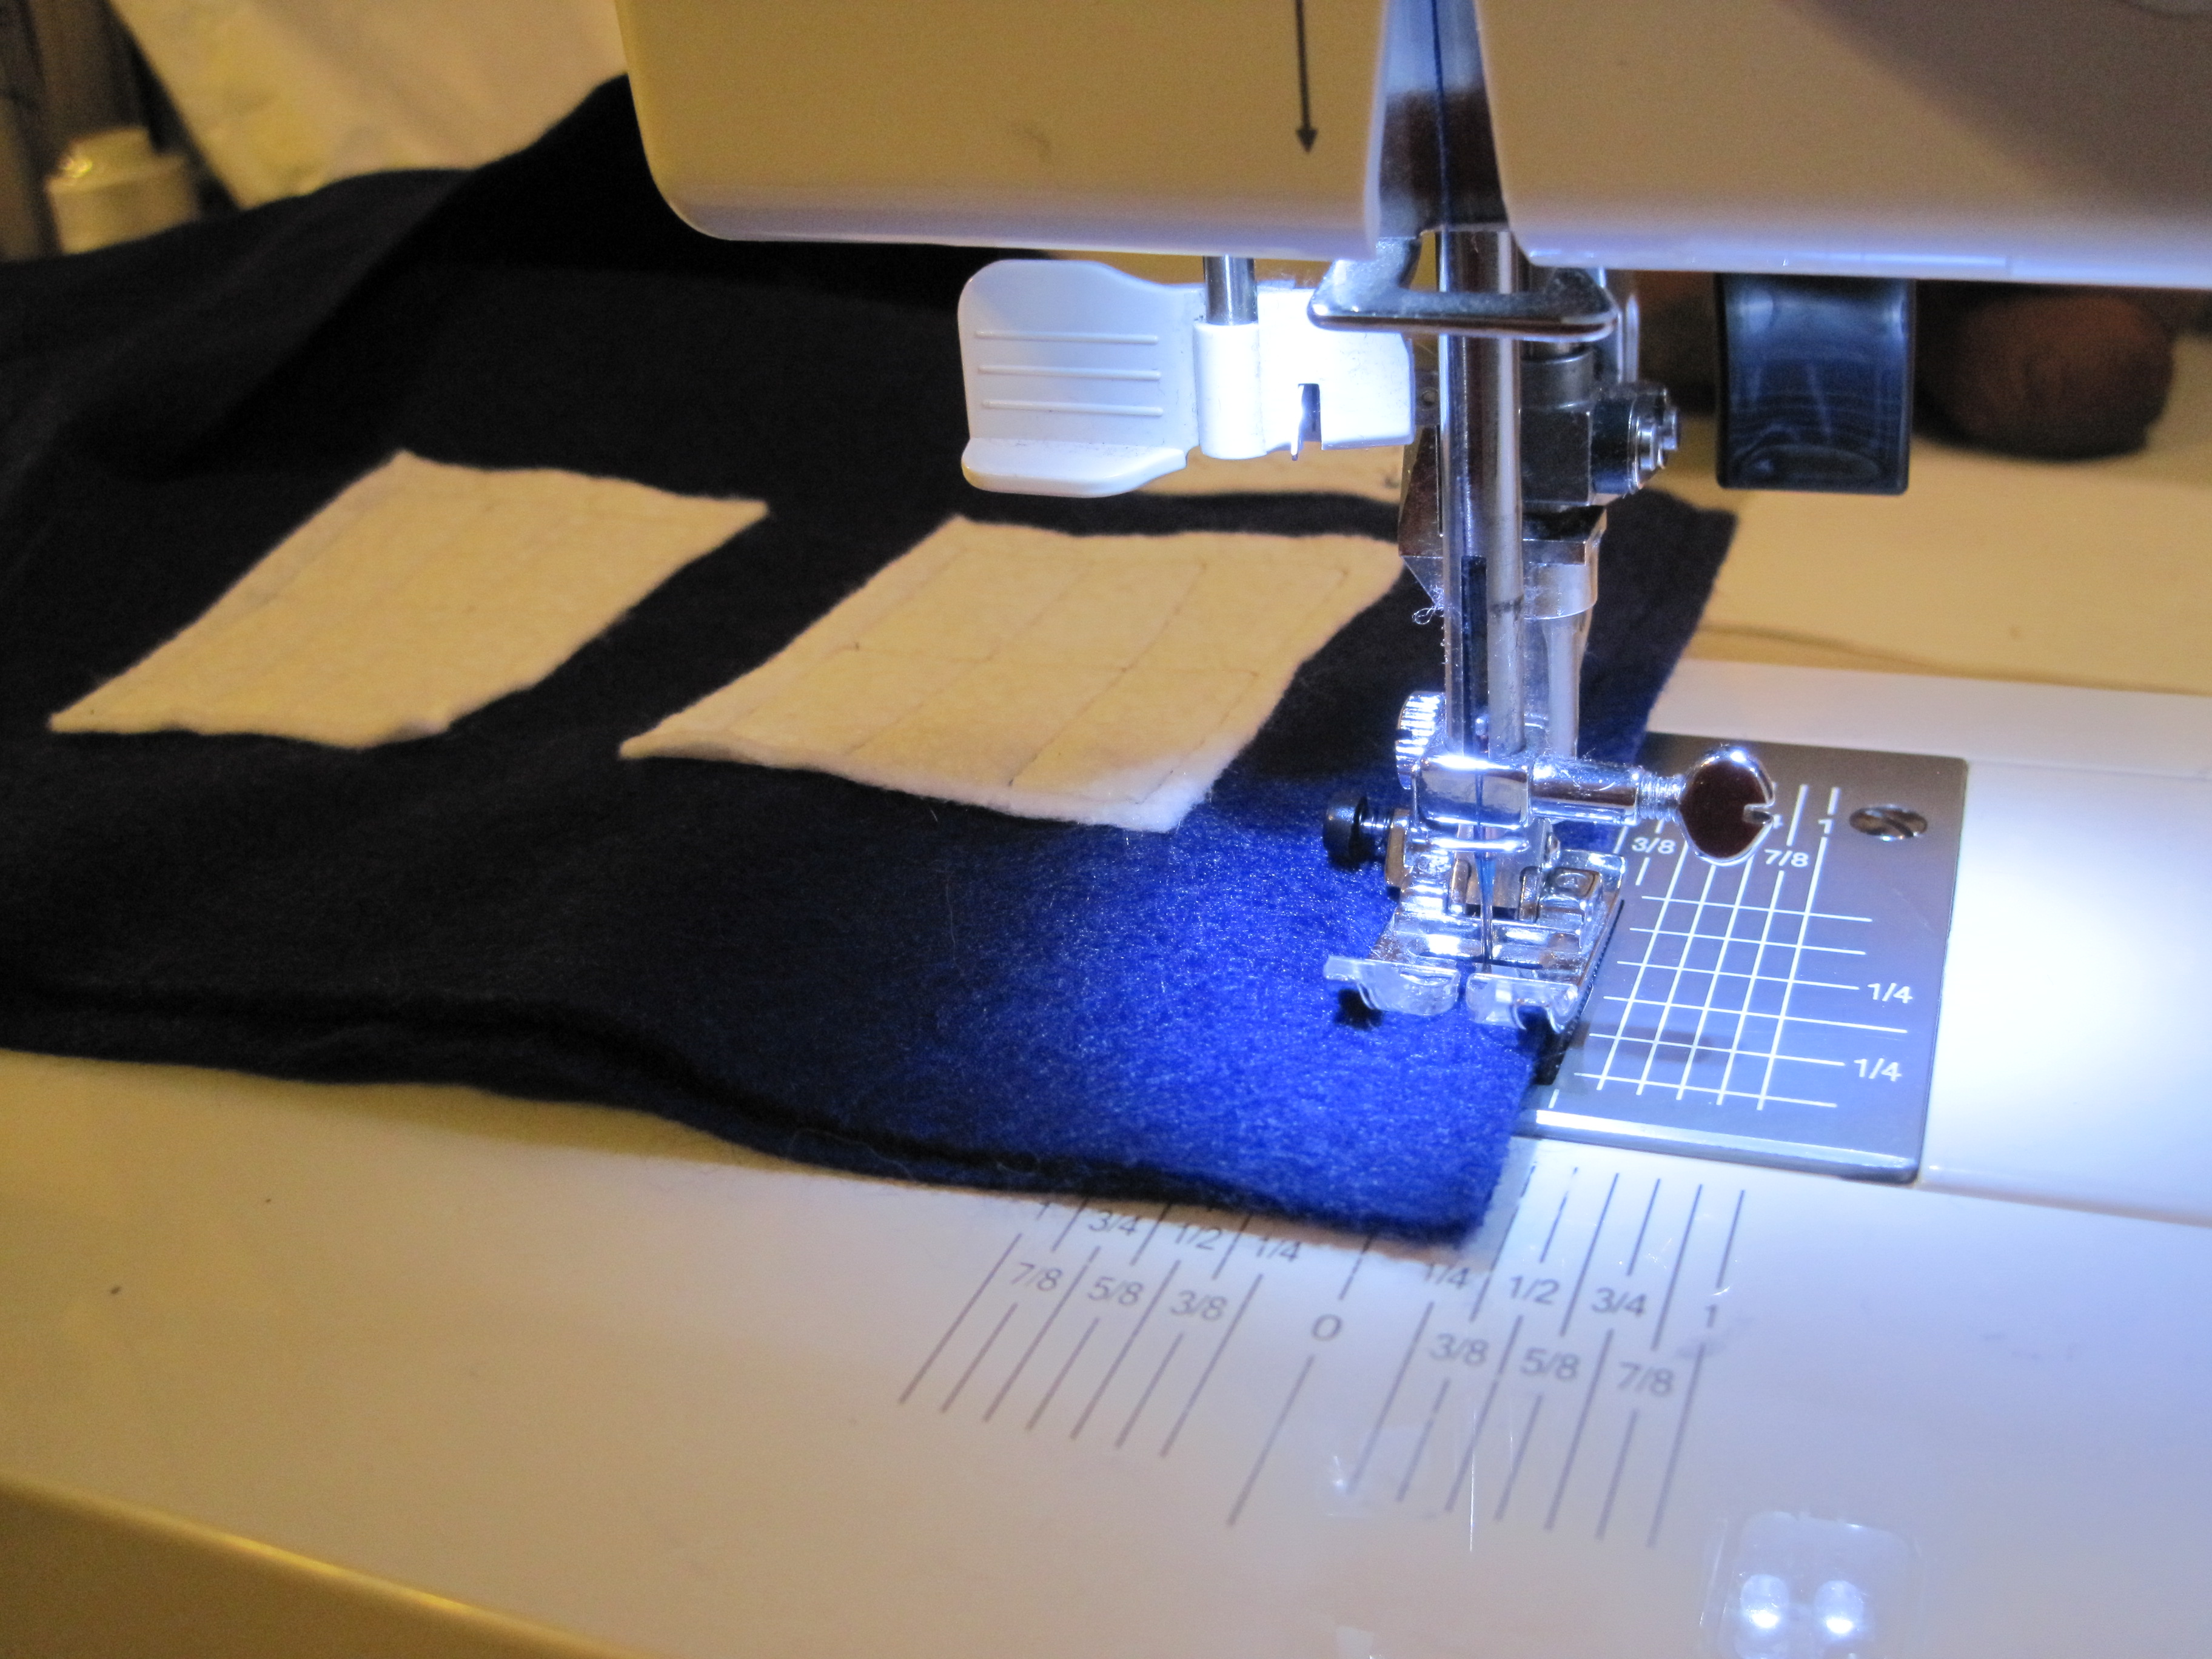
Stitch windows in place, 1/4″ in from outside of white felt. The TARDIS windows have six panes. My windows are estimated, but you can measure and divide your stitching if you choose. Repeat for the two sides that are NOT the front of the TARDIS.

For the Notice on the front, sew some random stitching onto the 1 1/2″ x 2″ piece of felt (as shown). This gives the illusion of writing from a distance. Stitch on each of the four sides with a short zig-zag stitch in each corner (forgot to take a close up…look about three photos down and you can see what I mean!).
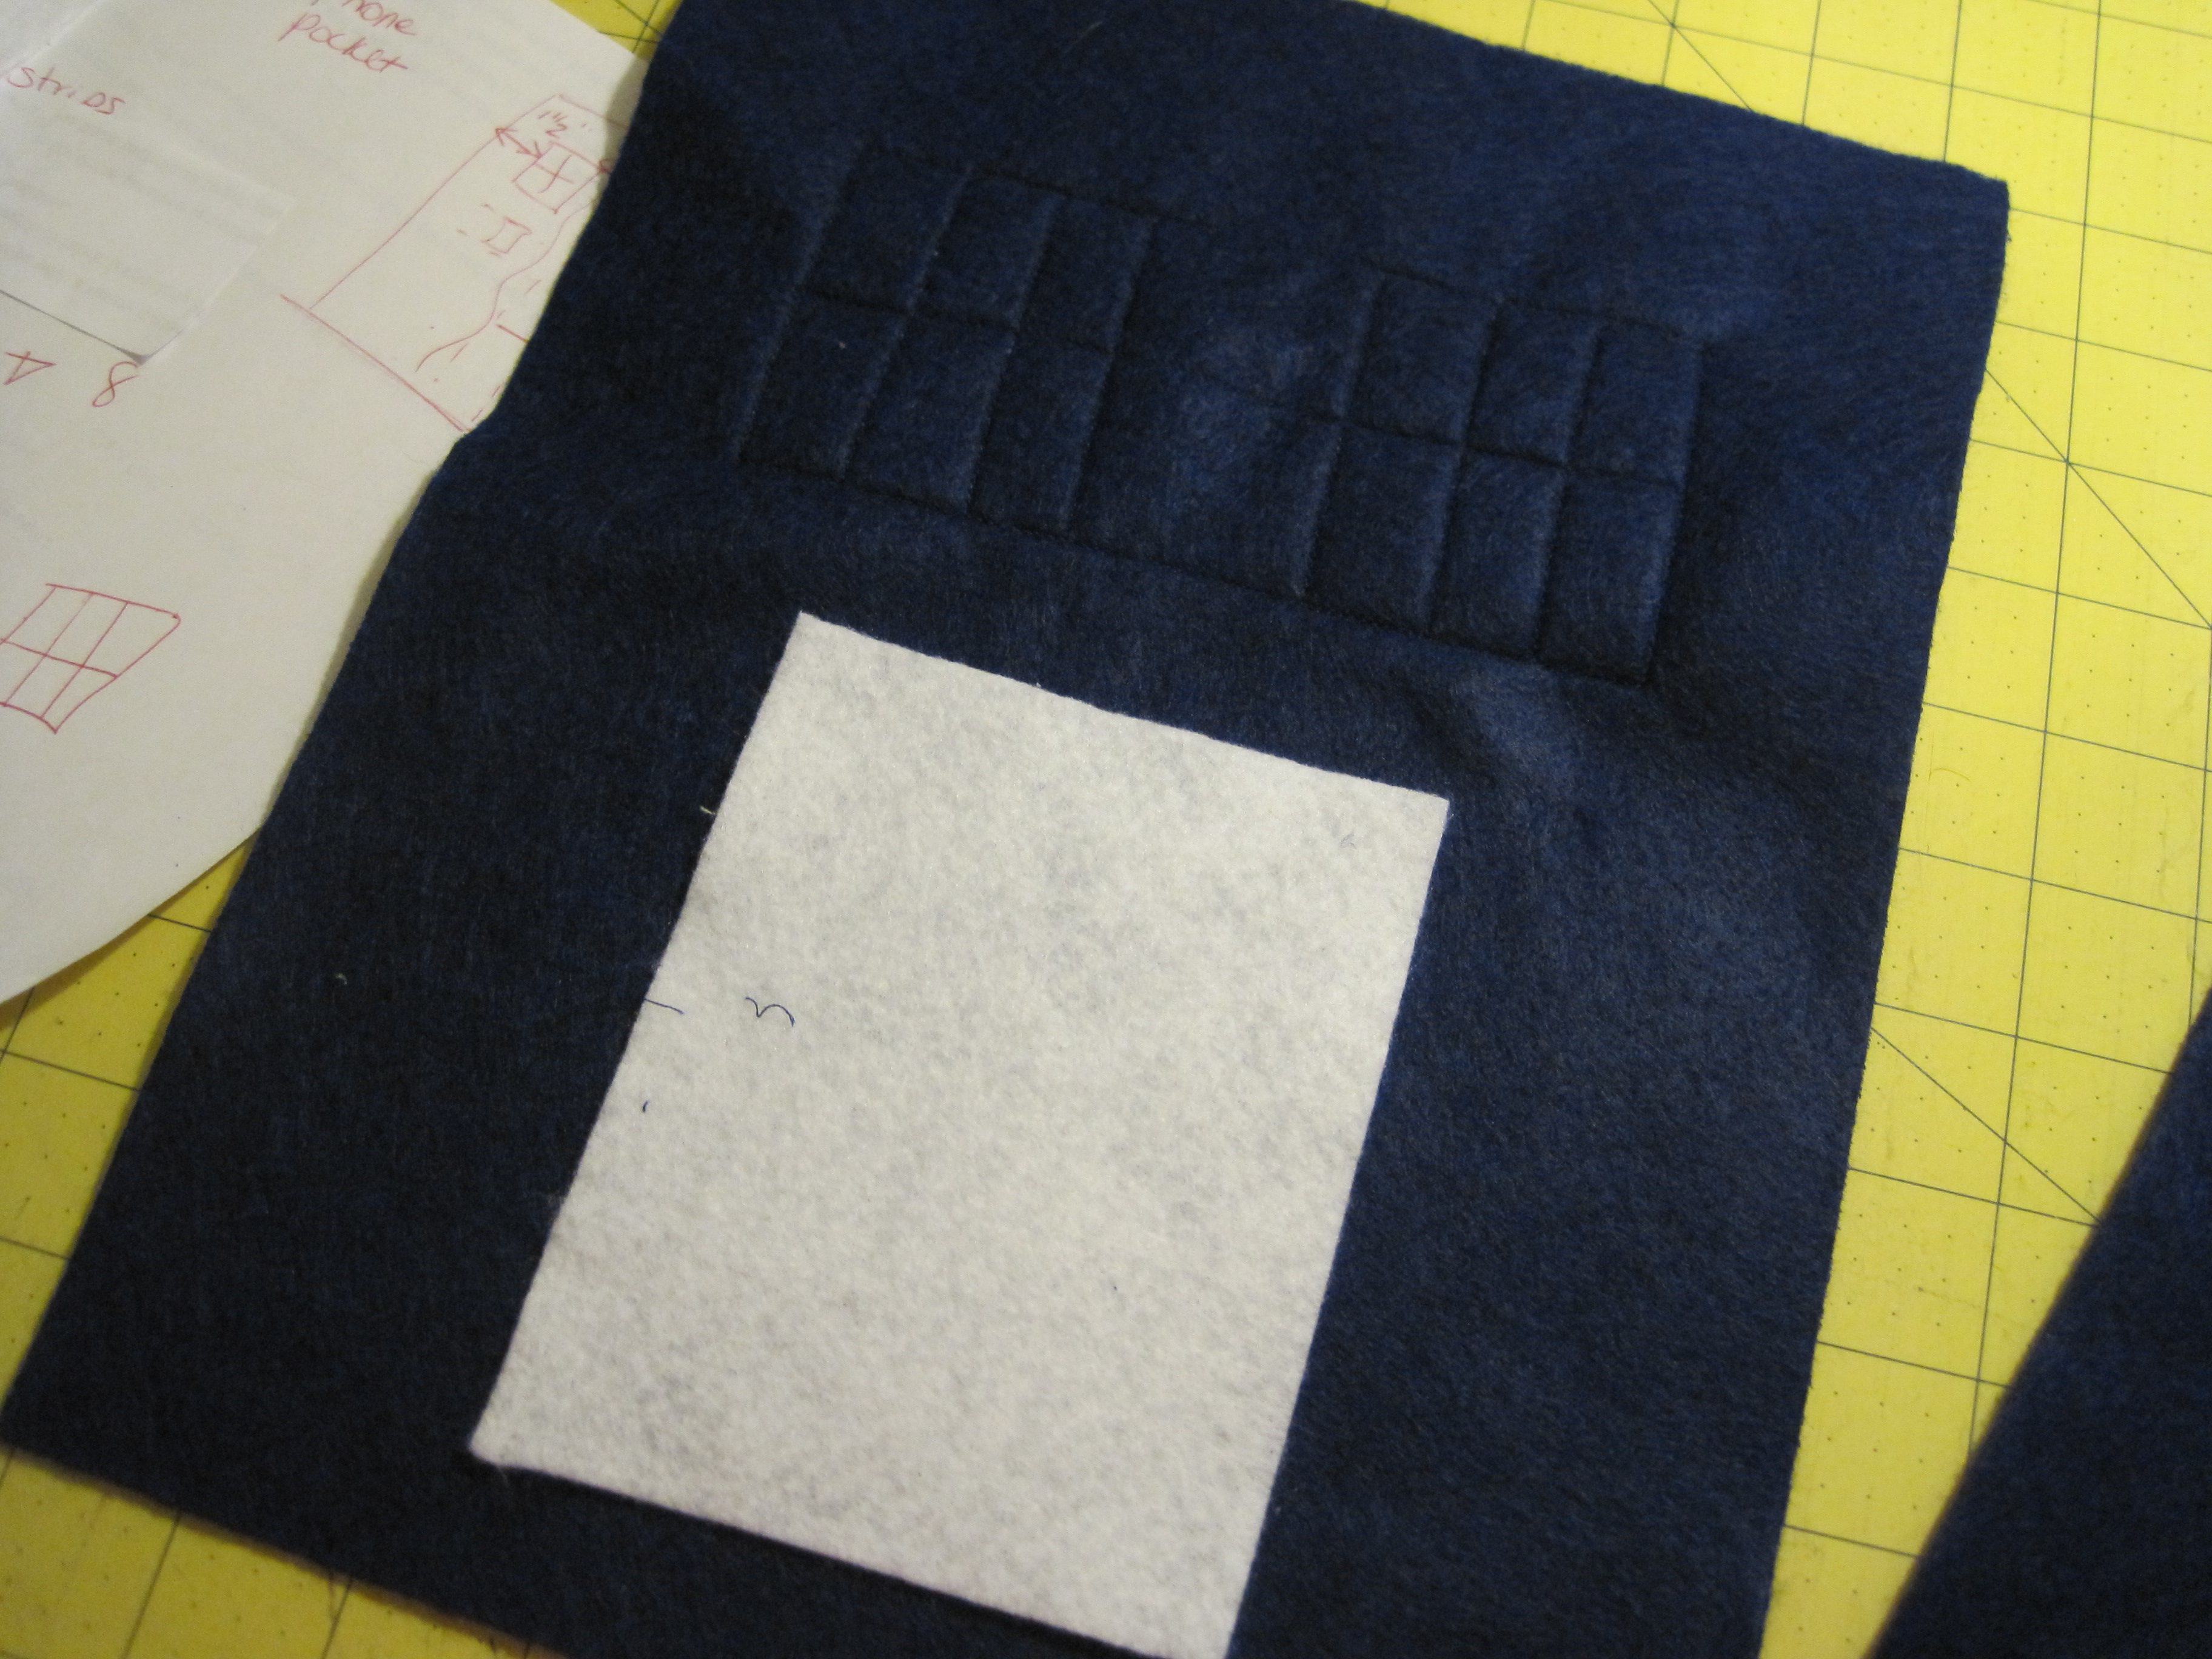
OPTIONAL – After stitching all the windows on, choose a blue side that is NOT the TARDIS front. Align the 4″ x 5″ piece of felt under the window stitching. Straight stitch on the two long sides and across the bottom, making sure to backstitch at the start and stop. This is your cell phone pocket.

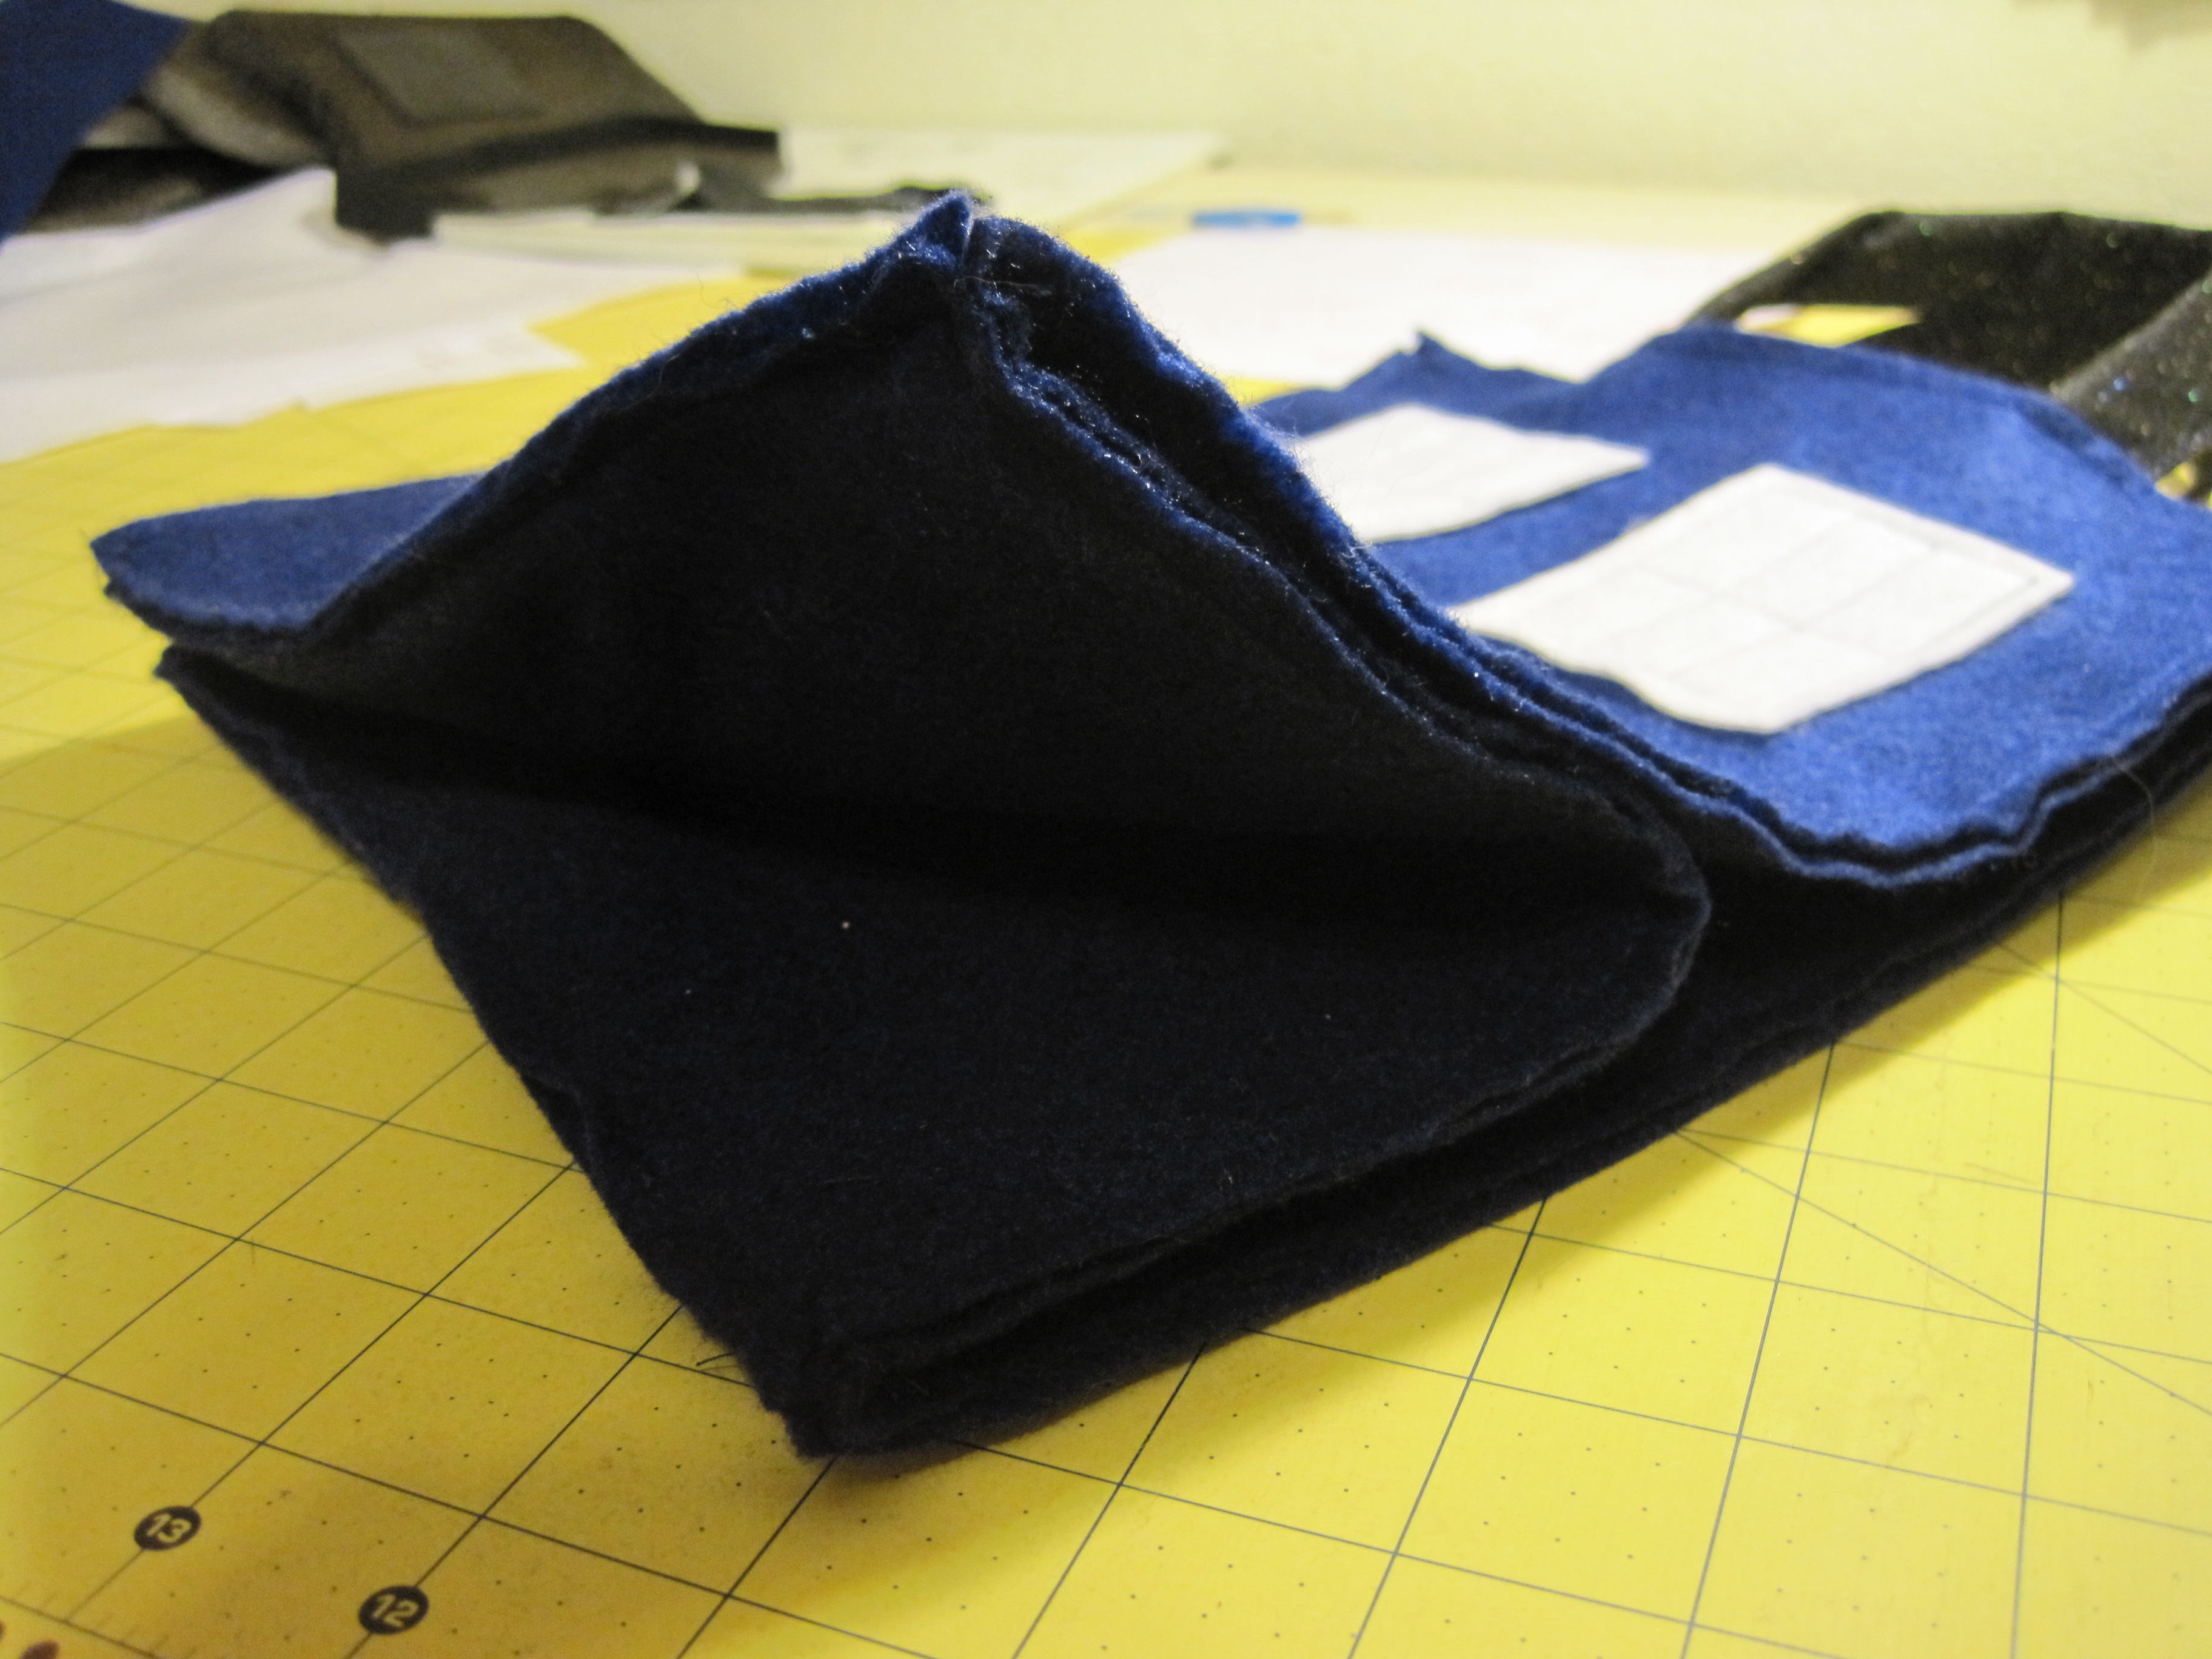
For handles – Fold in half lengthwise and zig-zag down the open side.

Your TARDIS is now ready for assembly!

Find the front (windows with notice) and back (cell phone pocket – or without if you didn’t make one) and bag bottom. With the insides facing/right side out, place the bottom of the front piece along one side of the 9″ x 9″ bottom piece. Stitch across, leaving 1/4″ at the beginning and end of the seam unstitched (see below).
Seam allowance will be on the outside of the bag.

1/4″ unstitched on the end of the seam (both ends).
Repeat stitching for the back side, making sure the bottom of that side meets the bottom of the bag.
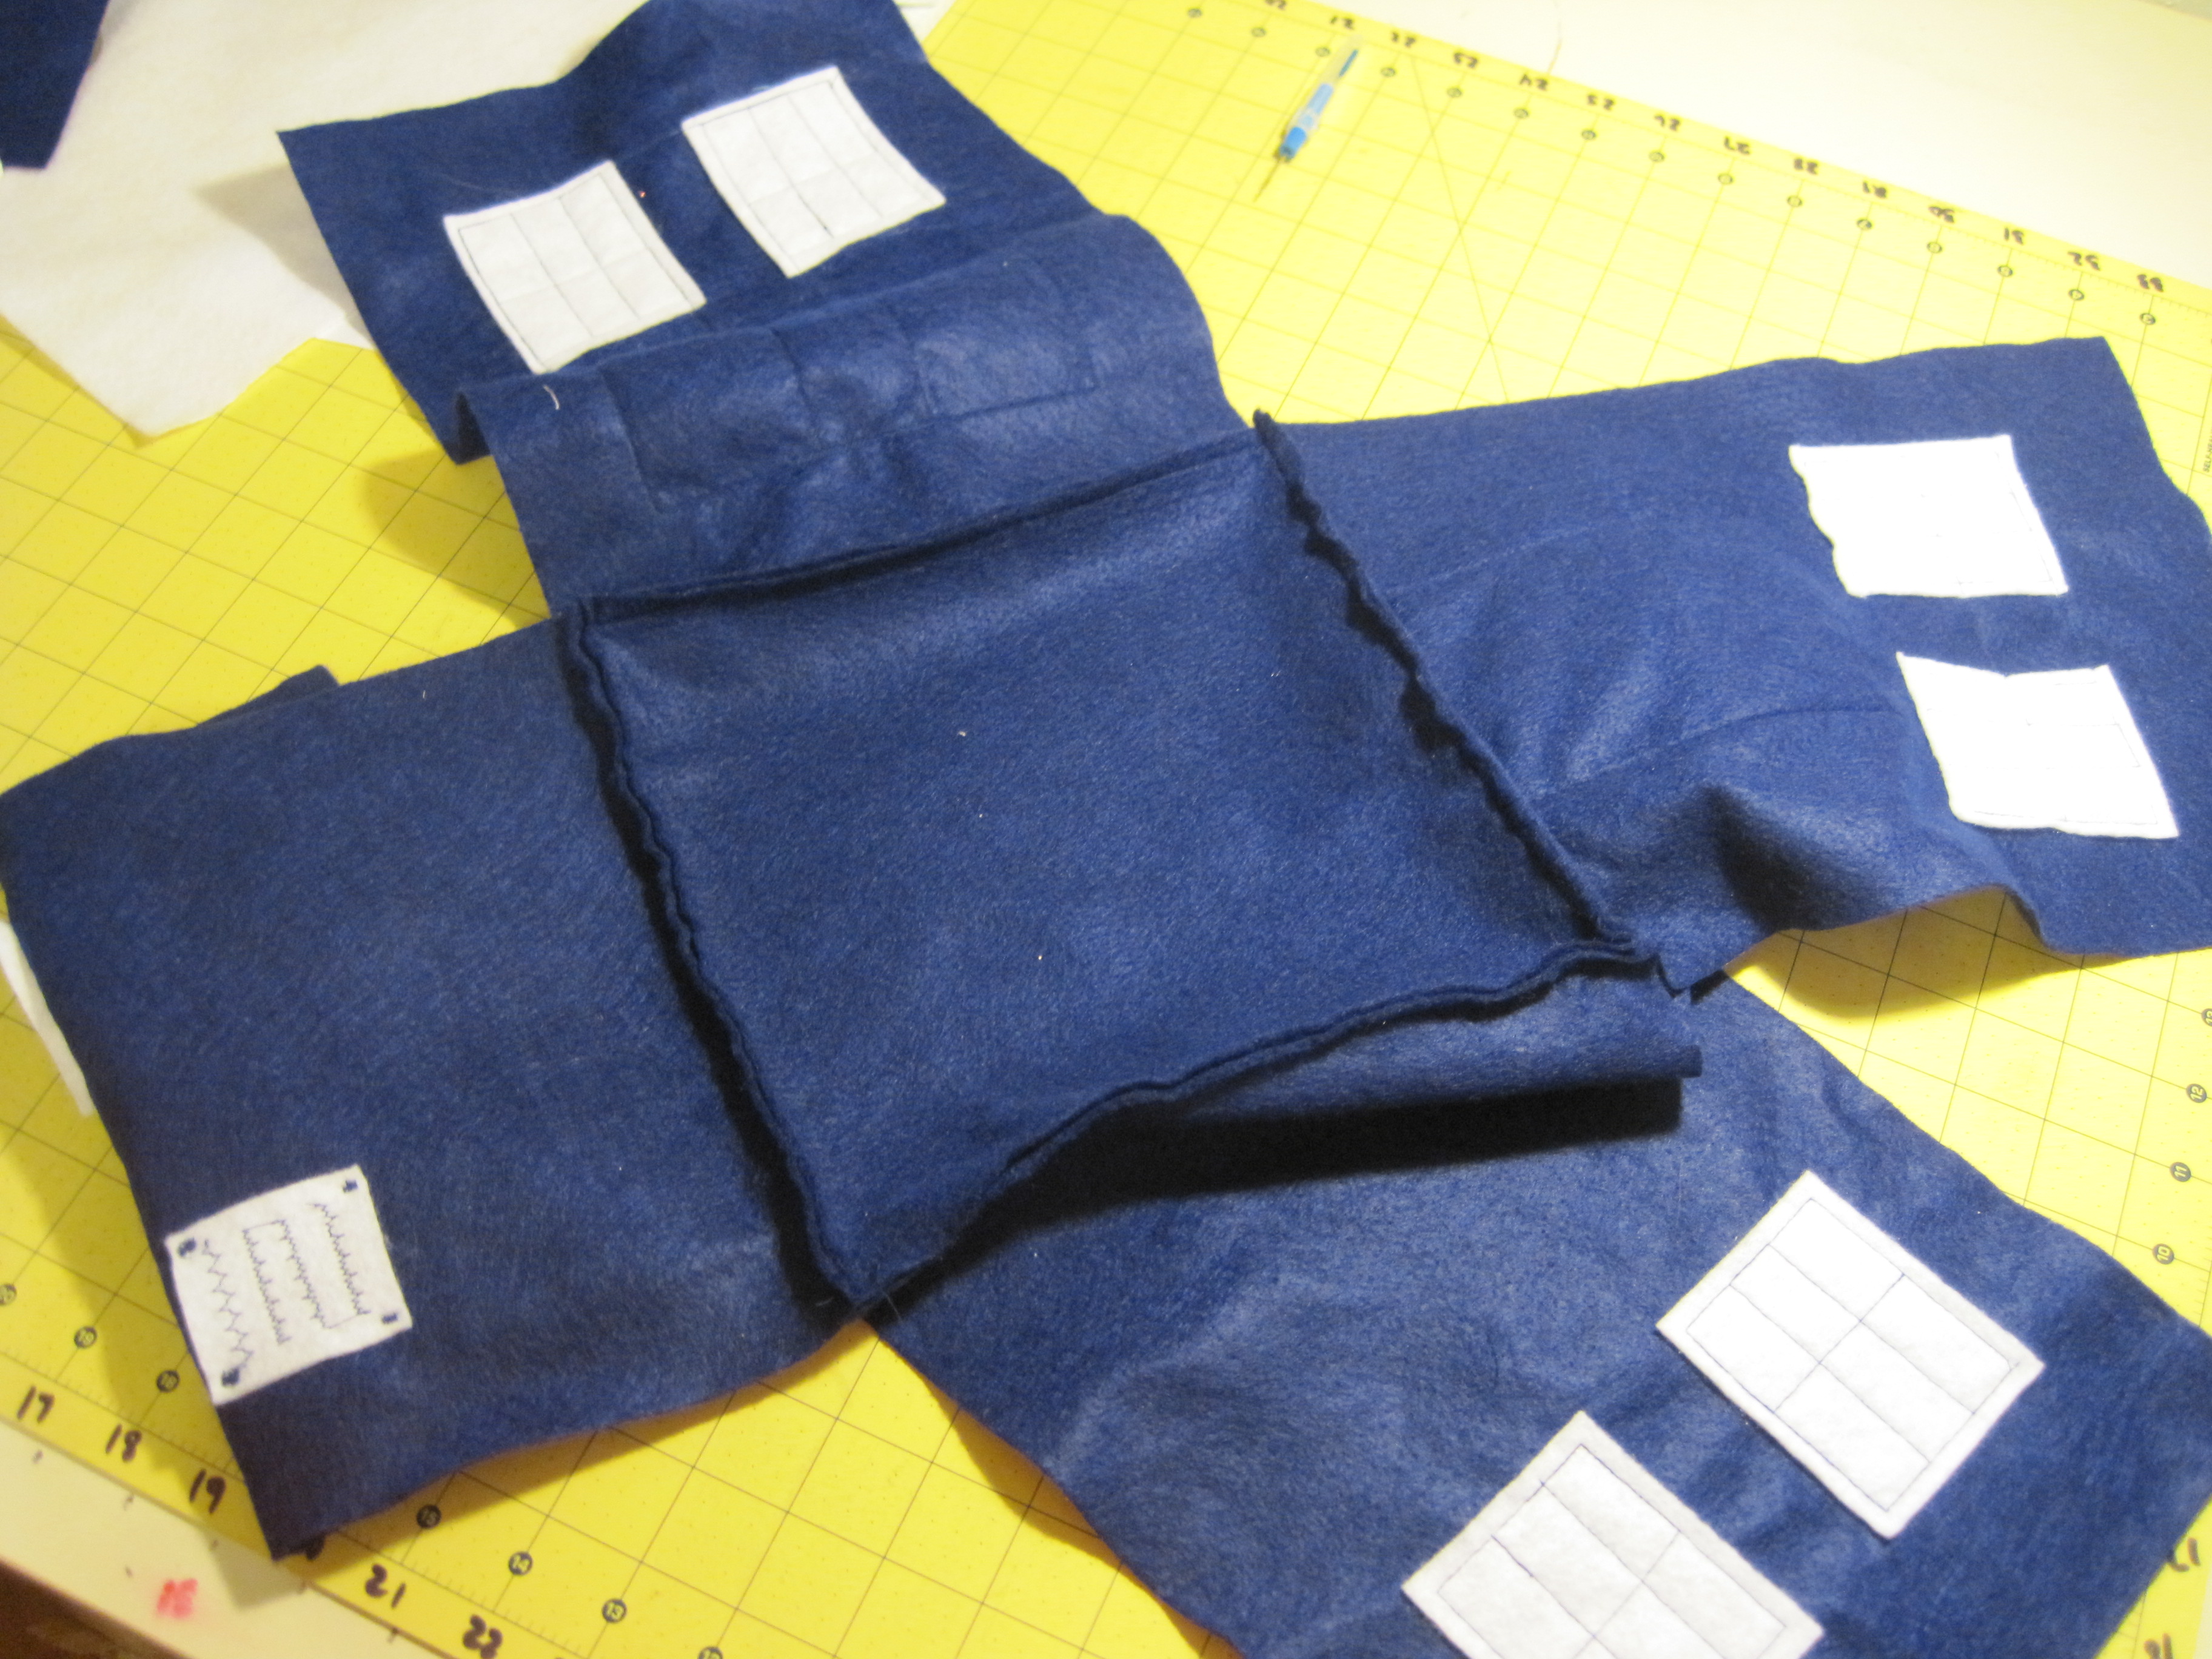
Sew the remaining two pieces on opposite sides, continuing to leave 1/4″ open at each end of the seam.

Find the front and the piece immediately to the left. Bring the two long sides (wrong side) together, right side out.

Stitch from corner to corner.
Repeat for the remaining three corners.

You now have a TARDIS with no handles. That’s the last bit and then you’re done!

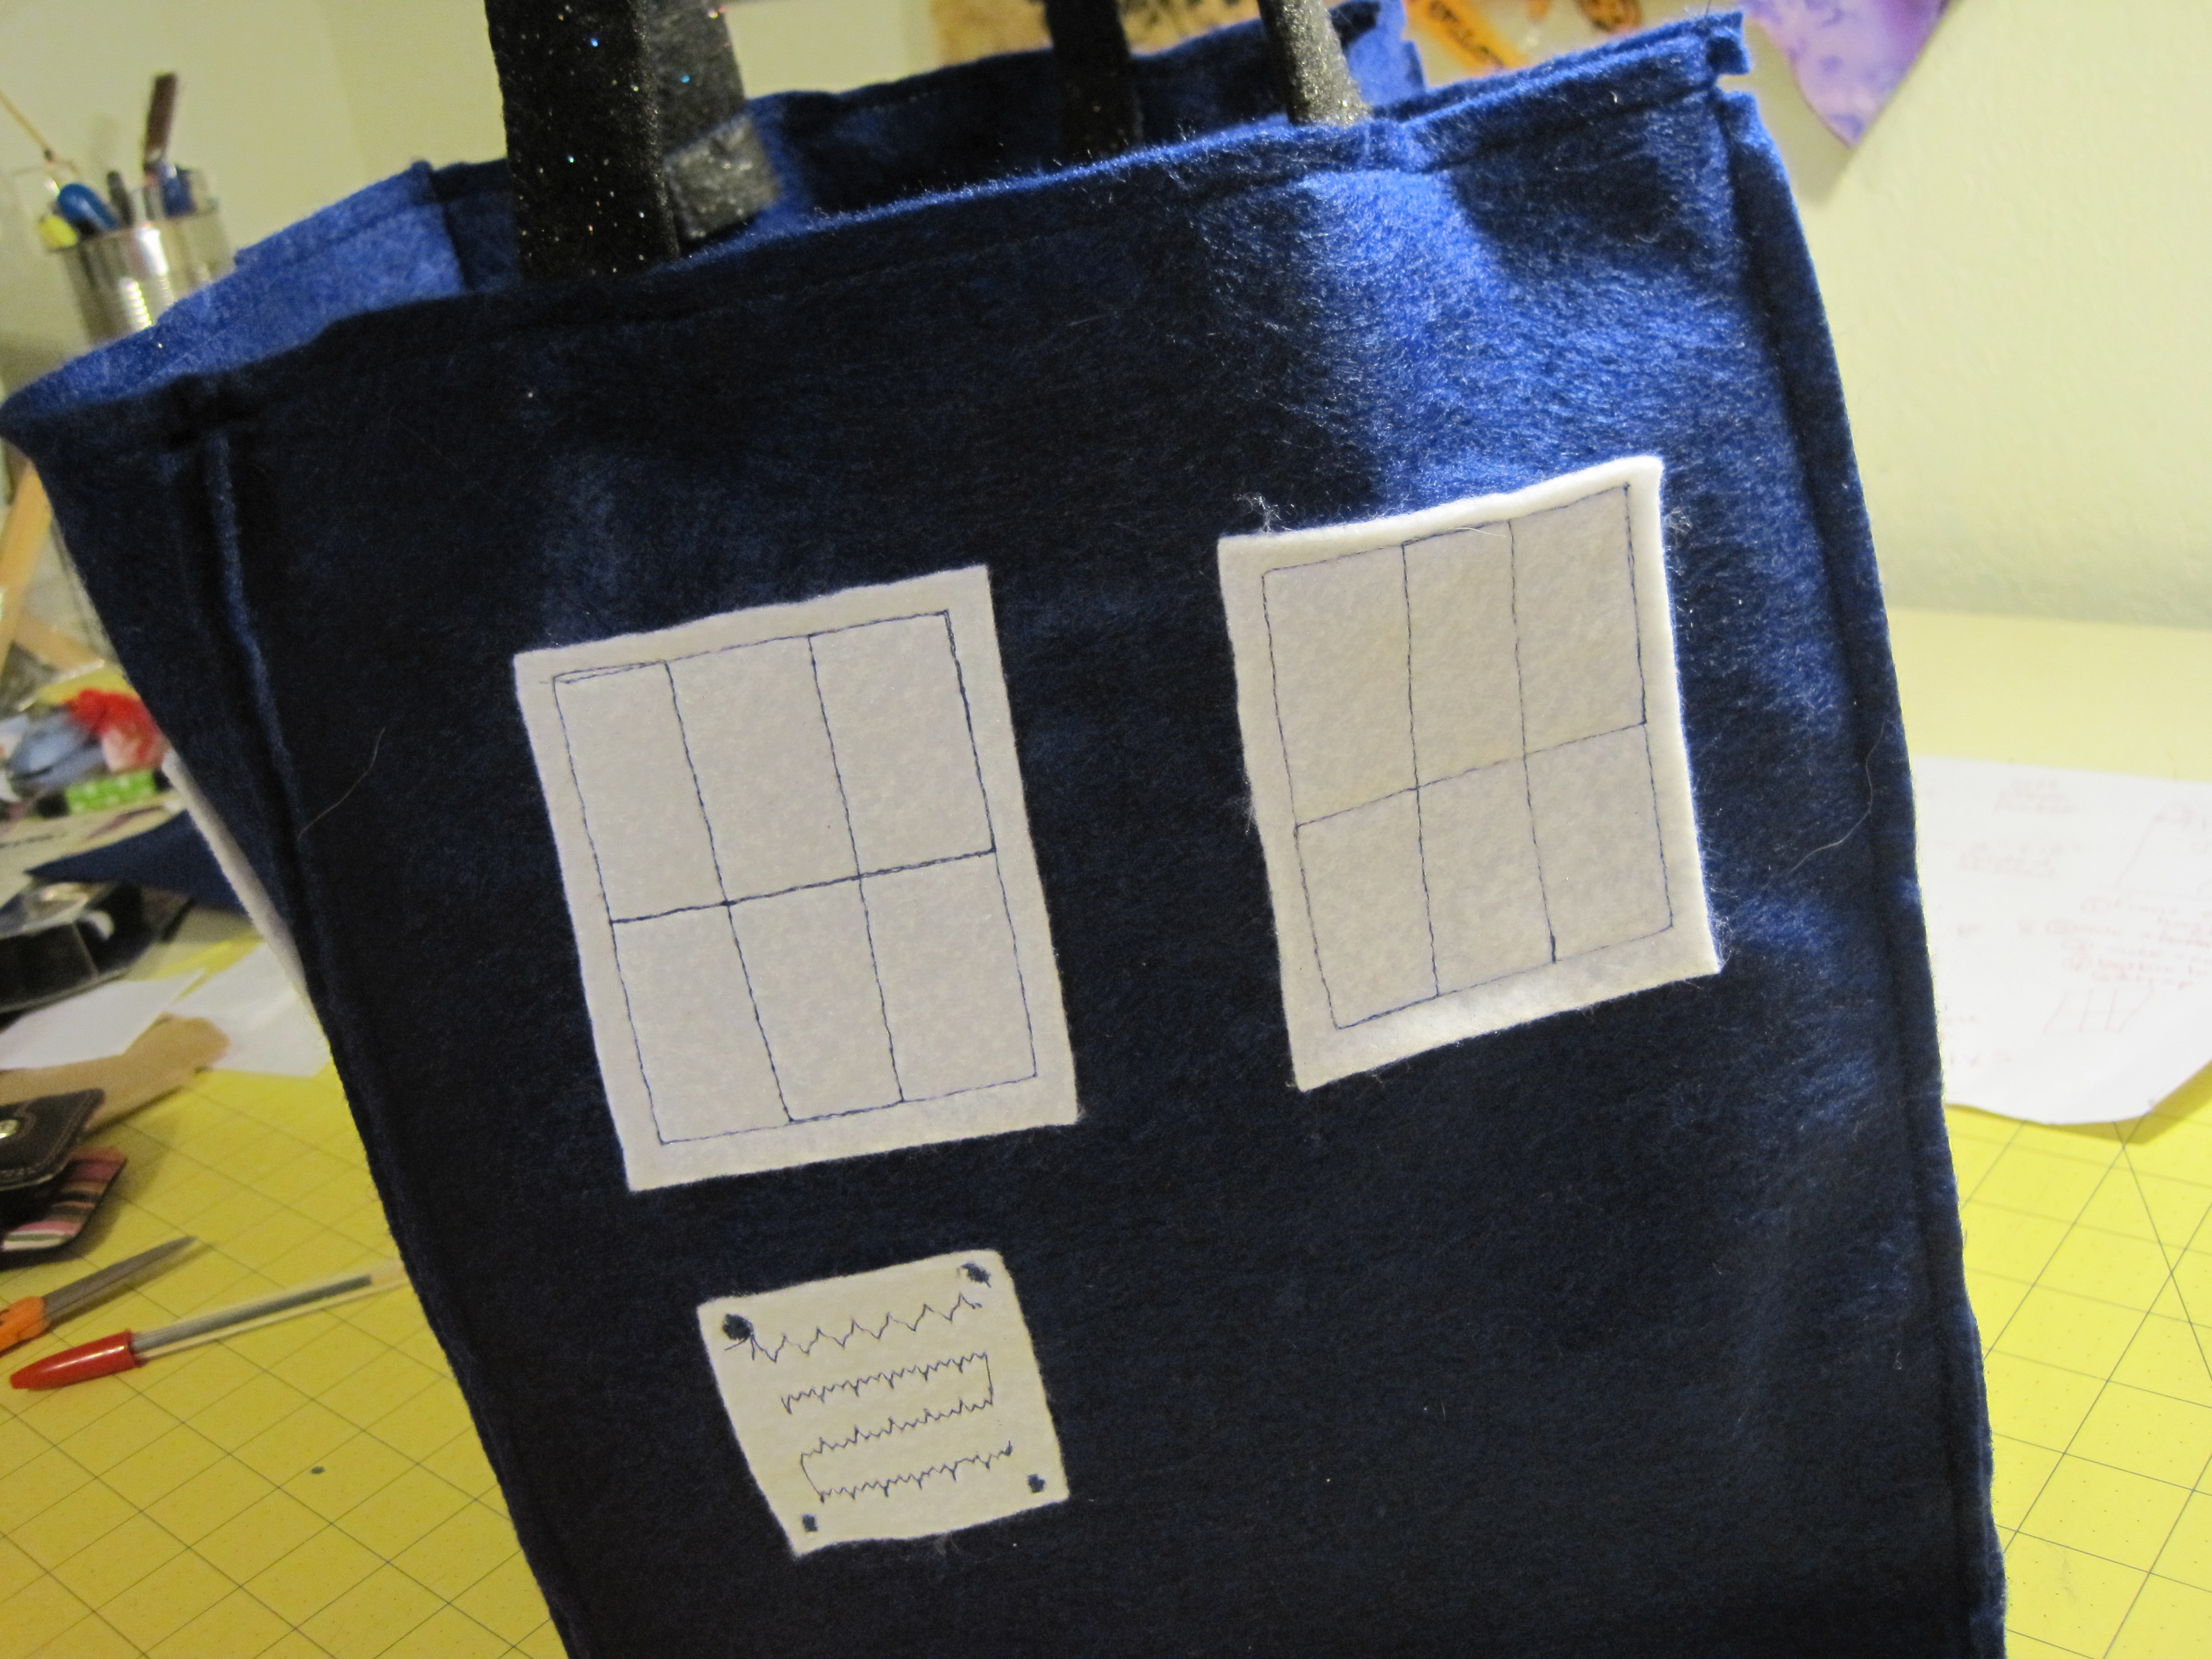
The handles attach to the front (windows + notice) and back of the bag. Use a ruler to line up the handles 2 1/2″ in from each side of the bag, with about 2/3″ inside. Pin in place.

Starting at a corner seam, stitch all the way across the top of the bag, backstitching when you get to the handles. For added strength, continue stitching all the way around the bag, flattening out the seam allowance with your fingers before you stitch across it.
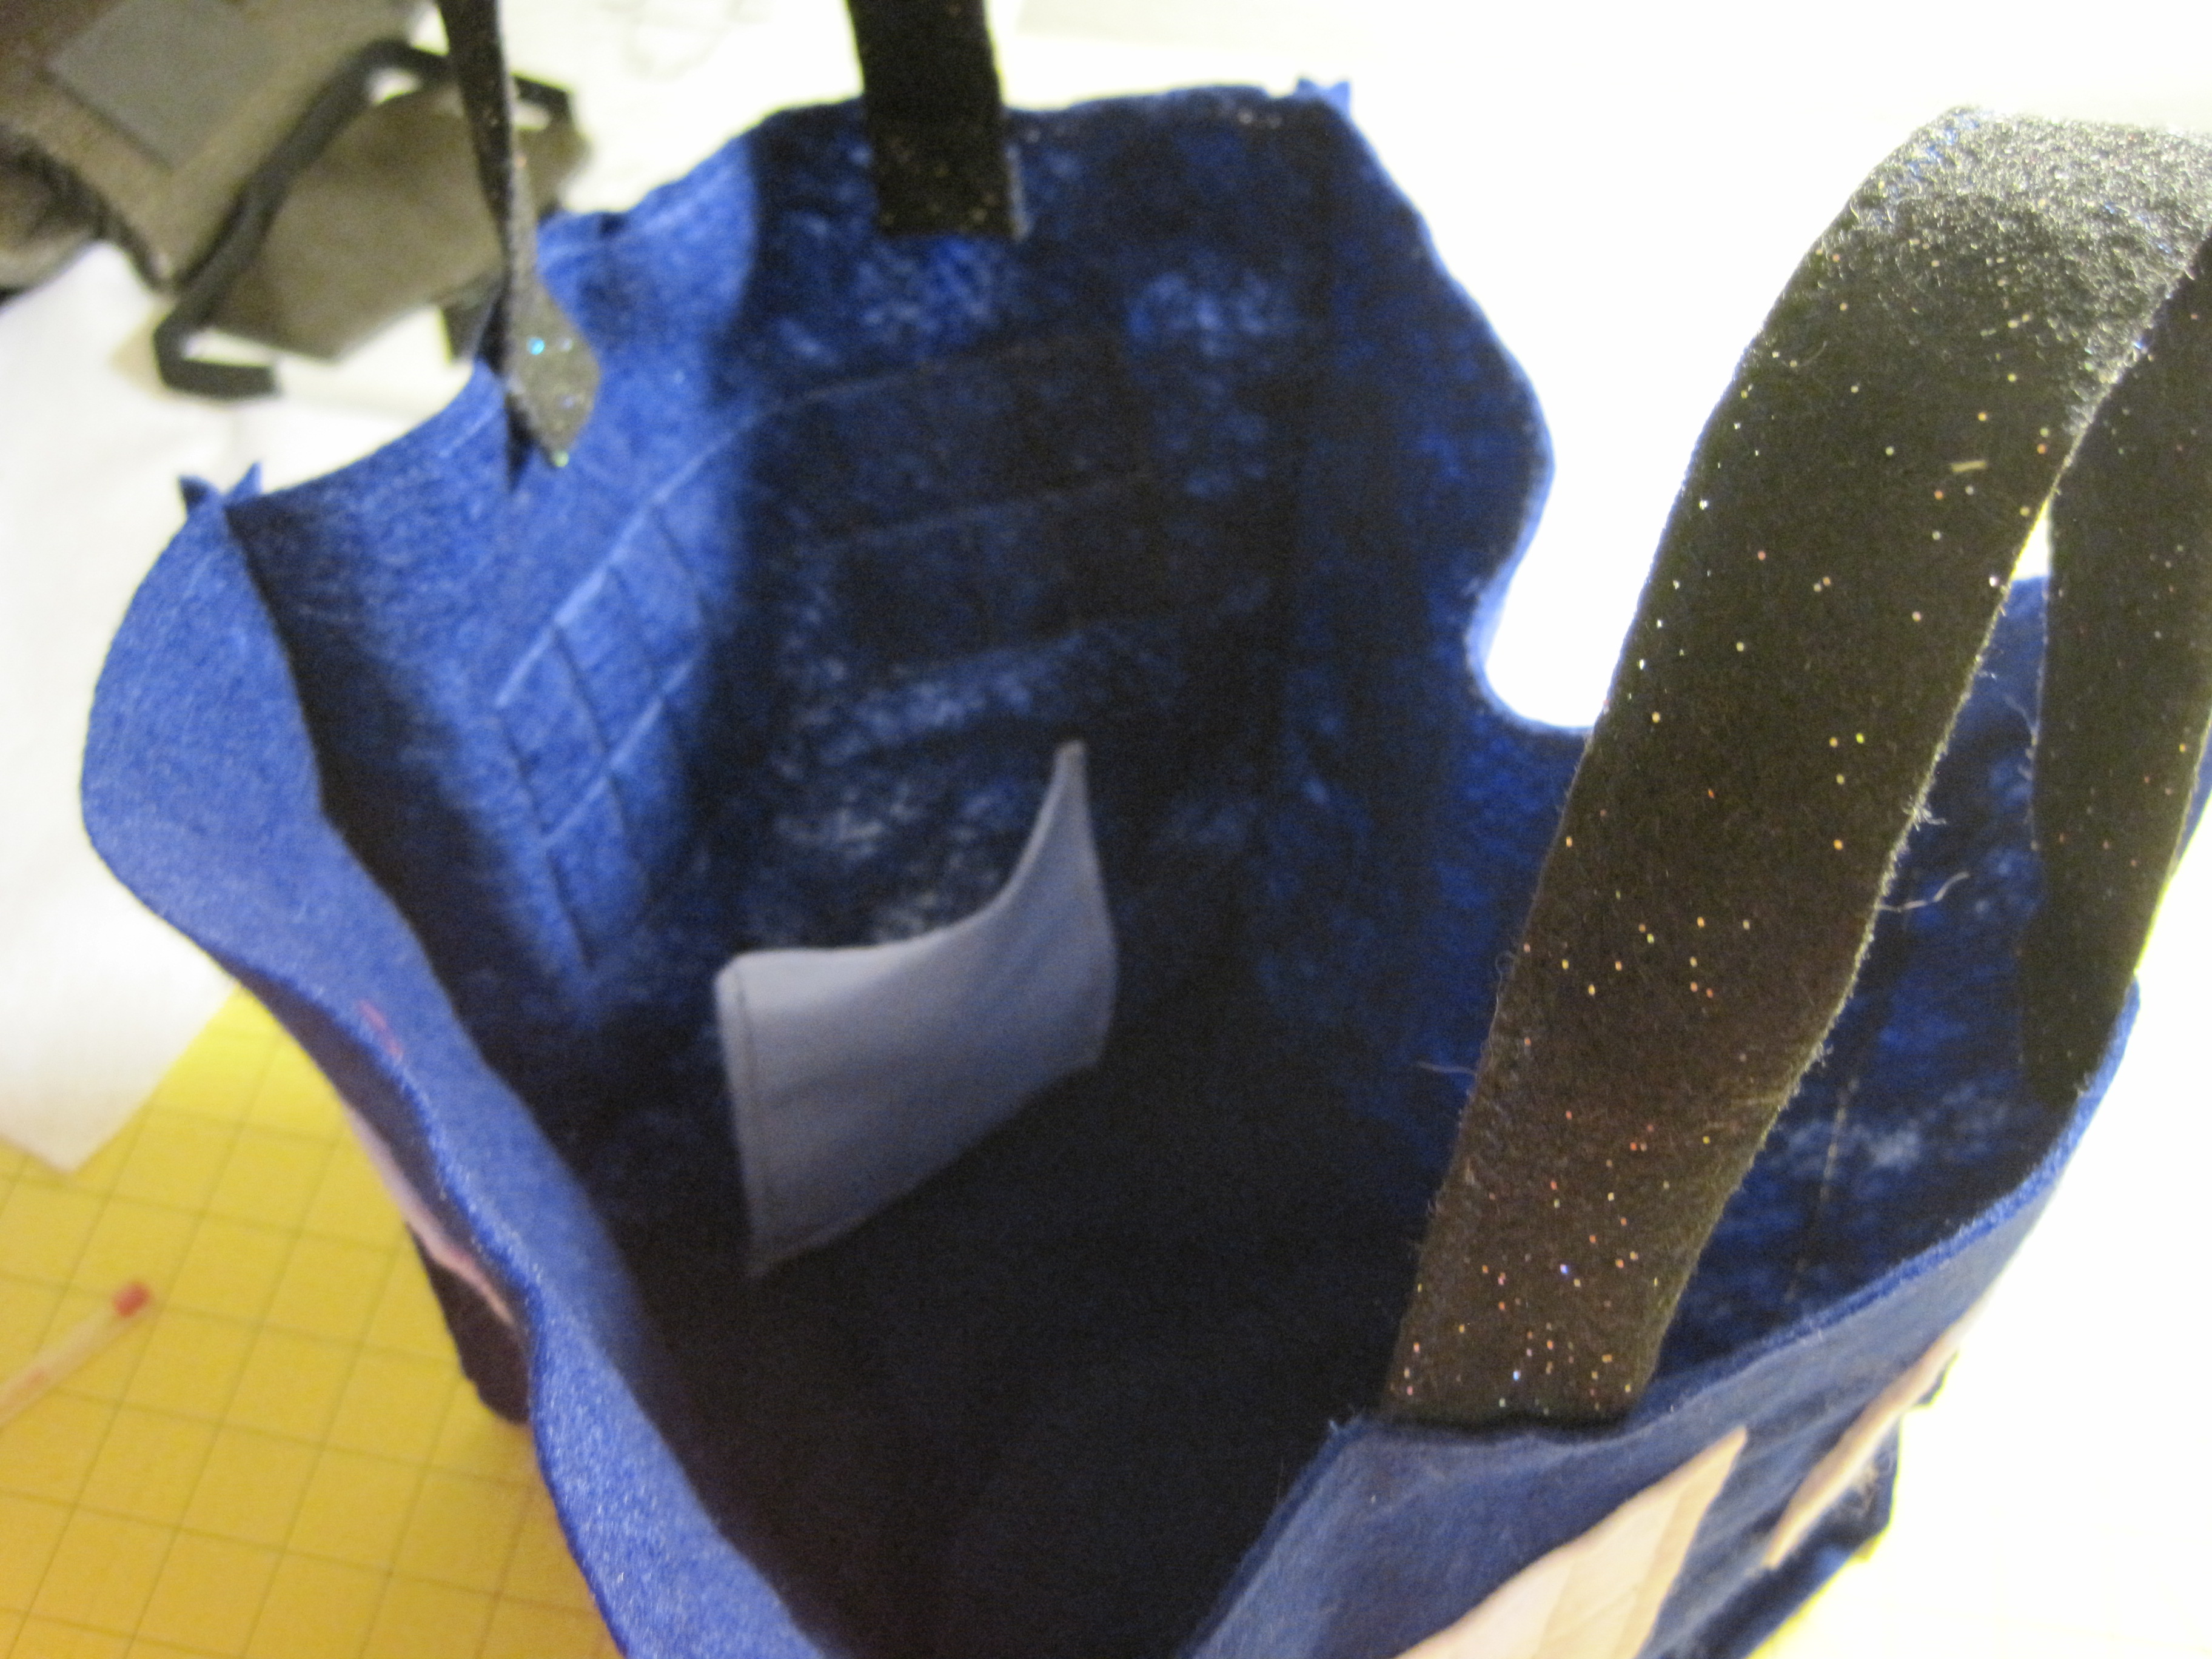
Handles…and you can see the cell phone pocket, too!
Snip above and below the top stitching to make the little notches (optional).
The TARDIS Treat Bag is easy to fold, just fold in the bottom and it will fold in on itself.

And… DONE!
Front detail.
FREE Doctor Who Quilt Patterns!


Happy crafting!
♥ Jennifer O
Posts on this blog may contain affiliate links to help cover the cost of my website. I thank you for your generous support. ♥

Free TARDIS paper pieced pattern, designed by me
and tested (as shown) by the ever awesome Shae.
Oh, fandom quilting, how do I love thee?
Bigger on the inside, that’s how!
In a fit of I Am A Fan, I made this a highly detailed TARDIS. I designed this pattern to be a 6″ block, but I would recommend enlarging it even bigger to work on, just for sanity’s sake. Shae made her’s 6″ and it worked out beautifully.
Why is the pattern purple? No idea. I drafted it back in May of 2009 and then it got lost amongst my files. When I unearthed it a couple of weeks ago, I realized it just needed numbering and separating. My guess is I had some really good wine and thought the purple was blue…
Need more Doctor Who?

How about a Dalek quilt block?
Sample pieced by Stephanie T
More hardcore fan, you say?
Need even more DW? Check out crafty_tardis on Livejournal and the Doctor Who crafts flickr group.
Happy crafting!
Add your Sewhooked-related photos to my flickr group and you might be featured in a future post.
The awesome organizers over at help_haiti on Livejournal have found a great way to get fandom (all fandoms!) involved in raising money for charity while getting fun stuff in return.
Crafters, graphic artist, writers and all sorts of other awesome people are donating their time and talents in return for charitable donations. You can bid in the comments of the item you’re interested in and once the auction is closed on noon (EST) January 20, 2010, the items will be paid for by donating to charity! Share your receipt and get awesome goodness in return. The charities win and you win, too!
I’m offering up one Custom Designed 5″ Paper Pieced Quilt Pattern. You can read the full details here. Be sure to bid in the comments at this link. I cannot accept bids here.
Also check out these awesome auctions by two of my crafty friends:
Amber (hp5freak) is auctioning off a 3’x3′ custom crochet blanket. She makes gorgeous and unique HP-themed blankets. You can see those here.
Mary (dragonsinger954) is the maker of many a fine Molly Weasley sweater. She’s offering a custom-made one up right here. You can see examples of her many lovely Molly sweaters here.
Also, the Queen of The Leaky Cauldron herself is auctioning off one autographed copy of Harry, A History. It’s a good thing, too, because you can’t have mine!
Happy bidding and thanks for supporting this wonderful cause!


TARDIS Newsroom – Pick of the Blogs
July 25, 2009
Is there anything more iconic to a Doctor Who fan than The TARDIS?
Oh, maybe. There are striped scarves and Daleks and, of course, Sonic Screwdrivers. But I think the TARDIS is pretty darn cool.

It just so happens that my 11 year old son does, too.
We’re big on painting, decorating and embellishing in our house. My daughter has The Fat Lady on her bedroom door, and has had for years now. My son has been waiting for just the right inspiration to decide what he’d like on his door.
This summer, it came to him. The Doctor’s TARDIS.
This was not a hard project, but it was time consuming between steps. Here’s how we did it!
Project Supplies:

The first step is probably the trickiest. After measuring the door, I taped two pieced of graph paper together and then made a scale replica of the door. Using a photo of the TARDIS, I drew up what was as close as I could come to a scale replica, being the door is tall and narrow.
If you’re feeling really detail oriented, flickr user Star_Cross has blueprints of the real deal.

Our door was already painted light blue, so we moved on to measuring. If your door is not blue, remove the doorknob, prime, paint and let dry overnight before moving on.
Next, we used the yard stick and started measuring. We started by finding the center of the door and working our way out, comparing constantly to our graph paper design (which you can see on the right of the photo).
Once the pencil lines were on, we started taping. I’ll show how we did it and add how I wish we’d done it…

We taped outside the windows and inside the door panels (we should have taped inside ALL the rectangles and painted the whole thing navy blue and then gone back and taped off the windows…it would have been easier!).
Then we painted the inside of the window panels white.

We peeled off the tape around the windows and then started painting the rest of the door navy blue.

Once that was good and dry, we peeled off all the tape. You can see the blue from the original door make nice highlights for the panels.

Next, we penciled in lines for adding the vinyl letters. Even though I’d measured carefully on the graph paper, they’re not quite even. My kid is happy, so I left them!

Next, we used the blue paint pen (we tried a Sharpie maker, believe me, it did NOT work) to draw on the window panes and to add mitered corners around the light blue borders.
The notice was made in Photoshop by taking a TARDIS pic and then enlarging the notice. I then typed over the words, adjusting fonts and sizes until it was right for the size we needed. The is the scale version.
The notice was attached with glue and then smoothed completely down. I used Modge Podge to cover it, being very careful not to smear the ink.

Once the notice was dry, we added the doorknob back and we were done! I do have silver handles to add to make it even more TARDIS-like, but they aren’t pictured.
Sorry about the awkward photo. The door is at a 45 degree angle to the hallway, which makes it very tricky to photograph!
More awesome TARDIS crafts:

TARDIS Phone Case by myimaginaryboyfriend

TARDIS Birthday Cake by abbietabbie

and my personal favorite, a squashy, plush TARDIS made by young crafter, Miss K
More Doctor Who crafts from sewhooked:
Share your Doctor Who crafts on the Doctor Who Crafts flickr group or on the Livejournal Group CraftyTardis
If you make a Sew Awesome Craft or any pattern, craft or recipe from sewhooked, I’d love to see a photo. Email me or add it to the sewhooked flickr group.
also posted on craftster and cut out + keep
Links from the video:
If you make a Sew Awesome Craft or any pattern, craft or recipe from sewhooked, I’d love to see a photo. Email me or add it to the sewhooked flickr group.