This week I talk about saving the TARDIS (cushion!!), my new-to-me almost 70-year-old sewing machine, A Very Important Fundraiser, plus a sneak peek at an in-progress project!
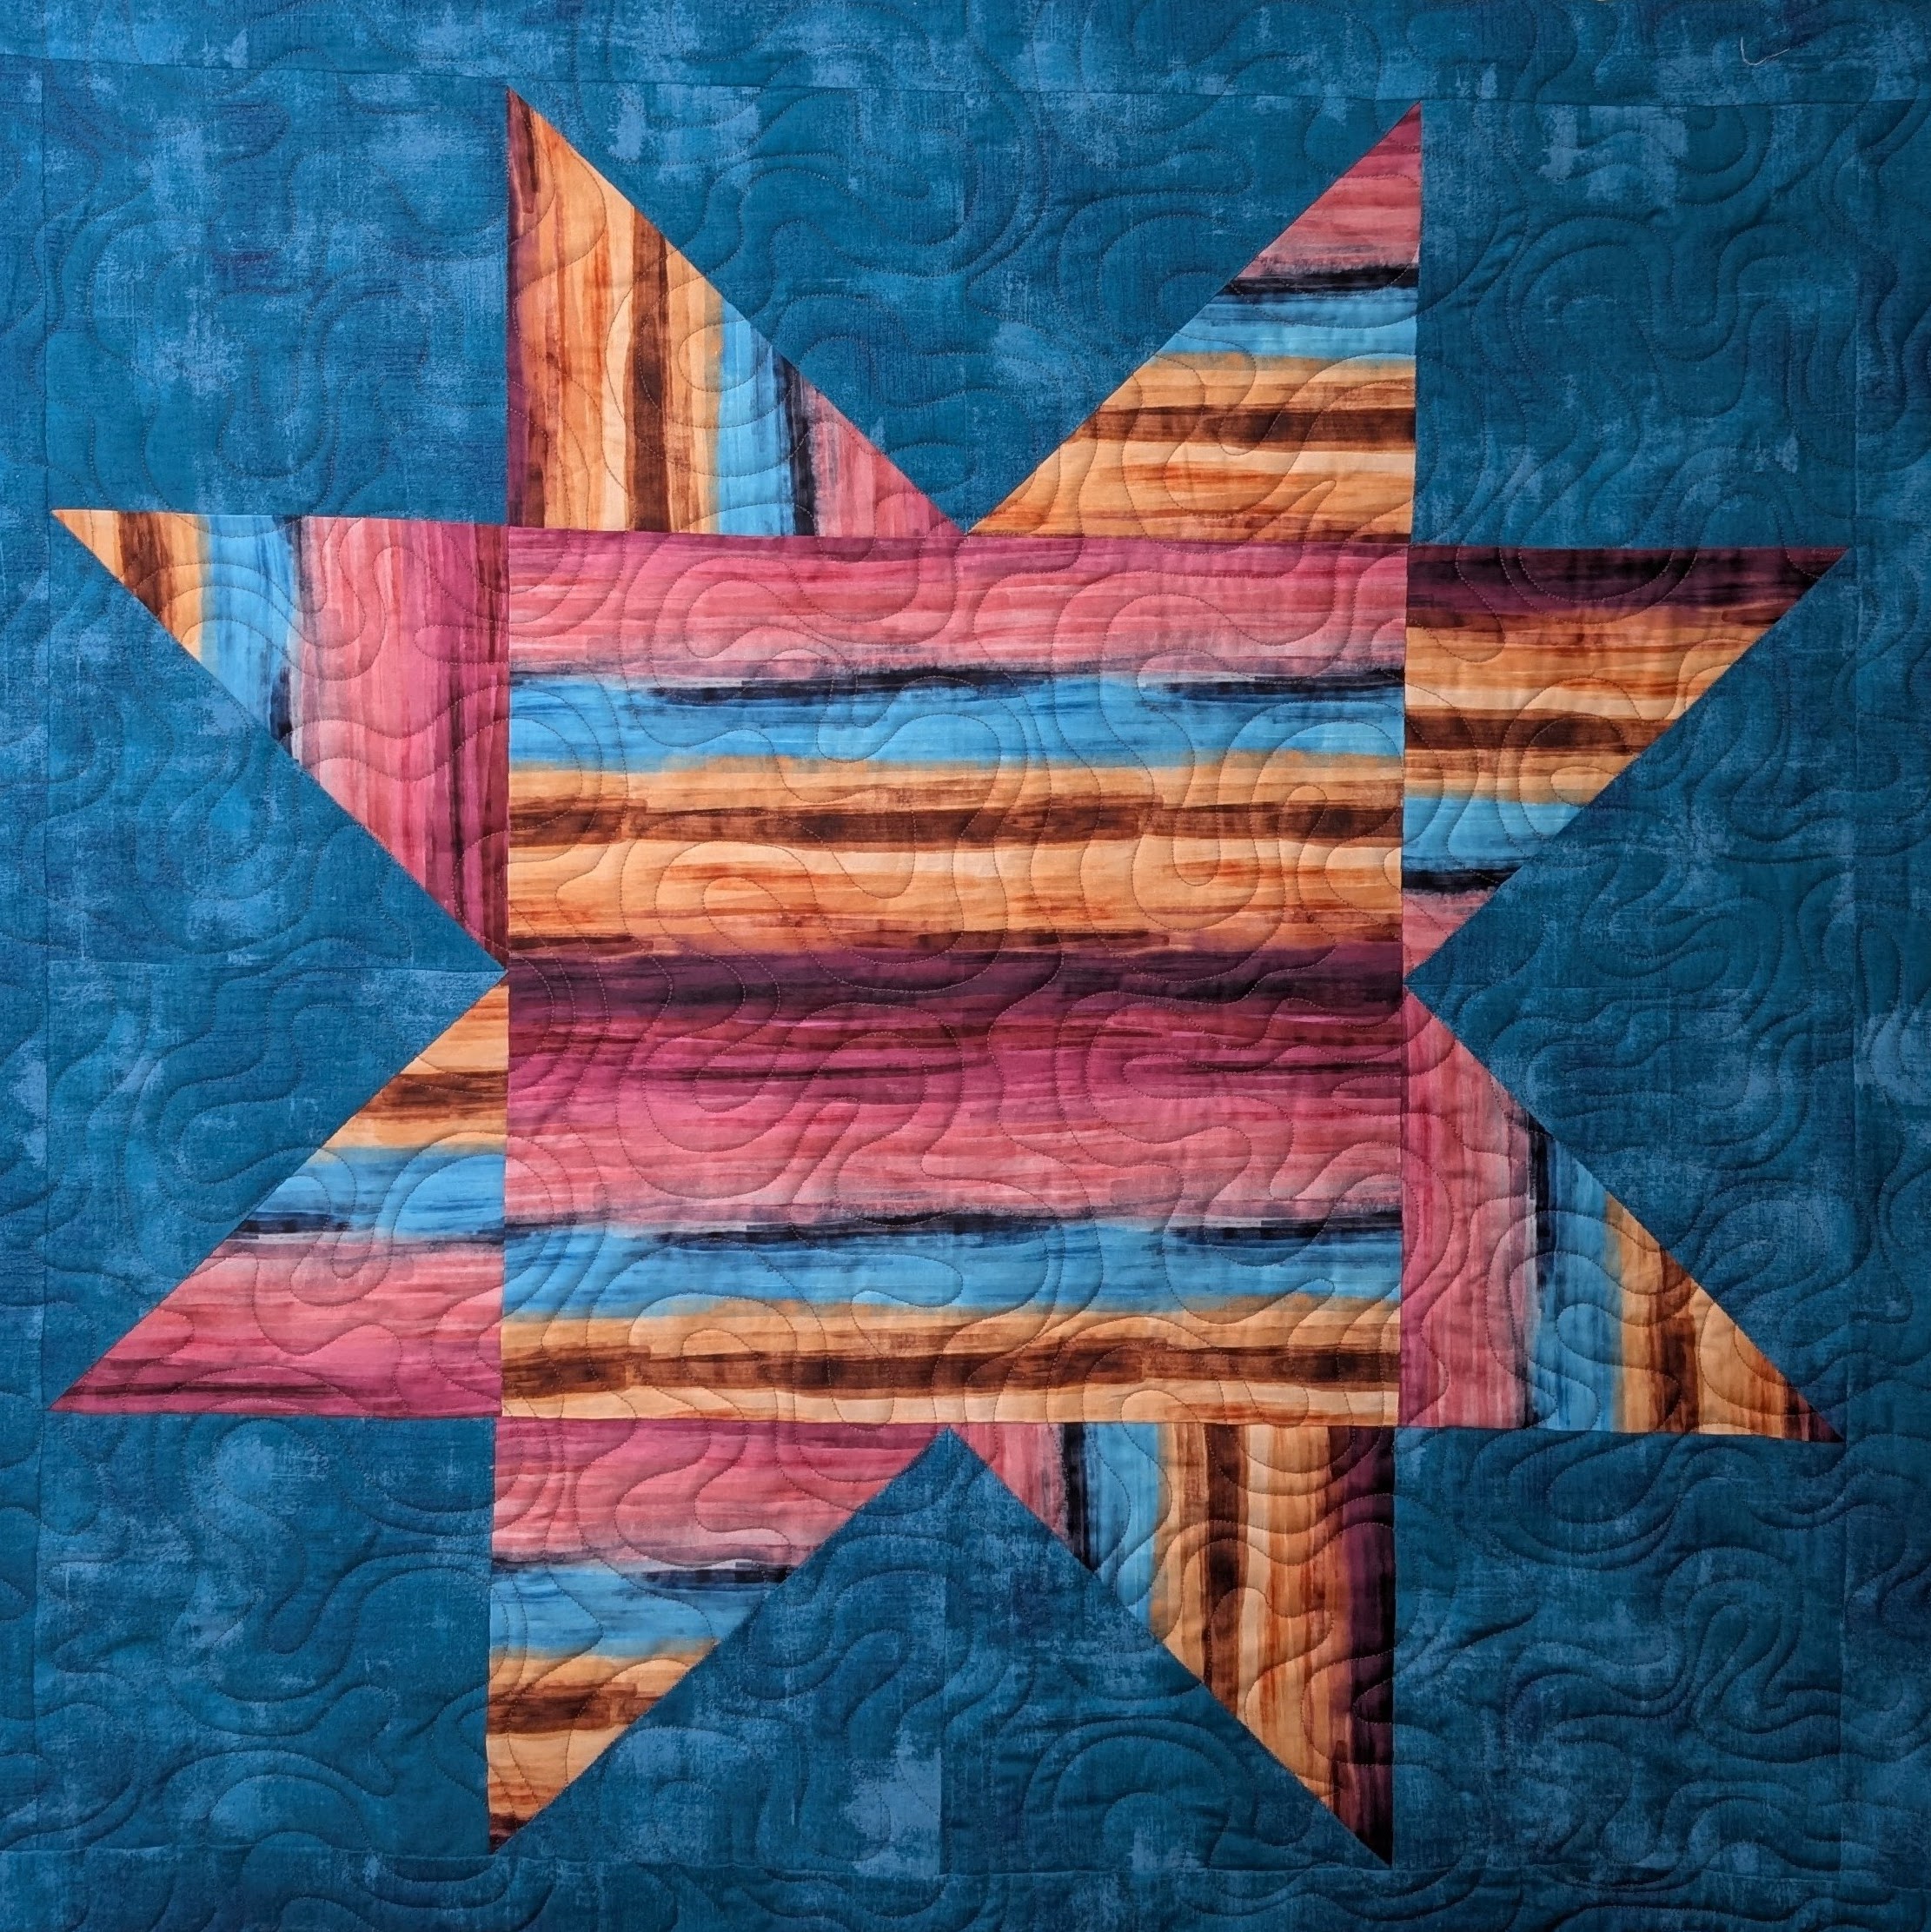
This week, I share Southwest Sonoma Star, a quilt kit finish, two blocks from the #ttmtbom, talk about cleaning out my fabric dresser, and share an old project back in the sewing room for mending!
We’re back again with 31 Days of Halloween! Today, we’re revisiting a tutorial I originally posted way back in 2010!
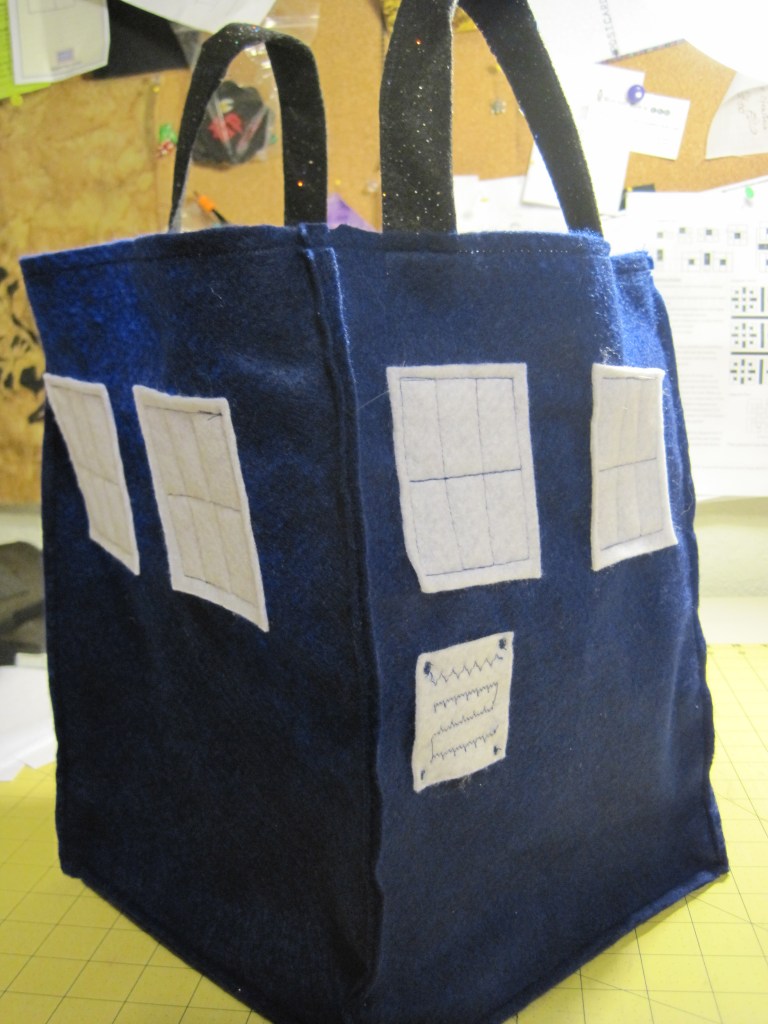
Enjoy the TARDIS Treat Bag…it’s bigger on the inside for all that candy!
You need:
9″ x 12″ acrylic felt sheets – 5 dark blue, 1 white and 1 glitter black
scissors
thread (I used navy blue)
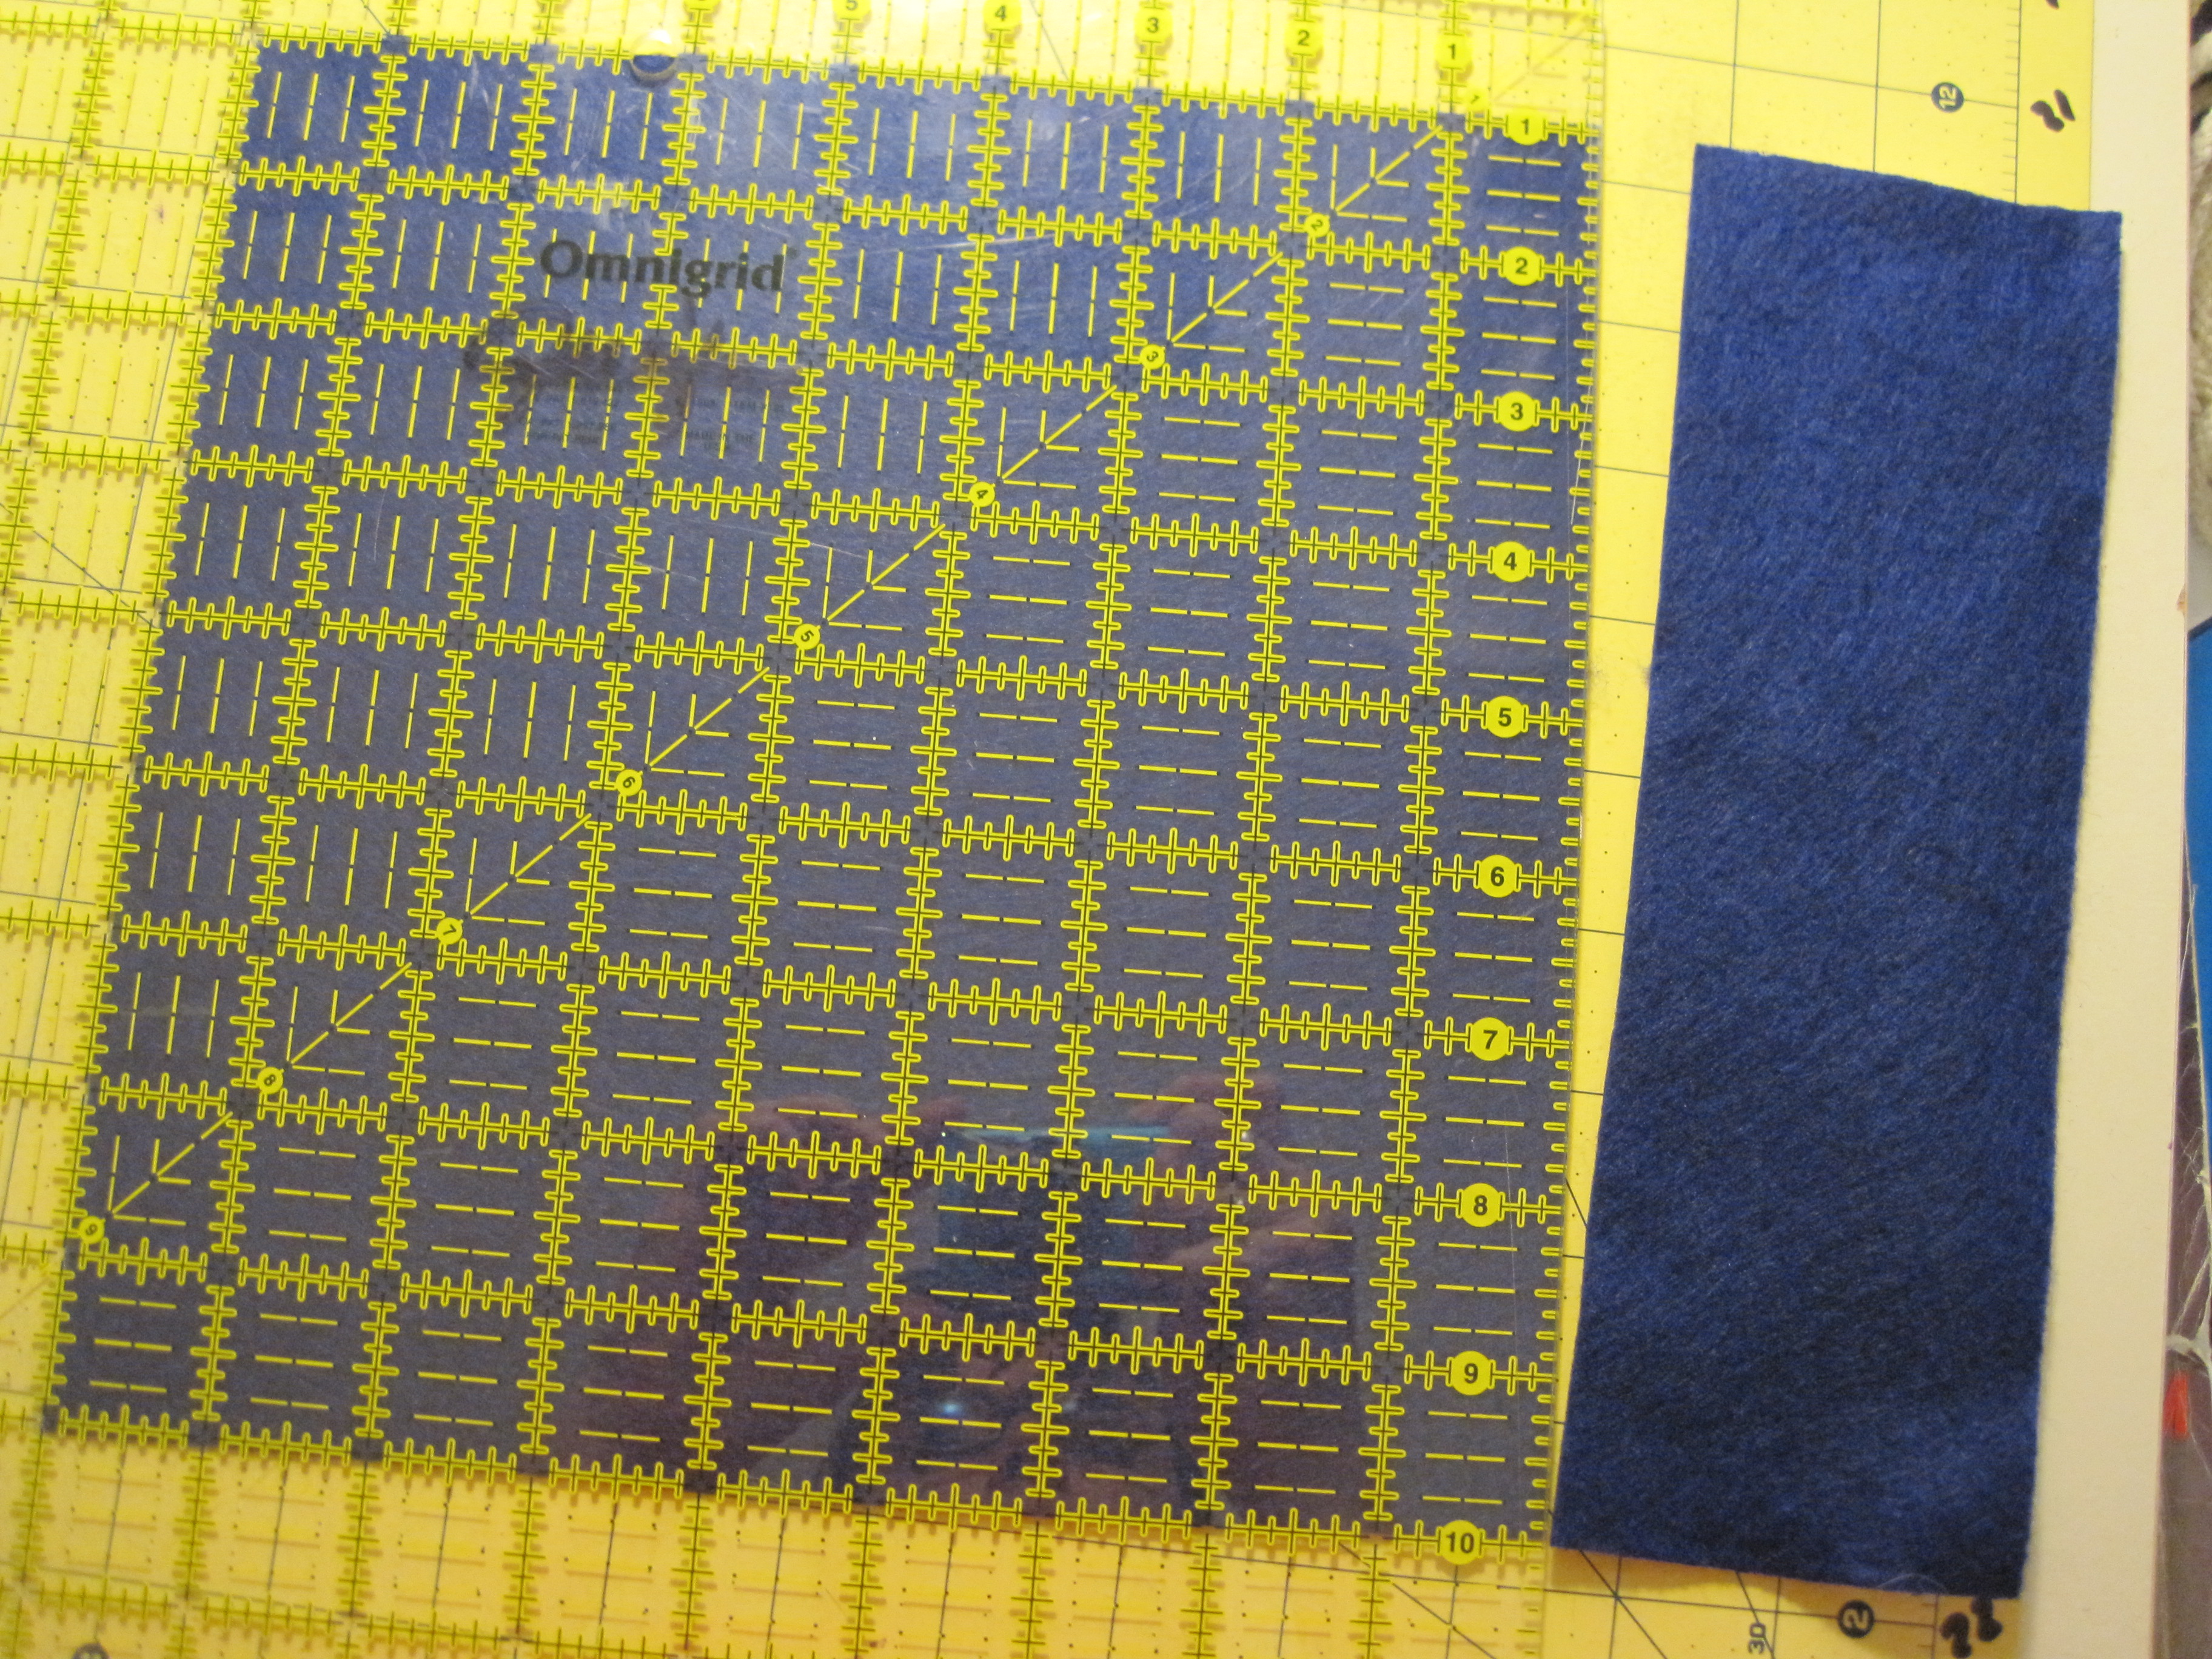
ruler (rotary, if you’ve got one)
rotary cutter (optional)
sewing machine (optional)
You can definitely do this project without a rotary cutter and ruler and even without a sewing machine, so those items are optional. If you do hand stitch, make sure you make tight, even stitches and use heavy-duty knots so you don’t lose your candy!
Cutting Instructions:
from 1 sheet of blue felt (the other 4 sheets of felt stay 9″ x 12″), cut:
9″ x 9″ square -bag bottom
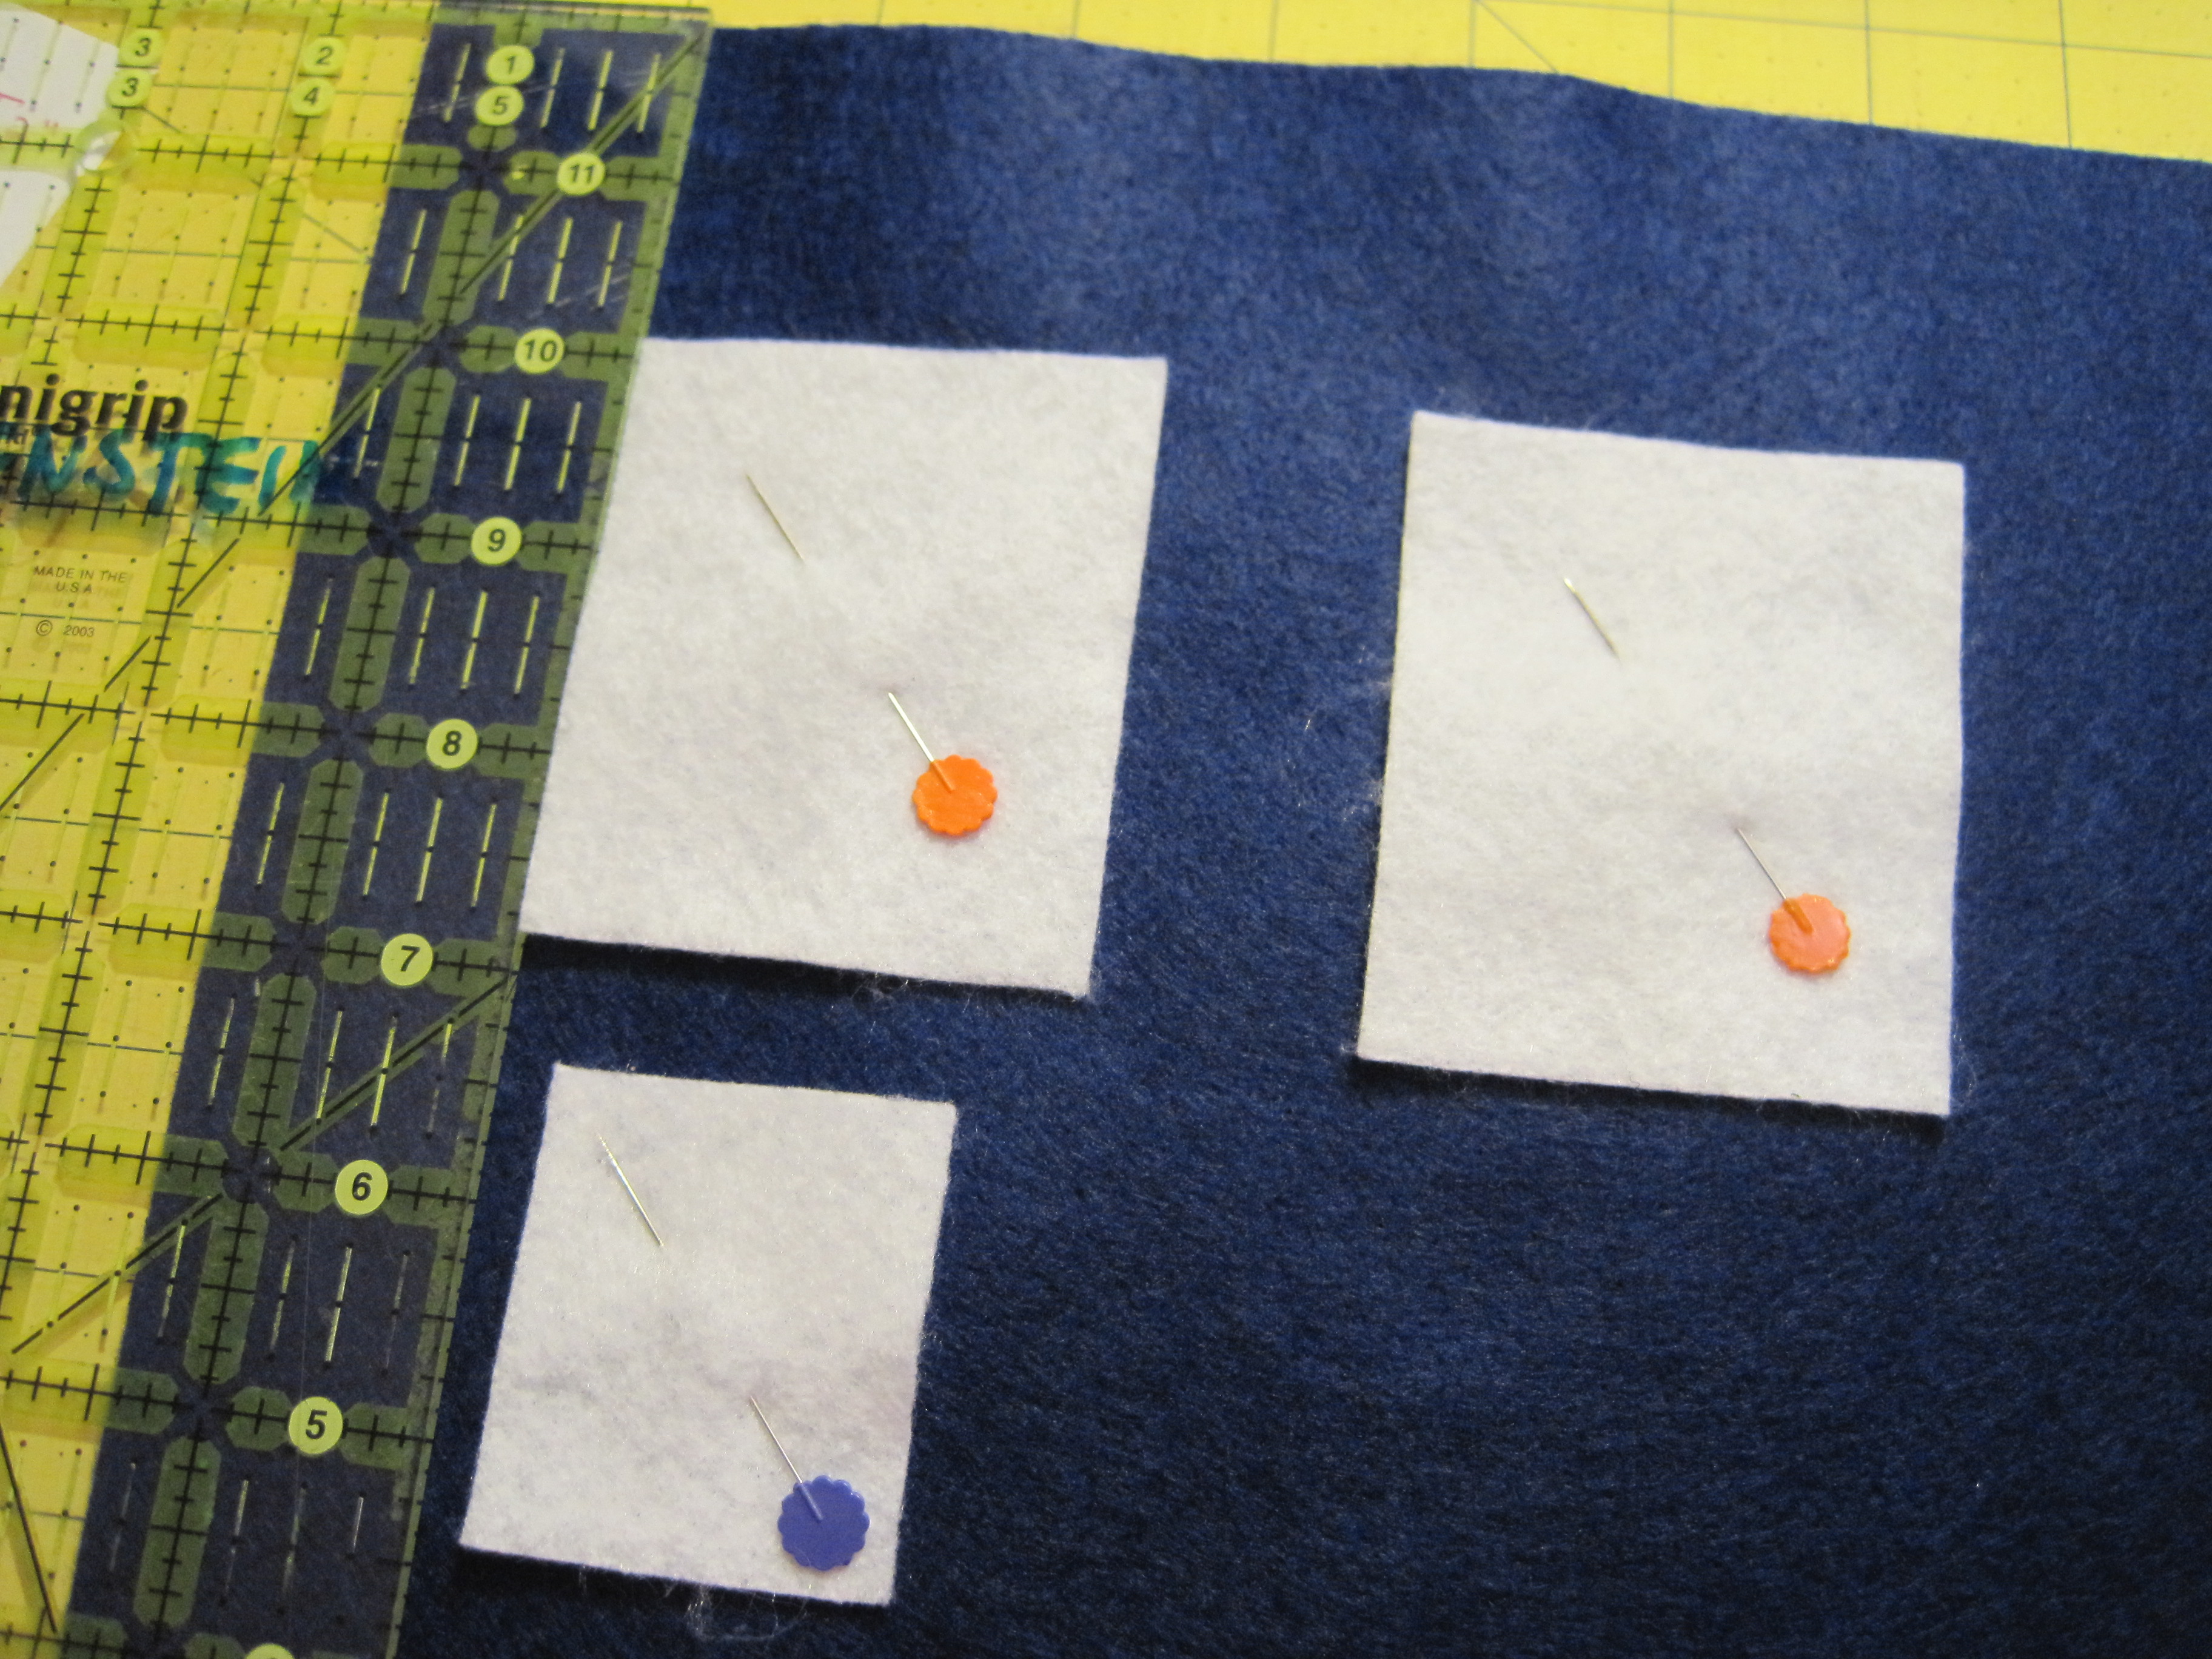
from 1 sheet of white felt, cut:
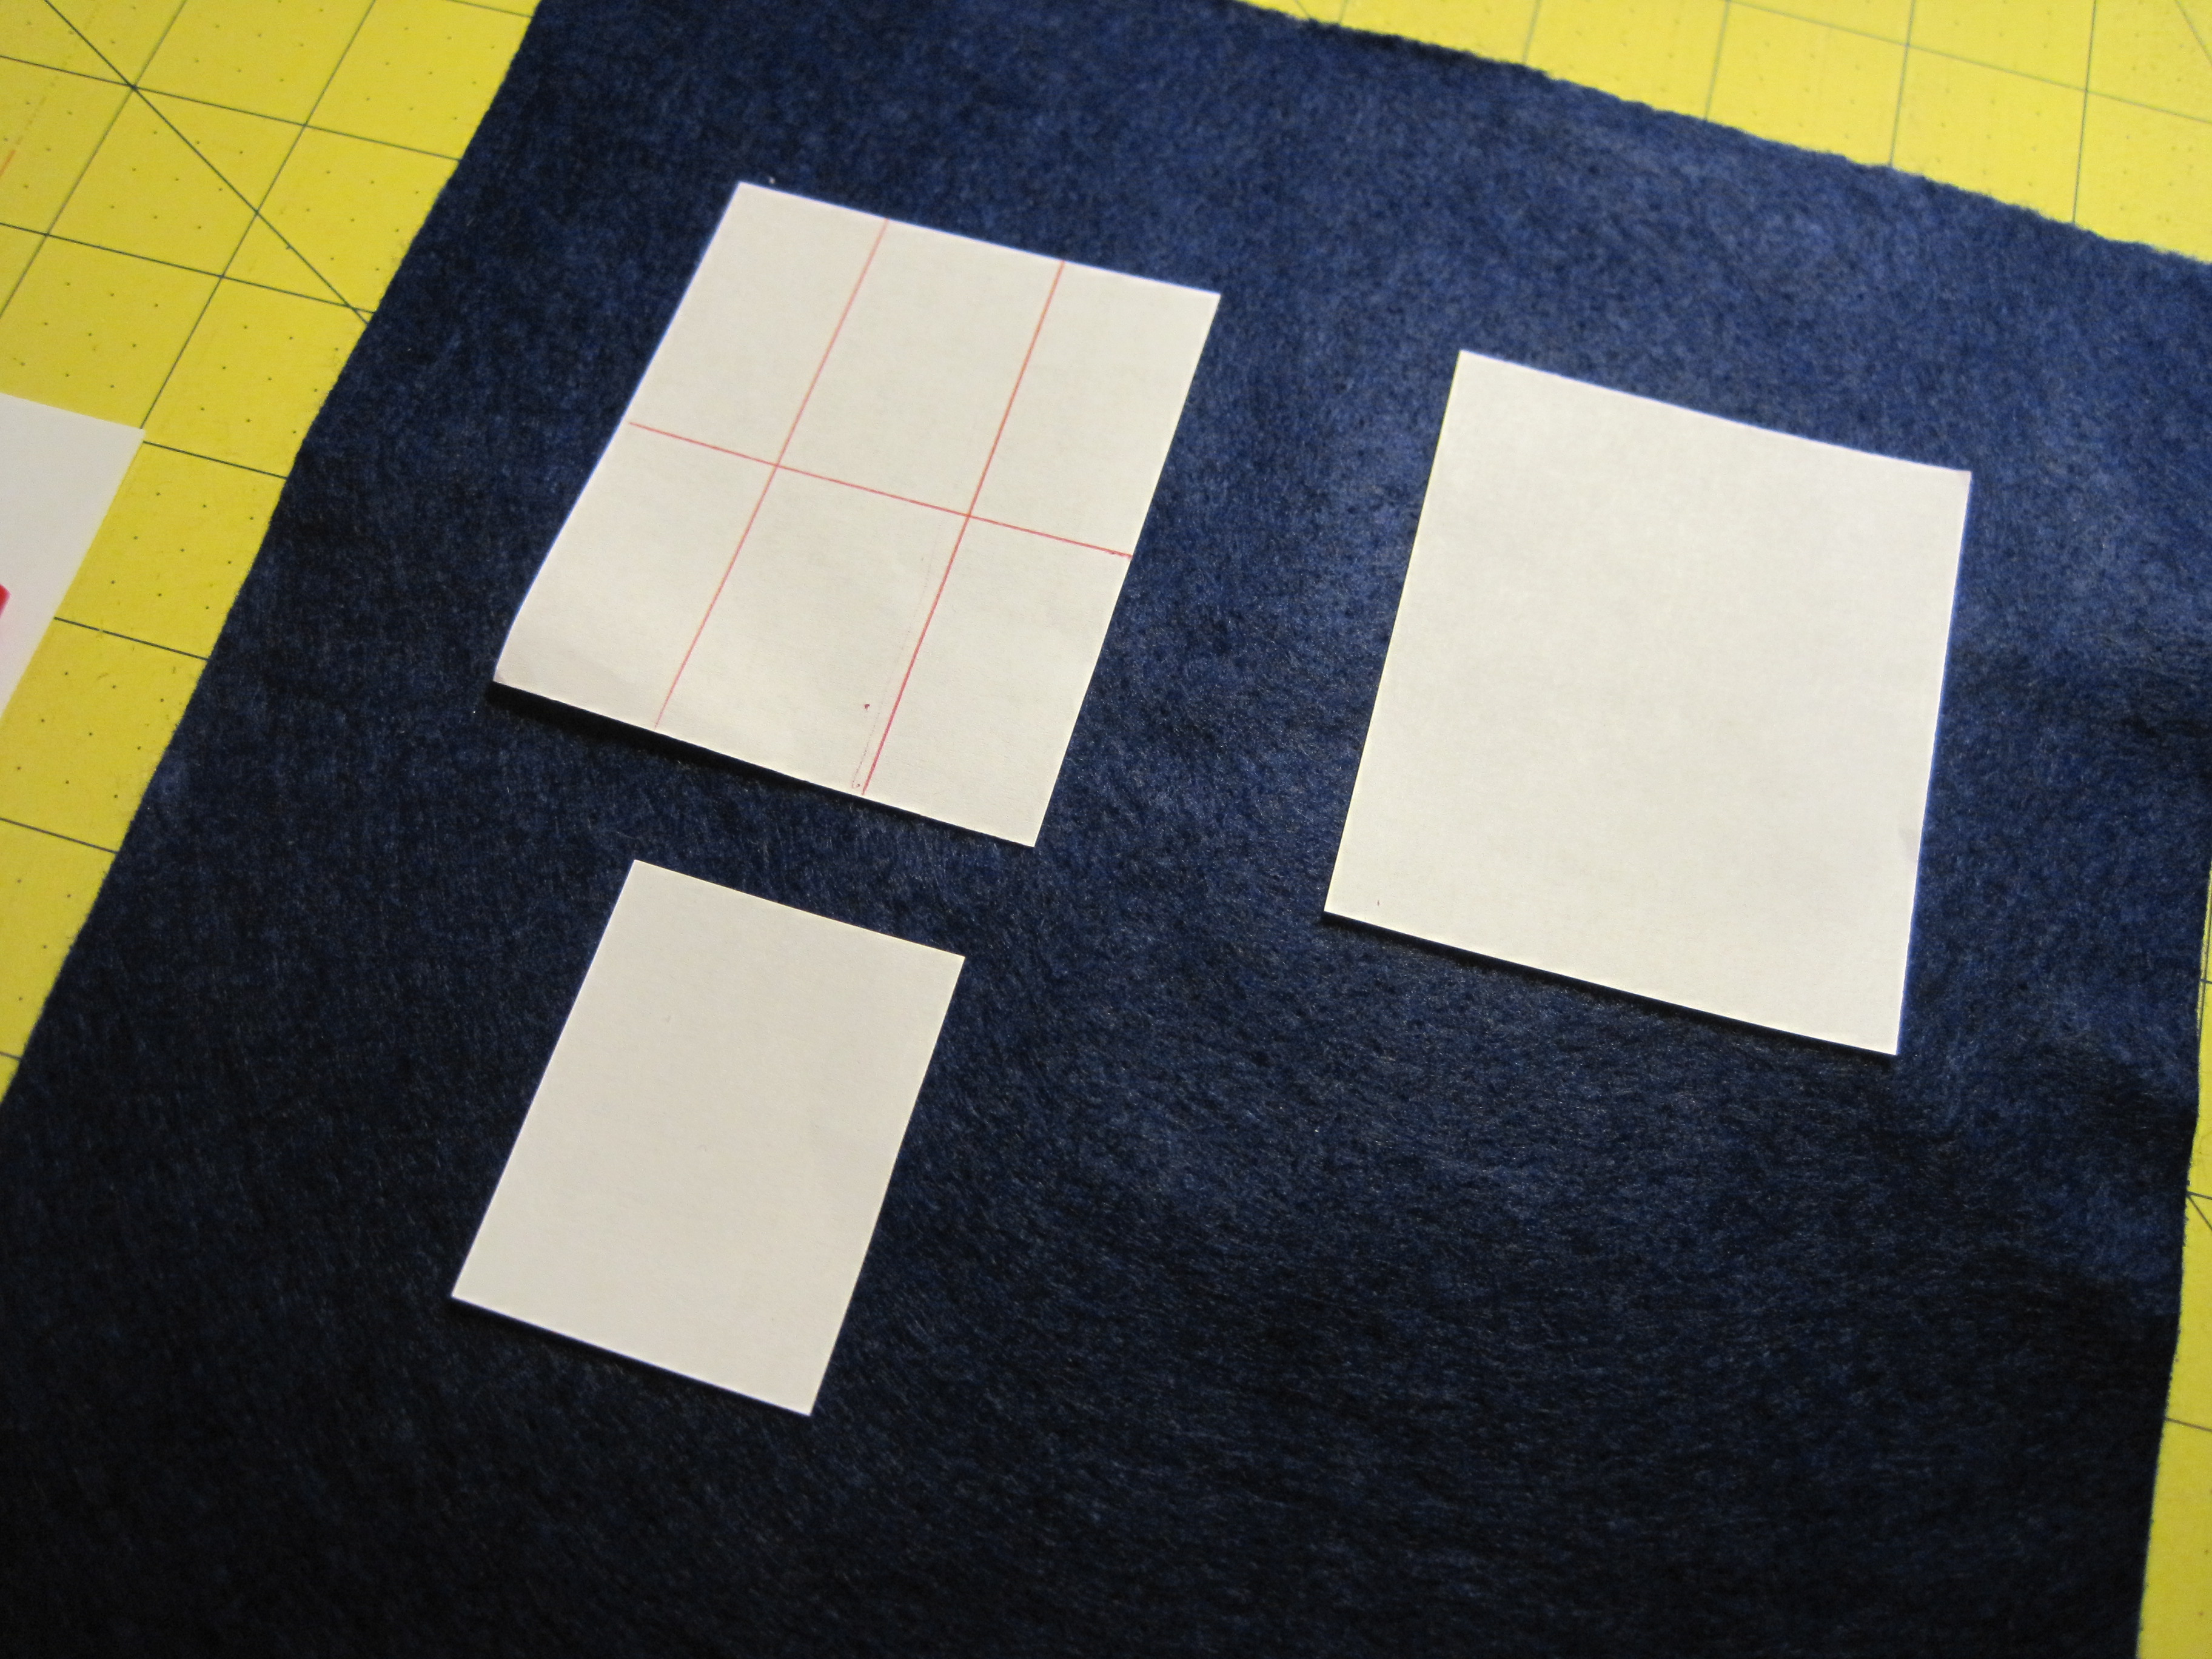
8 – 2 1/2″ x 3″ – Windows
1 – 1/2 x 2″ – Notice
(optional) 4″ x 5″ – cell phone pocket
from 1 sheet of glitter black cut:
2 – 2″ x 12″ – Handles
Note: On all acrylic pieces, 9″ is width 12″ is height, so pieces are arranged with the 9″ width being the top and bottom.
1/4″ inch seams are used throughout
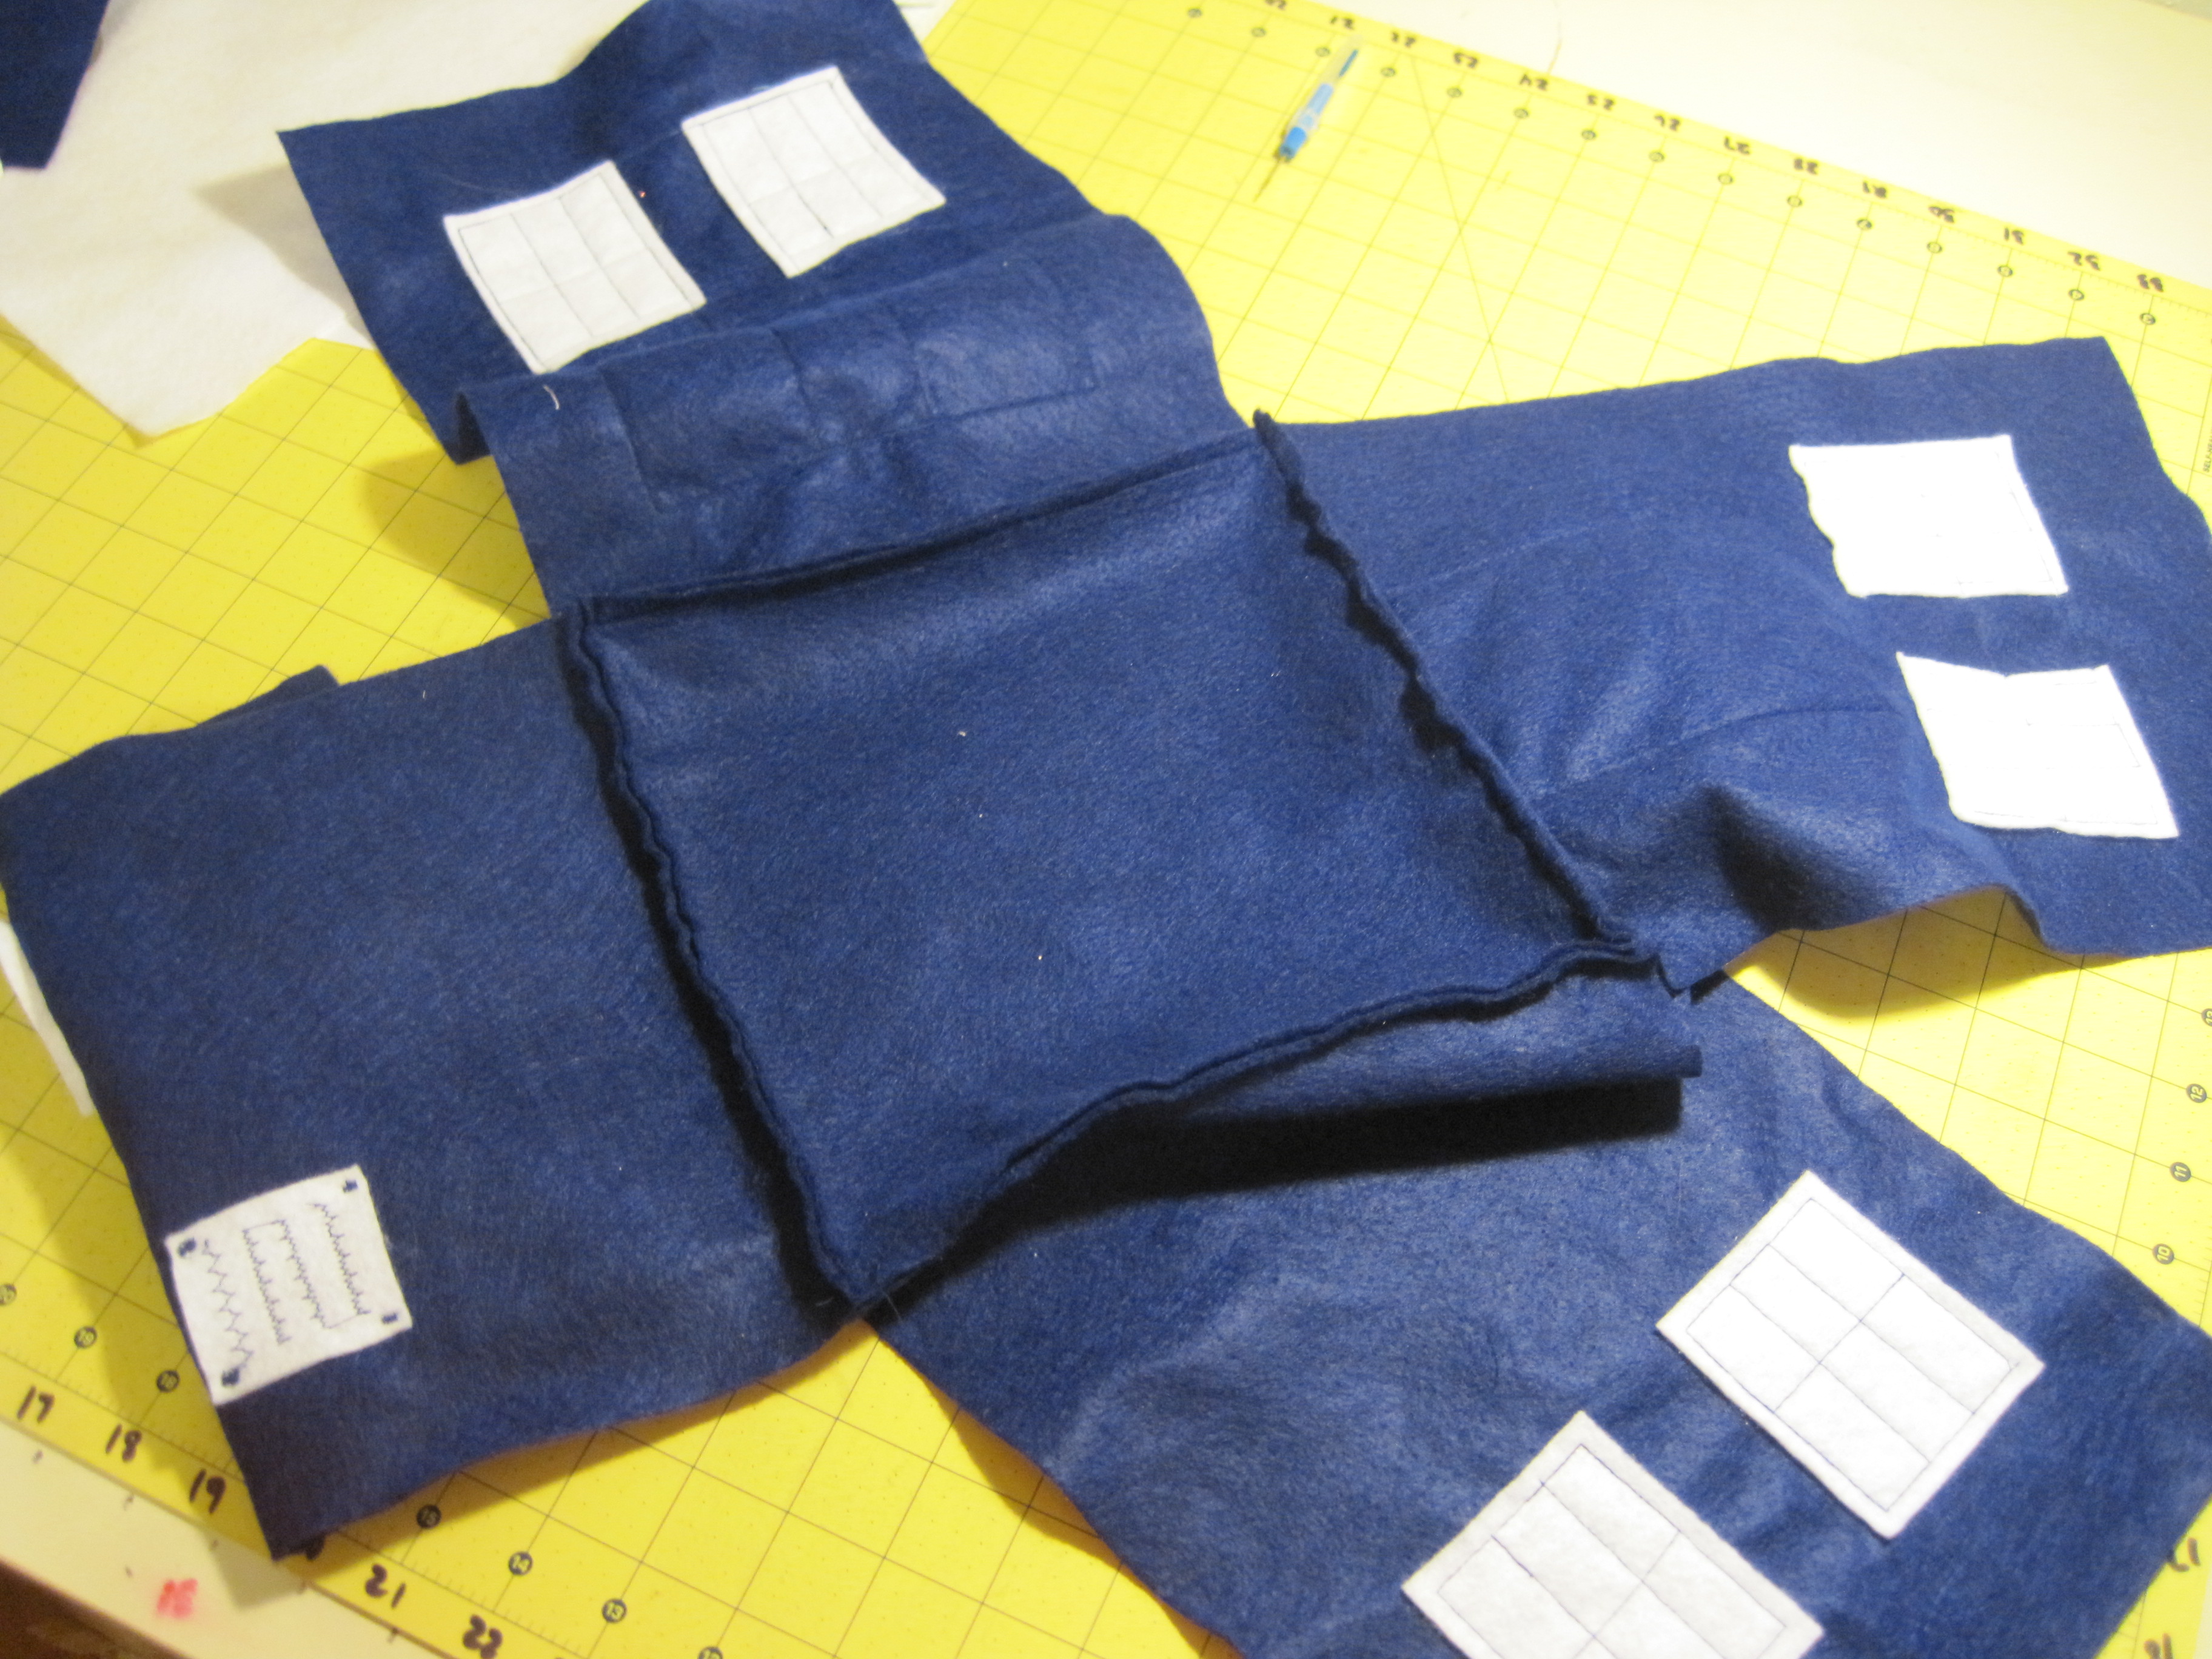
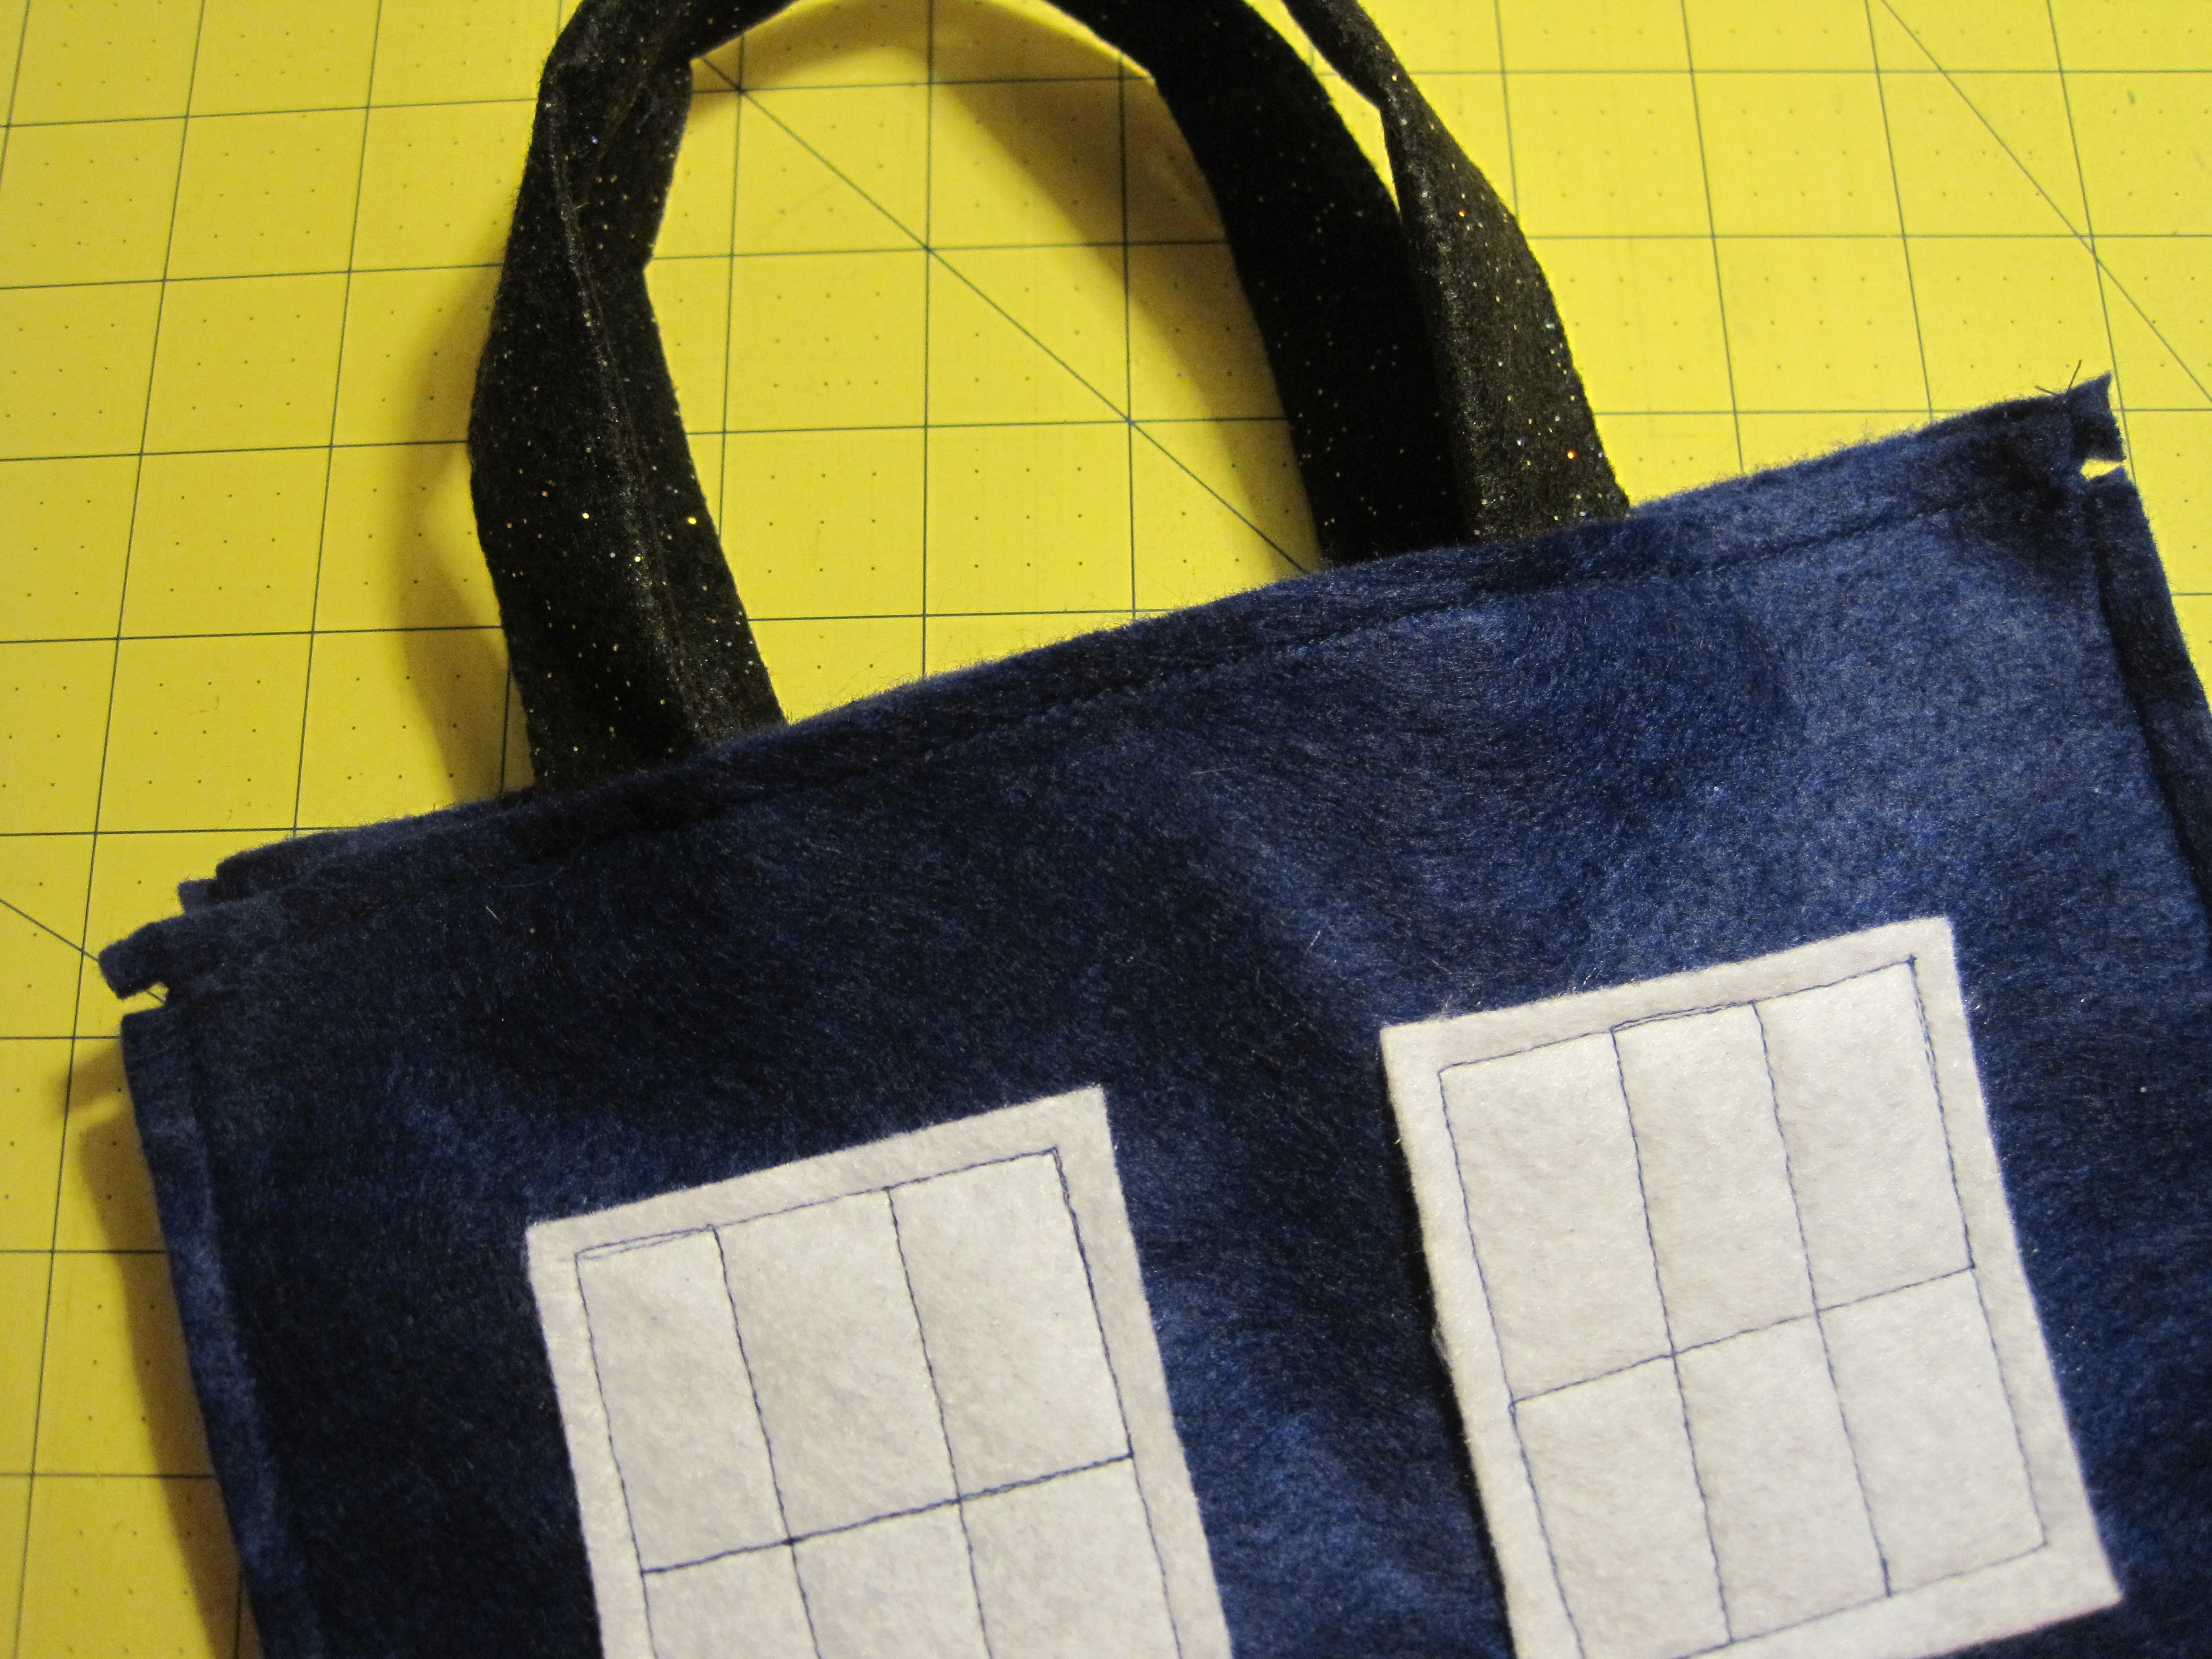
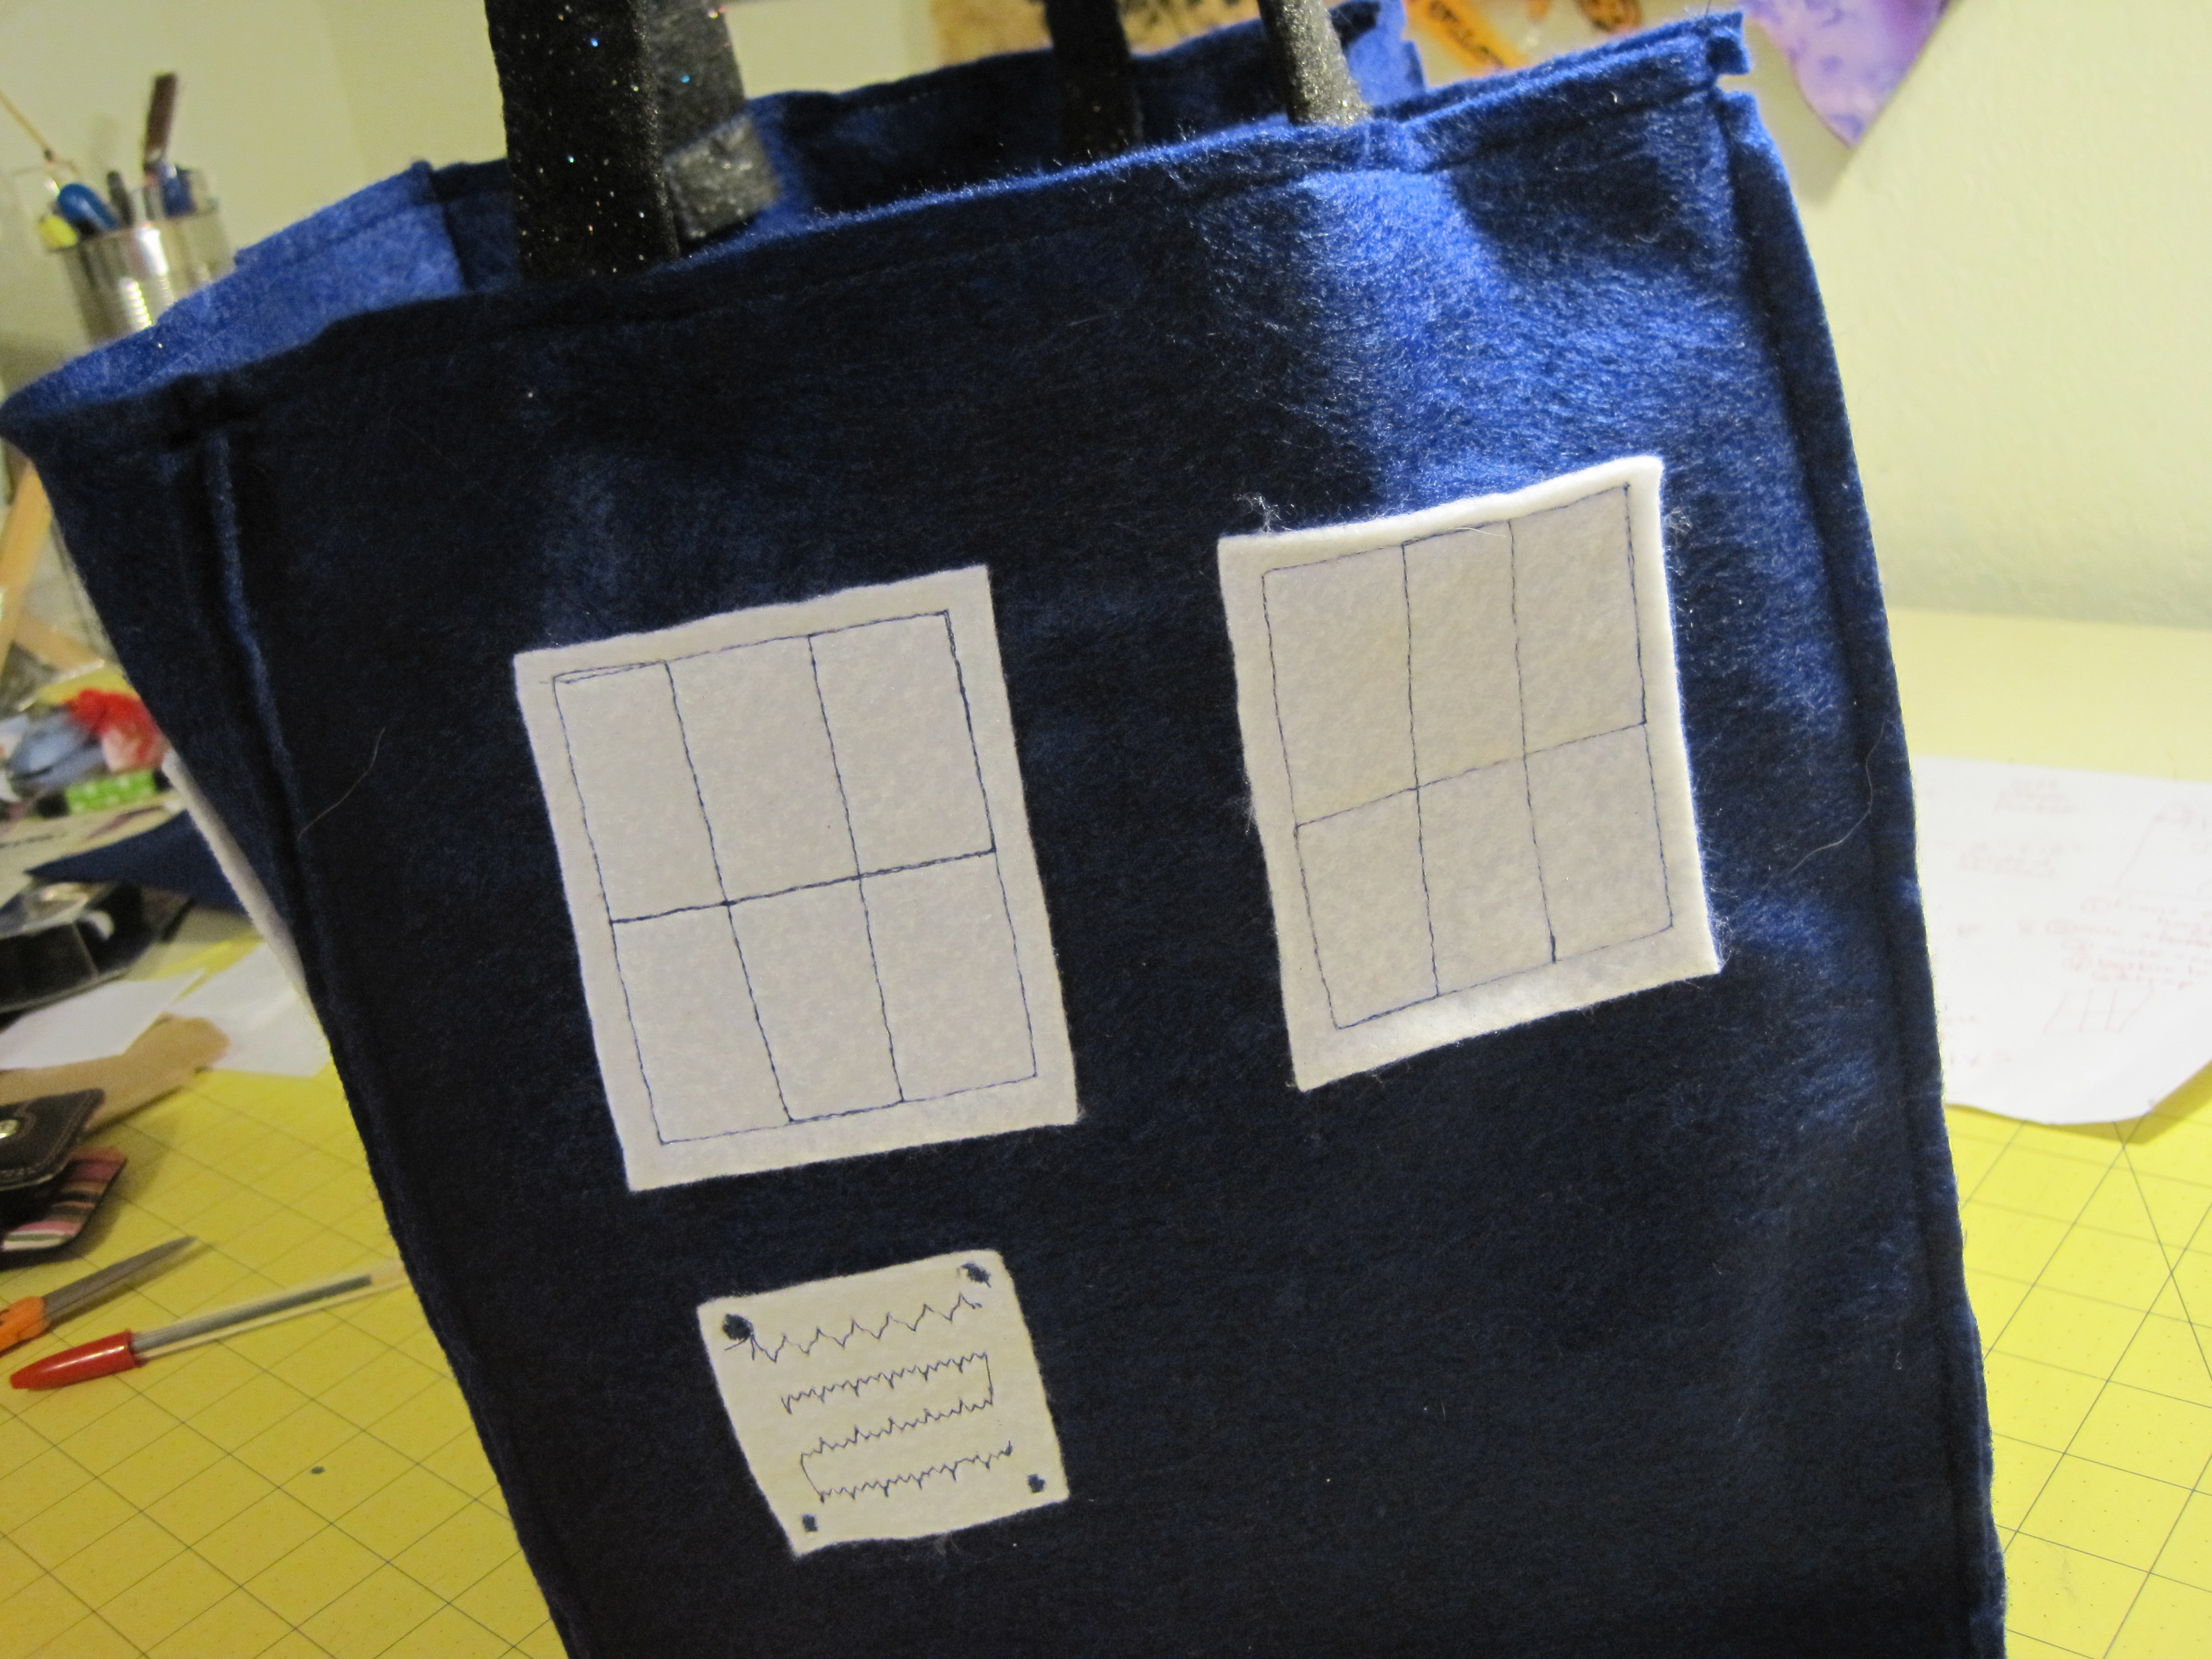
Using your ruler, arrange the window pieces on the 9″ x 12″ sheets of felt so that they are 1 1/2″ in from the sides and 2″ down from the top. For the TARDIS front, center the notice under the left window, leaving about 1/2″ in between.
Arrange window pieces on remaining three 9″ x 12″ blue felt.
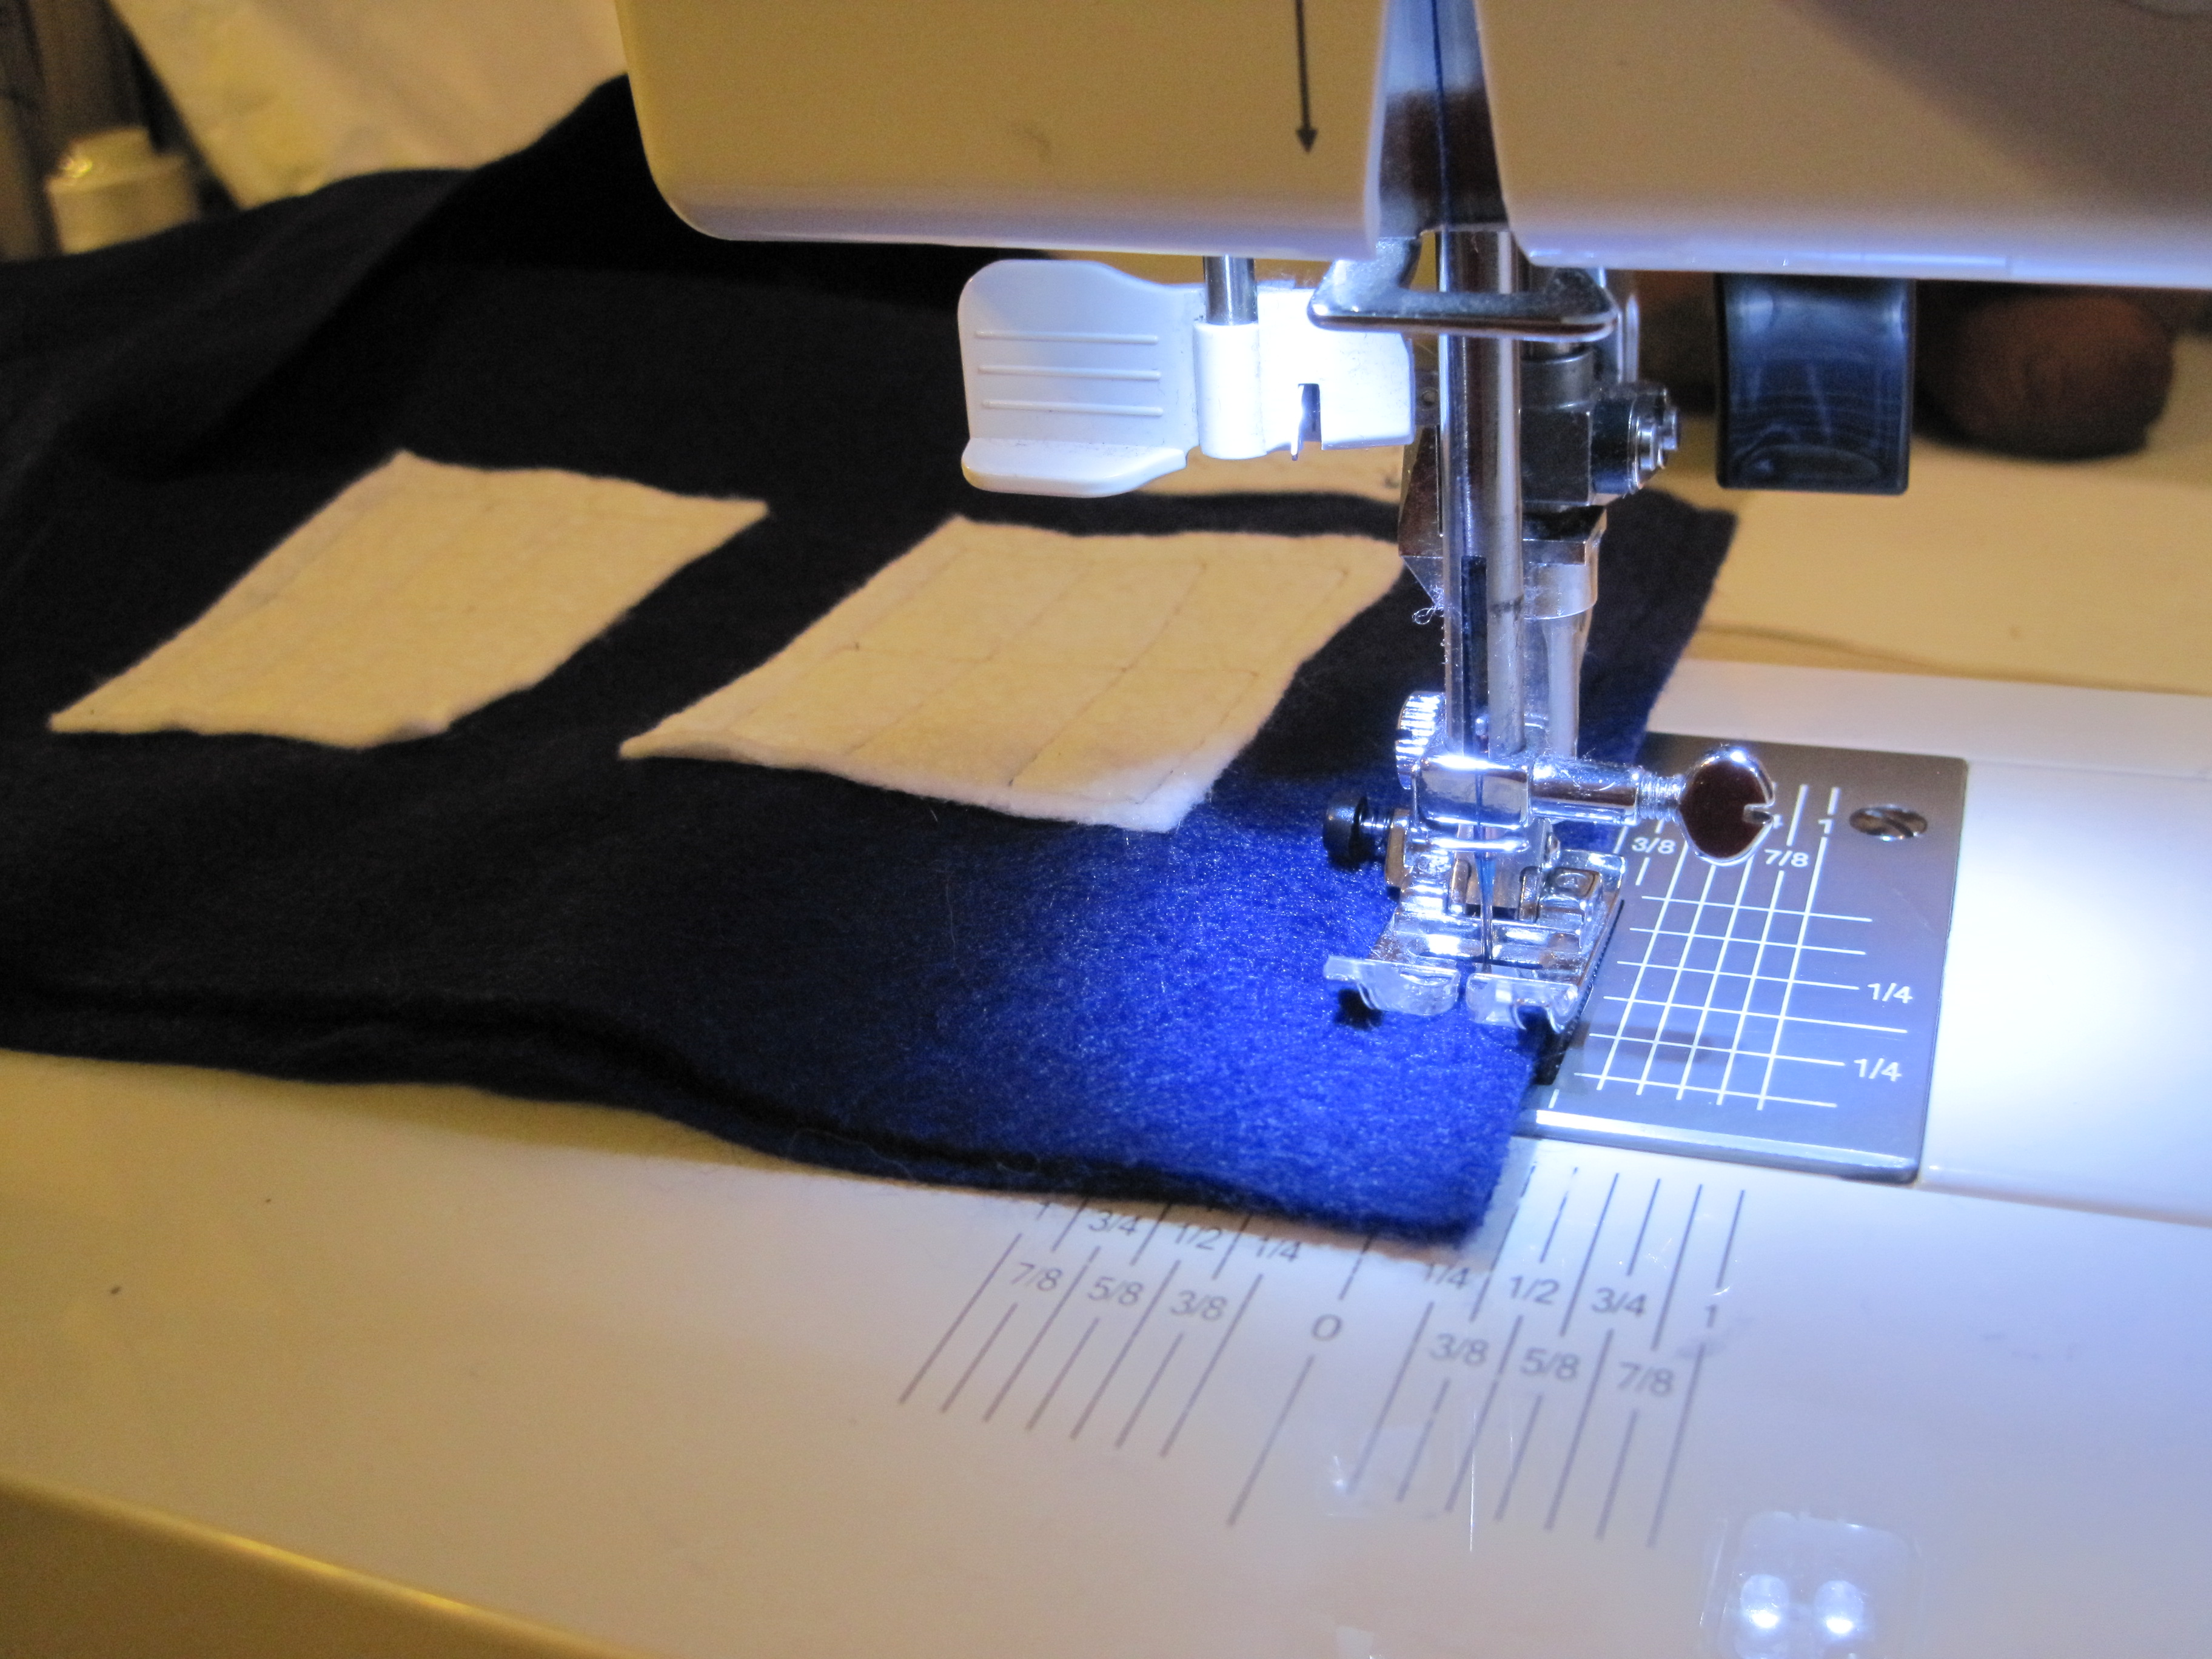
Stitch windows in place, 1/4″ in from outside of white felt. The TARDIS windows have six panes. My windows are estimated, but you can measure and divide your stitching if you choose. Repeat for the two sides that are NOT the front of the TARDIS.
For the Notice on the front, sew some random stitching onto the 1 1/2″ x 2″ piece of felt (as shown). This gives the illusion of writing from a distance. Stitch on each of the four sides with a short zig-zag stitch in each corner (forgot to take a close up…look about three photos down and you can see what I mean!).
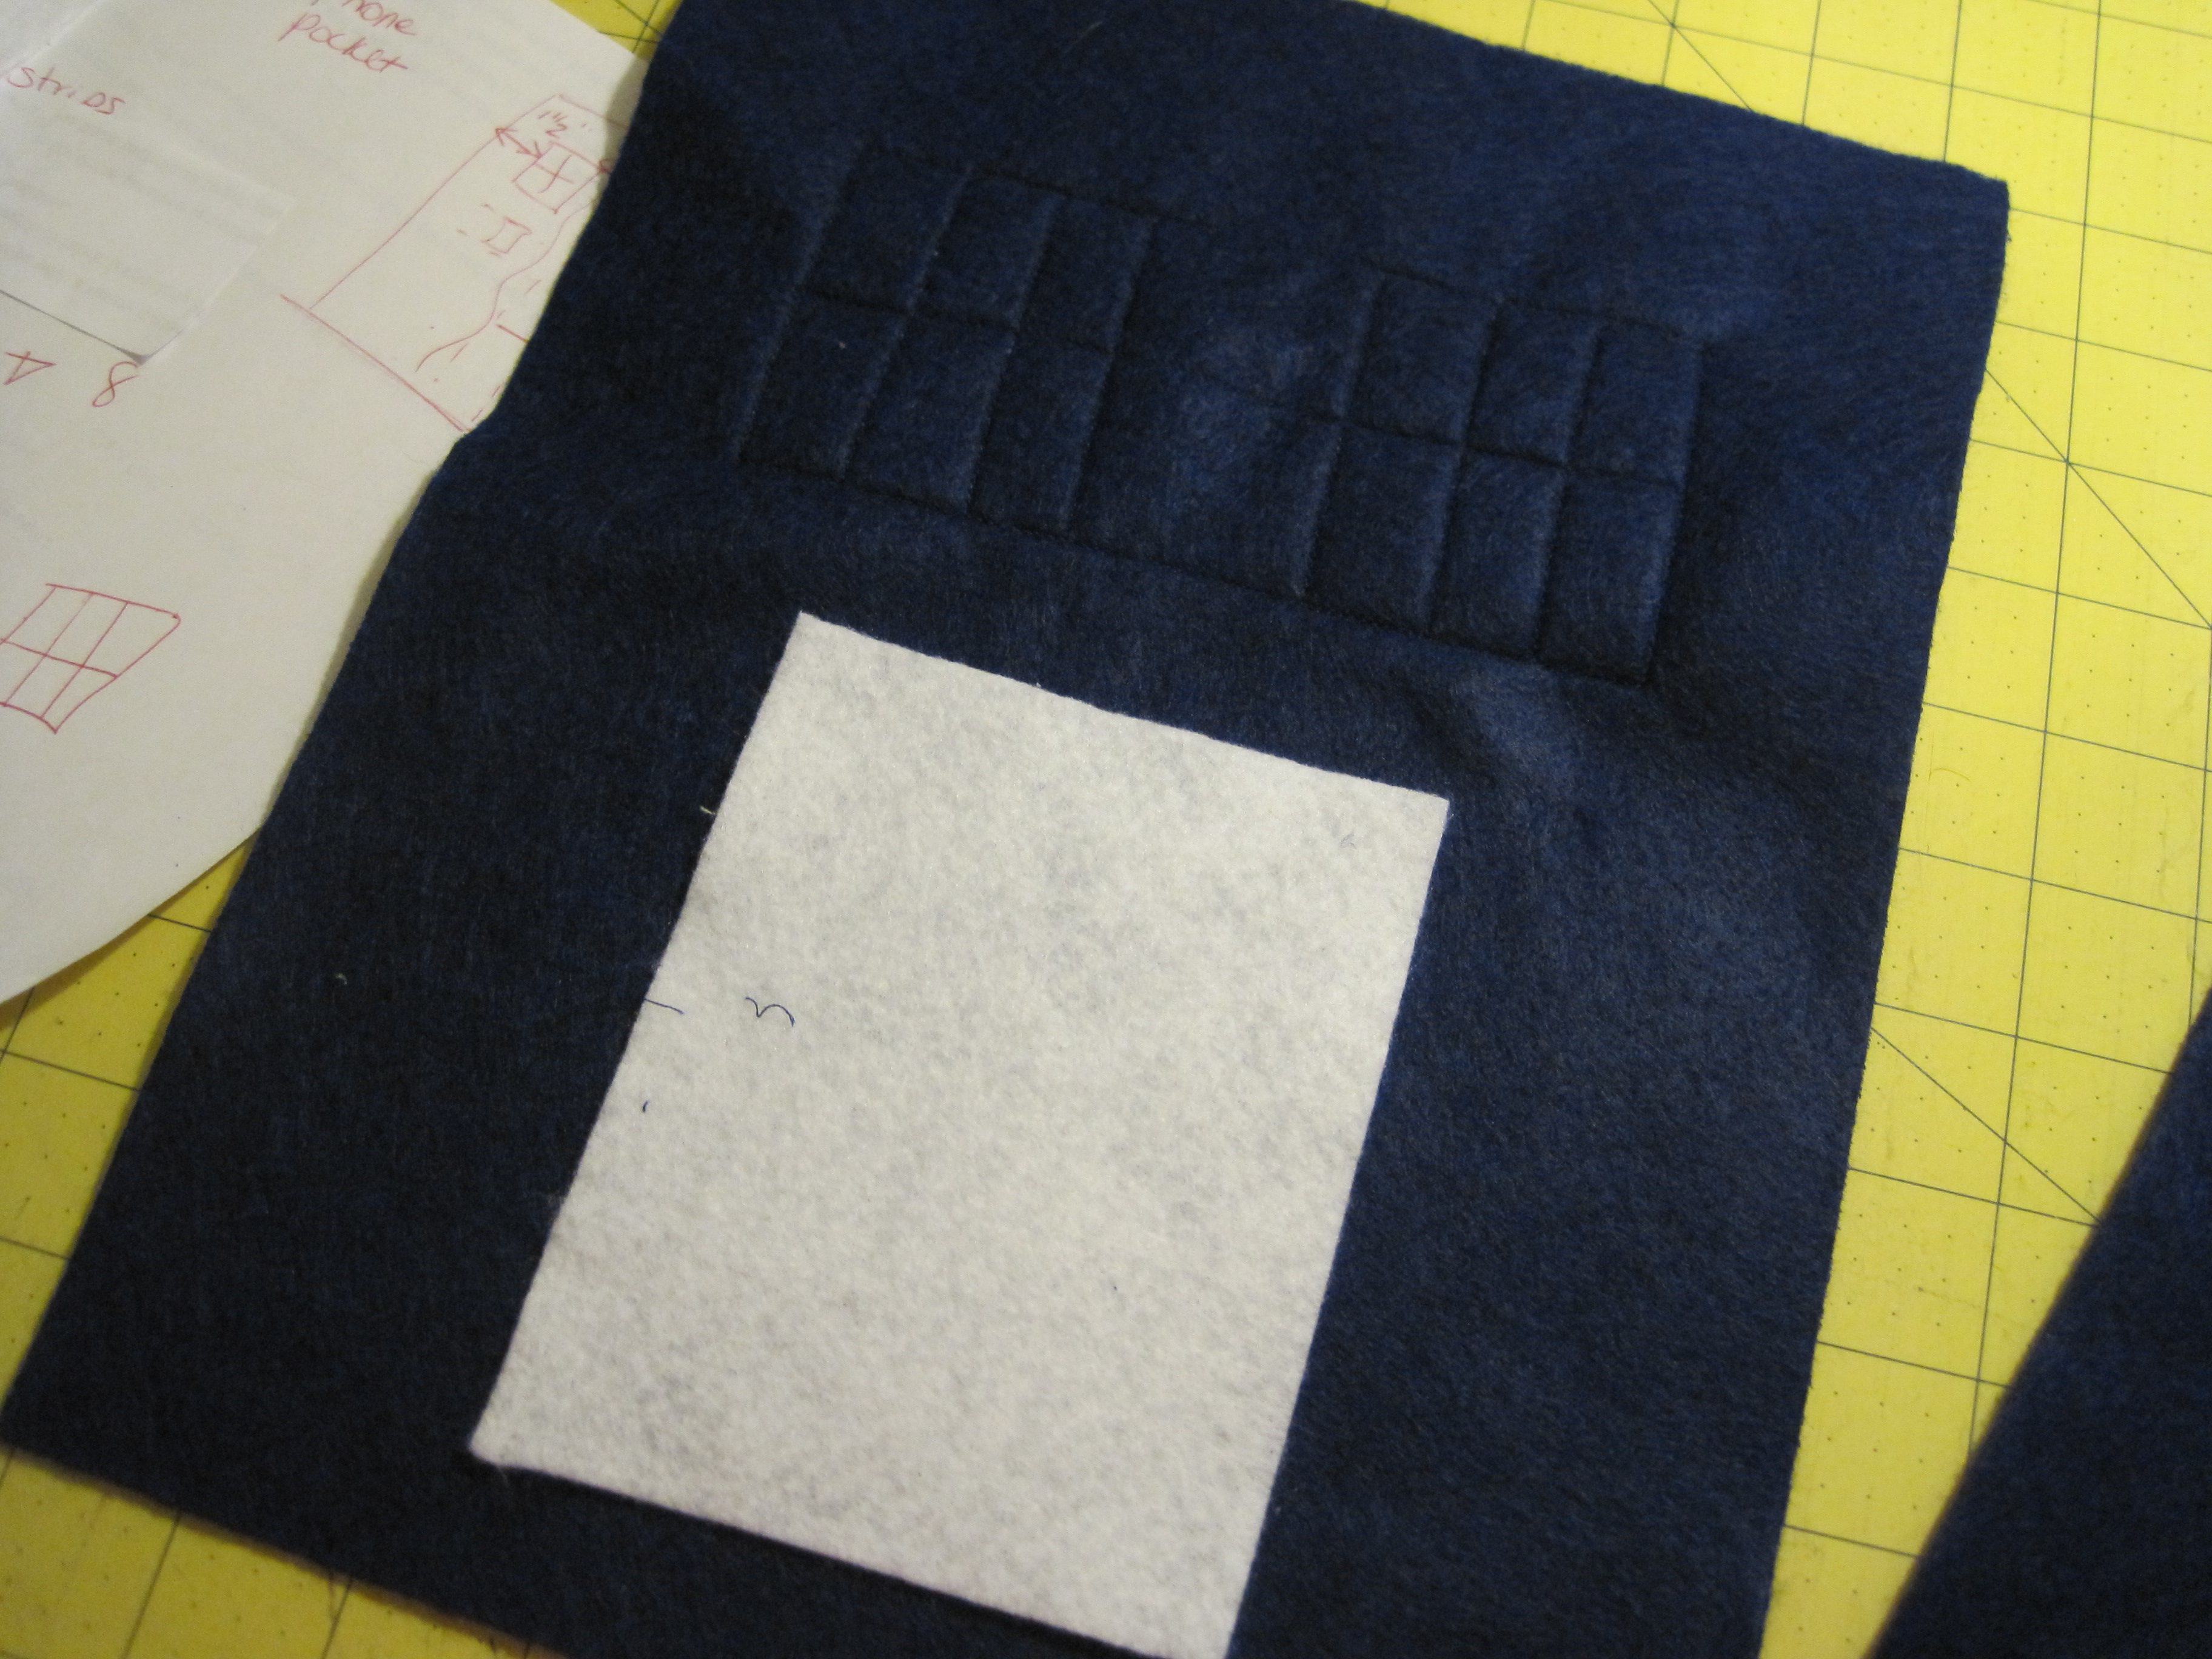
OPTIONAL – After stitching all the windows on, choose a blue side that is NOT the TARDIS front. Align the 4″ x 5″ piece of felt under the window stitching. Straight stitch on the two long sides and across the bottom, making sure to backstitch at the start and stop.
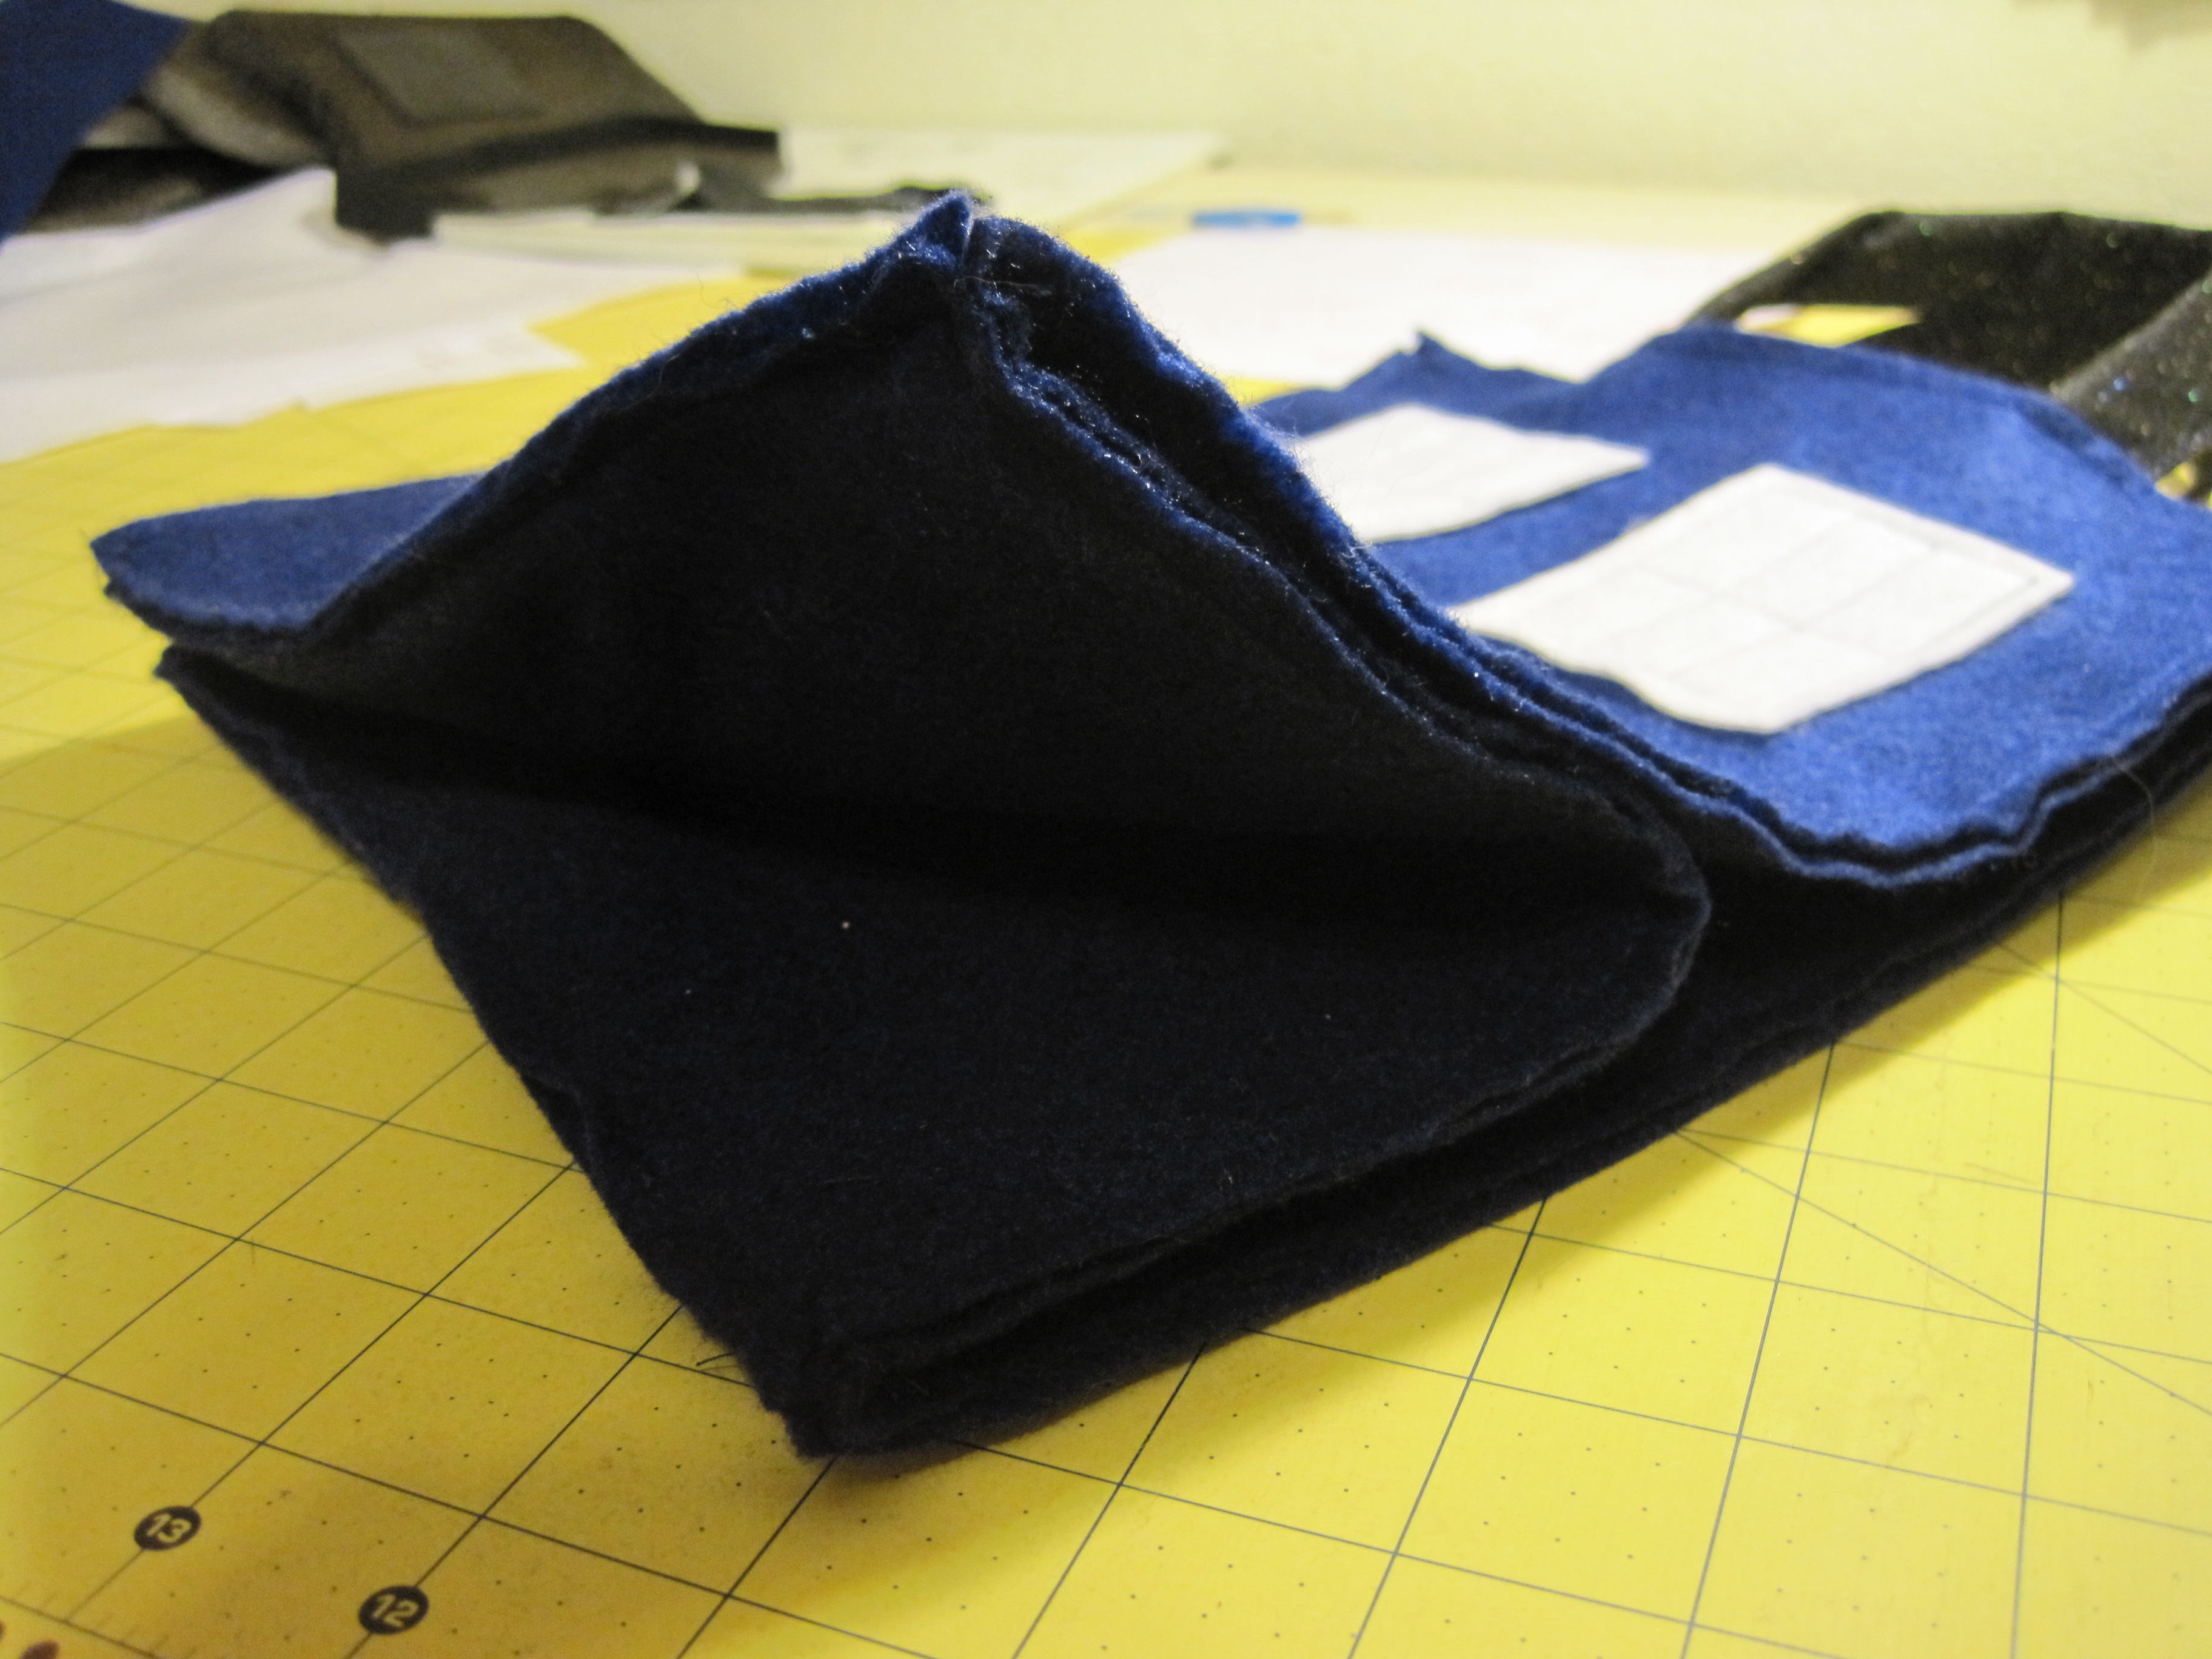
For handles – Fold in half lengthwise and zig-zag down the open side.
Your TARDIS is now ready for assembly!
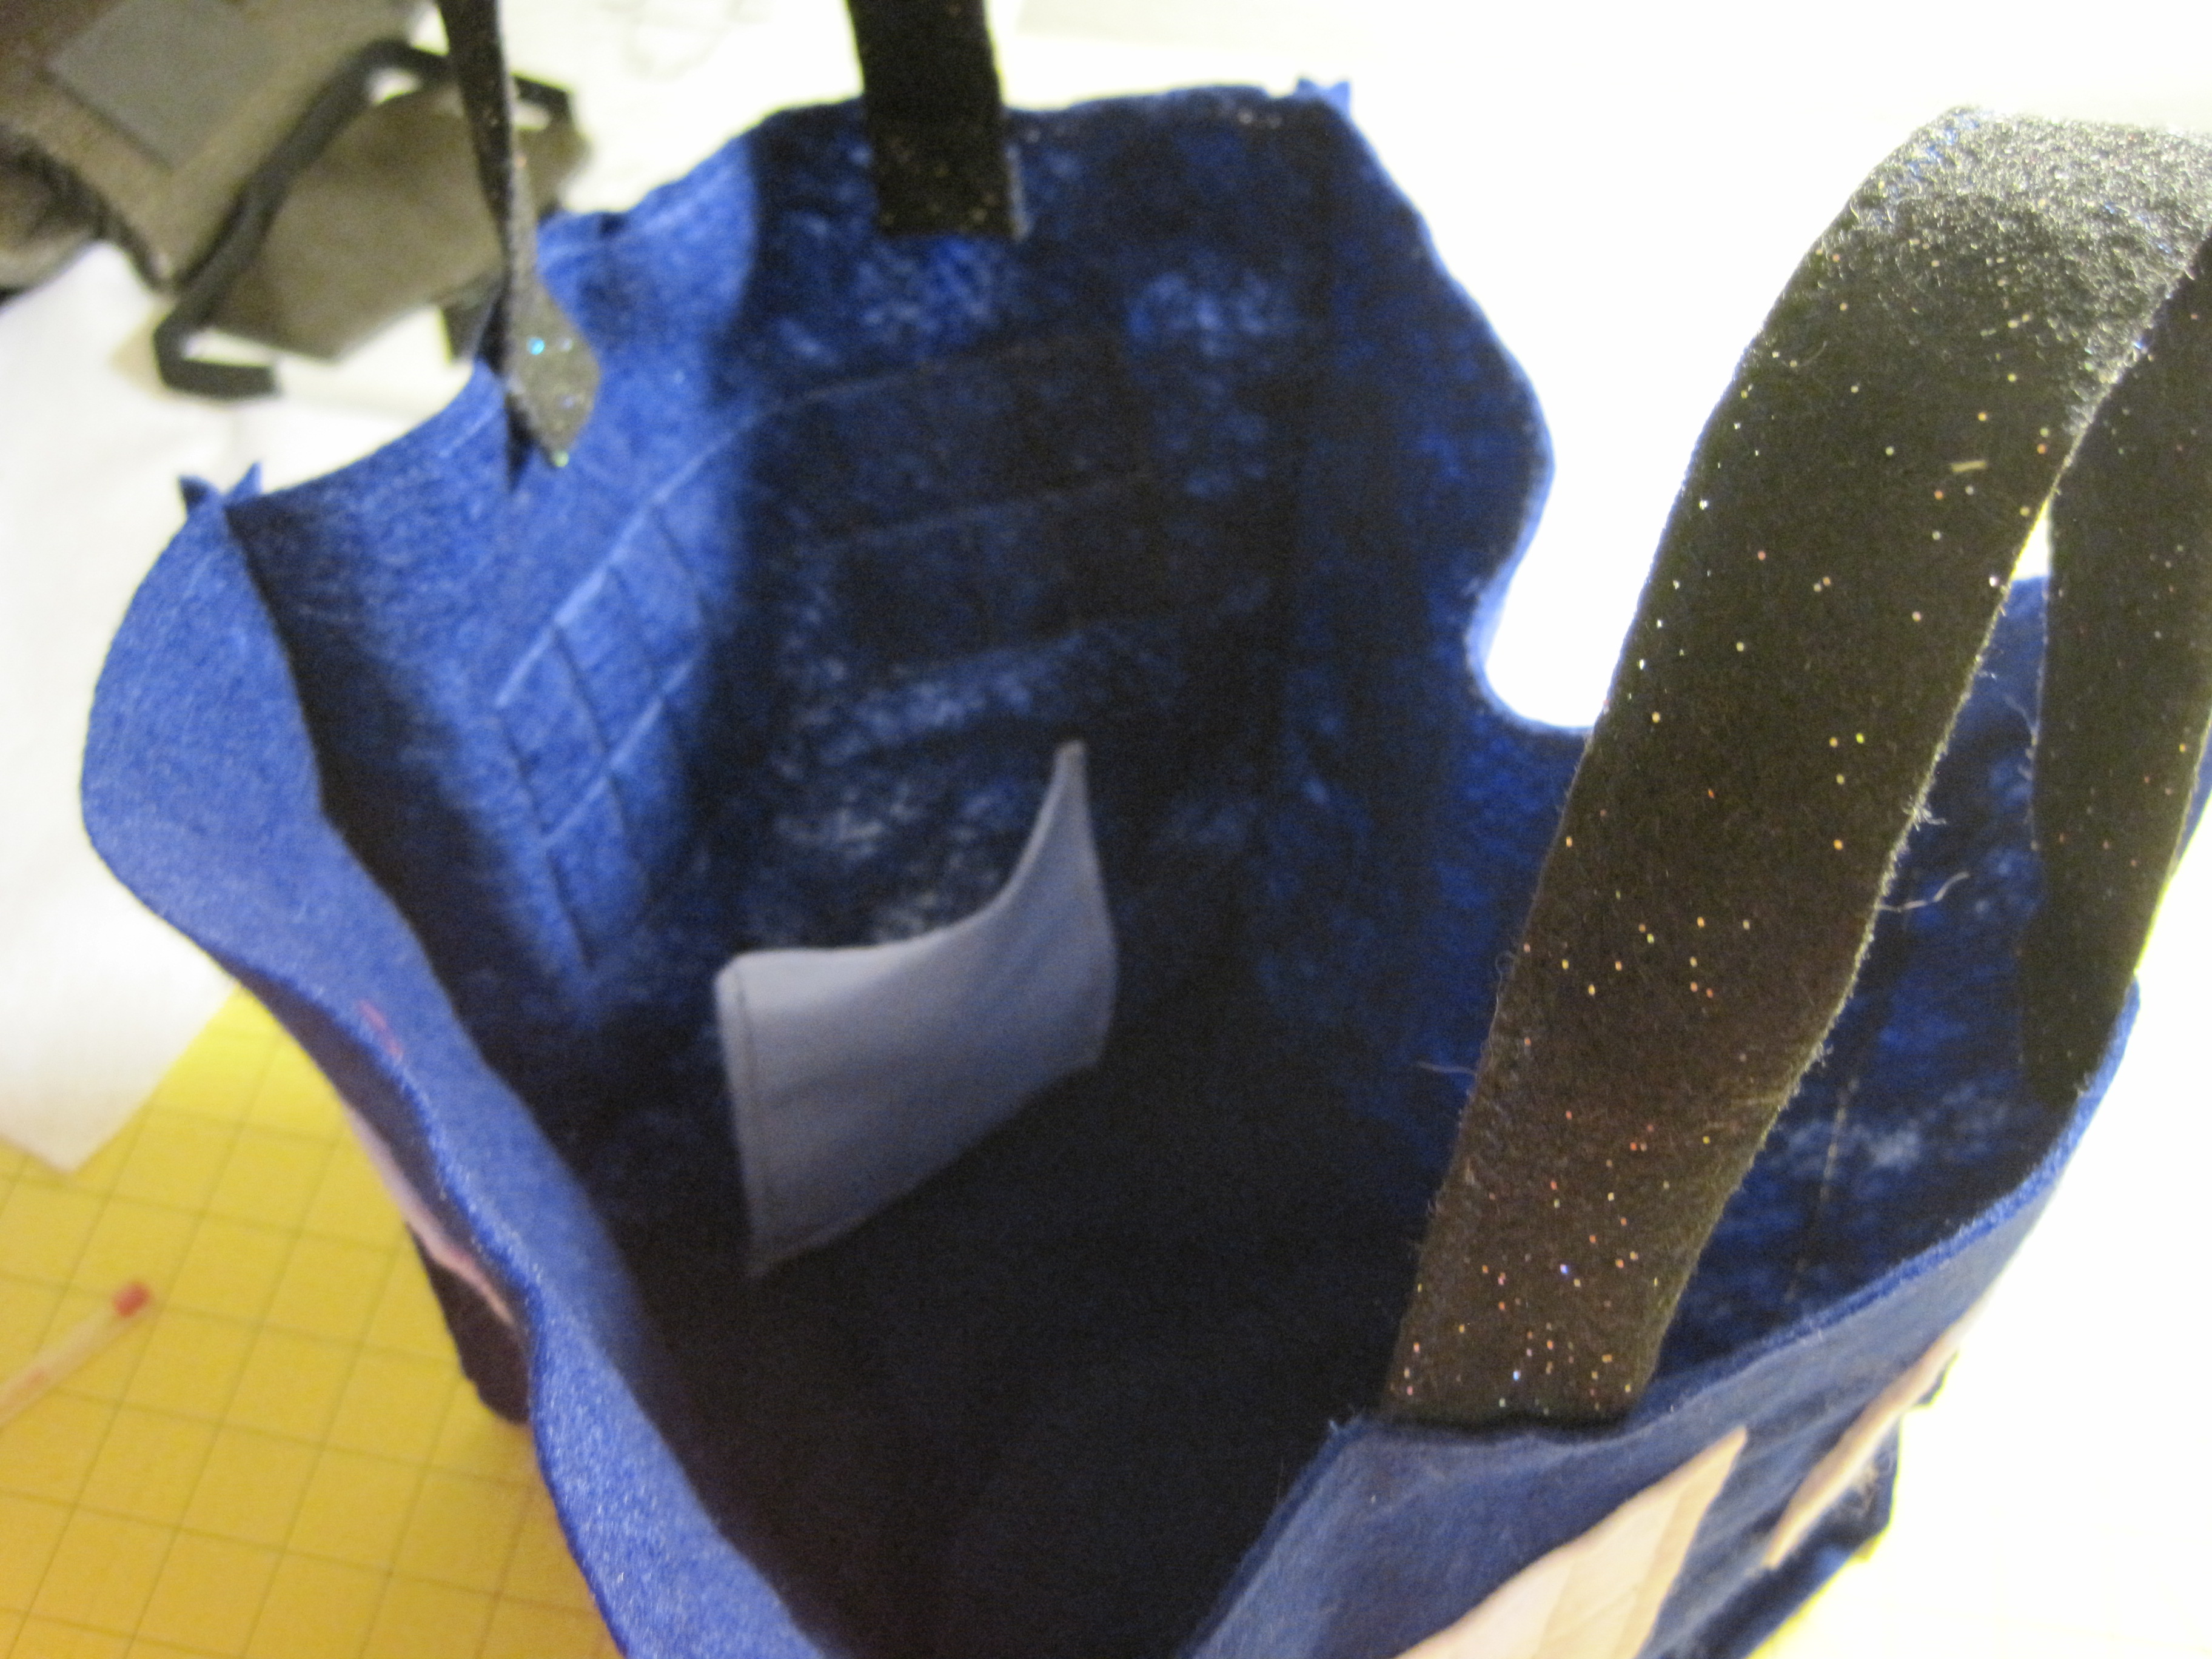
Find the front (windows with notice) and back (cell phone pocket – or without if you didn’t make one) and bag bottom. With the insides facing/right side out, place the bottom of the front piece along one side of the 9″ x 9″ bottom piece. Stitch across, leaving 1/4″ at the beginning and end of the seam unstitched (see below).
Seam allowance will be on the outside of the bag.
1/4″ unstitched on the end of the seam (both ends).
Repeat stitching for the back side, making sure the bottom of that side meets the bottom of the bag.
Sew the remaining two pieces on opposite sides, continuing to leave 1/4″ open at each end of the seam.
Find the front and the piece immediately to the left. Bring the two long sides (wrong side) together, right side out.
Stitch from corner to corner.
Repeat for the remaining three corners.
You now have a TARDIS with no handles. That’s the last bit and then you’re done!
The handles attach to the front (windows + notice) and back of the bag. Use a ruler to line up the handles 2 1/2″ in from each side of the bag, with about 2/3″ inside. Pin in place.
Starting at a corner seam, stitch all the way across the top of the bag, backstitching when you get to the handles. For added strength, continue stitching all the way around the bag, flattening out the seam allowance with your fingers before you stitch across it.
Handles…and you can see the cell phone pocket, too!
Snip above and below the top stitching to make the little notches (optional).
The TARDIS Treat Bag is easy to fold, just fold in the bottom and it will fold in on itself.
And… DONE!
It’s wibbly wobbly, timey whimey…
Are you making projects from 31 Days of Halloween? Share your photos with my flickr group! There will be a fun surprise after Halloween for one lucky winner!
Someday, I will have one tree dedicated to fandom (let’s face it, mostly Harry Potter!) themed Christmas ornaments. The ones pictured here are just some of my favorites.
A small disclaimer: I did not make most of these. They were gifts from fandom friends, all of whom are very talented!
There are FOUR snitches!
As you can see, I’ve been extraordinarily gifted by my very talented friends over the years. I love pulling out these extra special handmade ornaments each year and taking a moment to reflect on how lucky I am to have so many wonderful people in my life!
Stop back by every day between now and Christmas as I share crafts and ornaments that are special to me and my family.
I’d love to hear about your special decorations, too!
I love October and everything the Halloween season has to offer and thought it would be fun to dust off some old favorite crafts and feature them during the course of this month.
I made this fun bag for my daughter back in her freshman year of high school. This year? She’s a freshman in college and the proud owner of the Doctor Who Stitch Along quilt I completed in August of this year.
To make reliving the Crafts of Halloween Past even more fun for you, I’m offering a challenge with a prize!
Make any of my Halloween projects or patterns posted during the course of the month and post a photo to the Sewhooked flickr group tagged “halloween.”
At the end of the month, I’ll draw a winner to receive a free copy of Quiltmaker’s Quilts from 100 Blocks, which includes my pattern Corn Maze! Heck, I’ll even sign it, if you like! 😉
Do you design paper pieced, embroidery, applique or other quilt patterns? Love John Green books? Join us for the #tfios Design Challenge, happening now on Fandom In Stitches!
This is the last weekend to receive 10% off your total purchase from the Sewhooked Shop. Ends midnight, July 1, use coupon code SUMMER2012. Offer valid here on Sewhooked and in my Etsy Shop. Not valid on Craftsy.
The non-embroidered blocks, as well as the snowball corners, came from the fabric I treated myself to after my Trunk Show. I say “treat,” but I was really restocking my stash after the frenzy of sewing in April/May.
I think I’ll add borders and make this a baby-sized quilt and save it for a gift. Goodness knows I’ve needed enough baby gifts the last few years!
Project of Doom Signature Quilt (3/12 – March) – Top pieced!* Borders added & embroidery in progress.
Granny’s Signature Quilt (4/12 – April) – Complete! I am creating a mini-bio for each person whose name appears on this quilt, thanks to a great deal of help from my mom
The Project of Doom (5/12 – May) – Complete! Look for this quilt at the AAQG‘s show in September.
In addition to creating new designs for Sewhooked and working on 12 for 2012, I’ve been able to squeeze in a little fandom stitchery! There’s no therapy quite like it for me!
Since I’ve had EQ7, I’ve been slowly going through all my old patterns (both fandom and non) and giving them an overhaul. For the most part, my goal has been to simplify the patterns and make them more appealing to others to piece, as well as less color-soaked for easier printing. After all, what’s the point of sharing if no one wants to actually make the pattern?! 😉
This week, I updated my TARDIS pattern. Both the original, and the highly simplified updated version are available for free through Fandom In Stitches.
I was particularly happy with the free-motion quilting on this one. I’ve been working hard this year to improve my technique and to expand the variety of patterns I can do.
I can’t wait to see your Summer Challenge photos! The poll will be posted on Monday…as well as a photo of the prize…which has grown a bit since it was originally posted!
Being the Doctor Who obsessed family that we have become, I suppose it’s no surprise that one of my kids is going as The Doctor for Halloween. My eldest has their Ten costume all ready to go, courtesy of a day of thrifting. Because I can’t not be involved in costume making, I asked if there was anything I could do.
“Mum, can you can you make a TARDIS bag for my treats?”
You better believe I can!
Despite it’s awesomeness, the TARDIS Treat Bag is super simple.
You need:
9″ x 12″ acrylic felt sheets – 5 dark blue, 1 white and 1 glitter black
scissors
thread (I used navy blue)
ruler (rotary, if you’ve got one)
rotary cutter (optional)
sewing machine (optional)
You can definitely do this project without a rotary cutter and ruler and even without a sewing machine, so those items are optional. If you do hand stitch, make sure you make tight, even stitches and use heavy-duty knots so you don’t lose your candy!
Cutting Instructions:
from 1 sheet of blue felt (the other 4 sheets of felt stay 9″ x 12″), cut:
9″ x 9″ square -bag bottom
from 1 sheet of white felt, cut:
8 – 2 1/2″ x 3″ – Windows
1 – 1/2 x 2″ – Notice
(optional) 4″ x 5″ – cell phone pocket
Using your ruler, arrange the window pieces on the 9″ x 12″ sheets of felt so that they are 1 1/2″ in from the sides and 2″ down from the top. For the TARDIS front, center the notice under the left window, leaving about 1/2″ in between.
Arrange window pieces on remaining three 9″ x 12″ blue felt.
Stitch windows in place, 1/4″ in from outside of white felt. The TARDIS windows have six panes. My windows are estimated, but you can measure and divide your stitching if you choose. Repeat for the two sides that are NOT the front of the TARDIS.
For the Notice on the front, sew some random stitching onto the 1 1/2″ x 2″ piece of felt (as shown). This gives the illusion of writing from a distance. Stitch on each of the four sides with a short zig-zag stitch in each corner (forgot to take a close up…look about three photos down and you can see what I mean!).
Cell Phone Pocket
OPTIONAL – After stitching all the windows on, choose a blue side that is NOT the TARDIS front. Align the 4″ x 5″ piece of felt under the window stitching. Straight stitch on the two long sides and across the bottom, making sure to backstitch at the start and stop. This is your cell phone pocket.
For handles – Fold in half lengthwise and zig-zag down the open side.
Your TARDIS is now ready for assembly!
Find the front (windows with notice) and back (cell phone pocket – or without if you didn’t make one) and bag bottom. With the insides facing/right side out, place the bottom of the front piece along one side of the 9″ x 9″ bottom piece. Stitch across, leaving 1/4″ at the beginning and end of the seam unstitched (see below).
Seam allowance will be on the outside of the bag.
1/4″ unstitched on the end of the seam (both ends).
Repeat stitching for the back side, making sure the bottom of that side meets the bottom of the bag.
Sew the remaining two pieces on opposite sides, continuing to leave 1/4″ open at each end of the seam.
Find the front and the piece immediately to the left. Bring the two long sides (wrong side) together, right side out.
Stitch from corner to corner.
Repeat for the remaining three corners.
You now have a TARDIS with no handles. That’s the last bit and then you’re done!
The handles attach to the front (windows + notice) and back of the bag. Use a ruler to line up the handles 2 1/2″ in from each side of the bag, with about 2/3″ inside. Pin in place.
Starting at a corner seam, stitch all the way across the top of the bag, backstitching when you get to the handles. For added strength, continue stitching all the way around the bag, flattening out the seam allowance with your fingers before you stitch across it.
Handles…and you can see the cell phone pocket, too!
Snip above and below the top stitching to make the little notches (optional).
The TARDIS Treat Bag is easy to fold, just fold in the bottom and it will fold in on itself.
Free TARDIS paper pieced pattern, designed by me
and tested (as shown) by the ever awesome Shae.
Oh, fandom quilting, how do I love thee?
Bigger on the inside, that’s how!
In a fit of I Am A Fan, I made this a highly detailed TARDIS. I designed this pattern to be a 6″ block, but I would recommend enlarging it even bigger to work on, just for sanity’s sake. Shae made her’s 6″ and it worked out beautifully.
Why is the pattern purple? No idea. I drafted it back in May of 2009 and then it got lost amongst my files. When I unearthed it a couple of weeks ago, I realized it just needed numbering and separating. My guess is I had some really good wine and thought the purple was blue…
Is there anything more iconic to a Doctor Who fan than The TARDIS?
Oh, maybe. There are striped scarves and Daleks and, of course, Sonic Screwdrivers. But I think the TARDIS is pretty darn cool.
It just so happens that my 11 year old son does, too.
We’re big on painting, decorating and embellishing in our house. My daughter has The Fat Lady on her bedroom door, and has had for years now. My son has been waiting for just the right inspiration to decide what he’d like on his door.
This summer, it came to him. The Doctor’s TARDIS.
This was not a hard project, but it was time consuming between steps. Here’s how we did it!
Project Supplies:
A large, flat surface, primed and painted some variety of light blue
Measurements of the door
graph paper
pencil
ruler
yard stick
calculator (for those like me that don’t do math in their heads)
painter’s tape
navy blue acrylic paint
white acrylic paint
1″ and 2″ white vinyl letters (available at craft stores, mine are from Hobby Lobby)
off-white paper, printed with the notice (clickable version below)
Modge Podge or other decoupage sealer
The first step is probably the trickiest. After measuring the door, I taped two pieced of graph paper together and then made a scale replica of the door. Using a photo of the TARDIS, I drew up what was as close as I could come to a scale replica, being the door is tall and narrow.
Our door was already painted light blue, so we moved on to measuring. If your door is not blue, remove the doorknob, prime, paint and let dry overnight before moving on.
Next, we used the yard stick and started measuring. We started by finding the center of the door and working our way out, comparing constantly to our graph paper design (which you can see on the right of the photo).
Once the pencil lines were on, we started taping. I’ll show how we did it and add how I wish we’d done it…
We taped outside the windows and inside the door panels (we should have taped inside ALL the rectangles and painted the whole thing navy blue and then gone back and taped off the windows…it would have been easier!).
Then we painted the inside of the window panels white.
We peeled off the tape around the windows and then started painting the rest of the door navy blue.
Once that was good and dry, we peeled off all the tape. You can see the blue from the original door make nice highlights for the panels.
Next, we penciled in lines for adding the vinyl letters. Even though I’d measured carefully on the graph paper, they’re not quite even. My kid is happy, so I left them!
Next, we used the blue paint pen (we tried a Sharpie maker, believe me, it did NOT work) to draw on the window panes and to add mitered corners around the light blue borders.
The notice was made in Photoshop by taking a TARDIS pic and then enlarging the notice. I then typed over the words, adjusting fonts and sizes until it was right for the size we needed. The is the scale version.
The notice was attached with glue and then smoothed completely down. I used Modge Podge to cover it, being very careful not to smear the ink.
Once the notice was dry, we added the doorknob back and we were done! I do have silver handles to add to make it even more TARDIS-like, but they aren’t pictured.
Sorry about the awkward photo. The door is at a 45 degree angle to the hallway, which makes it very tricky to photograph!