In which I share all three of Abbie’s finished Raggedies! It was such a joy working on them. Abbie made it easy by having so much done already. The two small ones were more of a UFO project than a rescue, but still very fun! The lanky girl was my favorite to work on, a true restoration, and extra special to know I was working on Abbie’s own doll!
In which I share a new Halloween quilt top, the (almost!) finished pumpkin candle holders from BFF Retreat, a new-to-me thrifted blouse, and Abbie’s beautiful Raggedy kiddos in need of both finish & restoration!
In which I share the amazing #thriftcrawl haul from almost a week with the world’s best BFF, Jewells68!
Y’all, it was so great to have her here, and I’m sure you can tell how happy it makes me. I was so excited, I even forgot to mention how completely awesome the new downstairs ceiling looks!
We hit Savers, Goodwill (two regular stores & the Outlet), Habitat Restore, Texas Thrift, Austin Creative Reuse, and the Austin Antique Mall. We also had a great time at Ikea!
We’re a bit busy around here this week getting ready for back to school and all the things it entails, but I do have one small, fun thing to share: 10 seconds of cat video!
This is our newest family member, Rose (adopted at the end of March this year), fetching a treat for herself. She gets treats every day to help with her shedding, and she can gobble up her entire ration in about 2 seconds and come out wanting more!
I found this on Pinterest and unlike most projects I’ve pinned, I actually made this one! Rose is a treat gobbler, so we thought anything that would slow her down would be a good thing.
I was able to find a blog that mentioned the craft, but not one that credits who came up with it.
What better way to decorate for Halloween than a flock of adorably spooky felt bats?
These guys are about as easy as it gets, needing only a few supplies and maybe half an hour of your time! We have lots of these cute little guys and have used them to decorate both inside and outside our front door.
To make reliving the Crafts of Halloween Past even more fun for you, I’m offering a challenge with a prize!
Make any of my Halloween projects or patterns posted during the course of the month of October and post a photo to the Sewhooked flickr group tagged “halloween.”
At the end of the month, I’ll draw a winner to receive a free copy of Quiltmaker’s Quilts from 100 Blocks, which includes my pattern Corn Maze!
Heck, I’ll even sign it, if you like!
Do you design paper pieced, embroidery, applique or other quilt patterns? Love John Green books? Join us for the #tfios Design Challenge, happening now on Fandom In Stitches!
Since the 5, 4, 3, 2, 1 series started, I’ve been reading with great interest and enjoyment the lists of other crafty-type folks. Since my world revolves around handmade, I thought it would be fun to jump in.
So…here you go!
Me ~ Jennifer Ofenstein, aka ofenjen
One Project You Are Particularly Proud Of
This one is super easy. It’s the project I just wrapped up earlier this month, The Project of Doom (see what I did there, I even have “project” in the title!). The Project of Doom was a Harry Potter Block of the Week Mystery Quilt that I designed, wrote, edited and hosted from January – August of this year for Harry Potter Paper Piecing. It was my gift to the Harry Potter fandom, which has given me so very much. You can find The Project of Doom archived here (Fandom in Stitches) and here (Sewhooked).
Two Mistakes You’ve Made in the Past
1. Tying my self-worth to how accepting others are of my work. This was an especially hard lesson to learn. I hit a wall a couple of years ago when I had a book contract canceled. The publisher, after months of working with me, decided that my work wasn’t “mainstream” enough, despite having chosen my work for it’s whimsical nature. I had been working on the book project for about a year and a half at that point and it was a big pill to swallow. In the end I realized that my work is what it is because it’s part of who I am and being mainstream has never been my goal. I’m okay with that.
2. Much more fun, but still a mistake; doing too much at once. I love running community projects such as swaps and challenges and craft-alongs, and, and, and…the list just goes on! It’s much too easy to get very caught up in too many things and become overwhelmed. I’ve gotten much better at stepping back and taking a breathe before starting something new and huge.
Three Things That Make Your Work Unique
1. My whimsical style. I love hearing from people that they can recognize my pieces just by seeing them. That’s an awesome compliment.
2. I craft happy, and I think that comes through. What miserable person would spend time designing the things I do?
3. My close relationship with fandom. While I do make a lot of non-fandom related projects, both quilts and other crafts, my first love is fandom crafting and the community around it. I’ve been crafting for fandoms of all variety my entire life and am the proud owner of Fandom In Stitches, free fandom quilt patterns by fans for fans, and Harry Potter Paper Piecing, a Harry Potter quilting community.
2. My camera/camcorder. Being able to share real images from my life and my work, whether a digital photo or a during TTMT is absolutely invaluable. It makes what I share real and I love that!
3. My sewing machine, of course. It’s the tool I use to make the magic go from paper to reality. My current machine is a Babylock Quest 2. *pets*
4. Recycled paper. I draw on the back of everything. When an idea is stuck in my head and only a paper and pencil will do, I grab a sheet of the pile of recycled paper I keep and start sketching, plotting or calculating!
1. The first one is easy, my family. They give me so much support and a ridiculous amount of good ideas. I’ll be putting my kids through college on the royalties they should have earned for sharing their ideas with me!
2. The books and movies that I love is obviously a big one. Harry Potter, the works of JRR Tolkien, Star Trek, Star Wars, Doctor Who… The results of many of those efforts can be seen on Fandom In Stitches or in my Craft tutorial archive.
3. Friends, friends, friends! My friends give me so many good ideas, I should have them on payroll! They’ll have to settle for homemade candy at Christmas.
4. Community feedback and comments. I love when ideas unfold through conversations in comments. They’ll often nudge me this way or that, sometimes completely unintentionally.
5. Past projects I’ve worked on. Sometimes I’ll be looking through photos of old project and wonder why I didn’t do it this or that way…and then I do!
This is one of my favorite dish towels. It’s horrible, frayed and falling apart. It’s stained from family pizza night and wiping up messes after my kids.
But it’s absorbent and rugged and I love it the waffle-y-ness of it.
Maybe I’ve loved this one a bit too much.
Finally, I decided to rescue this dish towel. The mission: patch the gnarly hole and make my dish towel fabulous again. Alright, okay, maybe not fabulous, but at least functional and not-so-scary.
The first step was to find a scrap of fabric that would be wide enough to patch the hole, while being long enough to go across and around the towel plus a couple of inches for overlapping (see below). I also pulled out a couple of different threads to decide what color I’d like to use.
Hem along the length of the fabric trip, top and bottom.
Lay the towel across the fabric strip, making sure the scary bit will be covered.
Fold fabric strip over, smoothing and pinning so the pieces are even.
Fold over end and pin in place.
I wanted a distinct stitch, so I chose an extra wide one on my sewing machine, D50. This particular stitch goes back and forth three times.
Use the fun stitch of your choice and stitch all the way around the patch. See that pin? Pull it out. You definitely do not want to stitch across it!
If you have a walking foot, use it! You are sewing on a towel after all and a walking foot will help pull the thickness through. Hmm, need to dust my sewing machine…
Turn the corner and keep on stitching!
After the outside edges are stitched, I changed to white thread and stitched rows along the patch. Remember, the inside of this patch is scary, loose, falling-apart towel. Extra stitching will give the towel spiffy new stability.
Turn the patch and stitch the other way.
Rescue mission complete! It’s still not perfect, and it still has some funky pizza stains, but it’s usable and won’t go to the landfill.
Reduce, reuse, recycle!
I have a couple more towels like this and am thinking it would be fun to add some patchwork for a fun repair!
Add your Sewhooked photos to my flickr group and you might be featured in a future post!
I woke up this morning to an inbox full of messages and posts on my Twitter and Facebook about a certain quilt showing up on Craft this morning. When I clicked the link, my eyes were filled with the image above.
Woah.
And you know what? There’s even a link to the Project of Doom!
You all know that if I love anything, it’s paper piecing and fandom. Despite having completed my quilt in 2007, I still love quilting Harry and I still love my fandom friends.
Thanks, Craft, for sharing my labor of love and thank you, thank you to everyone that was excited enough about it to get in touch with me first thing this morning!
Remember, all Harry Potter free quilt patterns on Sewhooked, as well as other fandom patterns, both mine and the Sewhooked Guest Designers‘, are moving to Fandom In Stitches. I’m two designers away from having the Harry Potter page complete, where you’ll find all HP patterns organized by categories in my favorite easy to browse thumbnail format.
Fandom patterns will continue to be available on Sewhooked for a limited time and then those pages will automatically re-direct to FiS.
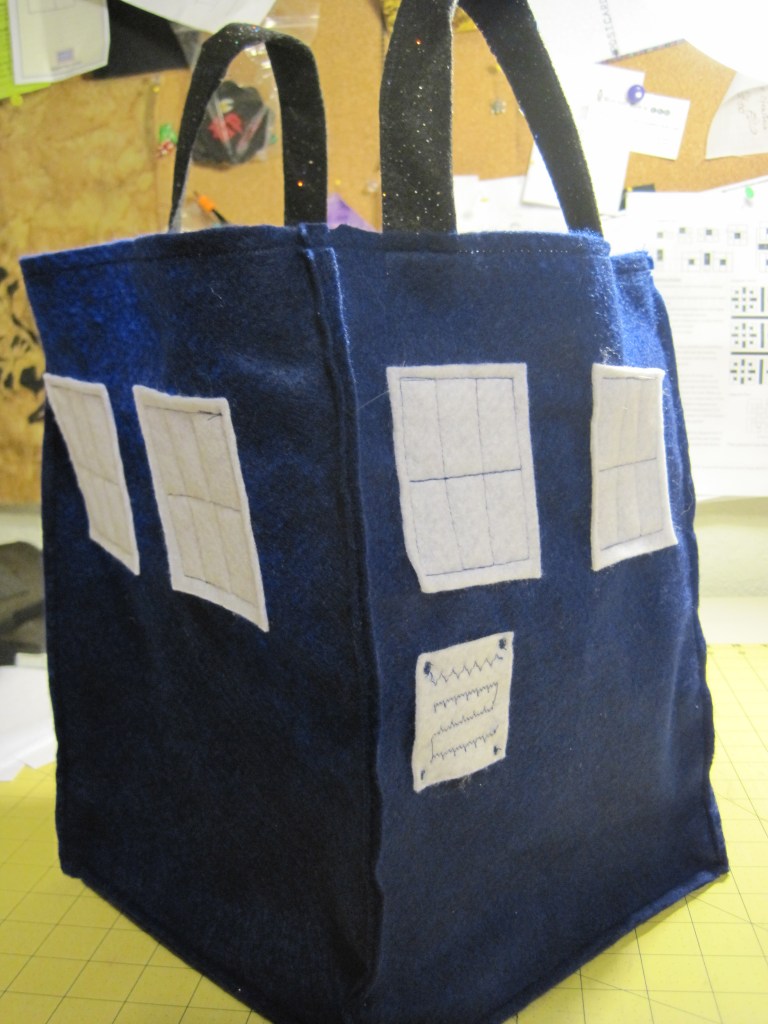
Being the Doctor Who obsessed family that we have become, I suppose it’s no surprise that one of my kids is going as The Doctor for Halloween. My eldest has their Ten costume all ready to go, courtesy of a day of thrifting. Because I can’t not be involved in costume making, I asked if there was anything I could do.
“Mum, can you can you make a TARDIS bag for my treats?”
You better believe I can!
Despite it’s awesomeness, the TARDIS Treat Bag is super simple.
You need:
9″ x 12″ acrylic felt sheets – 5 dark blue, 1 white and 1 glitter black
scissors
thread (I used navy blue)
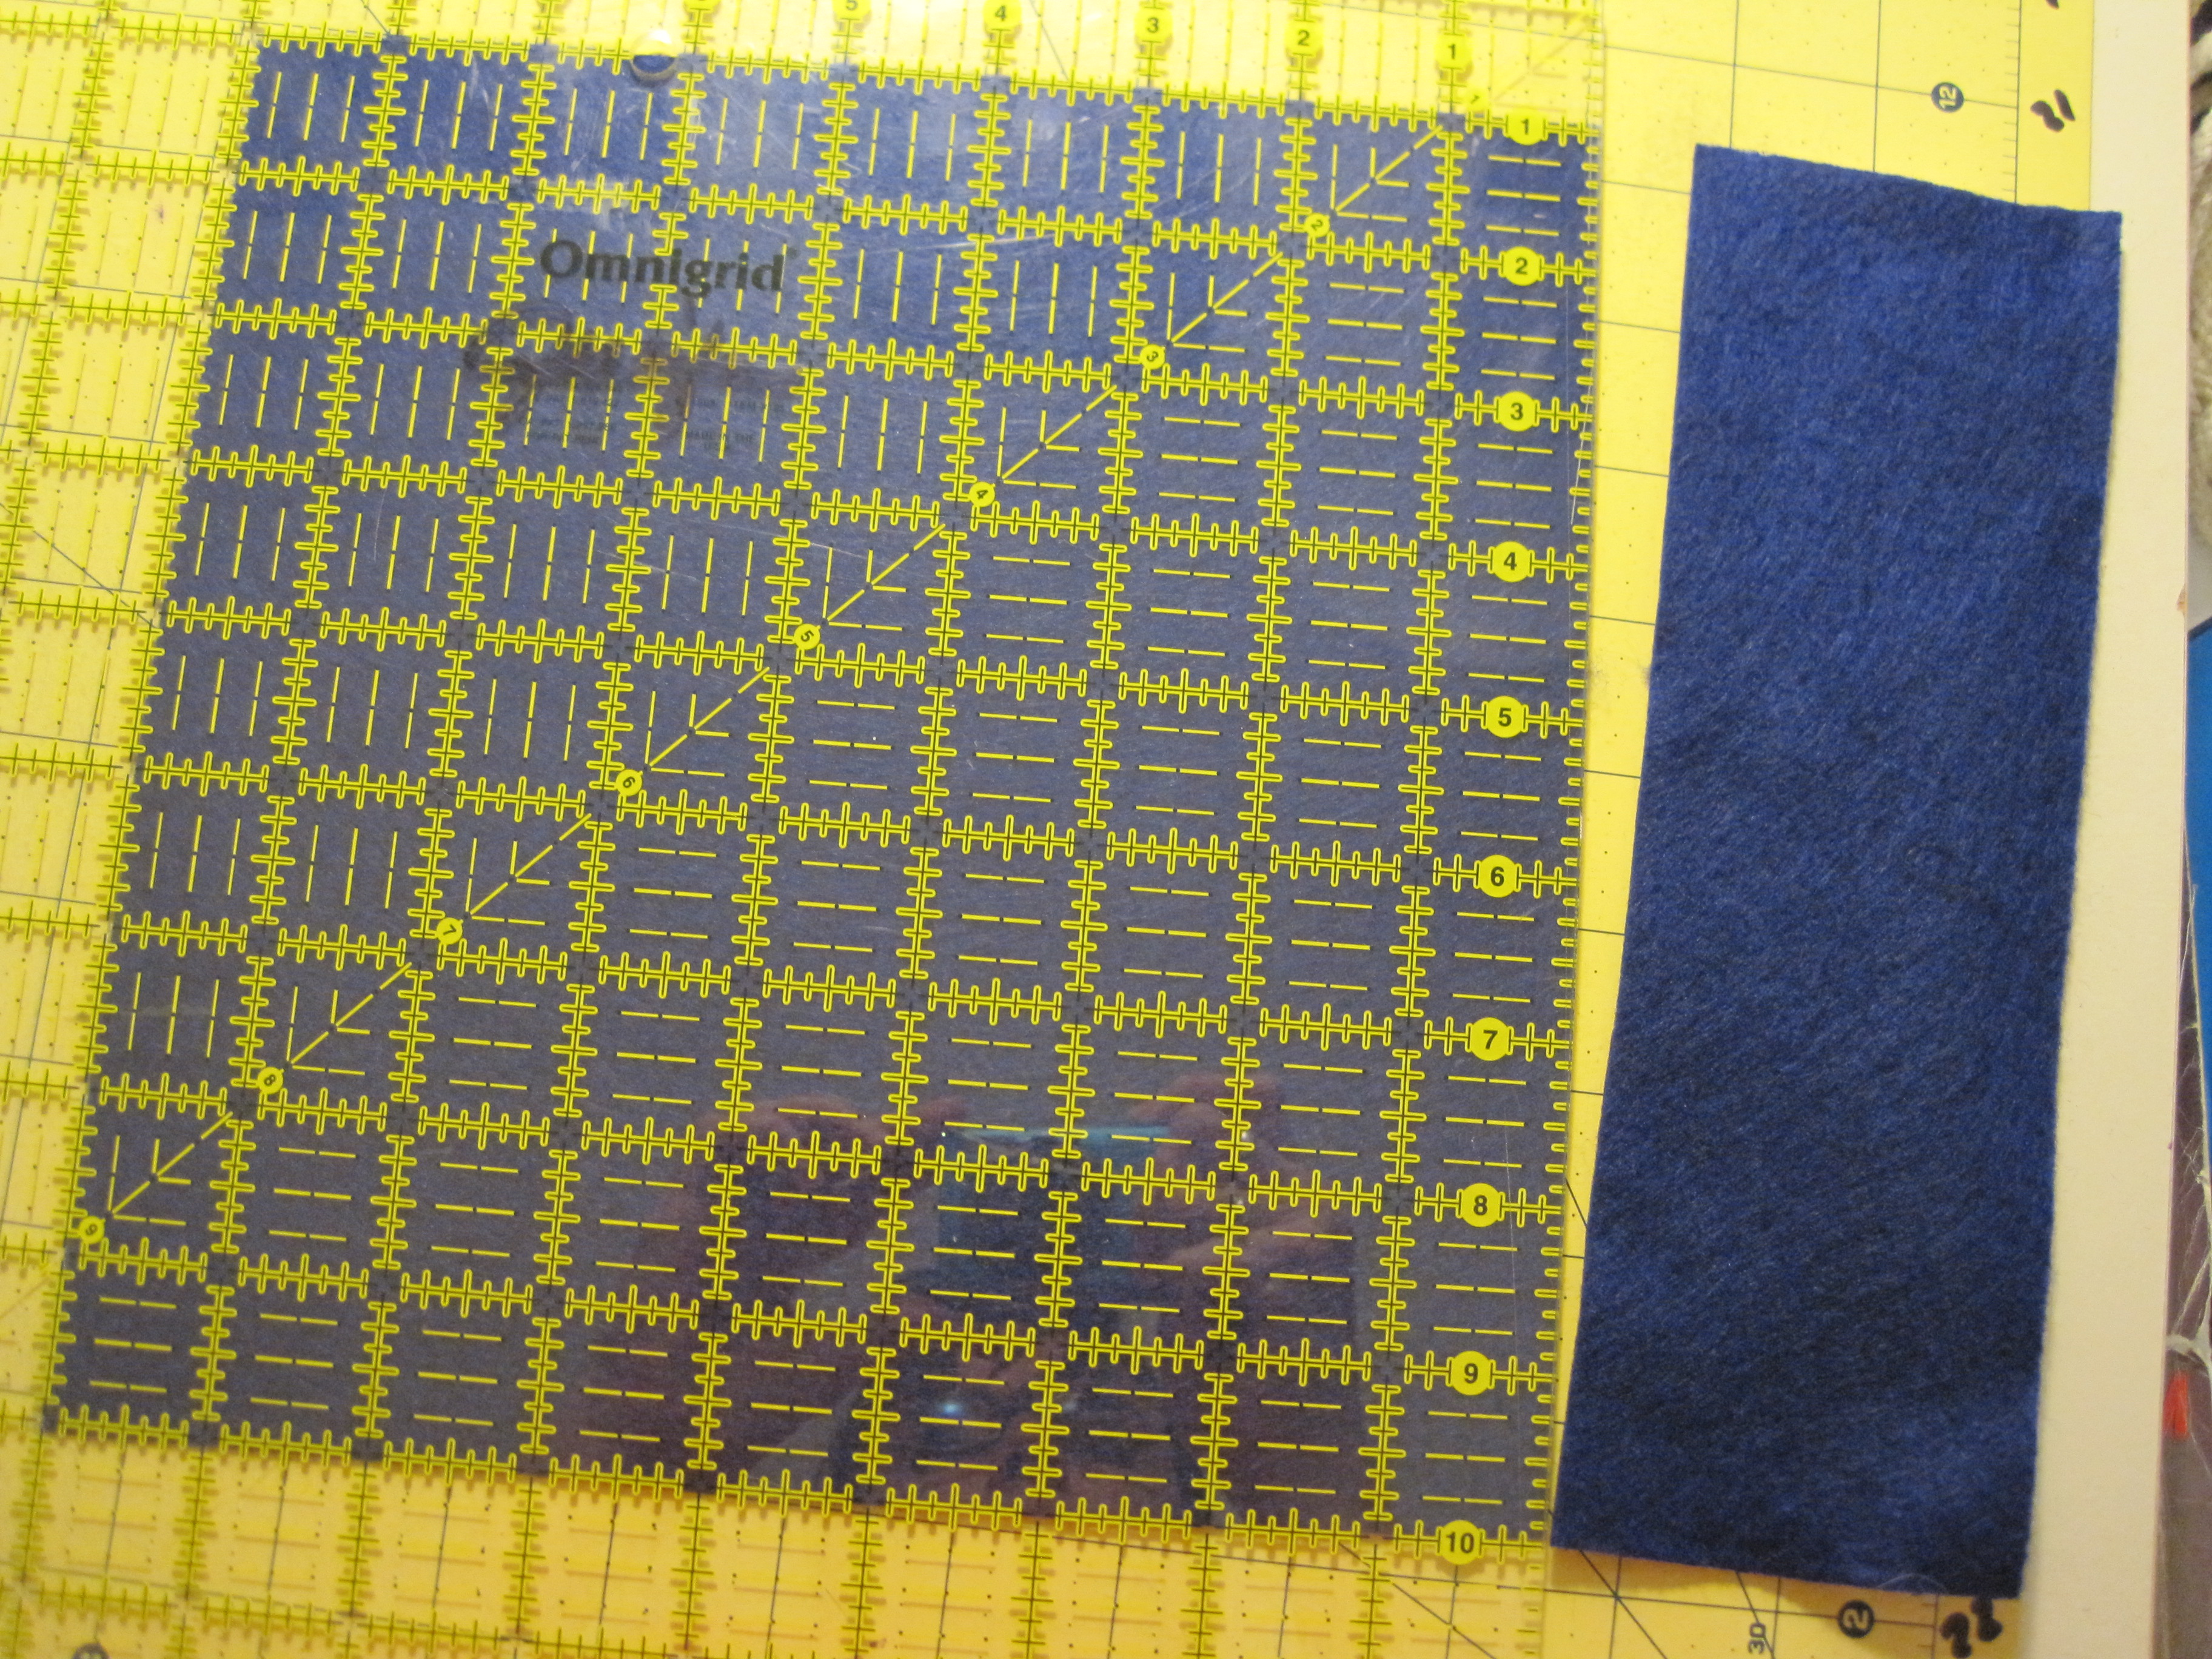
ruler (rotary, if you’ve got one)
rotary cutter (optional)
sewing machine (optional)
You can definitely do this project without a rotary cutter and ruler and even without a sewing machine, so those items are optional. If you do hand stitch, make sure you make tight, even stitches and use heavy-duty knots so you don’t lose your candy!
Cutting Instructions:
from 1 sheet of blue felt (the other 4 sheets of felt stay 9″ x 12″), cut:
9″ x 9″ square -bag bottom
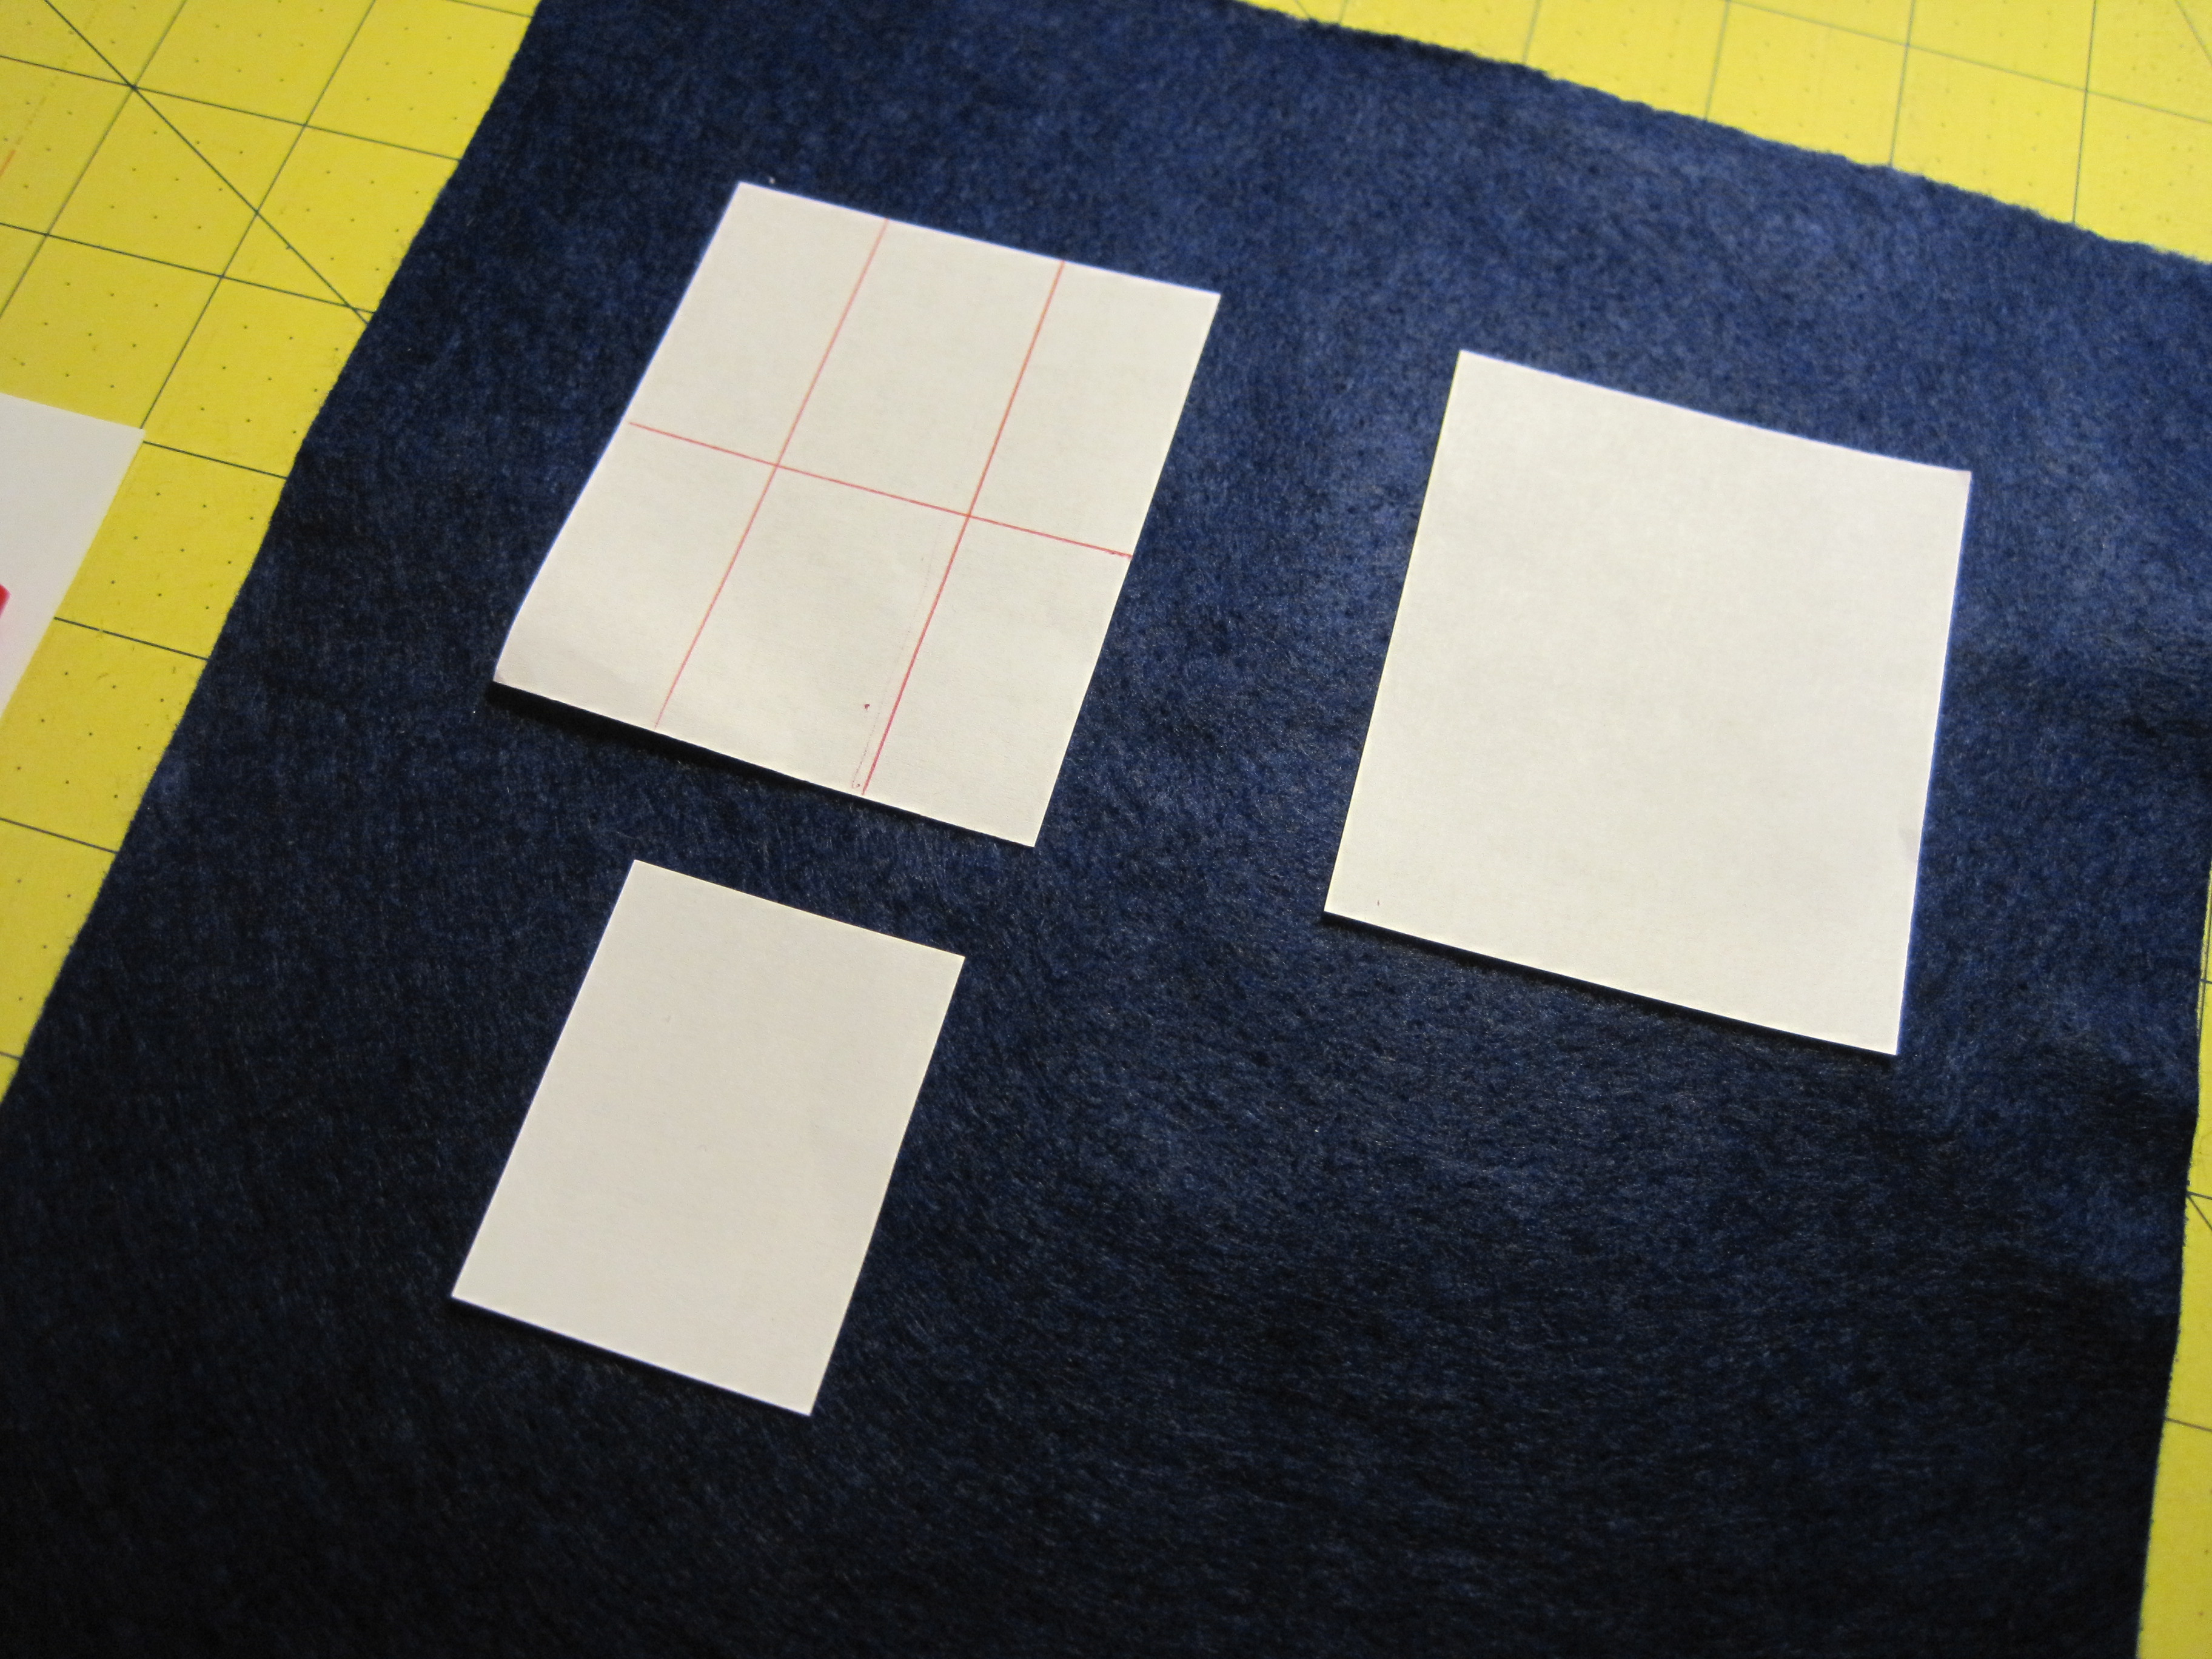
from 1 sheet of white felt, cut:
8 – 2 1/2″ x 3″ – Windows
1 – 1/2 x 2″ – Notice
(optional) 4″ x 5″ – cell phone pocket
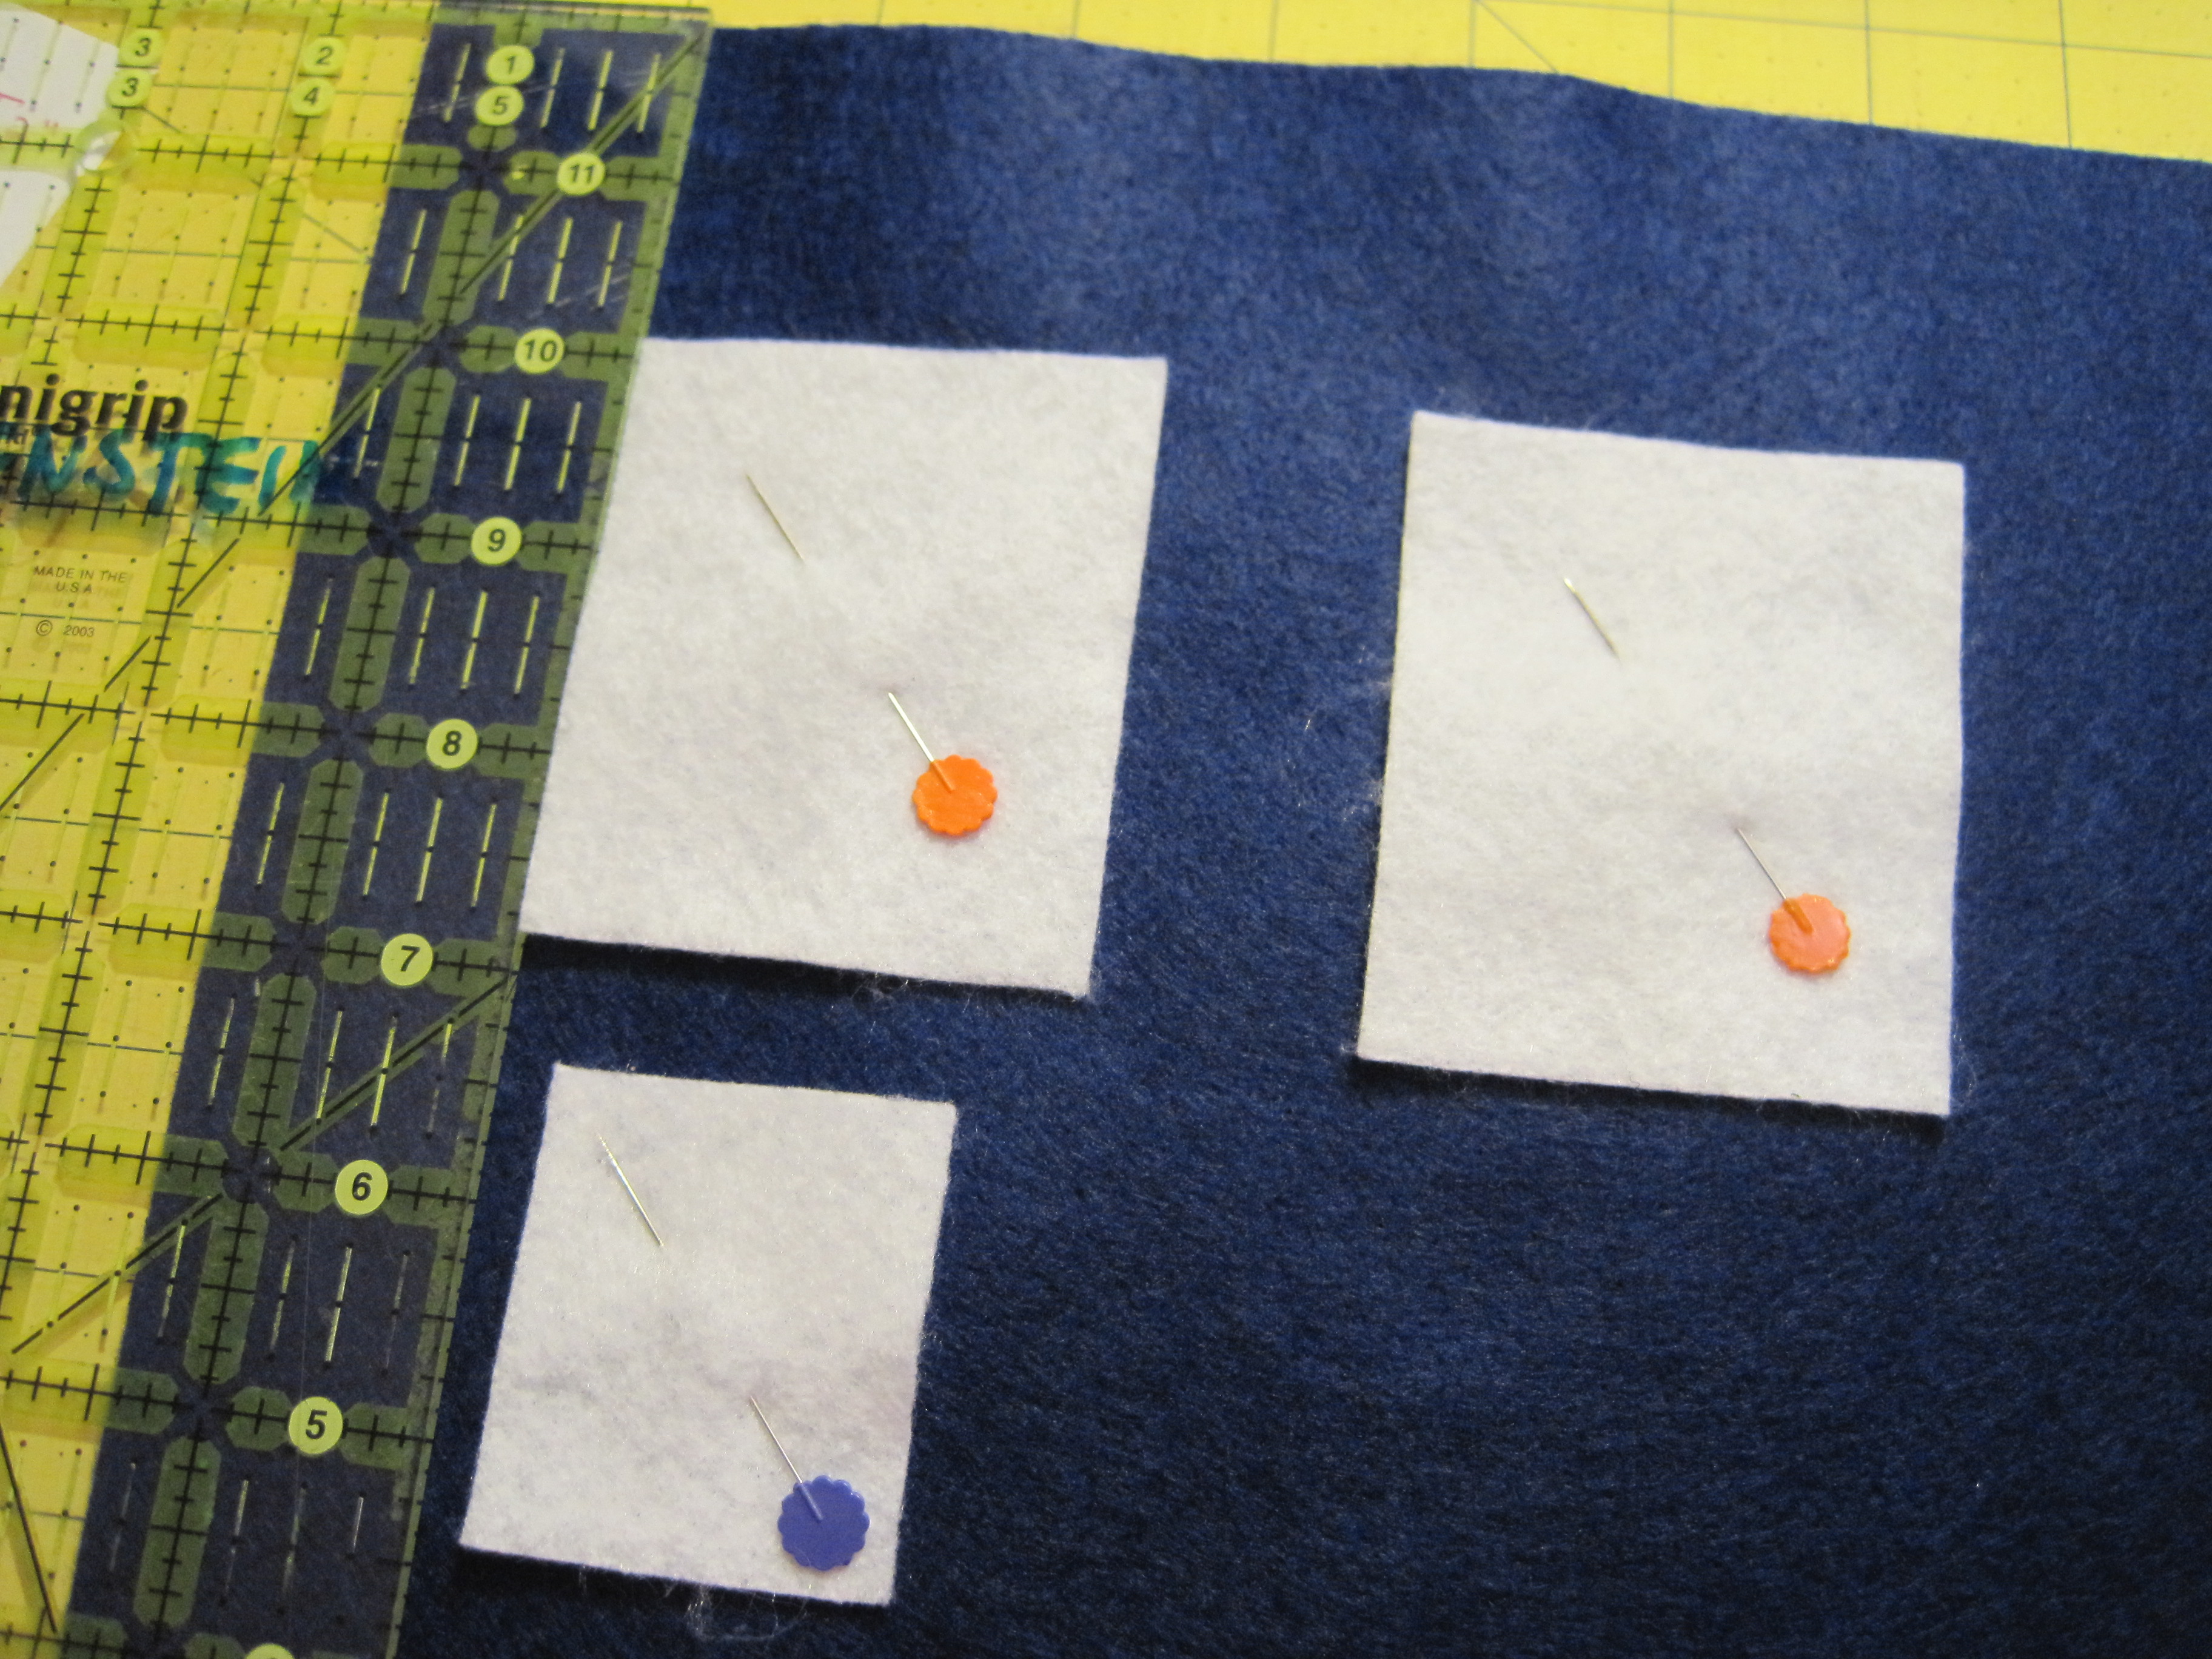
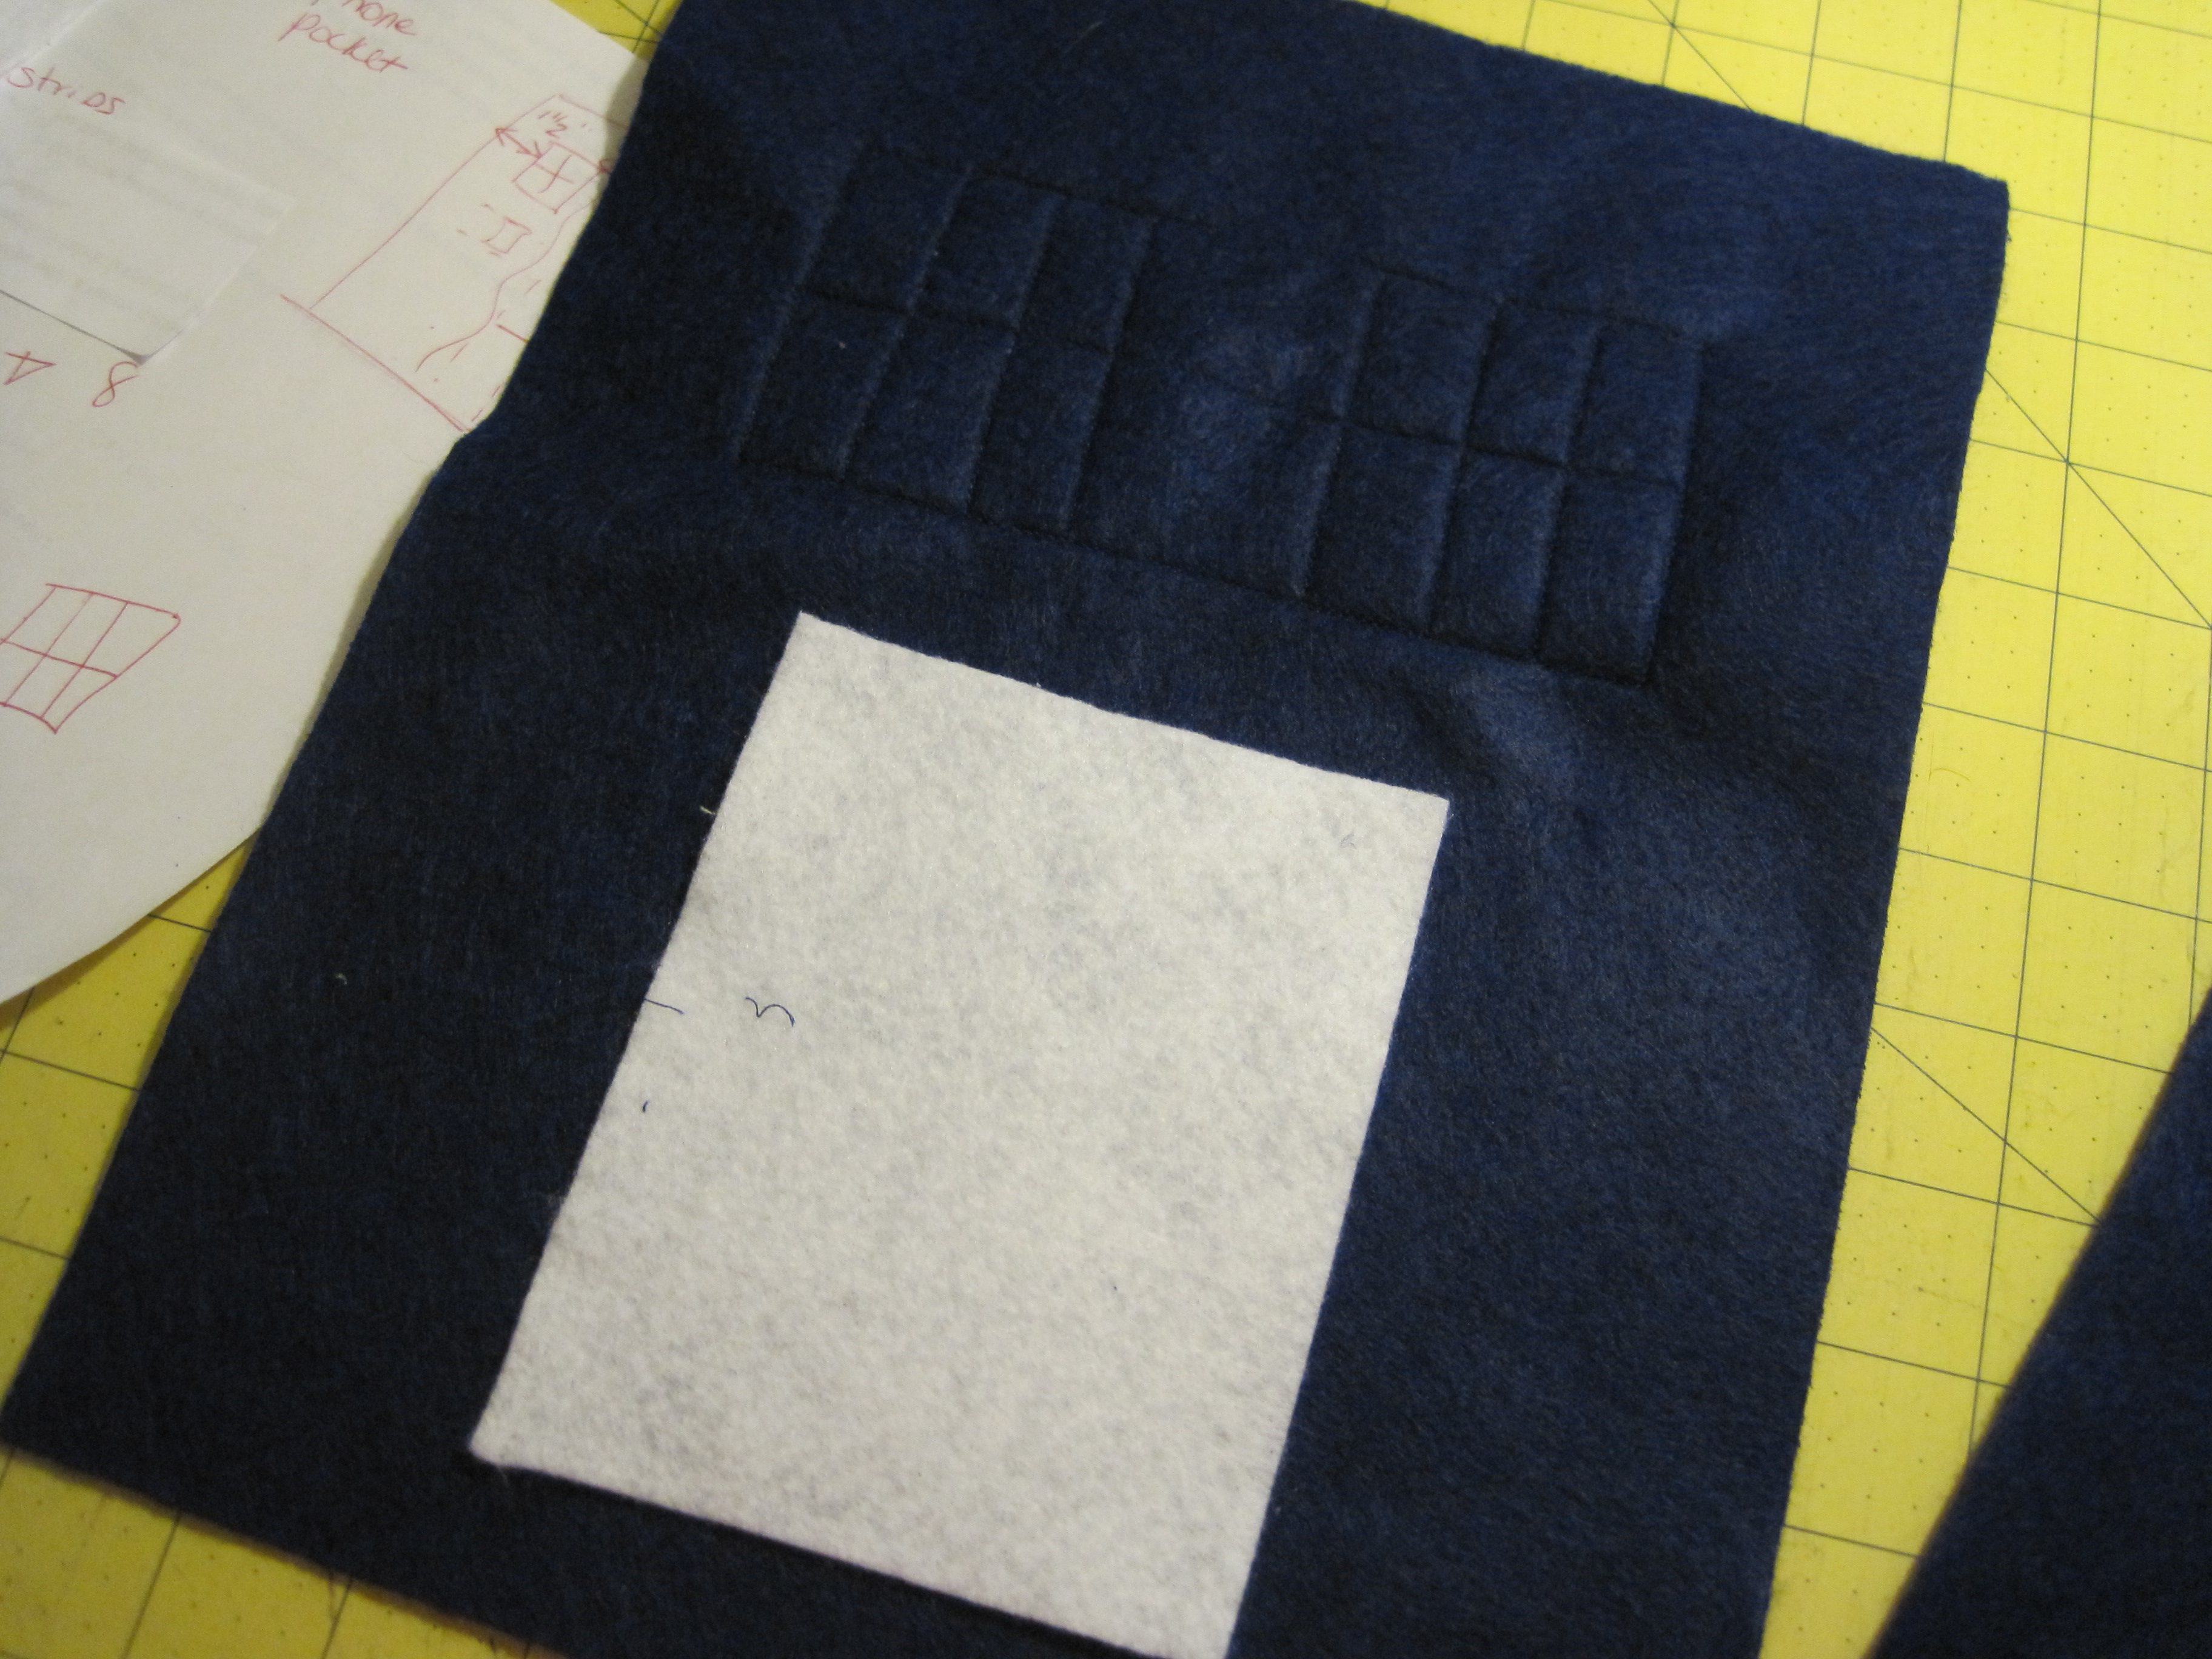
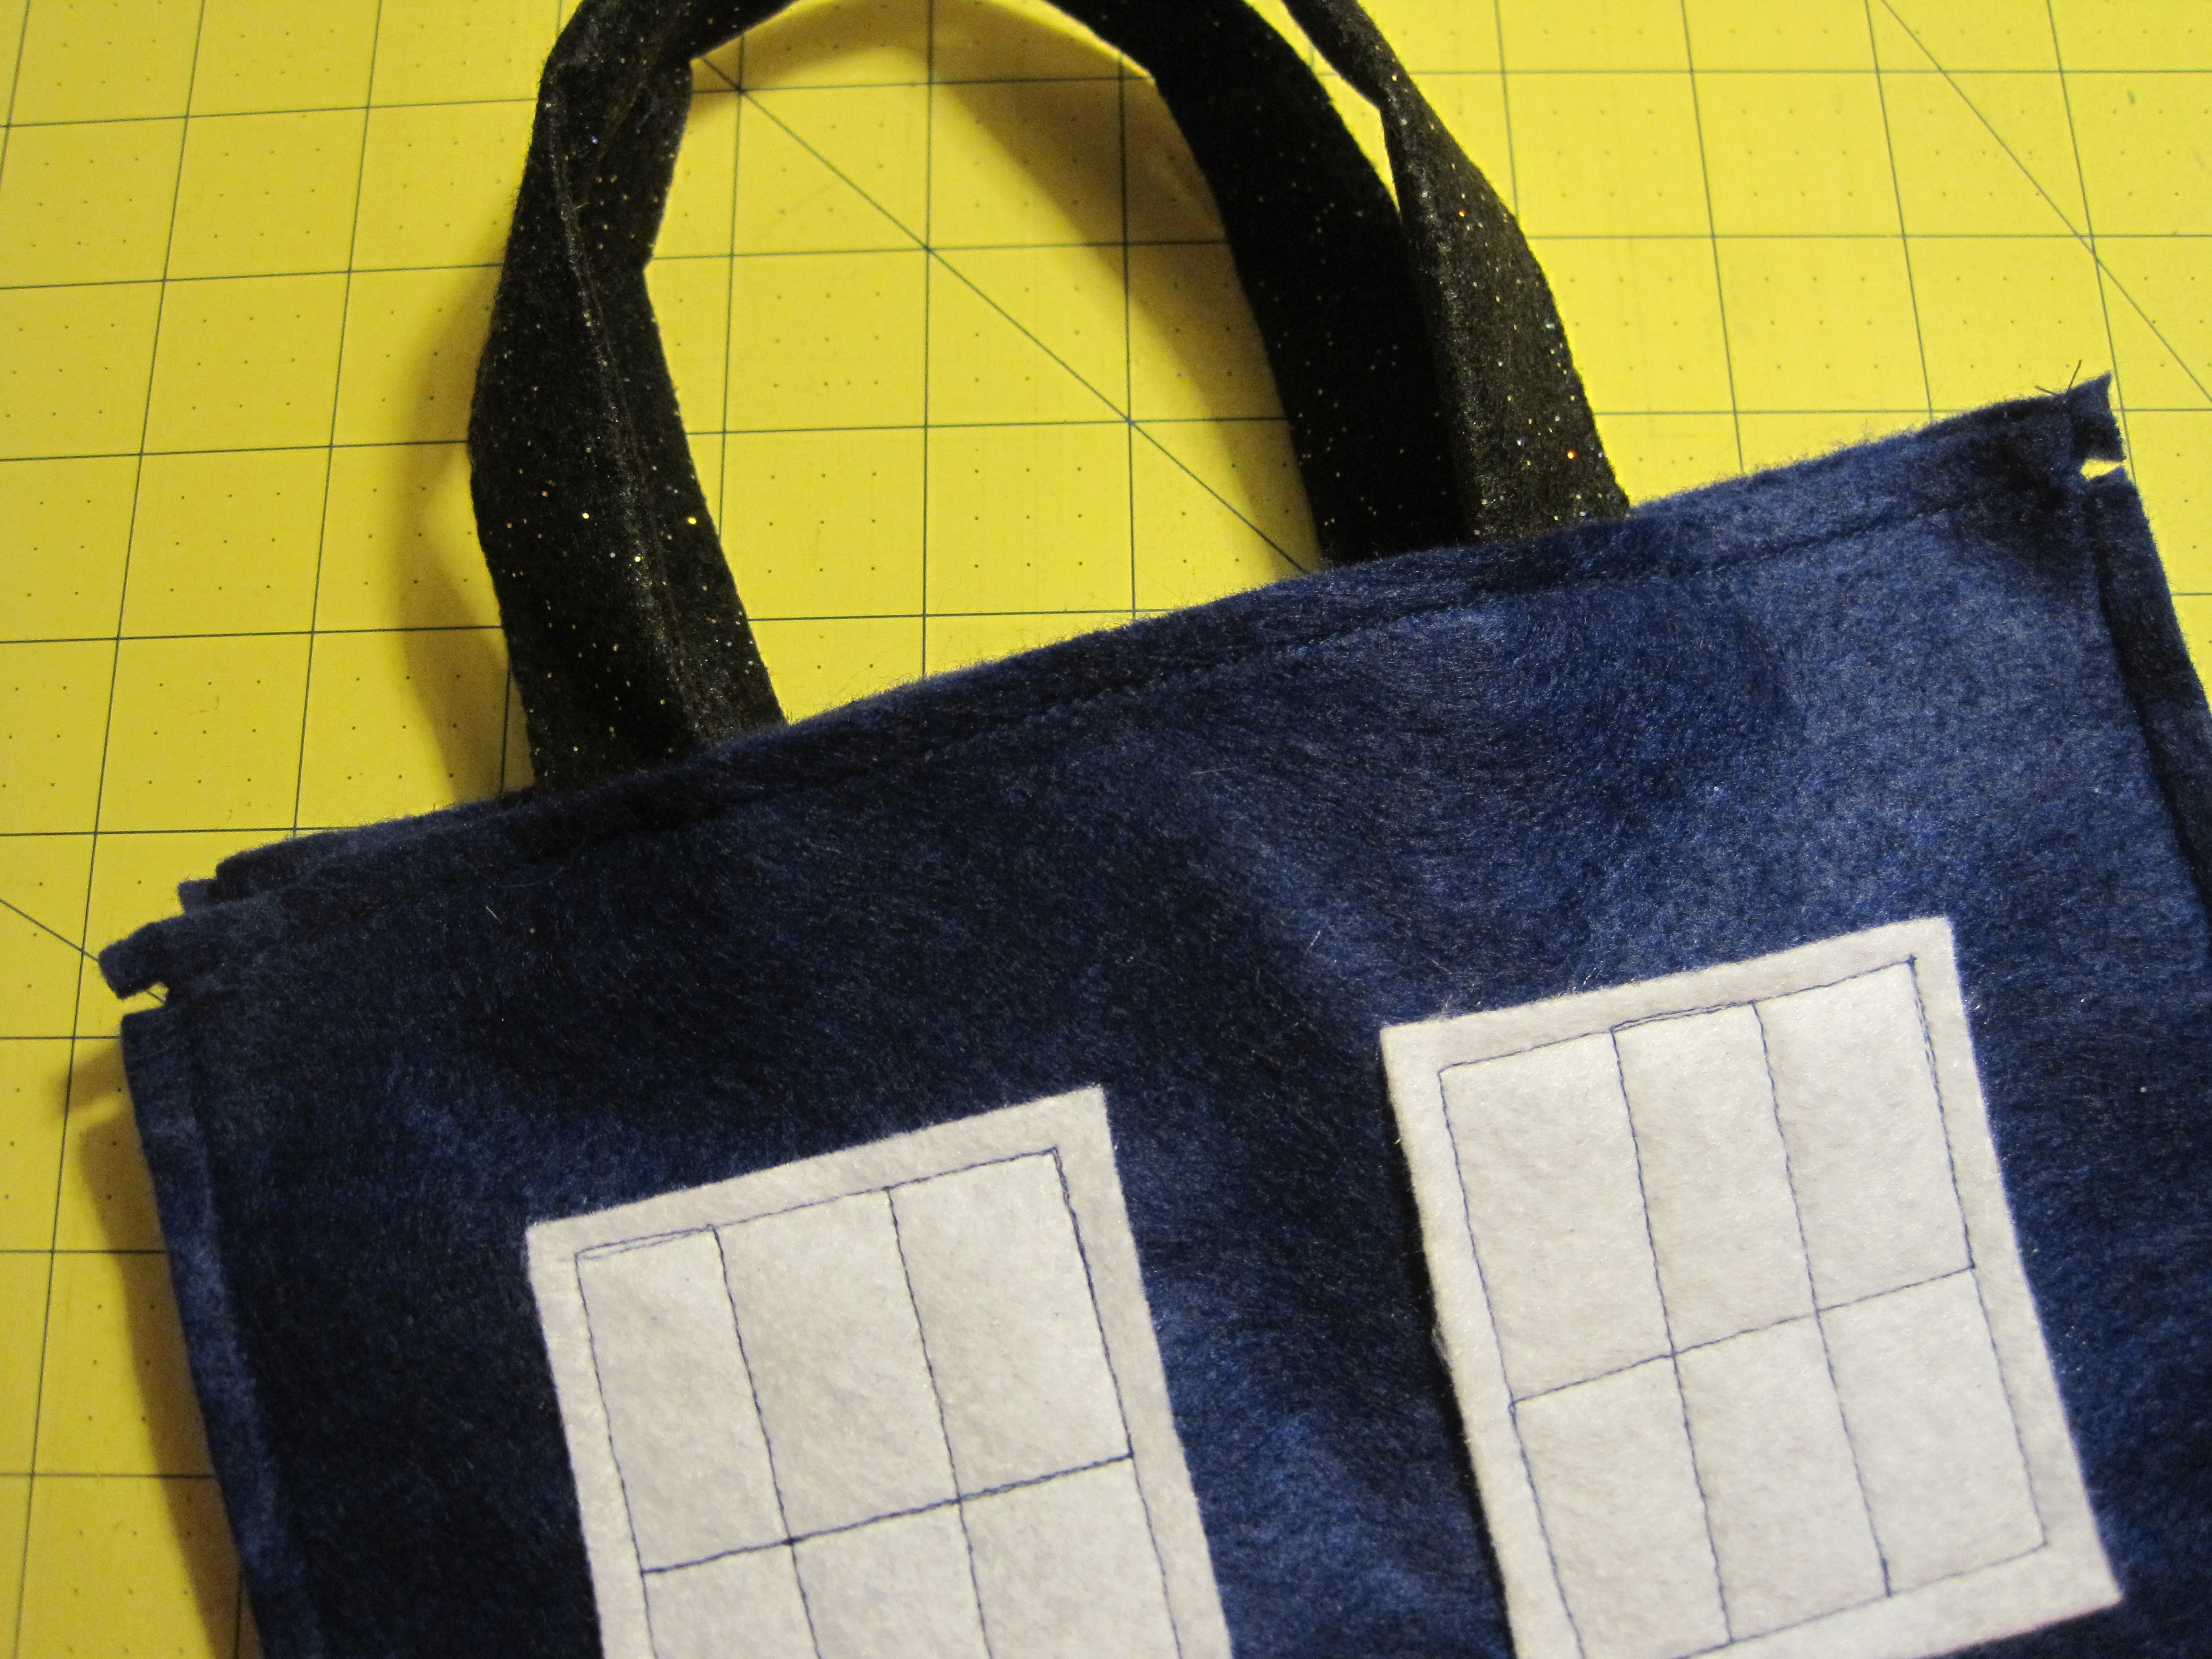
Using your ruler, arrange the window pieces on the 9″ x 12″ sheets of felt so that they are 1 1/2″ in from the sides and 2″ down from the top. For the TARDIS front, center the notice under the left window, leaving about 1/2″ in between.
Arrange window pieces on remaining three 9″ x 12″ blue felt.
Stitch windows in place, 1/4″ in from outside of white felt. The TARDIS windows have six panes. My windows are estimated, but you can measure and divide your stitching if you choose. Repeat for the two sides that are NOT the front of the TARDIS.
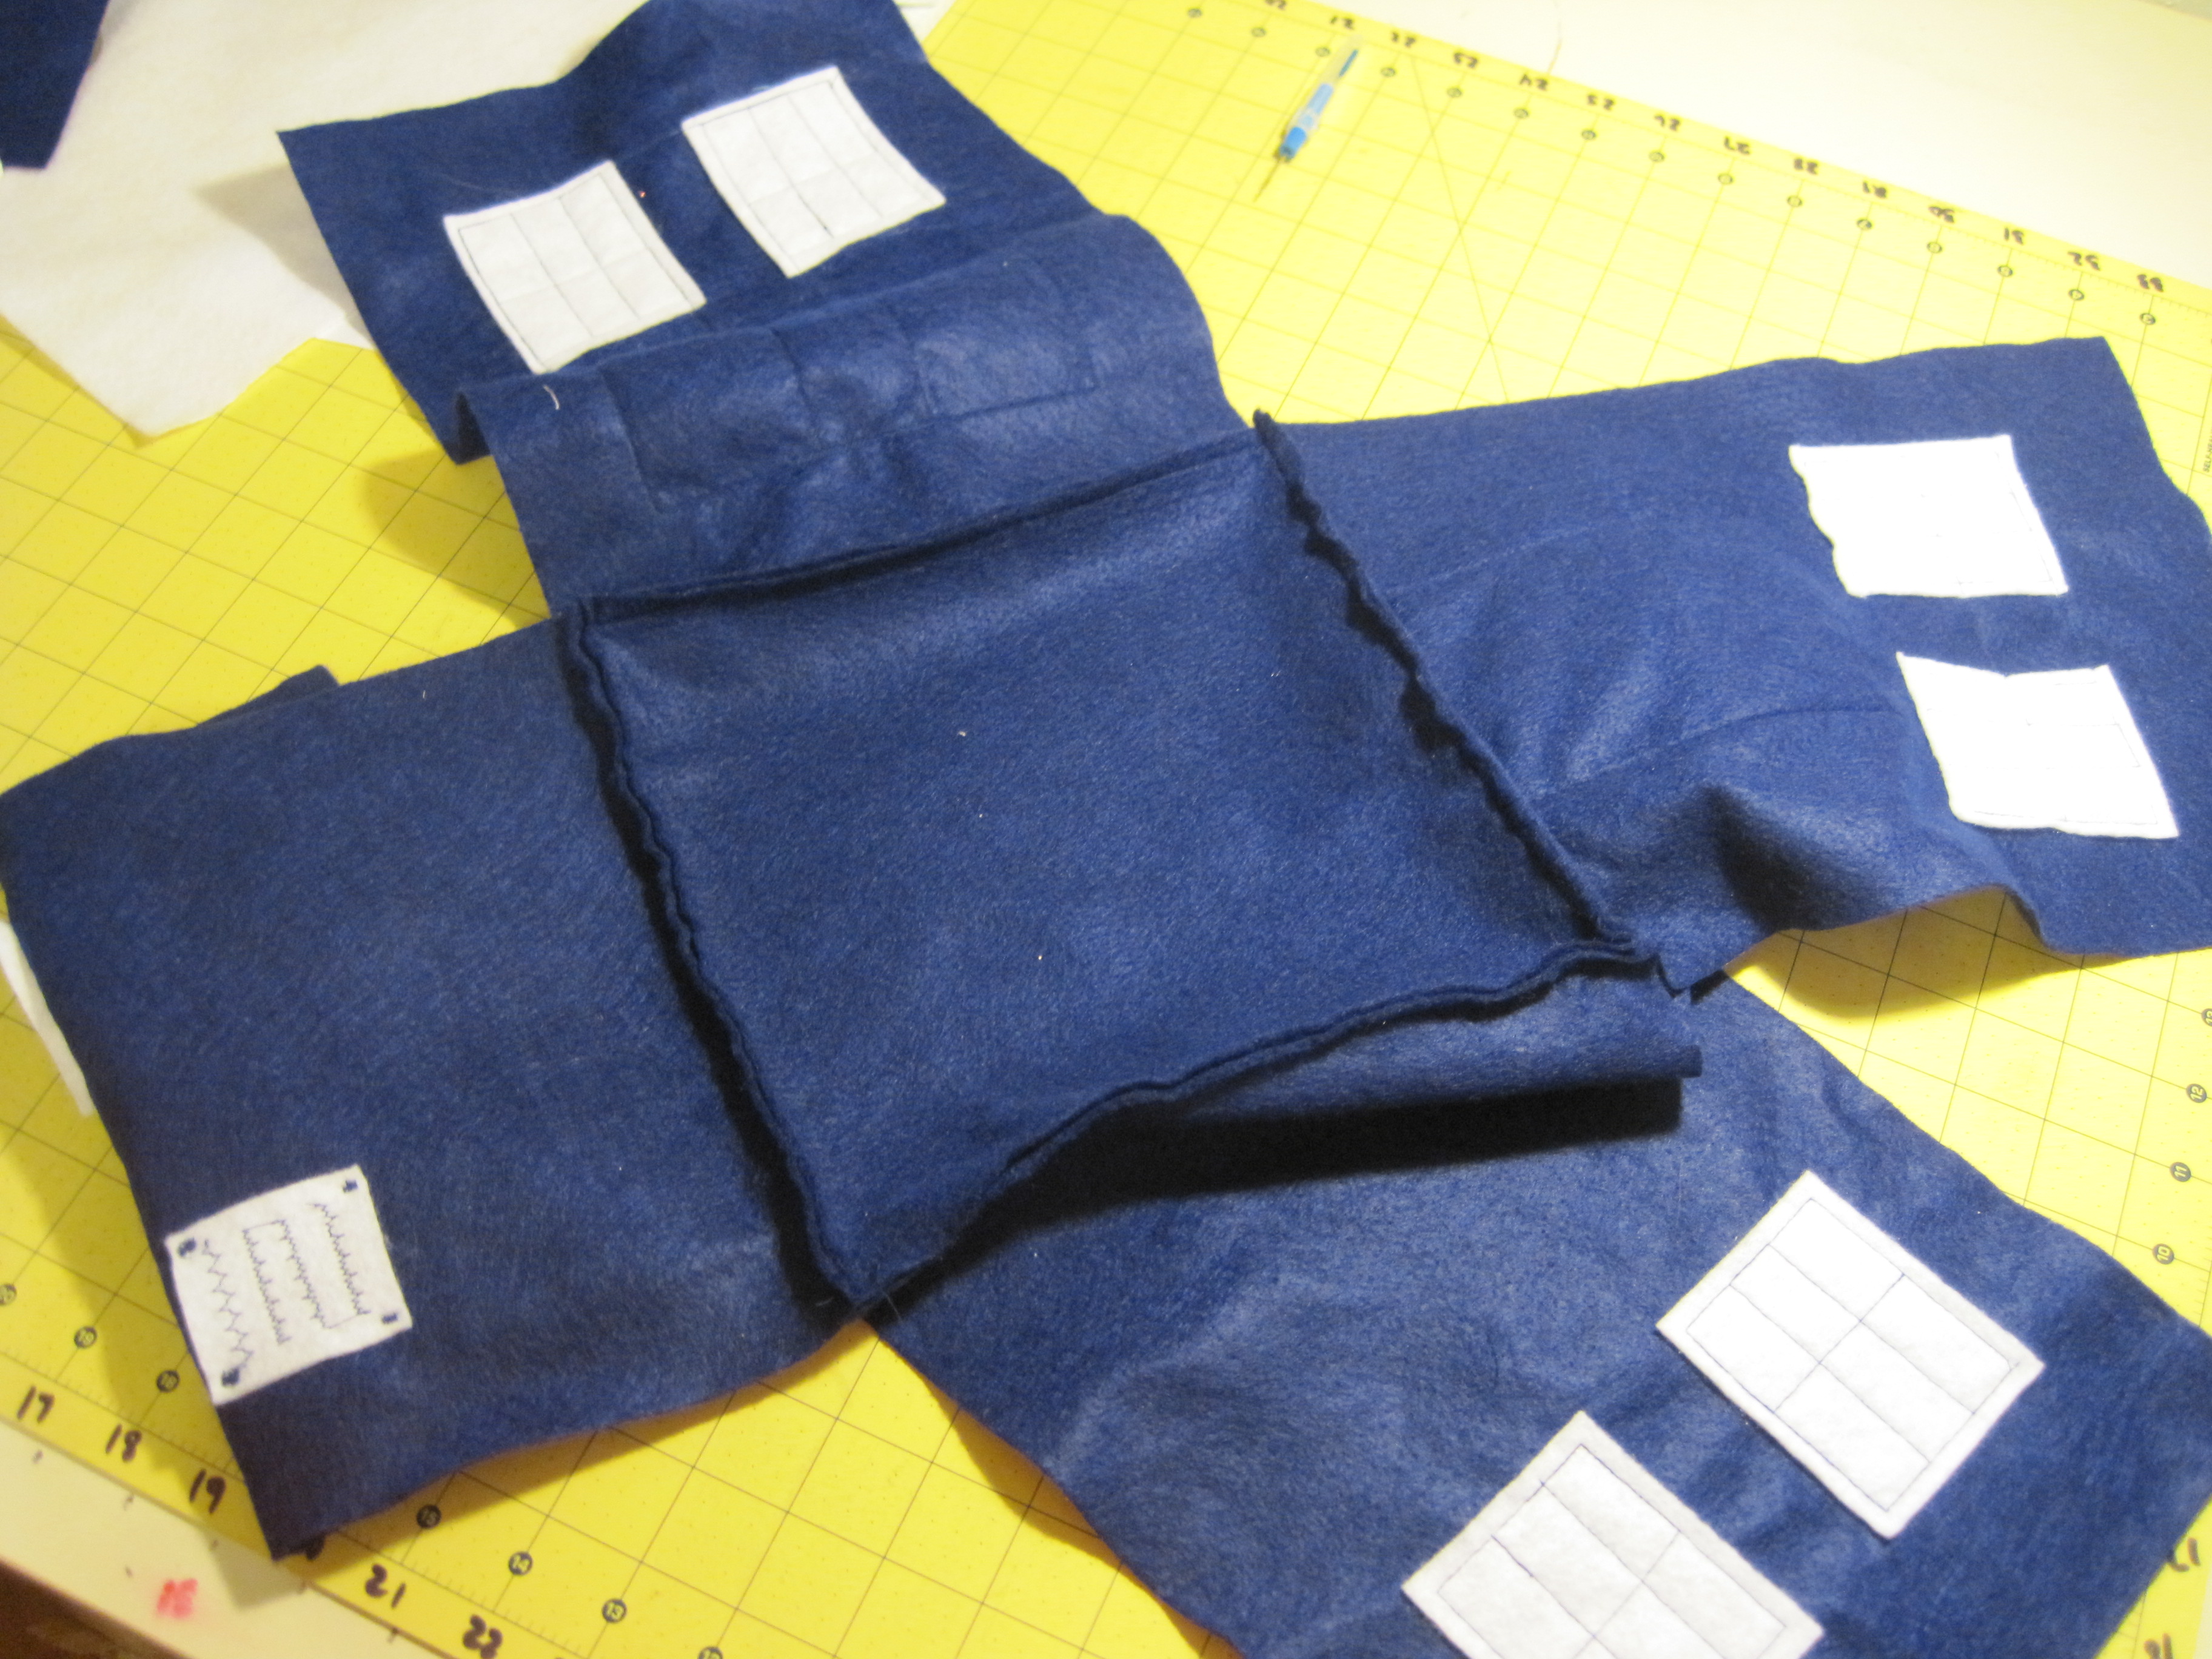
For the Notice on the front, sew some random stitching onto the 1 1/2″ x 2″ piece of felt (as shown). This gives the illusion of writing from a distance. Stitch on each of the four sides with a short zig-zag stitch in each corner (forgot to take a close up…look about three photos down and you can see what I mean!).
Cell Phone Pocket
OPTIONAL – After stitching all the windows on, choose a blue side that is NOT the TARDIS front. Align the 4″ x 5″ piece of felt under the window stitching. Straight stitch on the two long sides and across the bottom, making sure to backstitch at the start and stop. This is your cell phone pocket.
For handles – Fold in half lengthwise and zig-zag down the open side.
Your TARDIS is now ready for assembly!
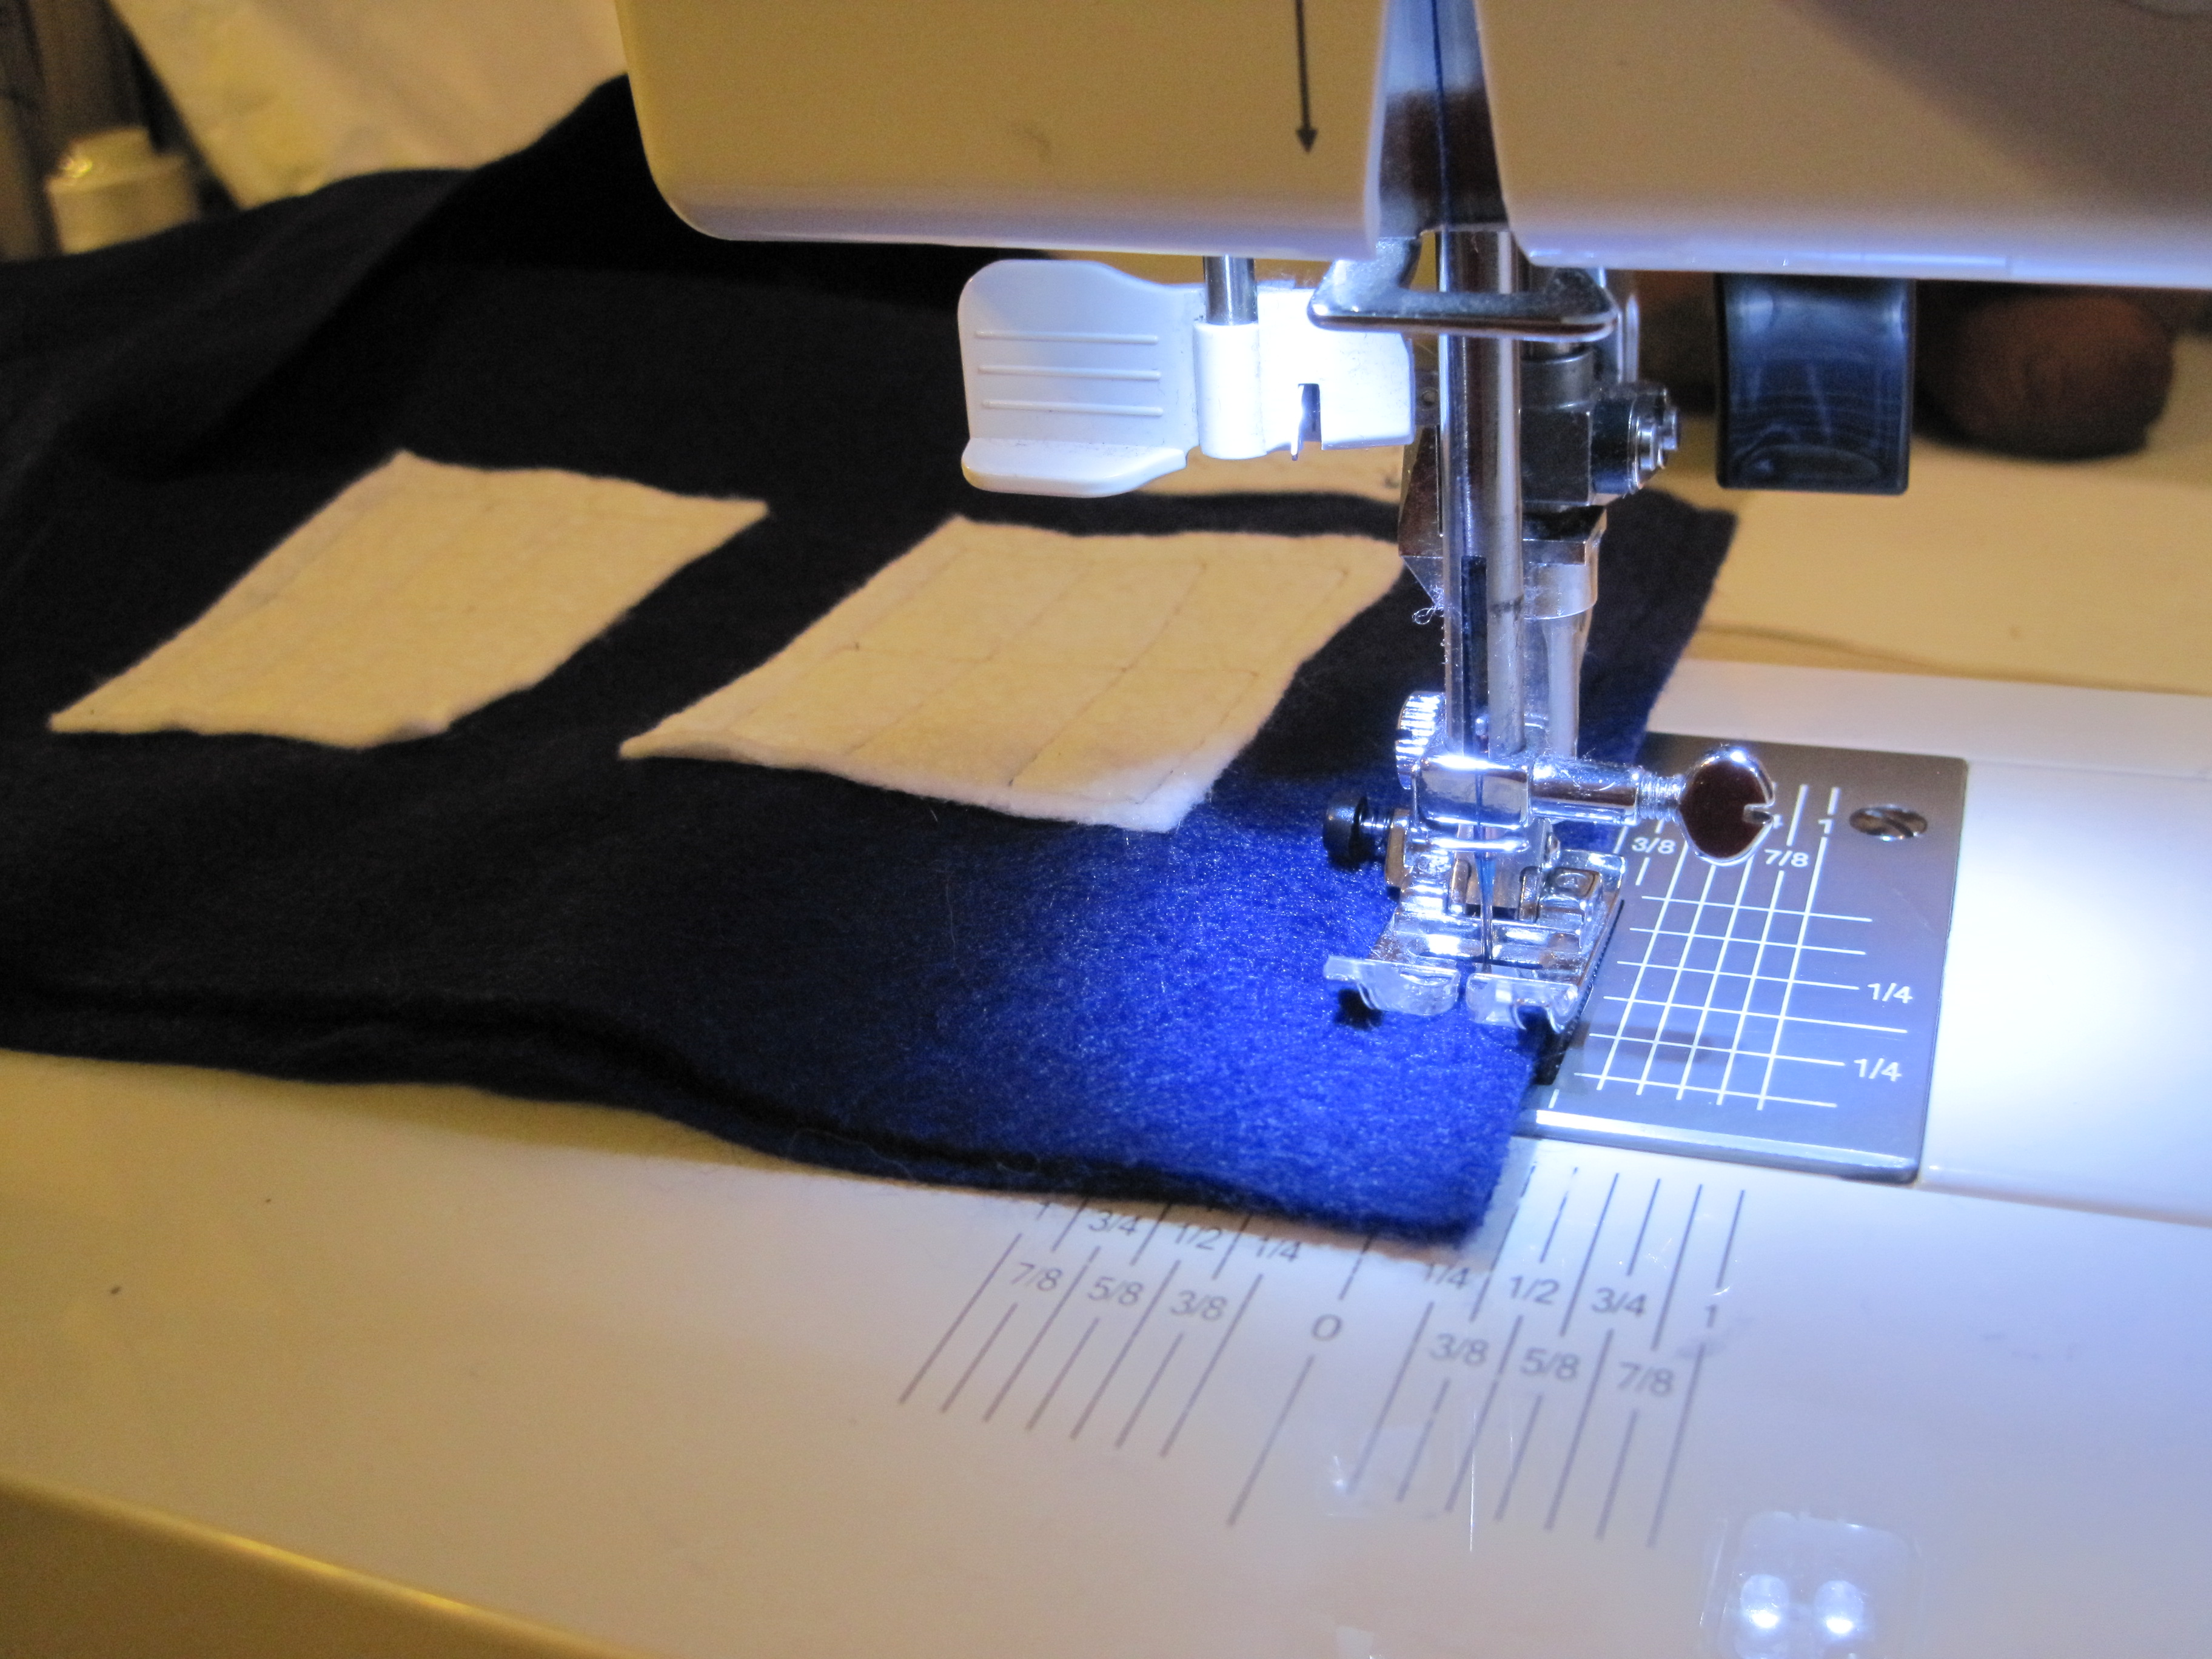
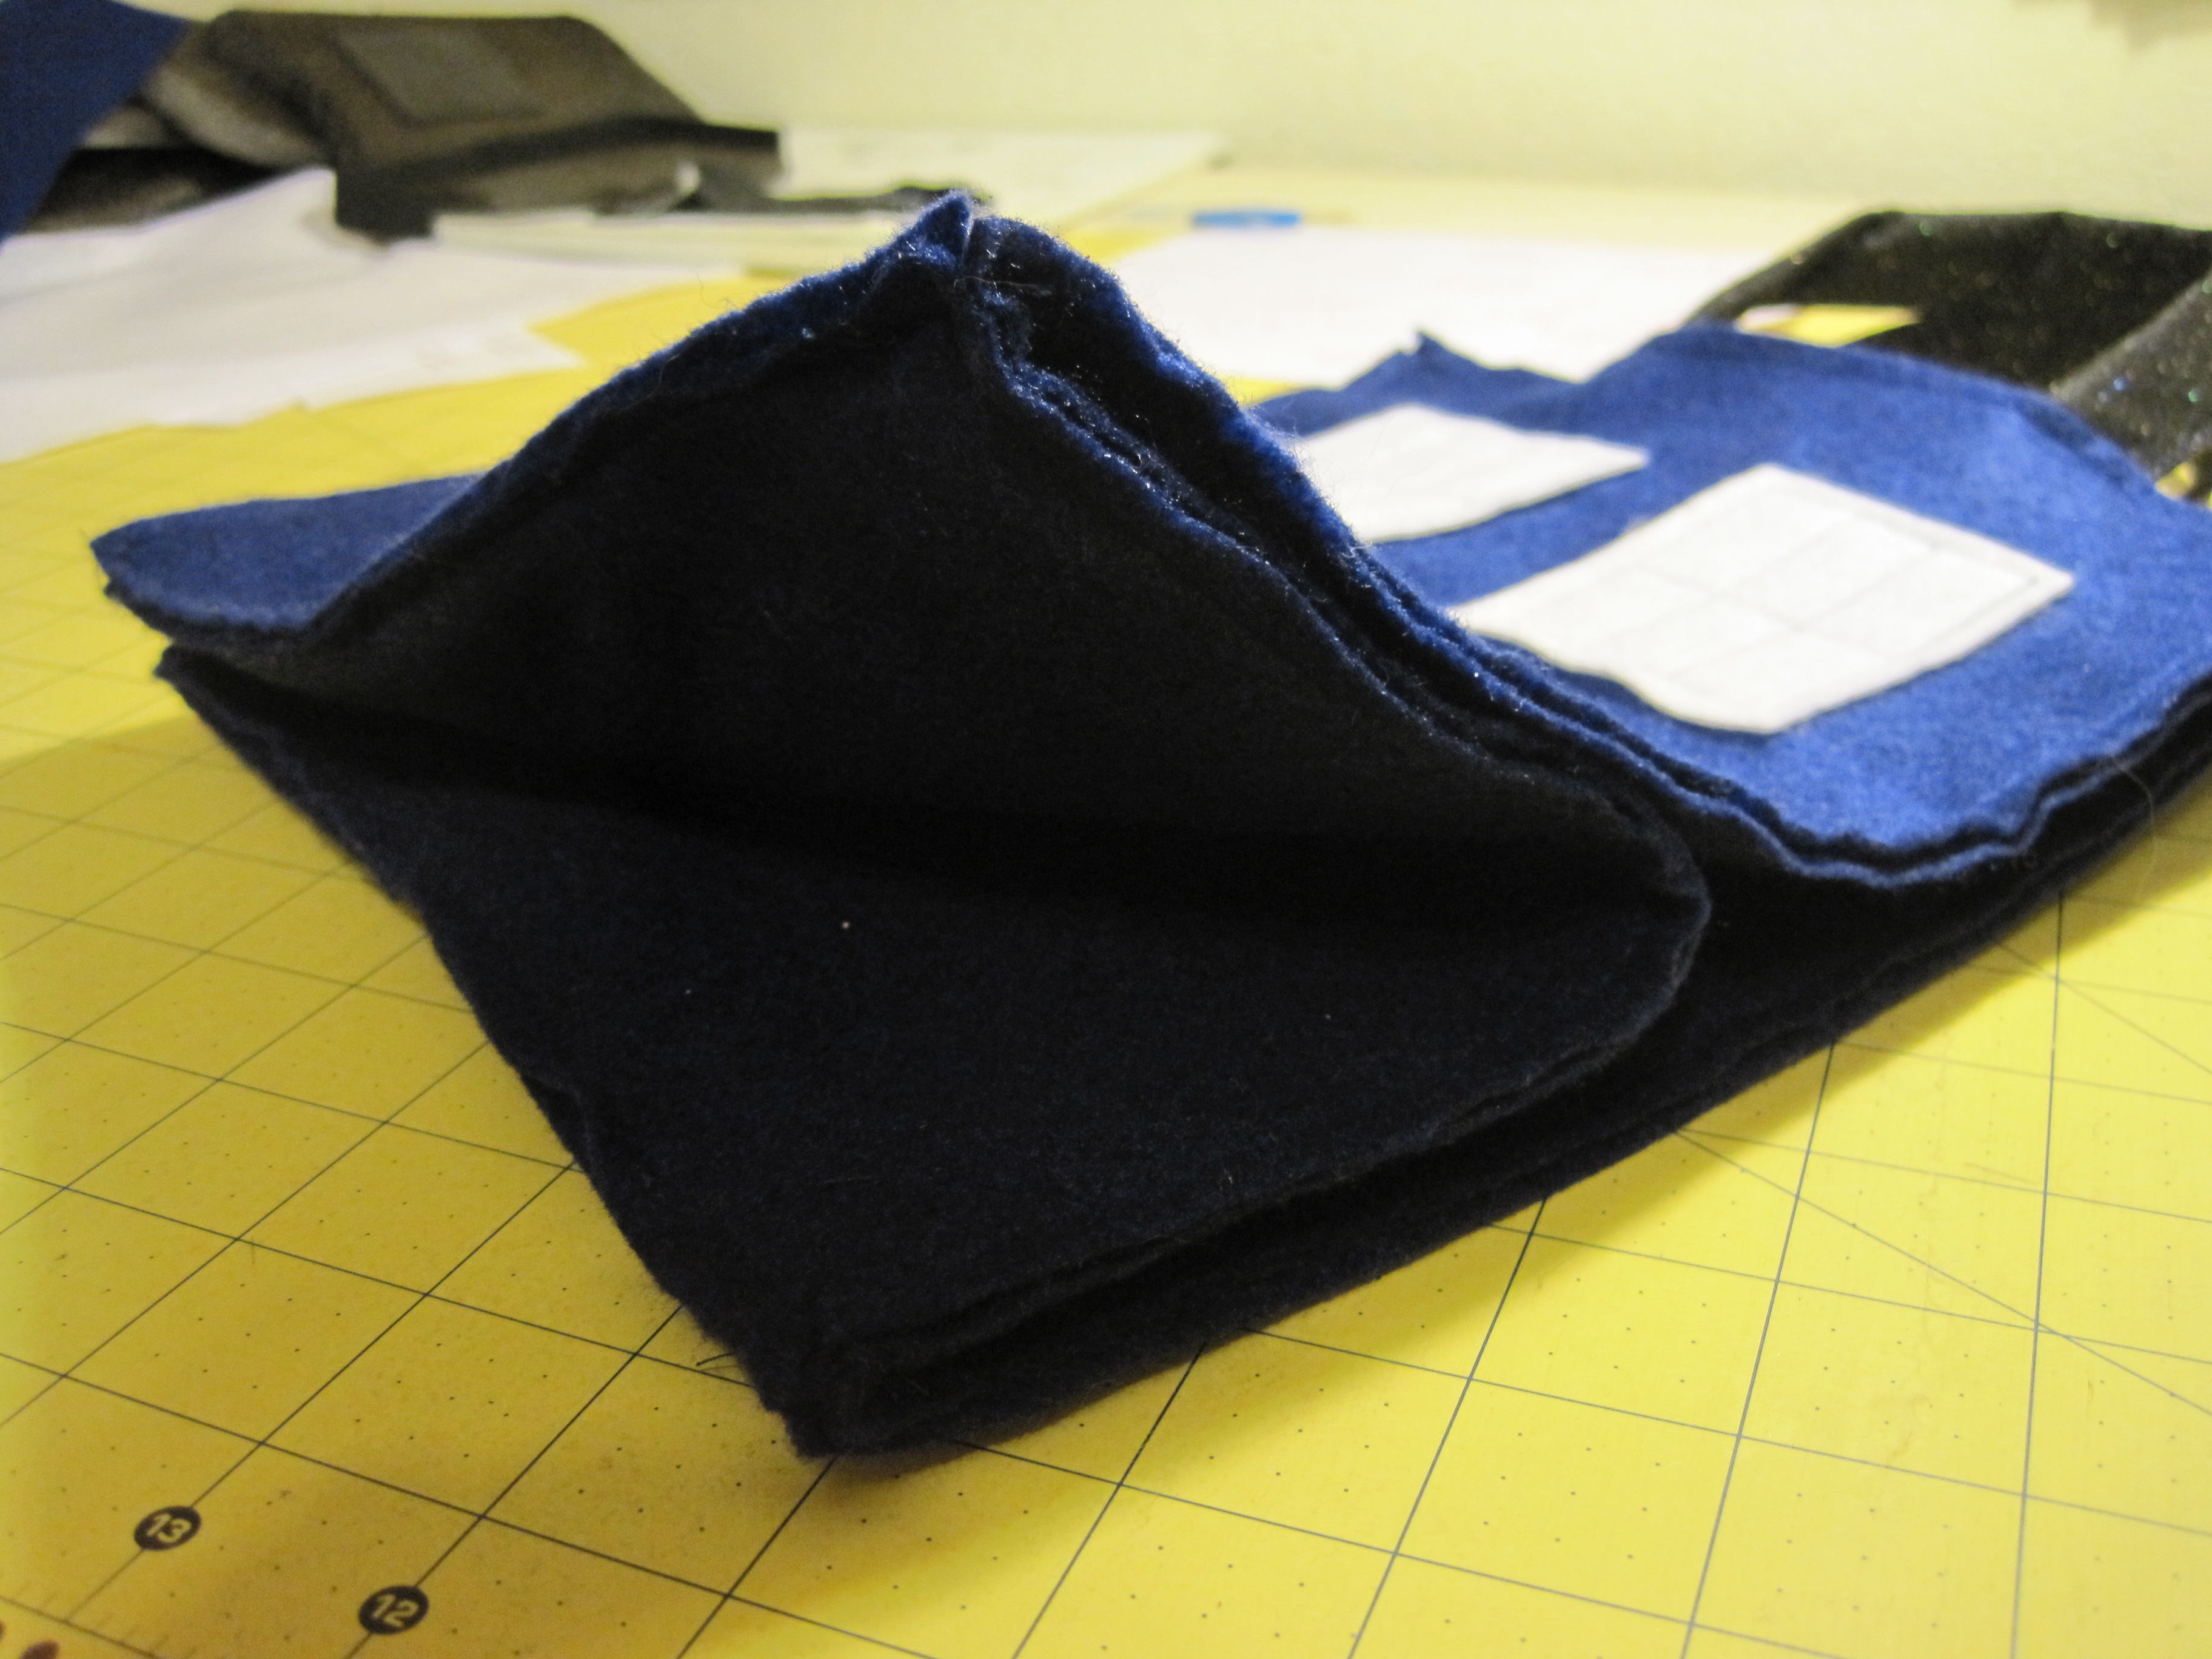
Find the front (windows with notice) and back (cell phone pocket – or without if you didn’t make one) and bag bottom. With the insides facing/right side out, place the bottom of the front piece along one side of the 9″ x 9″ bottom piece. Stitch across, leaving 1/4″ at the beginning and end of the seam unstitched (see below).
Seam allowance will be on the outside of the bag.
1/4″ unstitched on the end of the seam (both ends).
Repeat stitching for the back side, making sure the bottom of that side meets the bottom of the bag.
Sew the remaining two pieces on opposite sides, continuing to leave 1/4″ open at each end of the seam.
Find the front and the piece immediately to the left. Bring the two long sides (wrong side) together, right side out.
Stitch from corner to corner.
Repeat for the remaining three corners.
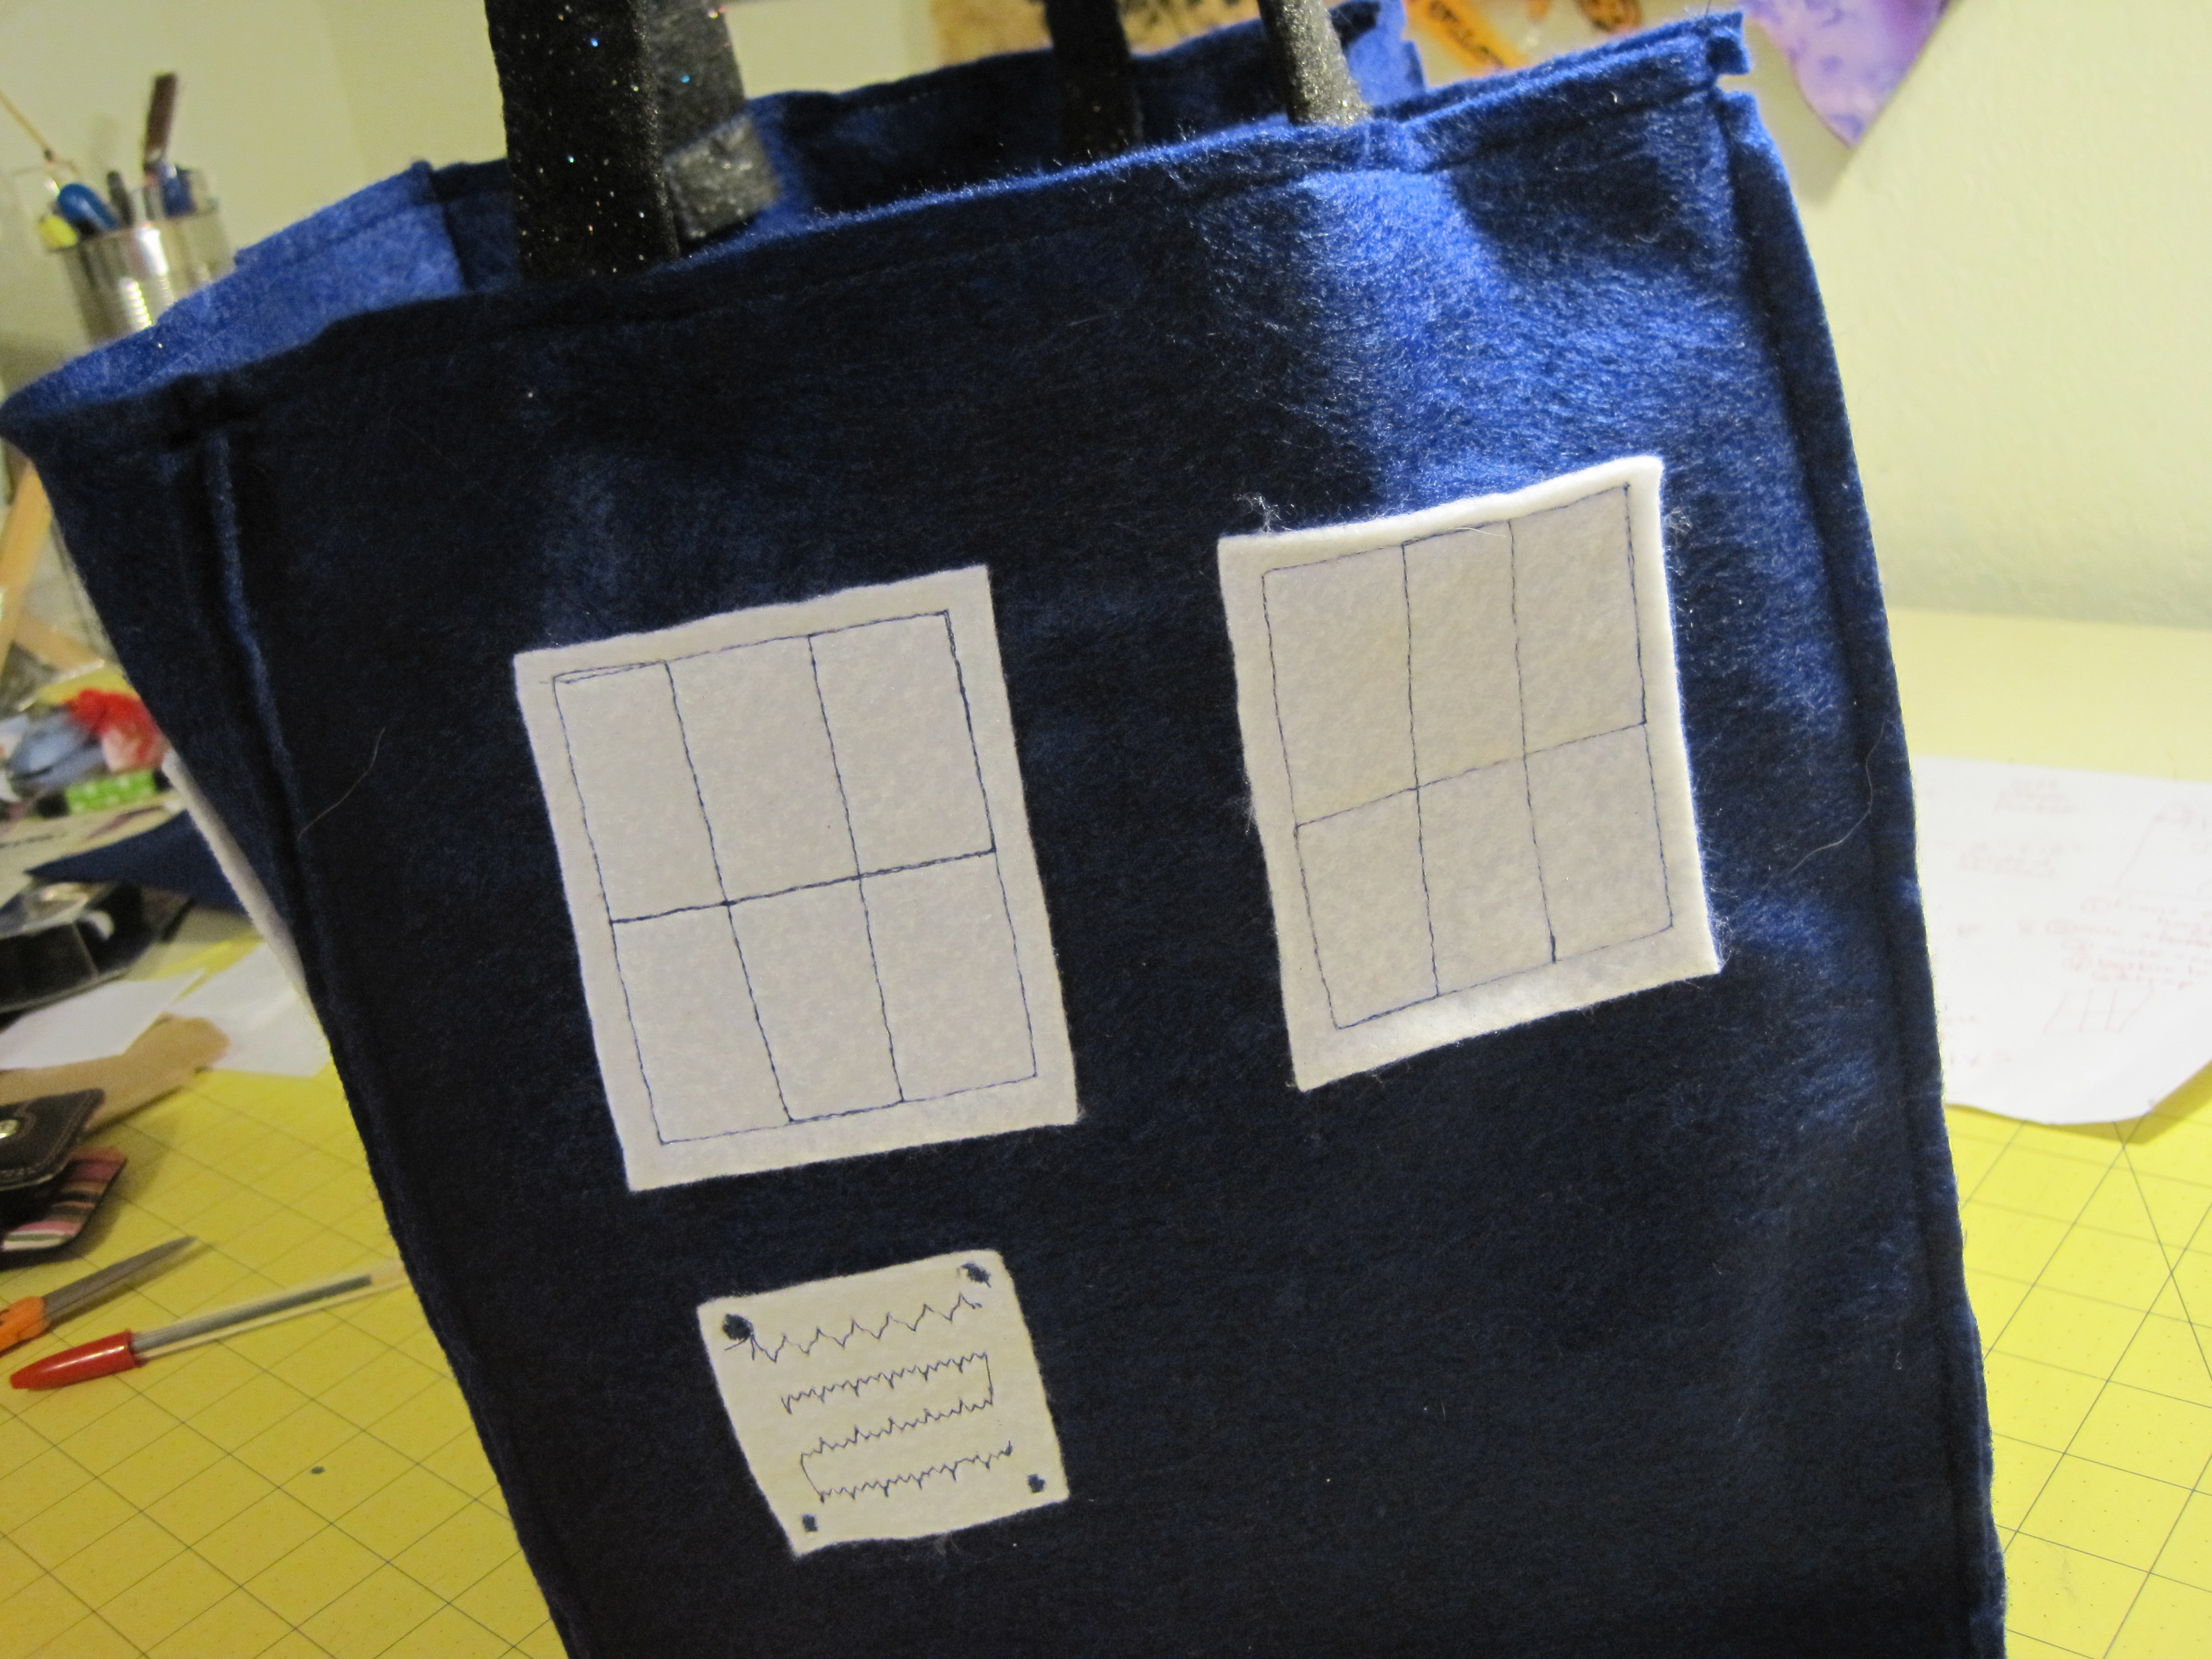
You now have a TARDIS with no handles. That’s the last bit and then you’re done!
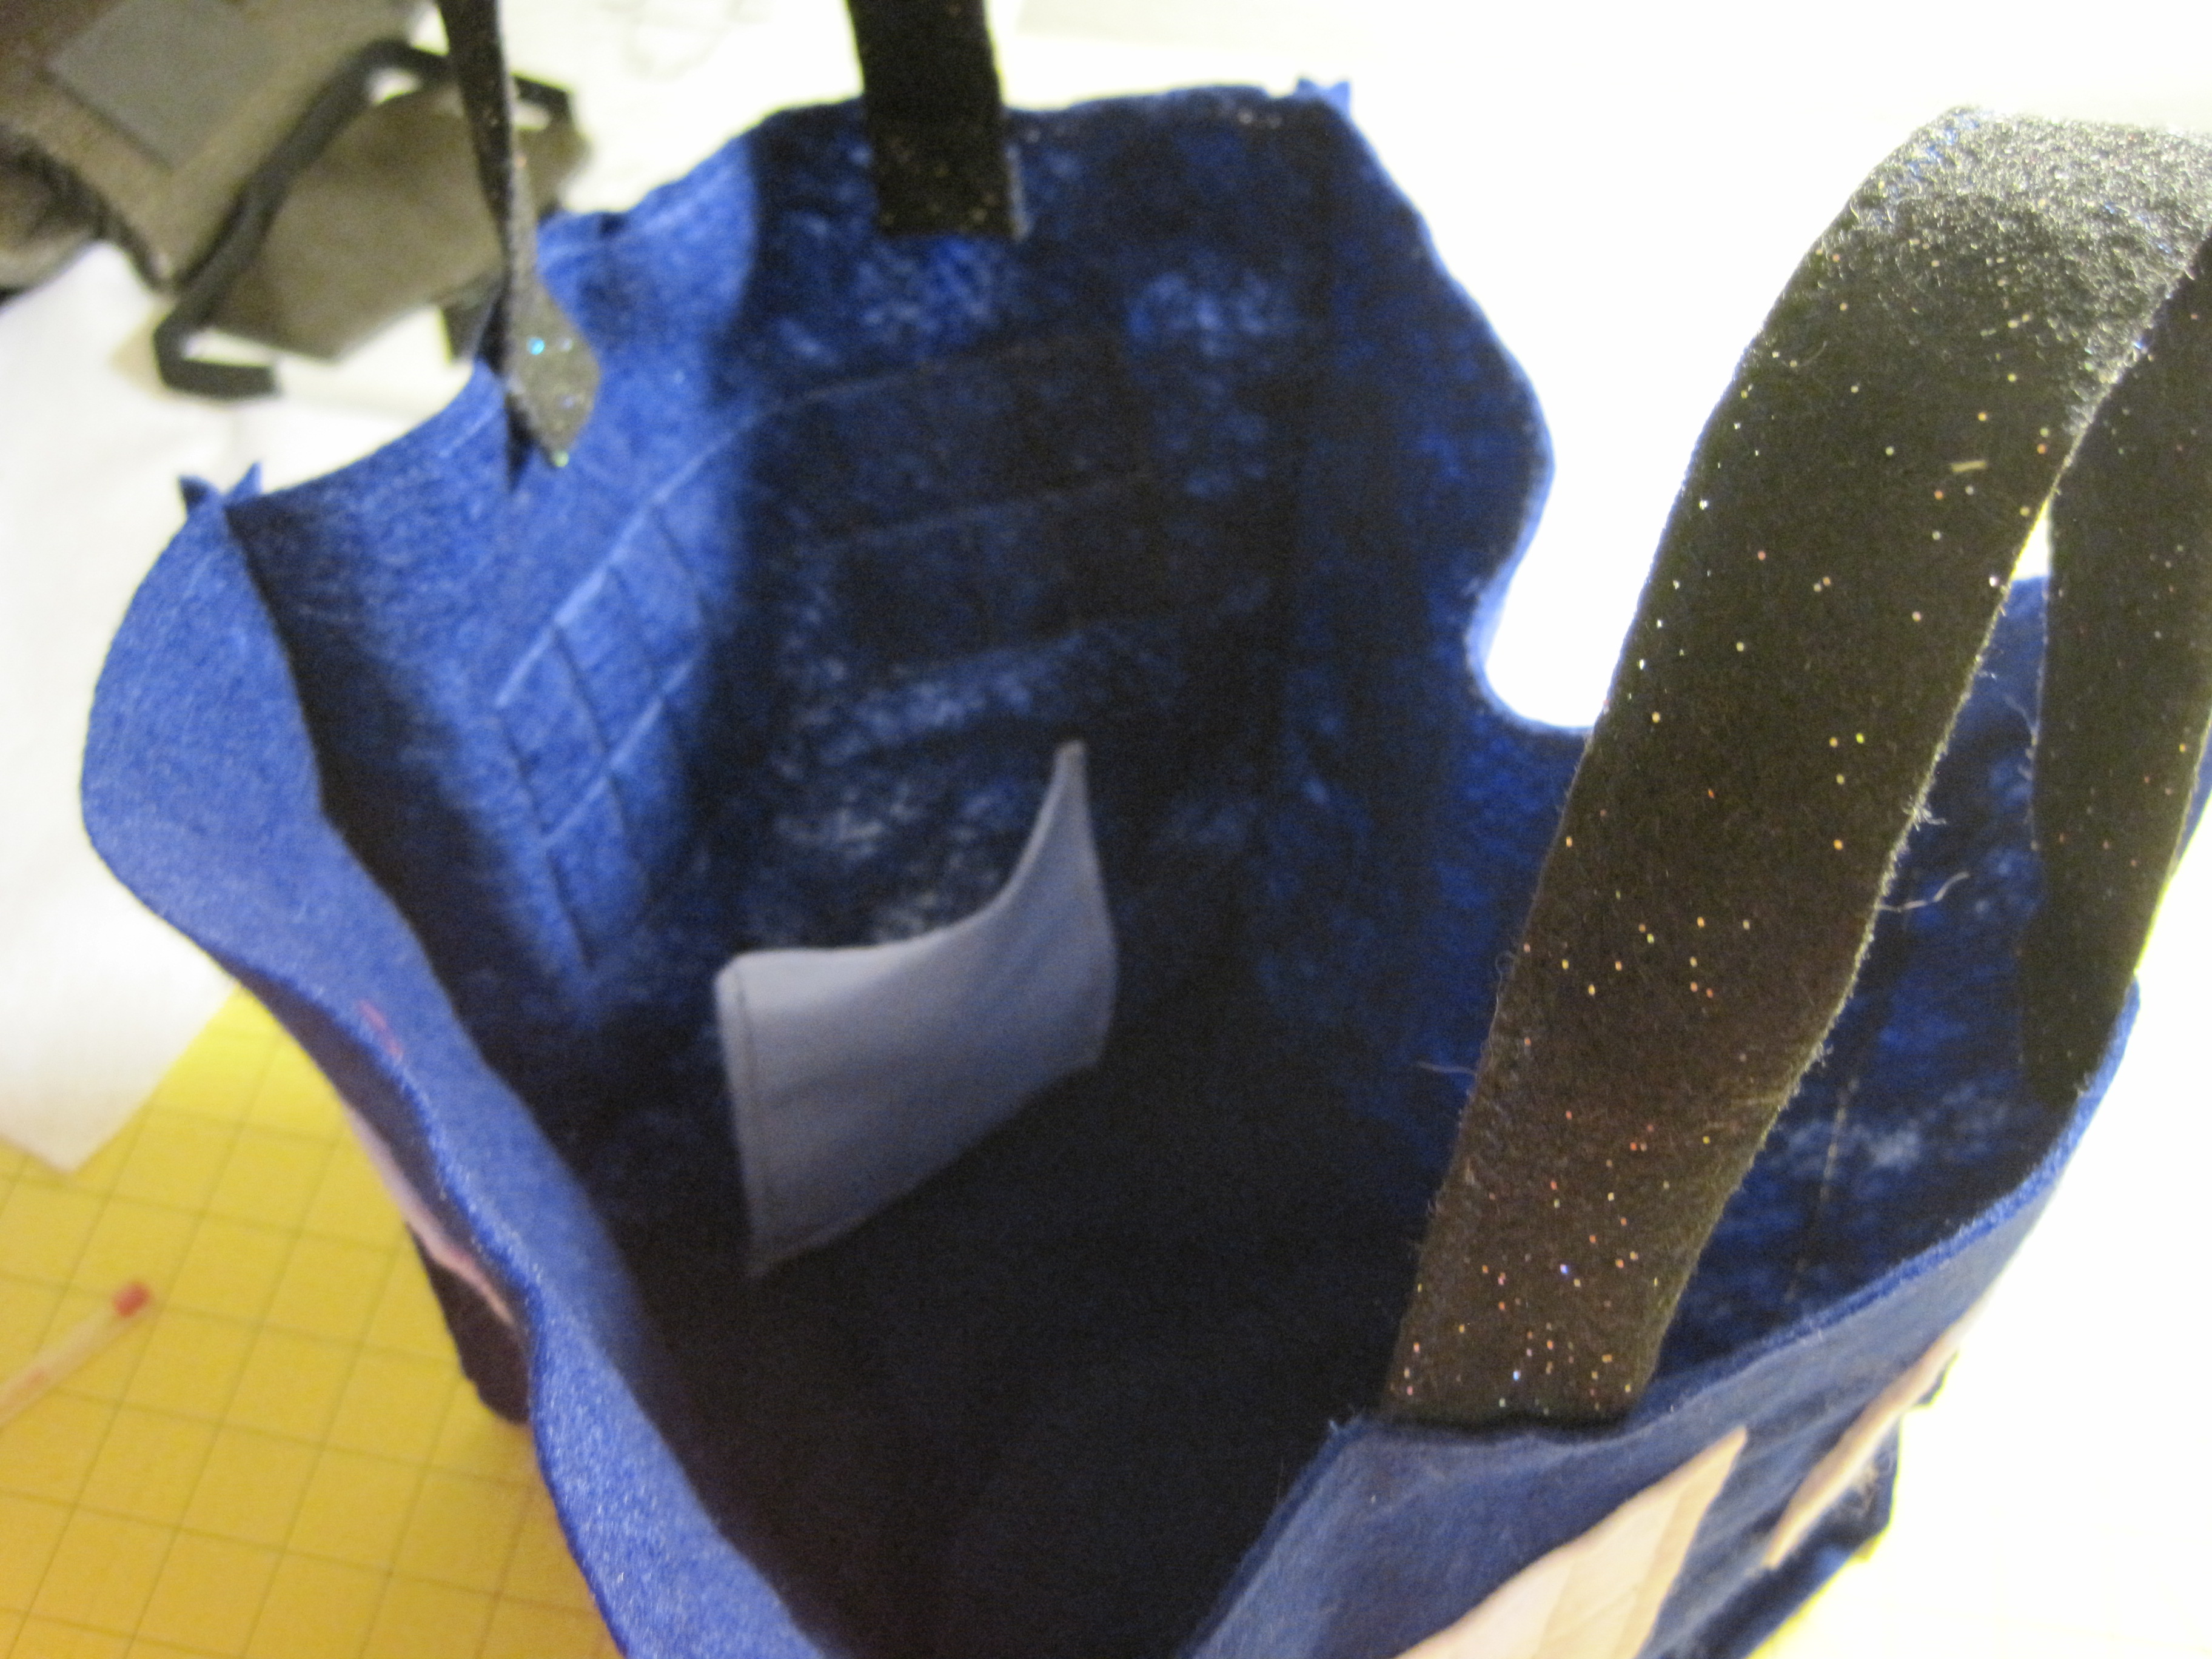
The handles attach to the front (windows + notice) and back of the bag. Use a ruler to line up the handles 2 1/2″ in from each side of the bag, with about 2/3″ inside. Pin in place.
Starting at a corner seam, stitch all the way across the top of the bag, backstitching when you get to the handles. For added strength, continue stitching all the way around the bag, flattening out the seam allowance with your fingers before you stitch across it.
Handles…and you can see the cell phone pocket, too!
Snip above and below the top stitching to make the little notches (optional).
The TARDIS Treat Bag is easy to fold, just fold in the bottom and it will fold in on itself.