Tag Archives: recycled

A Special Project for my Brother

20190131_142939

It’s done!

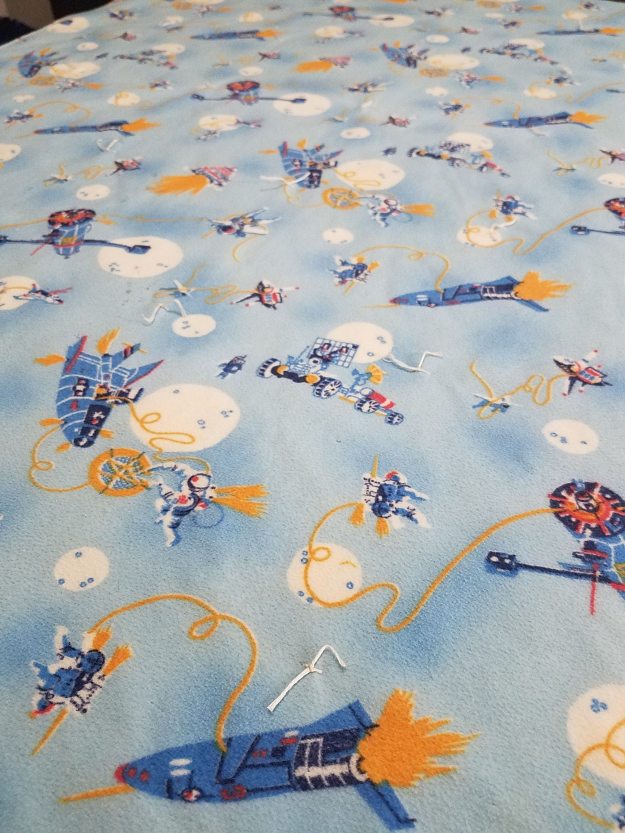
After Christmas, my little brother gave me his whole cloth baby quilt our grandmother made for him over 40 years ago with the mission to “save it.”

The back was transparent and dry rotted. Many of the original hand ties were missing. The edges were frayed and poking out. The quilt was oddly lumpy.

I really struggled with where to start. I considered patching it, but then quickly realized it was too damaged to just be patched. It’s a quilt full of love and meaning for my brother and I wanted to make sure I did this right.

I shared the “before” quilt on Talk to Me Tuesday earlier this week and then I just dove in. I had to fix this quilt and it wasn’t getting done sitting on the table in my sewing room!

image-20190130_160336

In the end, I took the whole thing apart, carefully picking out every stitch. The inside was layers of old sheets and flour sacking!

20190130_171122

image-20190130_161824

One of the layers was completely shredded and had turned into fluff, which created the random lumps. I sprinted the vintage fluff outside for birds to use in their nests.

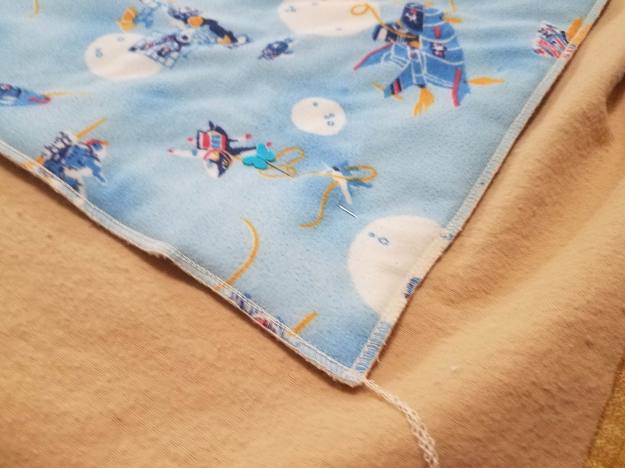
To complete my mission to save this quilt, I hand washed the original fabric top and added a super lightweight fusible to the back for stability and to help close some of the tiny holes created by the ties.

20190131_115518

20190131_115509

I kept the sheet that was inside for the weight but replaced the shredded flour sacking with my favorite Hobb’s 80/20 batting. I carefully basted the top, batting, and old sheet and then serged the edges together.

20190131_121228

Then I added a new soft flannel back, rebasting and hand tying to keep it as close to the original configuration as possible.

20190131_122217

20190131_132714

The back is turned to the front and stitched. The finish is as close to the same as I could make it.

20190131_125404

I shared a photo with my brother and he’s a happy camper. It’s already in the mail back to him.

PhotoGrid_1549052143148

PhotoGrid_1549052173690

This was a very emotional project and I felt like I was communing with our grandmother while I worked on the quilt. I did record a bit for TTMT before shipping this guy off, so look for that next Tuesday.

Have a wonderful weekend!

signature-2016

Sewhooked Pattern Shop

My Quilty Facebook ♥ Sewhooked on FB

Sewhooked Facebook Group

Instagram

Posts on this blog may contain affiliate links. Thank you for your support. ♥

Way Back Craft: Recycled Binder

In thinking about Back to School season, and the accordian file that I upcycled last week, I thought about a project I did for my daughter a couple of years ago. Then I realized, while I posted a photo of it in a collection of other upcycled/recycled projects, I’d never really talked about it here on my blog.

Here is the story the way I told in August of 2008, on craftster:

This craft starts with a story.  My 13 year old daughter’s middle school is huge.  The kids have less than 5 minutes to get from class to class and they don’t always have time to go to their lockers.  Many of them carry large binders so they can have multiple classes worth of work with them all the time.

Last year, we bought this binder for her, in an attempt to give her a place to keep all her things.  Within a few months, the rings in the binder blew out.   The handle is on the back of the rings, so the weight of the contents pulls down on them, causing them to fail.

So, time for a redesign.  How about a binder cover/bag that has the weight in the opposite direction and that can have the 3-ring binder changed when needed, without losing the rest?

I think this may be one of the coolest things I’ve made and I’m ridiculously pleased with the way it turned out!  It holds a 3″ 3-ring binder, which cost about $6 at the office supply store.  Everything else was recycled or I had on hand.


Outside back – the binding was hand stitched on the outside.  There was just too much stuff going on inside to do it the opposite way.   Cool sparkly fabric was a gift from hardhatcat.


The other side, standing up – the strap is recycled from the old binder.  The strap clicks onto a large split ring.  The bits of ribbon were from a sheet of samples someone gave me.   The denim was cut on the bias so it has give.  Oh, and the denim was leftover from a project that a friend of mine did.  She gave me her leftovers!


inside – the accordion files, back mesh pocket & zipper are all recycled


The accordion file, recycled from the old binder.  It was a bit hard to stitch around, but I managed by moving my needle over to the far left.


All that’s left of the original.  I used a razor blade to take it apart.  Razors are the friend of anyone that recons heavy duty materials, but they take a sure hand.

More photos of the binder cover/tote here.

My daughter loves it, especially the “bag” aspect, freeing up her hands and making it’ll be easier to carry her stuff.

Happy Crafting!

Photobucket

SEWHOOKED SHOP |SCHEDULE
FACEBOOK | TWITTER | FLICKR GROUP

Upcycled Accordion Folder


This whole “business owner” thing has a lot of learning curves. Taxes…blech! Legal stuff..blech! Unforeseen storage issues…creative opportunity!

After a couple of months of getting the Sewhooked Shop off the ground, I had a whole tote bag full of receipts, paperwork and odds ‘n ends that I need to keep track of.  There isn’t a spare foot anywhere in my workspace for a filing cabinet and, as they say, have laptop will travel. I need to be portable.

After contemplating what to do with the mess of papers and such, I headed to our family storage location for paper, folders and general office/school supplies. A giant figurative light bulb danced gleefully over my head at what I’d found.

An accordion folder. Really? How did I not know we had that? The answer is, I did, but I forgot. It was tucked away with the kids’ school supplies. It’s something I used when both of them were very early in their school careers, before I realized that no mere accordion folder could ever cope with the massive amount of tree carnage that is elementary school.

I think this folder was probably around when I was at least in high school. In another lifetime, my dad was a school supply buyer. The bonus of that when I was a kid was all kinds of nifty and creative supplies! I’m pretty sure that this was a remnant from that time that my mom passed on to us when our own kids were little.

Supplies:

  • Accordion folder with with a cardboard shell
  • Fabric Remnant
  • Batting Remnant
  • Spray adhesive
  • Glue Gun
  • Ribbon
  • Mailing Labels
  • Pliers, if needed

Accordion Folder Upcycle Project

So, I find this. Cutesy and functional. I like the functional, but not so much the cutesy!

First thing’s first, tear away the cardboard exterior, doing as little damage as possible.


There’s an elastic band that is used to close the folder. Yank that out from behind and put it aside. We’re going to do something totally different for our closure!


On the opposite side is the button that the elastic goes around. We’ll bend it and wiggle it until we can pull it out of the hole with minimal destruction.

Now, that glue needs cleaning up. We’ll peel all that away.

Much better!

Now, the fabric. How about a remnant from another project? This fabric made the centers of the blocks on my Friendship Star quilt.

Oh no, it’s too short! Ideally, it needs to be a few inches bigger on each side. And, it definitely needs to be ironed!

Not to worry, just add a bit of another fabric to one end. That’ll create a lovely front!

For a touch of magic, spray basting. Because this is a permanent application, regular spray adhesive will work, too.

I think a little padding will be nice, and I just happen to have this bit of leftover lightweight batting from another project.

Now, we’ll spray baste the fabric to the batting. Spray the batting and not the fabric and, of course, we follow manufacturer’s instructions!


Add spray baste to the outside of the decorative cardboard. It doesn’t matter at this point which end of the folder is front or back, as long as we get it even!

Hmm, now about some pretty ribbon? This was saved from a gift The Big Guy gave me for Christmas a couple of years ago.

There are lots of adhesive options at this point, but after seeing how the folder was originally constructed, I think we’ll break out the trusty old glue gun!

We’ll make it extra pretty by gluing each corner down first.

Glue and repeat!


Nice, all four are in place now!

Now, we’ll fold the four sides and glue those in places. This bit might be tricky because we want it taut, but not too tight.

Lots of glue is necessary to make sure all the layers stay in place.

With all the seams glued, it looks so pretty!

It’s all ready for ribbon now!

The ribbon cut in half and glued in the center of each side is just the ticket! Gluing it directly to the cardboard gives it some extra durability.

Both sides are in place, so now it’s time for the final steps!

Let’s put the accordion back in the folder! We’ll sit it right in the center.

Let’s get it all straight so that we don’t have a weird end sticking out or anything! Start at the bottom and swipe the glue back and forth just like it was originally. Be fast, the glue dries quick!*

*Do not, repeat, do not glue the bottom of the file to the outside cover! It needs to be able to expand and contract, or, ehem, accordion. 😉


For extra security, we’ll add more glue up the sides and around the top.


Squish the side hard!

Keep smoothing it until it feels like it’s set. We want the bonds to be nice and firm! With all the glue in place, we’re done! Wow, that was quick.

We’ll change the categories up with some leftover mailing peel and stick labels. A couple of the originals still apply!

Isn’t that nice?

This is a file folder I can travel with. I might even bring some crayons.

Happy Crafting!

Photobucket

SEWHOOKED SHOP | FACEBOOK | TWITTER | FLICKR GROUP

Recycled Gift Bags from, ehem, paper wine bags

Recyled Paper Bag

The holiday head cold has grabbed me with both hands!  Fortunately, I finished my gift making and wrapping before I could spread cooties along with my Christmas cheer.

I did something I almost never do and *gasp* bought pre-made gift bags for holiday treats.  When I opened the packages, they all had a bottle neck.  After I forced my eyebrows down out of my scalp, I realized the cute little bags were practically useless unless the entirety of my holiday giving included M&Ms.

Without any time to spare, I started digging around in my “keep just in case” drawer and came up with a stack of paper wine bags that I’ve been holding on to forever.  Jackpot!

To make your own holiday gift bags/wrap from recycled wine bags, you’ll need:

  • paper wine bags
  • tape or glue
  • hole punch
  • ribbon
  • iron
  • something to cut the bags (paper cutter, rotary cutter, decorative or plain scissors)
  • stamps, stickers or other embellishments

Recyled Paper Wine Bag

If your bags are like mine, they’re likely to be in all different states of crumpled-ness.  So , first things, first, iron those bags!  Medium heat works.  Ironing on a paper bag will also clean your iron, so you might want to start with a sacrificial bag, just in case your iron has any Ghosts of Craft Projects Past lurking around.

Recyled Paper Wine Bag

Much better!

Recyled Paper Wine Bag

I happen to have a snazzy wavy blade for my rotary cutter.  You can use something similar, a straight rotary or paper cutter or just plain scissors.

Recyled Paper Wine Bag

Each wine bag will make 2 gift bags.  Determine how big you want each side to be, leaving about 1″ for folding for each bag. Recyled Paper Wine Bag

Bottom and top (L-R)

Recyled Paper Wine Bag

The top bag is open on the top and the bottom, so it’ll need to have the bottom sealed up.

Recyled Paper Wine Bag Recyled Paper Wine Bag

Glue works fine for this, but so does tape or a cute sticker. This is a good time to embellish your gift bag with stickers, stamps or drawings.

Recyled Paper Wine Bag

Top finish off, fold the top down and punch two holes through all layers.  Insert your gift and tie a ribbon through to close.

Recyled Paper Wine Bag

Repeat the steps for all bags.  The bottom half of your recycled gift wrap will only need the tops folded and punched since the bottom is already sealed.  I stamped mine, but you can embellish your bags any way you like. Now, fill with holiday goodness and gift it!  If you’re stuffing your gift bags with edible homemade goodness, I suggest wrapping it in plastic or wax paper before placing it in the bag.

Add your Sewhooked-related photos to my flickr group and you might be featured in a future post.

Photobucket

 
Craftsy | Etsy | Facebook | SHFB | Flickr | Twitter | PinterestBloglovin

Craft: Recycle Last Year’s Calendar


I admit it…  I’m a hoarder.  I keep everything that I might be able to use or recycle later on.

If it’s pretty or cool or unique, it’s somewhere in a plastic bin or a drawer waiting to be reimagined.

Calendars are something we all have.  I’ve been recycling mine as long as I can remember.  Each December, I start eyeballing the soon-to-be-obsolete model wondering what it will be in a month or so.

In the past, old calendars have become post cards and gift boxes.  My favorite by far are envelopes.  Calendar pages, especially really cool calendar pages, make great envelopes!

You’ll need:

  • an old calendar, the bigger, the better!
  • envelope templates, A and B, printed, cut out and transferred to a piece of lightweight card stock or cardboard
  • staple remover
  • scissors
  • pencil
  • double stick tape OR a glue stick
  • Blanket mailing labels (optional)


Remove staples from the calendar


Separate pages and tear apart along the crease line


Position the template on a calendar page and trace with a pencil.

You might want to fussy cut here, if part of the page is more interesting than the rest.


Using scissors, cut along pencil lines.

Repeat for all pages.


Fold bottom of envelope up towards top, aligning with the bottoms of the side flaps.

For heavier paper, use your template or a ruler to crease.


Fold side flaps, making sure they’re even with the top and bottom.


Fold bottom flap out.


Place double stick tape on the side flaps, leaving 1/2″ to an 1″ at the top without tape.


Fold top flap down.


Finished envelope from the front.


Optional:  for darker papers, add a self adhesive mailing label.

Repeat until you have a pile of gorgeous envelopes!

For sealing, use double stick tape, a glue stick or fun stickers.


The same template, different calendar.


Same envelope from the front.

Now, what to do with the gorgeous thumbnails on the back of this calendar?


How about buttons!?

If you make this or any sewhooked crafts, I’d love to see a photo!  Email me or add it to the Friends of sewhooked flickr group.

Happy Crafting!


also posted on cut out + keep

Craft: Earring Hanger


I don’t make a lot of New Year’s Resolutions, but I do start each year trying to be more organized.  I’m starting with my personal spaces this year; my jewelry, make-up and the like.

I love big, swishy earrings, handmade, hand beaded, felted, you name it.  I have loads that were made by friends and a few made by myself, and those are definitely my favorites.

Storage has gotten a bit precarious and I’m usually trying to disentangle the mess and find a missing earring.

For quite a long time, I’ve used a small earring organizer to keep my studs and other small earrings that have a stem and a back.  It was time for a new, bigger version so I can finally find all of my fabulous earrings!

You need:

  • a picture frame with no glass (recycled or raw wood)
  • plastic canvas
  • hot melt glue
  • scissors
  • ribbon
  • stapler (a staple gun works great if you have one) or thumb tacks
  • optional:  paint & glitter


Cut the plastic canvas to fit inside your frame.


Optional:  Paint the frame the color of your choice.  If the frame is recycled and has a finish, you’ll need to give it a light sanding before painting.

I’m particularly fond of glitter…so I sprinkled some on my frame while it was still wet.


Once the paint and glitter are dry, place the plastic canvas inside the back of the frame.  Go around all four sides with hot melt glue.


This is what you have now!


Cut a piece of ribbon long enough to reach from one corner of the frame to the other, plus a little for turning under on the ends.  The length here depends on how you want your final product to look and how much of the ribbon you’d like to show.  Turn the ends under and staple or tack in place.


Hang on the wall and add all of your lovely dangly earrings!  Works best with French hook earrings.


smaller variation

If you make this or any sewhooked crafts, I’d love to see a photo!  Email me or add it to the Friends of sewhooked flickr group.

Happy Crafting!