I drew Curly Swirly Butterfly a couple of weeks back when I was sick and didn’t feel like doing much but doodle. In this case, my doodle turned into something so fun, that I even made it available as a t-shirt and bought myself one, too!
This fun pattern can be backstitched, stem stitched, or finished using your favorite embroidery stitch.
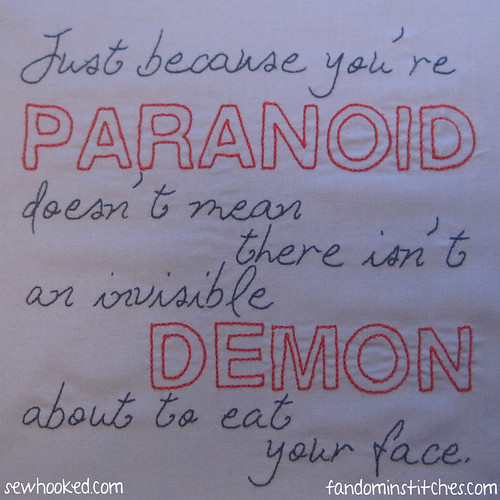
GREAT BIG THANKS to Robin & Rainey for stitching this sweet design up for me. (Click the links to check them out on Instagram!)
Our March drawing is for a fun set of fabric from the fabulous Vanda, all the way from South Africa!
The prize includes 20 cotton fabric pieces ranging in size from 5.5″ x 8″ to 10″ x 11″.
Don’t want to applique? You can also hand embroider or even stencil this pattern!
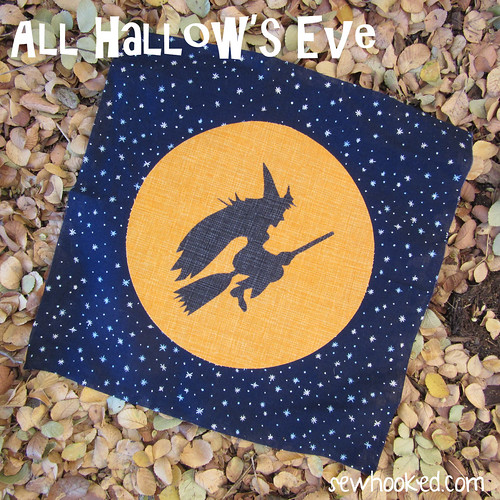
My opinion of the traditional Halloween witch has changed greatly since 1997, so our new friend here is much cuter and definitely curvier. I imagine she’s wearing her Halloween best as she rides her trusty broomstick to a fun party, perhaps in Hogsmeade!
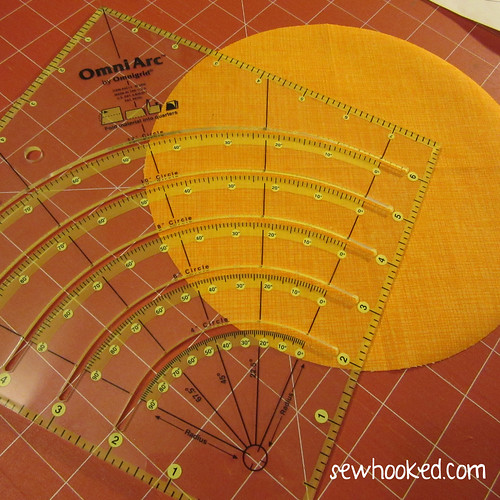
If you are lucky enough to have an OmniArc Ruler, try using the 8″ circle guide to create your moon.
I ironed my fusible webbing in place first and then folded the orange fabric before cutting with my rotary cutter. Follow the instructions as printed on the ruler.
Your moon will be about 1/2″ bigger than the one in the pattern, but it will still work great for, oh, say a 12″ quilt block or fun Halloween cushion!
No such luck? You can also cut around a ceramic plate with your rotary cutter!
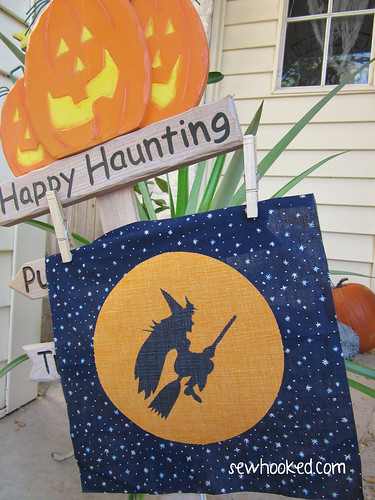
Are you making projects from 31 Days of Halloween? Share your photos with my flickr group! There will be a fun surprise after Halloween for one lucky winner!
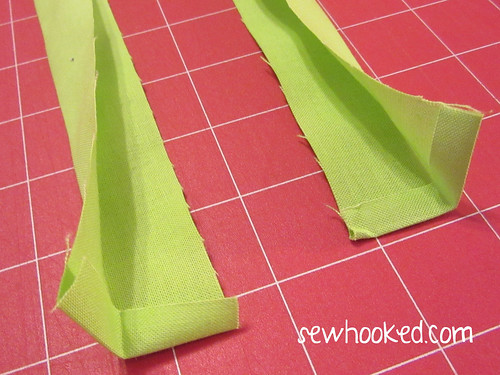
2 – 2″ x 22″ strips of green fabric (fat quarters work great or you can sub-cut a WOF)
fun thread color (optional)
pinking shears (optional)
sewing machine
iron
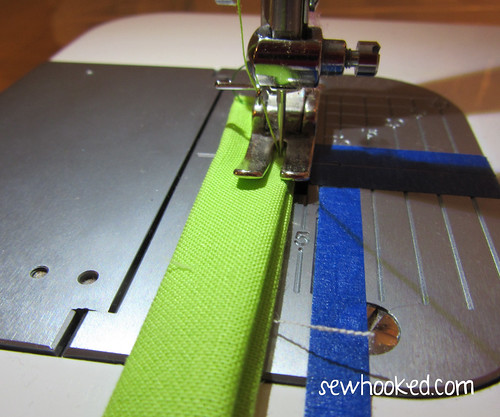
Press both 22″ strips in half, pressing one end of each strip under 1/4″. Press in half again.
Stitch across the turned under end and down the length of each green strip.
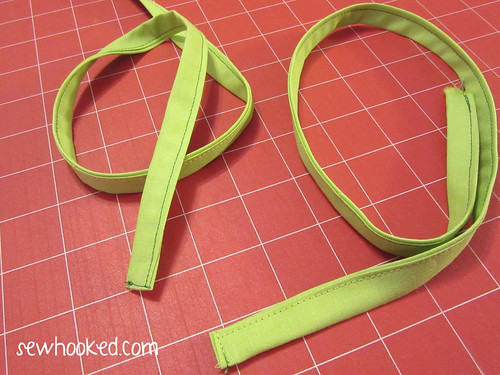
Now you’ll have this!
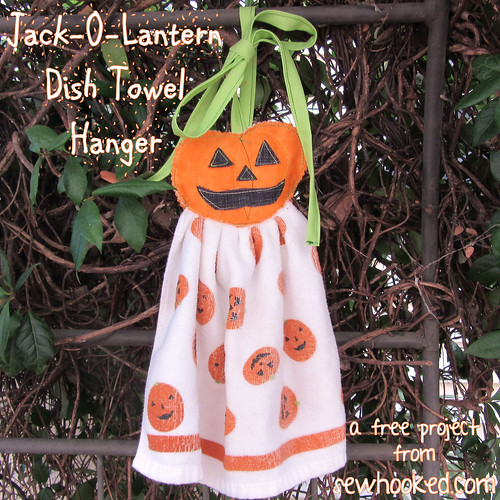
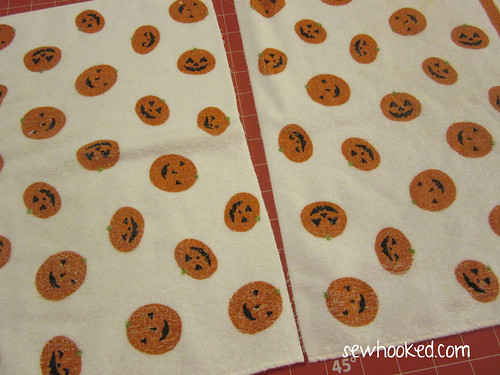
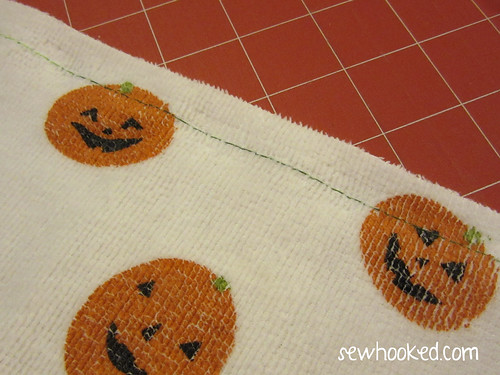
Depending on the size of your towel, you may need to cut it in half. My towel was 23″ long. If you don’t cut your towel in half, then cut the seam allowance off the top end.
Run a long basting stitch along the raw edge, being sure to leave long tails on each end.
Use the basting to gather the towel. Now, set aside for the fun part!
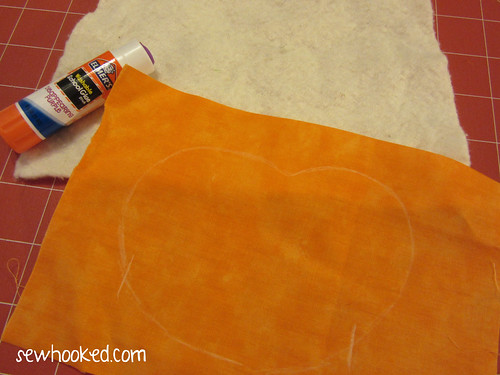
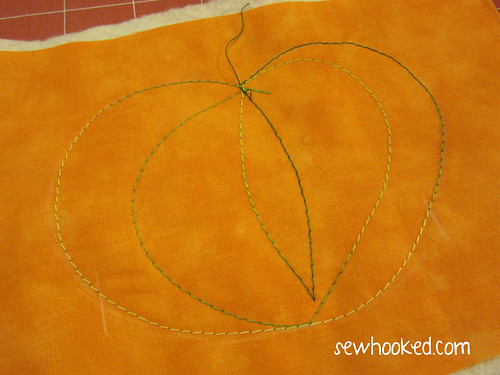
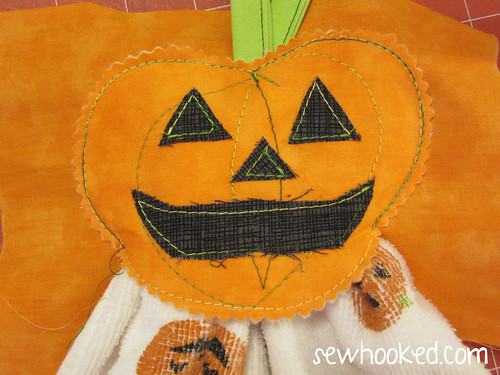
Cut your orange fabric into two pieces approximately 7″ square (mine was a little wider, so I just left it). Cut out and trace the Pumpkin Template onto the right side of one piece of orange fabric with an erasable fabric pencil. I used my white Sewline pencil.
I marked a four inch space to help with the opening later on. This is optional.
Baste the orange fabric you just traced on to the batting with a few dots of washable school glue.
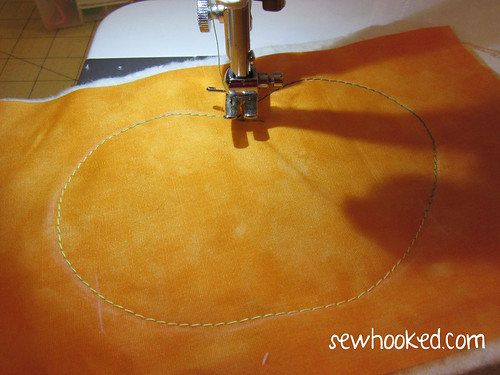
Using your fun thread and a wide stitch (I used a 3 on my Juki), trace the pumpkin line.
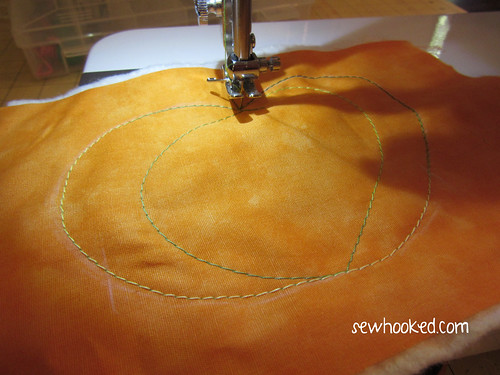
Starting at the top of the pumpkin, echo the shape an inch or so inside the line. You don’t have to be perfect here, every pumpkin is unique!
Mine looks like this.
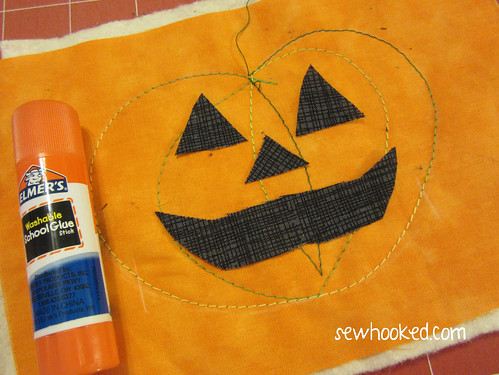
Using your black fabric scraps and a pair of scissors, cut out the face you’d like for your Jack-O-Lantern. I decided to go super simple, trimming as needed until it was just the way I wanted.
Baste these pieces on with the washable school glue. Hit it for a few seconds with your iron to dry the glue.
Using the same stitch as before, stitch around each facial feature, being sure to back stitch as needed.
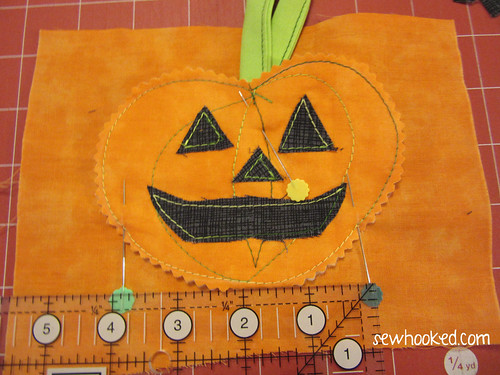
Trim the entire thing with pinking shears. The face is done, yay!
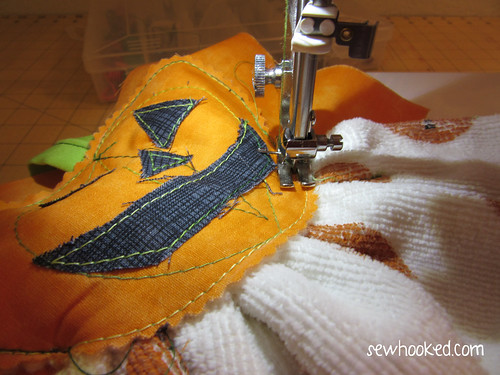
Place the completed face right side up on the remaining piece of orange fabric.
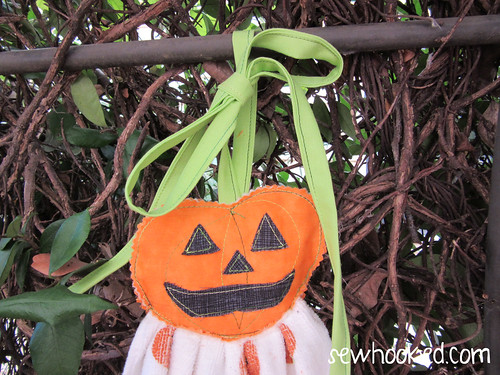
Slide the unstitched ends of the green ties into the top center and secure with a pin.
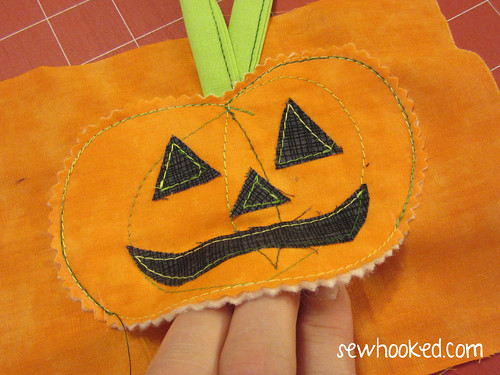
Measure a 4 inch opening at the bottom (this is what those marks were for back when I was tracing), Mark each side with a pen or erasable fabric pencil, marker, etc.
Sew around, on top of the original stitch, leaving the 4″ opening at the bottom. Back stitch at the beginning and end.
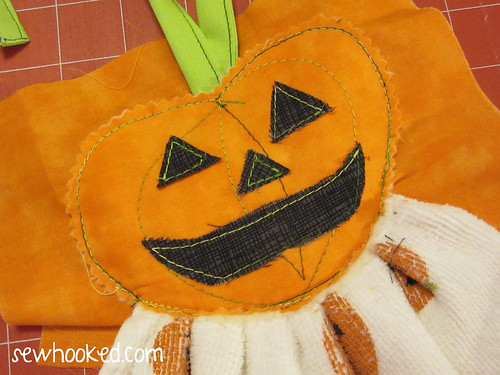
Insert the previously prepared towel in the opening (the back fabric is still untrimmed).
Adjust as needed until it is as even as possible.
Sew the opening closed. Depending on your machine, you may need to raise your presser foot or use a walking foot. You know your machine best, so do what works best for you.
Now, it’s time to trim off the back! Use scissors or your pinking shears to trim close to the stitching, being sure not to cut the front fabric.
There’s been fairly regular conversation over on the Project of Doom Facebook group about favorite tools for different aspects of quilting and paper piecing.
I thought I’d take that idea and share a list of some of my personal favorites.
Disclaimer: These are my favorites. I personally use and recommend every single one of things. This is not a paid ad, though there are affiliate links below. If you have a tool that you like better, or one I didn’t include, I’d love to hear about it!
I have included Amazon and other links for easy reference, but if you have a favorite local quilting store, please give them your business. ♥
I love my rotary mat, rulers, etc., which are all fairly basic quilting supplies, so I’m not including those here. I have a variety of different ruler brands and I enjoy them all. These are my special favorites, all used for paper piecing, and are the things that I wouldn’t want to live without in the sewing room!
Add-An-Eighth Ruler – also great for paper piecing, especially when there are lots of overlapping seams that need to be graded to avoid bulk.
Olfa 45mm Ergonomic Rotary Cutter – great for constant cutting and for anyone that forgets to close the blade on their standard rotary cutter. My first rotary cutter was not ergonomic, which I found harder to deal with as I began using it more and more (and let’s be honest, as I got older!). The Olfa is easy to use and has a squeeze grip that closes the blade when not in use.
Mary Ellen’s Best Press – Excellent starch alternative to get out stubborn wrinkles and to give fabric body without flakes or stickiness. Use sparingly when paper piecing if the paper is still attached to your block or you will end up with a soggy mess. I love the lavender, it smells just lovely!
Havel’s Ultra Pro Seam Ripper – ideal for serged seams, but it also cuts like butter through seams that need to be “unsewn,” including the small stitches that are best for paper piecing. Do be very careful with this, though. It’s a super sharp blade that will pierce your fabric (or you!) if you’re not careful! Refillable blade, which is a bonus!
Mini-Seam Fix Seam Ripper – this is my all time favorite. I keep several on hand because seam rippers get dull and occasionally need to be replaced. This little guy is a champ! It’s great at getting those tiny paper pieced stitches. The eraser end rubs away all the bits of leftover threads!
Fiskar 5″ Softgrip Scissors – I keep these handy little guys hanging on a 3M Command Wire Hook right on the side of my sewing machine. I always know where they are and they are useful for everything from trimming threads to snipping corners.
Black & Decker Classic Iron – The Black & Decker has a nice heft to it, which I find I really prefer to lightweight irons when pressing. I use it without steam to press when piecing (nothing will kill an iron faster than actually putting water in it!). It has a safety feature that will turn the iron off when it hasn’t been picked up after about 10 minutes, but turns on and heats up quickly once it’s moved again. That’s a great safety feature if you, like me, tend to get distracted and forget that the iron is on!
Steamfast Iron – This palm sized iron is a CHAMP for paper piecing. Originally my “to go” iron, when I have RSI flare ups, this is a much better choice for me to use. As much as I love the Black & Decker classic, I definitely use this one more.
Variera Iron Holder from IKEA – keeps the iron off the ironing board and safe from jumping and grabbing critters like cats and kids. I have had my iron holder for years and I couldn’t live without it. My iron stays safely mounted and out of the way when not being used and is a safe place to keep the iron even when it’s on. Sadly, this Iron caddy doesn’t appear to be currently available. This one is similar, though I haven’t used it myself.
Recycled Printer Paper – The number one supply question I’m asked is what kind of paper I use for paper piecing. There are a number of products out there specifically for paper piecing, and if those work for you, that’s absolutely brilliant. My personal favorite is recycled printer paper. It comes in reams, is reasonably priced, it runs easily and smoothly through my printer, it’s easier to remove than regular printer paper, but it has enough body that it stays in tact while you sew (and occasionally rip!) seams. After paper piecing, I recycle it again, making the circle complete! You can also use newsprint (also avaiable in printer-size) if you prefer a lighter weight paper.
Is your favorite tool not listed? I’d love to hear about it!
Posts on this blog may contain affiliate links but I have no control over “sponsored posts” which are the price I pay for a less expensive website. Thank you for your understanding & support. ♥
Next week, there will be a BIG wrap-up post that includes the winner of the Free FiS t-shirt as well as every pattern submitted for the event. Be sure to stop by Fandom In Stitches on Wednesday for that!
At the beginning of the summer, I challenged to design one new pattern for each SoS theme. There were 12 in all, and in the end, I’d designed 15 patterns, though I only stitched 14 of them.
Underachiever, right?! 😉
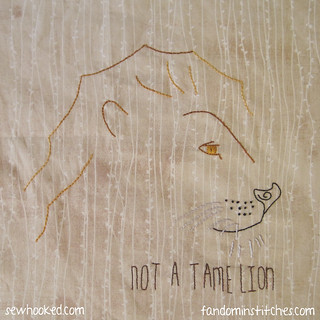
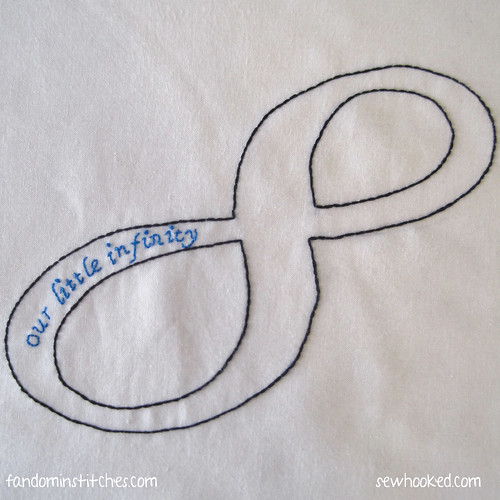
All of my designs are entirely free, all are hand embroidered and each design works up to approximately 7″ (my blocks are trimmed to 8 1/2″ after stitching).
I hope you find one among the lot that you’ll enjoy!
I’m a little behind on sharing my last two designs for Fandom In Stitches’s Summer of Stitching! Be sure to stop by next week for the final installment: I ❤ Disney!
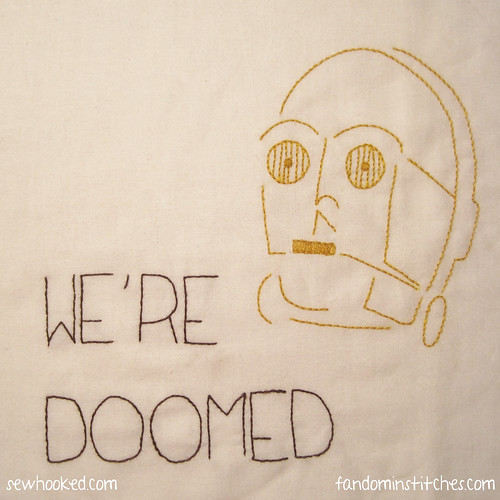
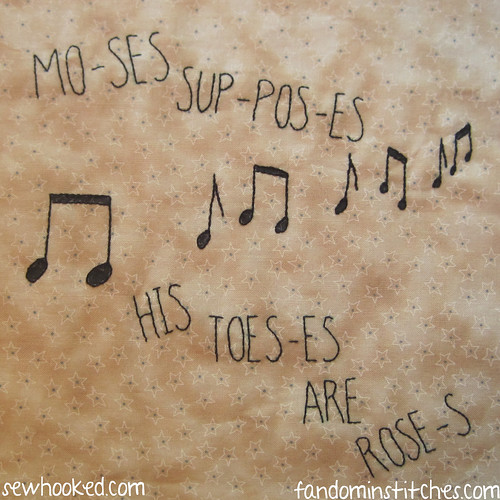
C3P0 was always my favorite Star Wars character. I love how pessimistic he is and how much he depends on R2D2 without even realizing it. When it came time to design a Star Wars block, he was the first thing that popped in my mind.
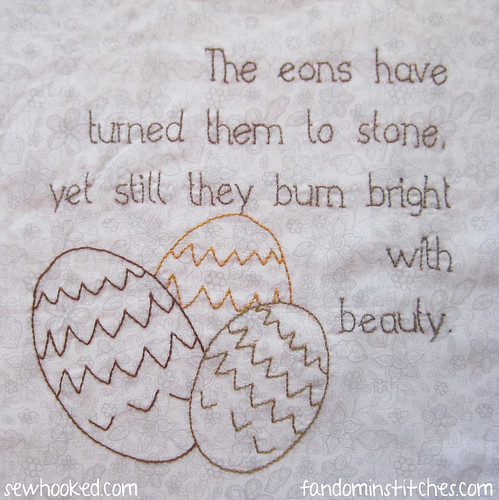
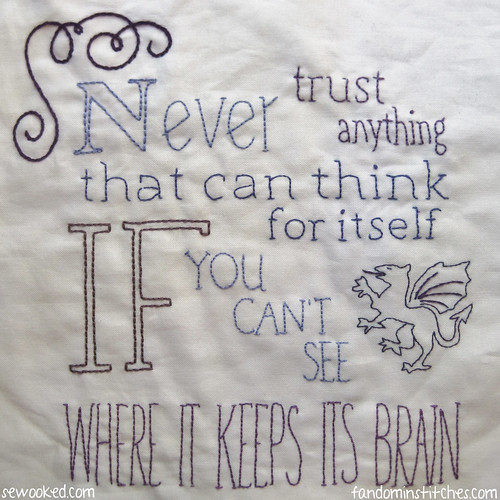
I’m a bit behind on Game of Thrones, having only read the books once and only watching the first season of the show. My daughter is currently working her way through the books and as she and I both agree that dragons are one of the best parts of any fantasy novel, I designed this block for her!
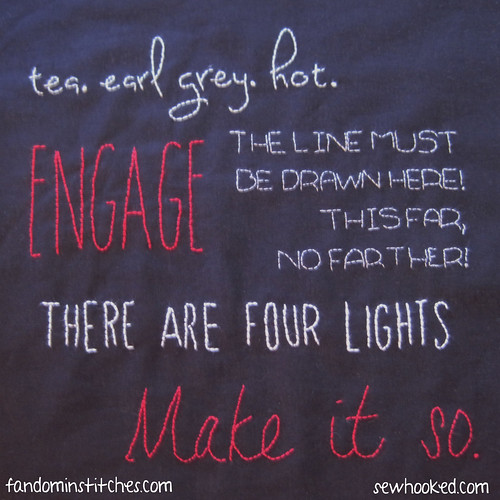
Get the free pattern for both designs by clicking on the name under the photo.