Category Archives: t-shirt reconstruction

Pocketses

Make a pocket for workout pants from an old tee.

I am not an athlete and I never have been. I kind of loathe exercise and would rather be sewing. Ehem. That said, I do try to take care of myself. Seriously, I’m 40 and I’d rather not fall apart as I get older.

I have a fabulous collection of yoga pants and jersey shorts of varying ages. These are my favorites for taking a long walk in the morning, something my hubby and I have been making an effort to do on a regular basis (see above comment about falling apart).

One of the best parts of these walks is that I usually text with my best friend while we’re out.  My best friend, my husband and I have all known each other for about twenty years. We all shared a house in college and we’re all friends. Eli and I live in Austin. Jewells lives in Albuquerque. Texting gives us a way to walk together despite the geographic distance. It’s kind of awesome and I look forward to it every day.

What’s driven me crazy for ages is that my favorite workout pants have no pockets. No place for keys. No place for a phone. That’s great if I’m not leaving my house, but for a long walk when I want to take my phone and I want easy access to it? Not so much. I’ve tried pouches, hip bags, and neck slings. They all make me crazy. I just want a pocket!

And then this happened…

My hubby has been cleaning out his closet. He’s 6’5″ and I’m 5’5″. I love his big tees for sleeping in and sometimes I do things like turn them into pants or girl shirts for myself.

He pulled out a plain grey tee that had a pocket on it. I looked at that pocket and it hit me that it’s the perfect size for my cell phone, so I grabbed my handy Havel seam ripper (best seam ripper EVER!), and removed the pocket.

When I flipped it over, WHAM!, I realize it I can use the bottom of the tee to make more pockets just like it!

This was a serious case of “Why did I not think of this before?!”

Make a pocket for workout pant from an old tee.  Make a pocket for workout pant from an old tee.

This is the pocket I Removed from the tee. It is an approximately 6″ square before the bottoms and sides have been folded in, including the seam.

Make a pocket for workout pant from an old tee.

I cut a 6″ strip from the bottom of the t-shirt, leaving the hem intact. I then subcut that 6″ strip into 6″ squares. Using the original t-shirt pocket that I removed from the same shirt, I pressed the squares to match. I used Best Press and steam to get them seams to stay. My iron was a little over enthusiastic with the steam…

Make a pocket for workout pant from an old tee.

This is the original t-shirt pocket on navy yoga capris. I lined it up just below the elastic and the string in the waistband.

Make a pocket for workout pant from an old tee.

Pins are good, just to keep everything in place.

Make a pocket for workout pant from an old tee.

I stitched around each pocket using a ball point needle and a stretch stitch. Ball point needles are made for stitching through stretchy fabrics like jersey and makes stitching it much, much easier. Stretch stitches have “give” so that when the fabric stretches, the thread doesn’t snap. Most sewing machines will have at least a basic stretch stitch. A narrow zig zag works just as well.

In the end, I placed all the pockets in the same spot, on the left hip. It’s been a couple of days since the addition of the pockets, and I LOVE them. My phone fits perfectly and it’s easy to grab when I get a text from my bff. I can even keep my house key in the bottom and it doesn’t interfere with my phone at all.

So, what became of the rest of the shirt?

XXL Tee to Tank Top
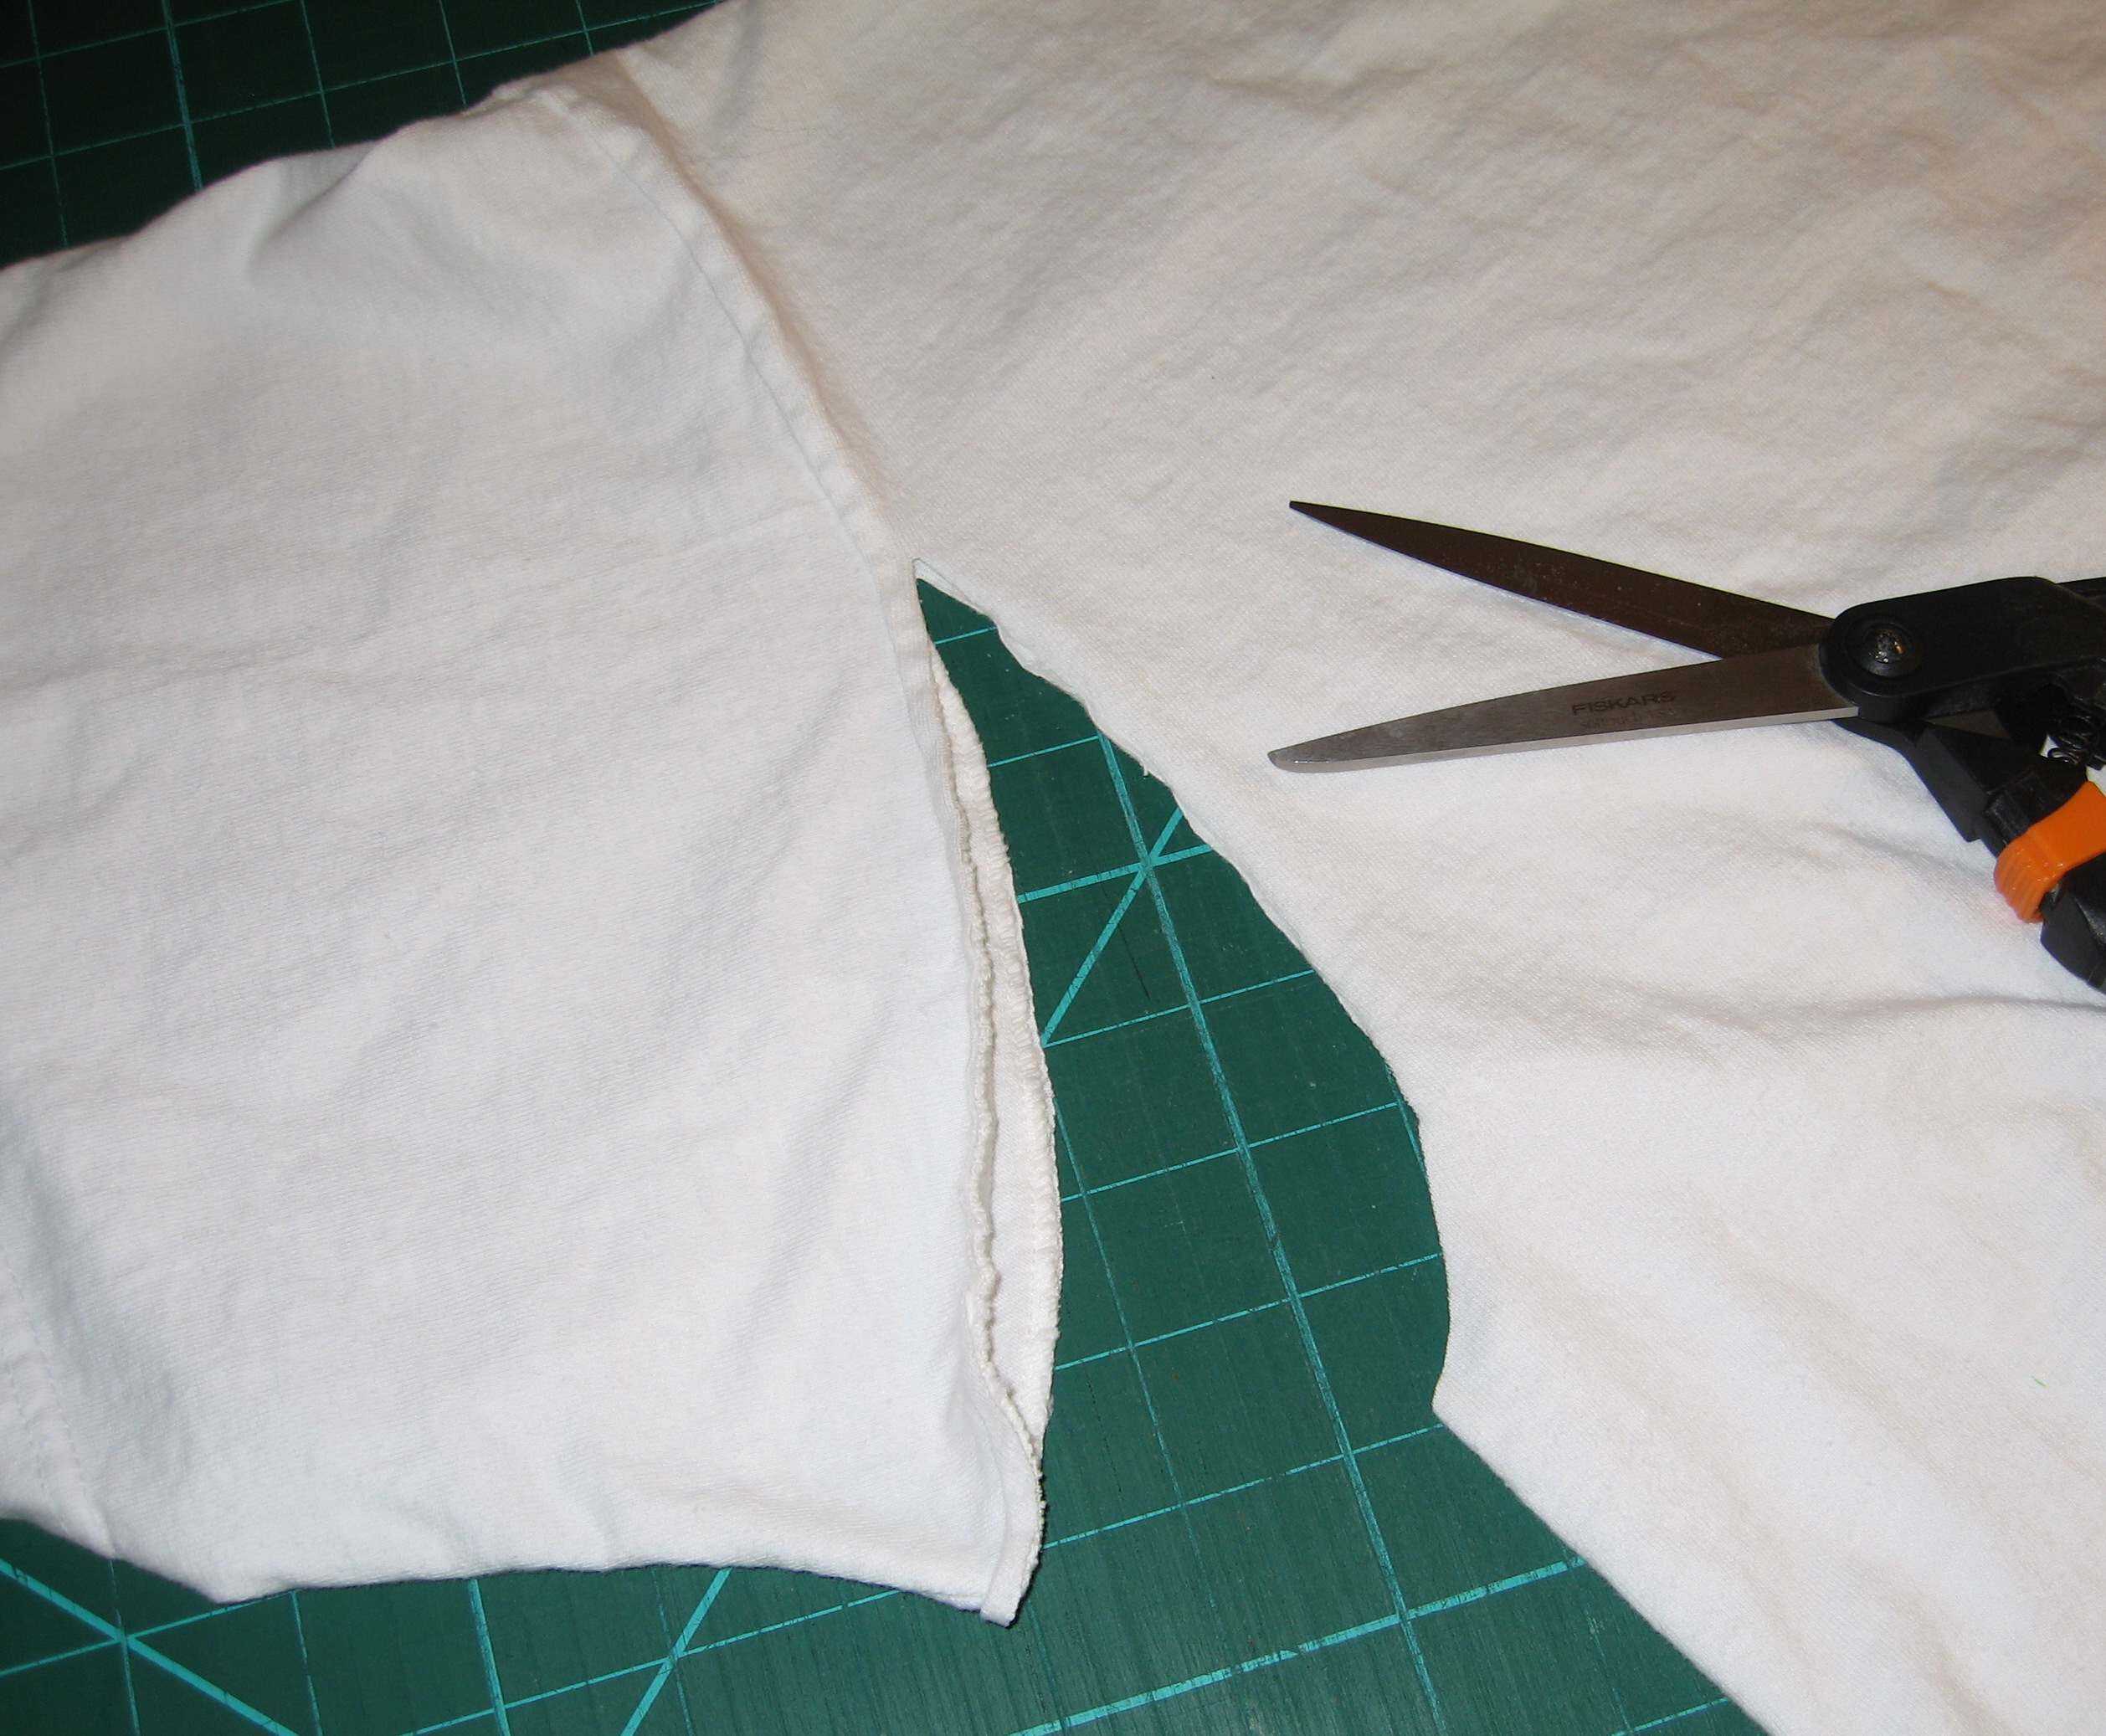
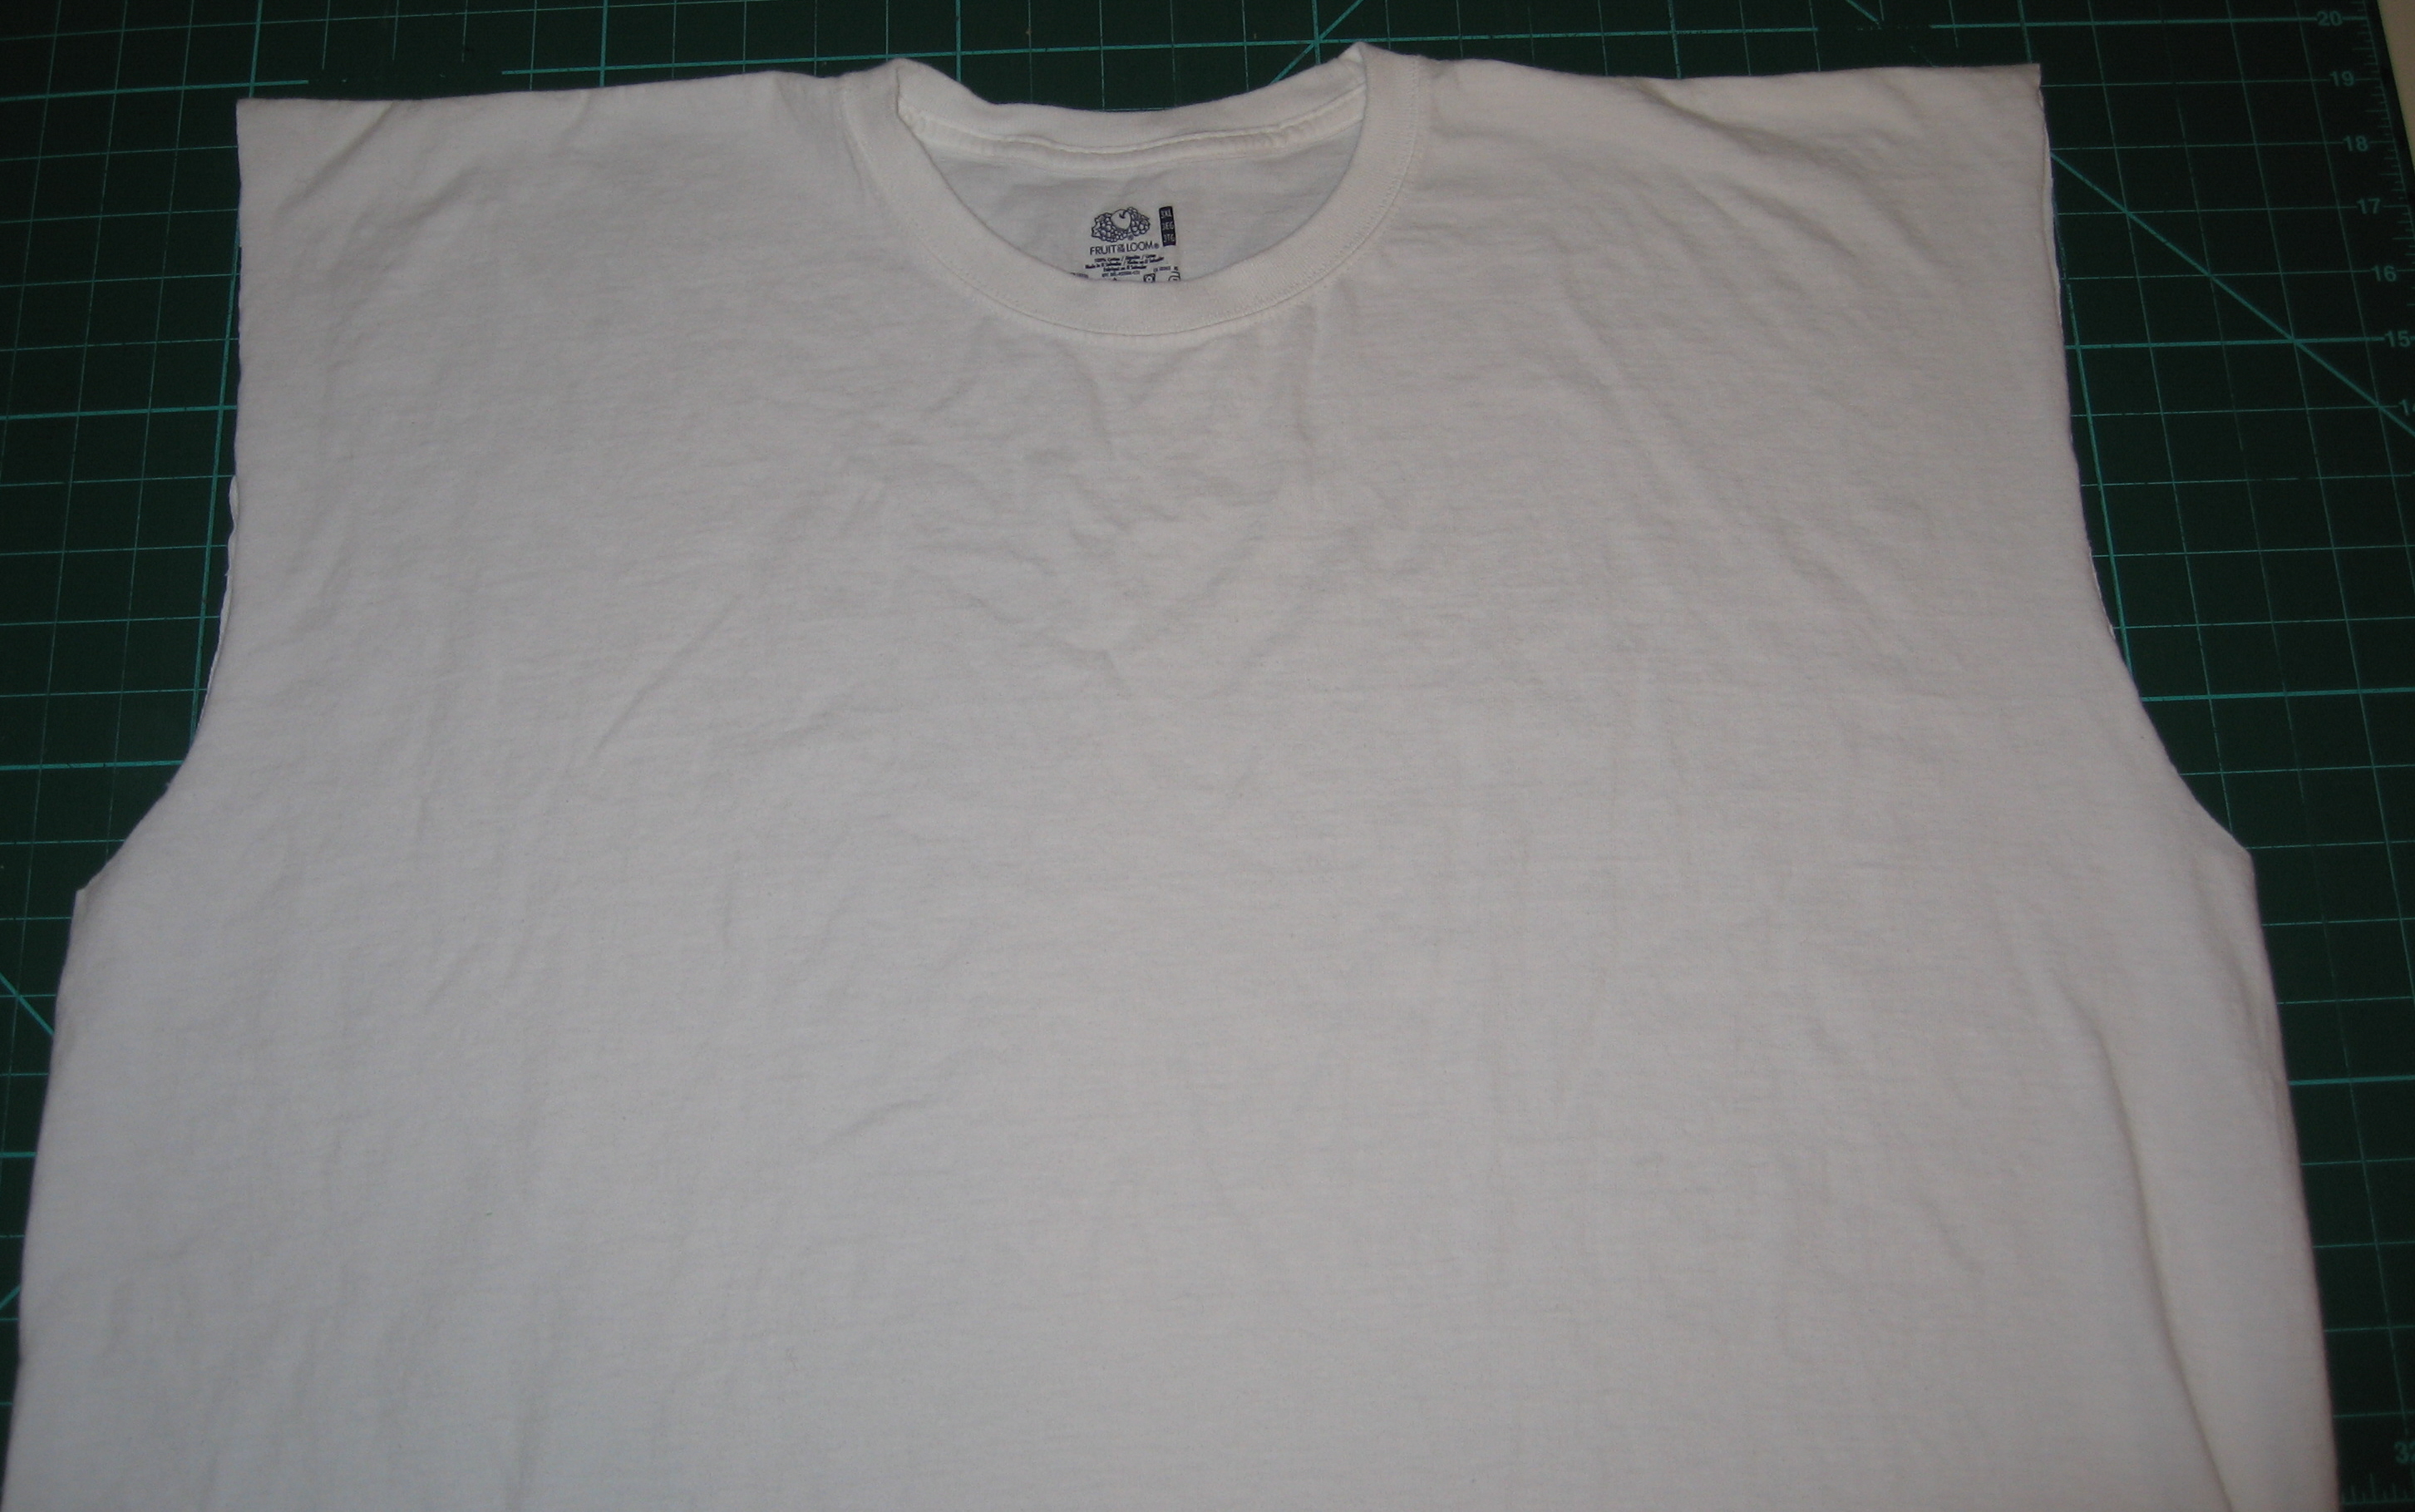
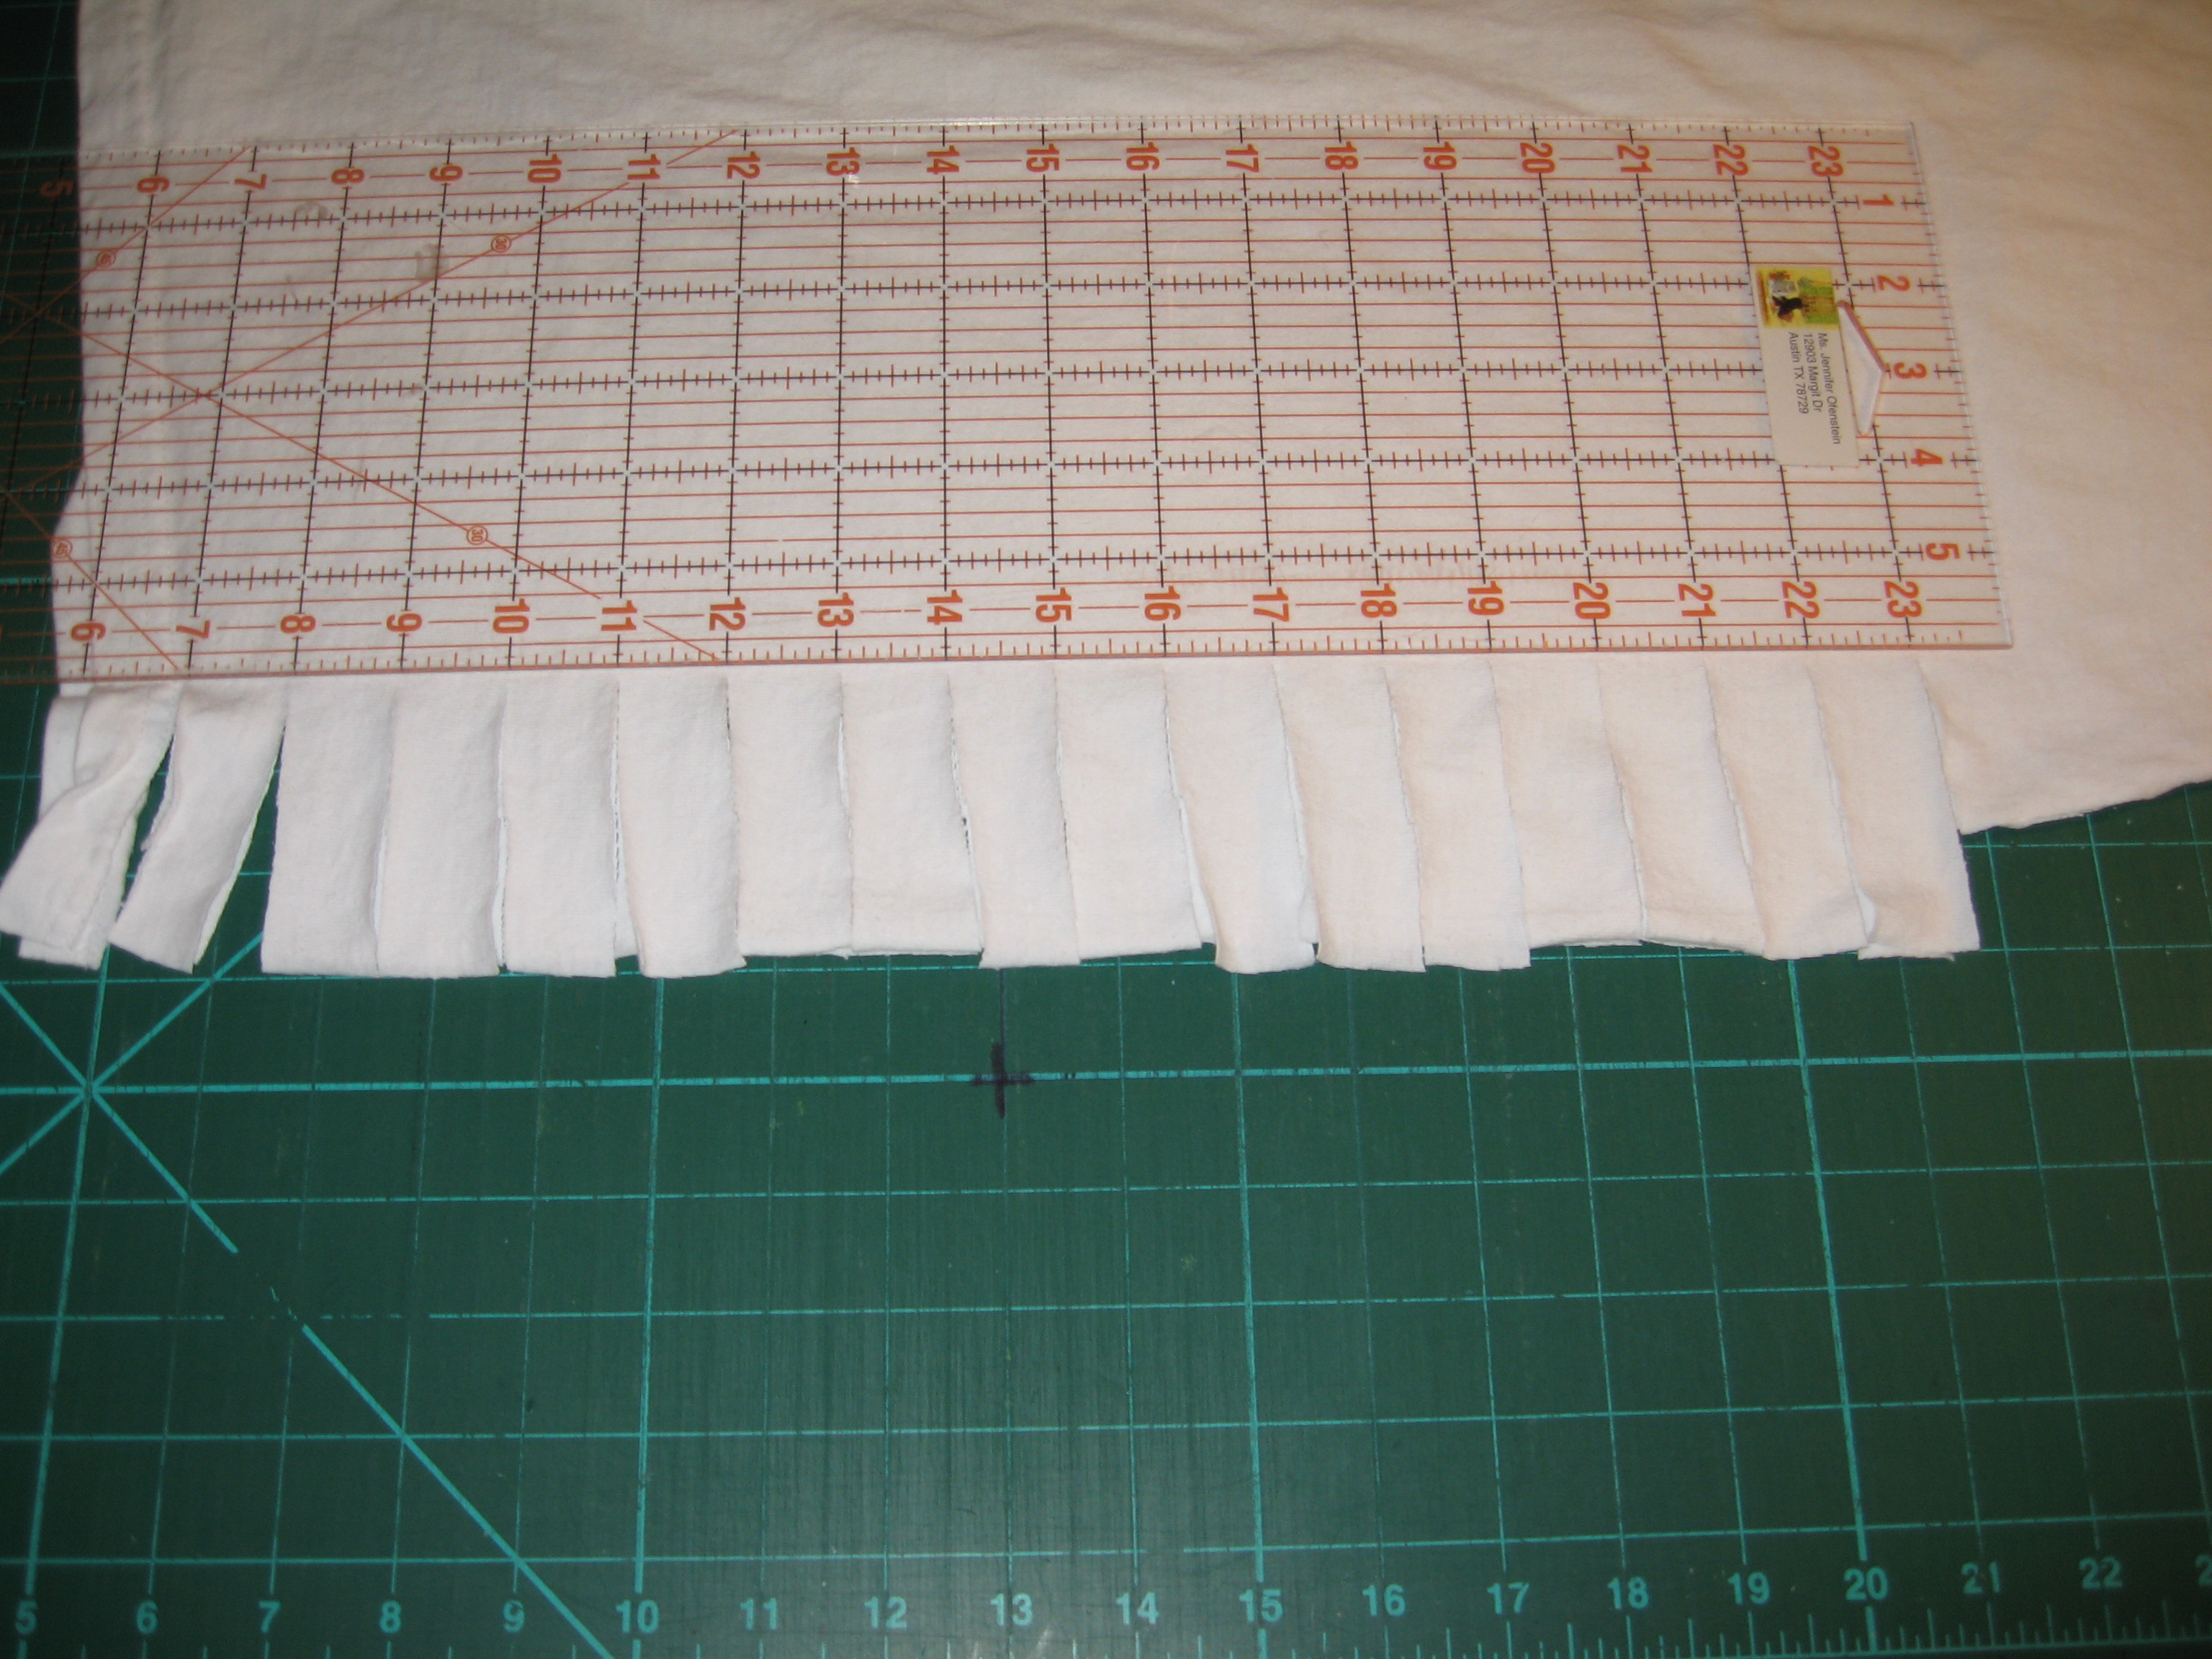
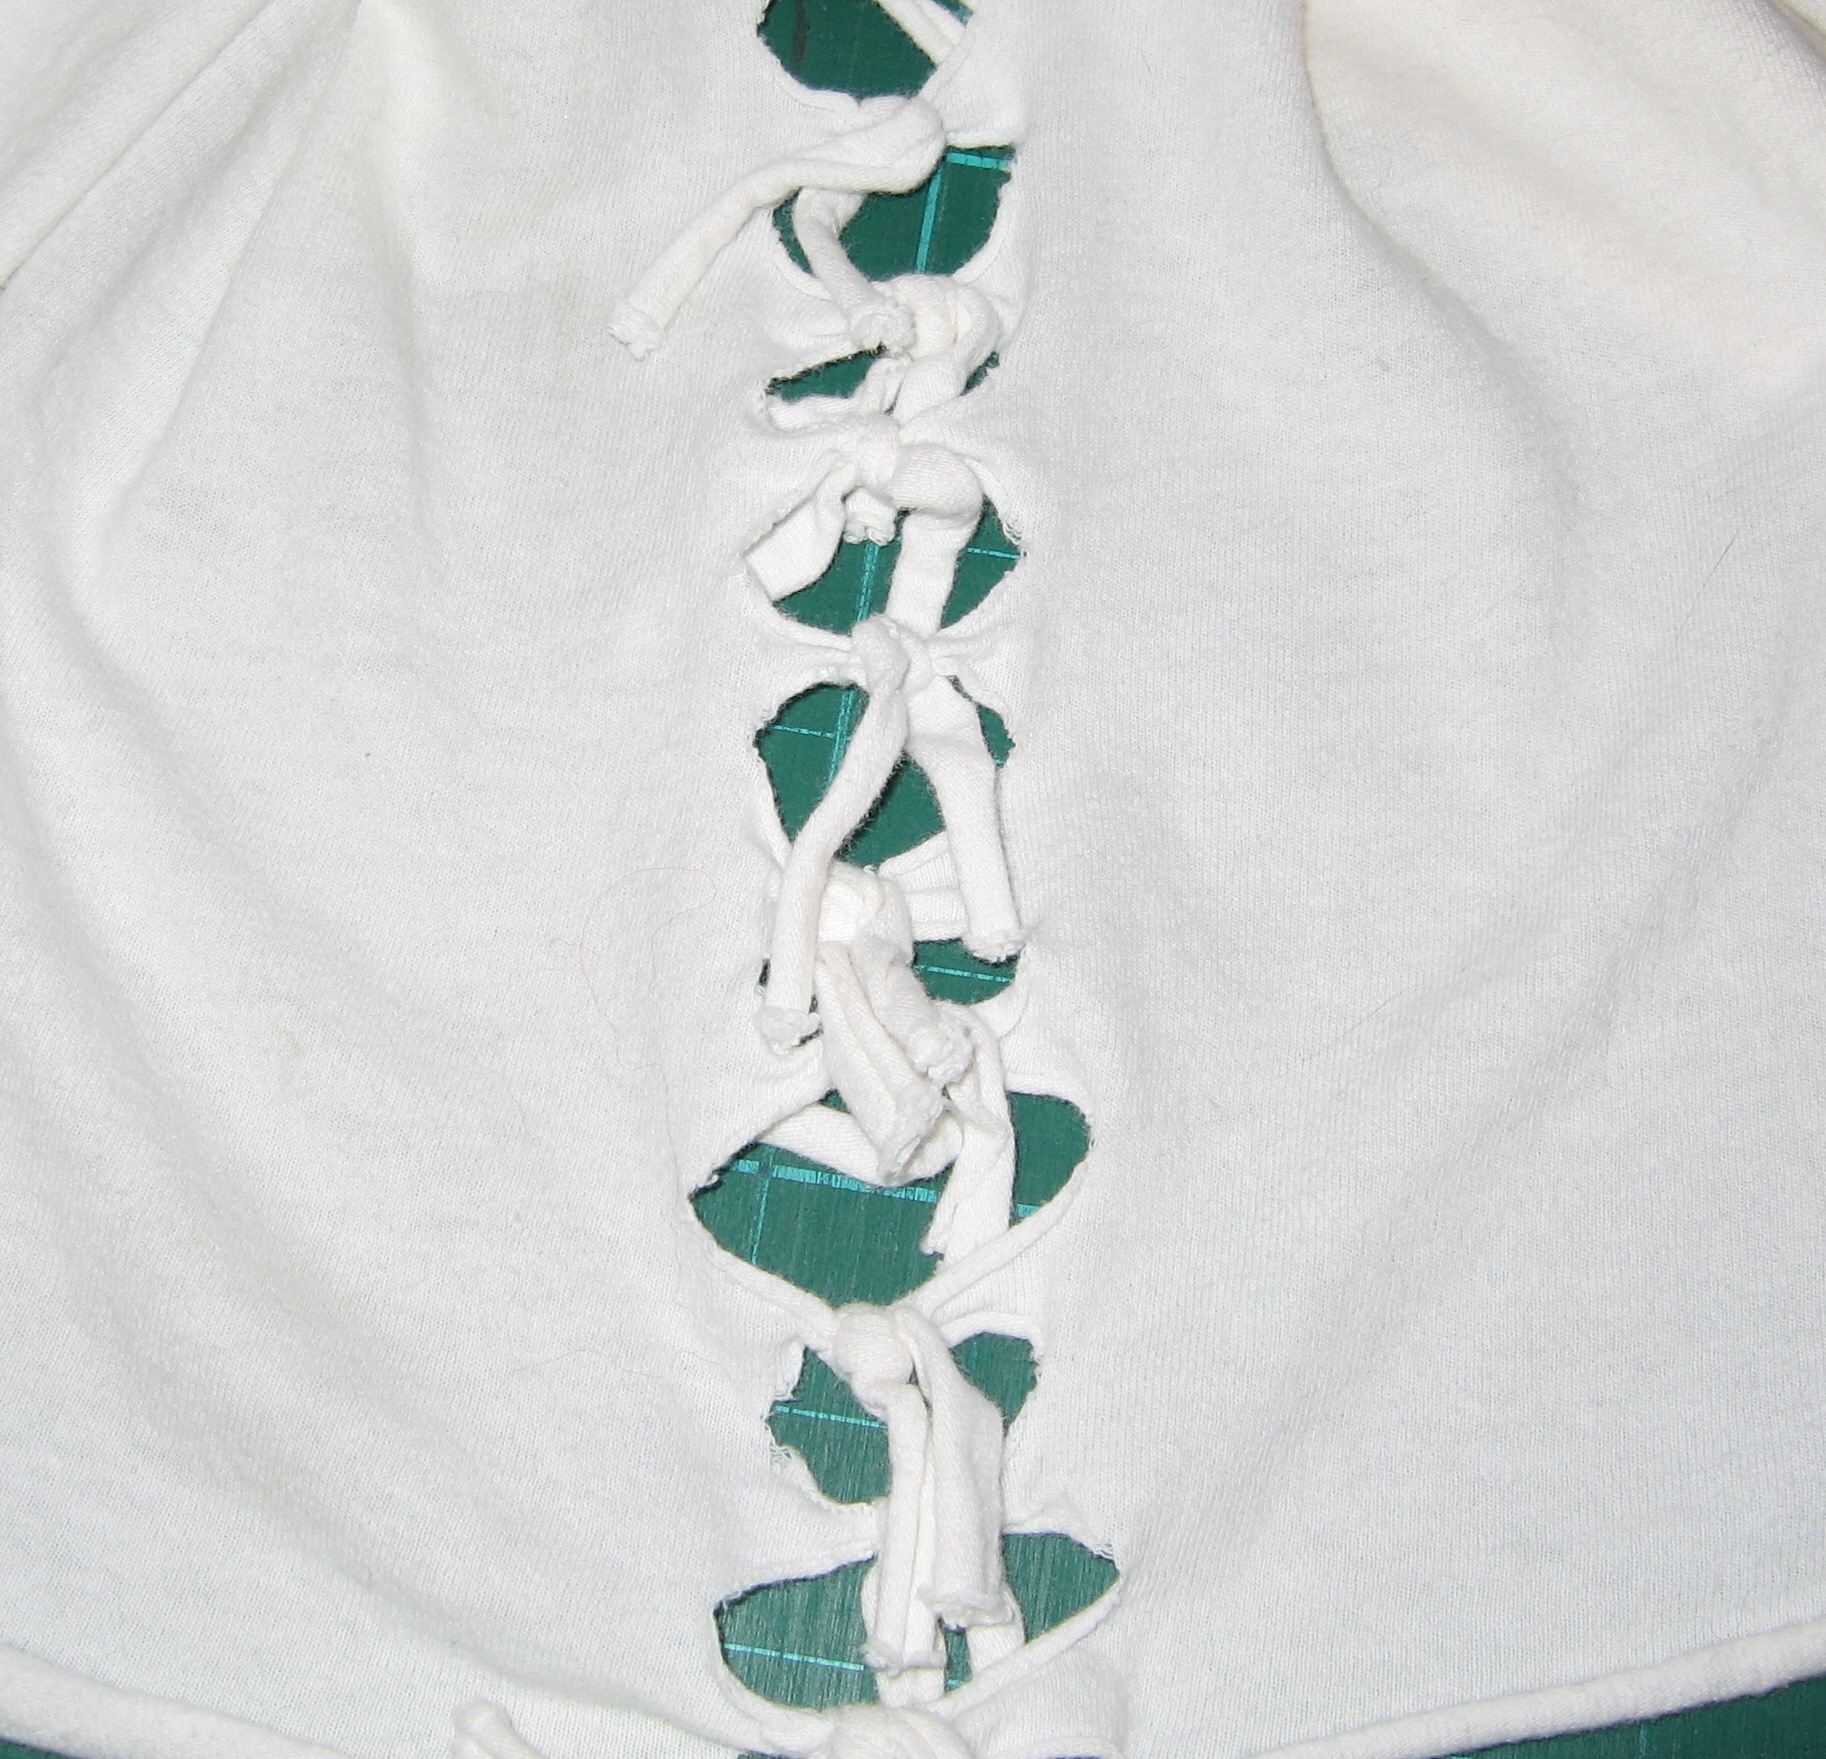
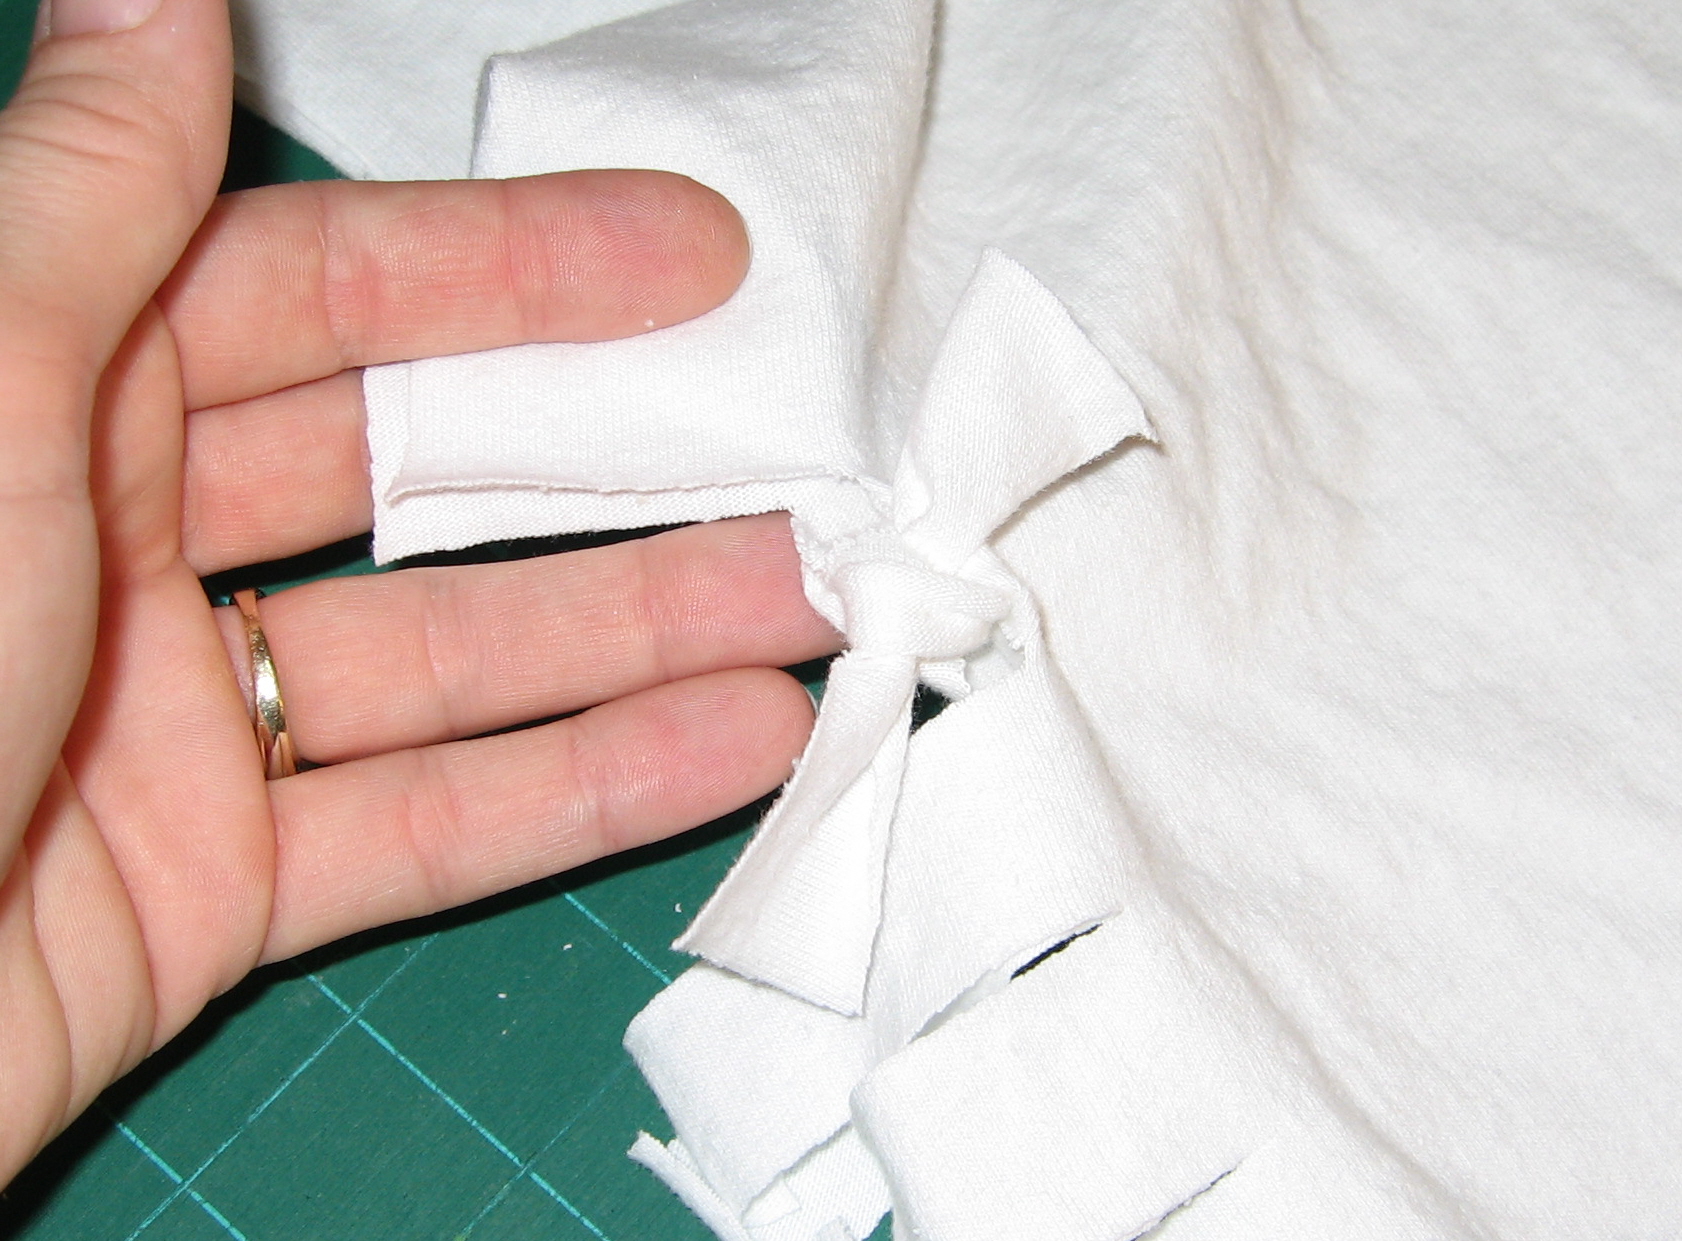
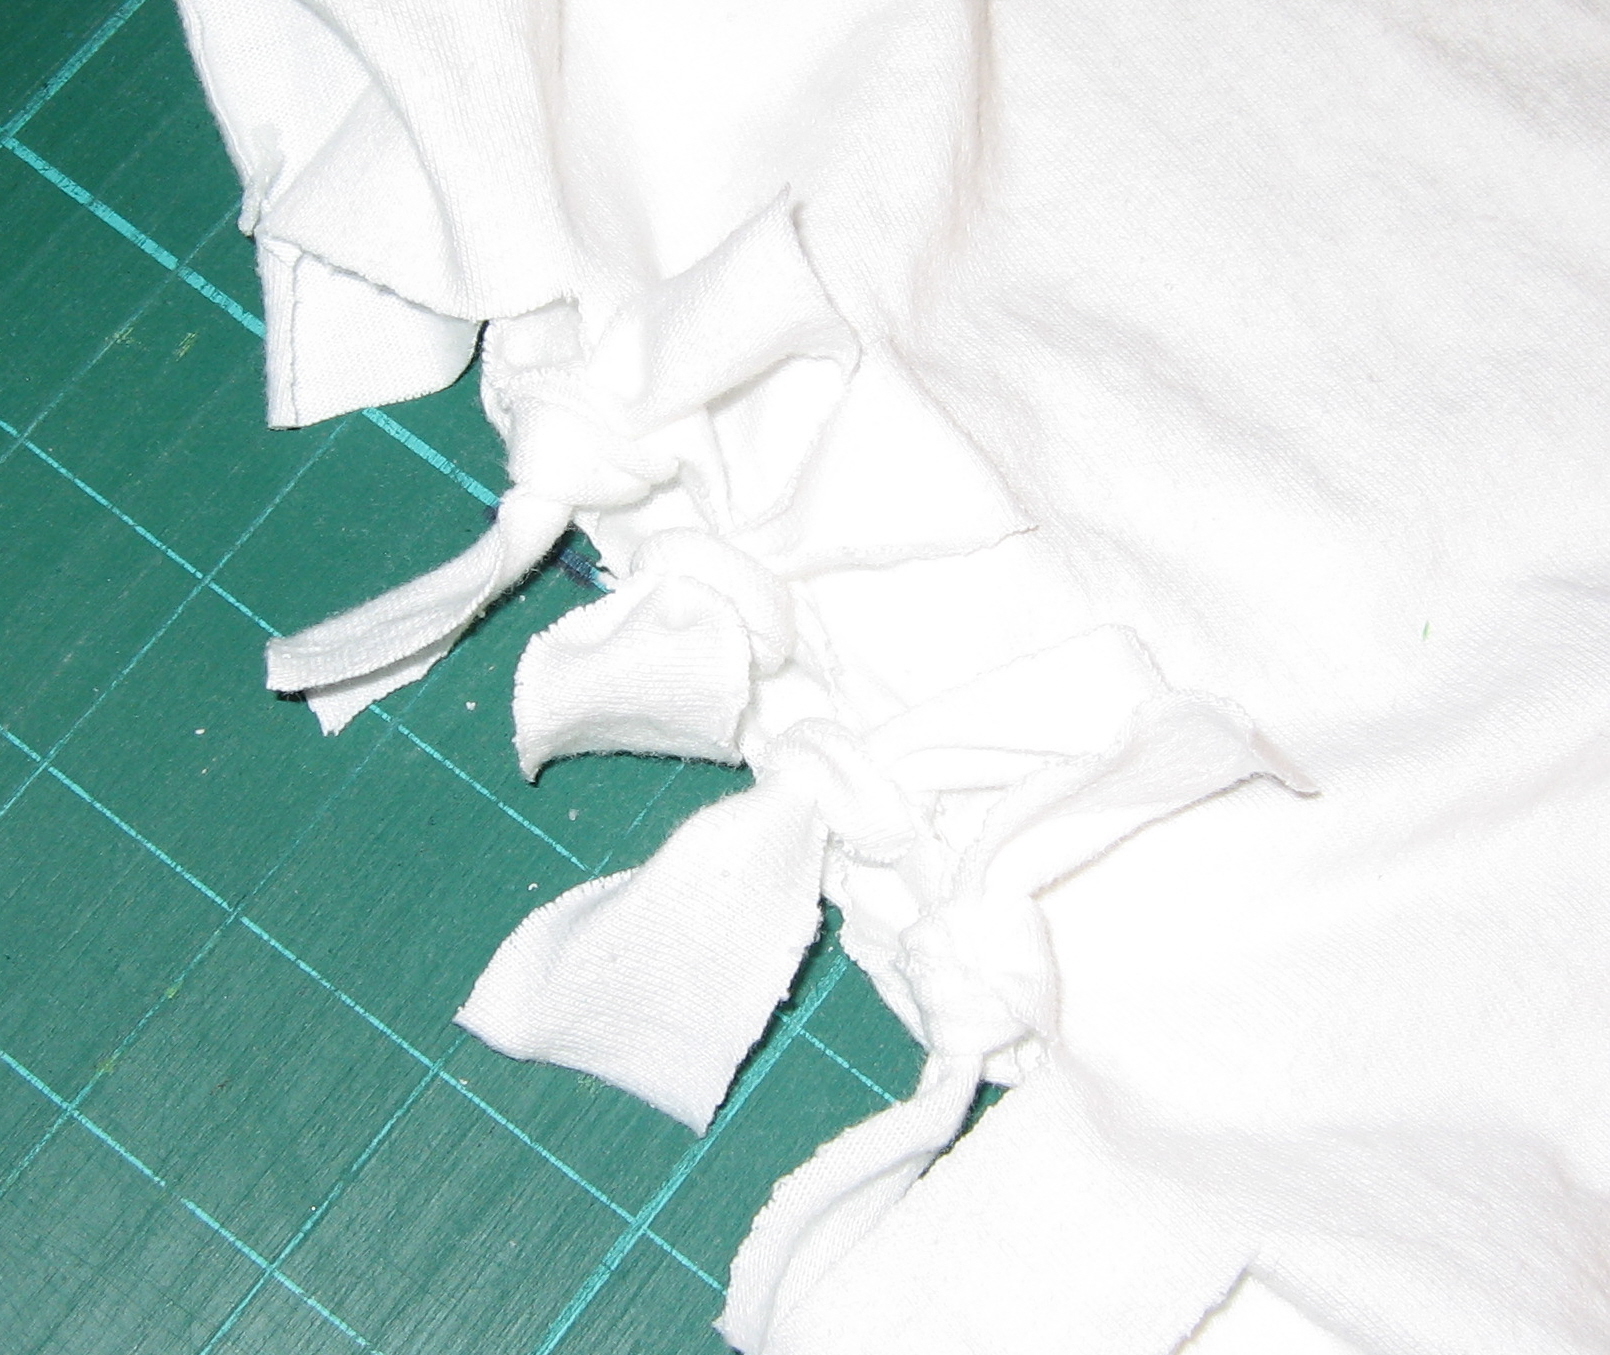
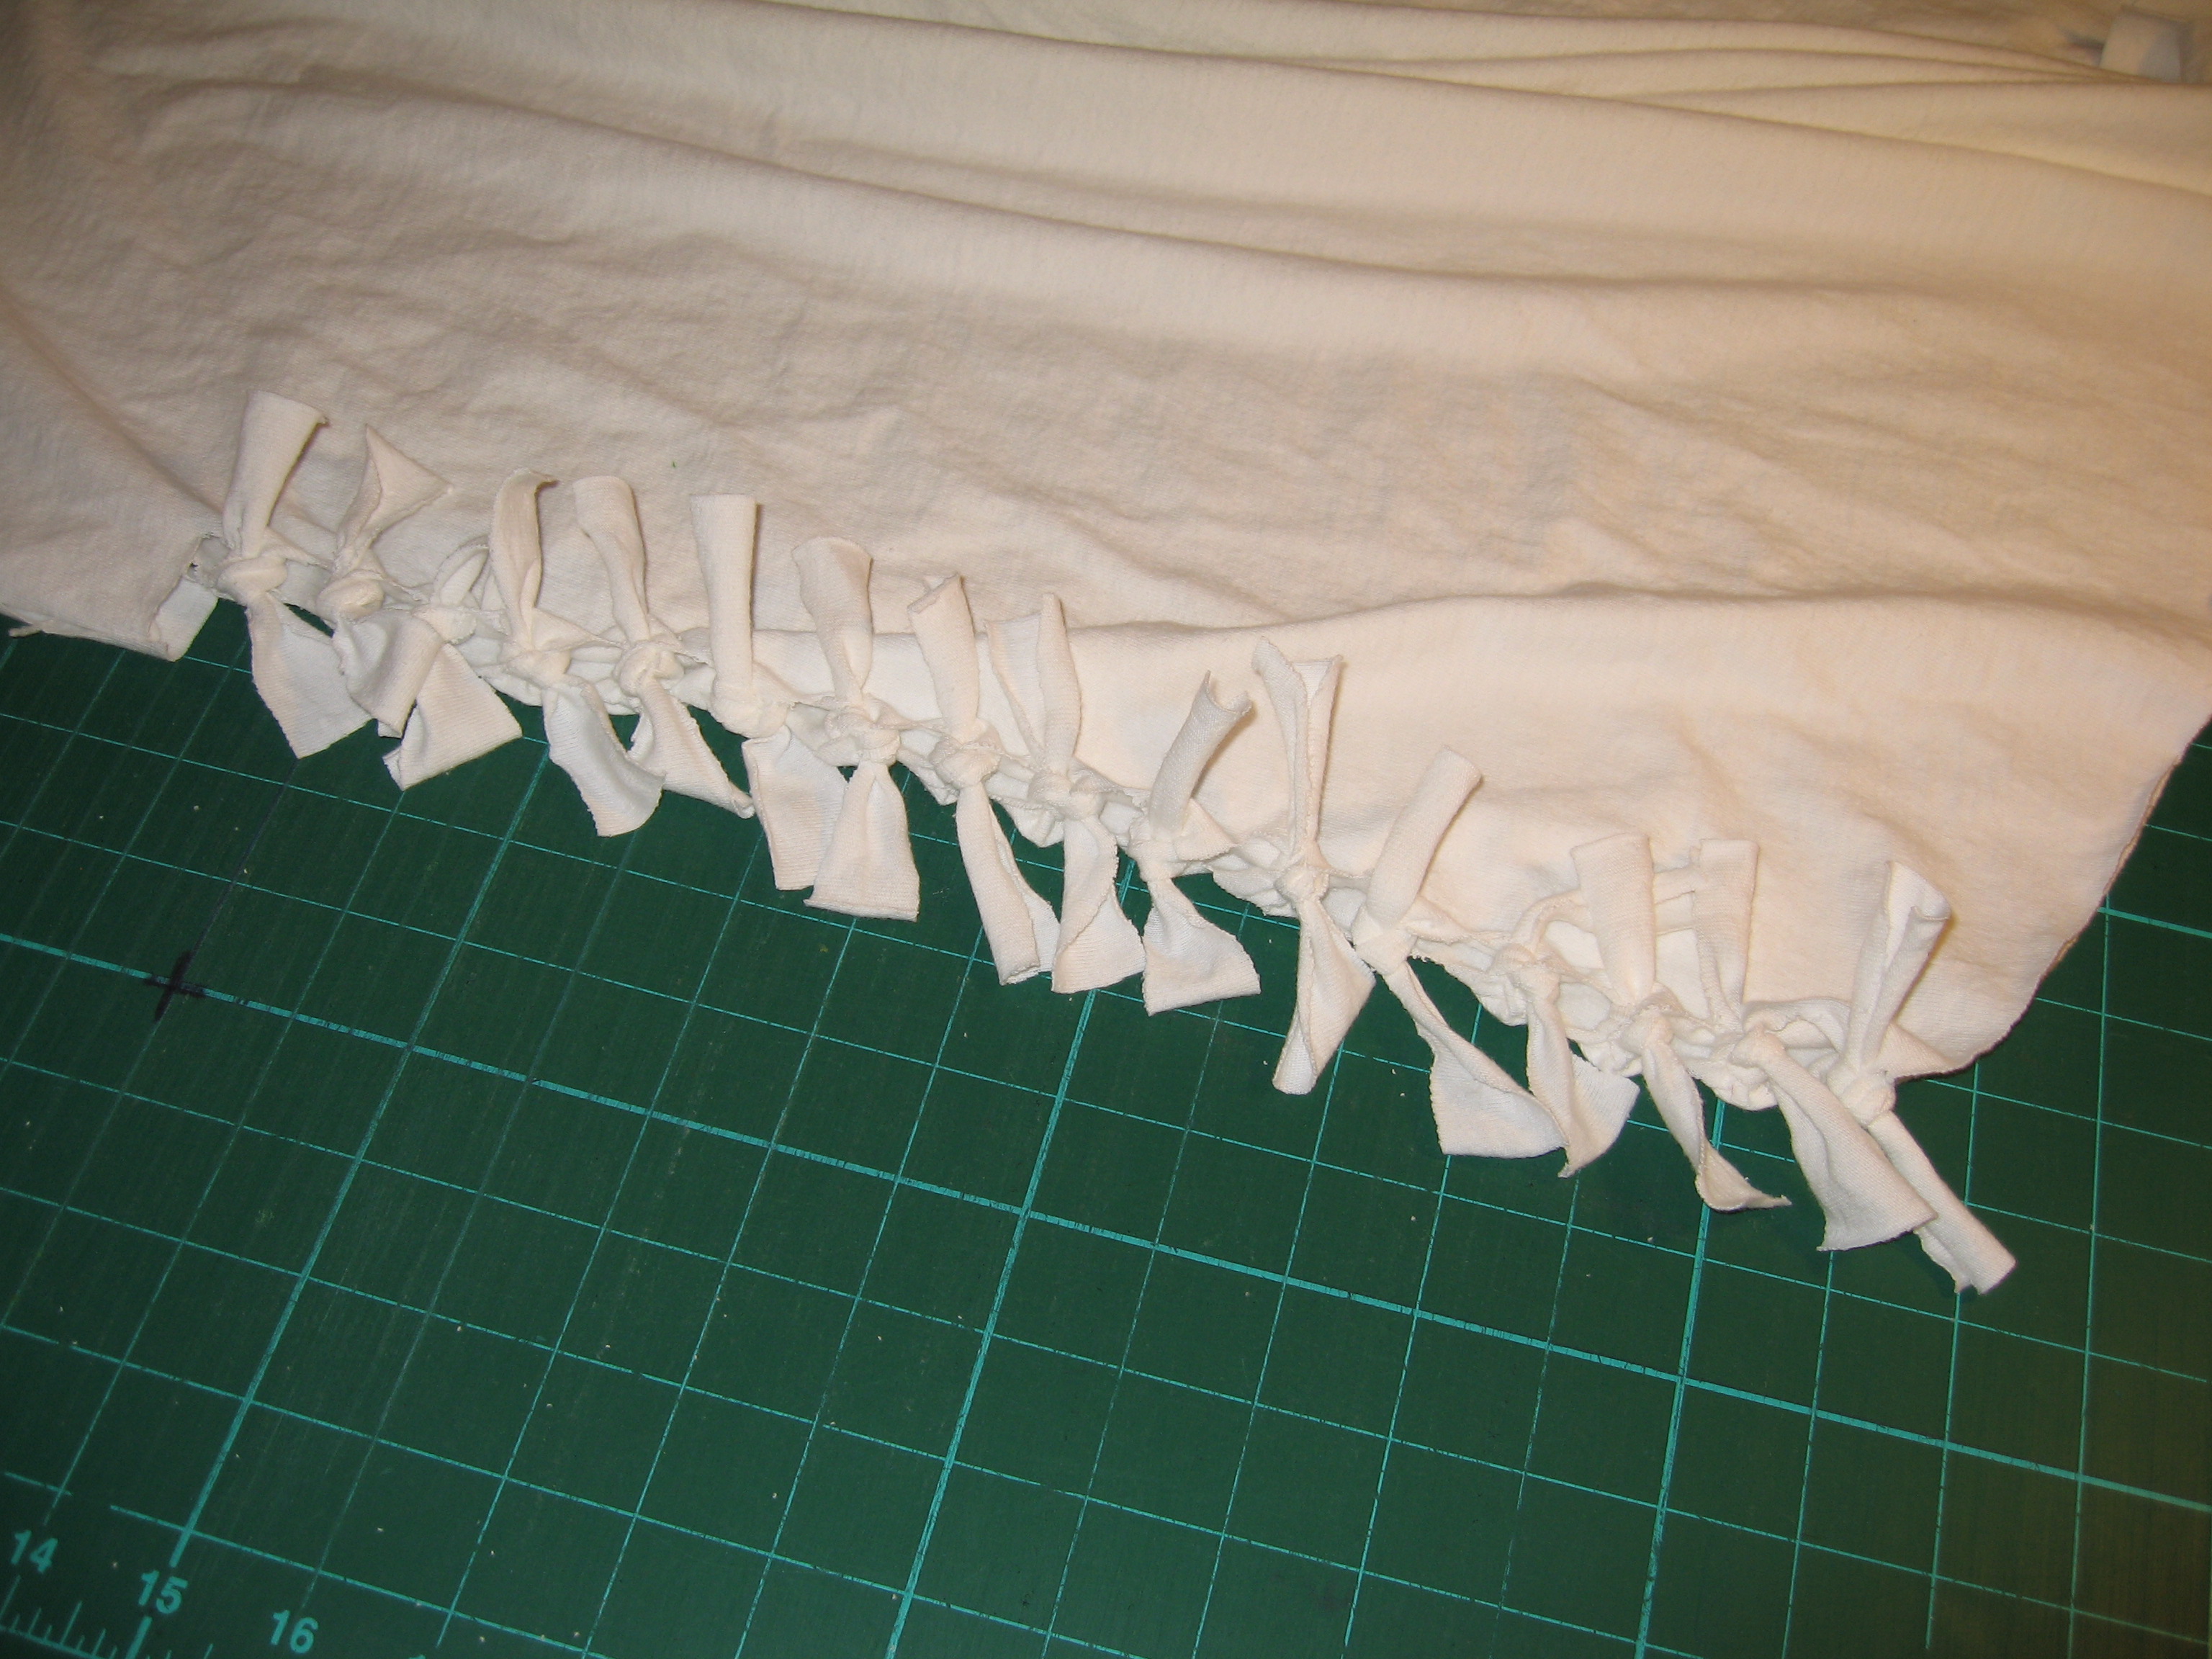
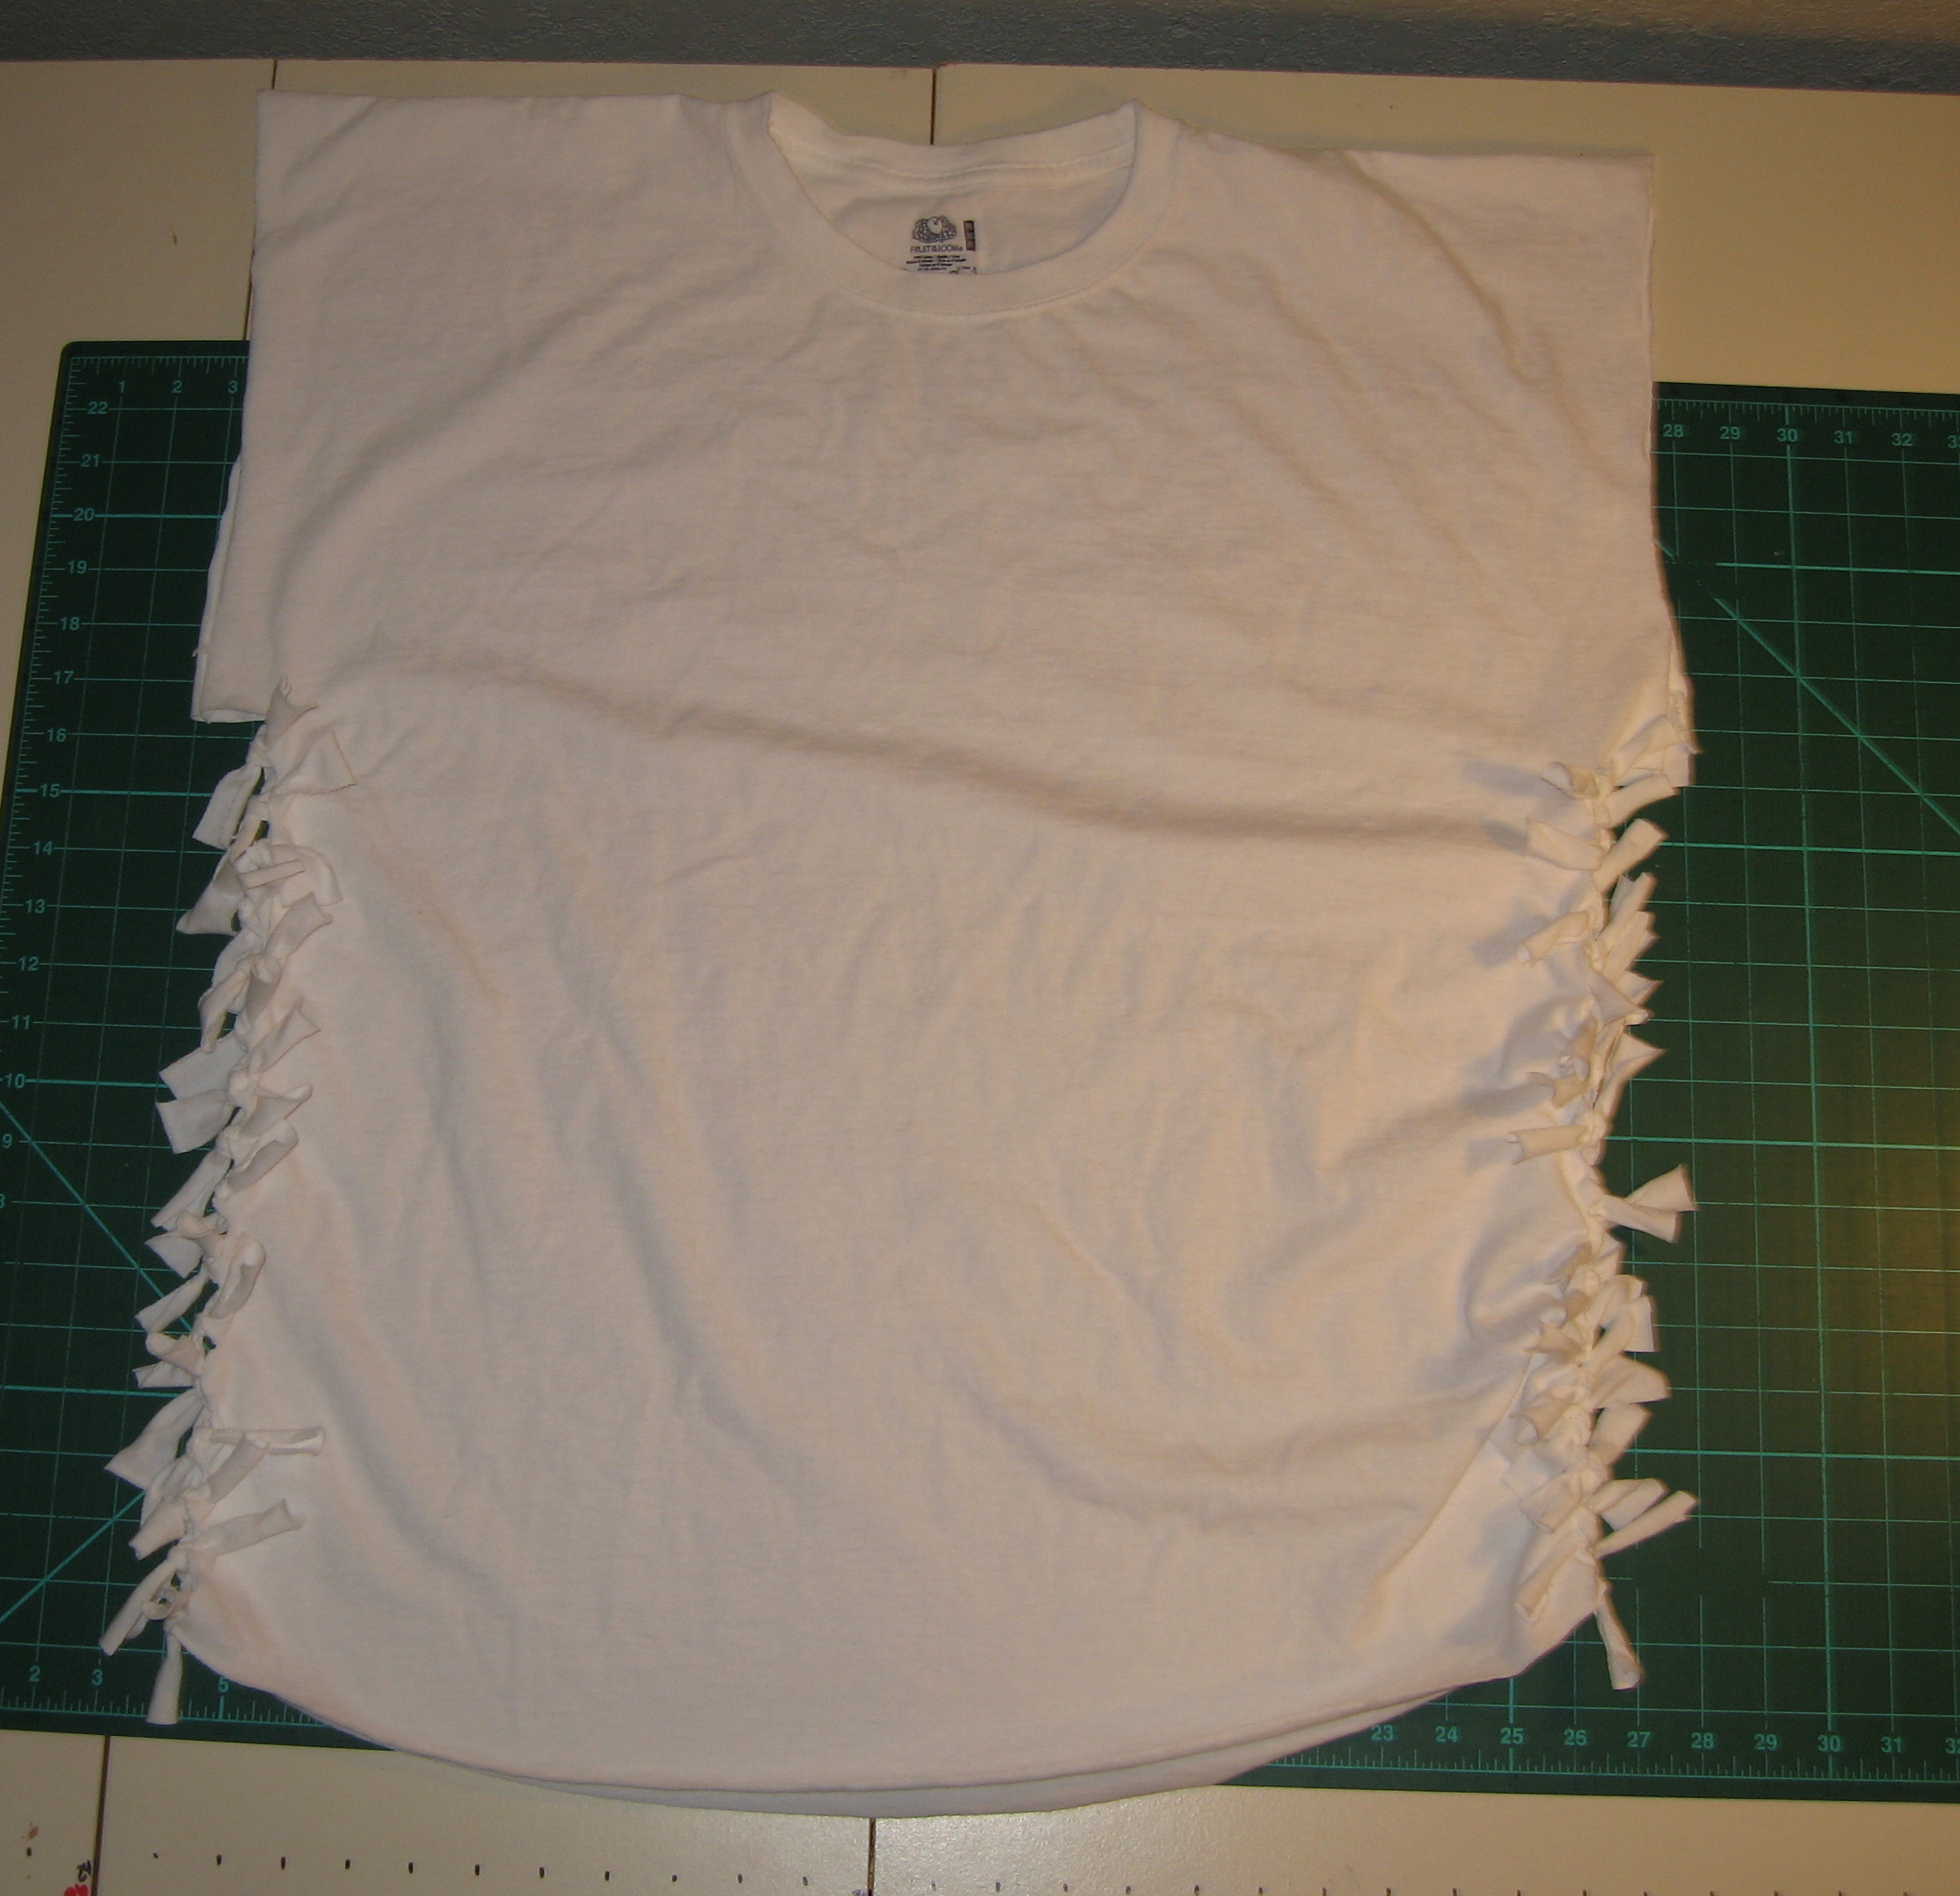
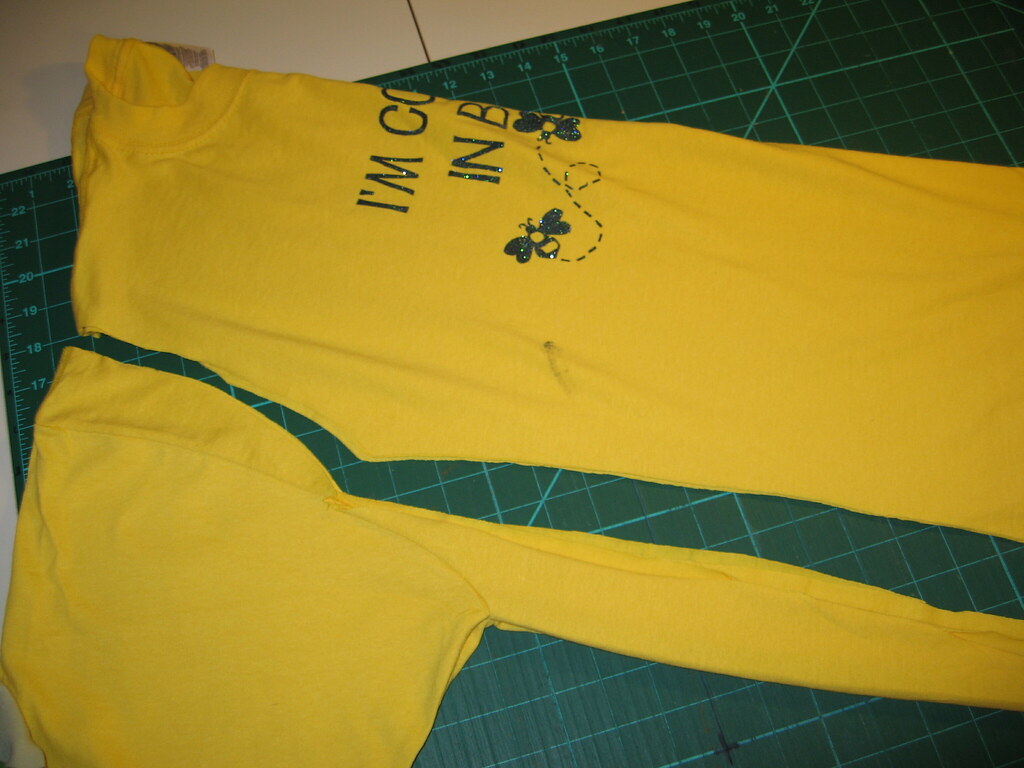
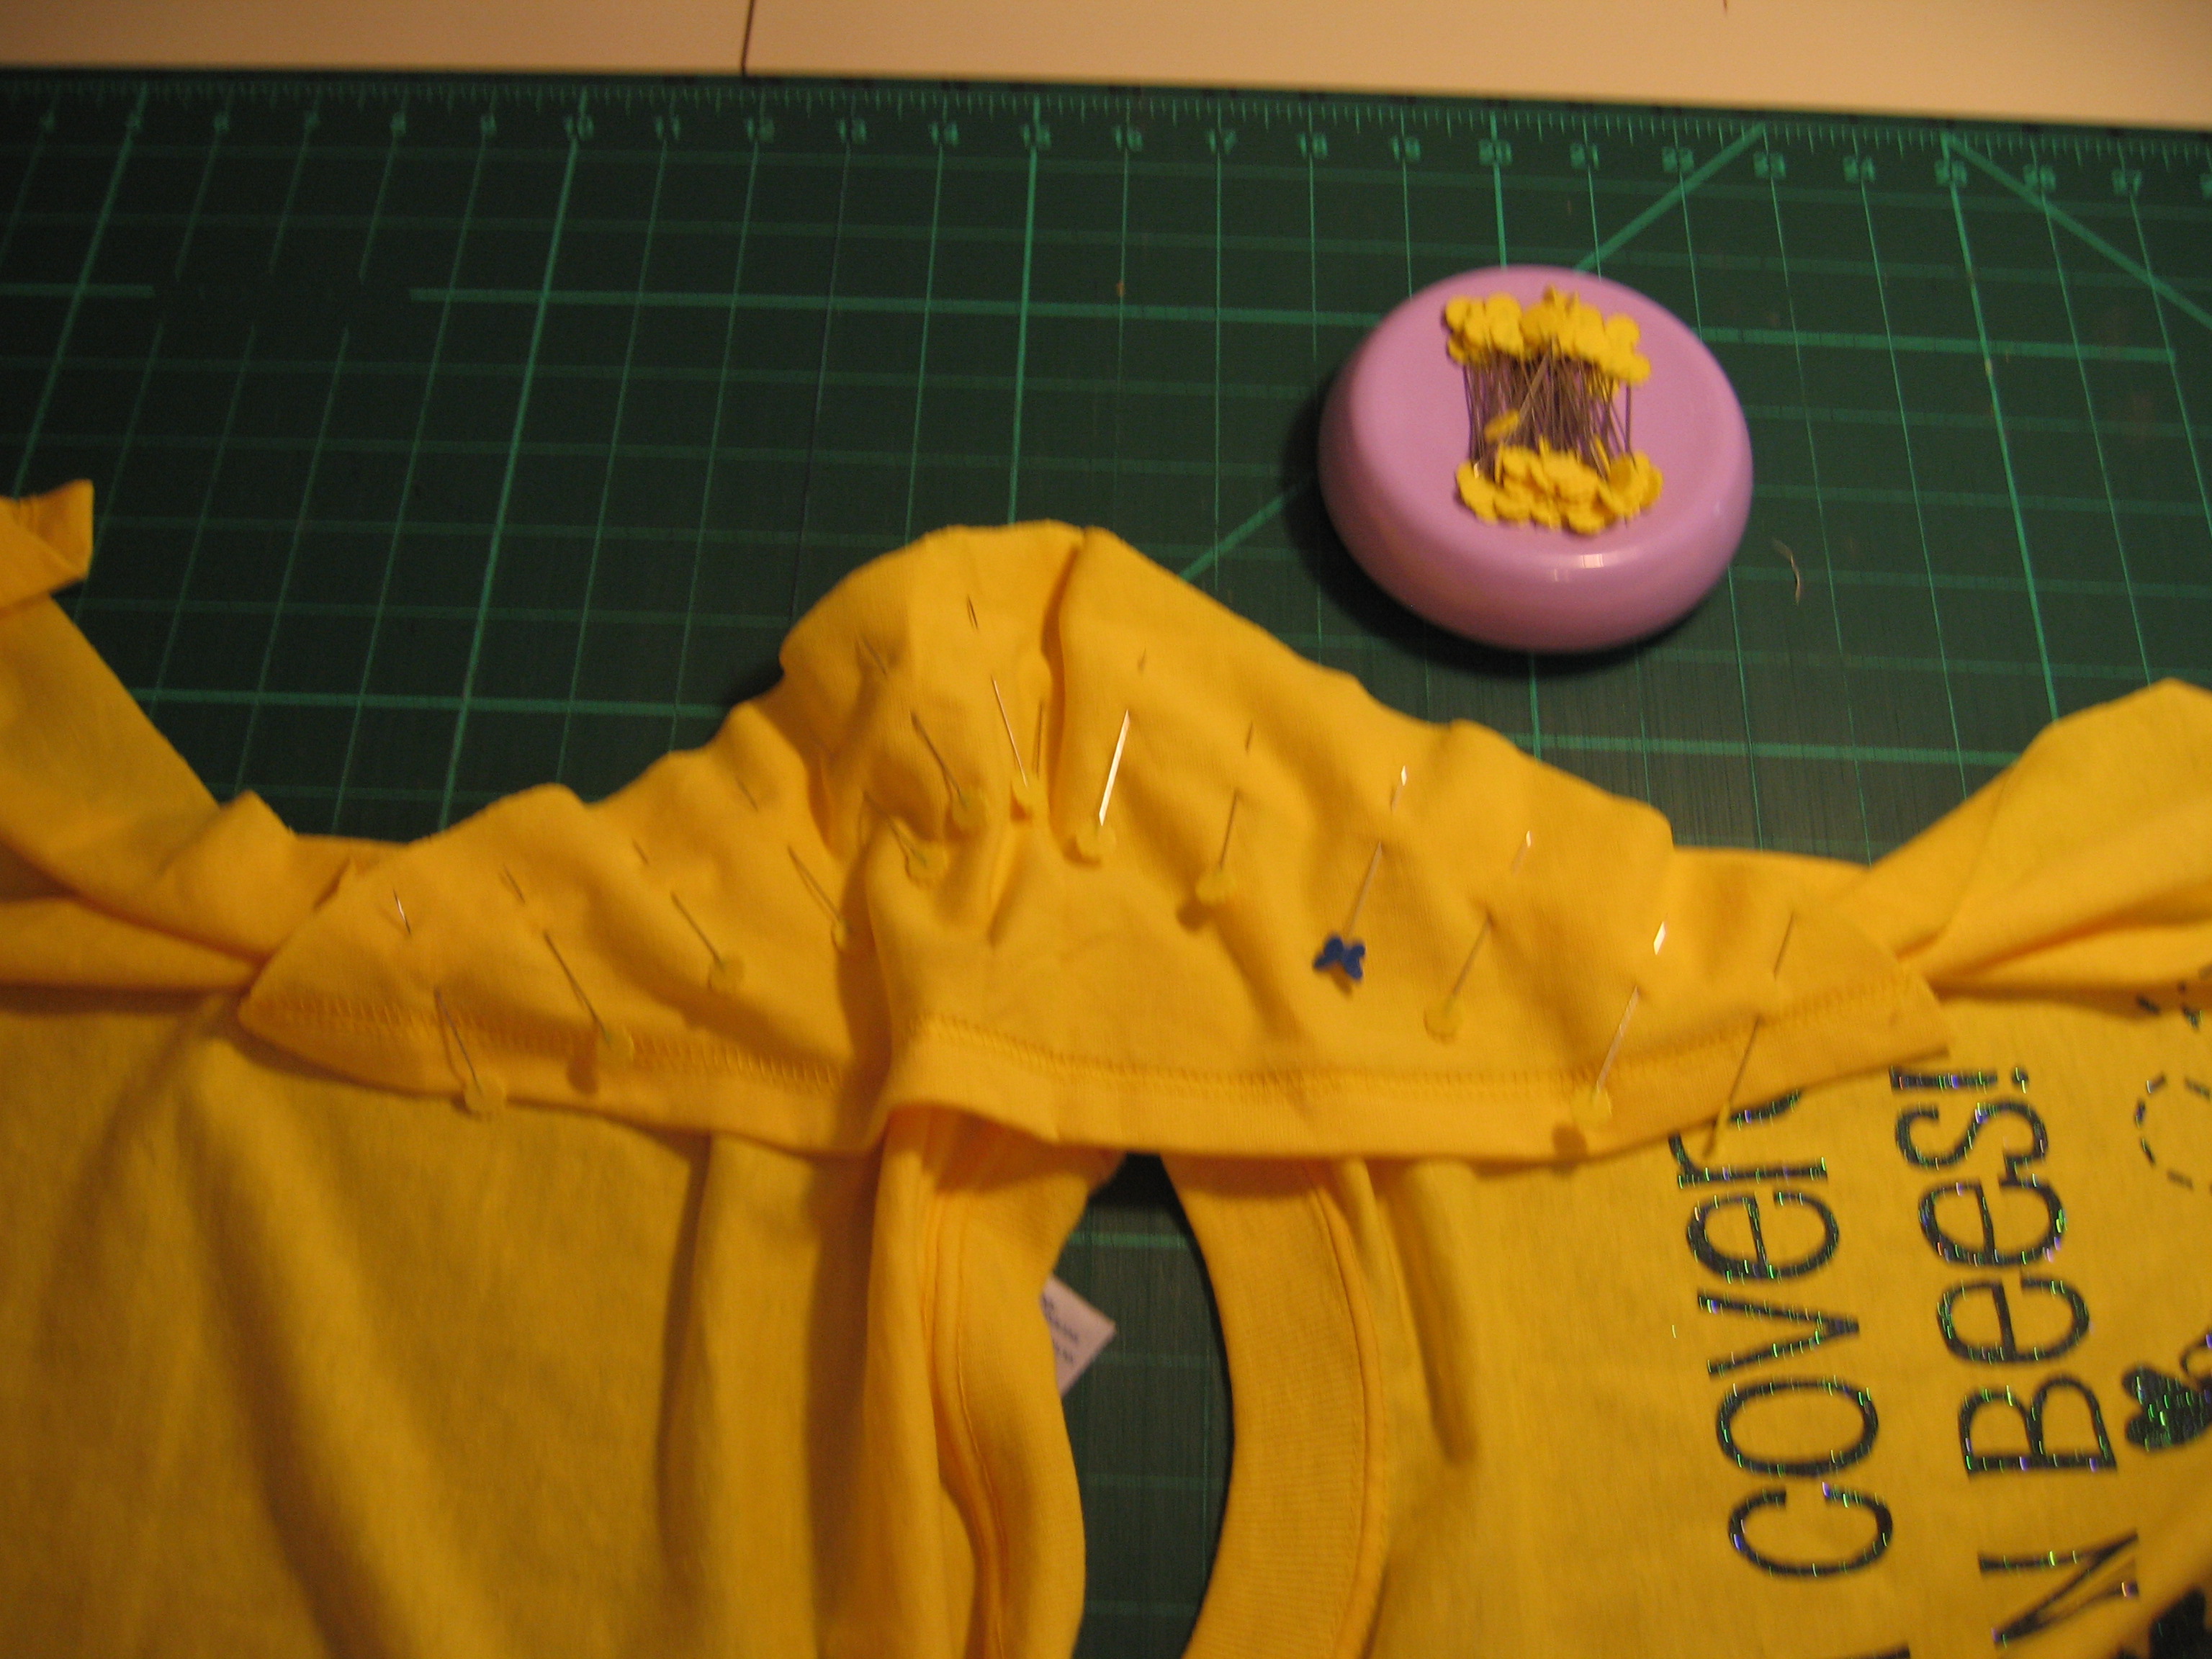
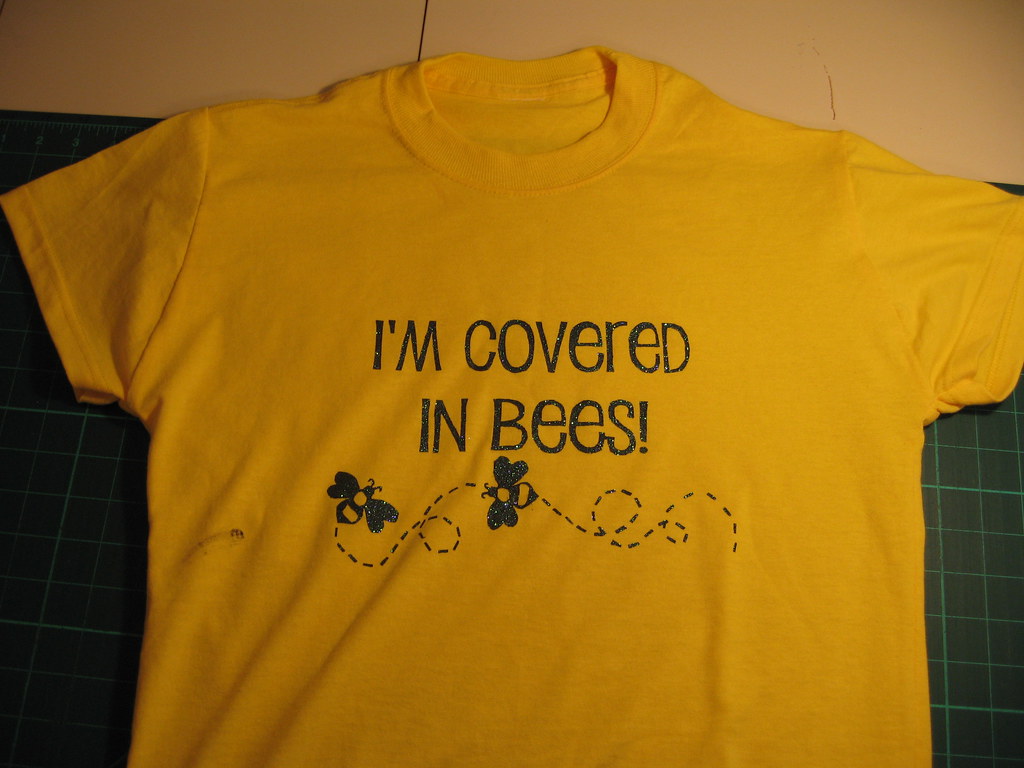
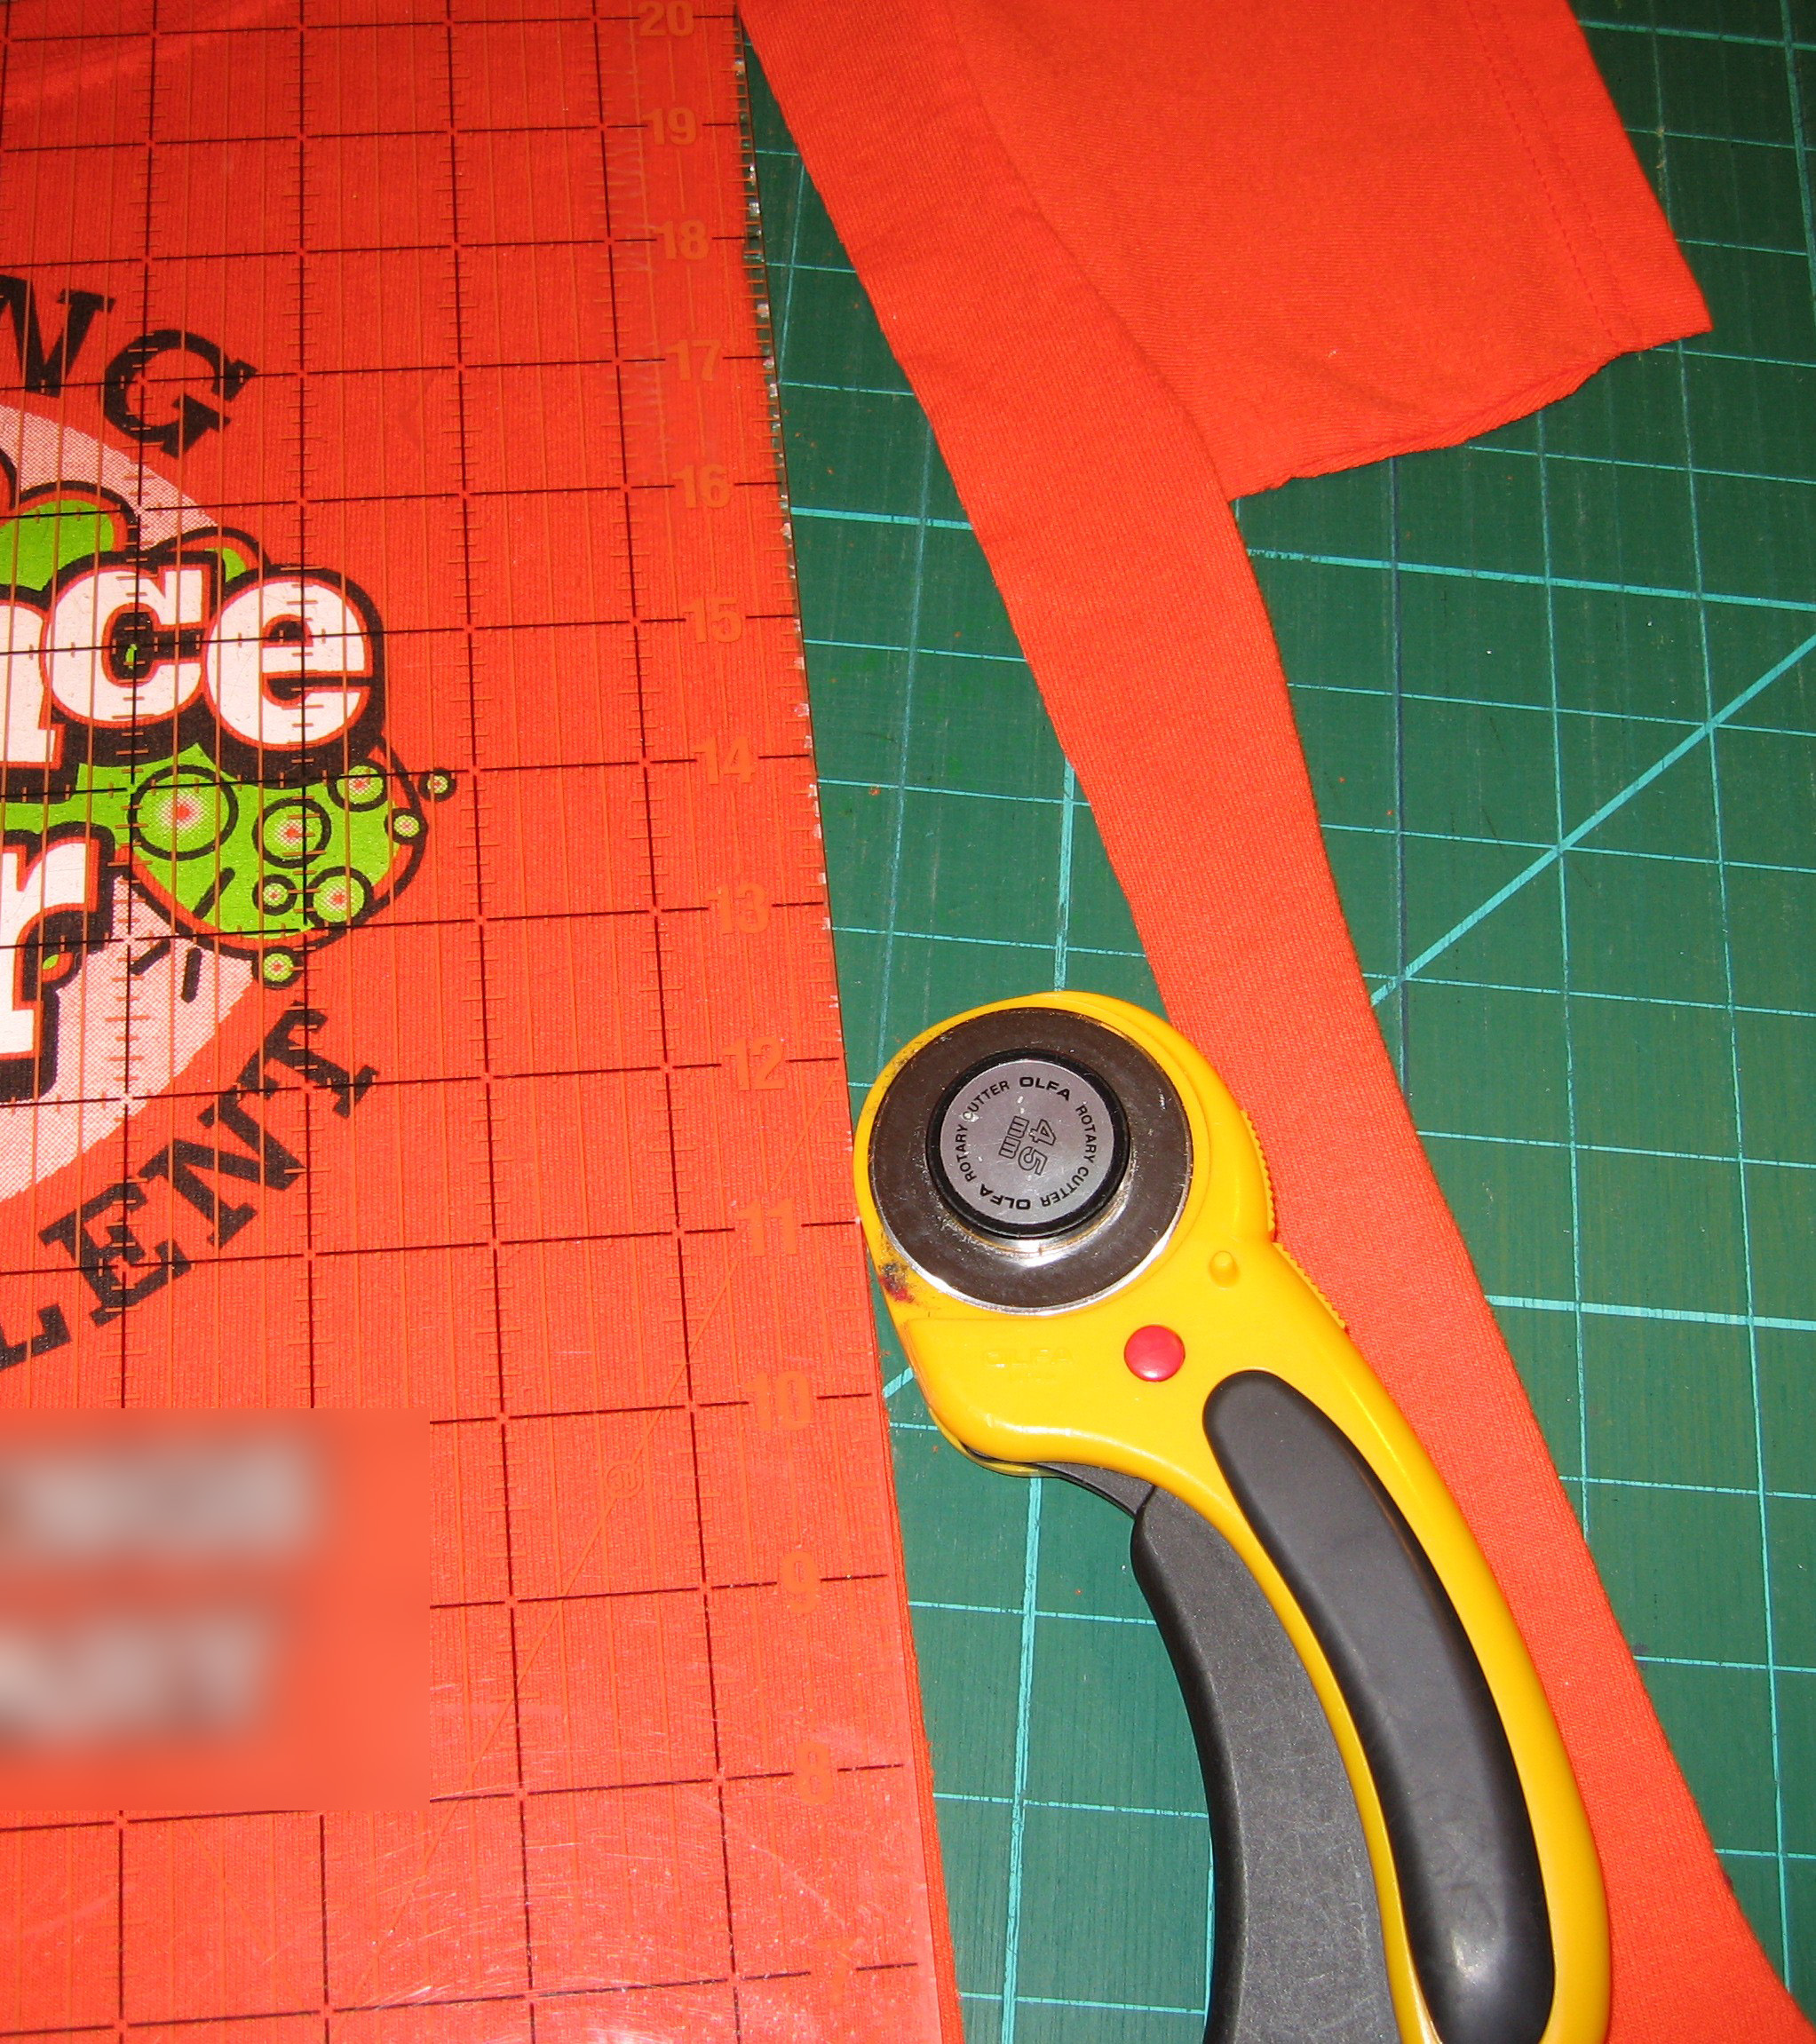
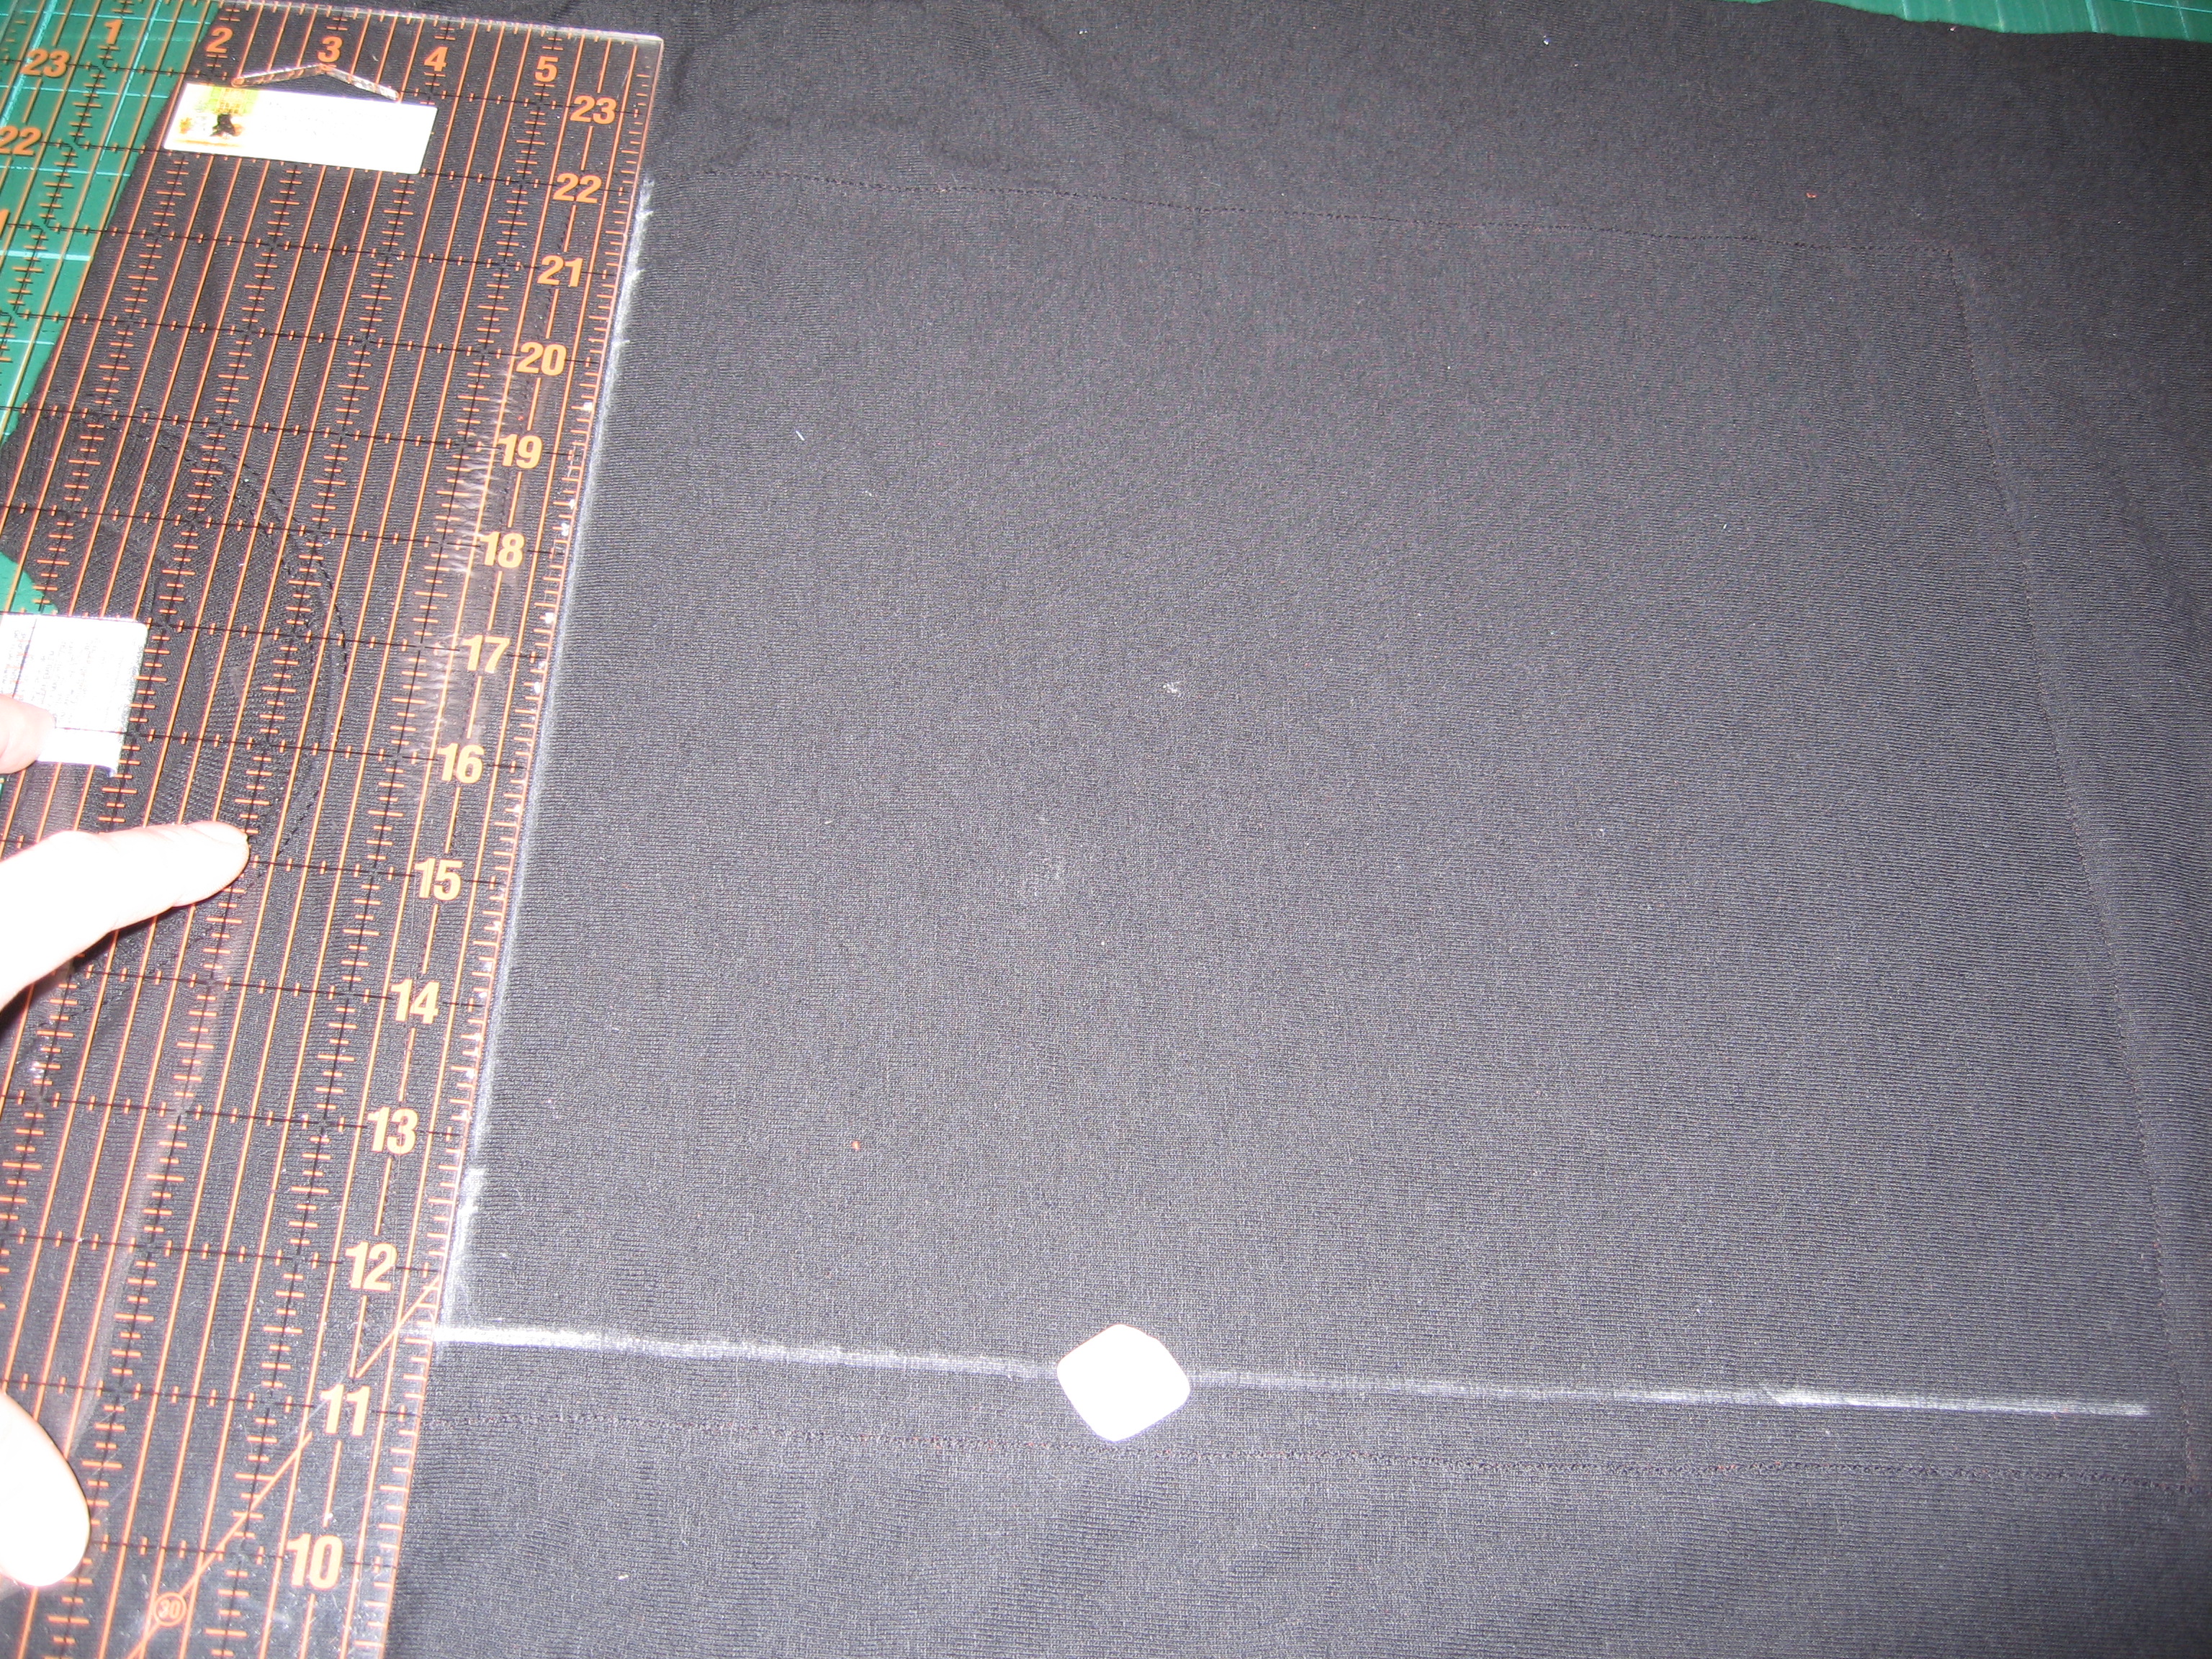
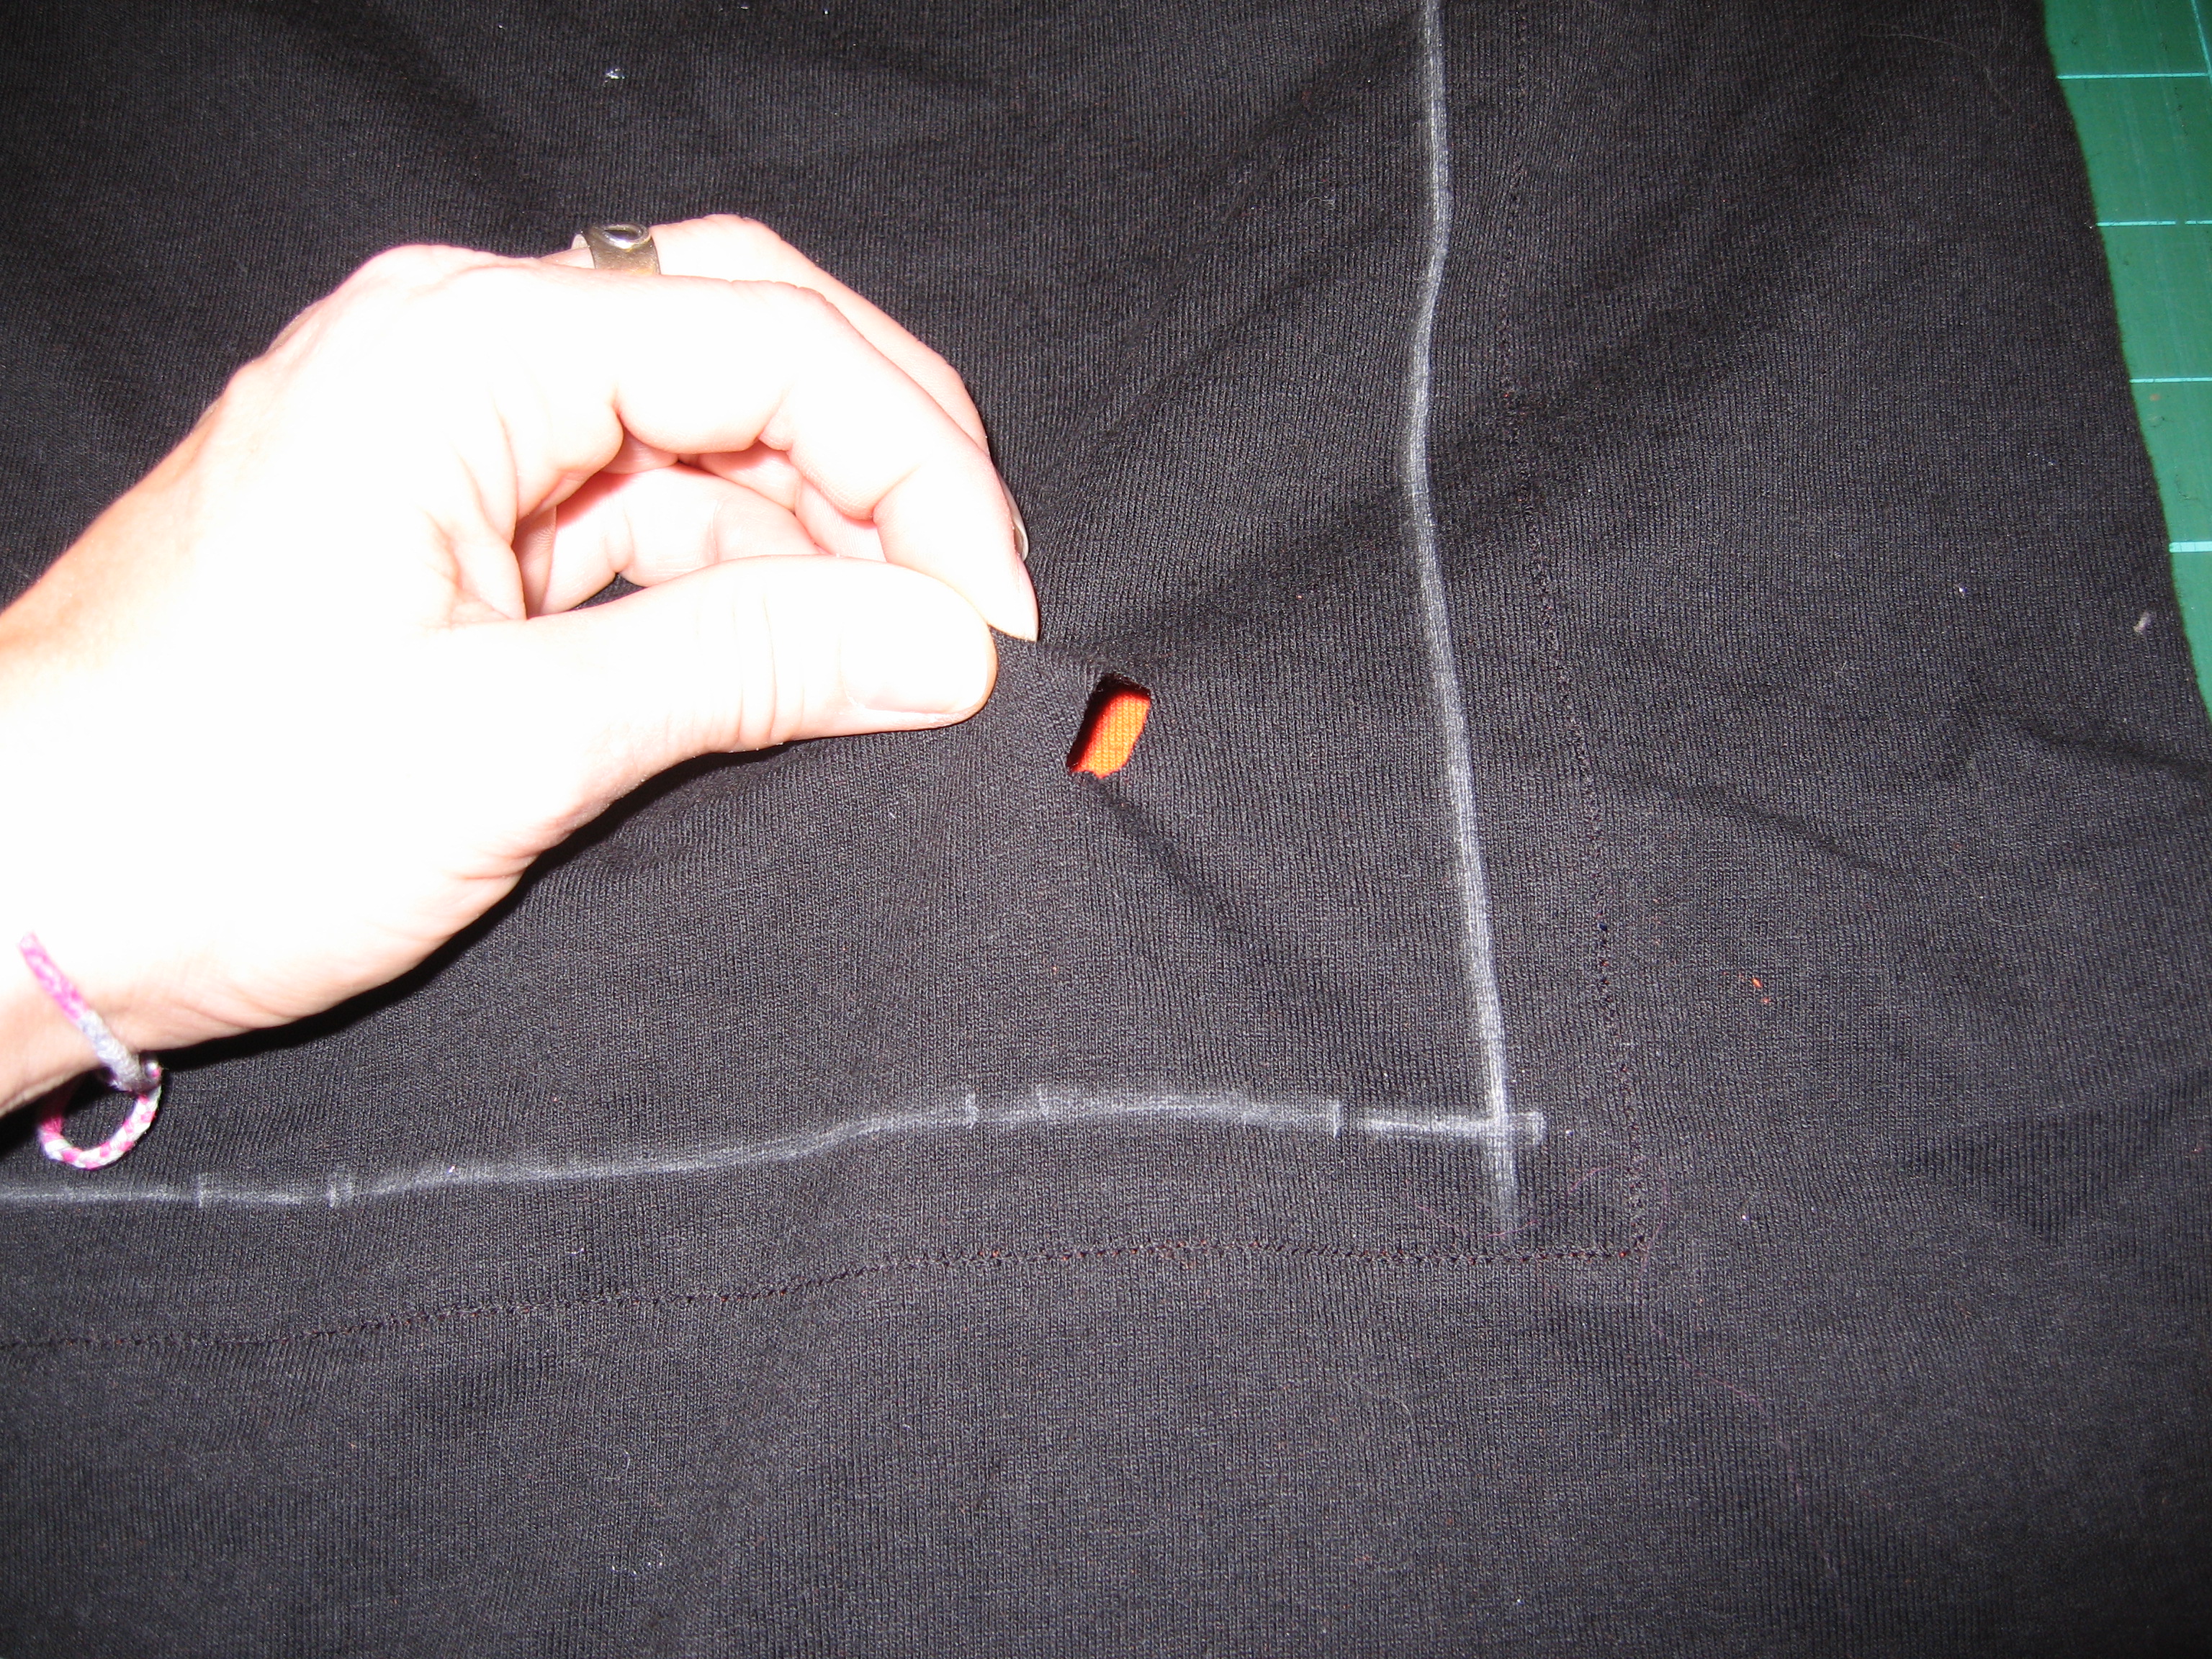
I used one of my favorite tank tops to as a template for this. This was the length after removing the 6″. I cut off the sleeves and just serged up the side seams so it matches my other tank top. Wallah! One new work out top and 5 pockets from one t-shirt! I still have the sleeves and a few squares from the bottom, just in case I need to add spontaneous pockets to anything else!

Photobucket

FB | SHFB | Flickr | Twitter | PinterestBloglovin

Featured Pattern: Tree Trimming, $8 on Craftsy!

stencil a t-shirt

Next class: You Can Stencil A T-Shirt!

READ MORE

Friday, September 6, 9 am – 12 pm
$30 per person, pay online or RSVP to pay at the door.
You will receive handout upon registration.
Add to Cart

2011 UFOs and WIPs

With the finish of the TTMT UFO Deadline Challenge, my mind is filled with the projects that I am not only working on, but the ones that have been on the back burner.

Before we start, some definitions:

UFO = UnFinished Object – a project that has been set aside and allowed to collect dust. Chances are it’s existence has been forgotten until it’s pulled out of whatever dark hole it was stuffed into. While there, it probably multiplied like Tribbles, leaving many more UFOs than you remember putting there in the first place.

WIP = Work In Progress  – Always in danger of becoming a UFO, a WIP is a project that is currently being worked on, and will hopefully become a…

FO = Finished Object – What all projects dream of being. The object of much blog activity and excitement and a good source of personal pride. The Ultimate Destination of a UFO and WIP.

This year, in addition to my list of UFOs, I’m including my WIPs and some DYI. This is by no means a complete list because I’m very much a Do It Right now kind of  person. That is to say, when I get an idea, I often have to stop everything and do it now!

See my 2010 UFO list and the follow-up post.

Quilting Projects

Brown Bear, sadly no change since 2009

Bear Paw Pass Around

STATUS – UFO

Started as a pass around project with my bee in 2008, I sadly have not touched these blocks for over a year. I did go through the box and make a plan…

Brown Bear, sadly no change since 2009

I plan to use the gold fabric for sashing and was playing with the idea of using brown for the cornerstones. The more I look at the fabric, the more I think I want brick red cornerstones. The brown just sort of disappears against the gold.

1/2 square triangles from exchanges

Half-square triangle exchange blocks

STATUS – UFO-ish

These are the results of two half-square triangle exchanged I participated in last year. I have not yet decided what I’m going to do with them, which is what gives them their “ish” status. They’re just waiting for the right project to crop up!

The InuYasha quilt - I still need t-shirts

InuYasha Quilt

STATUS – Still Collecting

I started collecting shirts for an InuYasha quilt for my daughter last year. The plan is to use the Shoji Screen pattern and place the t-shirt fronts where the large panels would be. Unfortunately, I only have one t-shirt so far, courtesy of ladyoflosttimes. If you have an InuYasha shirt you’d be willing to part with, please let me know and we can work out a trade. InuYasha is her fandom of choice and the least a good fandom mommy can do is make a fandom quilt for her daughter!

10" HP swap blocks that need to be a quilt

Harry Potter/Magical Swap blocks

STATUS – UFO

These quilt blocks are the results of several swaps. Sadly, I’ve had them several years now. I am one step closer to doing something with them now that I realize I  need to break them into sets. The top set are all the 10″ blocks with images on them that say “Harry Potter” to me. The bottom set are more traditional blocks, blocks that are bigger (or smaller!) than 10″ or magical blocks that aren’t as HP-ish. I still love all the blocks, but I definitely need to make two, possibly three, quilts out of these!

Misc Blocks from Swaps

Christmas Quilt needs borders

Christmas Quilt

STATUS – UFO…leaning towards WIP

Started two years ago from a swap I participated in on All About Paper Piecing (a currently defunct ning network), this quilt is getting a piano key border out of Christmas fabric. I’ve already got it sorted out and plan to start cutting in the next month so it’ll be ready to go to quilt retreat in March.

New York Beauty UFO

New York Beauty Quilt

STATUS – UFO

I started this NYB for a class I taught last year. I had lots of models for the class, all in different stages of done-ness. The class was a blast…and then I lost my steam. I will be optimistic and take this one to retreat in March. I have all the pieces cut and just need to get them together. Will I? Who knows!

Beginning applique class lesson UFO

Beginning Hand Appliquéd block

STATUS -UFO…leaning toward WIP

I took a beginning hand appliqué class last year and learned lots! I even almost finished my class project. Can you see there are two leaves that need to have buds added and to be stitched in place? That’s it…all I have left to do to finish this block. I’m putting it in my car so I can work on it in the carpool line. Maybe I’ll actually finish it then!

Photobucket

The Project of Doom

STATUS – WIP

All the blocks for the PoD are designed and I am several weeks ahead of everyone else in piecing them. I plan to have my quilt top finished by the end of March.  This is my pet project for 2011 and my gift to my friends in the Harry Potter crafty fandom. Want to play along and make your own Harry Potter mystery quilt? Click the banner above!

Below – Tackett protects the PoD blocks.

Tackett protects the Project of Doom.

Five at the Hive January Fall 5 at the Hive January Extra

5 @ The Hive Fall Colorway 2011

STATUS – WIP

5 @ The Hive is Honey Bee Quilt Store ‘s Block of the Month. I’m participating for the first time this year. The two blocks above are my January blocks. I’m doing the fall colorway with the extra block. By the end of the year, there will be enough blocks for a completed quilt top. I’m super excited about this one because 1)I’m not designing it and 2) it comes with fabric and 3)I love the blocks and the layout.

Crocheting

Brown Ghan UFO

Variegated and Browns

STATUS – UFO

I completely forgot about this until I cleaned out my stash. I will get back to working on it after I finish the next project on the list. This will probably be a blanket for The Linus Connection.

black and red project

Black/Red Knit or Crochet Swap

STATUS – WIP

After doing absolutely nothing with these fabulous black and red knit and crochet blocks from a Twilight Crafts swap in 2009, I have created enough white blocks to make a chess/checkerboard out of the set. The next step is to crochet them all together and then add a red, white and black border.

Crafts

A bowl I started

Rope Bowl – “It’s A Wrap” style

STATUS – UFO

This is the only unfinished craft project I found, and it can really be classified as a sewing project…so, go figure. This was the bowl I started when I taught the It’s A Wrap class last fall. I brought it home from class and promptly forgot all about it. I would like to get back to it and finish it up because the technique is just so darn fun!

DIY

Stairs - Before

Staircase makeover

STATUS – WIP

Just last week, I pulled the carpet off of our stairs. It had horrible, gross carpet that the builders installed 20 years ago. I’ve steamed cleaned them so many times, the thought of doing it again made me feel like weeping. The stairs are now de-carpeted, de-carpet-tacked, scrubbed and primed. The next step is a faux finish to turn the stairwell and stairs into a stone passageway. Yeah, you heard that, I actually said it out loud!

Projects In Mind

I have about a million and one other projects that I’d like to tackle this year. These are some ideas that have crossed my mind that are on the high end of happening.

  • A Twi-Wizard She-Shirt in Ravenclaw colors with “ofenjen” on the back. Because I can. And for DH, part 2.
  • A new Monk’s Bag 2.0
  • A granny ripple afghan for Linus. Someone made several in December and they were really neat. I want to make one.
  • A multitude of fun layout patterns for the Sewhooked Shop, like Classic Film, intended specifically for 5″ (finished) blocks.
  • A werewolf wall hanging or cushion for my daughter. Not found in all my stuff today were the blocks designed by Cat Magraith that I started making for Miss E last year (definite UFO status). Hopefully they’ll turn up before March!
  • Miscellaneous gifts for people I love. I do have some things in mind, but hey, spoilers!
What are you working on this year? Do you have any UFOs or WIPs? Blog about them and leave me a link so I can see what you’re up to or tell me in comments!

TTMT #62 – The She-Shirt

By request, a video version of this tutorial!

Add your Sewhooked-related photos to my flickr group and you might be featured in a future post!

Happy crafting!

Photobucket

Sewhooked Shop | FB | SHFB | Flickr | Twitter | Bloglovin | Craftsy

Photobucket

vlog TTMT: Living in a Swap World

<ul>
<li> <a href=”http://community.livejournal.com/twilight_crafts/102566.html&#8221; target=”_blank”>Twilight Crafts Black & Red Swap</a> </li>
<li> <a href=”http://www.flickr.com/photos/ofenjen/sets/72157621912495129/&#8221; target=”_blank”>My black & red block photos</a> </li>
<li> <a href=”http://www.threadbanger.com/post/8168/how-to-crochet-a-neckline&#8221; target=”_blank”>Crochet Neck Tee Tutorial</a> </li>
<li> <a href=”http://photo1.walgreens.com/storepage/storePageId=MemoryBooks&#8221; target=”_blank”>Walgreens Photo Books</a> </li>
</ul>

Photobucket

First set of squares for the Red/Black Swap
Black/Red Squares 1-4

red/black swap squares 5-12
Black/Red Squares 5-12

black/red swap block #13 - 15
Black/Red Squares 13-15

If you make a Sew Awesome Craft or any pattern, craft or recipe from sewhooked,  I’d love to see a photo.  Email me or add it to the sewhooked flickr group.

Stencils: Getting Ready for Harry

HPC Back To School Swap - Sent to Alli

Hufflepuff Tee  Elena's S.P.E.W. Shirt 2007_may (21).JPG

The movie release of Harry Potter and the Half-Blood Prince is next week.

SQUUUUUEEEEEE!!

Okay, got that out of the way.

What better way to celebrate the Boy Wizard on the Big Screen than some wizard wear?  It just so happens that I have a reasonable stock of HP stencils that I’ve created over the years, both for myself and for others.

HP Quilt @ Hill Country Bookstore

Me, as Tonks in my Weird Sisters tee, showing my HP quilt in Georgetown, Texas in 2007


Hogwarts House Stencils:

Other Harry Potter Inspired Stencils:

***Stenciling video tutorial on YouTube***

If you’re stenciling a shirt for the HBP movie release, be sure and check out The Leaky Cauldron’s July Craft-Along:  Accio Tee Stenciling!

Don’t want to stencil? How about an Easy Student Uniform?

More Harry Potter themed stencils and fabric embellishments at The Leaky Cauldron

More stencils and Harry Potter craft ideas on sewhooked

Add your Sewhooked-related photos to my flickr group and you might be featured in a future post!


Photobucket

Recon: No Sew Swim Shirt


My 14 year old daughter heads off for a week of orchestra camp on Saturday. During the week, they get the chance of swimming in the river near the college where the camp takes place. My lovely daughter is pale and freckled, the worse kind of complexion to spend a day in the sun.

Enter the No Sew Swim Shirt. This is the second version of this shirt I’ve made, the first having done it’s duty honorably for several summers now.  The sides are nice and open so the water will flow through your shirt and not weigh you down.  A must for any super-sun-sensitive gal.

There really is no sewing and you only need a couple of supplies and you’ll have your own No Sew Swim Shirt in about 10 minutes!

You’ll need:

  • 1 t-shirt, at least 2 sizes too big, in a light color to reflect the sun
  • a pair of scissors
  • a large ruler OR yardstick
  • cutting mat OR masking tape with 1″ intervals marked to about 20″


spread the t-shirt out, making sure the top and bottom are nicely aligned


cut off sleeve just inside the seam line, save for another project


repeat for second sleeve


slice up sides of t-shirt


smooth out the side of the t-shirt, using either the cutting mat and a ruler (shown) OR a yardstick and masking tape, measure 3″ from the cut edge along the shirt sides, cutting up those 3″ at 1″ interval


repeat on both sides, stopping before the sleeve area


snip off the bottom curve of the sleeve


remove bottom hem


starting at the top of one side, tie together front and back 3″ pieces


repeat for all 3″ pieces


repeat on the second side of the shirt


Done! Because this was a blank shirt, I added an iron-on dragon to jazz it up a bit.


side close up


Old No Sew Swim Tee, too small now and at the end of it’s sun-protecting days!

This one was stenciled using acrylic paint and my pirate stencil.

If you make a Sew Awesome Craft or any pattern, craft or recipe from sewhooked, I’d love to see a photo. Email me or add it to the sewhooked flickr group.

Reconstruction: Pockety Hoody

sweatshirt update

I’m a big thrift store shopper.  Sometimes, I find great articles of clothing that are the perfect size for one of my kids, but I know they won’t wear it because of a design or picture that’s on it.   They’re both really into black at the moment and I found a great black hoodie sweatshirt the perfect size for my son.  The price?  $1.25.  Could I pass that by?  NO WAY.

The drawback?  It came with an embroidered image of The Grinch.  Cute, yes, his style, absolutely not!

After having the sweatshirt linger in my “to do something with” pile for a while, it occurred to me that I have all kinds of odds and ends leftover from other projects that might update the shirt and make it ready to wear.

One Levi’s pocket and about ten minutes of stitching later, and the update is complete and the hoody has gone from “Absolutely not!” to “Cool, Mom!”

It’s more of an update than reconstruction, but you get the idea!

To update a logo sweatshirt, you’ll need the sweatshirt and one jean’s pocket.  Use a heavy-duty seam ripper to remove the pocket, or, if you feel comfortable doing so, a razor blade.  Just be careful if you do!

A sewing machine is pretty much a must for this project, but if you want to try it by hand, you’ll need a heavy duty needle and a bit of patience to sew through all the layers!

sweatshirt update

Smooth out your sweatshirt.

sweatshirt update

Remove jeans pocket, being careful not to tear the fabric or cut yourself.

sweatshirt update

Pin the pocket in place.  You can go for a straight angle like I did here, or turn it a bit left or right for a more interesting look.

sweatshirt update

From the front, stitch carefully around the pocket using the existing stitching lines.  Reinforce at the corners and top of the seams.

sweatshirt update

And you’re done!  Super fast and easy update!

As always, if you make any pattern or craft from sewhooked,  I’d love to see a photo. Email me or add it to the Friends of Sewhooked flickr group.

Happy crafting

Halloween Traditions

Halloween is probably my favorite holiday.  It’s certainly my favorite to craft for.  Fun costumes, crafts, decorations…

The first costume I made myself was one of my Dad’s suits that I reconstructed to look like Madonna in the Who’s That Girl? video.  I was in high school at the time.

Since then, I’ve enjoyed making all kinds of costumes, mostly for my kids.  Halloween is, of course, a darn good reason to costume!

Our family tradition is this:  My kids have until September 30 to choose a costume idea.  Once they’re decided, there is no going back and the planning begins in earnest.  They tend to lean towards character costumes, which are fun to try to duplicate.

InuYasha

Photobucket

This year, my 13 year old daughter wanted to be one of her all-time favorite characters, InuYasha. I created the top half of the costume based on a kimono I made some years ago. There are a number of custom changes to make the top appear the same as InuYasha’s. The pants are adapted from a pj pattern, with a more flared leg and belt.  The wig was purchased, with handcrafted ears added (made from faux fur and felt).  The sword and necklace were purchased online.  The scabbard is a toy sword scabbard that’s been covered in black fabric.   The entire costume is made with quilter’s cotton.

halloween 2008 029.JPG

Ryoga

Photobucket

My 10 year old son’s costume this year was Ryoga, from the manga and anime, Ranma 1/2.  The top is a reconstructed sweatshirt with a custom collar and cuffs made from cotton fabric.  The belt is also cotton fabric.  The pants are adapted from a pajama pattern, with loops added to the sides for lacing the legs.  The rucksack is completely custom from canvas.  The red paper umbrella was purchased online and customized with paint and fabric.  The cording is clothesline cord.   His headband is made from a strip of darker yellow fabric with squares stenciled on in black paint.

halloween 2008 018.JPG

halloween 2008 035.JPG

The two characters are from different manga / anime series, but both are creations of the same author, Rumiko Takahashi. We thought we’d have a little fun with that and took a couple of “what are you doing here!?” poses!

Charlie Brown & Pansy Parkinson

halloween 2008 047.JPG

My husband and I like to dress up, too!  This year, my hubby, Eli, was Charlie Brown in a t-shirt I stenciled and black shorts made from a commercial pattern.  I was Slytherin Pansy Parkinson in a hand painted green tie and custom Slytherin buttons…snarky attitude included!

halloween 2008 037.JPG

InuYasha and Ryoga are not amused at having a Slytherin at their back!

Visit my Halloween 2008 flickr album for more photos.

Costumes photos 1995 – Present

Happy November!

also posted in Craft Challenge #32 – DIY Halloween Costumes on craftster and on Deviant Art

T-Shirt Reconstruction: She-Shirt

Covered in Bees t-shirt, reconstructed

It’s no secret among my friends that I’m a big Eddie Izzard fan. My family and I were lucky enough to get to see him perform live in June. He was amazing, funny & brilliant, just like we knew he would be.

In honor of our shared Eddie-love, my good friend Shae stenciled this fantastic “Covered in Bees” t-shirt for me. She knew it would be too big and sent it with her crafty blessings to be reconstructed however I saw fit. Resizing tees is the recon I do most often, making my shirts fit me better while still being long (and wide!) enough to go over my hips.

Use a favorite shirt that you already love the fit of and that has similar stretch to the fabric.

This is a fairly easy recon and usually takes about 30 minutes from start to finish.

Supplies:

  • Too Big t-shirt
  • smaller tee (guide)
  • pins
  • scissors
  • thread
  • sewing machine (optional)
  • ball point needle (for jersey fabrics)
Covered In Bees - Original size

The shirt, before resizing

using a favorite shirt for size trimmed down
Resizing using a favorite shirt – cut about 1/2″ away from the original shirt so you have seam allowance. You’ll have to do a little guestimating on the sleeves, but if you take it slow and careful, it’ll work out fine.

eyeballing for sleeve size
Use my favorite recon technique and eyeball for the sleeve size, adjusting the sleeve under the body of the t-shirt until it’s the length and shape you want. Pencil a line on the existing sleeve using the cut on the t-shirt, and then added about 1/2″ for seam allowance.

re-attaching the sleeve
Find the center on the sleeves, pin to the seam allowance on the shirt. Pin along the sleeve, being careful not to pull or tug the fabric. Stitch using a stretch stitch and 1/2″ seam allowance.

Covered in Bees t-shirt, reconstructed
After stitching the sleeves, fold shirt in half, right sides together, matching the bottom hem. Stitch a 1/2″ seam under the sleeve and all the way down the side. Trim seam allowance, if you wish.

Because you leave the original hems for the sleeves and the shirt in place, the reconstruction is now complete!

Add your Sewhooked-related photos to my flickr group and you might be featured in a future post!

Happy Crafting!