Tag Archives: candy

31 Days of Halloween – Give Me Candy!

31 Days of Halloween on sewhooked.com

Welcome back for another 31 Days of Halloween post!

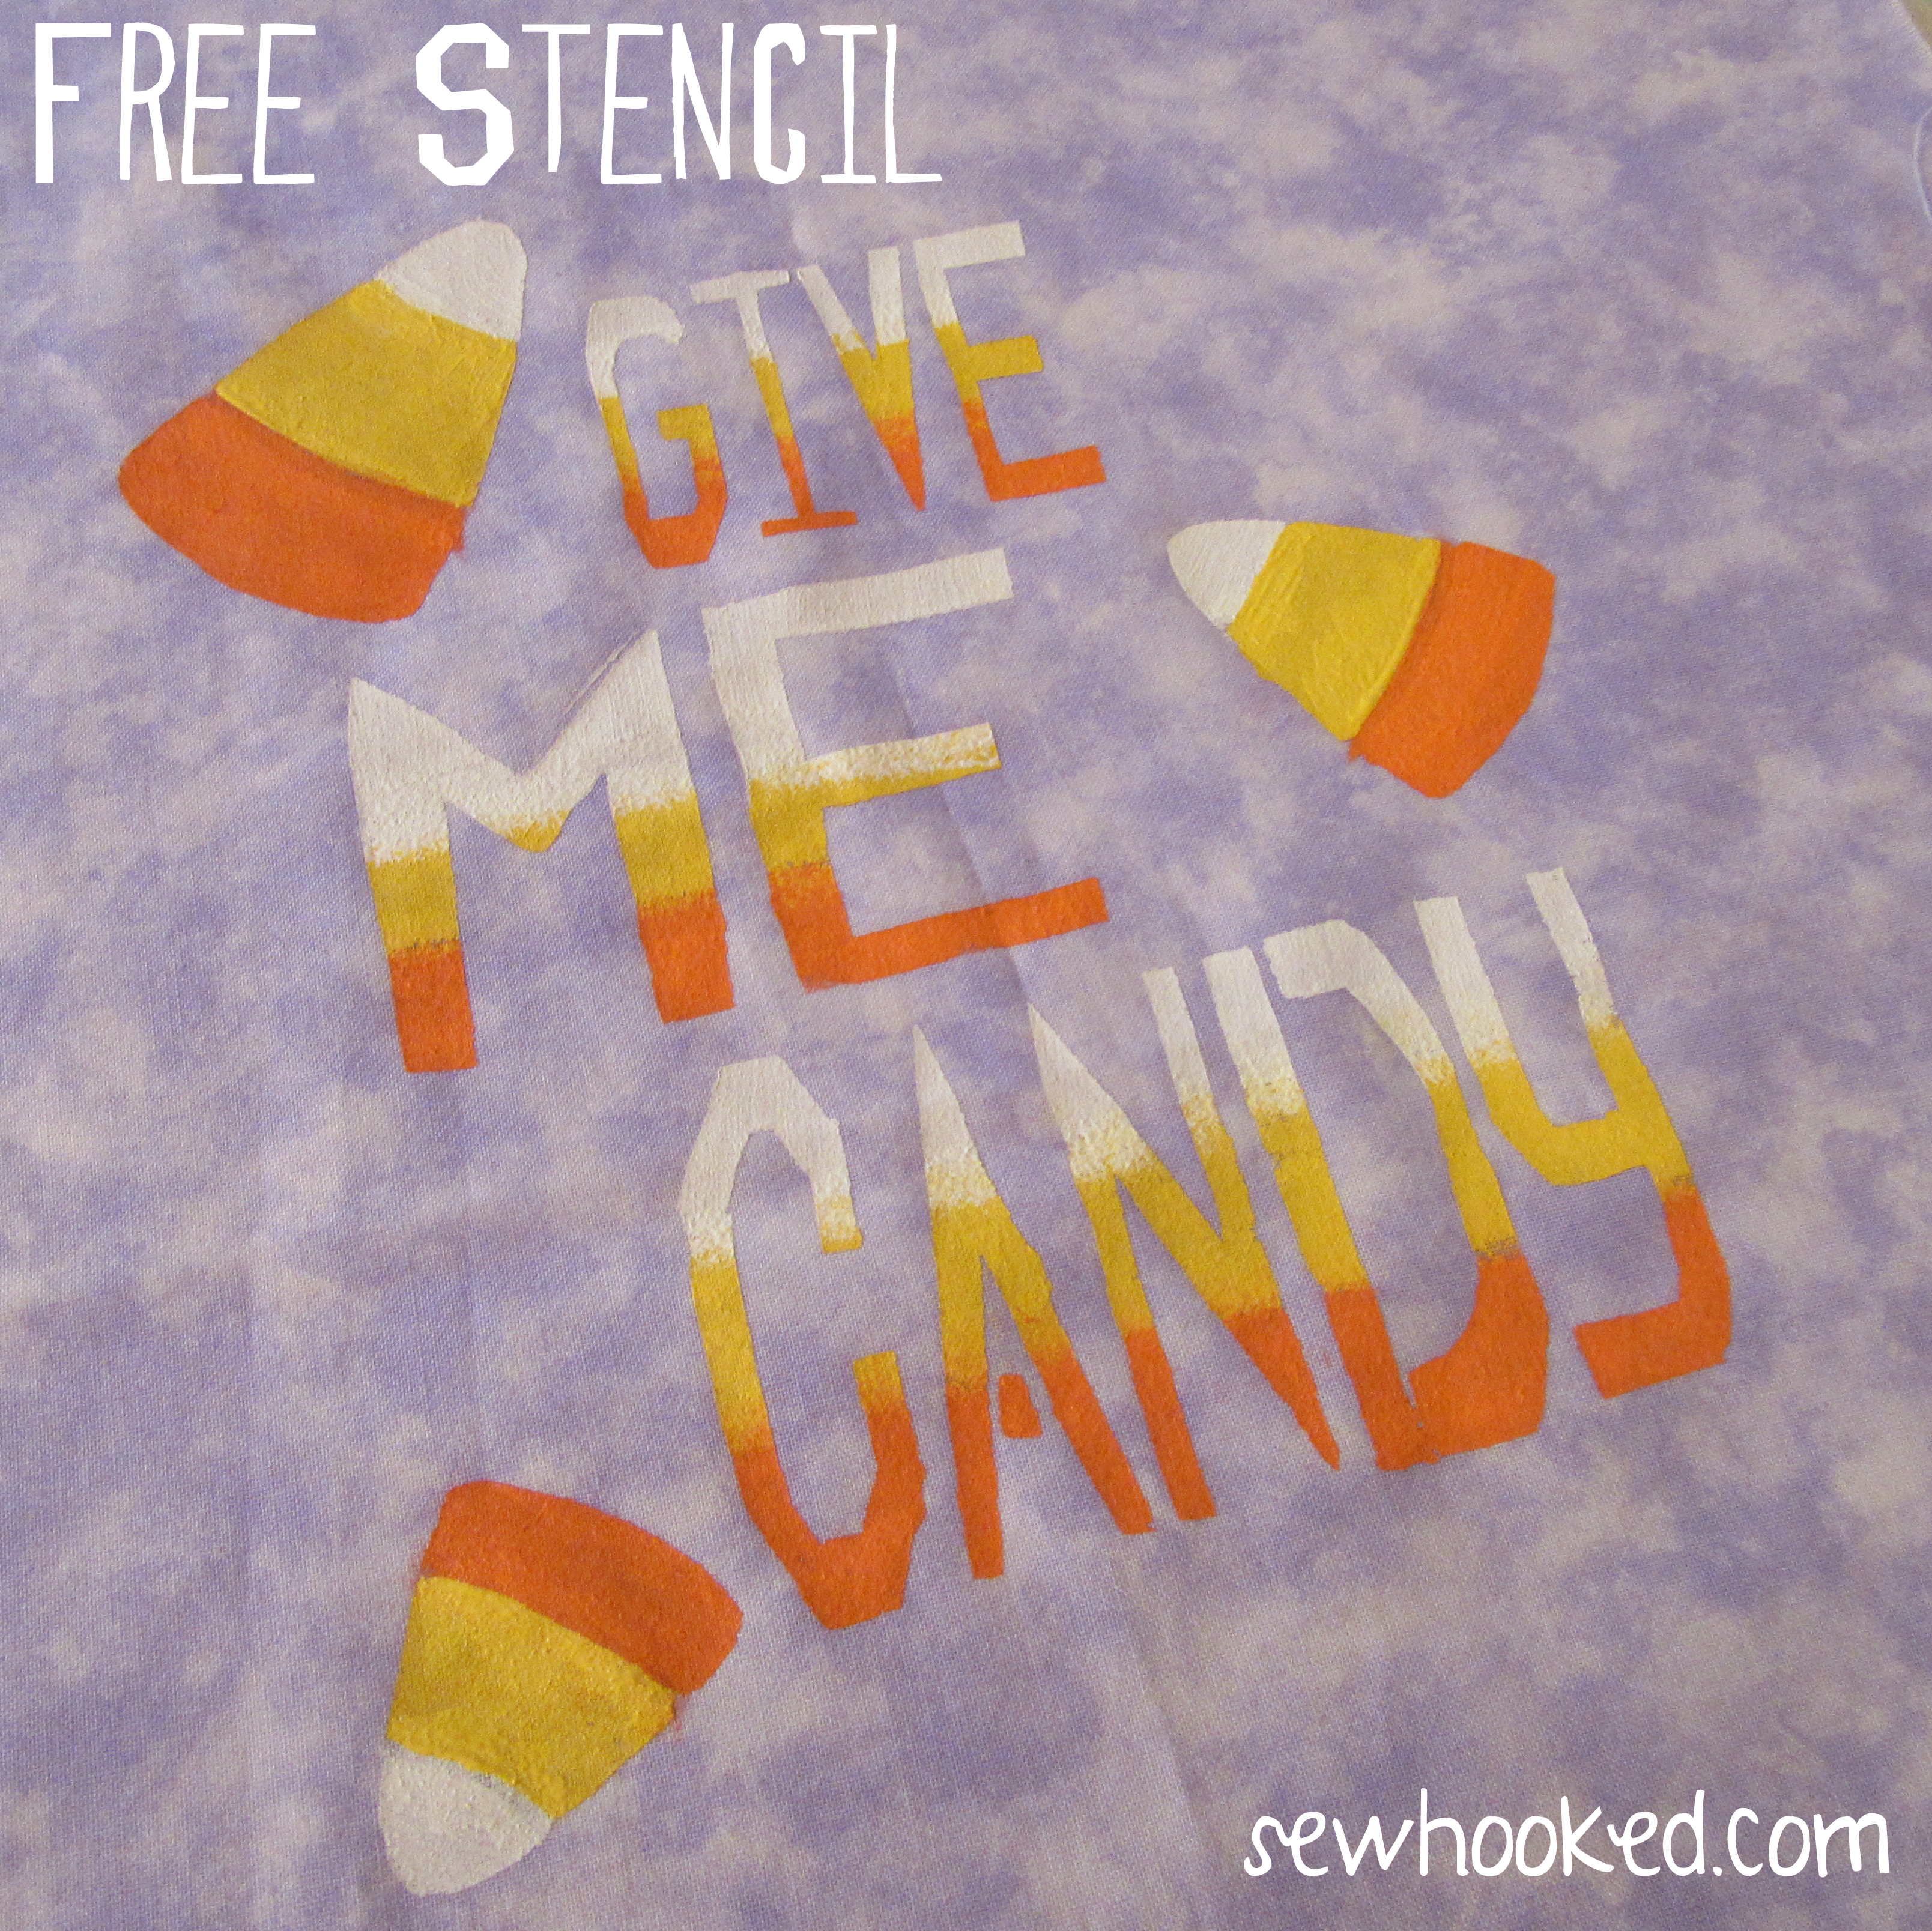
Today I’m excited to share a brand new and absolutely free Halloween stencil! This the first stencil I’ve shared in an age and I do hope you enjoy it!

Give Me Candy Stencil by Jennifer Ofenstein, sewhooked.com

Designed by me entirely in Inkscape, Give Me Candy represents a lifelong love, nay, adoration, of candy corn! Yum!

New to stenciling? Here’s a video tutorial I created waaay back in May of 2008. It’s hard to believe, but it pre-dates even Talk to Me Tuesday!

I also have a written tutorial specifically for my Torchwood stencil. Give Me Candy is much easier to execute!

For this project you’ll need:

  • The stencil, printed on the matte side of freezer paper (for easy printing, I cut a sheet to letter size then tape the top side to a piece of regular printer paper)
  • You can print or download the Give Me Candy Stencil OR Get it on Craftsy
  • X-acto Knife or other stencil cutting tool
  • cutting board or other safe cutting surface
  • Fabric paint. For this project, I used Tulip Soft Mandarin Orange, Sunshine Yellow and Velveteen White.
  • 1″ sponge brush
  • iron
  • cardboard or paper for inside the shirt/back of fabric
  • You’ll need fabric or a t-shirt. Most instructions say to pre-wash, but I won’t lie, I rarely do and I’ve never had any issues with the paint sticking or not lasting.

Give Me Candy Stencil by Jennifer Ofenstein, sewhooked.com

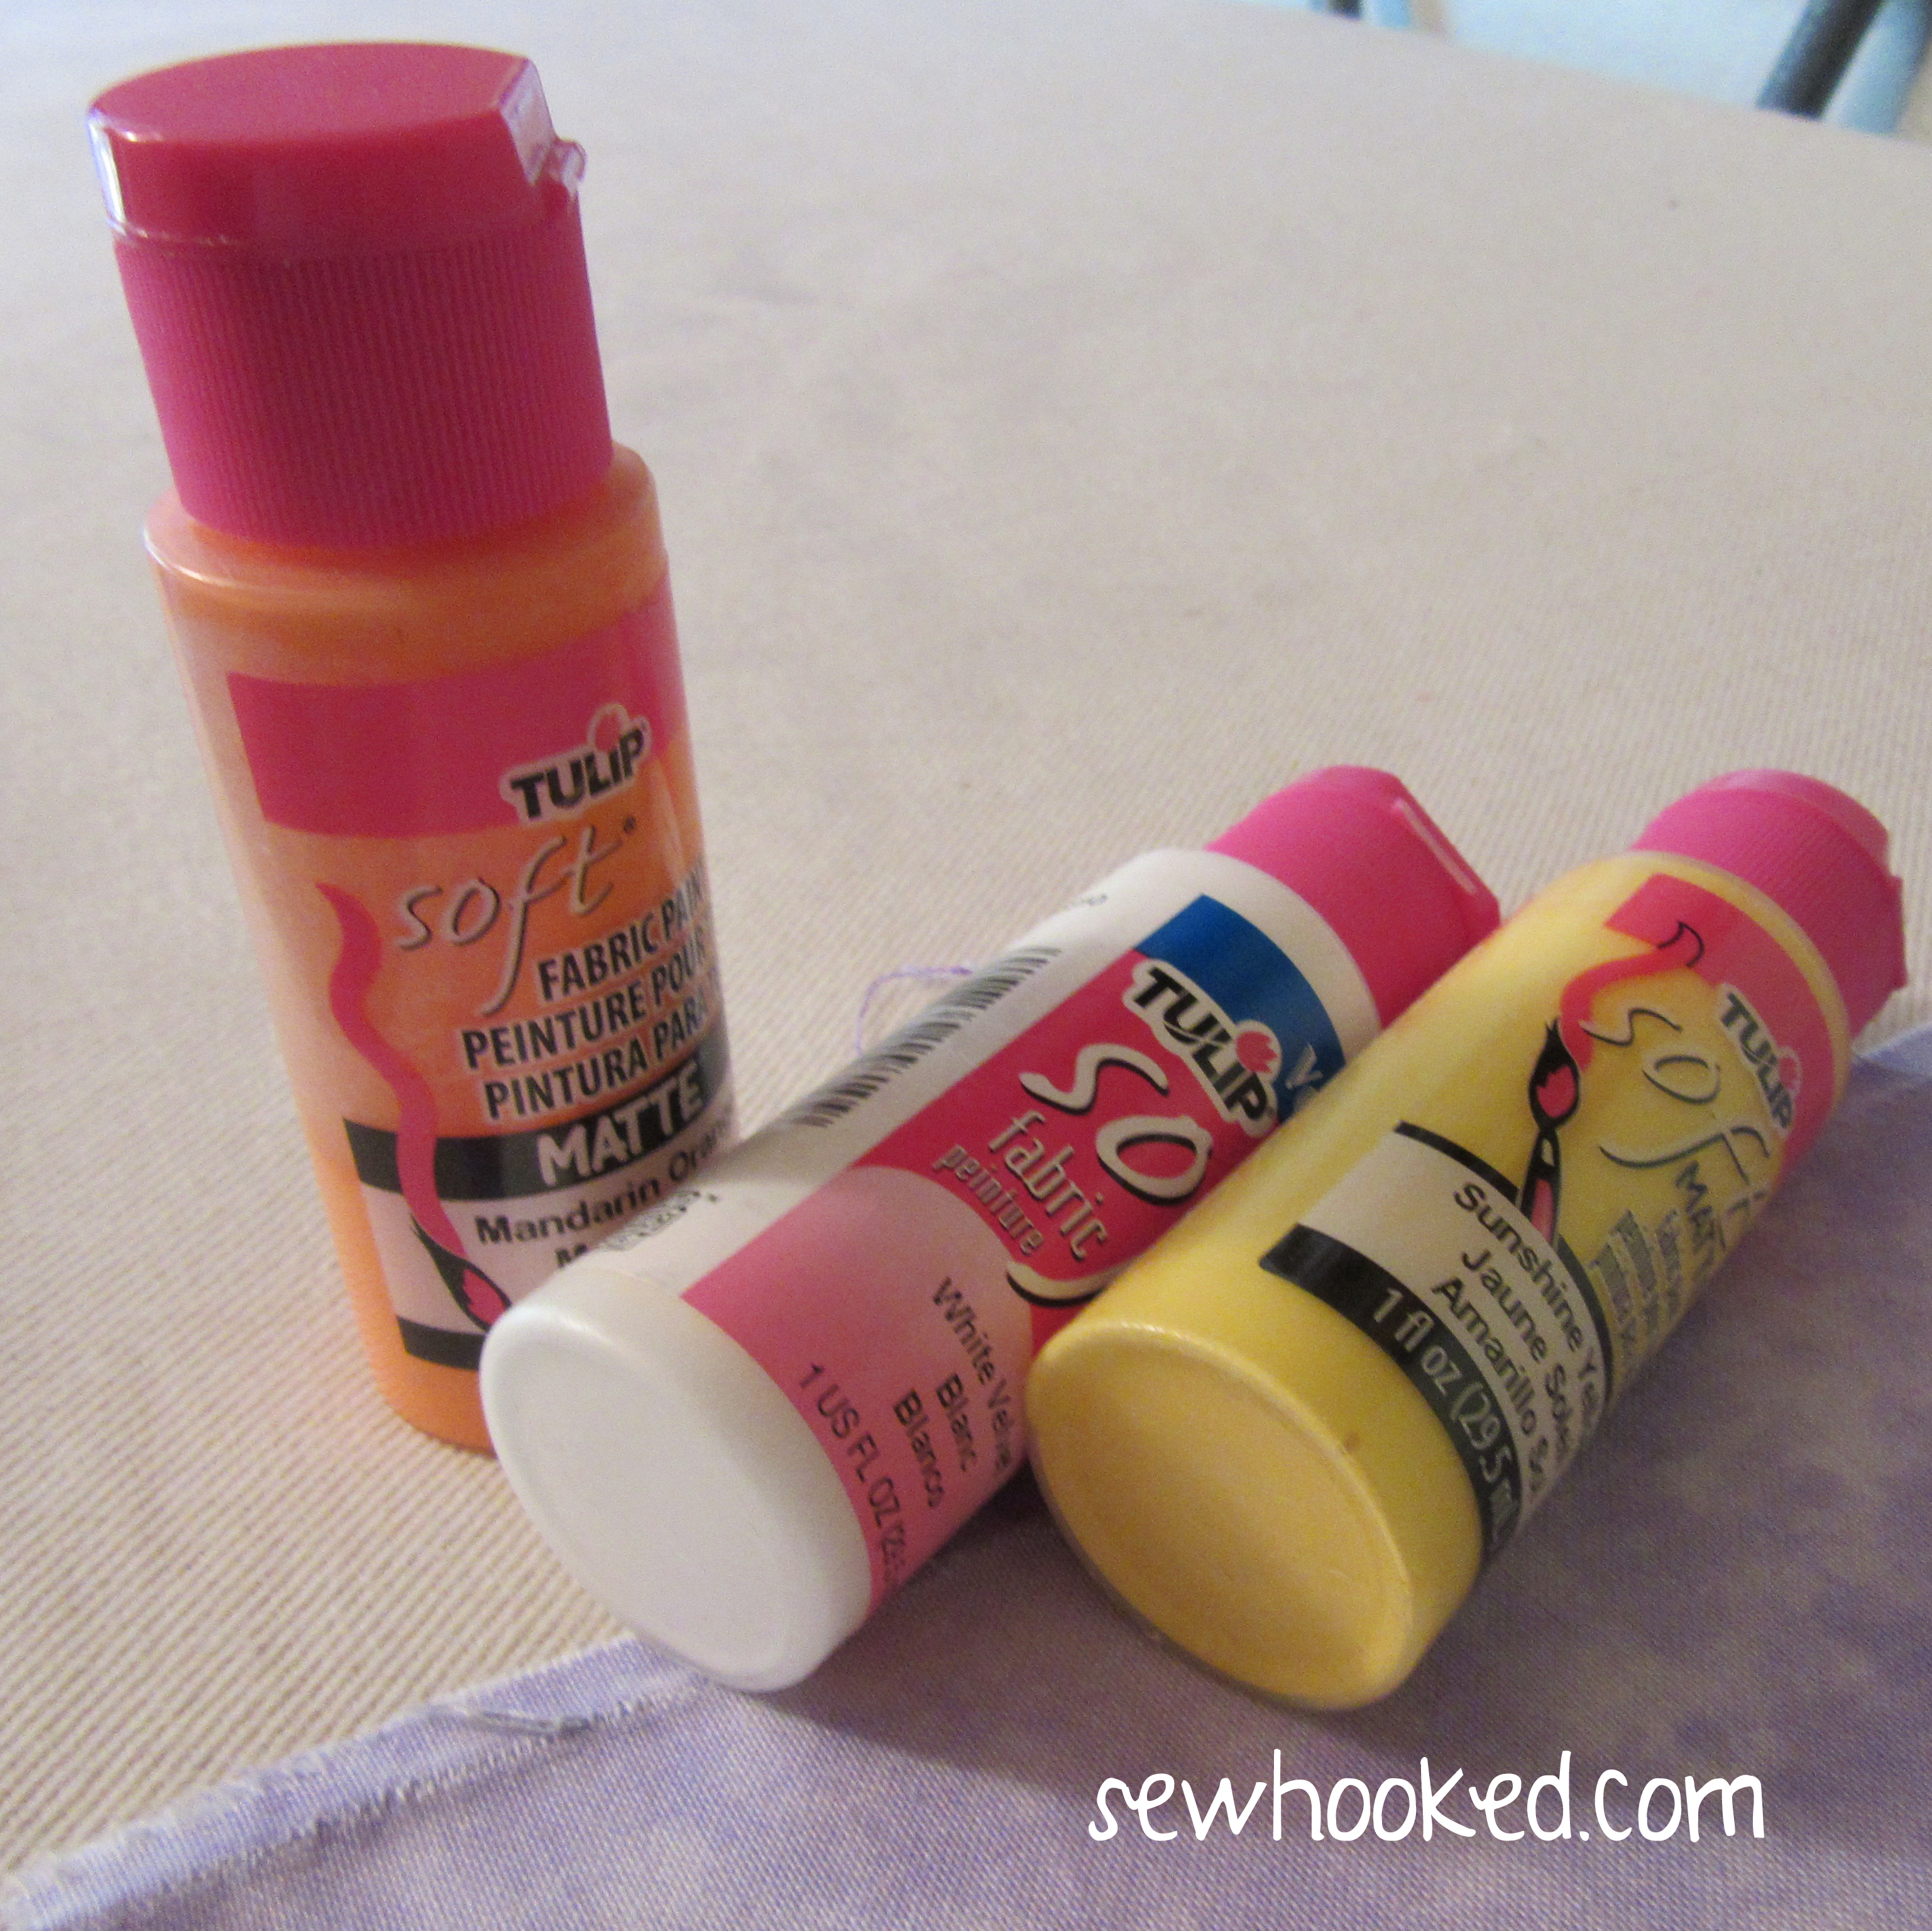
I used Tulip Soft Fabric Paint for this project.

Give Me Candy Stencil by Jennifer Ofenstein, sewhooked.com

Here’s the stencil all cut out and ironed on to my fabric. I like to use a pressing cloth after I iron the pointy bits are in place to ensure everything is nice and stuck.

Freezer paper creates a temporary bond, and it will peel off, so check your edges before painting.

Give Me Candy Stencil by Jennifer Ofenstein, sewhooked.com

I wanted a candy corn effect on the letters, so I blended my colors, starting with white and working my way down. When all the colors were in place, I went back and blended a little between the edges.

The stencil is designed so that the candy corn pieces can be entirely separate if you wish. If you’d prefer to blend yours, simply cut away the dividing bits before ironing the stencil on to your fabric (I didn’t do that, and had to go back with a tiny paint brush, no fun!).

Give Me Candy Stencil by Jennifer Ofenstein, sewhooked.com

It looks complicated, but it’s so, so simple! Just take your time and don’t be too fussed if the edges aren’t perfect.
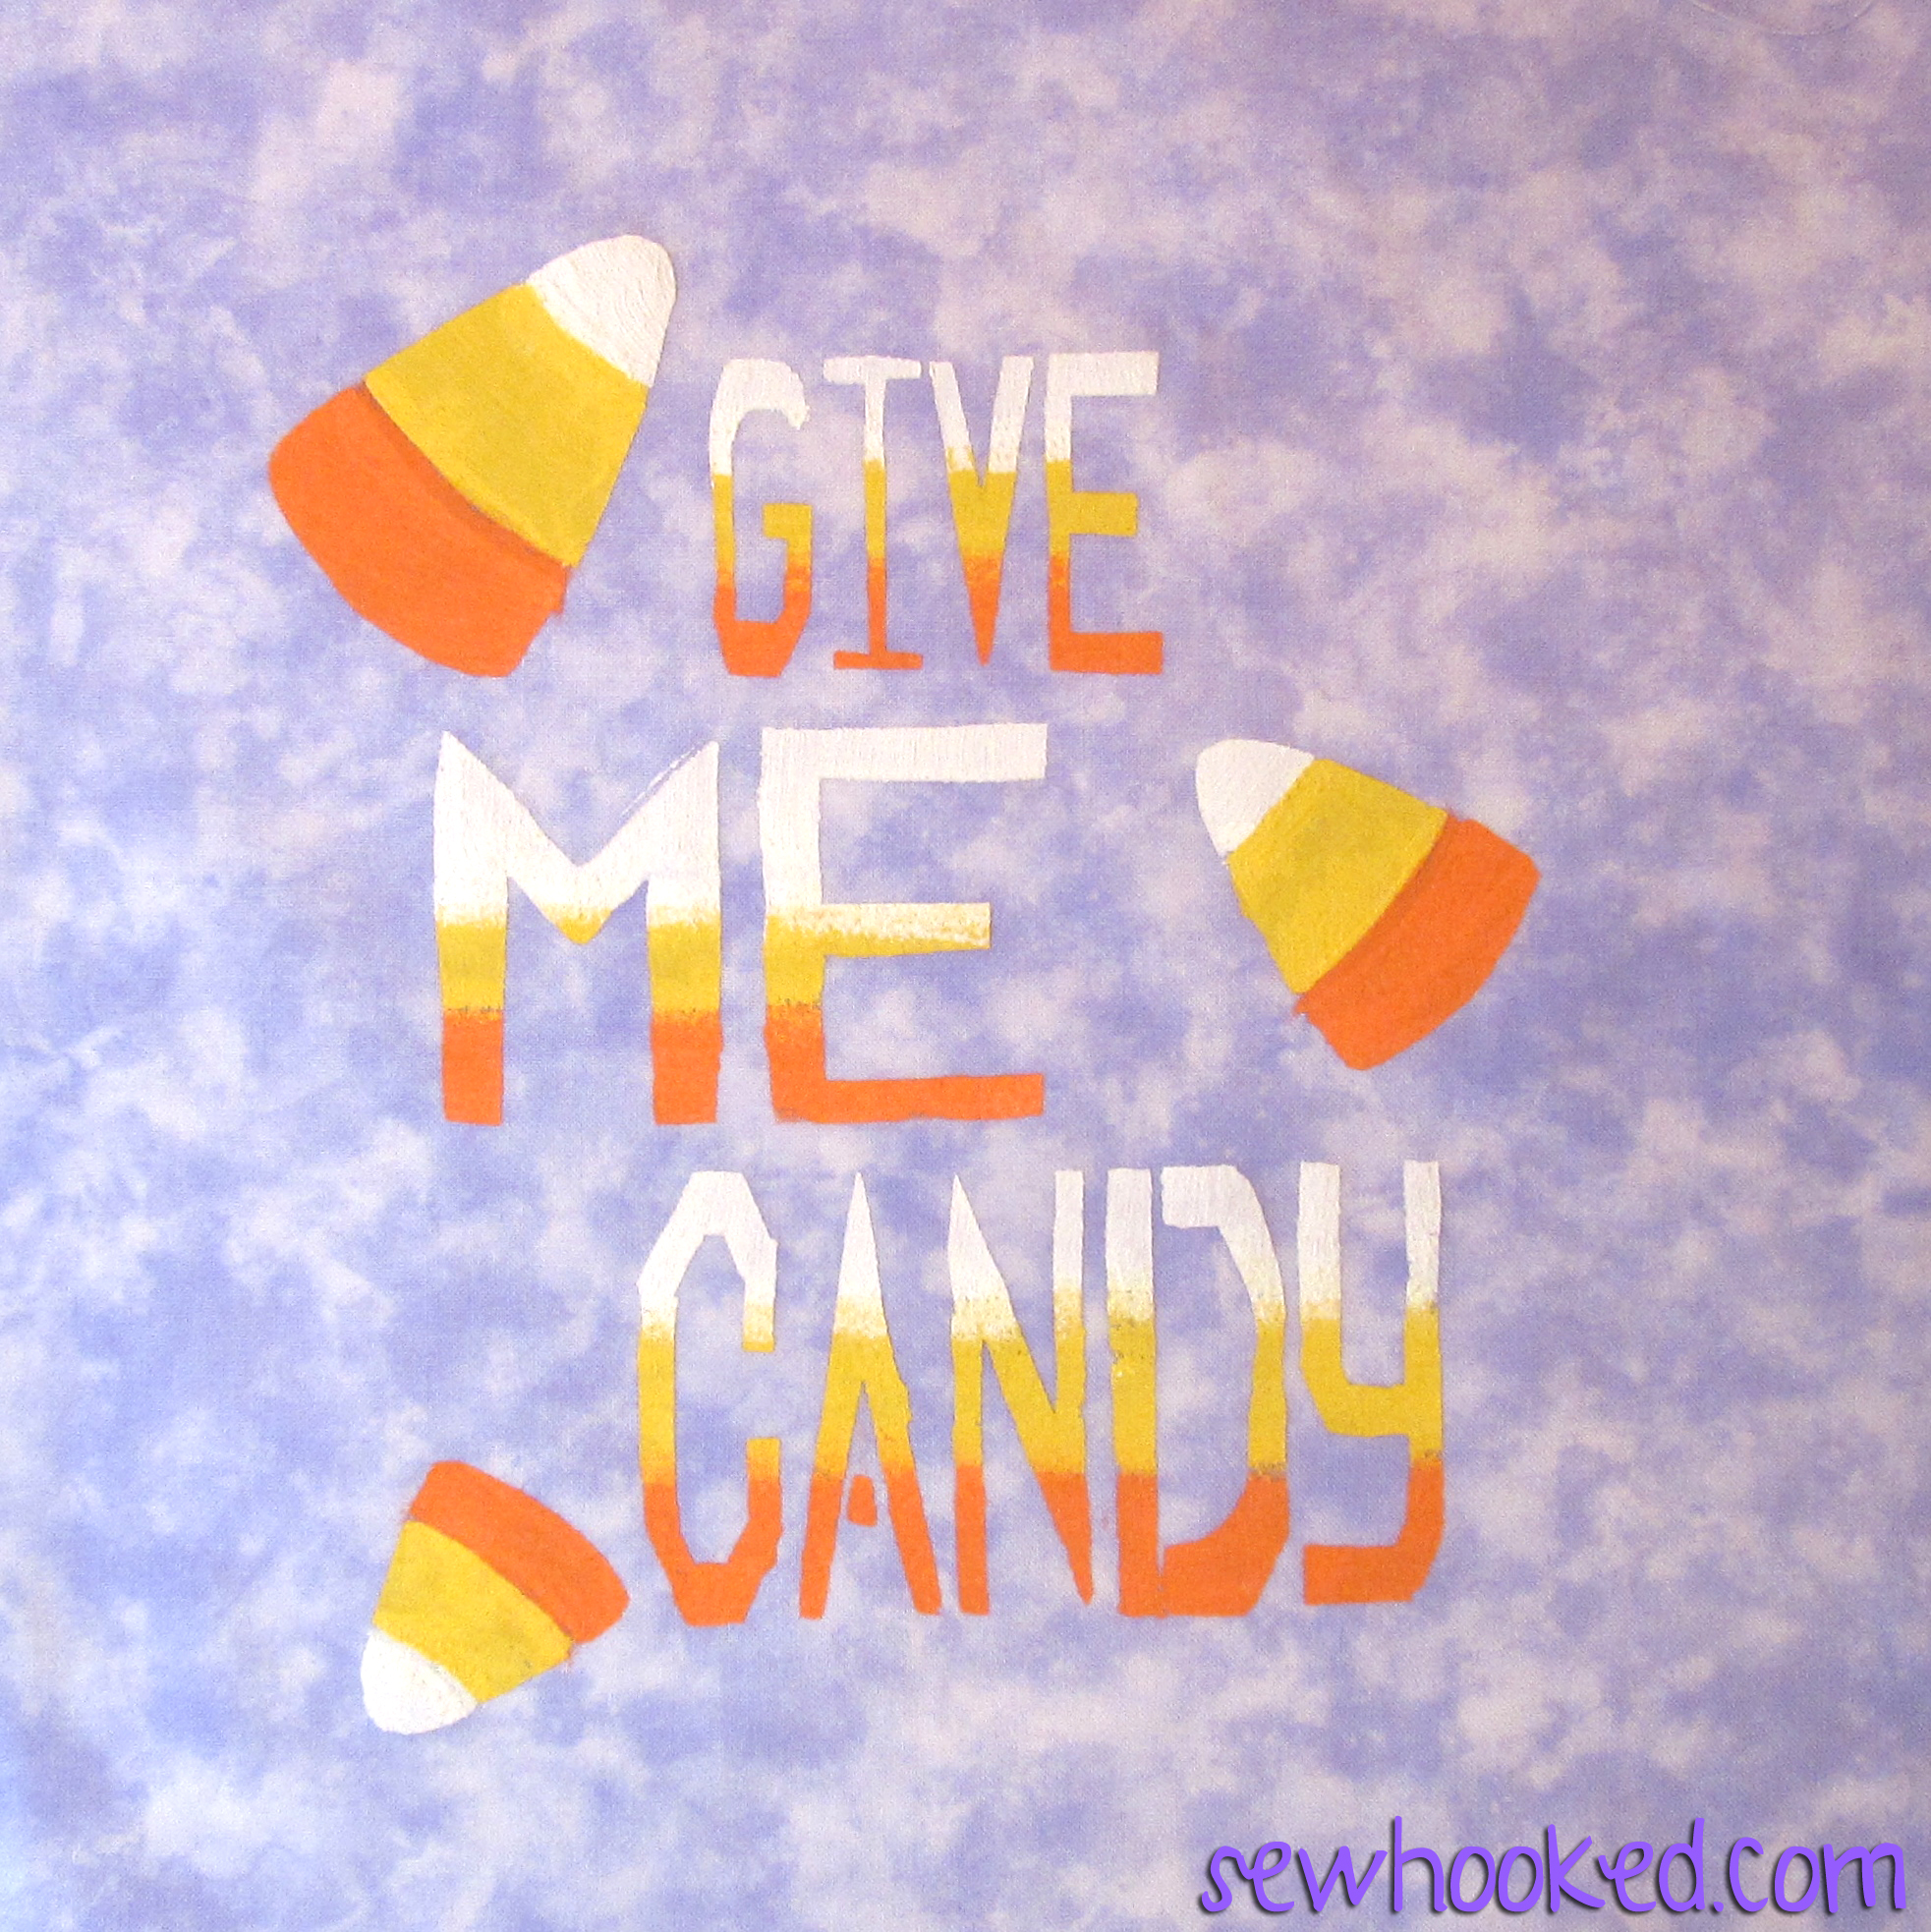
Give Me Candy Halloween Stencil by Jennifer Ofenstein, sewhooked.com

And, done!

I stenciled this on a piece of Moda Marbles and now I’m thinking my Jack cushion might need a companion…

If you’re feeling ambitious, try it with embroidery or even applique!

What do you think? Any ideas for how you might use this fun (and free!) stencil?

One more time…

Download the Give Me Candy Stencil OR Get it on Craftsy

Pattern #4 from Jack's Lanterns

Here’s Jack’s Lanterns, Pattern #4, looking good!

Jack's Lanterns, 9 Patterns to Paper Piece by Jennifer Ofenstein

Get Jack’s Lanterns on Craftsy for just $6!

Are you making projects from 31 Days of Halloween? Share your photos with my flickr group! There will be a fun surprise after Halloween for one lucky winner!

See you tomorrow for a look back on Halloweens past and this week’s Craftsy feature!

Photobucket

Craftsy | Etsy

Facebook | Sewhooked FB | Sewhooked Facebook Group

Instagram | Flickr | Twitter | PinterestBloglovin

Have a sewhooked little Christmas

A little Christmas Cheer from the sewhooked flickr group!

Christmas Hanging

by sewtobed on flickr

Ms. Santa
by ramblequeen on flickr

Photobucket

by Jennifer T.

Santa's Elf Little Wonky Christmas Tree Lil St. Nick Mrs. Claus

by liljabs on flickr

Lots more great quilts in the flickr Christmas quilts group!

Holly Jolly Christmas

More Christmas cheer from sewhooked:

If you make a Sew Awesome Craft or any pattern, craft or recipe from sewhooked,  I’d love to see a photo.  Email me or add it to the sewhooked flickr group.

Faux Rocher


I love chocolate.

It’s possibly unhealthy how much I love chocolate, but there you are!

Ferrero Rocher are one of my favorite indulgences, so much so that my lovely sister gave me a lovely heart shaped box full of them for Valentine’s.  I haven’t opened them yet…letting the anticipation build!

A friend of mine shared a recipe for a clone recipe.  The original came from Australia (love my Aussie friends!) and asked for packs of nuts and other ingredients without specific amounts included.   With my friend’s help, I worked out the “how much” and then gave the recipe my own U.S. touch.

These aren’t identical to Ferrero Rocher, but they’re a darn good facsimile and will be a lovely Valentine’s treat for me and my sweetie!

Faux Ferrero Rocher

  • 1 cup milk chocolate chips
  • 1 cup dark chocolate chips
  • 1 tbs shortening
  • 1 cup chopped lightly roasted peanuts, chopped
  • ½ – 1 cup hazelnuts or macadamia nuts (the real thing uses hazelnuts)
  • 1 (13 oz.) jar of Nutella
  • miniature muffin tins and liners (approx 1 1/4″ size)


I used Hershey’s, but you can use any combination of milk and dark chocolates.


Line miniature muffin tins with wrappers.


Place chocolate chips and shortening in a microwavable bowl. Cook for 3-4 minutes.  Remove from microwave and stir, adding chopped peanuts. Mix thoroughly.


Place small teaspoon chocolate nut mix in base of pan or wrapper.


Place a nut in center.

Nutella
Cover with about ½ tsp. Nutella.


Cover with chocolate nut mix.


Refrigerate until firm, about 1 hour.


Eat!
Makes approximately 30 really yummy candies.

more recipes

Add your Sewhooked-related photos to my flickr group and you might be featured in a future post.

Photobucket

 
Sewhooked Shop | FB | SHFB | Flickr | Twitter | Bloglovin

Candy Cups for Giving


Candy Cup for Christmas

Shared by my aunt, Amy, several years ago, Candy Cups have become a gift-giving standard for me.  I’ve made them for Christmas and birthdays and with all sorts of candy.

They’re easy, inexpensive and make gorgeous gifts for the hard-to-shop for.  Think teachers, friends and anyone that likes candy.  Have a diabetic in your life?  Sugar-free candy works, too!

Once all your supplies are gathered, it’ll take you about an hour to make one candy cup.

You’ll need:

  • Glass or Mug (I prefer clear, but any kind will work, the heavier the better!)
  • Candy with loose or twisted wrappers (example used approximately 40 oz. of peppermints)
  • Styrofoam ball (size depends on your glass or mug)
  • Filler for the cup – recycled paper or candy
  • Bamboo Skewer
  • Scissors
  • Hot Melt Glue
  • Greening Pins (also available at the hobby store with the floral accessories)
  • Ribbon
  • Cellophane

supplies


Push the bamboo skewer into the Styrofoam ball, all the way through the top. Put it in the glass to and push down until the ball is snug in the glass.


Snip off the excess skewer with your scissors.


With the skewer still in the glass, fill the bottom of with candy. Ideas are M&Ms, Hershey Kisses or Peppermints (though you could really use any candy). Another option is shredded paper, but the candy on the ball will make the cup top-heavy, so having a heavier filler keeps it from tipping over and gives the gifted a sweet bonus.


Place a small dot of hot melt glue on either side of the rim of the cup.  Gently press styrofoam ball onto glue, holding in place until it sets.

candies in twisted wrappers

greening pins


Use greening pins to add candy to ball by poking pins through the loose end near the twist of the candy wrapper.  Depending on the candy, you can get two or three on each pin.


Start at the bottom and work up to the top, going in circles.

part of first round


first round complete


first round, from the top


second round done


second round from the top


third round done


third round from the top


Fill in any holes with more candy & greening pins.

Final round complete, all the holes filled in.

Wrap in cellophane and embellish with a bow or ribbon.  The cellophane is optional, but it provides insurance that your candy will get from point “A” to point “B” intact.

Gift it!


Variation with M&Ms and Coca-Cola glasses

Variations by Amy Maxey – toffee coffee & bubble gum soda glass.

Add your Sewhooked-related photos to my flickr group and you might be featured in a future post.

Photobucket


Craftsy | Etsy | Facebook | SHFB | Flickr | Twitter | PinterestBloglovin

This is part of my “Way Back Craft” series; patterns, crafts, tutorials and general crafty memories before the days of this  blog.

Jennifer’s Best Peanut Brittle

Jennifer's Best Peanut Brittle

If I could make one candy to give away every year, it would be peanut brittle.

This is probably my most miraculous of recipes due to it’s ability to cause sheer happiness in it’s recipients.  I’ve actually made friends by sharing this at parties and functions.

Every year someone tells me that this is their favorite peanut brittle recipe, which of course gives me a reason to keep making it for them!

You’ll need a good, heavy saucepan and a candy thermometer for this.  If you’ve never owned a candy thermometer, it’s really worth having.   I recommend investing a few dollars (a very few, really!) in a good quality thermometer.  Glass thermometers are cheap, but they tend to break easily.  I have a professional metal candy thermometer that I picked up at a local restaurant supply store, but they’re easy to find online and at other stores with cooking supplies, too.

Peanut Brittle

  • 2 cups sugar
  • 1 cup light corn syrup (Golden Syrup works if you don’t have access to corn syrup)
  • 1/2 cup water
  • 2 cups raw peanuts (I like Spanish peanuts)
  • 1 teaspoon salt
  • 1 teaspoon vanilla
  • 1 tablespoon baking soda
  • real butter for greasing pan

Grease a 10″x15″ baking sheet thoroughly with butter.

Combine first five ingredients (sugar, corn syrup, water, peanuts and salt)  in heavy saucepan.  Stir using a long-handled wooden spoon.

Boil until candy thermometer reaches 293 degrees F.

Peanut Brittle in the pot

Remove from heat and cool for a couple of minutes.  Add vanilla and beat.   Sprinkle baking soda into the mixture and beat will.  It will foam and change colors, which is just what you want it to do!

Immediately pour into baking sheet.   Be very, very careful because liquid candy at high temperatures is like lava!   Make sure the baking sheet is on a towel or cooling rack because it will be extremely hot.

Allow to cool completely (time will vary, usually an hour or so)  then flip over and give it a whack!   Break the pieces up however you like, then store in an airtight container at room temperature.

Do not store peanut brittle with other candies because it will absorb moisture and become sticky, sticky, sticky.

For best results, share with friends!

more of my recipes

Photobucket

 
Sewhooked Shop | FB | SHFB | Flickr | Twitter | Bloglovin