Tag Archives: Hand Crafts

Way Back Craft: Gryffindor “Canopy”

Canopy, approximately 2002

Well, we’re way past due for a Way Back Craft!

So, you want a Harry Potter bedroom?  The very first thing I think of when I think of Harry’s dormitory, is the four poster bed with house-colored hangings.  Wouldn’t that be fabulous?

It definitely would be.

Unfortunately, not all of us have the means or the space for a four poster bed.

This is the problem I encountered when designing a Harry Potter room for my daughter.  Her room has a ceiling fan and the room is just too small for a four poster bed.  The Gryffindor canopy was on her Must Have list when the room decoration was being planned.   I have the great fortune to have two very DIY parents and the first thing that popped in my head was mounting something lightweight on to the wall.

How about a faux canopy that gives the feeling of those hangings without the actual expense or space requirements of a real four poster?

Then I started thinking price.  Cheap would be good.  Very good.  PVC.  PERFECT!

A fun aside on this project – when I was buying the fabric, the woman at the cutting table at the fabric store asked if I was making a dress.  When I told her I was making a Gryffindor canopy for a Harry Potter bedroom, she stared with her mouth open.  It was the first of many stunned looks directed at my fandom crafting!

Supplies

  • 3 lengths of 1 to 1 1/2” PVC pipe cut into 18” (45.7 cm) pieces (use a hacksaw or have it done at your DIY store)

Note: PVC under 1” is not recommended because it’s too flexible. Make sure the threaded plug & metal flange will work with the pipe you chose. They’re easy to test at the DIY store.

  • 3 threaded plugs
  • 3 metal floor flanges
  • 3 flat PVC caps
  • 3 decorative wood rosette with a flat back
  • Epoxy, Liquid Nails or other cement-like glue
  • Primer spray paint
  • Gold spray paint (Use silver for Slytherin, bronze or silver for Ravenclaw and black for Hufflepuff)
  • Pencil
  • Measuring tape
  • Screwdriver
  • Drill (optional)
  • Screws with anchors
  • 5 1/2 yards (5 meters) of red satiny fabric  (Use green for Slytherin, blue for Ravenclaw or yellow for Huffelpuff)
  • matching thread
  • sewing machine (optional)

Instructions

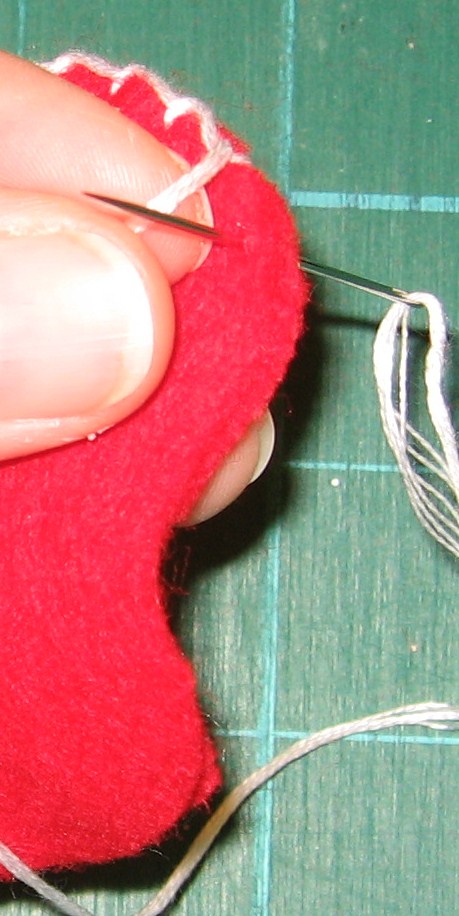
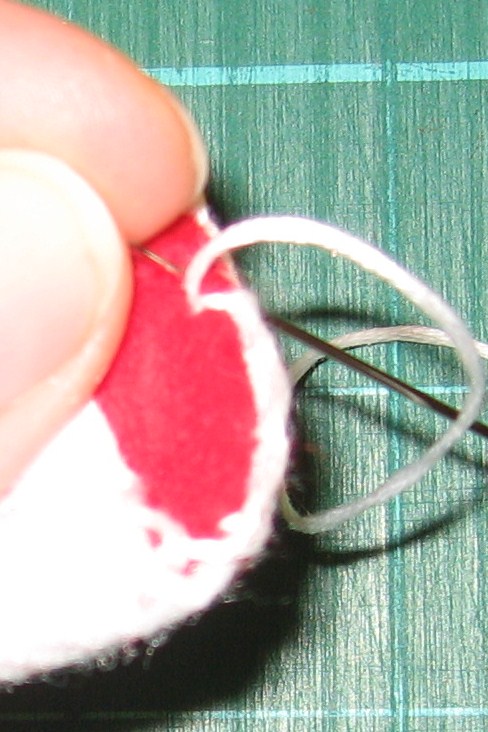
  1. Prewash fabric then hem on both ends, set aside.
  2. Following manufacturer’s directions, use epoxy to glue the threaded plugs to one end of each of the PVC pipes. On opposite ends of pipes, use epoxy to attach the PVC caps. Epoxy the wooden rosette onto the cap. Allow epoxy to dry. Screw pipe into metal flange. Stand up on it’s end in a well covered, well ventilated area.
  3. Paint with primer. Allow to dry according to manufacturer’s directions. Paint gold. Allow to dry overnight.
  4. Find the center of your bed, mark a light line on the wall. Depending on the width of your bed and where you want the fabric to reach on the sides, you will need to attach the flanges lower or higher.  If you have someone helping you, it’s a good idea to hold the center pipe in place with the fabric, centered, on the pipe. You can then determine how high the center pipe should be and where to place your two side pipes. They can be low or high, depending on your preference.  Use measuring tape to assure the three pipes will be symmetrical.
  5. Attach the metal flanges to the wall using screws and anchors, using the drill for pilot holes if necessary.
  6. Screw pipes into each flange. Arrange canopy fabric.

Makes a great window treatment, too!

Also for your Harry Potter room:  HP Bookcase Mural

p.s. I made the afghan, too.  😉

As always, if you make any pattern or craft from sewhooked,  I’d love to see a photo. Email me or add it to the Friends of sewhooked flickr group.

Happy crafting

also available on The Leaky Cauldron- Crafts

Crafty Retrospective: Don’t Waste, Thrift-cycle

A good deal of my crafting is recycling, reconstructing and repurposing.  Thrift stores are gold mines of raw materials and I rarely walk away empty handed once I set my mind to treasure hunting!

Here are a few crafty make-overs from over the years.

tire swing close up

Recycled Tire Swing made from a thrift store tire and a few dollars of hardware.  A back yard necessity!

Potions Bottles

Recycled thrift store bottles with simple paper labels turn them into potion bottles.   Given as part of a Harry Potter Secret Santa Swap.

Crafty Cabinet Full of herbs and spices?  I don't think so!

Repurposed thrift store find – a spice rack that now holds my beads and other wee crafty paraphernalia.

Yarn Ball Cozy from a CD Canister Recycled 2-Liter Bottle into Yarn bag

Recycled CD canister and 2-liter bottle into Yarn Ball Cozies

kurt cobain wallhanging

Thrifted Kurt Cobain tee, recycled into a quilted wall hanging.  Made as a gift.

Gareth's "Punked Out" Shirt Elena's Gauntlets - handsewn by her!

Recycled tees made with and by my kids, inspired by Generation T by Megan Nicolay

Binder Recon - Back to School Recycling

Binder Rescue - Back to School Recycling

Back-To-School binder rescue, a complete revamp (top) and minor fabric additions (bottom)

"handmade by" labels

Recycled cereal box labels

potholder tutorial 038.JPG

Recycled Pot Holder

earring hanger

Picture Frame Earring Hanger

quilt hanger before

quilt rack makeover with friendship quilt

Upcycled thrift store quilt hanger, before (top) and after (bottom)

Recycled Calendar Tutorial

Recycled Calendar Envelopes

Mumu for recyling

Monk's Bag made from a thrifted mumu

Monk’s Bag made from a thrift store mumu (pattern from Purl Bee)

Reduce, Reuse, Recycle a Thrift Store Sweater!Recycled Sweater Bag Tutorial

Recycled Thrift Store Sweater bags

Recontructed leather shirt bag

Recycled, thrifted leather shirt.  I carried this purse for ages!

sweatshirt update

Easy Pockety Hoody hides an unwanted logo and adds a touch of thrift store chic.

Do you have a favorite crafty recycle project?  Post a link in the comments!

As always, if you make any pattern or craft from sewhooked,  I’d love to see a photo. Email me or add it to the Friends of sewhooked flickr group.

Happy crafting


Don’t forget about the Friends of sewhooked challenge!

Friends of Sewhooked Challenge

If you know me, then you know I like contests, challenges and drawings. I have a drawing every month on my Livejournal group, hp_paperpiecing, with a Challenge thrown in whenever I can manage it.

It’s about time the love is spread to the rest of my crafty universe!  I’m proud to announce the first ever Friends of sewhooked challenge!

Photobucket

If you’re a Friend of sewhooked (which equates to a friend of Jennifer!), all you have to do to participate is to post a photo of something you’ve made from Sewhooked to the Friends of sewhooked flickr pool by Monday, February 16, 2009, 10 am, CST (U.S.).

Follow any pattern or tutorial and then share your photos…that’s it! I’ll draw a name from the pool and notify the winner via pm or email. Please, no cross-posting entries for the hp_paperiecing challenge.   I know you won’t, but I had to say it…just in case!

The winner’s craft will be features on the Sewhooked and that person will receive a hardback copy of Scrap Basket Crafts: Over 50 Quick and Easy Projects to Make from Fabric Scraps.

Photobucket

If this works out, I’ll have another drawing in the future. Fun, fun, fun!

Craft: Earring Hanger/Organizer

Earring Hanger/Organizer V1

I don’t make many New Year’s Resolutions, but I do start each year trying to be more organized.  I’m starting with my personal spaces this year; my jewelry, make-up, and the like.

I love big, swishy earrings, handmade, hand-beaded, felted, you name it.  I have loads that were made by friends and a few made by myself, and those are definitely my favorites.

Storage has gotten a bit precarious, and I’m usually trying to disentangle the mess and find a missing earring.

For quite a long time, I’ve used a small earring organizer to keep my studs and other small earrings that have a stem and a back.  It was time for a new, bigger version so I could finally find all of my fabulous earrings!

You need:

  • a picture frame with no glass (recycled or raw wood)
  • plastic canvas
  • hot melt glue
  • scissors
  • ribbon
  • stapler (a staple gun works great if you have one) or thumb tacks
  • optional:  paint & glitter


Cut the plastic canvas to fit inside your frame.

Optional:  Paint the frame the color of your choice.  If the frame is recycled and has a finish, you’ll need to give it a light sanding before painting.

I’m particularly fond of glitter…so I sprinkled some on my frame while it was still wet.

Once the paint and glitter are dry, place the plastic canvas inside the back of the frame.  Go around all four sides with hot melt glue.

Cut a piece of ribbon long enough to reach from one corner of the frame to the other, plus a little for turning under on the ends.  The length here depends on how you want your final product to look and how much of the ribbon you’d like to show.  Turn the ends under and staple or tack in place.

Hang on the wall and add all of your lovely dangly earrings!  Works best with French hook earrings.

Smaller, desk version


Find my free patterns on Sewhooked & Fandom in Stitches.

♥ Jennifer O

Posts on this blog may contain affiliate links to help cover the cost of my website. I thank you for your generous support. ♥

Ministry of Silly Walks Stencil

Ministry of Silly Walks Stenciled Tee

Here’s a fun stencil that I made for my son.  It’s a fairly simple stencil and a great conversation starter!

My family are huge Monty Python fans, so much so, that I ended up making a shirt for my hubby,too.

From the classic Python sketch, Ministry of Silly Walks:

Supplies:

In lieu of individual photos of the process, take a look at my how-to video for stenciling, which you may remember from this post or from The Cullen Crest post.

  1. Pre-wash t-shirt without fabric softener.
  2. Print stencil (or alternative updated version) onto freezer paper (matte side).
  3. Carefully cut out with an exact-o knife. There are loads of fiddly bits, so take your time and be careful.
  4. Set iron to medium.
  5. Place cardboard or newspaper inside t-shirt.
  6. Place stencil on t-shirt with a piece of blank paper on top (that keeps the tiny pieces in place) then carefully press with the iron.
  7. Use the foam brush to gently paint on the fabric paint.
  8. Allow a few minutes to dry, then carefully remove the stencil. For small pieces, use a straight pin to help get them started for easier removal.
  9. Finish drying according to manufacturer’s directions.

Ministry of Silly Walks stenciled tee #2Black on White Silly Walks

Silly Walk Tee
kirstencan’s Silly Walk tee from the flickr group

Add your Sewhooked-related photos to my flickr group and you might be featured in a future post!


Photobucket

also posted on craftster and cut out + keep

The black Ministry of Silly Walks tee was one of the winners of the Knitted Icons contest on cut out + keep. (Knitted Icons was the prize…the craft didn’t have to be knitted)

Blanket Stitched Christmas Stocking Ornament

December is almost here and that means a couple of things for my family. 

We eat too much, get to see family we haven’t seen for ages, and we craft.  While crafting in itself is a daily thing for us, December crafting is different.  We make ornaments for friends, family and ourselves.  Just something about the cold weather, hot chocolate and waiting for Santa makes the crafting a little bit more special.

On that note, today’s craft is an old favorite of mine.  It was originally designed to be an easy ornament to make during my kiddos’ elementary school days.  I wanted something that was inexpensive, took few materials and would be easy to teach kids how to do.

This simple blanket stitched Christmas Stocking is all of these things.  The knots might take a little adult assistance, but other than that, it’s a craft easy enough for anyone old enough to thread a needle!

Make it as is and you’ll have a 4″ stocking ornament.  Enlarge for a larger stocking; personalize, decorate or embellish!

Supplies:

  • felt stocking pattern (free to print or save)
  • felt in two colors (I used red and sparkly white)
  • scissors
  • pattern
  • embroidery floss
  • needle with a large eye
  • ruler or ruler and rotary cutter

Cut pattern on the fold of red felt.
Cut a strip of white felt 1 ” wide by long enough to go across both sides of stocking (4″ shown).

Align white felt across top of red so that the tops are flush.

Attach the white felt by stitching across the bottom with a blanket stitch.
(How to blanket stitch from futuregirl.com)

Optional – personalize or decorate while the stocking is still open.  I’ve left this one plain.

The back should look like this.

Fold stocking so white felt is outside.  Pin in place.

Starting on the open side of stocking, stitch using a blanket stitch.  You can hide the knot by starting under the white felt.  Push the needle through the three layers of felt and then take another stitch through all four layers before beginning the blanket stitch.

Continue around all the way around.

This is what we have so far!

Continue blanket stitching around the top of the stocking, catching both the inside and outside layer in the stitch.  Make sure to leave the stocking itself open.

Once you’ve made it all the way around, knot off the embroidery floss then make a loop about 1 1/2″ – 2″ long.   Make a knot inside the stocking.  Take a stitch and knot again.

The pattern is for a 3″ stocking, but it can easily be sized up or down depending on your needs.

Ta-Da!

Happy crafting!

Find my free patterns on Sewhooked & Fandom in Stitches.

♥ Jennifer O

Posts on this blog may contain affiliate links to help cover the cost of my website. I thank you for your generous support. ♥


Crochet Turkey

Crochet Turkey

Printable Pattern

Download it from Craftsy!

The date I wrote on the original copy of the pattern for this cute turkey is November 1999.  The creation of the turkey came right on the heels of the Jack-O-Lantern Finger Puppet.  I still think this little guy is too cute to be allowed.  His appearance can vary based on what color of yarn you choose for his feathers and body.

I made the one in the photo in a little under 10 minutes.  Make one or a lot and share with your friends!

Crochet Turkey

Makes a Fridgie, Pin, Finger Puppet or Pencil Topper

This is a very versatile pattern for a Thanksgiving Turkey. It works up very quickly and is cute, cute, cute!

  • worsted weight yarn – small amounts of tan, red, yellow, orange, dark orange (or seasonal colors of your choice)
  • H hook
  • pin back or magnet (optional)
  • 2 small google eyes

crochet turkey 001

Body – with tan, ch 4, 11 dc in 3rd ch from hook. Join with sl st. Finish Off

Back Feathers – with rust and orange together, join with sl st to back loop only of any dc, (ch 6, sl st in same st, sl st to next dc) rep until six feathers are made. On last feather, do not sl st to next dc. Finish off, 6 back feathers
made.

crochet turkey 002

Front Feathers – with orange, sl st in front loop opposite back feathers, (ch 4, sl st in same st, sl st to next front loop) repeat to last feather, do not sl st in next loop. 6 front feathers made. Finish off.

Head – with tan, ch 2, 6 sc in second ch from hook, sl st in first sc. Leave several inches of yarn for sewing to body.

crochet turkey 004

Wattle – join red to head with a sl st in back loop of any sc, ch 4, sl st in same loop, finish off.

Beak – using yarn needle, sew yellow directly above wattle in a “T” shape, leaving top half of head free for eyes.  Finish off.

crochet turkey 008

Assembly – placing head on top center of body, sew using yarn left on head. Finish off. Using low melt glue or Tacky Glue, attach 2 small google eyes.

For Fridgie or Pin – glue magnet or pin on the back after eyes have dried.

For Finger Puppet or pencil topper – crochet another body and attach to back of completed turkey by stitching around. Leave four dc open at the bottom for finger or pencil. Finish off.

Visit the Turkey Craft Round Up and the Turkey Craft Round Up flickr group for more fun Turkey crafts.

Happy crafting!

This is part of my “Way Back Craft” series; patterns, crafts, tutorials and general crafty memories before the days of the blog.

“Mellocreme” Pumpkin Earrings

Mmmmm, mellowcreme pumpkins, the yummy little sugar bombs that are really just candy corn kicked up a notch!  In homage to these tasty Halloween treats, how about a fun, easy craft that is cheap and makes enough to share with your friends?

I made the cute pumpkin earrings for a Halloween swap I was recently participated in.  You can make one pair or several!

makes 10 -12 pair

  • 1 block orange polymer clay
  • small amount green polymer clay
  • toothpick or skewer
  • hook ear wires (aka French hooks) (2 for each pair)
  • eyepins (2 for each pair)
  • jump rings (size of your choice)
  • jewelry pliers (I used one round nose and one chain nose)
  • Sculpey Glaze (gloss)
  • small, soft paint brush
  • parchment paper
  • baking sheet
  • optional: business cards and decorative bags for gift giving
Pumpkin Earrings

Separate the orange clay into enough pieces for 10 – 12 pairs of earrings.  Roll each piece into a rough ball shape.

Pumpkin Earrings

Using the round nose pliers, twist the eye pins into a curly shape, making sure each is approximately the same length.  Make the same amount as the orange balls in the last step.

Pumpkin Earrings

Squish the curly part of the eye pin into the orange ball.  Cover wire completely with clay, rounding with your fingers as you go.

Pumpkin Earrings

Add a small amount of green clay, gently pressing it around the wire into a stem shape.  Make sure to leave the “eye” in the pin visible.  If necessary, use a toothpick or skewer to clean out the hole.

Pumpkin Earrings

Use the toothpick to gently roll creases into the orange ball.

Pumpkin Earrings

Wallah!  A tiny pumpkin!  Repeat steps for each earring.

Pumpkin Earrings

Place earrings on parchment paper lined tray and bake according to manufacturer’s instructions.

Pumpkin Earrings

Pumpkin charms, all baked.  They look a little dull, so…

Pumpkin Earrings

Place earrings eye pin side down in Styrofoam.  Gently brush on Sculpey Glaze.  Allow to dry upside down.   Once they’re turned over, add a little more Glaze around the top if needed.

Pumpkin Earrings

Attach the ear wire (French hook) with a jump ring and pliers.  (how to open and close a jump ring)

Repeat for each pumpkin charm.

If making enough to share with your friends, poke holes in a business card with a pin, then slide the ear wire through.  Fold the top end of the business card down and place in a cute little bag.

Happy Crafting!

♥ Jennifer O

Posts on this blog may contain affiliate links to help cover the cost of my website. I thank you for your generous support. ♥

Way Back Craft: Golden Snitch Antennae Ball

snitch 005

I’ve been crafting Harry Potter-themed items since my first reading of the Harry Potter and the Sorcerer’s Stone (Philospher’s Stone for those outside the U.S.).

When I turn back my brain to 1999, I’m quite sure one of the very first things I made was a Golden Snitch. That first Snitch was not an antennae ball, but a soft version with actual feathered wings that my kids played with during their enthusiastic quidditch matches!

You can find many of my Harry Potter craft ideas both on sewhooked and in the Harry Potter Crafts section of The Leaky Cauldron.

Snitch Antenna Ball
by Jennifer Ofenstein
http://www.sewhooked.org

  • 1 ball-shaped antenna ball
  • spay primer
  • gold paint (either spray or oil based in a can)
  • 2 gold brads
  • white craft foam
  • Wing Pattern
  • a skewer or chopstick
  • old box or piece of Styrofoam
  • box cutter or Exacto Knife
  • hot melt glue OR Tacky Glue
***Please Note: When using spray paint work outside or in a well ventilated area***

Place the antenna ball on the skewer.

Poke the skewer into the box or Styrofoam. This will hold the ball in place for painting and give it a place to dry.

Prime the antenna ball. Follow the paint manufacturer’s instructions for drying.

Use gold paint to paint the ball. If using spray, follow manufacturer’s directions.

For brush on, if you have enough, dip the ball in the paint and allow most of the paint to drip back in the can before carefully placing it back in the drying area. Allow to dry overnight.

Cut two wing shapes out of the craft foam.

Using the Exacto knife, cut a small hole in the base of each wing and on either side of the ball where you want to place the wings. Do this by gently pushing the blade into the ball. It does not have to be very deep, just enough to poke the brad in.

Use the tip of the scissors to score the center of the wing (as shown on pattern). Do not cut, just create a gentle groove. This will help with the feathery shape of the wing.

Snip along the wing to create a feather shape (as shown on pattern). Stop 1/4″ from the scoring line.

Poke the brad through the hole in the wing. Place a dab of glue on the cut in the hole cut earlier in the ball and then push the brad into it, positioning the wing how you want it as you do so.

Repeat for the second wing.

Finishing touch – tack the wings together to keep them from drooping while they are on the antenna of your car.


This is part of my “Way Back Craft” series’; patterns, crafts, tutorials and general crafty memories before the days of this craft blog.

Happy Crafting!

this tutorial also available on cut out + keep

Recycled Cereal Box Labels

Recycled Cereal Box Labels

I am not a scrapbooker, not even by the grandest stretch of the imagination. There are crafters in my life that are uber-talented scrapbookers and do amazing things with photos, ink and paper.

Even though I don’t scrapbook, I do love stamps. My stamp collection is tiny, but functional and I love to use it whenever I can.

Because I make so many hand crafts, I love to have handmade labels on hand. My new favorite stamp is a “handmade by” I found at Hobby Lobby during a recent sale.

Recycling + new stamps = Cereal Box Labels! One large cereal box makes about 18 3″ x 4″ labels.

  • cereal box
  • stamps
  • ink pads
  • ribbon
  • paper cutter OR ruler & scissors

Open the cereal box along the seam line. Trim off the flaps. Recycle or set aside for another project.

The next two steps can be done either with a paper cutter or with a ruler and scissors.Square up the end of the box. Cut in 4″ strips.


Cut strips into 3″ pieces, giving you 3″ x 4″ cards

Now the fun part! Stamp! Use whatever stamp, color, etc. you like. If you have alphabet stamps, add your name, too!

Punch holes in the side or corners of the labels.

Tie a ribbon or string through the hole in the label. Thread the two ends in first, then bring those through the loop. Pull tight.

Tie, tape, pin, or glue your new recycled labels onto crafty projects.

After originally uploading this tutorial, I was gifted my own custom stamp. How fun is that?!

Happy crafting!

Find my free patterns on Sewhooked & Fandom in Stitches.

♥ Jennifer O

Posts on this blog may contain affiliate links to help cover the cost of my website. I thank you for your generous support. ♥