I always look forward to getting to share with you. ♥
Today I’m sharing an old favorite.!
This was my very first hand embroidered pieces made in 2010 or 2011. This was early in my days of learning to hand embroider. This little hoop hangs next to my desk as a reminder that we’re always learning. Also, I think it’s sweet. 🙂
Groovy Mushrooms was inspired by a vintage hand-drawn pattern that came to me in a pile of other things. Date and original designer unknown. I can tell you that the original version was brittle with age and practically fell apart in my hands when I held it. This is my own take on that original doodle. I share with you now in homage to the unknown, but obviously groovy, artist!
Like my free content? Consider being a Patron! Find out all you need to know on my Patreon page.
♥
Want to support my work but Patreon is not for you? You can still help support my free content and keep me creating by purchasing a pattern. Buying patterns gives you something tangible for your money and helps me keep doing what I do! However, you choose to support me, whether it’s Patron, purchases, or by sharing my work with your other quilty friends, I appreciate you. ♥
This is just one of the patterns available in my Craftsy shop!
After an April that was all about ME, I wanted to share some fun charity projects in May!
First up is a child-sized quilt pattern I designed inspired by the heart logo of my favorite blanket making charity, The Linus Connection.
Made of 5 1/2″ squares and half square triangles, this is an easy peasy quilt to chain piece. Make it for a wee one you love or for your favorite blanket charity.
This is a quick to watch tutorial on chain piecing from Shiny Happy World.
♥
Are you quilting along with Paper Piecing Vintage? Share a Signature Block for the PPV Signature Quilt! This special project is a for a commemorative signature quilt that I will keep after Paper Piecing Vintage has concluded. Find this block on page 21 of Paper Piecing Vintage. If you’re only making a few blocks, you can also find the Signature Block Pattern right here.
♥
Stop by Sewhooked on the second and fourth Mondays of every month through June for the Paper Piecing Vintage Quilt Along (PPV2017)!
I recently spent a whole lot of time cleaning up the hard drive on my computer. During this adventure in bytes, I found tons of unfinished patterns, sketches, doodles, and whatnot, all of which I’d never shared.
At some point it the distant past, I sat and doodled a slew of cupcakes with personality for hand embroidery. Why? Not a clue, but when I rediscovered these designs, it occurred to me that nothing could be more perfect for my birthday post!
I hope you enjoy these personality-filled cupcakes to hand embroider. Happy birthday to me!
Pro-Tip: I use Sulky Sticky Fabri-Solvy for all of my hand embroidery projects. Print designs on this water soluble fabric using your printer, stick it on your fabric and stitch! It rinses away cleanly when you’re done. Easy, peasy perfect transfer every time. This isn’t a paid endorsement, but the above is an affiliate link. I really do use this stuff all the time! 😉 Check your local quilt store or order online.
Are you quilting along with Paper Piecing Vintage? Share a Signature Block for the PPV Signature Quilt! This special project is a for a commemorative signature quilt that I will keep after Paper Piecing Vintage has concluded. Find this block on page 21 of Paper Piecing Vintage. If you’re only making a few blocks, you can also find the Signature Block Pattern right here.
♥
Stop by Sewhooked on the second and fourth Mondays of every month through June for the Paper Piecing Vintage Quilt Along (PPV2017)!
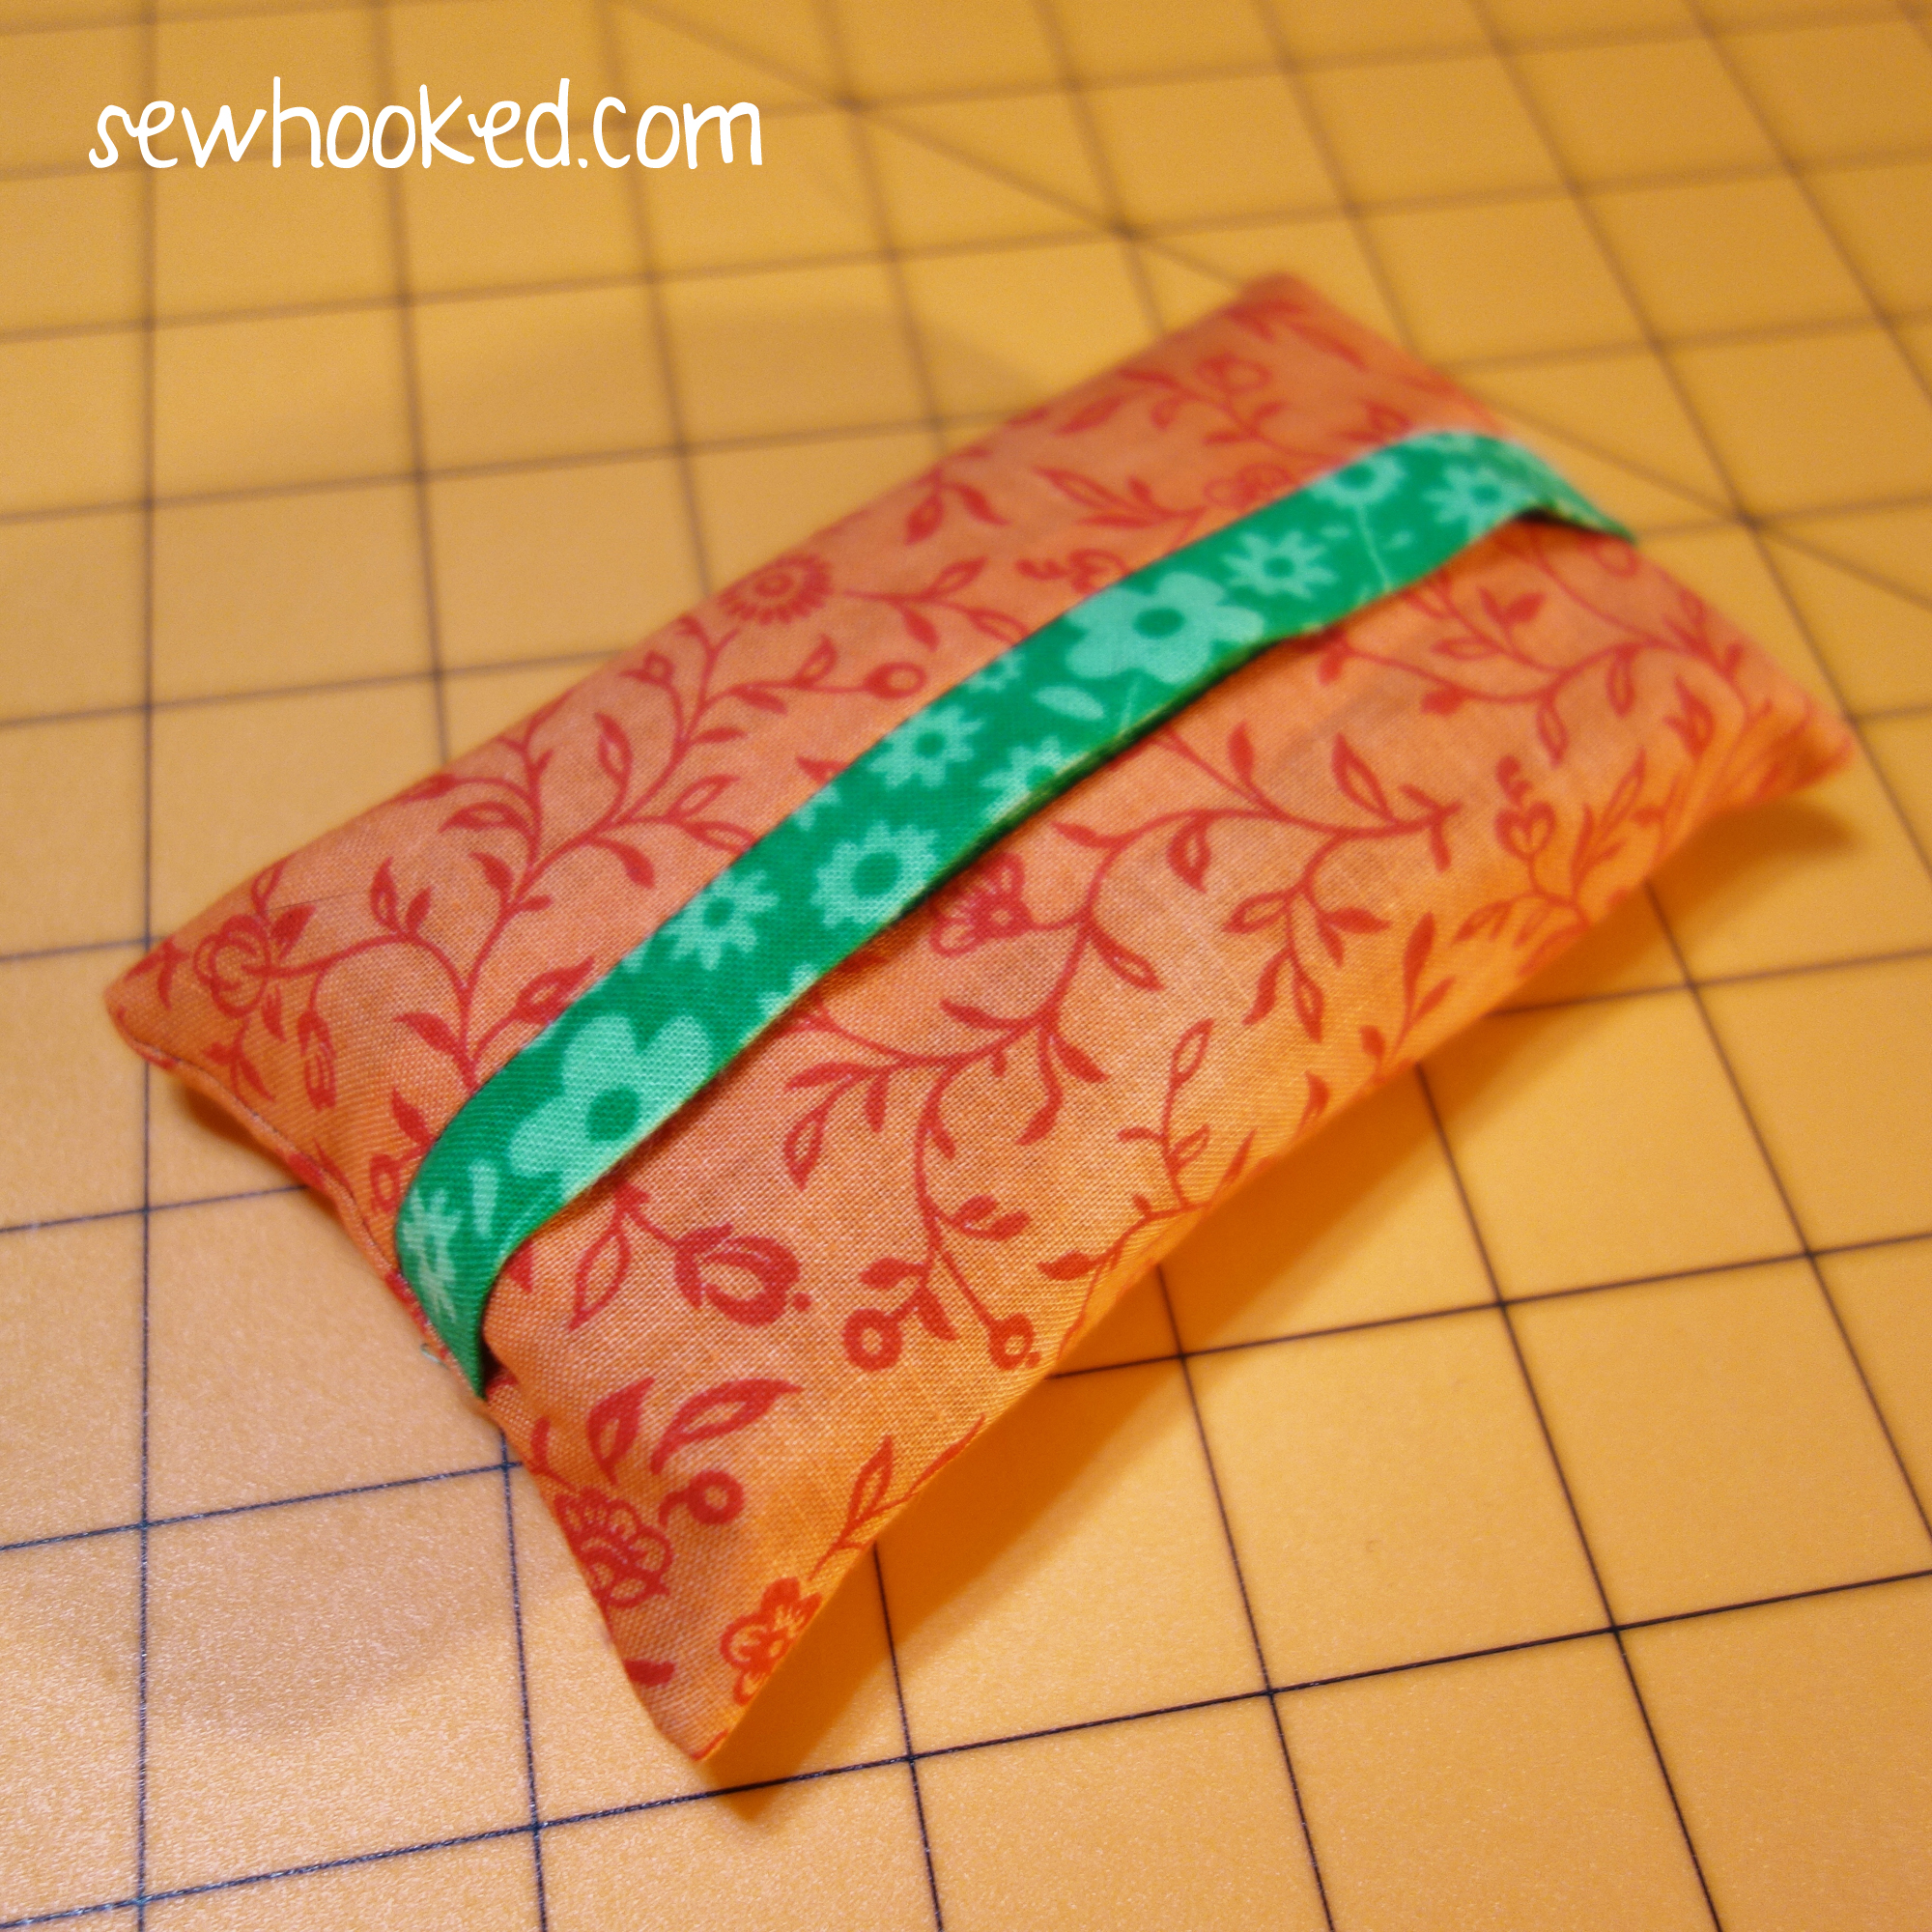
As promised several Talk to Me Tuesdays ago, we have a super simple tutorial to make a self-trimmed tissue packet cover.
Don’t want trim? I have instructions for that, too!
Please note that this tissue cover is sized to fit Kleenex Facial Tissues. Mine are a generic version but are the same size as the Kleenex. Use the brand works for you.
Adjust the dimensions if needed. You can also play with quilt blocks and directional fabric as desired.
These little packets make great gifts, swap additions, and are perfect for keeping your tissues clean and safe in your bag or purse.
First up! Self-Trimming Tissue Cover…
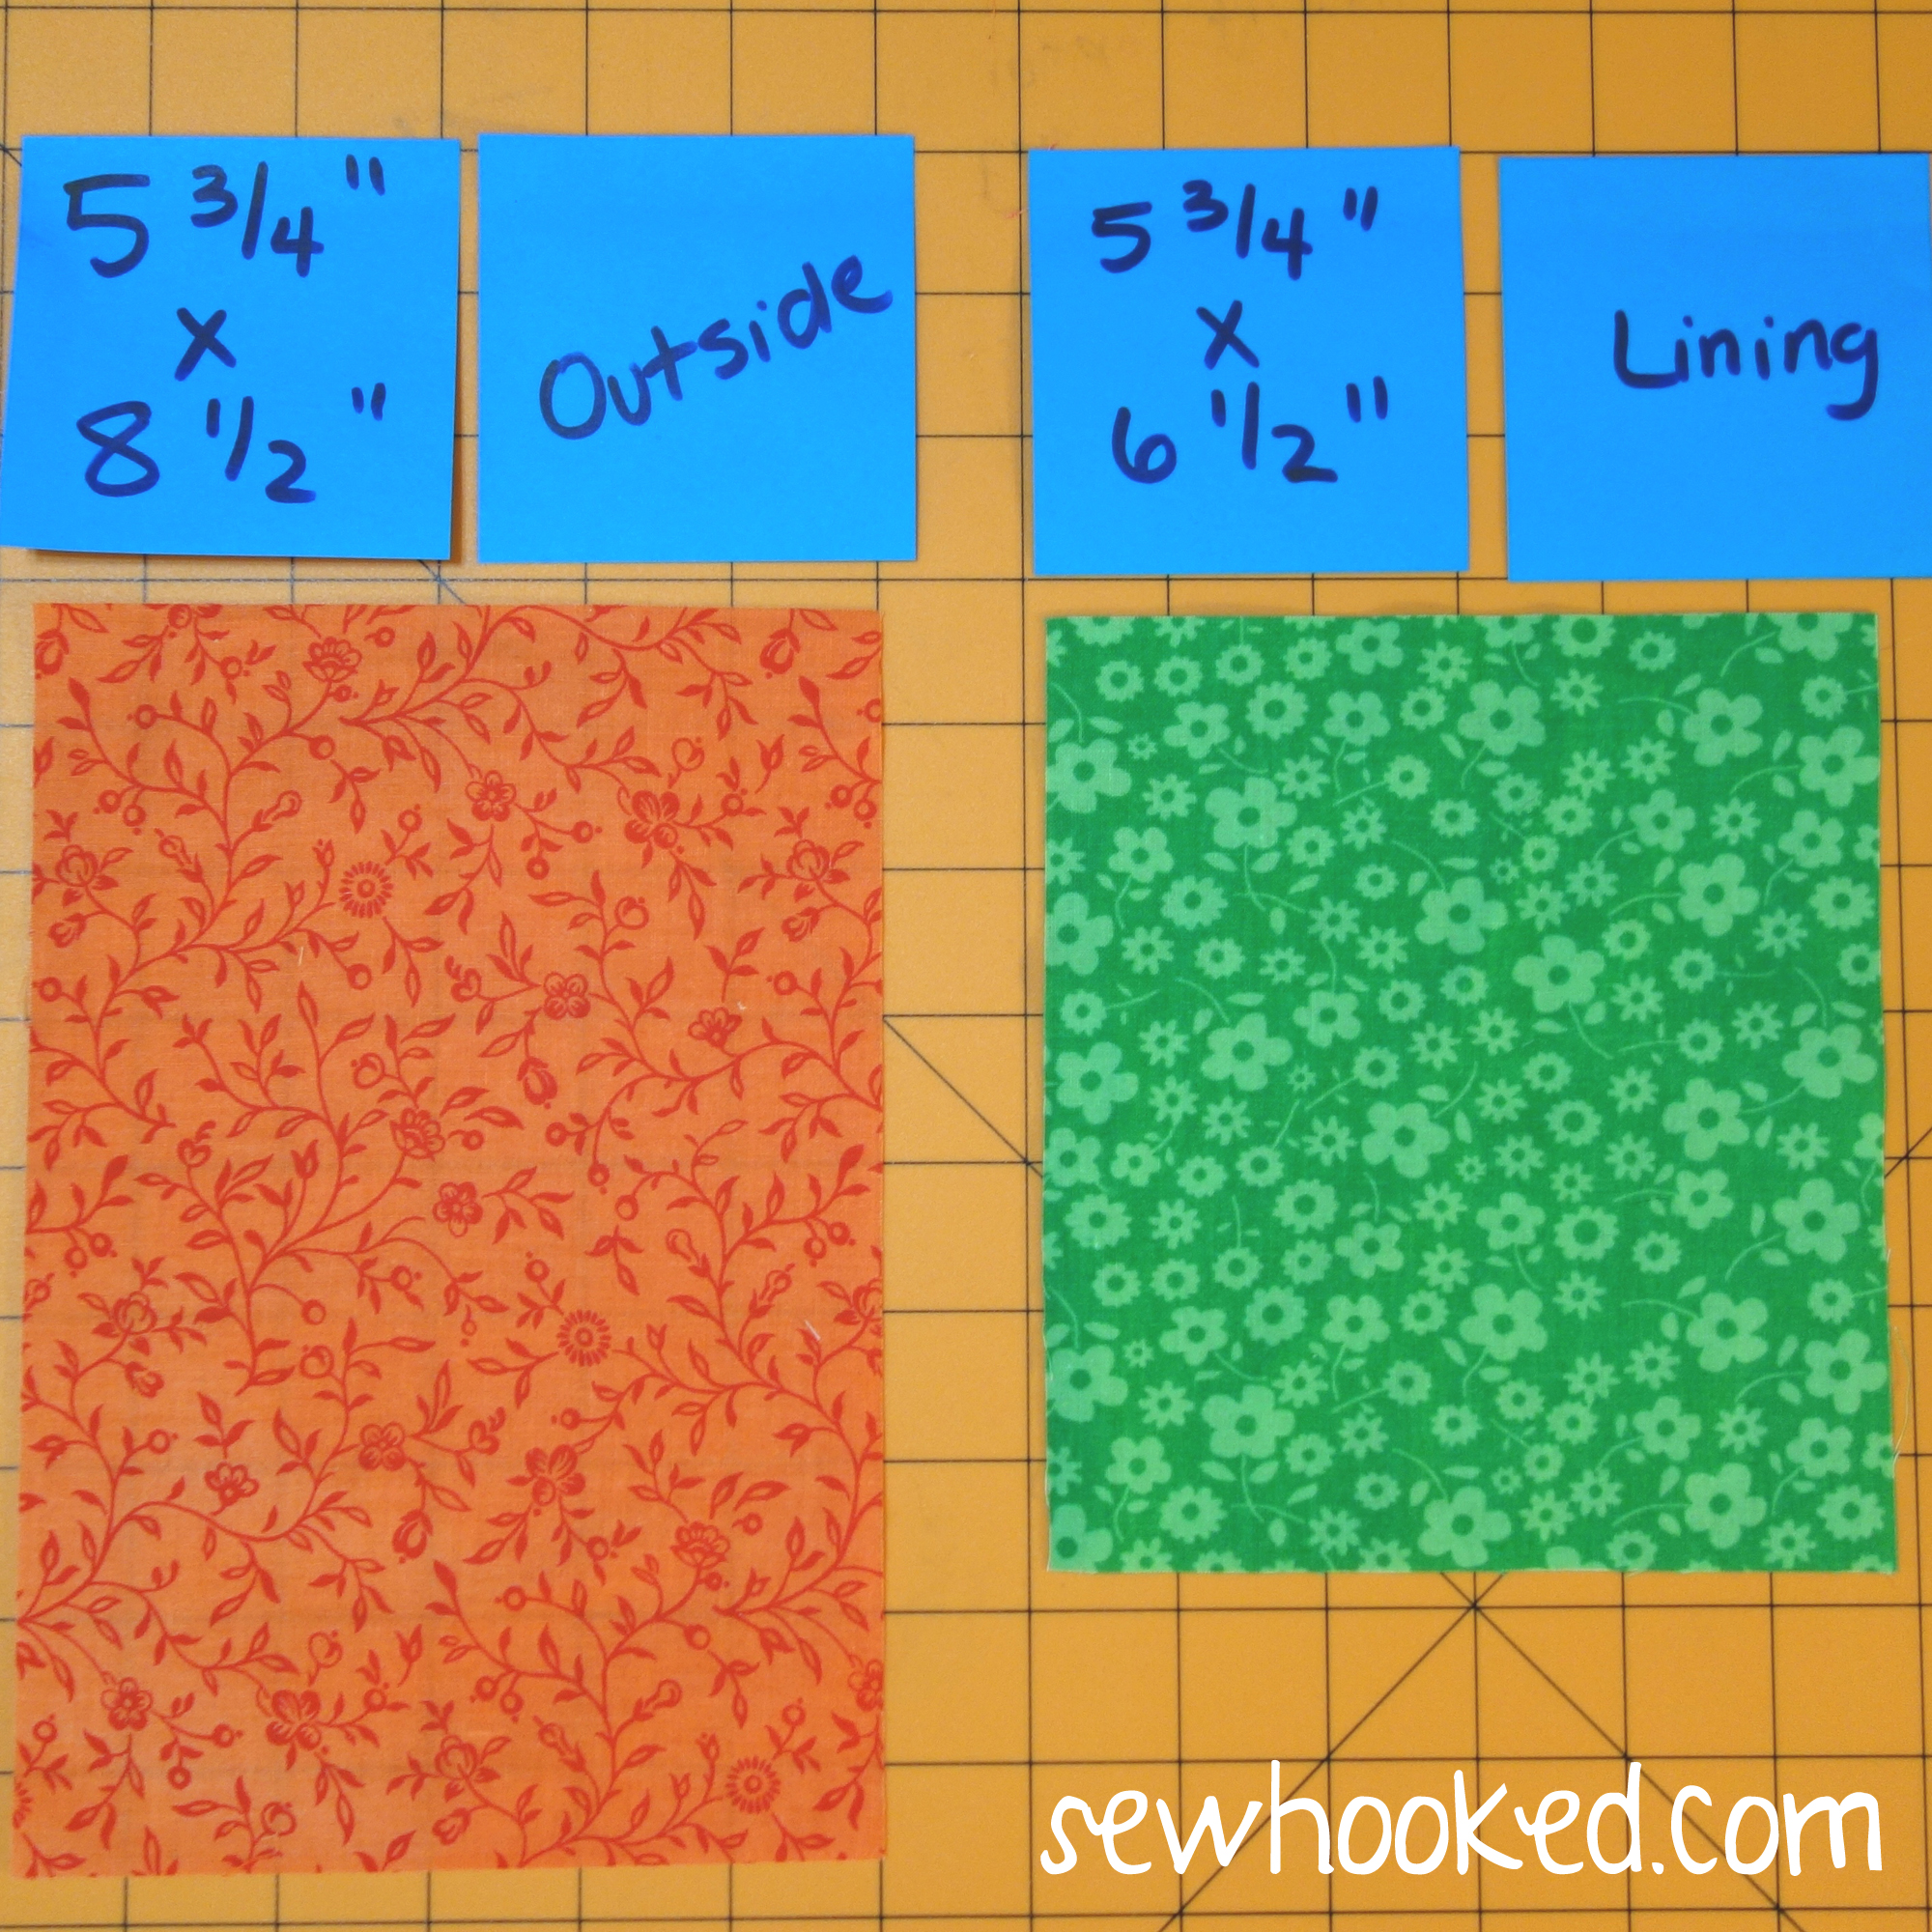
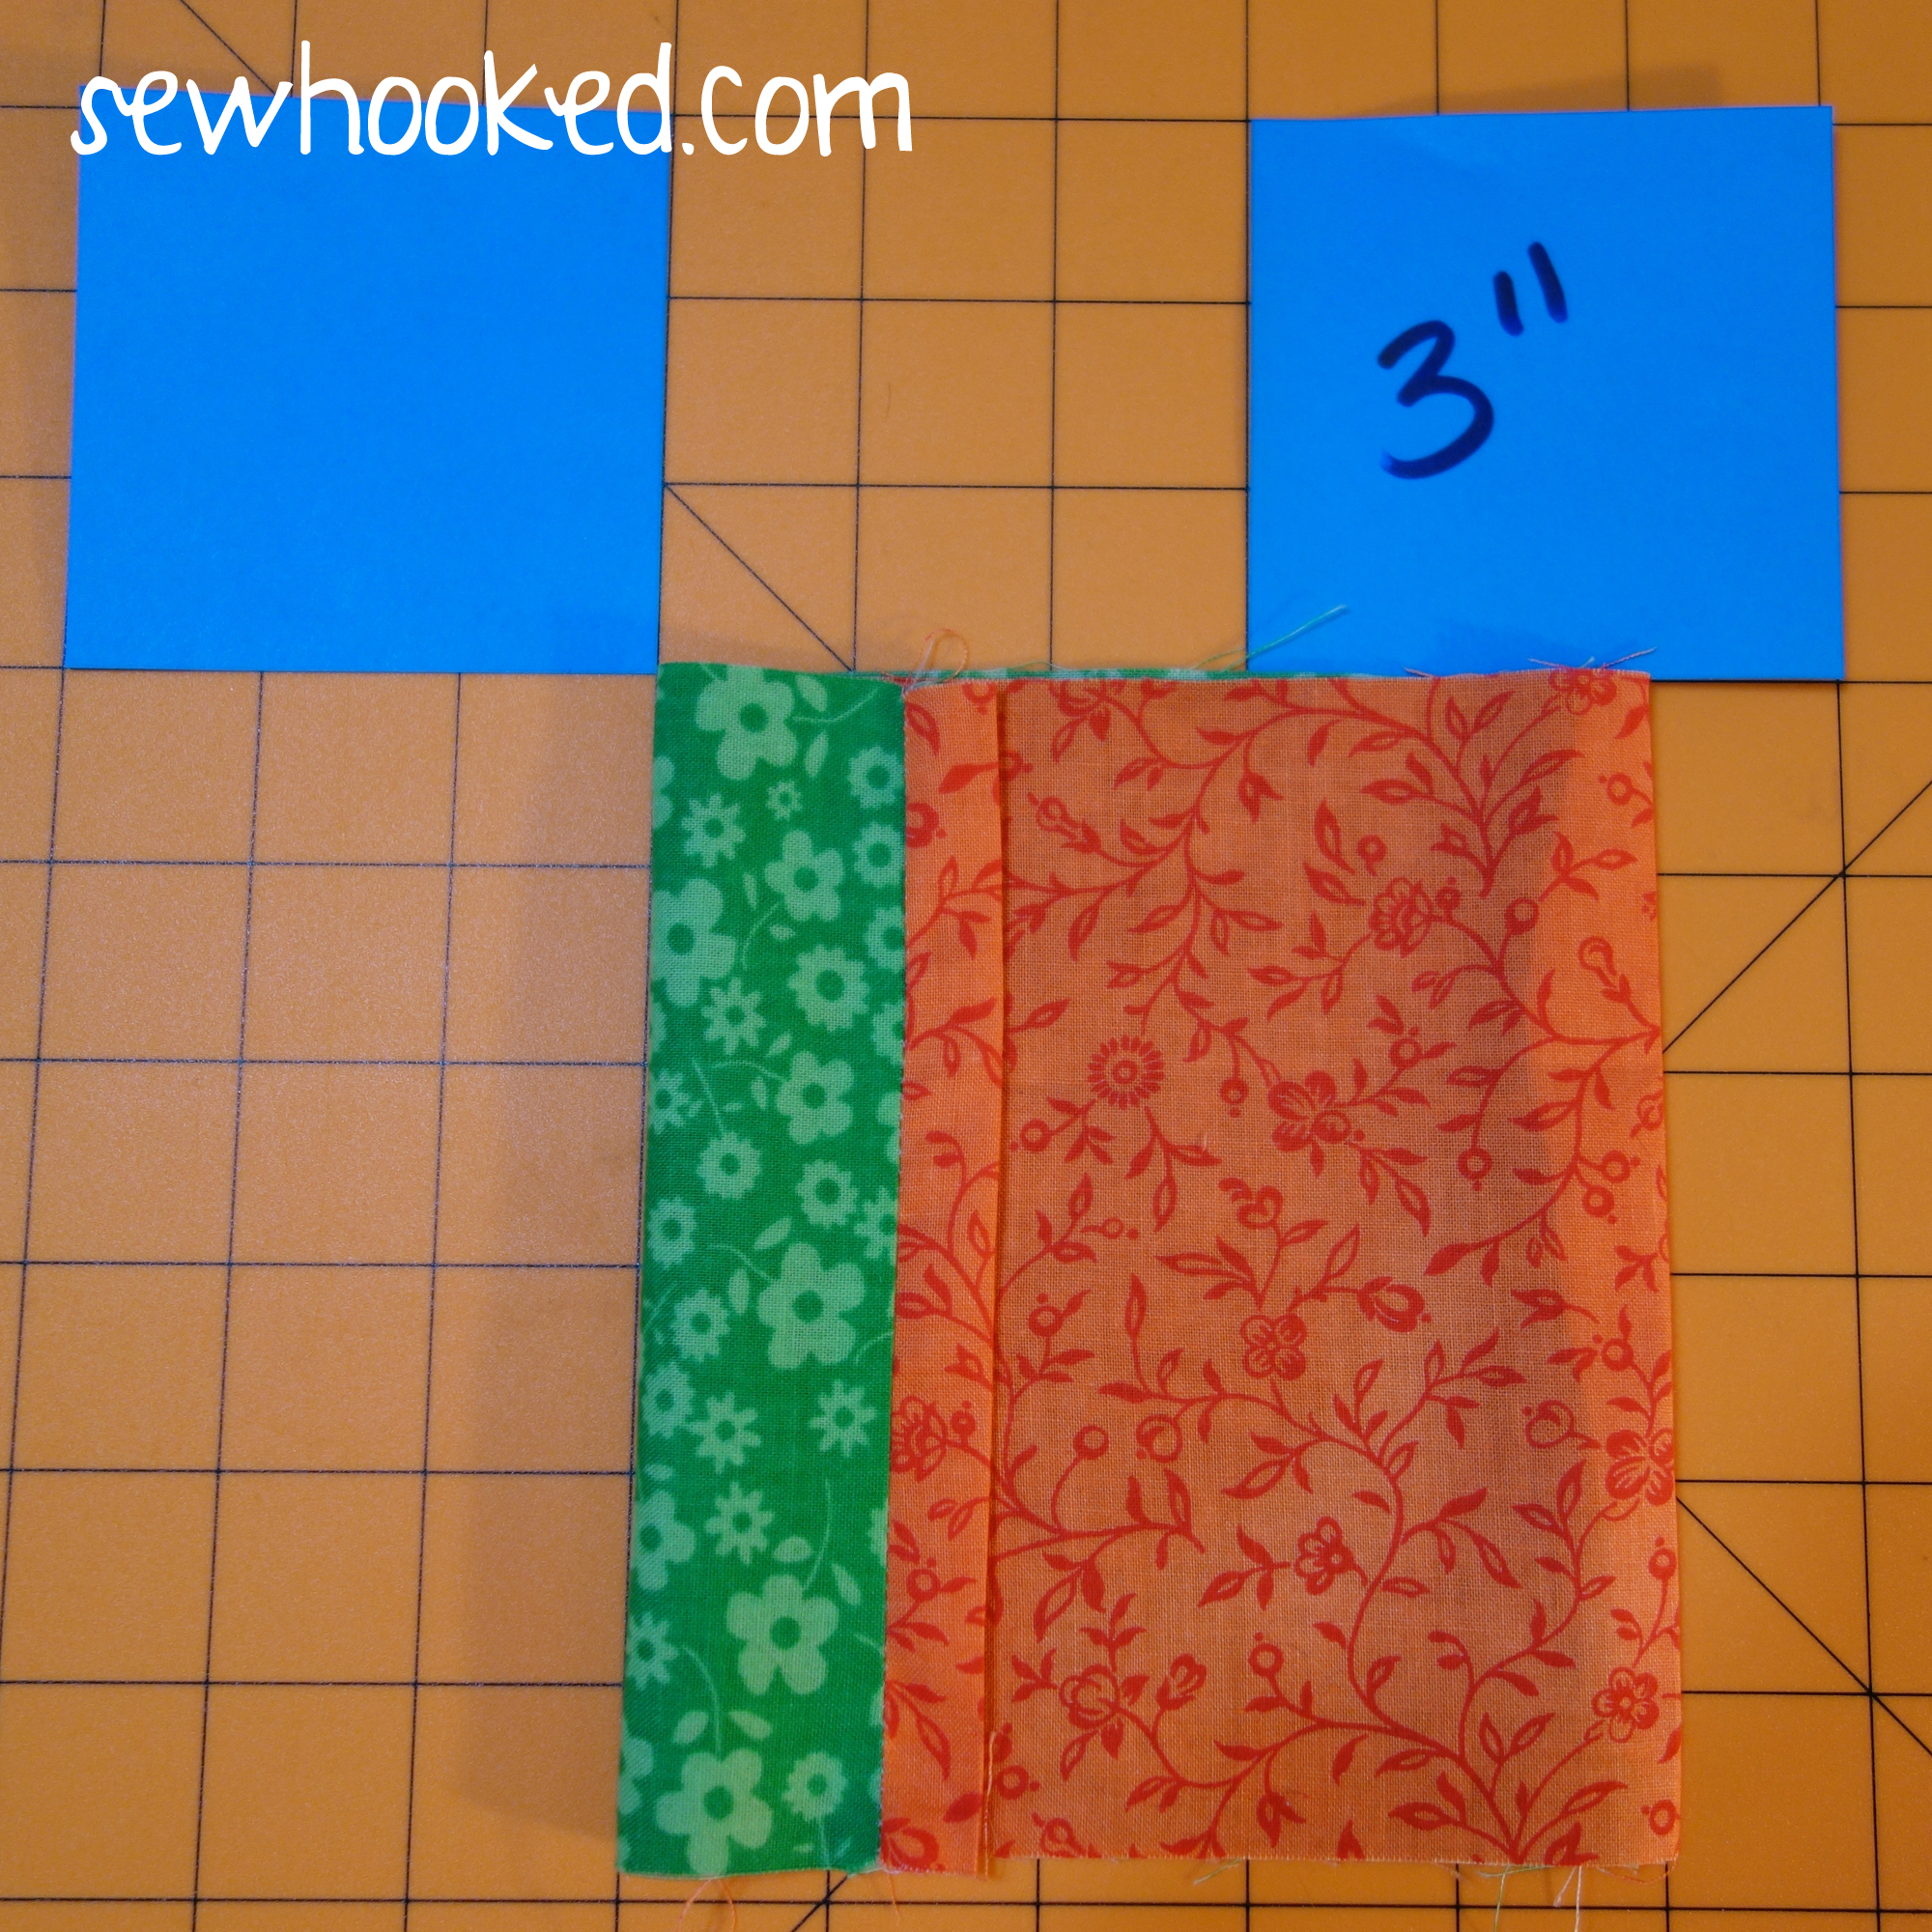
You’ll need fabric in two colors. I’m using contrasting colors to make the lining and outside very obvious. For both the trimmed and non-trimmed version, the outside will be orange.
For TRIMMED Cover:
Lining/Trim – 5 3/4″ x 8 1/2″
Outside – 5 3/4″ x 6 1/2″
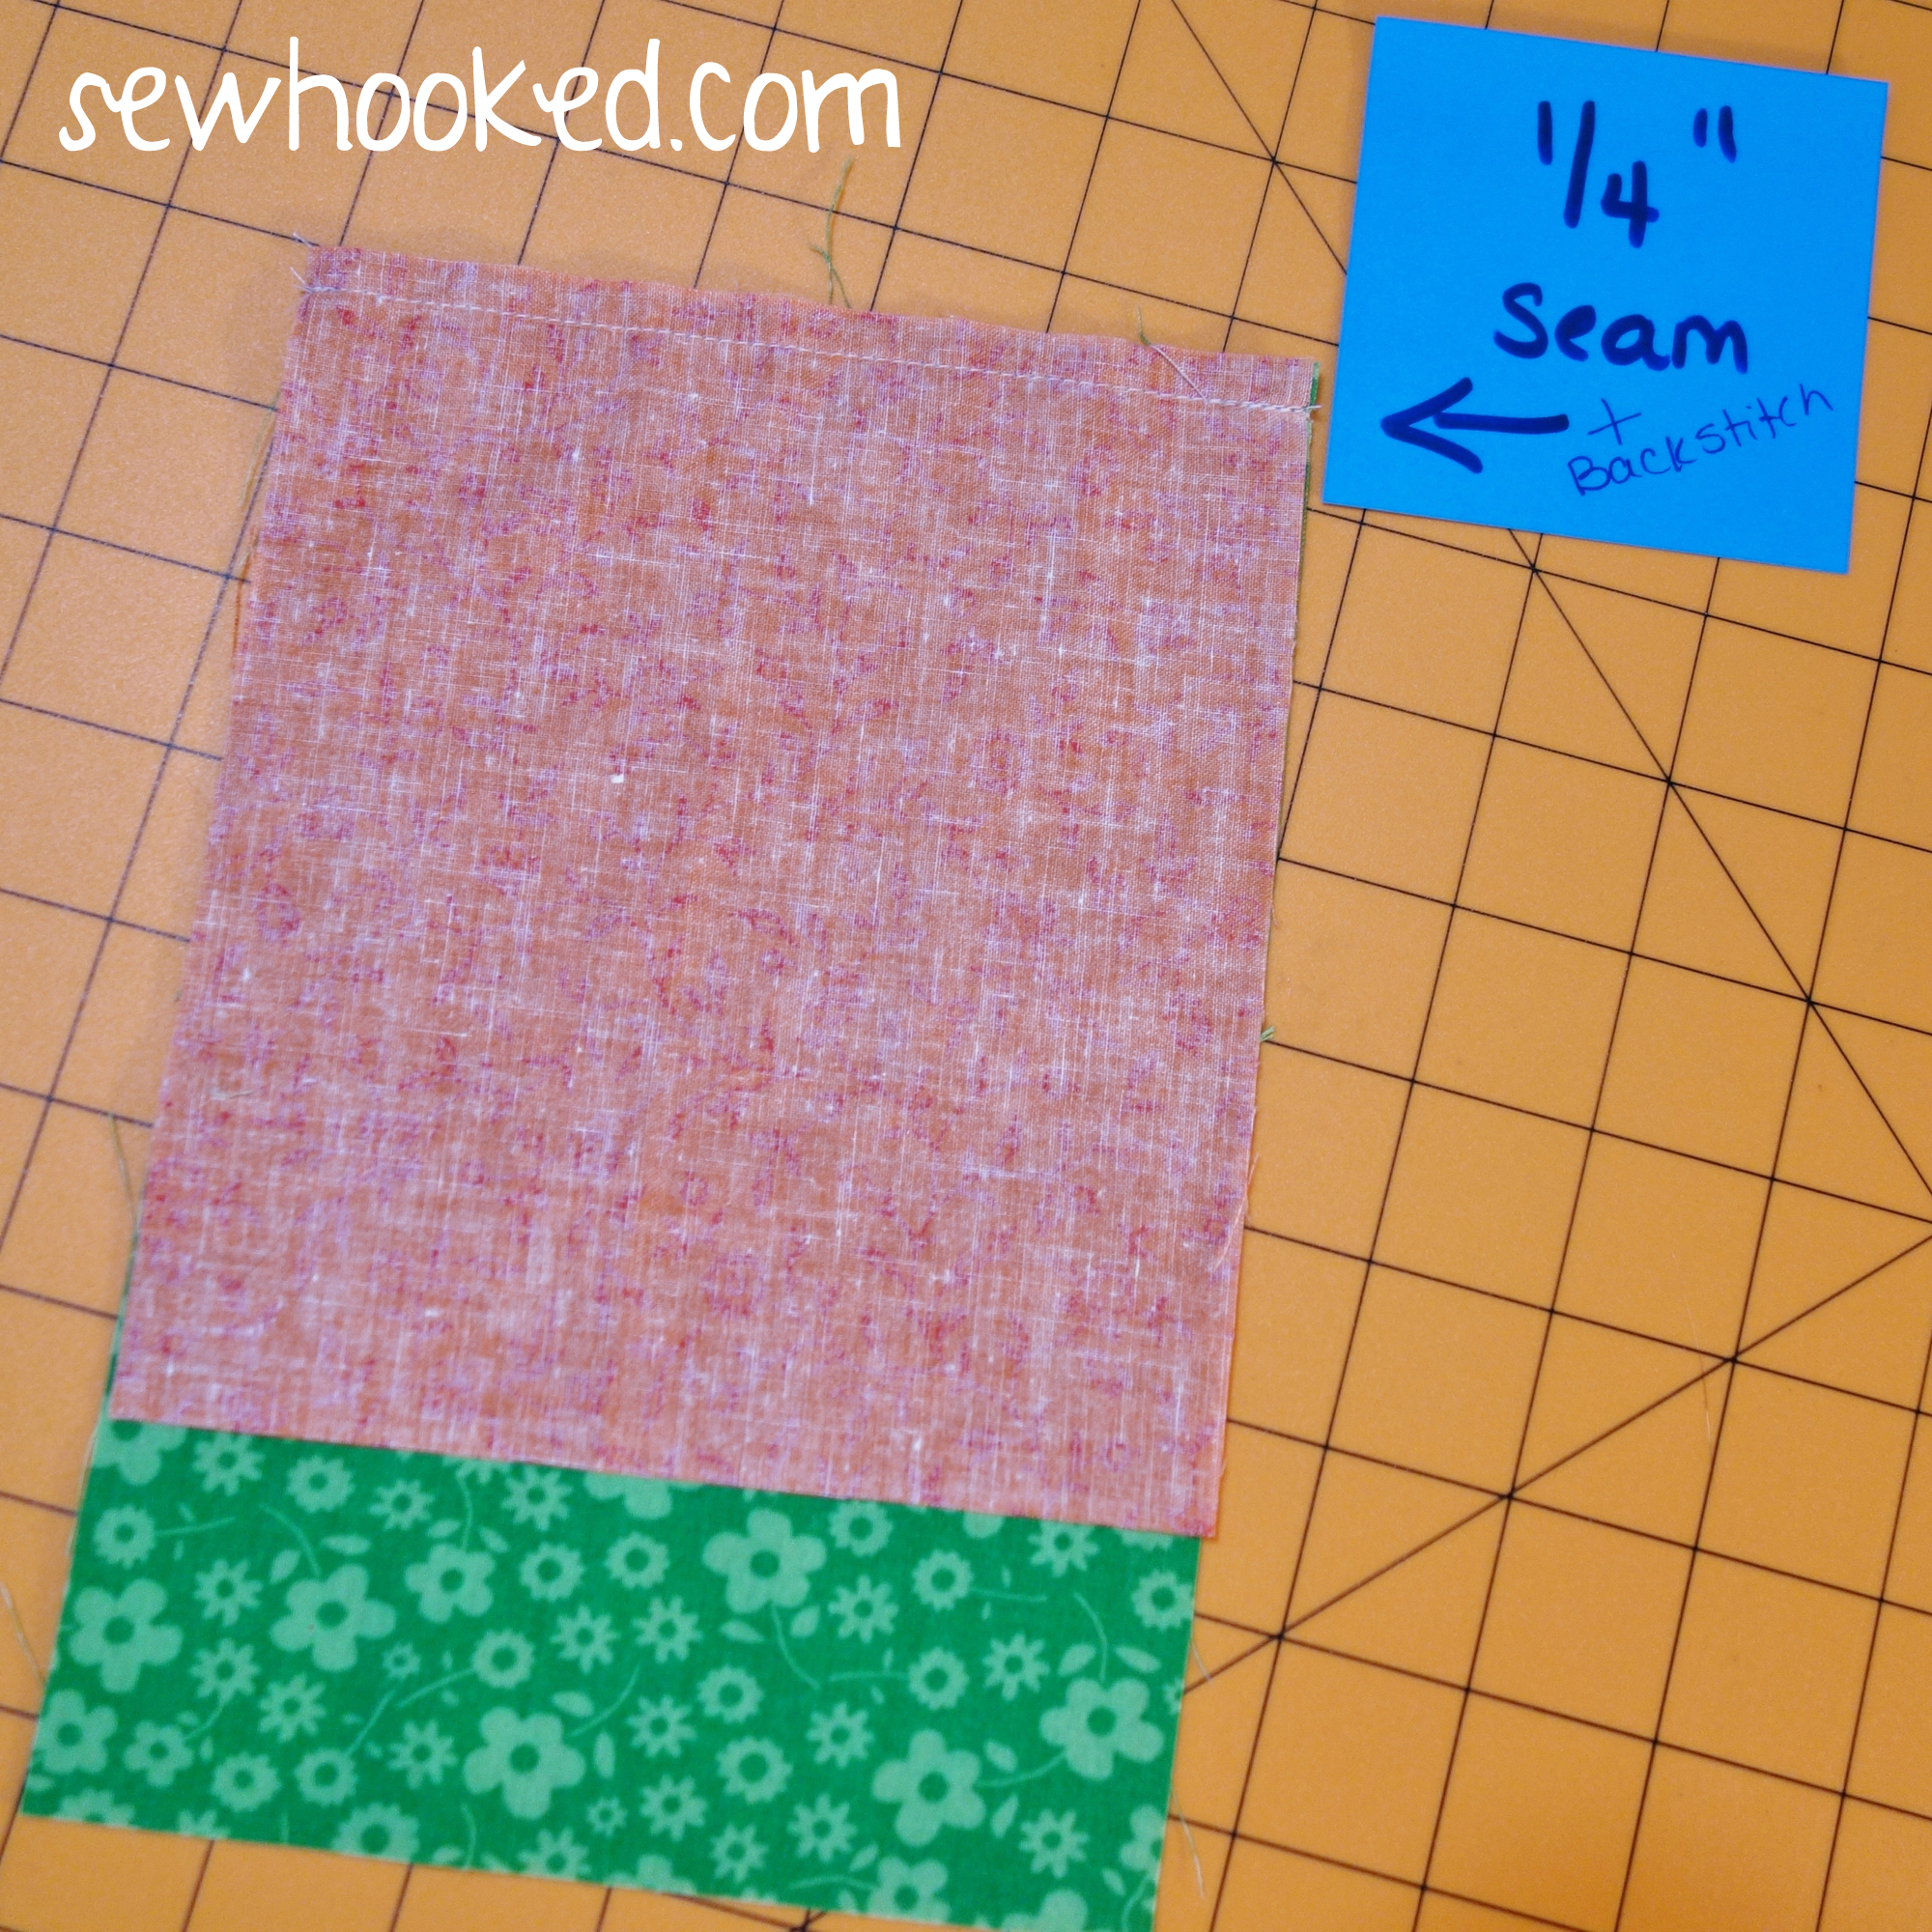
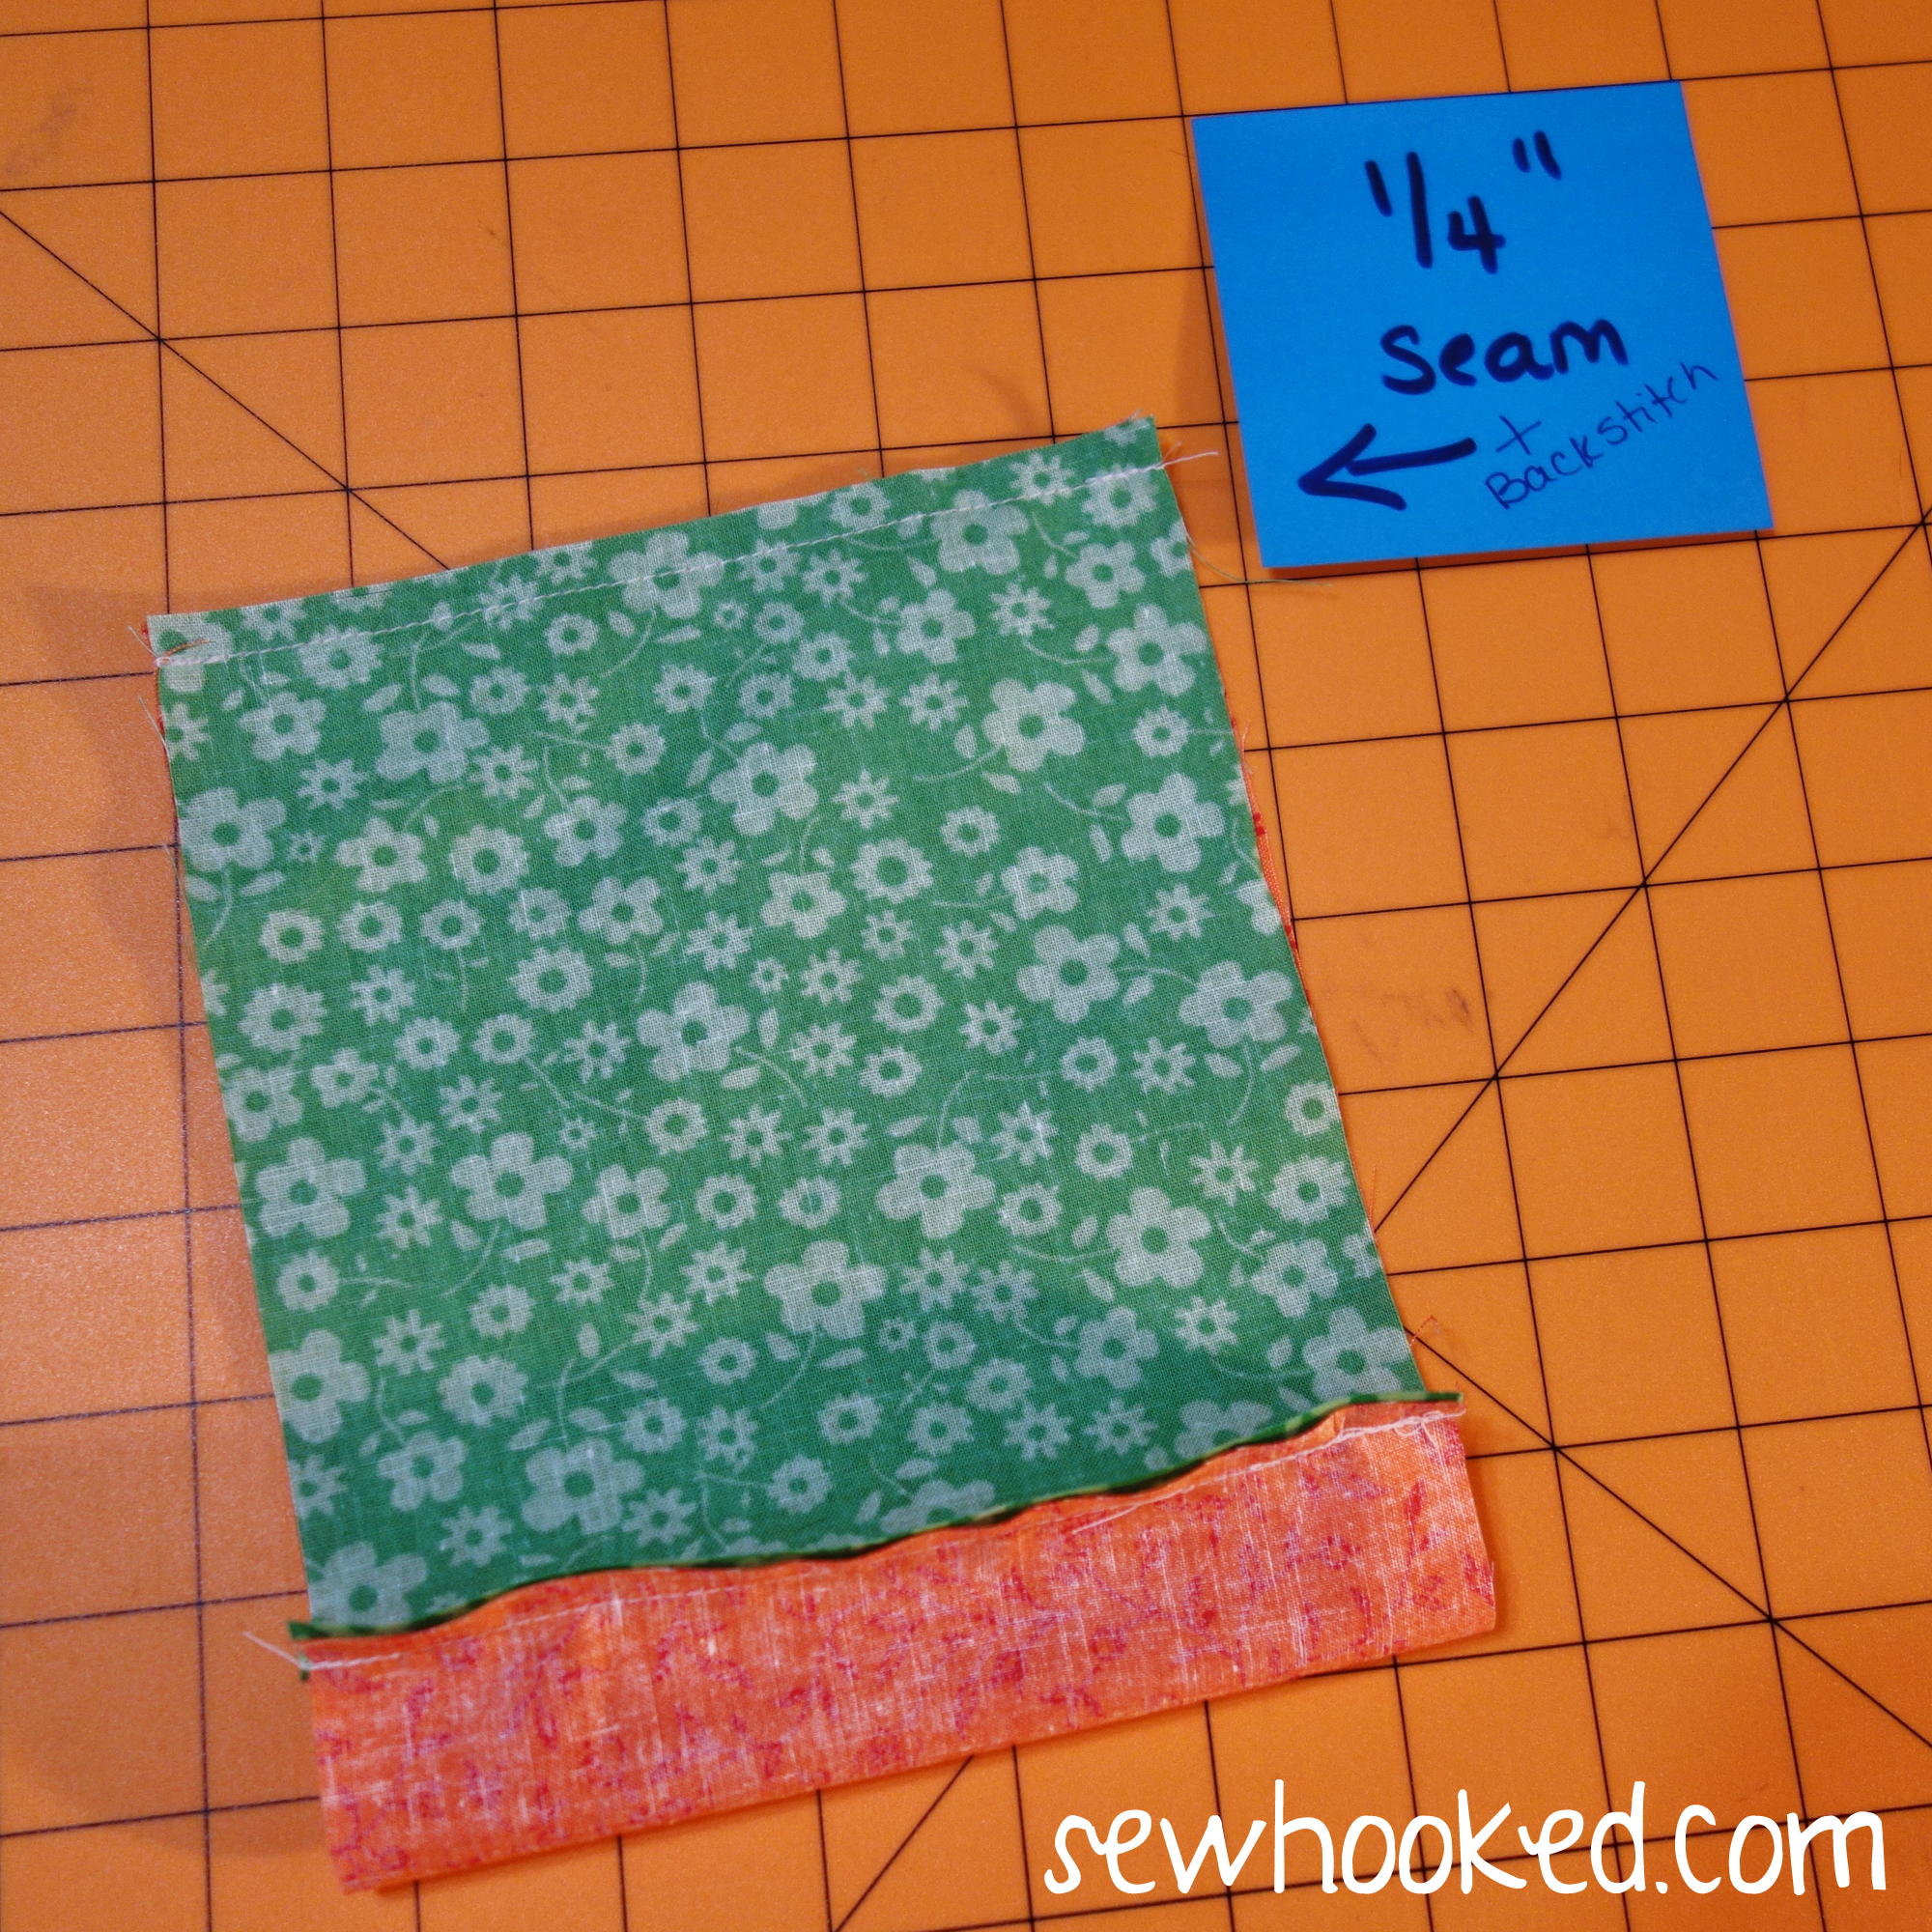
With right sides together, line one end of OUTSIDE to one end of LINING/TRIM on the side that measures 5 3/4″.
Stitch a 1/4″ seam with backstitching at both ends.
Line up opposite ends and repeat the 1/4″ seam with backstitching along the other 5 3/4″ side.
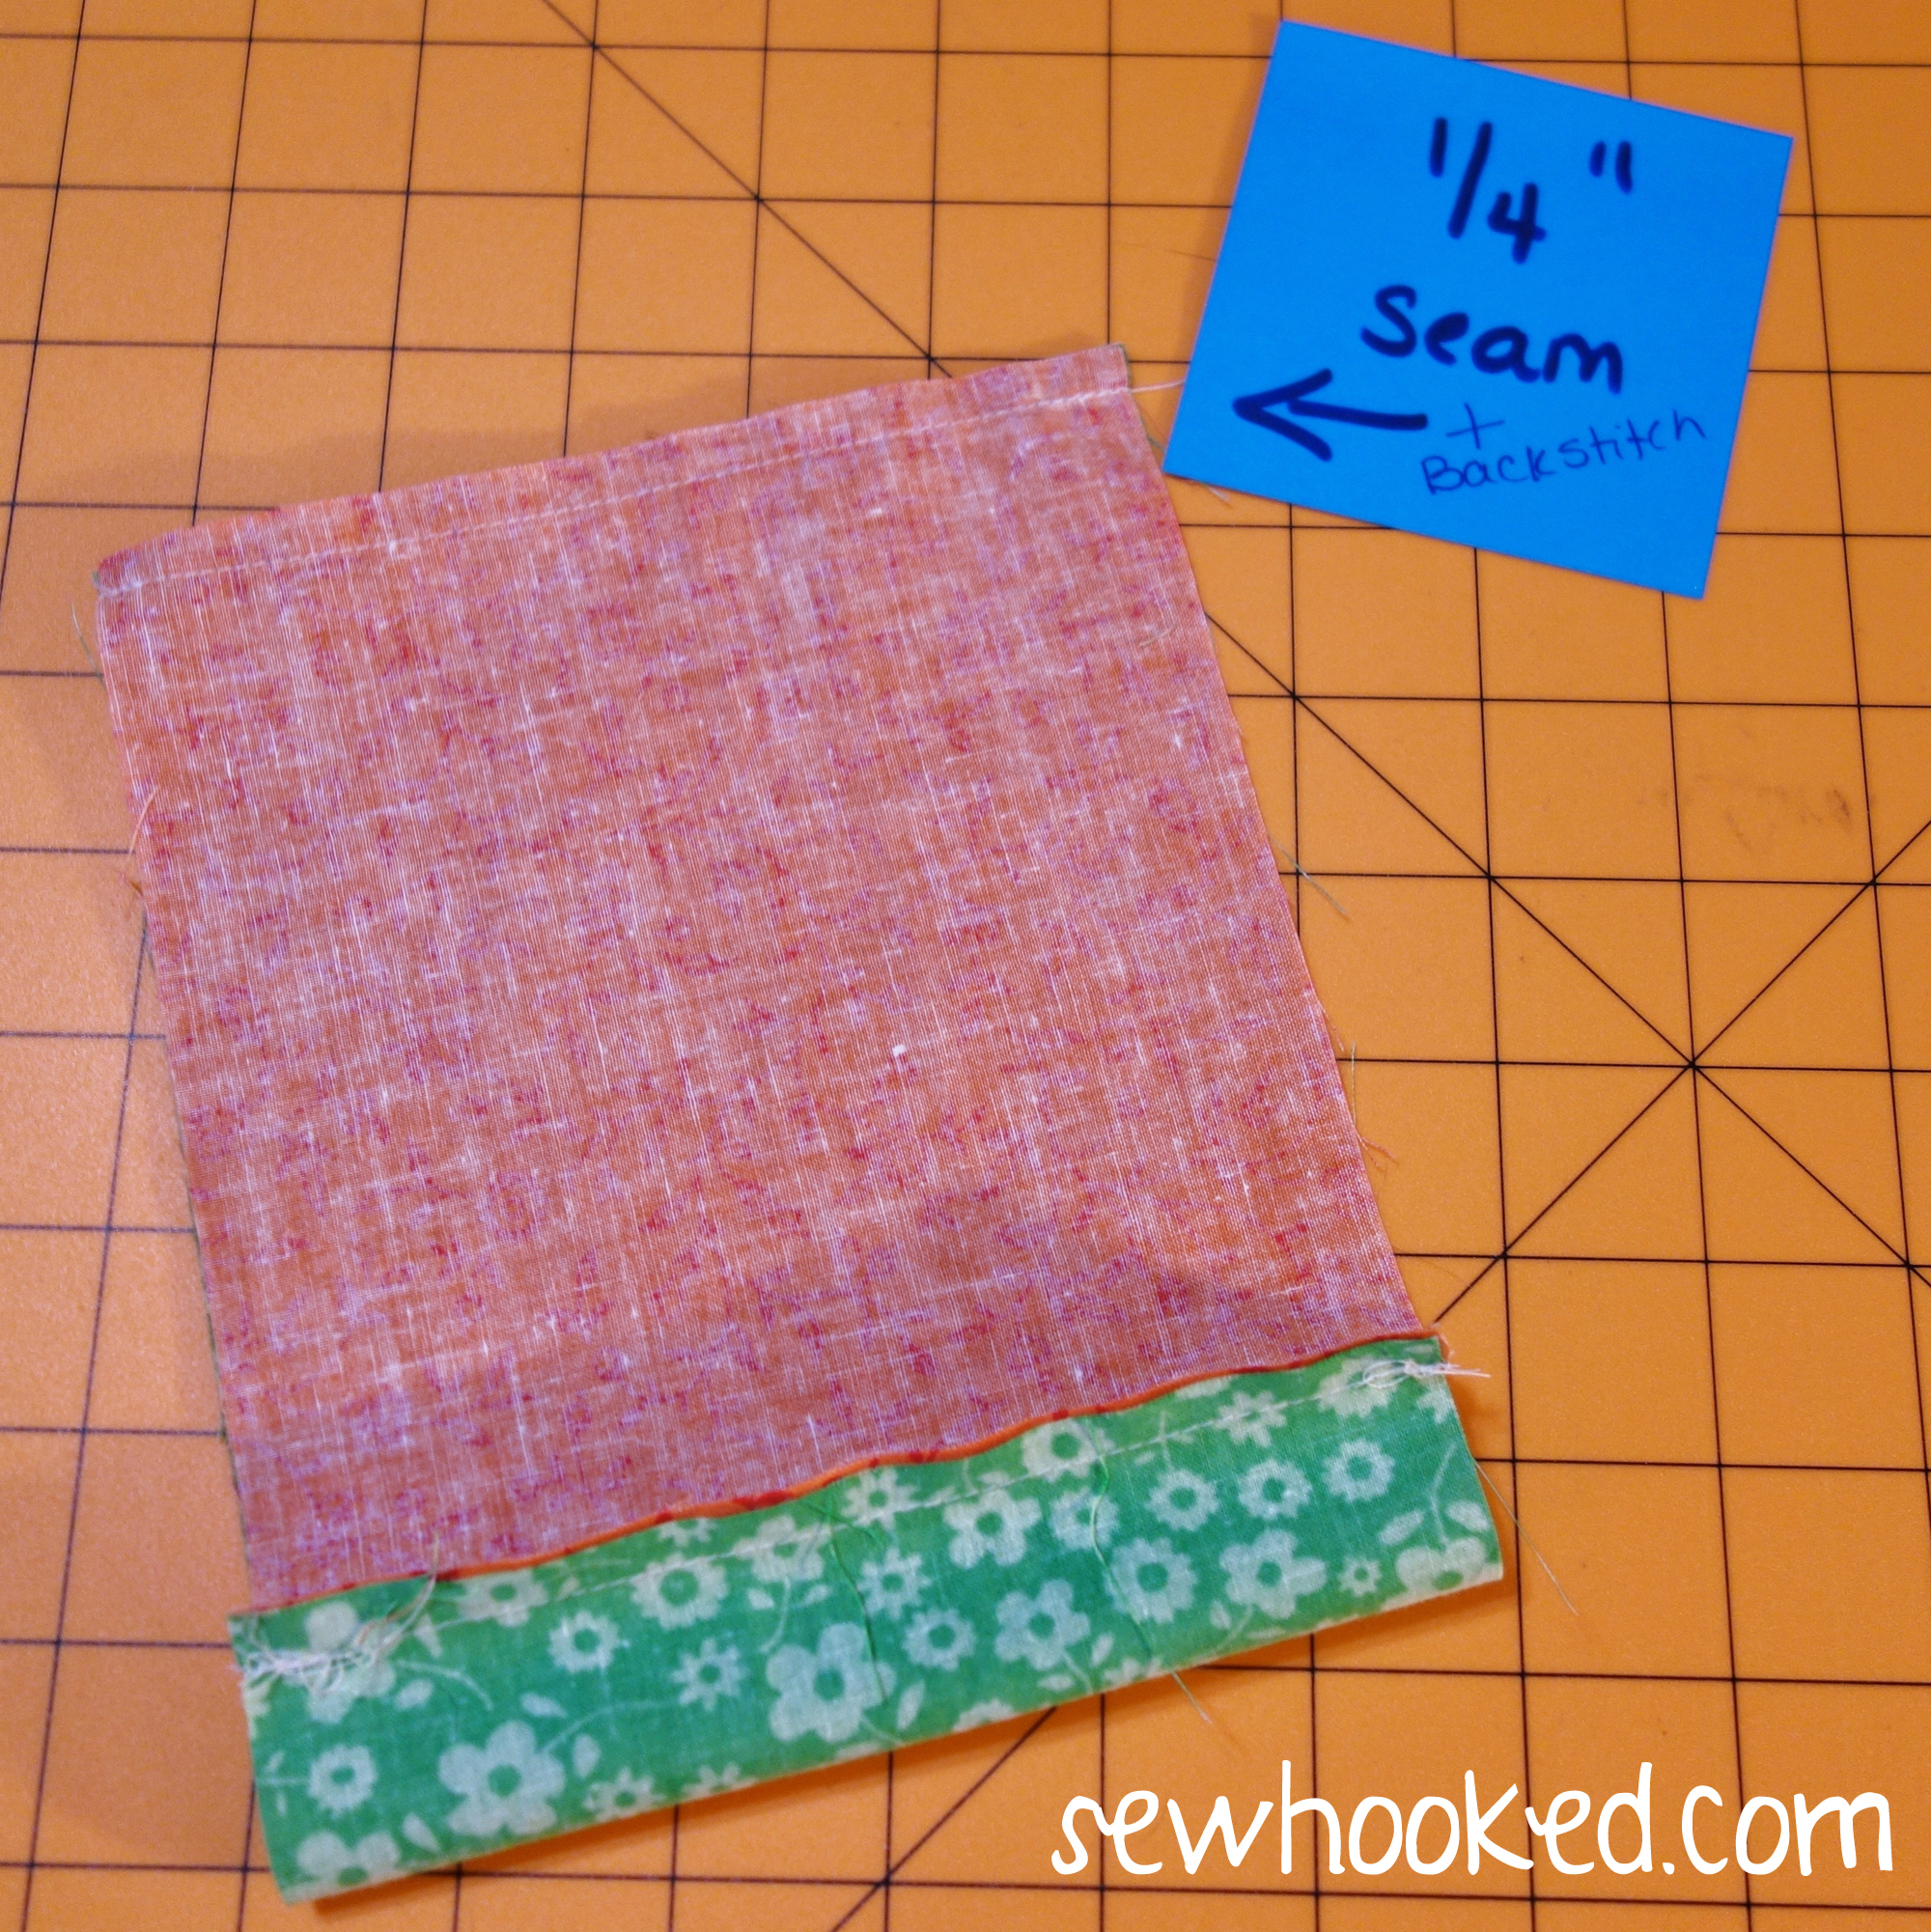
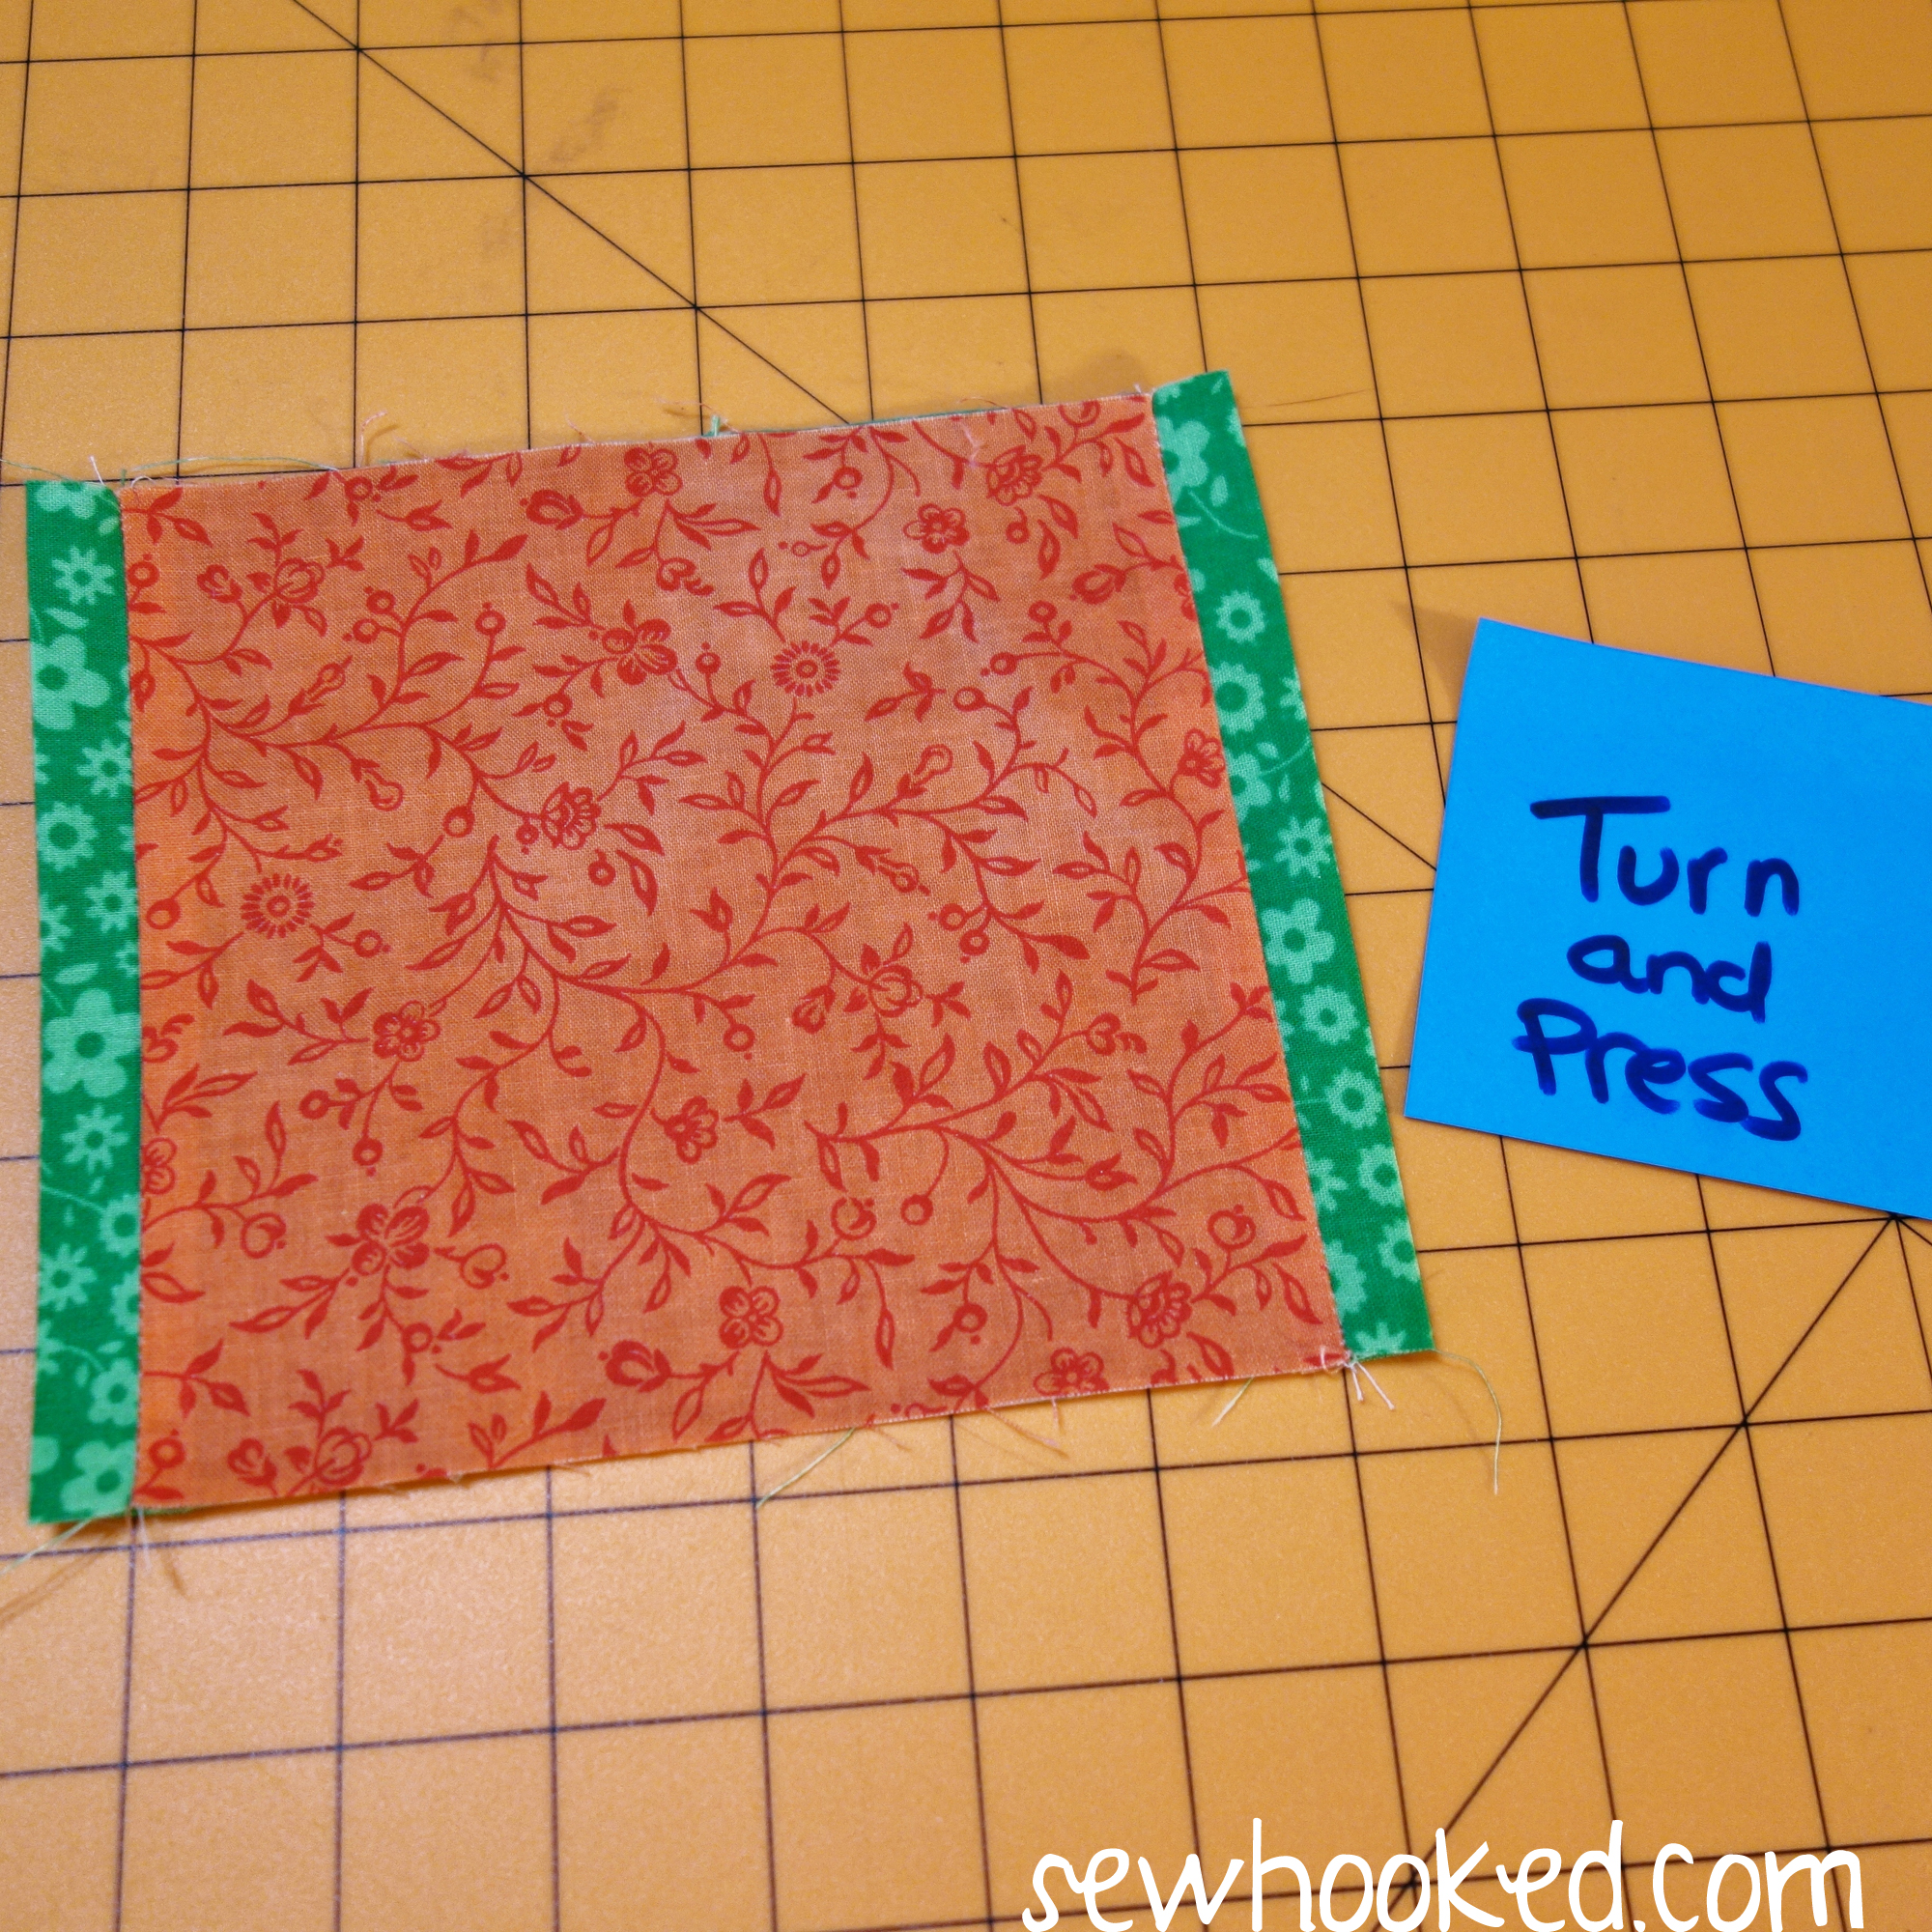
Turn so that wrong sides of the fabric are together. Adjust so that each end of TRIM is approximately the same size.
Press.
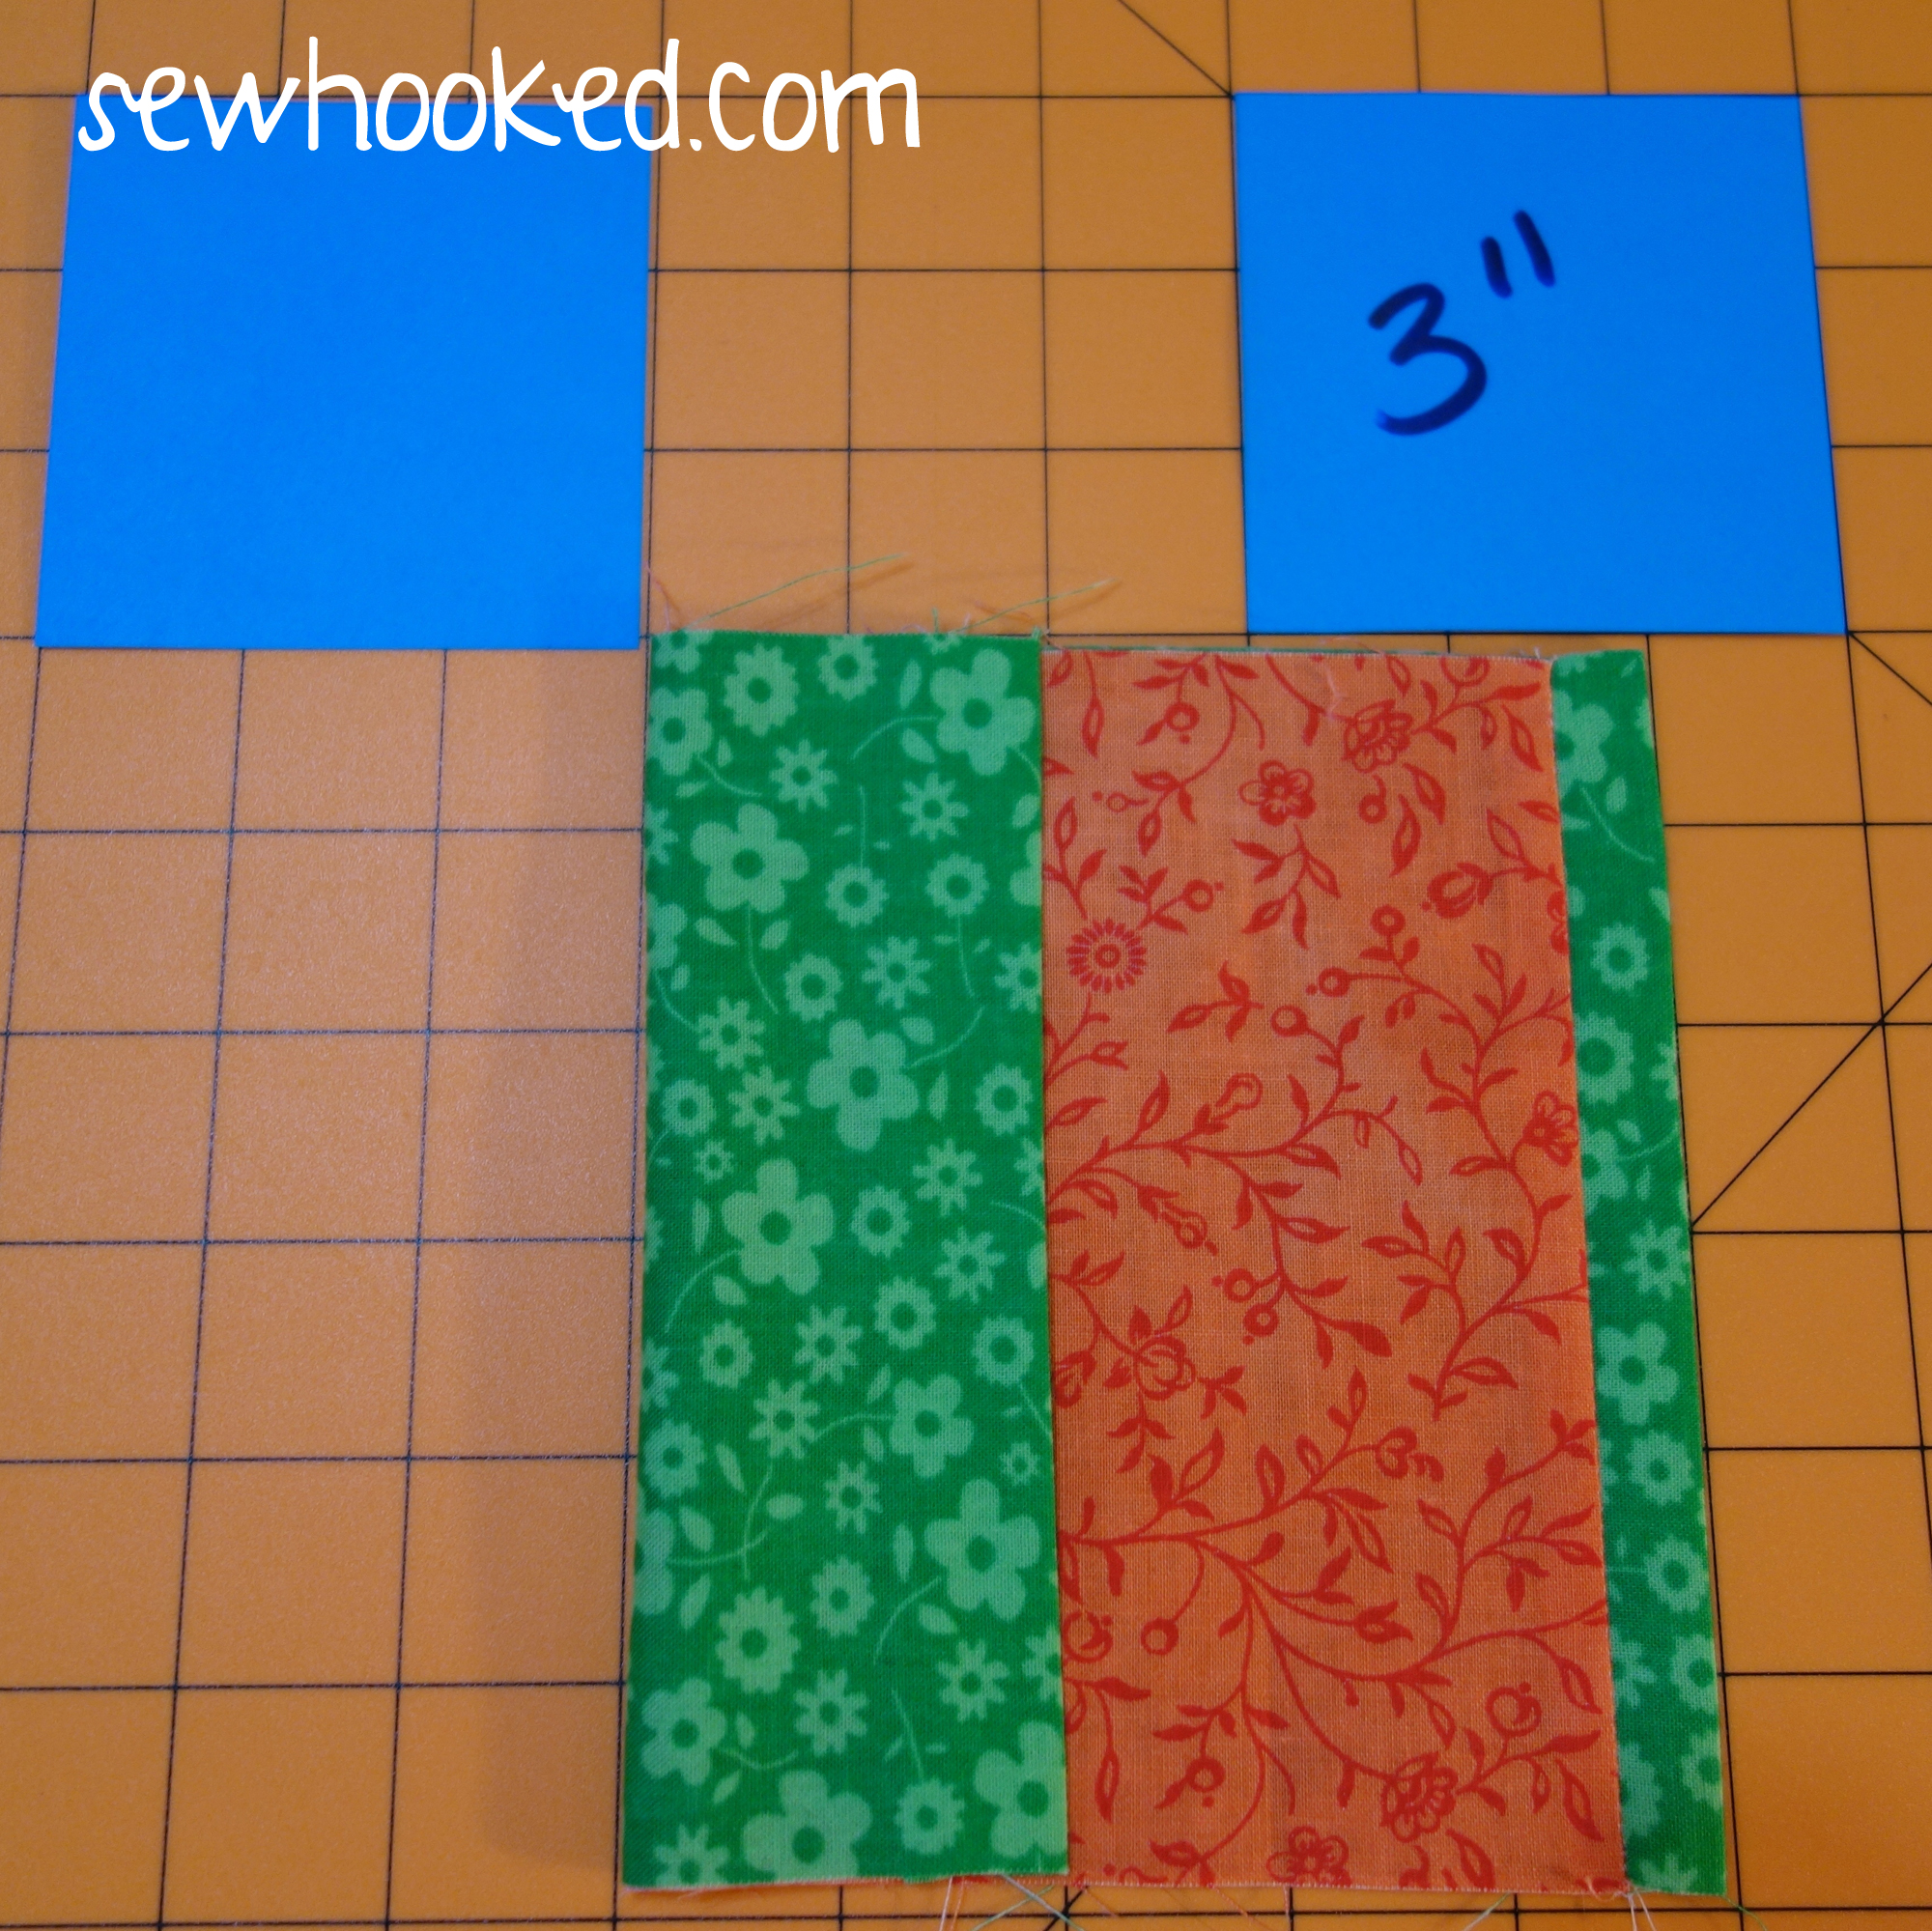
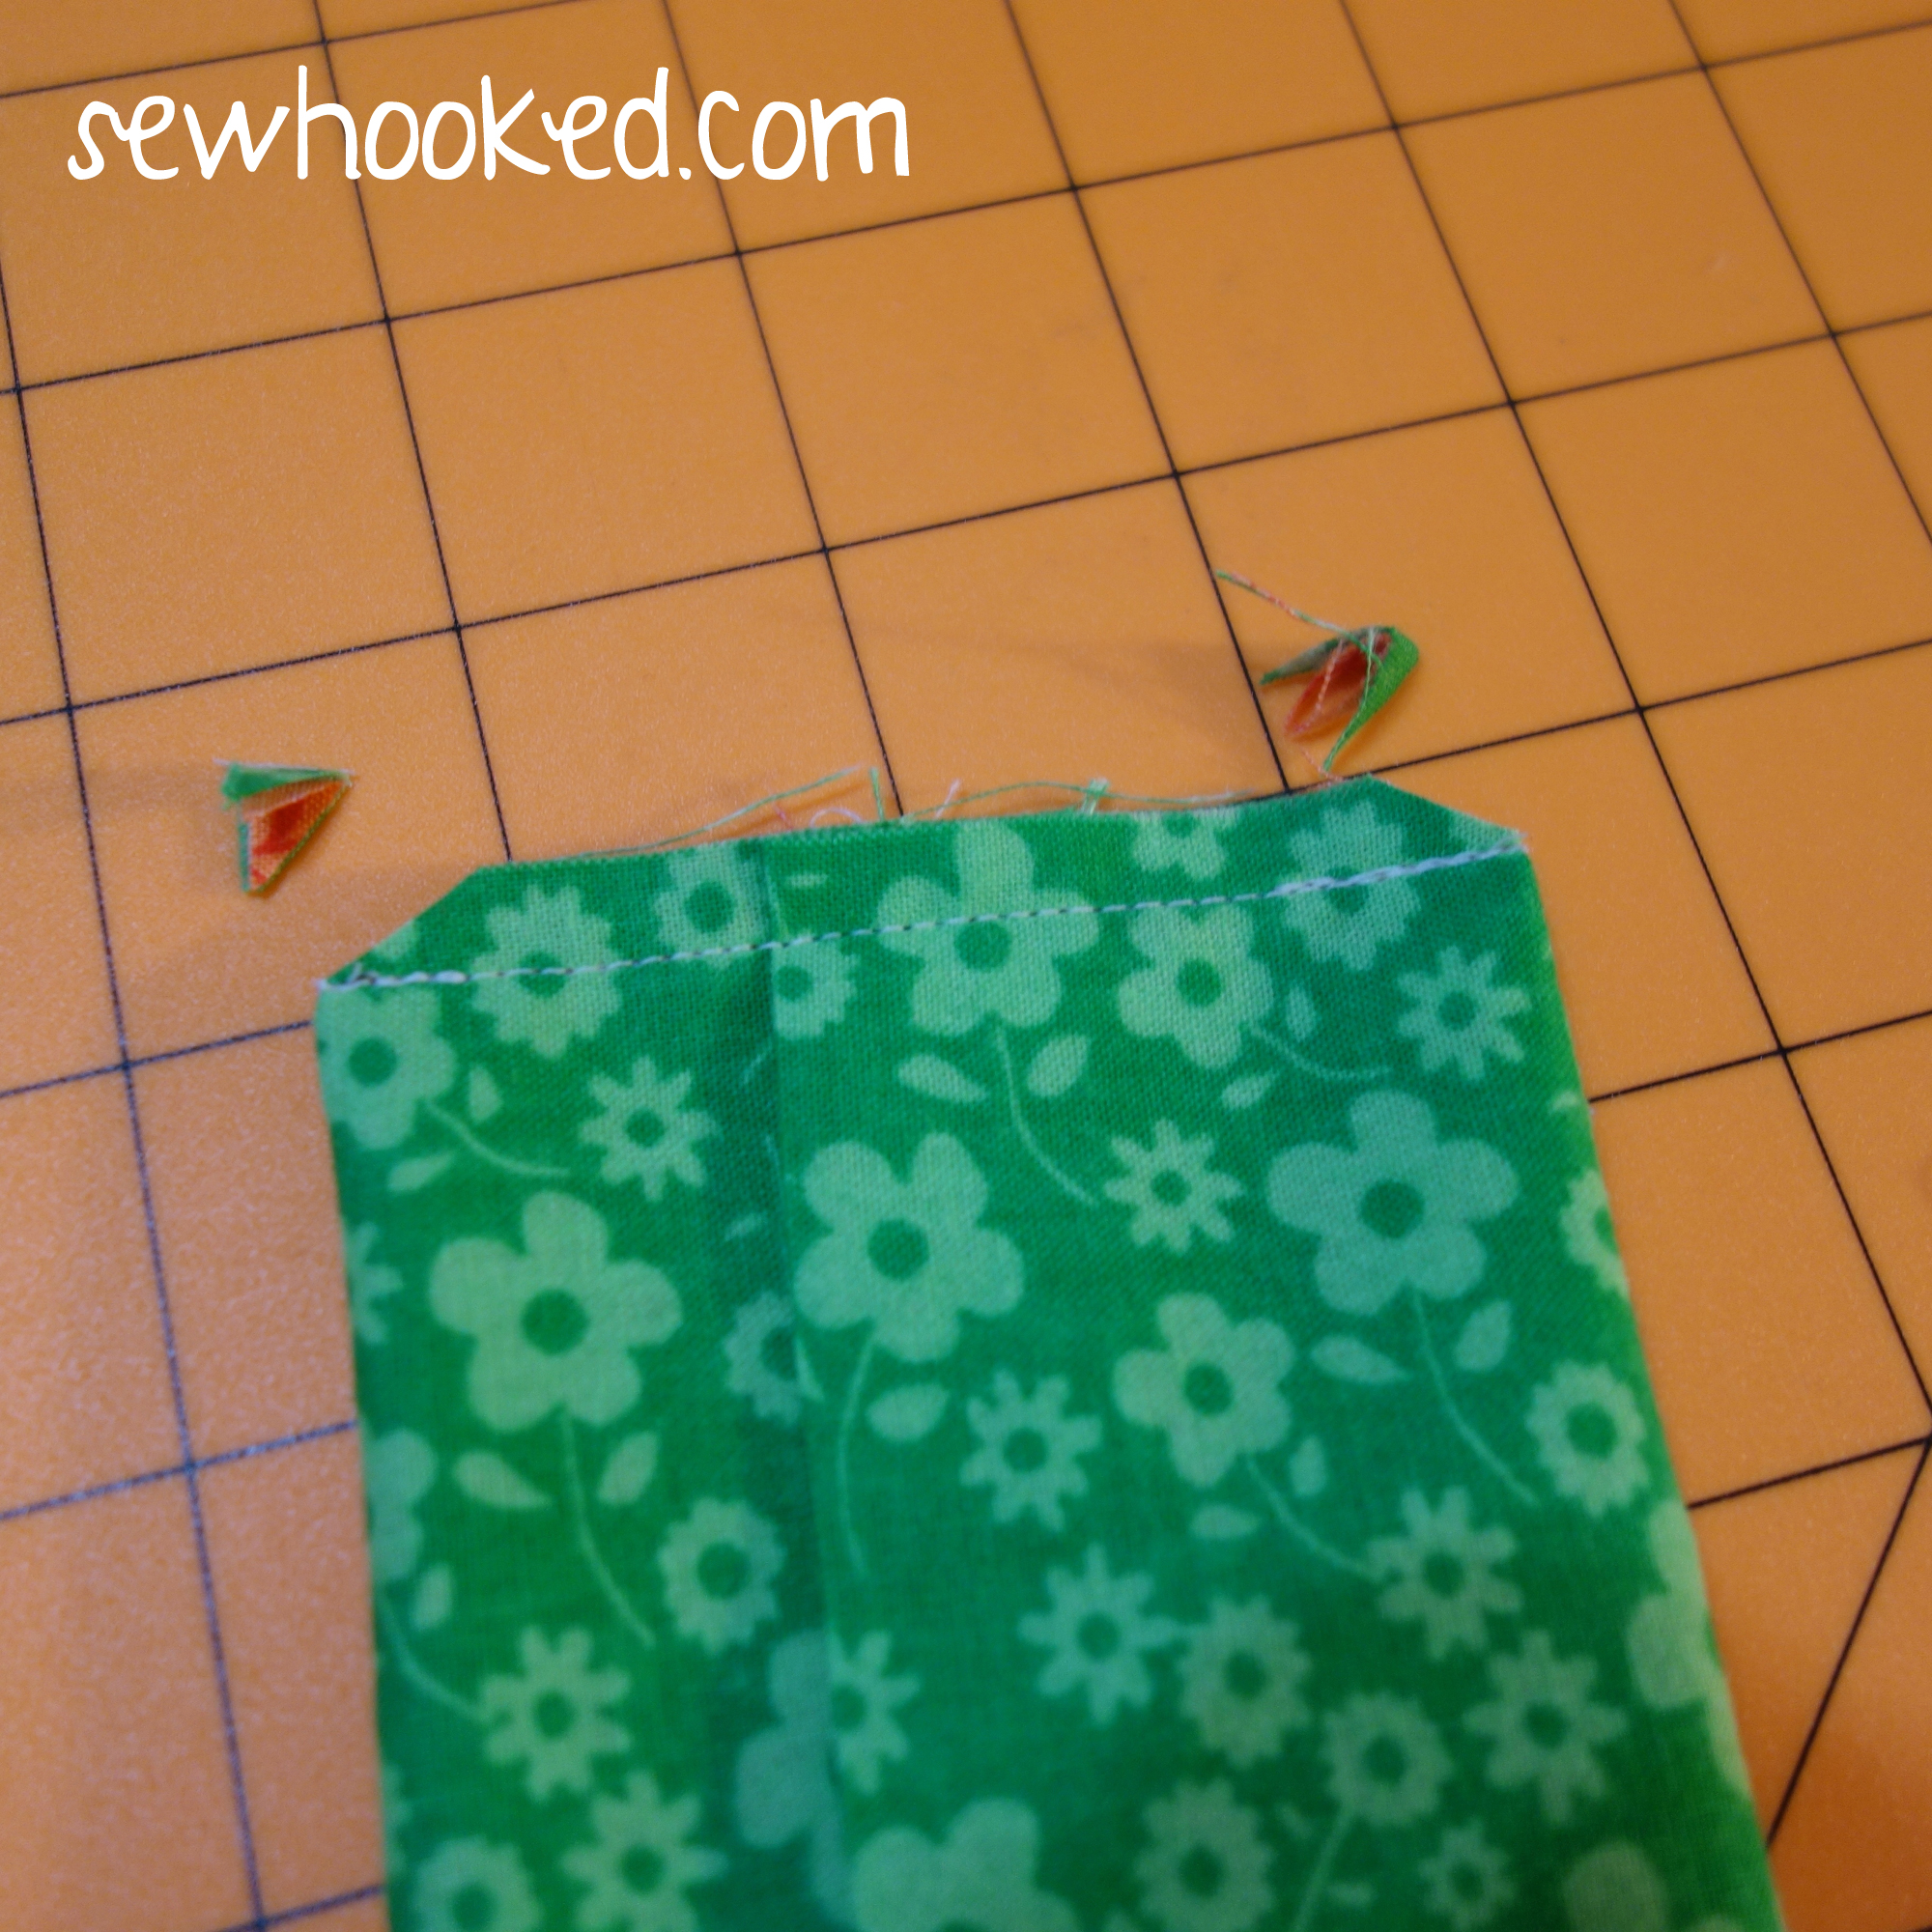
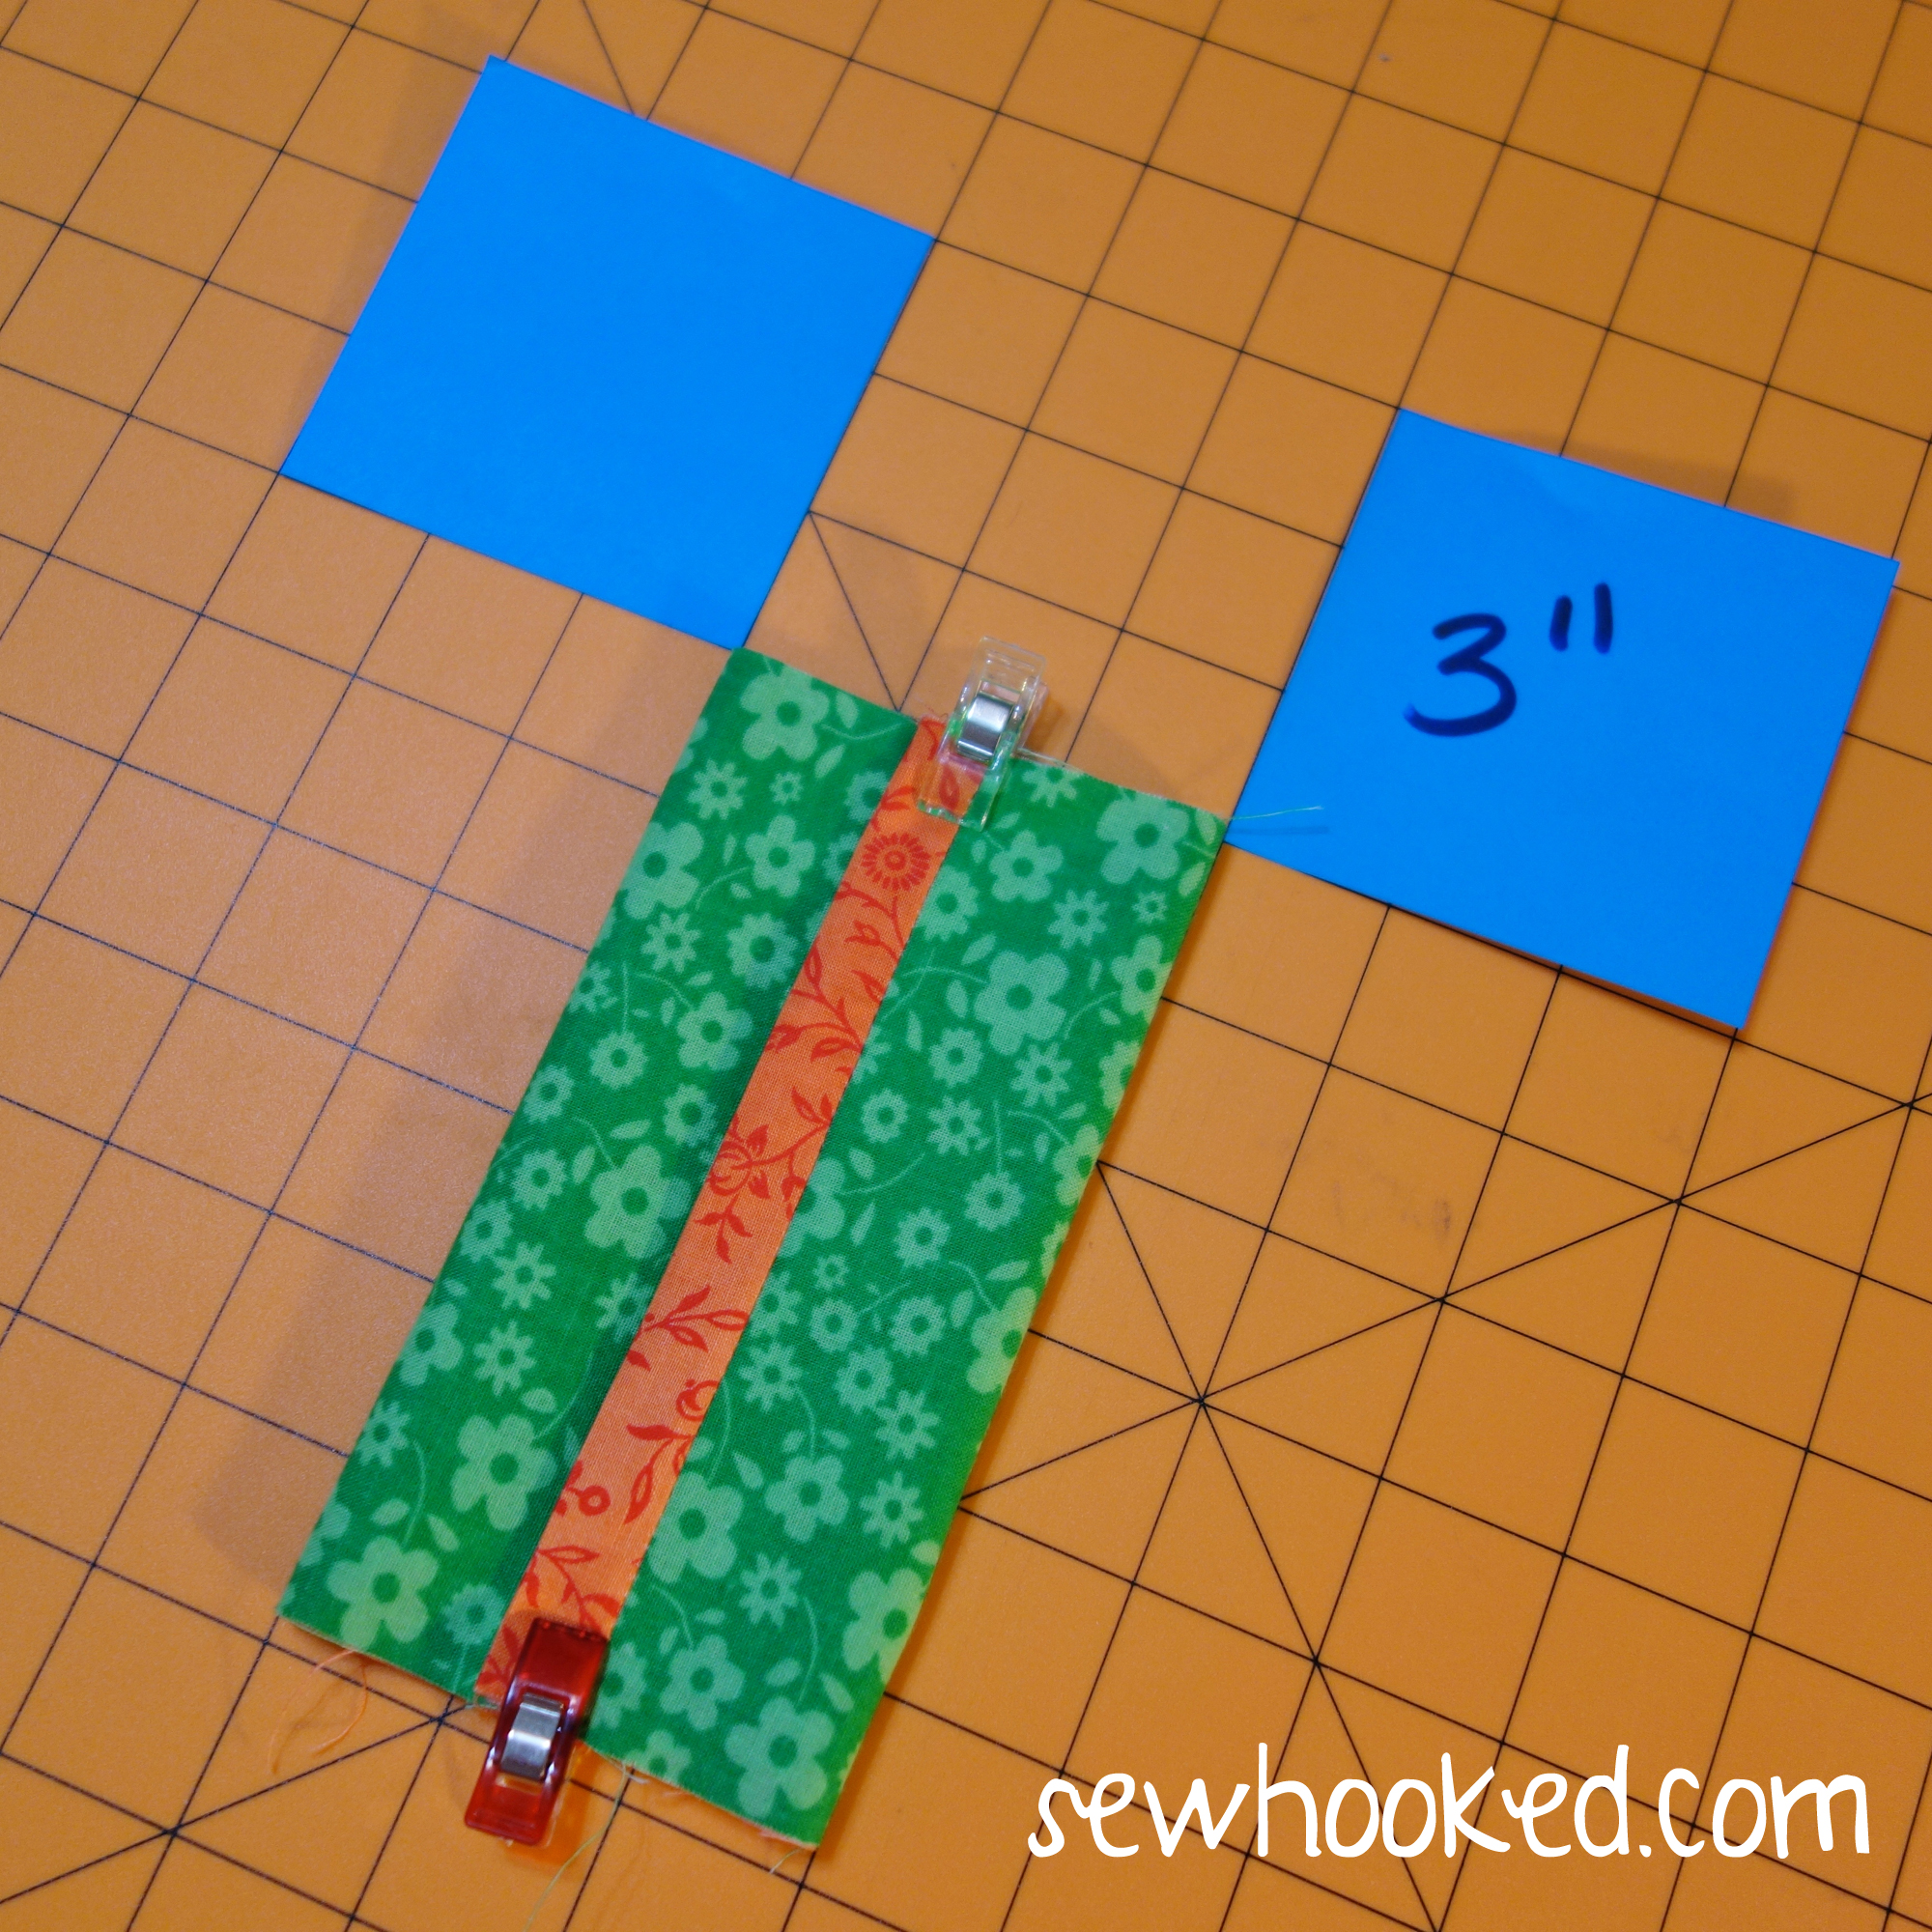
Using a ruler or rotary mat, fold right sides of the OUTSIDE together so that it is 3″ wide. If you’re using a rotary mat, you can align easily use the markings on your mat for this part. Edges should overlap in the approximate center.
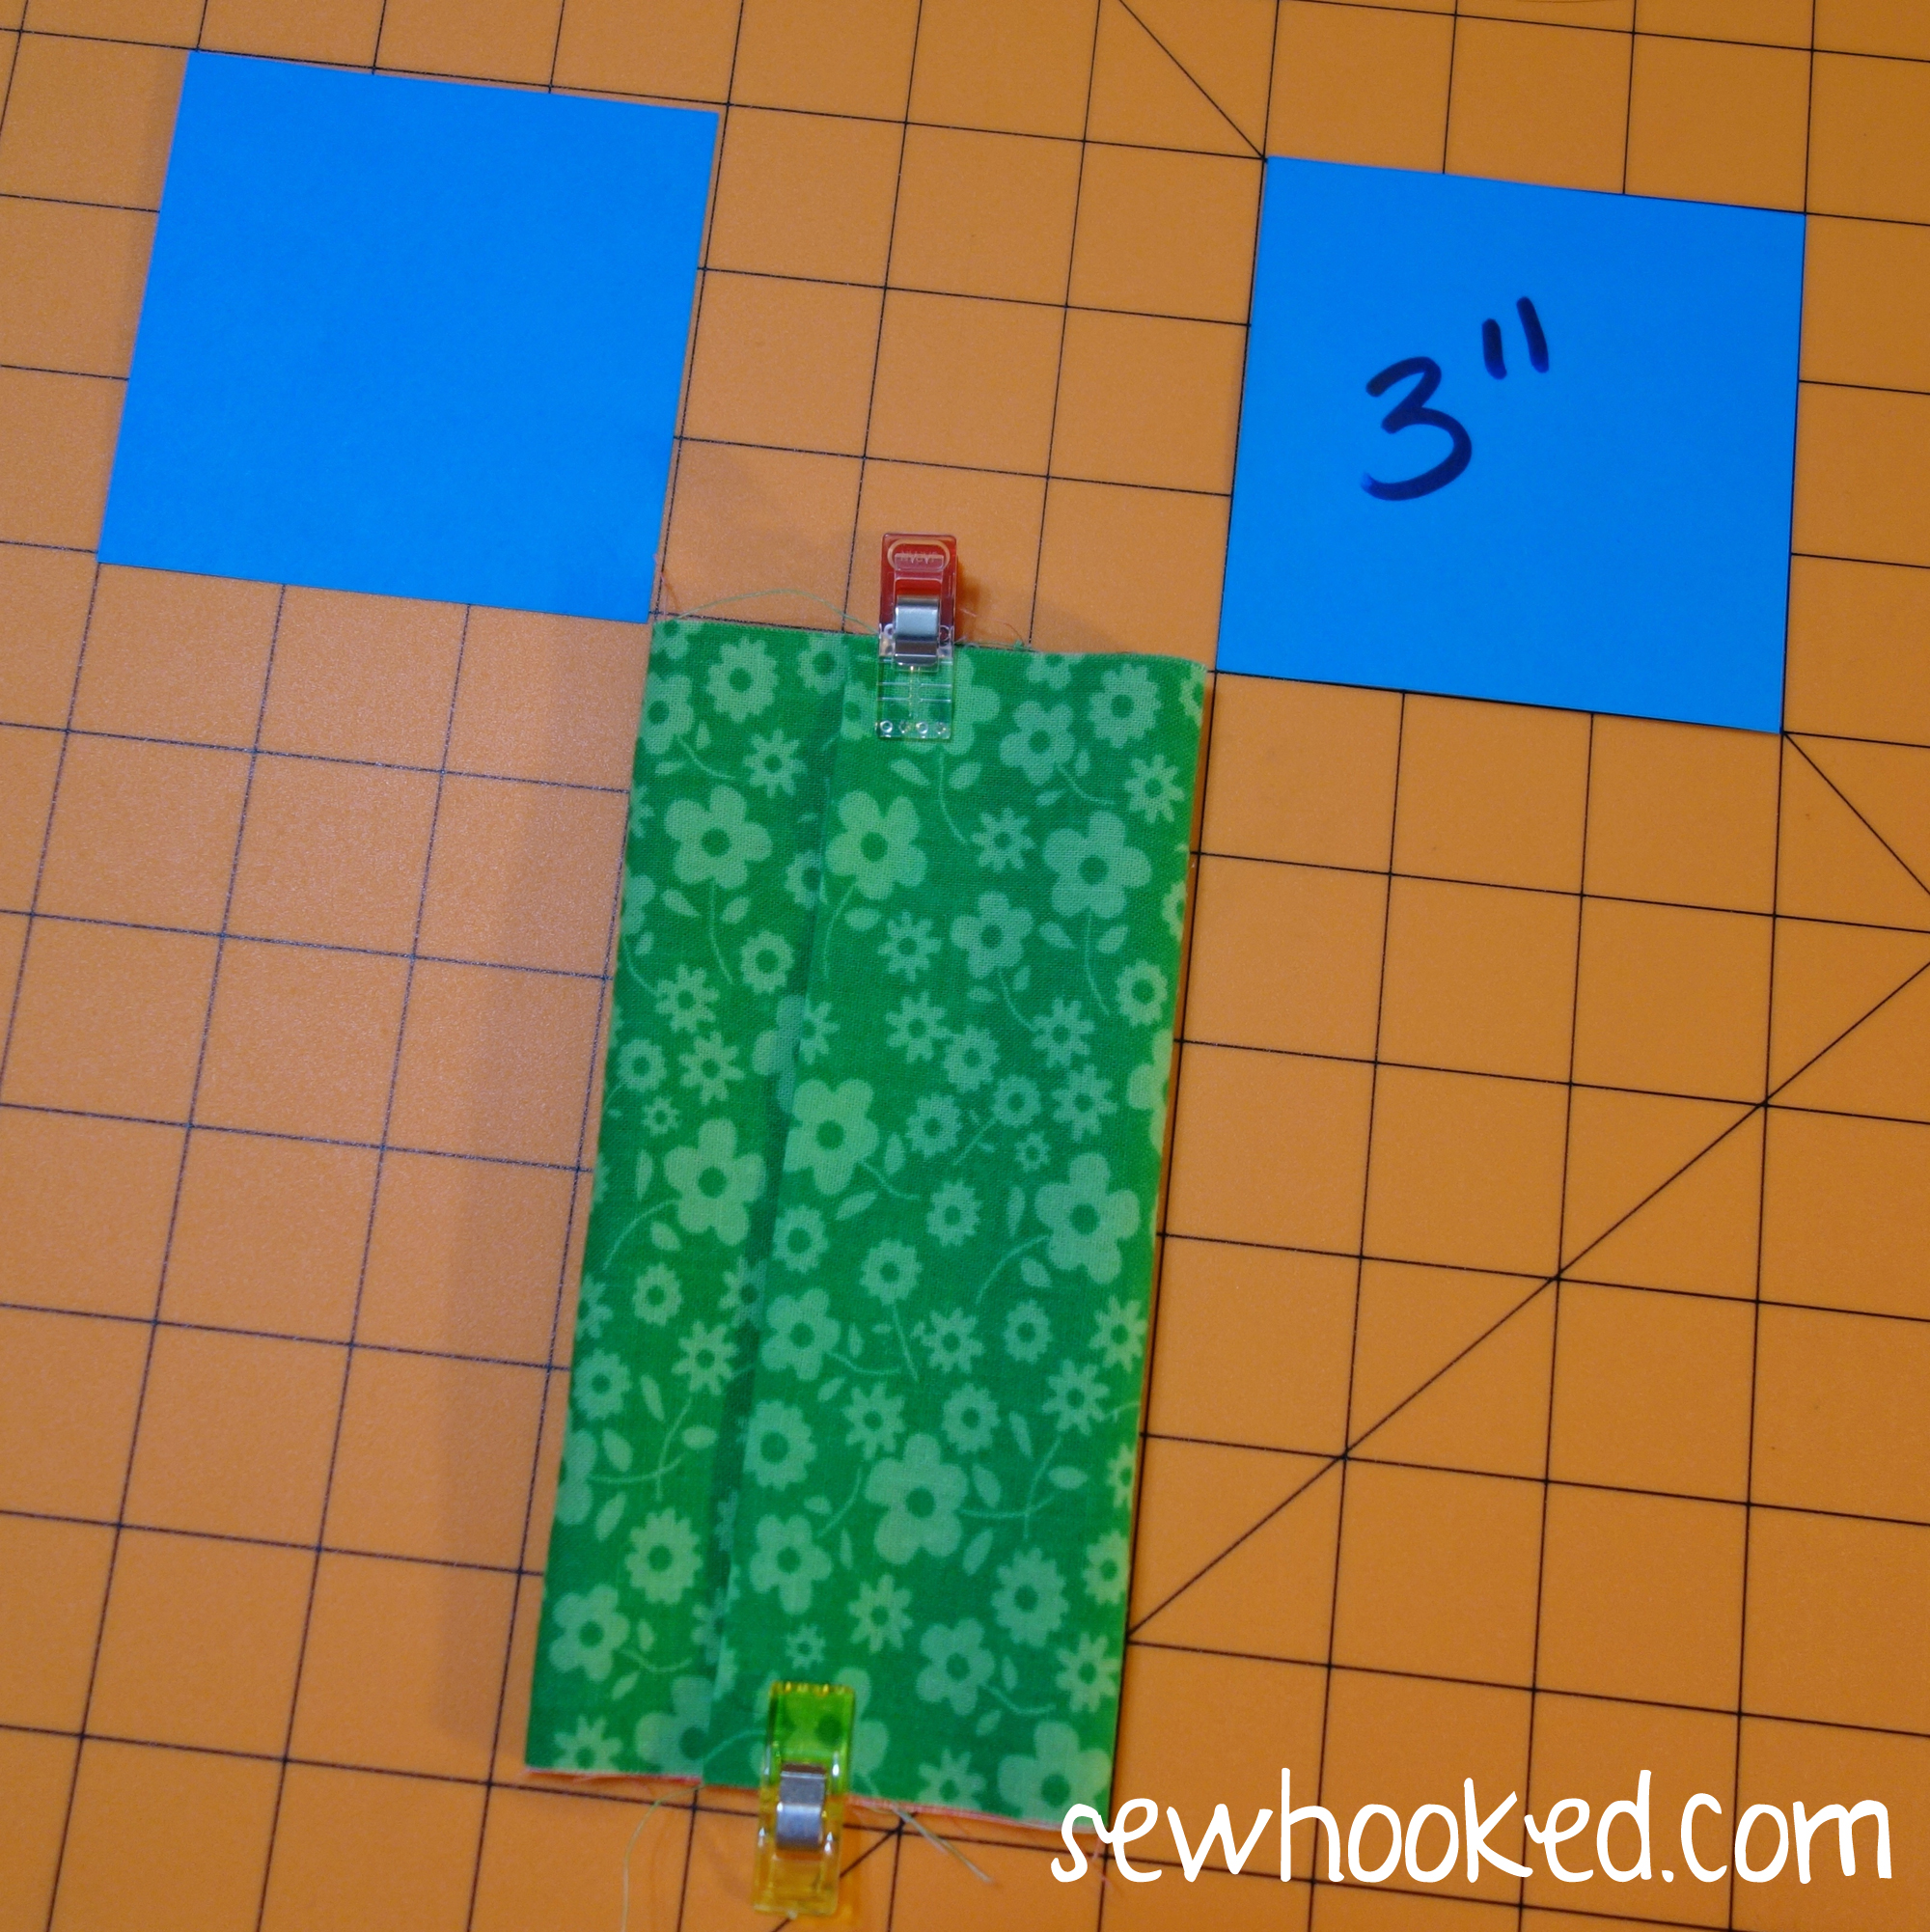
Once adjustments have been made to your liking and the width is 3″, pin or clip with sewing clips. Wonder Clips or Magic Clips work great. (I have both.)
Because this version has TRIM, you will not see the overturned edge during this step.
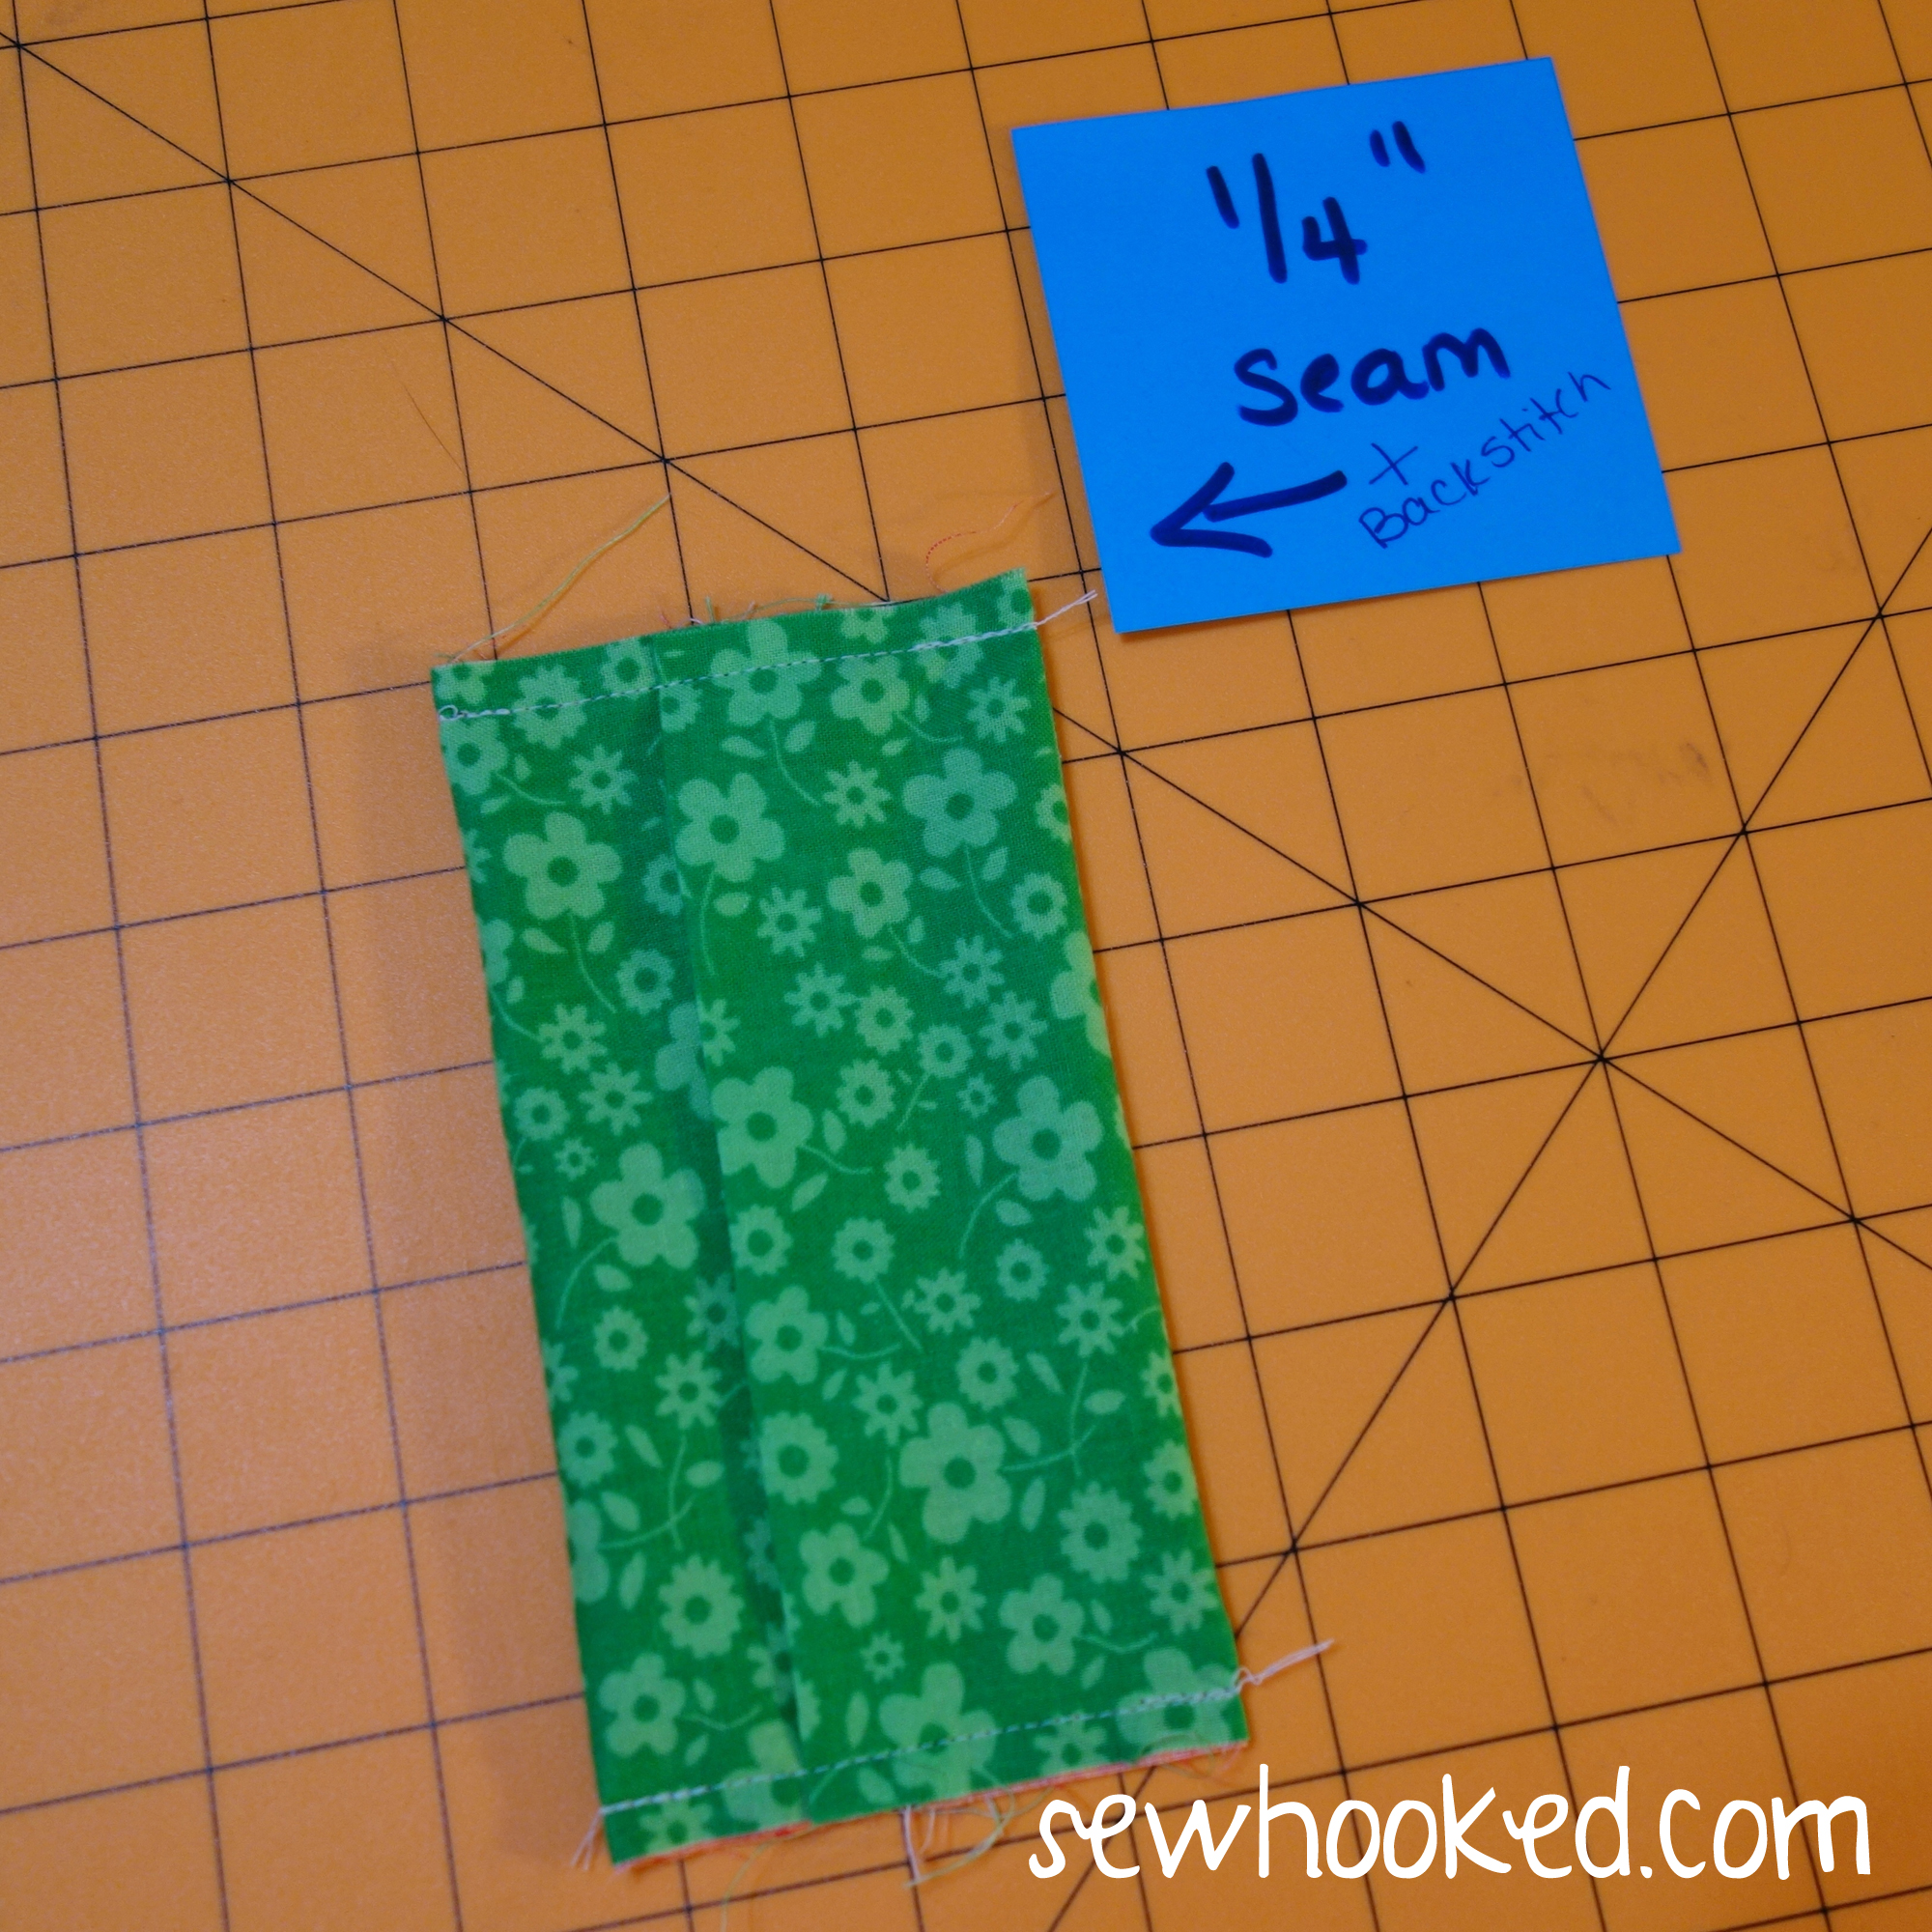
Sew each end with a 1/4″ seam allowance, backstitching at the beginning and end.
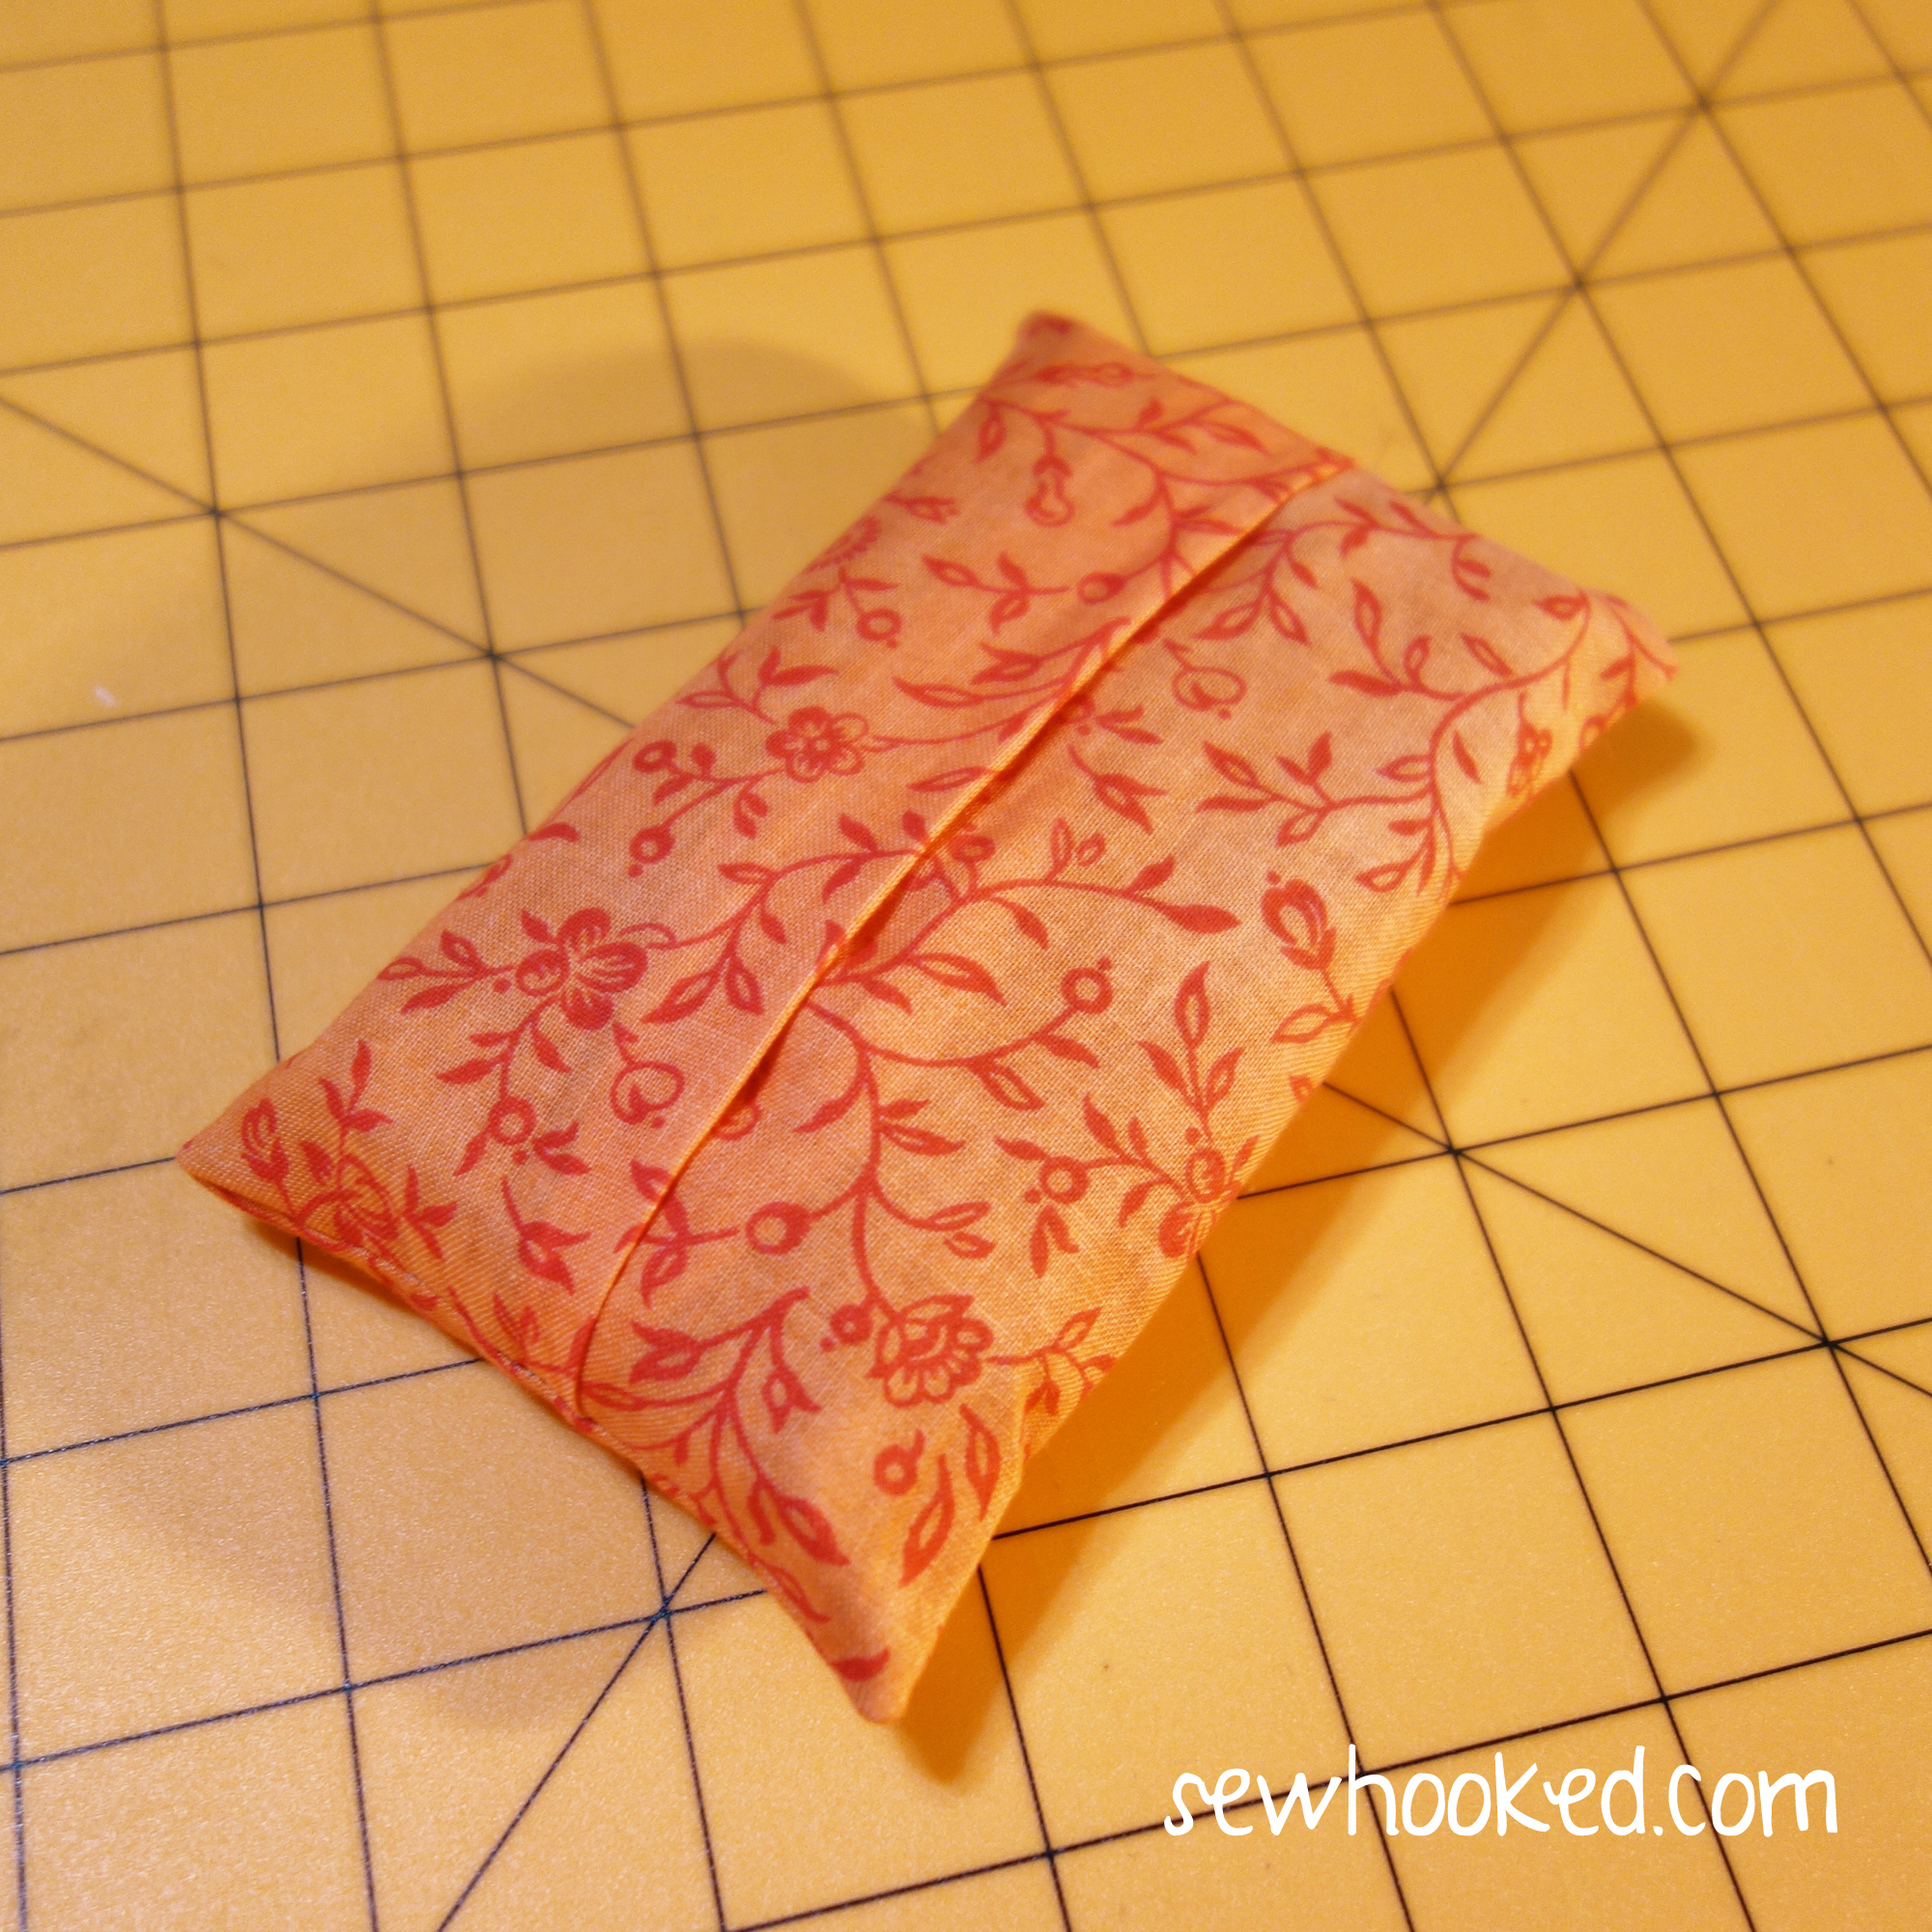
Clip corners & turn.
Done!
See how the Lining/Trim makes a lovely accent? You can have fun playing with stripes, dots or other fun fabrics.
Now, let’s make one that isn’t trimmed. We’ll use the same technique, but the fabric sizes will be reversed.
You’ll need fabric in two colors. Just as before, the orange fabric is the OUTSIDE.
For UN-TRIMMED Cover:
Outside – 5 3/4″ x 8 1/2″
Lining – 5 3/4″ x 6 1/2″
With right sides together, line one end of LINING to one end of OUTSIDE on the side that measures 5 3/4″.
Stitch a 1/4″ seam with backstitching at both ends.
Line up opposite ends and repeat the 1/4″ seam with backstitching along the other 5 3/4″ side.
Turn so that wrong sides of the fabric are together. Adjust so that each end is approximately the same width.
Press.
Using a ruler or rotary mat, fold right sides of the OUTSIDE together so that it is 3″ wide. If you’re using a rotary mat, you can align easily use the markings on your mat for this part. Edges should overlap in the approximate center
Once adjustments have been made to your liking and the width is 3″, pin or clip with sewing clips.
Because this version doesn’t have TRIM, you’ll see the overturned edge during this step.
Sew each end with a 1/4″ seam allowance, backstitching at the beginning and end.
Clip Corners & Turn.
Done!
Stop by tomorrow for Free Pattern Friday for my weekly featured FREE quilt pattern!
I drew Curly Swirly Butterfly a couple of weeks back when I was sick and didn’t feel like doing much but doodle. In this case, my doodle turned into something so fun, that I even made it available as a t-shirt and bought myself one, too!
This fun pattern can be backstitched, stem stitched, or finished using your favorite embroidery stitch.
GREAT BIG THANKS to Robin & Rainey for stitching this sweet design up for me. (Click the links to check them out on Instagram!)
Our March drawing is for a fun set of fabric from the fabulous Vanda, all the way from South Africa!
The prize includes 20 cotton fabric pieces ranging in size from 5.5″ x 8″ to 10″ x 11″.
Don’t want to applique? You can also hand embroider or even stencil this pattern!
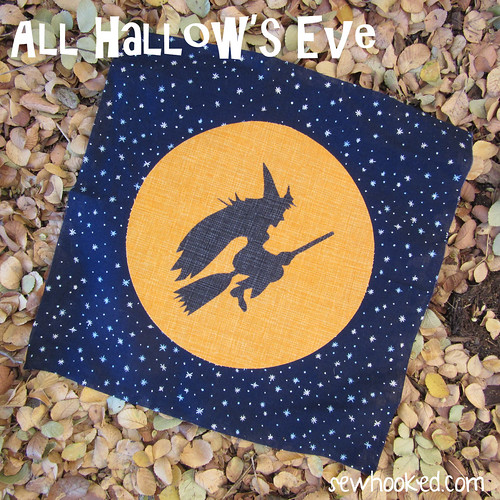
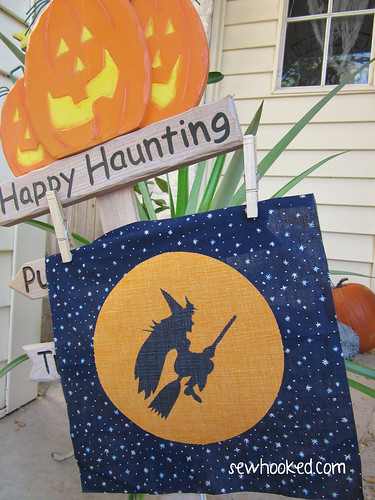
My opinion of the traditional Halloween witch has changed greatly since 1997, so our new friend here is much cuter and definitely curvier. I imagine she’s wearing her Halloween best as she rides her trusty broomstick to a fun party, perhaps in Hogsmeade!
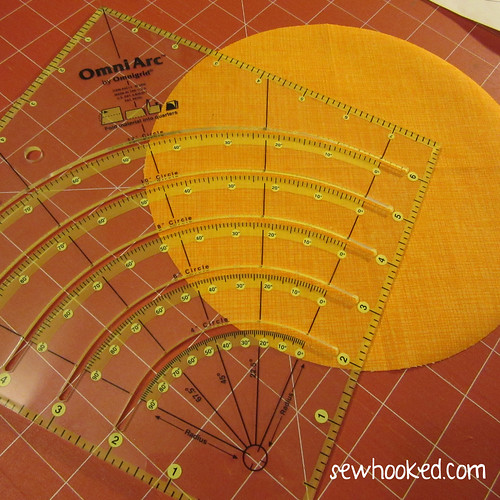
If you are lucky enough to have an OmniArc Ruler, try using the 8″ circle guide to create your moon.
I ironed my fusible webbing in place first and then folded the orange fabric before cutting with my rotary cutter. Follow the instructions as printed on the ruler.
Your moon will be about 1/2″ bigger than the one in the pattern, but it will still work great for, oh, say a 12″ quilt block or fun Halloween cushion!
No such luck? You can also cut around a ceramic plate with your rotary cutter!
Are you making projects from 31 Days of Halloween? Share your photos with my flickr group! There will be a fun surprise after Halloween for one lucky winner!
2 – 2″ x 22″ strips of green fabric (fat quarters work great or you can sub-cut a WOF)
fun thread color (optional)
pinking shears (optional)
sewing machine
iron
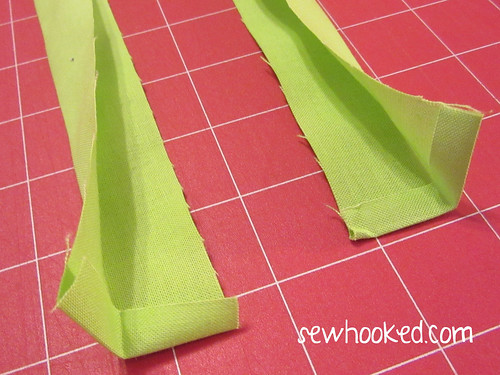
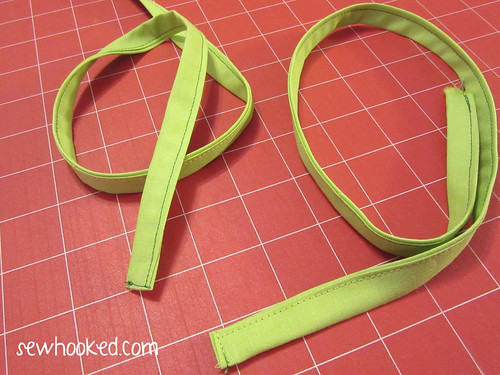
Press both 22″ strips in half, pressing one end of each strip under 1/4″. Press in half again.
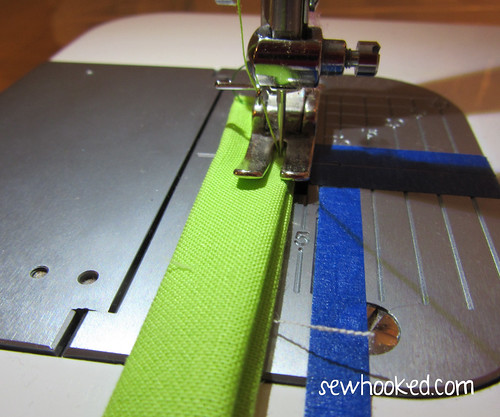
Stitch across the turned under end and down the length of each green strip.
Now you’ll have this!
Depending on the size of your towel, you may need to cut it in half. My towel was 23″ long. If you don’t cut your towel in half, then cut the seam allowance off the top end.
Run a long basting stitch along the raw edge, being sure to leave long tails on each end.
Use the basting to gather the towel. Now, set aside for the fun part!
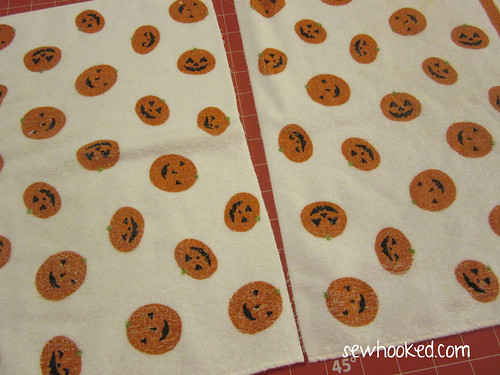
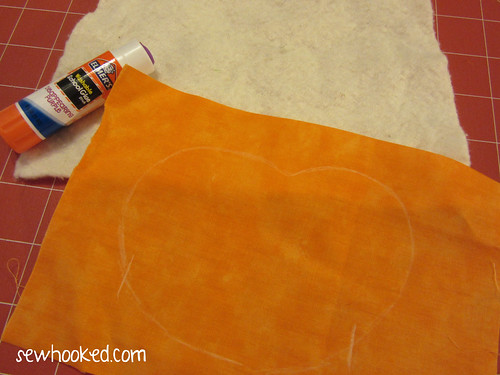
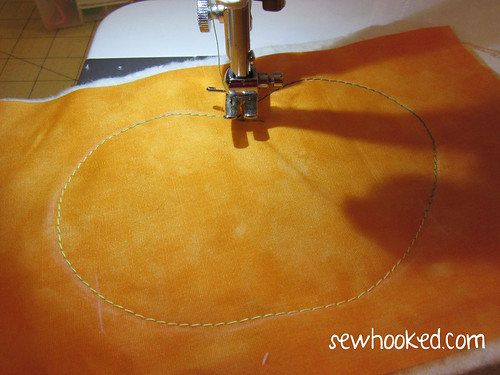
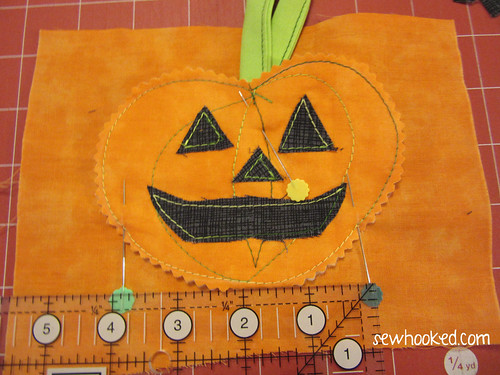
Cut your orange fabric into two pieces approximately 7″ square (mine was a little wider, so I just left it). Cut out and trace the Pumpkin Template onto the right side of one piece of orange fabric with an erasable fabric pencil. I used my white Sewline pencil.
I marked a four inch space to help with the opening later on. This is optional.
Baste the orange fabric you just traced on to the batting with a few dots of washable school glue.
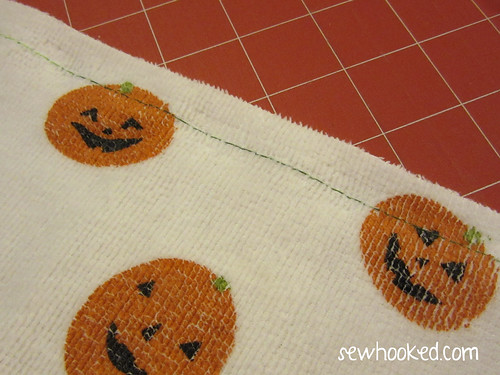
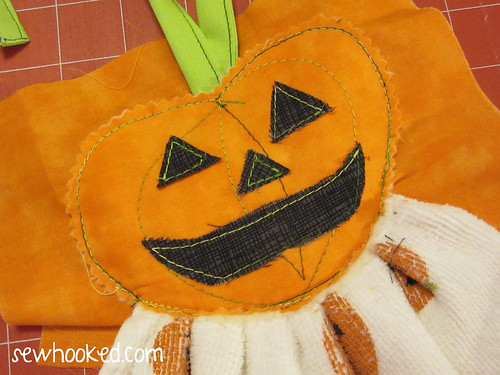
Using your fun thread and a wide stitch (I used a 3 on my Juki), trace the pumpkin line.
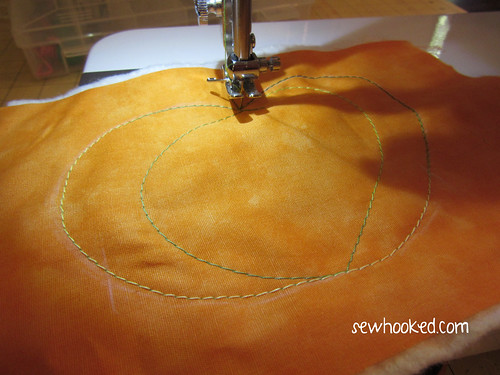
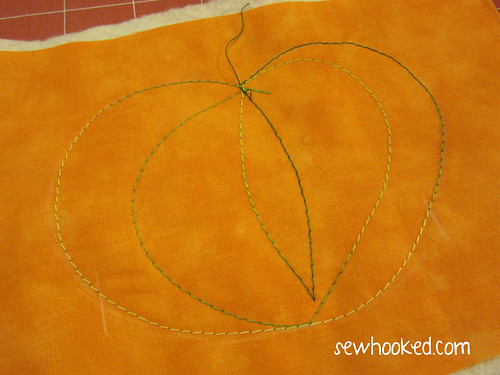
Starting at the top of the pumpkin, echo the shape an inch or so inside the line. You don’t have to be perfect here, every pumpkin is unique!
Mine looks like this.
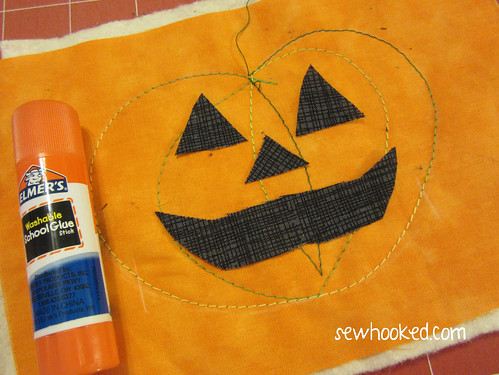
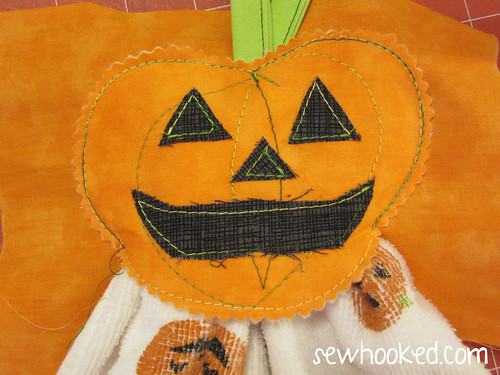
Using your black fabric scraps and a pair of scissors, cut out the face you’d like for your Jack-O-Lantern. I decided to go super simple, trimming as needed until it was just the way I wanted.
Baste these pieces on with the washable school glue. Hit it for a few seconds with your iron to dry the glue.
Using the same stitch as before, stitch around each facial feature, being sure to back stitch as needed.
Trim the entire thing with pinking shears. The face is done, yay!
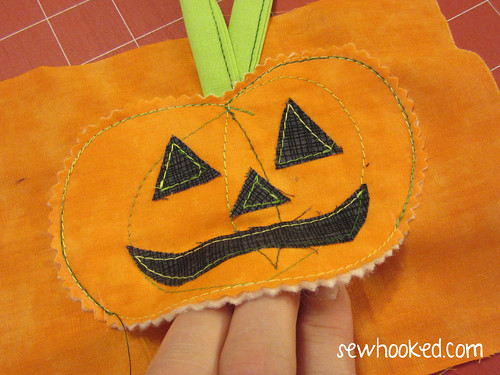
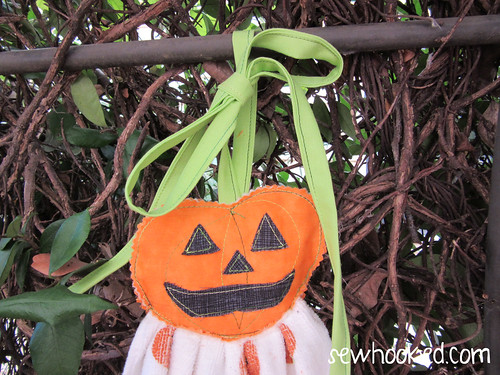
Place the completed face right side up on the remaining piece of orange fabric.
Slide the unstitched ends of the green ties into the top center and secure with a pin.
Measure a 4 inch opening at the bottom (this is what those marks were for back when I was tracing), Mark each side with a pen or erasable fabric pencil, marker, etc.
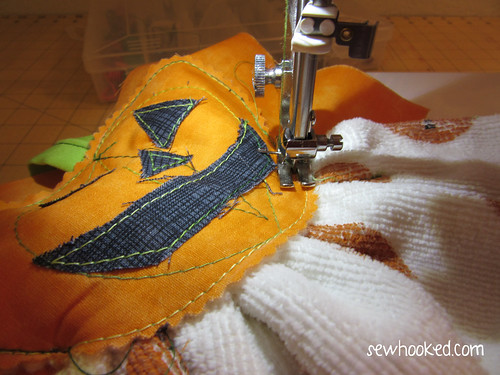
Sew around, on top of the original stitch, leaving the 4″ opening at the bottom. Back stitch at the beginning and end.
Insert the previously prepared towel in the opening (the back fabric is still untrimmed).
Adjust as needed until it is as even as possible.
Sew the opening closed. Depending on your machine, you may need to raise your presser foot or use a walking foot. You know your machine best, so do what works best for you.
Now, it’s time to trim off the back! Use scissors or your pinking shears to trim close to the stitching, being sure not to cut the front fabric.