Category Archives: Holidays

31 Days of Halloween – Tri-Wizard Tee Costume

31 Days of Halloween on sewhooked.com

Crack open the WAY BACK MACHINE for today’s 31 Days of Halloween!

Today we have a fast, easy costuming option for the Harry Potter fans out there.

TriWizard Tee Tutorial sewhooked.com Craftster Swap - HP for our kids

Originally created in 2006 for a Craftster Swap, I’m breaking this tutorial out today for anyone that might not have a costume in mind, or, like me, might need something a wee bit cooler to wear come Halloween!

The best part about this project is that you can sew it by hand if you don’t have a machine or use a serger to finish it even faster!

You’ll need:

  • 1 red t-shirt
  • 1 black t-shirt in the same size and style as the red t-shirt
  • Rotary cutter, 24″ rotary ruler & cutting mat
  • OR a straight edge, pencil and sharp scissors
  • Seam ripper
  • Pins
  • Sewing machine, serger or needle and thread
  • Freezer Paper, cut into 2 8 ½” x 11” sheets (print Hogwarts Crest Stencil & Potter/Star Stencil on these sheets)
  • fabric paint in red, green, blue, yellow, white and gold
  • foam paintbrushes

Instructions

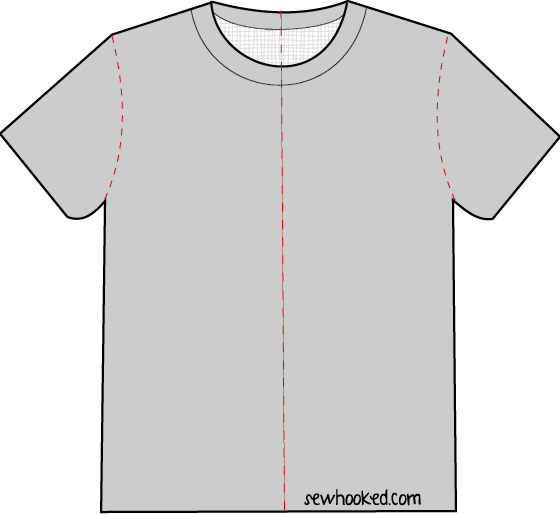
t-shirt black t-shirt red

  • Find the center of each shirt by folding in half towards the front and matching the sleeves.
  • Mark the top and the bottom with a pin.
  • If using a rotary cutter, this is your cutting line.
  • If using a straight edge, draw a pencil line from top to bottom.
  • Cut as straight as possible.

Sleeve Reconstruction

t-shirt left right sleeves

  • Select the red shirt right (right side when the shirt is worn) and black shirt left and carefully remove the sleeves from each side of the shirt using a seam ripper. Be very careful to not stretch the fabric.

t-shirt left right sleeves2

  • Swap the sleeves so that red sleeve is with black shirt piece and the black sleeve is with red.
  • Turn the shirt half you are working on inside out and place the sleeve, right side out inside the
  • sleeve hole (right sides will be together), matching the top and bottom creases. Pin the sleeve in place, being careful not to stretch the fabric.
  • Using a serger or a stretch stitch on your sewing machine, stitch in a 1/4″ to 1/2″ seam all the way around.
  • If stitching by hand, take small stitches.
  • Repeat for second sleeve.

Shirt Body Reconstruction

t-shirt 2

  • Place one shirt half inside the other, right sides together so that the wrong sides of the seam lines will be on the outside. You will have two seams, a front seam and a back seam.
  • Carefully pin every few inches starting at the t-shirt ribbing and work your way down, trying not to stretch the fabric.
  • If the bottoms hems do not meet, pin the bottom edges together and ease along the middle of the shirt (t-shirts can be really wonky, but you can make it work!).
  • Carefully stitch along this line as for the sleeves.
  • Snip the corners of the inside seams on the diagonal.
  • Turn the shirt right side out.

Stenciling the front (Hogwarts Crest)

  • Cut out the four sections of the Hogwarts Crest stencil.
  • Place cardboard or newspaper inside the t-shirt to protect from bleed through.
  • Using a warm iron, carefully place the stencil on the upper left side of the shirt (the black
  • side).
  • Stencil the upper left section red, the upper right section green, the lower left section yellow and the lower right section blue*.
  • Gently peel stencil away and allow to dry.
  • Optional: Paint a cursive “H” over the four sections in gold paint.

Stenciling the back (Potter & Star)

  • Cut out the Potter and Star stencil.
  • Optional: Create a stencil with your own name using a Sans Serif font OR use purchased iron on letters.
  • Place cardboard or newspaper inside the t-shirt to protect from bleed through.
  • Using a warm iron, carefully place the stencil in the middle of the back of the shirt, matching center lines.
  • Stencil the name and star with red paint.
  • Gently peel away and allow to dry.

*I recommend testing your paint on dark fabric before you start. Some paints will need multiple layers. If the paint doesn’t cover, you can start with a white base coat.

TriWizard Tee Tutorial sewhooked.com

Need more information on stenciling? Check out my post from last week!

Craftsy Logo

LAST DAY: As a special bonus for my readers, get 50% off Machine Quilting: Free Motion & More until October 15, 12015! Original price is $39.99, get it now for $19.99! Offer good until 10/15/15 @11:59pm MT.

Are you making projects from 31 Days of Halloween? Share your photos with my flickr group! There will be a fun surprise after Halloween for one lucky winner!

Photobucket

Craftsy | Etsy

Facebook | Sewhooked FB | Sewhooked Facebook Group

Instagram | Flickr | Twitter | Pinterest| Bloglovin,

31 Days of Halloween – Jack-O-Lantern Dish Towel Tutorial!

As I mentioned in yesterday’s Talk to Me Tuesday, we continue with the fun of 31 Days of Halloween by sharing a new tutorial!

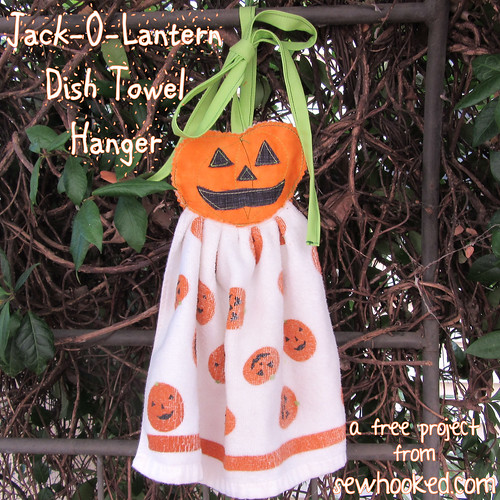
Jack-O-Lantern Dish Towel Hanger by Jennifer Ofenstein, sewhooked.com

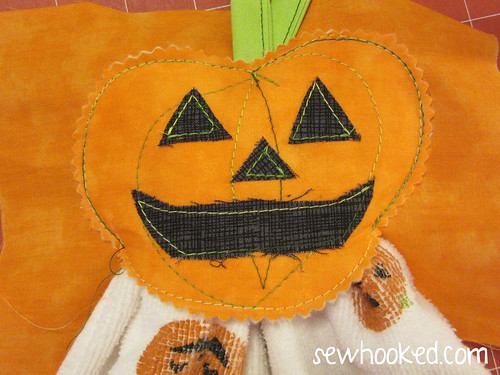
Hot off the sewing machine, a festive, Jack-O-Lantern Dish Towel topper!

Jack-O-Lantern Dish Towel Hanger by Jennifer Ofenstein, sewhooked.com

You’ll need:

  • Pumpkin Template (free download)
  • Dish Towel of your choice
  • small amount of batting
  • small amount of orange fabric
  • scrap of black fabric
  • 2 – 2″ x 22″ strips of green fabric (fat quarters work great or you can sub-cut a WOF)
  • fun thread color (optional)
  • pinking shears (optional)
  • sewing machine
  • iron
Jack-O-Lantern Dish Towel Hanger by Jennifer Ofenstein, sewhooked.com

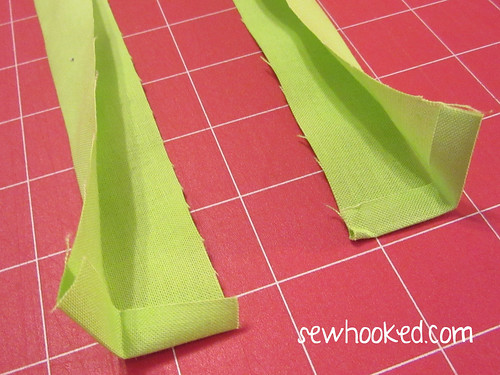
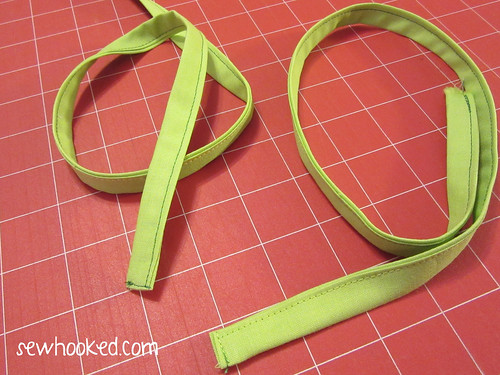
Press both 22″ strips in half, pressing one end of each strip under 1/4″. Press in half again.

Jack-O-Lantern Dish Towel Hanger by Jennifer Ofenstein, sewhooked.com

Stitch across the turned under end and down the length of each green strip.

Jack-O-Lantern Dish Towel Hanger by Jennifer Ofenstein, sewhooked.com

Now you’ll have this!

Jack-O-Lantern Dish Towel Hanger by Jennifer Ofenstein, sewhooked.com

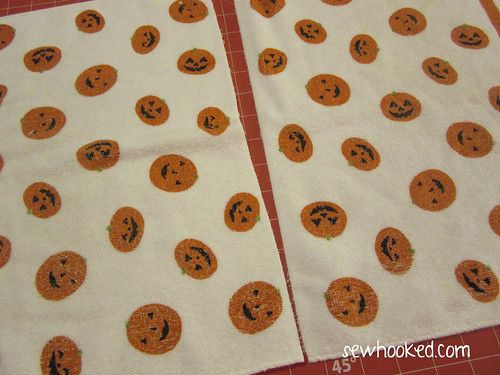
Depending on the size of your towel, you may need to cut it in half. My towel was 23″ long. If you don’t cut your towel in half, then cut the seam allowance off the top end.

Jack-O-Lantern Dish Towel Hanger by Jennifer Ofenstein, sewhooked.com

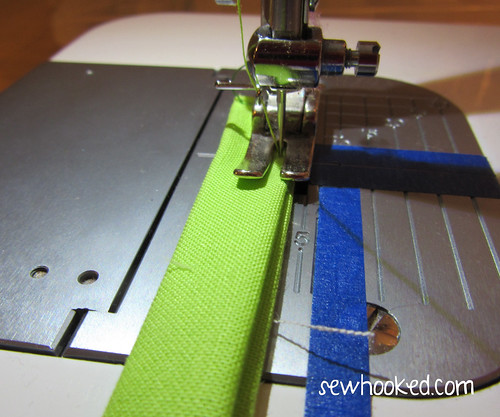
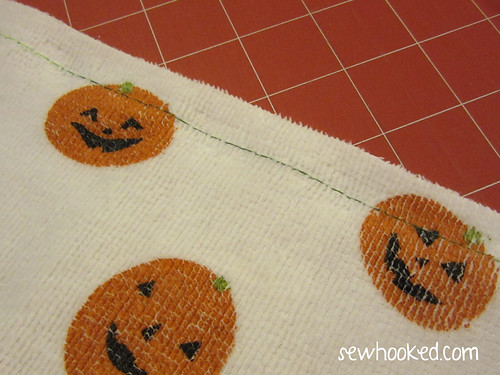
Run a long basting stitch along the raw edge, being sure to leave long tails on each end.

Jack-O-Lantern Dish Towel Hanger by Jennifer Ofenstein, sewhooked.com

Use the basting to gather the towel. Now, set aside for the fun part!

Jack-O-Lantern Dish Towel Hanger by Jennifer Ofenstein, sewhooked.com

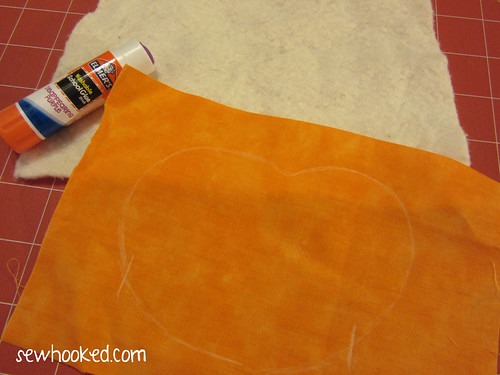
Cut your orange fabric into two pieces approximately 7″ square (mine was a little wider, so I just left it). Cut out and trace the Pumpkin Template onto the right side of one piece of orange fabric with an erasable fabric pencil. I used my white Sewline pencil.

I marked a four inch space to help with the opening later on. This is optional.

Jack-O-Lantern Dish Towel Hanger by Jennifer Ofenstein, sewhooked.com

Baste the orange fabric you just traced on to the batting with a few dots of washable school glue.

Jack-O-Lantern Dish Towel Hanger by Jennifer Ofenstein, sewhooked.com

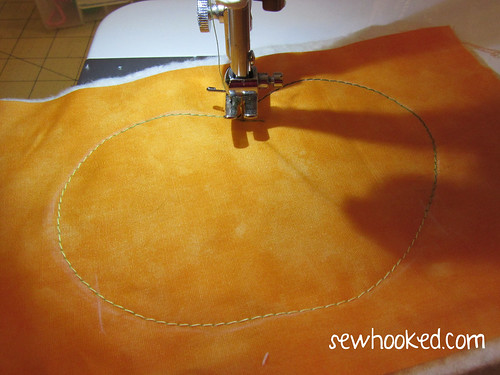
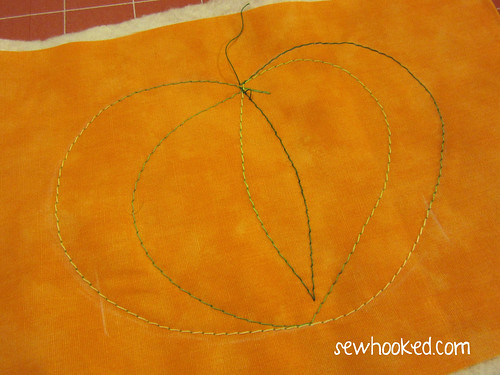
Using your fun thread and a wide stitch (I used a 3 on my Juki), trace the pumpkin line.

Jack-O-Lantern Dish Towel Hanger by Jennifer Ofenstein, sewhooked.com

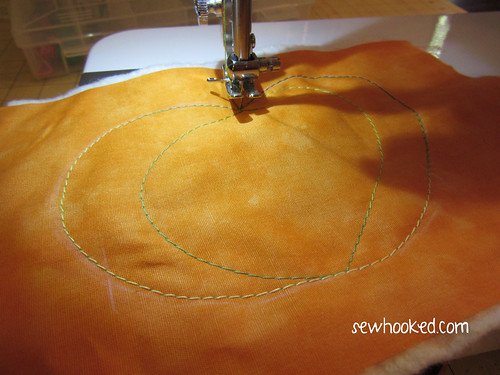
Starting at the top of the pumpkin, echo the shape  an inch or so inside the line. You don’t have to be perfect here, every pumpkin is unique!

Jack-O-Lantern Dish Towel Hanger by Jennifer Ofenstein, sewhooked.com

Mine looks like this.

Jack-O-Lantern Dish Towel Hanger by Jennifer Ofenstein, sewhooked.com

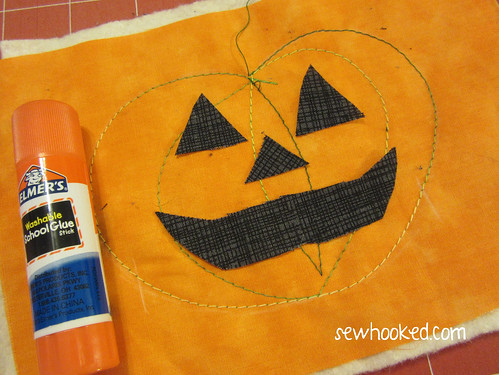
Using your black fabric scraps and a pair of scissors, cut out the face you’d like for your Jack-O-Lantern. I decided to go super simple, trimming as needed until it was just the way I wanted.

Baste these pieces on with the washable school glue. Hit it for a few seconds with your iron to dry the glue.

Jack-O-Lantern Dish Towel Hanger by Jennifer Ofenstein, sewhooked.com

Using the same stitch as before, stitch around each facial feature, being sure to back stitch as needed.

Jack-O-Lantern Dish Towel Hanger by Jennifer Ofenstein, sewhooked.com

Trim the entire thing with pinking shears. The face is done, yay!

Jack-O-Lantern Dish Towel Hanger by Jennifer Ofenstein, sewhooked.com

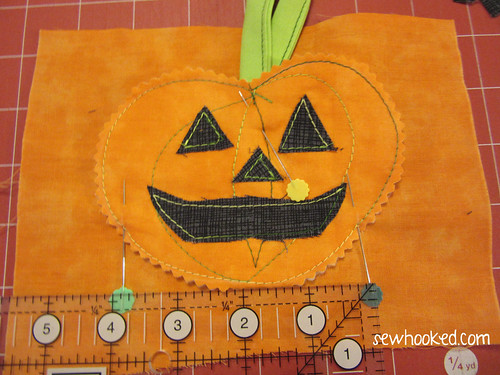
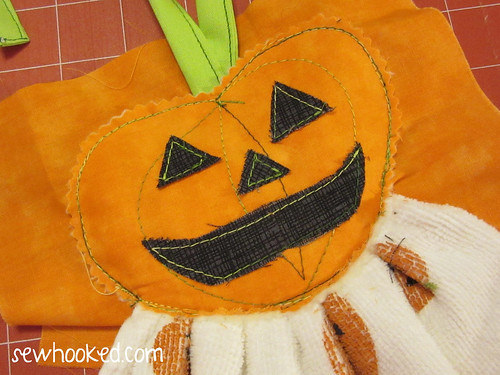
Place the completed face right side up on the remaining piece of orange fabric.

Slide the unstitched ends of the green ties into the top center and secure with a pin.

Measure a 4 inch opening at the bottom (this is what those marks were for back when I was tracing), Mark each side with a pen or erasable fabric pencil, marker, etc.

Jack-O-Lantern Dish Towel Hanger by Jennifer Ofenstein, sewhooked.com

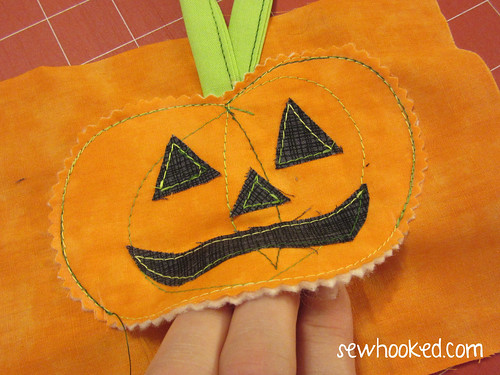
Sew around, on top of the original stitch, leaving the 4″ opening at the bottom. Back stitch at the beginning and end.

Jack-O-Lantern Dish Towel Hanger by Jennifer Ofenstein, sewhooked.com

Insert the previously prepared towel in the opening (the back fabric is still untrimmed).

Adjust as needed until it is as even as possible.

Jack-O-Lantern Dish Towel Hanger by Jennifer Ofenstein, sewhooked.com

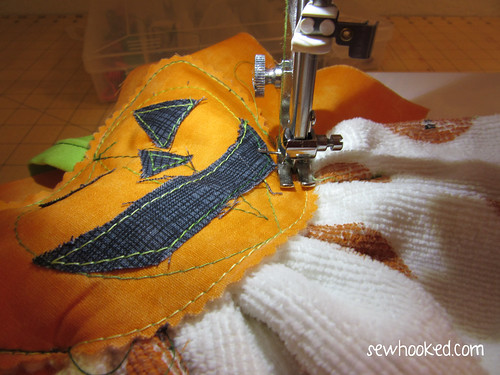
Sew the opening closed. Depending on your machine, you may need to raise your presser foot or use a walking foot. You know your machine best, so do what works best for you.

Jack-O-Lantern Dish Towel Hanger by Jennifer Ofenstein, sewhooked.com

Now, it’s time to trim off the back! Use scissors or your pinking shears to trim close to the stitching, being sure not to cut the front fabric.

Jack-O-Lantern Dish Towel Hanger by Jennifer Ofenstein, sewhooked.com

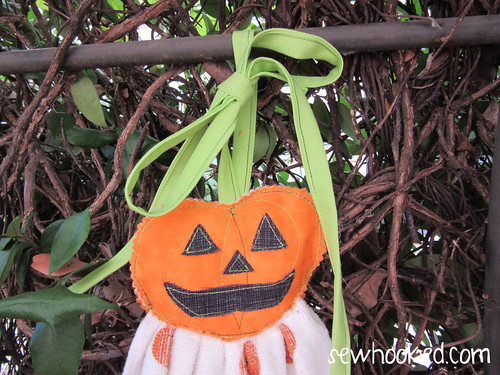
Here we go, all done! What a happy Jack!

Are you making projects from 31 Days of Halloween?  

♥ Jennifer O

Posts on this blog may contain affiliate links to help cover the cost of my website. I thank you for your generous support. ♥

31 Days of Halloween – Caramel Apple Bites

31 Days of Halloween on sewhooked.com

Here we are again and we’re one day closer to my favorite holiday as we continue on with  31 Days of Halloween!

Today, I’m sharing a quick and easy caramel apple fix. Do you have five minutes? Then you can do this!

Caramel Apple Bites

What you’ll need:

  • One Granny Smith or your favorite tart apple
  • Caramel candies
  • chopped walnuts or pecans (optional)
  • wooden toothpicks
  • microwaveable plate*
  • parchment paper

*Don’t want to microwave? Try this under the broiler, but keep any eye on it, the candy will melt fast!

Caramel Apple Bites

Slice and core the apple any way you like, I like to cut my apples in 8ths for a nice apple bite! Place apple slices on parchment lined microwave-safe plate.

Caramel Apple Bites

Using toothpicks, attach one caramel to the center of each apple

Caramel Apple Bites

Microwave until the caramel just starts to melt. It takes my microwave about 1 minute and 20 seconds. Time may very with yours, so keep an eye on it.

Some of your caramel slip off? That’s okay, just scoop it up and dump it back on top!

Caramel Apple Bites

As a finishing touch, sprinkle chopped pecans or walnuts (shown) on top while the candy is still warm. I recommend eating these warm, but you can refrigerate them, too. The candy may settle a bit, but it’ll peel right off the parchment paper!

Craftsy Logo

REMINDER: As a special bonus for my readers, get 50% off Machine Quilting: Free Motion & More until October 15, 12015! Original price is $39.99, get it now for $19.99! Offer good until 10/15/15 @11:59pm MT.

Are you making projects from 31 Days of Halloween? Share your photos with my flickr group! There will be a fun surprise after Halloween for one lucky winner!

Photobucket

Craftsy | Etsy

Facebook | Sewhooked FB | Sewhooked Facebook Group

Instagram | Flickr | Twitter | Pinterest| Bloglovin

31 Days of Halloween – Cauldron Pin Cushion

31 Days of Halloween on sewhooked.com

Happy Sunday! Today, we’re revisiting a tried and true favorite for our 31 Days of Halloween!

Pin Cushion Cauldron

While not new to Sewhooked, Cauldron Pin Cushions are one of my all time favorite super-easy crafty gift to make for Harry Potter & Halloween-loving friends who sew!

You’ll need:

  • Plastic Cauldron Party Favor (available during Halloween & St. Patrick’s Day at party stores)
  • marbles, pony beads or whatever you like to weigh down the bottom (absolutely necessary or the cauldron will be top heavy and roll)
  • a small amount of polyfil
  • scrap of fabric
  • hand sewing needle needle
  • thread
  • scissors
  • hot melt glue gun

cauldron pin cushion

Gather your supplies (weights are in the bowl).

cauldron pin cushion
Cut a circle about twice the size of the cauldron out of the fabric. With the thread doubled on your needle, stitch a straight running stitch around the outside edge.Cauldron Pin Cushion
Pull the running stitch up about half way to gather the fabric circle. Add polyfil to the fabric circle & pull thread tight. Knot off securely.

Cauldron Pin Cushion

Add weights to the bottom of the cauldron and top with polyfil.

Cauldron Pin Cushion
Squeeze hot melt glue under the lip of the cauldron. Push fabric into the cauldron, pretty side up, making sure it catches under the lip.

Cauldron Pin Cushion

Let dry and, we’re done! How fun and easy is that?

Craftsy Logo

As a special bonus for my readers, get 50% off Machine Quilting: Free Motion & More until October 15, 12015! Original price is $39.99, get it now for $19.99! Offer good until 10/15/15 @11:59pm MT.

Are you making projects from 31 Days of Halloween? Share your photos with my flickr group! There will be a fun surprise after Halloween for one lucky winner!
Photobucket

Craftsy | Etsy

Facebook | Sewhooked FB | Sewhooked Facebook Group

Instagram | Flickr | Twitter | Pinterest| Bloglovin

31 Days of Halloween – Bats!

31 Days of Halloween on sewhooked.com

Happy Saturday! Here we are again with another fun, free pattern post for the  31 Days of Halloween!

Today, I’m sharing a fun favorite that is both fandom and very Halloween.

It also makes me think of Sesame Street…

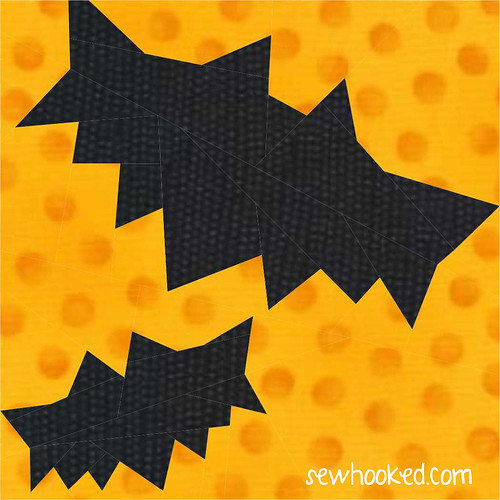
Bats 2014 update

Paper Pieced Bat Pattern

5″ finished (5 1/2″ unfinished)

OR

Get it on Craftsy!

Bat Quilt Idea

How about a fun quilt layout idea? I couldn’t resist!

Yeah, my kids are pretty much grown and I still love Sesame Street. 😉

Craftsy Logo

As a special bonus for my readers, get 50% off Machine Quilting: Free Motion & More until October 15, 12015! Original price is $39.99, get it now for $19.99! Offer good until 10/15/15 @11:59pm MT.

Are you making projects from 31 Days of Halloween? Share your photos with my flickr group! There will be a fun surprise after Halloween for one lucky winner!
Photobucket

Craftsy | Etsy

Facebook | Sewhooked FB | Sewhooked Facebook Group

Instagram | Flickr | Twitter | Pinterest| Bloglovin

31 Days of Halloween – Jack Leaves The Lights On

31 Days of Halloween on sewhooked.com

Welcome back!

It’s October 9 and we’re well into our 31 Days of Halloween!

Each Friday in October, I’ll be featuring some of my Halloween-inspired patterns that are available for sale in my Craftsy shop.

Not to worry, free goodies return tomorrow!

Jack Leaves The Light On by Jennifer Ofenstein, sewhooked.com

Jack be nimble, Jack be quick, Jack’s hanging out with the candle sticks!

Today we’re visiting Jack Leaves The Light On, a versatile pattern set that includes two block patterns plus piecing instructions for this 12″ x 28″ table runner, all for just $6 on Craftsy!

Want a longer runner? Add more blocks!

Jack Leaves the Light On - Quilt Variation by Jennifer Ofenstein

Jack Leaves The Light On would also make a great quilt!

Jack Leaves The Light On - Vertical Option with added sashing

Need a wall hanging? Just piece the blocks vertically!

Craftsy Logo

As a special bonus for my readers, get 50% off Machine Quilting: Free Motion & More until October 15, 12015! Original price is $39.99, get it now for $19.99! Offer good until 10/15/15 @11:59pm MT.

Are you making projects from 31 Days of Halloween? Share your photos with my flickr group! There will be a fun surprise after Halloween for one lucky winner!
Photobucket

Craftsy | Etsy

Facebook | Sewhooked FB | Sewhooked Facebook Group

Instagram | Flickr | Twitter | Pinterest| Bloglovin

31 Days of Halloween – Give Me Candy!

Welcome back for another 31 Days of Halloween post!

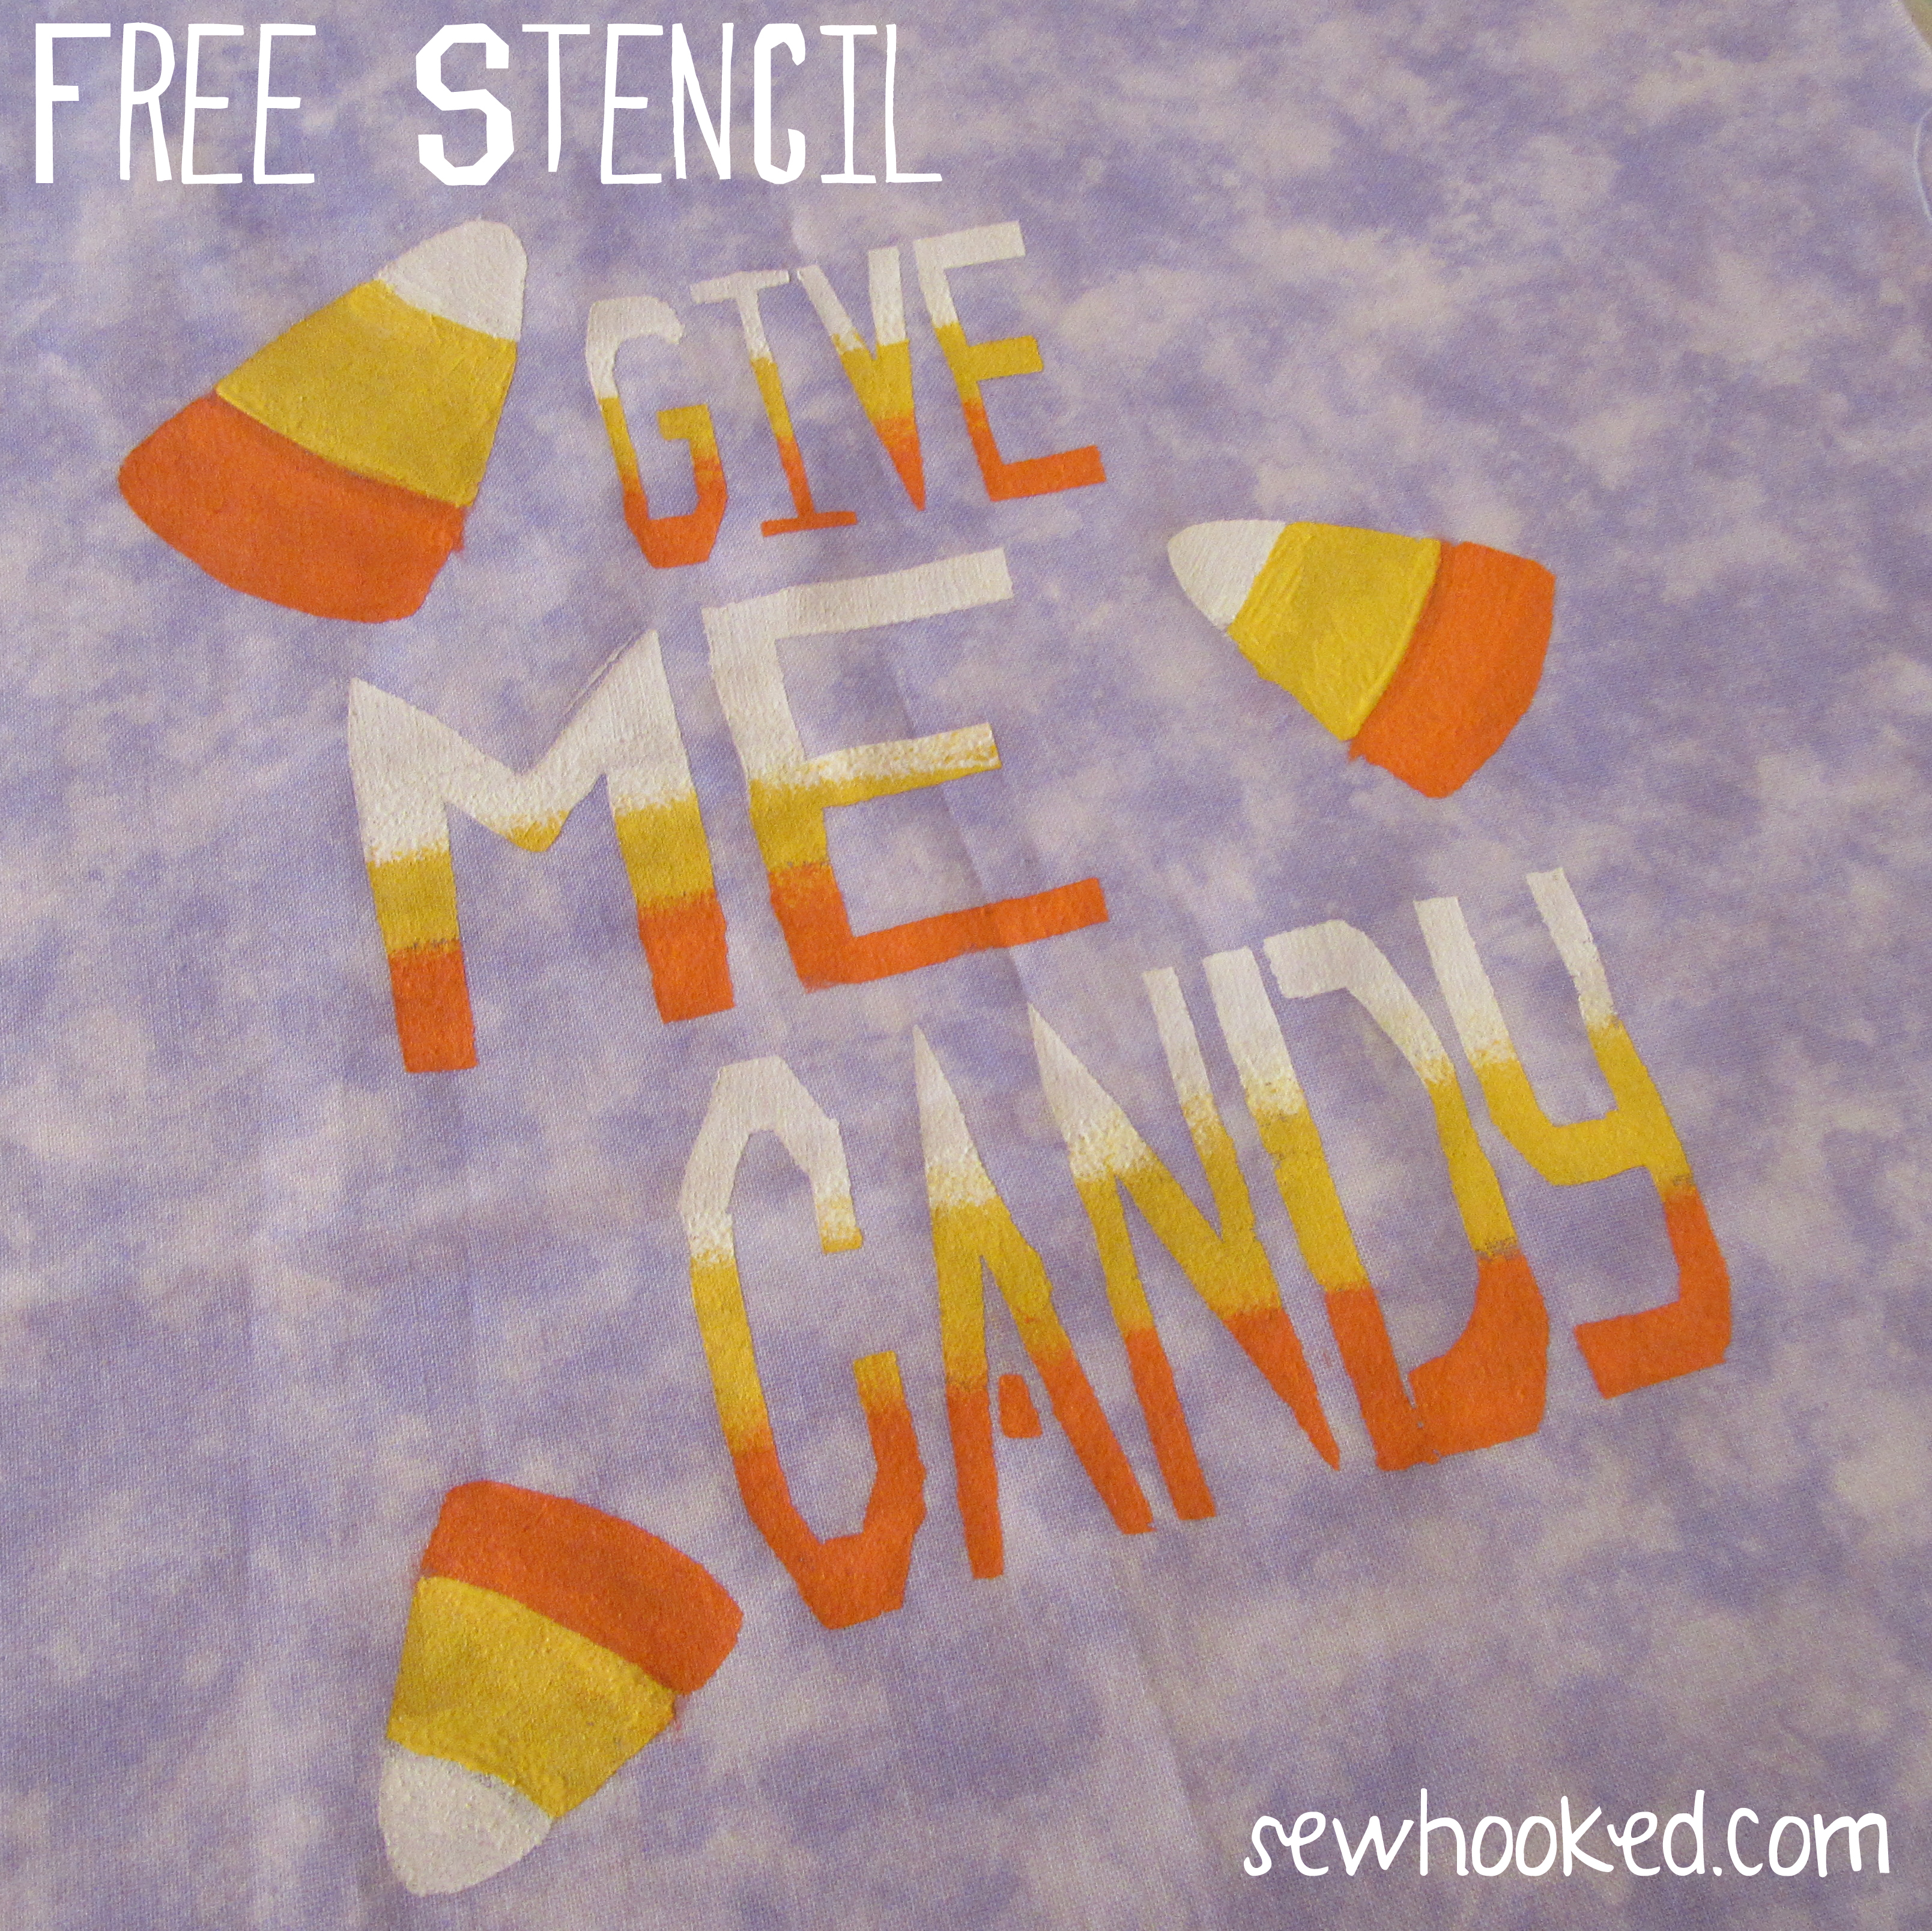
Today I’m excited to share a brand new and absolutely free Halloween stencil! This the first stencil I’ve shared in an age and I do hope you enjoy it!

Designed by me entirely in Inkscape, Give Me Candy represents a lifelong love, nay, adoration, of candy corn! Yum!

New to stenciling? Here’s a video tutorial I created waaay back in May of 2008. It’s hard to believe, but it pre-dates even Talk to Me Tuesday!

For this project you’ll need: (affiliate links are marked *)

  • The stencil, printed on the matte side of freezer paper (for easy printing, I cut a sheet to letter size then tape the top side to a piece of regular printer paper)
  • You can print or download the Give Me Candy Stencil.
  • X-acto Knife or other stencil cutting tool
  • cutting board or other safe cutting surface
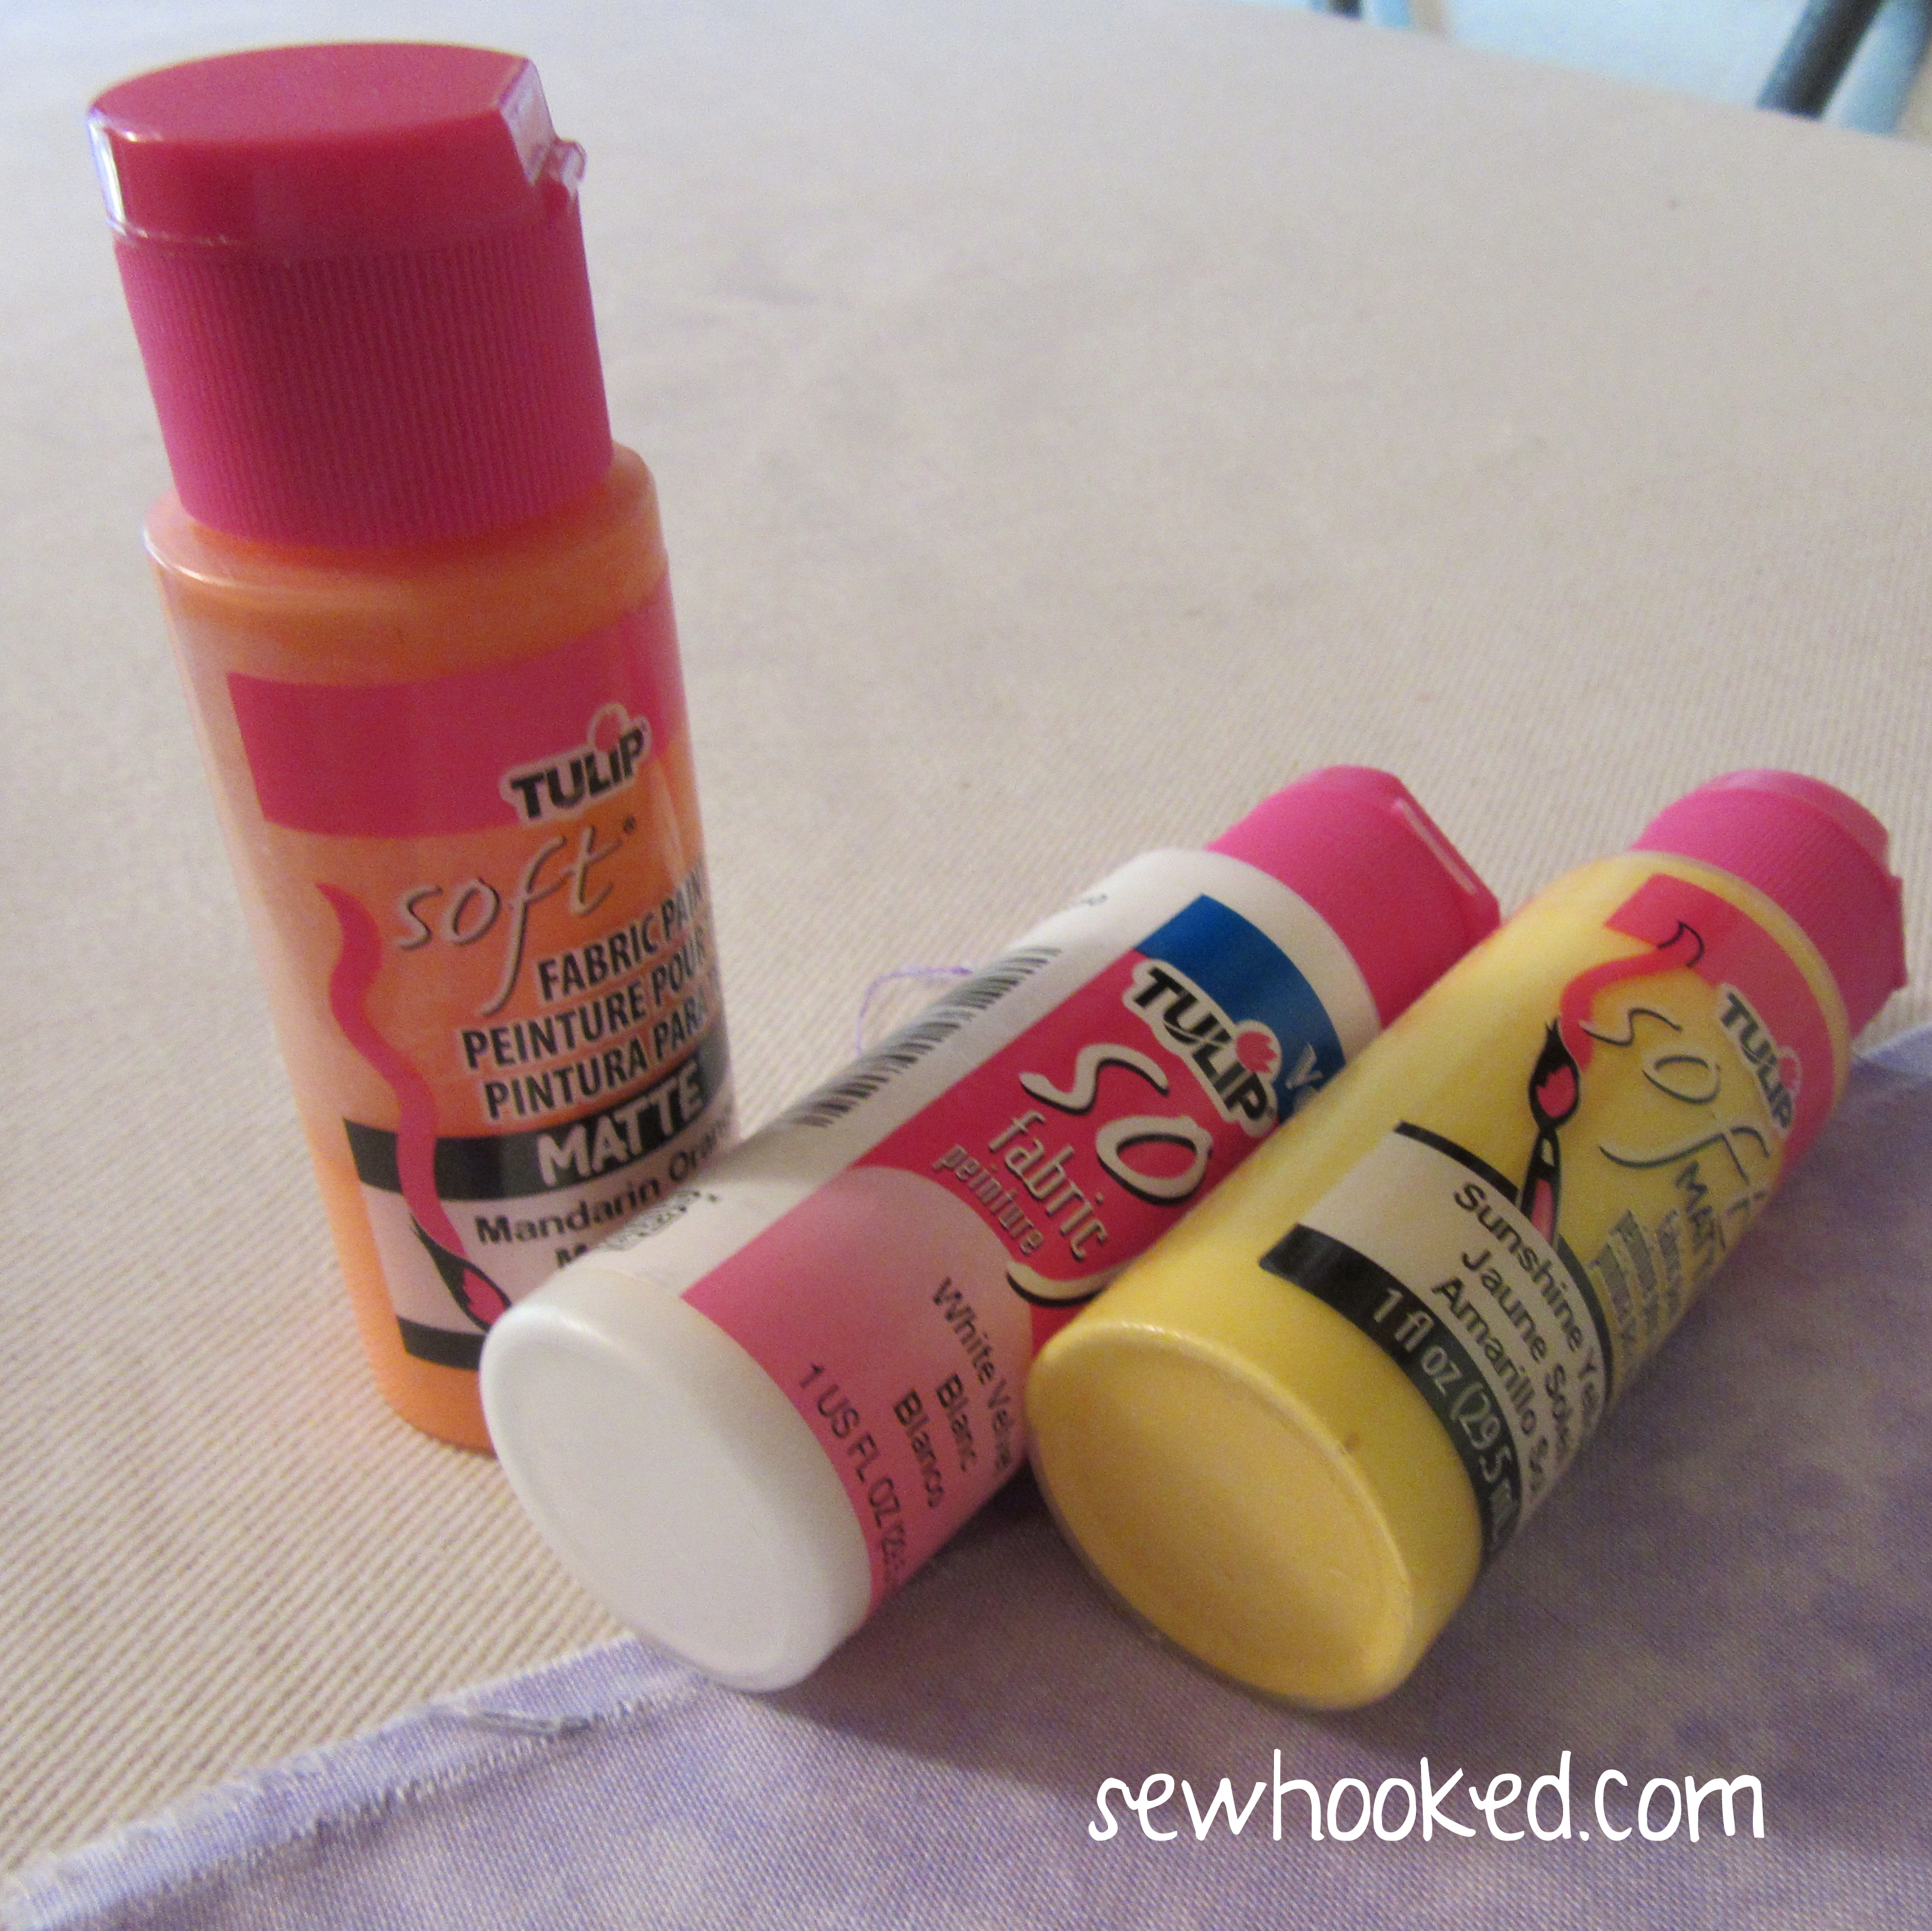
  • Fabric paint. For this project, I used Tulip Soft Mandarin Orange, Sunshine Yellow and Velveteen White.
  • 1″ sponge brush
  • iron
  • cardboard or paper for inside the shirt/back of fabric
  • You’ll need fabric or a t-shirt. Most instructions say to pre-wash, but I won’t lie, I rarely do and I’ve never had any issues with the paint sticking or not lasting.

I used Tulip Soft Fabric Paint for this project.


Here’s the stencil all cut out and ironed on to my fabric. I like to use a pressing cloth after I iron the pointy bits are in place to ensure everything is nice and stuck.

Freezer paper creates a temporary bond, and it will peel off, so check your edges before painting.

I wanted a candy corn effect on the letters, so I blended my colors, starting with white and working my way down. When all the colors were in place, I went back and blended a little between the edges.

The stencil is designed so that the candy corn pieces can be entirely separate if you wish. If you’d prefer to blend yours, simply cut away the dividing bits before ironing the stencil on to your fabric (I didn’t do that, and had to go back with a tiny paint brush, no fun!).

It looks complicated, but it’s so, so simple! Just take your time and don’t be too fussed if the edges aren’t perfect.


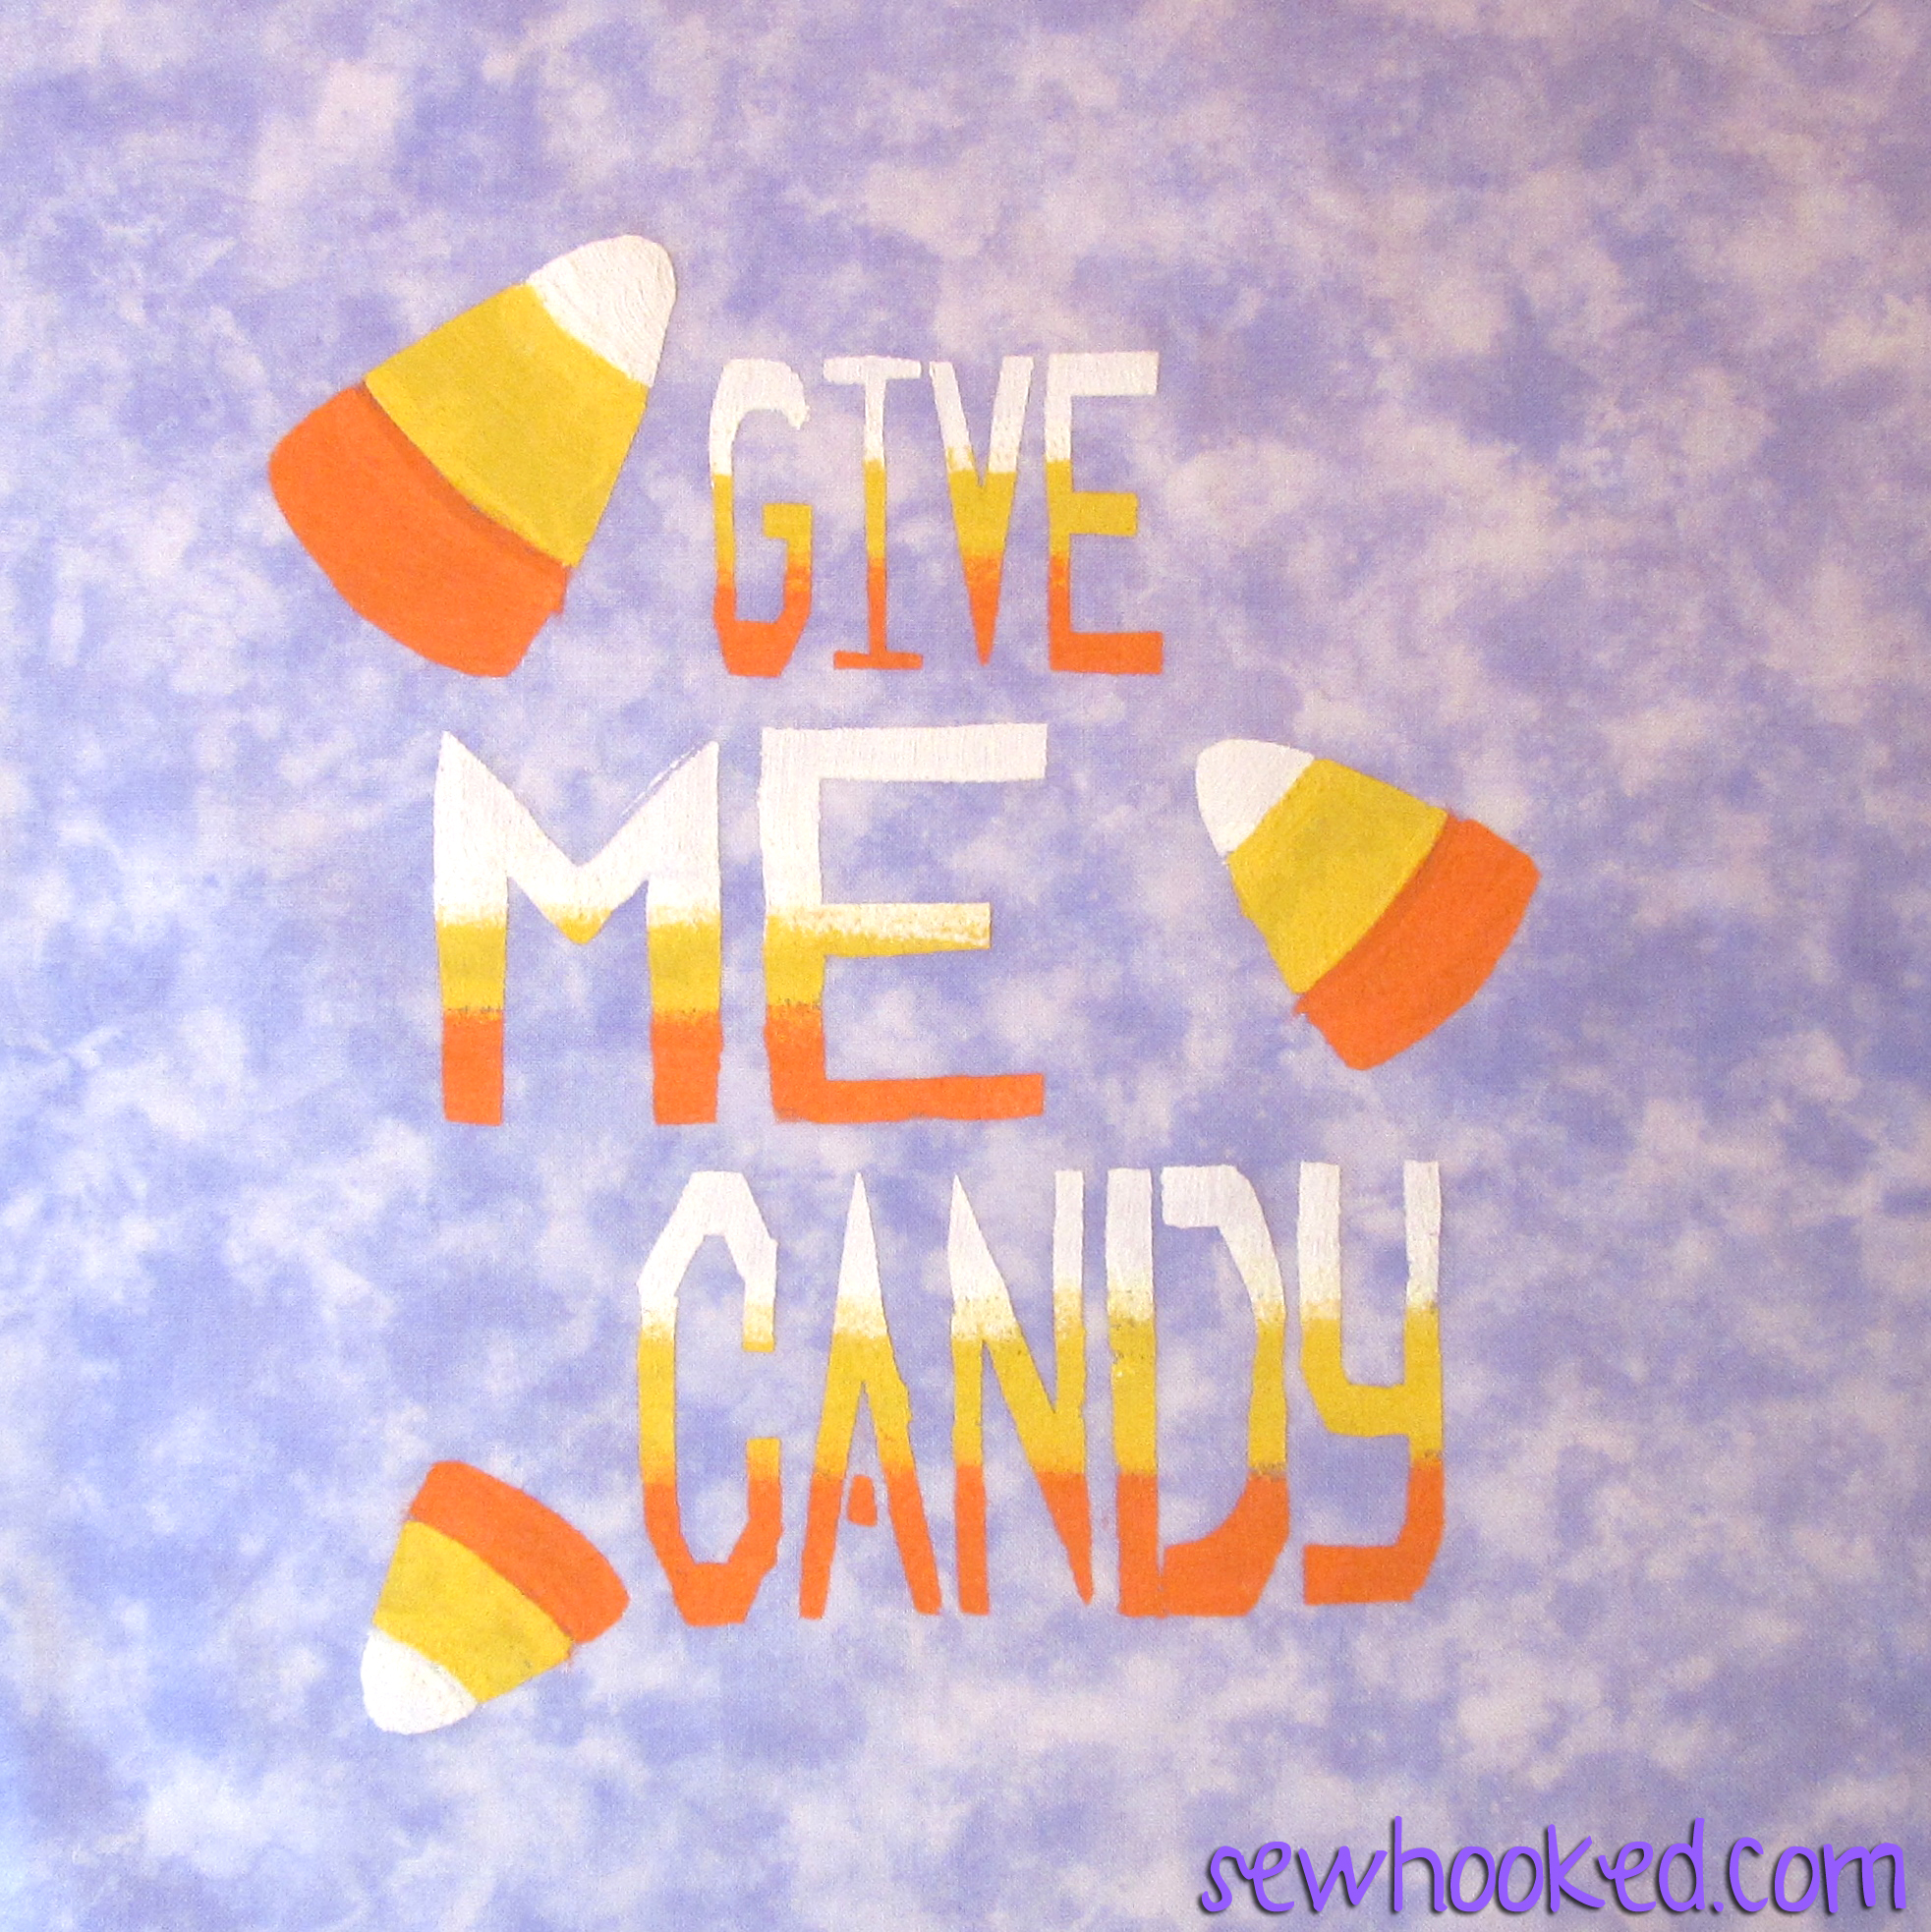
And, done!

I stenciled this on a piece of Moda Marbles and now I’m thinking my Jack cushion might need a companion…

If you’re feeling ambitious, try it with embroidery or even applique!

What do you think? Any ideas for how you might use this fun (and free!) stencil?

One more time…

Download the Give Me Candy Stencil 

Are you making projects from 31 Days of Halloween? I’d love to see! 

See you tomorrow for a look back on Halloweens past !

♥ Jennifer O


31 Days of Halloween – Wizard Trading Cards

31 Days of Halloween on sewhooked.com

Here we are again and we’re one day closer to my favorite holiday as we continue on with  31 Days of Halloween!

Harry Potter Birthday Party, 2003

As I mentioned when I shared the Cauldron Cakes on Thursday, in the Way Back of 2003, my daughter, now 20 years old, had a magical, Harry Potter-themed birthday party.

Time flies, eh?

I thought today would be the perfect time to share another craft from that fun day: Wizard Trading Cards!


Wizard Trading Cards

Chocolate Frogs complete with Wizard Trading Cards

Print Single-Sided Card

Print Double-Sided Card

While not strictly Halloween, no young witch or wizard can resist the lure of a chocolate frog and Wizard Trading Cards!

These are simple and inexpensive to make. There’s no fancy cutting or expensive supplies required. Just grab a sheet of ready-to-print business cards and you’re good to go! Business cards are  U.S. Letter Size (8 1/2″ x 11″). If you don’t have access to that, simply print on card stock and cut to size.

These make great party favors, especially if you know your Halloween crowd are Harry Potter fans!

I used candy molds and milk chocolate chips to make the Chocolate Frogs. Yum!

The cards are those wizards that Harry and Ron come across on their frog cards on the Hogwarts Express during their first trip to Hogwarts! I paraphrased historical information found online, except for Dumbledore, his listing comes directly from Sorcerer’s/Philosopher’s Stone.

These were made WAY back in 2003 and I have unfortunately lost the source list for the information and artists as well as the original editable document, which I would have very much like to have shared. My greatest apologies for this, if there is any way I can recreate the source list, it will be attached to the file at a future date.

Even so, I hope you will enjoy and perhaps make your own set of Wizard Trading Cards!

Are you making projects from 31 Days of Halloween? Share your photos with my flickr group! There will be a fun surprise after Halloween for one lucky winner!
Photobucket

Craftsy | Etsy

Facebook | Sewhooked FB | Sewhooked Facebook Group

Instagram | Flickr | Twitter | Pinterest| Bloglovin

TTMT #338 – Super Secret Sewing & 31 Days of Halloween!

31 Days of Halloween on sewhooked.comToday’s video includes a very special story about a very special quilt and a brand new pattern set that is part of 31 Days of Halloween. I hope you enjoy!

Don’t forget to check out my EQ7 Seasons Row Along Show & Tell Post from earlier today! I’d also like to encourage anyone that made my own Spring row to post photos in my flickr group. I would love to see what you made!

Looking for the Talk to Me Tuesday community? Here it is!

Visit Fandom in Stitches tomorrow for week 9 in the Smart Phone Quilt Along with new patterns by Jennifer Rowles!

Jack's Lanterns, 9 Patterns to Paper Piece by Jennifer Ofenstein

Get Jack’s Lanterns on Craftsy for just $6!

See you tomorrow for another fun day of Halloween-inspired happiness!

Photobucket

Craftsy | Etsy

Facebook | Sewhooked FB | Sewhooked Facebook Group

Instagram | Flickr | Twitter | Pinterest| Bloglovin

31 Days of Halloween – Vampires & Werewolves

31 Days of Halloween on sewhooked.com

It’s Monday, October 5, and that means another fun post for the 31 Days of Halloween right here on Sewhooked!

Today, I thought I’d share two free paper pieced patterns that I designed for fandominstitches.com, but that work beautifully well for Halloween, too!

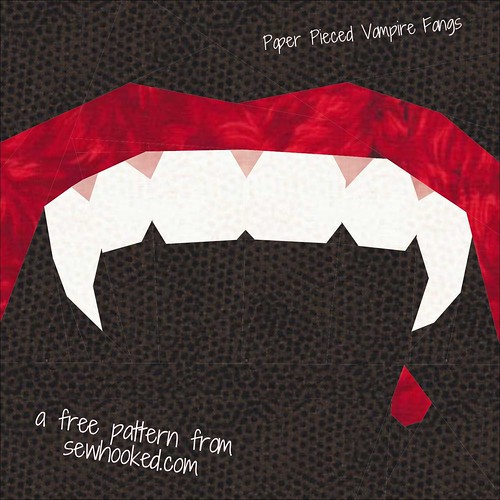
Vampire Fangs Paper Pieced pattern by Jennifer Ofenstein, sewhooked.com

The first up is my Vampire Fangs pattern, designed with my vampire-loving friends in mind. I still love those chompers!

Vampire Fangs is 5 1/2″ (5″ finished) paper pieced and absolutely free!

Get the pattern here.

Prefer Craftsy? You can download it there, too! Team Jacob howling wolf pillow made for archerprenNext, how about a spooky Howling Wolf? While I imagine him as a werewolf, use your own imagination as to where he might fit in your Halloween plans. He’s shown here as part of a cushion I made for a friend ages quite some time ago. I still love that circle fabric in the border!

2004 - Frodo and Werewolf

Here is my own Howling Wolf, along with her little brother, Frodo, from way back in 2004!

The Howling Wolf pattern is 5 1/2″ (5″ finished) and absolutely free.

Get the pattern here.

If you prefer, download the pattern from Craftsy!

I'm a Craftsy Designer
Are you making projects from 31 Days of Halloween? Share your photos with my flickr group! There will be a fun surprise after Halloween for one lucky winner!
See you tomorrow with Talk To Me Tuesday and more Halloween fun!

Photobucket

Craftsy | Etsy

Facebook | Sewhooked FB | Sewhooked Facebook Group

Instagram | Flickr | Twitter | Pinterest| Bloglovin

smartphone quilt along

Visit Fandom in Stitches for the Smartphone Quilt Along happening now!