You may remember my earring hanger that I posted some time ago. No? Well, go check it out, then! It’s fun and easy to make.
What do you do when you have a teenager with way more earrings than the hanger can hold? Make a new one, of course!
While rummaging around my supplies looking for a spare frame, I came across an extra piece from one of those wire cube storage widgets. This thing has been hanging around forever in my pile of “you never know” craft supplies.
Today, it found it’s purpose!
It’s as easy as pie to put together (and definitely takes less time than pie!).
All you need is one piece of a wire cube storage set, or some other wire-frame widget, some zip ties, a piece of plastic canvas and some of those awesome 3M Command hooks. All of these things were in my craft supplies, left over from other projects. Total cost… $0!
The piece of plastic canvas fit perfectly across, leaving two rows at the top for the earrings that won’t fit through the smaller holes.
Hey, wait a minute! Some of those earrings are mine…. *grumblegrumble*
I put the zip ties on from the back and then trimmed them, so the closure is hidden.
Using larger hooks on top gave her a place to put her gargantuan hoop earrings while simultaneously keeping the earring hanger sturdy.
A single smaller hook on the bottom holds the whole shebang nice and steady so the earrings don’t get bounced off!
I have oodles of those 99 cent green bags that the local grocery store sells. It takes about 8 of them to carry groceries for our family of four home. Most of the bags are three or so years old, and they’ve definitely seen some wear since I avoid plastic bags whenever possible.
Since it’s the start of a new year and it’s too darn cold to do much outside, I thought now would be a good time to give them a bit of an overhaul!
This is more mending than craft, but it’s easy and helps maintain my reusable bags.
First, I checked for broken or damaged inserts that help keep the bottom firm and the bag upright. Several of them were completely trashed. After fishing around in my recycling, I came up with a couple sturdy cereal boxes.
The boxes were the perfect size, so I just trimmed them up with scissors, rounded the corners and popped them into the bag. Wallah, brand new bottom inserts!
Next, I checked for split or damaged seams. Most of them were okay because I fairly regularly check for popped stitching caused by one too many cans! There was one that had lost it’s stitching and was starting to lose the trim that holds the front and bottom together. A quick zig zag stitch using whatever thread was on my machine, and it’s good to go!
The holiday head cold has grabbed me with both hands! Fortunately, I finished my gift making and wrapping before I could spread cooties along with my Christmas cheer.
I did something I almost never do and *gasp* bought pre-made gift bags for holiday treats. When I opened the packages, they all had a bottle neck. After I forced my eyebrows down out of my scalp, I realized the cute little bags were practically useless unless the entirety of my holiday giving included M&Ms.
Without any time to spare, I started digging around in my “keep just in case” drawer and came up with a stack of paper wine bags that I’ve been holding on to forever. Jackpot!
To make your own holiday gift bags/wrap from recycled wine bags, you’ll need:
paper bags (any size)
tape or glue
hole punch
ribbon
iron
Something to cut the bags (paper cutter, rotary cutter, decorative or plain scissors)
stamps, stickers, or other embellishments
If your bags are like mine, they’re likely to be in all different states of crumpled-ness. So, first things, first, iron those bags if needed. Medium heat works. Ironing on a paper bag will also clean your iron, so you might want to start with a sacrificial bag, just in case your iron has any Ghosts of Craft Projects Past lurking around.
Much better!
I happen to have a snazzy wavy blade for my rotary cutter. Try scissors, decorative or plain, or fun rotary blades.
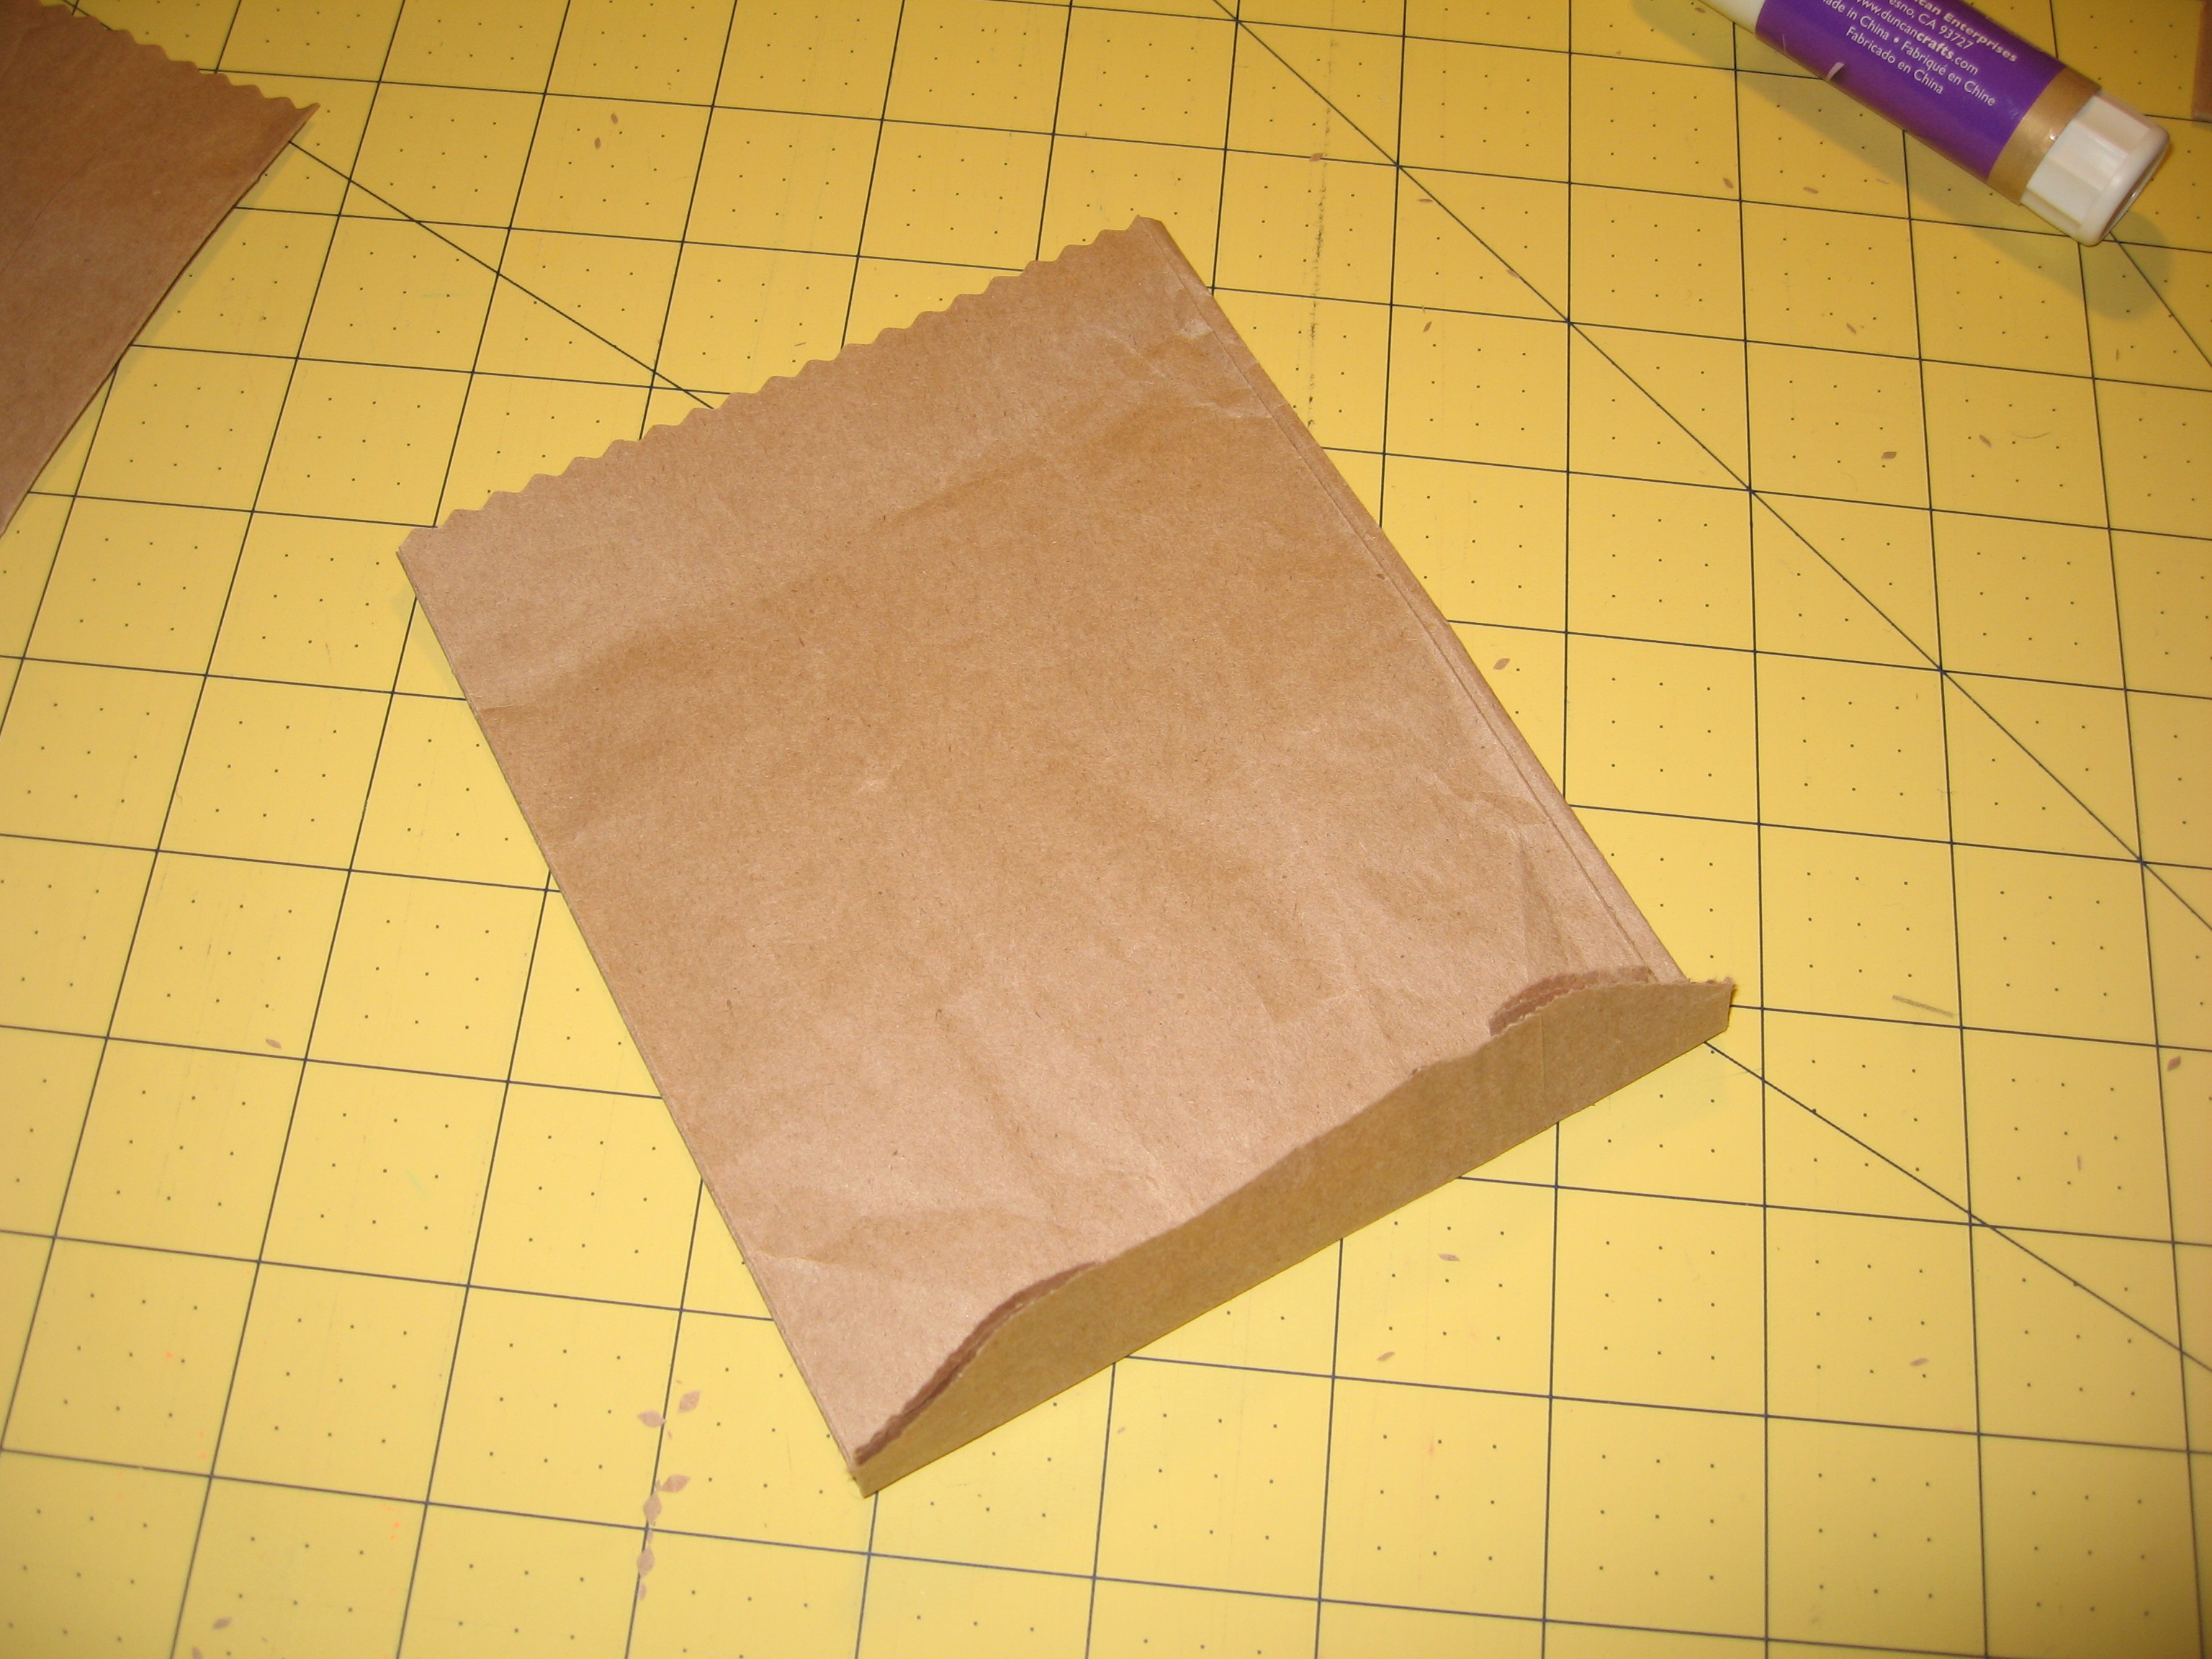
Each wine bag will make 2 gift bags. Determine how big you want each side to be, leaving about 1″ for folding for each bag.
Bottom and top (L-R)
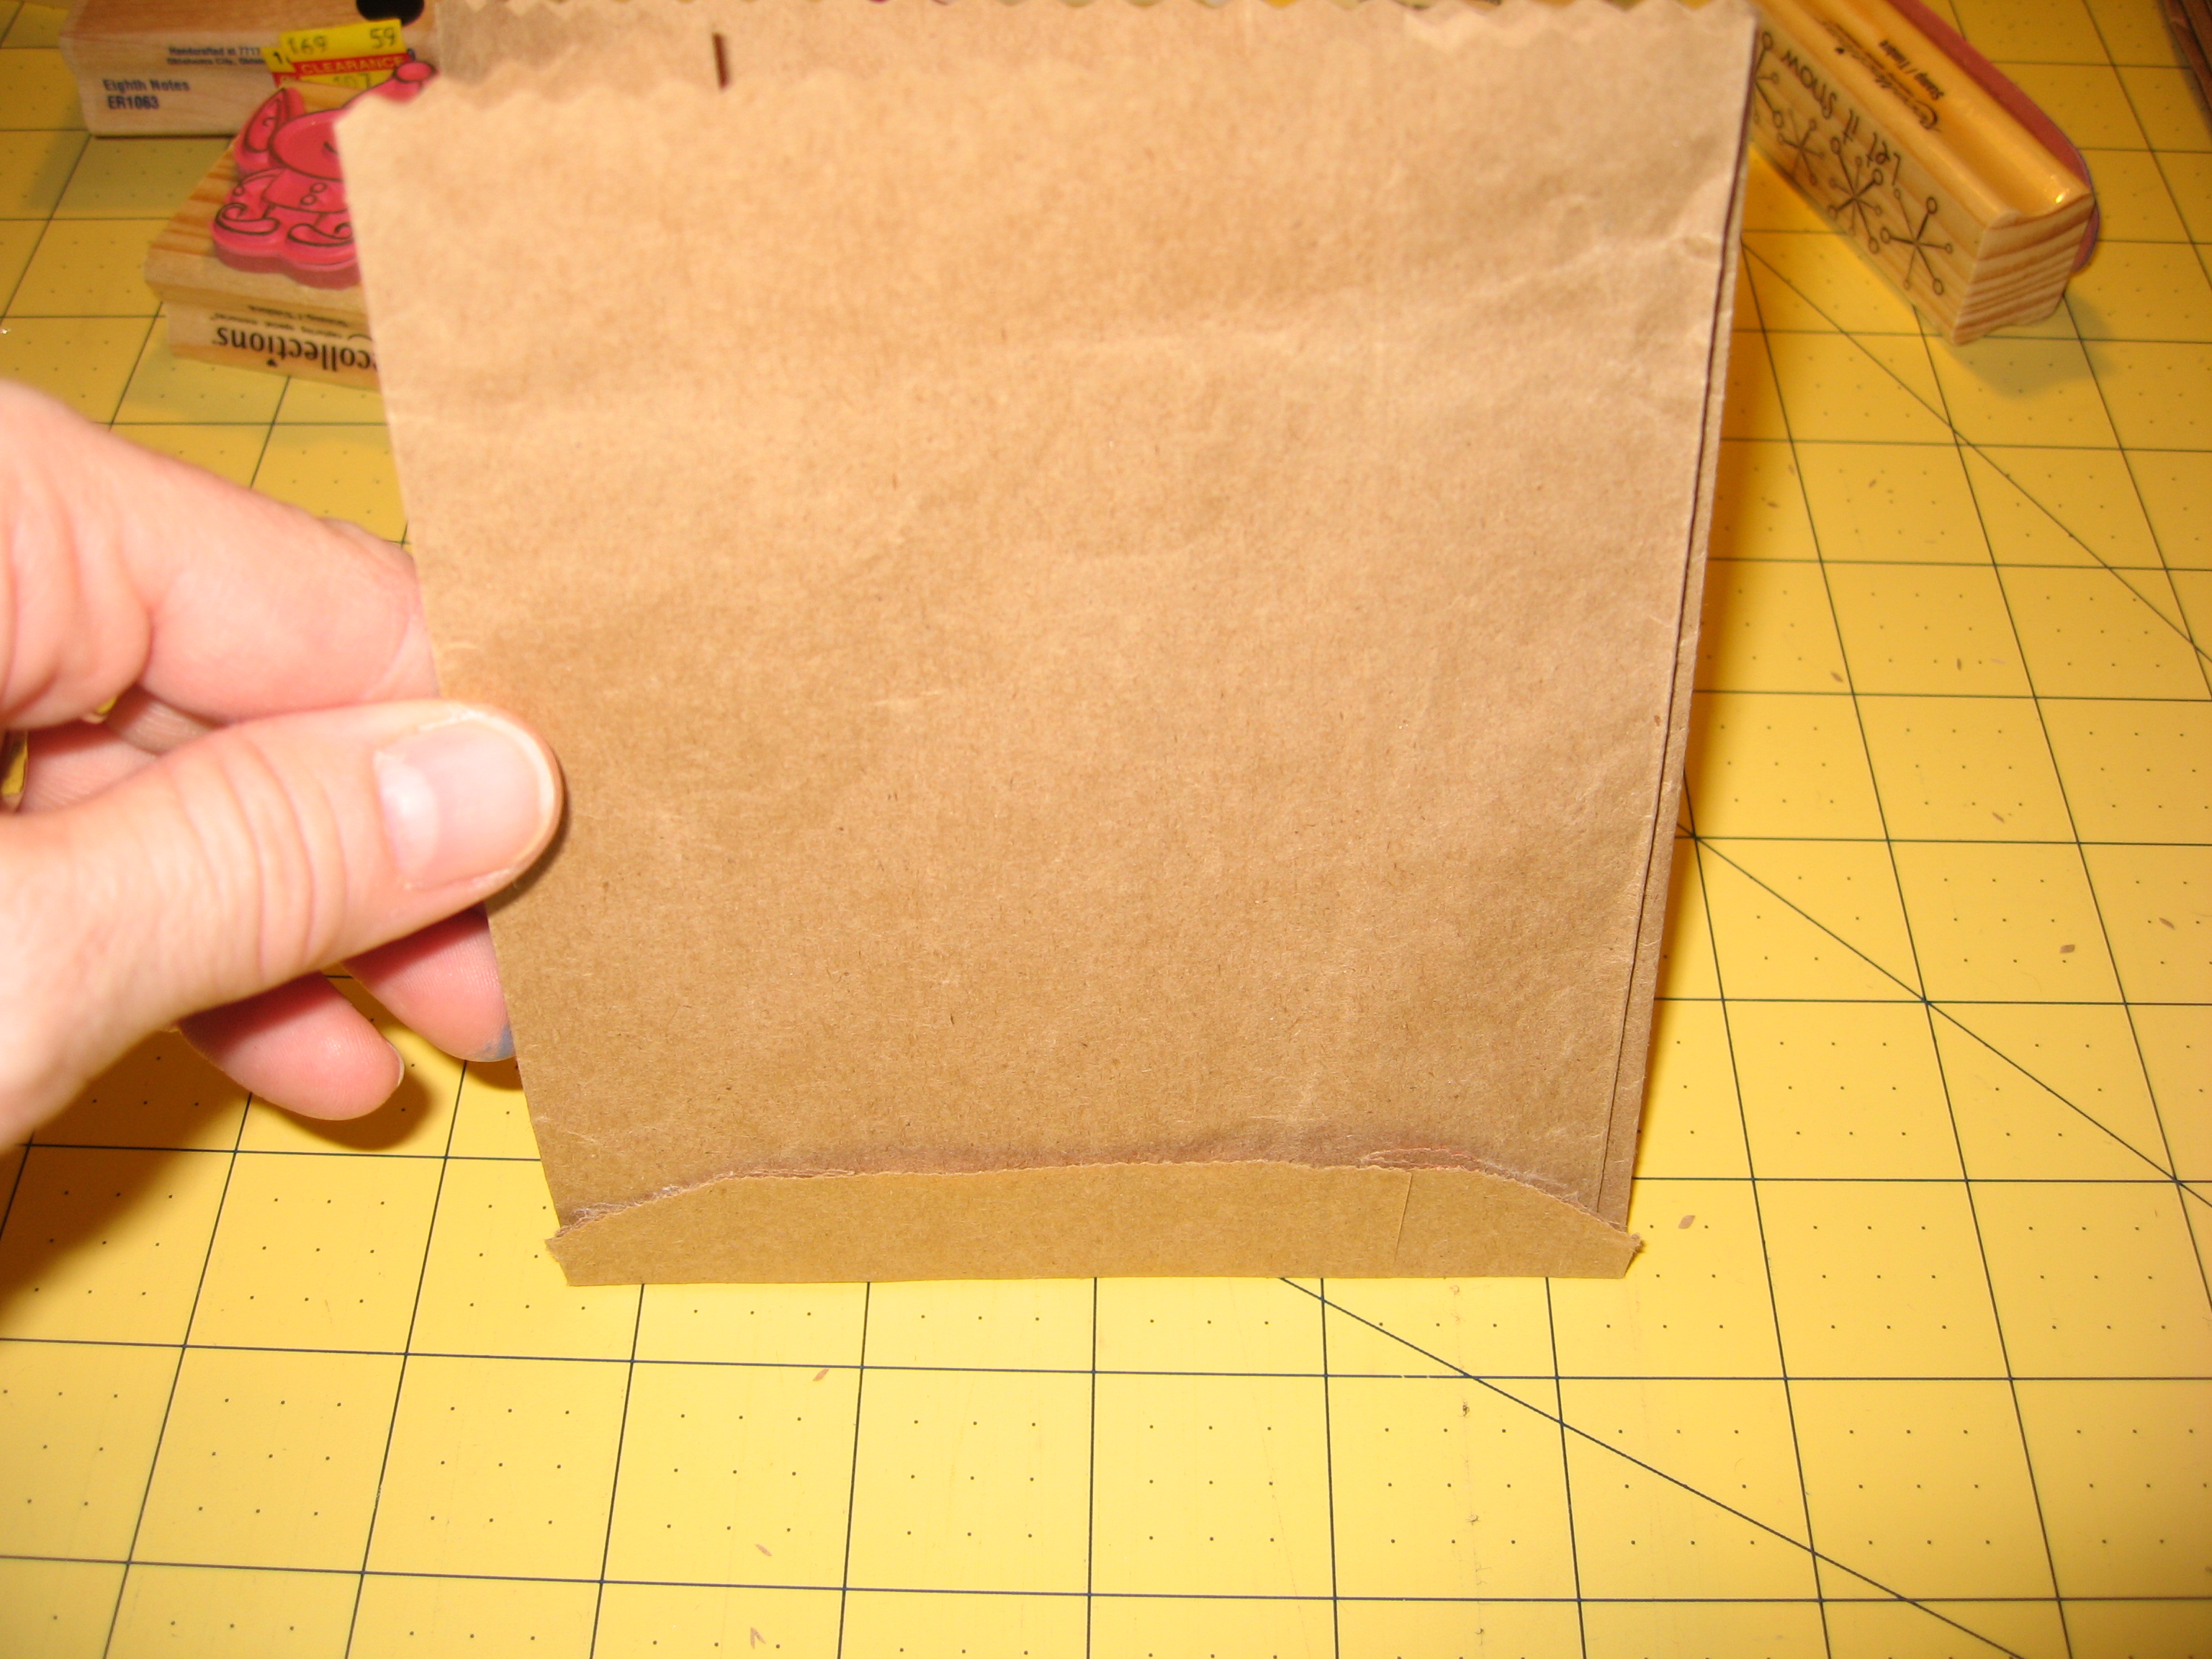
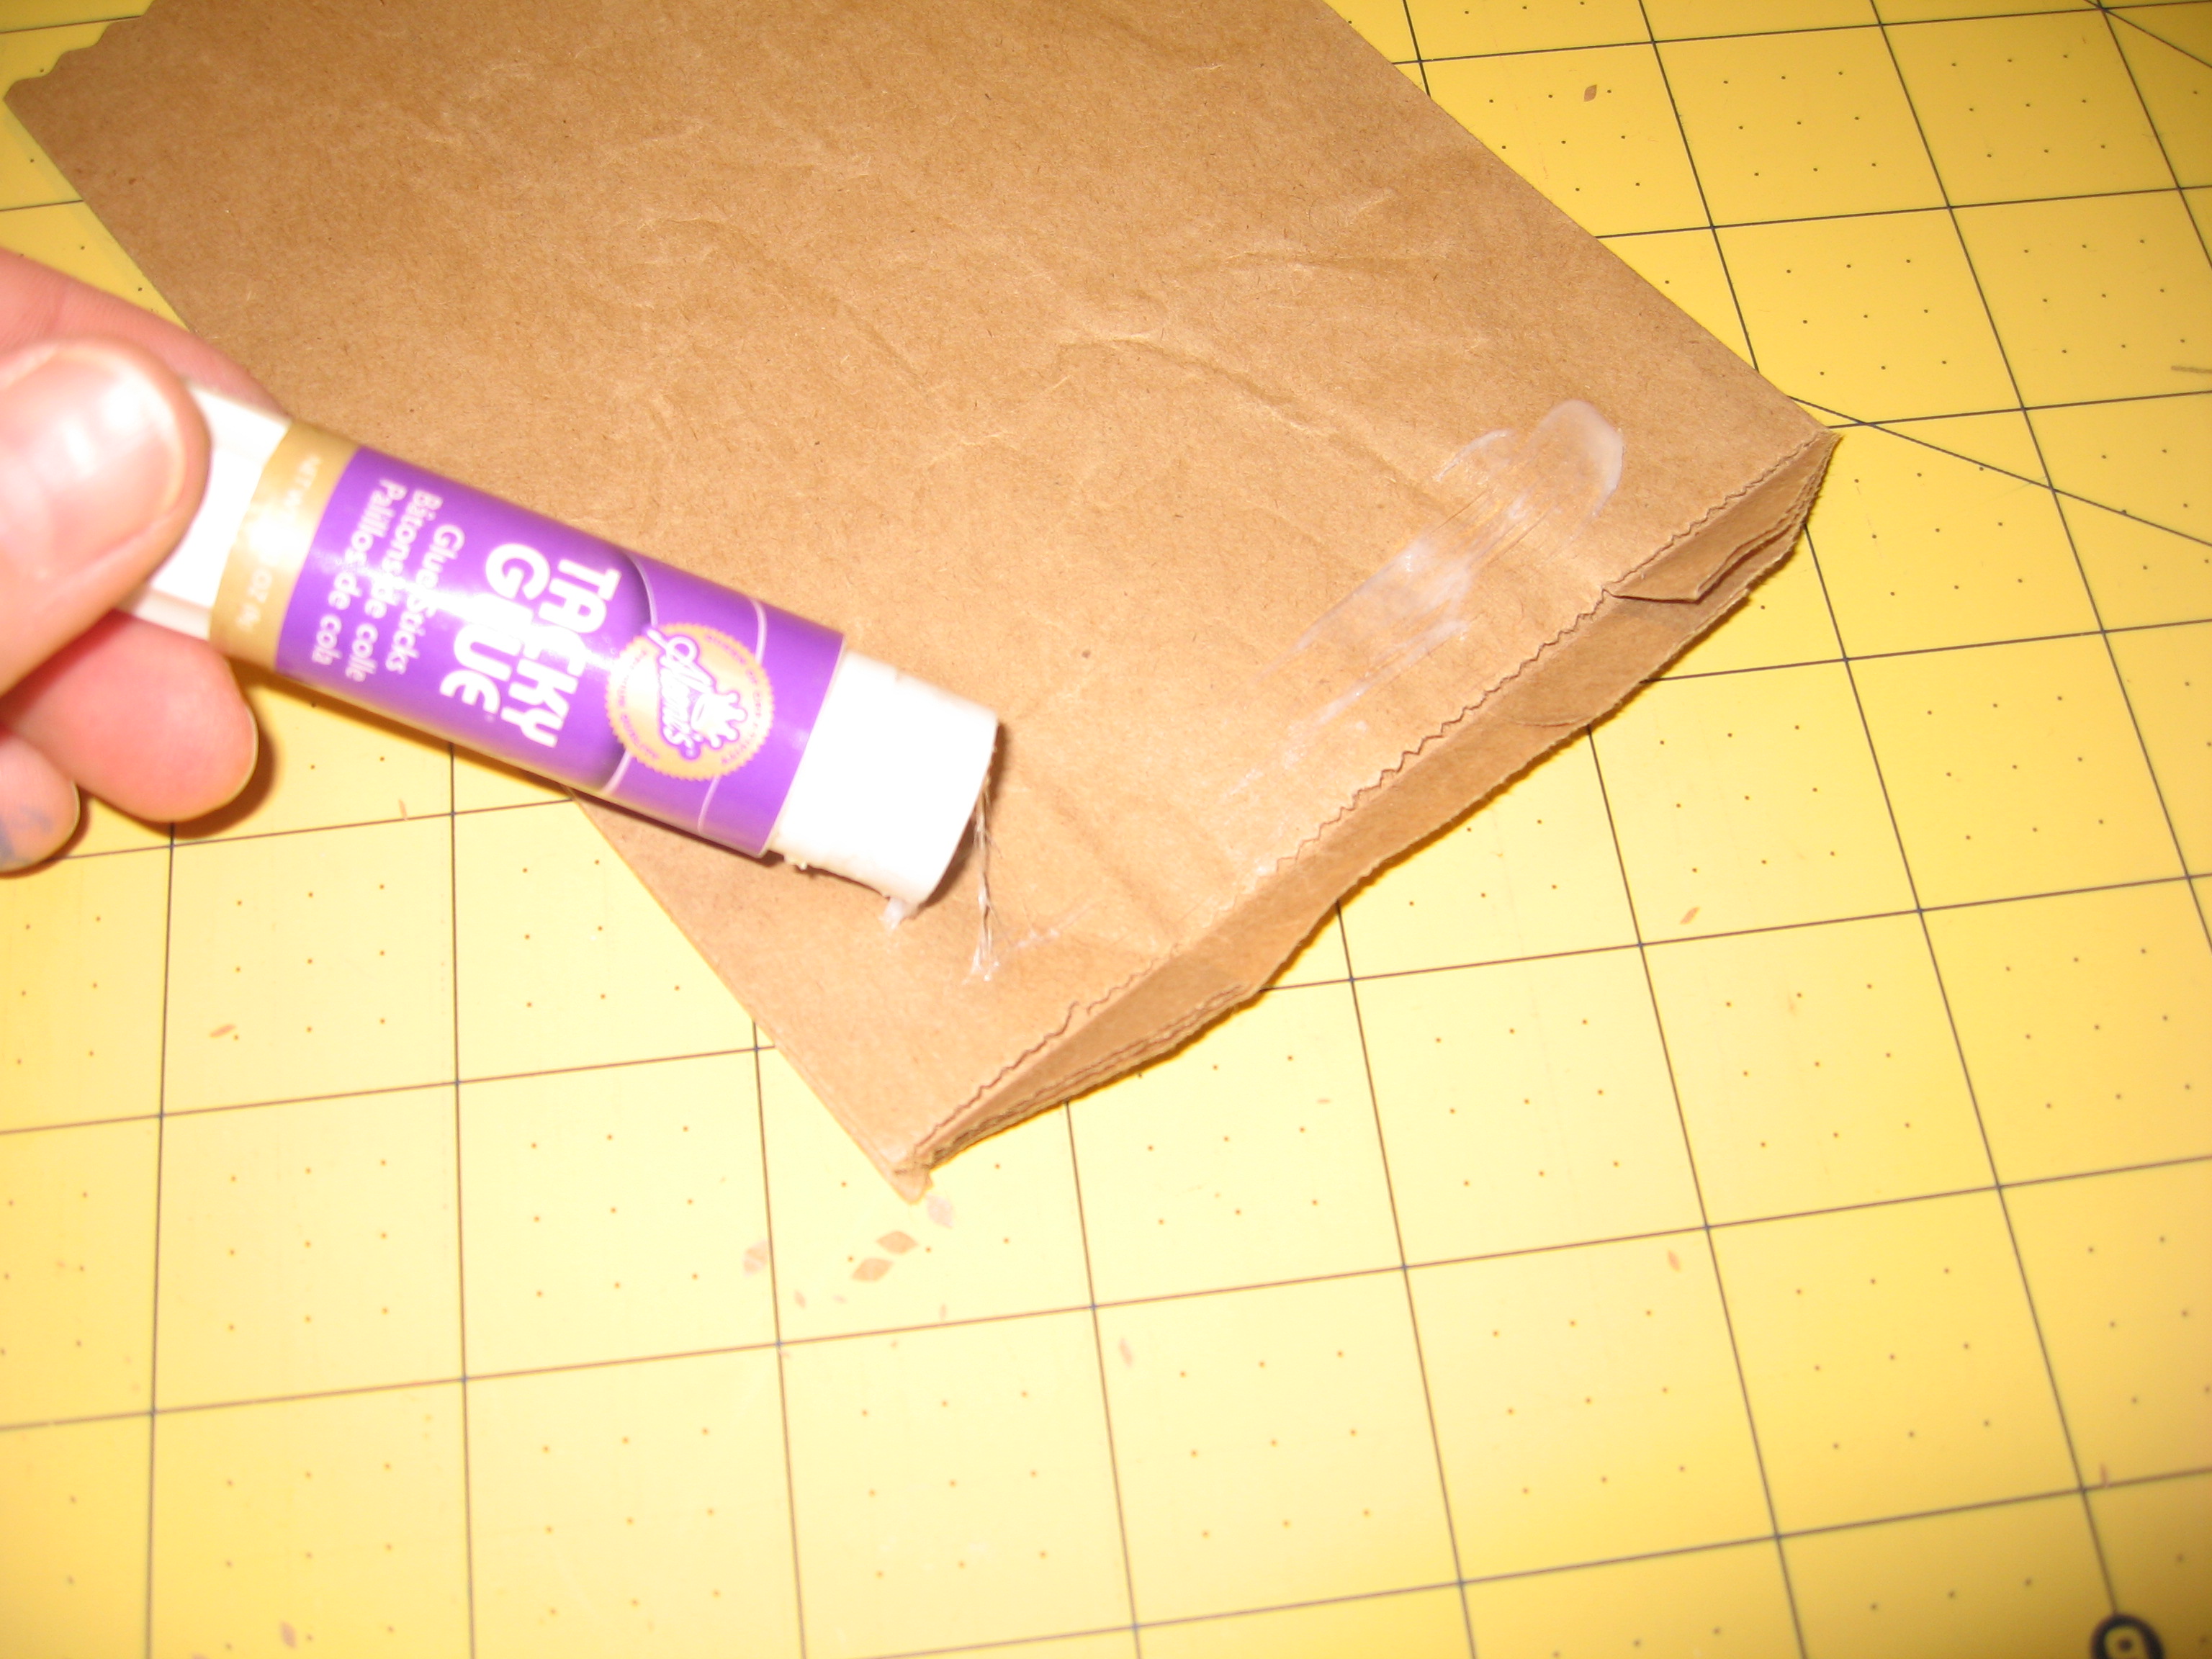
If you’re making more than one gift bag out of your original bag, you may need to seal the bottom. Glue works for this, but so does tape or a cute sticker.
This is also a good time to embellish your gift bag with stickers, stamps, or doodles.
Top finish off, fold the top down and punch two holes through all layers. Insert your gift and tie a ribbon through to close.
Repeat the steps for all bags. The bottom half of your recycled gift wrap will only need the tops folded and punched since the bottom is already sealed. I stamped mine, but you can embellish your bags any way you like. Now, fill with holiday goodness and gift it! If you’re stuffing your gift bags with edible homemade goodness, I suggest wrapping it in plastic or wax paper before placing it in the bag.
I admit it… I keep everything that I might be able to use or recycle later on.
If it’s pretty, cool, or unique, it’s somewhere in a plastic bin or drawer waiting to be reimagined.
I’ve been recycling my paper calendars as long as I can remember. Each December, I start eyeballing the soon-to-be-obsolete model, wondering what it will be in a month or so.
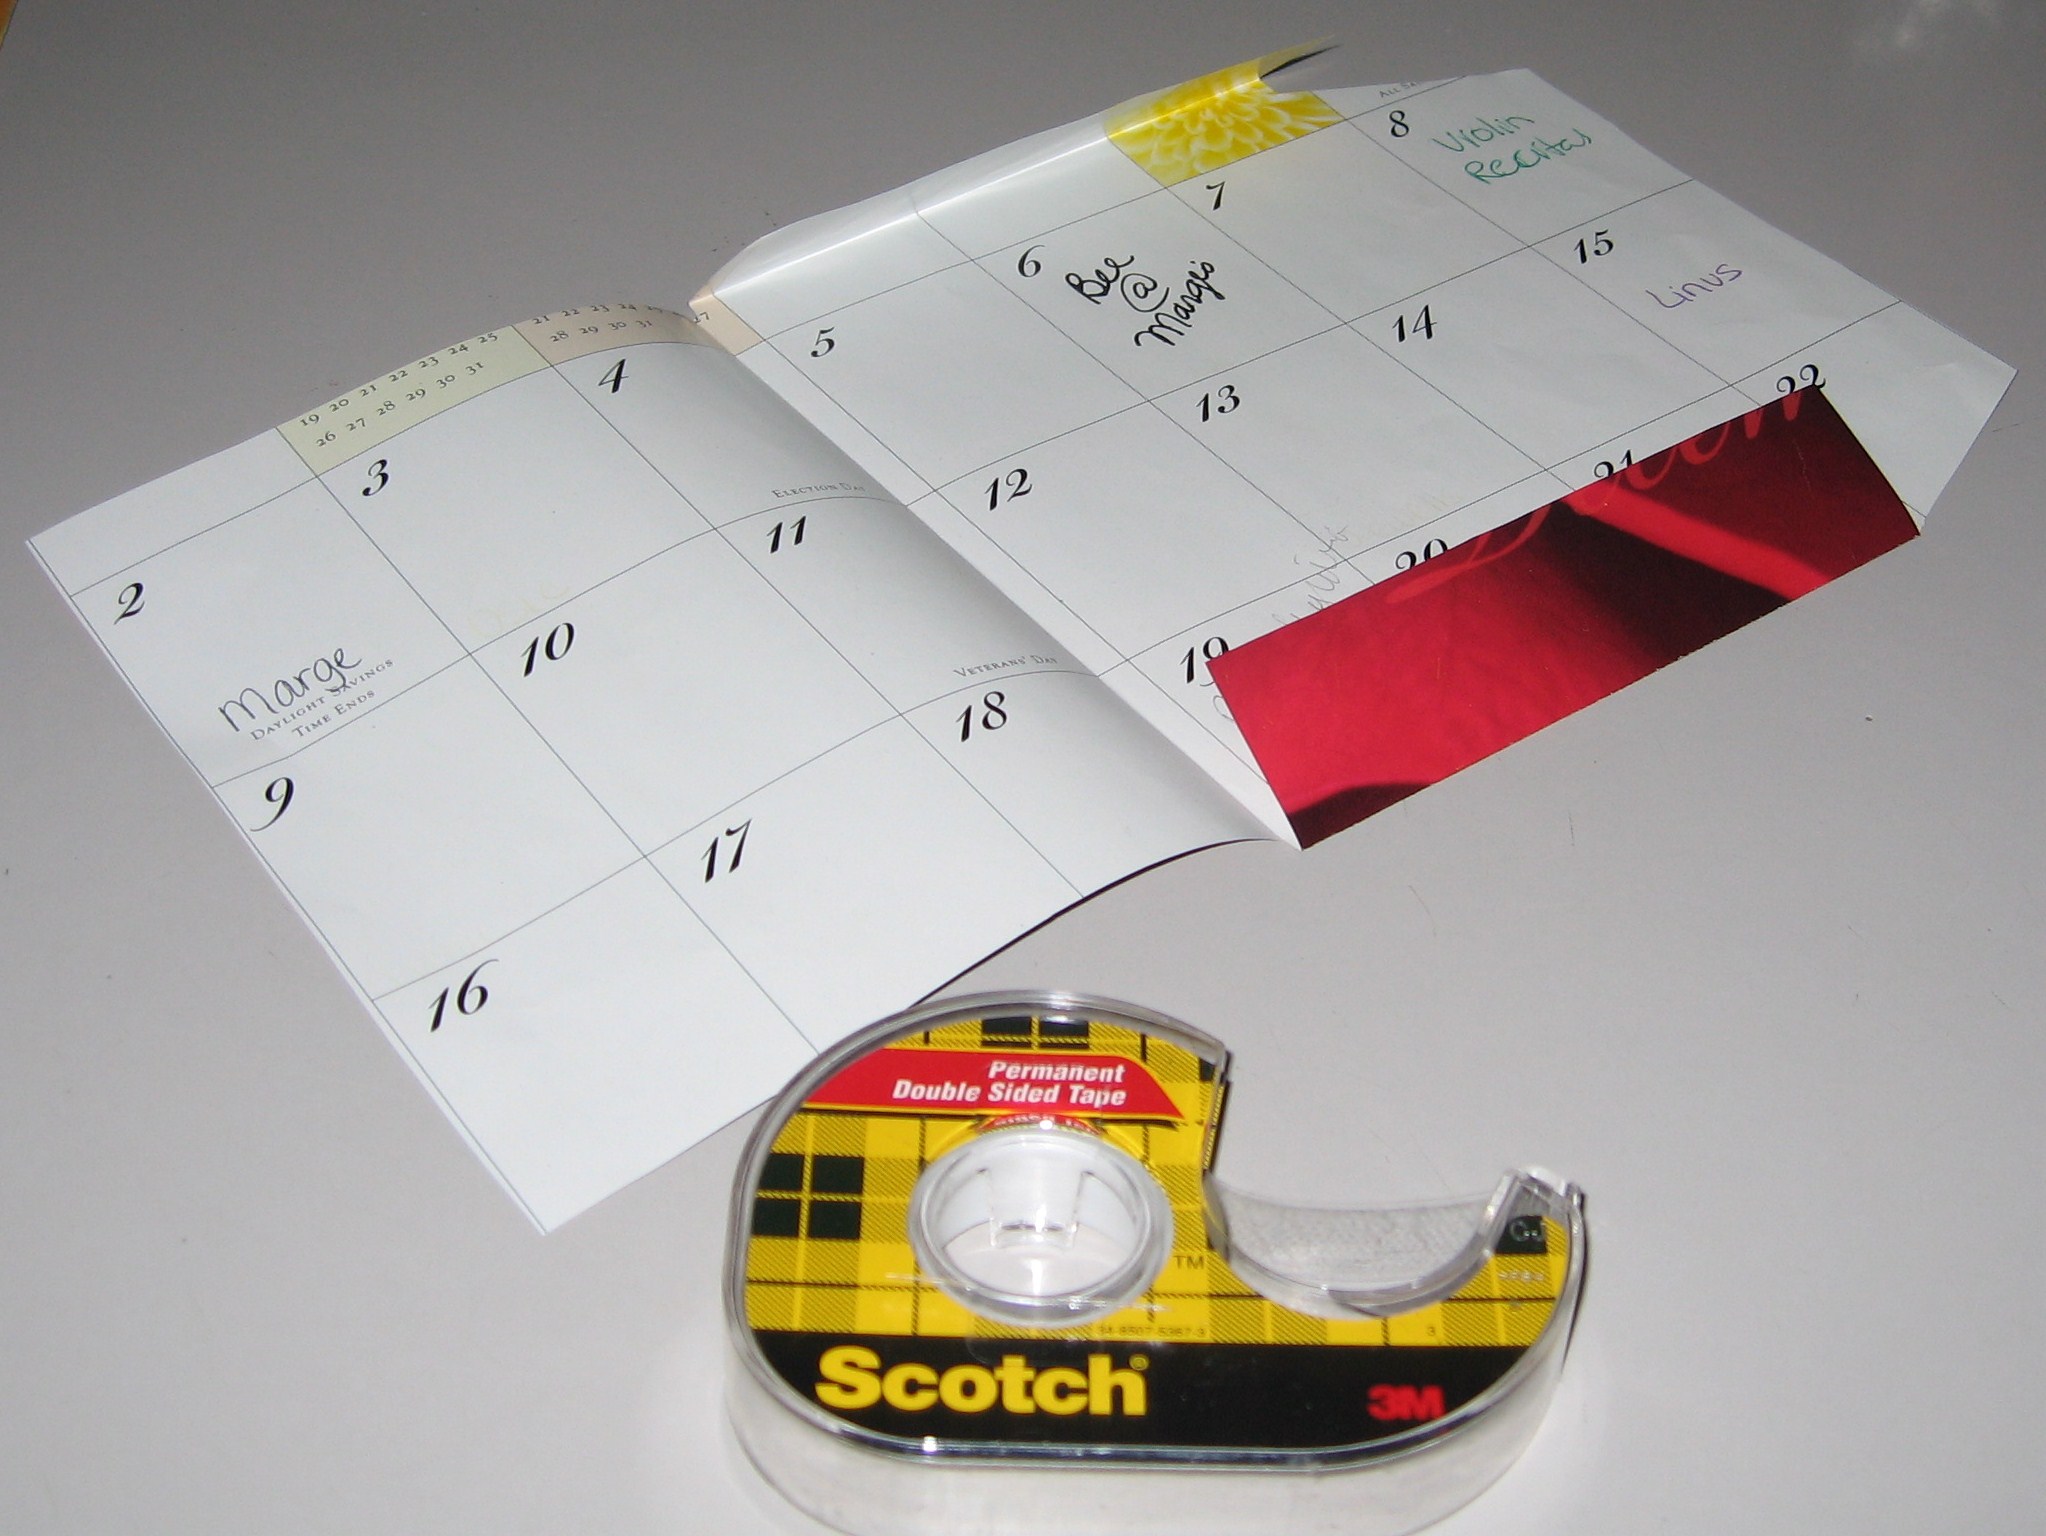
In the past, old calendars have become postcards and gift boxes. My favorite by far is envelopes. Calendar pages, especially really cool calendar pages, make great envelopes!
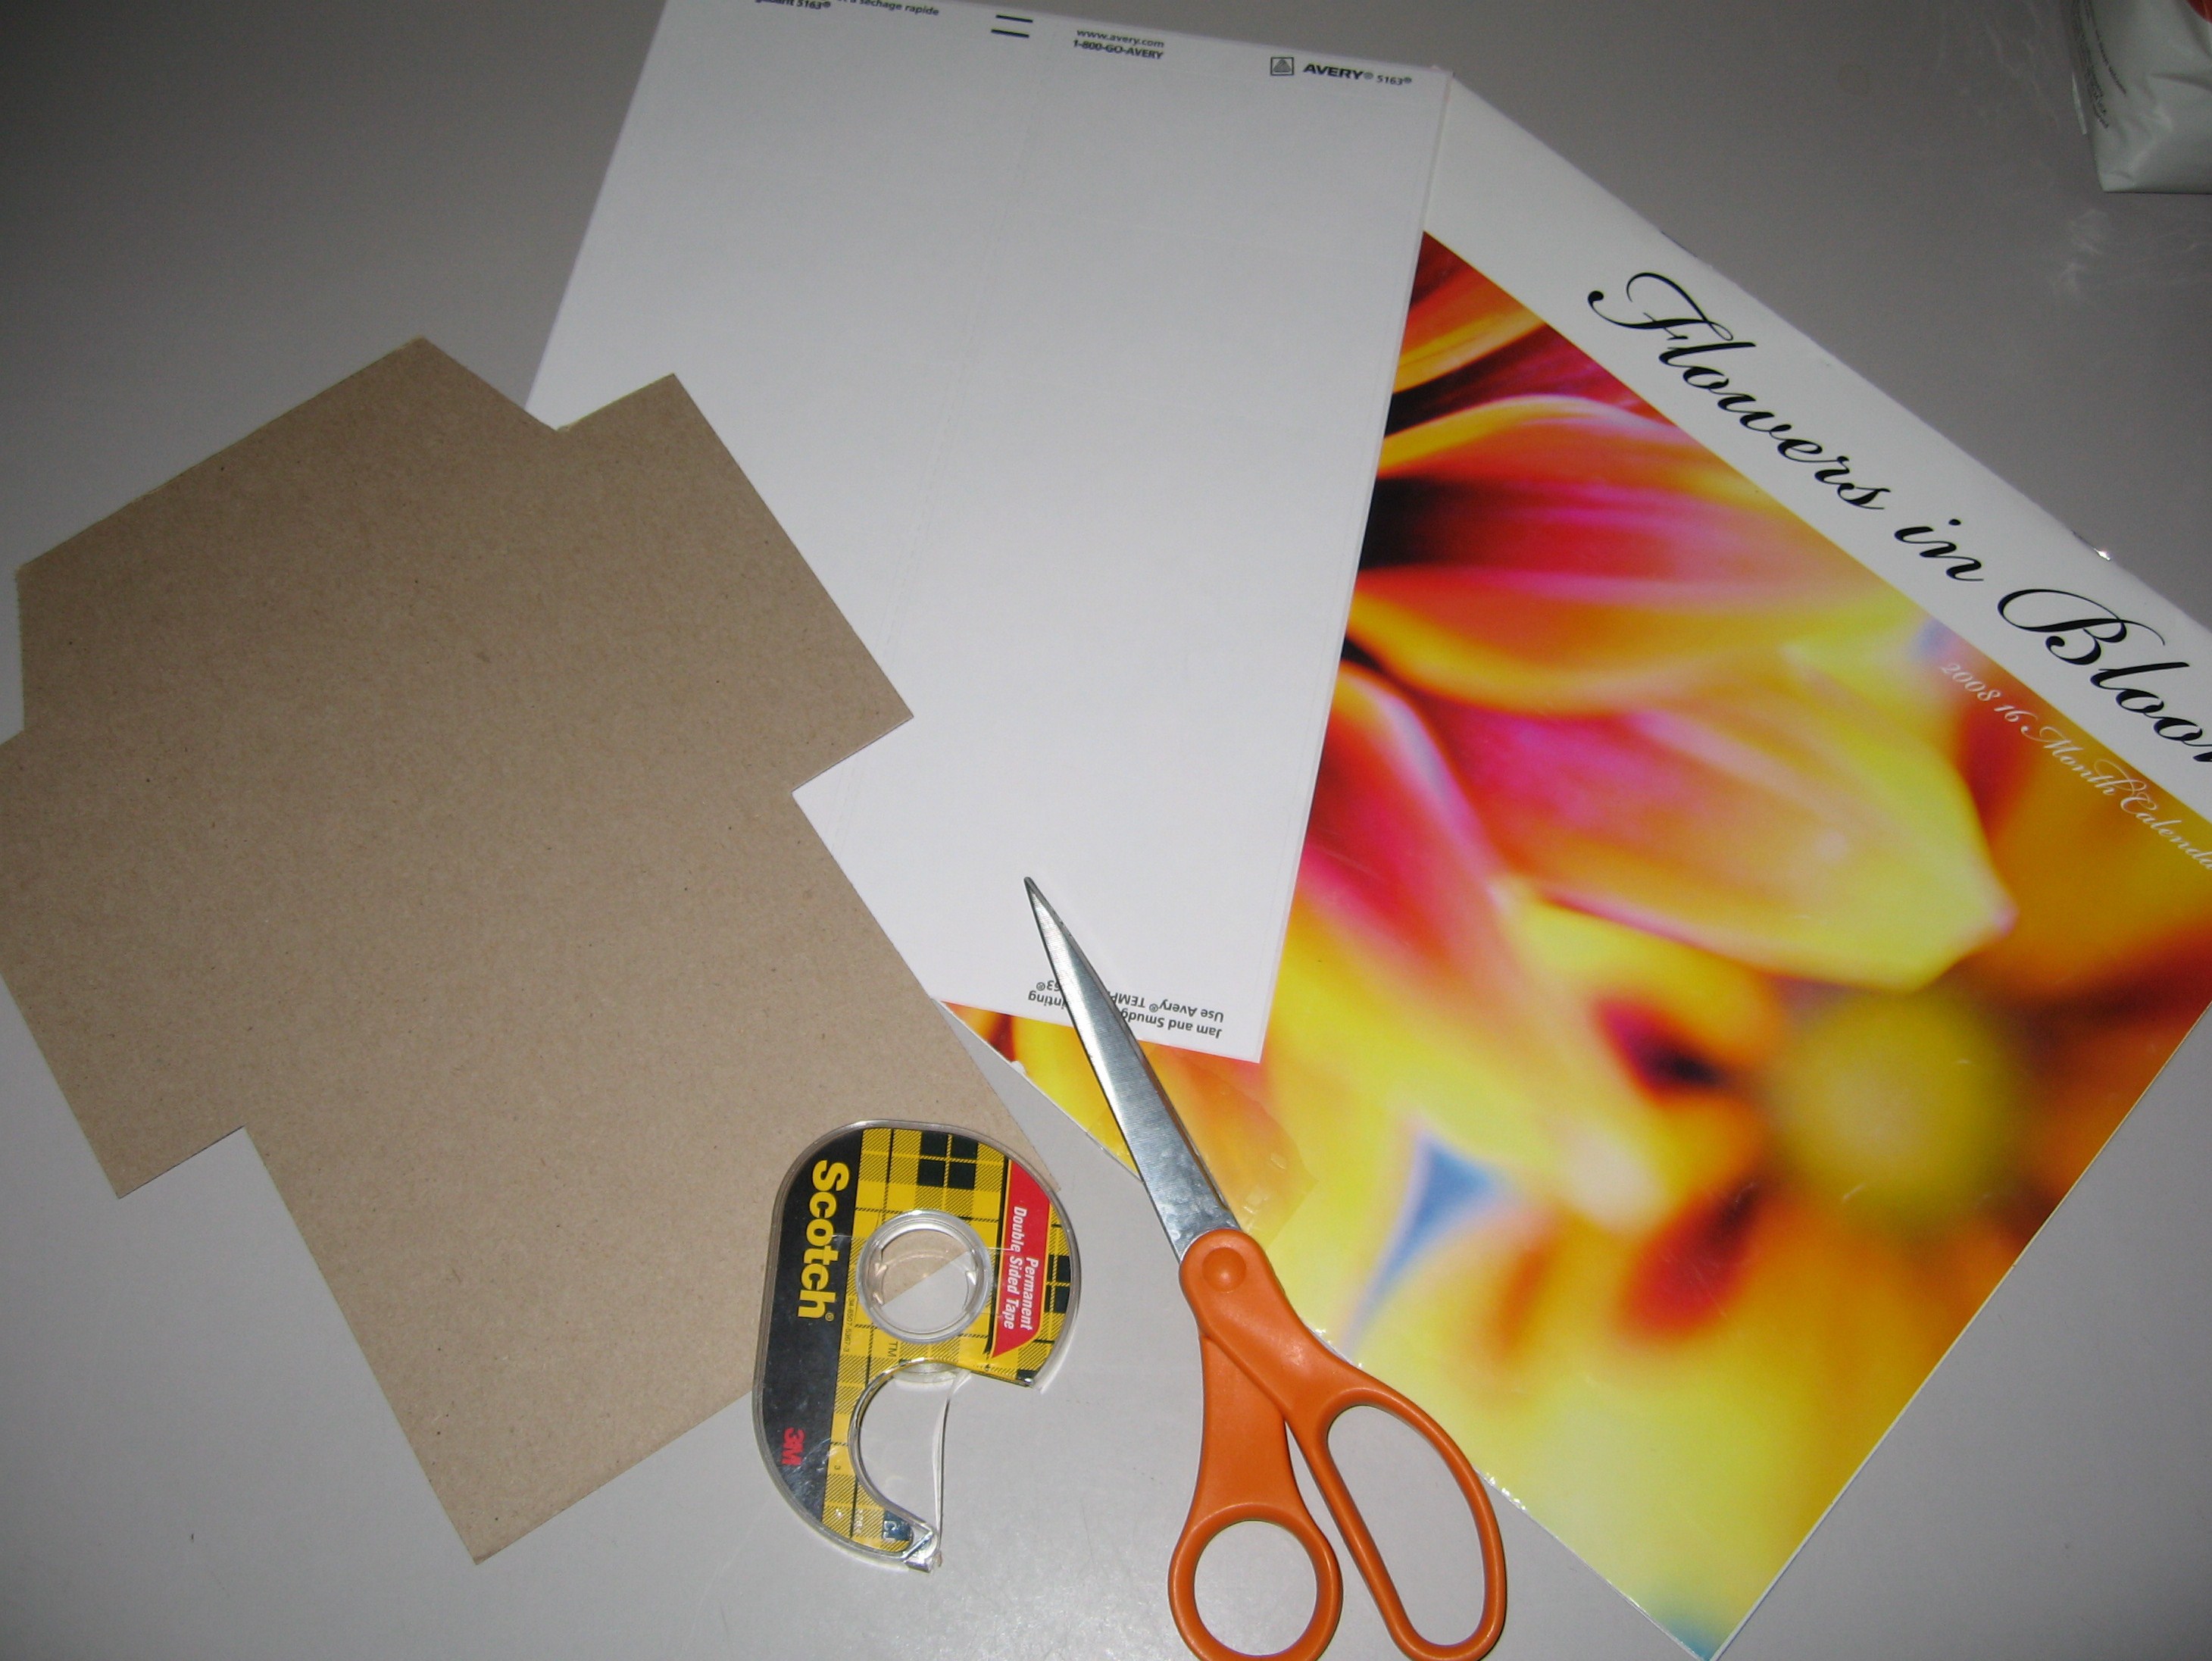
You’ll need:
an old calendar, the bigger, the better!
envelope template – cut out, and transferred to a piece of lightweight card stock or cardboard
staple remover
scissors
pencil
double stick tape OR a glue stick
Blanket mailing labels (optional)
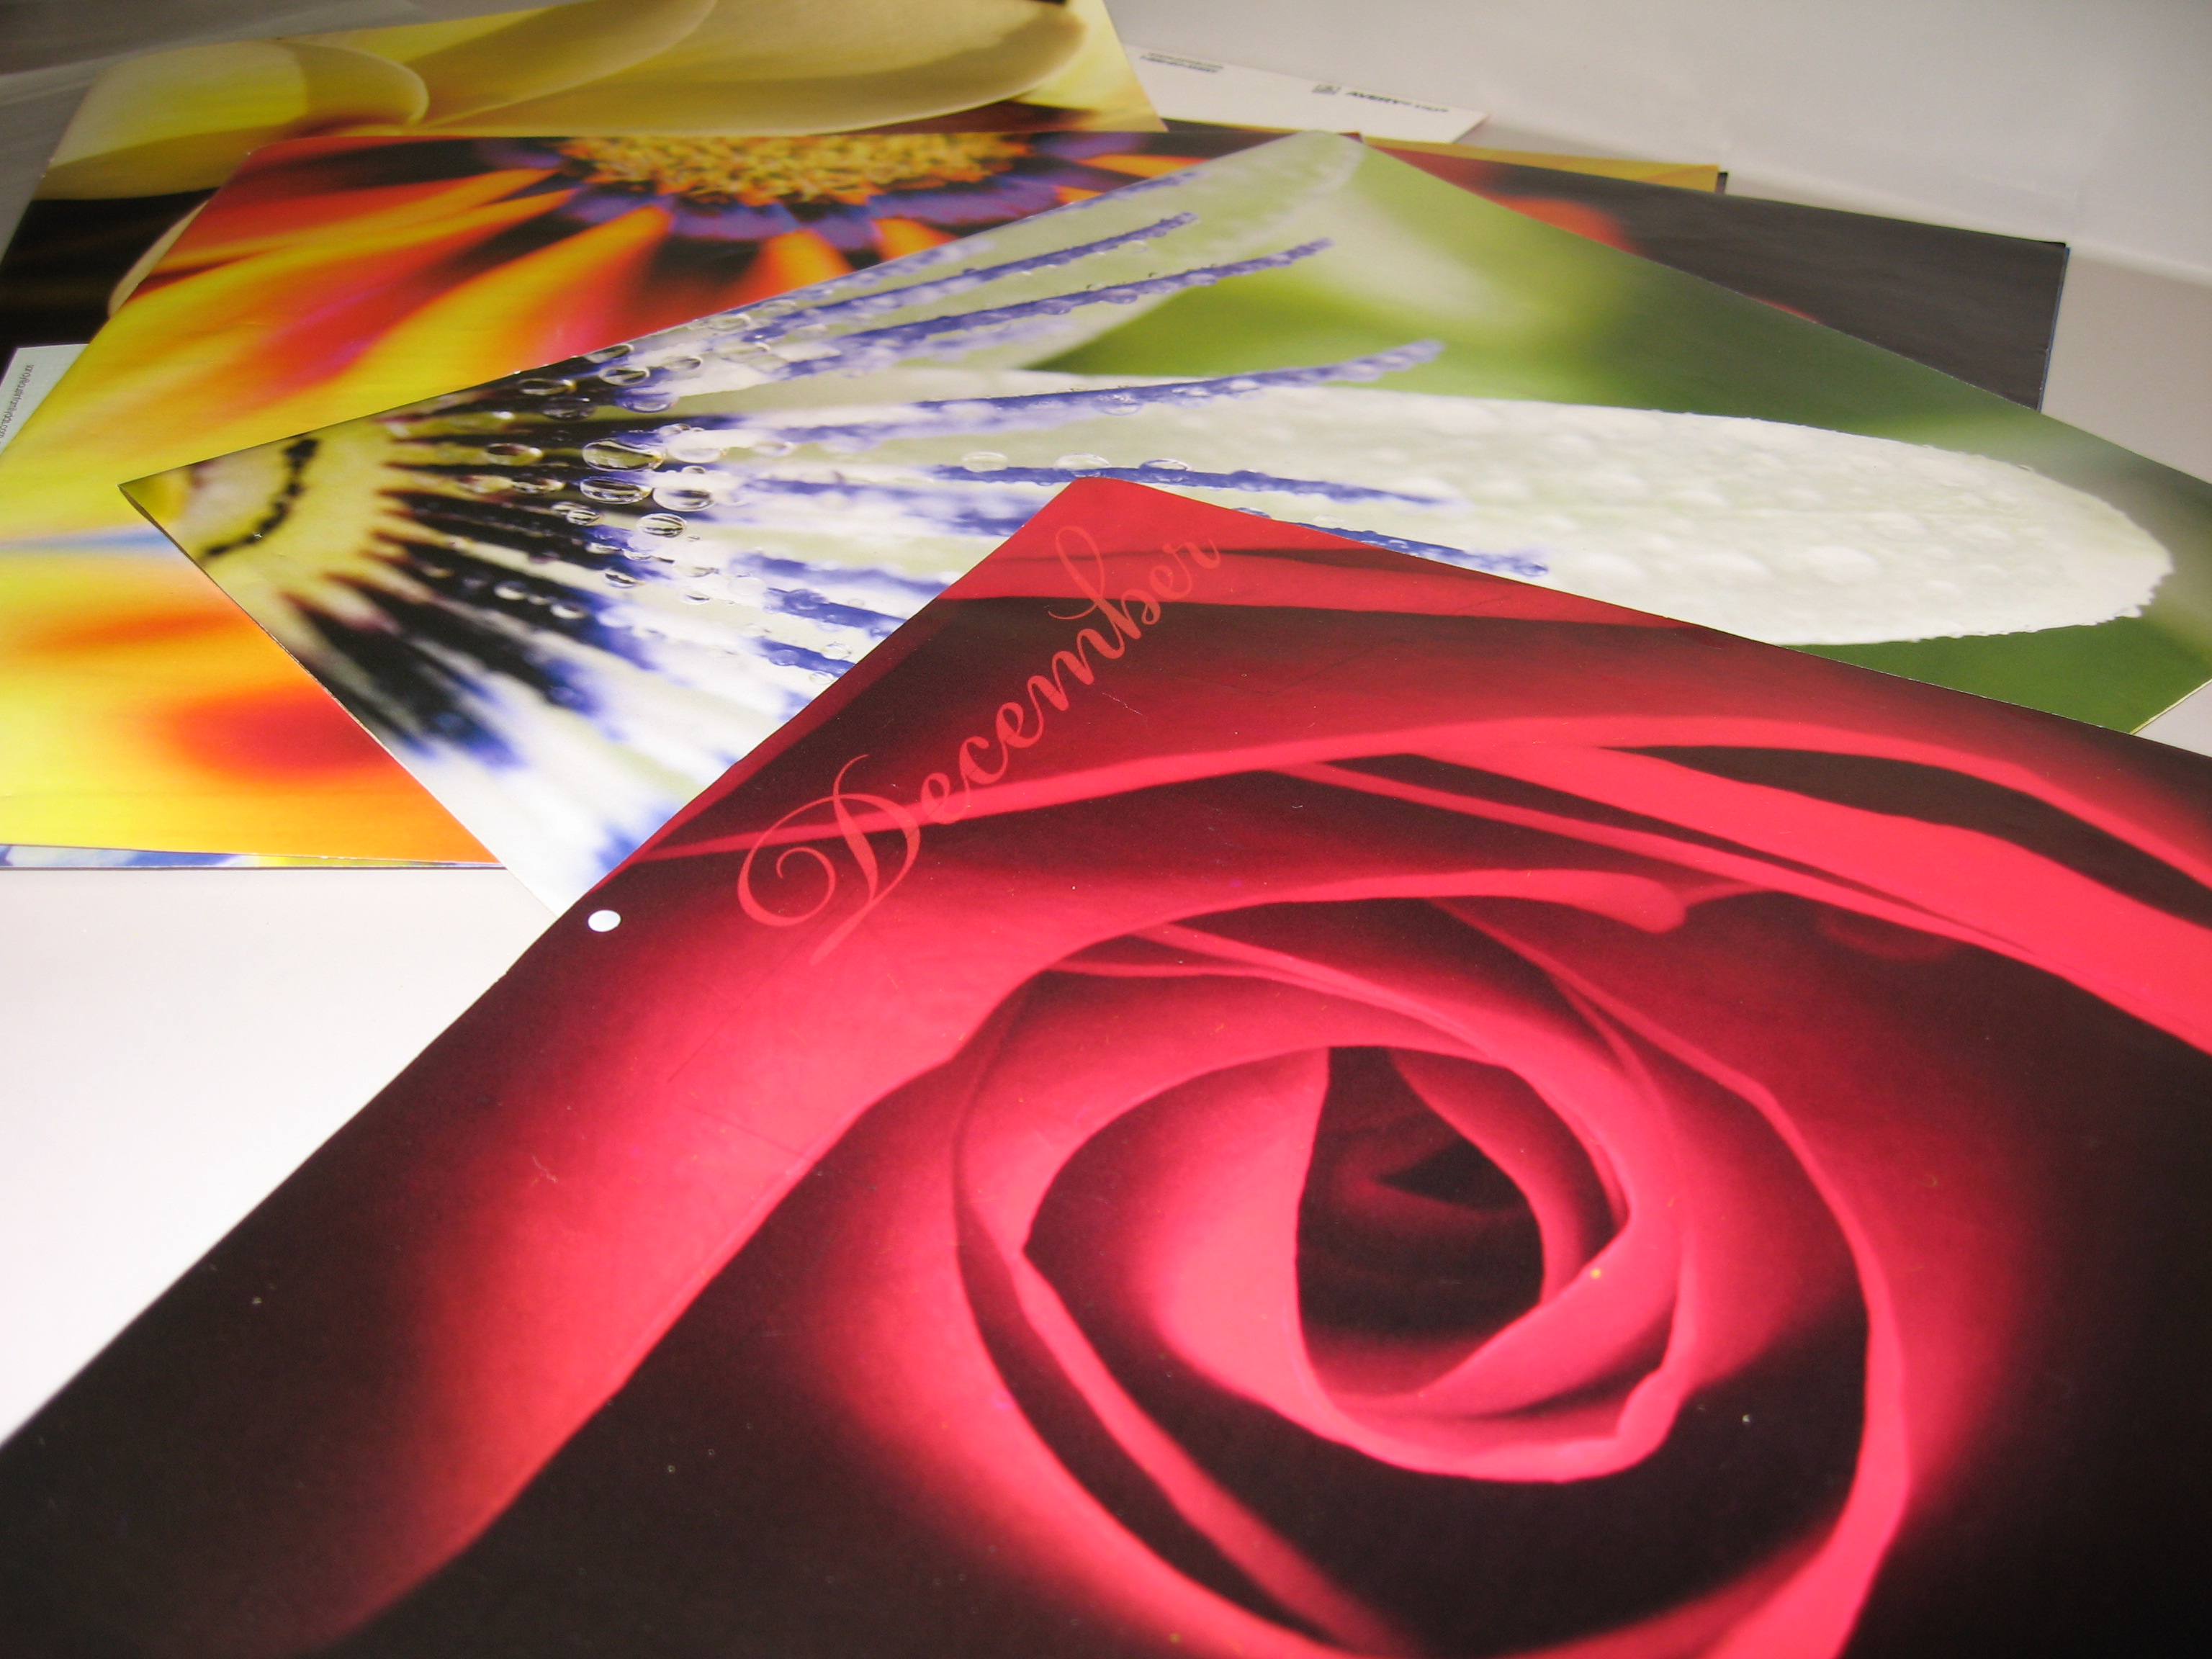
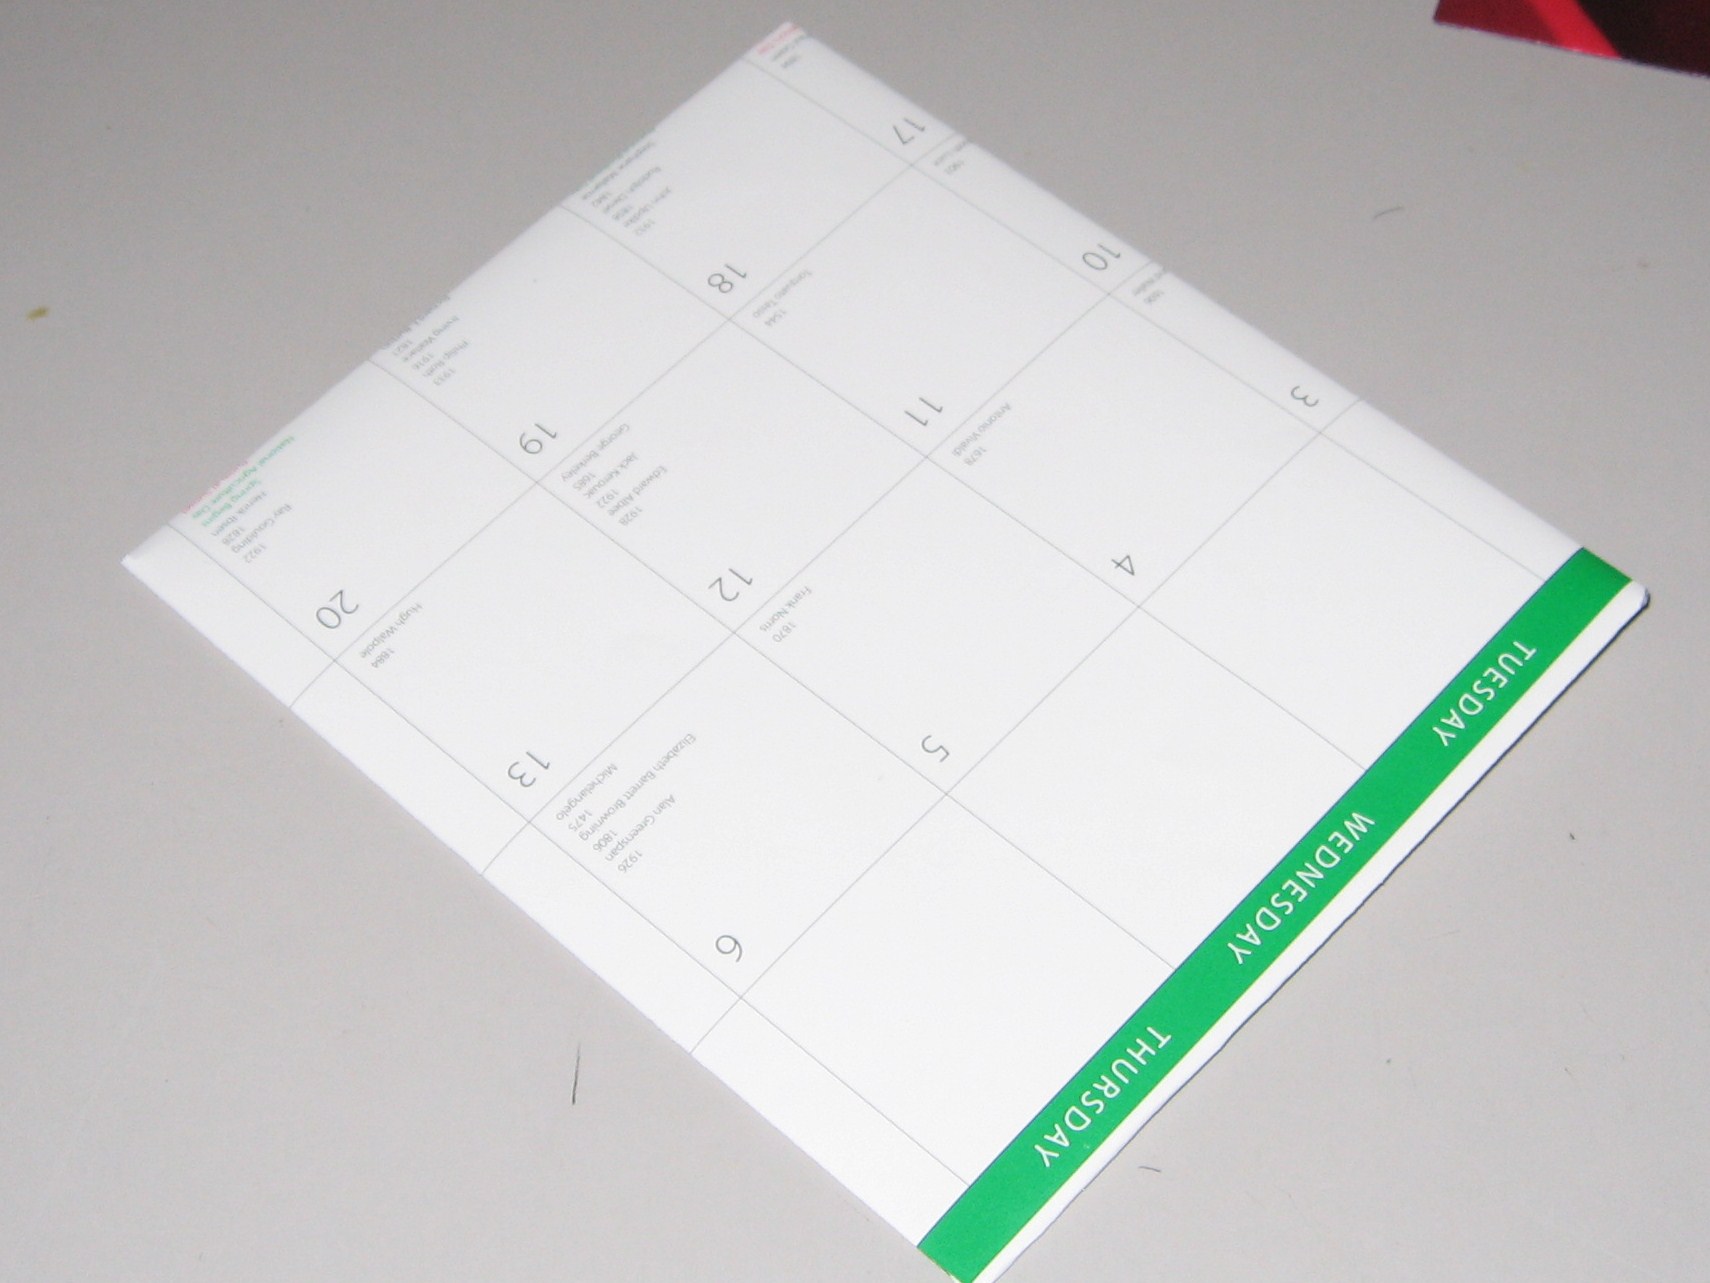
Remove staples from the calendar
Separate pages and tear apart along the crease line
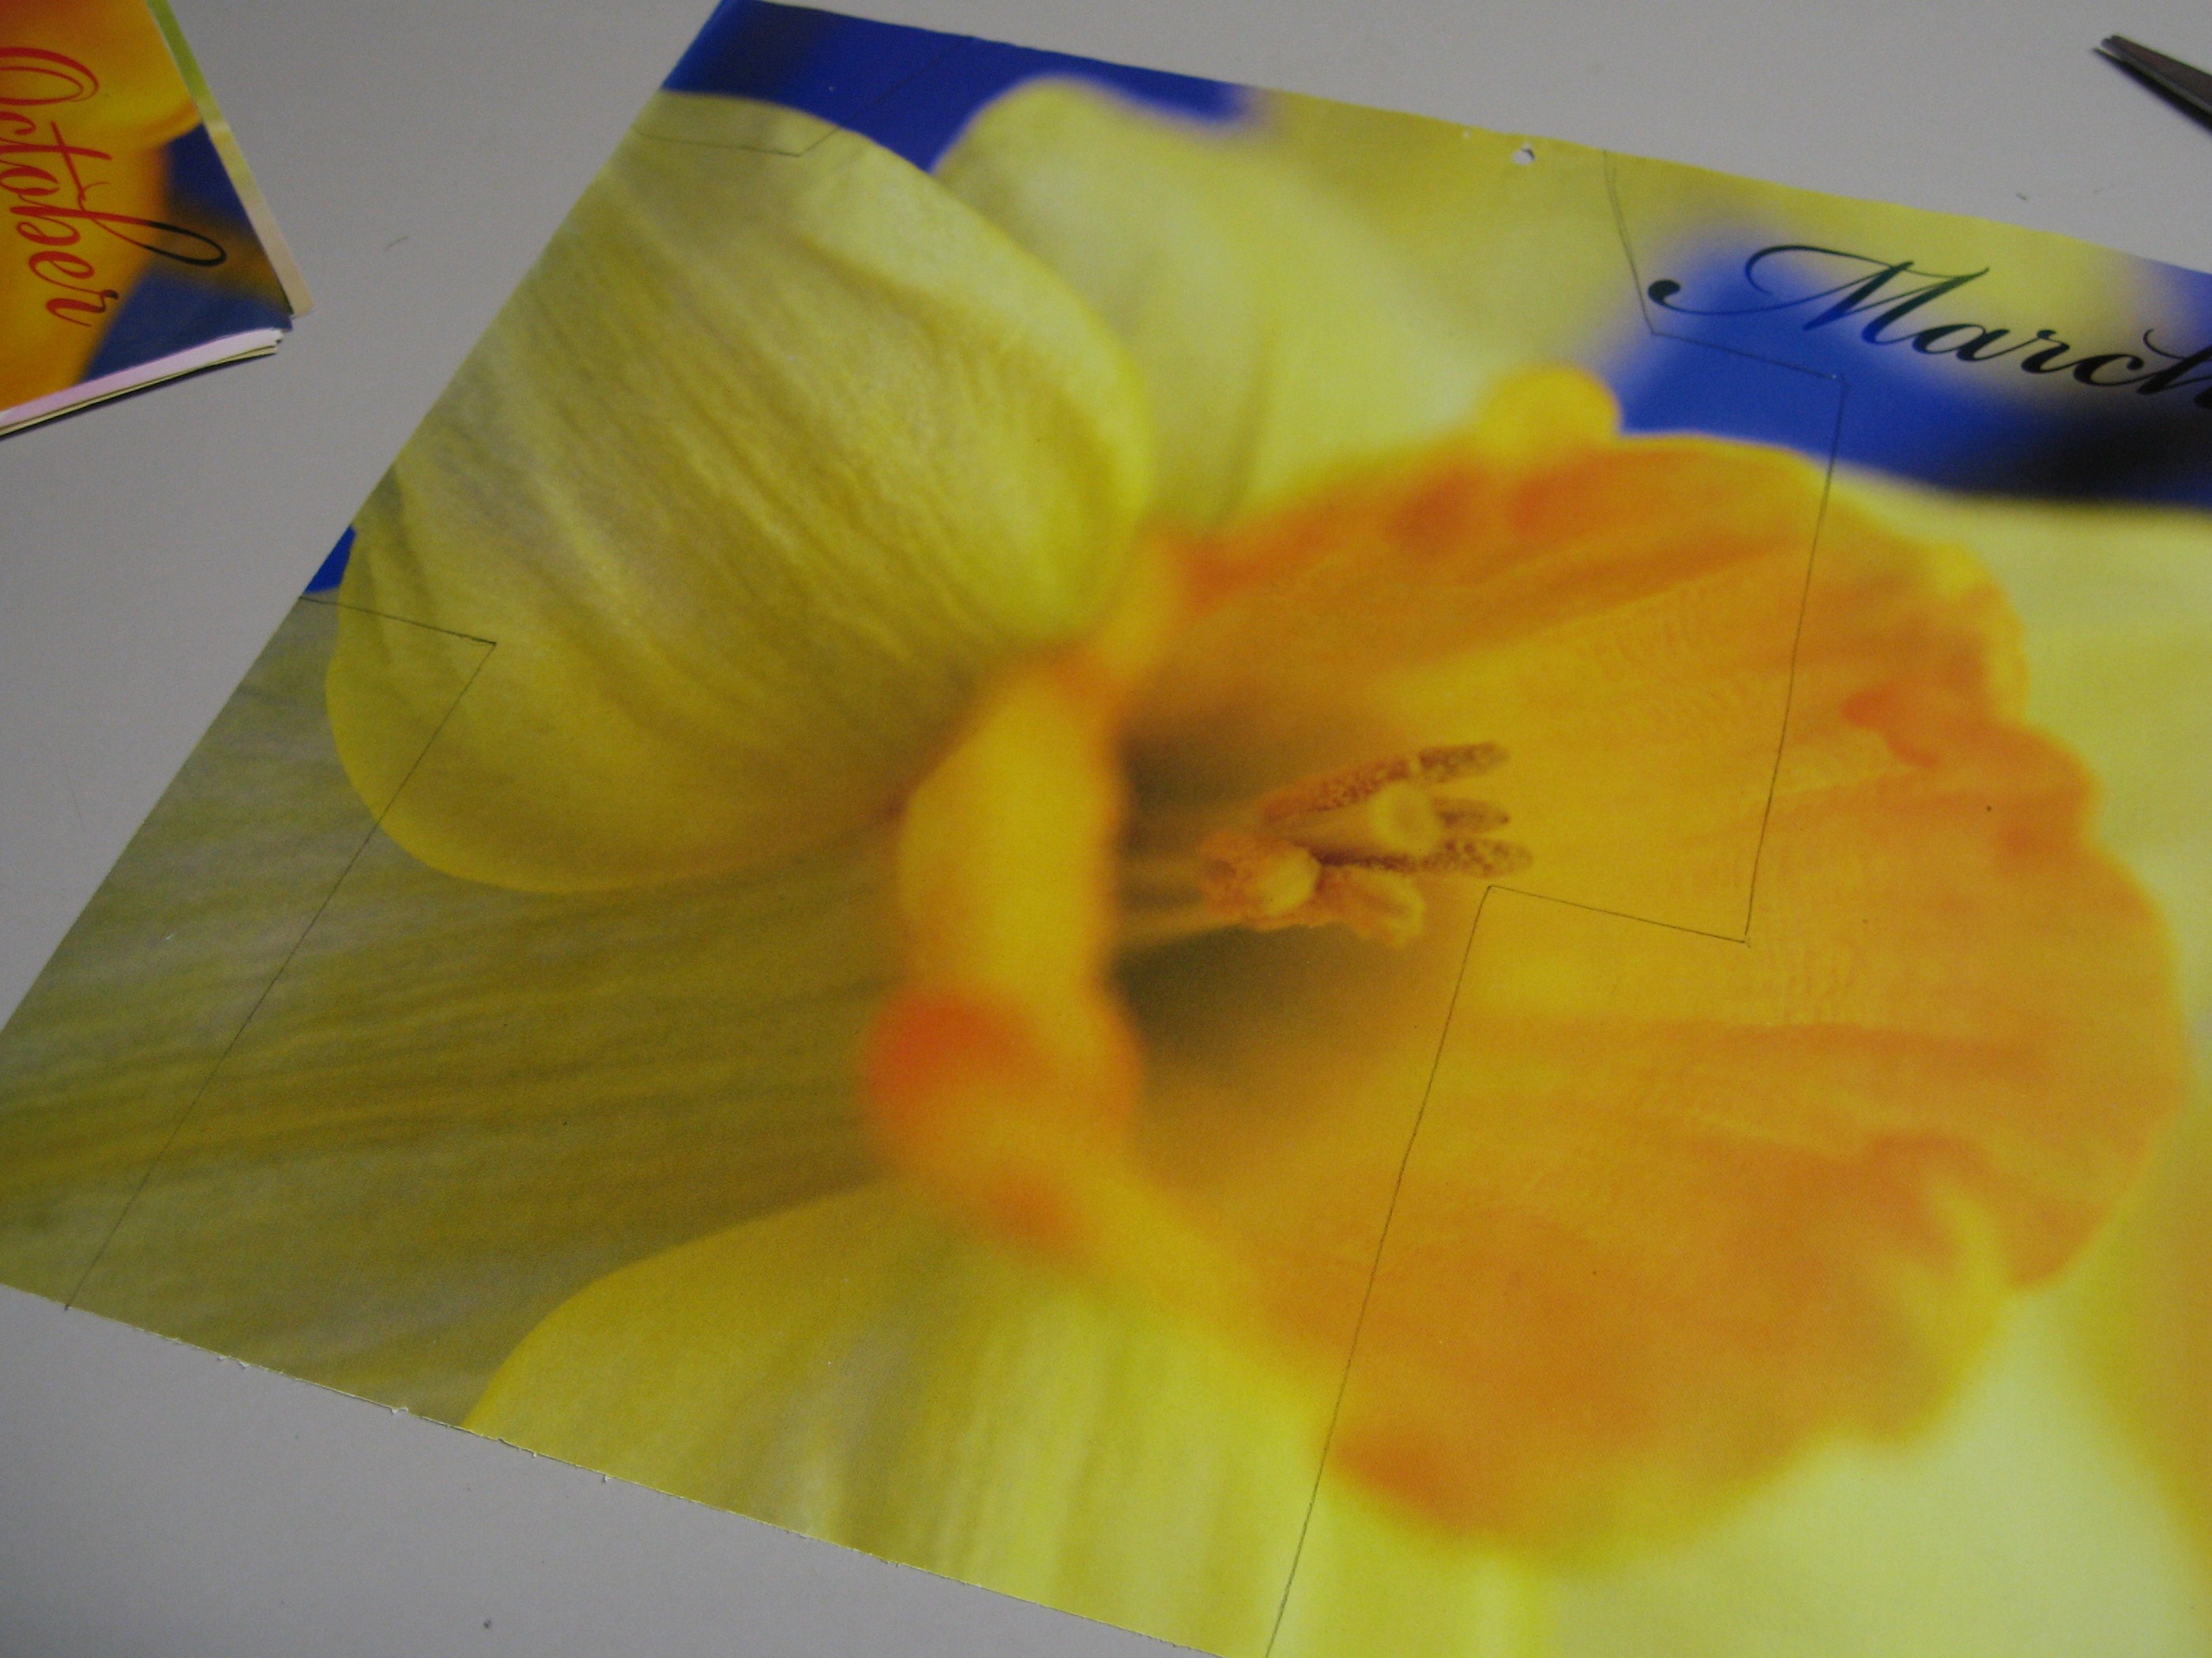
Position the template on a calendar page and trace with a pencil.
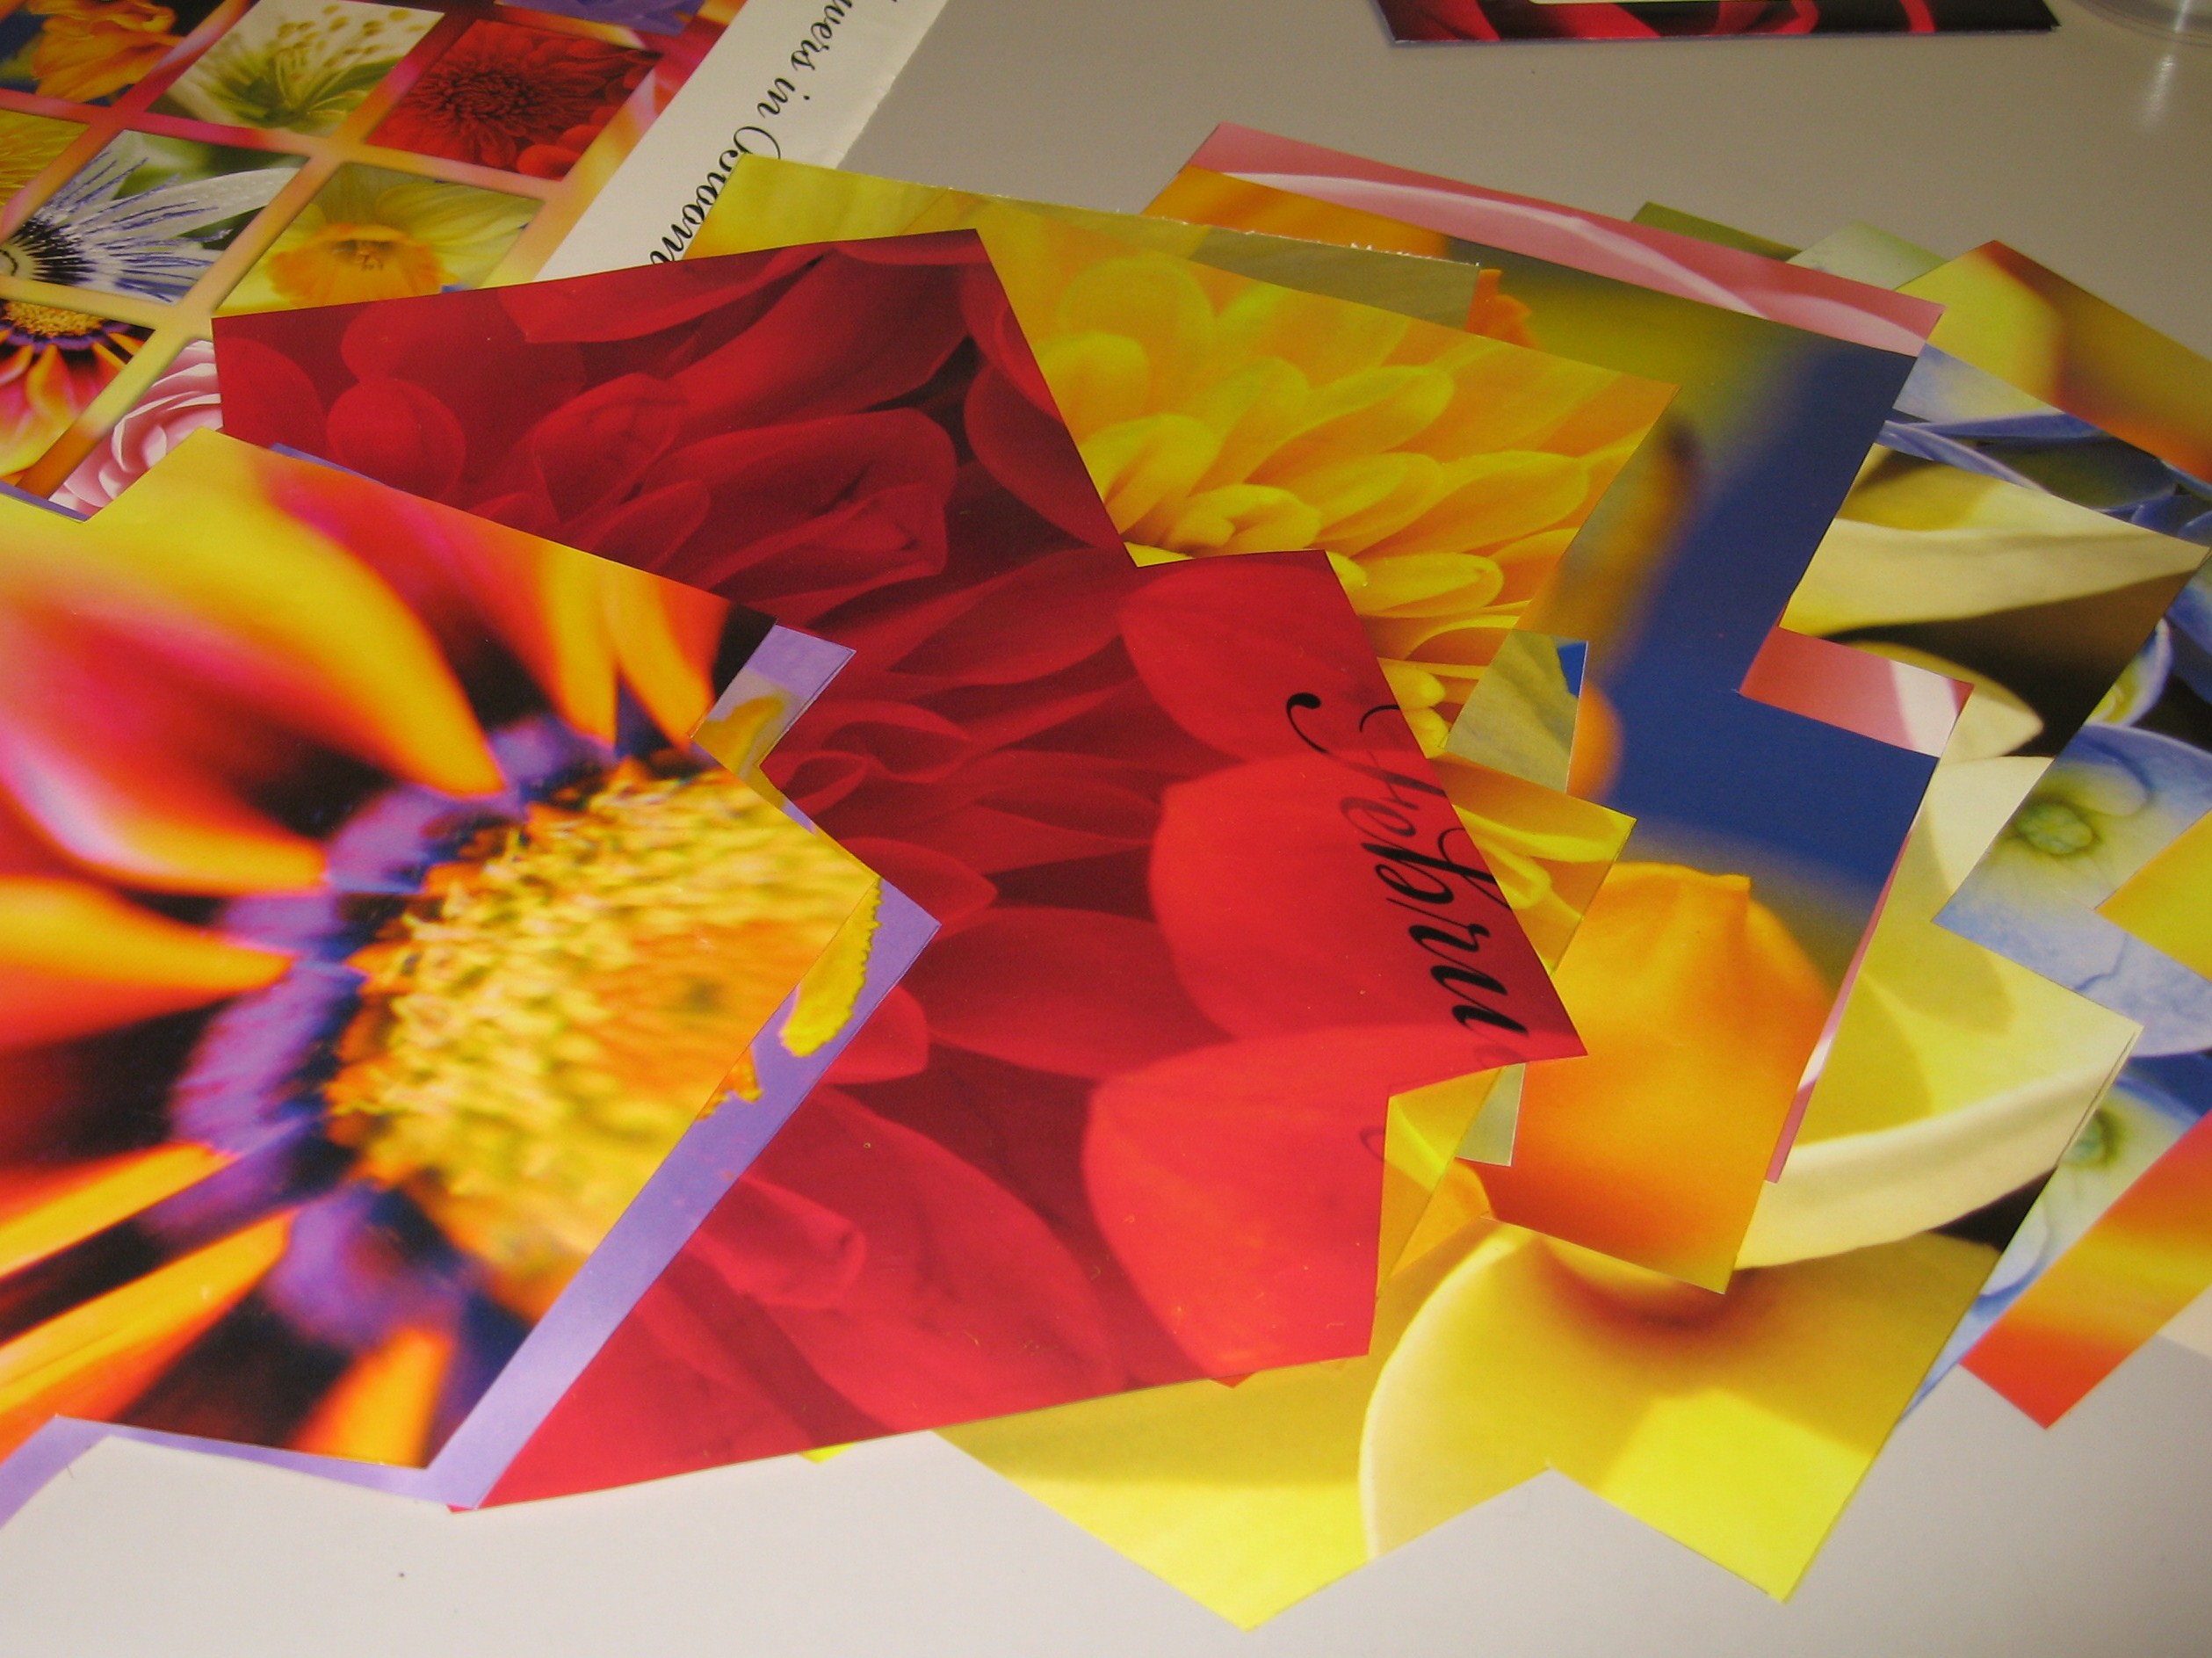
You might want to fussy cut here, if part of the page is more interesting than the rest.
Using scissors, cut along pencil lines.
Repeat for all pages.
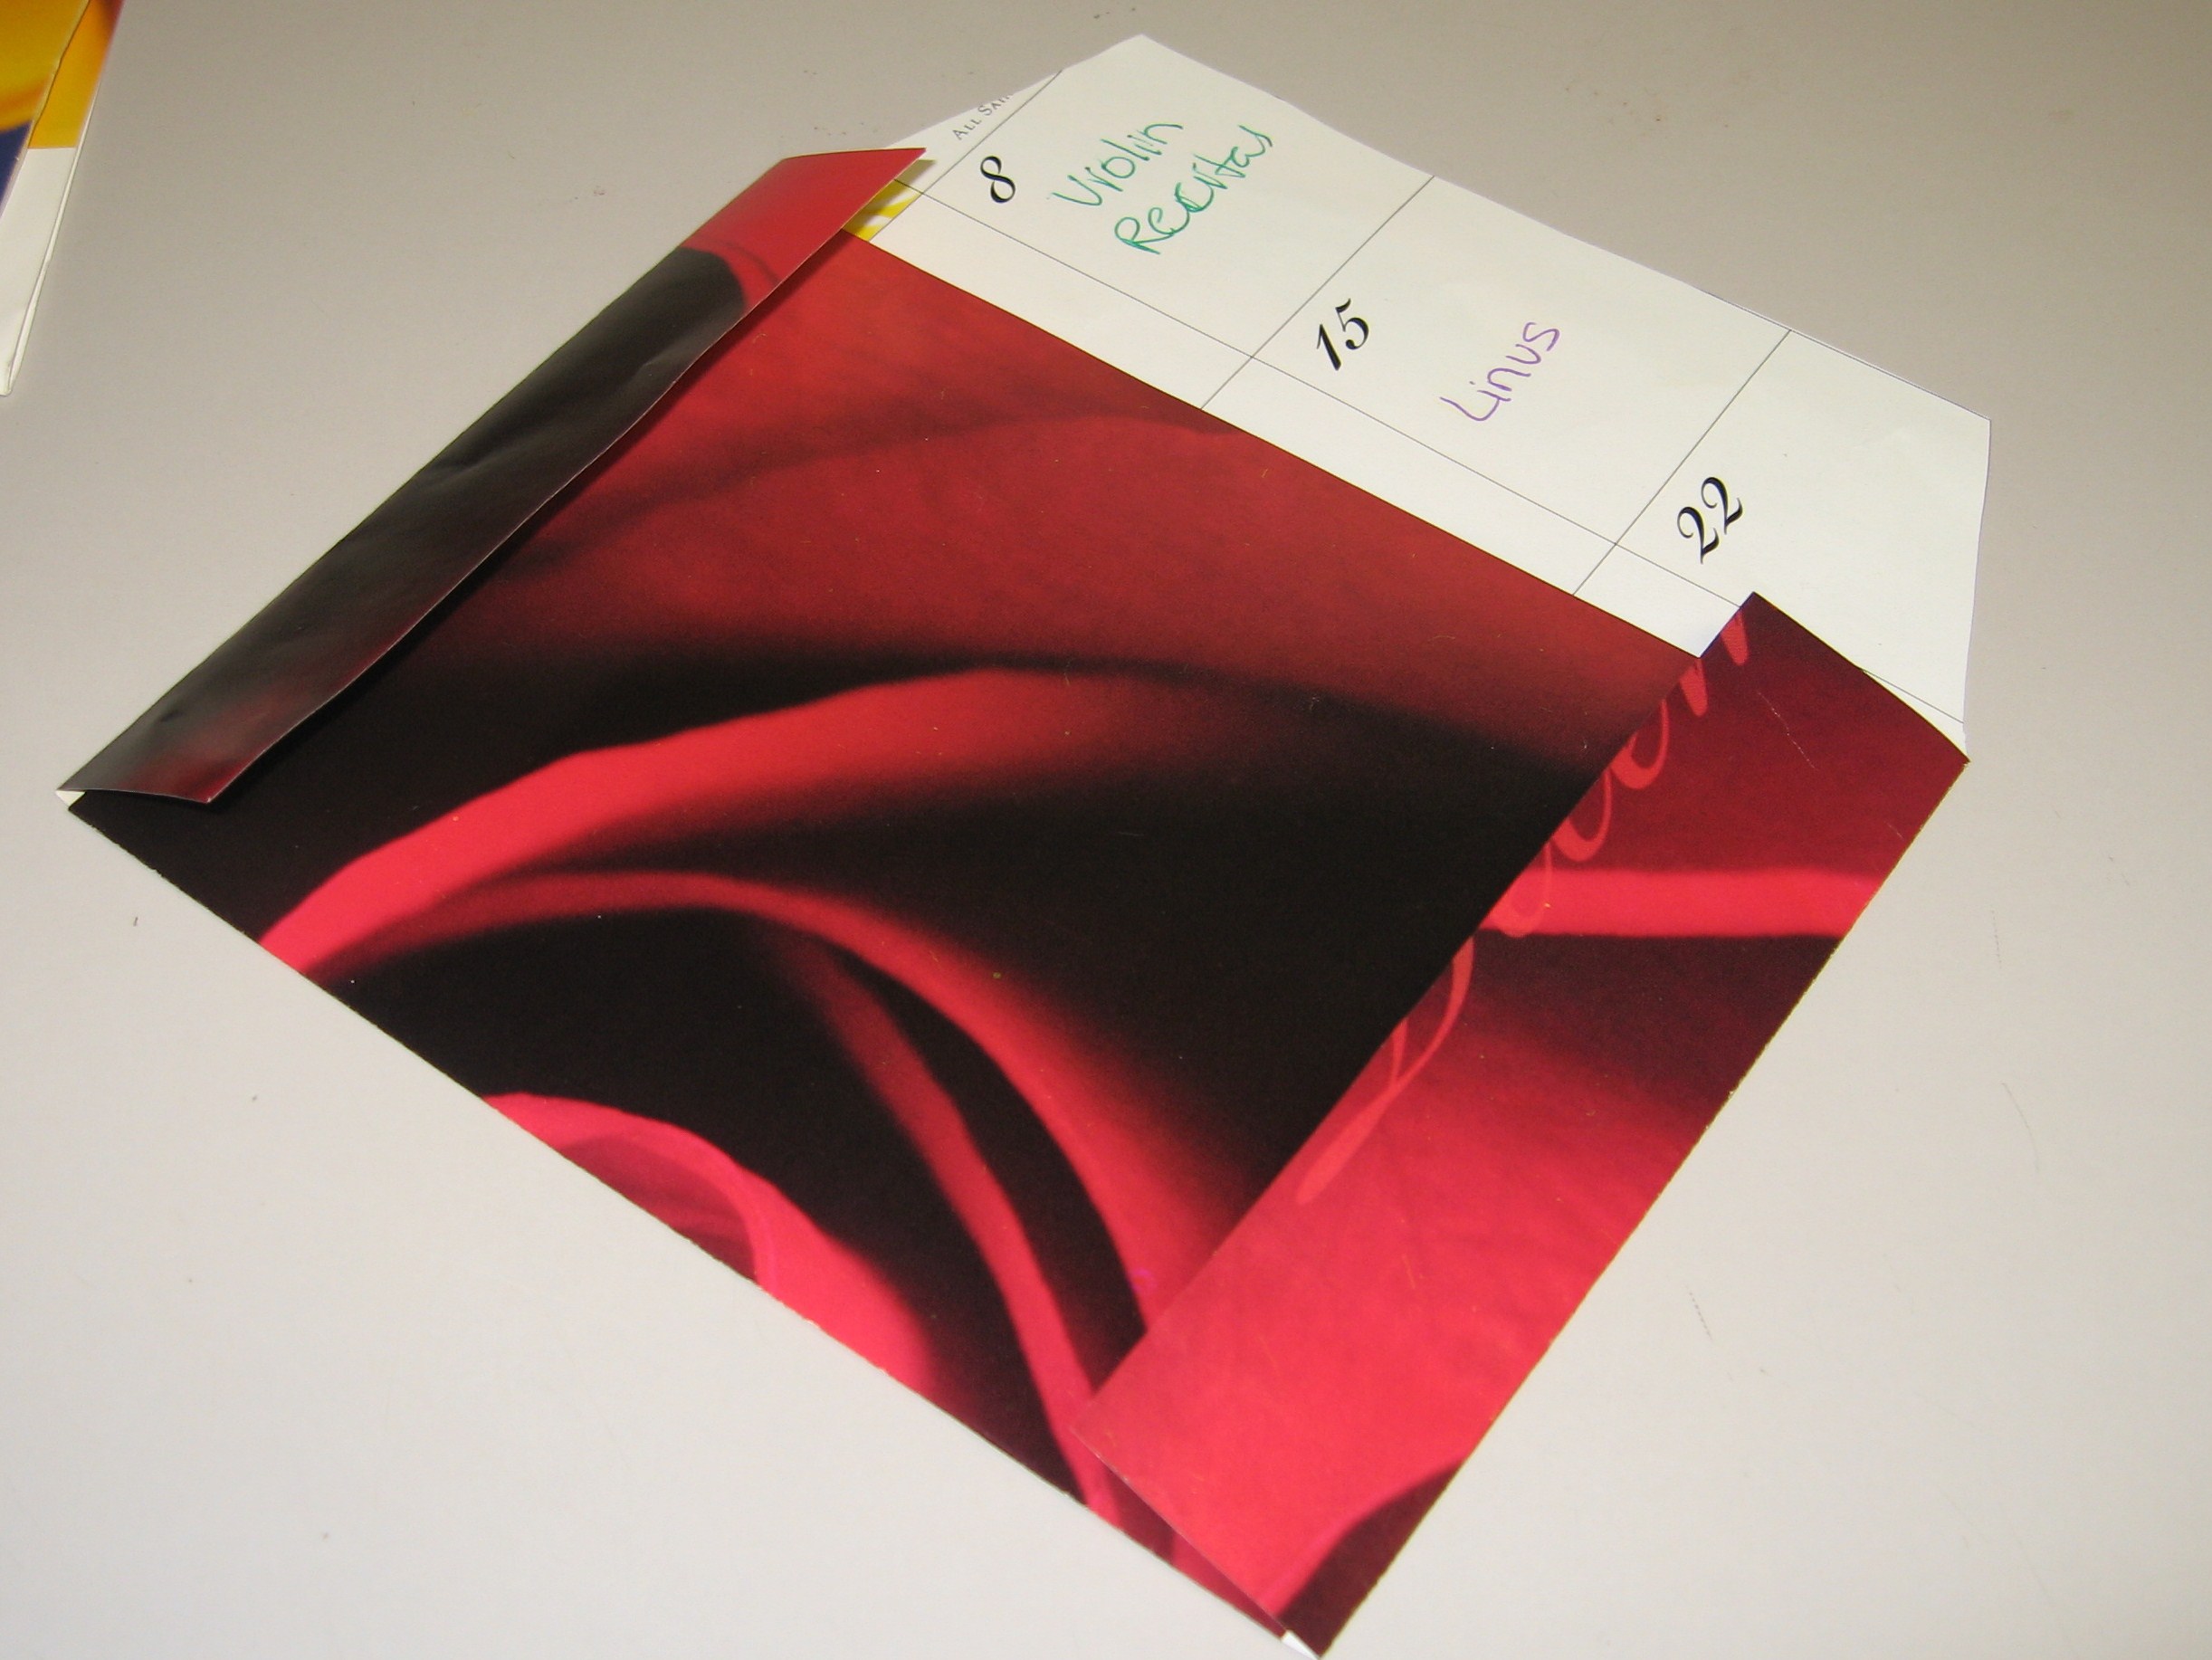
Fold bottom of envelope up towards top, aligning with the bottoms of the side flaps.
For heavier paper, use your template or a ruler to crease. If you have paper-folding tools, this is a great time to use them!
Fold side flaps, making sure they’re even with the top and bottom.
Fold bottom flap out.
Place double stick tape, or use a glue stick, on the side flaps, leaving 1/2″ to 1″ at the top without adhesive.
Fold top flap down.
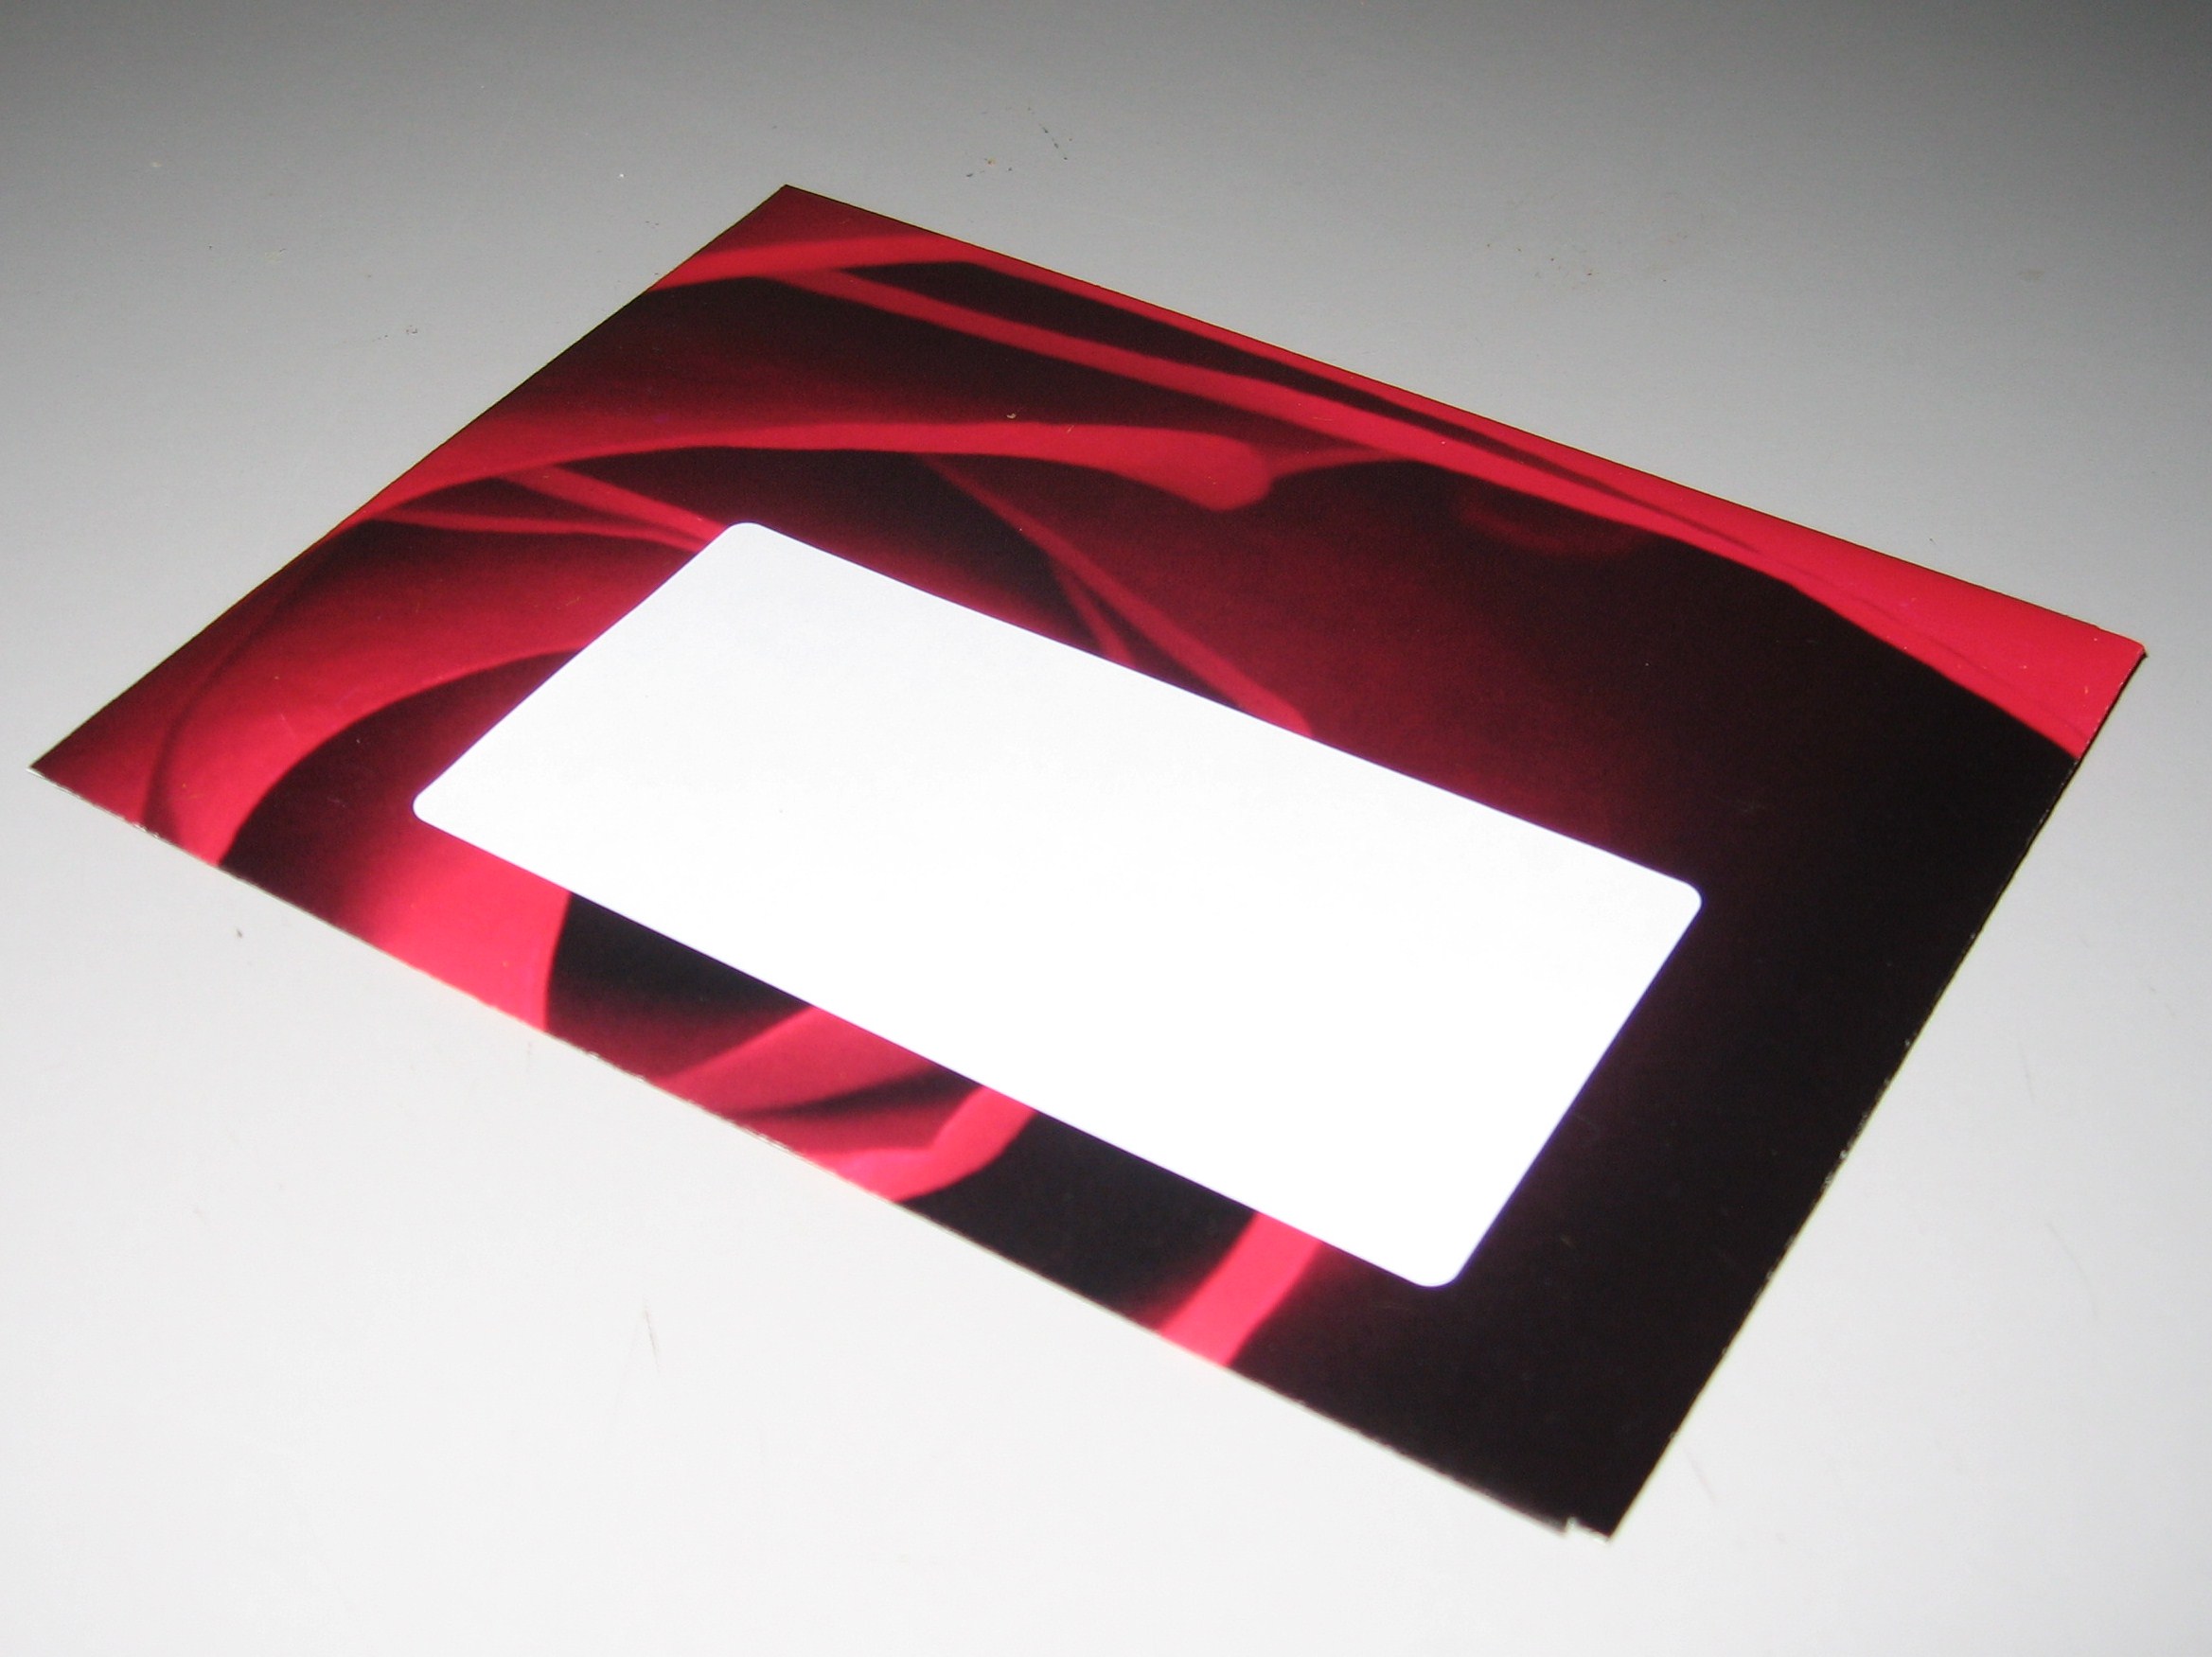
Finished envelope from the front.
Optional: for darker papers, add a self adhesive mailing label.
Repeat until you have a pile of gorgeous envelopes!
For sealing, use double stick tape, a glue stick or fun stickers.
The same template, different calendar.
Same envelope from the front.
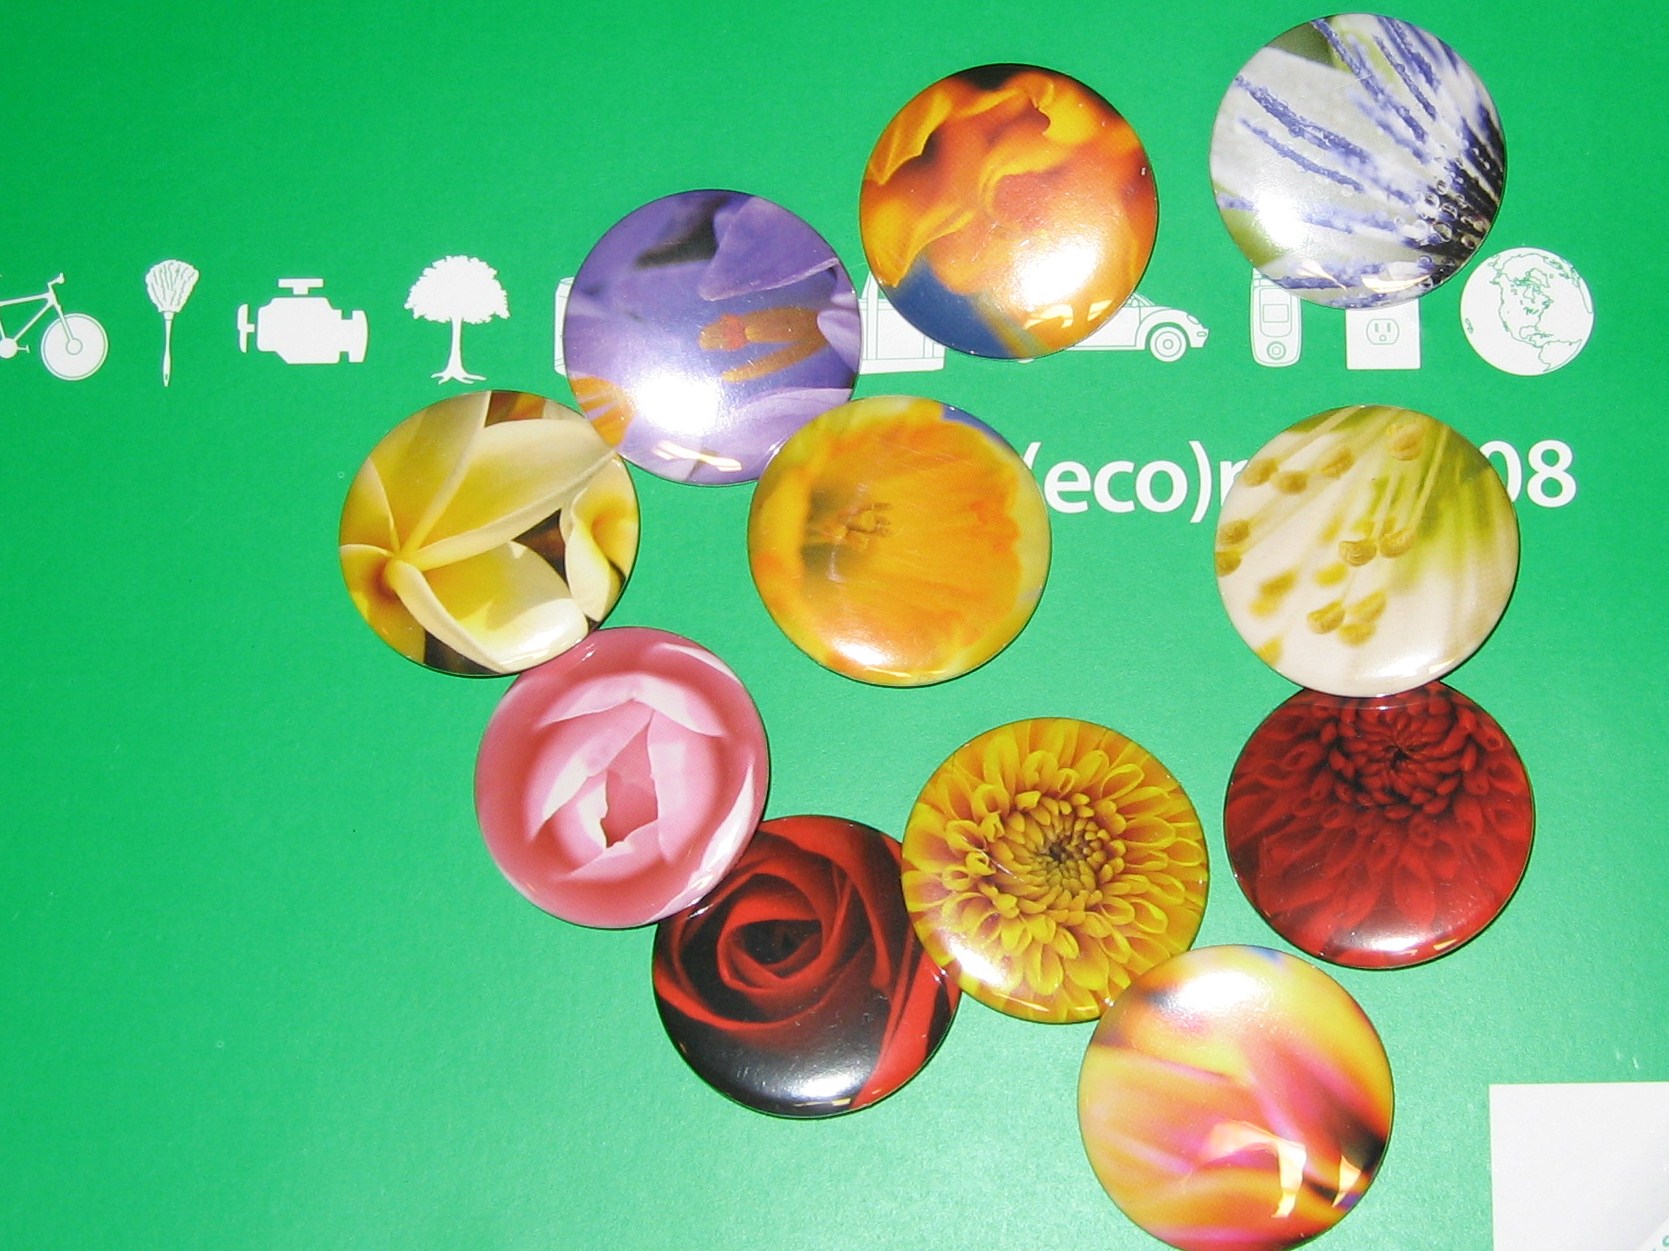
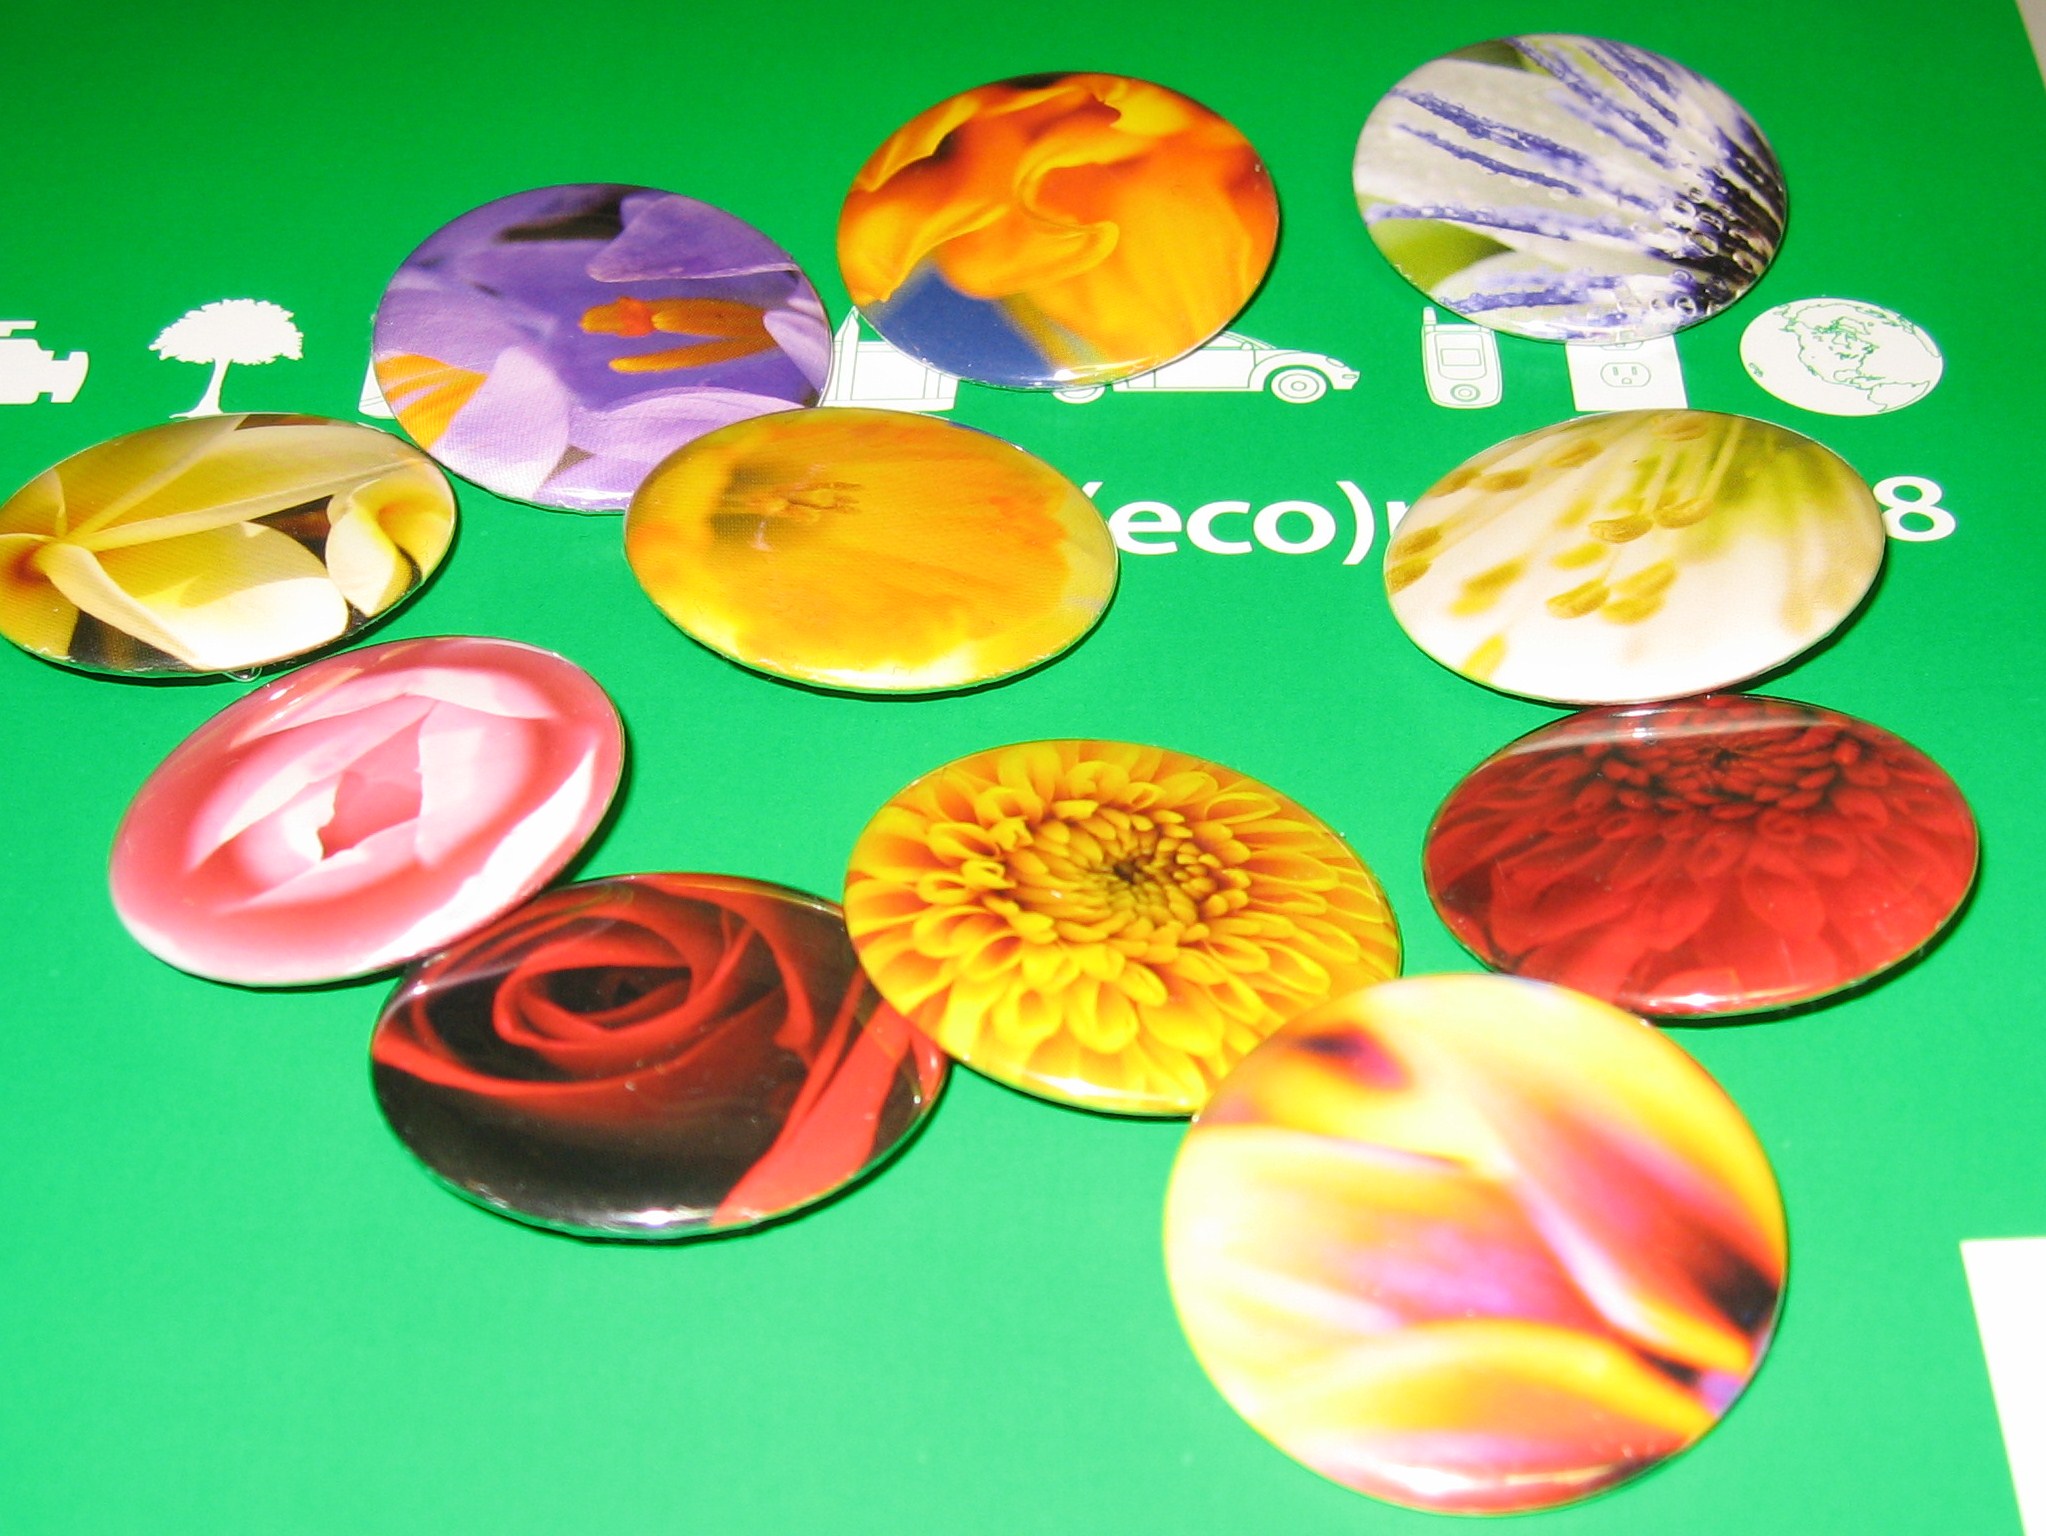
Now, what to do with the gorgeous thumbnails on the back of this calendar?
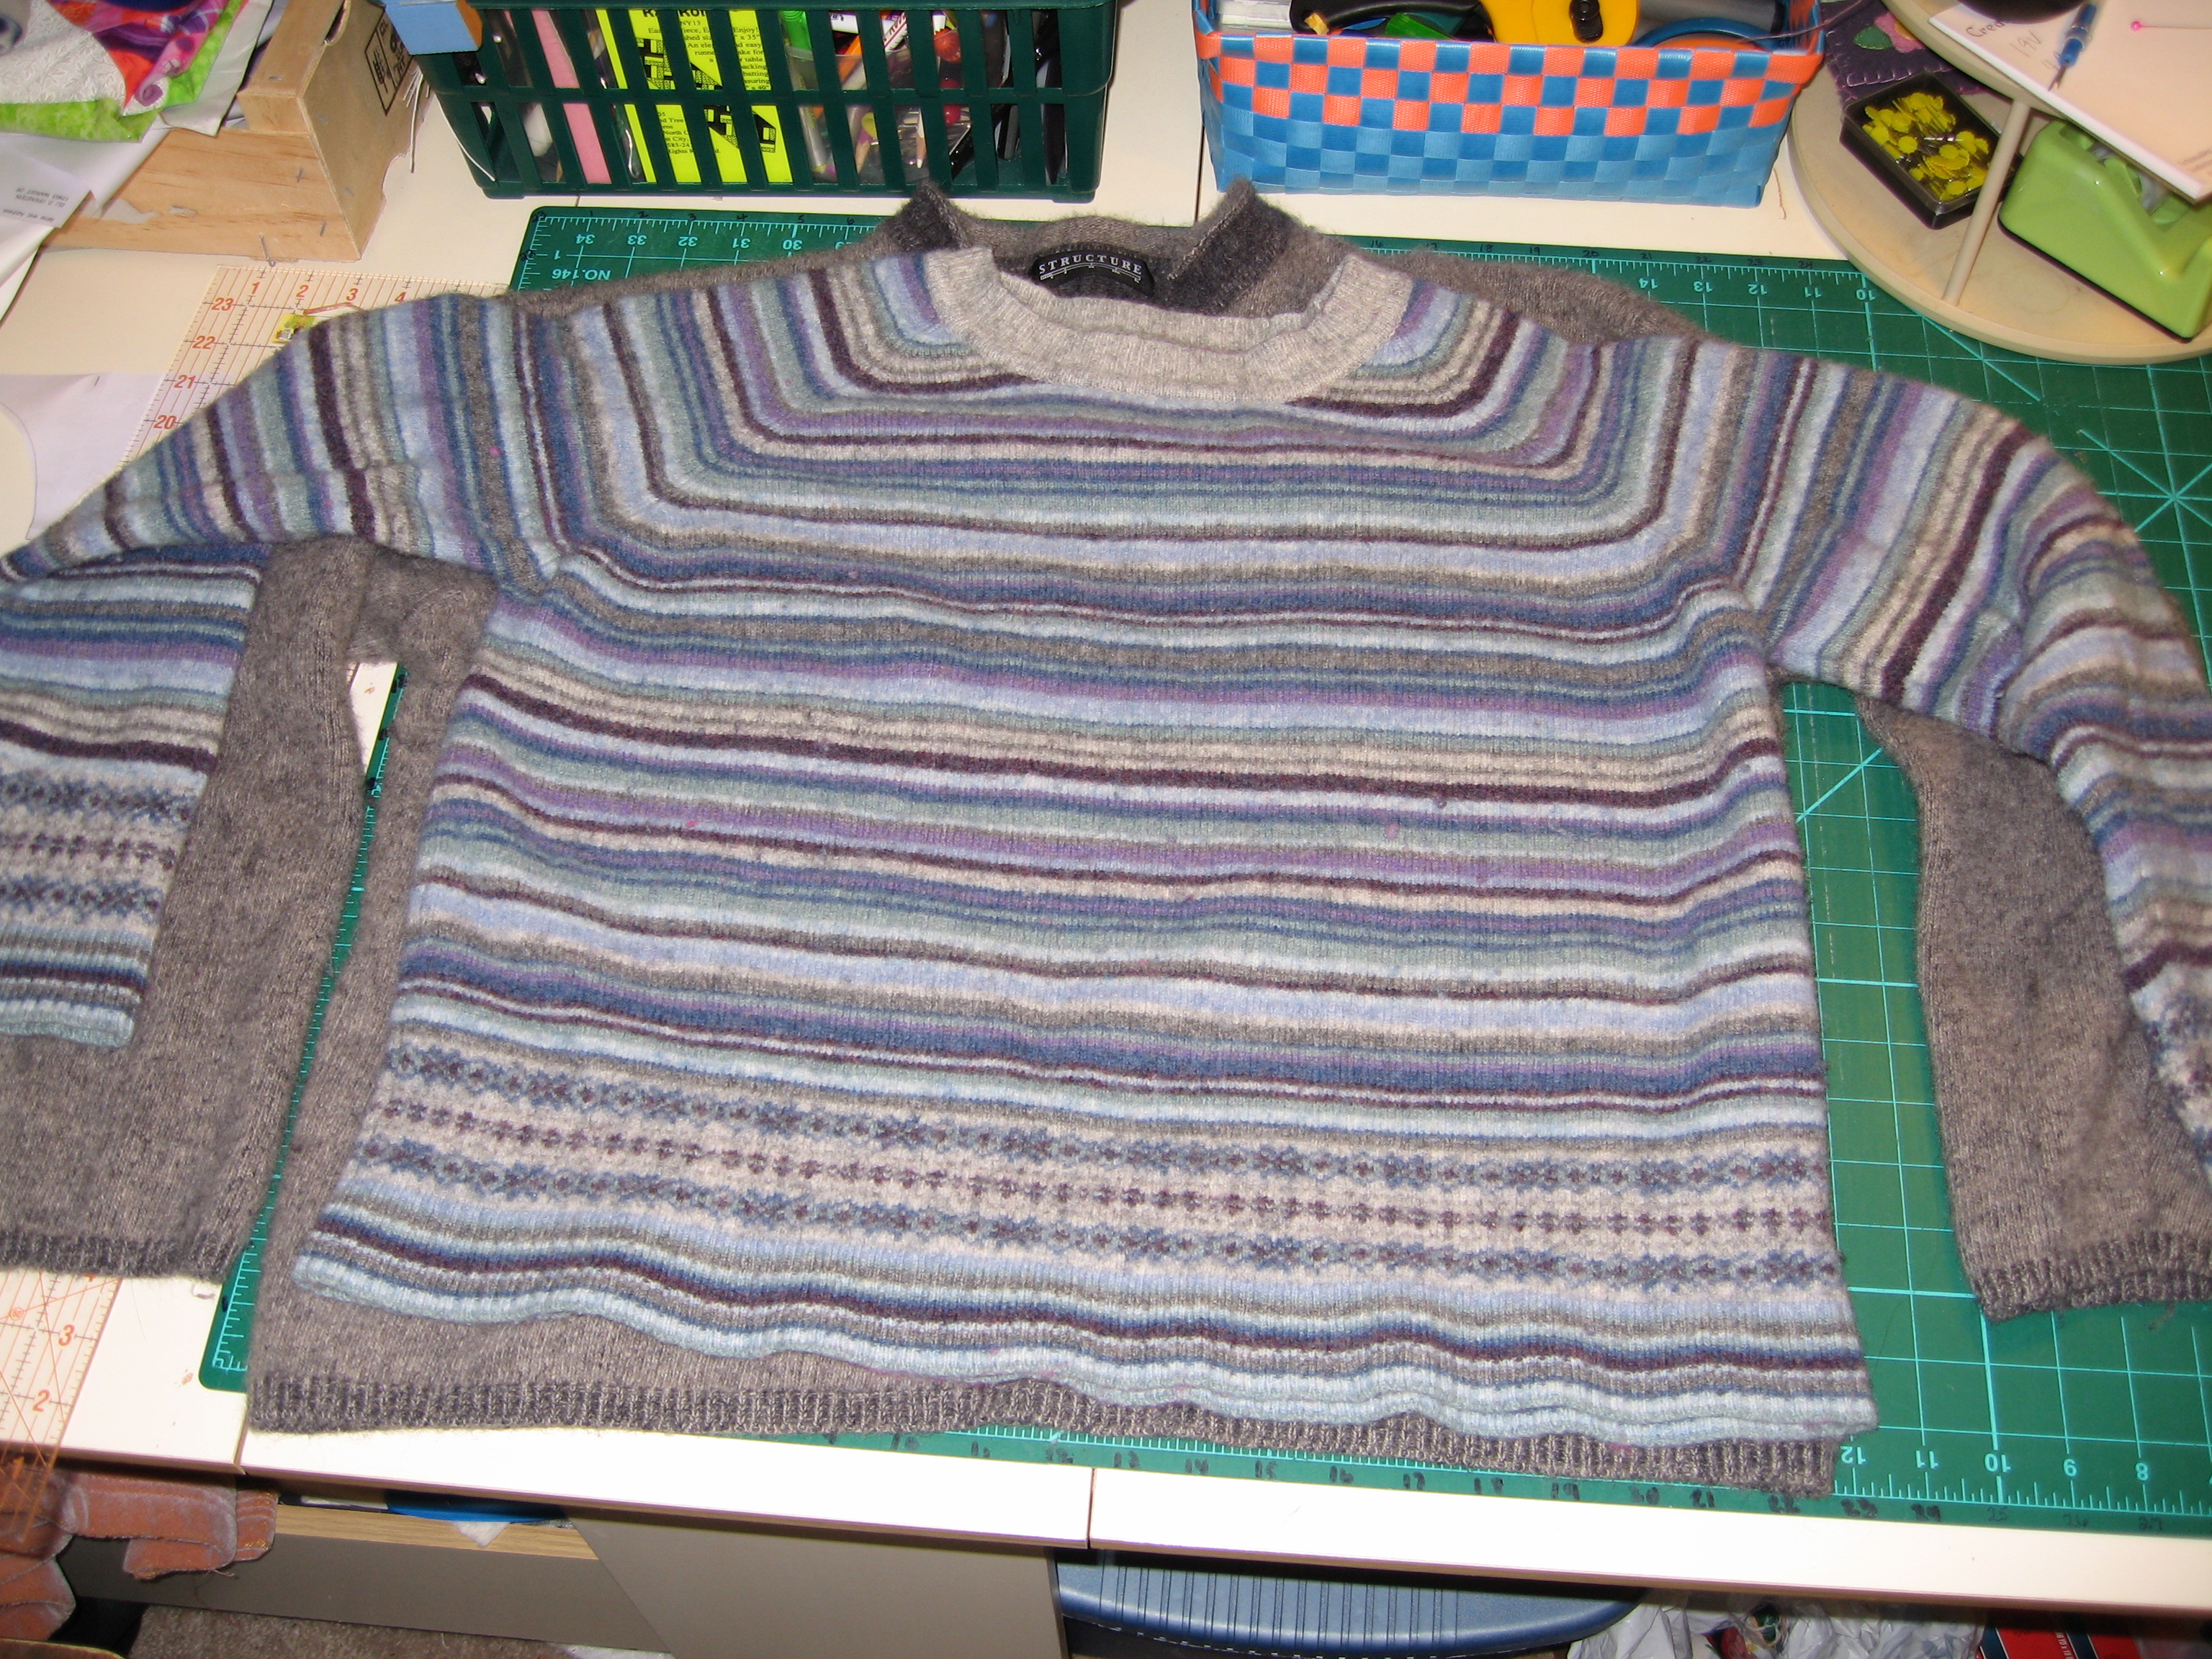
The Recycled Sweater Bag isn’t quite old enough to be considered a Way Back Craft. I first started making this bag last year. It works great with a felted thrift store sweater, but you can also make this bag out of denim, upholstery fabric, or just about any other heavy duty material.
The bag size will vary based on the size of your sweater.
Do I need a reason to make a new bag? Not really, but recycling is a darn good incentive!
Use the written instructions below or watch the video. (Please note this video tutorial was posted in 2008, and the quality reflects that).
You will need:
1 old (or thrift store) 100% wool sweater – felted
fabric for lining & pockets
magnet purse snap
2 buttons
sewing machine
thread
scissors
chalk
pins
rotary cutter (optional)
walking foot (optional)
I used a 1/2″ seam allowance throughout. If your sweater is bulkier, go a little wider or use what works for you.
First up – let’s prep our fabrics!
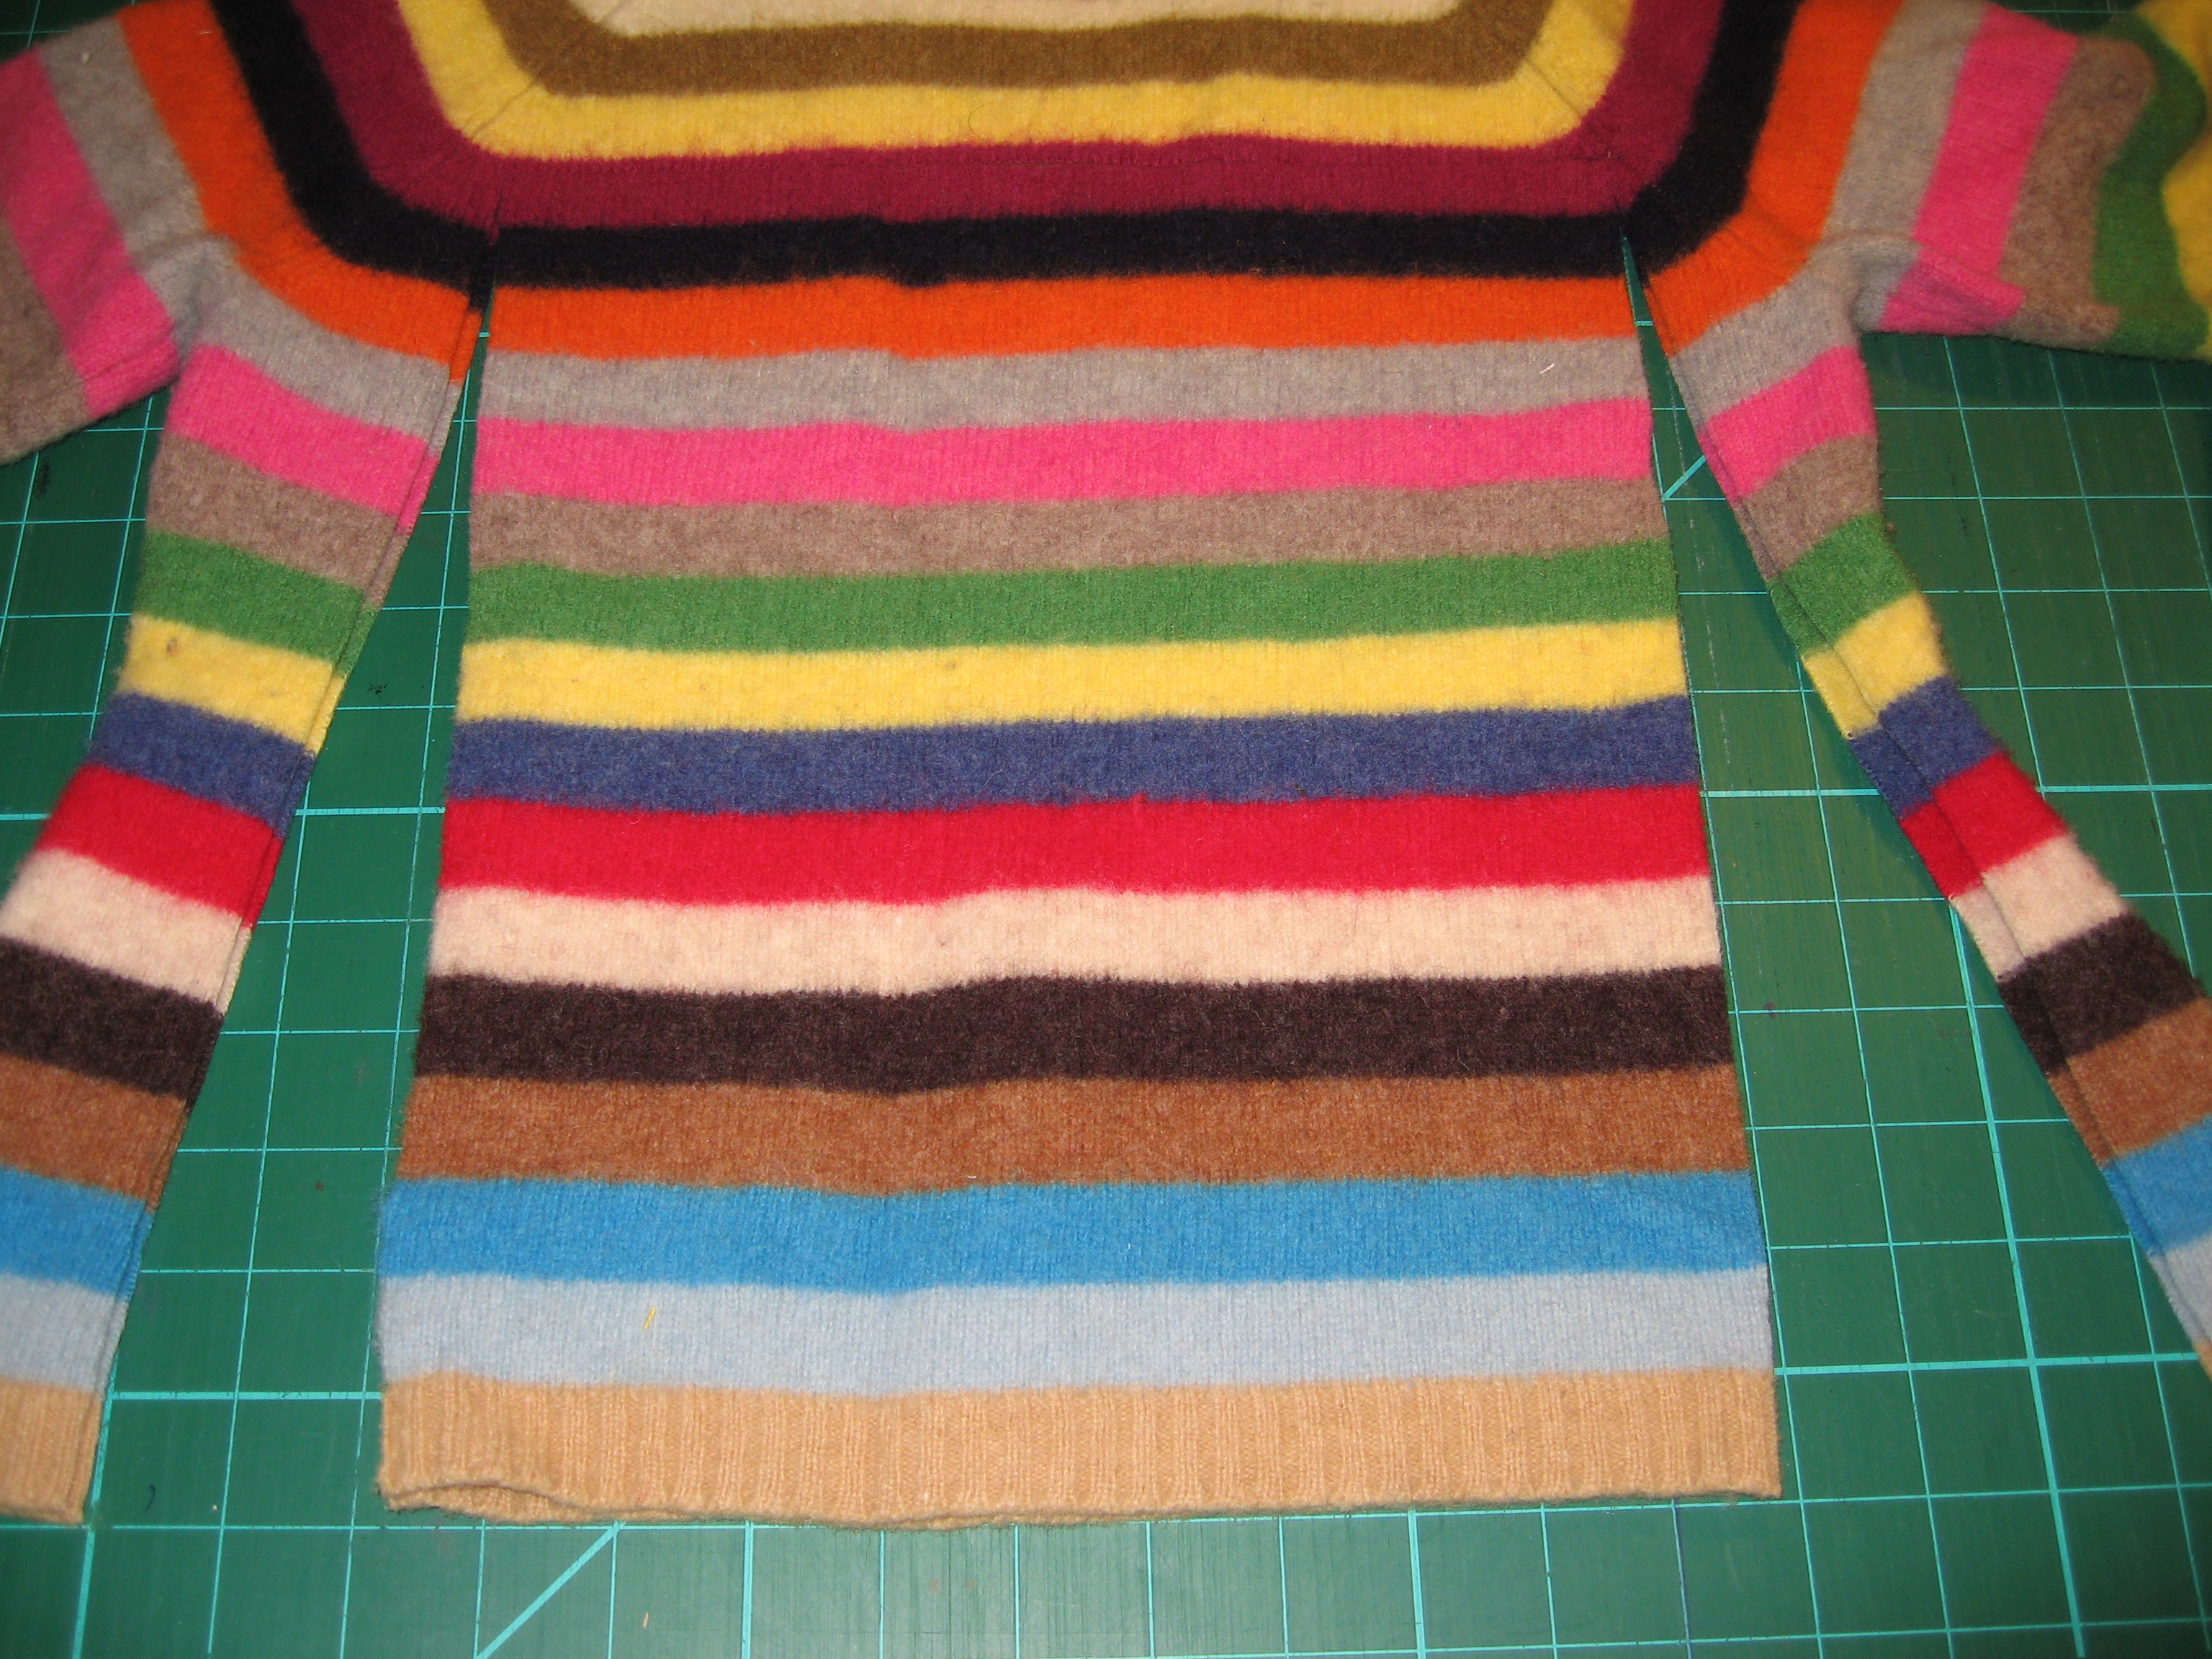
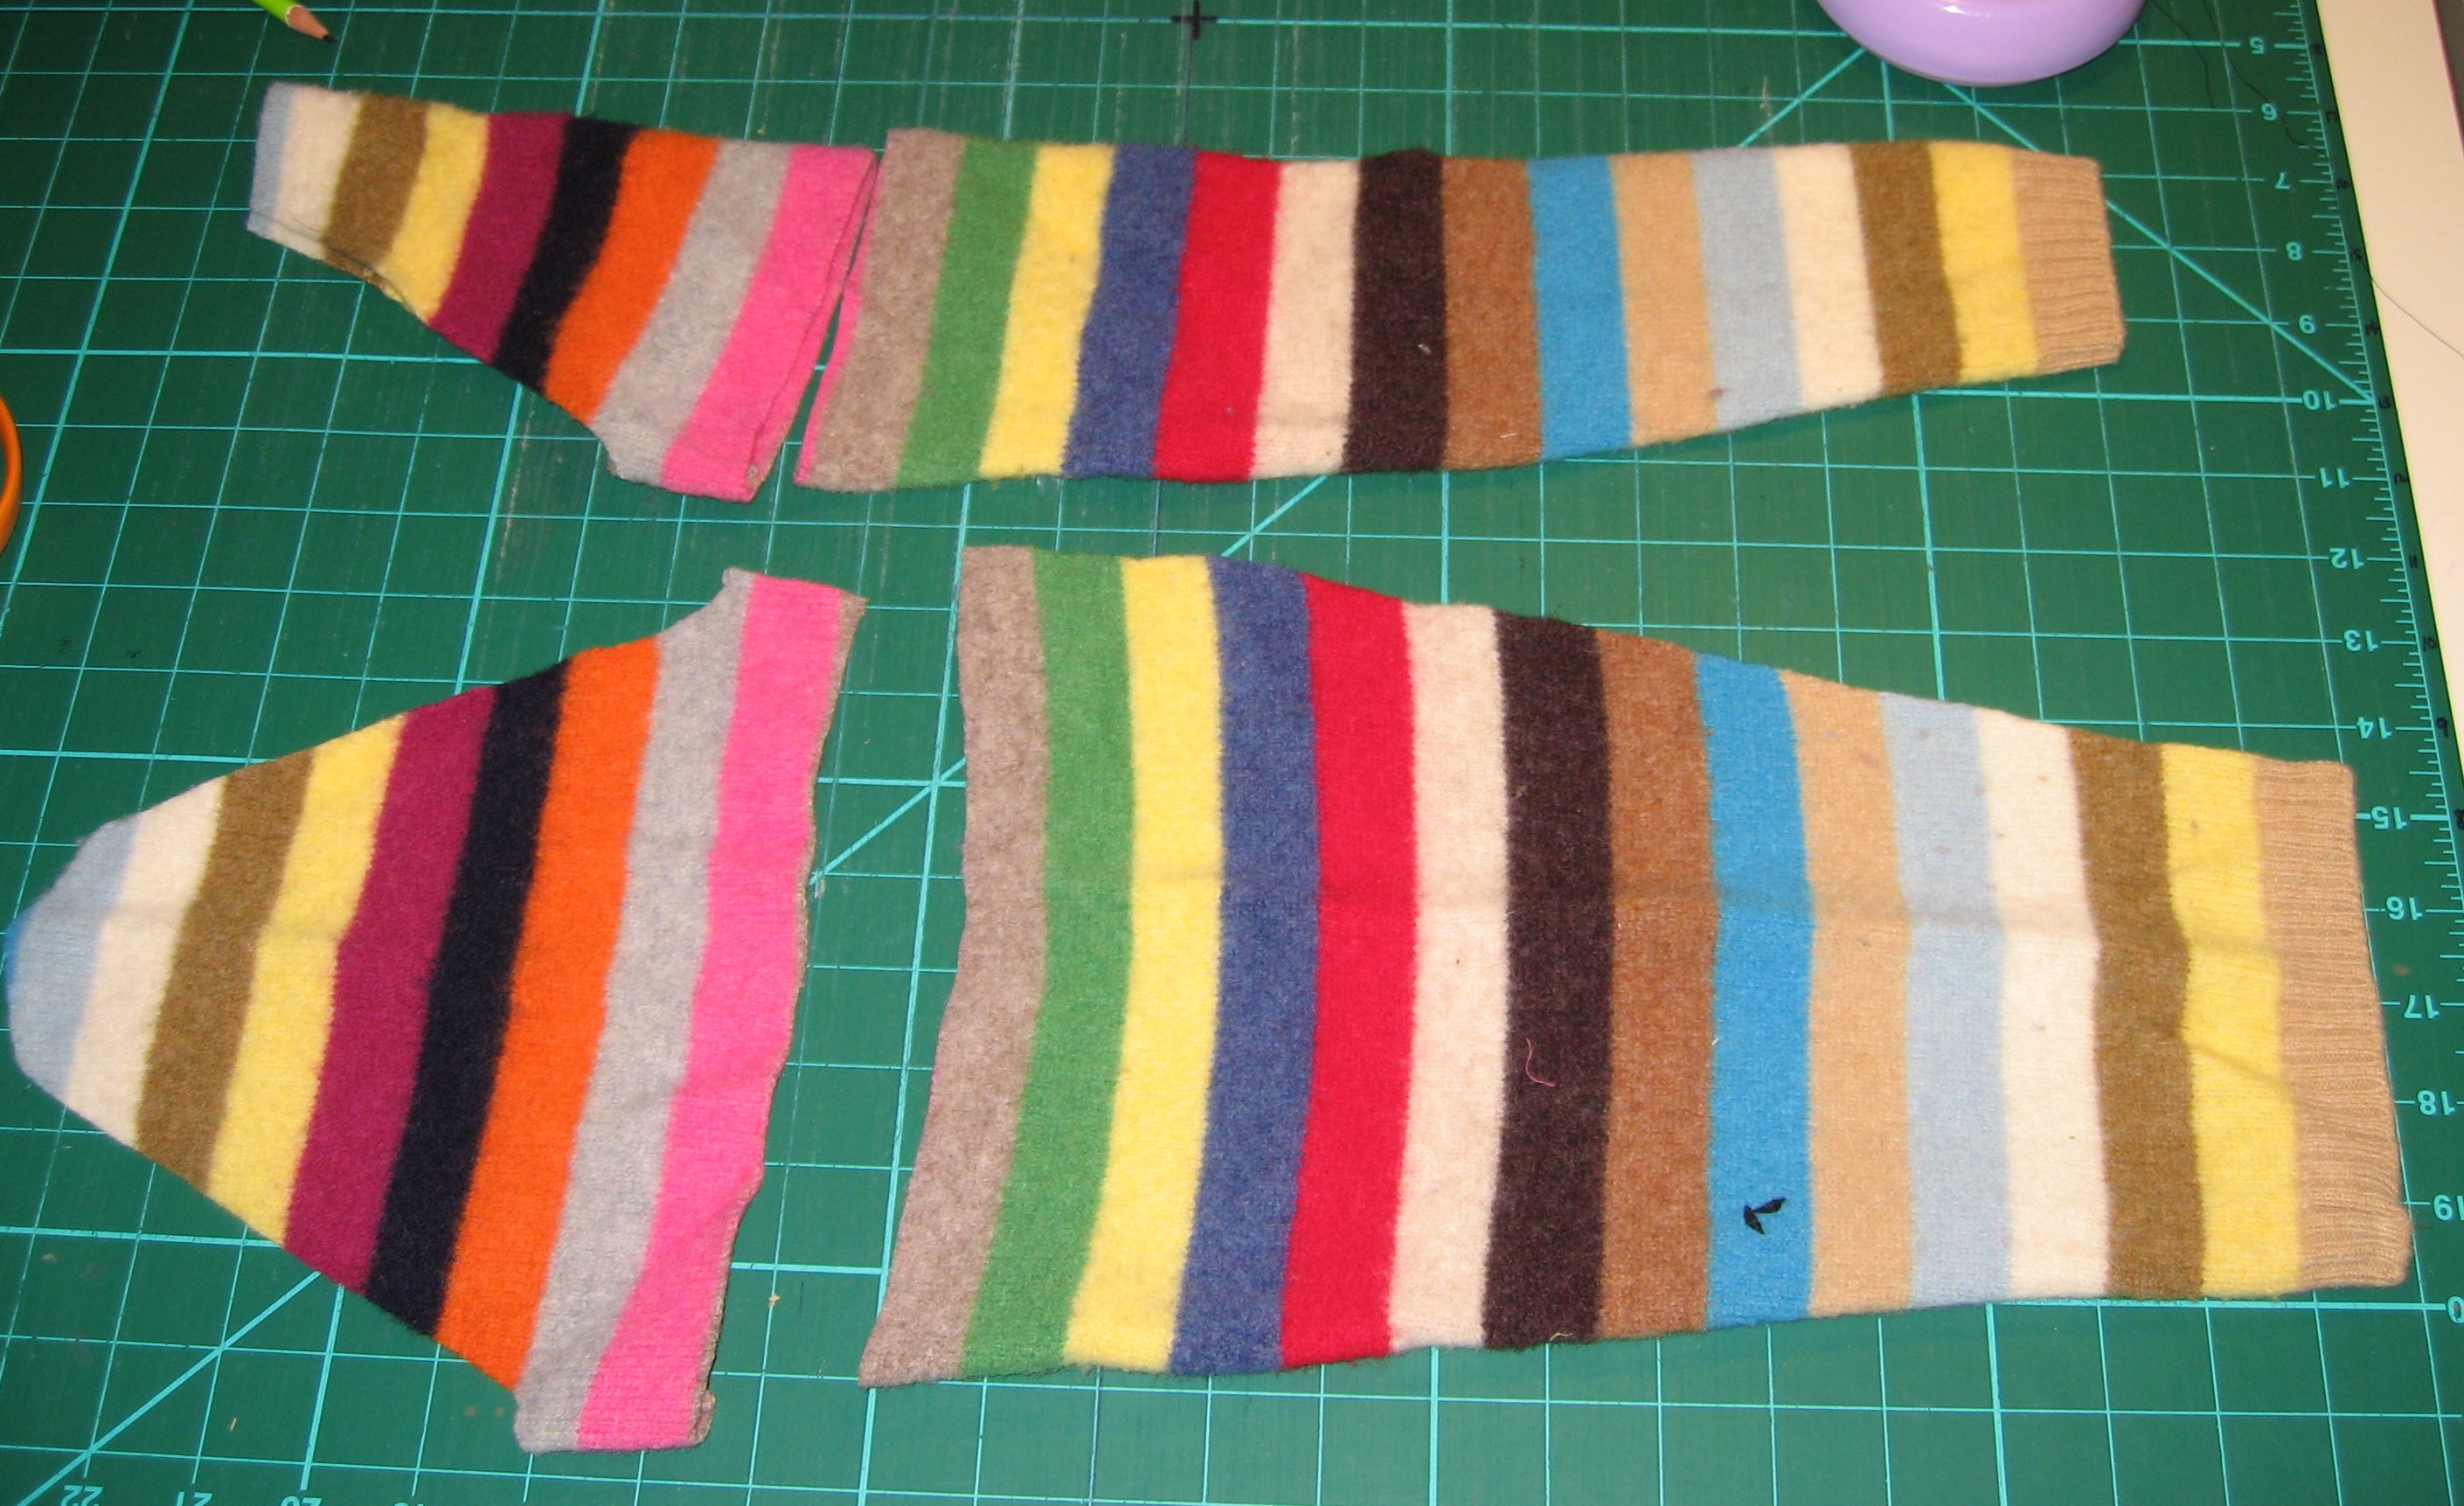
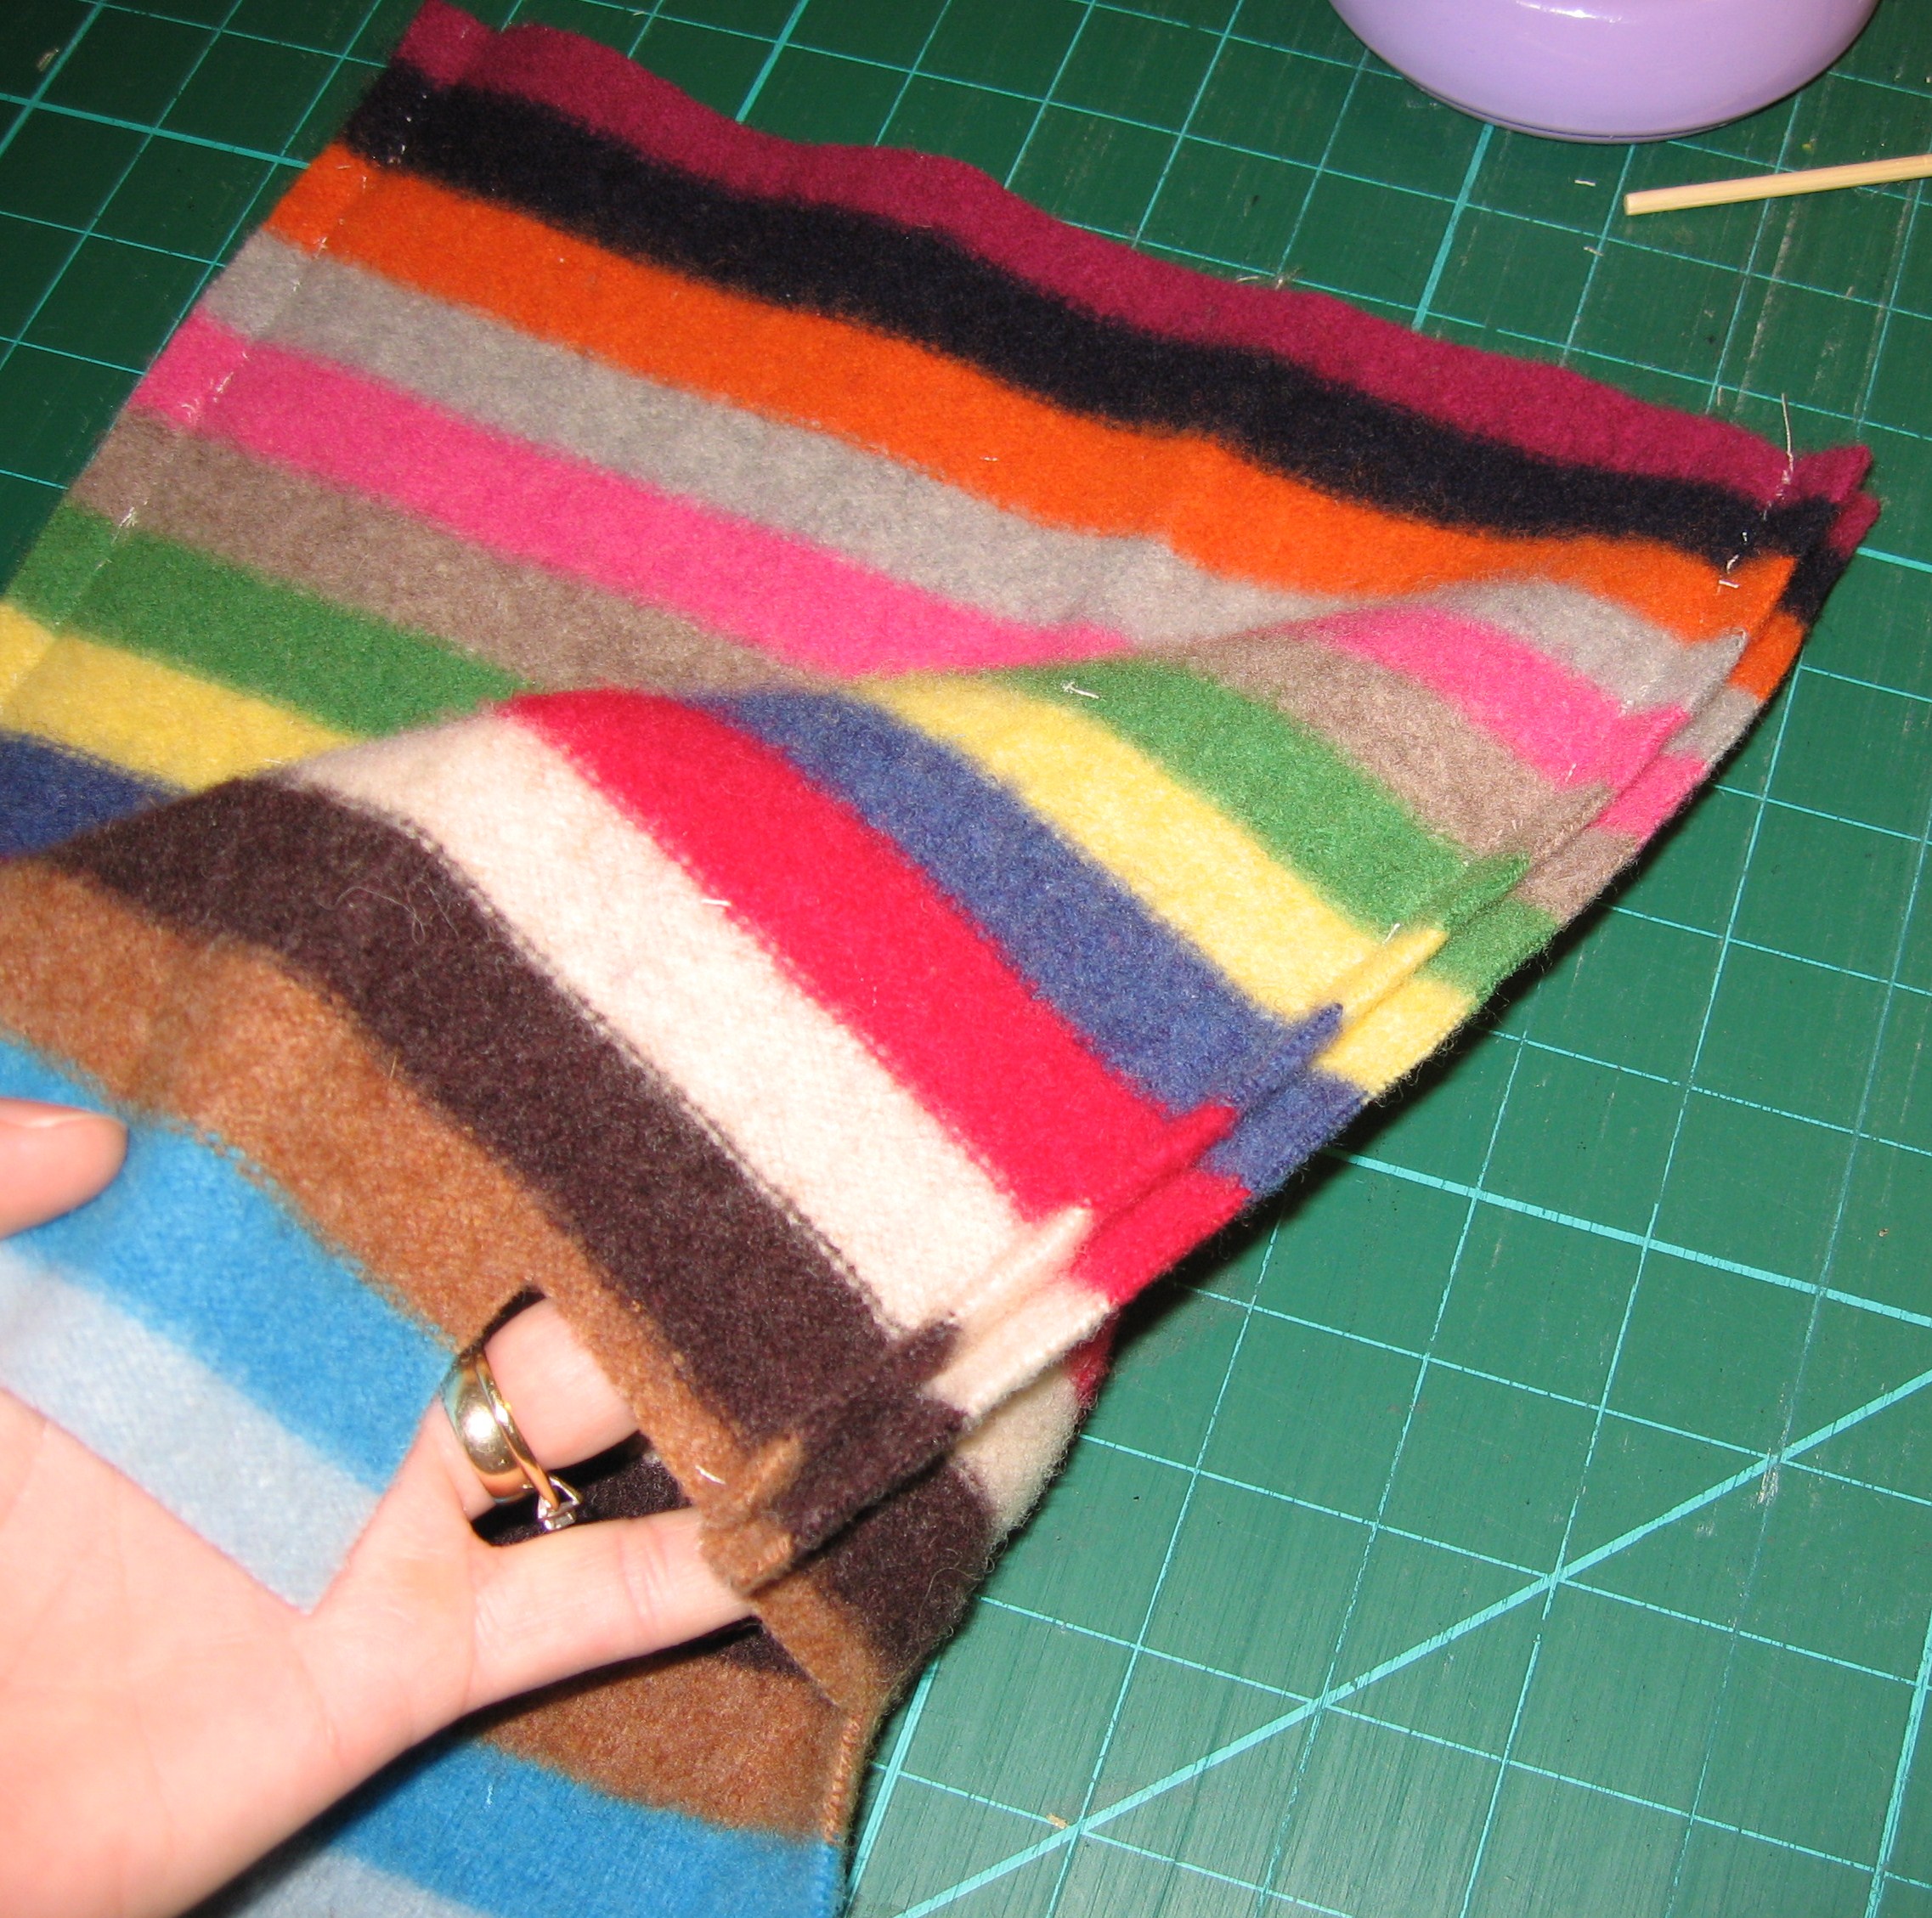
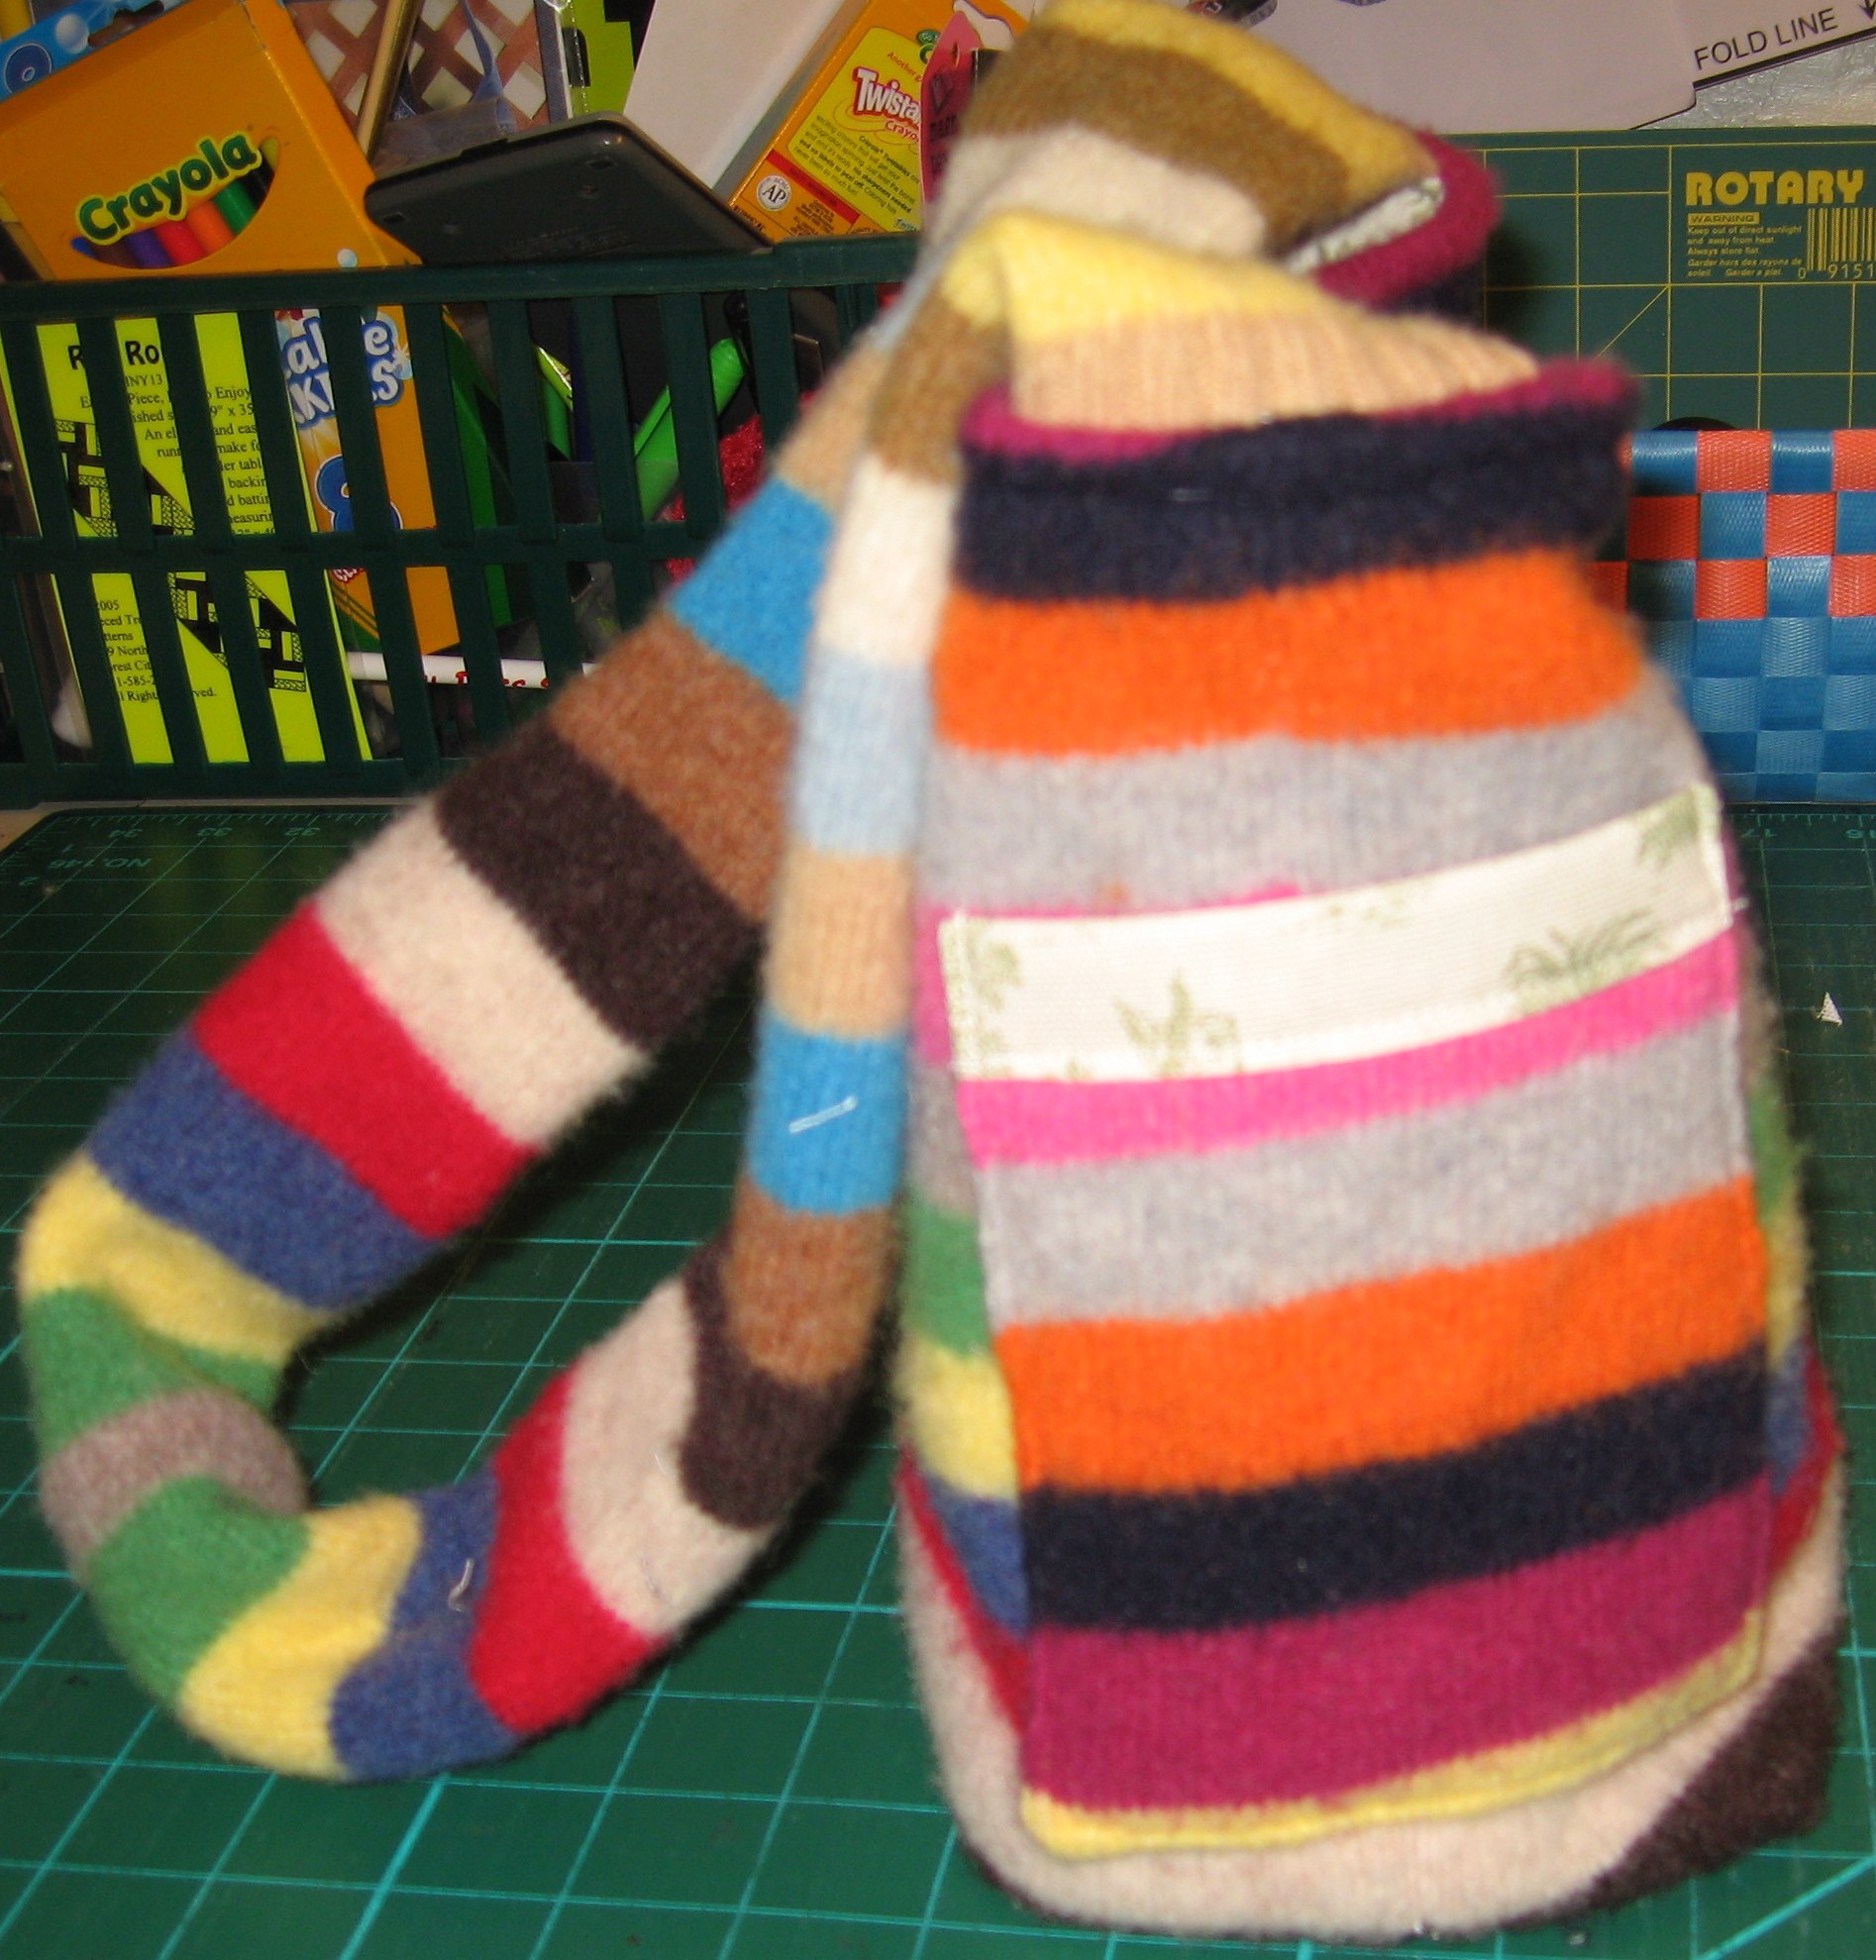
Cut a square or rectangle out of the body of the sweater, cut the same dimensions from lining fabric, remove sweater arms.
Split sleeves up seam and cut off the tops for pockets.
Cut rectangles out of the sleeve tops, cut same dimensions +1.5″ in length for lining.
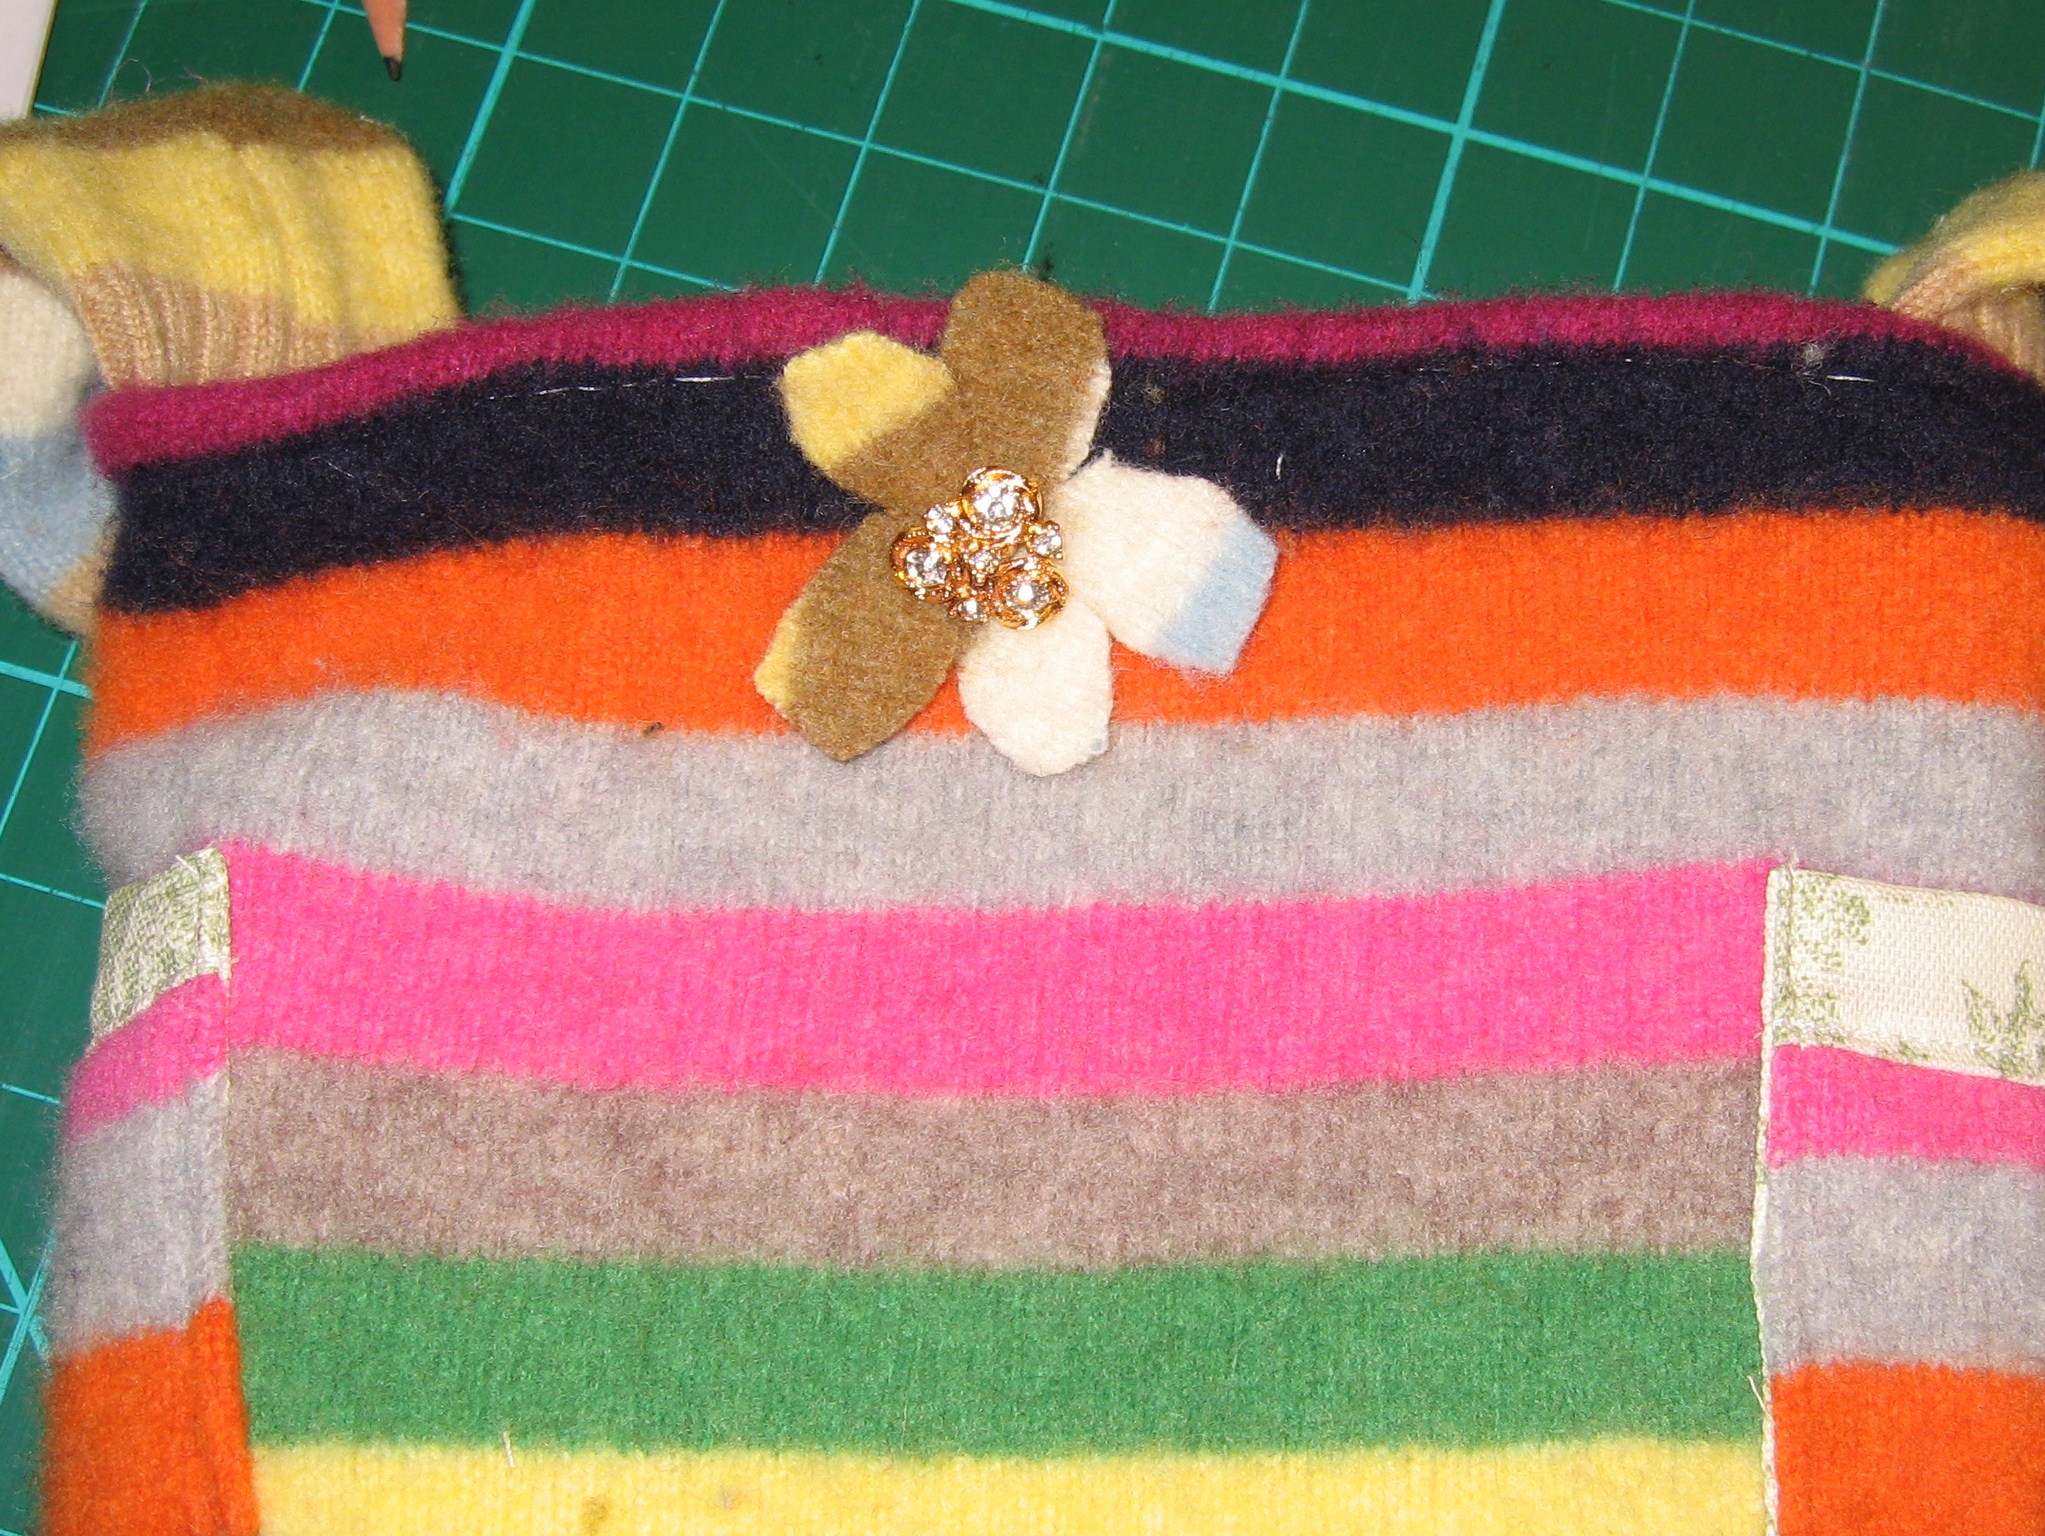
Using the remaining scraps, cut out 2 circles and trim the circles into free-form flowers.
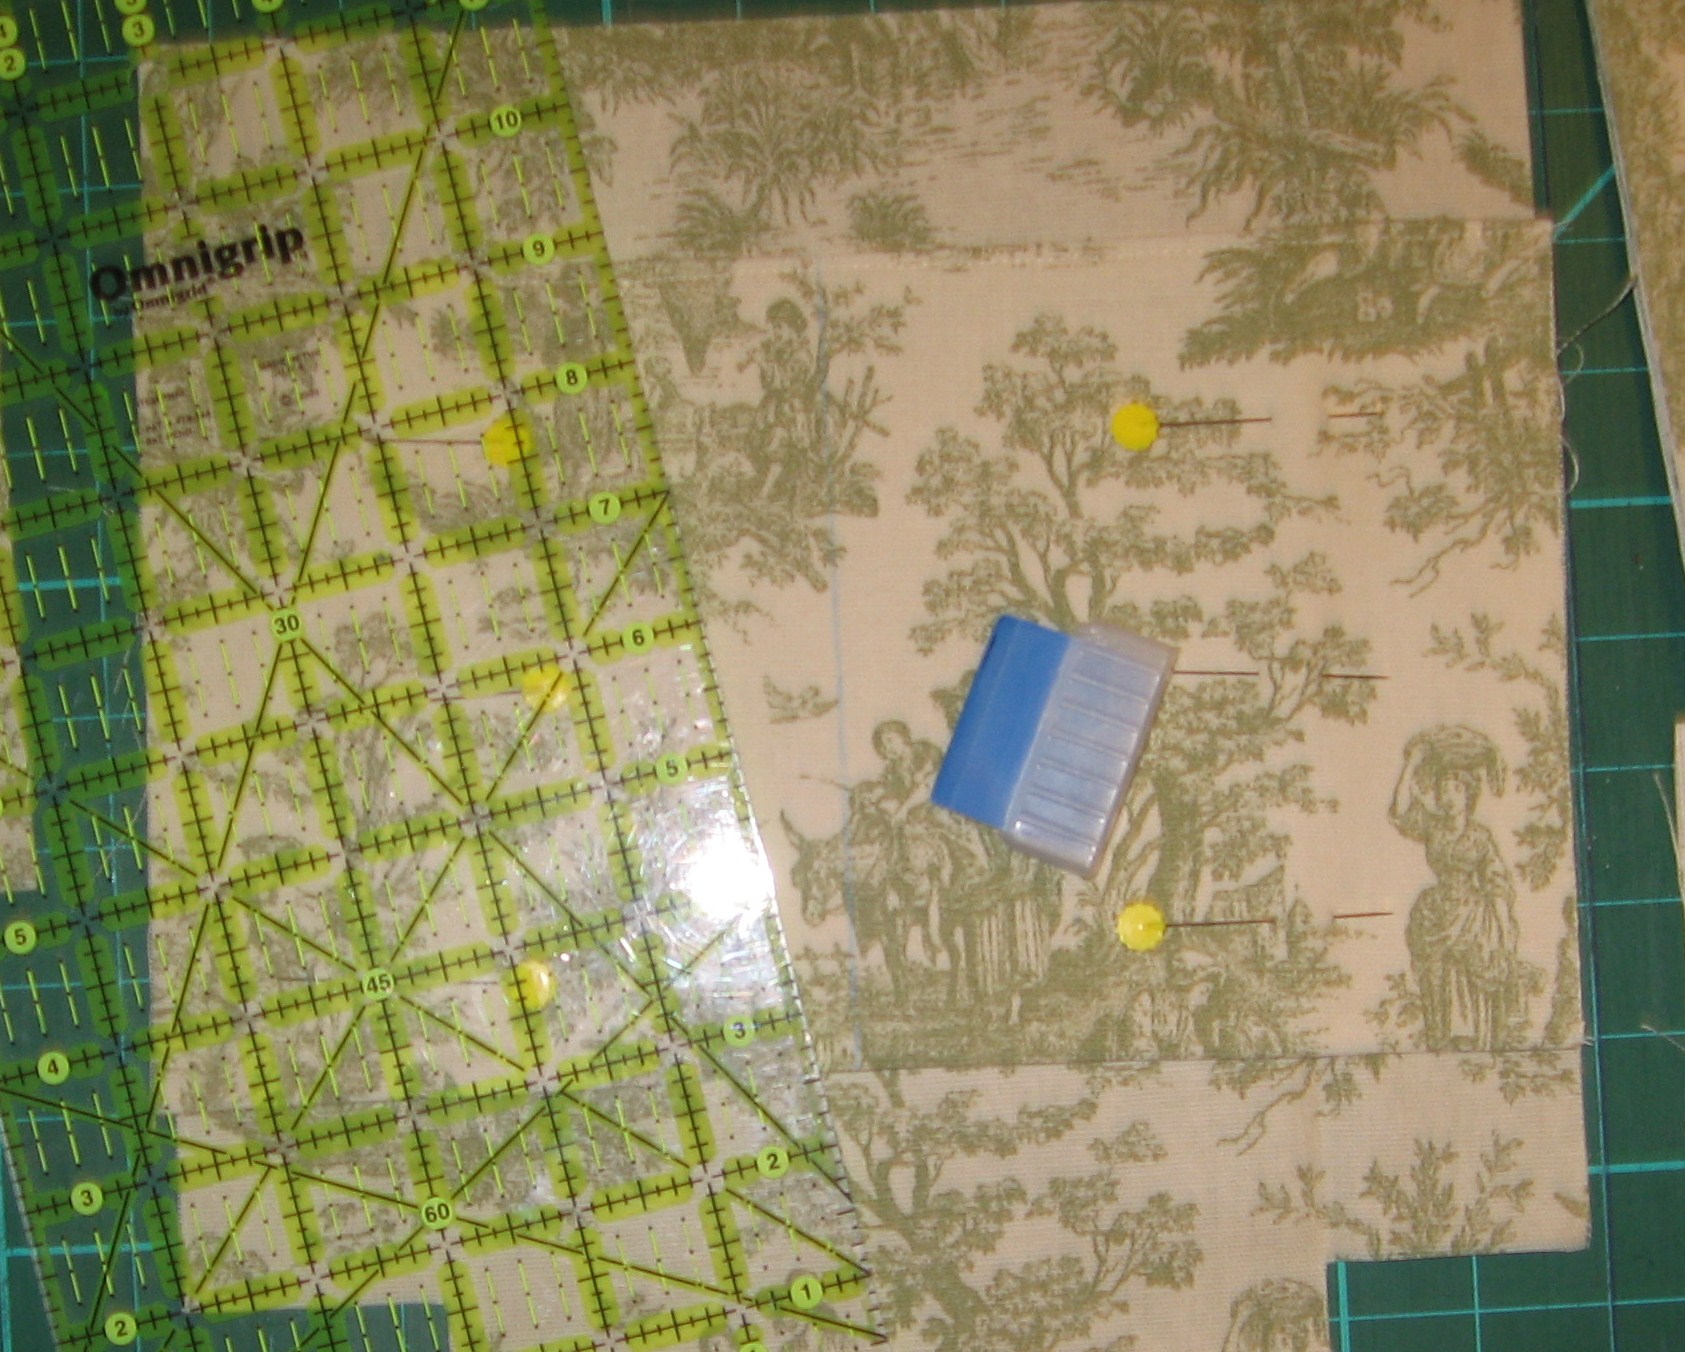
Cut 2″ squares out of the bottom left and right, repeat for lining fabric.
Now, let’s make the lining!
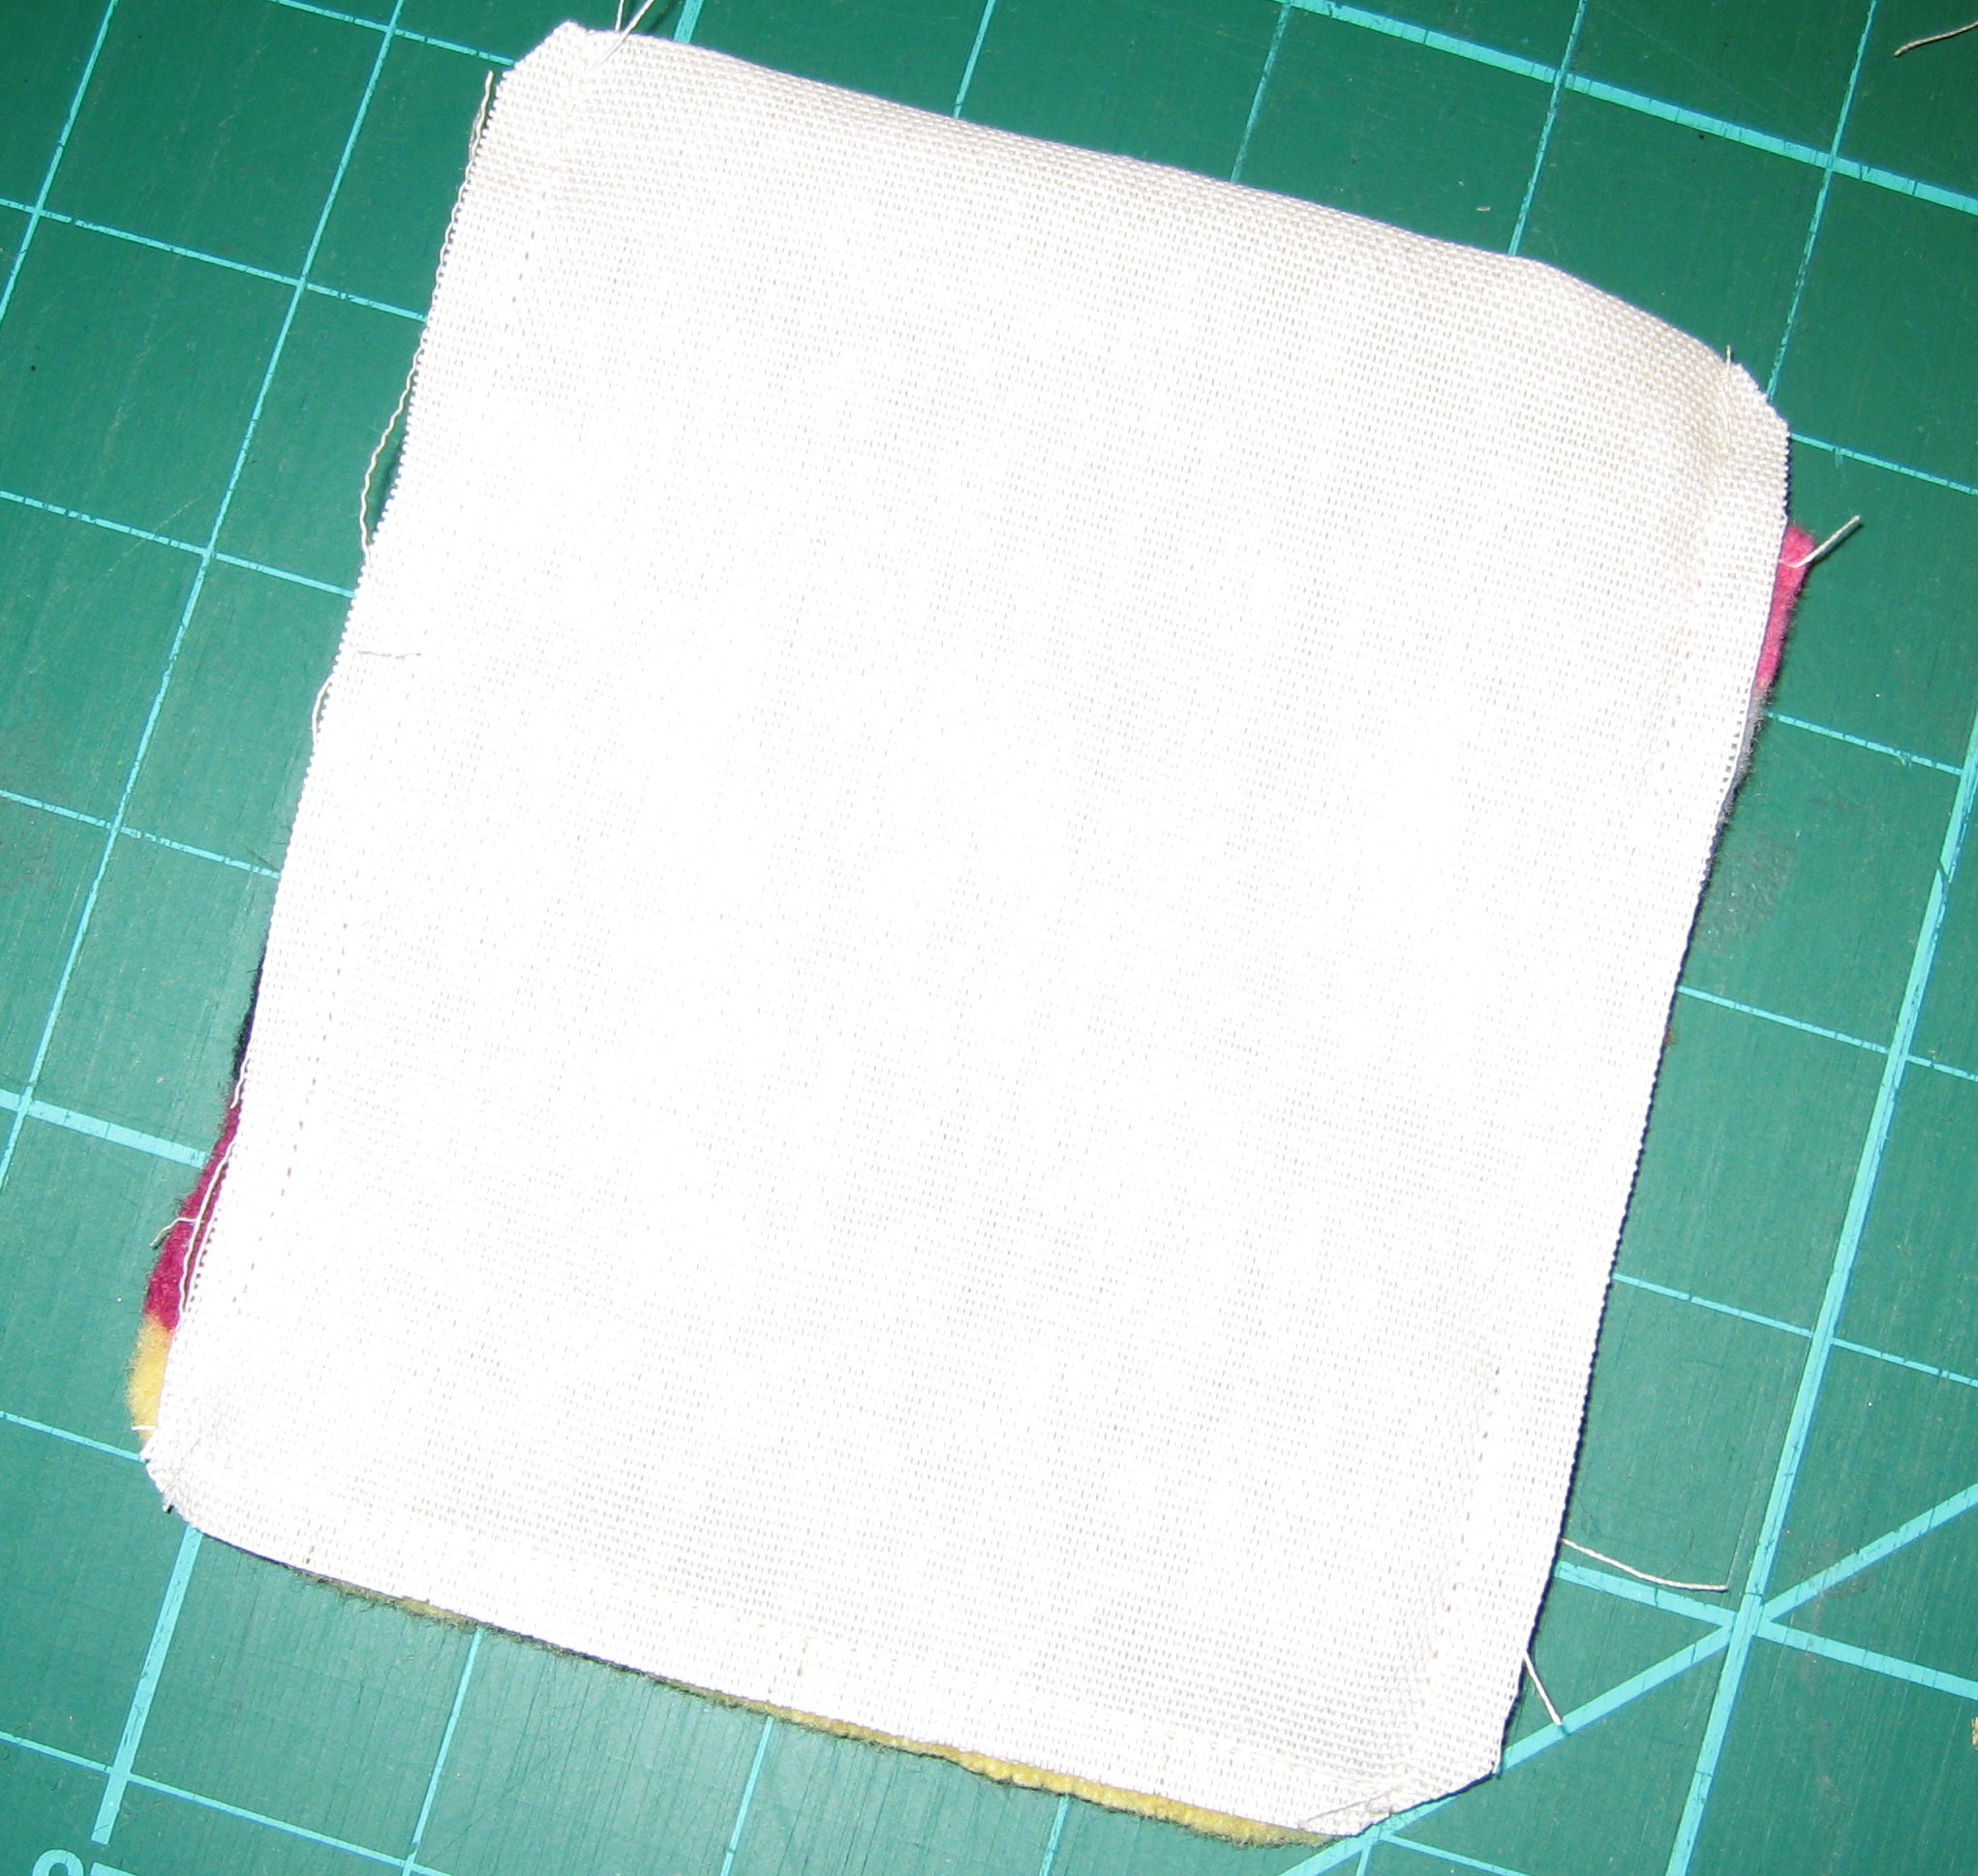
Cut a square the same width and length from lining fabric for inside pockets. Fold in half and stitch along the fold.
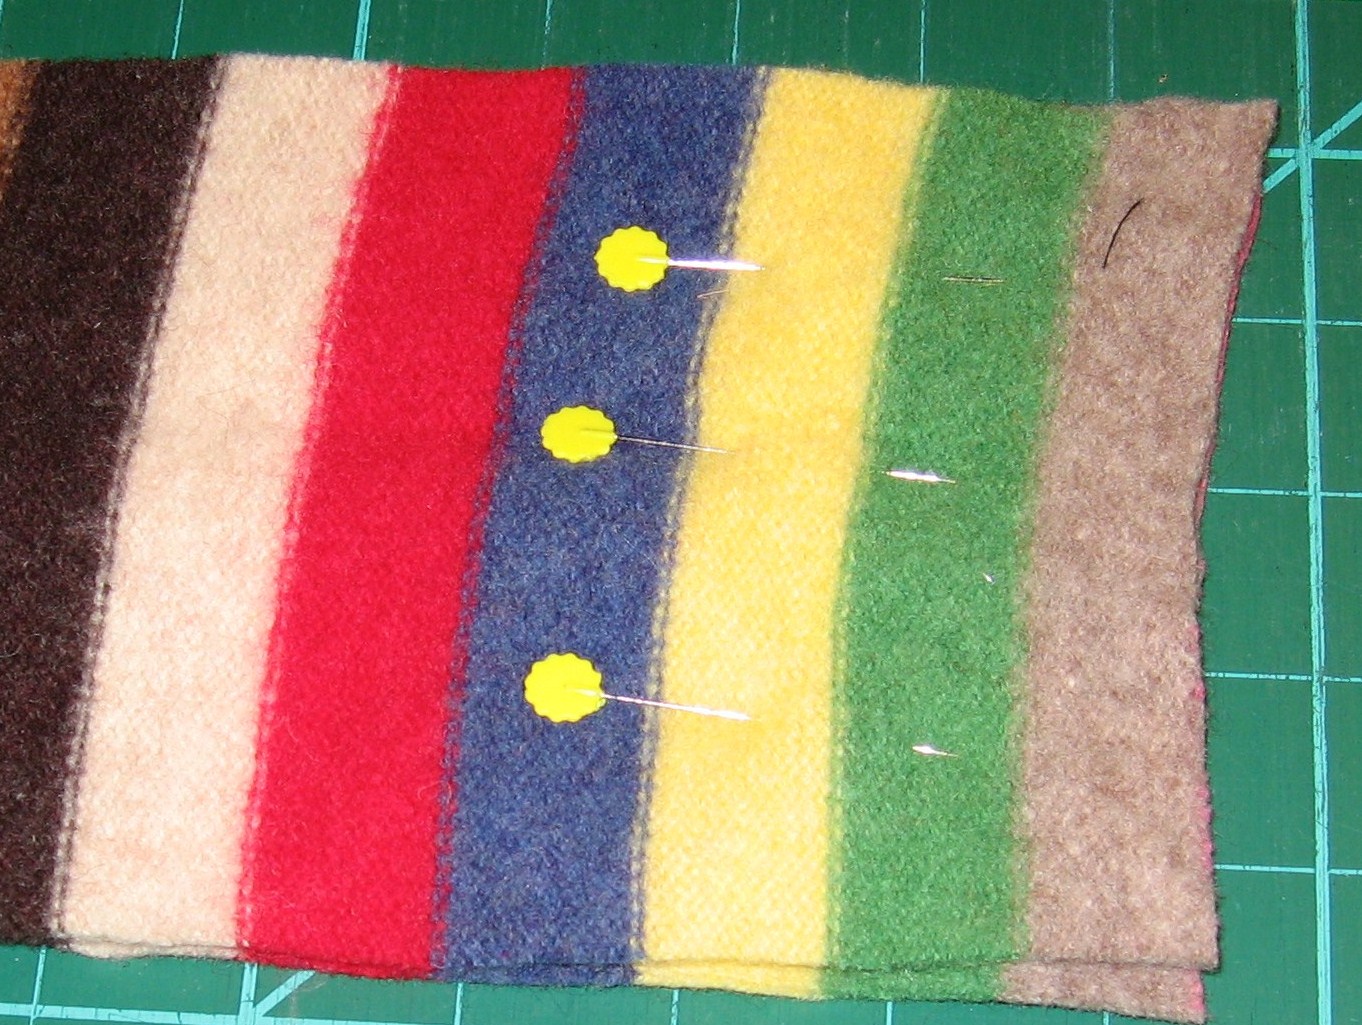
Pin pocket to inside and mark center with chalk for stitching line.
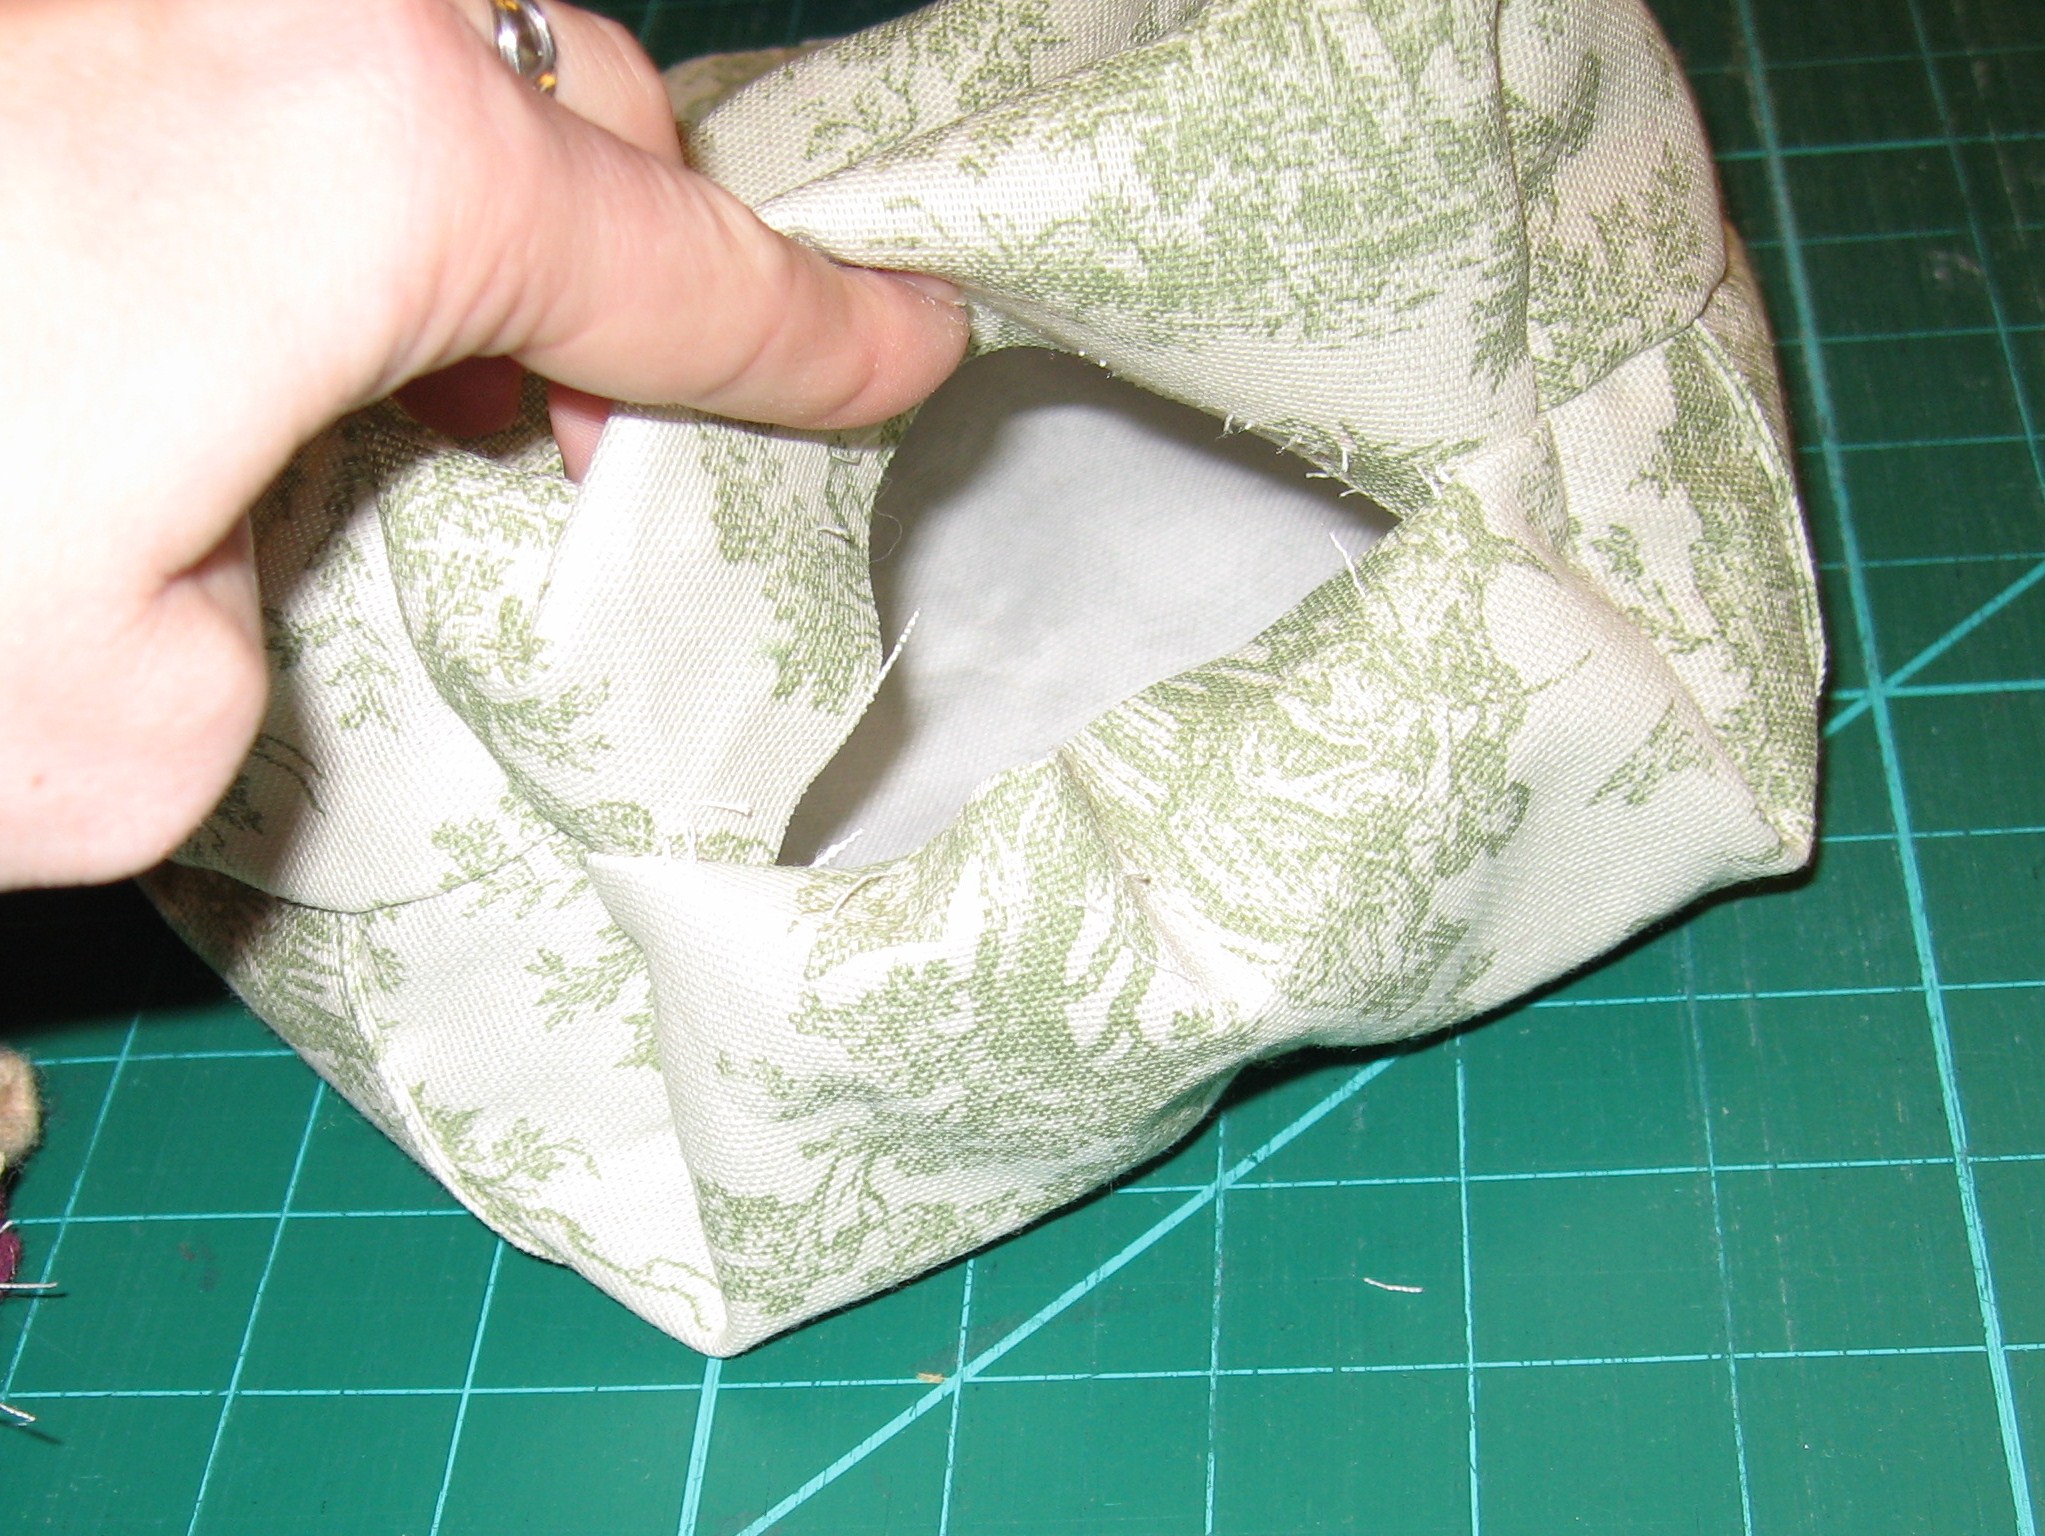
Pin sides and bottom of lining, stitch, leave 2″ corners open, leave opening in the side or bottom for turning.
Match boxed corners (the notches in the bottom of the bag), pin & stitch.
Press seams then turn right side out. The bottom and pockets of your lining should now look like this.
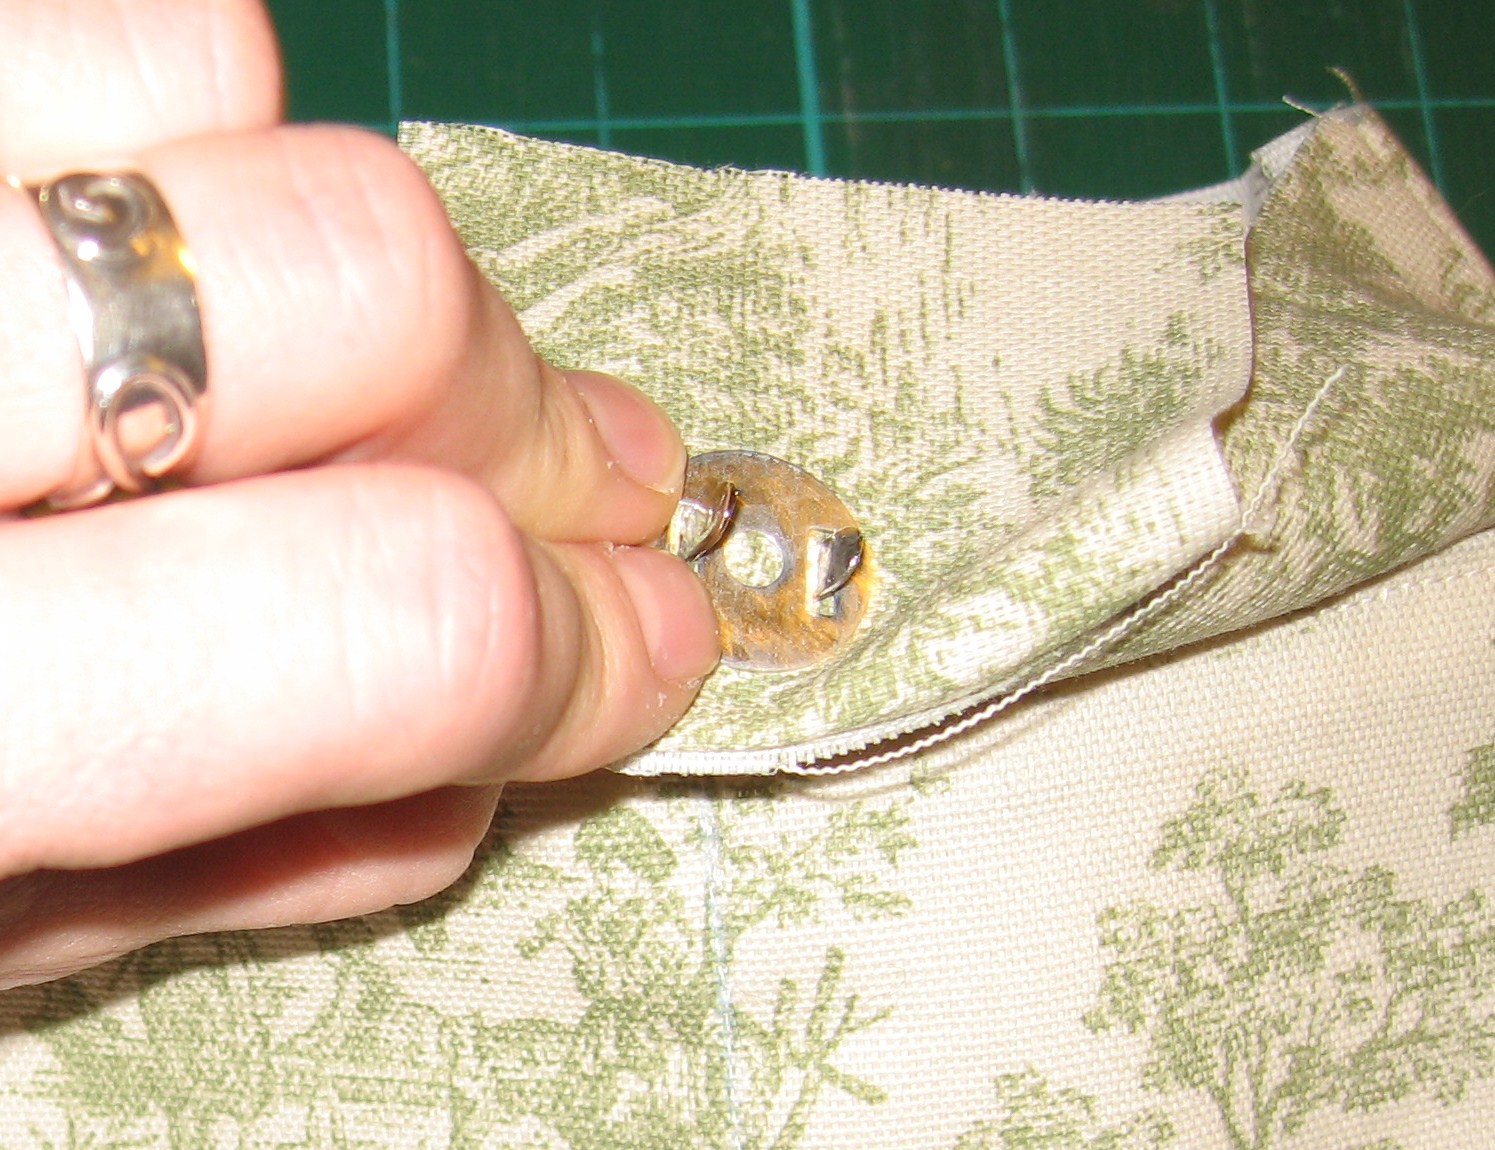
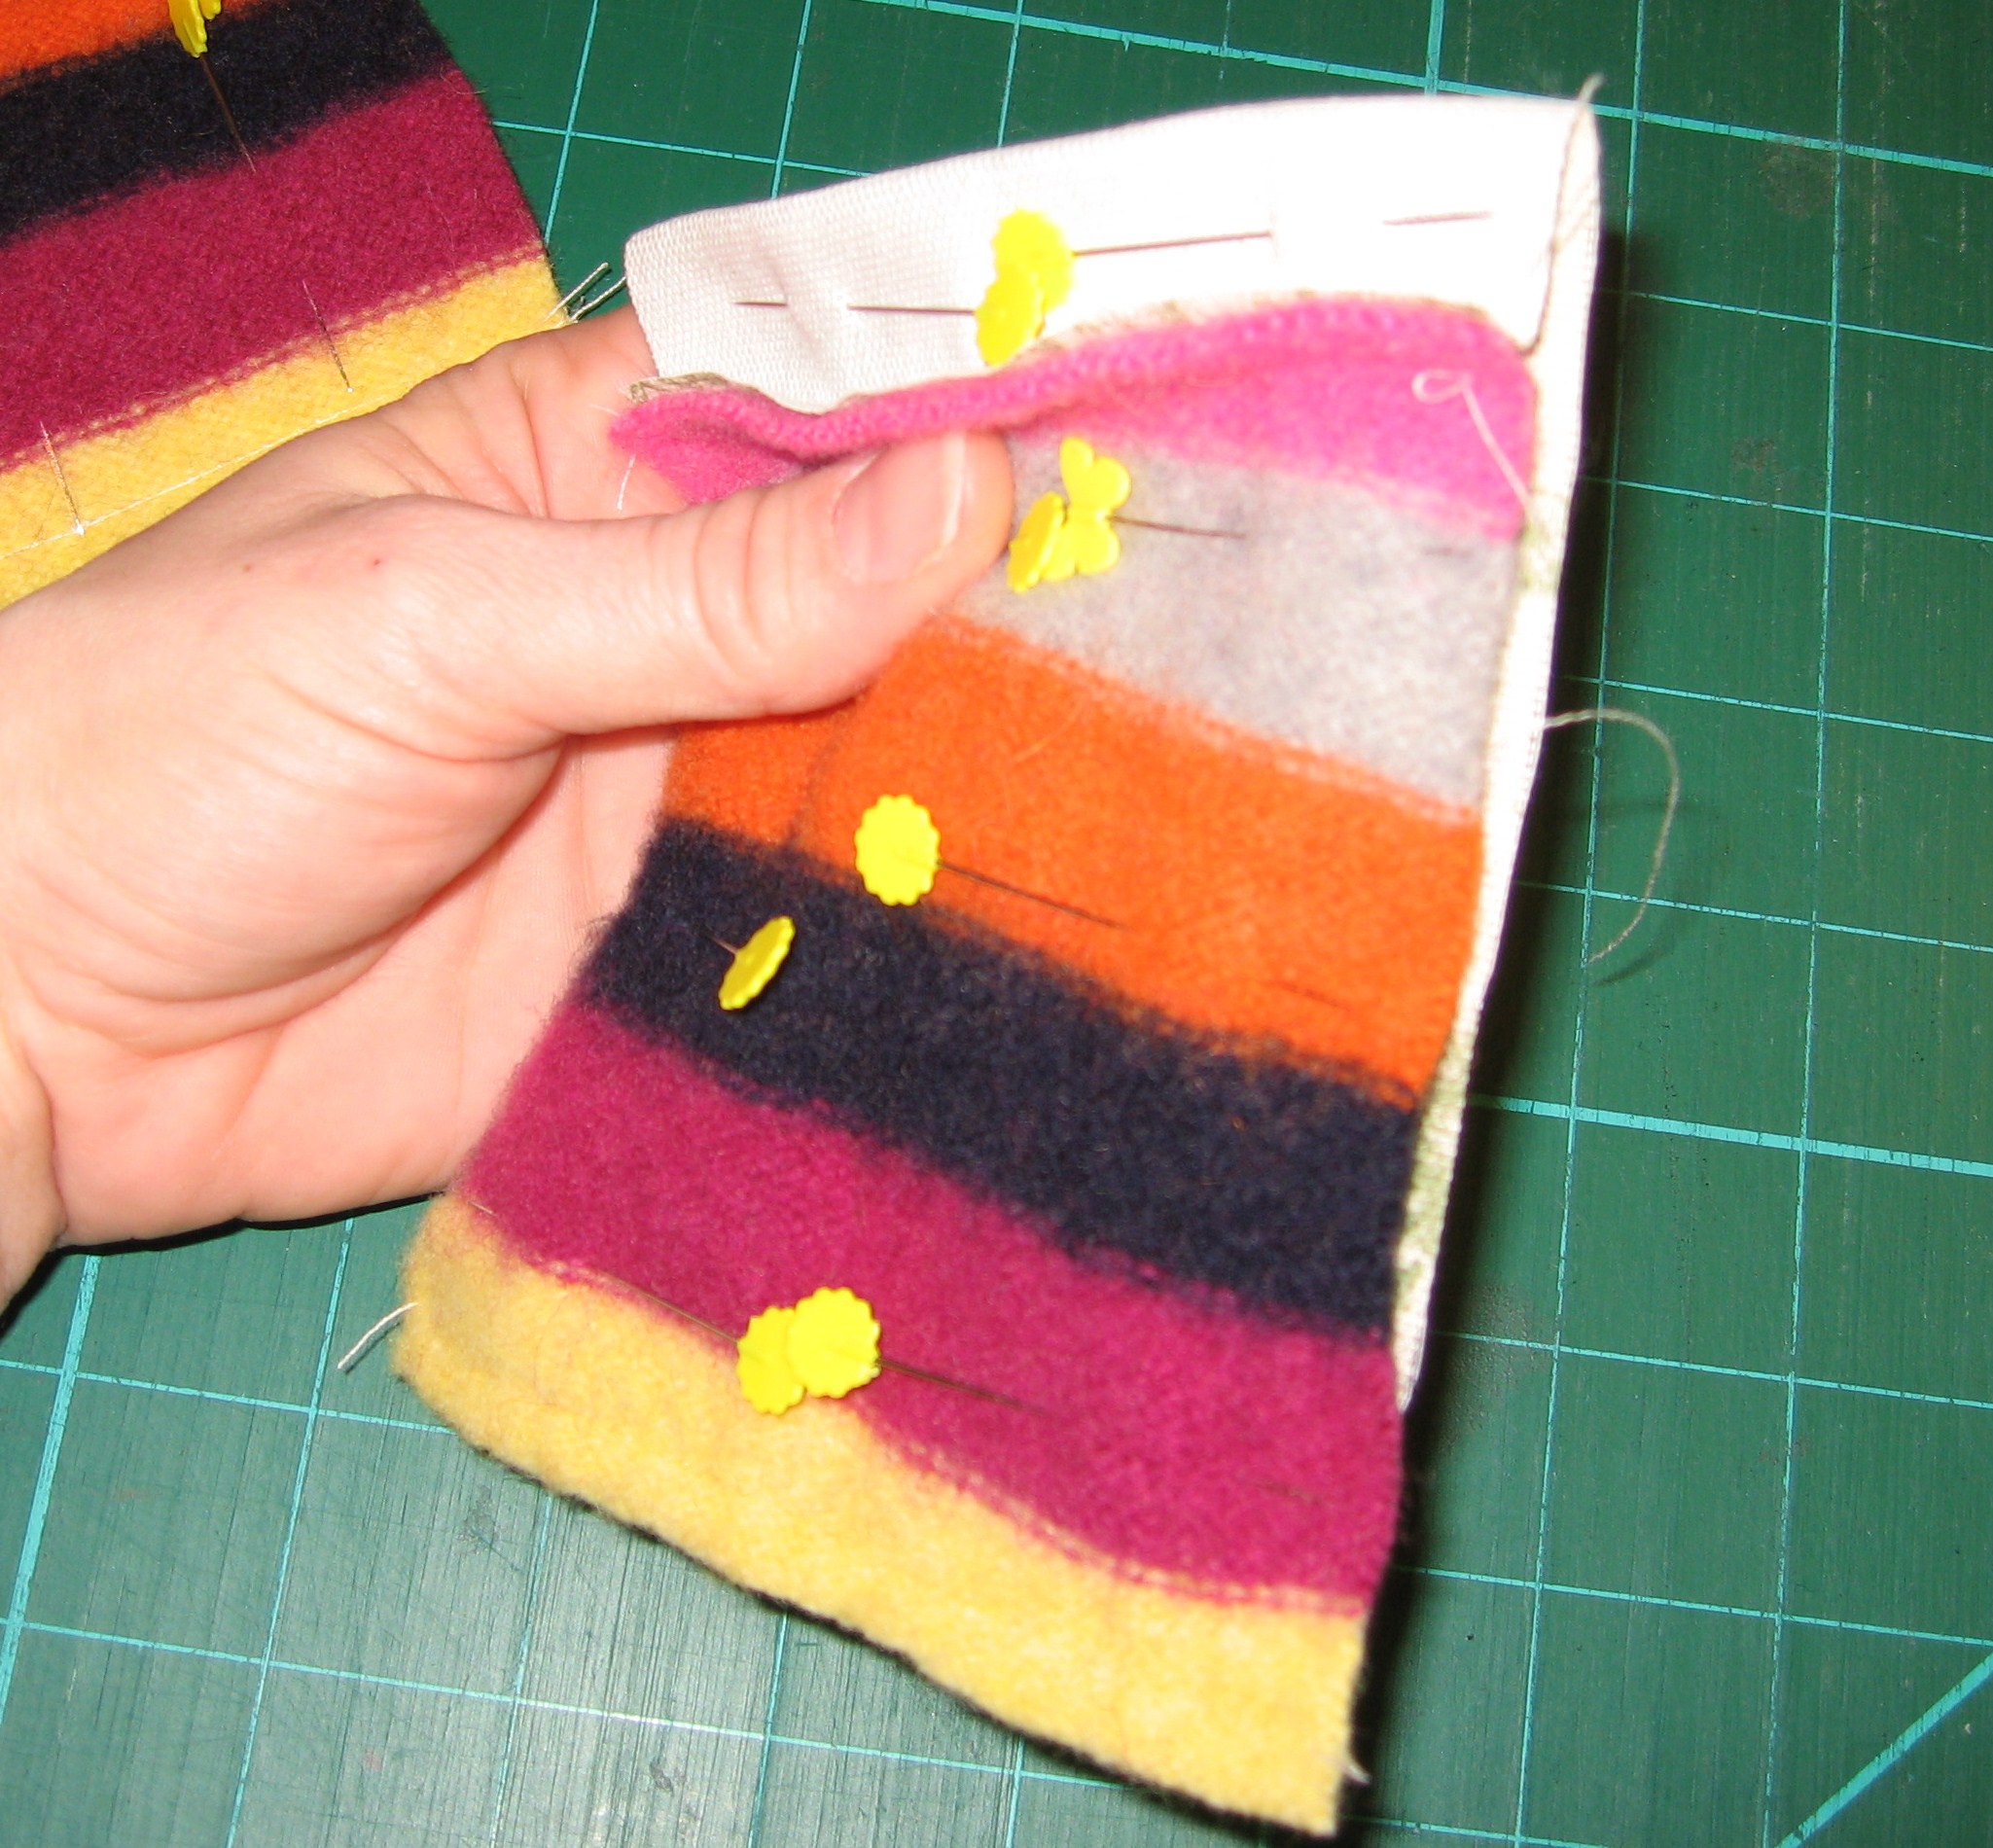
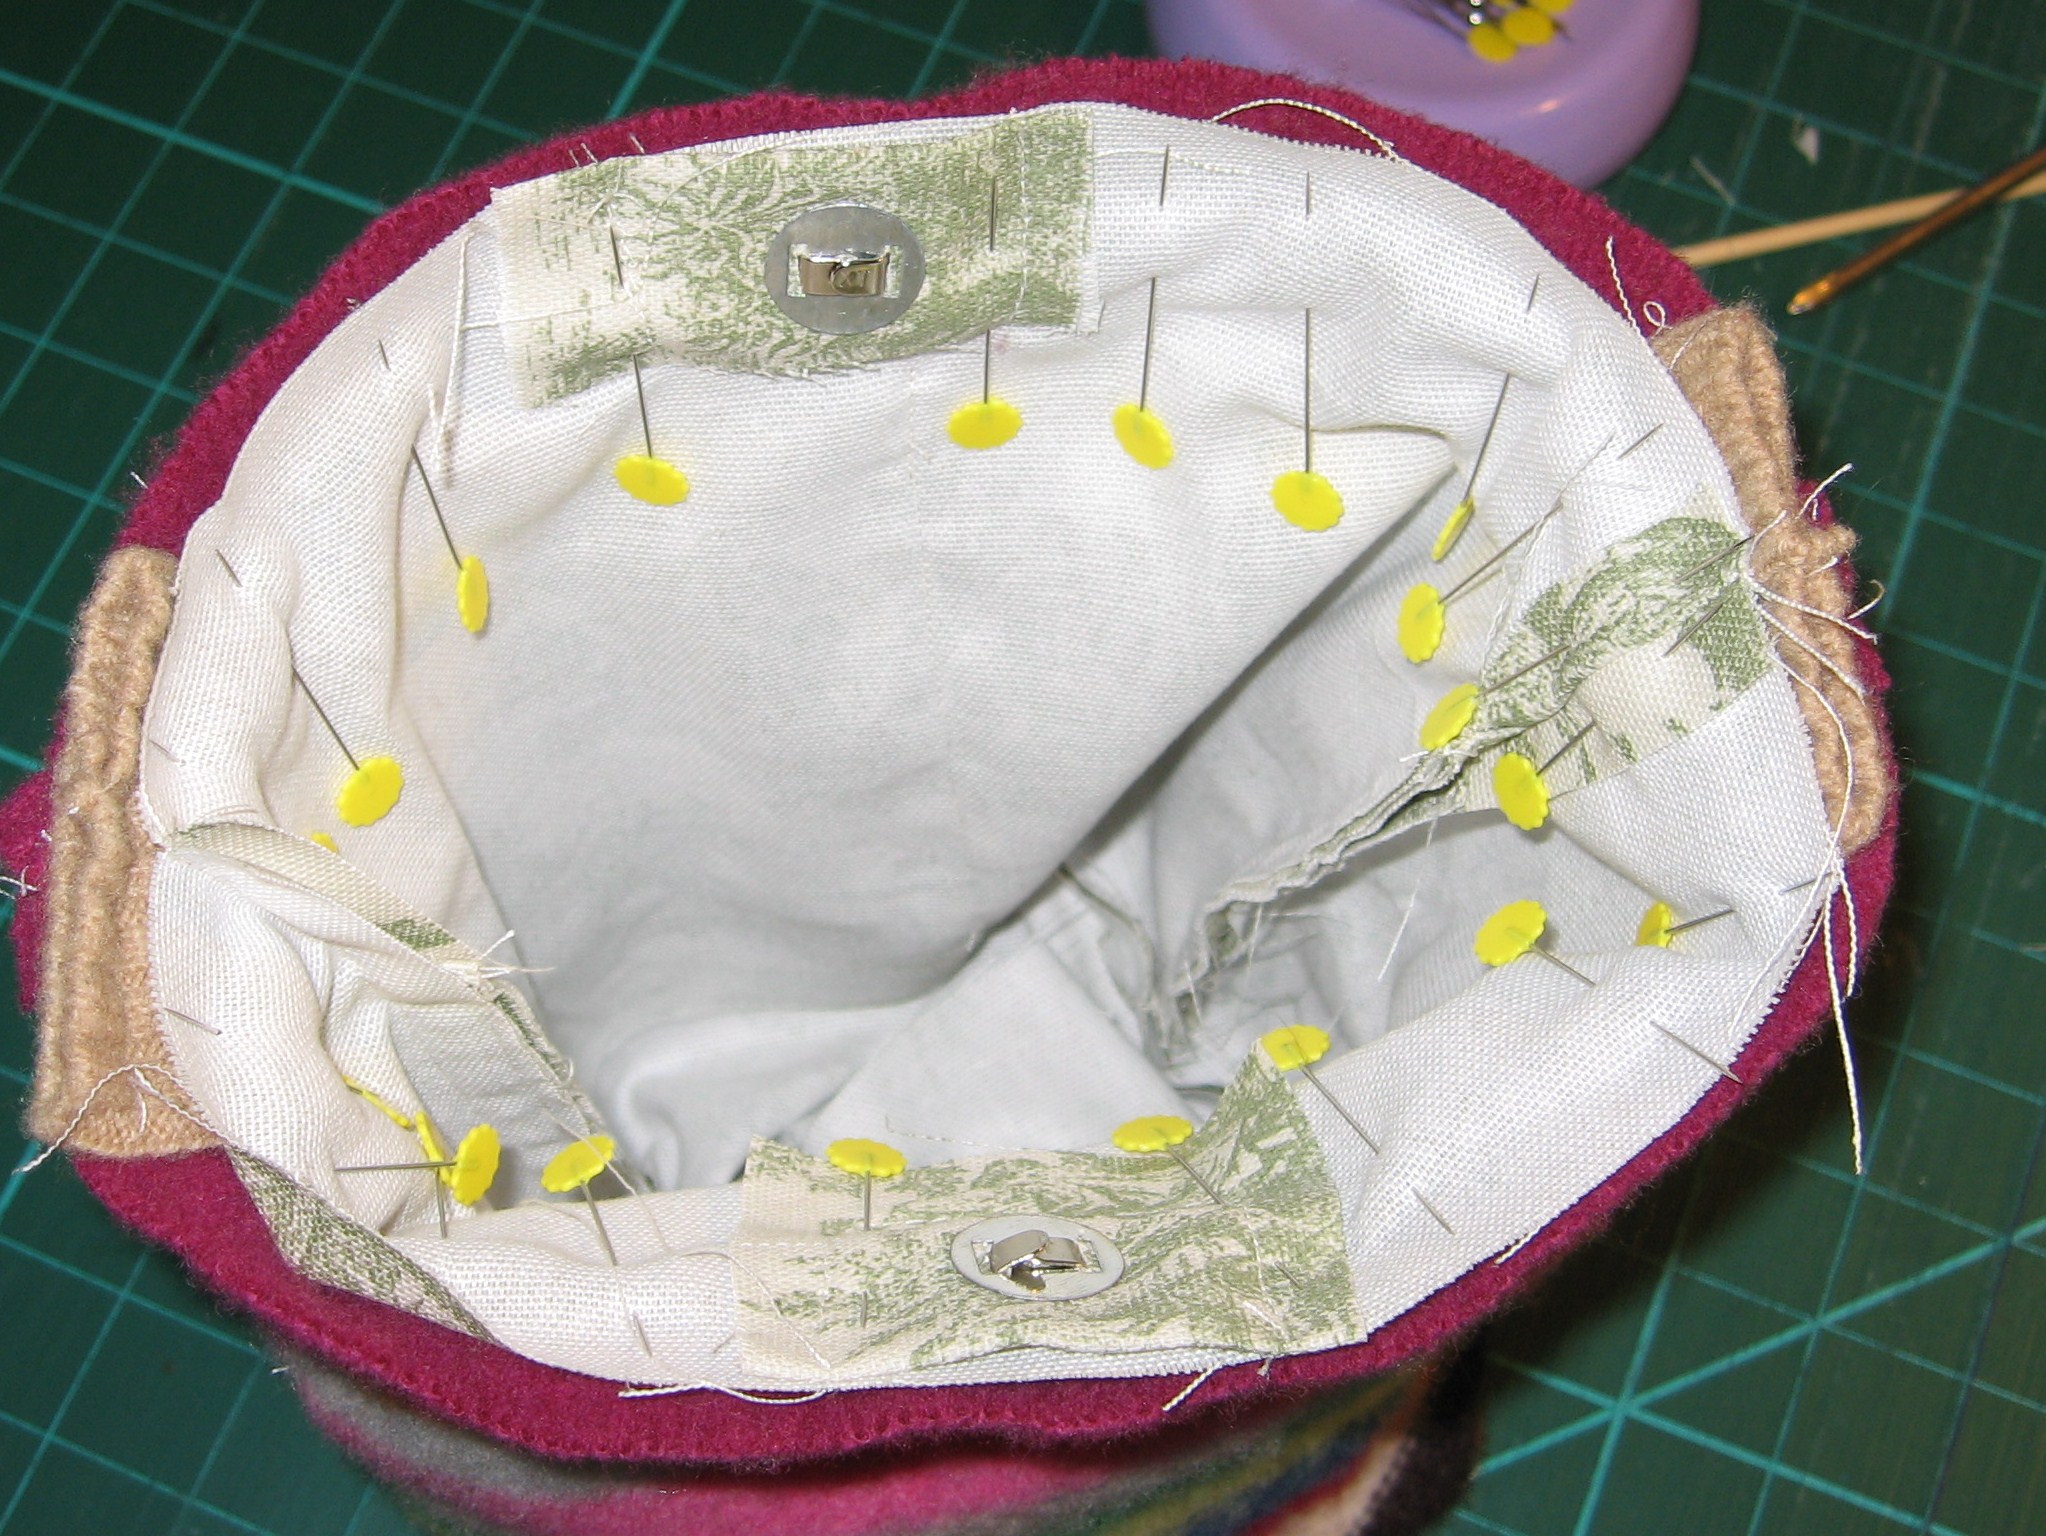
Add magnetic snaps to your lining following the manufacturer’s directions. Leave enough seam allowance at the top for stitching around. I recommend 1″ or more of space. Add a folded piece of scrap fabric to the back to reinforce the snap. Stitch around the snap to reinforce extra fabric.
Time to work on the outside sweater pieces!
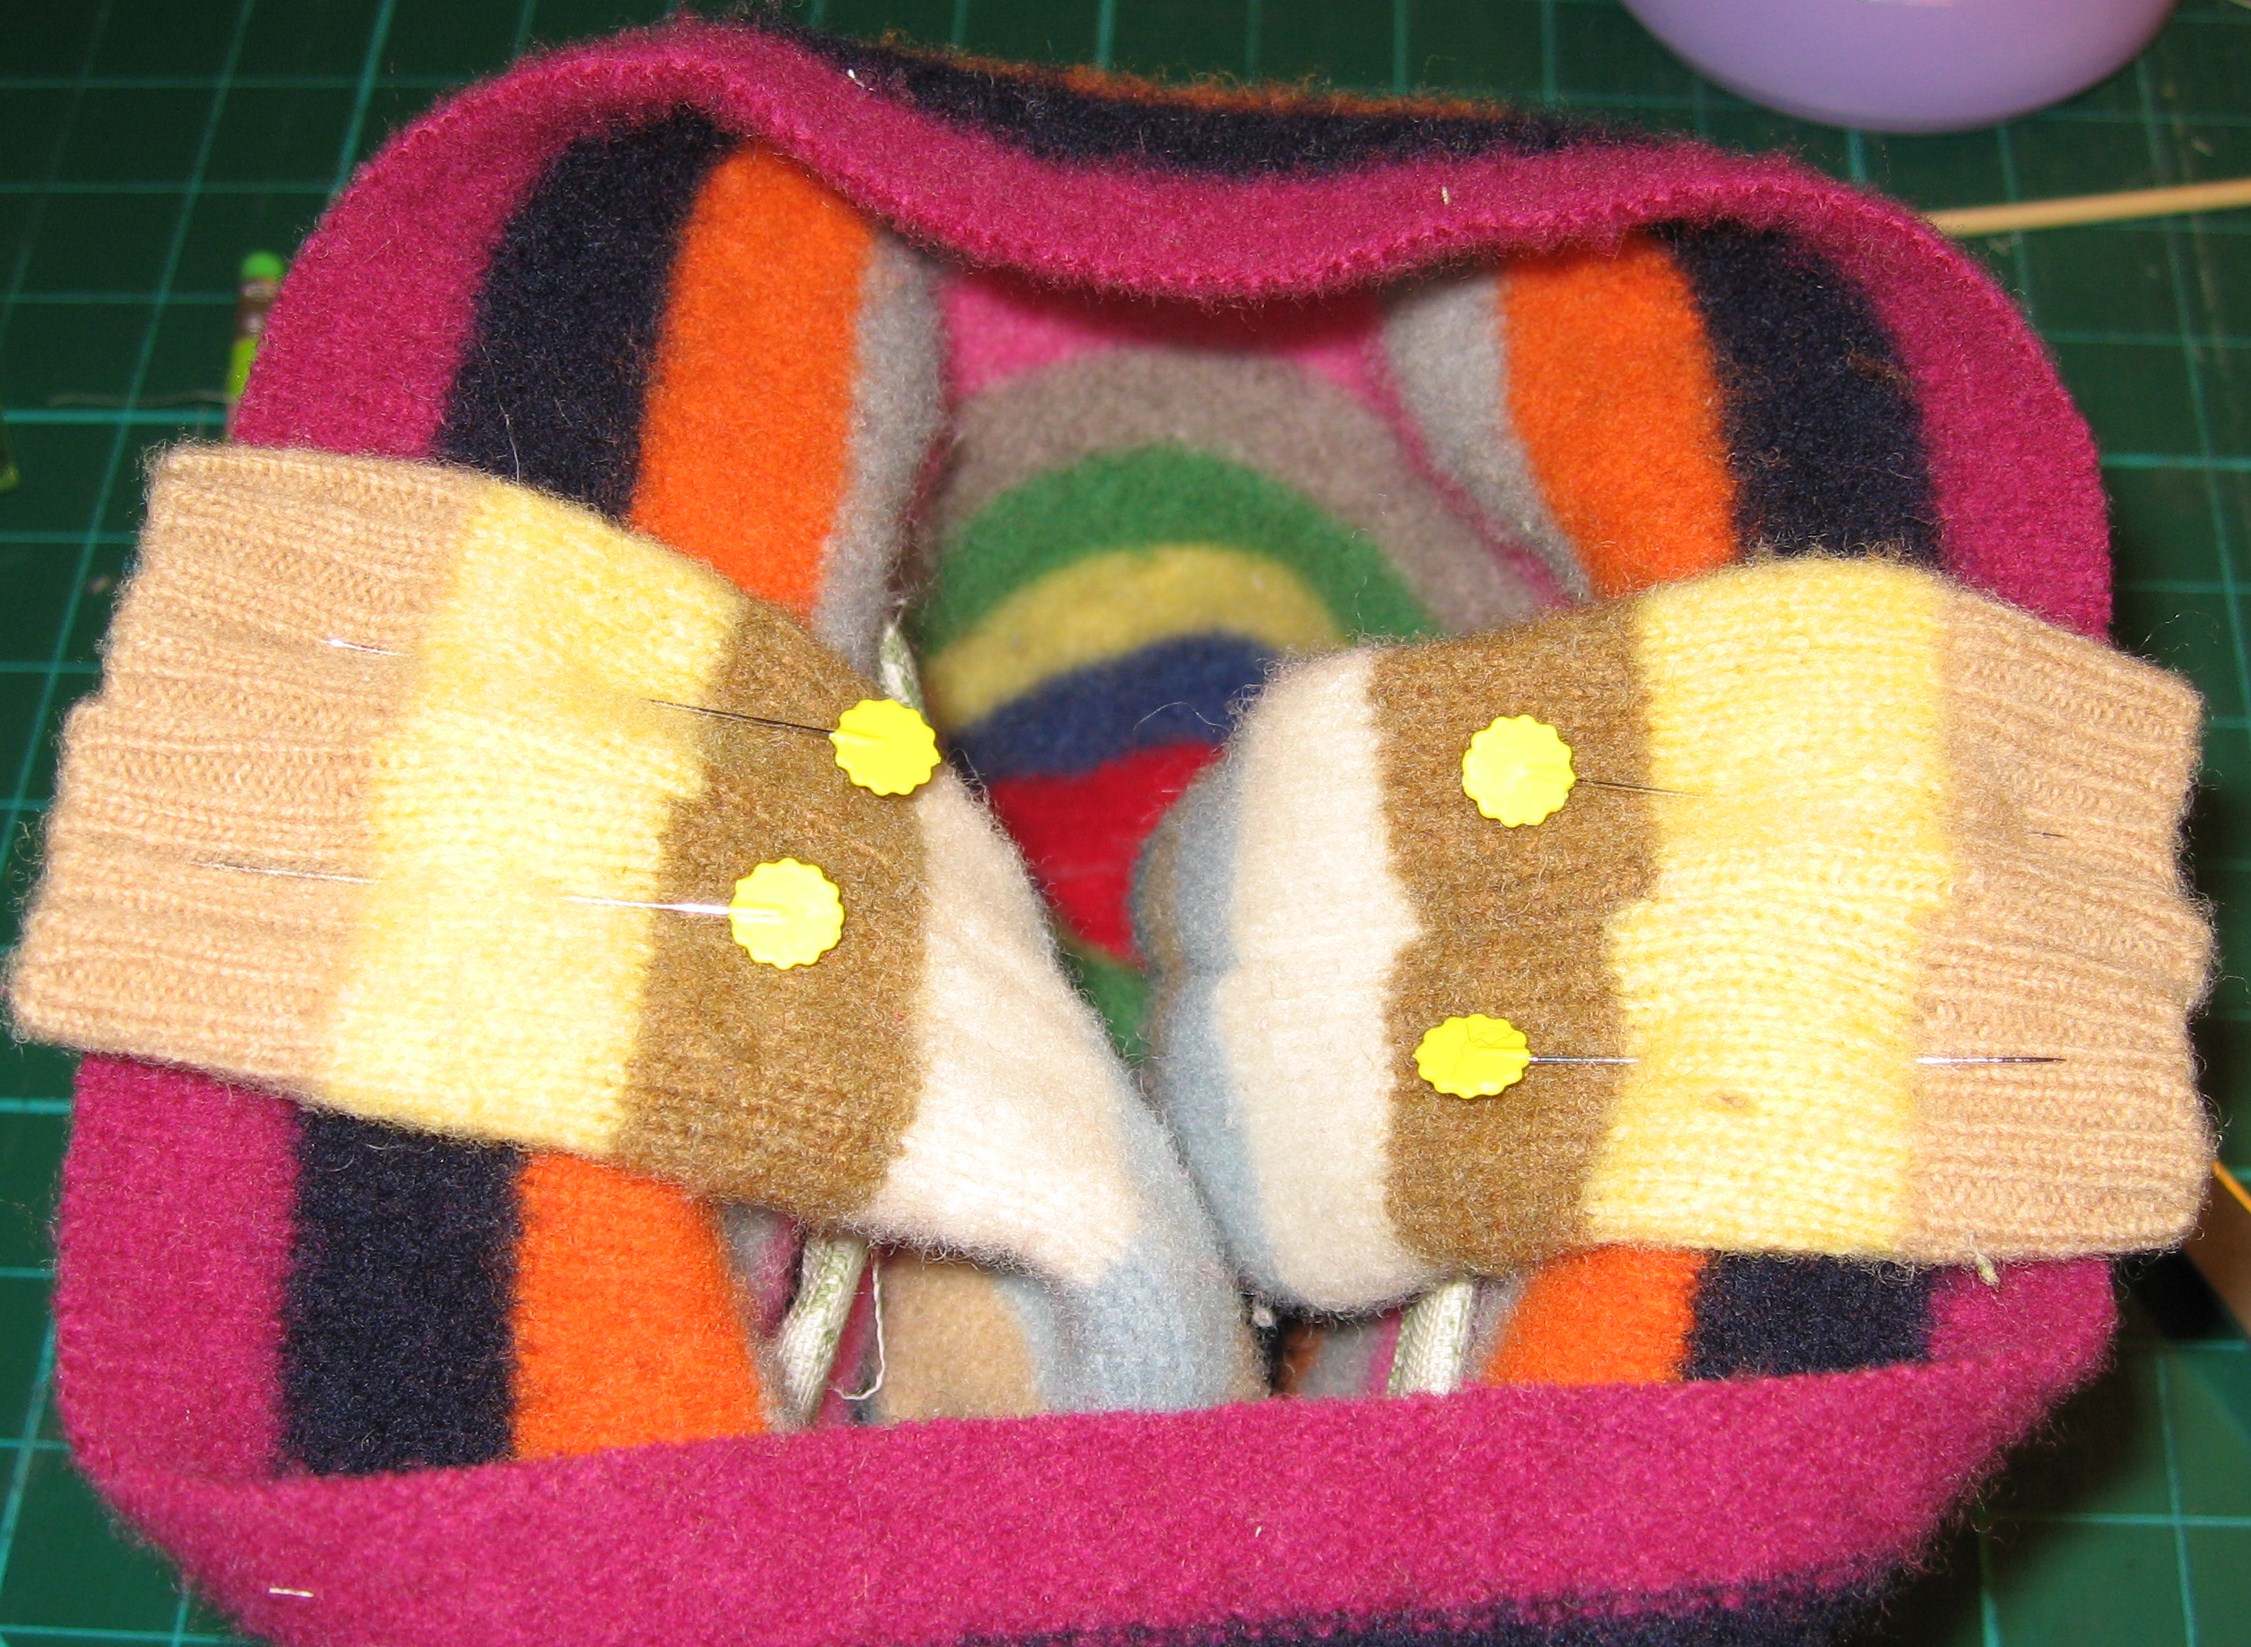
Pin sweater pocket piece to lining pocket piece, right sides together (lining should be 1.5″ longer), stitch ends.
Line up bottom of pocket, pin, then stitch sides. Leave an opening for turning.
Trim corners, turn pocket and pin openings.
Stitch side seams of bag, leaving bottom open.
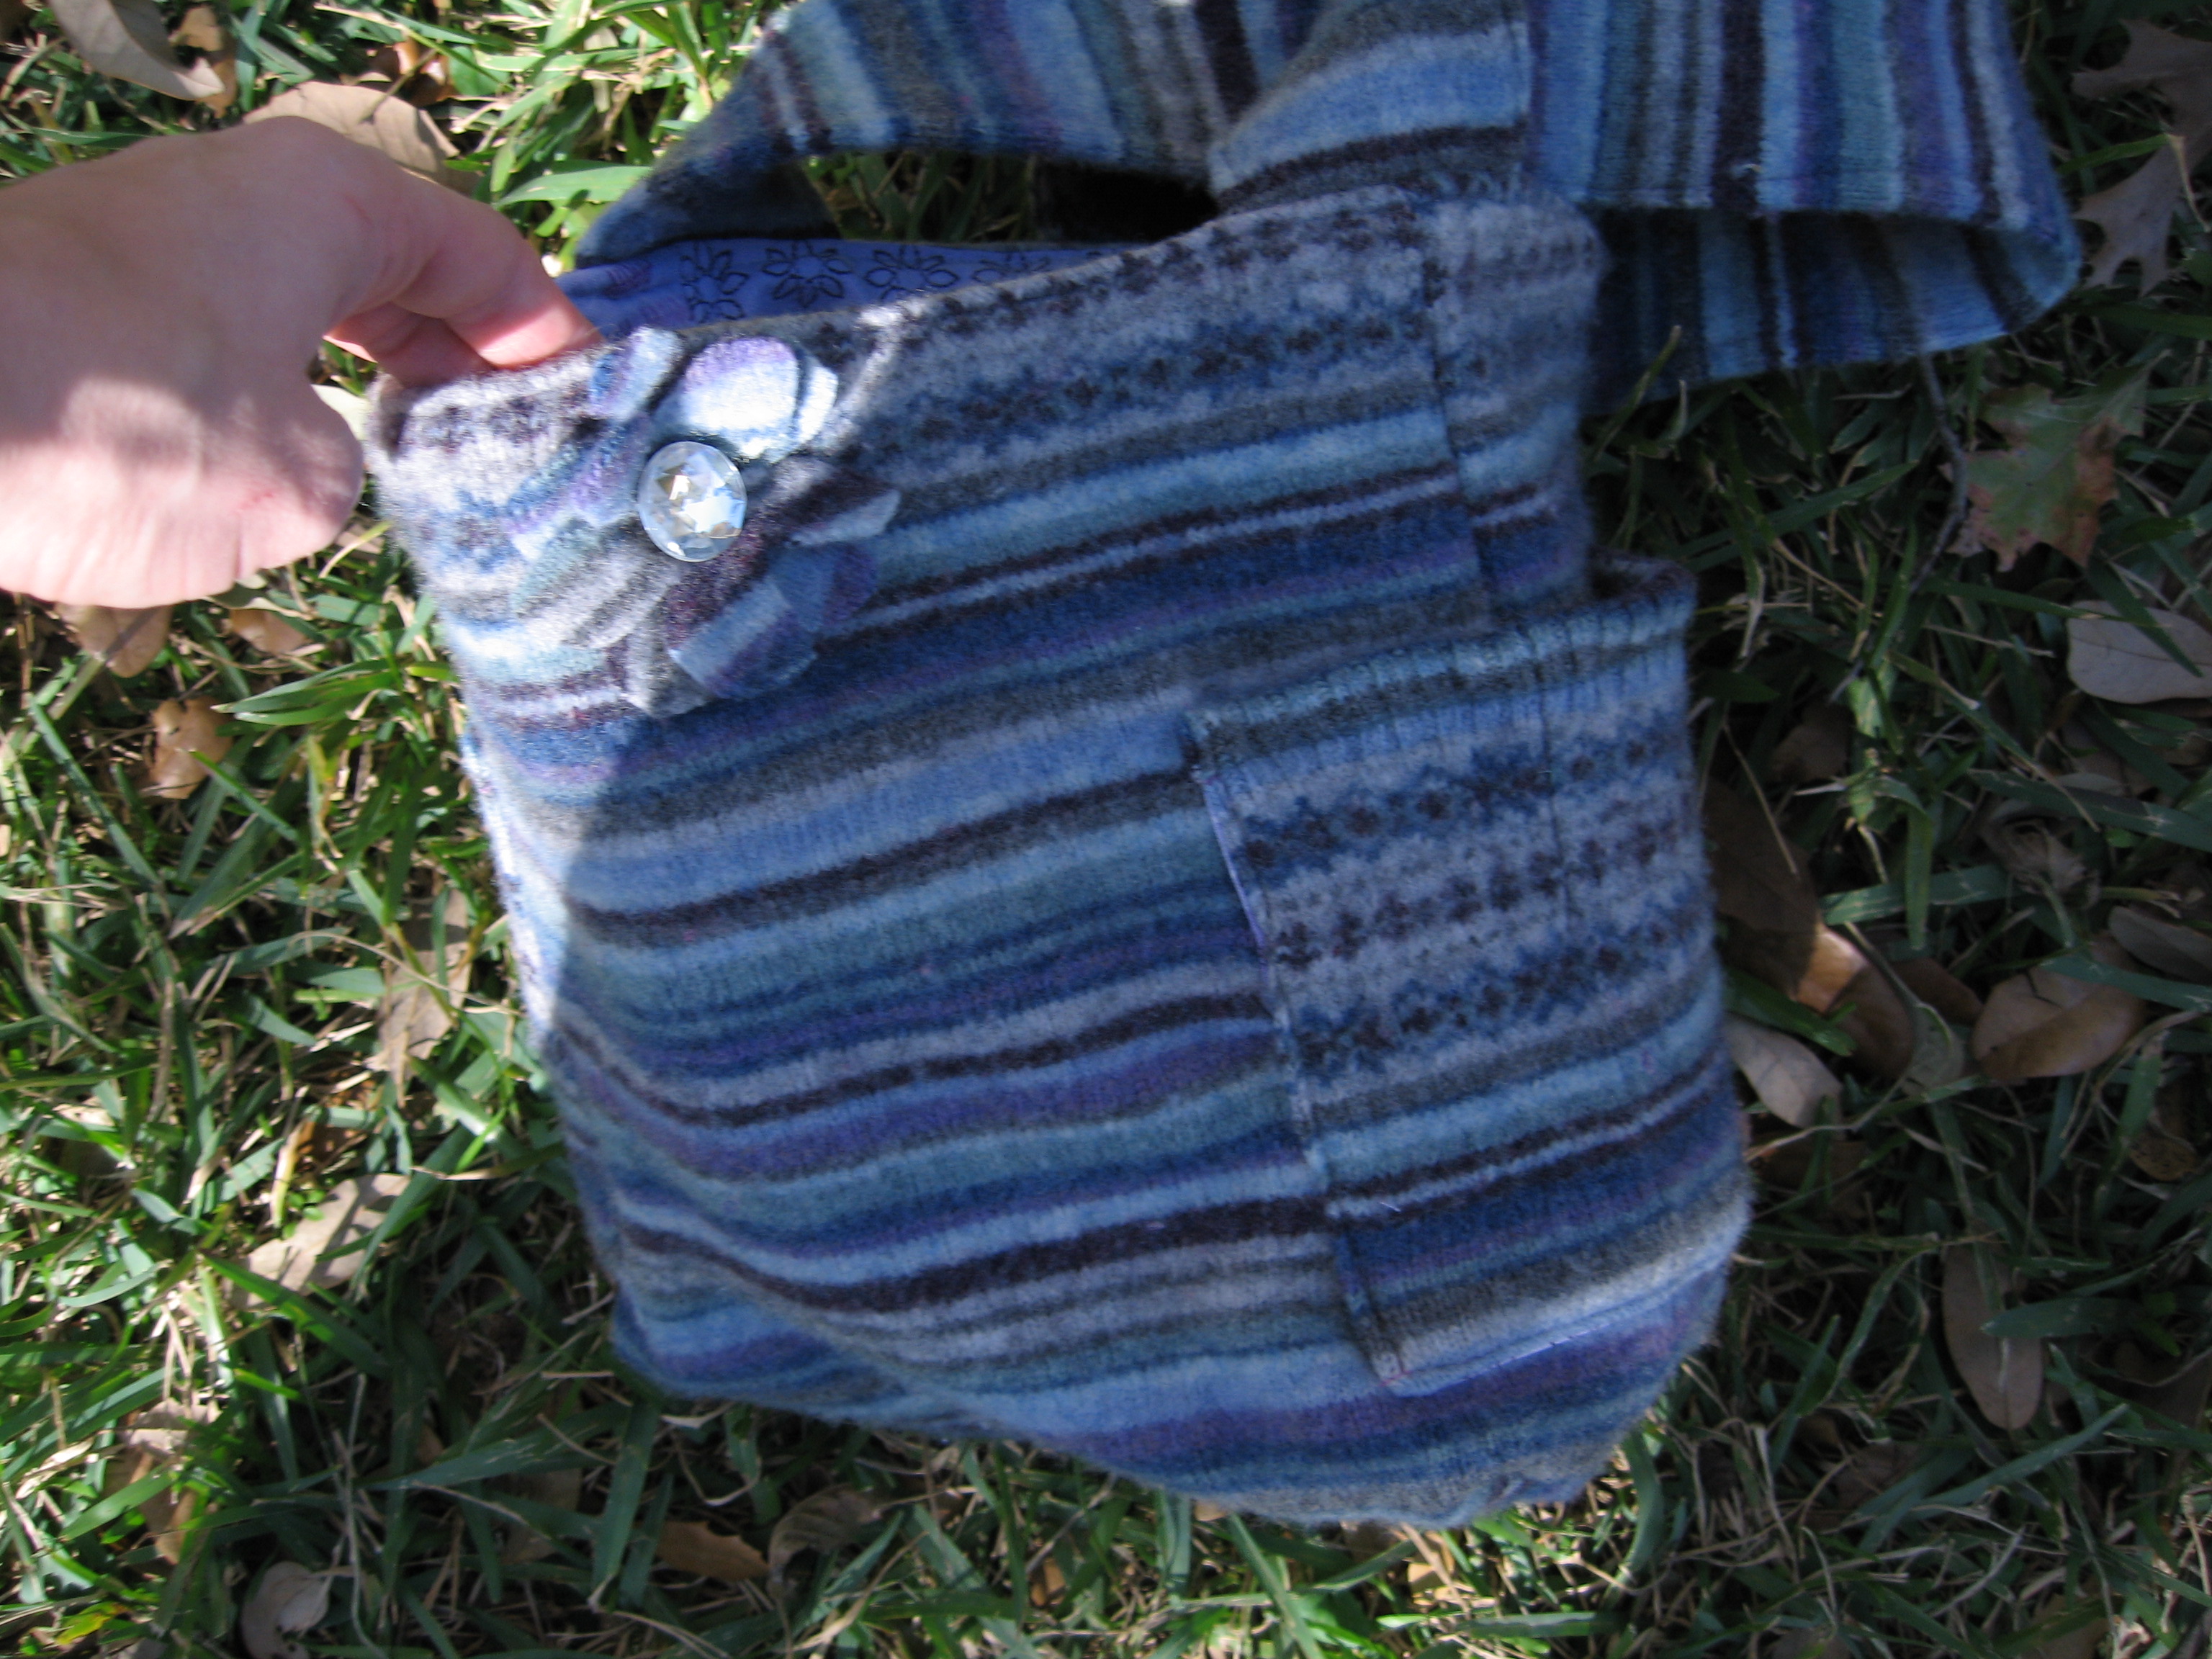
Turn the sweater bag body right side out, matching seams. Pin pockets over the side seams, then stitch to attach.
With right sides together, stitch across sweater bag bottom.
Fold in boxed corners, matching side & bottom seams, pin & stitch.
The inside bottom should look like this.
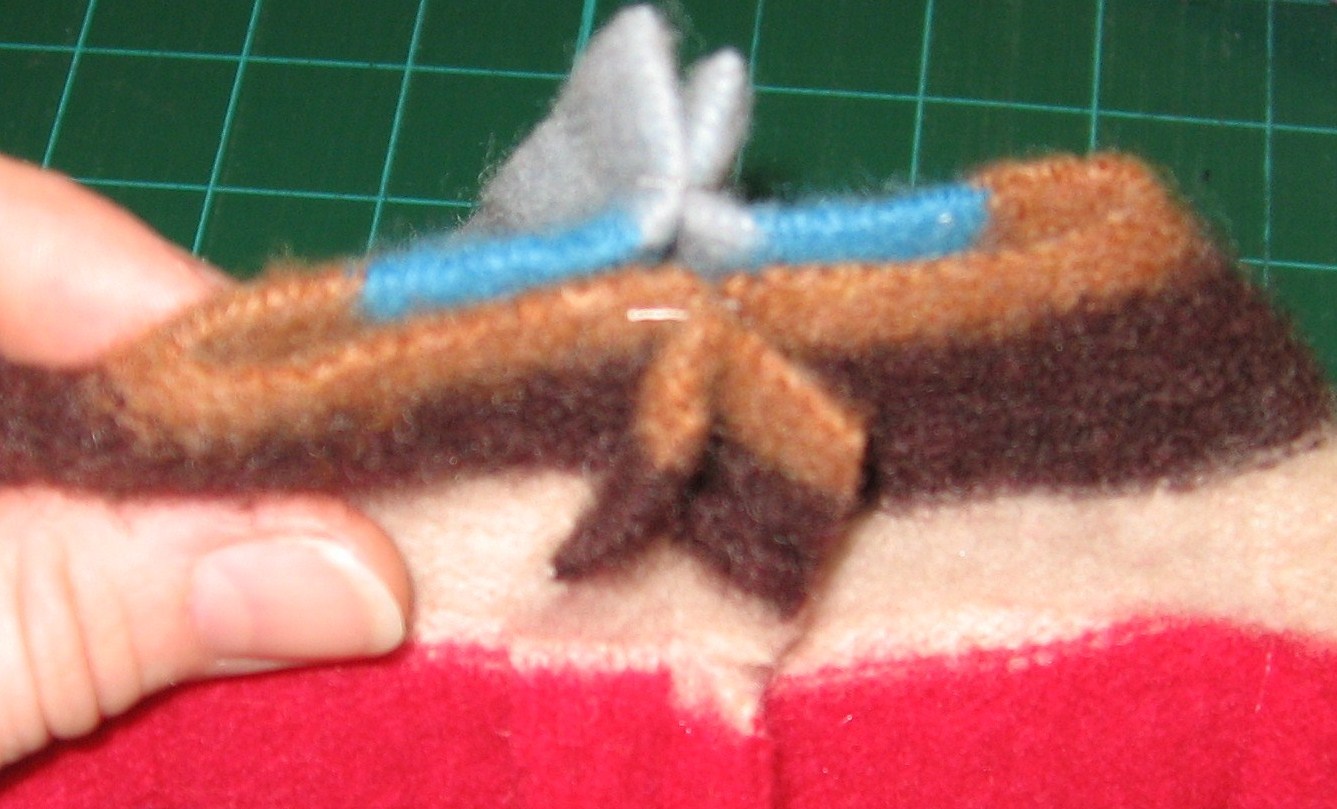
Time for Sleeves!
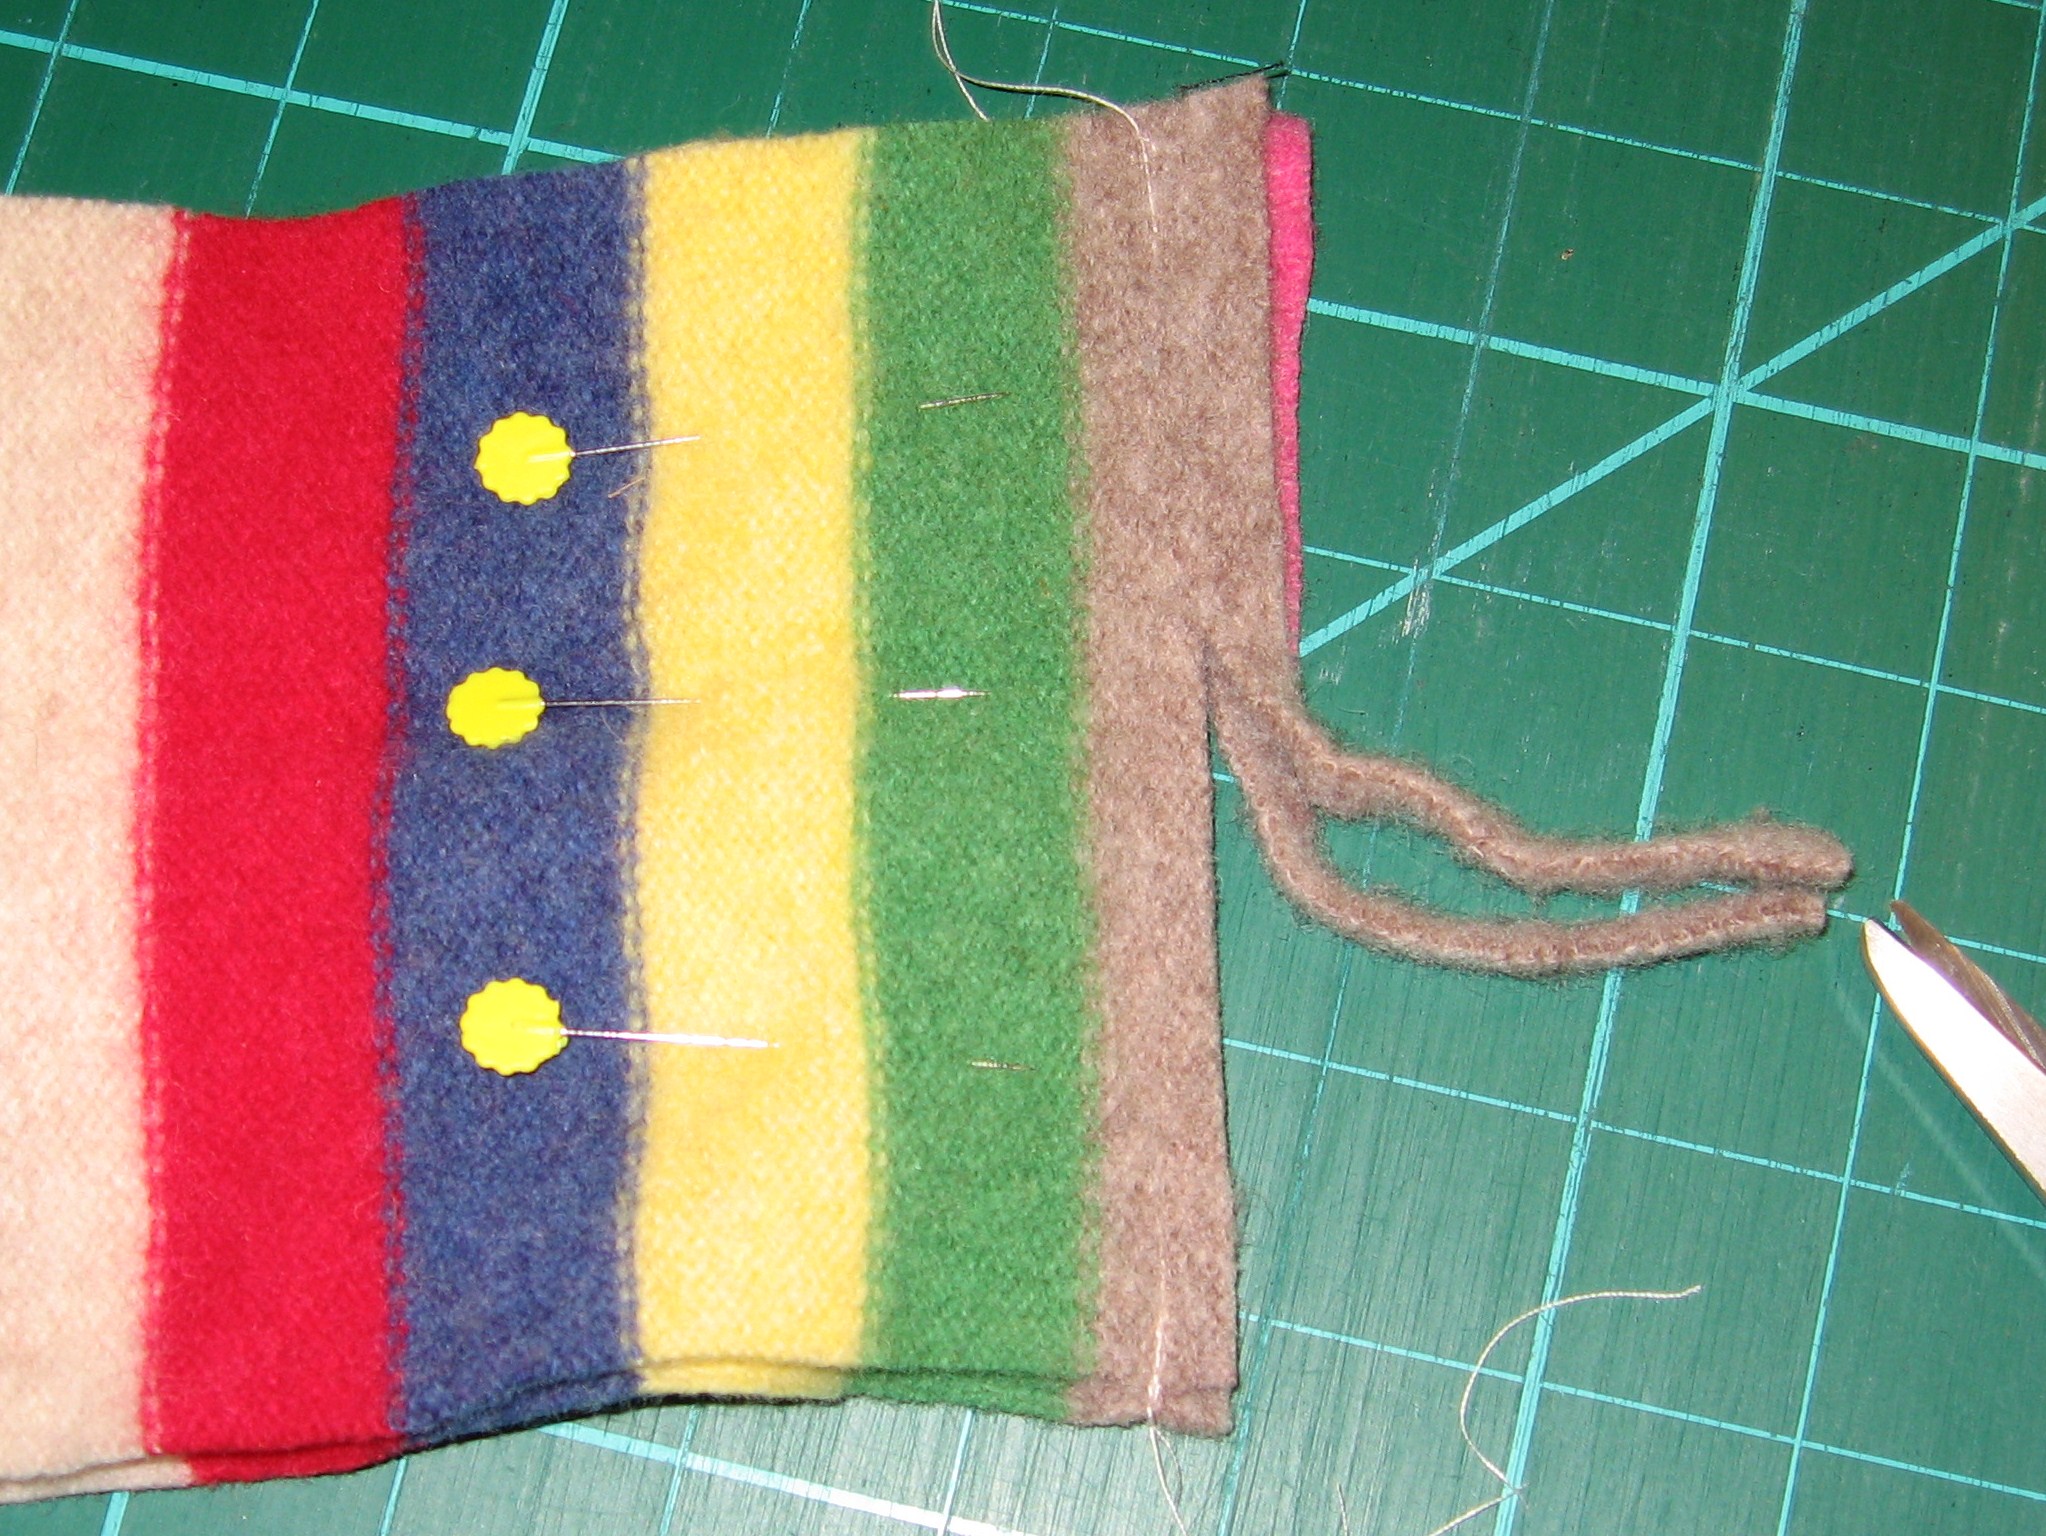
Trim sleeves to desired width for strap, I like a wider strip so tend to cut about 5″. This includes seam allowance. Remember, this is your bag, and this width will vary based on your sweater, so the dimensions are all yours!
Pin ends of two sleeves together, stitch and trim seam.
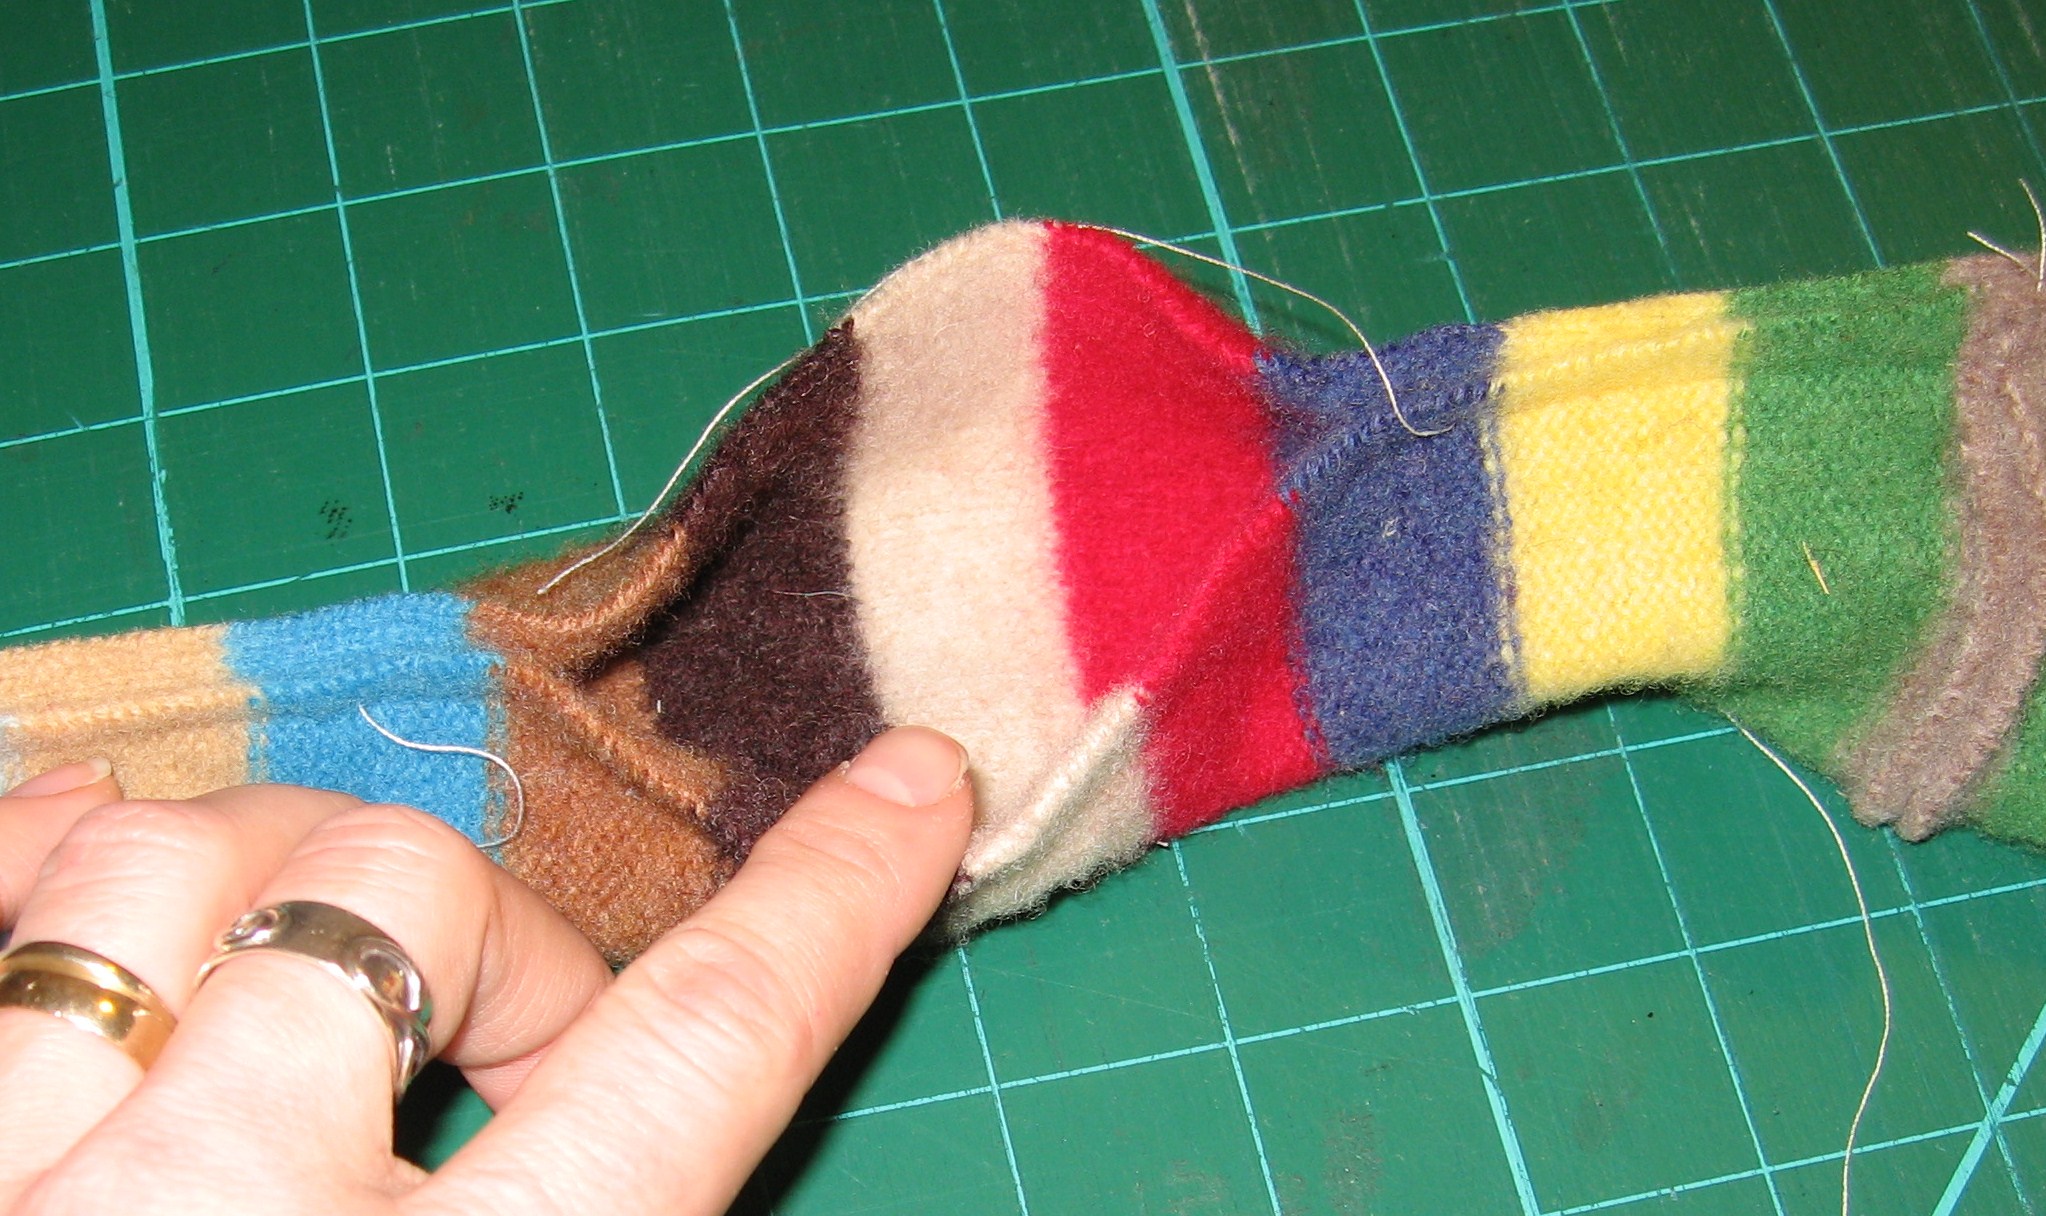
Fold lengthwise, stitch, leaving approx. 6″ open for turning
Turn right side out and smooth opening.
Stitch closed with a tight whip stitch.
Center and pin straps to side seams, being sure to match right sides. Stitch in place.
Ensure the straps are inside and pin the lining to the sweater (outside of the bag), right sides together. Stitch around the top.
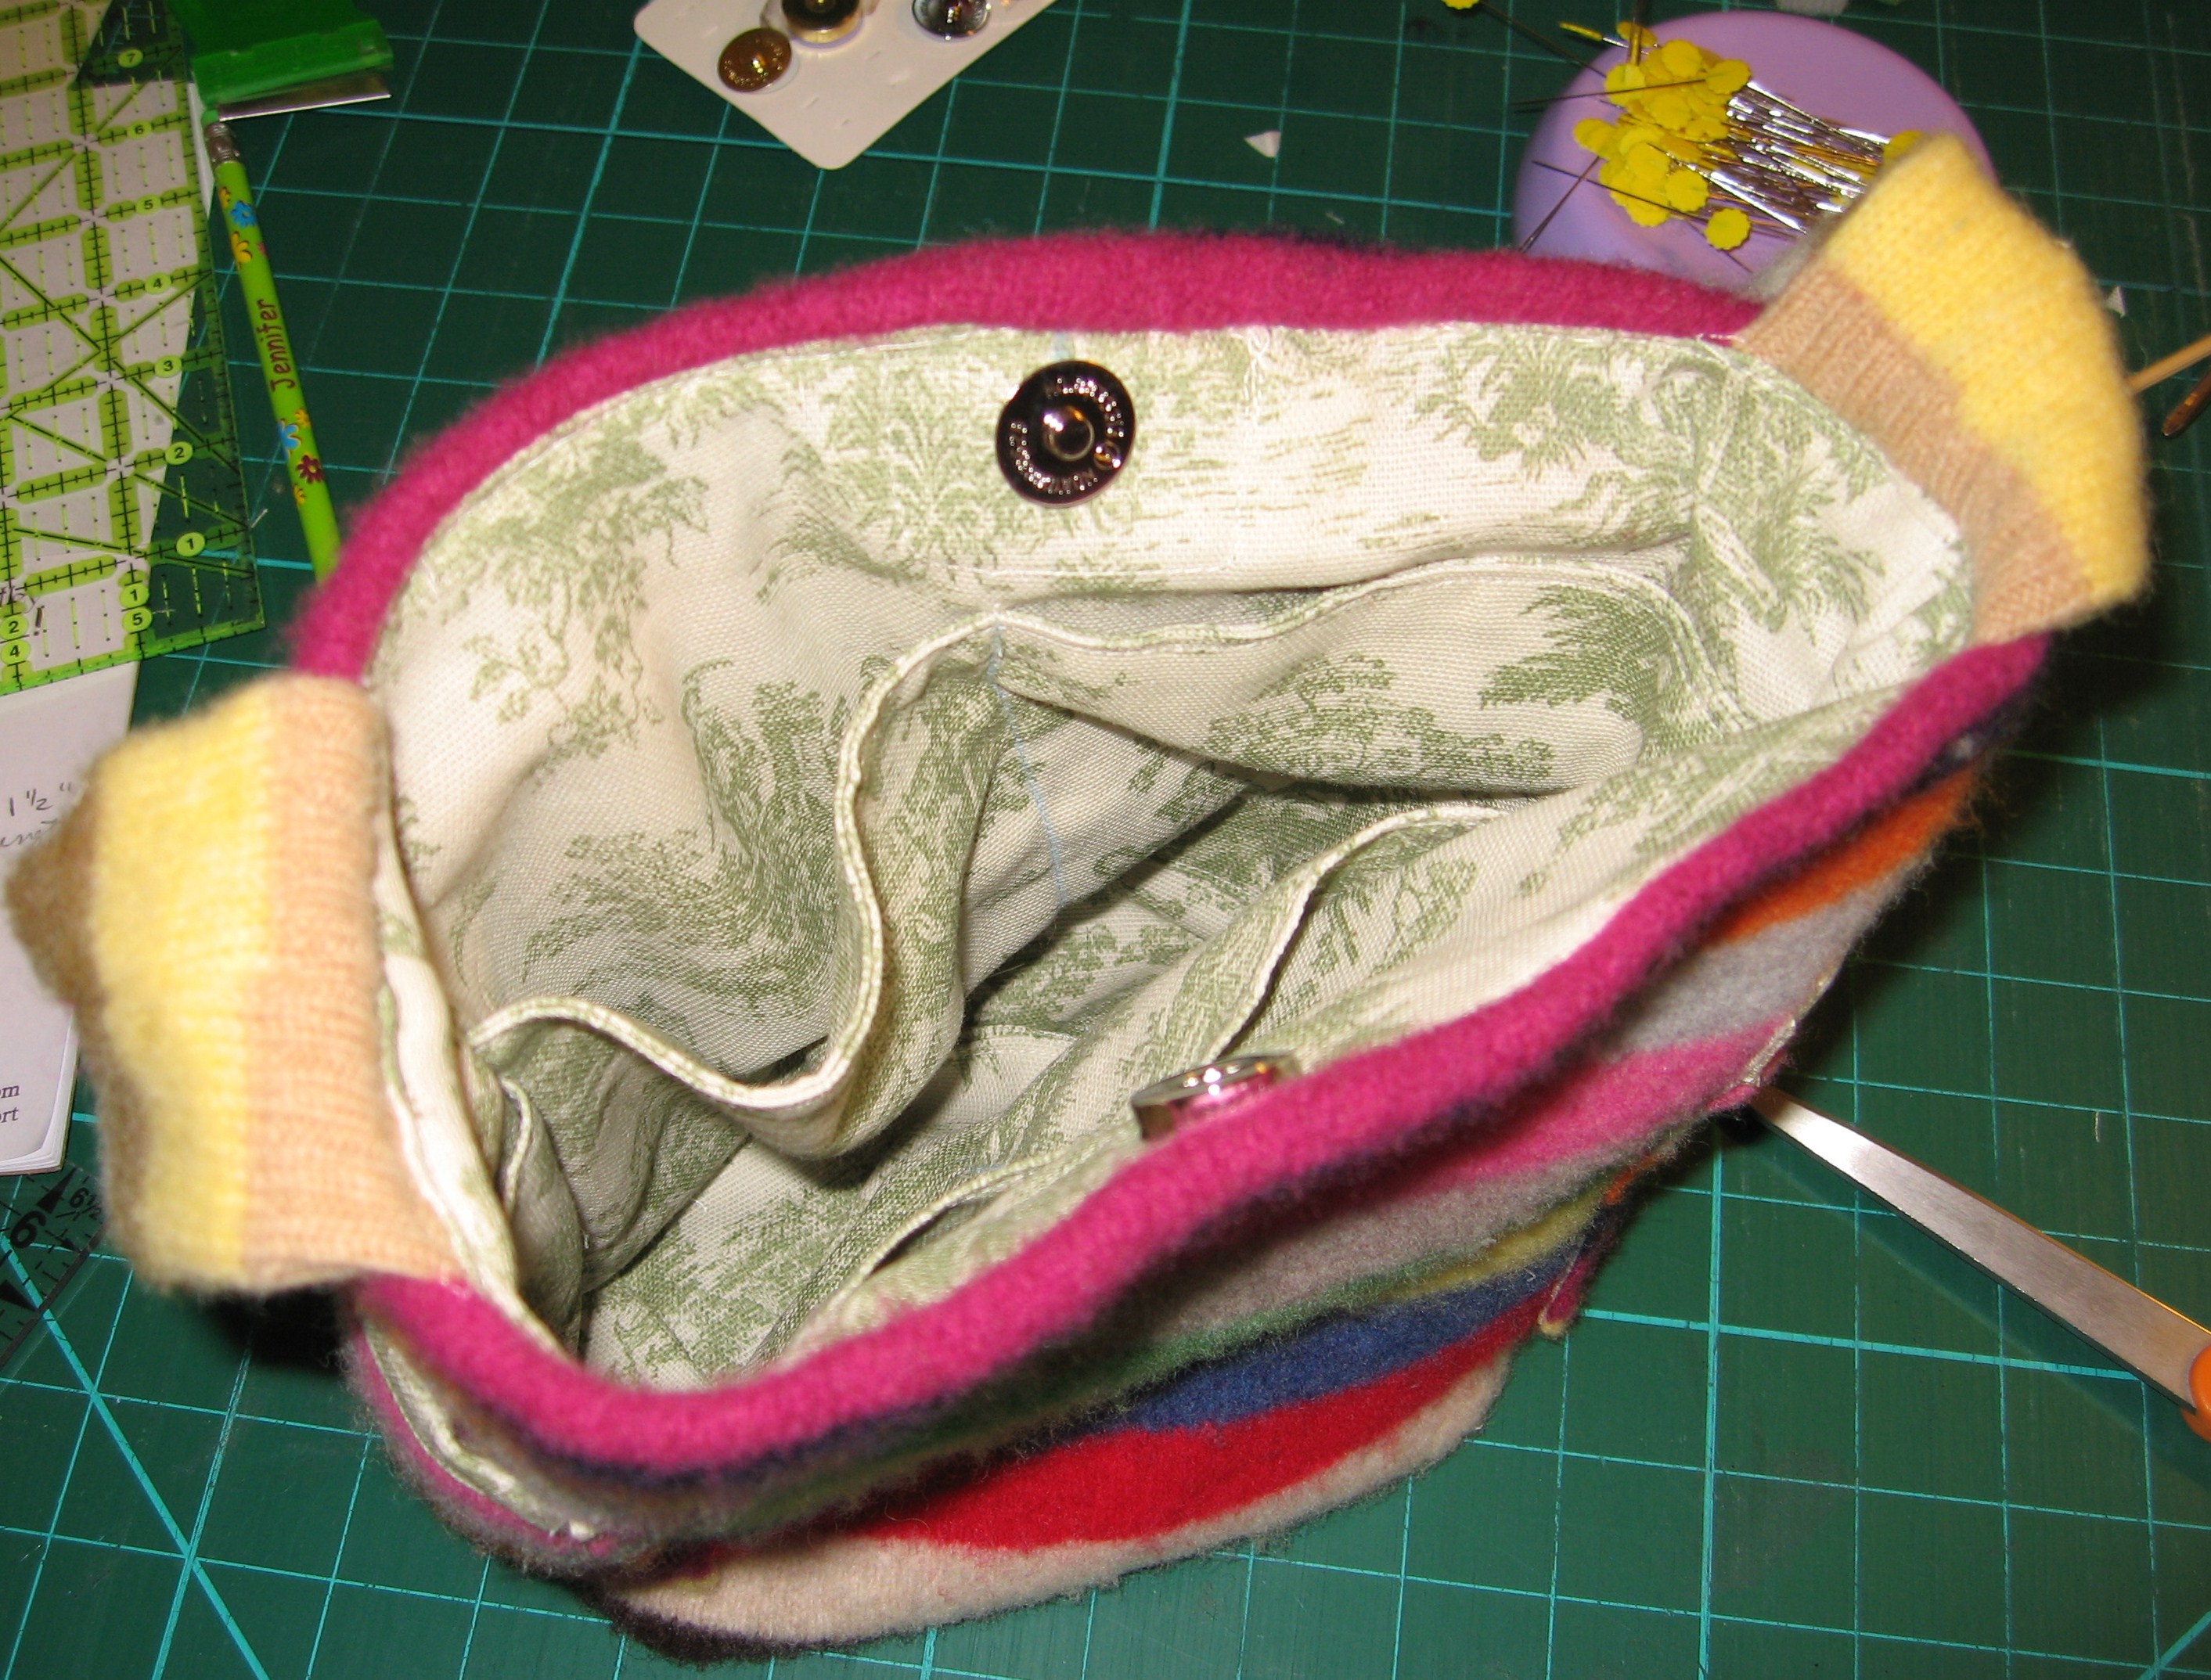
Turn the bag right side out through the opening in the lining.
Pin opening in lining. Stitch closed.
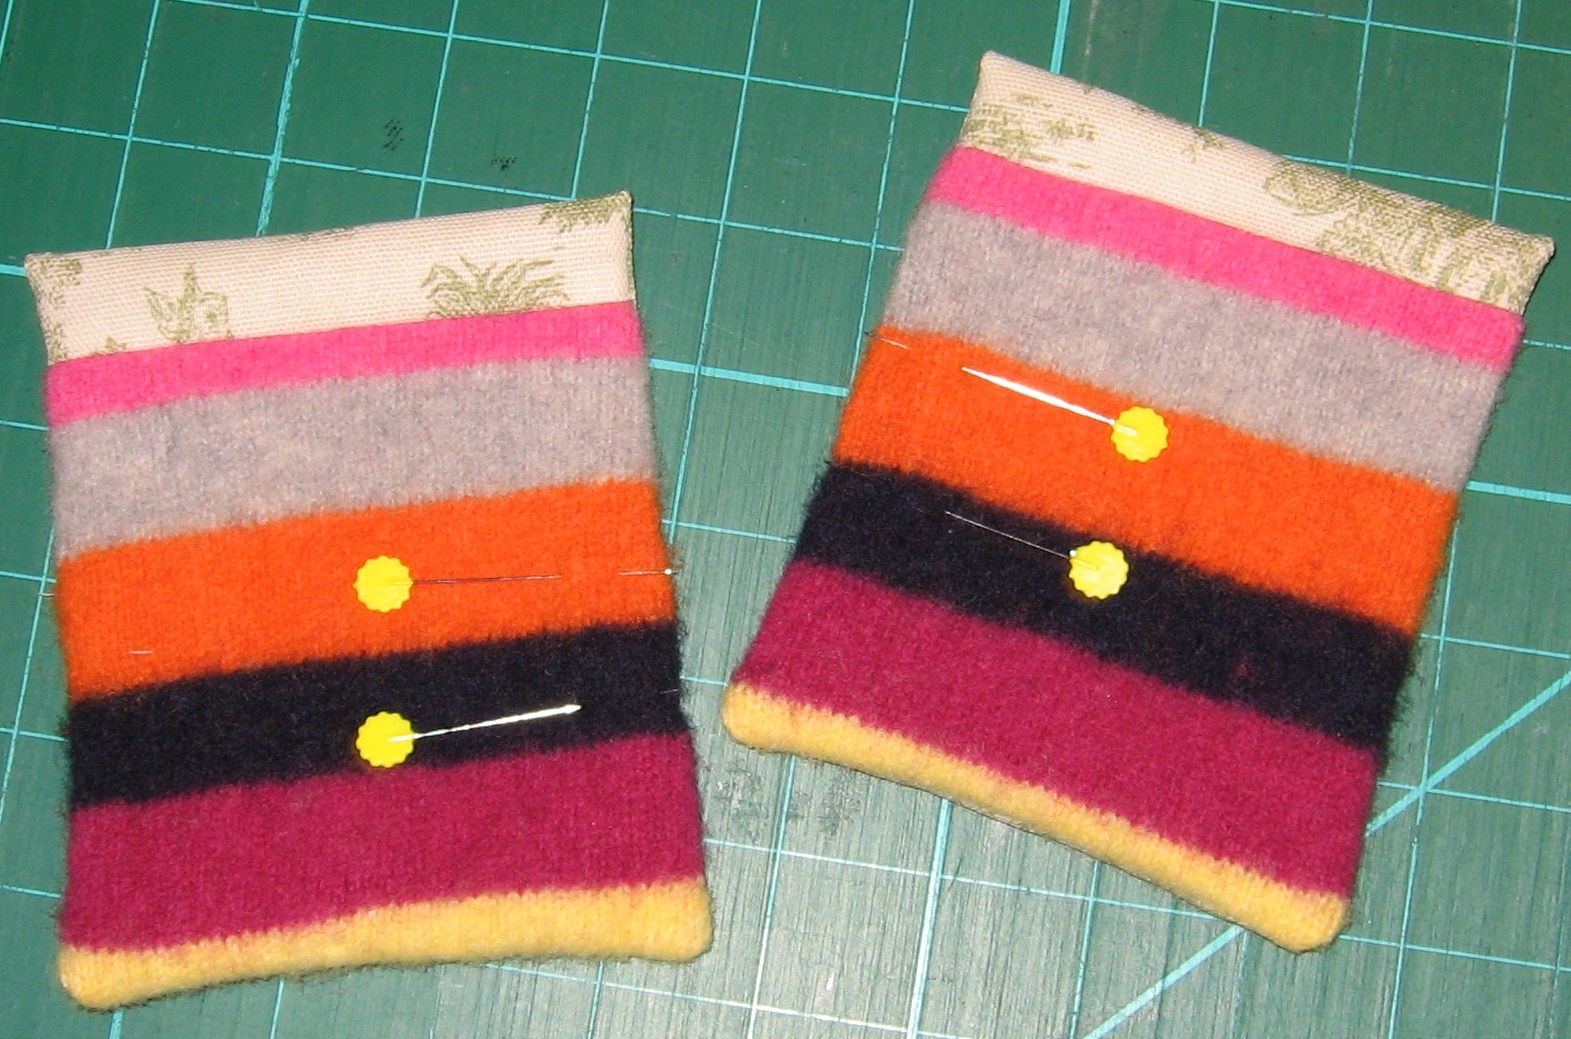
Turn lining inside, smooth and pin. Top stitch.
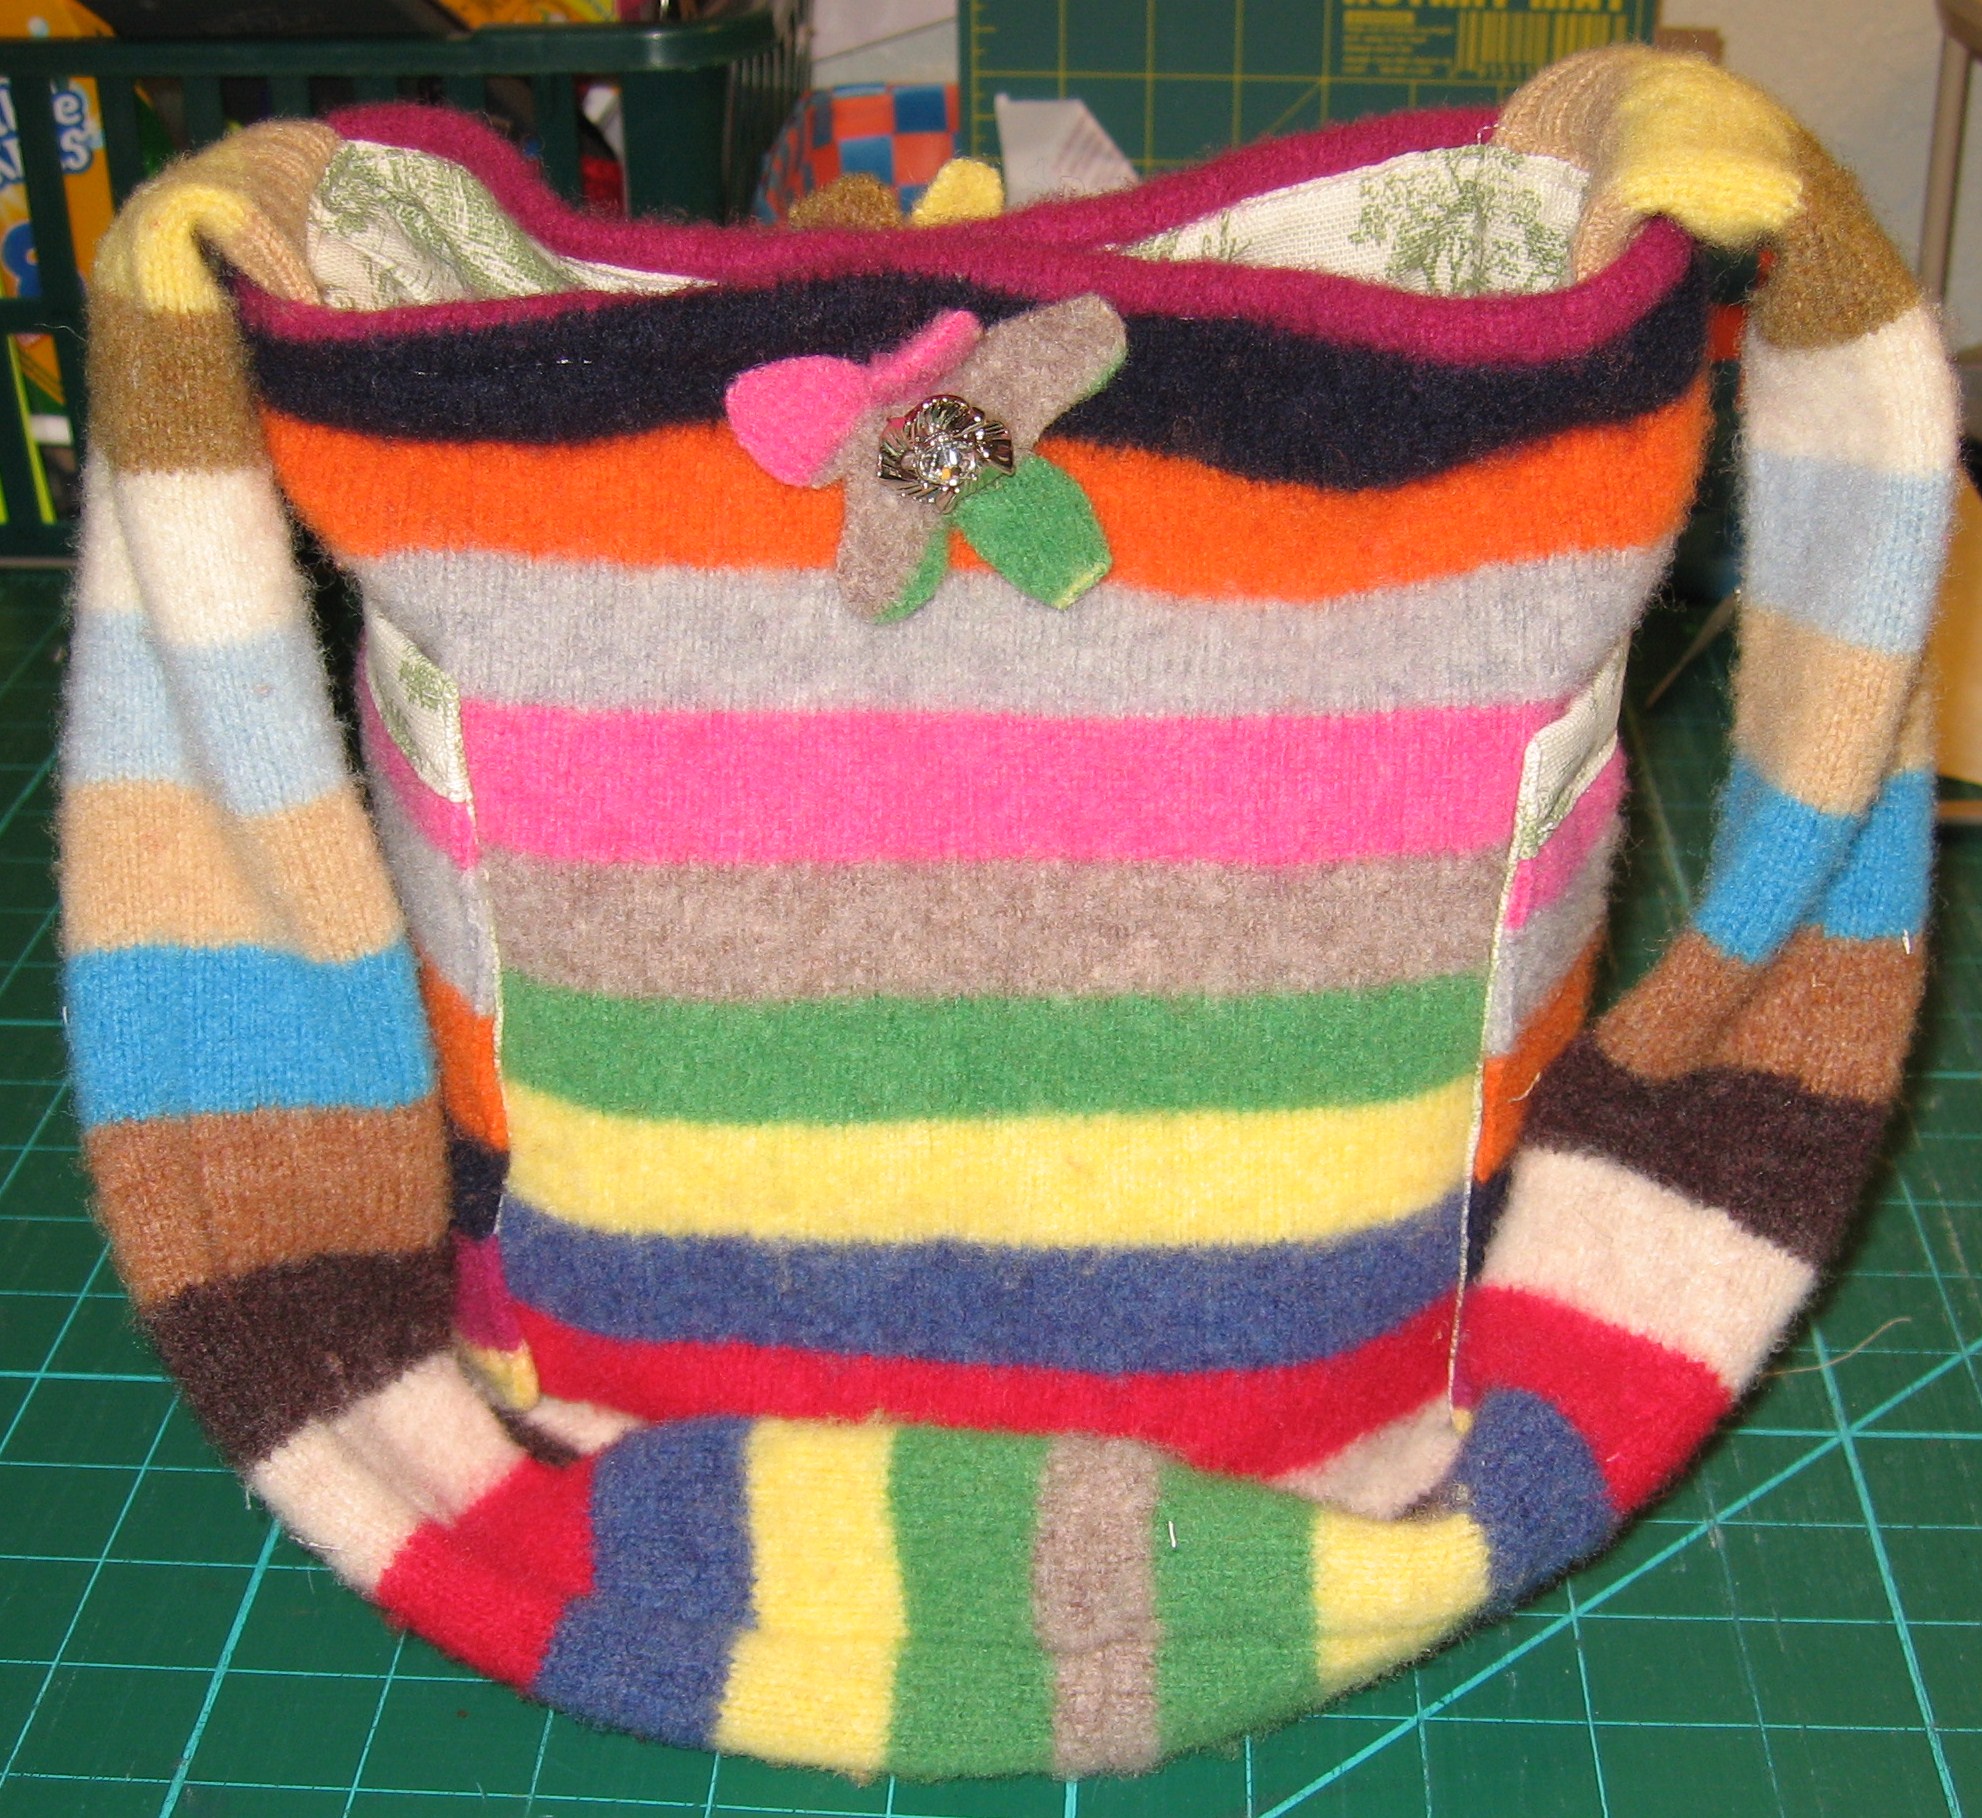
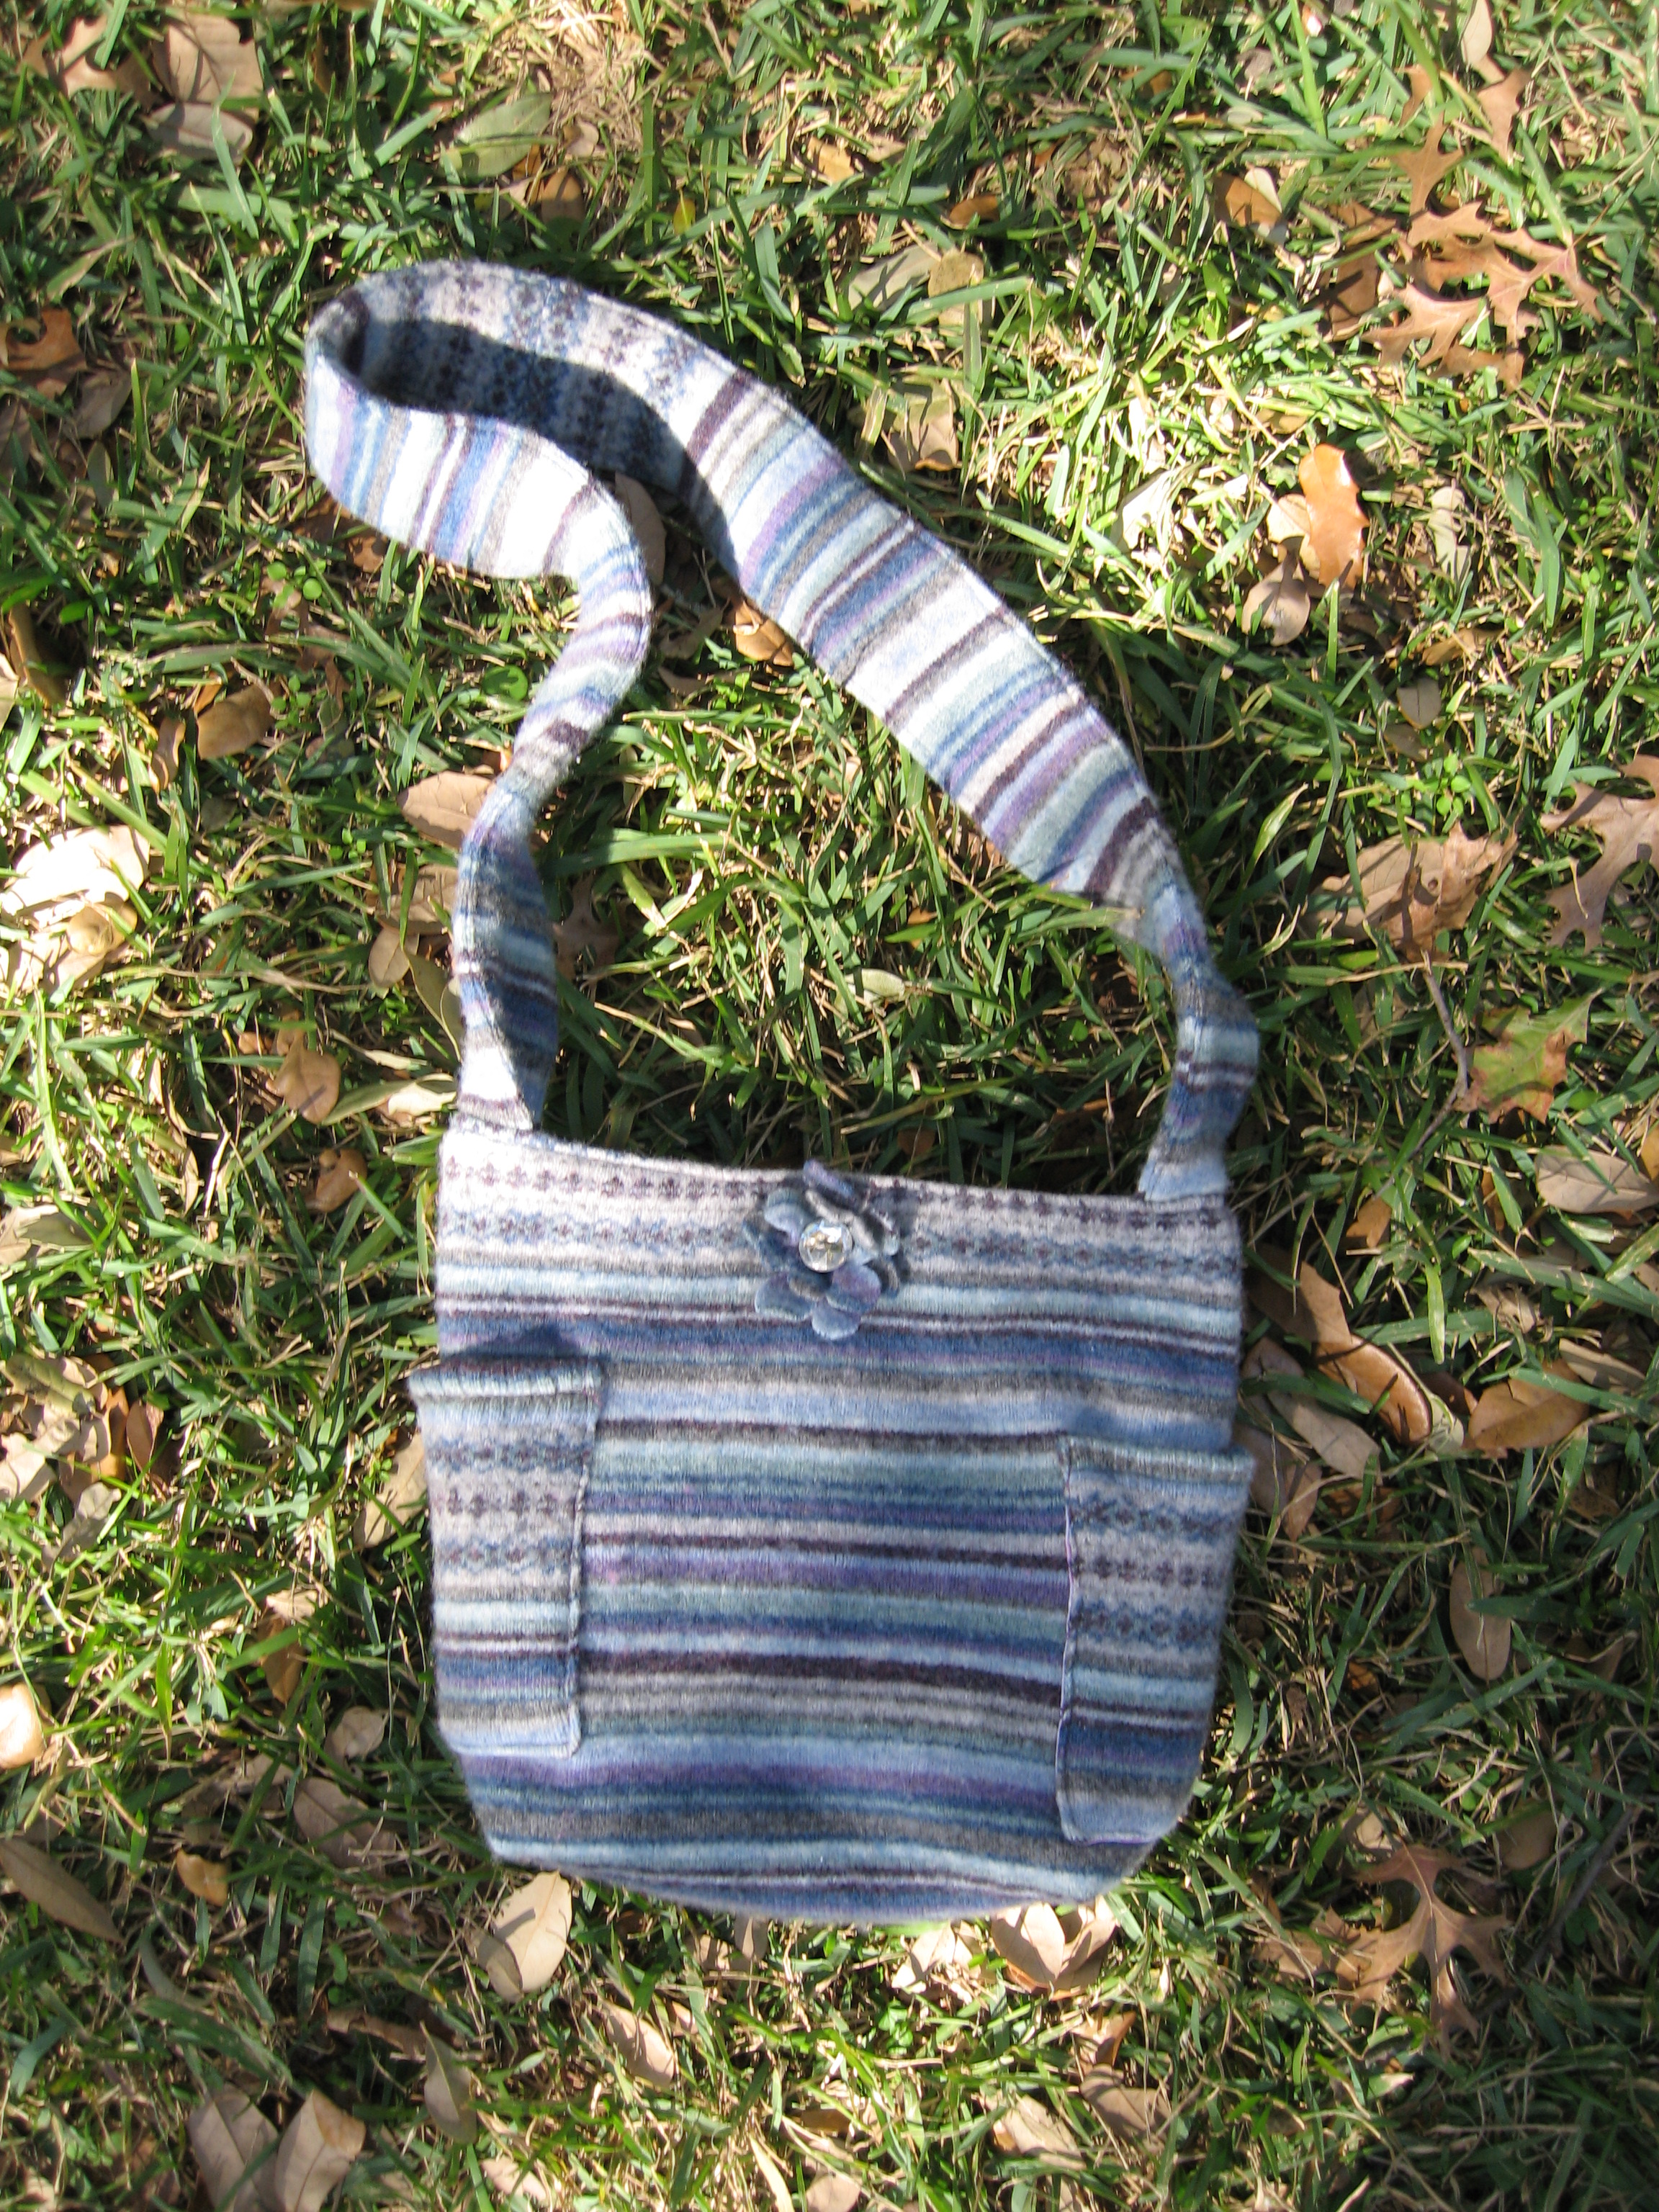
Stitch flower to center of each side over snap, stitch button on top. We are DONE!
What a fun way to recycle an old sweater!
Here’s a fun one I made with a cute purple sweater!
I don’t make many New Year’s Resolutions, but I do start each year trying to be more organized. I’m starting with my personal spaces this year; my jewelry, make-up, and the like.
I love big, swishy earrings, handmade, hand-beaded, felted, you name it. I have loads that were made by friends and a few made by myself, and those are definitely my favorites.
Storage has gotten a bit precarious, and I’m usually trying to disentangle the mess and find a missing earring.
For quite a long time, I’ve used a small earring organizer to keep my studs and other small earrings that have a stem and a back. It was time for a new, bigger version so I could finally find all of my fabulous earrings!
You need:
a picture frame with no glass (recycled or raw wood)
plastic canvas
hot melt glue
scissors
ribbon
stapler (a staple gun works great if you have one) or thumb tacks
optional: paint & glitter
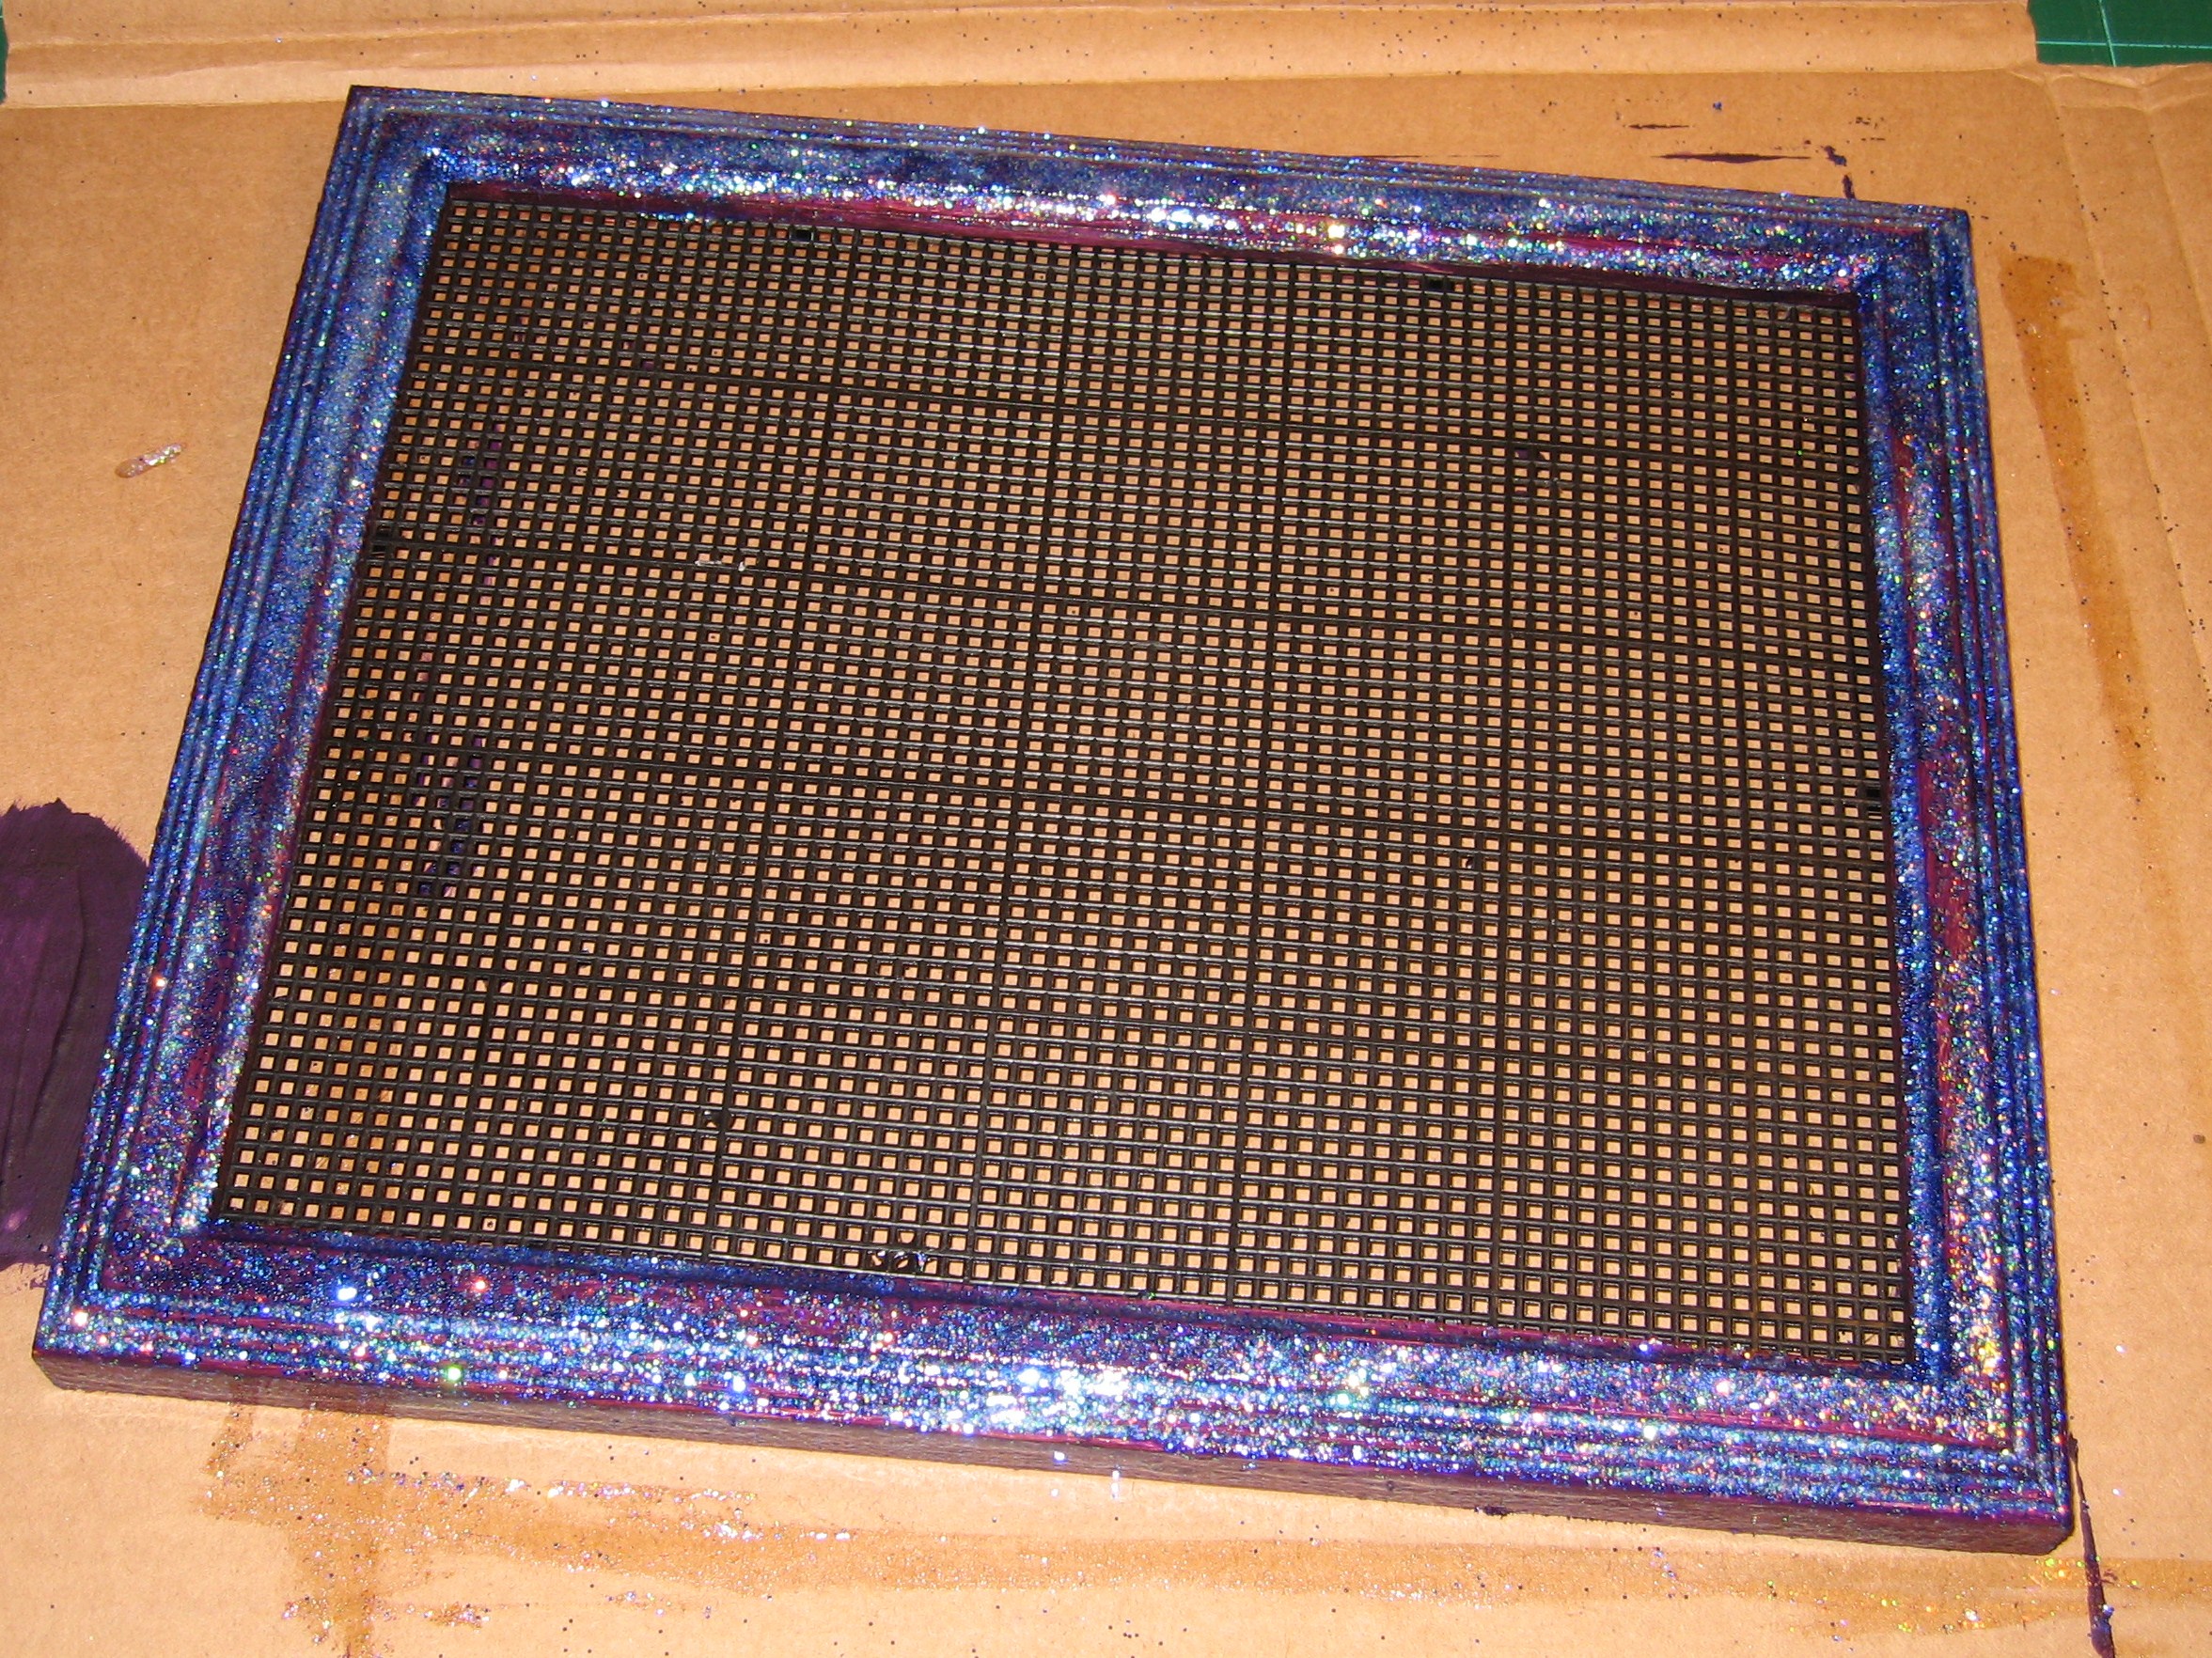
Cut the plastic canvas to fit inside your frame.
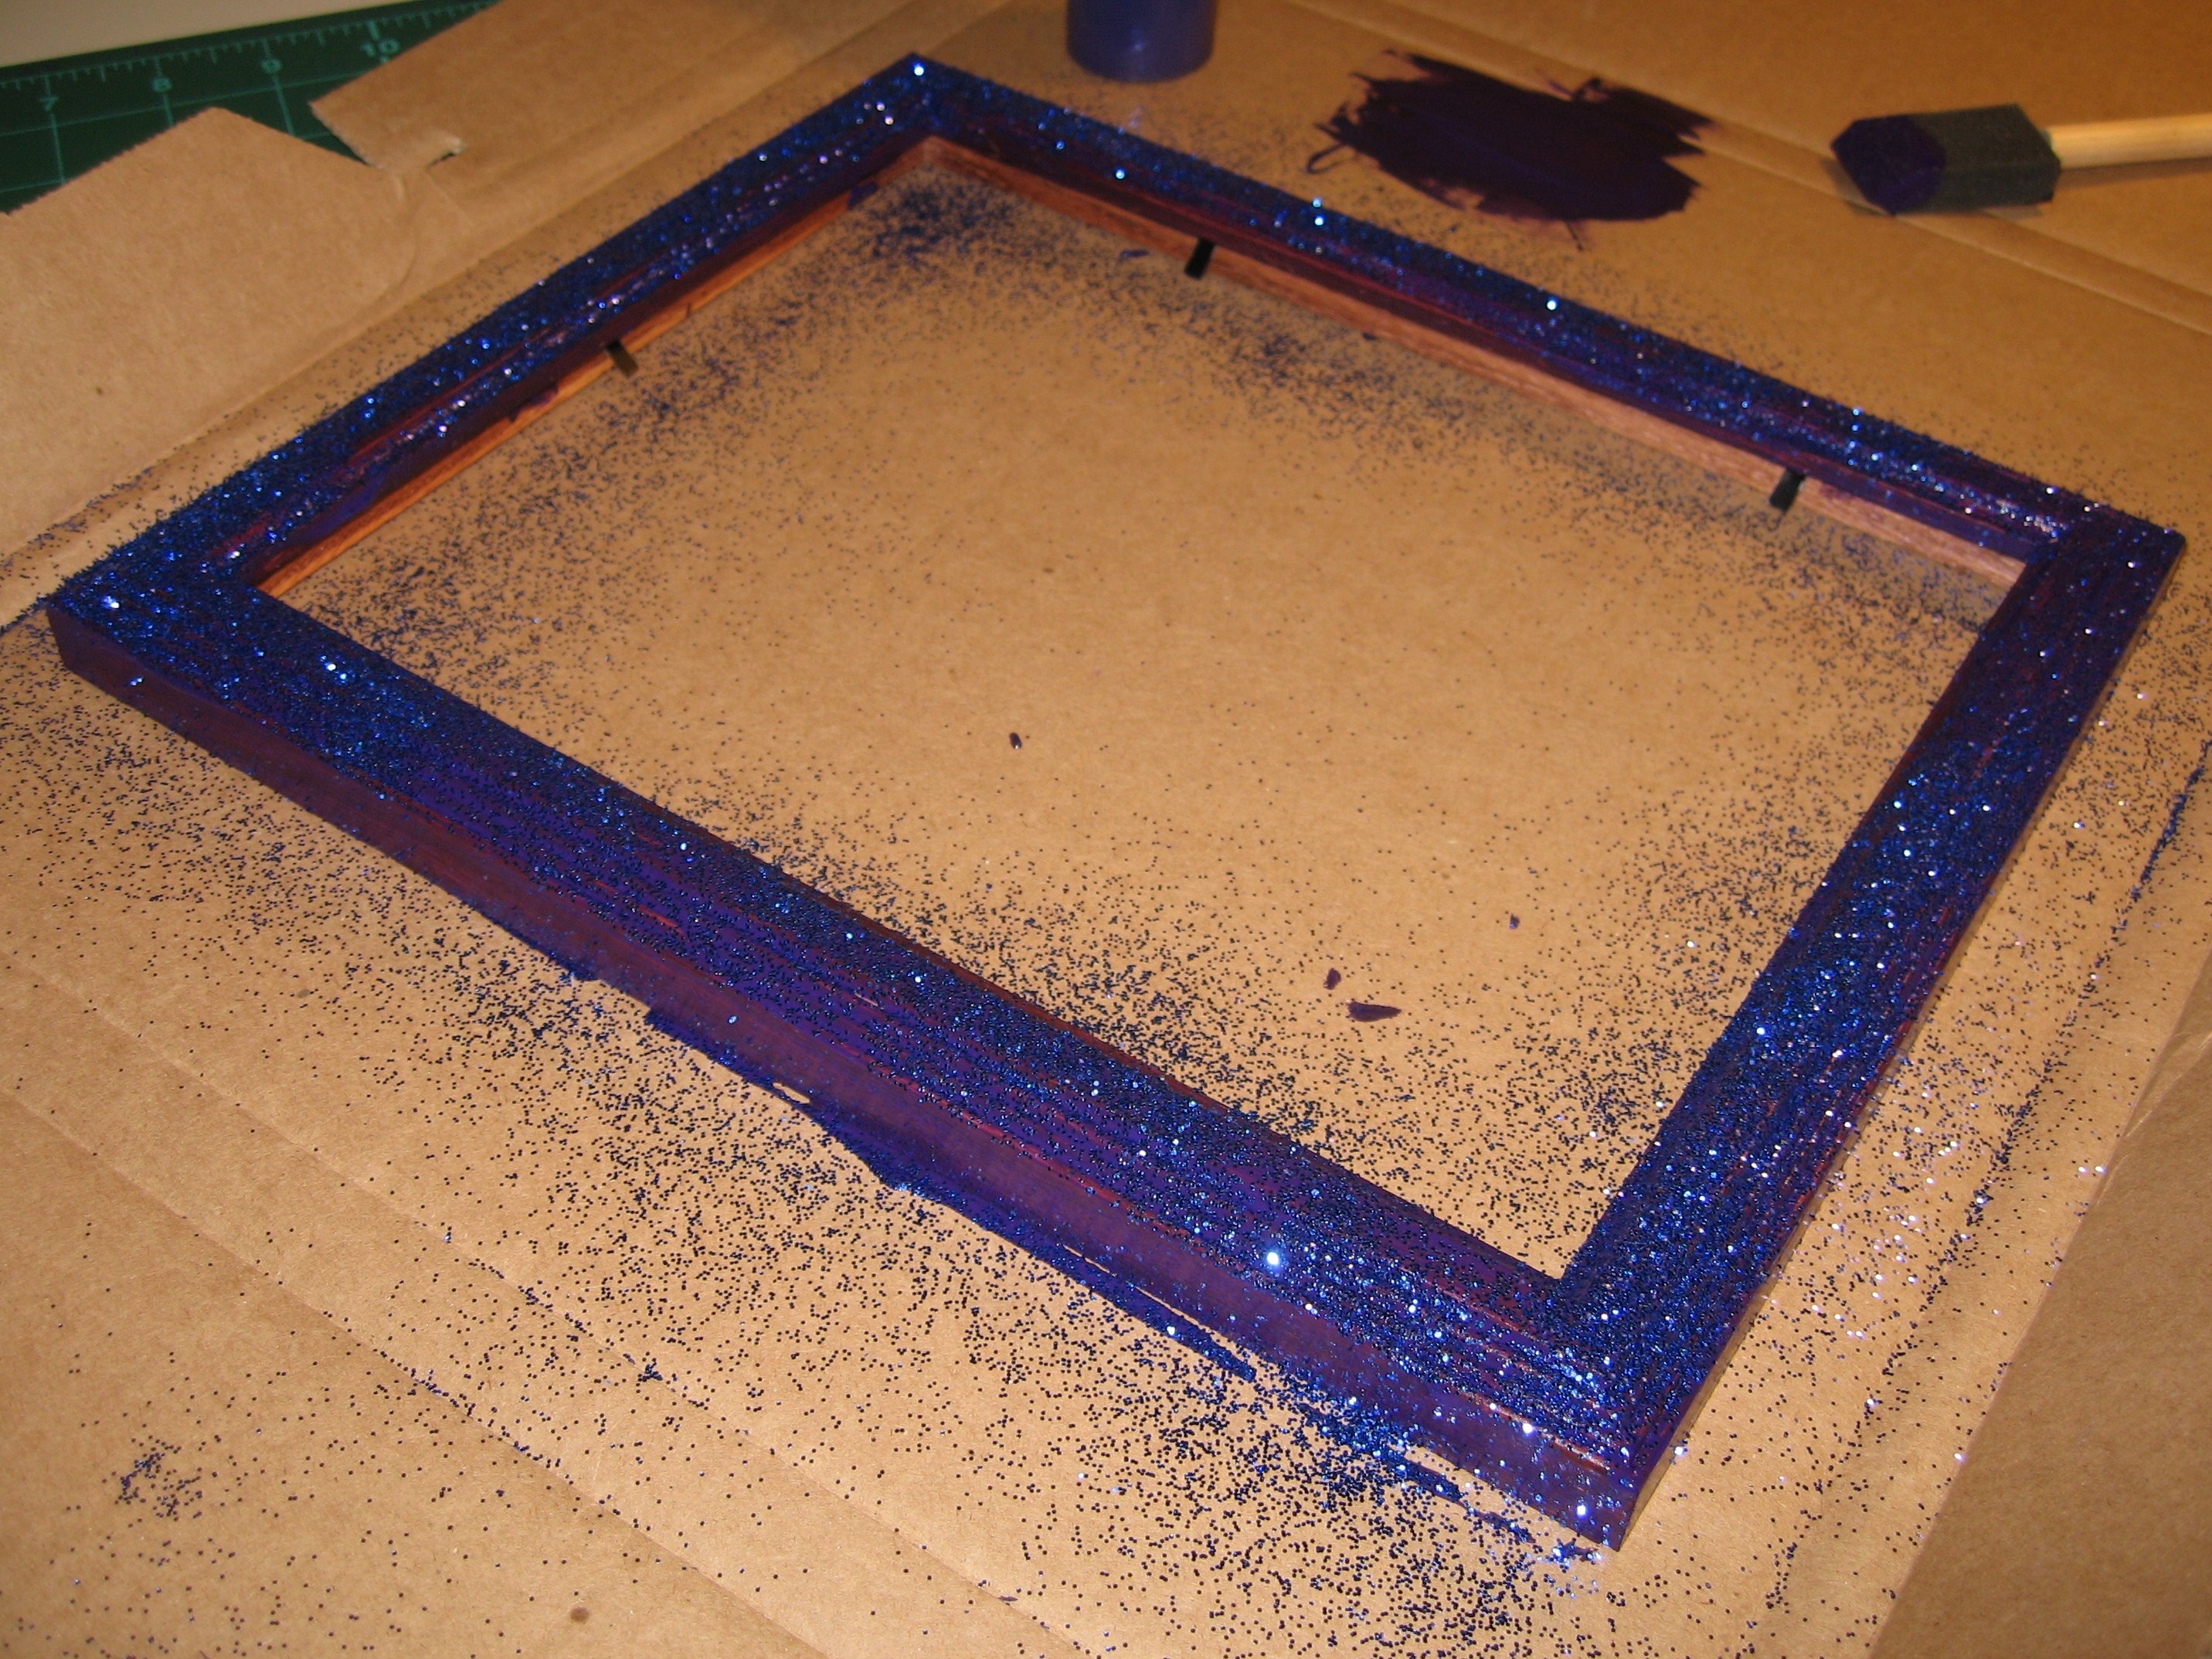
Optional: Paint the frame the color of your choice. If the frame is recycled and has a finish, you’ll need to give it a light sanding before painting.
I’m particularly fond of glitter…so I sprinkled some on my frame while it was still wet.
Once the paint and glitter are dry, place the plastic canvas inside the back of the frame. Go around all four sides with hot melt glue.
Cut a piece of ribbon long enough to reach from one corner of the frame to the other, plus a little for turning under on the ends. The length here depends on how you want your final product to look and how much of the ribbon you’d like to show. Turn the ends under and staple or tack in place.
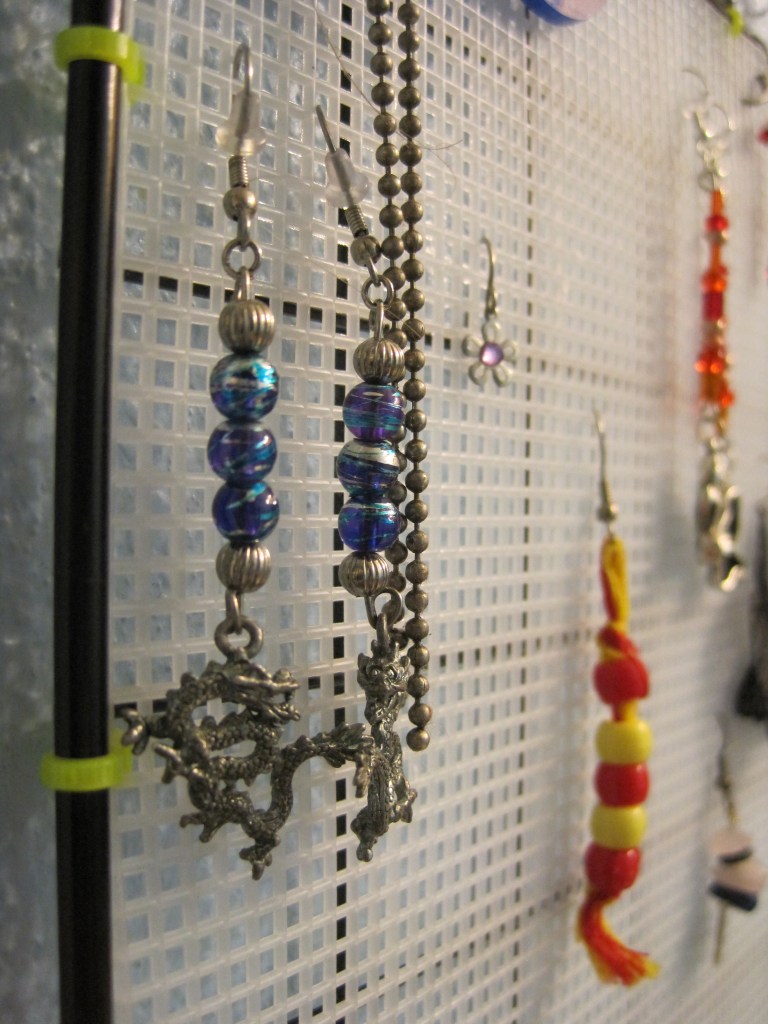
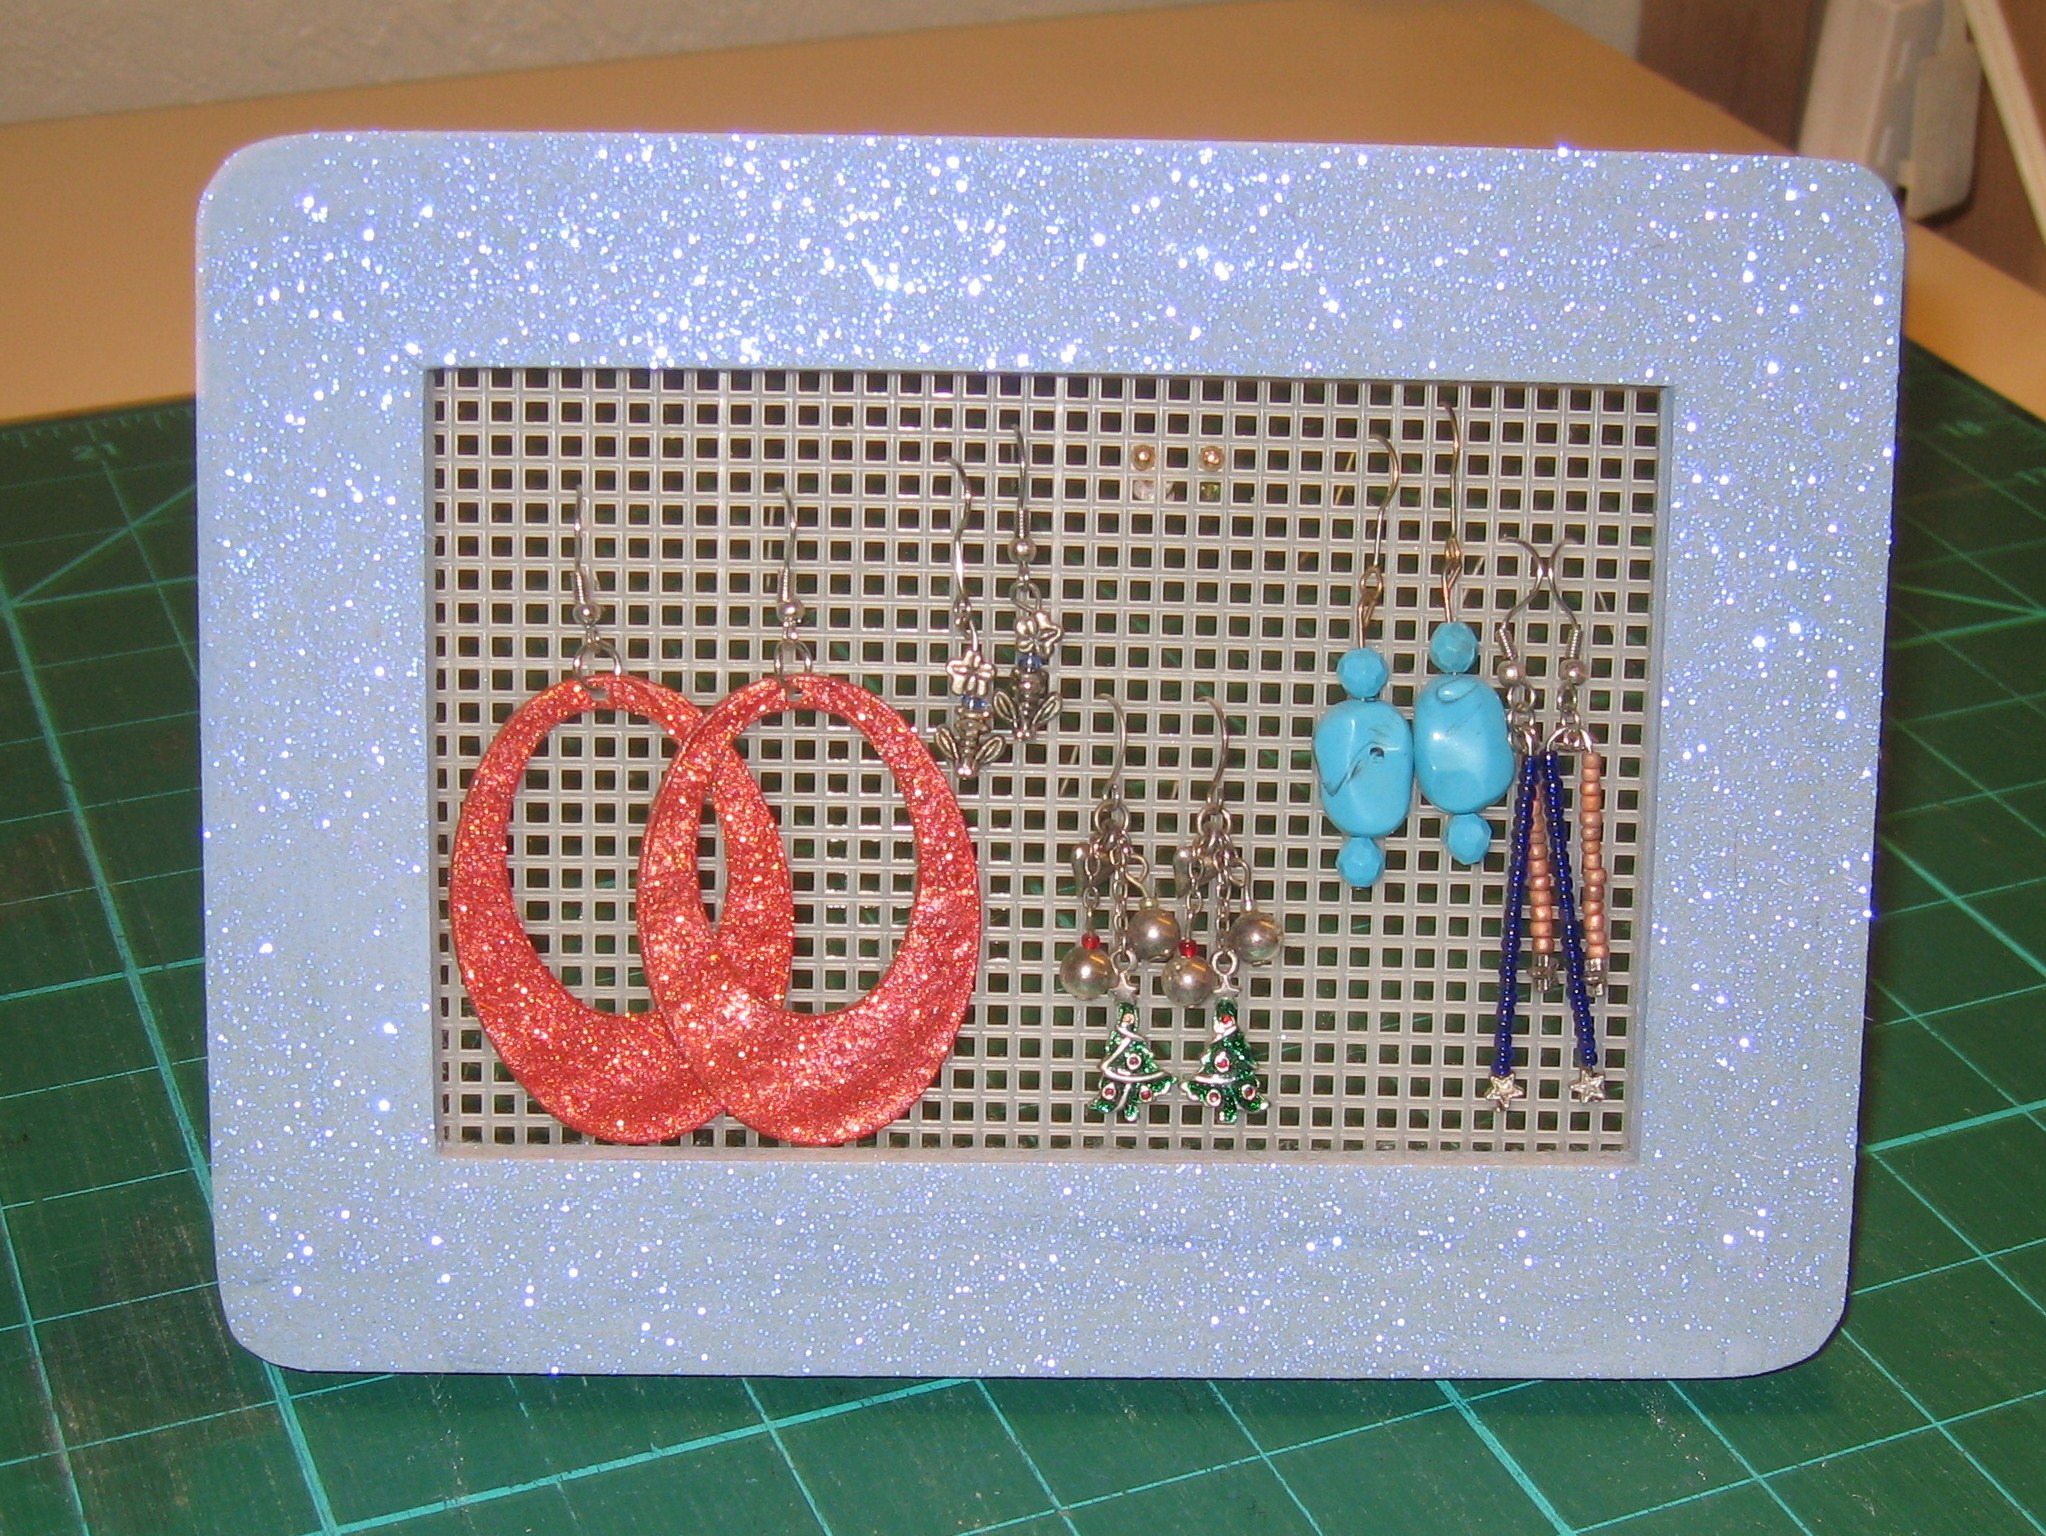
Hang on the wall and add all of your lovely dangly earrings! Works best with French hook earrings.
My family and I spent last weekend in Alpine, Texas for the wedding of my husband’s youngest brother, Mark, to his lovely new bride, Allison. It was a genuinely wonderful weekend, with lots of food, family and happiness all around.
While visiting, I came across a recycled creation made by my father-in-law, Leo. He took an old wool sock that was in much need of darning, cut off the toe and hung it with a bit of wire hanger. This previous-sock is now the home to plastic bags for even more recycling. The bags go in the top and come out the bottom.
I’ve, of course, seen similar commercial creations as well as make-from-scratch patterns, but I am very much drawn to repurposing and am now on the lookout for my own long sock that is in need of recycling so I can make one for myself!
I am not a scrapbooker, not even by the grandest stretch of the imagination. There are crafters in my life that are uber-talented scrapbookers and do amazing things with photos, ink and paper.
Even though I don’t scrapbook, I do love stamps. My stamp collection is tiny, but functional and I love to use it whenever I can.
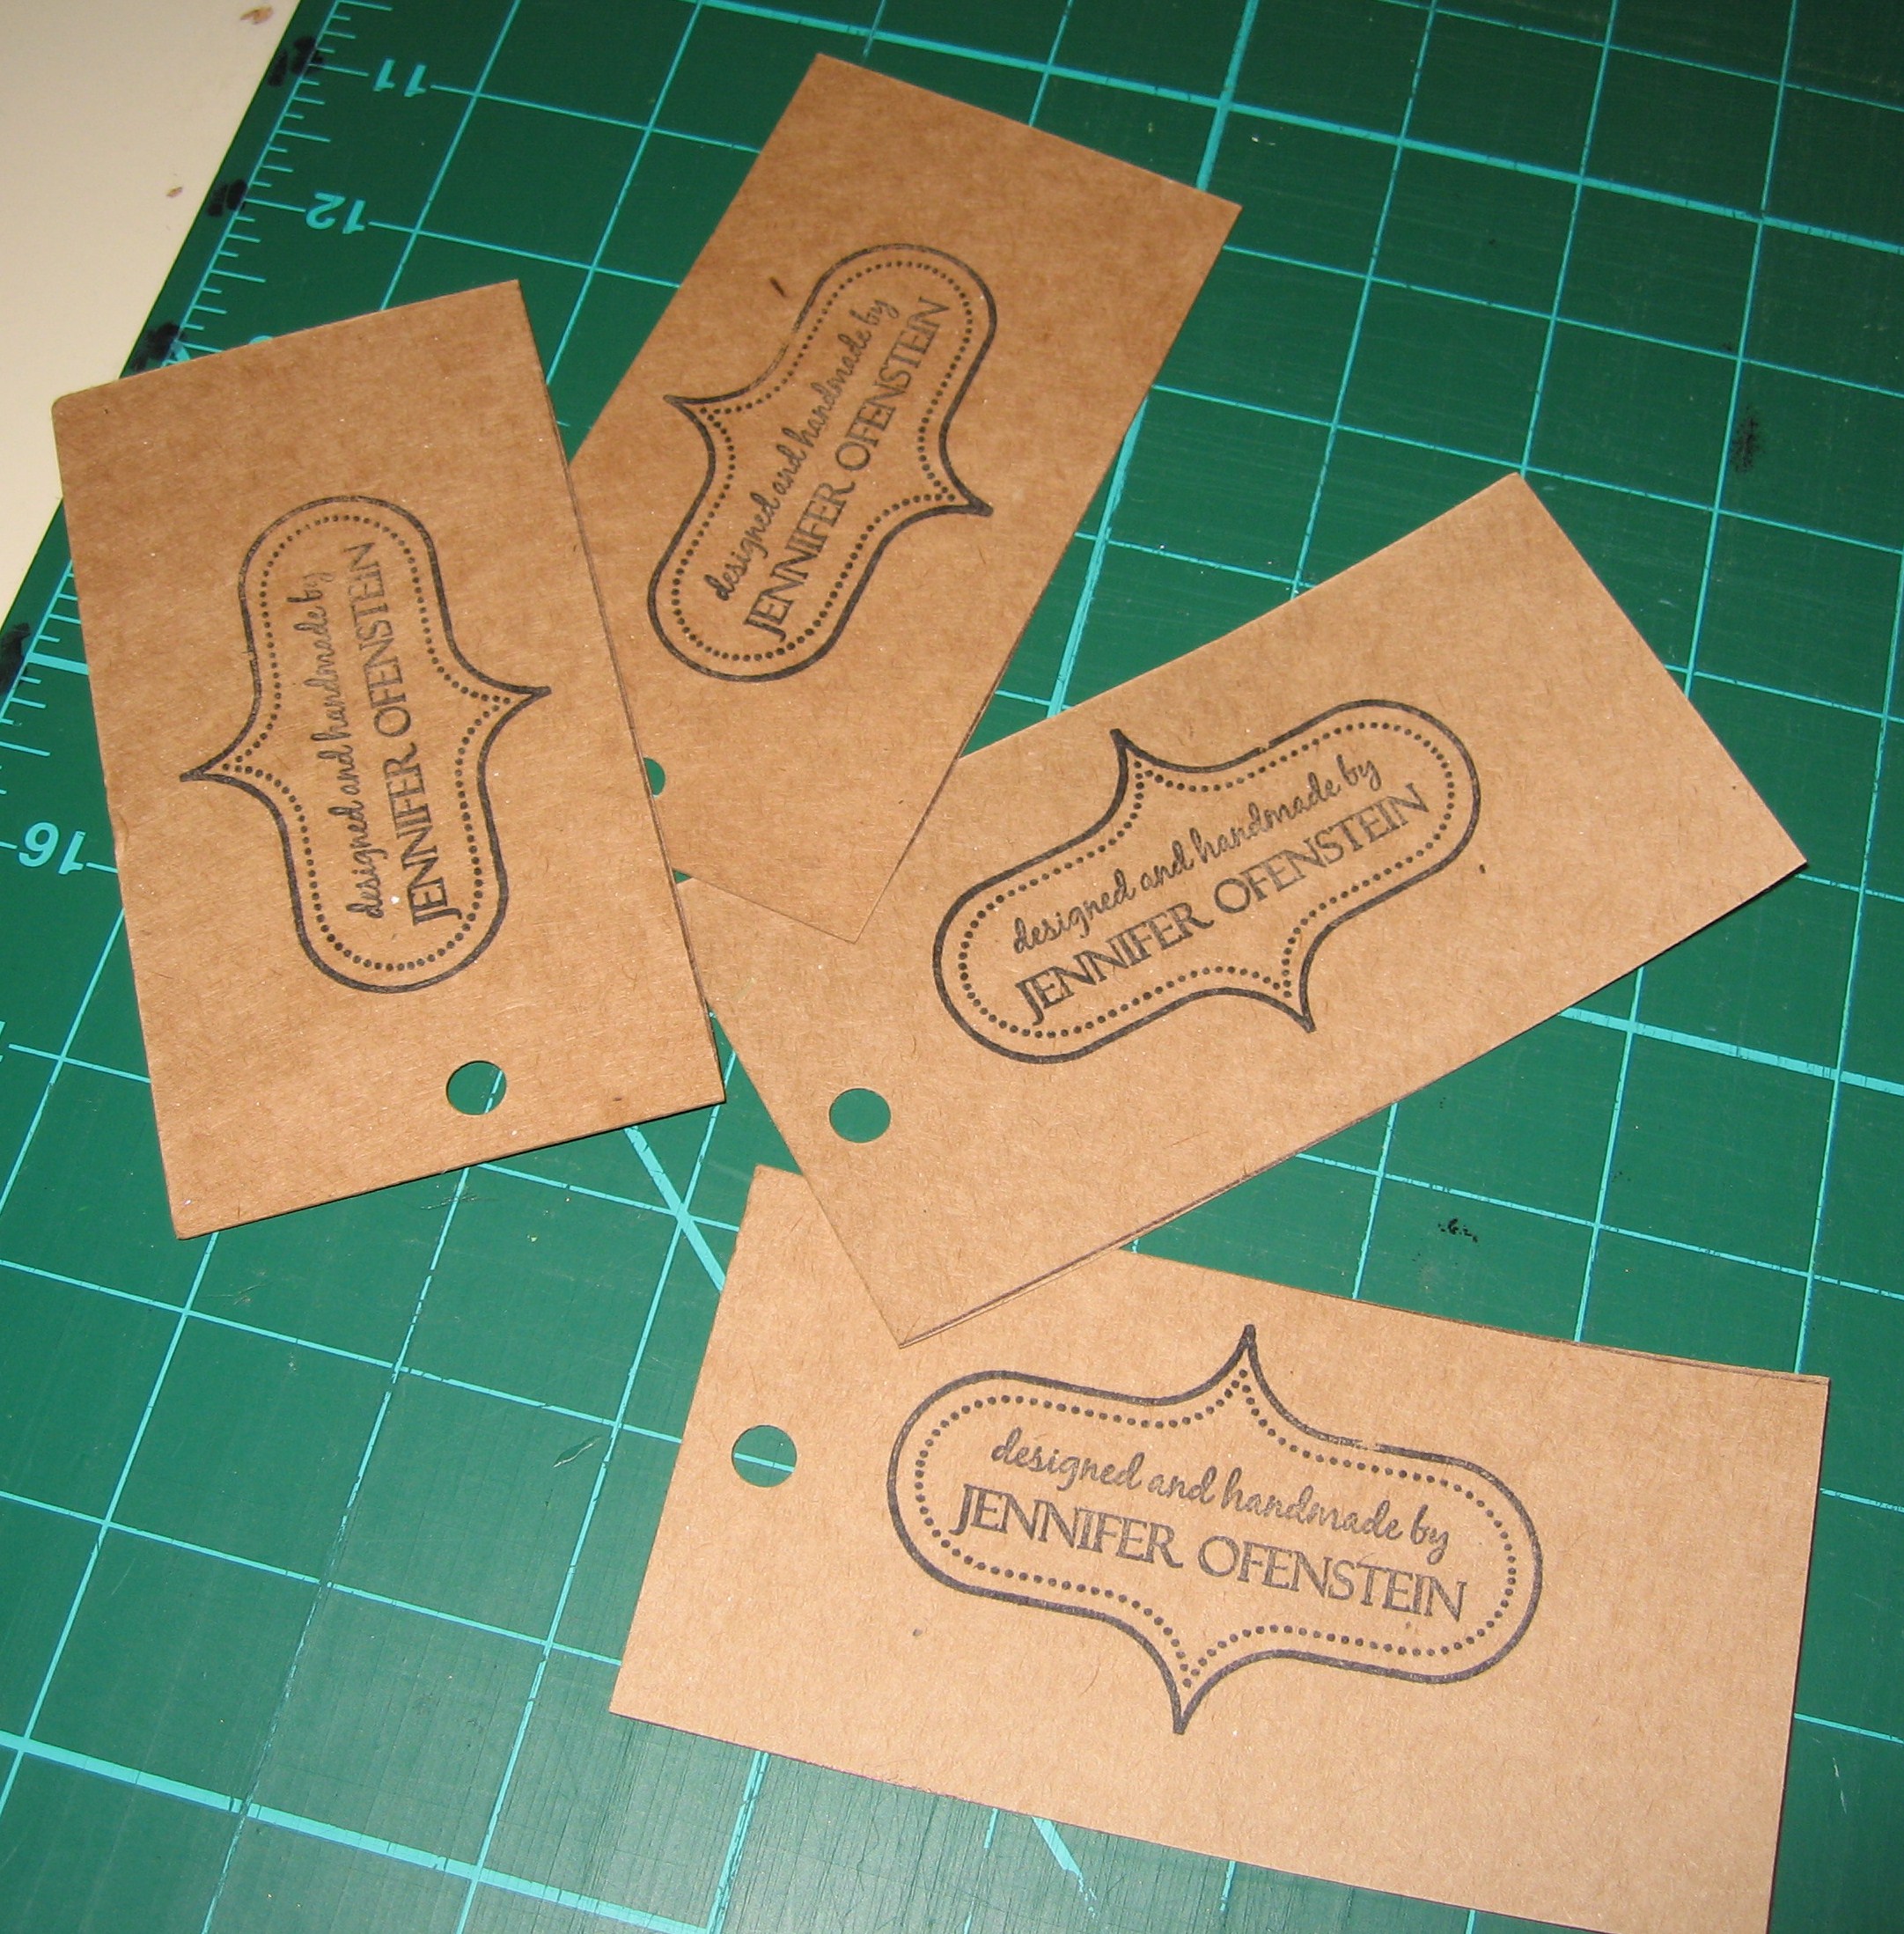
Because I make so many hand crafts, I love to have handmade labels on hand. My new favorite stamp is a “handmade by” I found at Hobby Lobby during a recent sale.
Recycling + new stamps = Cereal Box Labels! One large cereal box makes about 18 3″ x 4″ labels.
cereal box
stamps
ink pads
ribbon
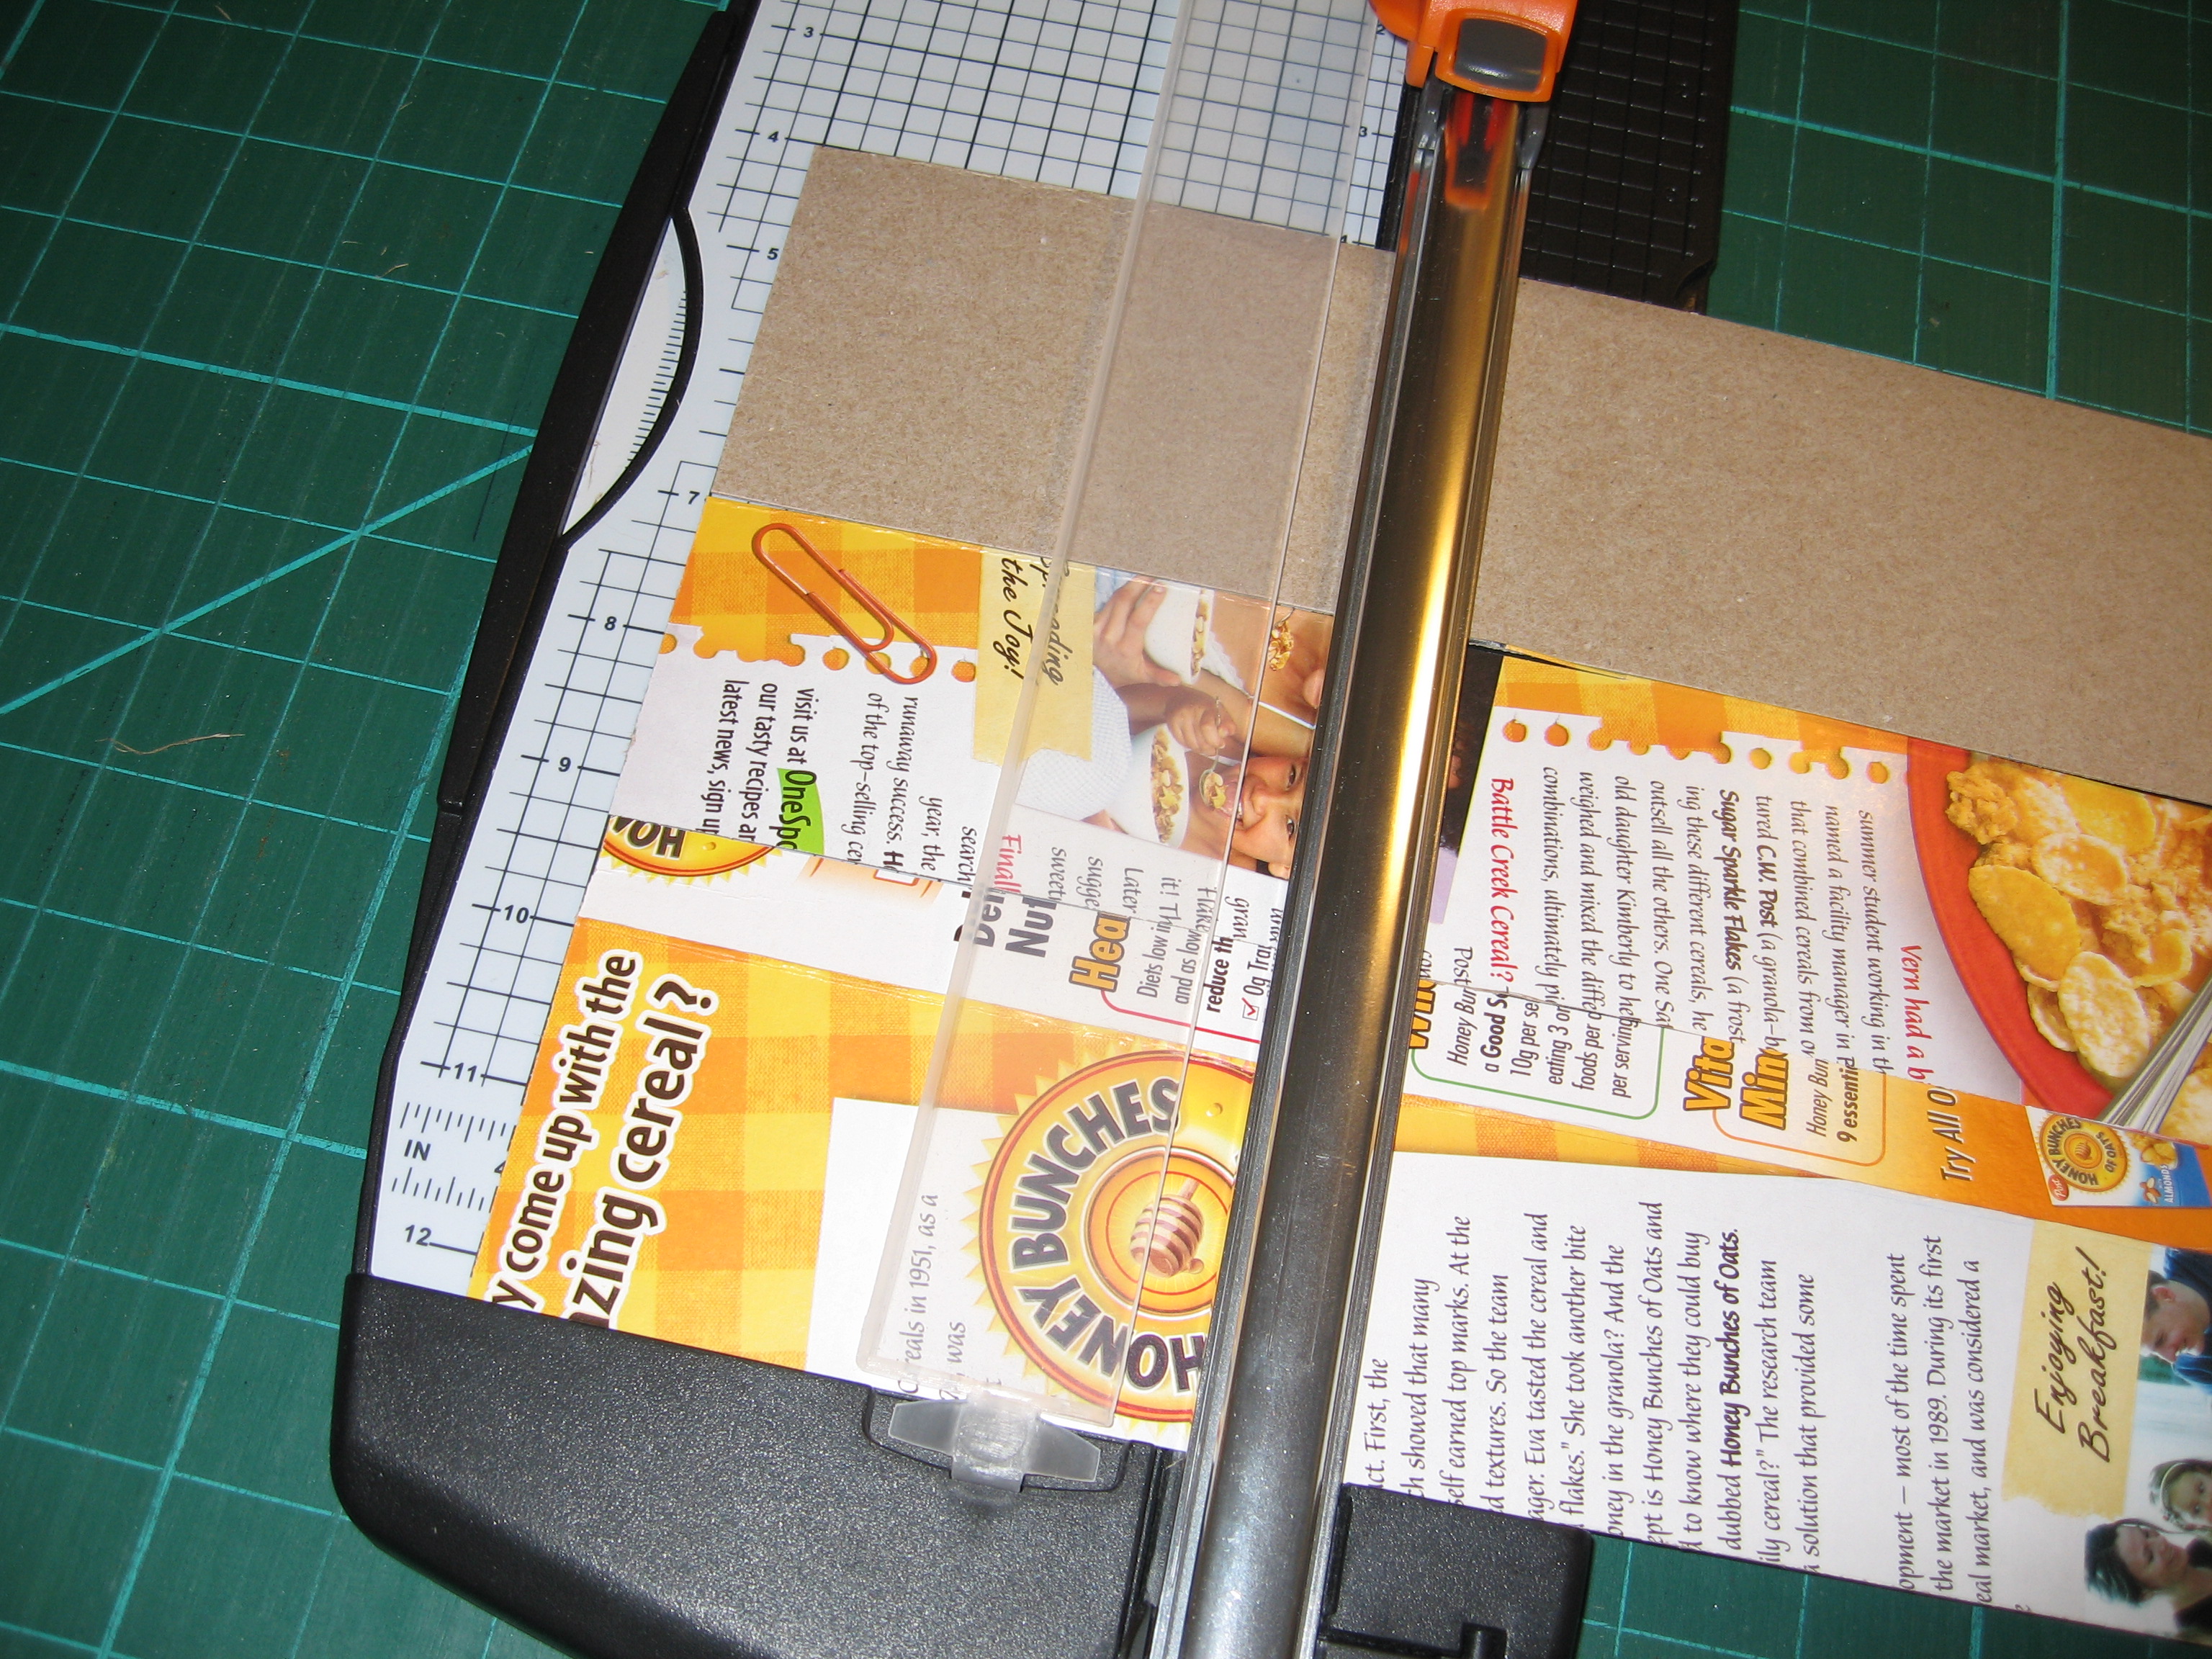
paper cutter OR ruler & scissors
Open the cereal box along the seam line. Trim off the flaps. Recycle or set aside for another project.
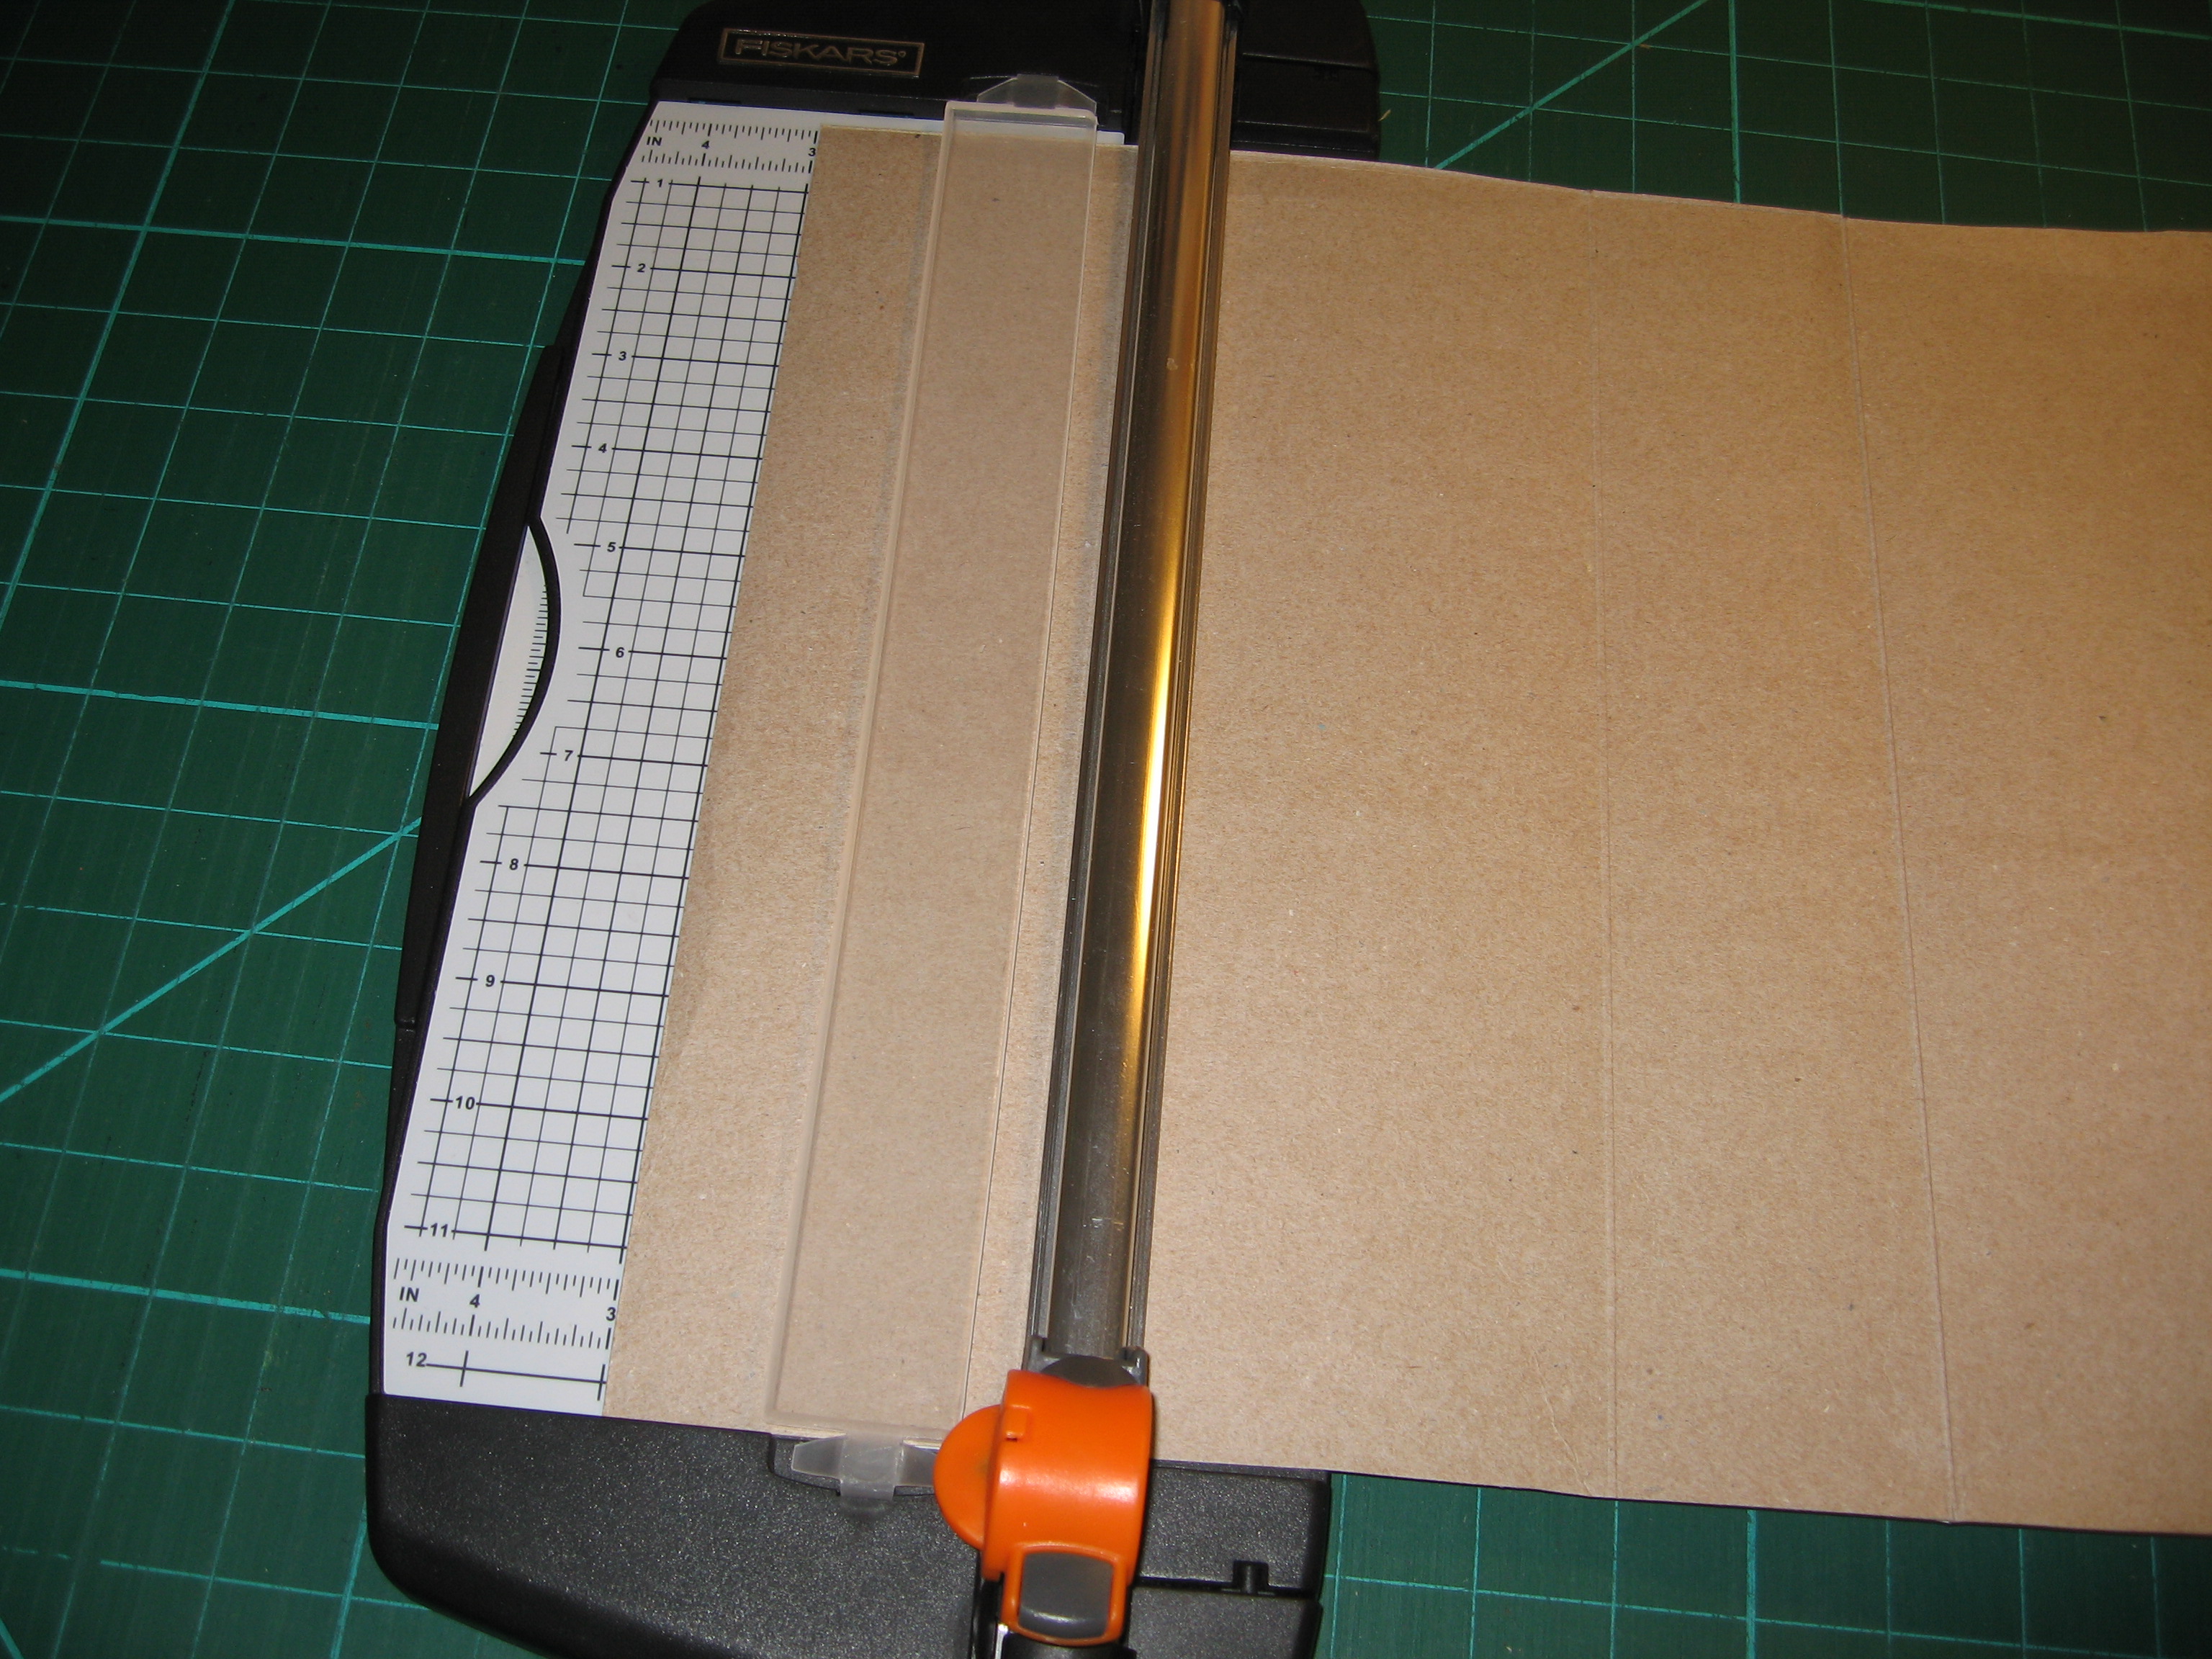
The next two steps can be done either with a paper cutter or with a ruler and scissors.Square up the end of the box. Cut in 4″ strips.
Cut strips into 3″ pieces, giving you 3″ x 4″ cards
Now the fun part! Stamp! Use whatever stamp, color, etc. you like. If you have alphabet stamps, add your name, too!
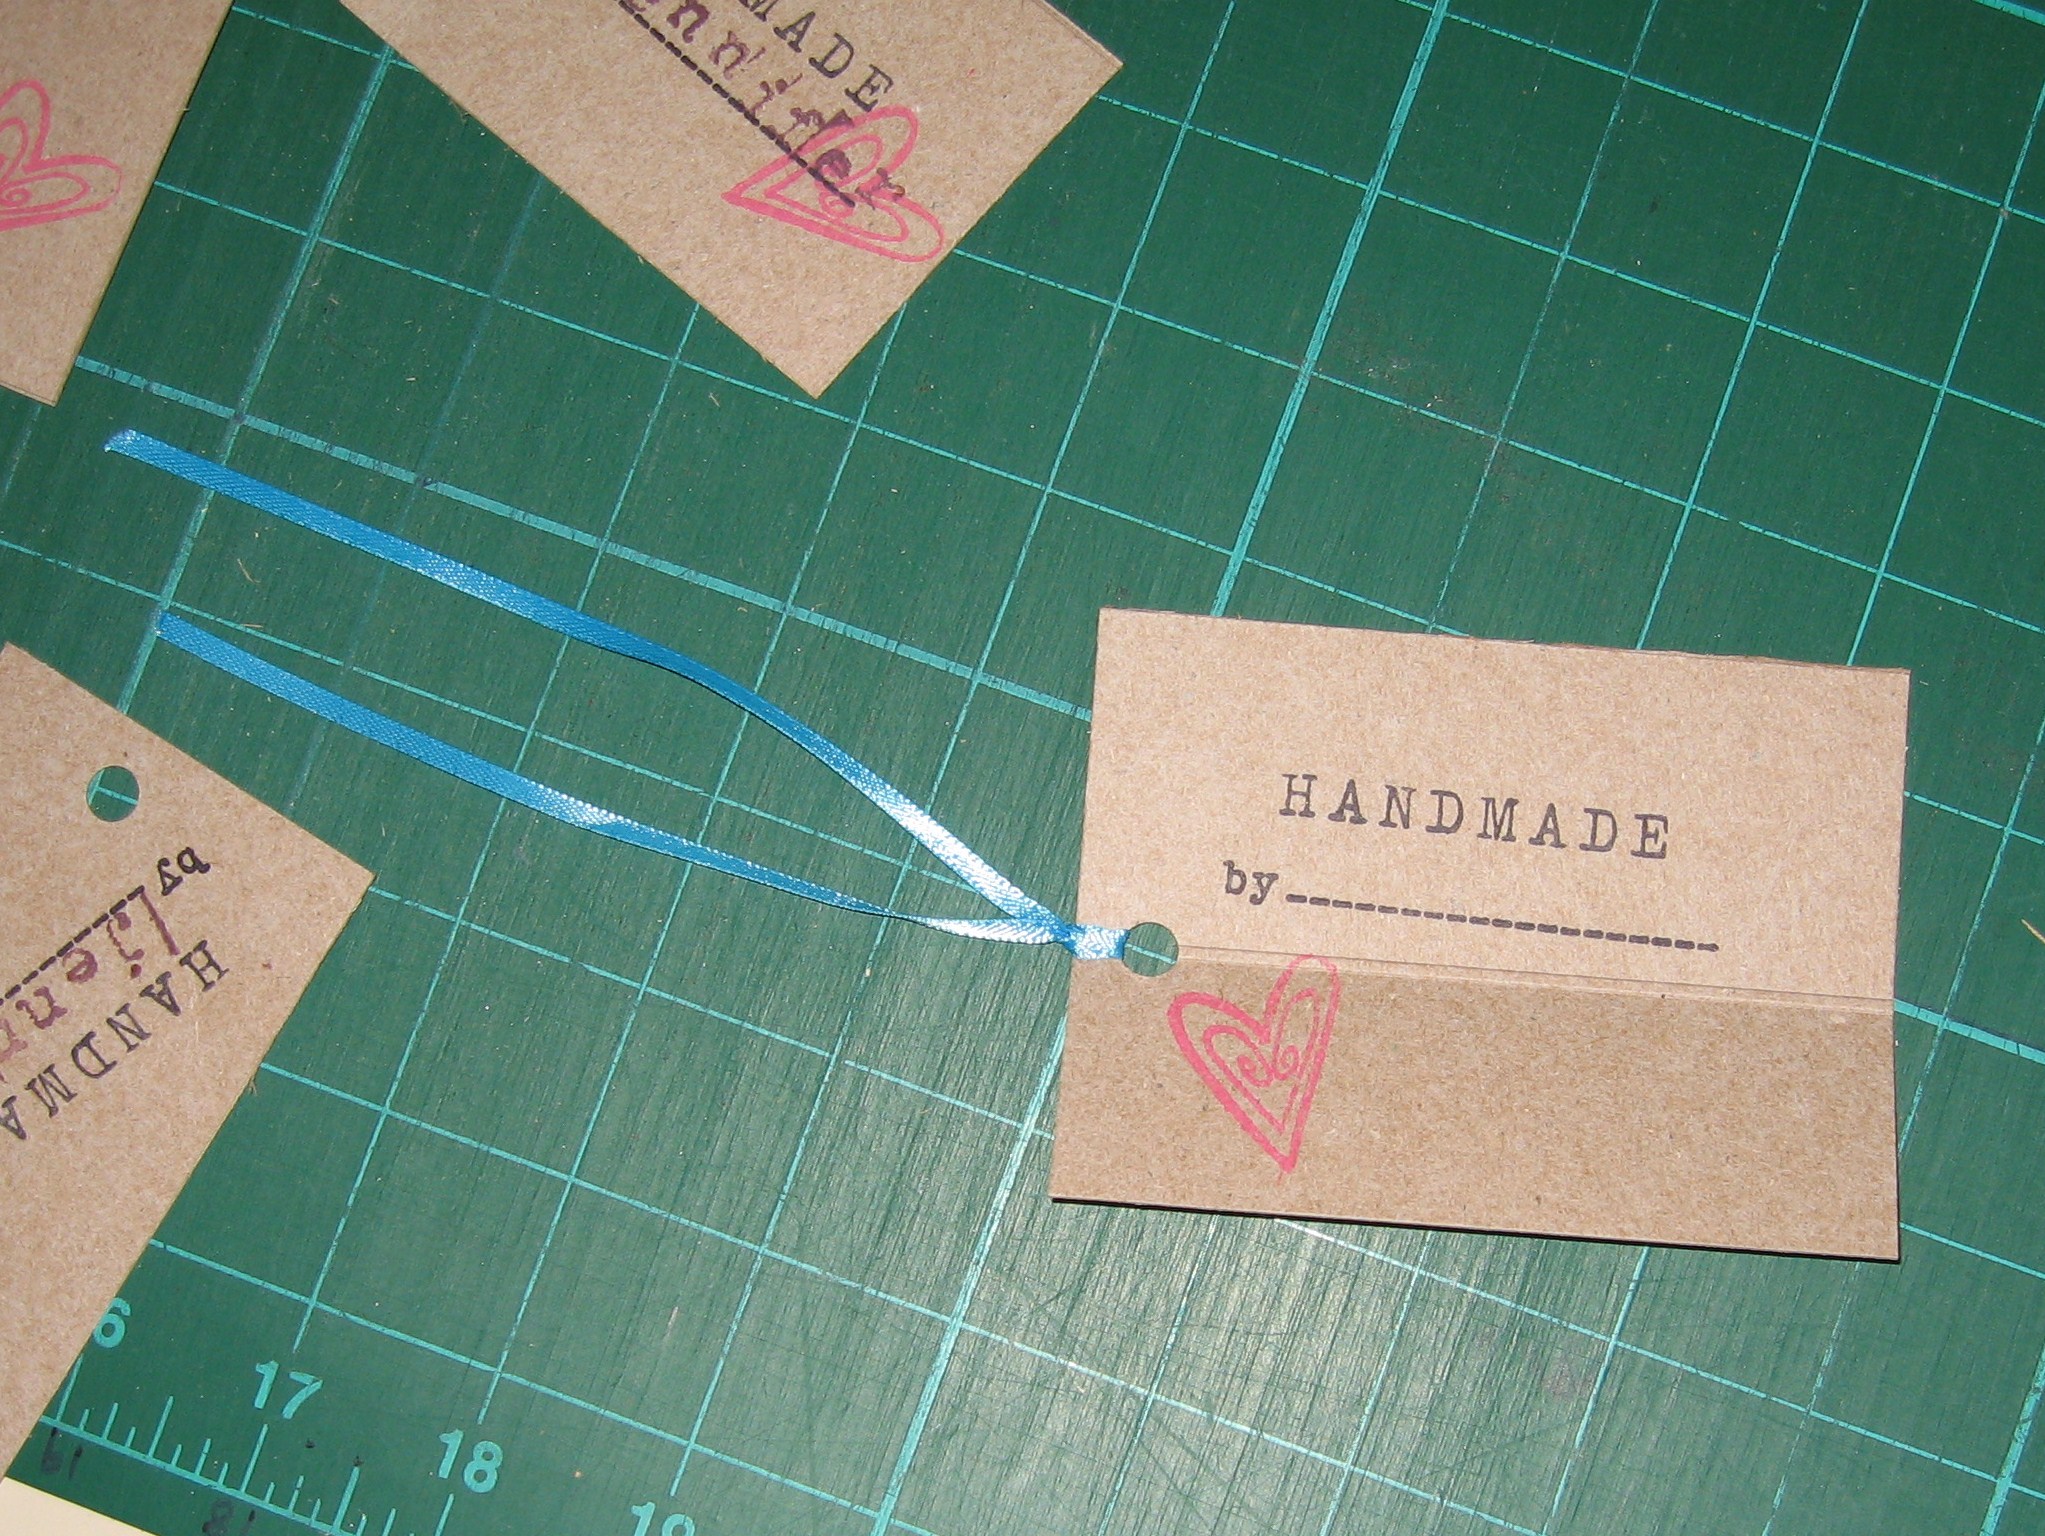
Punch holes in the side or corners of the labels.
Tie a ribbon or string through the hole in the label. Thread the two ends in first, then bring those through the loop. Pull tight.
Tie, tape, pin, or glue your new recycled labels onto crafty projects.
After originally uploading this tutorial, I was gifted my own custom stamp. How fun is that?!