As promised in a previous video, let’s lengthen those jeans pockets!
For some horrible reason, the pockets in women’s jeans are often unusable. This is a quick & easy tutorial to lengthen your pockets using scrap fabric. You can make them as simple as I did here, or spend a bit more time to achieve a more finished look.
You will need two pieces of non-stretch fabric (quilting cotton works great) at least 1/2″ wider than the pocket you want to alter.
The length will depend on the jeans you’re working on. A good rule of thumb for me is a finished pocket size of 8″ – 10″ long. I find that I usually add around 4″ in length to get the depth I am looking for. You’ll want to double that number if you fold your fabric as I show in this tutorial.
This is an easy project to eyeball, so don’t feel like it has to be perfect. These pockets are on the inside and no one will see them but you, though you may get asked where you found jeans with real pockets!
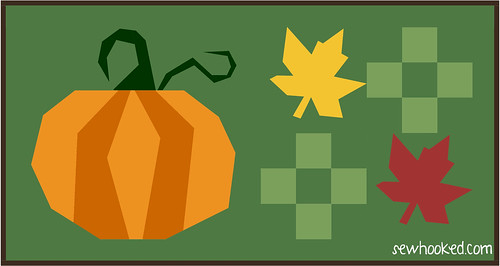
I haven’t shared anything aside from Talk To Me Tuesday since having surgery, and since it is October, my favorite month, I couldn’t resist doing a roundup of my own Halloween and fall patterns and tutorials!
I’ve included both Free Patterns & Retired shop patterns below. As a compromise for those who want access to my previously for sale patterns, I will share the pattern of your choice for a small donation to a local-to-you non-profit. More info below with the Retired Patterns.
To date, wonderful quilters have donated over $300 to a wide variety of charities, donated food, clothing, and hundreds of masks to those who need them. Your charitable efforts make my heart swell with happiness and I thank you from the bottom of my heart!
What are your favorite things to make for Halloween? I’d love to see! Let me know in comments or share over in the Sewhooked Facebook Group!You can also tag me on Instagram – @sewhookedjen.
I retired my online quilt pattern shop December 31, 2019 but I still receive quite a few requests for retired patterns.I decided the best way to address that was to have those interested in a retired pattern make a small donation to a local-to-you non-profit of your choice. Email your receipt and I’ll be happy to send the pattern. Please, only one pattern per receipt.
If you’re unsure if a pattern is FREE (I have loads of those, check out the main menu on sewhooked.com), or RETIRED, just drop me an email or comment and I’ll let you know.
A Little Haunted – Retired Pattern
Monster Madness – Retired Pattern Set
I Want My Mummy – Retired Pattern (supplemental pattern to Monster Madness)
Like my free content? Consider being a Patron! Find out all you need to know on my Patreon page. $10 Patrons receive new paid patterns for free as they are released. Details on Patreon.
♥
Want to support my work but Patreon is not for you? You can still help support my free content and keep me creating by purchasing a pattern. Buying patterns gives you something tangible for your money and helps me keep doing what I do! However, you choose to support me, whether it’s Patron, purchases, or by sharing my work with your other quilty friends, I appreciate you. ♥
This is just one of the patterns available in my Craftsy shop!
♥
Happening now! Quilt along or work at your own pace.
After an April that was all about ME, I wanted to share some fun charity projects in May!
First up is a child-sized quilt pattern I designed inspired by the heart logo of my favorite blanket making charity, The Linus Connection.
Made of 5 1/2″ squares and half square triangles, this is an easy peasy quilt to chain piece. Make it for a wee one you love or for your favorite blanket charity.
This is a quick to watch tutorial on chain piecing from Shiny Happy World.
♥
Are you quilting along with Paper Piecing Vintage? Share a Signature Block for the PPV Signature Quilt! This special project is a for a commemorative signature quilt that I will keep after Paper Piecing Vintage has concluded. Find this block on page 21 of Paper Piecing Vintage. If you’re only making a few blocks, you can also find the Signature Block Pattern right here.
♥
Stop by Sewhooked on the second and fourth Mondays of every month through June for the Paper Piecing Vintage Quilt Along (PPV2017)!
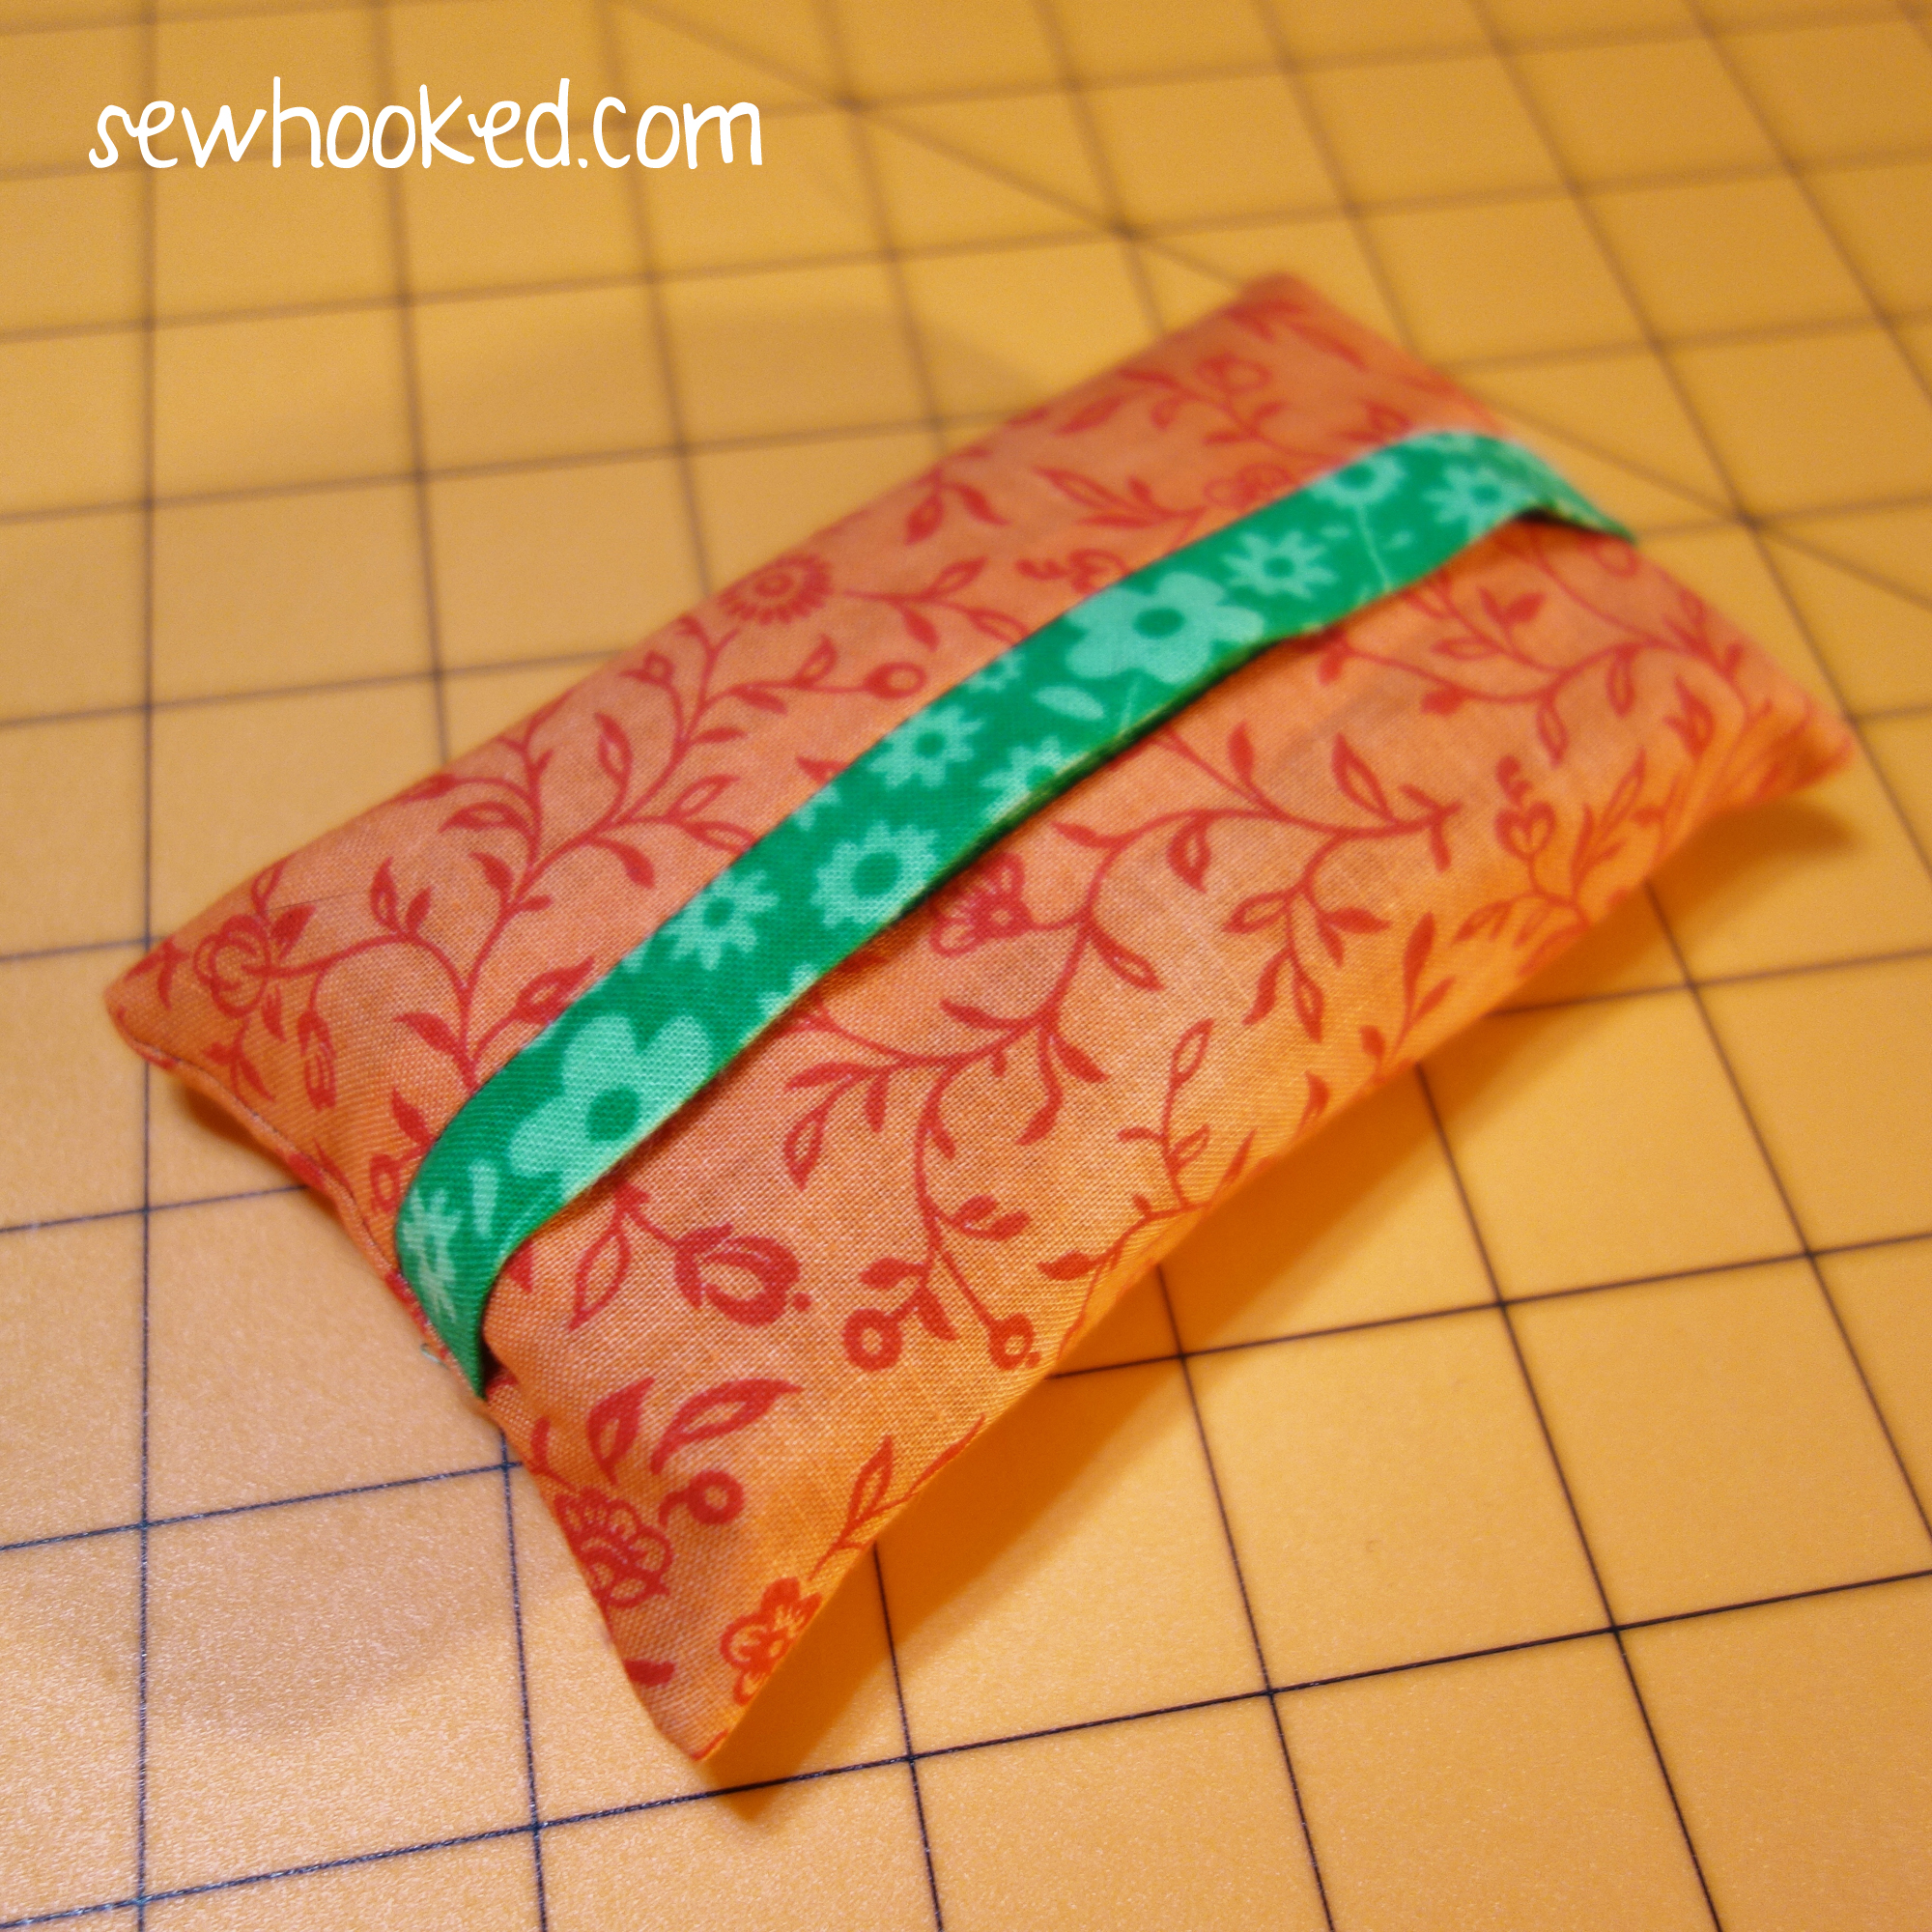
As promised several Talk to Me Tuesdays ago, we have a super simple tutorial to make a self-trimmed tissue packet cover.
Don’t want trim? I have instructions for that, too!
Please note that this tissue cover is sized to fit Kleenex Facial Tissues. Mine are a generic version but are the same size as the Kleenex. Use the brand works for you.
Adjust the dimensions if needed. You can also play with quilt blocks and directional fabric as desired.
These little packets make great gifts, swap additions, and are perfect for keeping your tissues clean and safe in your bag or purse.
First up! Self-Trimming Tissue Cover…
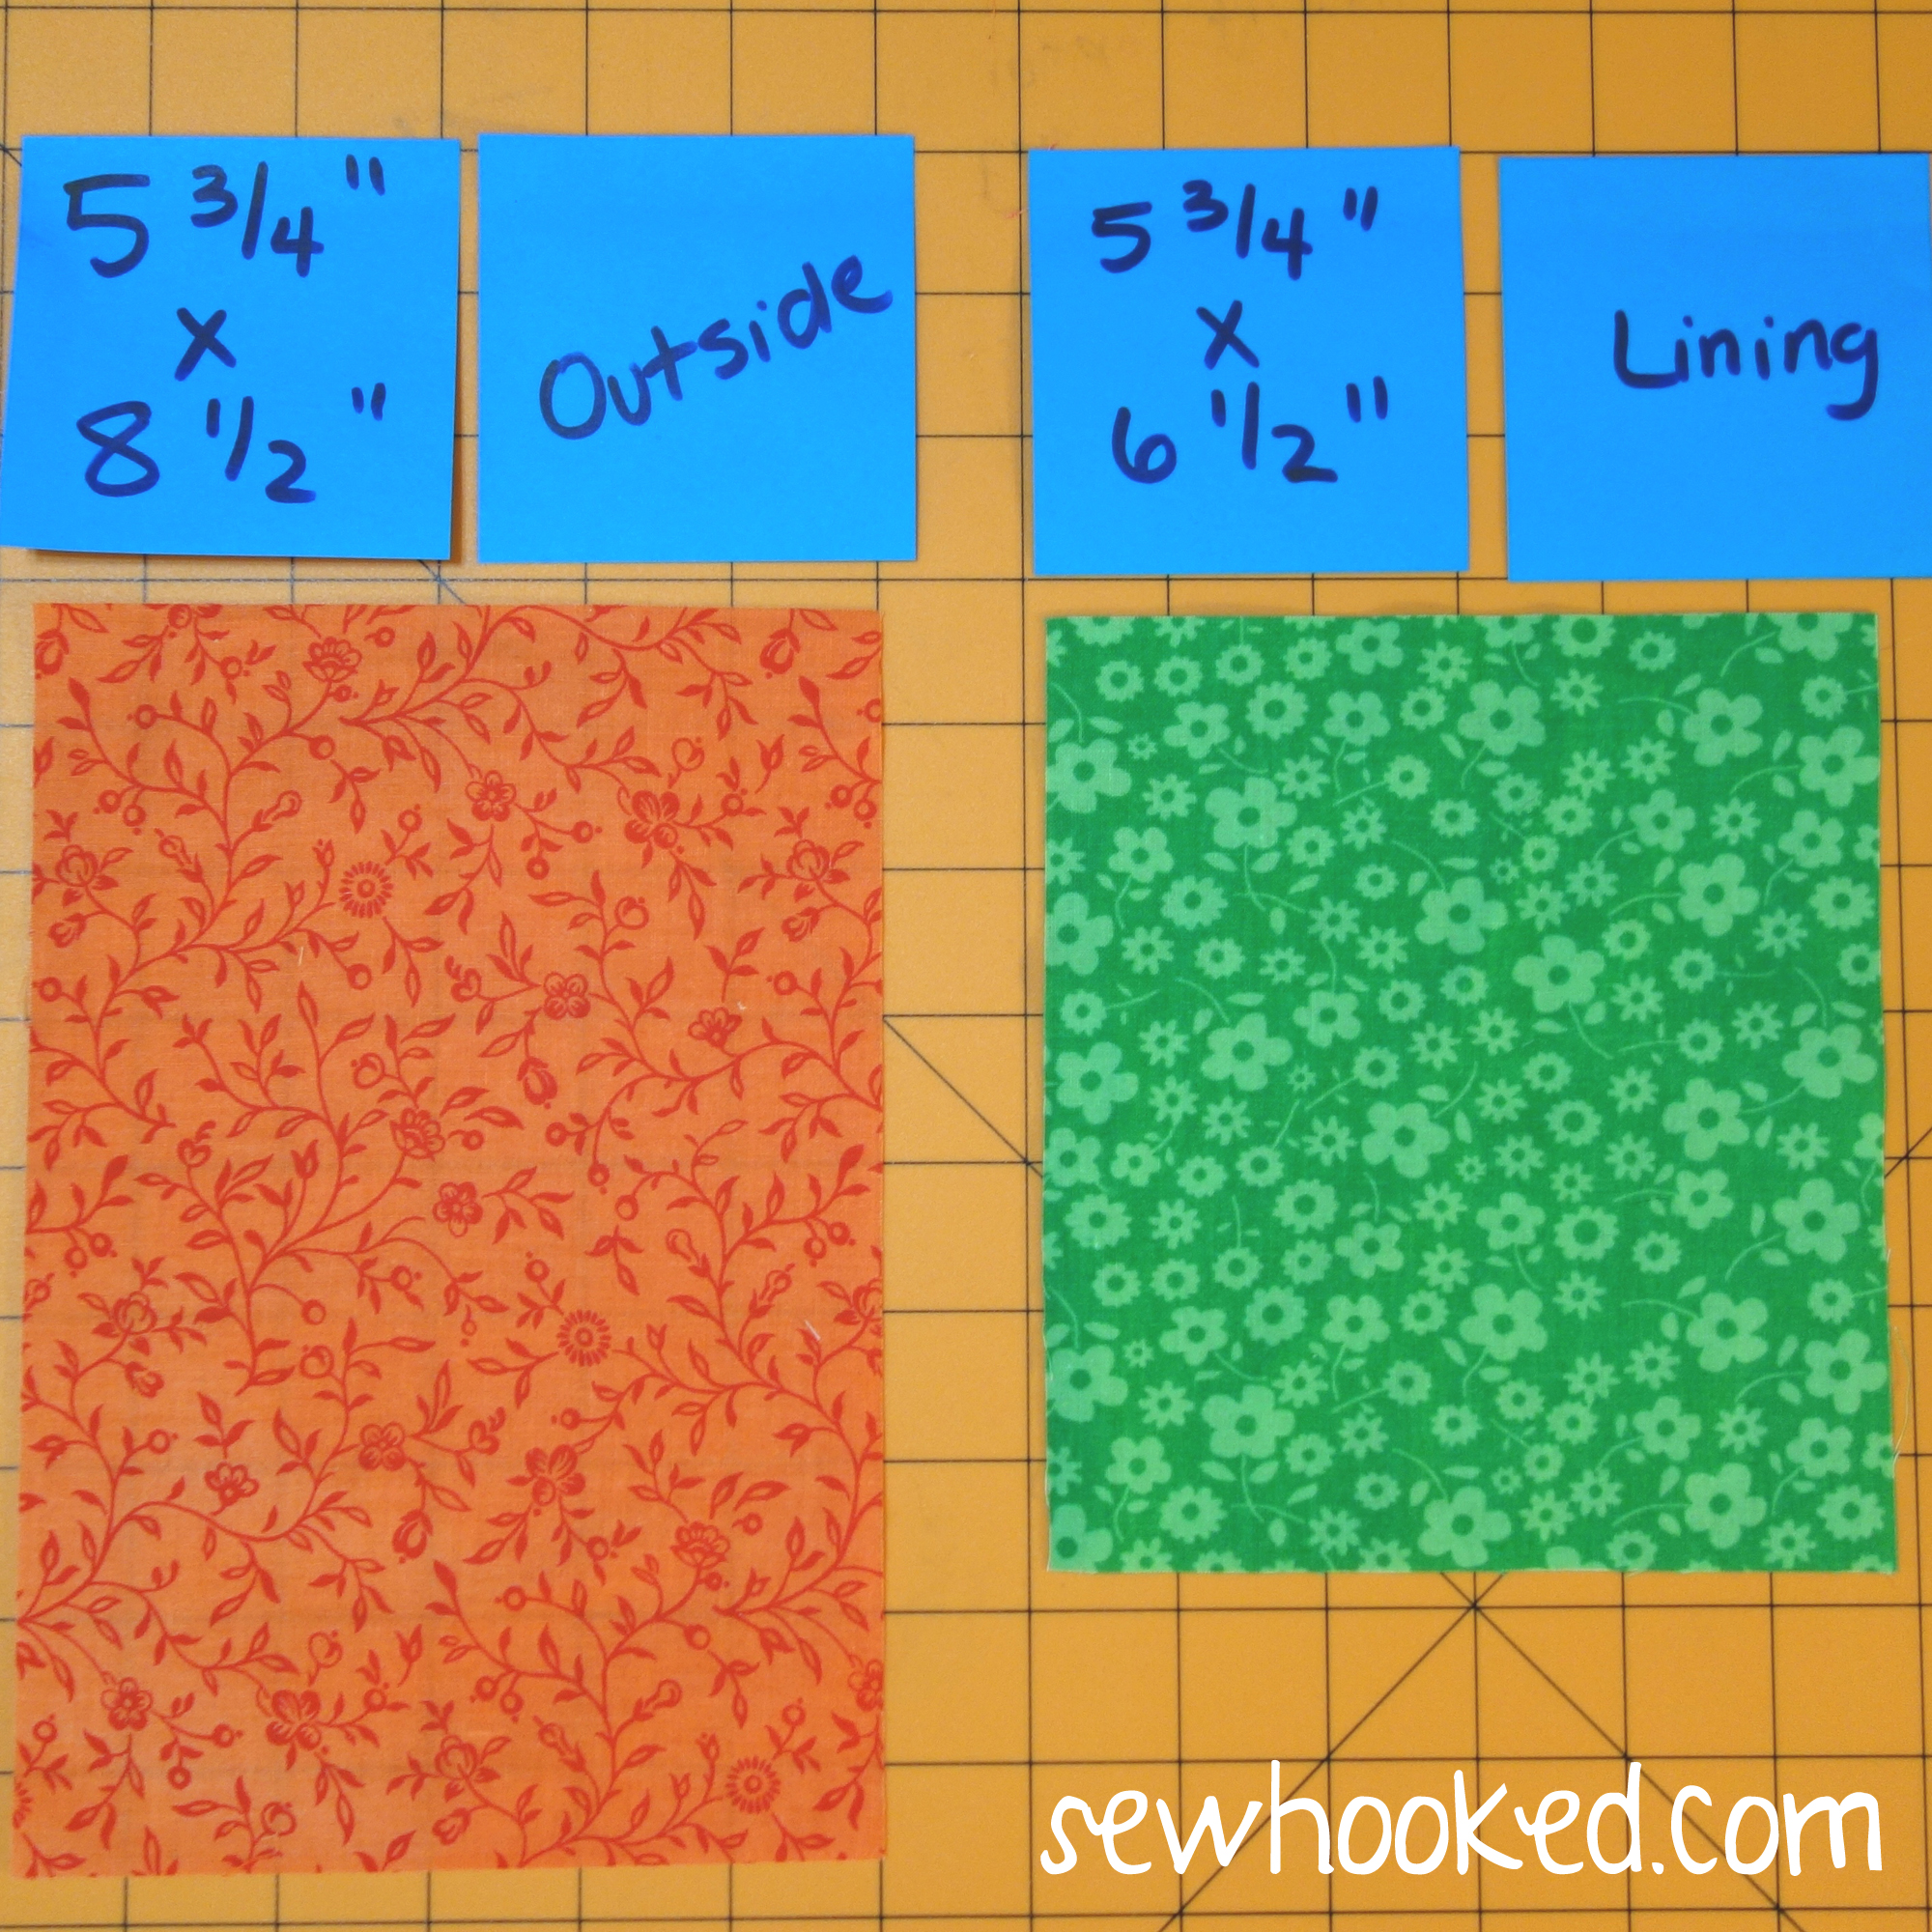
You’ll need fabric in two colors. I’m using contrasting colors to make the lining and outside very obvious. For both the trimmed and non-trimmed version, the outside will be orange.
For TRIMMED Cover:
Lining/Trim – 5 3/4″ x 8 1/2″
Outside – 5 3/4″ x 6 1/2″
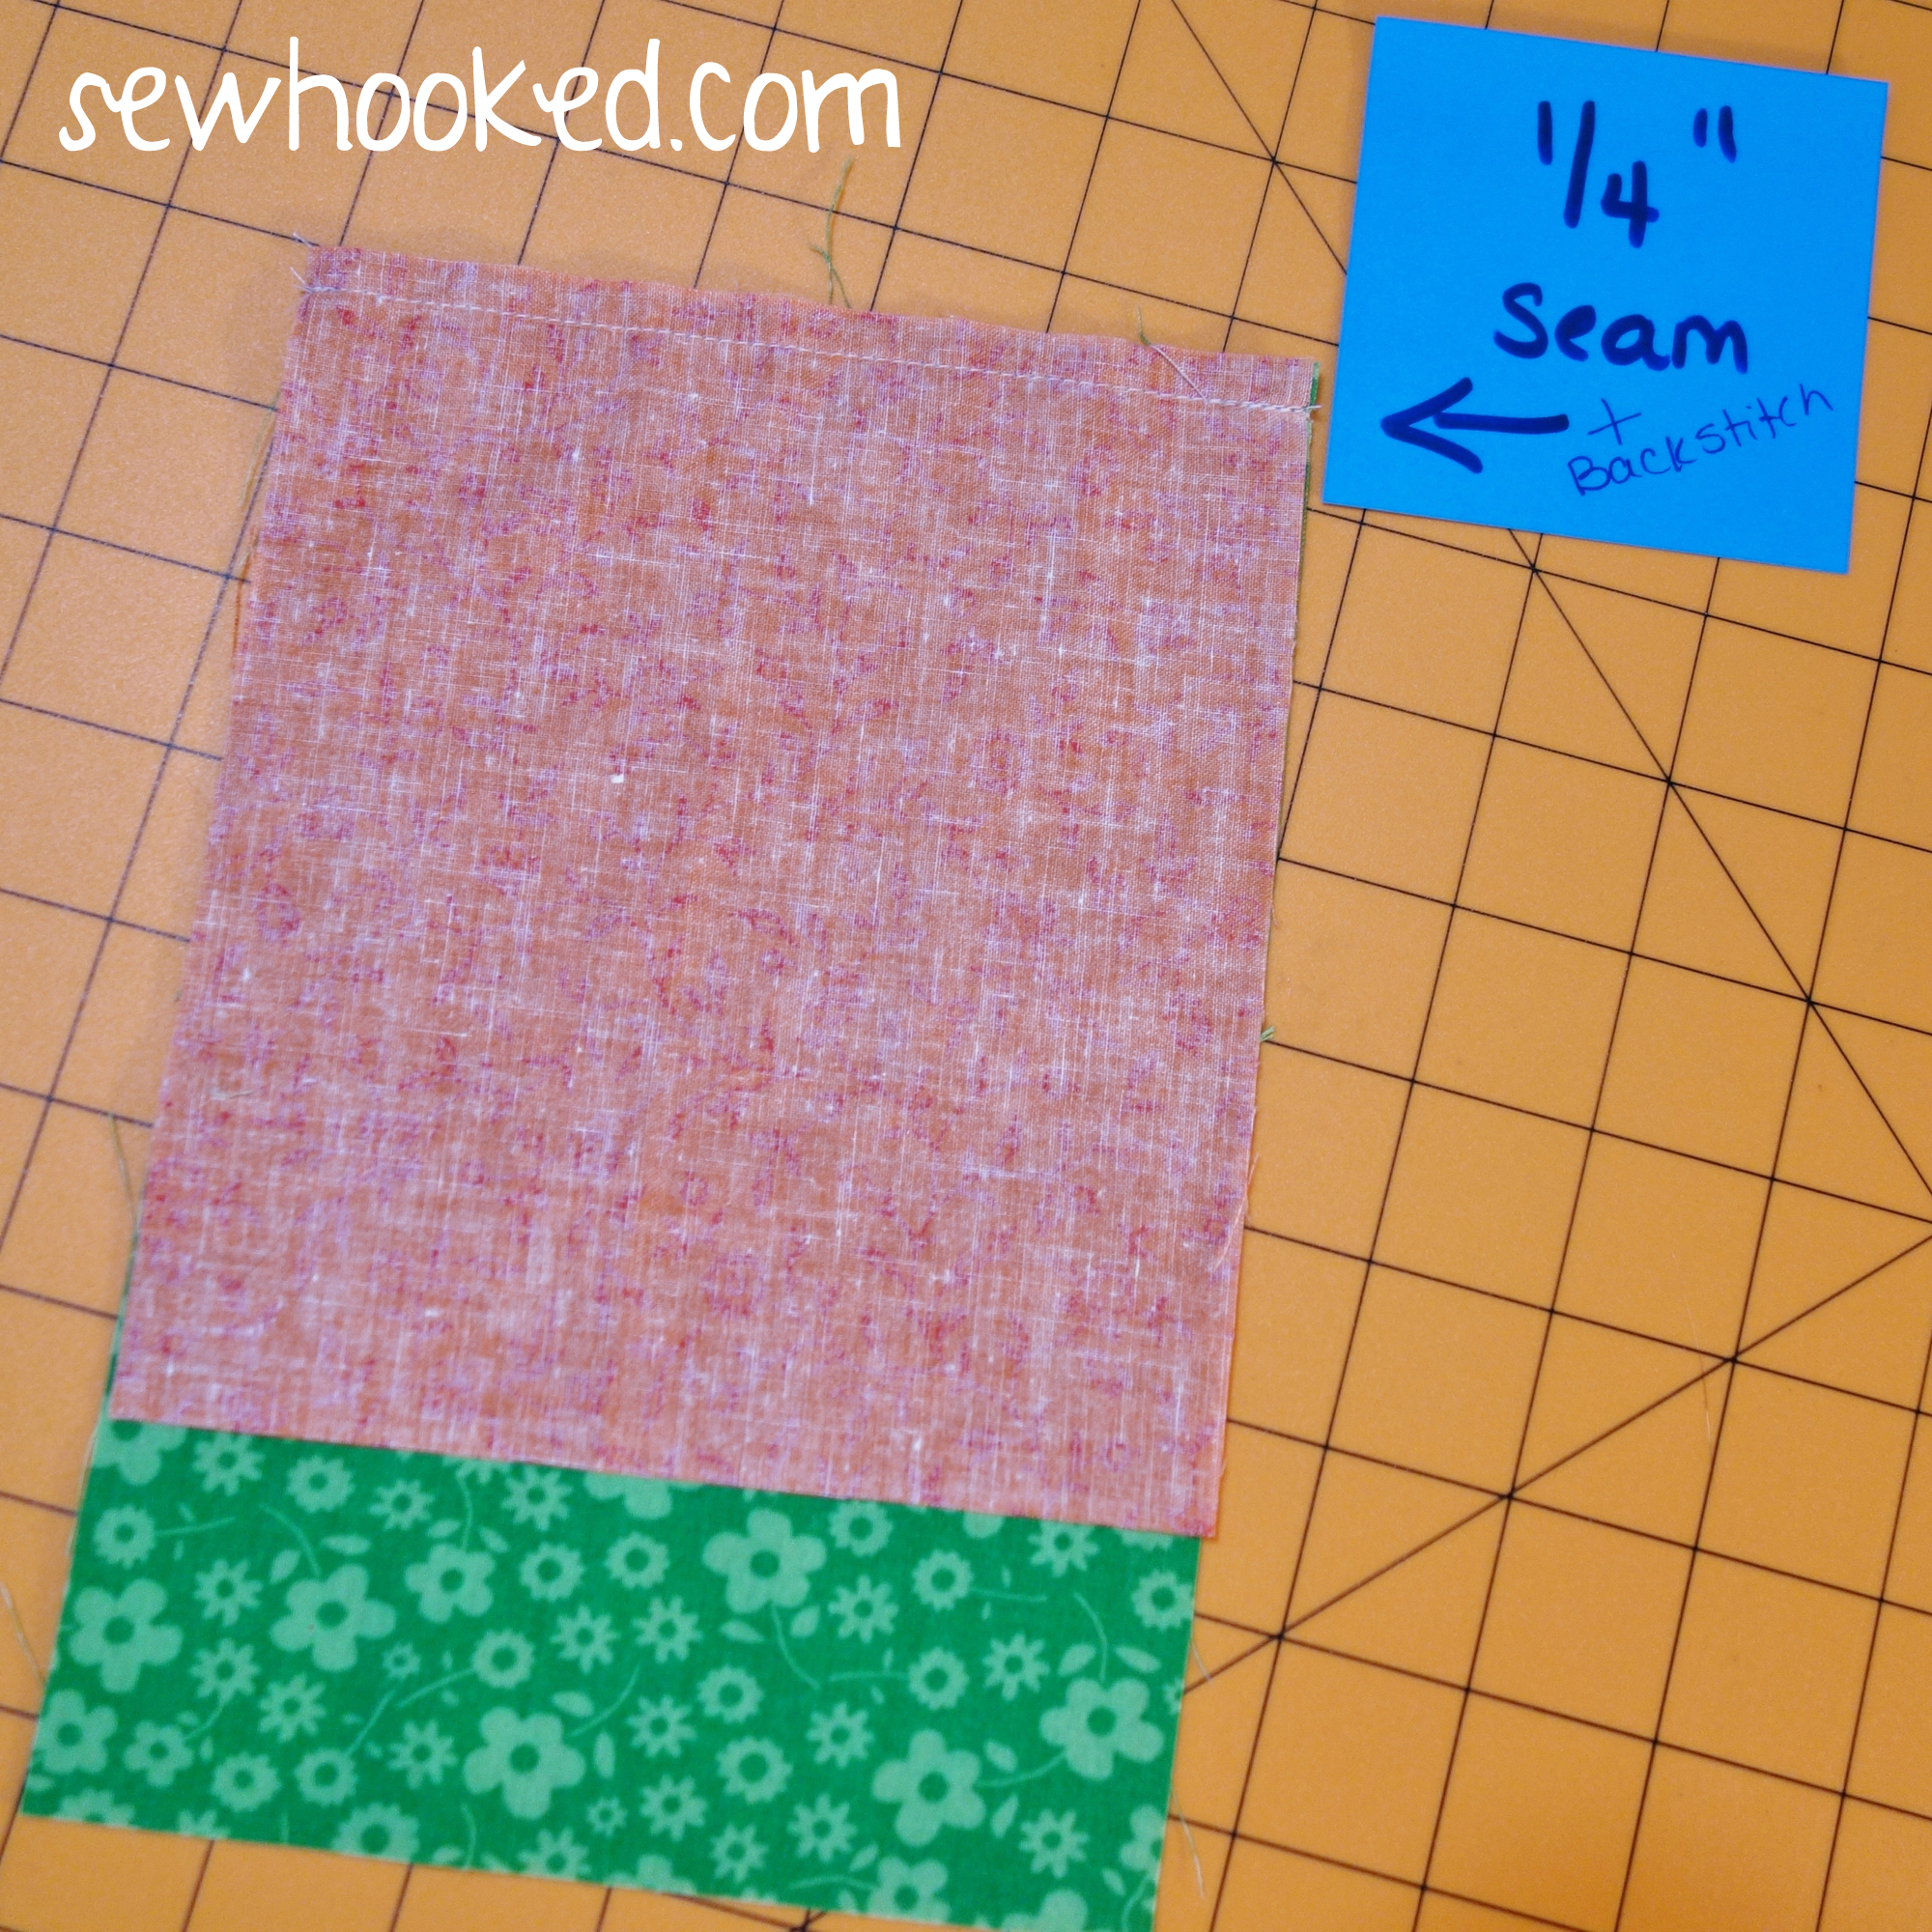
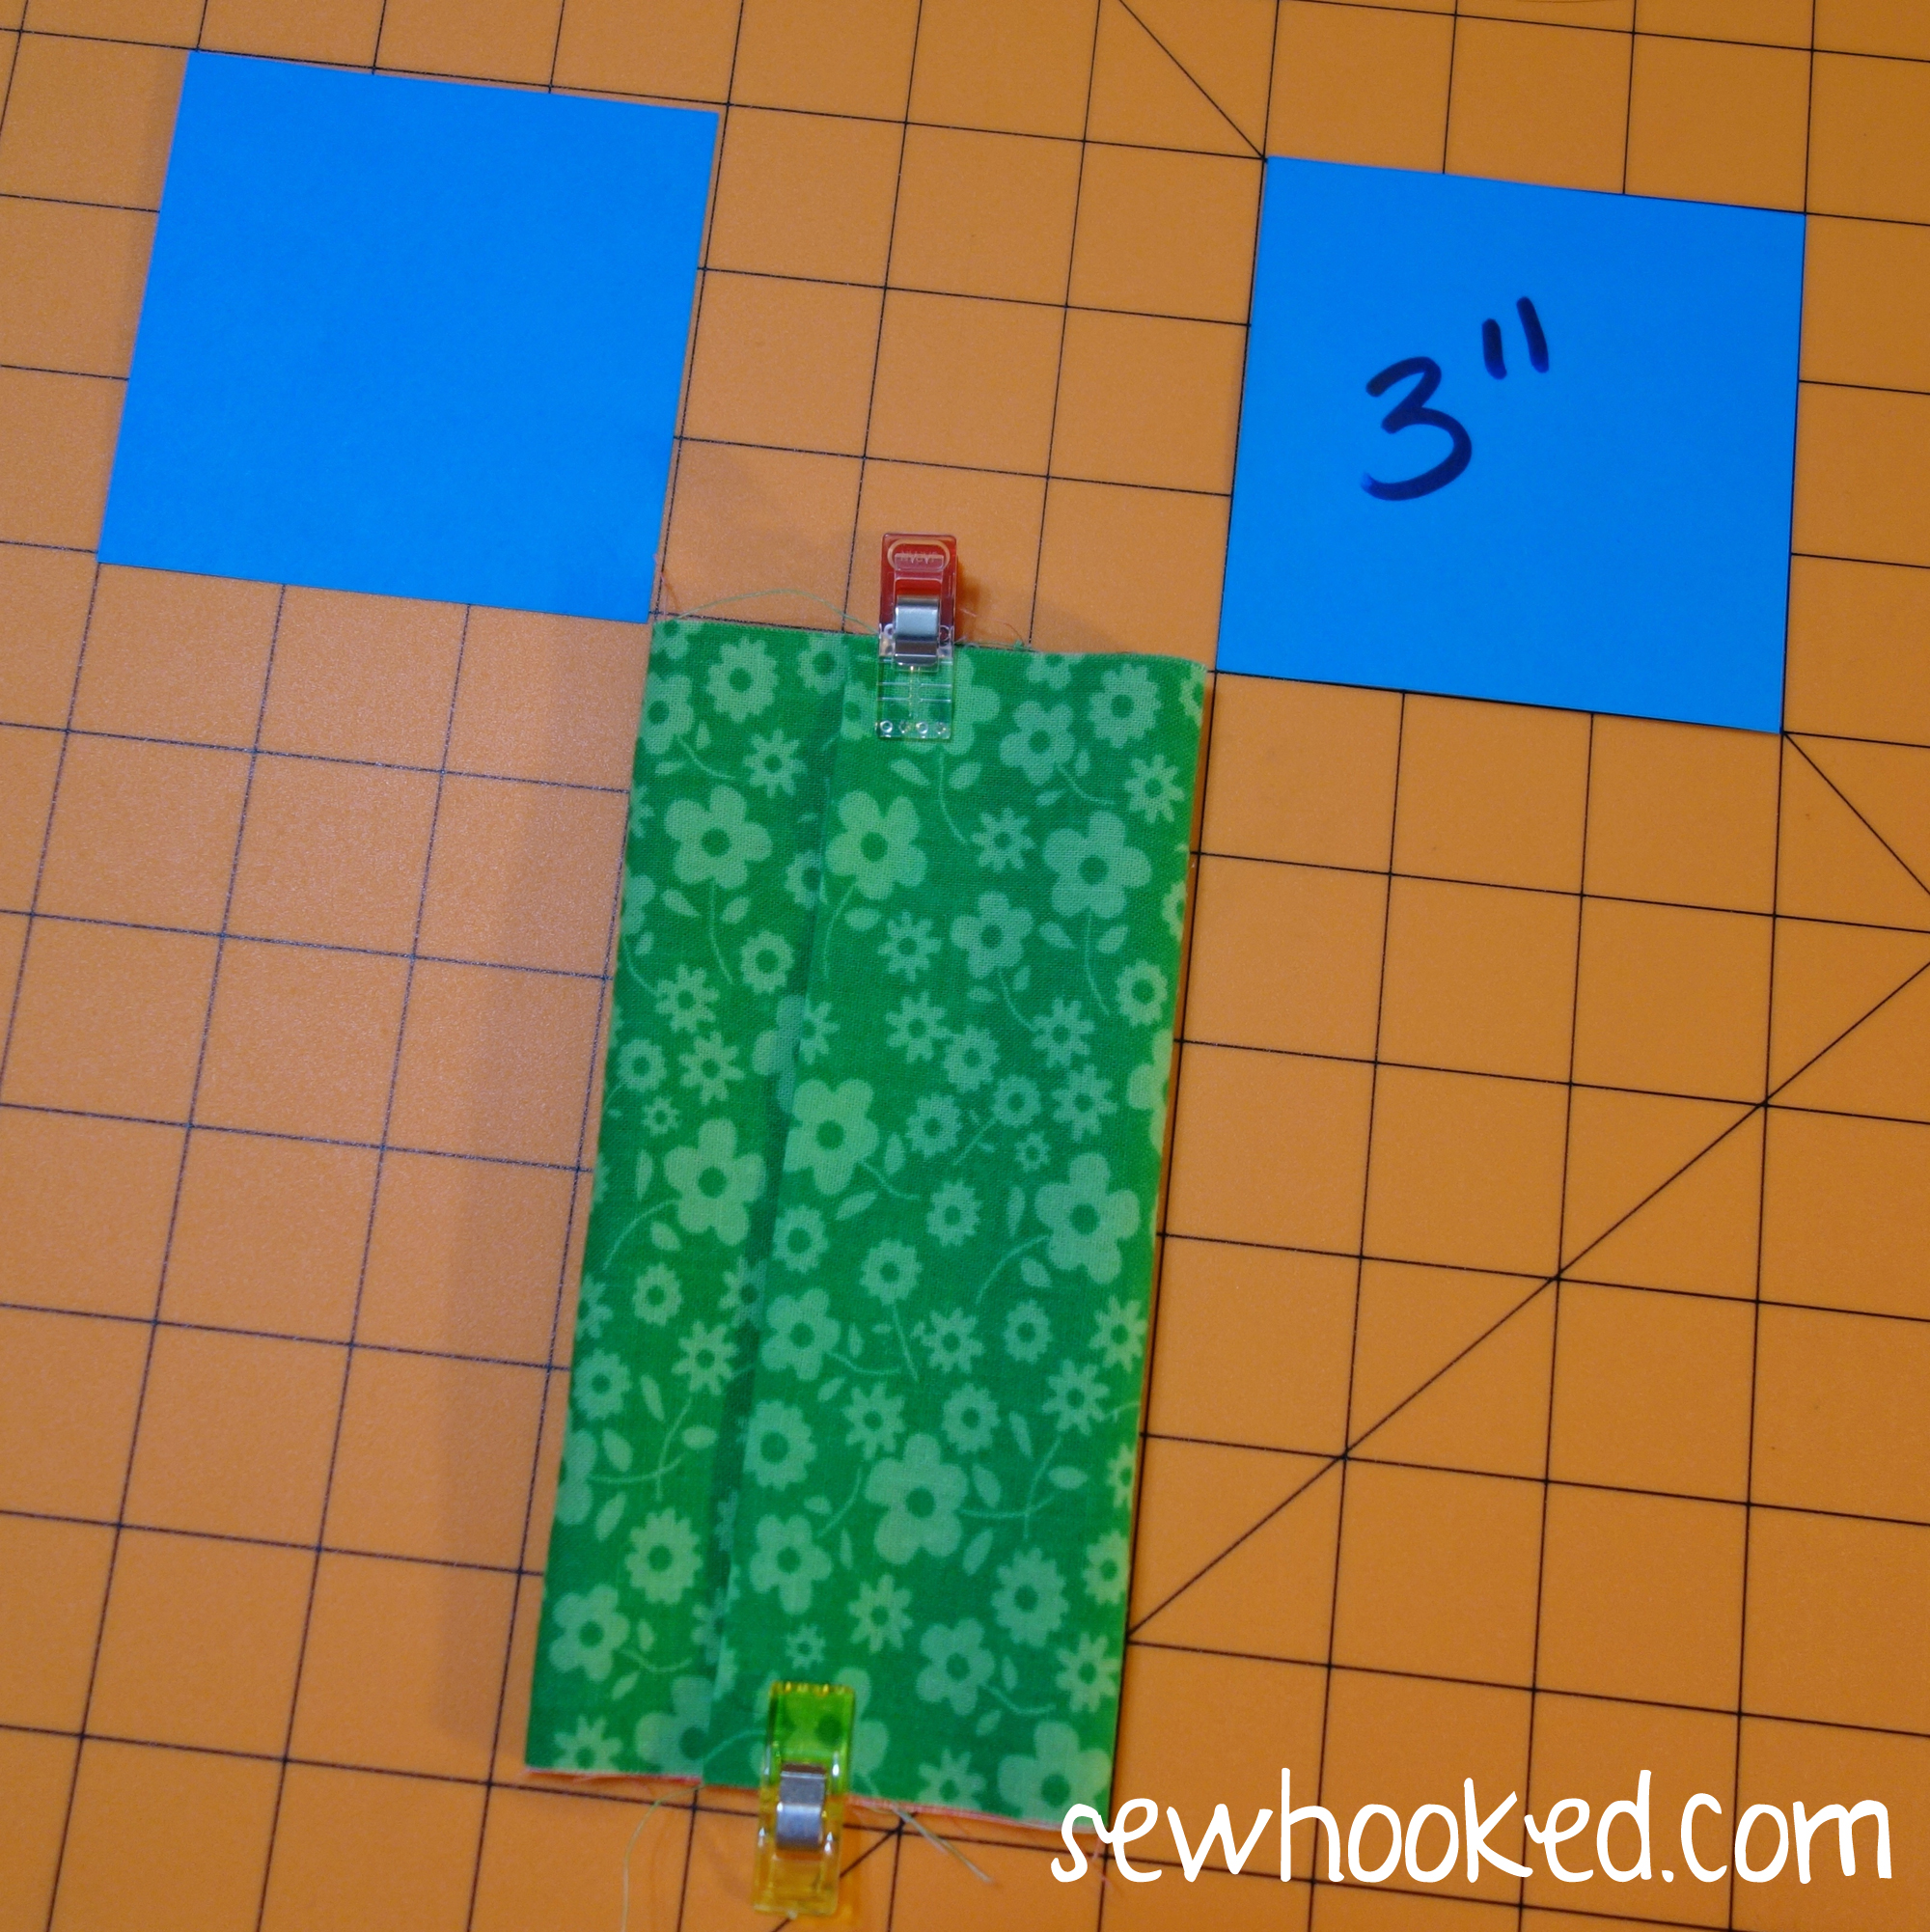
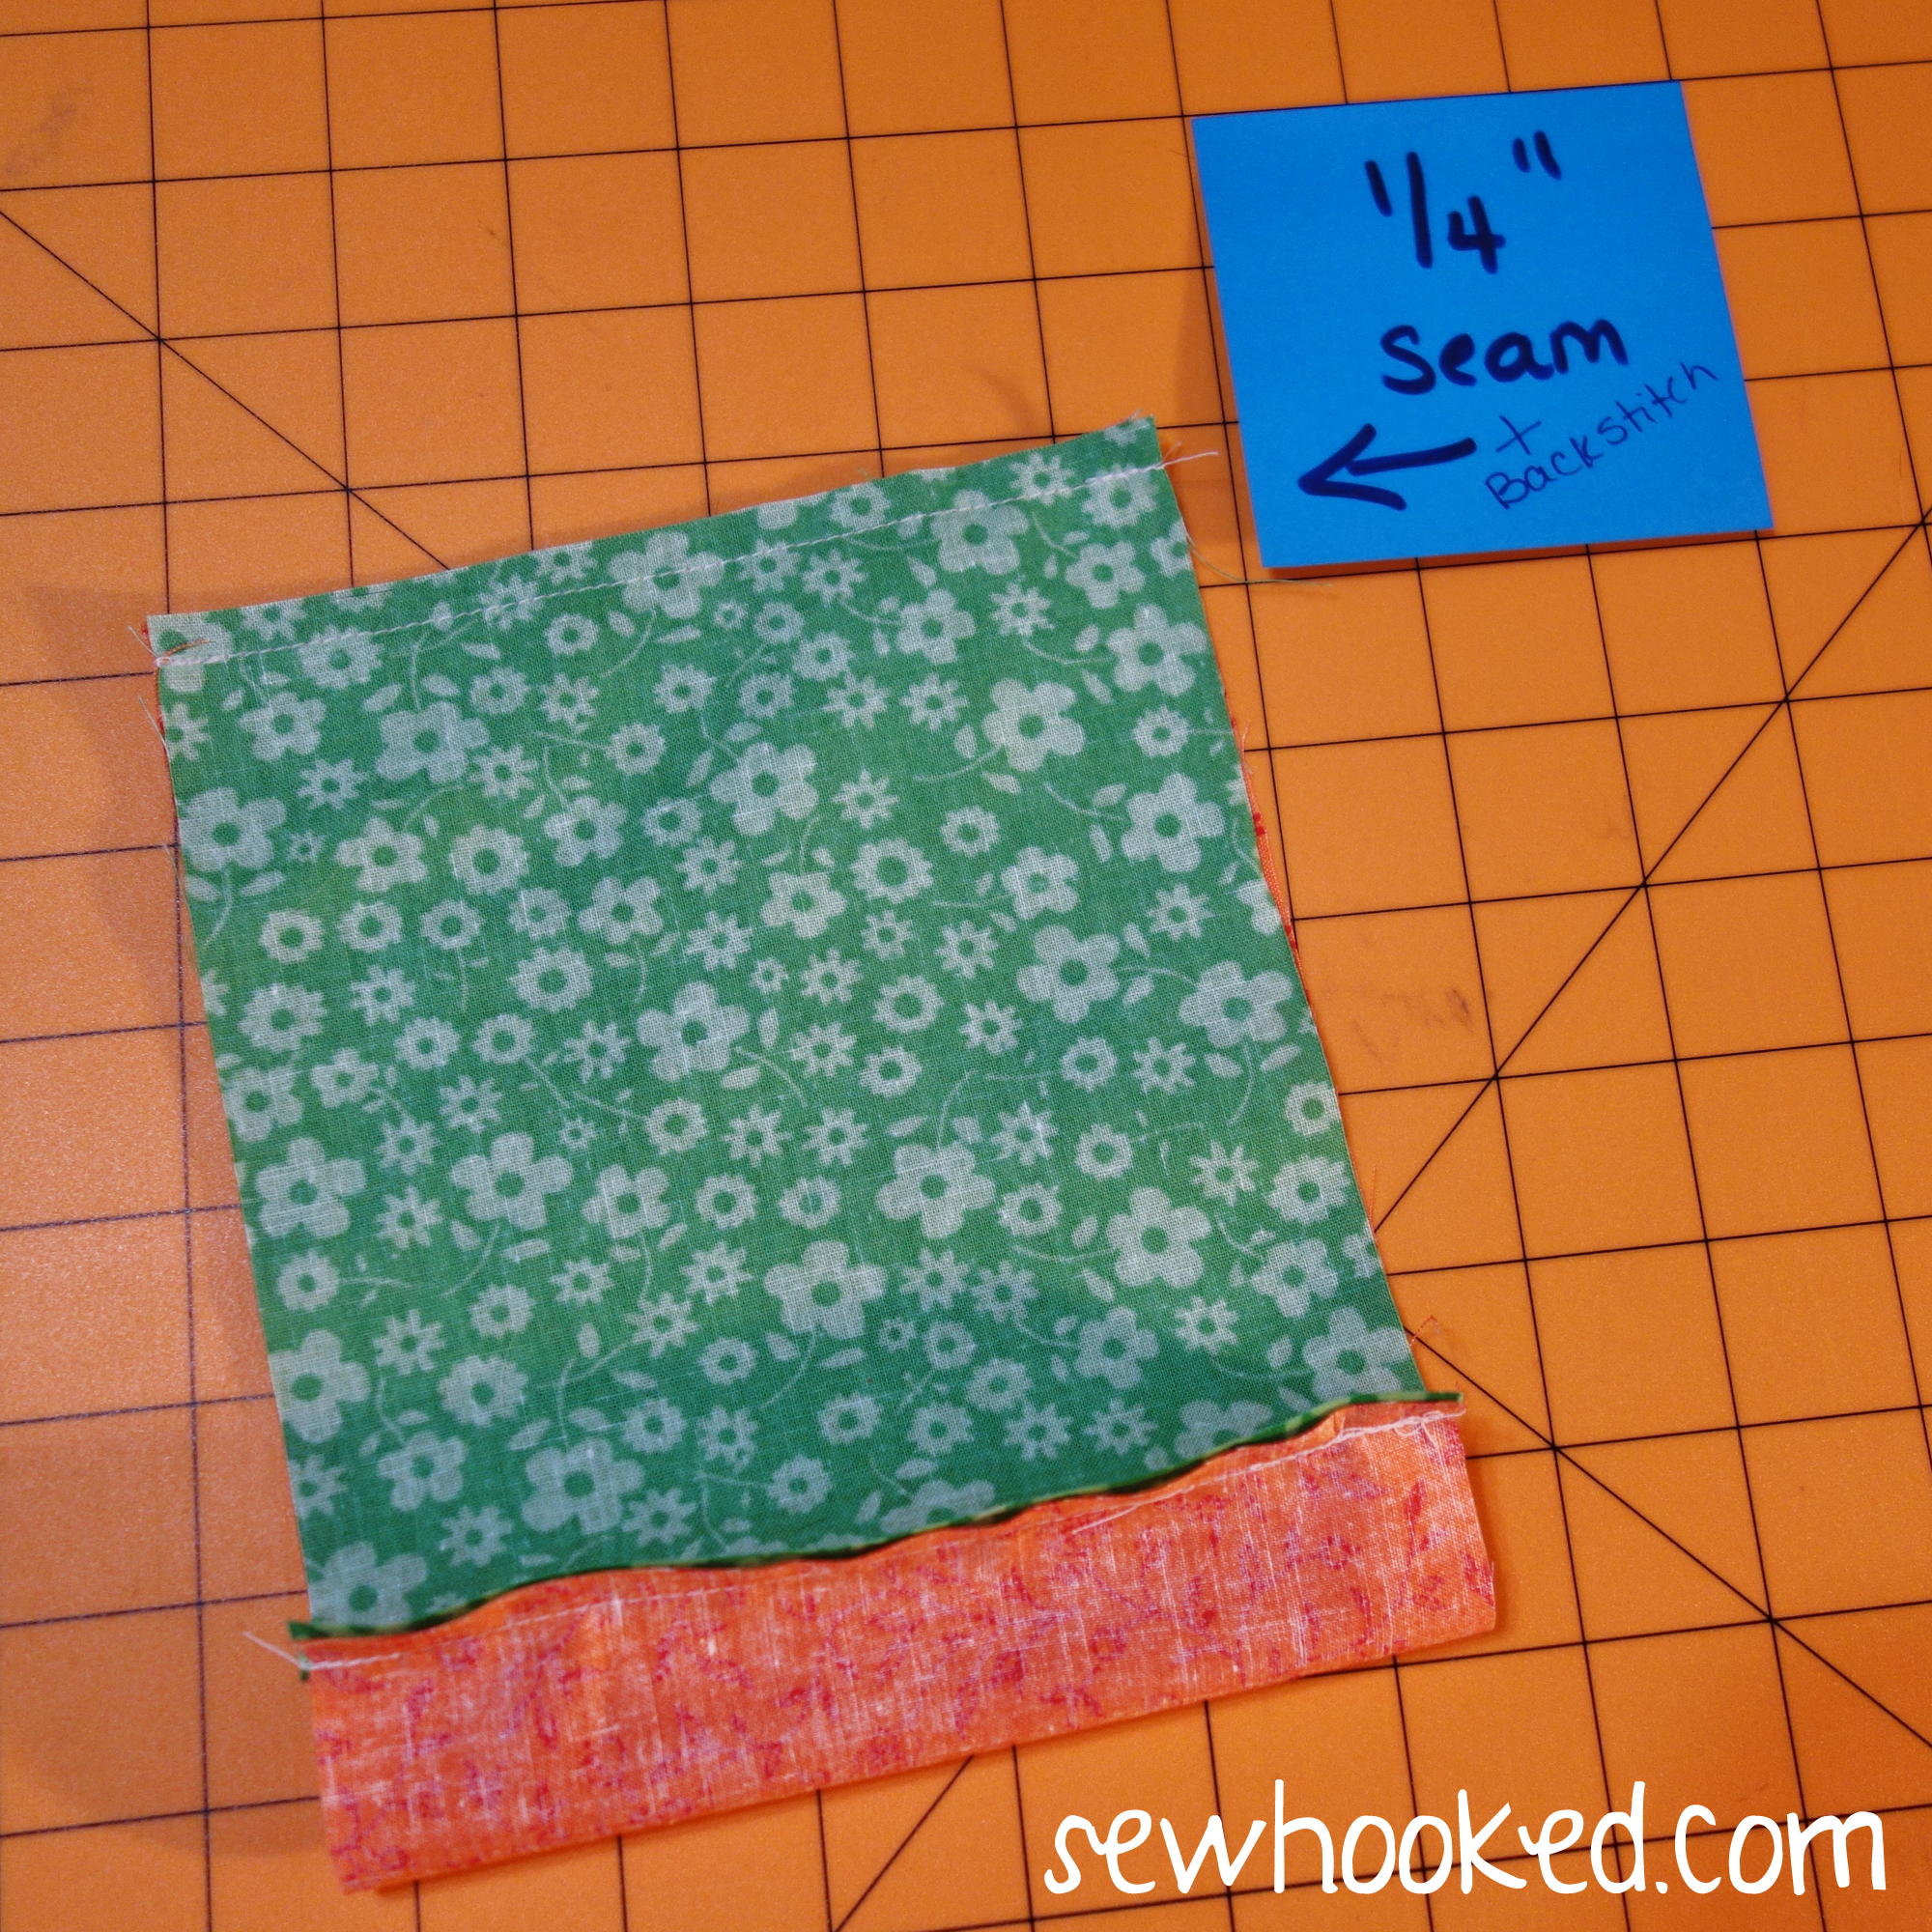
With right sides together, line one end of OUTSIDE to one end of LINING/TRIM on the side that measures 5 3/4″.
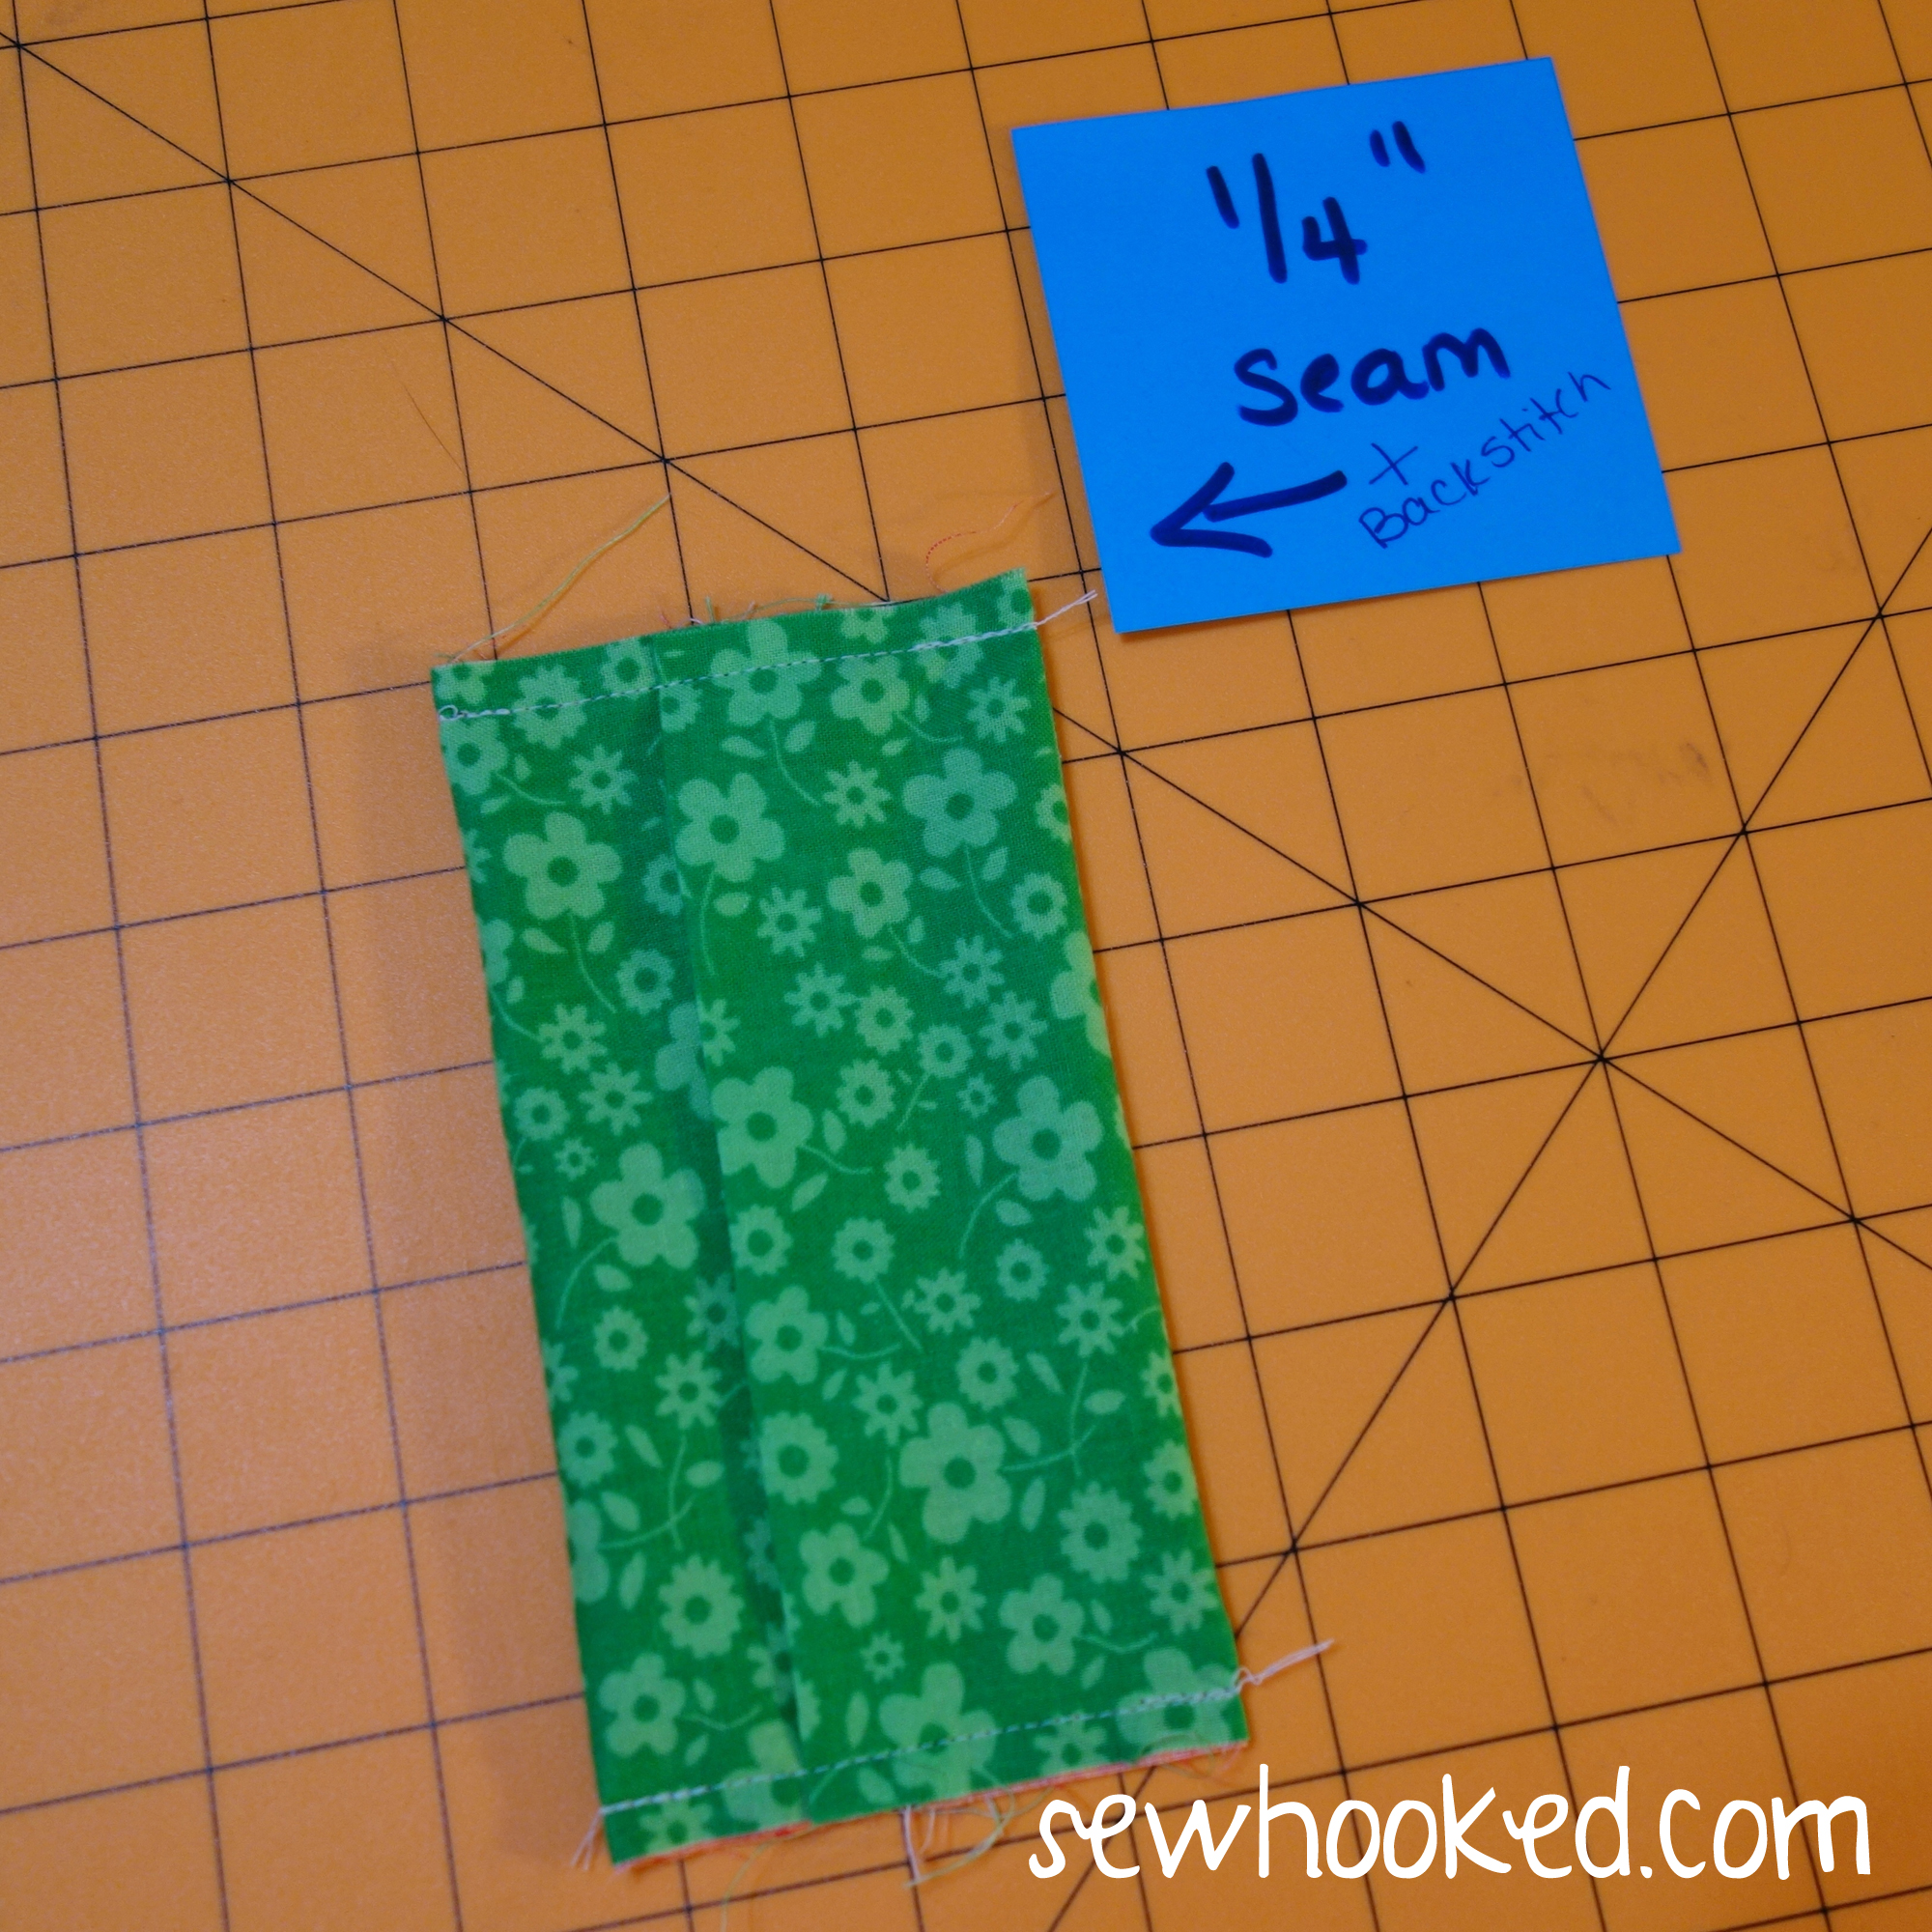
Stitch a 1/4″ seam with backstitching at both ends.
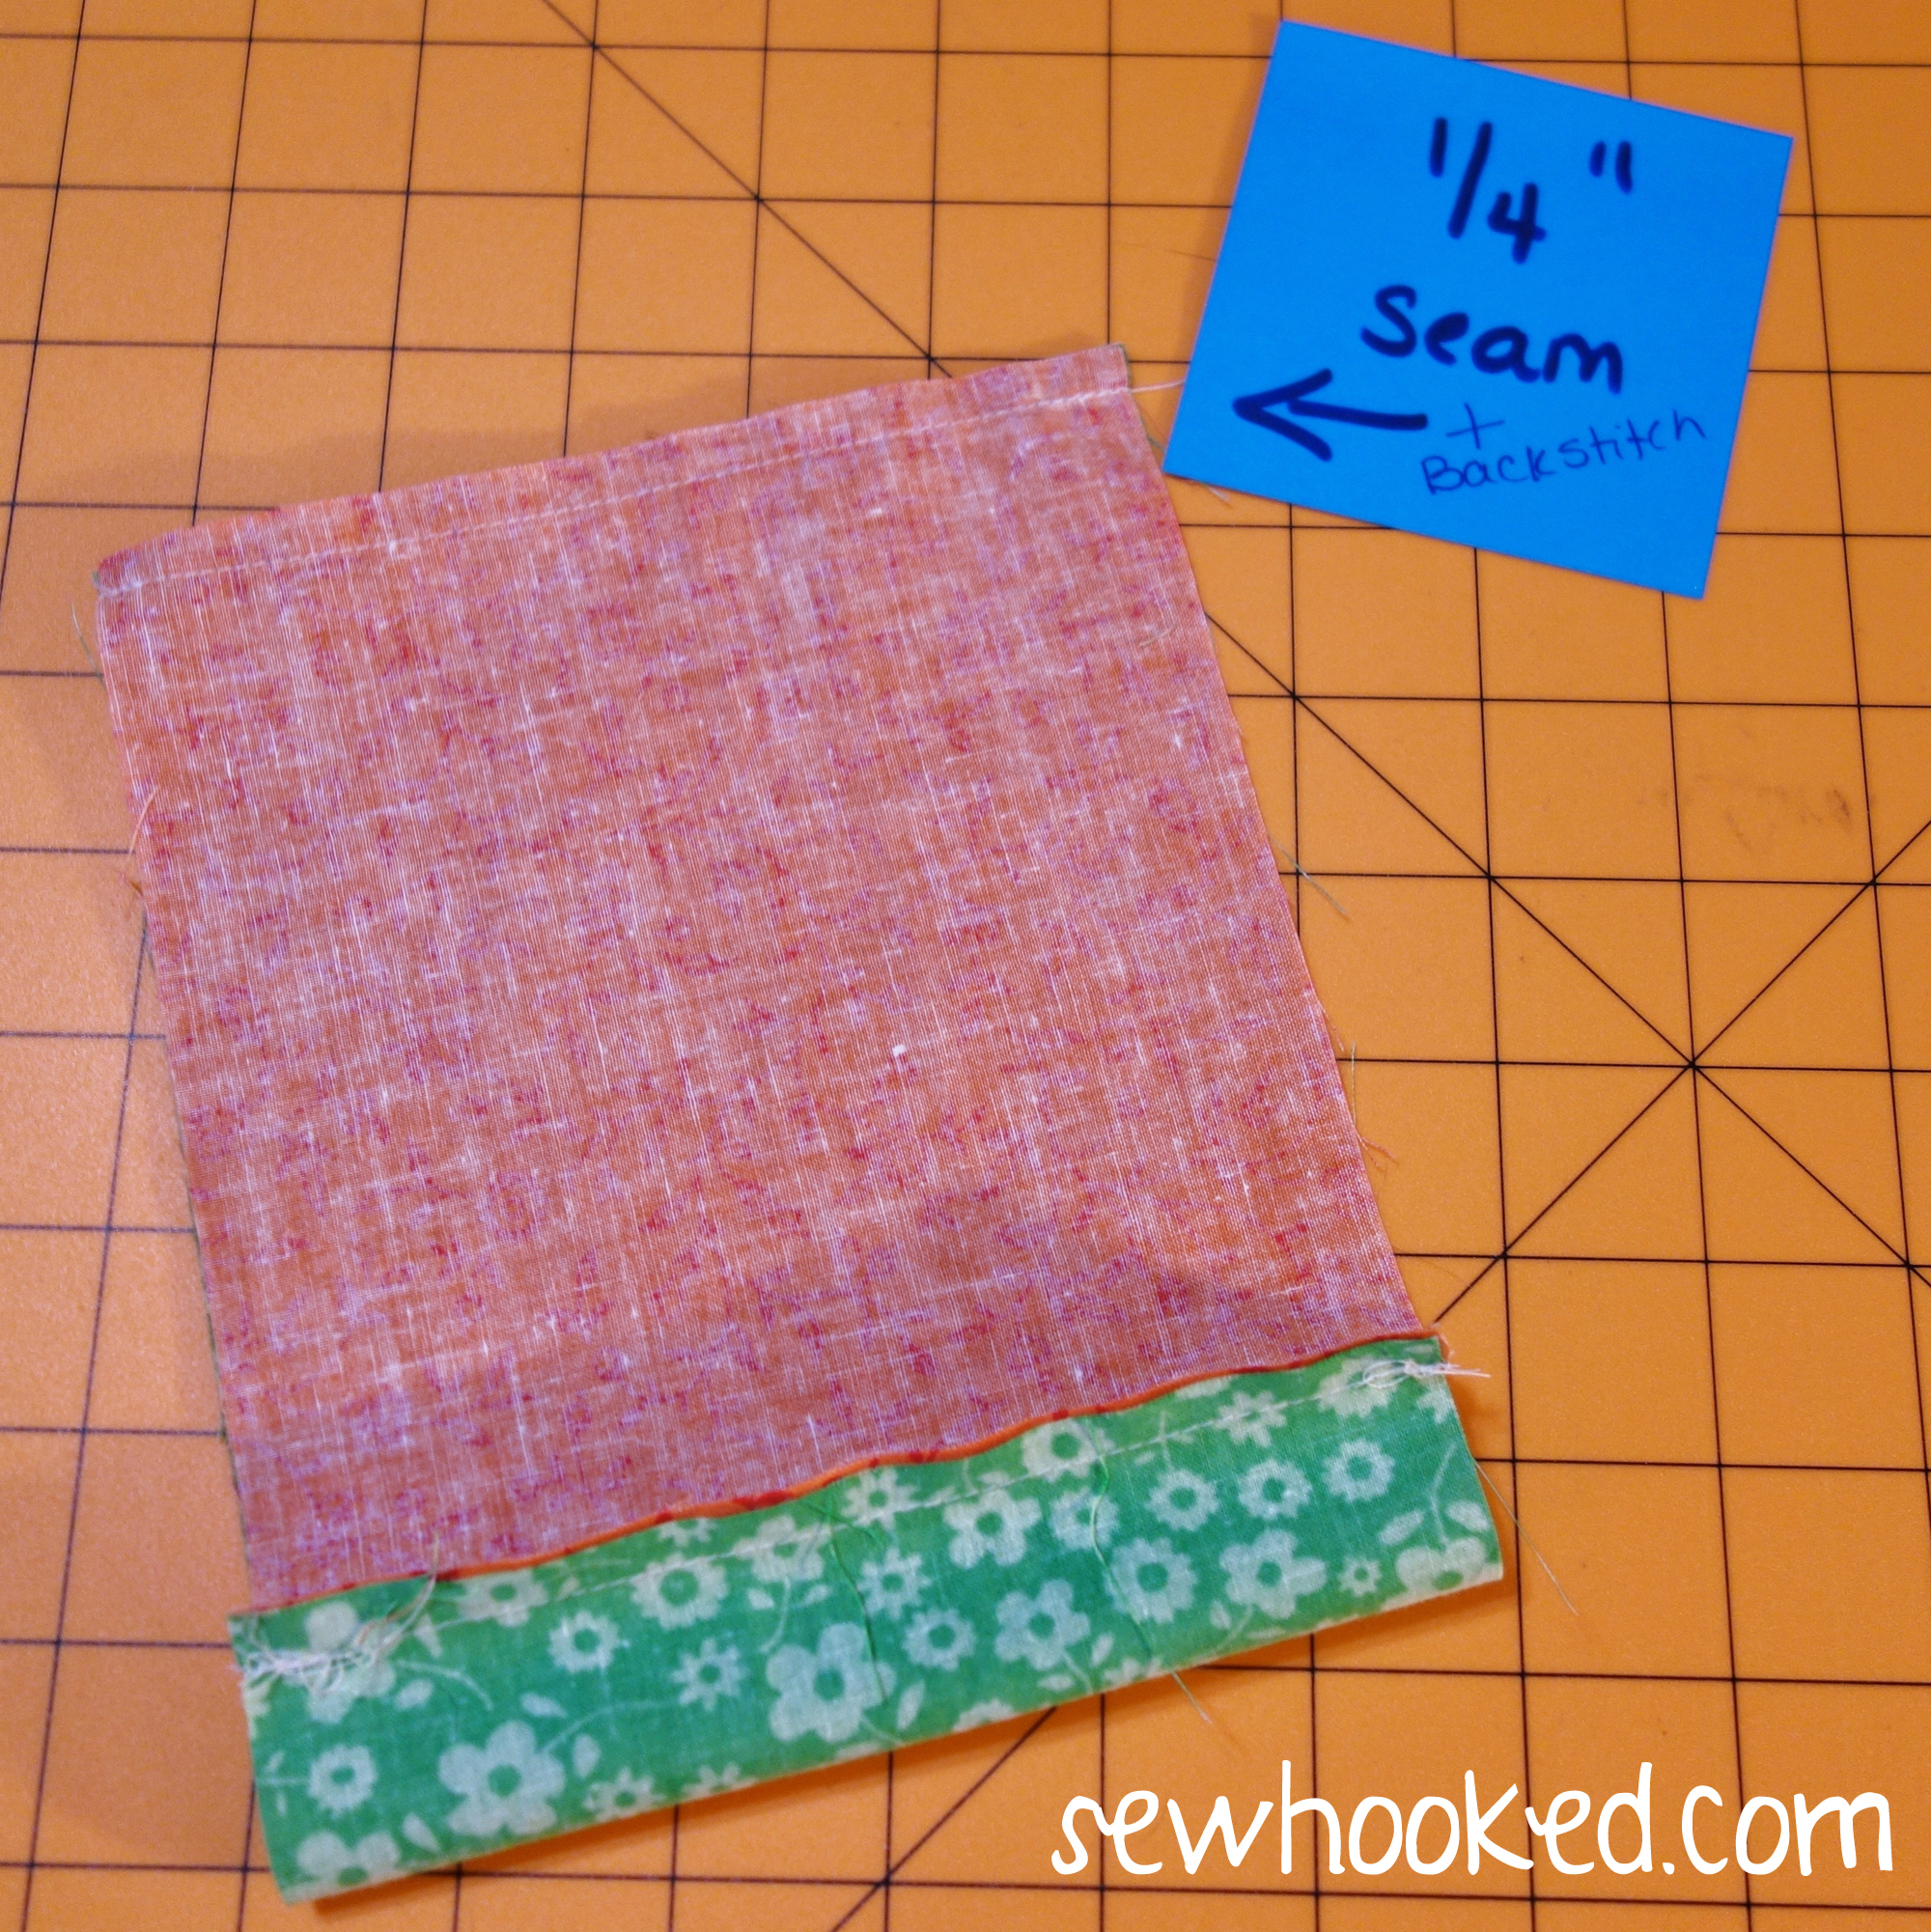
Line up opposite ends and repeat the 1/4″ seam with backstitching along the other 5 3/4″ side.
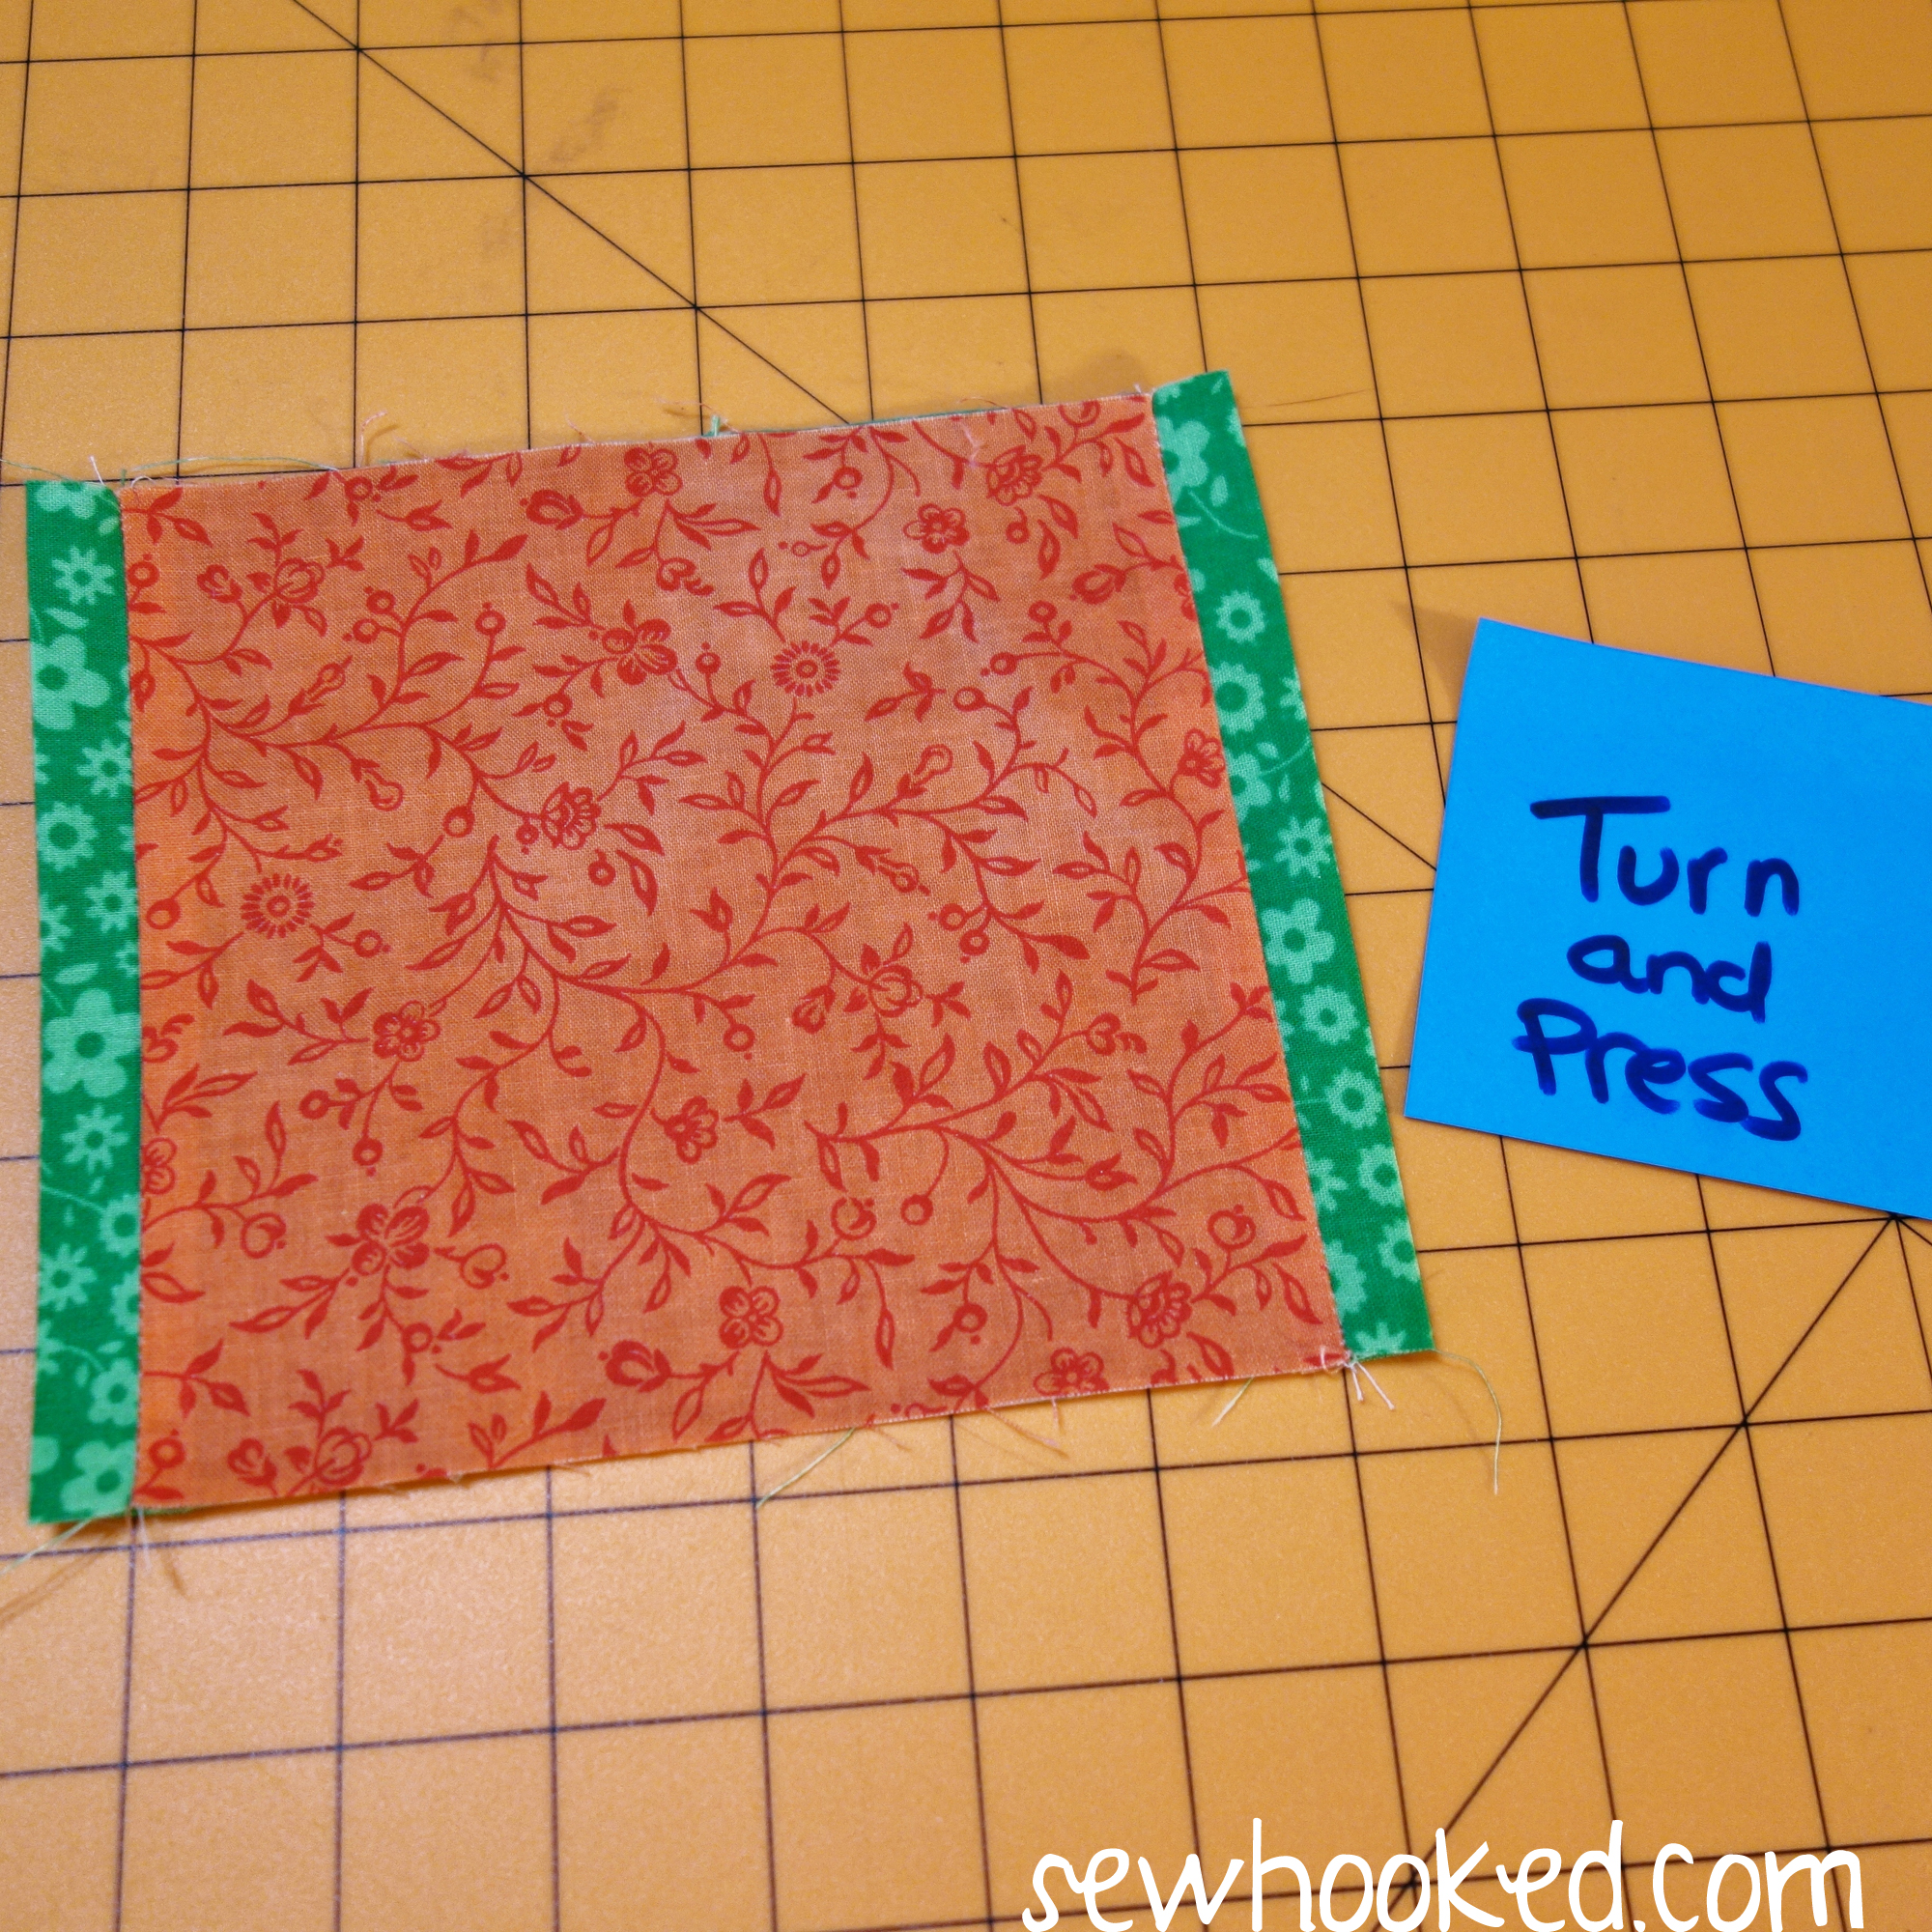
Turn so that wrong sides of the fabric are together. Adjust so that each end of TRIM is approximately the same size.
Press.
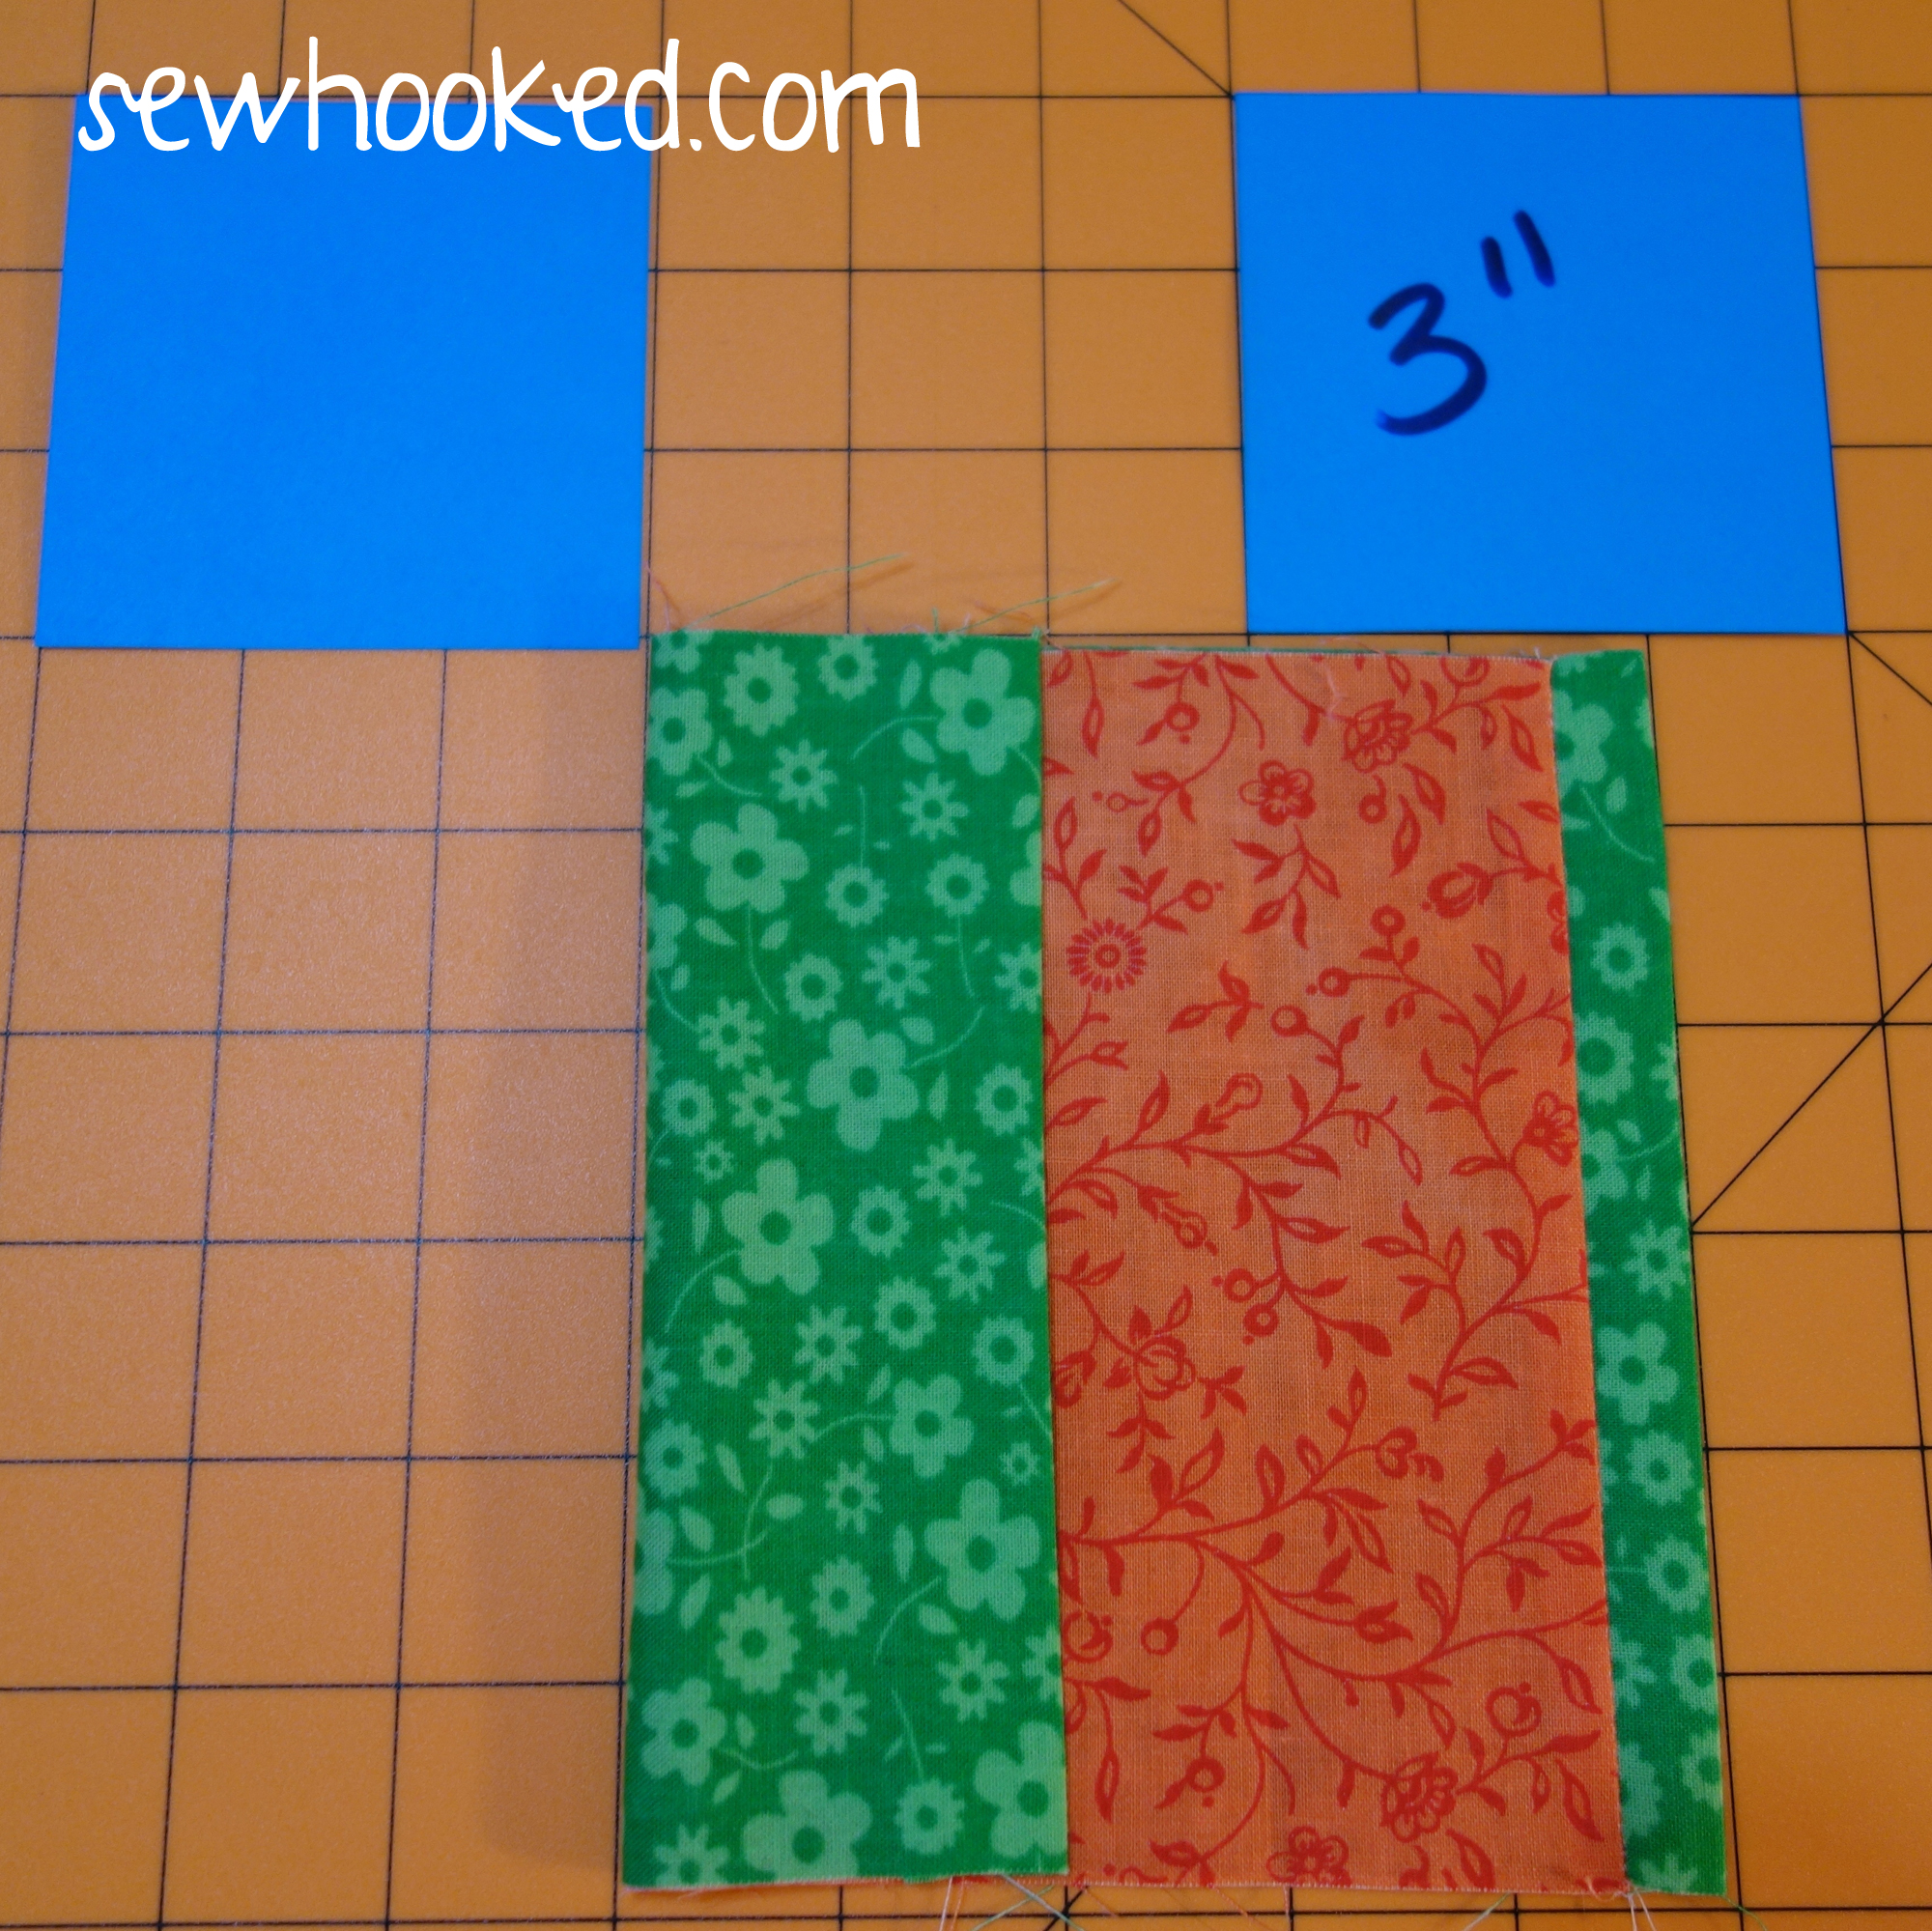
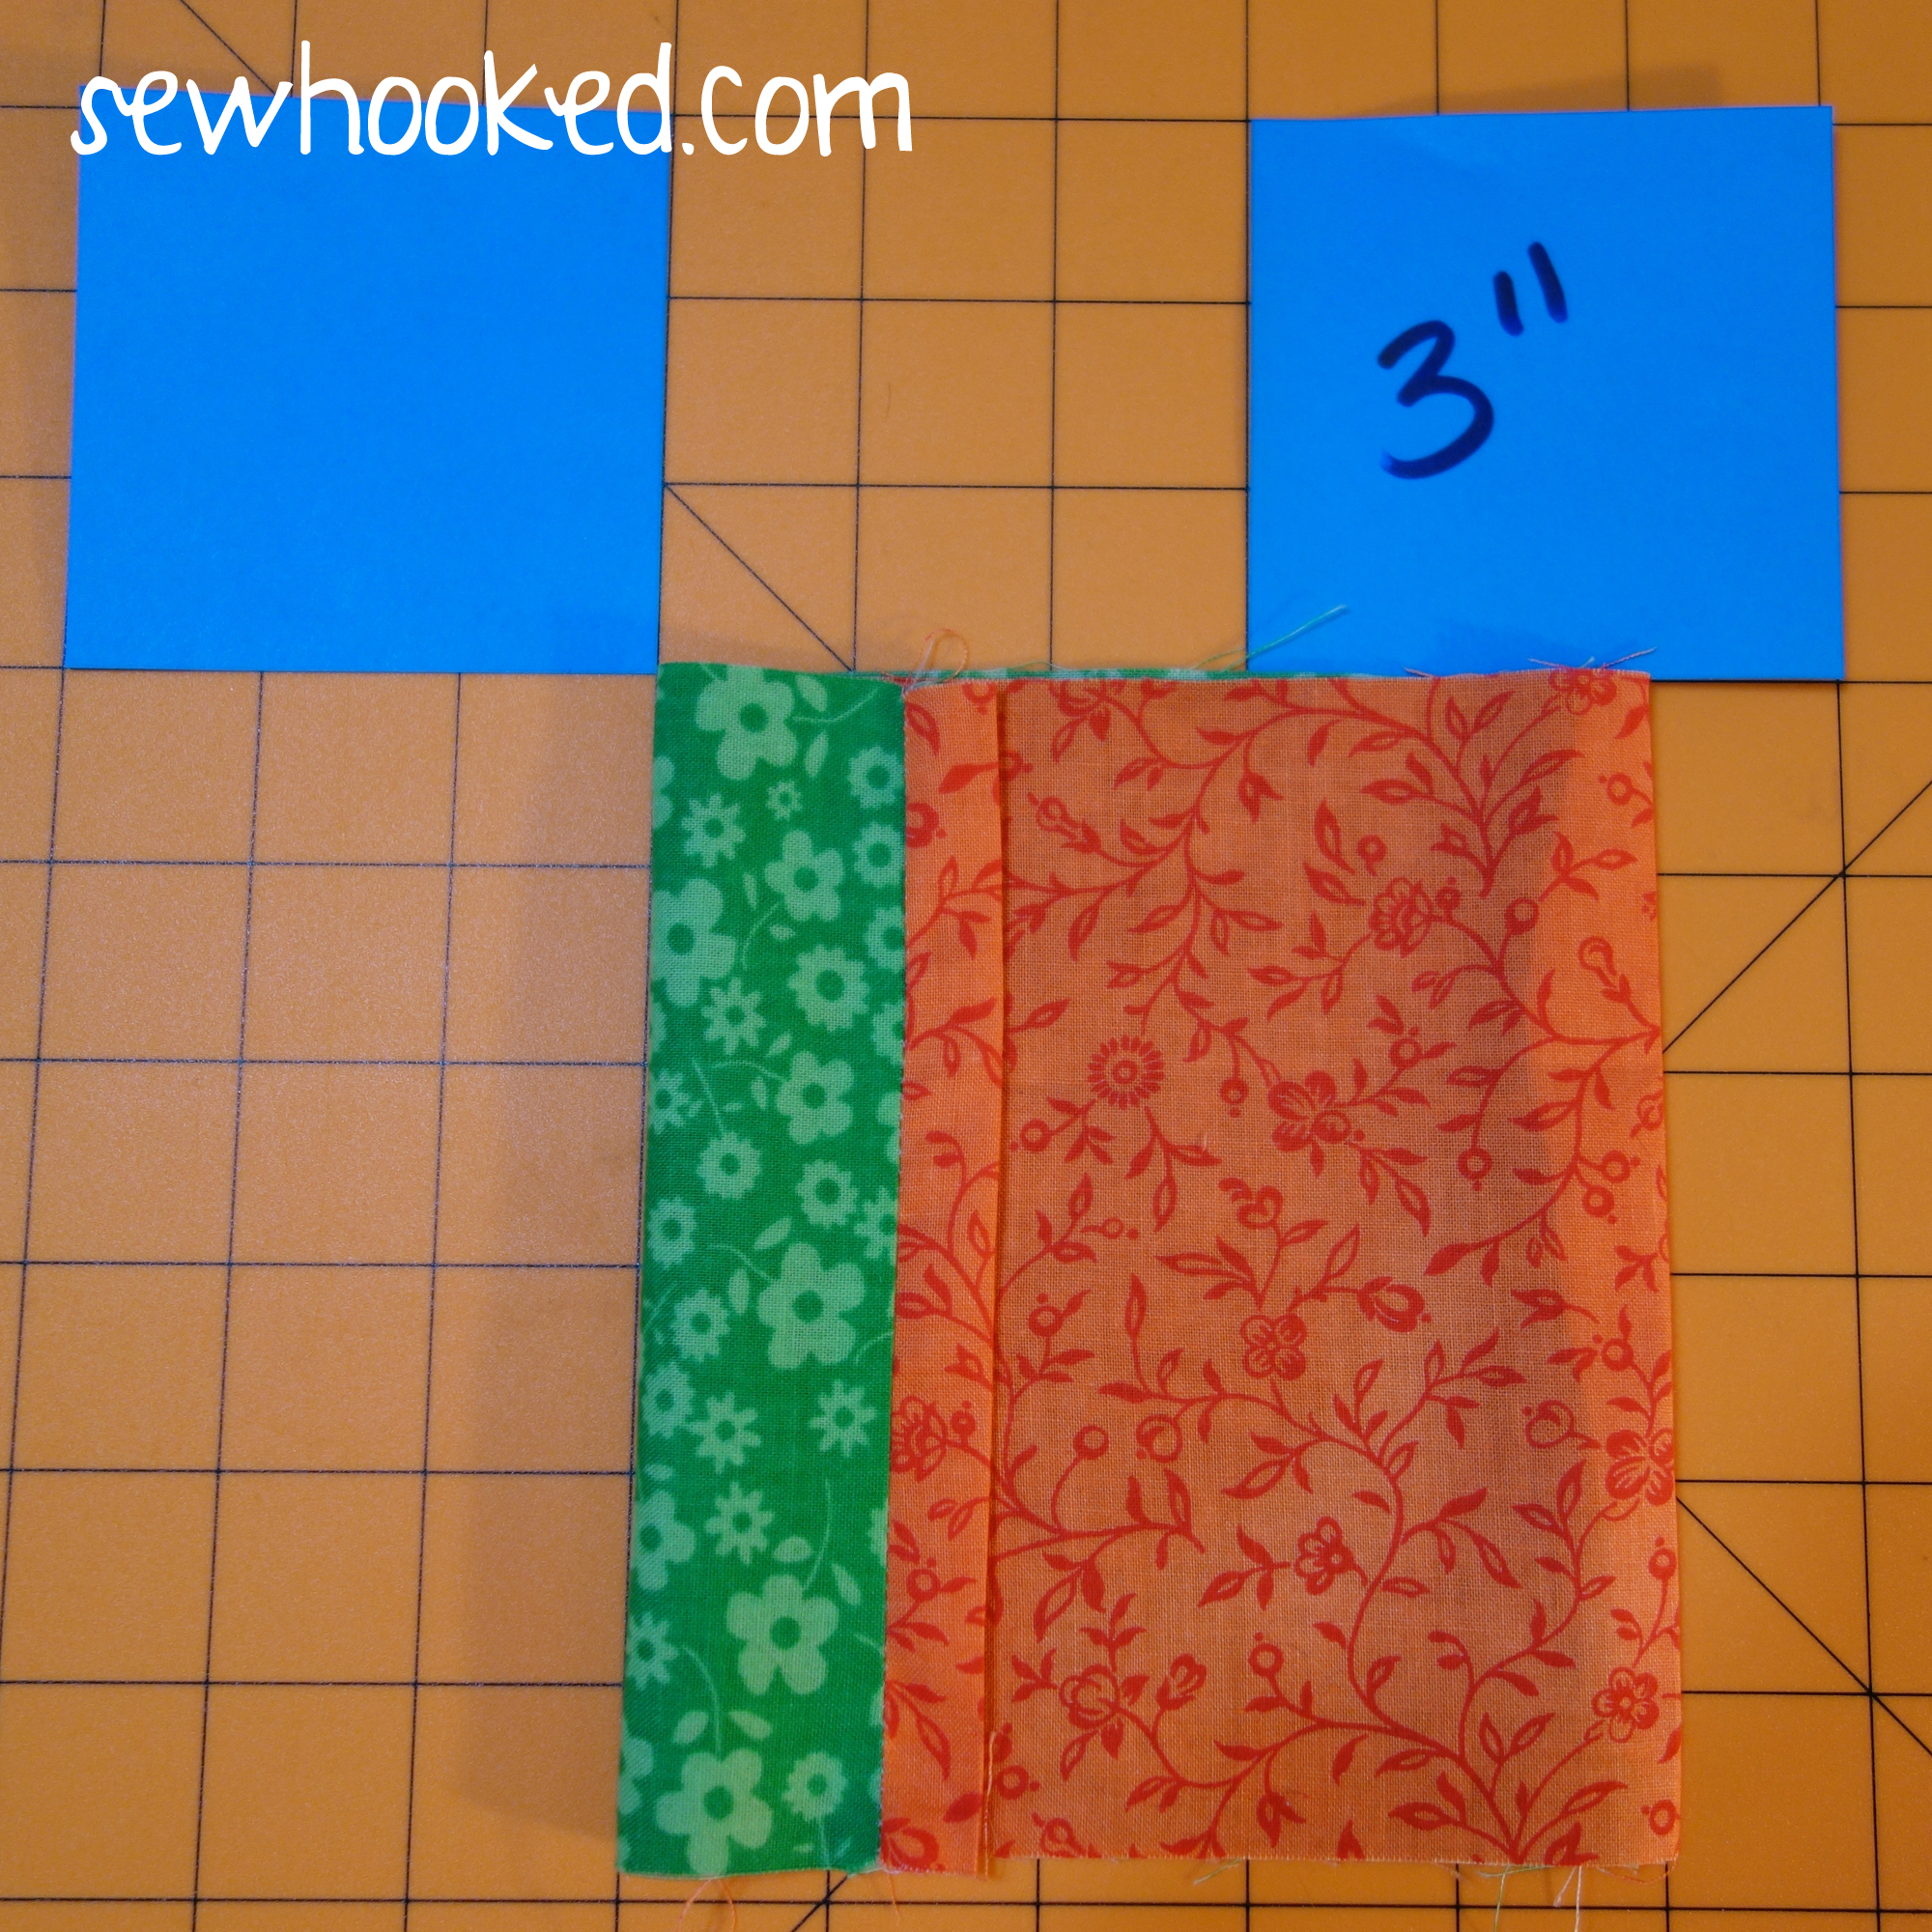
Using a ruler or rotary mat, fold right sides of the OUTSIDE together so that it is 3″ wide. If you’re using a rotary mat, you can align easily use the markings on your mat for this part. Edges should overlap in the approximate center.
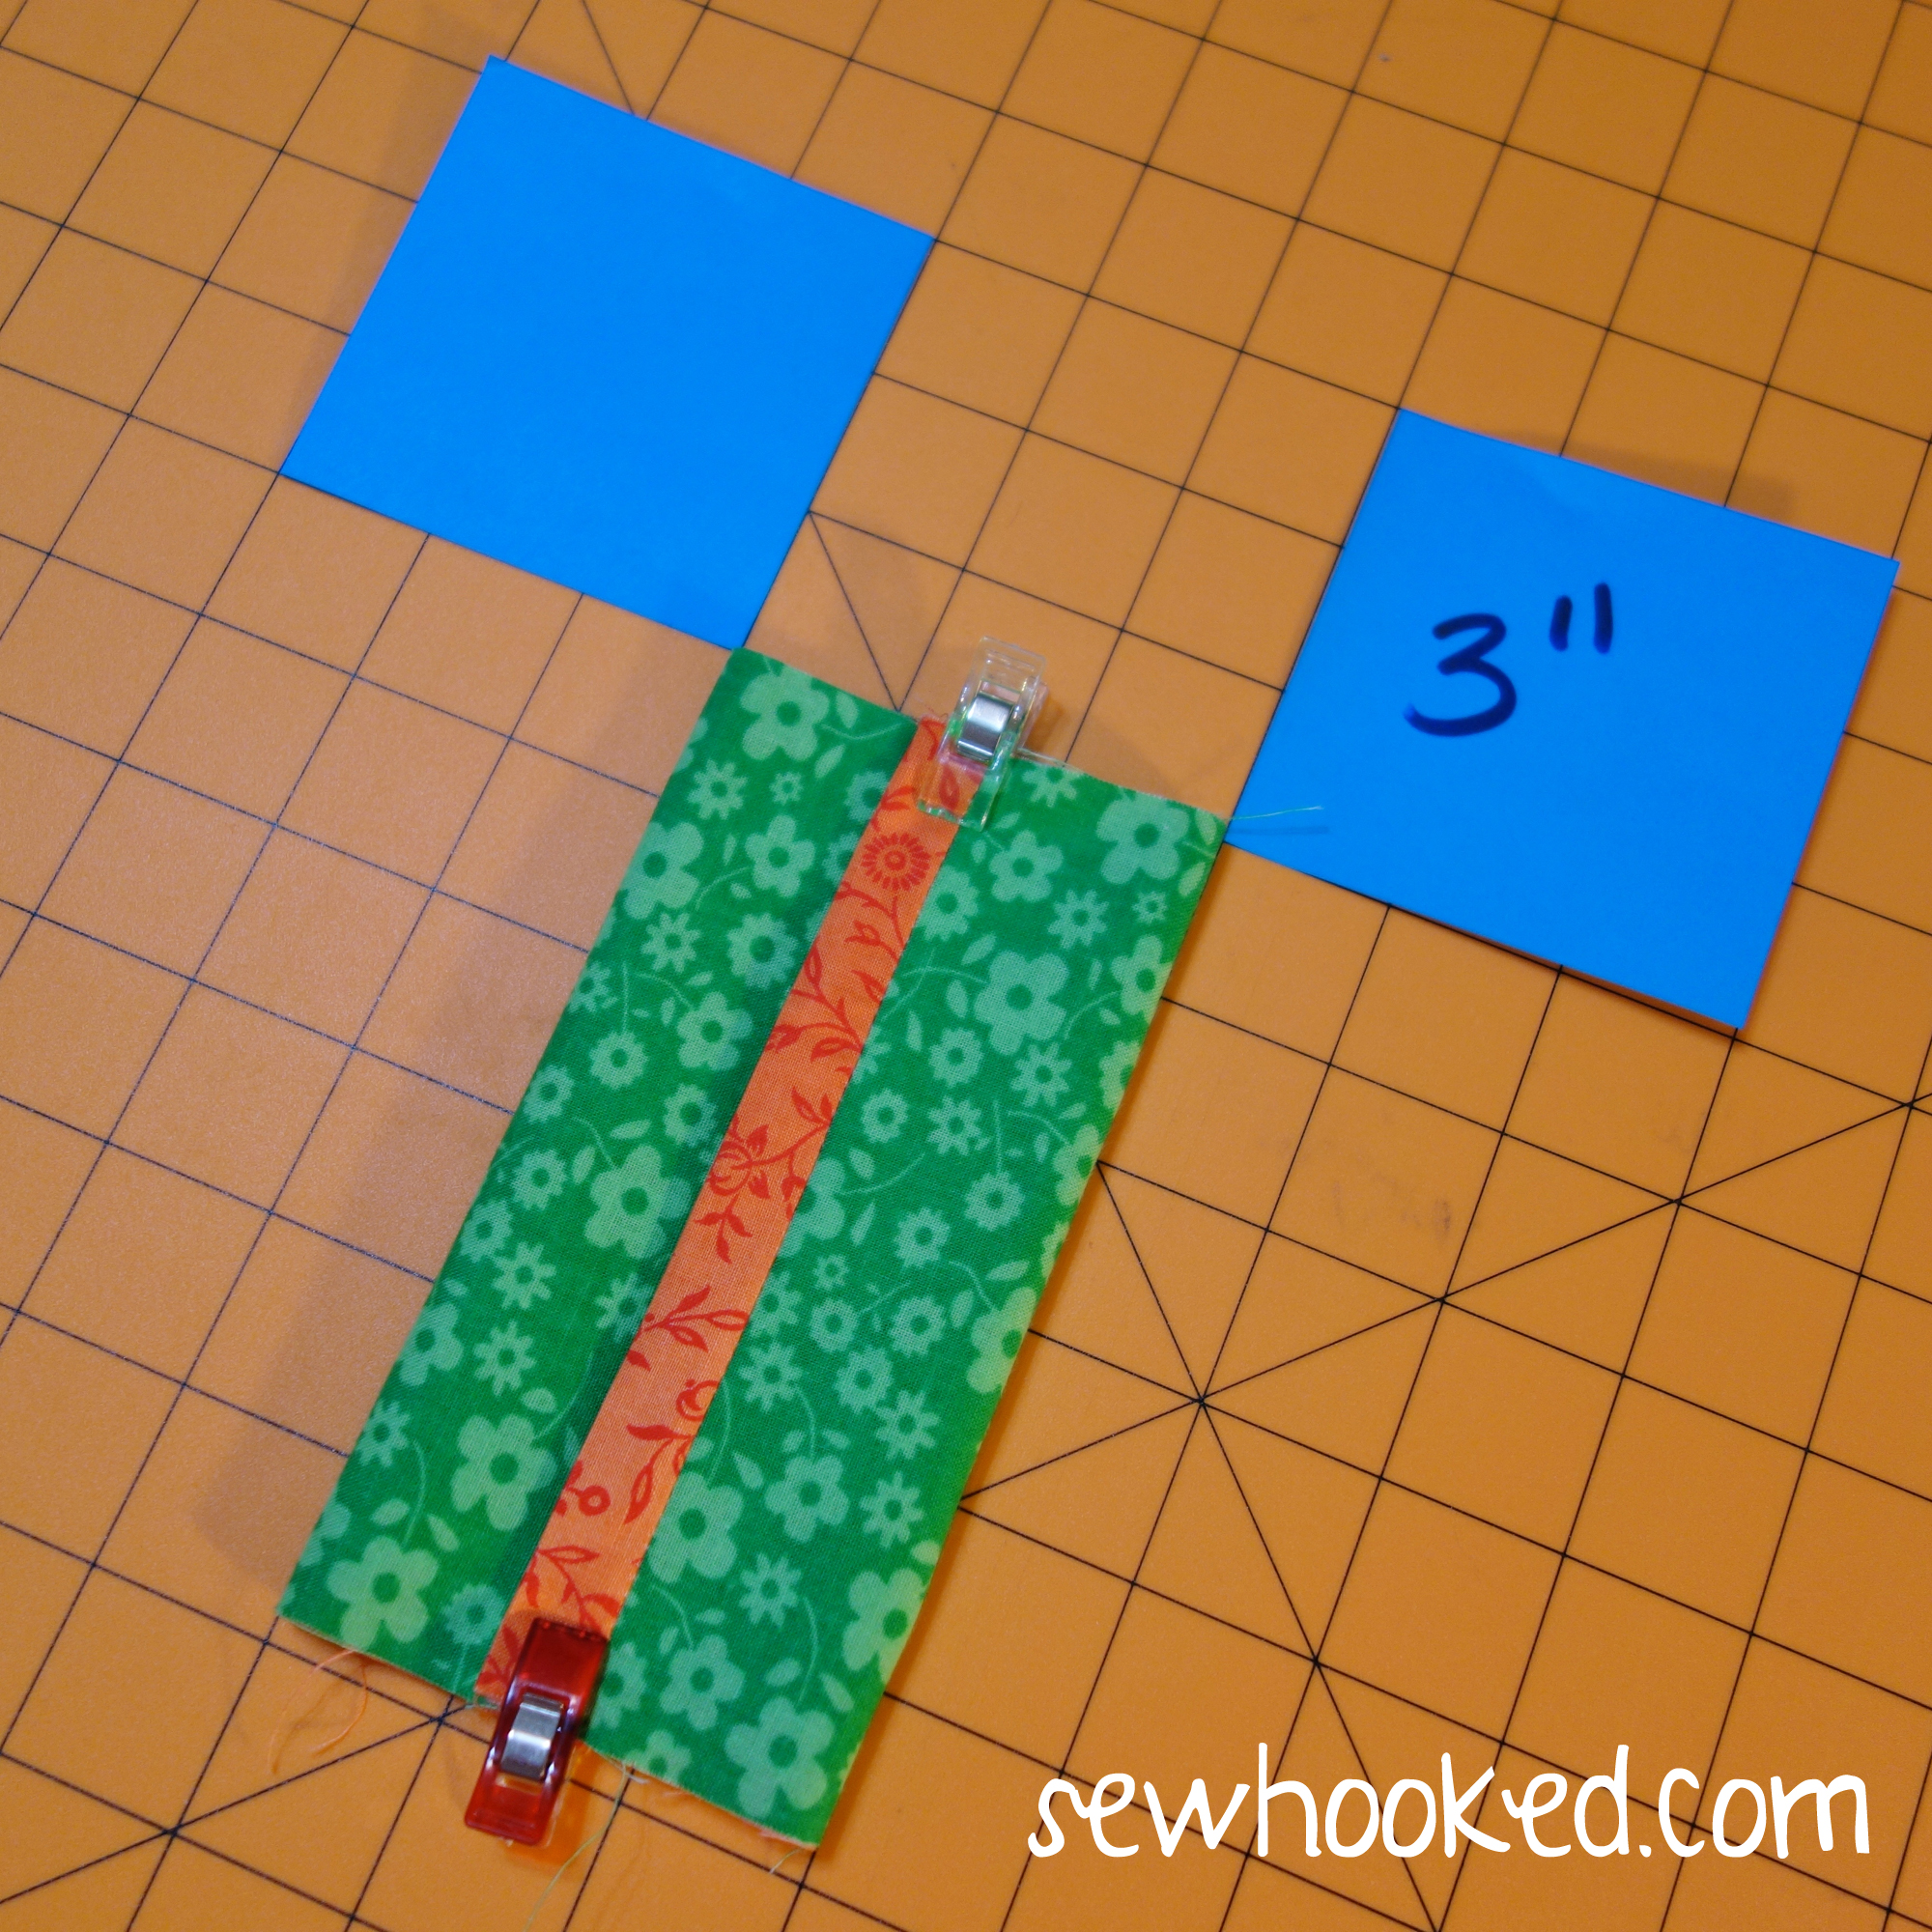
Once adjustments have been made to your liking and the width is 3″, pin or clip with sewing clips. Wonder Clips or Magic Clips work great. (I have both.)
Because this version has TRIM, you will not see the overturned edge during this step.
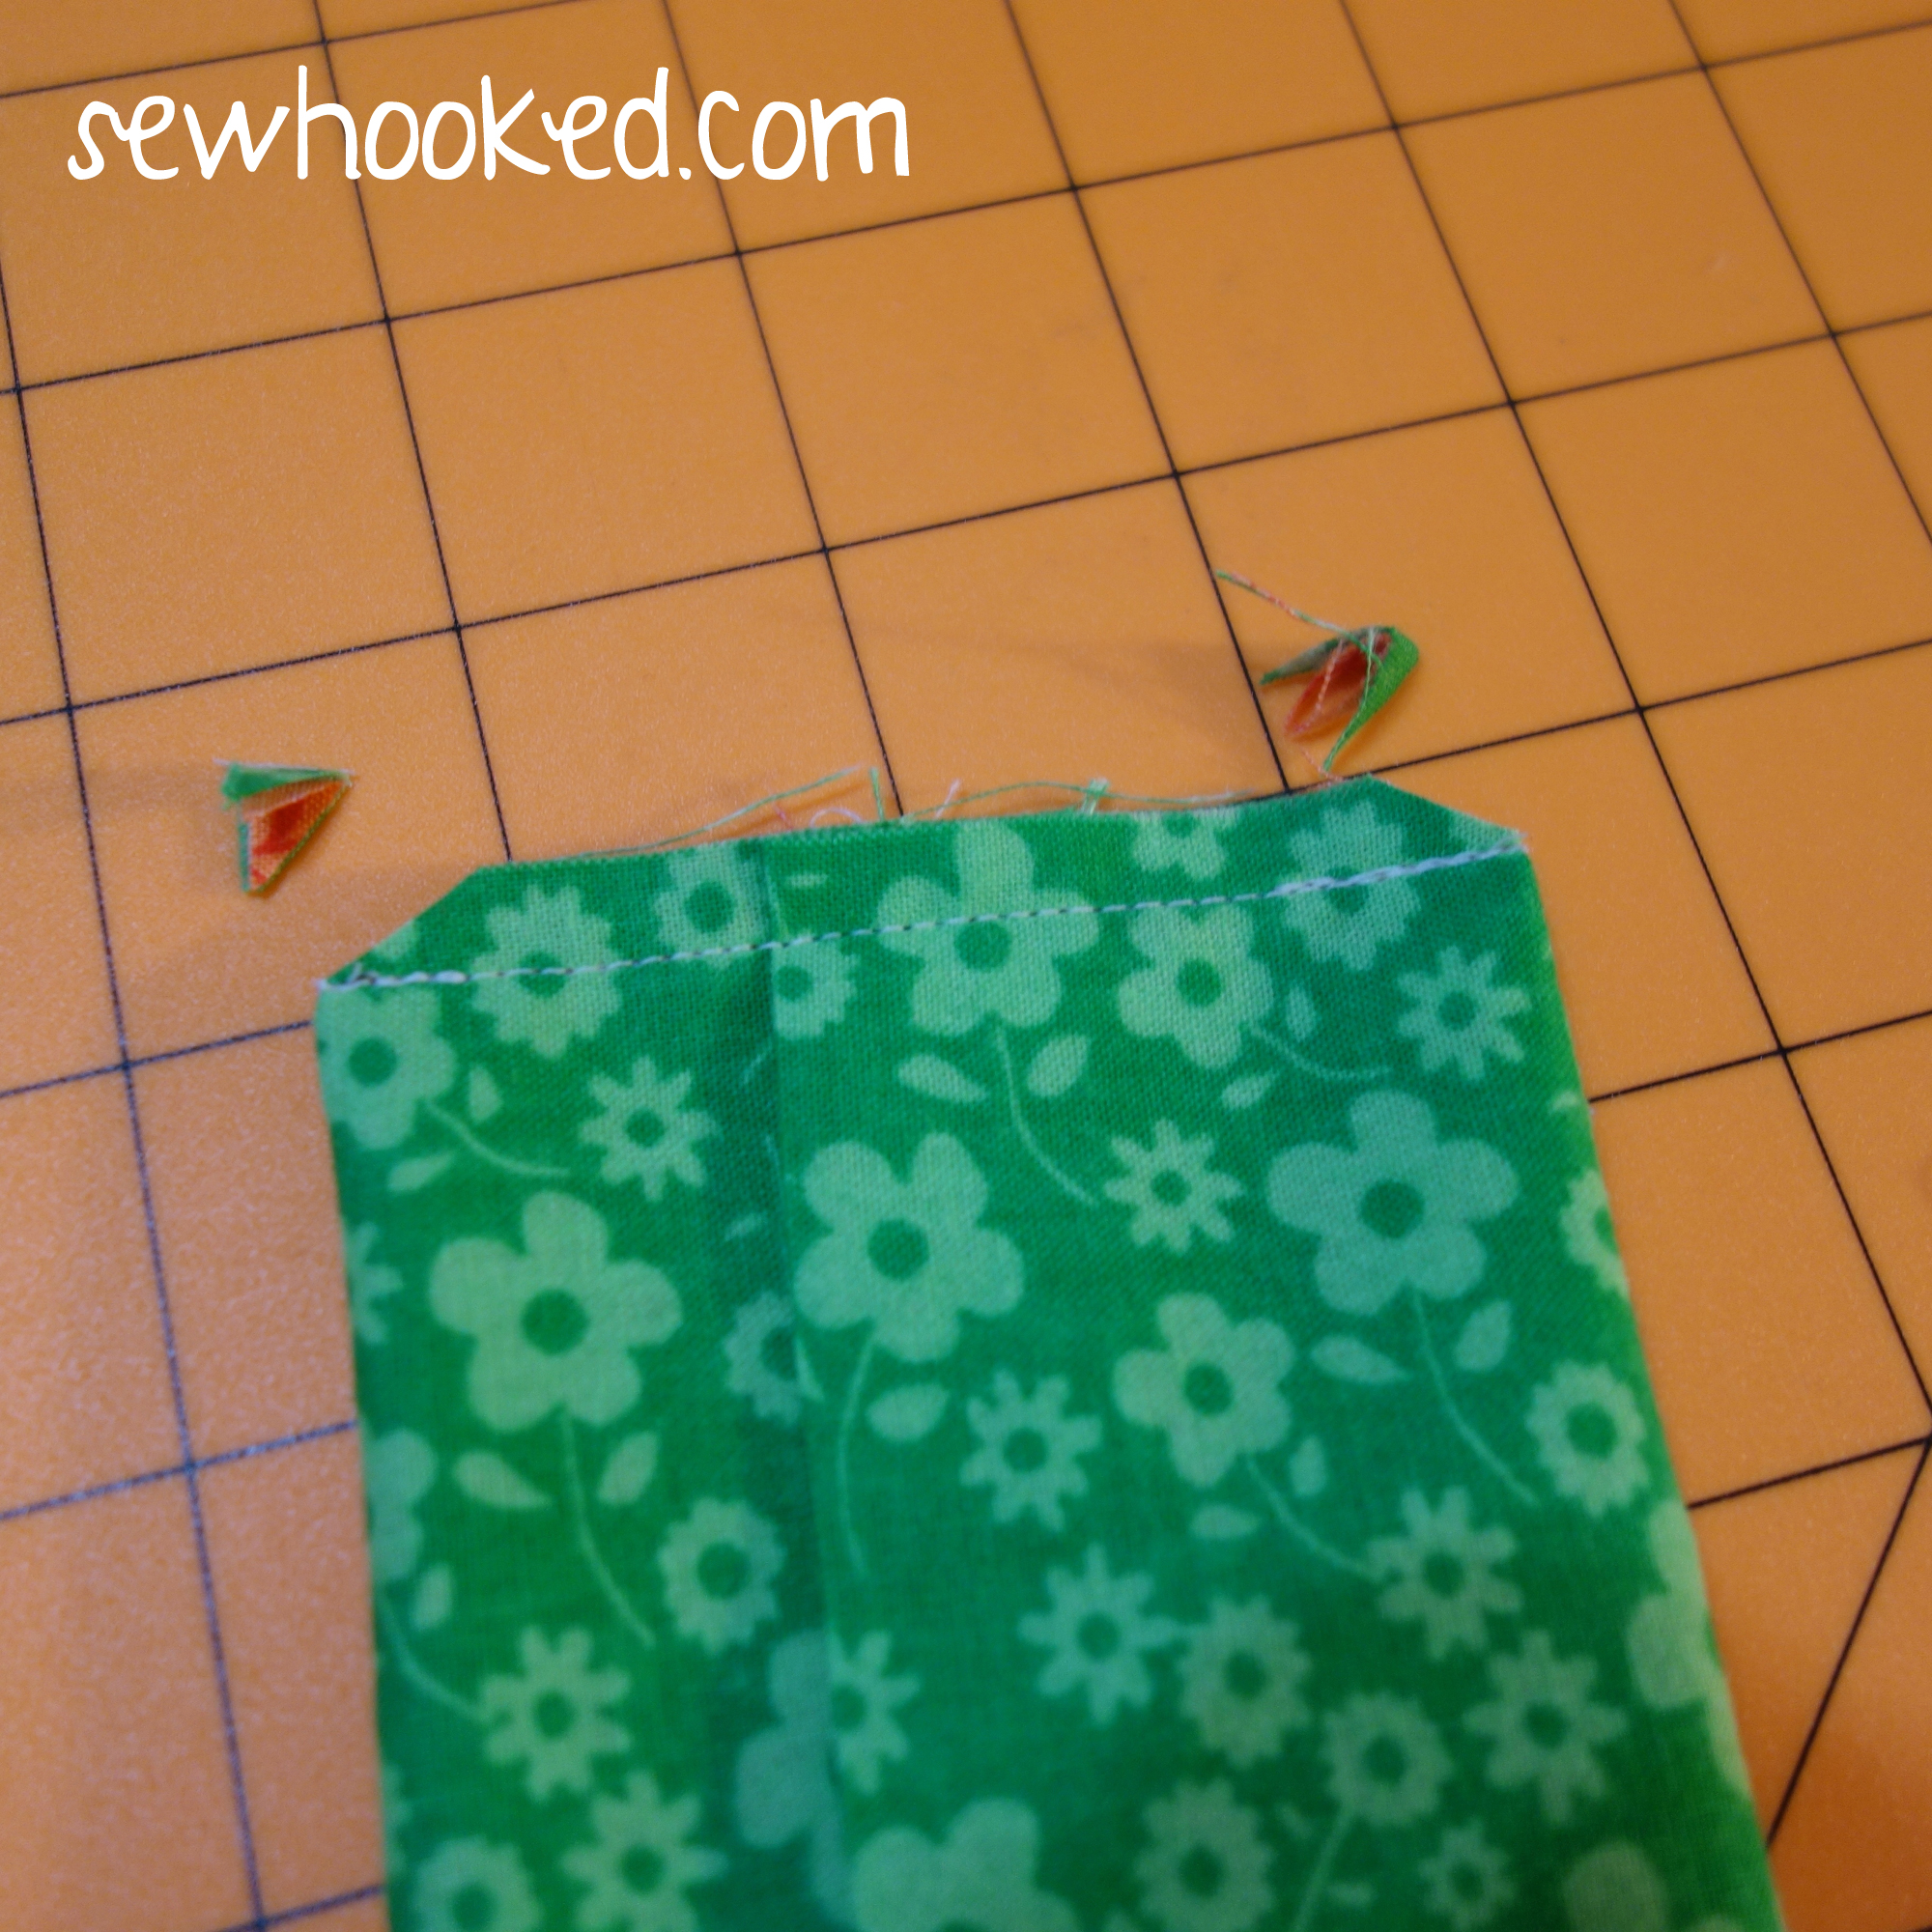
Sew each end with a 1/4″ seam allowance, backstitching at the beginning and end.
Clip corners & turn.
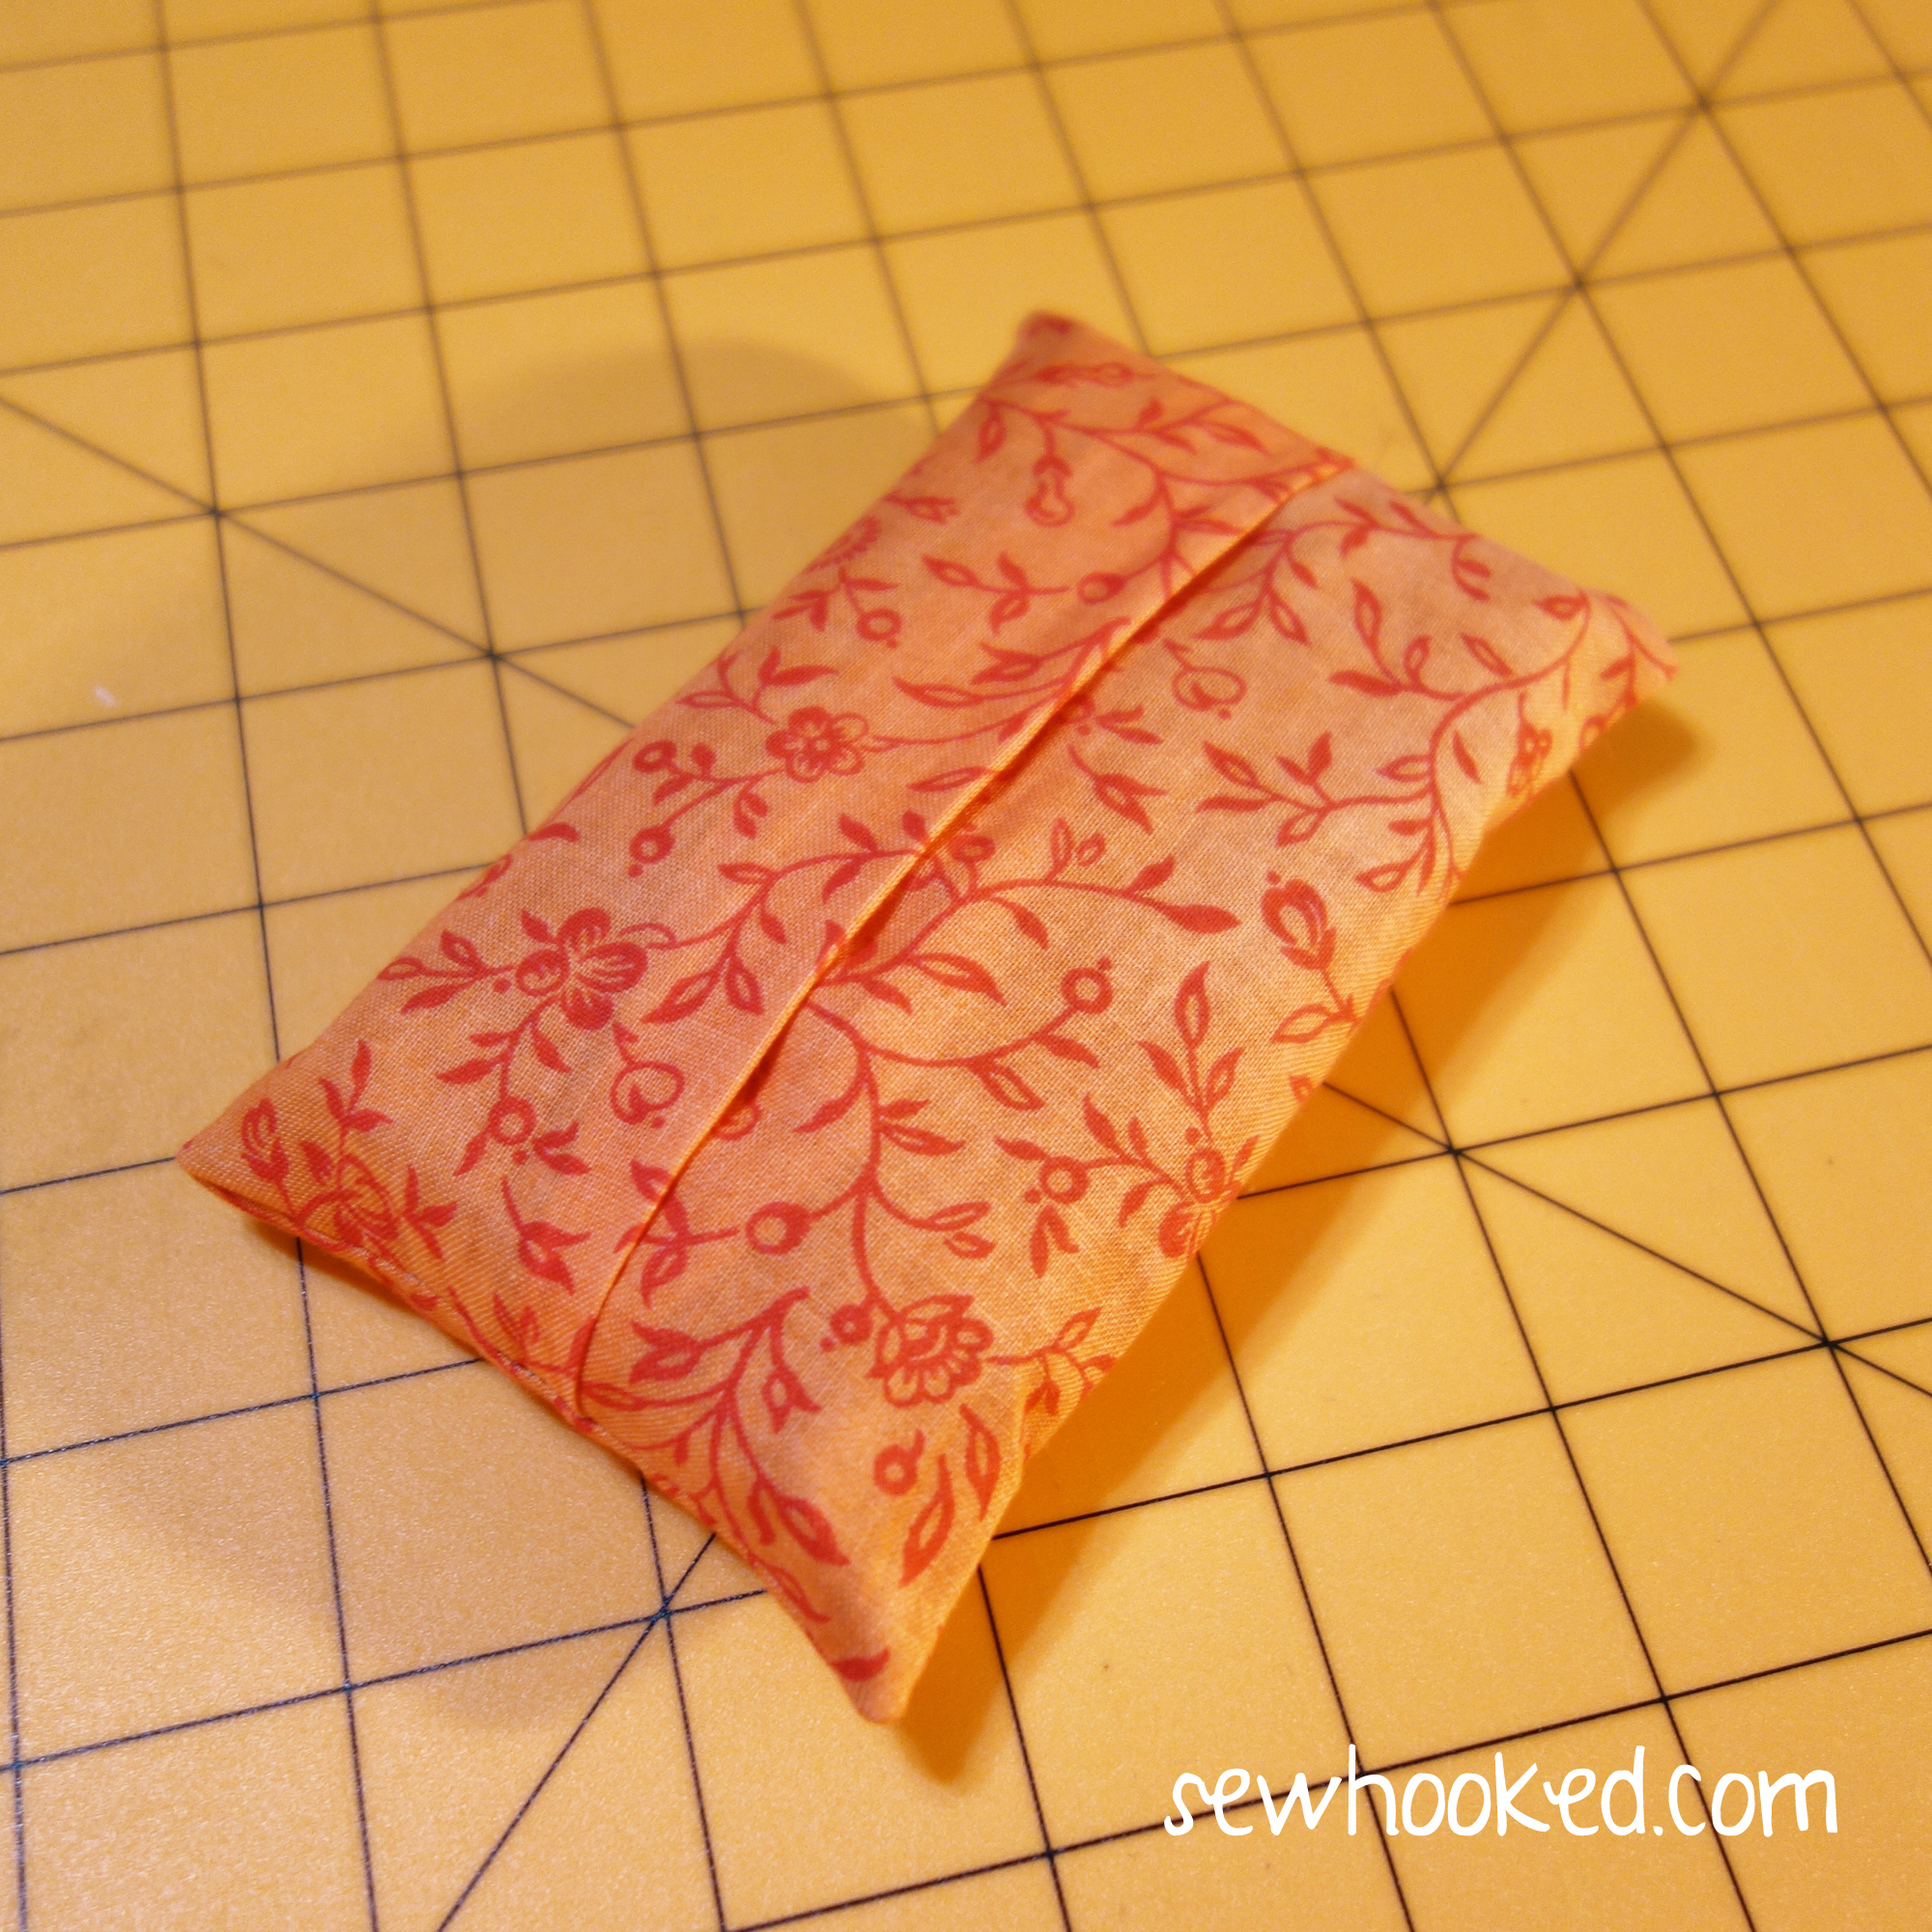
Done!
See how the Lining/Trim makes a lovely accent? You can have fun playing with stripes, dots or other fun fabrics.
Now, let’s make one that isn’t trimmed. We’ll use the same technique, but the fabric sizes will be reversed.
You’ll need fabric in two colors. Just as before, the orange fabric is the OUTSIDE.
For UN-TRIMMED Cover:
Outside – 5 3/4″ x 8 1/2″
Lining – 5 3/4″ x 6 1/2″
With right sides together, line one end of LINING to one end of OUTSIDE on the side that measures 5 3/4″.
Stitch a 1/4″ seam with backstitching at both ends.
Line up opposite ends and repeat the 1/4″ seam with backstitching along the other 5 3/4″ side.
Turn so that wrong sides of the fabric are together. Adjust so that each end is approximately the same width.
Press.
Using a ruler or rotary mat, fold right sides of the OUTSIDE together so that it is 3″ wide. If you’re using a rotary mat, you can align easily use the markings on your mat for this part. Edges should overlap in the approximate center
Once adjustments have been made to your liking and the width is 3″, pin or clip with sewing clips.
Because this version doesn’t have TRIM, you’ll see the overturned edge during this step.
Sew each end with a 1/4″ seam allowance, backstitching at the beginning and end.
Clip Corners & Turn.
Done!
Stop by tomorrow for Free Pattern Friday for my weekly featured FREE quilt pattern!
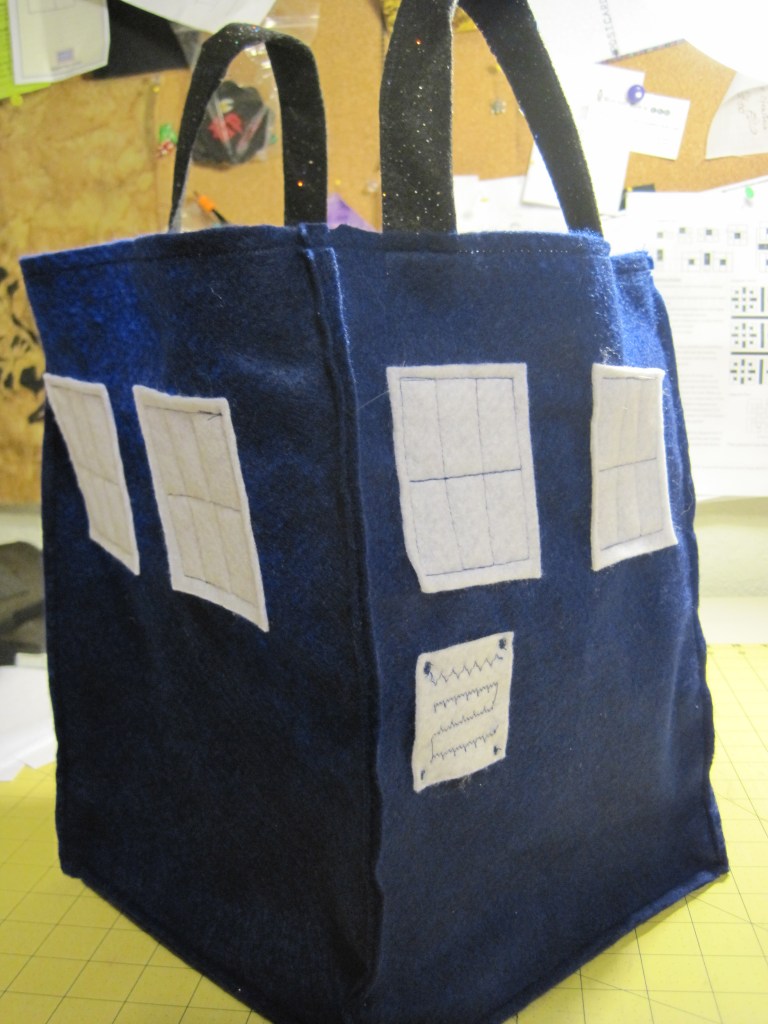
Being the Doctor Who obsessed family that we have become, I suppose it’s no surprise that one of my kids is going as The Doctor for Halloween. My eldest has their Ten costume all ready to go, courtesy of a day of thrifting. Because I can’t not be involved in costume making, I asked if there was anything I could do.
“Mum, can you can you make a TARDIS bag for my treats?”
You better believe I can!
Despite it’s awesomeness, the TARDIS Treat Bag is super simple.
You need:
9″ x 12″ acrylic felt sheets – 5 dark blue, 1 white and 1 glitter black
scissors
thread (I used navy blue)
ruler (rotary, if you’ve got one)
rotary cutter (optional)
sewing machine (optional)
You can definitely do this project without a rotary cutter and ruler and even without a sewing machine, so those items are optional. If you do hand stitch, make sure you make tight, even stitches and use heavy-duty knots so you don’t lose your candy!
Cutting Instructions:
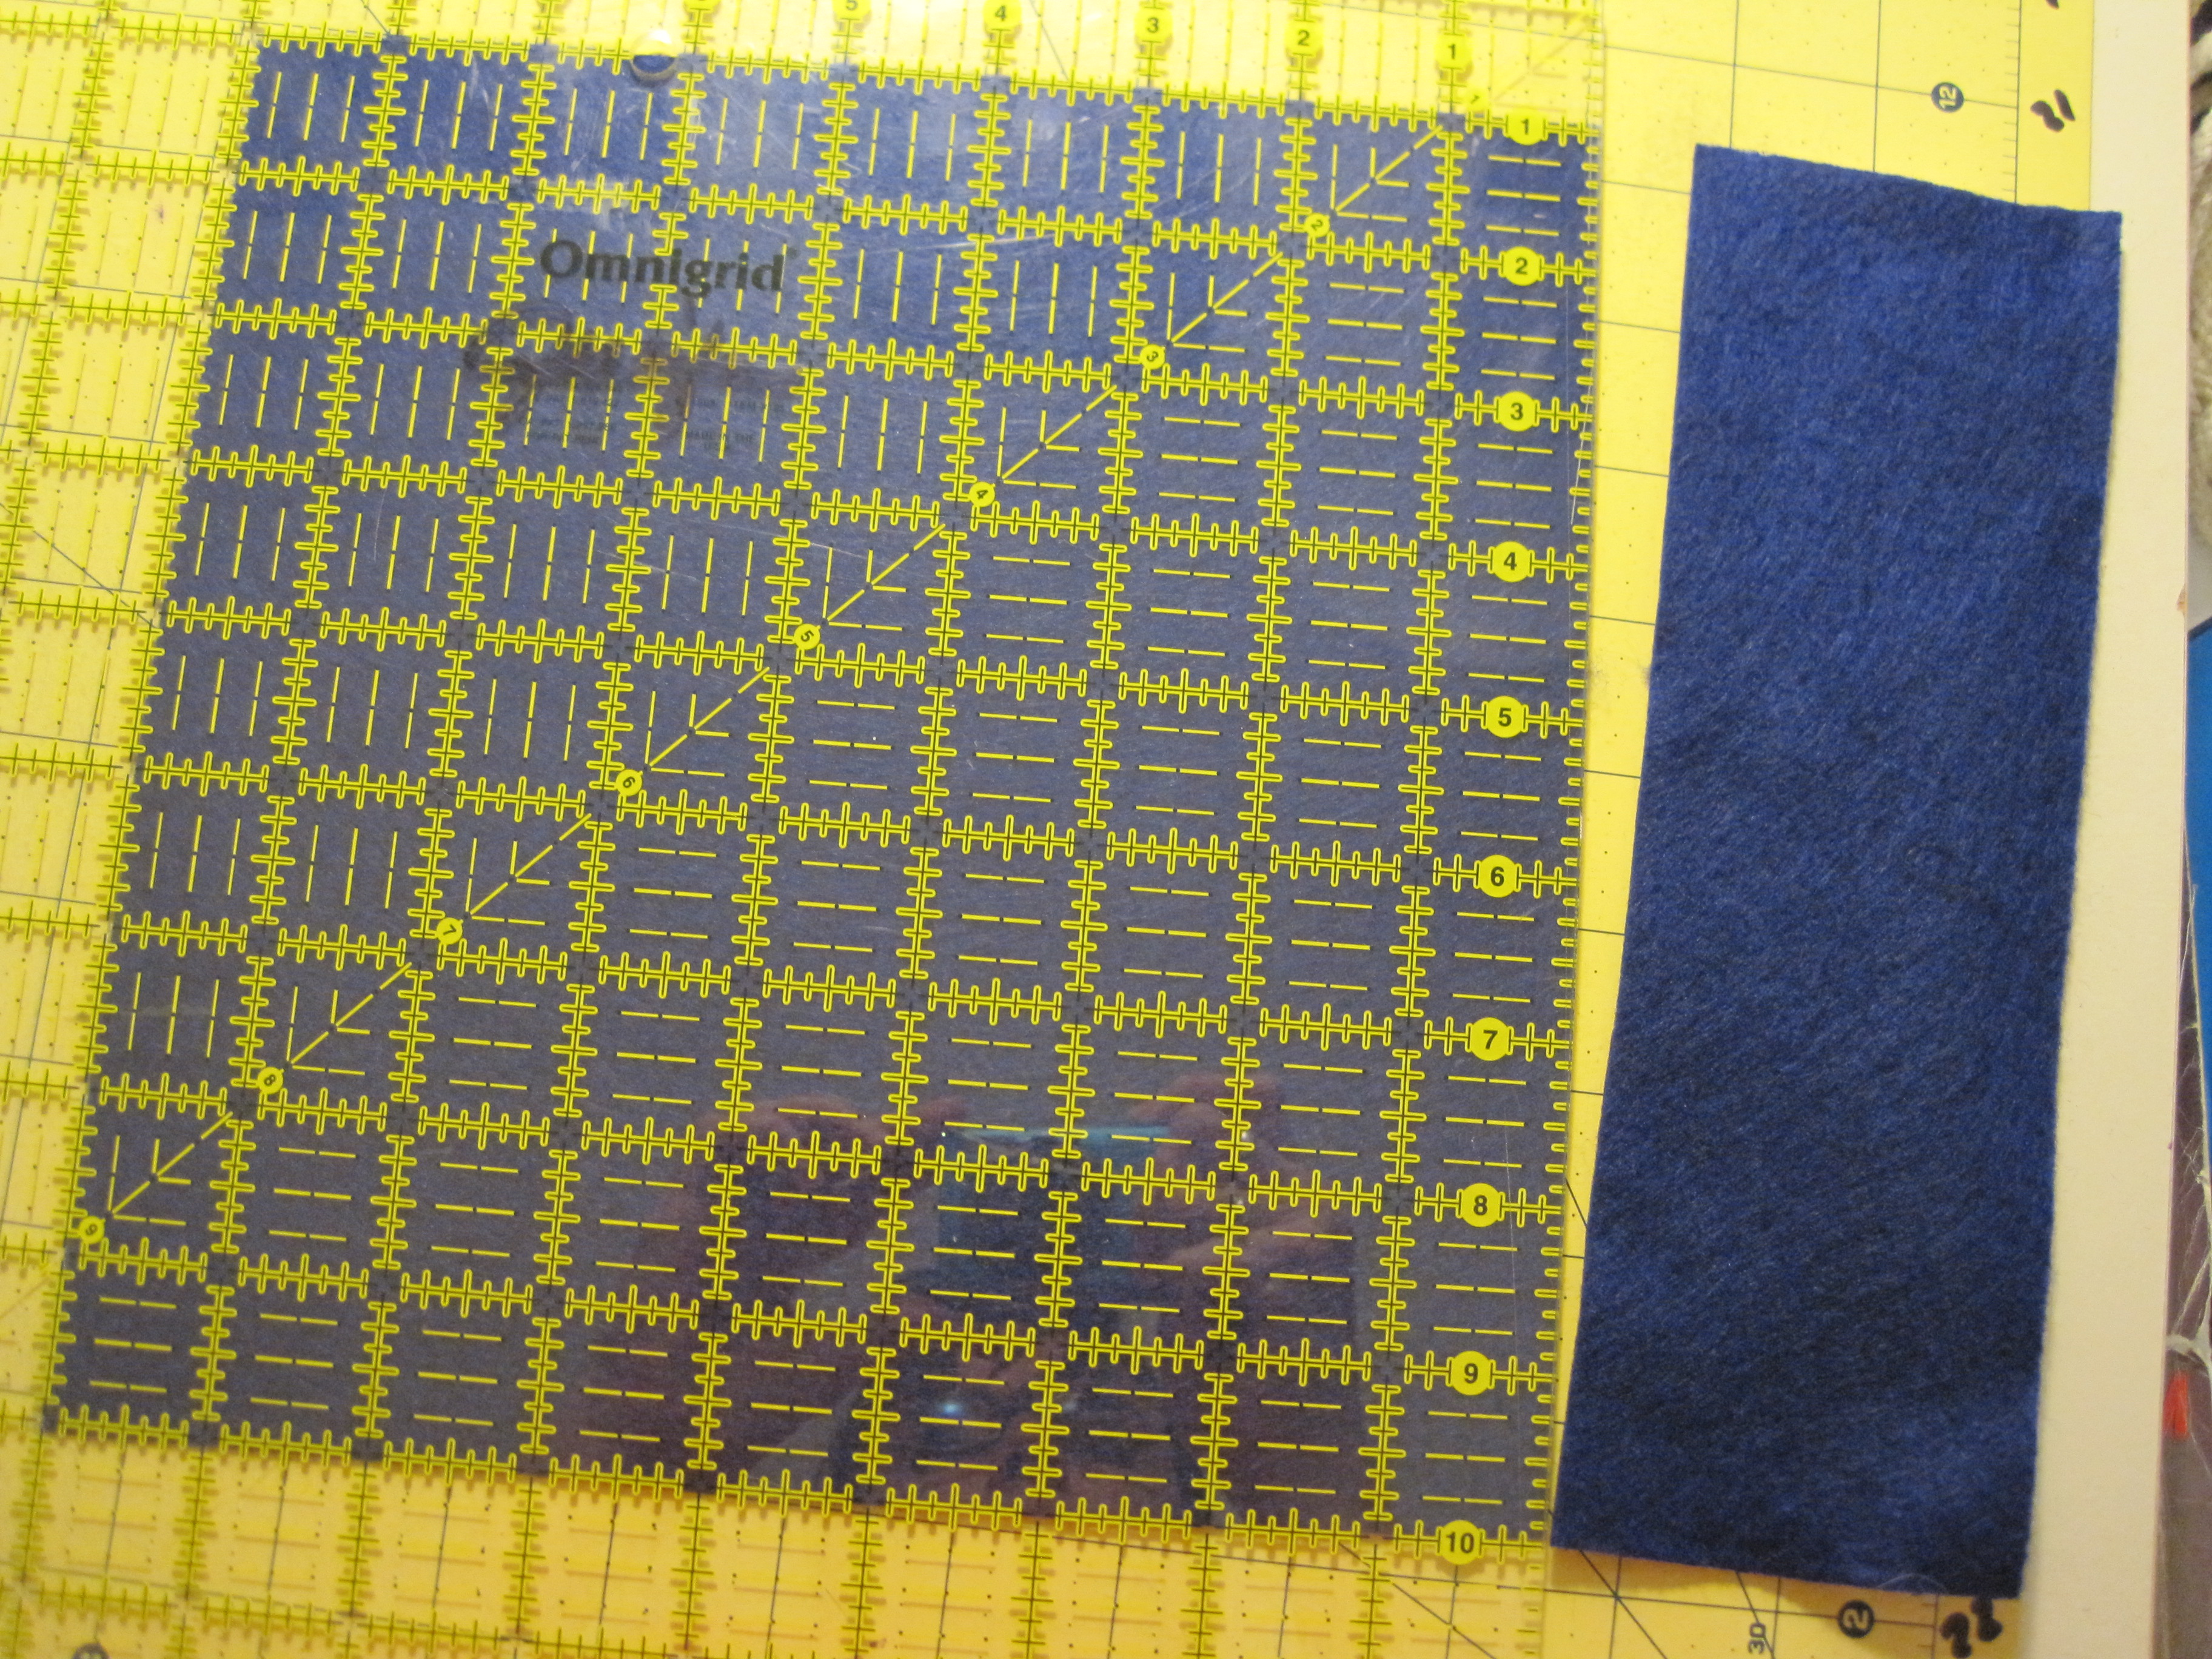
from 1 sheet of blue felt (the other 4 sheets of felt stay 9″ x 12″), cut:
9″ x 9″ square -bag bottom
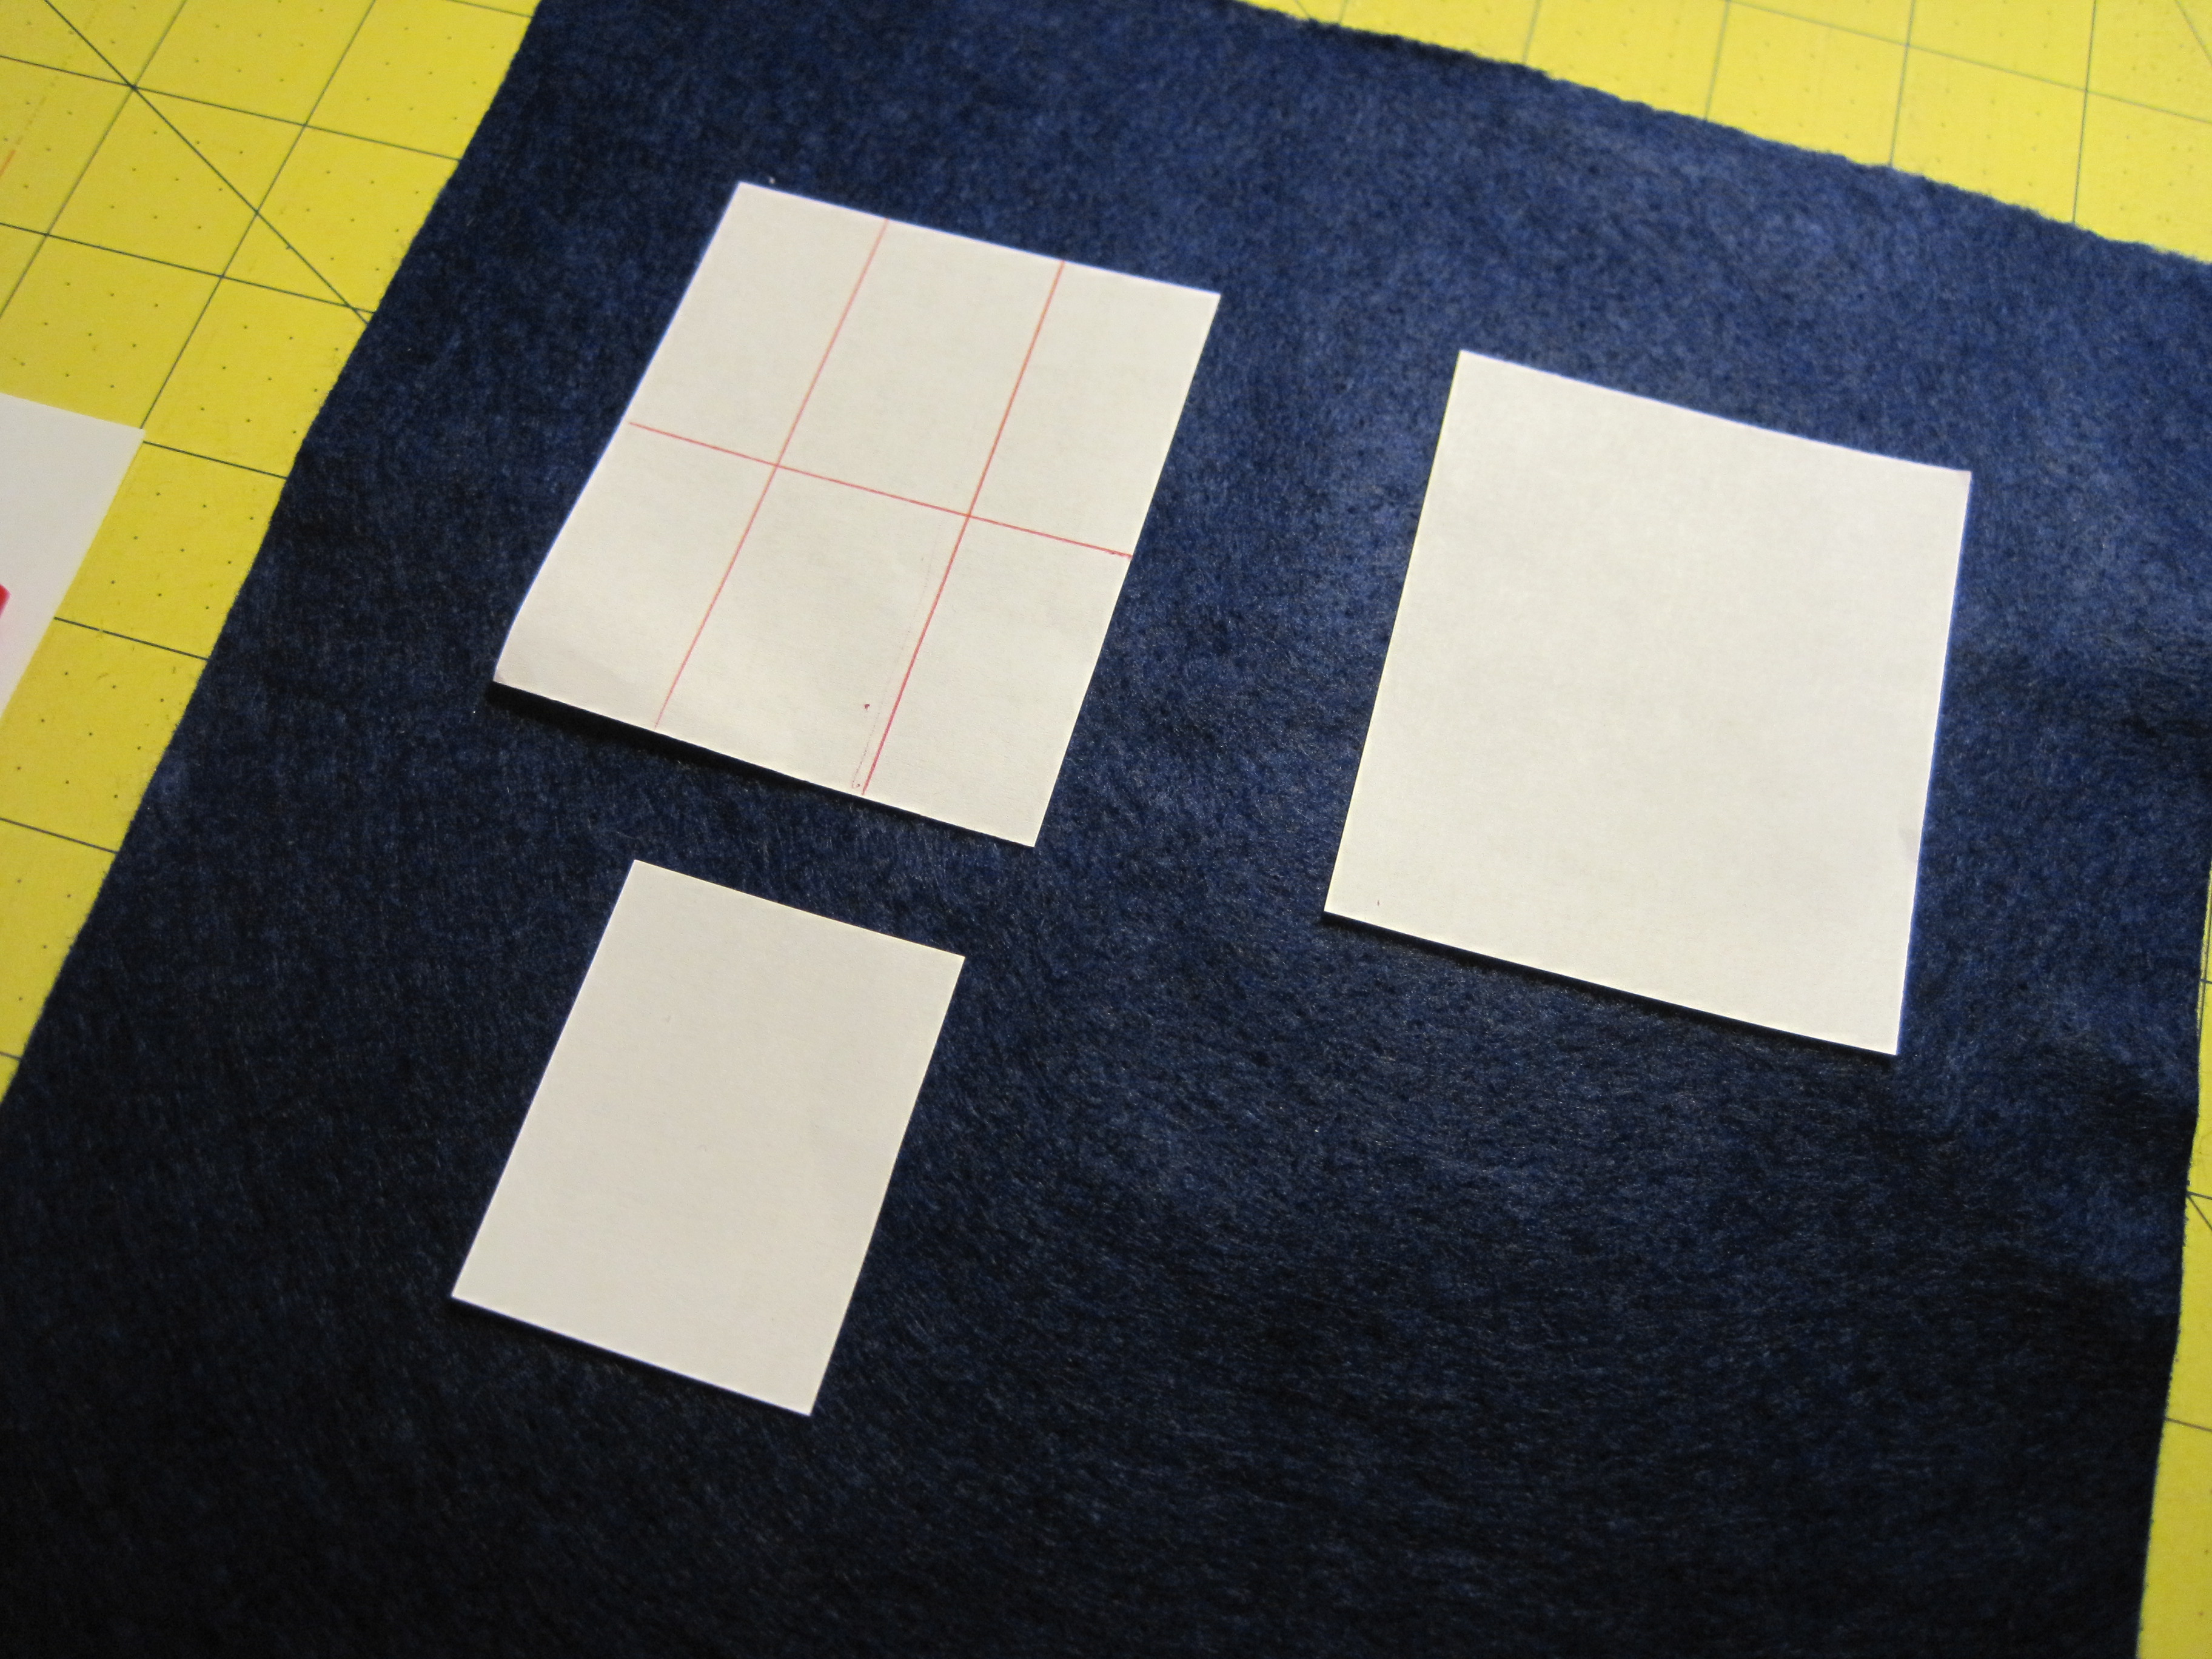
from 1 sheet of white felt, cut:
8 – 2 1/2″ x 3″ – Windows
1 – 1/2 x 2″ – Notice
(optional) 4″ x 5″ – cell phone pocket
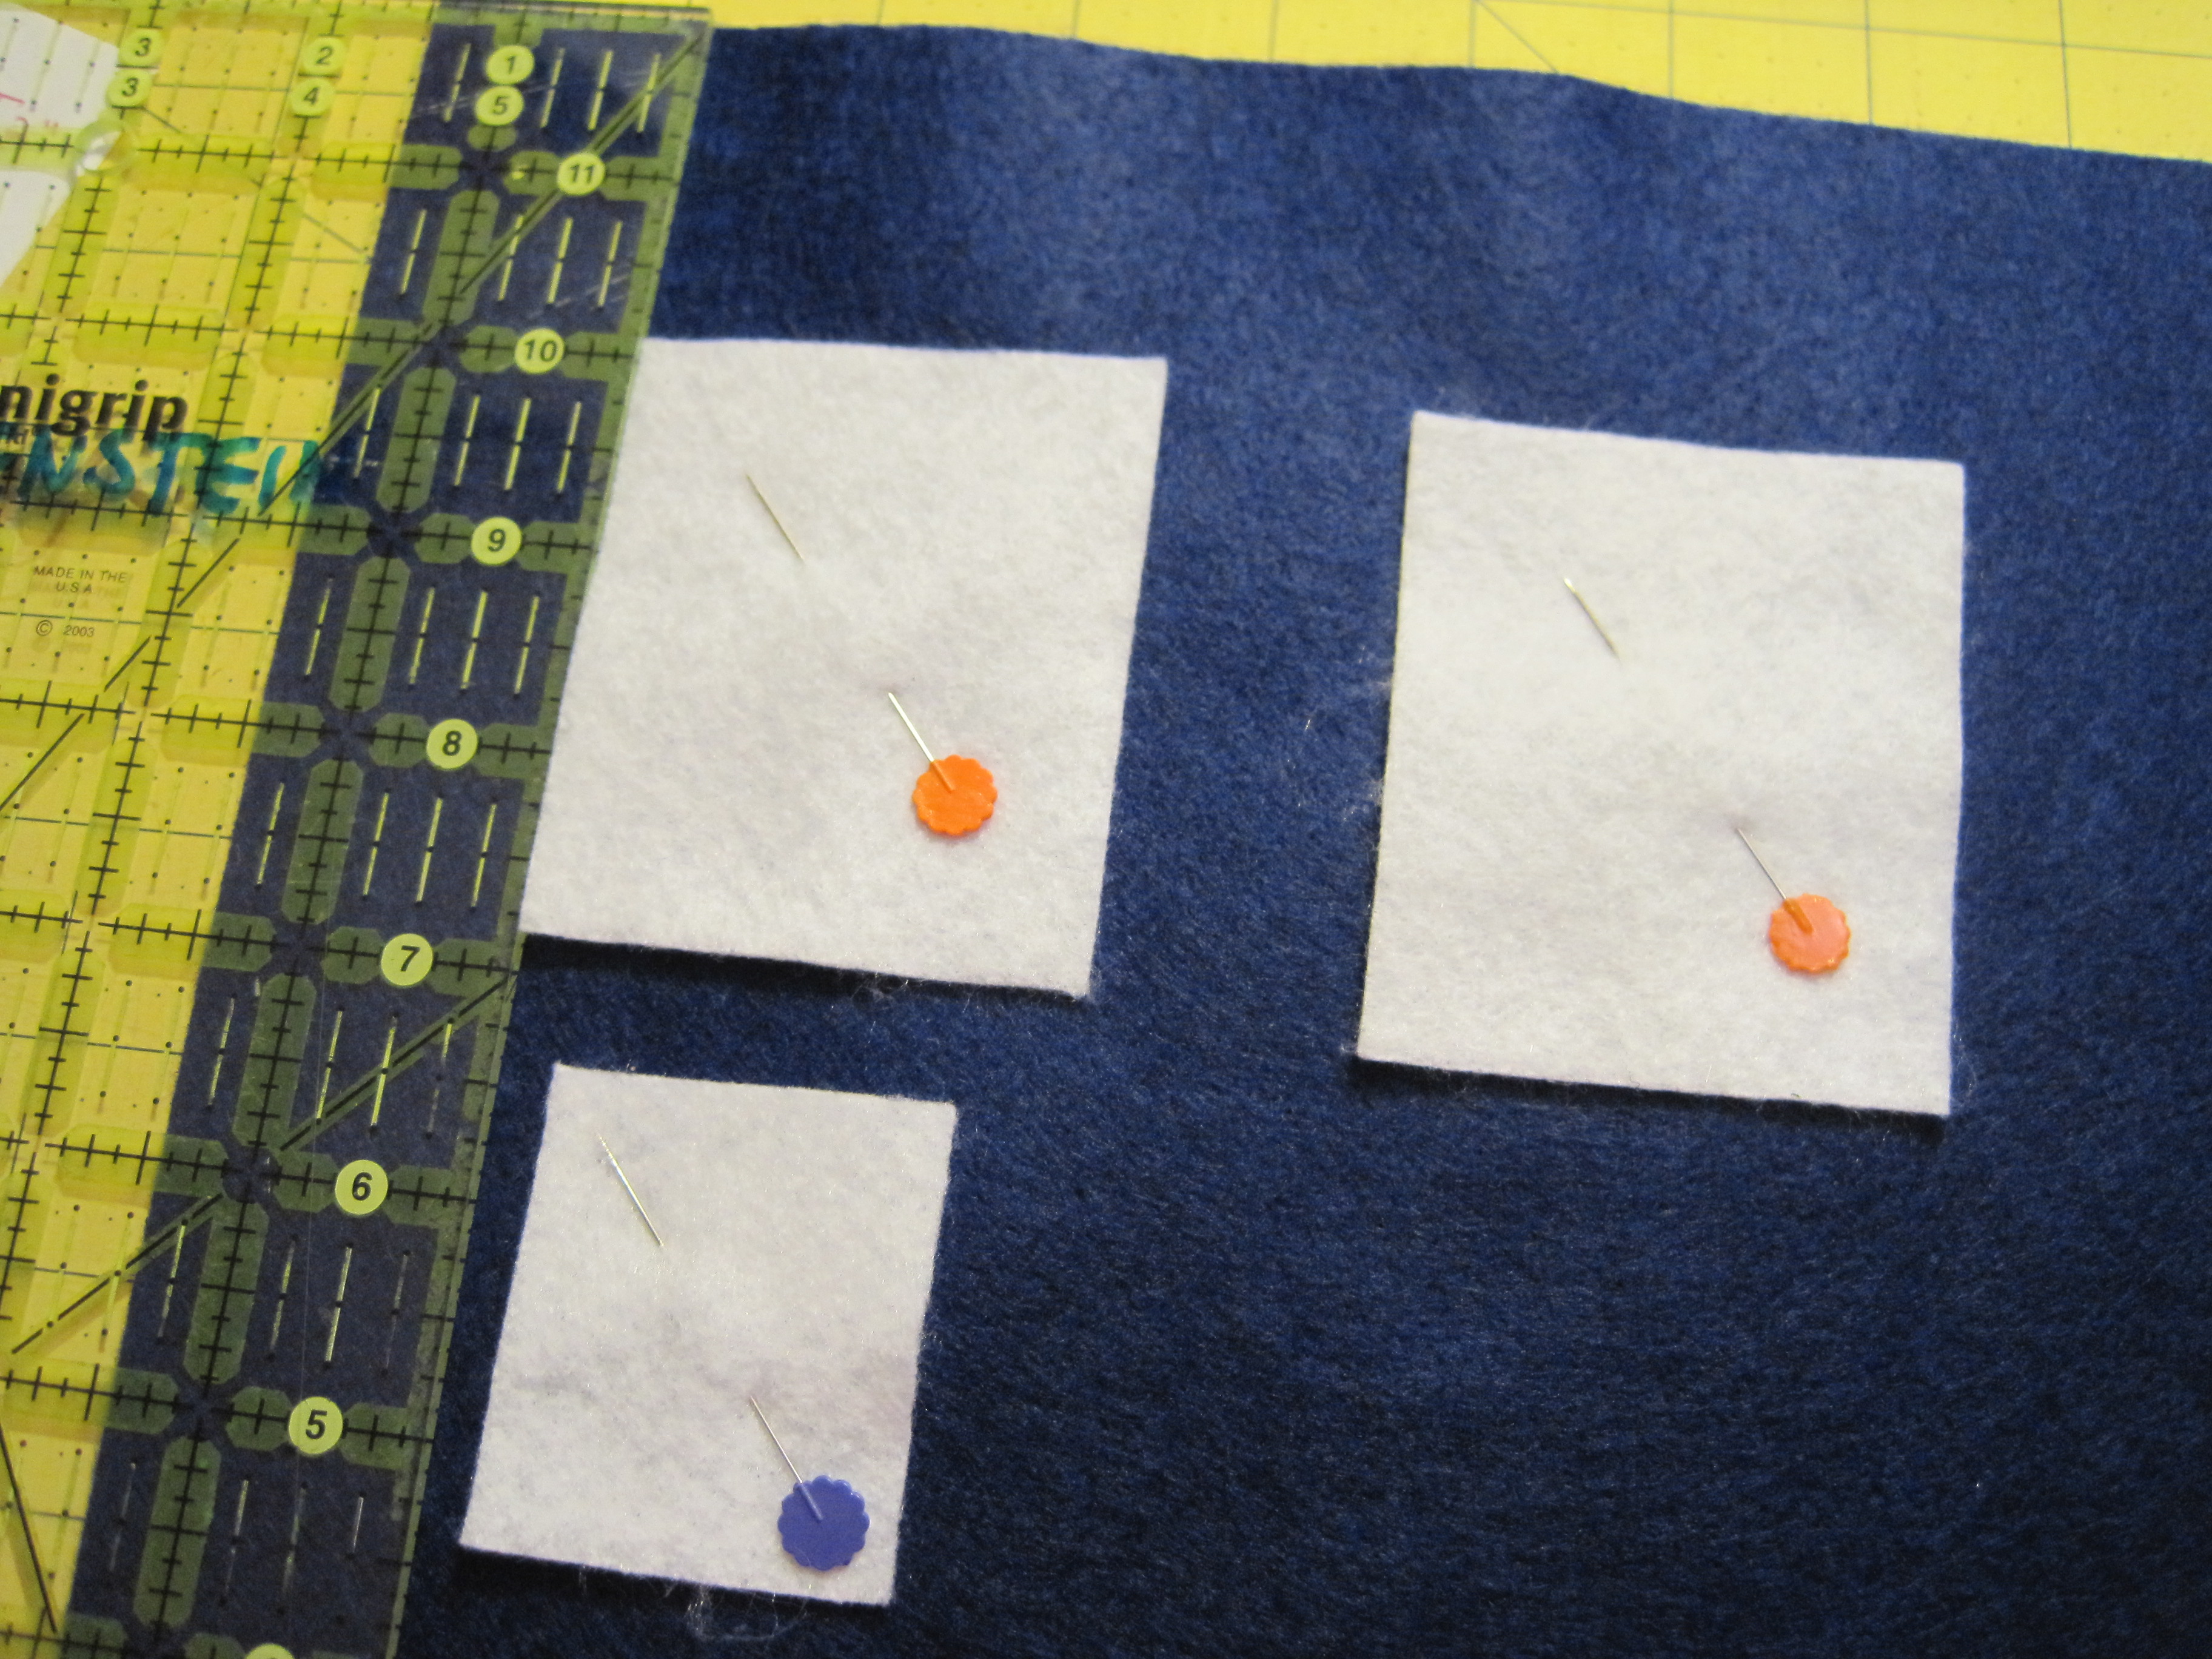
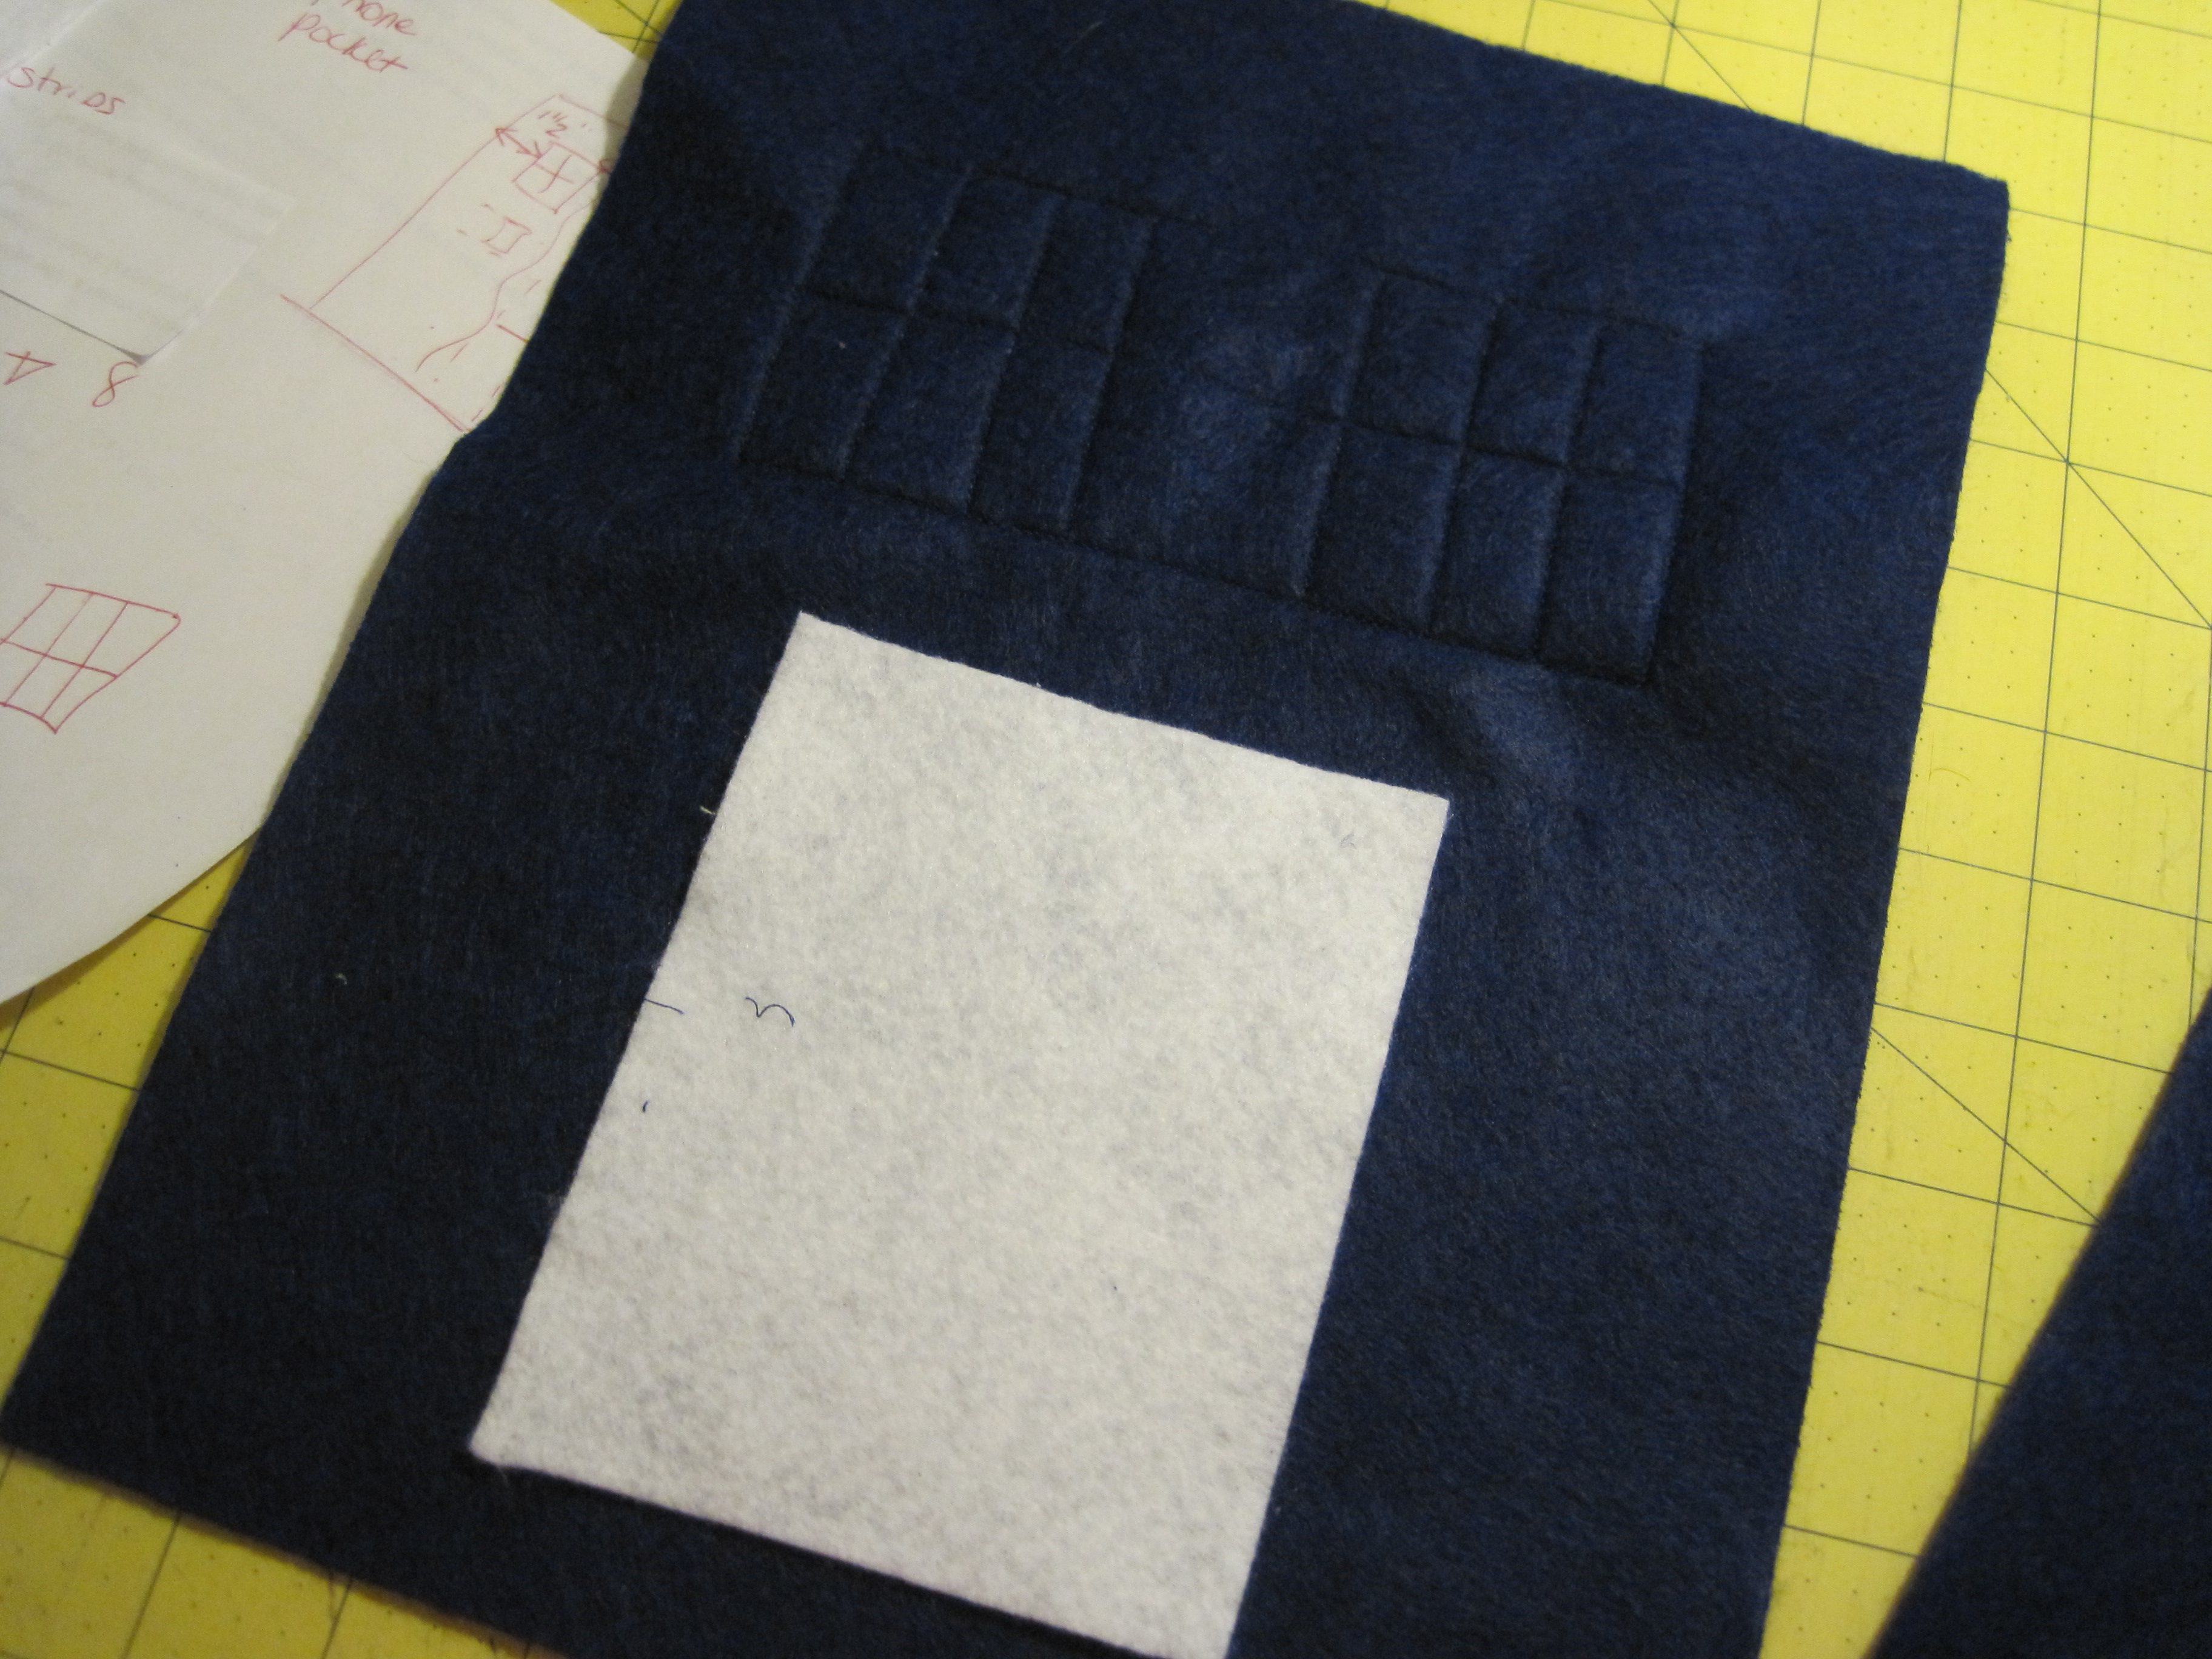
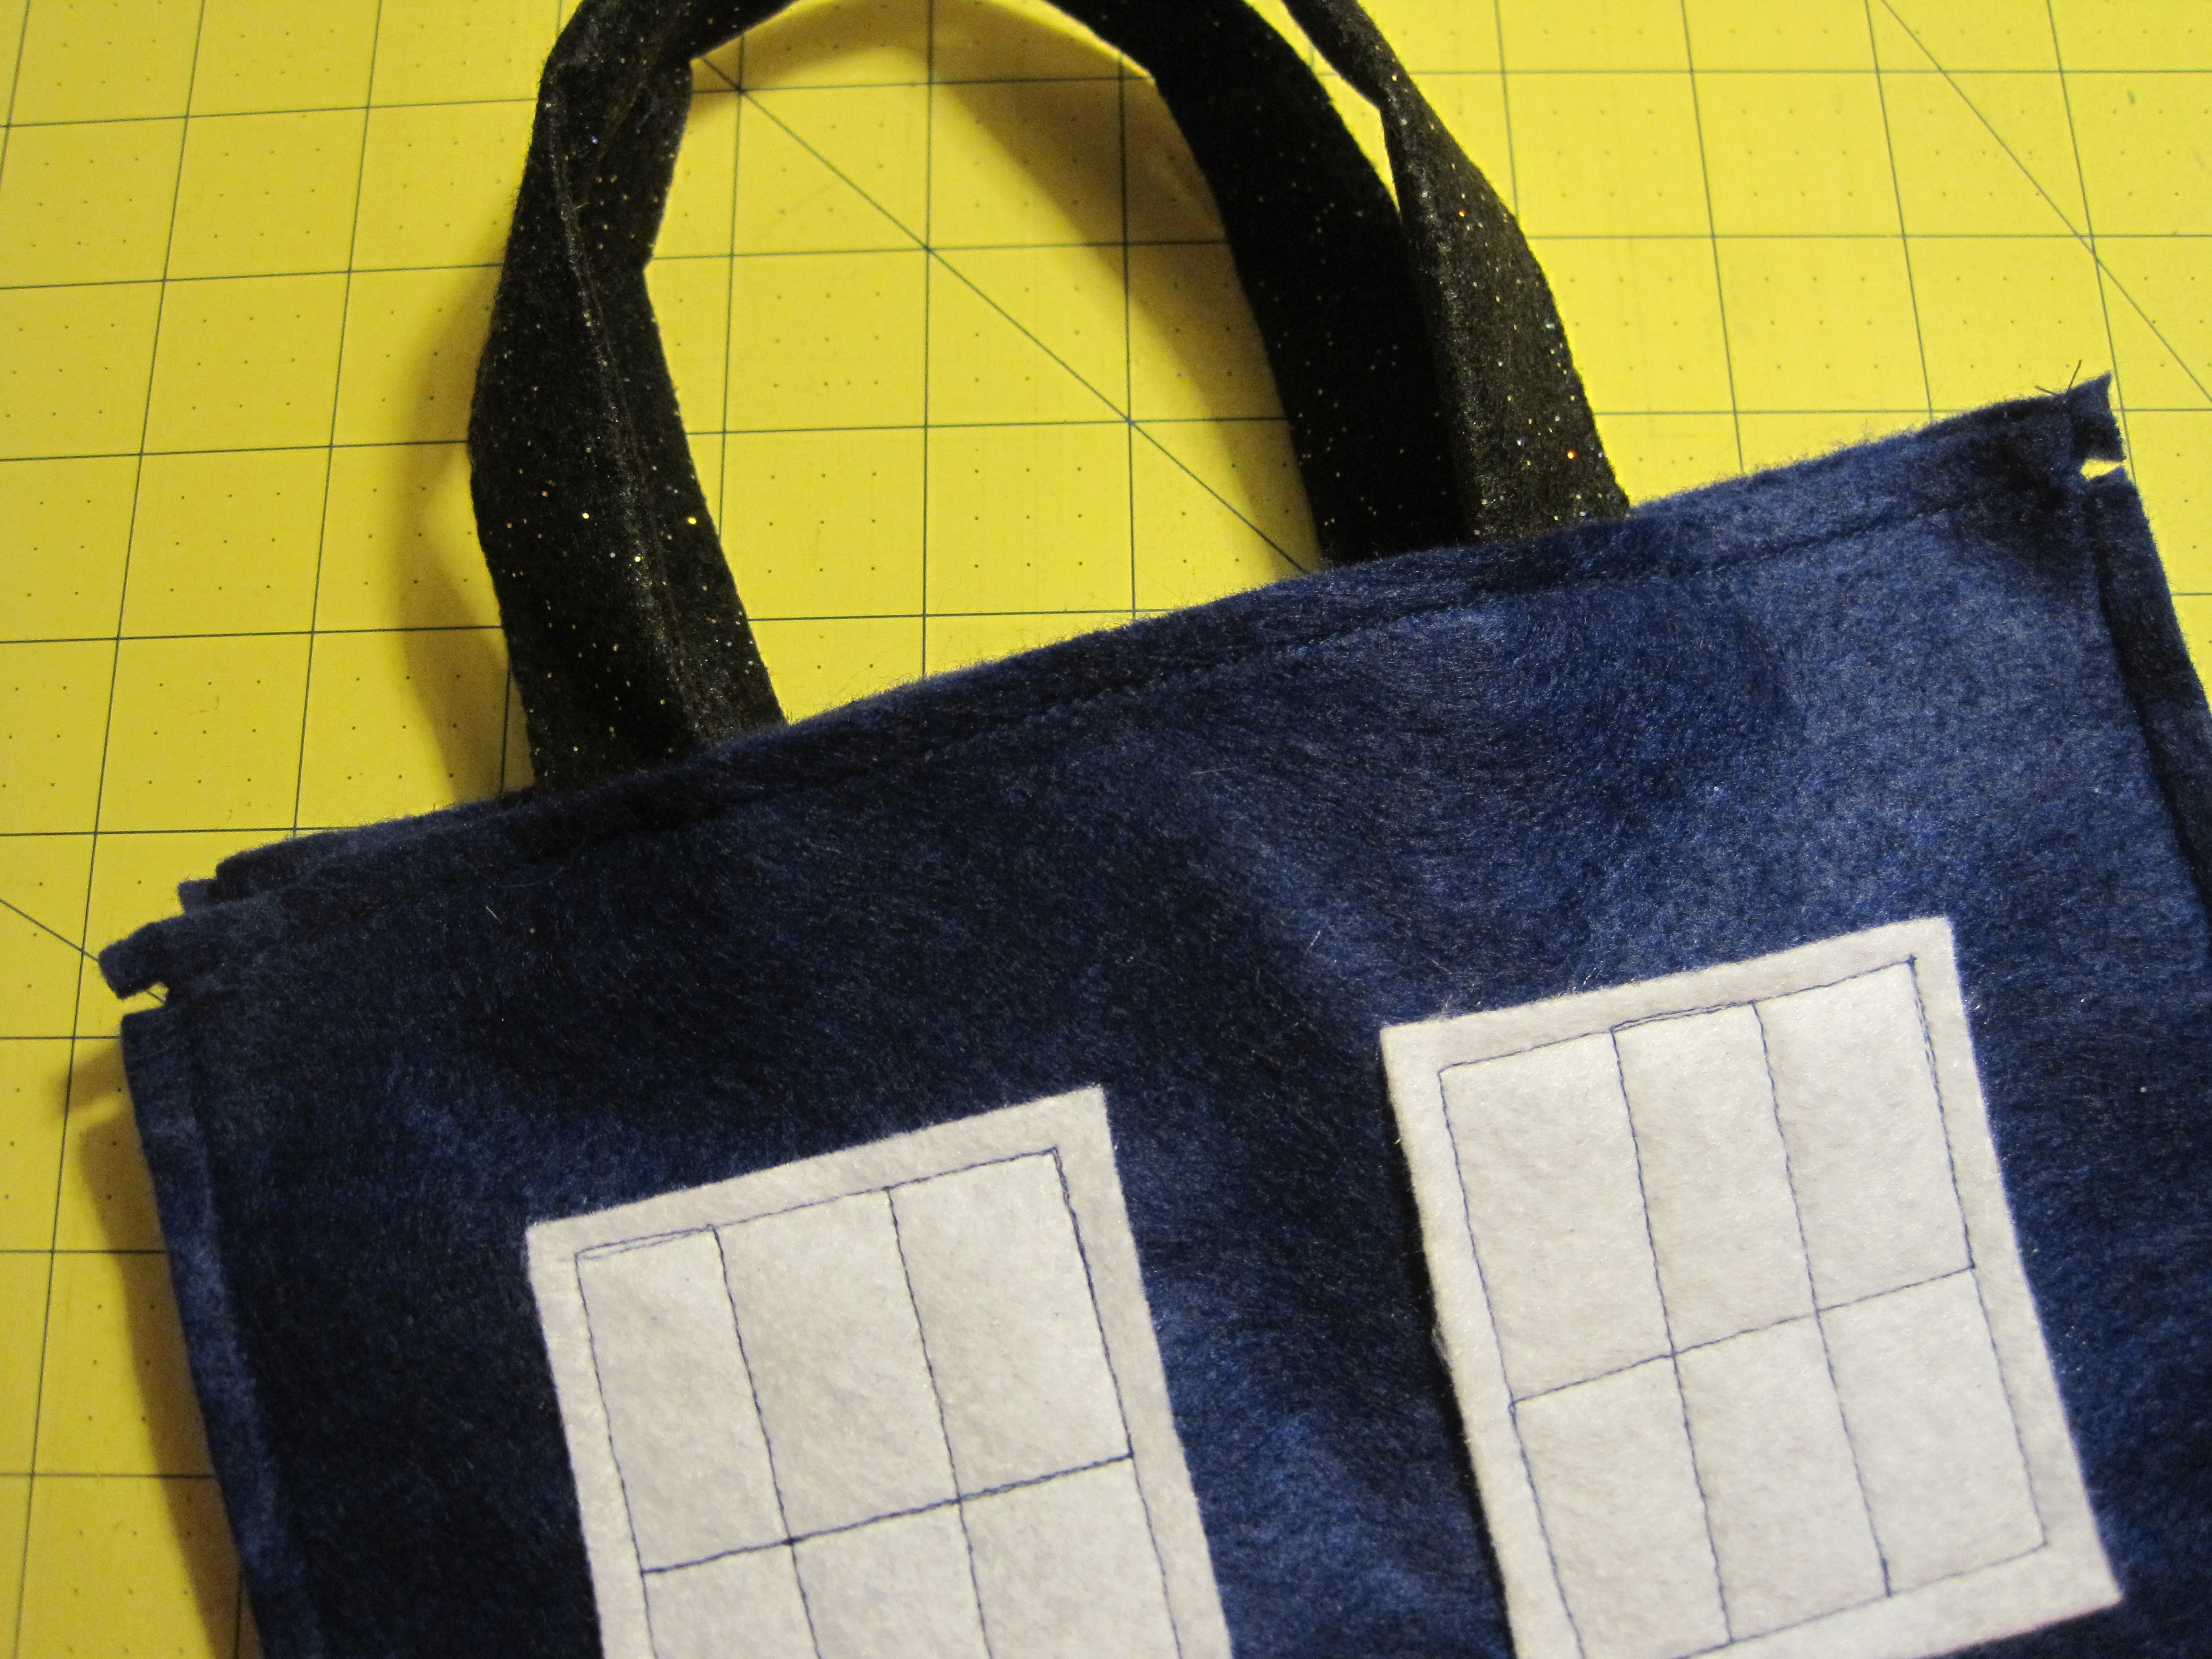
Using your ruler, arrange the window pieces on the 9″ x 12″ sheets of felt so that they are 1 1/2″ in from the sides and 2″ down from the top. For the TARDIS front, center the notice under the left window, leaving about 1/2″ in between.
Arrange window pieces on remaining three 9″ x 12″ blue felt.
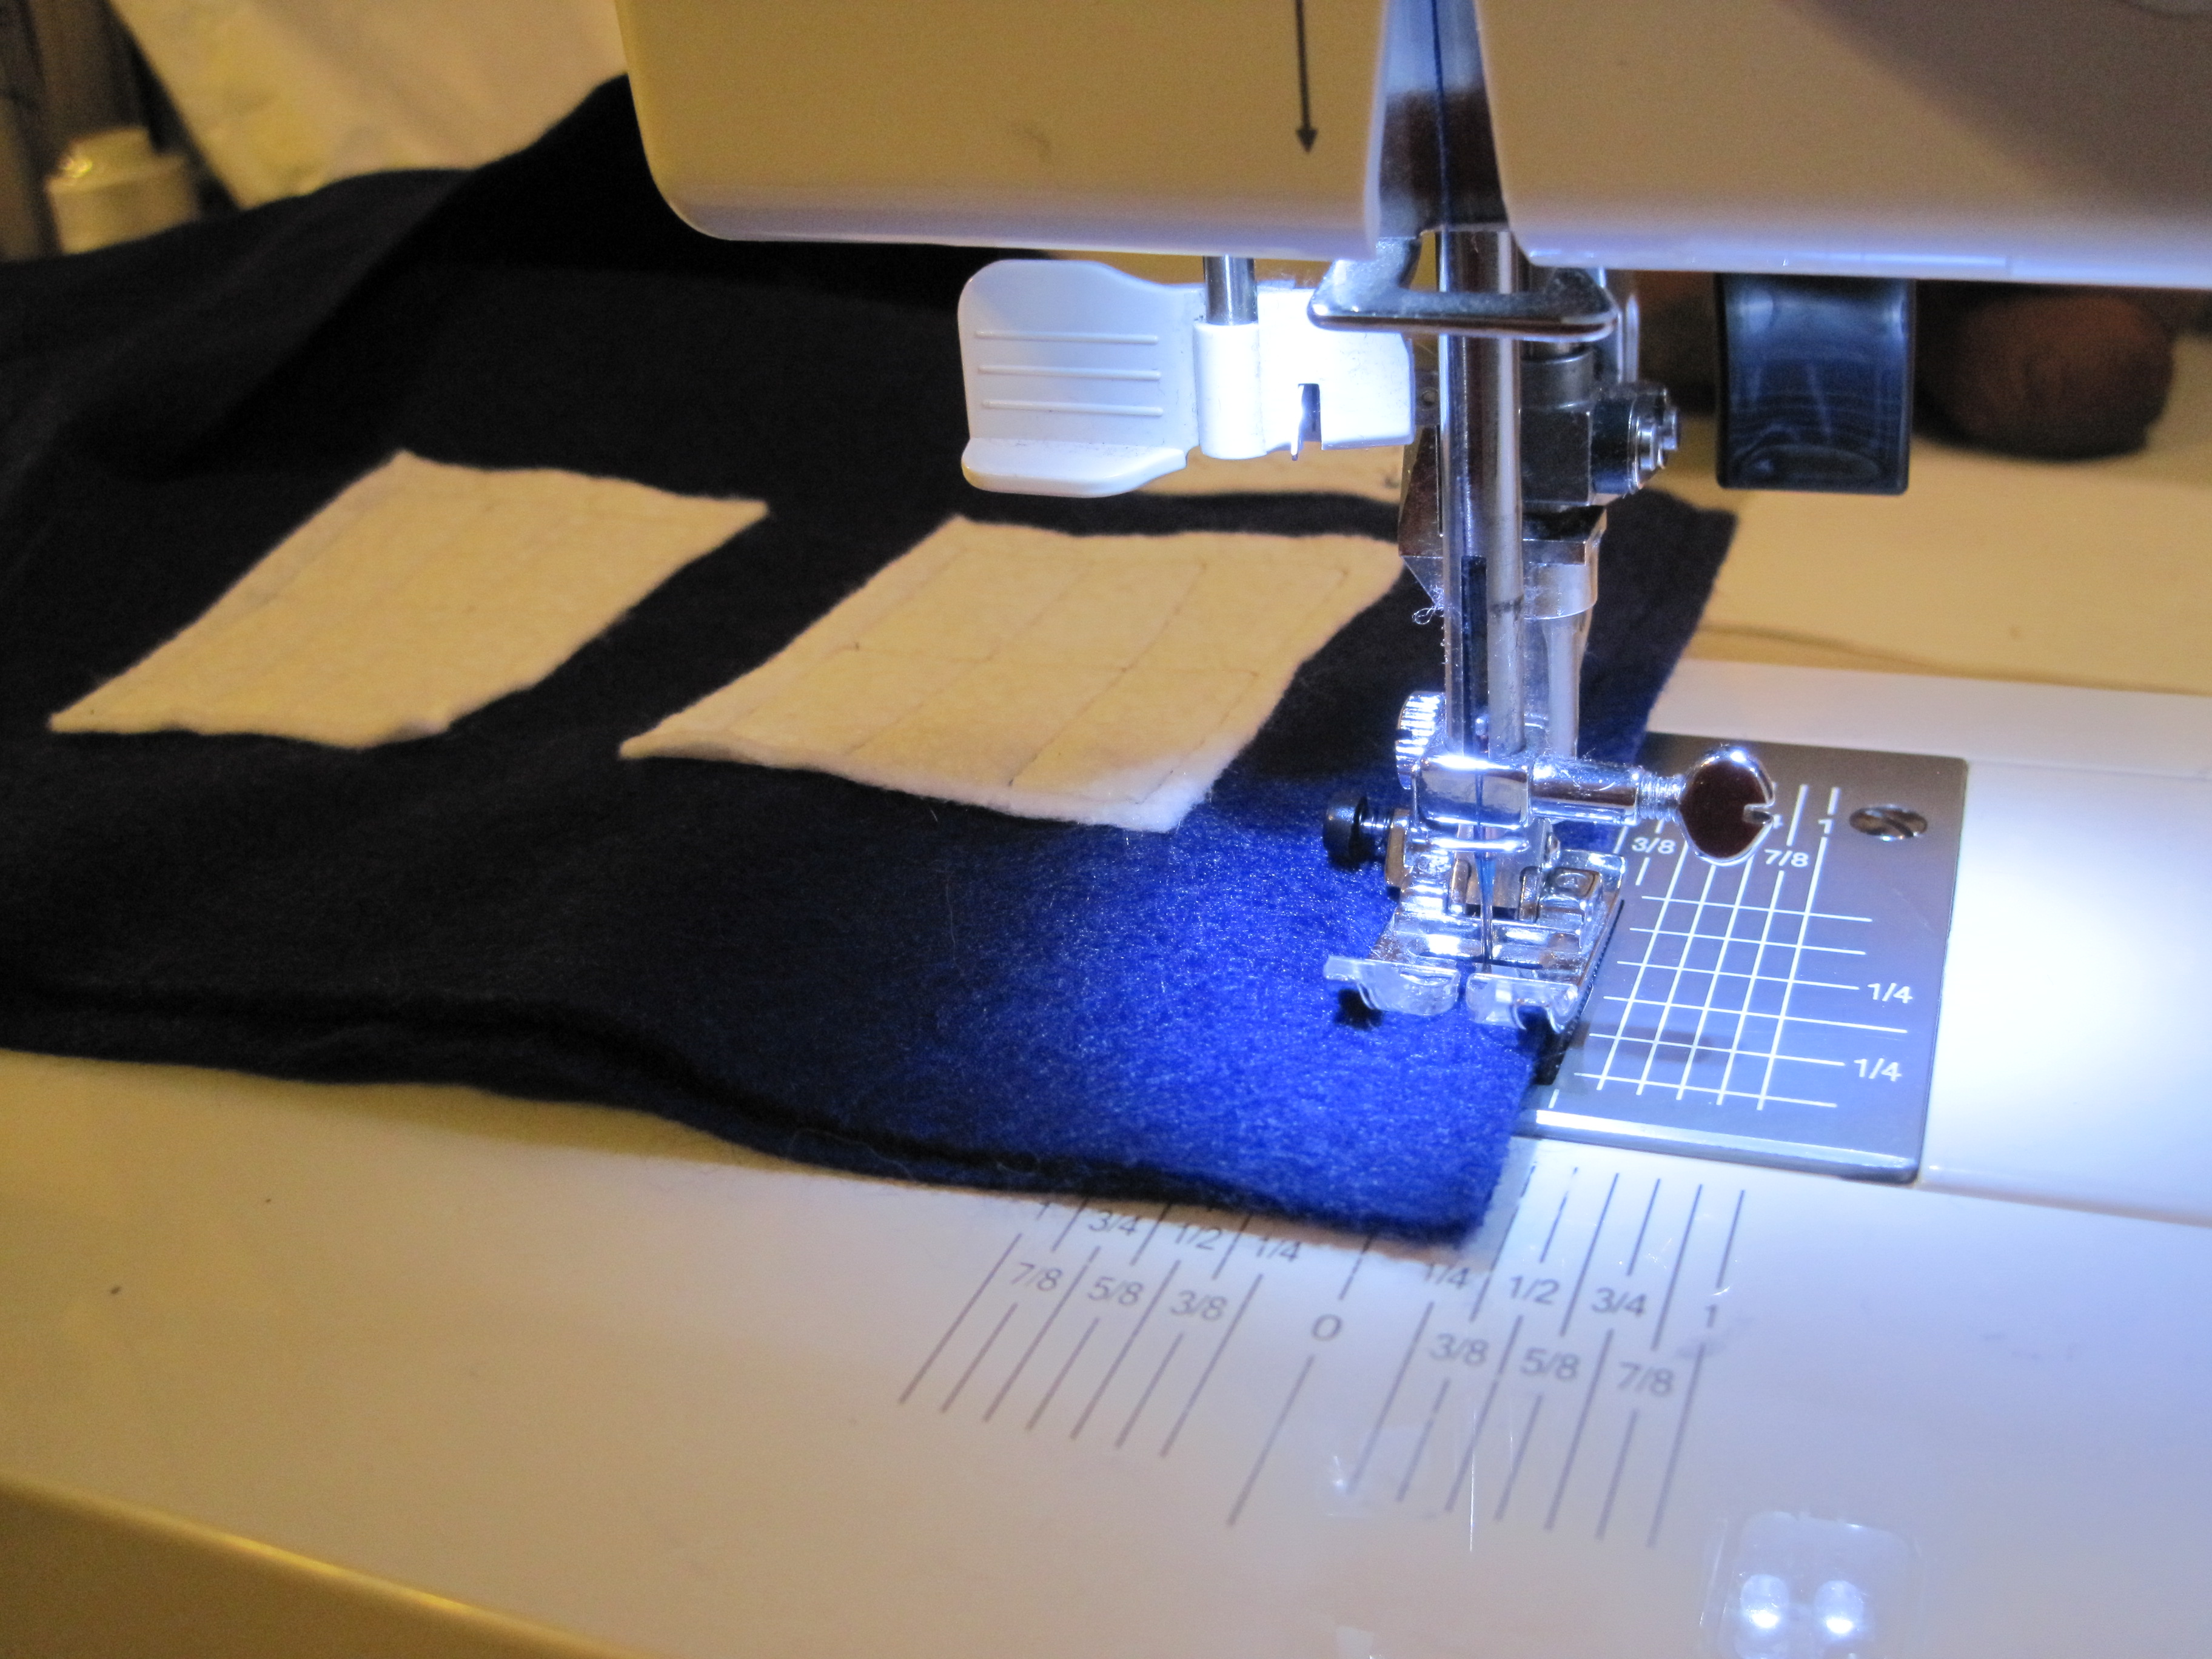
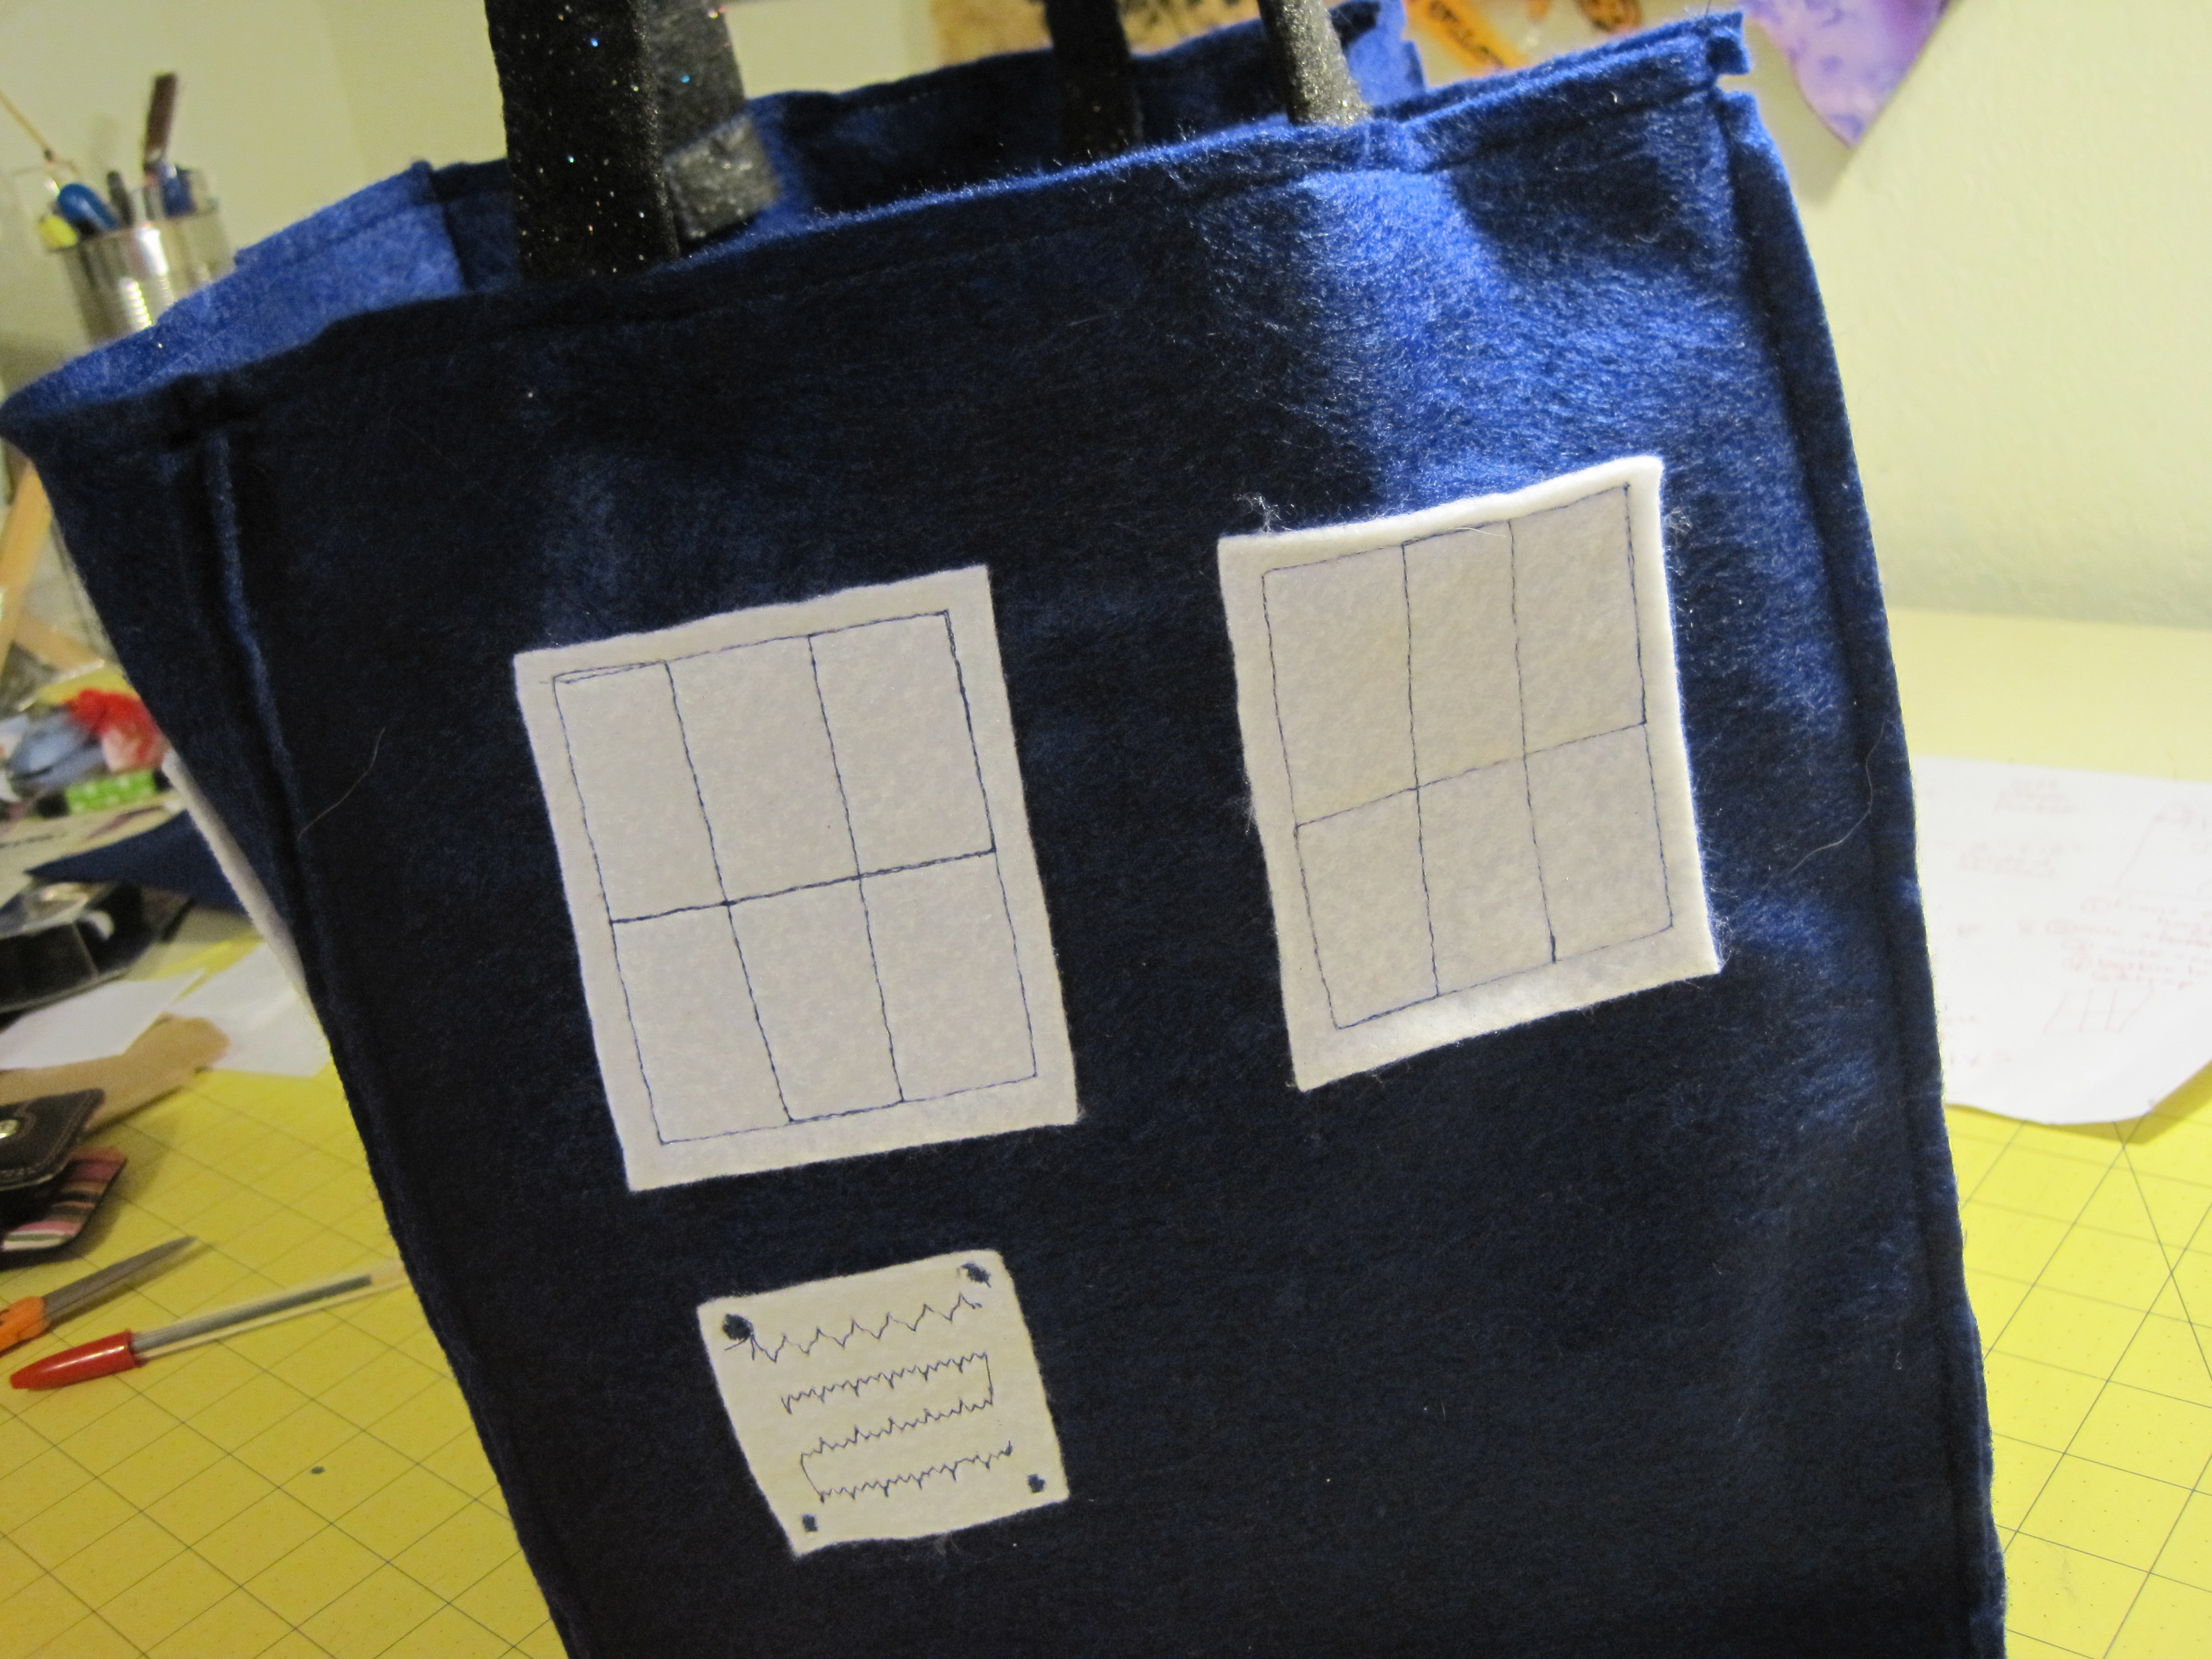
Stitch windows in place, 1/4″ in from outside of white felt. The TARDIS windows have six panes. My windows are estimated, but you can measure and divide your stitching if you choose. Repeat for the two sides that are NOT the front of the TARDIS.
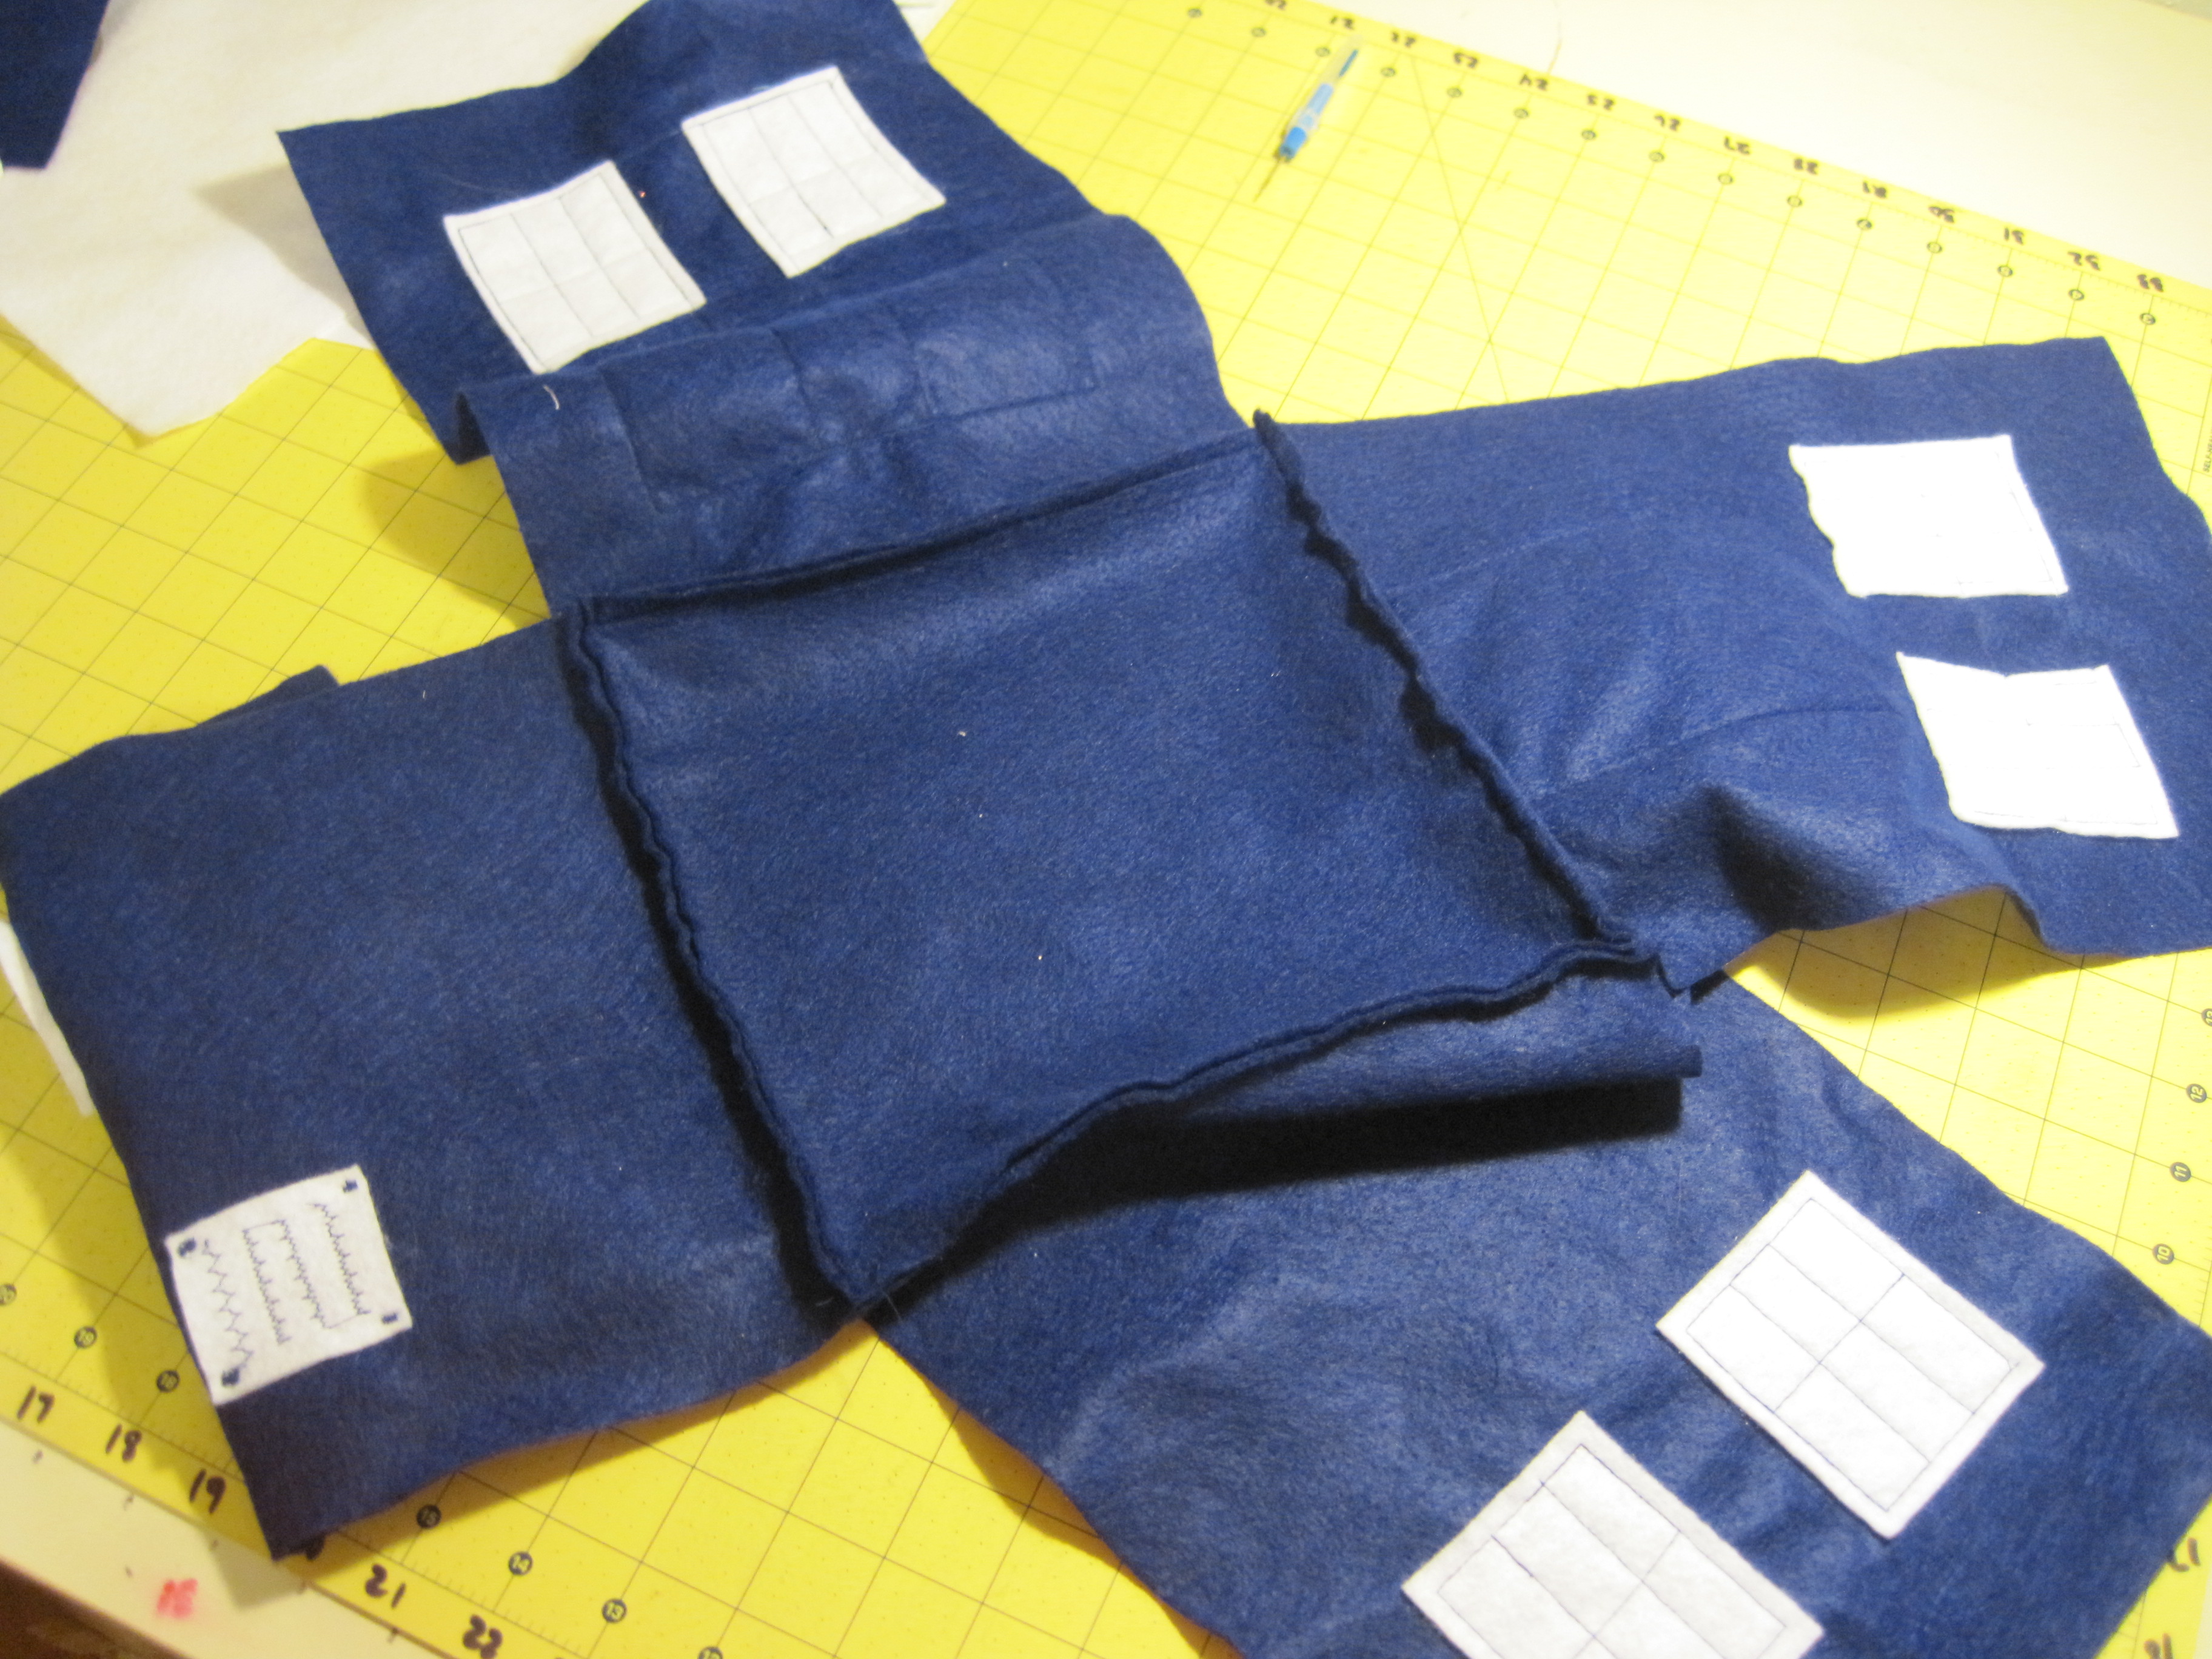
For the Notice on the front, sew some random stitching onto the 1 1/2″ x 2″ piece of felt (as shown). This gives the illusion of writing from a distance. Stitch on each of the four sides with a short zig-zag stitch in each corner (forgot to take a close up…look about three photos down and you can see what I mean!).
Cell Phone Pocket
OPTIONAL – After stitching all the windows on, choose a blue side that is NOT the TARDIS front. Align the 4″ x 5″ piece of felt under the window stitching. Straight stitch on the two long sides and across the bottom, making sure to backstitch at the start and stop. This is your cell phone pocket.
For handles – Fold in half lengthwise and zig-zag down the open side.
Your TARDIS is now ready for assembly!
Find the front (windows with notice) and back (cell phone pocket – or without if you didn’t make one) and bag bottom. With the insides facing/right side out, place the bottom of the front piece along one side of the 9″ x 9″ bottom piece. Stitch across, leaving 1/4″ at the beginning and end of the seam unstitched (see below).
Seam allowance will be on the outside of the bag.
1/4″ unstitched on the end of the seam (both ends).
Repeat stitching for the back side, making sure the bottom of that side meets the bottom of the bag.
Sew the remaining two pieces on opposite sides, continuing to leave 1/4″ open at each end of the seam.
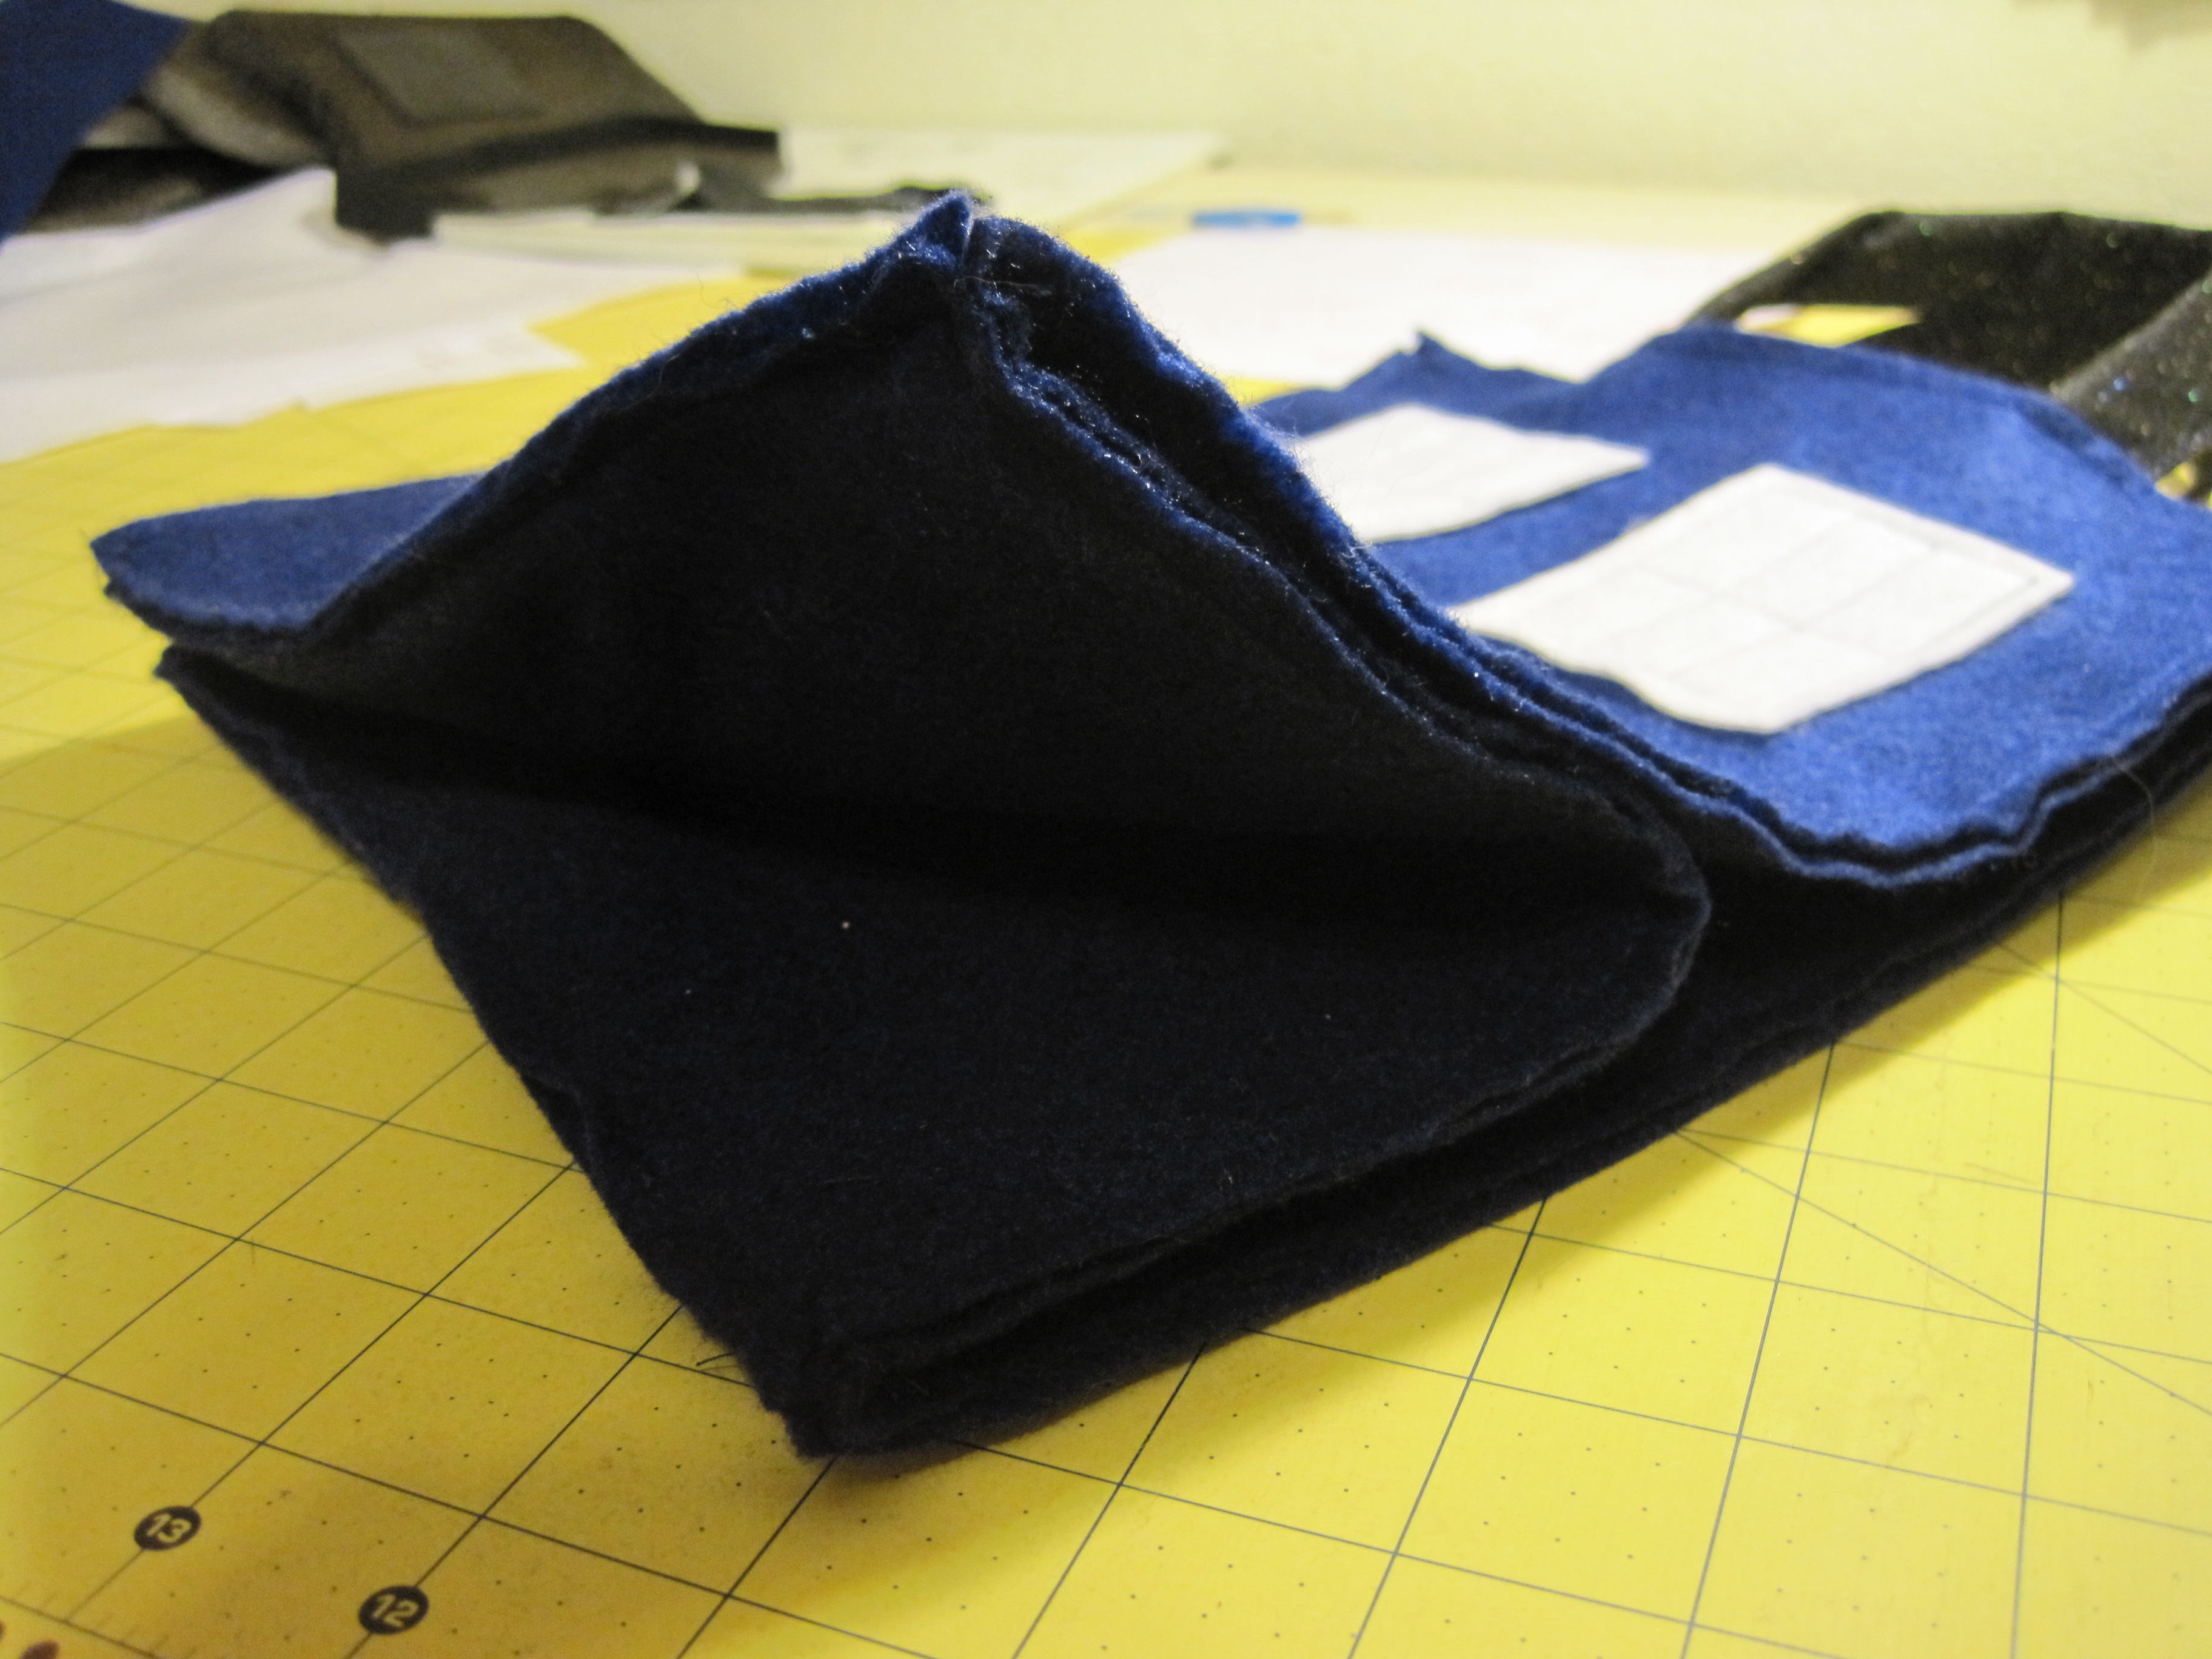
Find the front and the piece immediately to the left. Bring the two long sides (wrong side) together, right side out.
Stitch from corner to corner.
Repeat for the remaining three corners.
You now have a TARDIS with no handles. That’s the last bit and then you’re done!
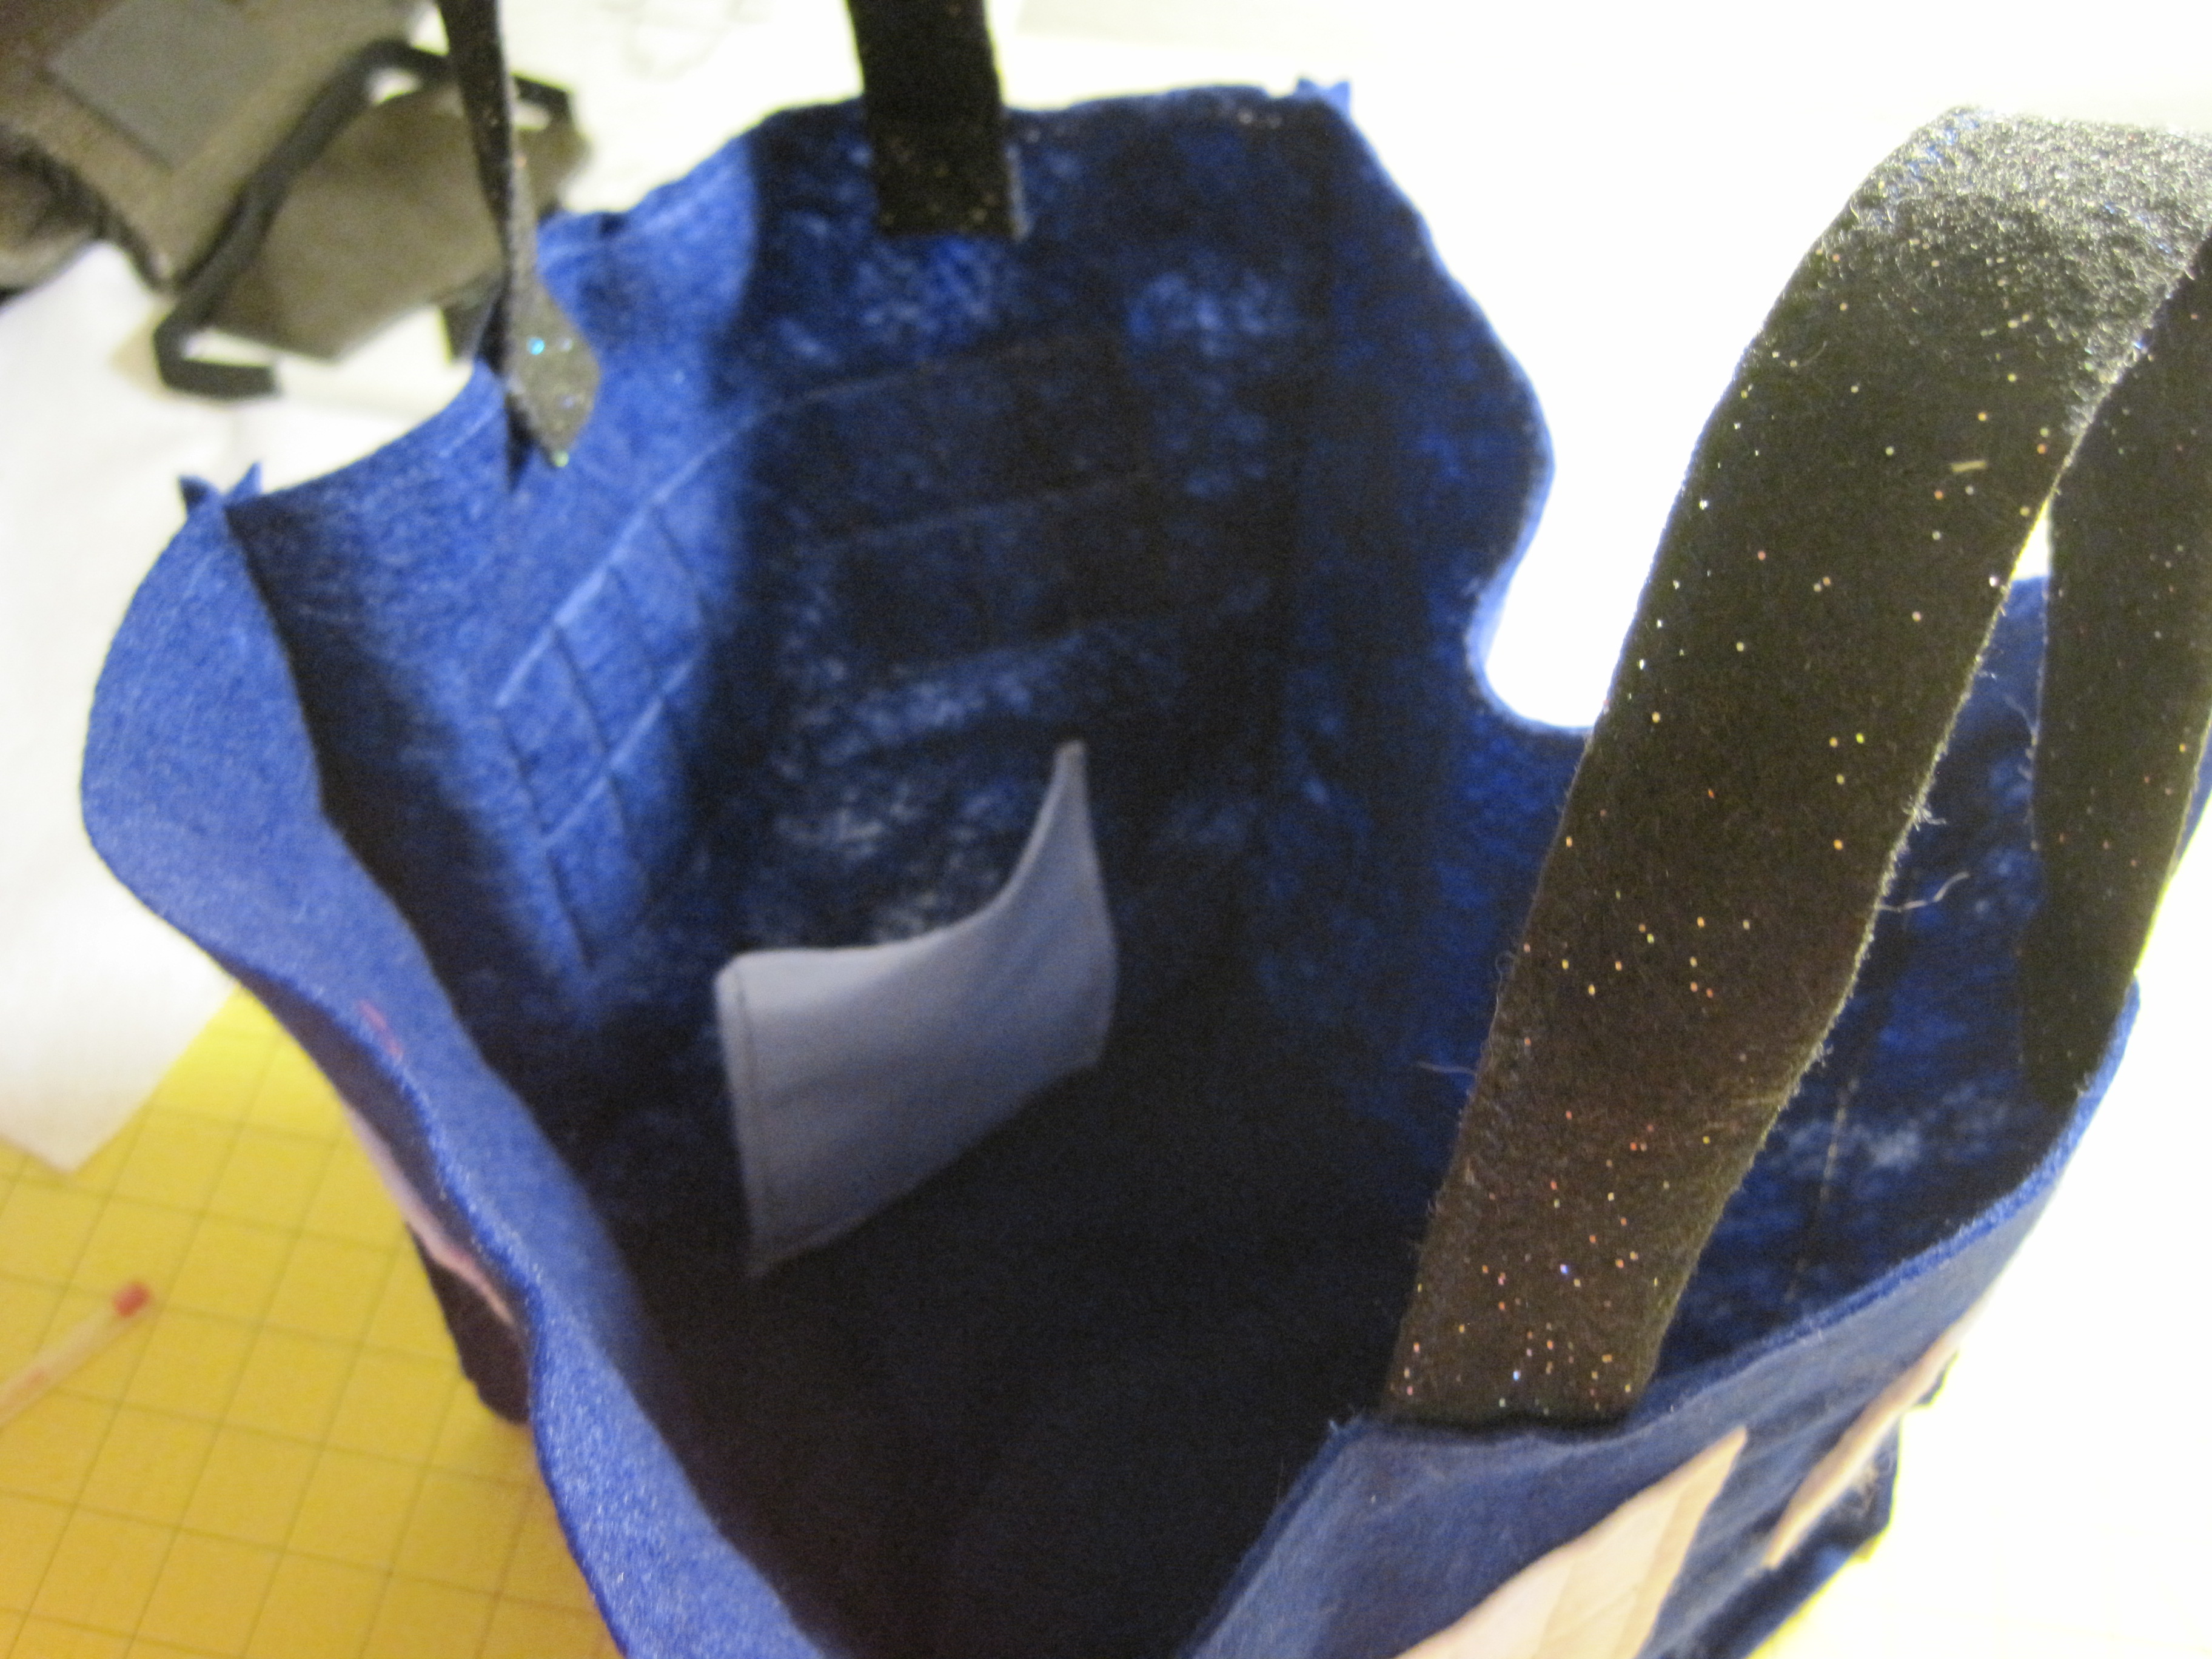
The handles attach to the front (windows + notice) and back of the bag. Use a ruler to line up the handles 2 1/2″ in from each side of the bag, with about 2/3″ inside. Pin in place.
Starting at a corner seam, stitch all the way across the top of the bag, backstitching when you get to the handles. For added strength, continue stitching all the way around the bag, flattening out the seam allowance with your fingers before you stitch across it.
Handles…and you can see the cell phone pocket, too!
Snip above and below the top stitching to make the little notches (optional).
The TARDIS Treat Bag is easy to fold, just fold in the bottom and it will fold in on itself.