Author Archives: Jennifer Ofenstein

Unknown's avatar

About Jennifer Ofenstein

Owner of sewhooked.com and fandominstitches.com. #quiltforgood advocate. Quilt designer, instructor, Talk to Me Tuesday founder & contributor, cat mom, and craft enabler.

Harry Potter Party Revisit Part 2 – Diagon Alley

harry potter party students 01

I’m continuing on with the Harry Potter party revisits today.

For our party, I chose to provide cloaks, hats and wands, all which came from Diagon Alley. Instead of going to Diagon Alley, our student’s packages were delivered “by owl” during the party!  The children received a cloak, student hat, and cauldron when they enter the door, all wrapped in brown paper and string, with labels from the appropriate Diagon Alley stores: Ollivander’s, Madam Malkin’s, etc.

harry potter party diagon alley

Student Uniform:


Cloak

  • 1 – 1 ½ yards of inexpensive black fabric per cloak
  • 20” – 24” elastic for each cloak (depending on age of the child)
  • black or gold decorative button

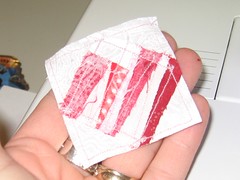
Hem fabric at each end, making one of the hems wide enough to slide the elastic through.   Add a Hogwarts or House crest to the left front of the cloak using the stencil.  The crest can be stenciled, made of felt, painted, embroidered, or a printable iron on transfer.  Commercially available patches are available from Whimsic Alley.

Pull elastic through one of the hemmed ends, stitch together ends. Tack the two side of the fabric together so they will stay closed. Add decorative button on top.

The children that attended our party were 5 – 10 years old. The cloaks were all approximately the same size, but I did ask for height measurements and made them to measure.


Wizard Hat

Wizard Hat Illustration

  • Black Felt
  • hat that fits and holds it’s shape without stretching too much (like a fleece hat)
  • paper large enough for pattern (freezer paper works well)

On paper, trace around hat. Extend top to a point. Cut out template. Cut out two pieces of felt in the same shape. Stitch, trim & turn inside out. Test the hat first, to make sure it fits before making the rest in case you need to make adjustments.

Wands

  • 12” dowel rods (available pre-cut at craft stores)
  • sand paper
  • acrylic craft paint
  • clear acrylic sealant
  • foam brush
  • egg carton

Gently sand the dowels to make sure they’re smooth. Poke a holes into the bottom of the inverted egg carton. Inset the dowels into the holes. Paint each dowel a different color. When dry, flip and paint the other end. Repeat with sealant.

Optional: before sanding, trim dowels to different lengths, sanding the rough edges off of the ends.

Sample Wand Names:

  • Unicorn Hair, Willow, 10 inches
  • Unicorn Hair, Yew, 11 inches
  • Phoenix Feather, Maple, 11 1/2 inches
  • Dragon Heartstring, Cedar, 11 3/4 inches
  • Dragon Heartstring, Ash, 10 3/4 inches
  • Phoenix Feather, Redwood, 12 inches

Include wand names on an Ollivander’s label, printed on parchment and attached by string to the brown paper package. Cut and paste to make your own labels!

Ollivanders: Makers of Fine Wands since 382 BC

Every Ollivander wand has a core of a powerful magical substance. We use unicorn hairs, phoenix tail feathers and the heartstrings of dragons. No two Ollivander wands are the same, just as no two unicorns, dragons or phoenixes are quite the same.You will never get such good results with another wizard’s wand. (from Harry Potter and the Sorcerer’s Stone)

The kids chose their wrapped wands from a cauldron , or rather their wands chose them!   Each wand was unique, which made it easier for them to keep track of during the party.


Cauldrons

You can purchase black plastic cauldrons from your local party store and many grocery stores during Halloween and St. Patrick’s Day. If your party is during a different time of year, try searching online for a party supply store. Cauldrons are great for decorations or party favors. We had one for each child. This is where they stored all their things from the party when it was time for them to leave. They also had a great time using their imaginations making potions once we were done with our “classes.”

Also see:  Part 1, Invitations and Decorations

As always, if you make any pattern or craft from Sewhooked you can share your photos by adding them to the Sewhooked flickr group!

Happy crafting

also available on The Leaky Cauldron – Crafts

Harry Potter Party, Revisit Part 1 – Invitations and Decorations

harry potter party diagon alley

My darling daughter turns 14 later this week.  That’s her, on the front right.  She’s next to her little brother. who himself just turned 11 this past  December and is now old enough to attend Hogwarts.  It was February of 2003; Order of the Phoenix had not yet hit book stores and there were only two HP movies so far.

While I sit and try to absorb these amazing thoughts and all the years my family has loved Harry Potter and the ways we’ve chosen to express that appreciation, it’s easy to remember when birthday parties were much more important than birthday presents.

I thought I’d take this week leading up to my daughter’s next step towards adulthood and relive a little of that young girl fandom love by sharing how we sent our kids and their friends to Hogwarts for a Very Magical Sleepover.  Maybe the next time you feel like having a little adventure, you can go to Hogwarts, too!

Invitations

The invitation you use is the best way to get your party started!  Create a letter from Hogwarts to the prospective “students” using the format of Harry’s first letter.  Be sure to include party time, location, and what to bring (if it’s a sleepover, etc) and where to send reply “by owl” (email, phone number, etc.)

We printed our invitations on yellow parchment (from the local craft store) using the Lumos font and printed in, what else, emerald-green ink! These were rolled into scrolls and sealed with wax. I got the parents of the kids invited involved by hand delivering each invite so the parents could tell the kids an owl had stopped by with a letter for them!

To use the swirly and signature graphics, right-click and save!

You’ll need:

  • parchment paper
  • Lumos Font
  • image – Professor McGonnagall’s signature (from the American editions of Harry Potter)
  • image – “swirly” (also from the American eds.)

Here’s a sample letter:

HOGWARTS SCHOOL of WITCHCRAFT and WIZARDRY [Lumos Font]
LETTERSWIRLY
Headmaster: Albus Dumbledore
(Order of Merlin, First Class, Grand Sorc., Chf. Warlock, Supreme Mugwump, International confed. of Wizards)

We are pleased to inform you that you are invited to [reason for party], a Very Magical Sleepover [what we called our party]!

The party will be at [location], [location address]. It will take place [day, date & time].
Please bring your sleeping bag, pillow, pjs, toiletries, and any other muggle items you may need.
Student Uniforms will be provided.

We await your owl by no later than [RSVP date] (or you can call [name, phone and/or email]).

Yours Sincerely,
McGonagallsig
Minerva McGonagall, Deputy Headmistress

Decorations
harry potter party decorations potions

Decorations can be simple and inexpensive.  Be creative and use what you have on hand. Look at thrift shop and dollar stores for interesting “magical” items,  potions bottles, interesting looking props, out of season Halloween costumes and decorations.

These are some of the decorations we used for our party:
Great Hall Enchanted Ceiling

  • Navy Blue Plastic Tablecloth
  • Glow in the Dark Stars
  • Low Temp Glue Gun
  • thumbtacks or push pins

Glue stars on plastic tablecloth in a random pattern. Use thumbtacks to hang over the eating area.

Potions Bottles

  • Empty Spice Bottles
  • chopped celery (dragon claw)
  • whole nutmeg (bezoars)
  • Pop Rocks Candy (fire crystals)
  • Food coloring (colored water for various potions)

Fill the empty bottles with a variety of contents.   These are just suggestions, use what you have on hand for your own variety.

Party favors, class supplies and the feast, all add to the atmosphere.  More on that in the next Harry Potter Party revisit!

As always, if you make any pattern or craft from Sewhooked,  I’d love to see a photo. Email me or add it to the Sewhooked flickr group!

Happy crafting

also available on potterparties and The Leaky Cauldron – Crafts

Way Back Craft: Gryffindor “Canopy”

Canopy, approximately 2002

Well, we’re way past due for a Way Back Craft!

So, you want a Harry Potter bedroom?  The very first thing I think of when I think of Harry’s dormitory, is the four poster bed with house-colored hangings.  Wouldn’t that be fabulous?

It definitely would be.

Unfortunately, not all of us have the means or the space for a four poster bed.

This is the problem I encountered when designing a Harry Potter room for my daughter.  Her room has a ceiling fan and the room is just too small for a four poster bed.  The Gryffindor canopy was on her Must Have list when the room decoration was being planned.   I have the great fortune to have two very DIY parents and the first thing that popped in my head was mounting something lightweight on to the wall.

How about a faux canopy that gives the feeling of those hangings without the actual expense or space requirements of a real four poster?

Then I started thinking price.  Cheap would be good.  Very good.  PVC.  PERFECT!

A fun aside on this project – when I was buying the fabric, the woman at the cutting table at the fabric store asked if I was making a dress.  When I told her I was making a Gryffindor canopy for a Harry Potter bedroom, she stared with her mouth open.  It was the first of many stunned looks directed at my fandom crafting!

Supplies

  • 3 lengths of 1 to 1 1/2” PVC pipe cut into 18” (45.7 cm) pieces (use a hacksaw or have it done at your DIY store)

Note: PVC under 1” is not recommended because it’s too flexible. Make sure the threaded plug & metal flange will work with the pipe you chose. They’re easy to test at the DIY store.

  • 3 threaded plugs
  • 3 metal floor flanges
  • 3 flat PVC caps
  • 3 decorative wood rosette with a flat back
  • Epoxy, Liquid Nails or other cement-like glue
  • Primer spray paint
  • Gold spray paint (Use silver for Slytherin, bronze or silver for Ravenclaw and black for Hufflepuff)
  • Pencil
  • Measuring tape
  • Screwdriver
  • Drill (optional)
  • Screws with anchors
  • 5 1/2 yards (5 meters) of red satiny fabric  (Use green for Slytherin, blue for Ravenclaw or yellow for Huffelpuff)
  • matching thread
  • sewing machine (optional)

Instructions

  1. Prewash fabric then hem on both ends, set aside.
  2. Following manufacturer’s directions, use epoxy to glue the threaded plugs to one end of each of the PVC pipes. On opposite ends of pipes, use epoxy to attach the PVC caps. Epoxy the wooden rosette onto the cap. Allow epoxy to dry. Screw pipe into metal flange. Stand up on it’s end in a well covered, well ventilated area.
  3. Paint with primer. Allow to dry according to manufacturer’s directions. Paint gold. Allow to dry overnight.
  4. Find the center of your bed, mark a light line on the wall. Depending on the width of your bed and where you want the fabric to reach on the sides, you will need to attach the flanges lower or higher.  If you have someone helping you, it’s a good idea to hold the center pipe in place with the fabric, centered, on the pipe. You can then determine how high the center pipe should be and where to place your two side pipes. They can be low or high, depending on your preference.  Use measuring tape to assure the three pipes will be symmetrical.
  5. Attach the metal flanges to the wall using screws and anchors, using the drill for pilot holes if necessary.
  6. Screw pipes into each flange. Arrange canopy fabric.

Makes a great window treatment, too!

Also for your Harry Potter room:  HP Bookcase Mural

p.s. I made the afghan, too.  😉

As always, if you make any pattern or craft from sewhooked,  I’d love to see a photo. Email me or add it to the Friends of sewhooked flickr group.

Happy crafting

also available on The Leaky Cauldron- Crafts

Challenge: Winner!

Photobucket
Thank you so much to everyone that participated in the first ever Friends of sewhooked Challenge!  We had a handful of entries, and I appreciated each and every one!

The only requirement was to make any craft or pattern from sewhooked or the sewhooked blog and then post a photo either on the Friends of sewhooked flickr group or on the sewhooked_talk Livejournal community.    I also accepted emailed challenge entries.
The winner was chosen at random.  Thanks to my friend Cat for indulging me by choosing a number without any idea what I was up to. 😉

Without further ado, our winner!  ferraras on flickr!

Twilight Cullen Stenciled Sweater

ferraras stenciled the back of a black jacket with the Cullen Crest Stencil

A big congrats to ferrars, who will receive a hardback copy of Scrap Basket Crafts: Over 50 Quick and Easy Projects to Make from Fabric Scraps.

Photobucket

Happy crafting!

Faux Rocher


I love chocolate.

It’s possibly unhealthy how much I love chocolate, but there you are!

Ferrero Rocher are one of my favorite indulgences, so much so that my lovely sister gave me a lovely heart shaped box full of them for Valentine’s.  I haven’t opened them yet…letting the anticipation build!

A friend of mine shared a recipe for a clone recipe.  The original came from Australia (love my Aussie friends!) and asked for packs of nuts and other ingredients without specific amounts included.   With my friend’s help, I worked out the “how much” and then gave the recipe my own U.S. touch.

These aren’t identical to Ferrero Rocher, but they’re a darn good facsimile and will be a lovely Valentine’s treat for me and my sweetie!

Faux Ferrero Rocher

  • 1 cup milk chocolate chips
  • 1 cup dark chocolate chips
  • 1 tbs shortening
  • 1 cup chopped lightly roasted peanuts, chopped
  • ½ – 1 cup hazelnuts or macadamia nuts (the real thing uses hazelnuts)
  • 1 (13 oz.) jar of Nutella
  • miniature muffin tins and liners (approx 1 1/4″ size)


I used Hershey’s, but you can use any combination of milk and dark chocolates.


Line miniature muffin tins with wrappers.


Place chocolate chips and shortening in a microwavable bowl. Cook for 3-4 minutes.  Remove from microwave and stir, adding chopped peanuts. Mix thoroughly.


Place small teaspoon chocolate nut mix in base of pan or wrapper.


Place a nut in center.

Nutella
Cover with about ½ tsp. Nutella.


Cover with chocolate nut mix.


Refrigerate until firm, about 1 hour.


Eat!
Makes approximately 30 really yummy candies.

more recipes

Add your Sewhooked-related photos to my flickr group and you might be featured in a future post.

Photobucket

 
Sewhooked Shop | FB | SHFB | Flickr | Twitter | Bloglovin

Make A Mini Valentine


One of the best things about paper pieced patterns is that they are so easy to scale.

The great majority of the patterns I design finish 5″, which makes the math a bit easier.  Want a 10″ block?  Print at 200%.  Want a 1.5″ block?  Print at 30%.

Miniatures have long been a favorite of mine.  They work up quickly and are just so darn adorable when you’re done!

Use Scrappy Heart in miniature and some card stock and you’ve got yourself a cute, fast handmade Valentine for your sweetie!

When choosing a paper pieced pattern to miniaturize, the simpler the pattern the better.  Choose a pattern that is all one piece or only a few individual pieces.  The more paper pieces you have to work with, the trickier your pattern will get and the thicker the seams will be.

For the Valentine’s Card you’ll need:

What to do:


Print your scaled pattern (shown here with the original 5″)

OR use the 1.5″ pattern sets created just for this tutorial (added Feb. 2012)


Piece the block like you would any other

Paper Piecing:  Step By Step


When piecing in miniature, the smaller your seam allowance, the better.  I like a scant 1/8″


This is your block finished from the back and the front.


Follow the stitching line around the block.  This will make it possible to remove the paper without stretching the bias edges.  Contrasting thread shown.


Remove the paper from the block.

**note – normally, the paper needs to stay on the block until it is pieced in it’s final destination, but because we are appliqueing it, that’s not an option here**


card stock and wall paper or seam roller


Fold the card stock in half, and press the crease with the wall paper roller.  The same effect can be achieved with a  scoring tool.


Position the block on the front of the card.  Use a zig zag or other decorative stitch to applique in place.

Now fill the inside with sweet nothings and you’re ready to give it to your Valentine!

Get lots of free patterns right here on Sewhooked!

Add your Sewhooked-related photos to my flickr group and you might be featured in a future post.

Photobucket


Sewhooked Shop | FB | SHFB | Flickr | Twitter | Bloglovin

Oh Wavy Baby!

oh wavy baby

printable pattern

This is yet another baby blanket I designed specifically with charity blankets in mind.  A local charity receives the great majority of my crochet efforts and because crochet is so portable, I get a lot done.  I crochet in the carpool line, when I watch telly or when I have to wait for an appointment.  If my hands are busy, I tend to be happy!

Use up your scraps, go solid, variegated or ombre.  Each works brilliantly with a wavy ‘ghan!

For the scrappy version, you’ll need:

  • odds and ends of a worsted weight yarn (sample made in Red Heart)
  • K hook

Finished size is approximately 40″, depending on your gauge.   This is a homey pattern and I don’t fuss about the gauge, as long as it’s crocheting up nicely.

Note:  When changing colors, join new color with a sl just before you ch 3 for a new row.

ch 132

Row 1: 1 dc into third ch from hook and in the next three ch, *skip 2 ch, 1 dc into next 4 ch, ch 2, 1 dc in next 4 ch*.  Repeat * to * until the last six ch.  Skip 2 ch, 1 dc in next 3 ch, 2 dc in last ch.  Ch 3, turn.

Row 2: 1 dc in first st, 1 dc in next 3 st, *sk 2 st, 1 dc in next 3 st, (1 dc, ch 2, 1 dc) into ch 2 sp.  1 dc in next 3 st*.  Repeat * to * until the last six ch.  Skip 2 ch, 1 dc in next 3 ch, 2 dc in top of last dc.  Ch 3, turn.

Pattern: Repeat row 2 until blanket is approximately 40″ long.  Finish off.

For a more delicate pattern, try a lighter-weight yarn with a smaller hook.

Happy crafting!

signature-2016

Sewhooked Pattern Shop

My Quilty Facebook ♥ Sewhooked on FB

Sewhooked Facebook Group

Instagram

Posts on this blog may contain affiliate links. Thank you for your support. ♥

Sewing: Hem Extension (aka unhemmed)


Jeans Hem Extension – UNHEMMED

You probably know by now, I’m a big thrift store shopper, especially for clothes.

I found a great pair of Gap jeans that fit perfectly, and only paid $1.25 for them!  The only drawback was that they were too short, even for my average-length legs.

This was my easy-peasy solution.  It works with or without the extra trim. I just love adding a little flavor to my thrifted goods!

You’ll need:

  • One pair of too-short jeans
  • seam ripper or razor (use razor with care, I don’t want anyone losing a finger!)
  • steam iron set to “cotton”
  • optional:  trim, ribbon, etc.
  • sewing machine
  • thread
  • scissors

What to do:

  1. Rip out the hem using a seam ripper, or, if you have a steady hand, a razor works great to get through the heavy duty stitching.
  2. Press the legs out, removing any bits of thread left from ripping out the seam.  You may need steam for this step to get the old hem lines nice and flat.
  3. If the previous location of the bottom edge is a holey or ragged, you can add ribbon, leftover quilt binding, or any other washable trim by pinning around the outside.  Tuck the ends under and then top stitch both edges.
  4. For an unfinished edge, zig zag around the edge of each leg or use a decorative stitch.  Once they’re washed, they’ll fray nice and even.

I’ve got several pairs of jeans like this, all of them found for super cheap and all of them with their own distinctive look.  Love them!

Happy crafting

Find my free patterns on Sewhooked & Fandom in Stitches.

♥ Jennifer O

Posts on this blog may contain affiliate links to help cover the cost of my website. I thank you for your generous support. ♥


Announcement: Guest Blogger on Quilting Gallery

It’s Guest Blogger Month on Quilting Gallery.  Yours truly is today’s Guest Blogger!

I had a great time writing up the post and collecting quilty photos and would like thank Michele from Quilting Gallery for including me in such an awesome project.

There’s a prize from me for the first five commenters, so be sure and have a look.


Don’t forget about the Friends of sewhooked challenge!

Craft: Pet Name Tags


I have kitties.

Lots of kitties.  Okay four, that’s lots, right?

My fur babies all stay indoors, but I still feel safest if they’re wearing a name tag with our address and phone number on it in addition to their city tags.   They’re sneaky, ya know?

After numerous lost collars, a couple of which turned up years later under a pile of boxes in the garage, I started making replacement tags instead of buying.  It’s easy and inexpensive.

The first one I made is about two years old now and is still in perfect shape!

You’ll need:

  • Polymer clay (like Sculpey or Fimo; also called polyclay)
  • polymer clay pasta machine OR poly clay rolling pin
    **please note: if using a pasta machine, it needs to be used only for polymer clay. DO NOT use the same machine that you’d make pasta with**
  • parchment paper
  • 1 to 1 1/2″ cookie cutter with a uniform shape (don’t be tempted to make the tag larger, the larger it is, the more likely your pet will be able to get into his or her mouth)
  • Bic Cristal Pen lid
  • toothpick or skewer
  • alphabet stamps (optional)
  • small cookie sheet
  • regular or toaster oven
  • acrylic paint
  • large jump ring
  • Sculpey Glaze


Knead a small amount of clay, then roll out with a clay roller or pass through pasta machine on the next to thickest setting.  On my machine, that’s an 8.

For more information about handling polyclay see Working With Polymer Clay on Crafts-For-All-Seasons


Place clay on a small on the parchment paper.   Press the cookie cutter straight down, making one blank.  If you’re making more than one, now is a great time to cut them all out.


Tag blank.


If you have alphabet stamps, use them to stamp on your pet’s name by gently pushing the stamp straight down and lifting straight up.  Shown are jewelers stamps, which need to be cleaned well if used with polymer clay.

If not using alphabet stamps, use the directions for finishing the back of the tag.


Finished front with a fun star stamp added.


Take the lid off the Bic pen.  It makes a perfect circle cutter for the jump ring hole.


Press the pen lid down into the clay, removing gently to avoid distorting the tag shape.  Remove the plug from the lid with a toothpick.


For the back (and the front if you don’t have stamps), use the toothpick to gently write your address or phone number.

Place parchment paper with tag(s) on cookie sheet and bake according to manufacturer’s directions.


Once the tags are cool, rub a small amount of paint onto the front and backs with a paper towel, wiping away the excess.  This will make the letters stand out.  Allow that paint to dry for a few minutes (it won’t take long) and then coat with glaze.  Allow to dry.

Add jump ring.

Because your pet will be wearing this and safety is always first, let the tag dry at least 24 hours before attaching it to his or her collar.

Merlin, wearing his custom kitty tag

As always, if you make any pattern or craft from sewhooked,  I’d love to see a photo. Email me or add it to the Friends of sewhooked flickr group.

Happy crafting

also posted on cut out + keep


Don’t forget about the Friends of sewhooked challenge!