Category Archives: halloween

“Mellocreme” Pumpkin Earrings

Mmmmm, mellowcreme pumpkins, the yummy little sugar bombs that are really just candy corn kicked up a notch!  In homage to these tasty Halloween treats, how about a fun, easy craft that is cheap and makes enough to share with your friends?

I made the cute pumpkin earrings for a Halloween swap I was recently participated in.  You can make one pair or several!

makes 10 -12 pair

  • 1 block orange polymer clay
  • small amount green polymer clay
  • toothpick or skewer
  • hook ear wires (aka French hooks) (2 for each pair)
  • eyepins (2 for each pair)
  • jump rings (size of your choice)
  • jewelry pliers (I used one round nose and one chain nose)
  • Sculpey Glaze (gloss)
  • small, soft paint brush
  • parchment paper
  • baking sheet
  • optional: business cards and decorative bags for gift giving
Pumpkin Earrings

Separate the orange clay into enough pieces for 10 – 12 pairs of earrings.  Roll each piece into a rough ball shape.

Pumpkin Earrings

Using the round nose pliers, twist the eye pins into a curly shape, making sure each is approximately the same length.  Make the same amount as the orange balls in the last step.

Pumpkin Earrings

Squish the curly part of the eye pin into the orange ball.  Cover wire completely with clay, rounding with your fingers as you go.

Pumpkin Earrings

Add a small amount of green clay, gently pressing it around the wire into a stem shape.  Make sure to leave the “eye” in the pin visible.  If necessary, use a toothpick or skewer to clean out the hole.

Pumpkin Earrings

Use the toothpick to gently roll creases into the orange ball.

Pumpkin Earrings

Wallah!  A tiny pumpkin!  Repeat steps for each earring.

Pumpkin Earrings

Place earrings on parchment paper lined tray and bake according to manufacturer’s instructions.

Pumpkin Earrings

Pumpkin charms, all baked.  They look a little dull, so…

Pumpkin Earrings

Place earrings eye pin side down in Styrofoam.  Gently brush on Sculpey Glaze.  Allow to dry upside down.   Once they’re turned over, add a little more Glaze around the top if needed.

Pumpkin Earrings

Attach the ear wire (French hook) with a jump ring and pliers.  (how to open and close a jump ring)

Repeat for each pumpkin charm.

If making enough to share with your friends, poke holes in a business card with a pin, then slide the ear wire through.  Fold the top end of the business card down and place in a cute little bag.

Happy Crafting!

♥ Jennifer O

Posts on this blog may contain affiliate links to help cover the cost of my website. I thank you for your generous support. ♥

Halloween Bats Tutorial

Easy Felt Bats

Every year, my family and I break out our big orange and black box full of Halloween decorations, cauldrons and punched aluminum candle holders. Folded and tucked into the side of the box are these sweet bats we made years and years ago. They’ve adorned several front doors, including our current home of almost ten years.


Halloween Bat Door Decoration

Super easy and adorable to boot, these anything-but-scary Halloween bats take about five minutes to whip up.

Supplies:

  • Felt Bat Template
  • 1 piece of black acrylic felt for each bat
  • scissors
  • pin
  • hot melt glue gun & glue
  • google eyes
  • round magnets


Gather your supplies


Fold the acrylic felt lengthwise in half. Pin the Bat pattern on the fold.


Cut around the bat shaped pattern, leaving the fold intact. Fold fabric out.


Use hot melt glue to attach google eyes, being careful to use only a dot of glue. Use pattern placement as a guide.


Use the same method to add the magnets to the back of the bat, using the placement shown on the pattern.


Two sizes of eyes.


Looking great!

Once the glue has dried, your batty friends are ready to display!

This is part of my “Way Back Craft” series’; patterns, crafts, tutorials and general crafty memories before the days of this craft blog.

Happy Crafting!

Photobucket

FB | SHFB | Flickr | Twitter | Pinterest| Bloglovin

this tutorial also available on cut out + keep

Get Back Jack!


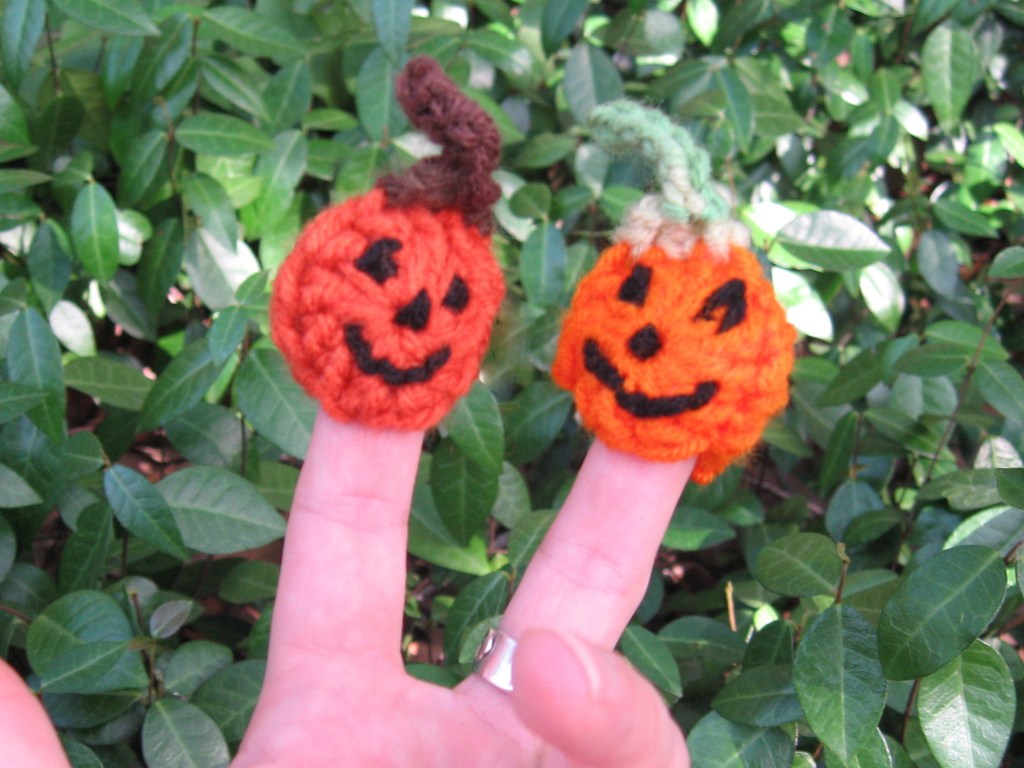
Once upon a time, I had a kindergartner. That kiddo was five years old, and my oldest child. Halloween was, and had always been, our favorite holiday. When it rolled around, I wanted to make something to share with the class. It needed to be easy, child-friendly, and cute.

Jack was born, as were about 20 of his brothers.

It was eight years ago now and my then five-year-old is thirteen and about to start eighth grade. Times have changed, but Jack is still easy, child-friendly…and cute!

also makes a great magnet or pencil topper!

  • Small amount worsted weight yarn: Orange, black, green
  • H hook
  • tapestry/yarn needle

Pumpkin Body:

With orange, make 2 (for fridgie, make 1):

Ch 4, dc in 4th ch from hook 11 times. Join with sl st in top of ch 3. Leave a tail about 8″ long for stitching later.

Jack-o-lantern face:

Using black yarn with yarn needle, make Jack-O-Lantern face on one circle. Finish off.

Joining the the halves:

Using tail, and a yarn needle, join two circles by whipstitching through both sc. Leave an opening at the bottom large enough to put your finger or a pencil inside the pumpkin. Finish off.

Stem:

With pumpkin facing you, sl st in sc one st to the right of center. Sc in next st, sl st in next. Turn. (Do not ch 1) Sl st in next two st. Ch 5, sl st in 2nd ch from hook. Sl st in next 3 ch, sl st again in base sc. Finish off.

If making a magnet or fridgie, only make one circle before adding the stem and then glue a magnet to the back.

Happy Crafting!


signature-2016

Posts on this blog may contain affiliate links. Thank you for your support. ♥