I have a feeling that most of my long-time blog friends are going to look at these patterns and say to themselves, “Huh, I thought I’d seen those before…”
I admit it, it’s true. While working on Sunbonnet Sue’s Magical Friends, I created these patterns and briefly posted them as free content. They have not been online in quite some time now, but emails about them have never stopped. They’re back now, with newly updated easier to read, full-color patterns, just in time for a little bit of Christmas crafting!
These patterns were not included with the original set because the holiday theme just didn’t quite work. Even so, I adore these characters. They’re some of my absolute favorites!
Sunbonnet Sue’s Magical Friends (Supplemental Set 1) – Holly Jolly includes Lil’ St. Nick, Santa’s Helper, Lil’ Mrs. Claus, Wonky Lil’ Christmas Tree and Wee Lil’ Penguin.
Sunbonnet Sue’s Magical Friends are inspired by the classic Sunbonnet Sue and Overall Sam blocks, with a fun, whimsical twist!
Complete paper pieced patterns and sewing order for each. Pattern can be printed in color or gray scale.
5″ finished patterns can be printed in color or gray scale
Included: 5 paper pieced block patterns with sewing order.
These patterns and others are super-easy to buy from the Sewhooked Shop as an instant PDF download with PayPal payment – completely secure shopping through E-junkie! If you feel more comfortable shopping through e-junking, you can go straight to my storefront there.
With your PDF download, you receive a 6 paper pieced patterns with seam allowance and stitching instructions.
Every once in a while, I get an idea that will not leave me alone. I have a friend named Wendy. She loves rainbows. LOVES. Like loves adores worships…you get the picture. I had wanted to make her something rainbow-worthy for a while, when I came across a skein of Red Heart Kids in Crayon, which inspired me to create an awesome, HUGE scarf for her.
I wanted the project to be a surprise, but I also wanted her to know I had a project in the works. Yeah, I’m funny like that. I shared this photo as a teaser!
This is part guidelines, part pattern. It’s super simple and works up really quickly.
Super Long Spiral Boa
~4 oz of worsted weight yarn
Size H or I hook
Loosely cochet an RLC (Really Long Chain). Mine was about 6′ long and reached to my knees. Yours can be shorter or longer.
Row 1 – sc in to the third ch from the hook, and in each ch across. Chain 3, turn
Row 2 – 4 DC in the same st as the turning ch, 5 DC in each st across.
Finish off.
See, I told you it was easy!
When you get done, your spiral is likely to not be 100% spirally. Not to worry! Find a place to hang your scarf…a hook, a clothesline, your bff, etc. Working from one end of the scarf to the other, make sure all the spirals, well, spiral! It might take a few minutes, but it will be worth your effort.
My journey creating Sunbonnet Sue’s Magical Friends, while frustrating at times, was overall a good experience. I learned a lot about publishing and layout, despite not seeing my book in print.
I’ve had many people suggest that I self-publish the book. It’s something I definitely haven’ t ruled out, but for now, I’m very happy to own my own small pattern company and to continue to share both my for sale designs and free patterns designed both by myself and my talented Guest Designers on Sewhooked.
This is the last “official” set of Magical Friends, meaning only that these cute little characters are the last of the patterns that would have been part of the book. Like any other project, there are often tangents that occur that may or may not make the final cut. Those design will be presented as supplemental sets. Those sets were, in my own opinion, not quite obviously magical enough or they have other elements that aren’t very Sunbonnet Sue, or they got away from the basic theme I was following. They’re still fun patterns that I believe captures my my style and enjoyment of the work.
Sunbonnet Sue’s Magical Friends (Set 5) – Busy Bodies includes Broomstick Witch, Fortune Teller, Green Thumb Witch, Old Wise Wizard, Oopsie Daisy Witch and Potion Maker.
Sunbonnet Sue’s Magical Friends are inspired by the classic Sunbonnet Sue and Overall Sam blocks, with a fun, whimsical twist!
Complete paper pieced patterns and sewing order for each. Pattern can be printed in color or gray scale.
5″ finished patterns can be printed in color or gray scale
Included: 5 paper pieced block patterns with sewing order.
These patterns and others are super-easy to buy from the Sewhooked Shop as an instant PDF download with PayPal payment – completely secure shopping through E-junkie! If you feel more comfortable shopping through e-junking, you can go straight to my storefront there.
With your PDF download, you receive a 6 paper pieced patterns with seam allowance and stitching instructions.
Add your Sewhooked-related photos (that includes my patterns posted to Fandom In Stitches!) to my flickr group and you might be featured in a future post!
There’s just something a little extra magical about a story with animals in it. Perhaps it’s how they seem to perceive our needs and be our friends, without ever being able to verbally communicate. Maybe it’s because they’re cute or maybe, just maybe, it’s because we see something simple and appealing when we look at our cat curled up in a spot of sunshine.
Enter Sunbonnet Sue’s Magical Friends (Set 4) – Friendly Familiars: Wizard with Rat, Witch with Owl, Witch with Cat, Wizard with Snake and Wizard with Toad.
Sunbonnet Sue’s Magical Friends are inspired by the classic Sunbonnet Sue and Overall Sam blocks, with a fun, whimsical twist!
Complete paper pieced patterns and sewing order for each. Pattern can be printed in color or gray scale.
5″ finished patterns can be printed in color or gray scale
Included: 5 paper pieced block patterns with sewing order.
These patterns and others are super-easy to buy from the Sewhooked Shop as an instant PDF download with PayPal payment – completely secure shopping through E-junkie! If you feel more comfortable shopping through e-junking, you can go straight to my storefront there.
With your PDF download, you receive a 6 paper pieced patterns with seam allowance and stitching instructions.
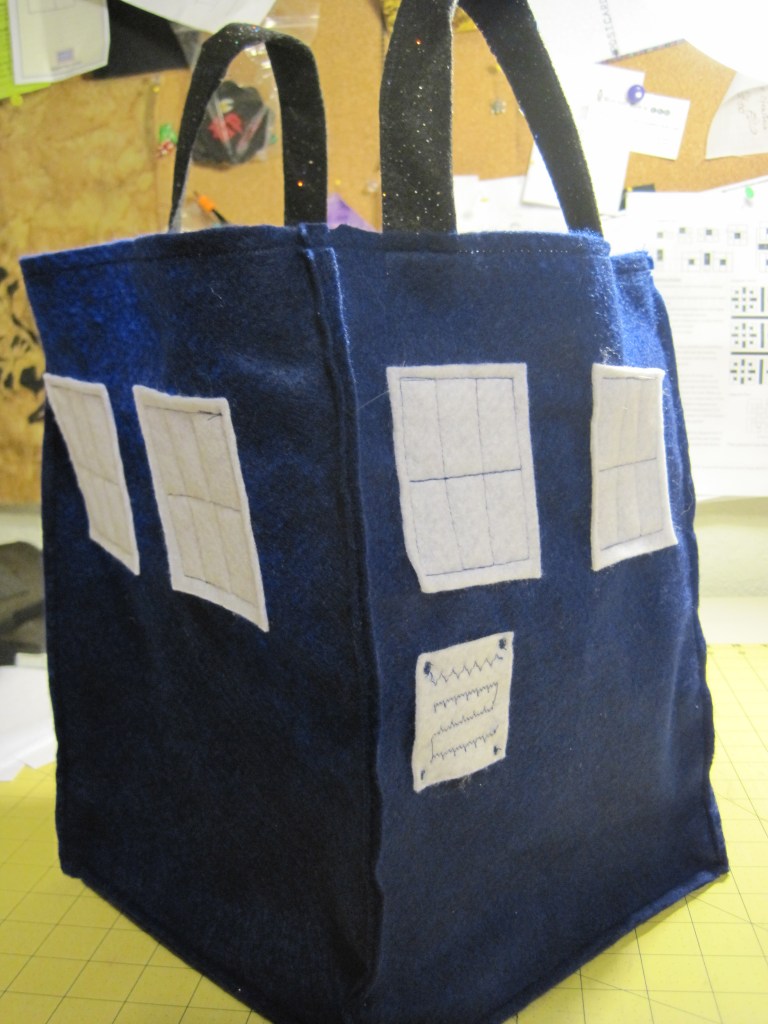
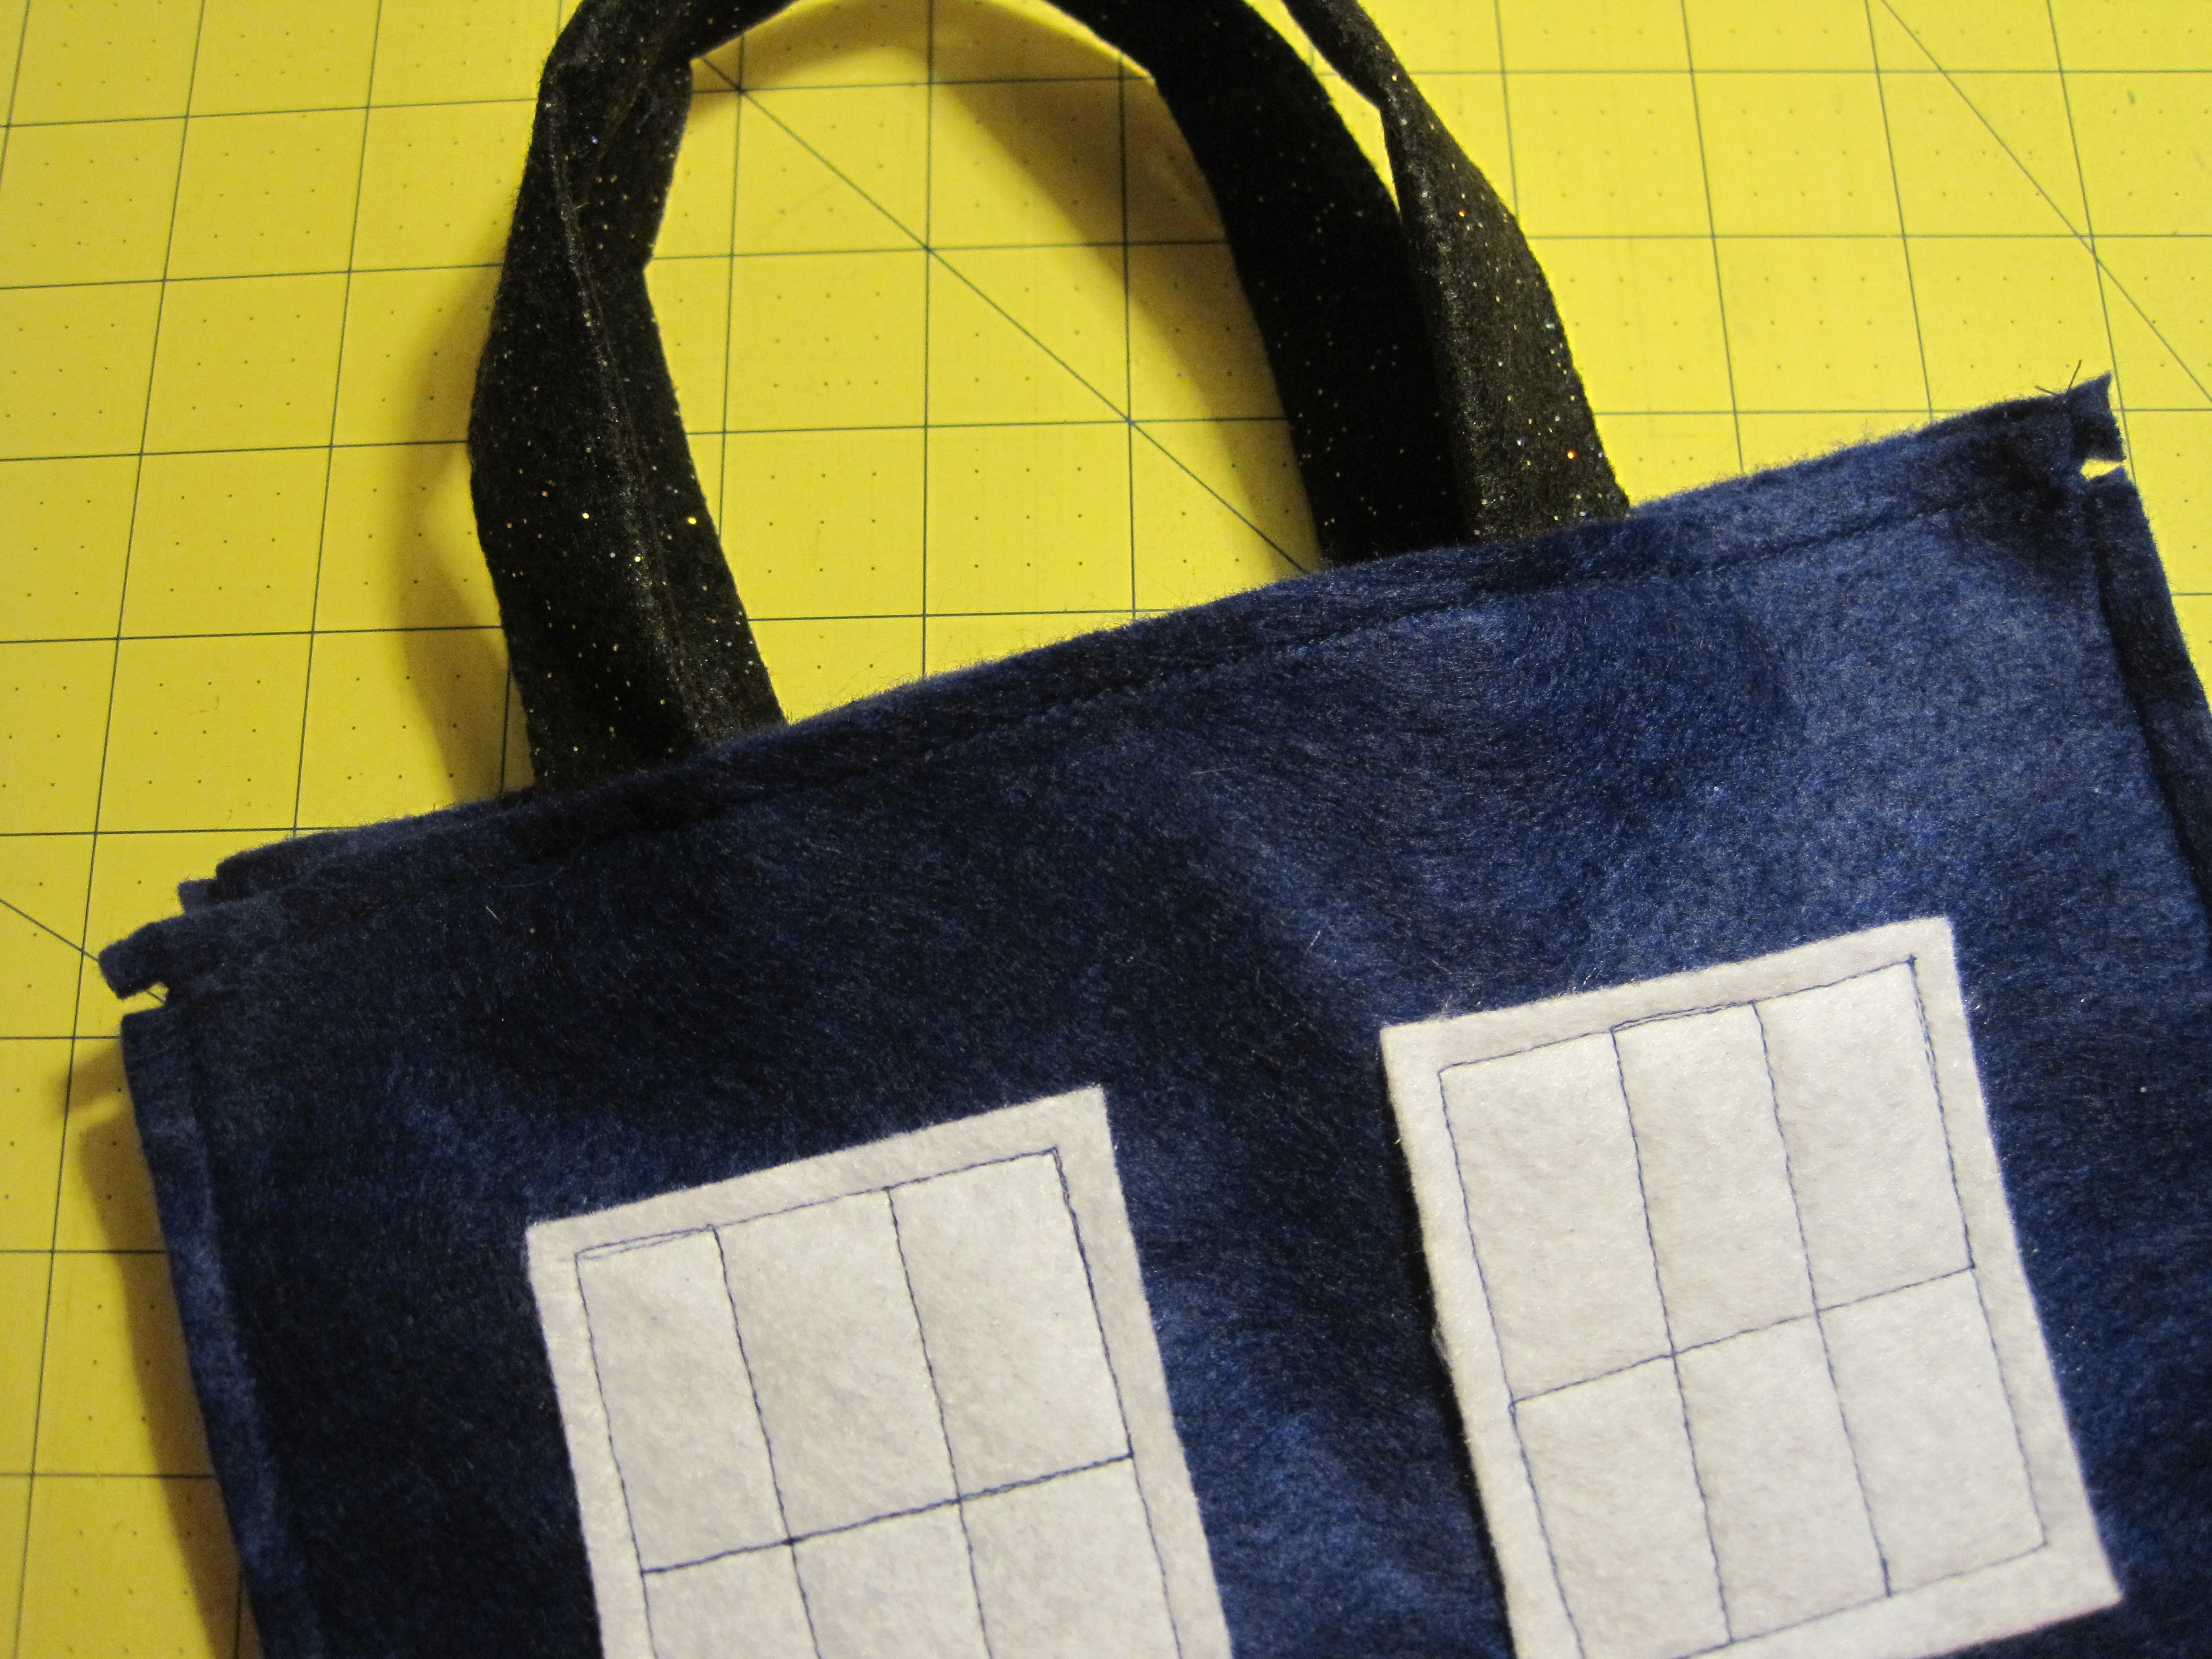
Being the Doctor Who obsessed family that we have become, I suppose it’s no surprise that one of my kids is going as The Doctor for Halloween. My eldest has their Ten costume all ready to go, courtesy of a day of thrifting. Because I can’t not be involved in costume making, I asked if there was anything I could do.
“Mum, can you can you make a TARDIS bag for my treats?”
You better believe I can!
Despite it’s awesomeness, the TARDIS Treat Bag is super simple.
You need:
9″ x 12″ acrylic felt sheets – 5 dark blue, 1 white and 1 glitter black
scissors
thread (I used navy blue)
ruler (rotary, if you’ve got one)
rotary cutter (optional)
sewing machine (optional)
You can definitely do this project without a rotary cutter and ruler and even without a sewing machine, so those items are optional. If you do hand stitch, make sure you make tight, even stitches and use heavy-duty knots so you don’t lose your candy!
Cutting Instructions:
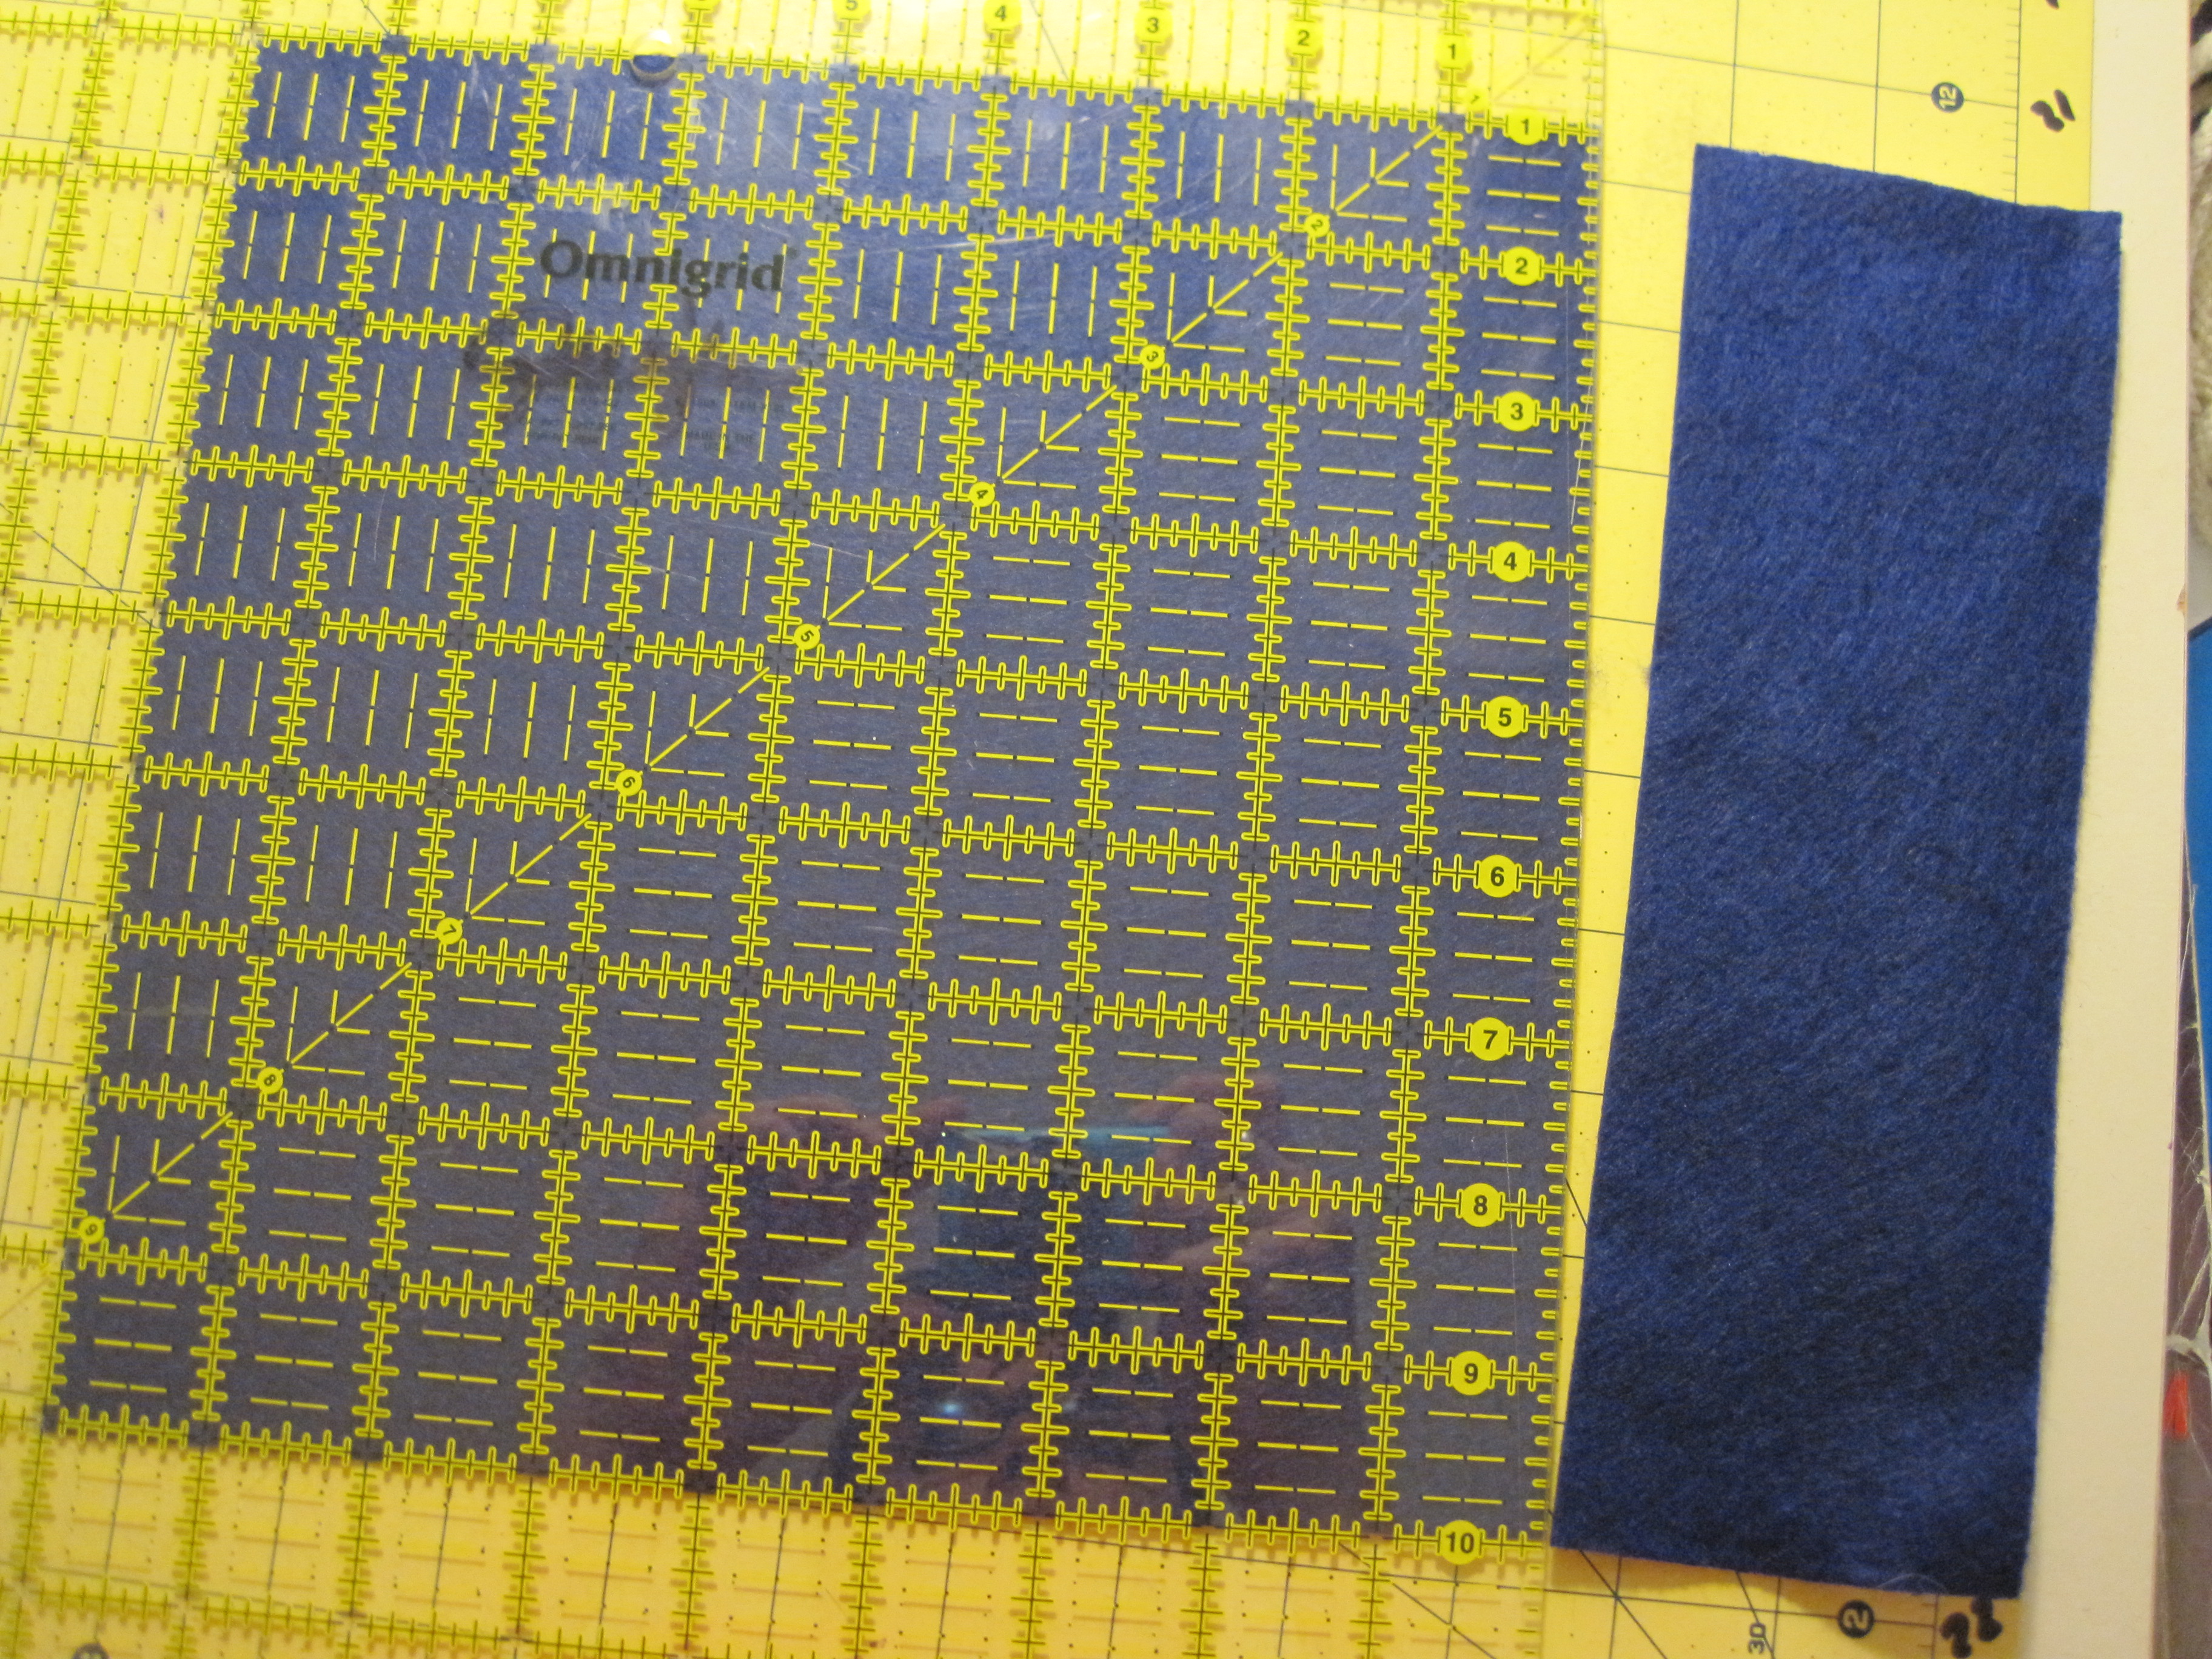
from 1 sheet of blue felt (the other 4 sheets of felt stay 9″ x 12″), cut:
9″ x 9″ square -bag bottom
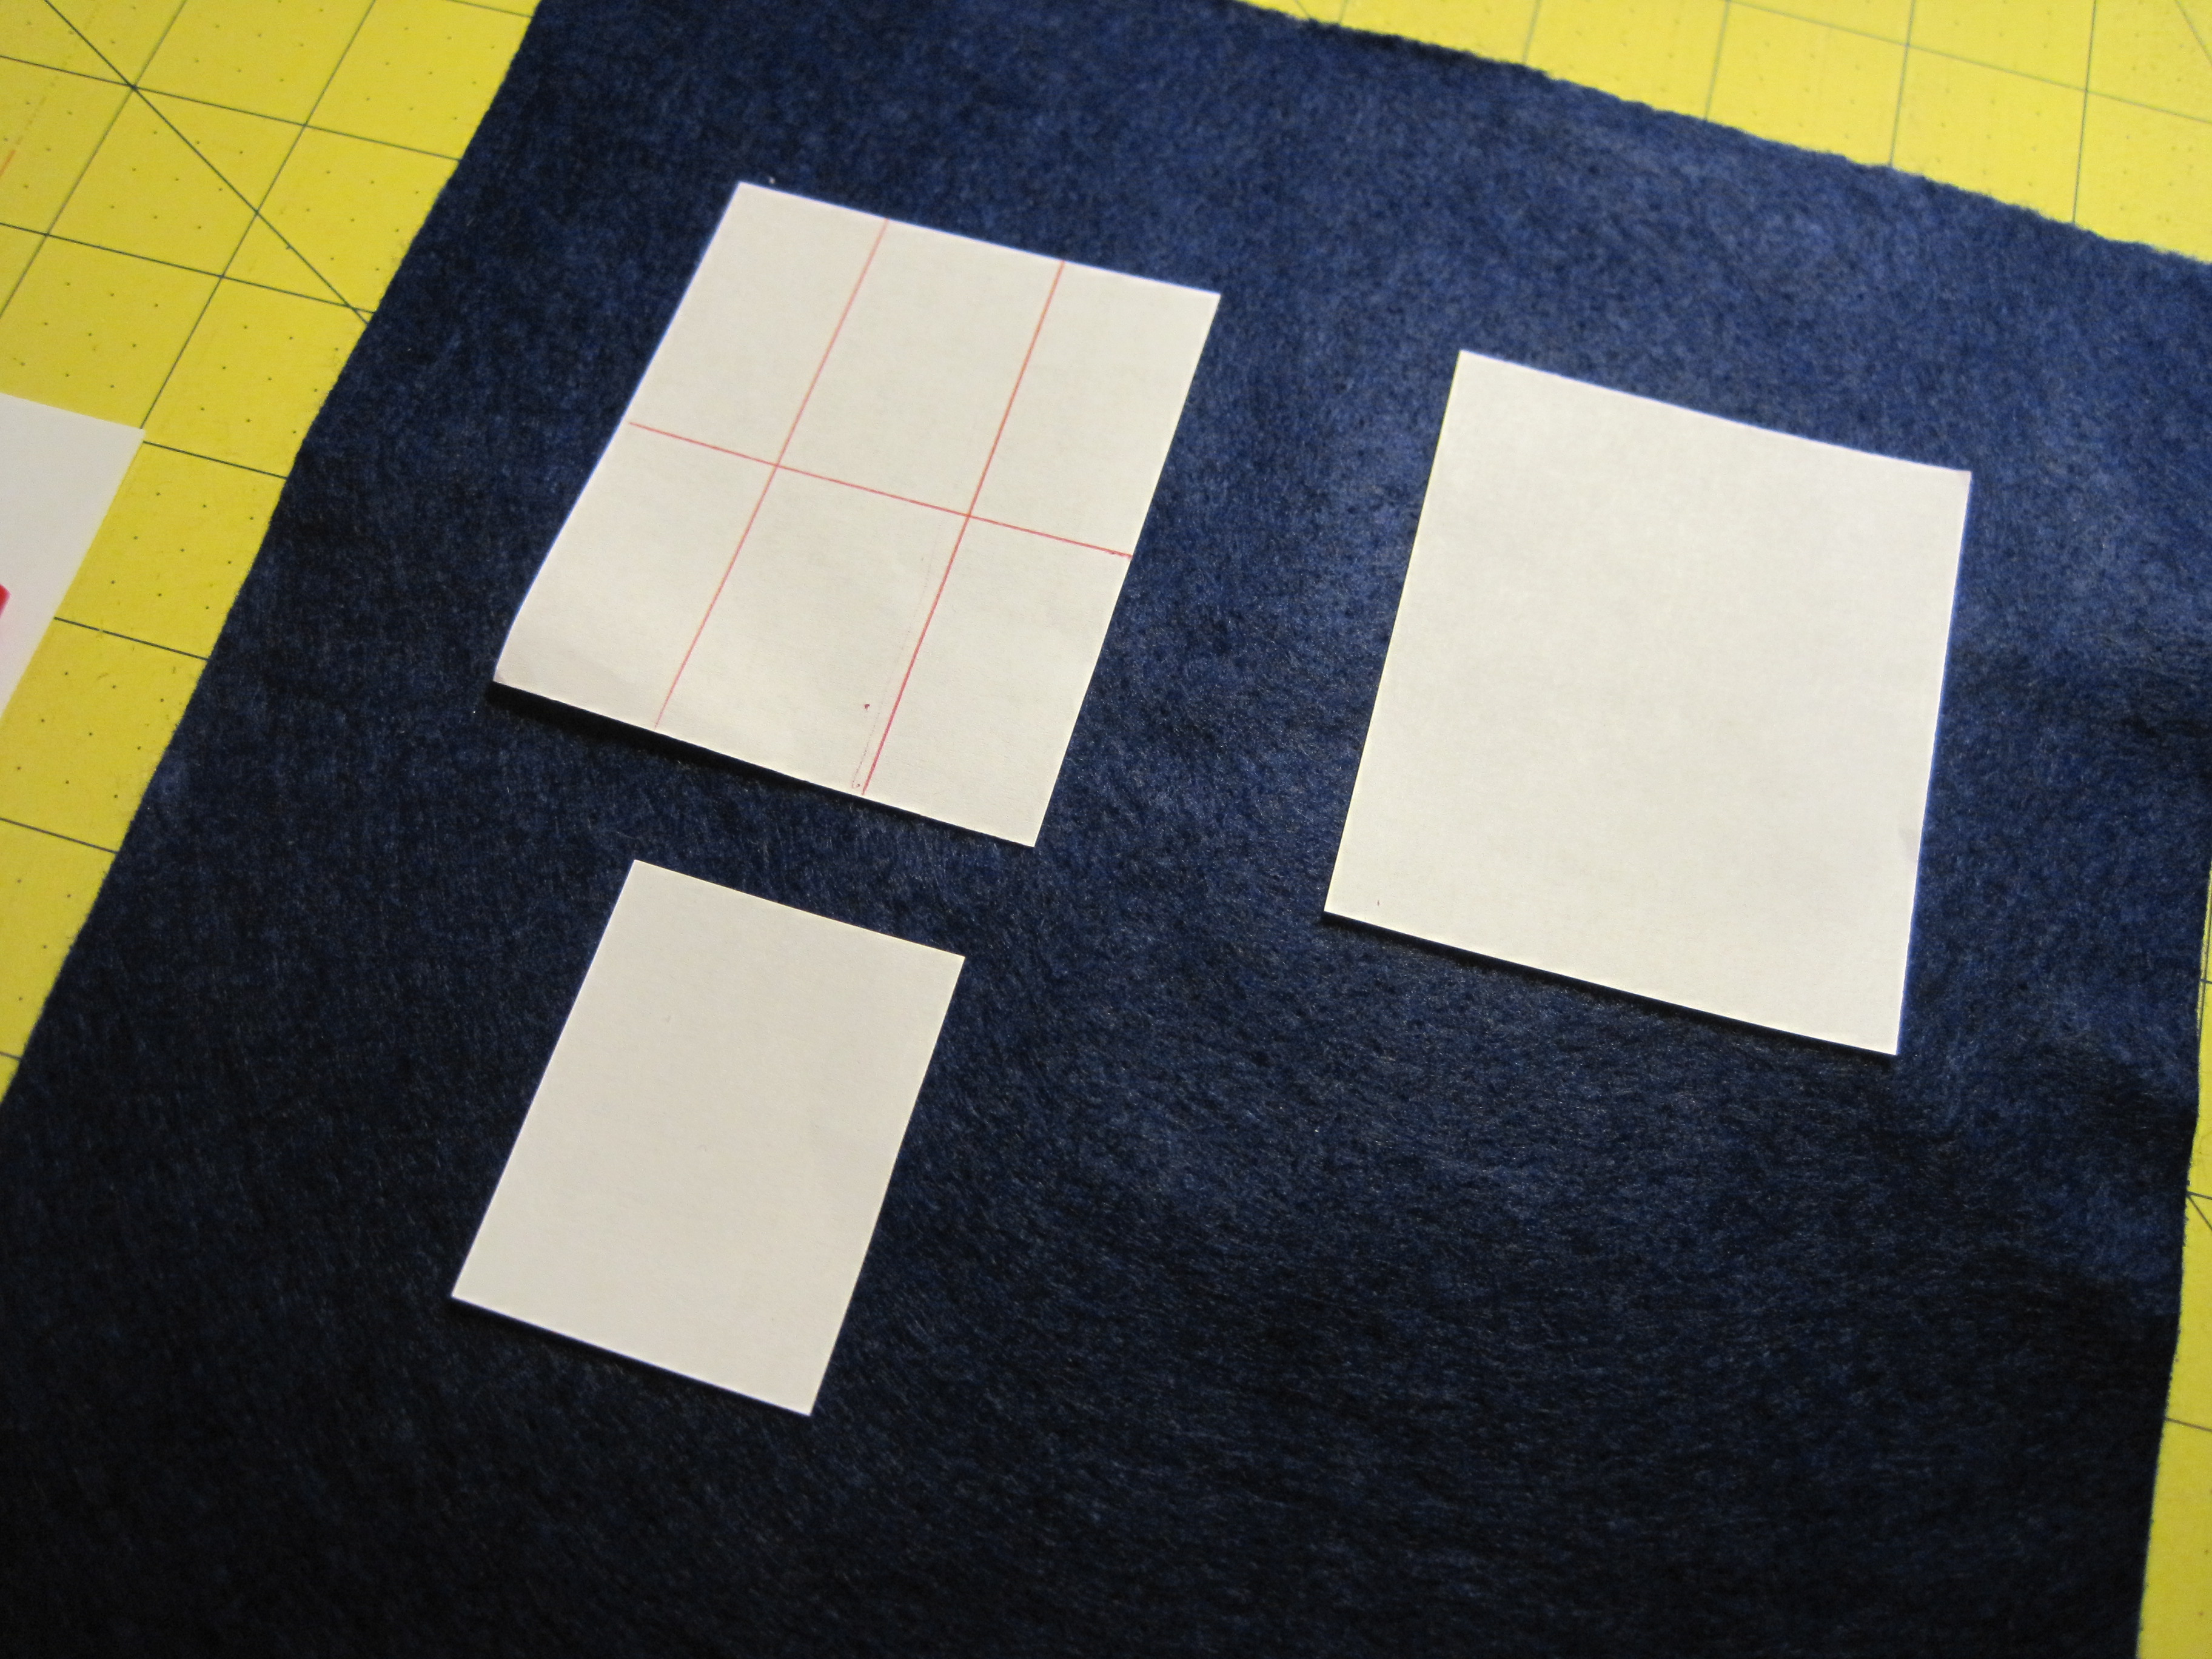
from 1 sheet of white felt, cut:
8 – 2 1/2″ x 3″ – Windows
1 – 1/2 x 2″ – Notice
(optional) 4″ x 5″ – cell phone pocket
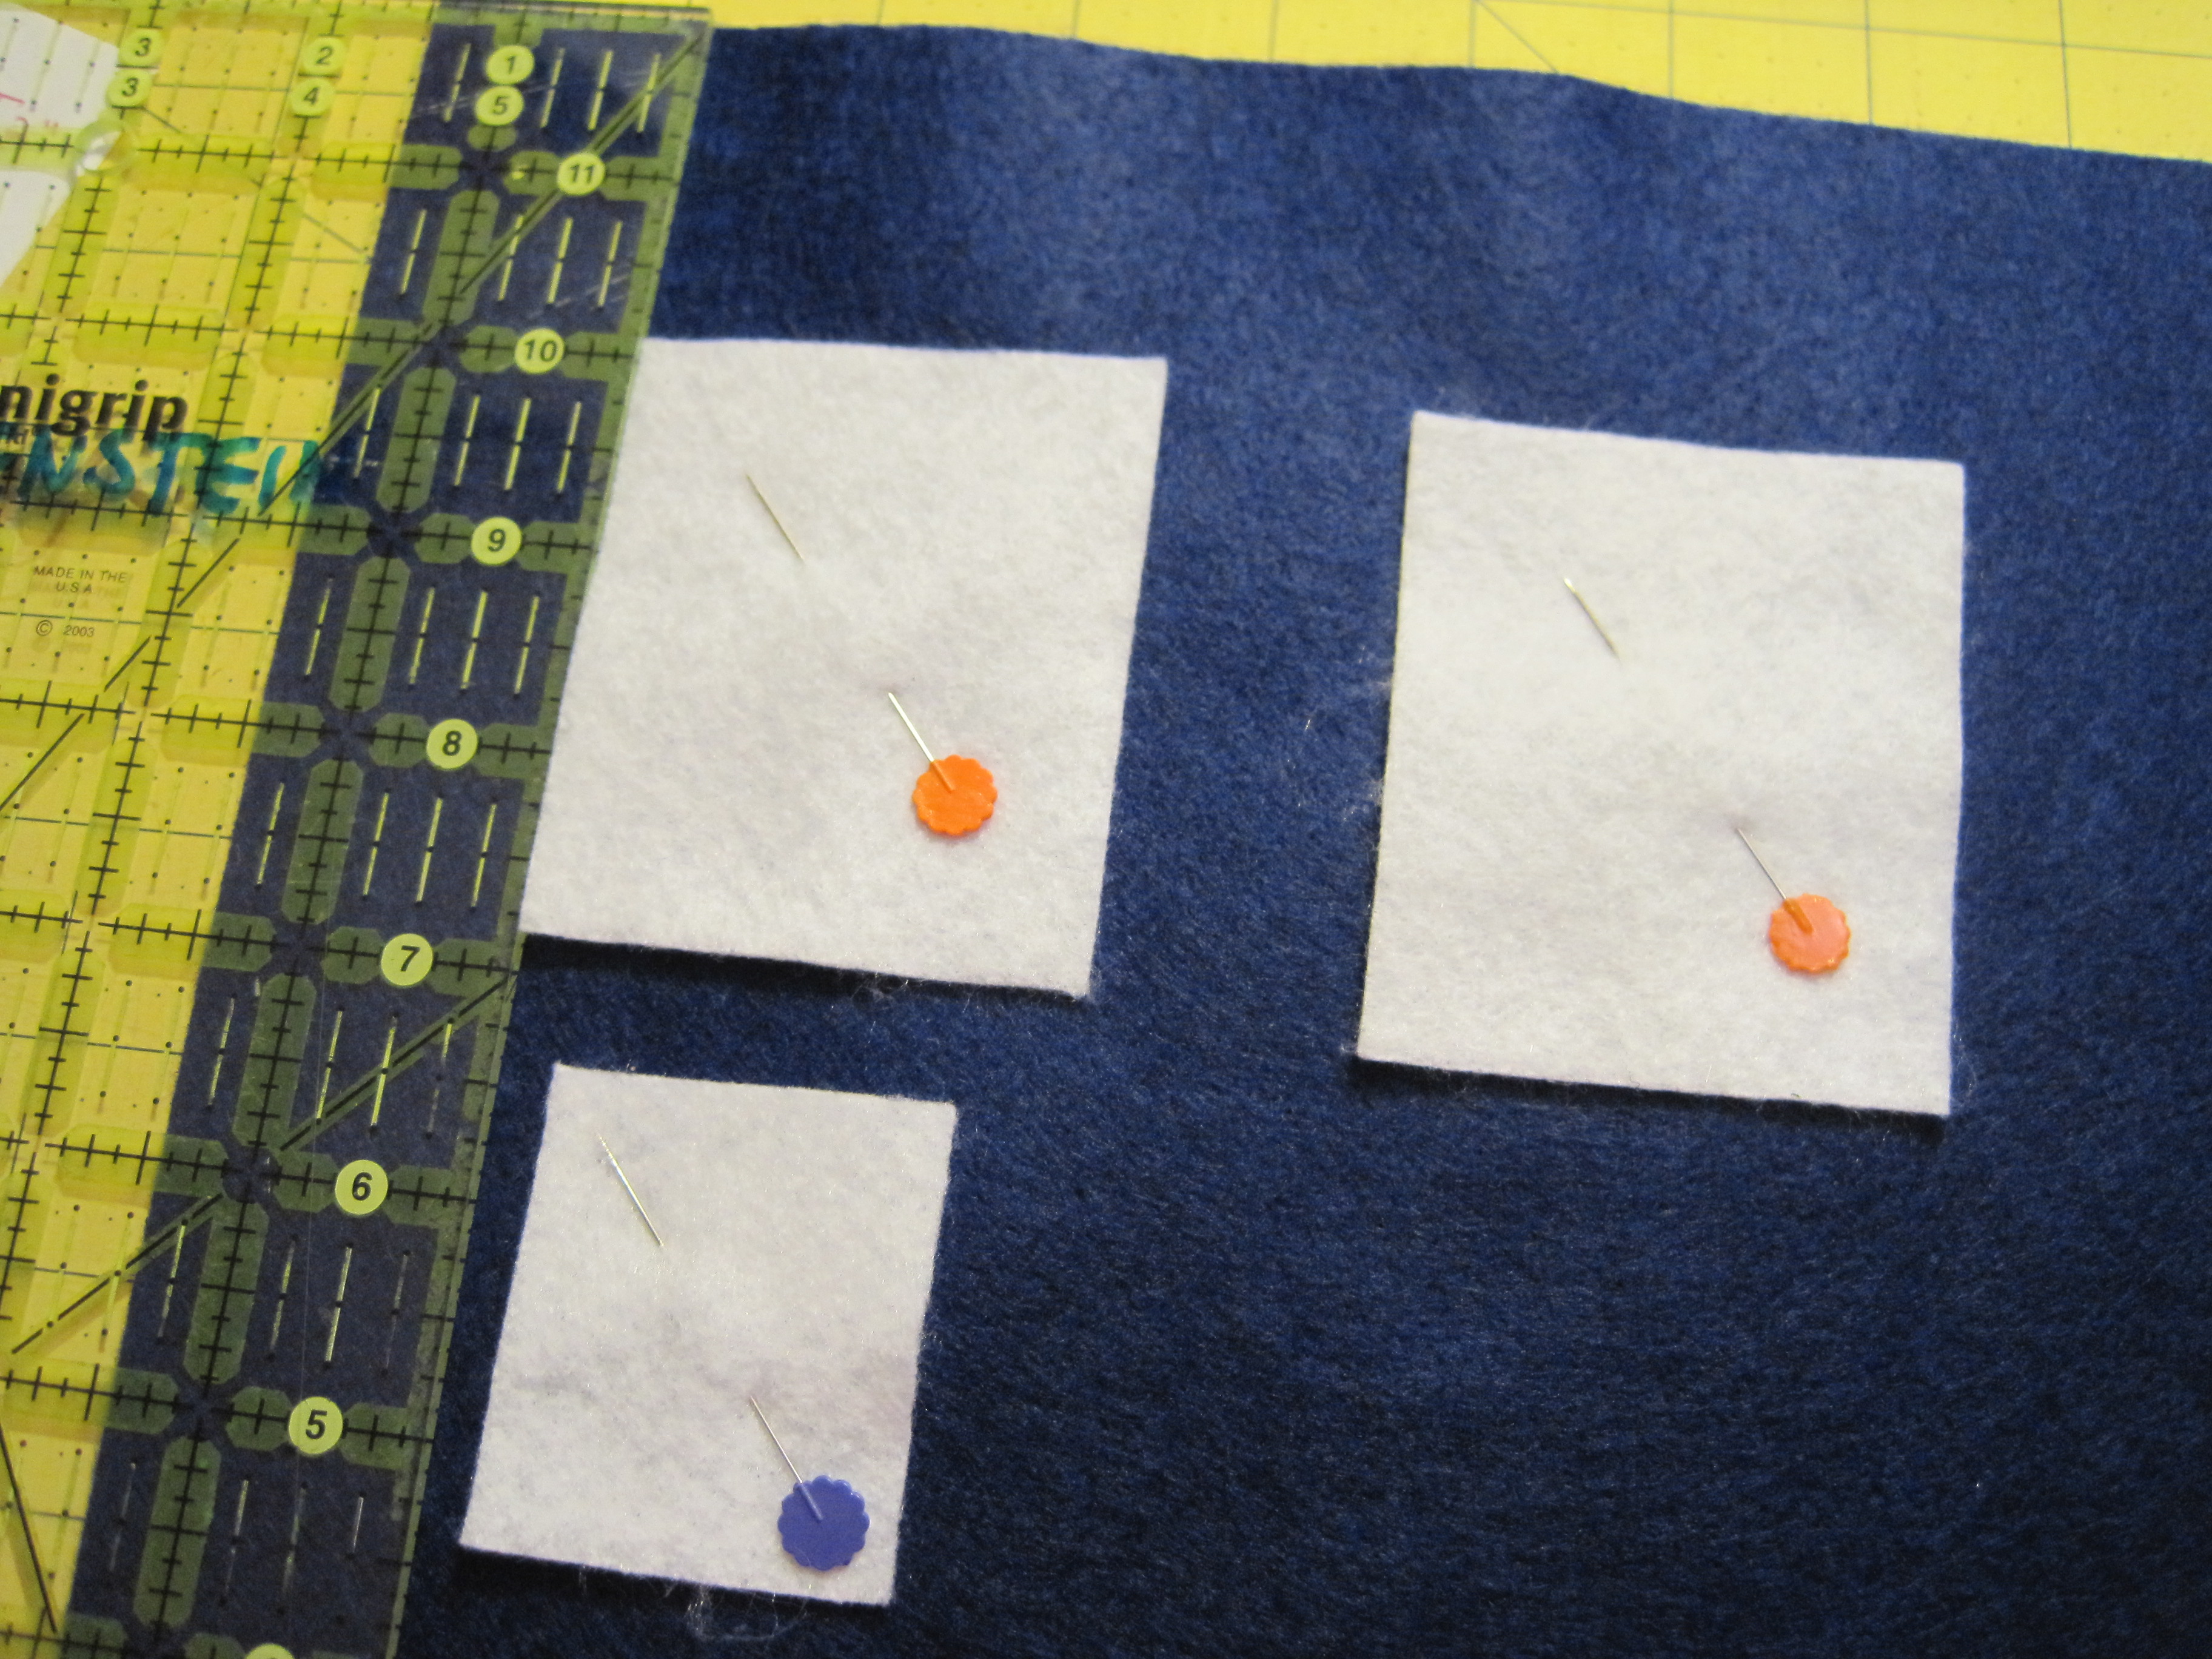
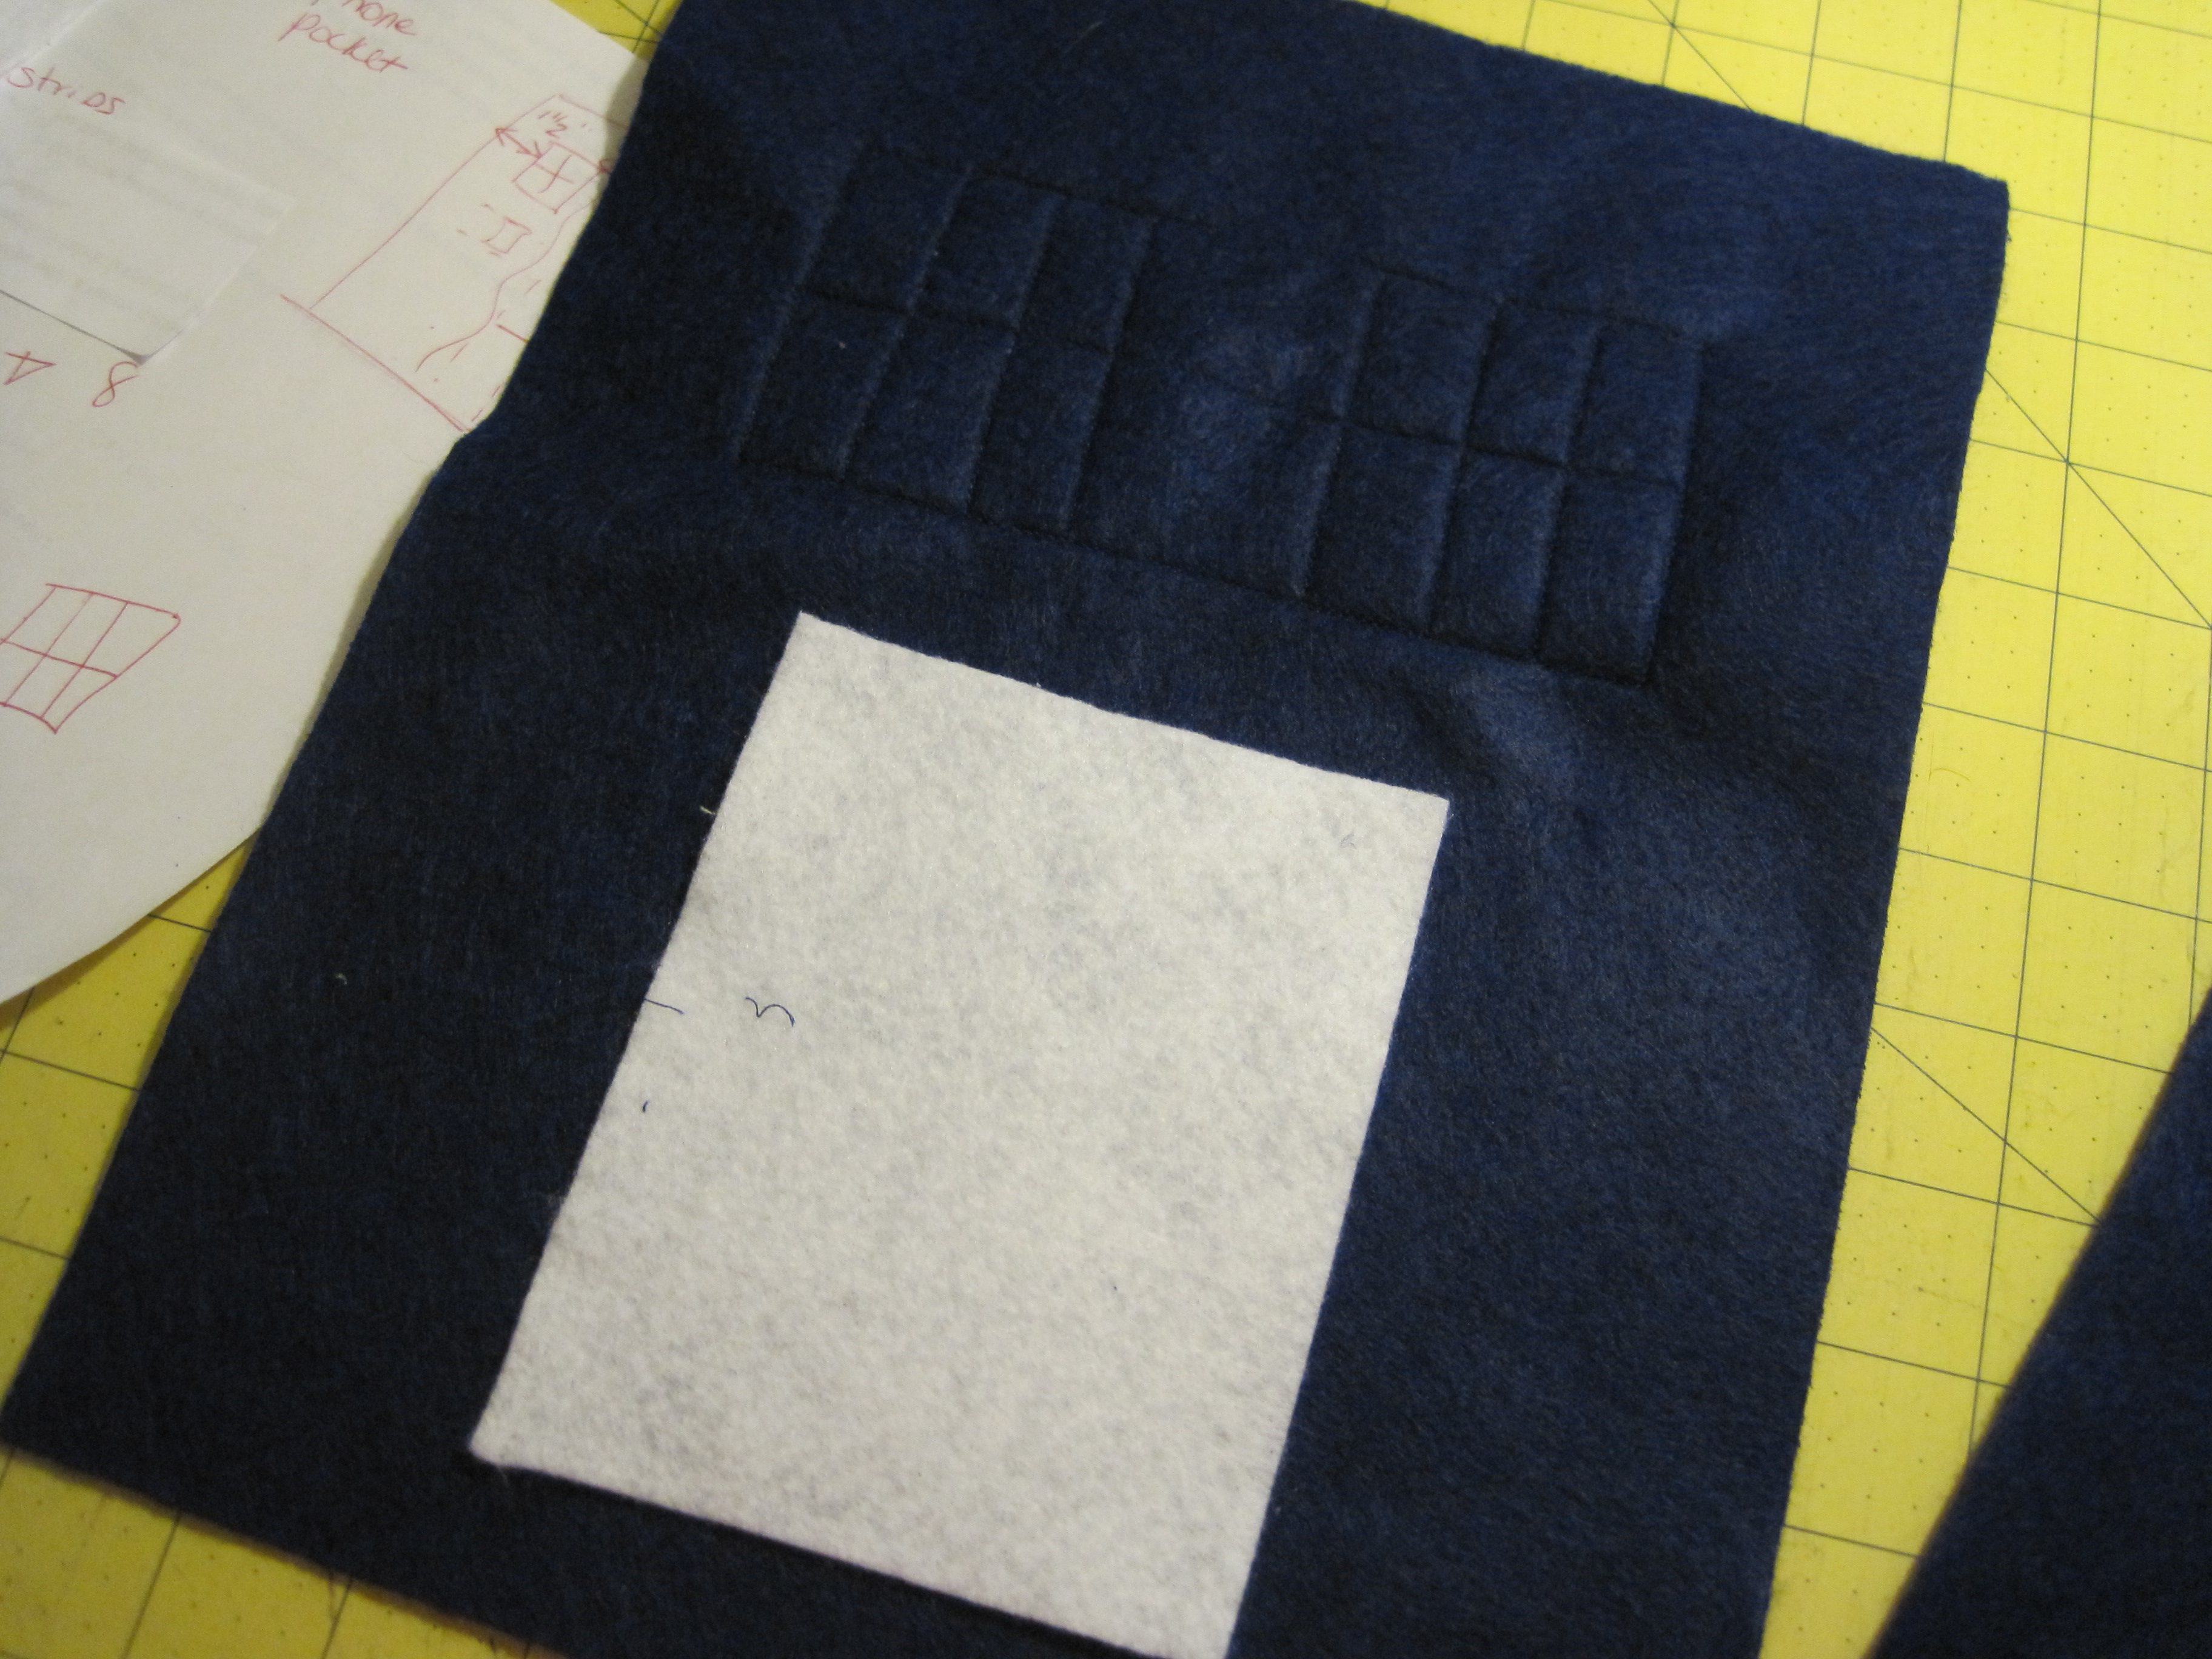
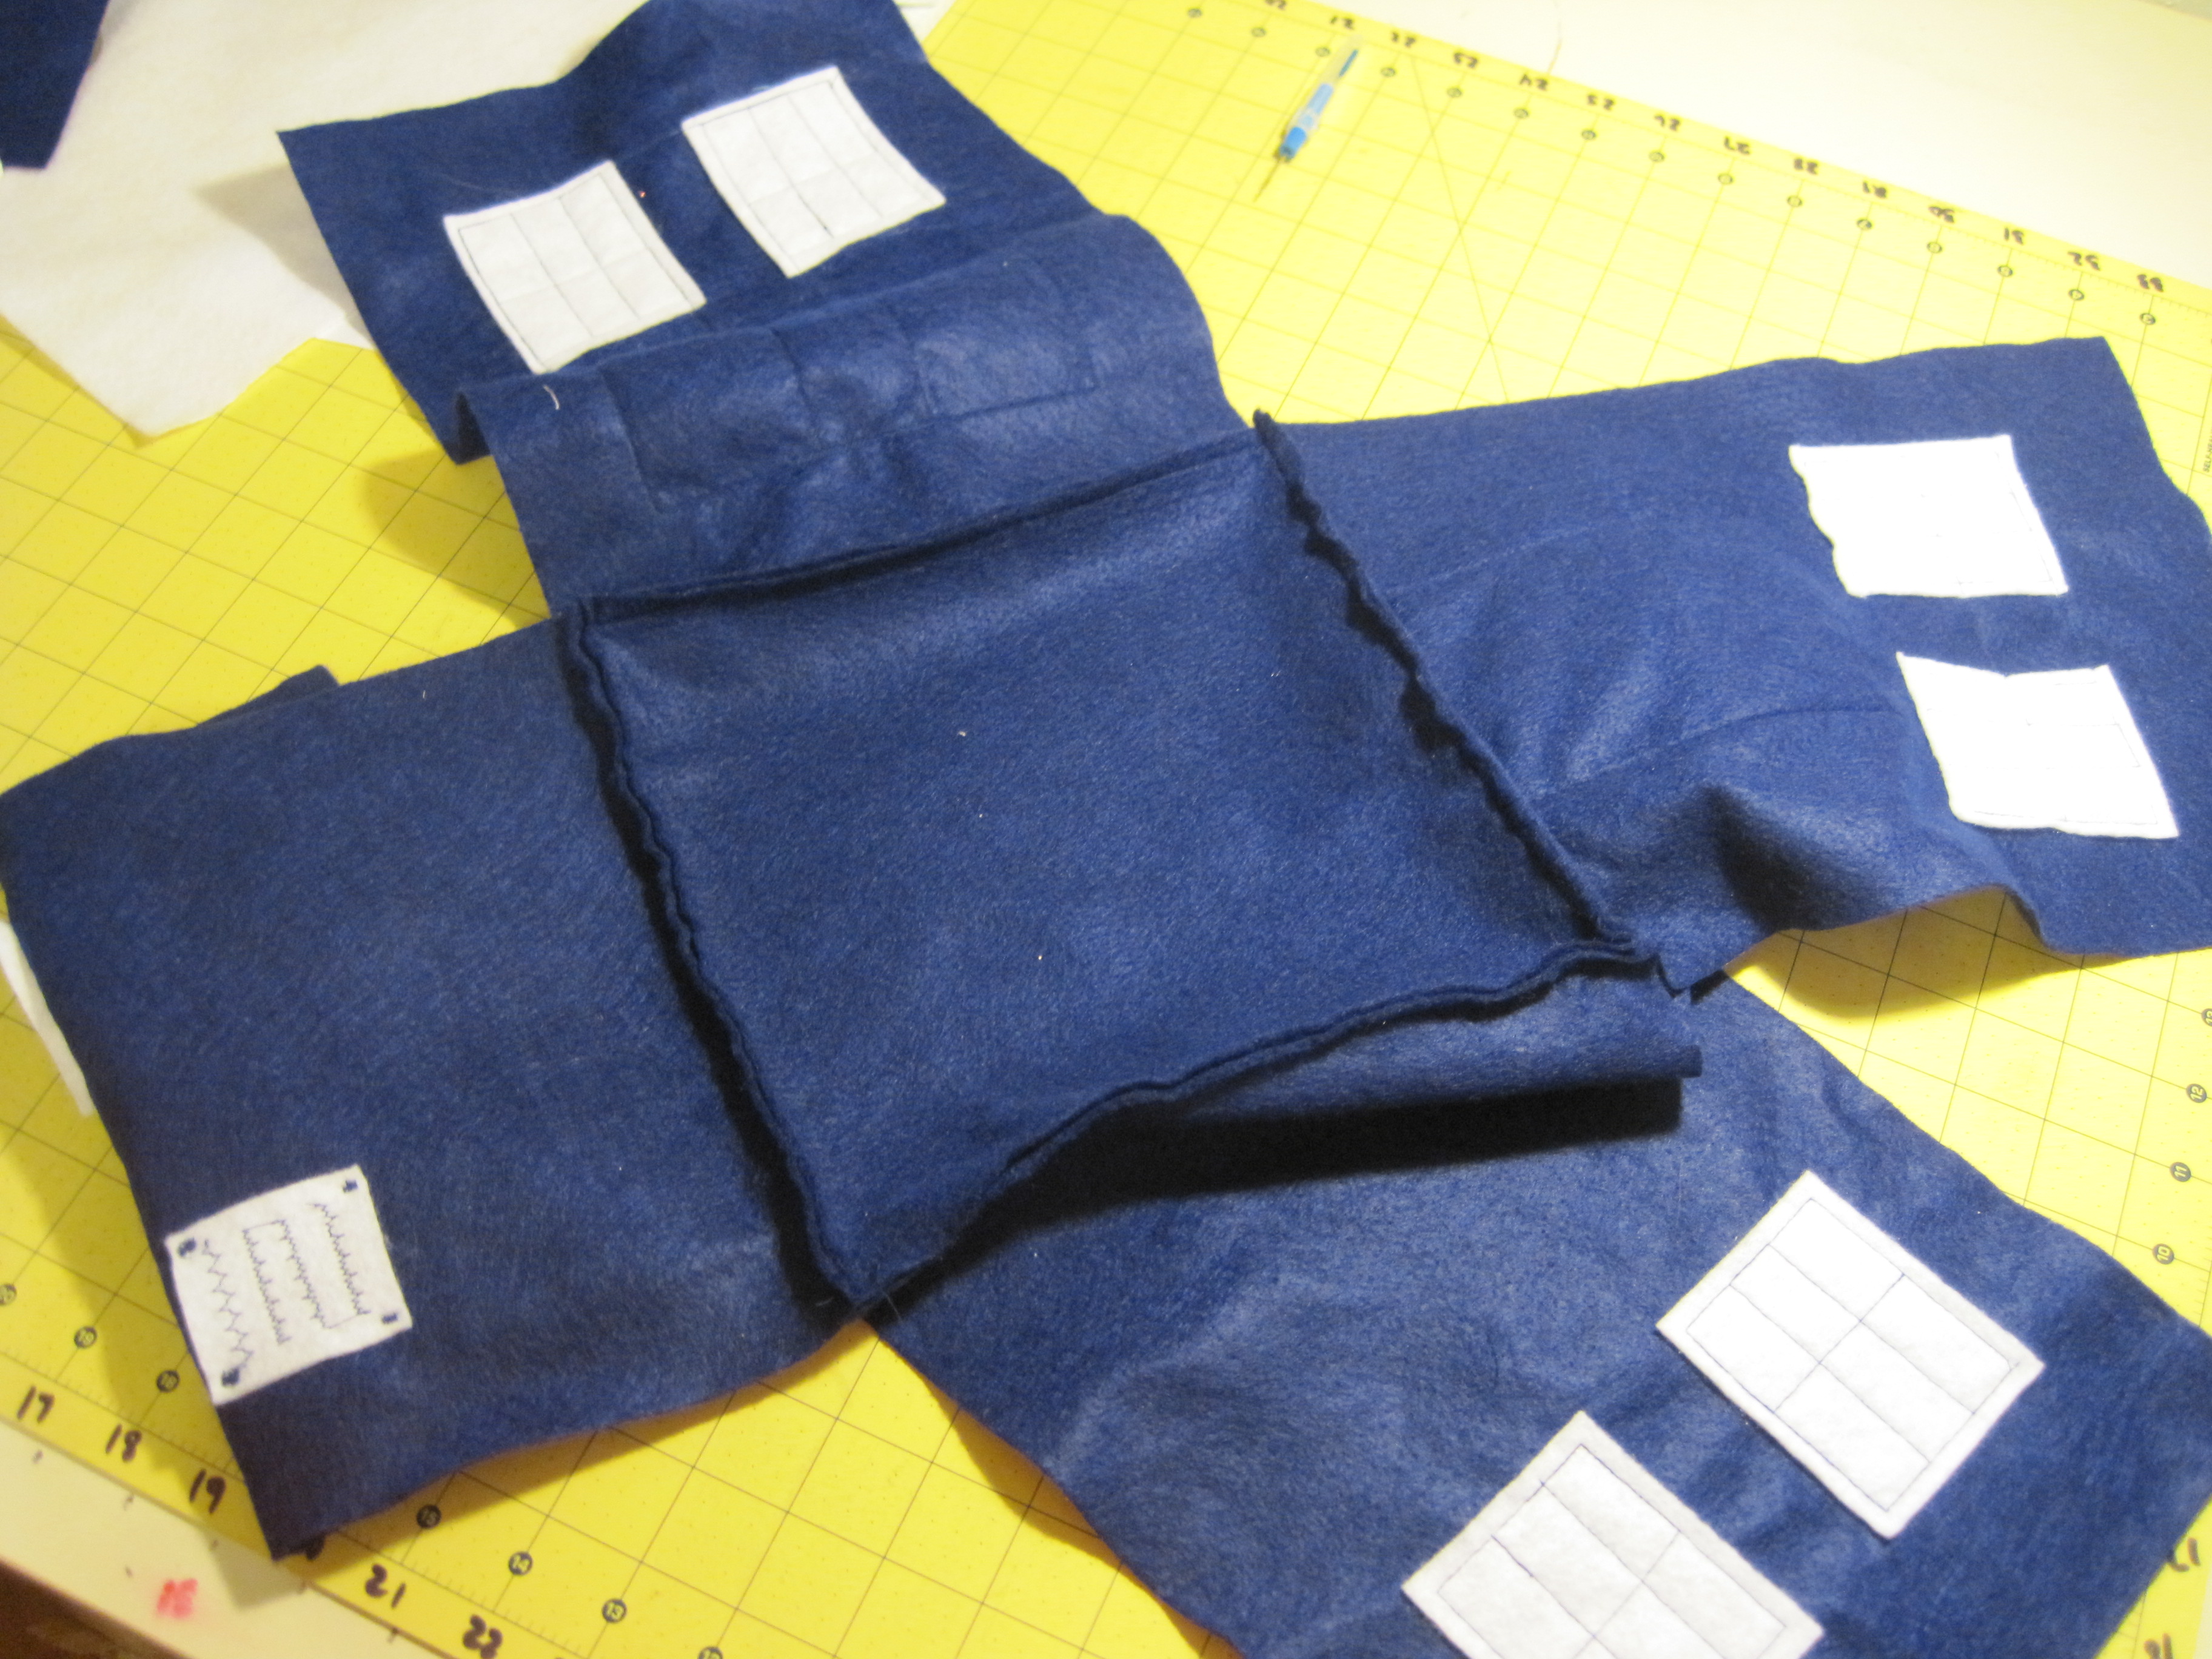
Using your ruler, arrange the window pieces on the 9″ x 12″ sheets of felt so that they are 1 1/2″ in from the sides and 2″ down from the top. For the TARDIS front, center the notice under the left window, leaving about 1/2″ in between.
Arrange window pieces on remaining three 9″ x 12″ blue felt.
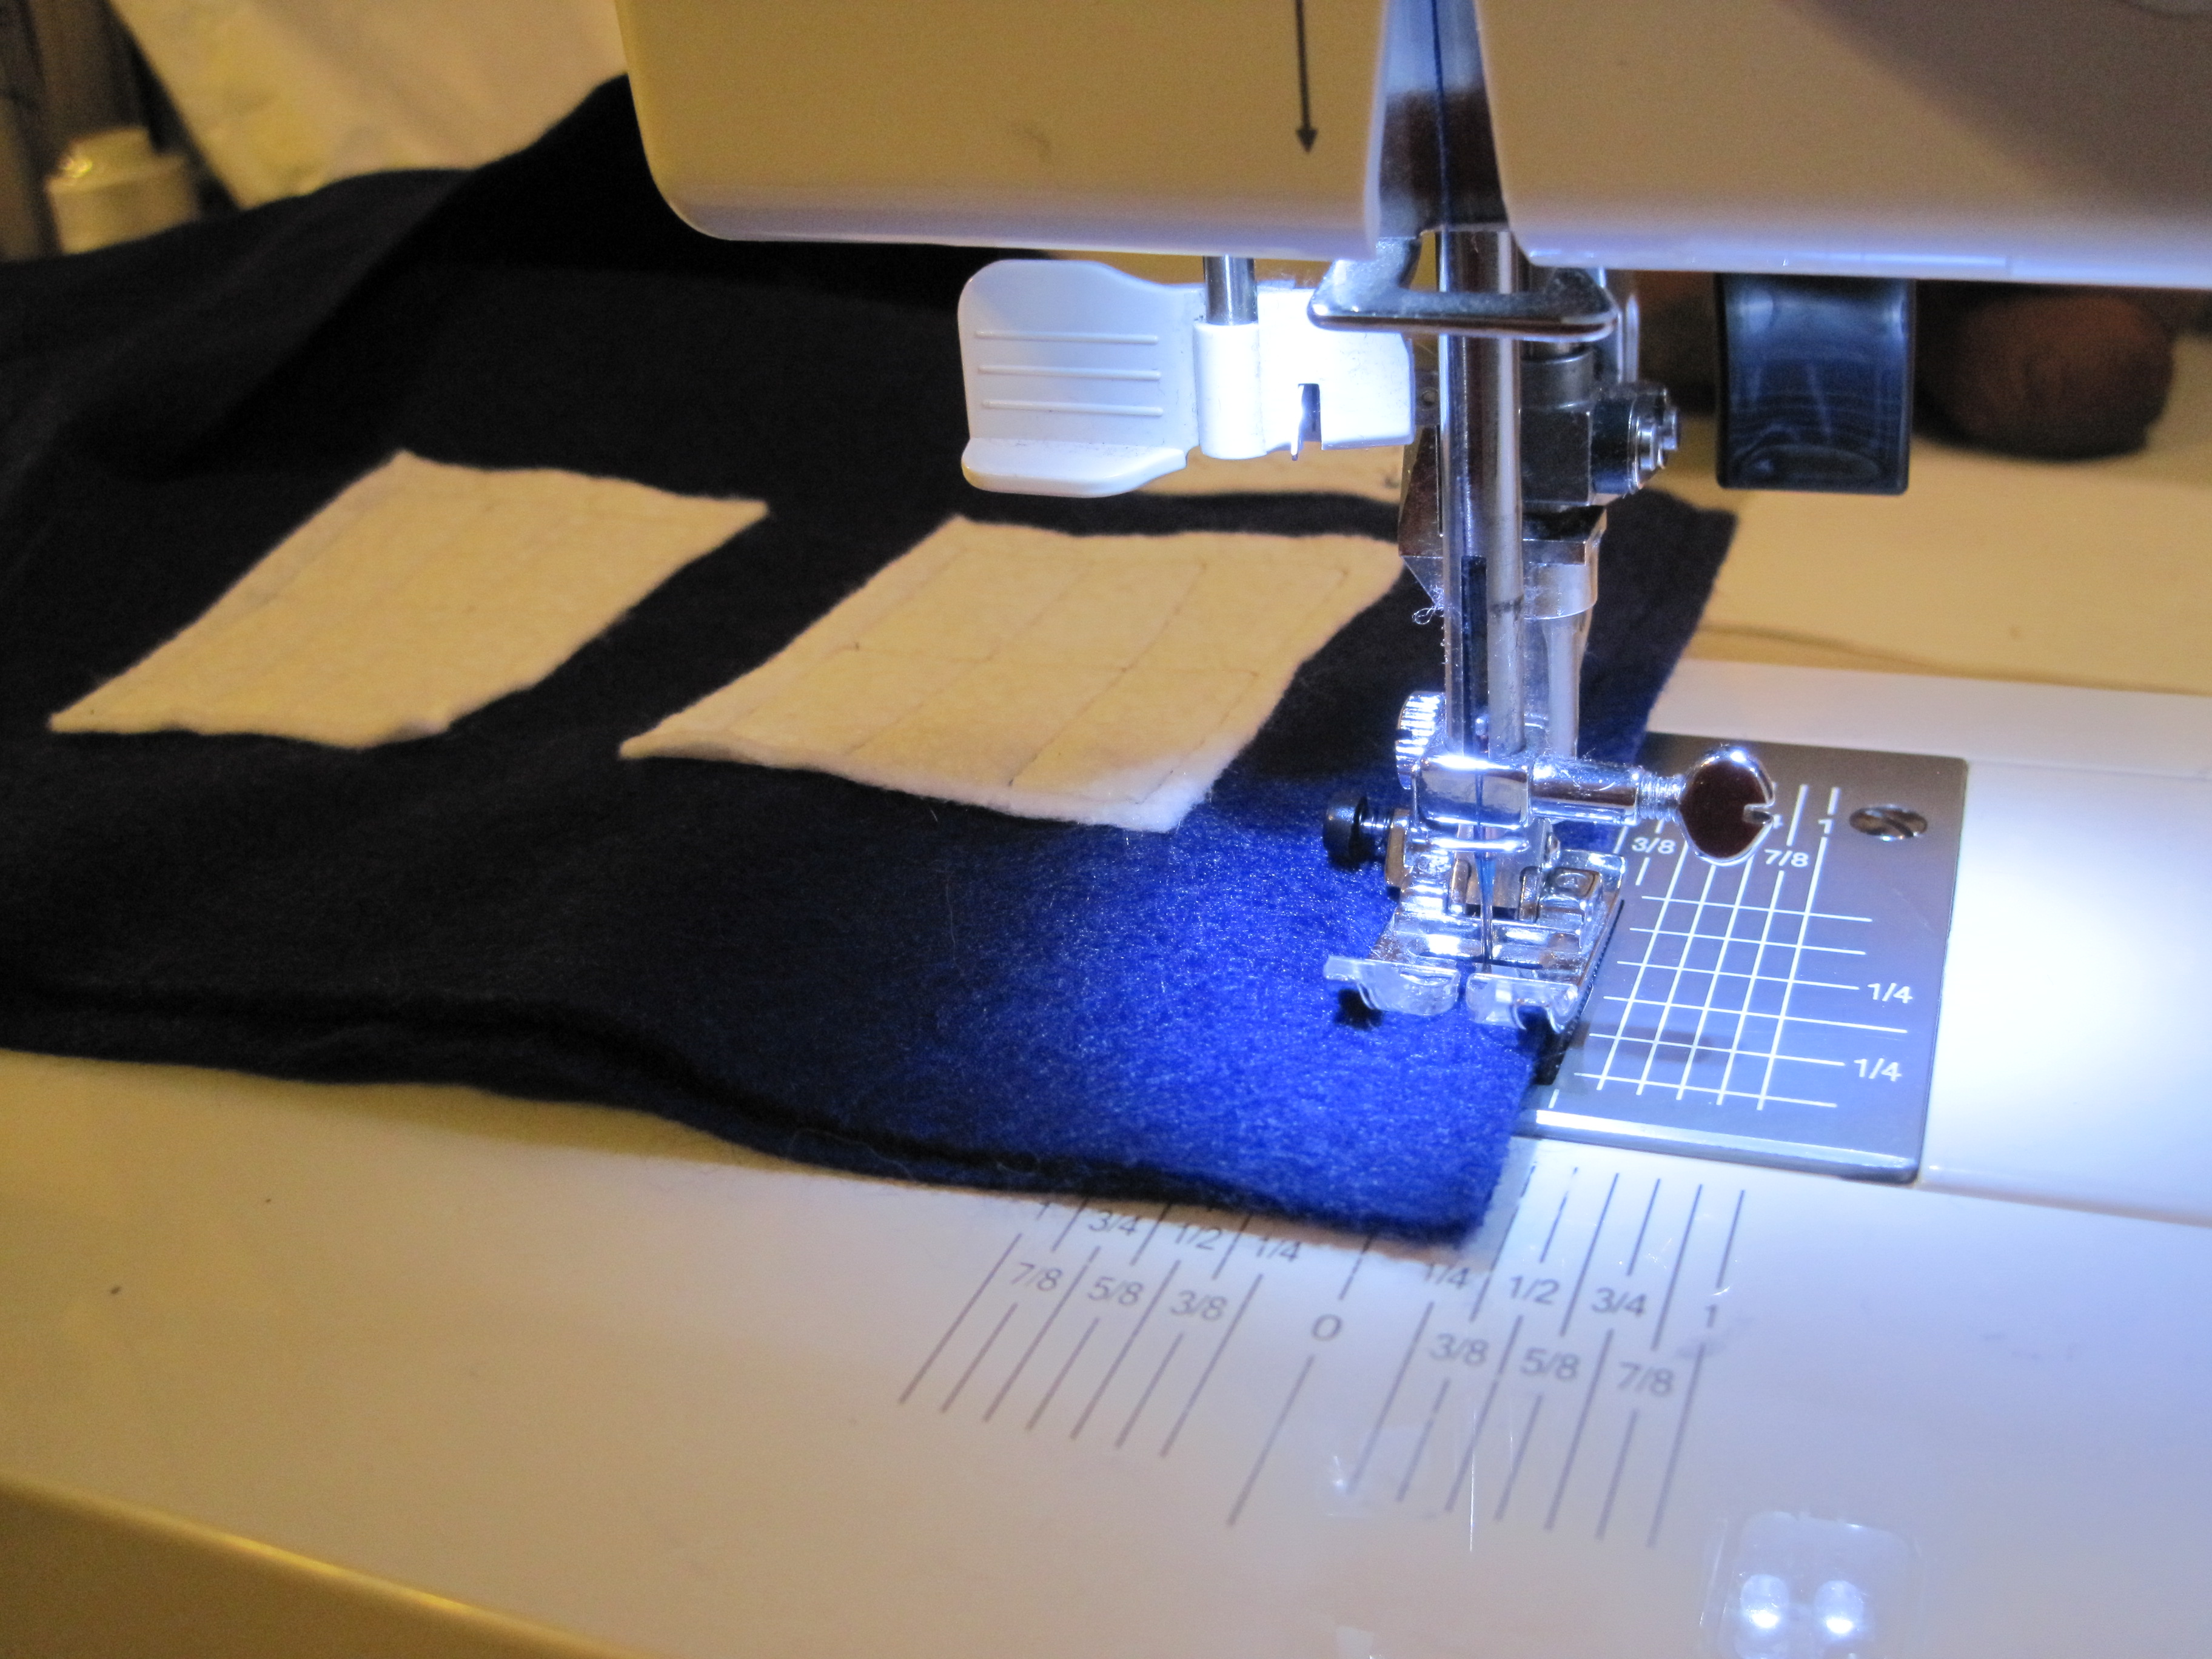
Stitch windows in place, 1/4″ in from outside of white felt. The TARDIS windows have six panes. My windows are estimated, but you can measure and divide your stitching if you choose. Repeat for the two sides that are NOT the front of the TARDIS.
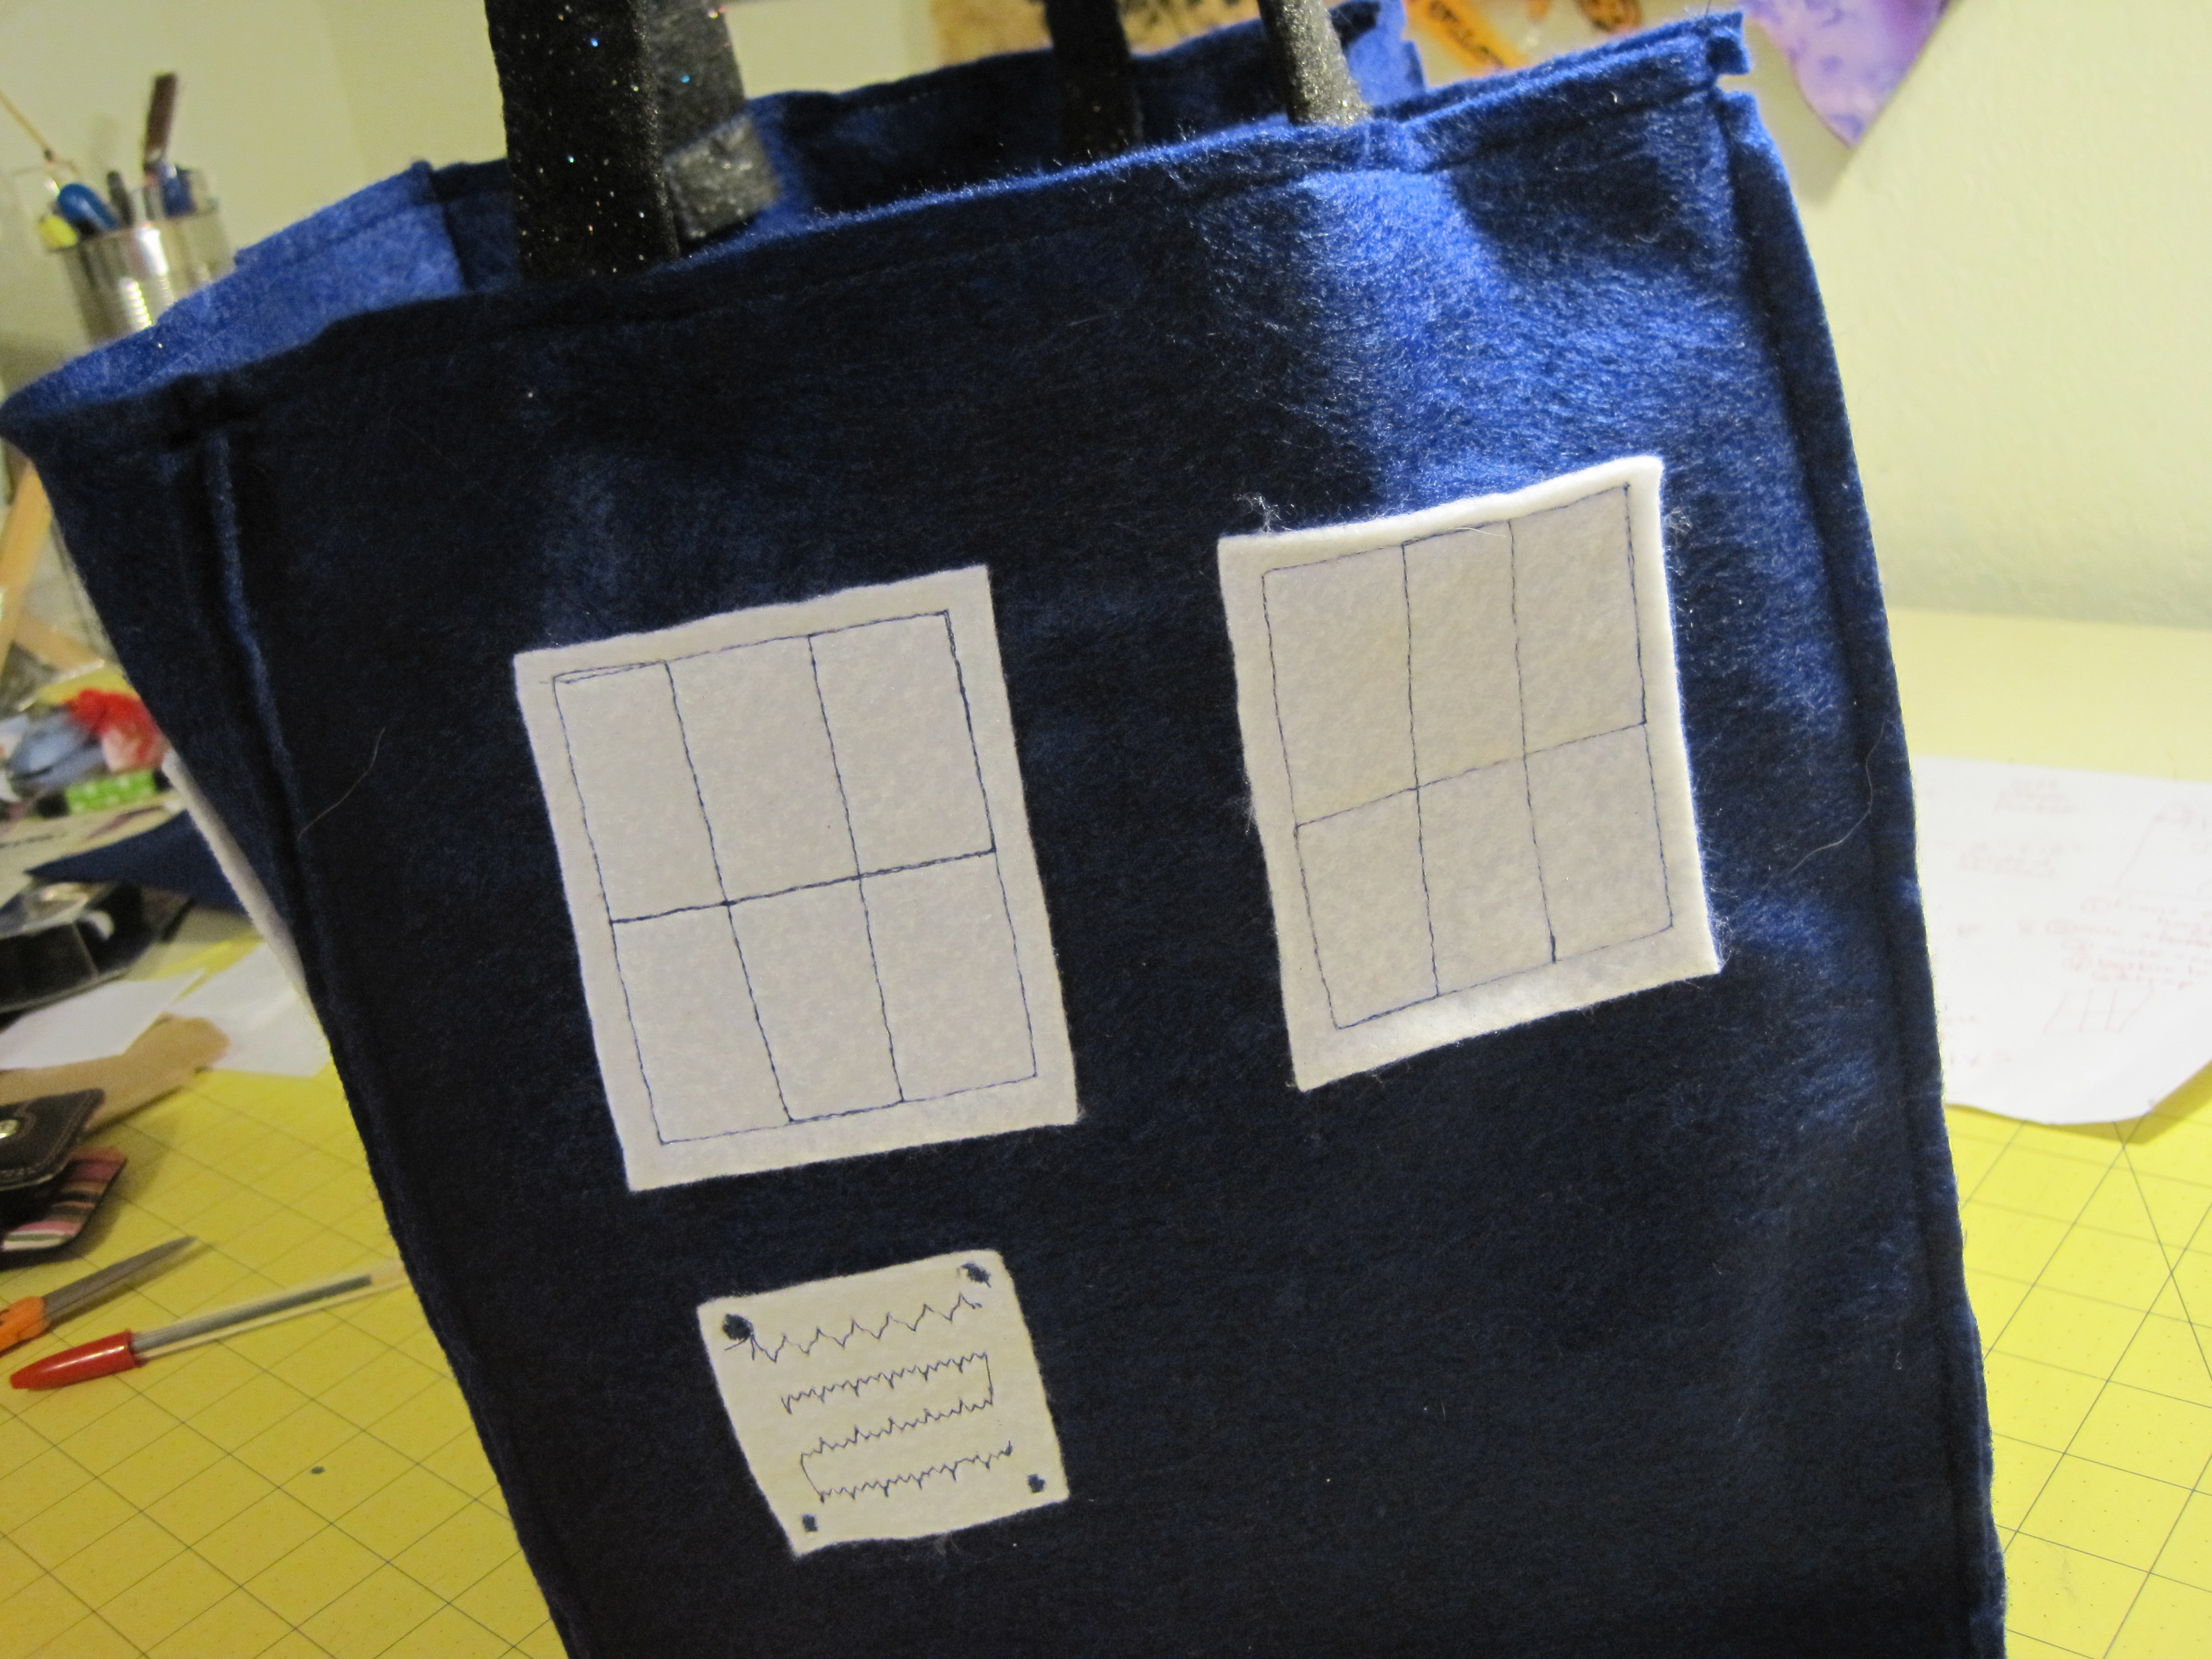
For the Notice on the front, sew some random stitching onto the 1 1/2″ x 2″ piece of felt (as shown). This gives the illusion of writing from a distance. Stitch on each of the four sides with a short zig-zag stitch in each corner (forgot to take a close up…look about three photos down and you can see what I mean!).
Cell Phone Pocket
OPTIONAL – After stitching all the windows on, choose a blue side that is NOT the TARDIS front. Align the 4″ x 5″ piece of felt under the window stitching. Straight stitch on the two long sides and across the bottom, making sure to backstitch at the start and stop. This is your cell phone pocket.
For handles – Fold in half lengthwise and zig-zag down the open side.
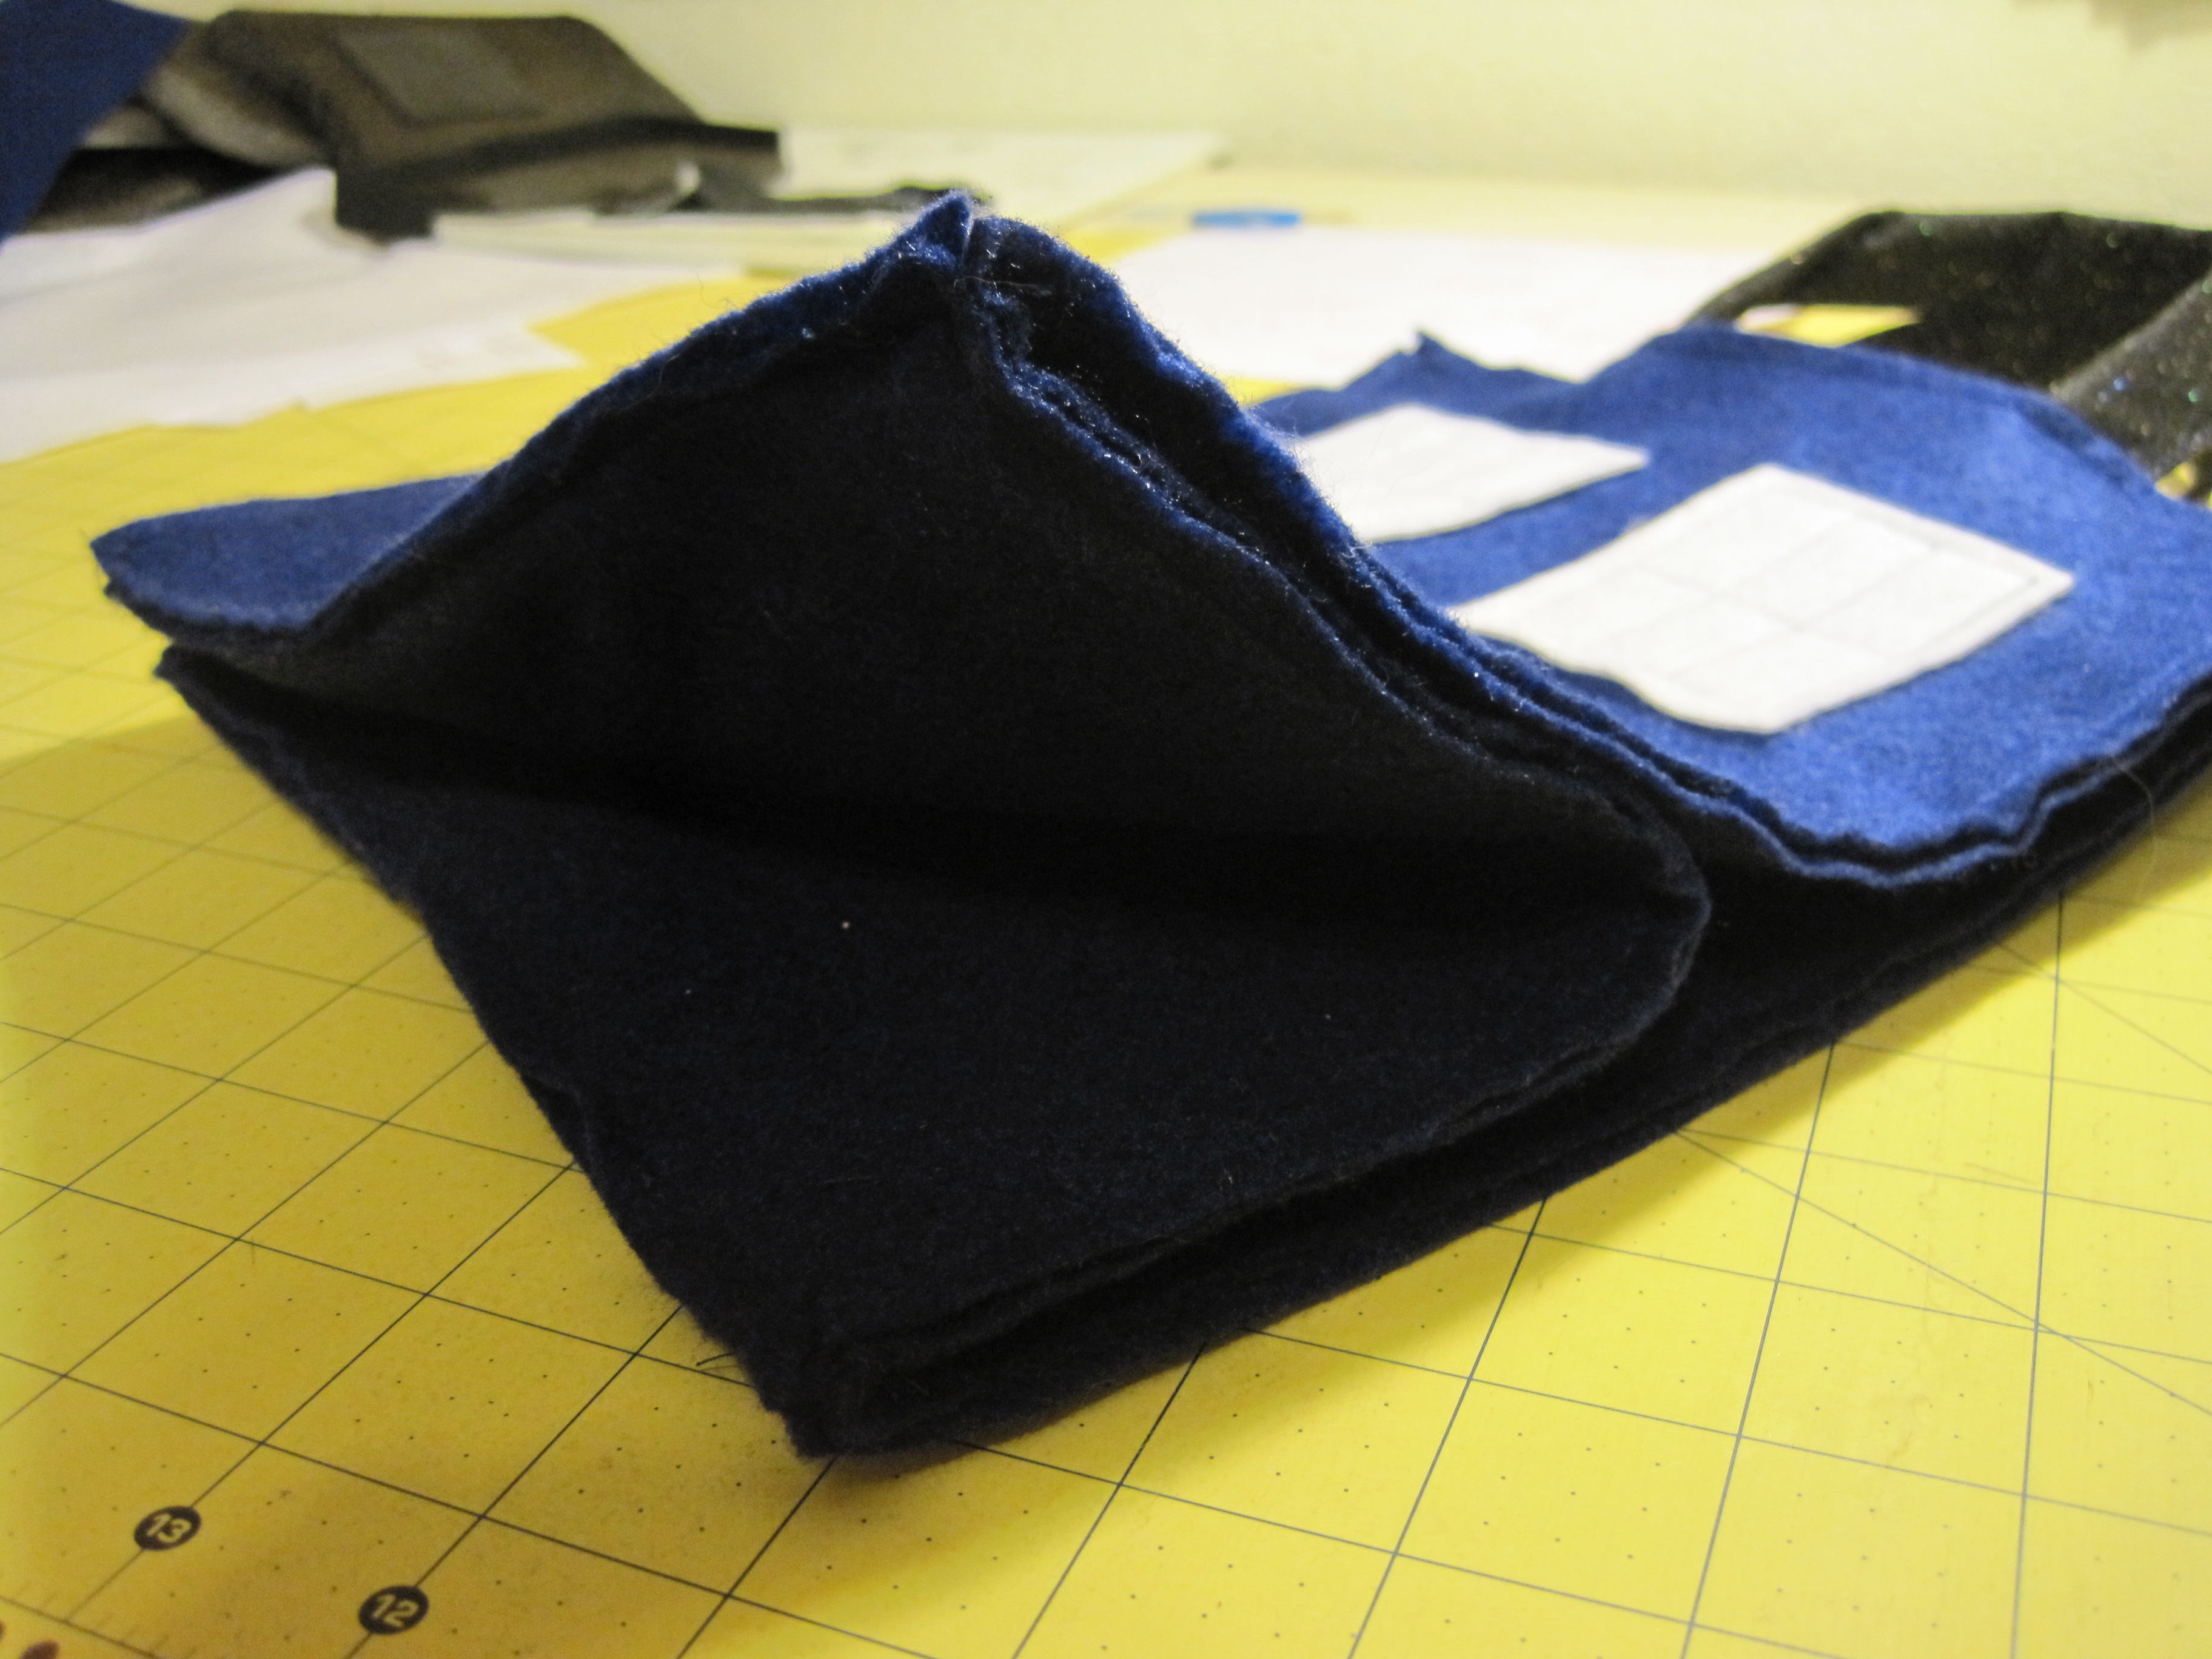
Your TARDIS is now ready for assembly!
Find the front (windows with notice) and back (cell phone pocket – or without if you didn’t make one) and bag bottom. With the insides facing/right side out, place the bottom of the front piece along one side of the 9″ x 9″ bottom piece. Stitch across, leaving 1/4″ at the beginning and end of the seam unstitched (see below).
Seam allowance will be on the outside of the bag.
1/4″ unstitched on the end of the seam (both ends).
Repeat stitching for the back side, making sure the bottom of that side meets the bottom of the bag.
Sew the remaining two pieces on opposite sides, continuing to leave 1/4″ open at each end of the seam.
Find the front and the piece immediately to the left. Bring the two long sides (wrong side) together, right side out.
Stitch from corner to corner.
Repeat for the remaining three corners.
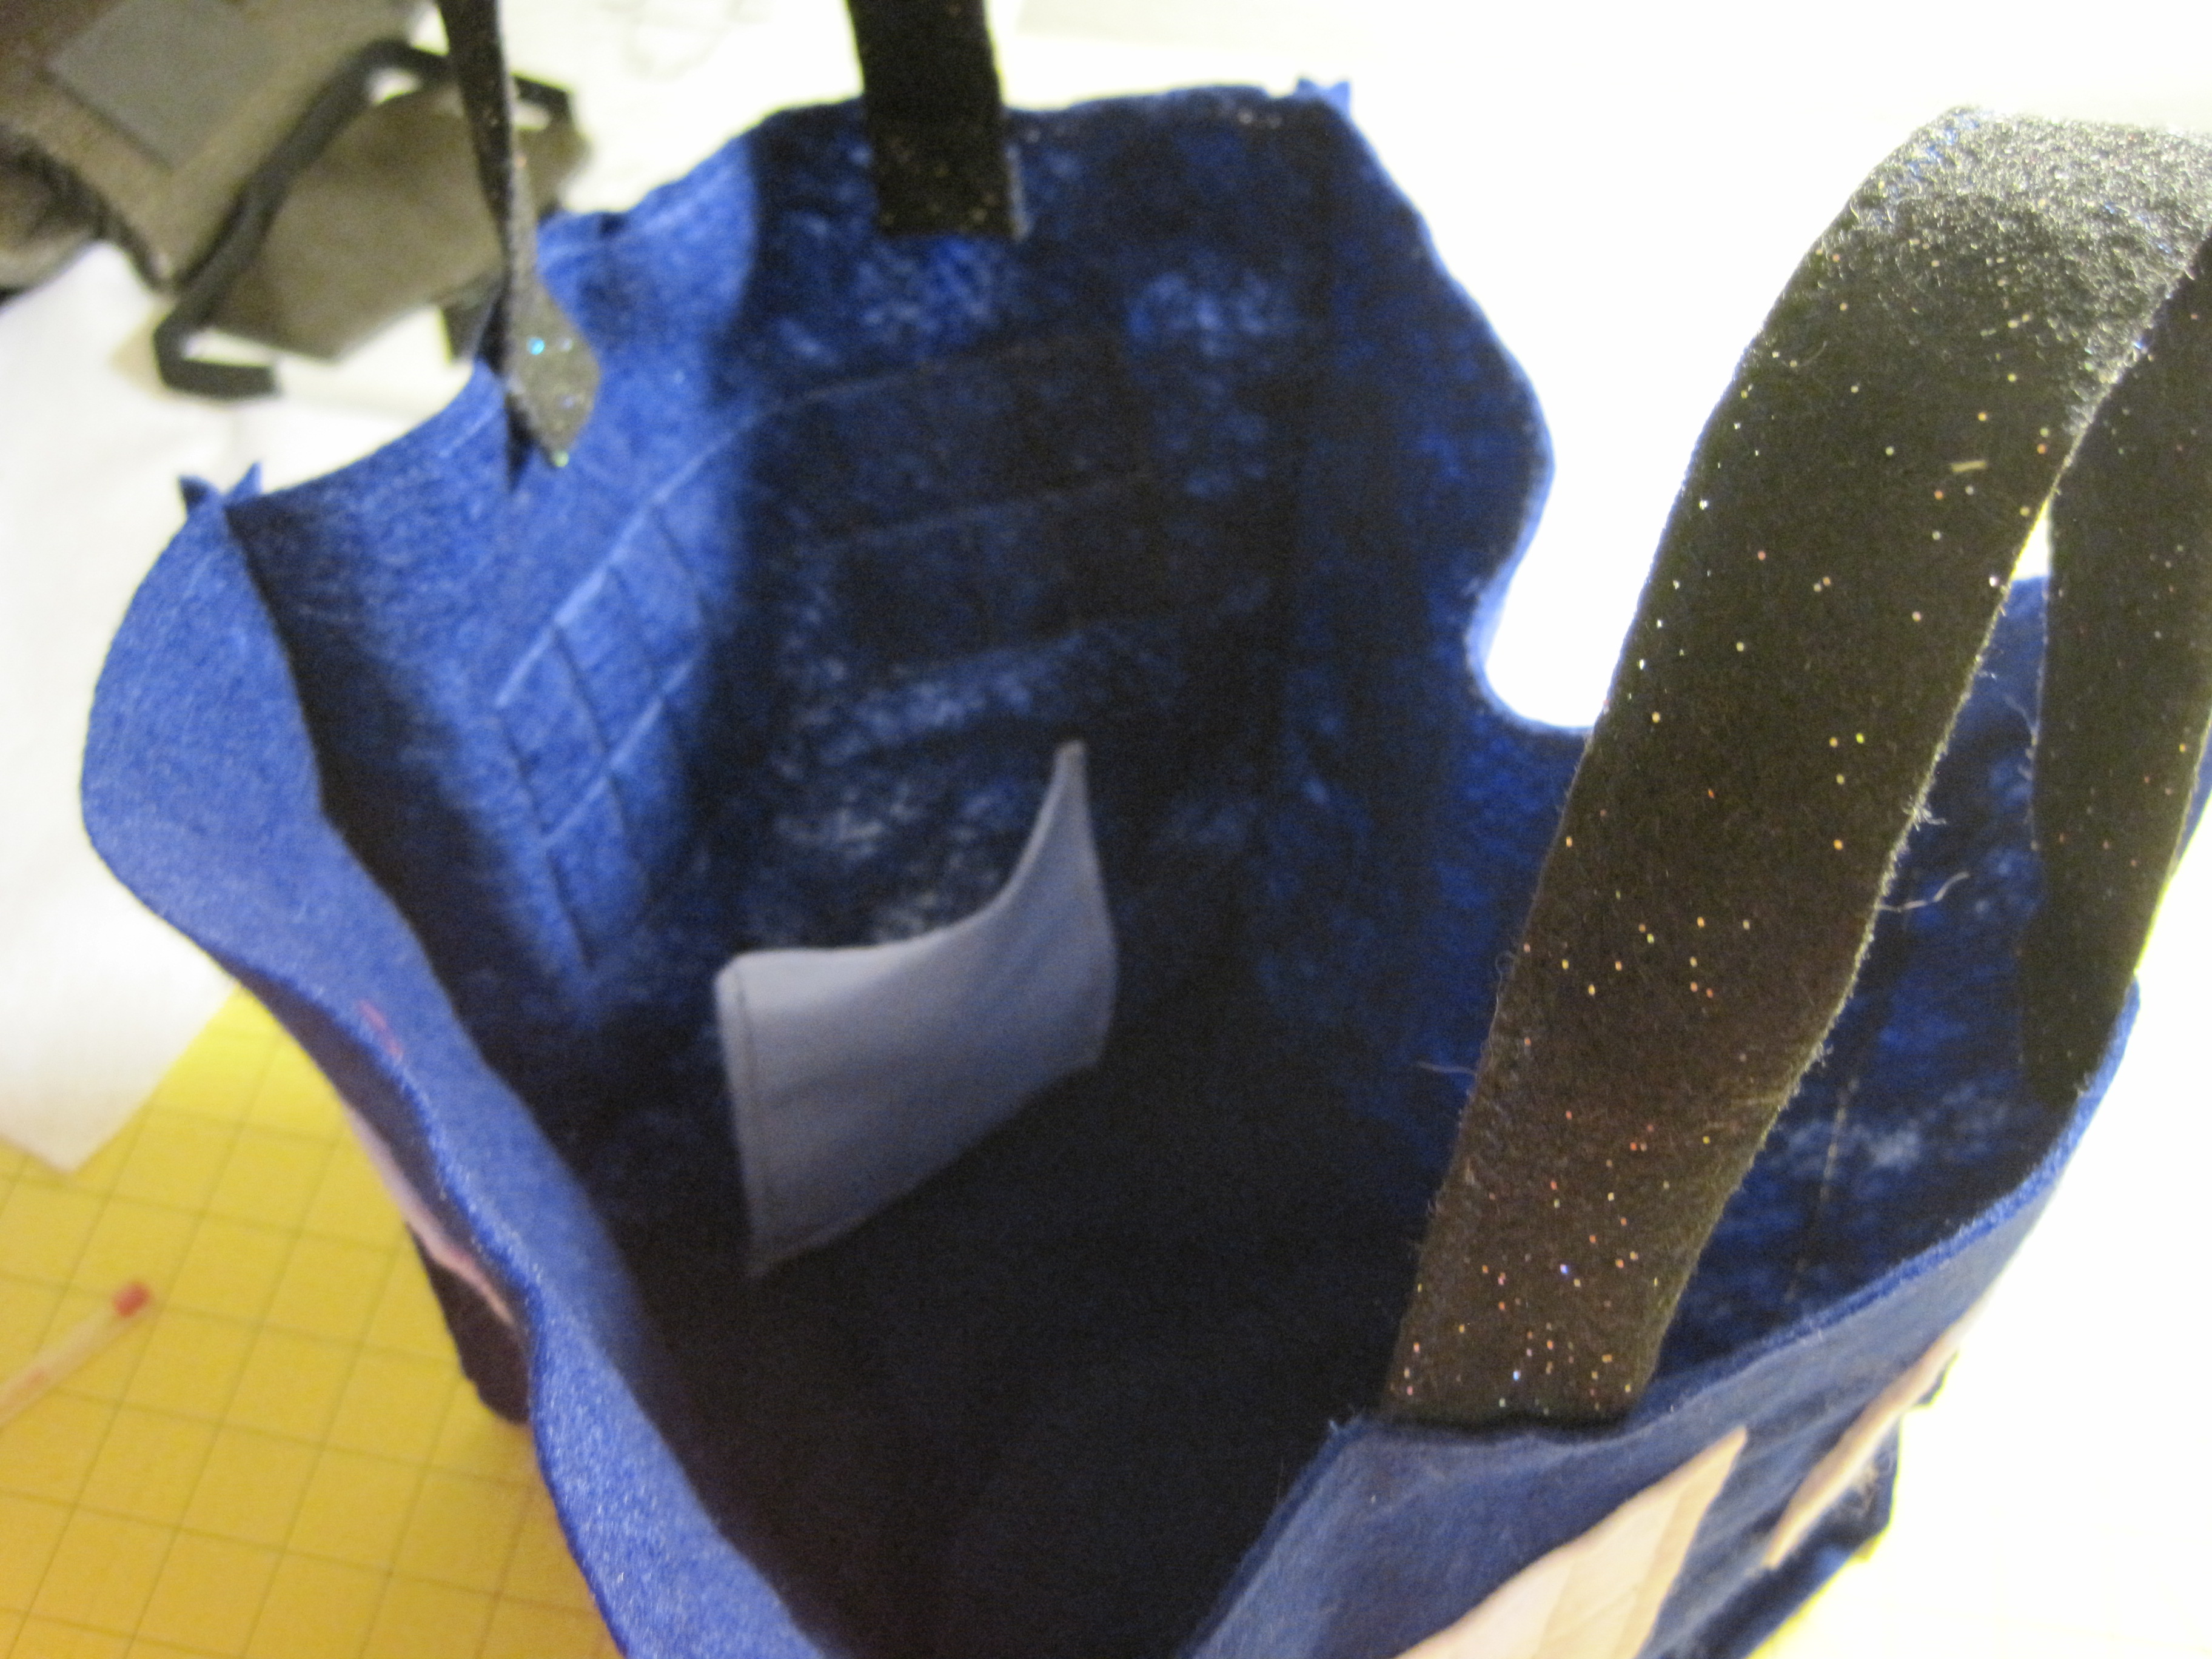
You now have a TARDIS with no handles. That’s the last bit and then you’re done!
The handles attach to the front (windows + notice) and back of the bag. Use a ruler to line up the handles 2 1/2″ in from each side of the bag, with about 2/3″ inside. Pin in place.
Starting at a corner seam, stitch all the way across the top of the bag, backstitching when you get to the handles. For added strength, continue stitching all the way around the bag, flattening out the seam allowance with your fingers before you stitch across it.
Handles…and you can see the cell phone pocket, too!
Snip above and below the top stitching to make the little notches (optional).
The TARDIS Treat Bag is easy to fold, just fold in the bottom and it will fold in on itself.
For Fabric Friday this week, I want to talk about one of my favorite kinds of fabrics… Scraps! Scraps come in all shapes and sizes. They are they leftovers, consider tossable by many that sew, scraps are my preferred palate for many projects, including paper piecing and a fun technique I’ve been enjoying lately passed on my by friend Osie and the book, It’s A Wrap.
Purple scraps became a gorgeous tote that I made for my best friend, Jewells’, birthday.
Many of these fabrics were purples used in the quilt I made for a previous birthday gift for Jewells.
Another type of scrap I’ve become increasingly fond of is selvage. Selvage has been turned into all kinds of things and there’s a whole blog dedicated to it! I saved mine up, with the help of my quilty friends, and made a bowl.
So, for Fabric Friday, rethink your scraps…there is treasure lurking in there, if only you’re willing to look for it!