ferraras stenciled the back of a black jacket with the Cullen Crest Stencil
A big congrats to ferrars, who will receive a hardback copy of Scrap Basket Crafts: Over 50 Quick and Easy Projects to Make from Fabric Scraps.
Happy crafting!


ferraras stenciled the back of a black jacket with the Cullen Crest Stencil
A big congrats to ferrars, who will receive a hardback copy of Scrap Basket Crafts: Over 50 Quick and Easy Projects to Make from Fabric Scraps.
Happy crafting!

It’s possibly unhealthy how much I love chocolate, but there you are!
Ferrero Rocher are one of my favorite indulgences, so much so that my lovely sister gave me a lovely heart shaped box full of them for Valentine’s. I haven’t opened them yet…letting the anticipation build!
A friend of mine shared a recipe for a clone recipe. The original came from Australia (love my Aussie friends!) and asked for packs of nuts and other ingredients without specific amounts included. With my friend’s help, I worked out the “how much” and then gave the recipe my own U.S. touch.
These aren’t identical to Ferrero Rocher, but they’re a darn good facsimile and will be a lovely Valentine’s treat for me and my sweetie!
Faux Ferrero Rocher
I used Hershey’s, but you can use any combination of milk and dark chocolates.

Line miniature muffin tins with wrappers.

Place chocolate chips and shortening in a microwavable bowl. Cook for 3-4 minutes. Remove from microwave and stir, adding chopped peanuts. Mix thoroughly.

Place small teaspoon chocolate nut mix in base of pan or wrapper.

Cover with about ½ tsp. Nutella.

Refrigerate until firm, about 1 hour.

Eat!
Makes approximately 30 really yummy candies.
Add your Sewhooked-related photos to my flickr group and you might be featured in a future post.

One of the best things about paper pieced patterns is that they are so easy to scale.
The great majority of the patterns I design finish 5″, which makes the math a bit easier. Want a 10″ block? Print at 200%. Want a 1.5″ block? Print at 30%.
Miniatures have long been a favorite of mine. They work up quickly and are just so darn adorable when you’re done!
Use Scrappy Heart in miniature and some card stock and you’ve got yourself a cute, fast handmade Valentine for your sweetie!
When choosing a paper pieced pattern to miniaturize, the simpler the pattern the better. Choose a pattern that is all one piece or only a few individual pieces. The more paper pieces you have to work with, the trickier your pattern will get and the thicker the seams will be.
For the Valentine’s Card you’ll need:
What to do:
Print your scaled pattern (shown here with the original 5″)
OR use the 1.5″ pattern sets created just for this tutorial (added Feb. 2012)
Piece the block like you would any other
When piecing in miniature, the smaller your seam allowance, the better. I like a scant 1/8″
This is your block finished from the back and the front.
Follow the stitching line around the block. This will make it possible to remove the paper without stretching the bias edges. Contrasting thread shown.
Remove the paper from the block.
**note – normally, the paper needs to stay on the block until it is pieced in it’s final destination, but because we are appliqueing it, that’s not an option here**
card stock and wall paper or seam roller
Fold the card stock in half, and press the crease with the wall paper roller. The same effect can be achieved with a scoring tool.
Position the block on the front of the card. Use a zig zag or other decorative stitch to applique in place.
Now fill the inside with sweet nothings and you’re ready to give it to your Valentine!
Get lots of free patterns right here on Sewhooked!
Add your Sewhooked-related photos to my flickr group and you might be featured in a future post.

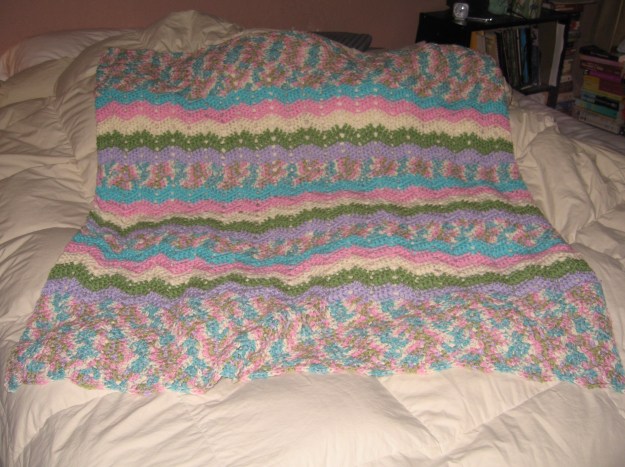
This is yet another baby blanket I designed specifically with charity blankets in mind. A local charity receives the great majority of my crochet efforts and because crochet is so portable, I get a lot done. I crochet in the carpool line, when I watch telly or when I have to wait for an appointment. If my hands are busy, I tend to be happy!
Use up your scraps, go solid, variegated or ombre. Each works brilliantly with a wavy ‘ghan!
For the scrappy version, you’ll need:
Finished size is approximately 40″, depending on your gauge. This is a homey pattern and I don’t fuss about the gauge, as long as it’s crocheting up nicely.
Note: When changing colors, join new color with a sl just before you ch 3 for a new row.
ch 132
Row 1: 1 dc into third ch from hook and in the next three ch, *skip 2 ch, 1 dc into next 4 ch, ch 2, 1 dc in next 4 ch*. Repeat * to * until the last six ch. Skip 2 ch, 1 dc in next 3 ch, 2 dc in last ch. Ch 3, turn.
Row 2: 1 dc in first st, 1 dc in next 3 st, *sk 2 st, 1 dc in next 3 st, (1 dc, ch 2, 1 dc) into ch 2 sp. 1 dc in next 3 st*. Repeat * to * until the last six ch. Skip 2 ch, 1 dc in next 3 ch, 2 dc in top of last dc. Ch 3, turn.
Pattern: Repeat row 2 until blanket is approximately 40″ long. Finish off.
For a more delicate pattern, try a lighter-weight yarn with a smaller hook.
Happy crafting!

My Quilty Facebook ♥ Sewhooked on FB
Posts on this blog may contain affiliate links. Thank you for your support. ♥

You probably know by now, I’m a big thrift store shopper, especially for clothes.
I found a great pair of Gap jeans that fit perfectly, and only paid $1.25 for them! The only drawback was that they were too short, even for my average-length legs.
This was my easy-peasy solution. It works with or without the extra trim. I just love adding a little flavor to my thrifted goods!
You’ll need:
What to do:
I’ve got several pairs of jeans like this, all of them found for super cheap and all of them with their own distinctive look. Love them!
Happy crafting
Find my free patterns on Sewhooked & Fandom in Stitches.
Posts on this blog may contain affiliate links to help cover the cost of my website. I thank you for your generous support. ♥
It’s Guest Blogger Month on Quilting Gallery. Yours truly is today’s Guest Blogger!
I had a great time writing up the post and collecting quilty photos and would like thank Michele from Quilting Gallery for including me in such an awesome project.
There’s a prize from me for the first five commenters, so be sure and have a look.

I have kitties.
Lots of kitties. Okay four, that’s lots, right?
My fur babies all stay indoors, but I still feel safest if they’re wearing a name tag with our address and phone number on it in addition to their city tags. They’re sneaky, ya know?
After numerous lost collars, a couple of which turned up years later under a pile of boxes in the garage, I started making replacement tags instead of buying. It’s easy and inexpensive.
The first one I made is about two years old now and is still in perfect shape!
You’ll need:
Knead a small amount of clay, then roll out with a clay roller or pass through pasta machine on the next to thickest setting. On my machine, that’s an 8.
For more information about handling polyclay see Working With Polymer Clay on Crafts-For-All-Seasons
Place clay on a small on the parchment paper. Press the cookie cutter straight down, making one blank. If you’re making more than one, now is a great time to cut them all out.
Tag blank.
If you have alphabet stamps, use them to stamp on your pet’s name by gently pushing the stamp straight down and lifting straight up. Shown are jewelers stamps, which need to be cleaned well if used with polymer clay.
If not using alphabet stamps, use the directions for finishing the back of the tag.
Finished front with a fun star stamp added.
Take the lid off the Bic pen. It makes a perfect circle cutter for the jump ring hole.
Press the pen lid down into the clay, removing gently to avoid distorting the tag shape. Remove the plug from the lid with a toothpick.
For the back (and the front if you don’t have stamps), use the toothpick to gently write your address or phone number.
Place parchment paper with tag(s) on cookie sheet and bake according to manufacturer’s directions.
Once the tags are cool, rub a small amount of paint onto the front and backs with a paper towel, wiping away the excess. This will make the letters stand out. Allow that paint to dry for a few minutes (it won’t take long) and then coat with glaze. Allow to dry.
Add jump ring.
Because your pet will be wearing this and safety is always first, let the tag dry at least 24 hours before attaching it to his or her collar.
Merlin, wearing his custom kitty tag
As always, if you make any pattern or craft from sewhooked, I’d love to see a photo. Email me or add it to the Friends of sewhooked flickr group.
Happy crafting

*sniffs*
Do you smell that?
Ooooo, baking bread! I can’t think of anything that makes a house feel more like a home than the smell of baking bread. My mom is a bread baker and I am always reminded of coming home from school on cold days and smelling her sourdough bread baking. Nomnomnom…nothing better!
This is a favorite recipe of mine originally from a very old community cookbook. I’ve edited and changed it until it’s just the way we like it. If you’ve never made homemade bread before, this is an easy recipe to start with.
Pull-Apart Bread
sometimes called Monkey Bread
In a large mixing bowl*, dissolve yeast and lukewarm water. In a small bowl, beat the egg, add salt, sugar and 1/2 cup of melted and cooled butter, beating well. Add to yeast mixture. Mix well.
Slowly mix in flour, about 1 cup at a time, mixing well as you go. Mix until the dough is elastic and pulls away from the edges of the bowl.
*If you have a stand mixer, add ingredients into the mixer bowl, using the standard attachment through the first two cups of flour. Change to the dough hook and mix until dough pulls away from the bowl.
Cover and let rise until double in bulk. Time will vary based on the room temperature. Approximately 2 hours.
Once the dough has doubled, place remaining 1/2 cup of butter in a microwave safe bowl. Microwave 30 seconds at a time until just melted. Stir to help any unmelted bits finish melting.
Prepare two loaf pans by spraying lightly with non-stick cooking spray.
Place dough on a large piece of parchment paper. Roll out to about 1/4″ thickness. Use a pizza cutter or a dough knife and cut into 1 1/2″ to 2″ pieces. Dip each piece in melted butter and place in loaf pan, evenly distributing pieces between the two pans.
Cover with a towel and let rise until double again, approximately 1 hour.
Preheat oven to 400°F. Bake loaves for about 35 minutes or until golden brown. Allow to cool for 10-15 minutes and then turn out on a plate or cooling rack.
A lovely loaf of Pull-Apart Bread

The pieces will just fall apart and are lovely to have with dinner!
Add your Sewhooked-related photos to my flickr group and you might be featured in a future post.

When I was in high school, I read The Hobbit and The Lord of the Rings for the very first time.
Tolkien’s world wrapped me up and captured me. I fantasized (and still do!) of taking off for middle earth, walking the road with Bilbo and visiting the elves.
Once a fandom girl, always a fandom girl.
Part of my Hobbit collection
When my hubby and I bought our home ten years ago, I had already been stockpiling paperback copies of the The Hobbit. I’ve been collecting interesting Tolkien covers for years and have a lovely collection. More than one sad, falling-apart copy of The Hobbit came home with me, just to have for that special project I knew I’d be doing some day.
It’s been a good seven or eight years ago that the “The Reading Room” came in to existence. I still remember the wicked happiness I had knowing that I was permanently attaching words from one of my very favorite stories onto a wall in my house. Part of it was the joy of Tolkien, and part of it was rebellion at years in rental places with cream colored walls!
When we have new visitors for the first time, and they ask to use our restroom, it’s always with a bit of glee that I direct them to the proper door. Most people hold on to their calm until they’ve exited the room, but we get the occasional guest that will shout out through the door after they’ve entered. It’s incredibly striking to stand face to face with a wall that is book pages top to bottom!
And hey, we’ve always got something to read in the bathroom!
Decoupaged Wall with pages from two copies of The Hobbit
Note: This is a permanent application. Do not use this technique unless you are absolutely sure you want a permanent change.
Supplies
● books (something you’re willing to recycle paper back books, maps, picture or comics, newspapers or letters) – amount will vary depending on the size of the wall and the materials used to cover it
● Minwax® Polycrylic® Protective Finish or other clear protective finish
● High Quality Paintbrush (check finish container for suggested brush)
● parchment paper
● large piece of cardboard
● masking tape
● newspaper or drop cloth
● latex gloves
● mineral oil
● rags
Instructions
Thror’s Map, a reproduction that hangs in “The Reading Room”
drawn by Jennifer Ofenstein, 2003
black inck on tea stained paper
As always, if you make any pattern or craft from Sewhooked, share it with the Sewhooked flickr group for a chance to see it posted right here on sewhooked.com!

Sewhooked Shop | FB | SHFB | Flickr | Twitter | Bloglovin | Craftsy
Shop Sewhooked and help keep the free pattern page free!

Less Than Three
click on image for pattern
Back in November when I put together the post for Don’t Go Breaking My Heart, I talked about my own penchant for designing heart patterns (see below).
Geeks need love, too, so I present Less Than Three (above)!
click on image for pattern
In addition to Less Than Three, with the Pink & Red season looming and Cupid stringing his bow for another year, I thought it would be fun to find all the heart patterns online that I could get my hands on and then share them with you!
After searching around for a bit, it’s obvious to me that I’m not the only one obsessed with hearts. It doesn’t surprise me greatly, but I didn’t expect the quantity of patterns I found floating around out there.
The variety ranges from simple hand drawn patterns to chic professionally published ones. There were a few websites that I’m sure haven’t been updated in a decade. The patterns are still fun, cute and just waiting to be made!
Make a heart, it’ll give Cupid a target!
Free Heart Patterns:
*site has multiple heart patterns
Not in the mood for all these happy hearts? How about a broken one?
click on image for pattern
Also check out: Paper Piecing: Step By Step
&
Paper Piecing: Seams To Me (adding seams)
Free Paper Pieced Patterns On Sewhooked!

Posts on this blog may contain affiliate links. Thank you for your support. ♥