Today I share my FINISHED 2015 version of The Project of Doom made during the quilt along hosted the same year on Fandom in Stitches. This is the third full version of this quilt I’ve made by myself. I’ve also made several as part of collaborations for charity. This one is made from Stonehenge fabric. It was designed, pieced, quilted, and bound by me. It will also be labeled by me a.s.a.p. so I can start using it!
Join me on Thursday, September 15, 2016, at the Pflugerville Quilt Guild‘s Monthly Meeting. I’ll be presenting show & tell of my original designs and will be available for questions about paper piecing. I hope to see you there!
Entering to win the 201 6 monthly prize is easy, just share your photos with the Sewhooked Flickr group, making sure your photos are set to share. You’ll have one chance to win for each photo you share!
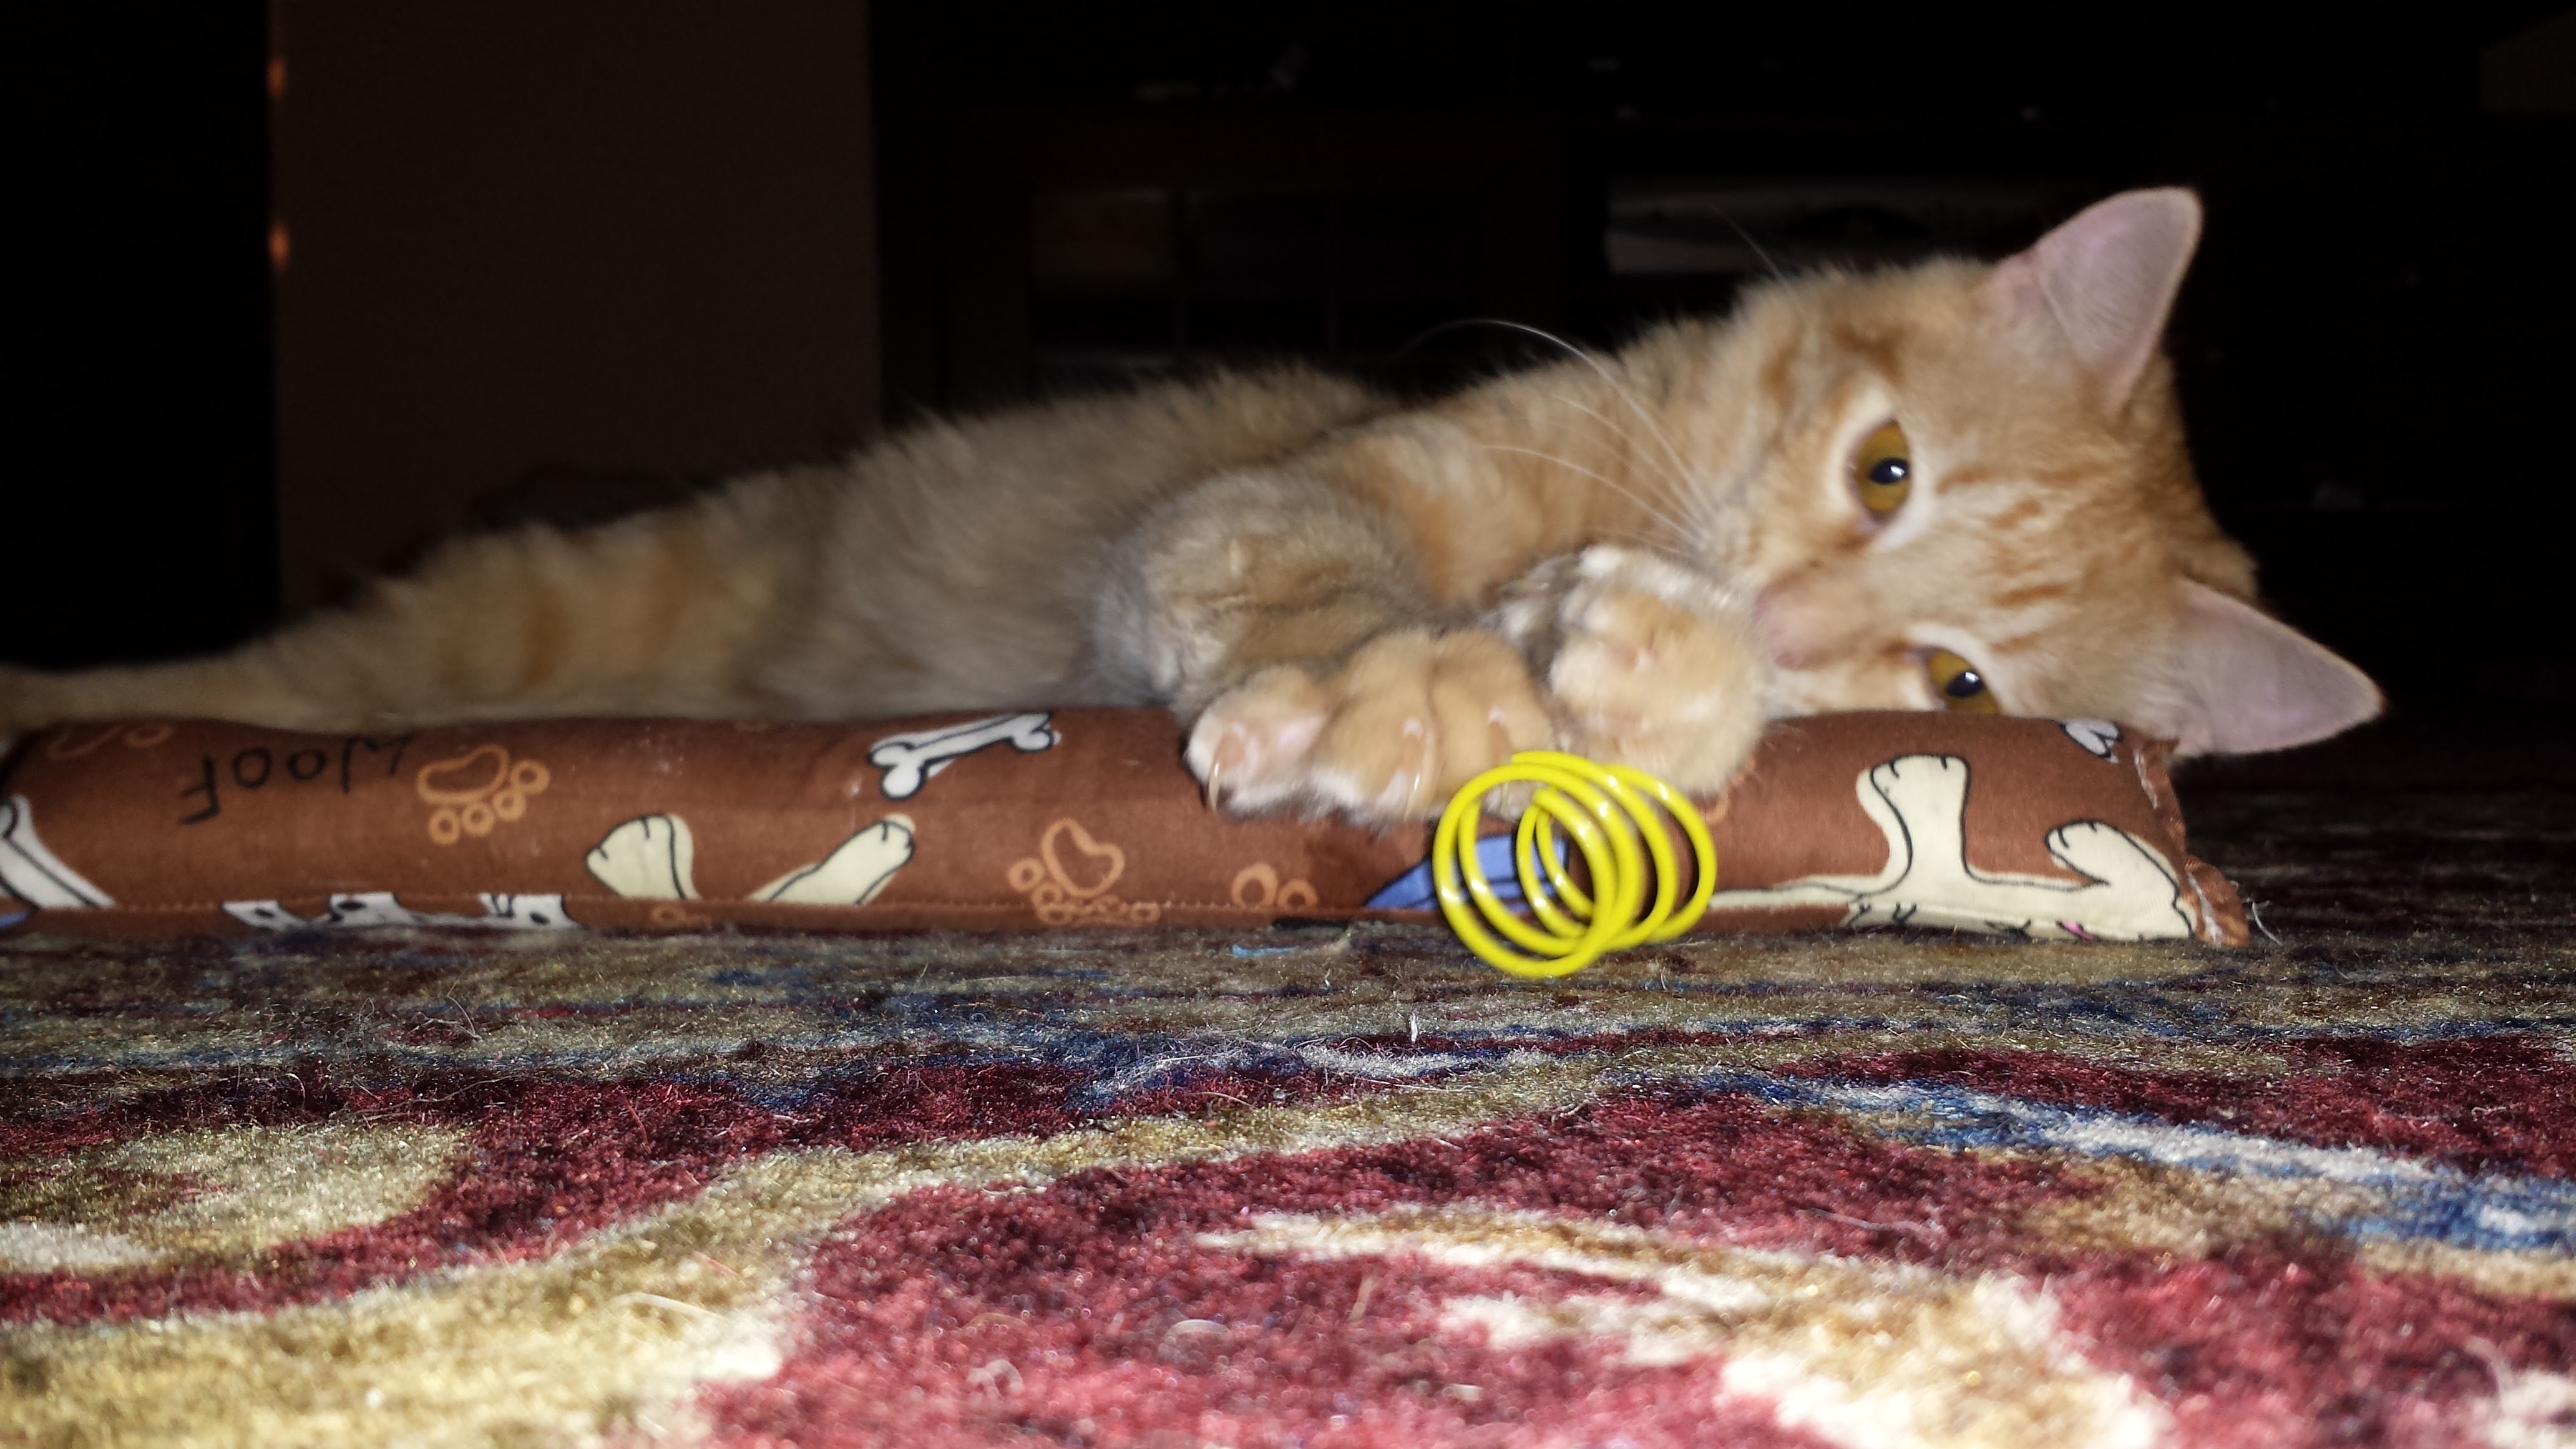
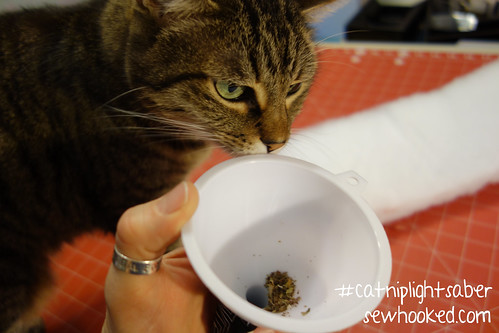
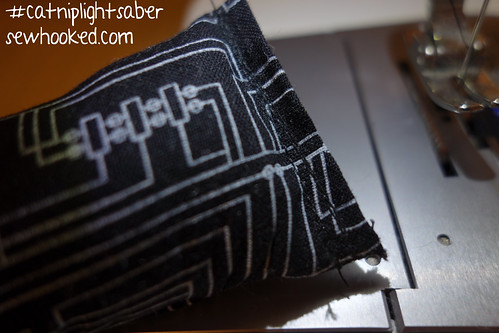
In between Much More Important Things, I’ve been making kitty toys here and there for our cat family members.
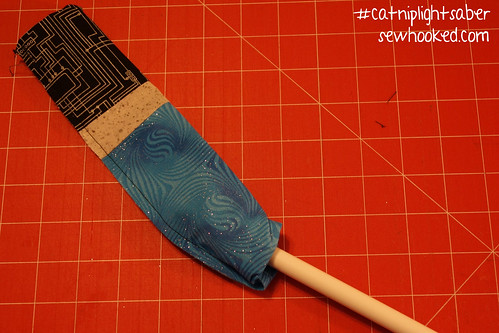
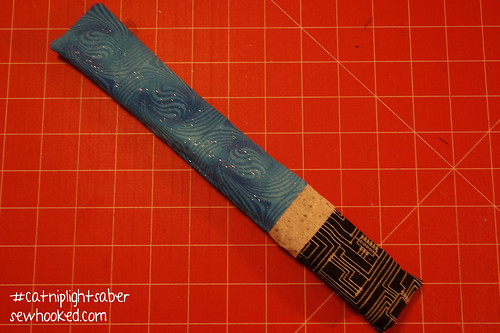
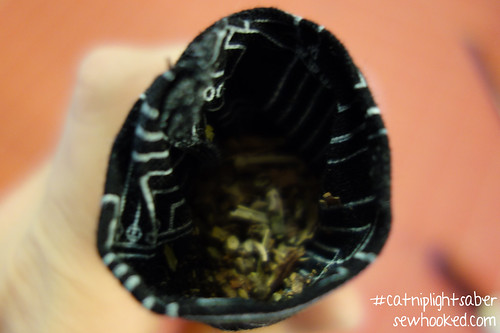
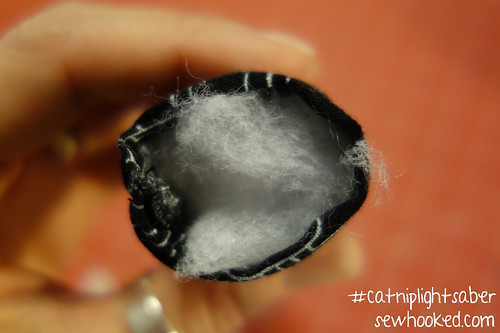
Last weekend, I made something new, tubes of fabric filled with Poly-fil & catnip. They were easy to make and the cats love them.
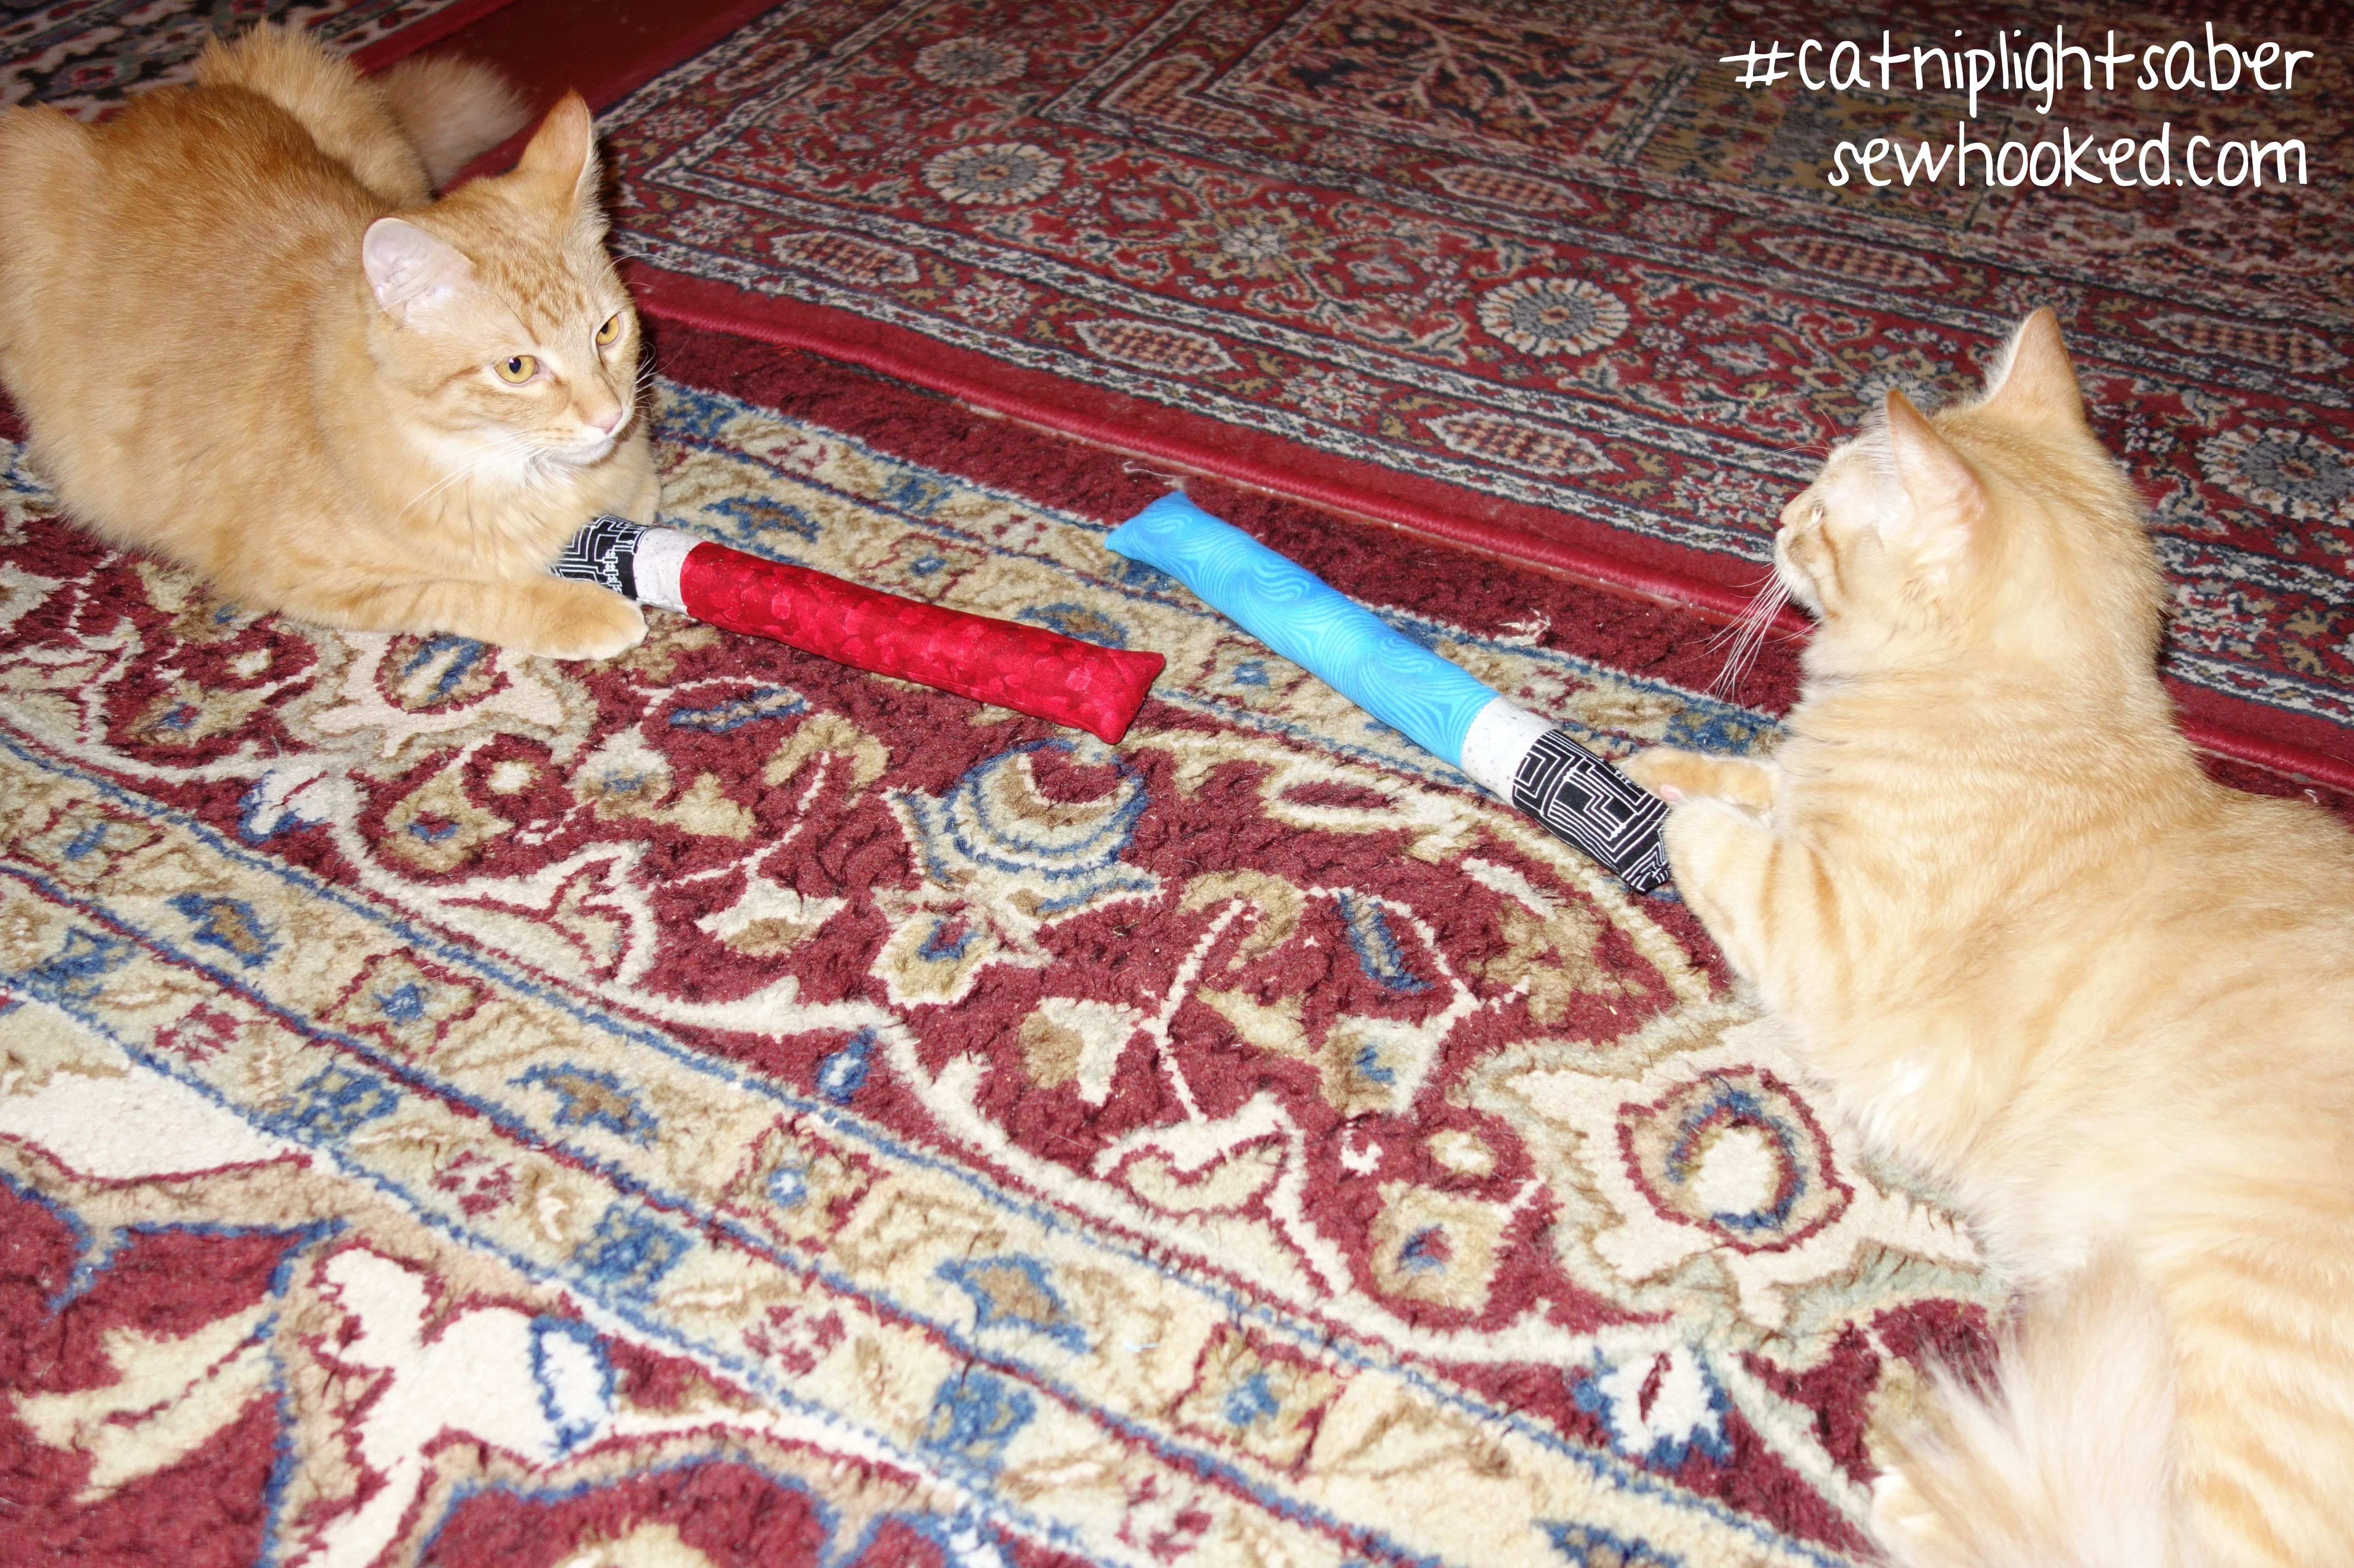
While watching 8 month old Iliad and his brother Ramses play with their catnip tubes, it occurred to me that they could be much, much more fun to watch!
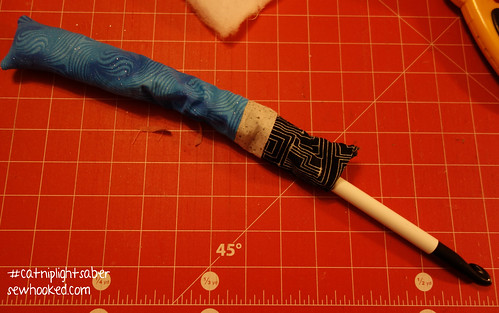
Enter, CATNIP LIGHTSABERS!
Have I seen The Force Awakens recently?
Yes, twice. Why do you ask? 😉
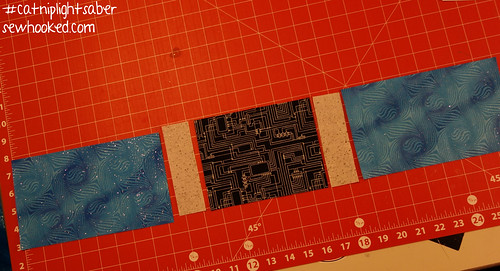
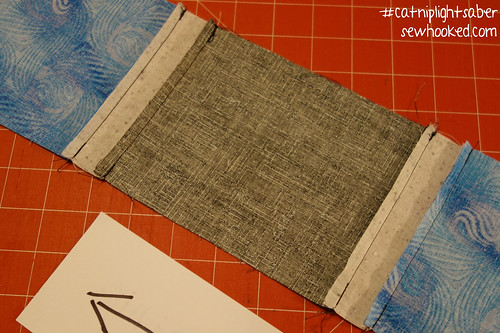
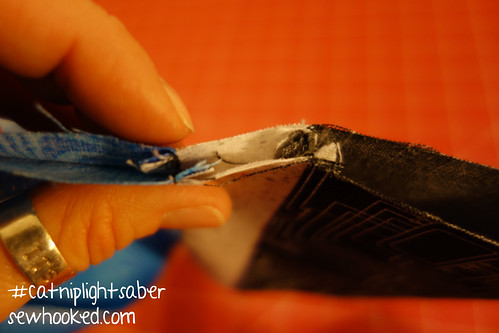
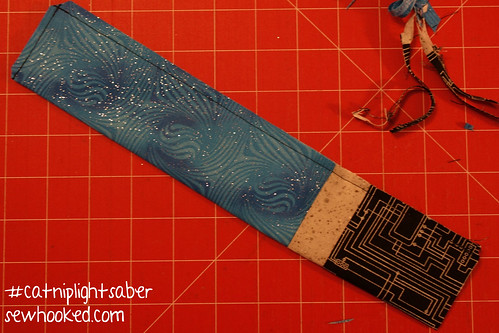
These aren’t much more complicated to make than the original single piece of fabric version. I made both shown here in about an hour, and that includes stopping to take pictures. Easy peasy!
As usual, this tutorial is for your personal & non-profit use. I would LOVE for you to make these both for your own kitties and your local shelter!
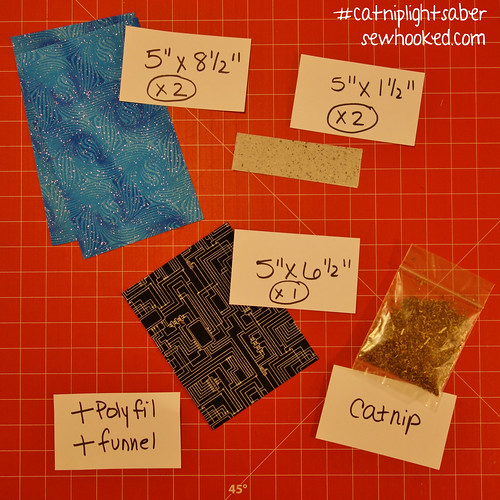
You’ll need:
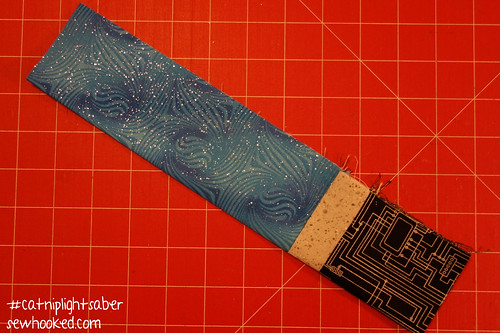
2 – 5″ x 8 1/2″ pieces of fabric in blue, red, or the lightsaber color of your choice
2 – 5″ x 1 1/2″ pieces of grey or silver fabric
1 – 5″ x 6 1/2″ piece of black or black printed fabric
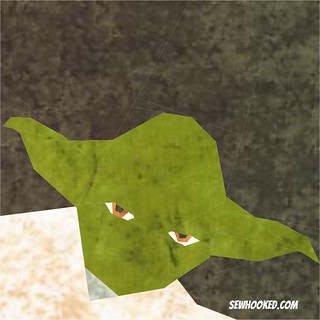
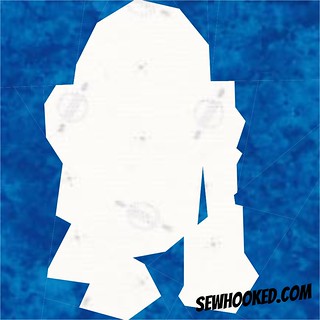
As with many of our events on Fandom in Stitches, we ended this one by throwing out an invite to our community to share supplemental designs for the project.
I thought it would be fun to design two of my favorite crafty apps to share with our community.
Robert Kaufman Quilt Calculator is my go-to app for calculating binding. It has oodles of other features, but that is definitely my favorite!
This free pattern is 10″ Paper Pieced.
Tested version by Vanda Chittenden. Thanks, Vanda!
The Jo-Ann Fabric & Craft Store App has been a lifesaver! I used to always forget my coupons, but now they are always available at the touch of a finger. Woo, technology!
This free pattern is also 10″ Paper Pieced.
Tested by Vanda!
Want to make a Smartphone quilt? Find more awesome patterns here:
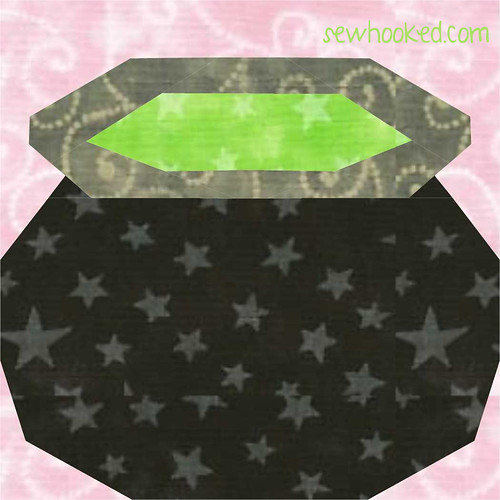
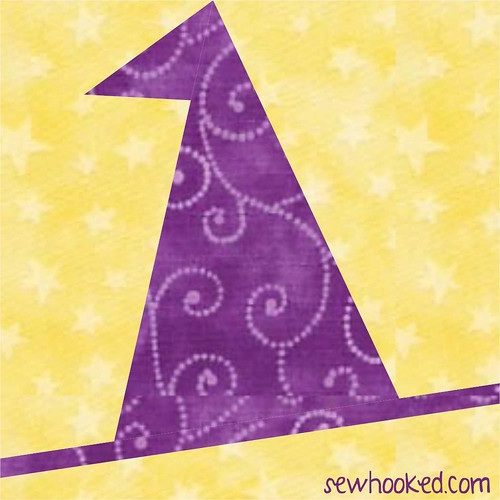
Happy Thursday! We’ve got just a few more days left in our 31 Days of Halloween journey and I do hope you’ve enjoyed every step of the way!
Today, we’re revisiting more fun patterns from the massive collection I’ve created over the years and turning their original Harry Potter-ish intention towards things Halloween!
First, we have the humble cauldron, a staple in any witch’s pantry!
Are you making projects from 31 Days of Halloween? Share your photos with my flickr group! There will be a fun surprise after Halloween for one lucky winner!
Embroidered Flowers Quilt – needs to be basted & quilted
Topsy Turvy – needs to be basted & quilted
Australian Fabric Quilt – now a quilt top, needs to be basted & quilted
Carol’s Quilt – completed and given to Amelia (added to the list in April)
Are you making projects from 31 Days of Halloween? Share your photos with my flickr group! There will be a fun surprise after Halloween for one lucky winner!
We’re back again with 31 Days of Halloween! Today, we’re revisiting a tutorial I originally posted way back in 2010!
Enjoy the TARDIS Treat Bag…it’s bigger on the inside for all that candy!
You need:
9″ x 12″ acrylic felt sheets – 5 dark blue, 1 white and 1 glitter black
scissors
thread (I used navy blue)
ruler (rotary, if you’ve got one)
rotary cutter (optional)
sewing machine (optional)
You can definitely do this project without a rotary cutter and ruler and even without a sewing machine, so those items are optional. If you do hand stitch, make sure you make tight, even stitches and use heavy-duty knots so you don’t lose your candy!
Cutting Instructions:
from 1 sheet of blue felt (the other 4 sheets of felt stay 9″ x 12″), cut:
9″ x 9″ square -bag bottom
from 1 sheet of white felt, cut:
8 – 2 1/2″ x 3″ – Windows
1 – 1/2 x 2″ – Notice
(optional) 4″ x 5″ – cell phone pocket
from 1 sheet of glitter black cut:
2 – 2″ x 12″ – Handles
Note: On all acrylic pieces, 9″ is width 12″ is height, so pieces are arranged with the 9″ width being the top and bottom.
1/4″ inch seams are used throughout
Using your ruler, arrange the window pieces on the 9″ x 12″ sheets of felt so that they are 1 1/2″ in from the sides and 2″ down from the top. For the TARDIS front, center the notice under the left window, leaving about 1/2″ in between.
Arrange window pieces on remaining three 9″ x 12″ blue felt.
Stitch windows in place, 1/4″ in from outside of white felt. The TARDIS windows have six panes. My windows are estimated, but you can measure and divide your stitching if you choose. Repeat for the two sides that are NOT the front of the TARDIS.
For the Notice on the front, sew some random stitching onto the 1 1/2″ x 2″ piece of felt (as shown). This gives the illusion of writing from a distance. Stitch on each of the four sides with a short zig-zag stitch in each corner (forgot to take a close up…look about three photos down and you can see what I mean!).
OPTIONAL – After stitching all the windows on, choose a blue side that is NOT the TARDIS front. Align the 4″ x 5″ piece of felt under the window stitching. Straight stitch on the two long sides and across the bottom, making sure to backstitch at the start and stop.
For handles – Fold in half lengthwise and zig-zag down the open side.
Your TARDIS is now ready for assembly!
Find the front (windows with notice) and back (cell phone pocket – or without if you didn’t make one) and bag bottom. With the insides facing/right side out, place the bottom of the front piece along one side of the 9″ x 9″ bottom piece. Stitch across, leaving 1/4″ at the beginning and end of the seam unstitched (see below).
Seam allowance will be on the outside of the bag.
1/4″ unstitched on the end of the seam (both ends).
Repeat stitching for the back side, making sure the bottom of that side meets the bottom of the bag.
Sew the remaining two pieces on opposite sides, continuing to leave 1/4″ open at each end of the seam.
Find the front and the piece immediately to the left. Bring the two long sides (wrong side) together, right side out.
Stitch from corner to corner.
Repeat for the remaining three corners.
You now have a TARDIS with no handles. That’s the last bit and then you’re done!
The handles attach to the front (windows + notice) and back of the bag. Use a ruler to line up the handles 2 1/2″ in from each side of the bag, with about 2/3″ inside. Pin in place.
Starting at a corner seam, stitch all the way across the top of the bag, backstitching when you get to the handles. For added strength, continue stitching all the way around the bag, flattening out the seam allowance with your fingers before you stitch across it.
Handles…and you can see the cell phone pocket, too!
Snip above and below the top stitching to make the little notches (optional).
The TARDIS Treat Bag is easy to fold, just fold in the bottom and it will fold in on itself.
And… DONE!
It’s wibbly wobbly, timey whimey…
Are you making projects from 31 Days of Halloween? Share your photos with my flickr group! There will be a fun surprise after Halloween for one lucky winner!
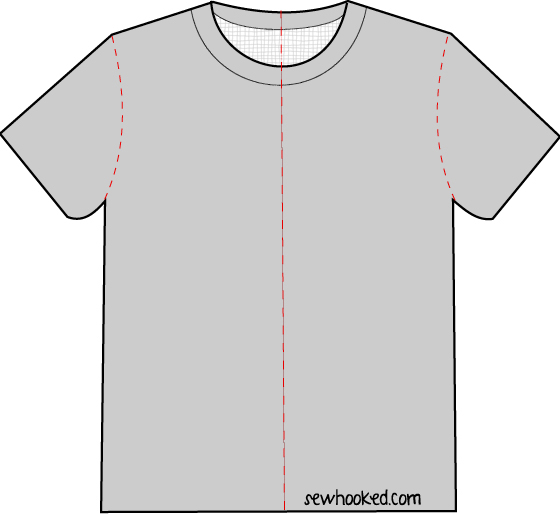
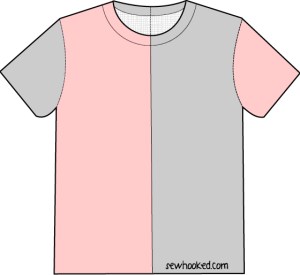
Today we have a fast, easy costuming option for the Harry Potter fans out there.
Originally created in 2006 for a Craftster Swap, I’m breaking this tutorial out today for anyone that might not have a costume in mind, or, like me, might need something a wee bit cooler to wear come Halloween!
The best part about this project is that you can sew it by hand if you don’t have a machine or use a serger to finish it even faster!
You’ll need:
1 red t-shirt
1 black t-shirt in the same size and style as the red t-shirt
fabric paint in red, green, blue, yellow, white and gold
foam paintbrushes
Instructions
Find the center of each shirt by folding in half towards the front and matching the sleeves.
Mark the top and the bottom with a pin.
If using a rotary cutter, this is your cutting line.
If using a straight edge, draw a pencil line from top to bottom.
Cut as straight as possible.
Sleeve Reconstruction
Select the red shirt right (right side when the shirt is worn) and black shirt left and carefully remove the sleeves from each side of the shirt using a seam ripper. Be very careful to not stretch the fabric.
Swap the sleeves so that red sleeve is with black shirt piece and the black sleeve is with red.
Turn the shirt half you are working on inside out and place the sleeve, right side out inside the
sleeve hole (right sides will be together), matching the top and bottom creases. Pin the sleeve in place, being careful not to stretch the fabric.
Using a serger or a stretch stitch on your sewing machine, stitch in a 1/4″ to 1/2″ seam all the way around.
If stitching by hand, take small stitches.
Repeat for second sleeve.
Shirt Body Reconstruction
Place one shirt half inside the other, right sides together so that the wrong sides of the seam lines will be on the outside. You will have two seams, a front seam and a back seam.
Carefully pin every few inches starting at the t-shirt ribbing and work your way down, trying not to stretch the fabric.
If the bottoms hems do not meet, pin the bottom edges together and ease along the middle of the shirt (t-shirts can be really wonky, but you can make it work!).
Carefully stitch along this line as for the sleeves.
Snip the corners of the inside seams on the diagonal.
Optional: Create a stencil with your own name using a Sans Serif font OR use purchased iron on letters.
Place cardboard or newspaper inside the t-shirt to protect from bleed through.
Using a warm iron, carefully place the stencil in the middle of the back of the shirt, matching center lines.
Stencil the name and star with red paint.
Gently peel away and allow to dry.
*I recommend testing your paint on dark fabric before you start. Some paints will need multiple layers. If the paint doesn’t cover, you can start with a white base coat.
LAST DAY: As a special bonus for my readers, get 50% off Machine Quilting: Free Motion & More until October 15, 12015! Original price is $39.99, get it now for $19.99! Offer good until 10/15/15 @11:59pm MT.
Are you making projects from 31 Days of Halloween? Share your photos with my flickr group! There will be a fun surprise after Halloween for one lucky winner!
The end is near! There are just a couple of days left to take advantage of the awesome class deal from Craftsy JUST for Sewhooked readers!
Machine Quilting: Free Motion & Morehas everything you need. For just $19.99 (regularly $39.99), you’ll get unlimited access to the following lessons:
Lesson 1. Introduction
Lesson 2. Preparing Your Quilts
Lesson 3. Stabilizing the Quilt
Lesson 4. Walking Foot Stitch Designs
Lesson 5. Marking for Free-Motion Quilting
Lesson 6. Simple Free-Motion Quilting
Lesson 7. Complex Free-Motion Quilting
Lesson 8. Thread Talk
Lesson 9. Whole Cloth Quilting & Troubleshooting
Lesson 10. Bindings & Finishing Touches
Sewhooked readers get 50% off Machine Quilting: Free Motion & More until October 15, 12015! Original price is $39.99, get it now for $19.99! Offer good until 10/15/15 @11:59pm MT.
Are you making projects from 31 Days of Halloween? Share your photos with my flickr group! There will be a fun surprise after Halloween for one lucky winner!