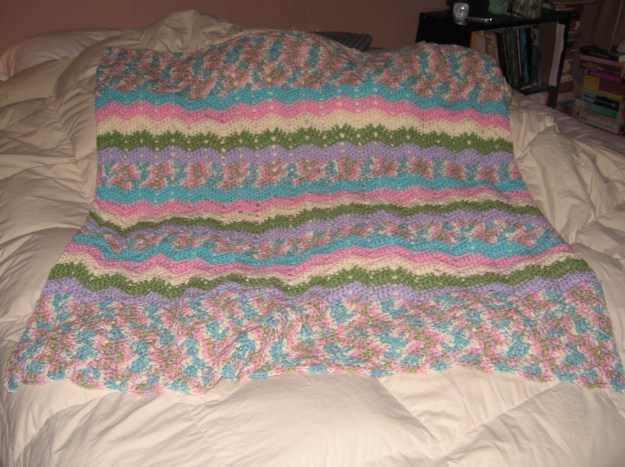
This is yet another baby blanket I designed specifically with charity blankets in mind. A local charity receives the great majority of my crochet efforts and because crochet is so portable, I get a lot done. I crochet in the carpool line, when I watch telly or when I have to wait for an appointment. If my hands are busy, I tend to be happy!
Use up your scraps, go solid, variegated or ombre. Each works brilliantly with a wavy ‘ghan!
For the scrappy version, you’ll need:
odds and ends of a worsted weight yarn (sample made in Red Heart)
K hook
Finished size is approximately 40″, depending on your gauge. This is a homey pattern and I don’t fuss about the gauge, as long as it’s crocheting up nicely.
Note: When changing colors, join new color with a sl just before you ch 3 for a new row.
ch 132
Row 1: 1 dc into third ch from hook and in the next three ch, *skip 2 ch, 1 dc into next 4 ch, ch 2, 1 dc in next 4 ch*. Repeat * to * until the last six ch. Skip 2 ch, 1 dc in next 3 ch, 2 dc in last ch. Ch 3, turn.
Row 2: 1 dc in first st, 1 dc in next 3 st, *sk 2 st, 1 dc in next 3 st, (1 dc, ch 2, 1 dc) into ch 2 sp. 1 dc in next 3 st*. Repeat * to * until the last six ch. Skip 2 ch, 1 dc in next 3 ch, 2 dc in top of last dc. Ch 3, turn.
Pattern: Repeat row 2 until blanket is approximately 40″ long. Finish off.
For a more delicate pattern, try a lighter-weight yarn with a smaller hook.
You probably know by now, I’m a big thrift store shopper, especially for clothes.
I found a great pair of Gap jeans that fit perfectly, and only paid $1.25 for them! The only drawback was that they were too short, even for my average-length legs.
This was my easy-peasy solution. It works with or without the extra trim. I just love adding a little flavor to my thrifted goods!
You’ll need:
One pair of too-short jeans
seam ripper or razor (use razor with care, I don’t want anyone losing a finger!)
steam iron set to “cotton”
optional: trim, ribbon, etc.
sewing machine
thread
scissors
What to do:
Rip out the hem using a seam ripper, or, if you have a steady hand, a razor works great to get through the heavy duty stitching.
Press the legs out, removing any bits of thread left from ripping out the seam. You may need steam for this step to get the old hem lines nice and flat.
If the previous location of the bottom edge is a holey or ragged, you can add ribbon, leftover quilt binding, or any other washable trim by pinning around the outside. Tuck the ends under and then top stitch both edges.
For an unfinished edge, zig zag around the edge of each leg or use a decorative stitch. Once they’re washed, they’ll fray nice and even.
I’ve got several pairs of jeans like this, all of them found for super cheap and all of them with their own distinctive look. Love them!
My fur babies all stay indoors, but I still feel safest if they’re wearing a name tag with our address and phone number on it in addition to their city tags. They’re sneaky, ya know?
After numerous lost collars, a couple of which turned up years later under a pile of boxes in the garage, I started making replacement tags instead of buying. It’s easy and inexpensive.
The first one I made is about two years old now and is still in perfect shape!
You’ll need:
Polymer clay (like Sculpey or Fimo; also called polyclay)
polymer clay pasta machine OR poly clay rolling pin
**please note: if using a pasta machine, it needs to be used only for polymer clay. DO NOT use the same machine that you’d make pasta with**
parchment paper
1 to 1 1/2″ cookie cutter with a uniform shape (don’t be tempted to make the tag larger, the larger it is, the more likely your pet will be able to get into his or her mouth)
Knead a small amount of clay, then roll out with a clay roller or pass through pasta machine on the next to thickest setting. On my machine, that’s an 8.
For more information about handling polyclay see Working With Polymer Clay on Crafts-For-All-Seasons
Place clay on a small on the parchment paper. Press the cookie cutter straight down, making one blank. If you’re making more than one, now is a great time to cut them all out.
Tag blank.
If you have alphabet stamps, use them to stamp on your pet’s name by gently pushing the stamp straight down and lifting straight up. Shown are jewelers stamps, which need to be cleaned well if used with polymer clay.
If not using alphabet stamps, use the directions for finishing the back of the tag.
Finished front with a fun star stamp added.
Take the lid off the Bic pen. It makes a perfect circle cutter for the jump ring hole.
Press the pen lid down into the clay, removing gently to avoid distorting the tag shape. Remove the plug from the lid with a toothpick.
For the back (and the front if you don’t have stamps), use the toothpick to gently write your address or phone number.
Place parchment paper with tag(s) on cookie sheet and bake according to manufacturer’s directions.
Once the tags are cool, rub a small amount of paint onto the front and backs with a paper towel, wiping away the excess. This will make the letters stand out. Allow that paint to dry for a few minutes (it won’t take long) and then coat with glaze. Allow to dry.
Add jump ring.
Because your pet will be wearing this and safety is always first, let the tag dry at least 24 hours before attaching it to his or her collar.
When I was in high school, I read The Hobbit and The Lord of the Rings for the very first time.
Tolkien’s world wrapped me up and captured me. I fantasized (and still do!) of taking off for middle earth, walking the road with Bilbo and visiting the elves.
Once a fandom girl, always a fandom girl.
Part of my Hobbit collection
When my hubby and I bought our home ten years ago, I had already been stockpiling paperback copies of the The Hobbit. I’ve been collecting interesting Tolkien covers for years and have a lovely collection. More than one sad, falling-apart copy of The Hobbit came home with me, just to have for that special project I knew I’d be doing some day.
It’s been a good seven or eight years ago that the “The Reading Room” came in to existence. I still remember the wicked happiness I had knowing that I was permanently attaching words from one of my very favorite stories onto a wall in my house. Part of it was the joy of Tolkien, and part of it was rebellion at years in rental places with cream colored walls!
When we have new visitors for the first time, and they ask to use our restroom, it’s always with a bit of glee that I direct them to the proper door. Most people hold on to their calm until they’ve exited the room, but we get the occasional guest that will shout out through the door after they’ve entered. It’s incredibly striking to stand face to face with a wall that is book pages top to bottom!
And hey, we’ve always got something to read in the bathroom!
Decoupaged Wall with pages from two copies of The Hobbit
Note: This is a permanent application. Do not use this technique unless you are absolutely sure you want a permanent change.
Supplies
● books (something you’re willing to recycle paper back books, maps, picture or comics, newspapers or letters) – amount will vary depending on the size of the wall and the materials used to cover it
● High Quality Paintbrush (check finish container for suggested brush)
● parchment paper
● large piece of cardboard
● masking tape
● newspaper or drop cloth
● latex gloves
● mineral oil
● rags
Instructions
Protect floor, baseboards, etc, with newspaper or drop cloth and masking tape.
Gently remove the book cover (I framed mine and hung them in the same room as the deco wall).
Peel apart the individual pages (this works best with paperback books).
Tape a large piece of parchment paper to the cardboard.
Wearing the latex gloves, put place several book pages on the parchment paper.
Using the paintbrush, cover each with Polycrylic.
Start applying pages to the wall. For a neat effect, line pages up side by side, or overlap and vary (as shown) for a more staggered effect.
“Cut in” by placing pages side by side or slightly overlapping to frame your wall then working your way in.
Use the brush to smooth out any air bubbles. You only have a minute or so to work with each page, so make sure you’re happy with it before moving on.
Allow pages to dry and then apply another coat of Polycrylic over the wall.
Use mineral oil and rags for clean up. Be sure to follow all manufacturer’s safety instructions.
Thror’s Map, a reproduction that hangs in “The Reading Room”
drawn by Jennifer Ofenstein, 2003
black inck on tea stained paper
As always, if you make any pattern or craft from Sewhooked, share it with the Sewhooked flickr group for a chance to see it posted right here on sewhooked.com!
If you know me, then you know I like contests, challenges and drawings. I have a drawing every month on my Livejournal group, hp_paperpiecing, with a Challenge thrown in whenever I can manage it.
It’s about time the love is spread to the rest of my crafty universe! I’m proud to announce the first ever Friends of sewhooked challenge!
If you’re a Friend of sewhooked (which equates to a friend of Jennifer!), all you have to do to participate is to post a photo of something you’ve made from Sewhooked to the Friends of sewhooked flickr pool by Monday, February 16, 2009, 10 am, CST (U.S.).
Follow any pattern or tutorial and then share your photos…that’s it! I’ll draw a name from the pool and notify the winner via pm or email. Please, no cross-posting entries for the hp_paperiecingchallenge. I know you won’t, but I had to say it…just in case!
The winner’s craft will be features on the Sewhooked and that person will receive a hardback copy of Scrap Basket Crafts: Over 50 Quick and Easy Projects to Make from Fabric Scraps.
If this works out, I’ll have another drawing in the future. Fun, fun, fun!
I admit it… I keep everything that I might be able to use or recycle later on.
If it’s pretty, cool, or unique, it’s somewhere in a plastic bin or drawer waiting to be reimagined.
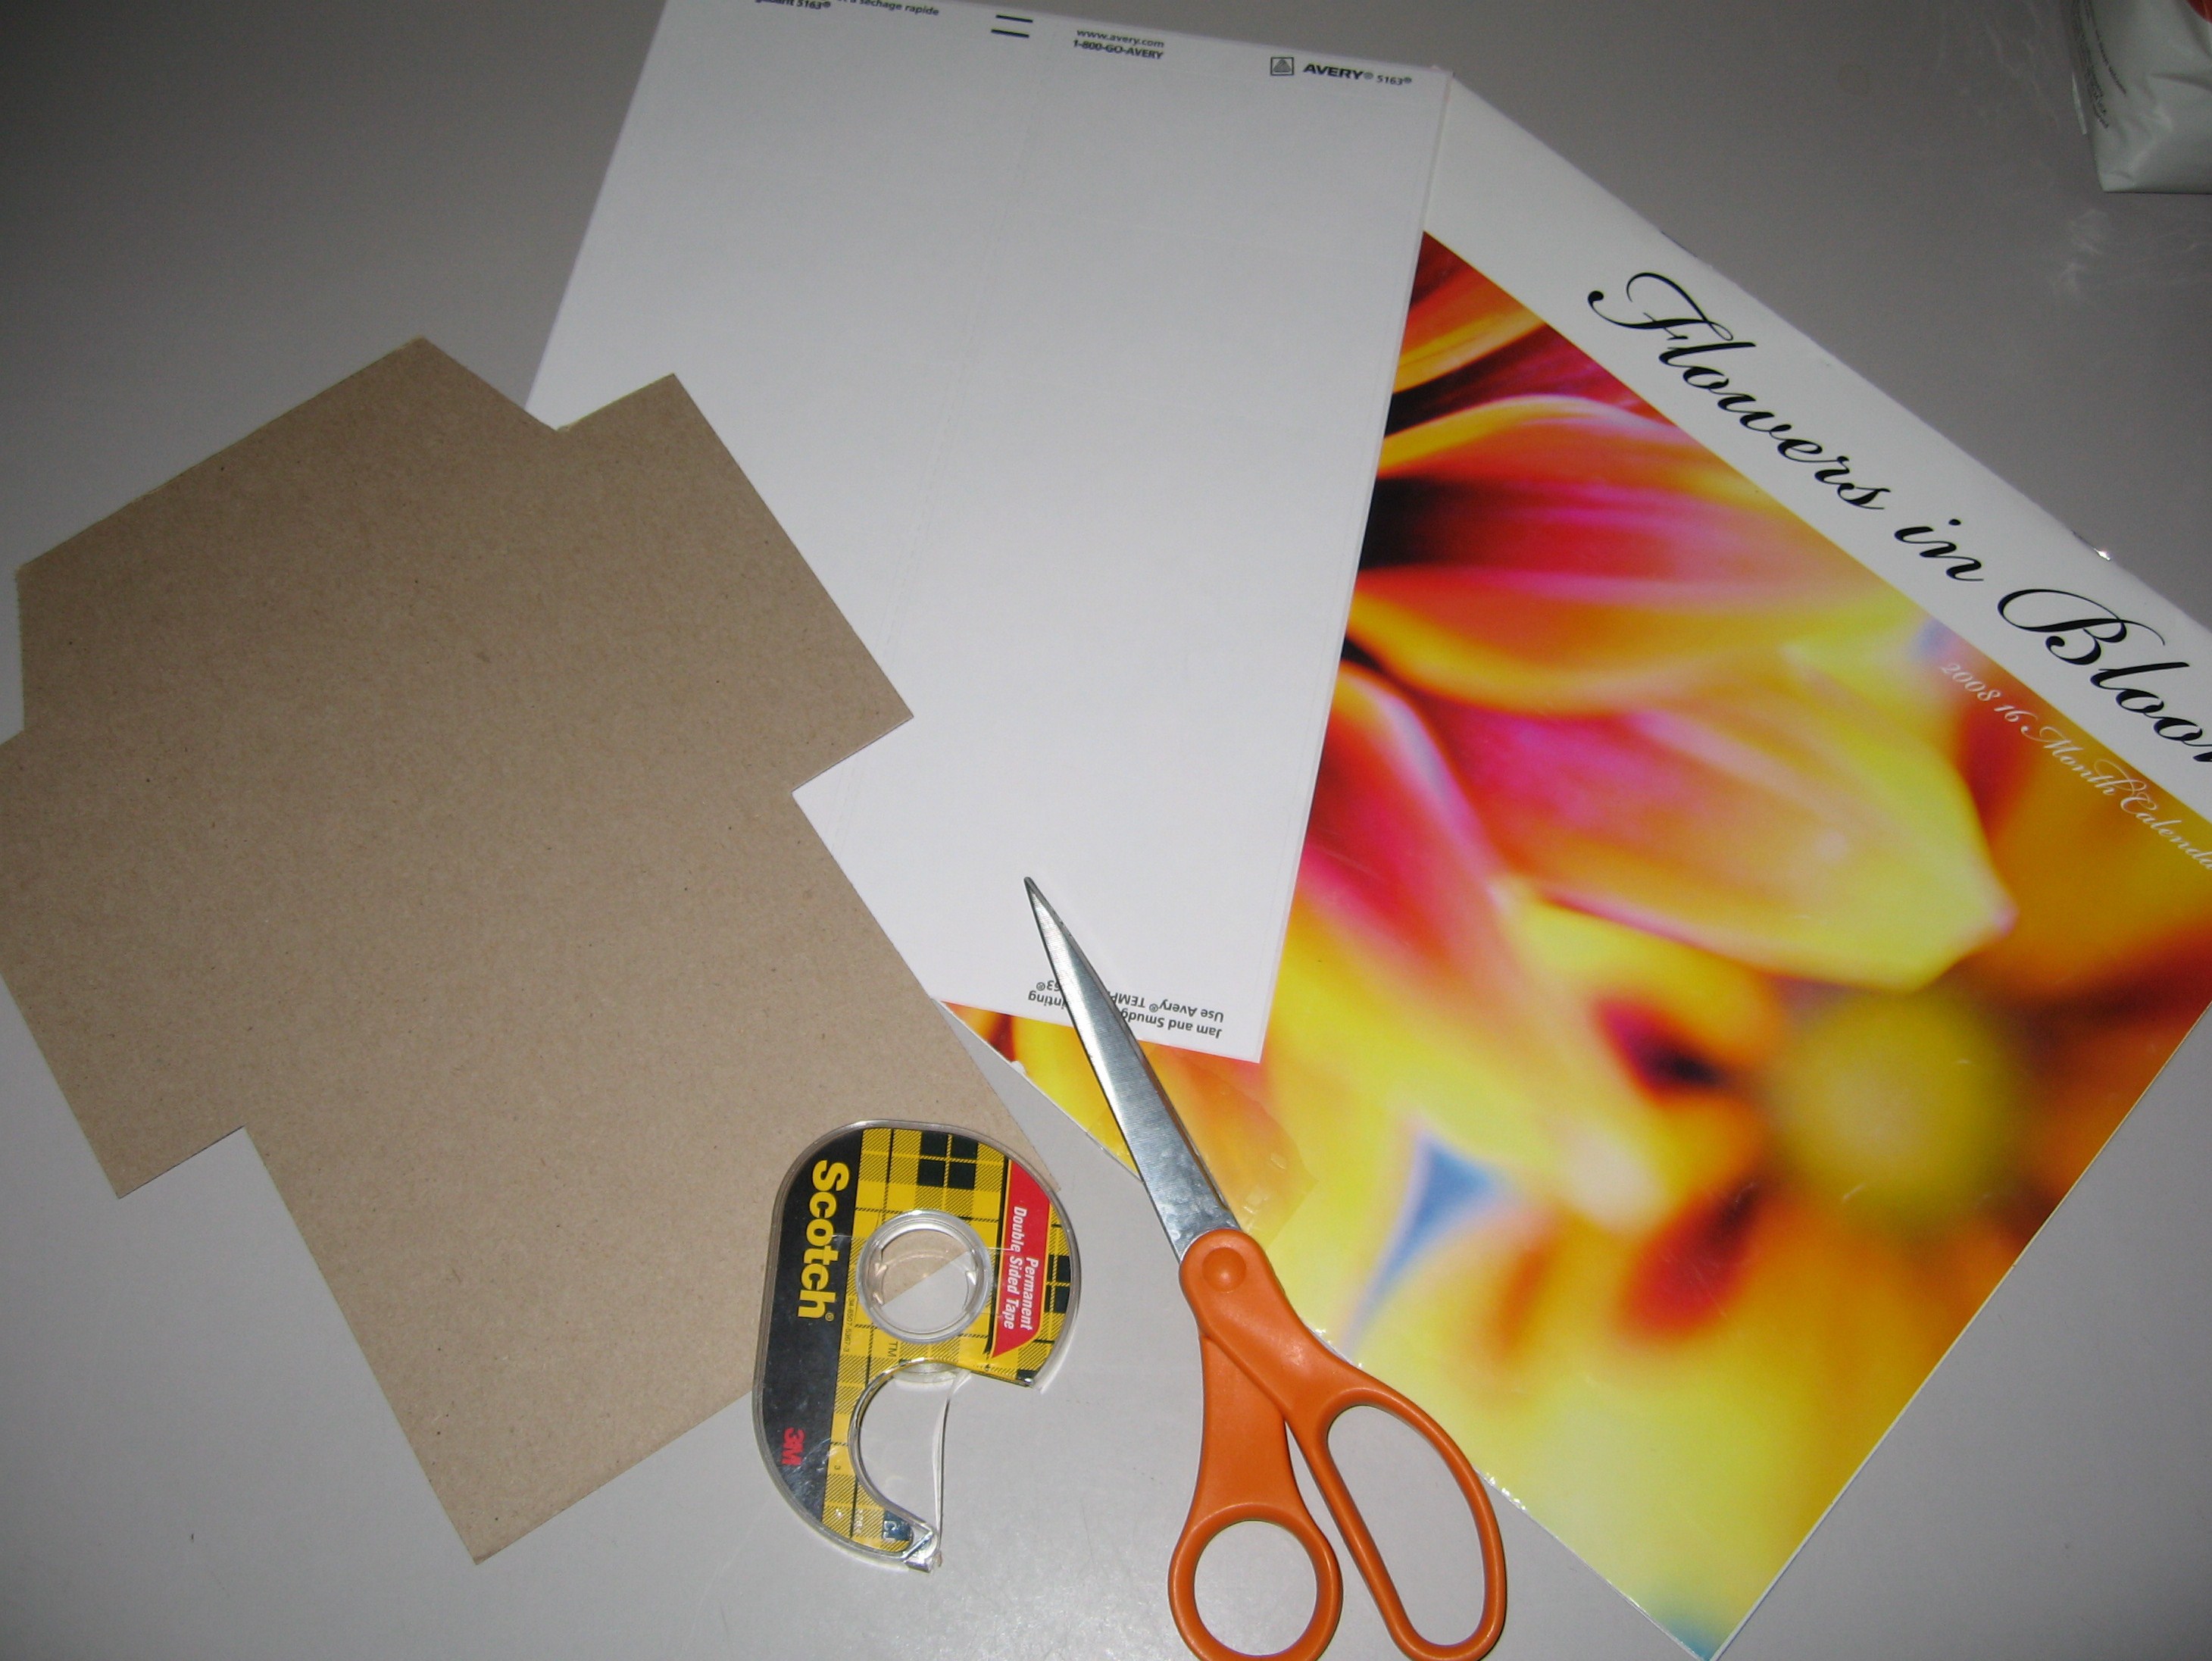
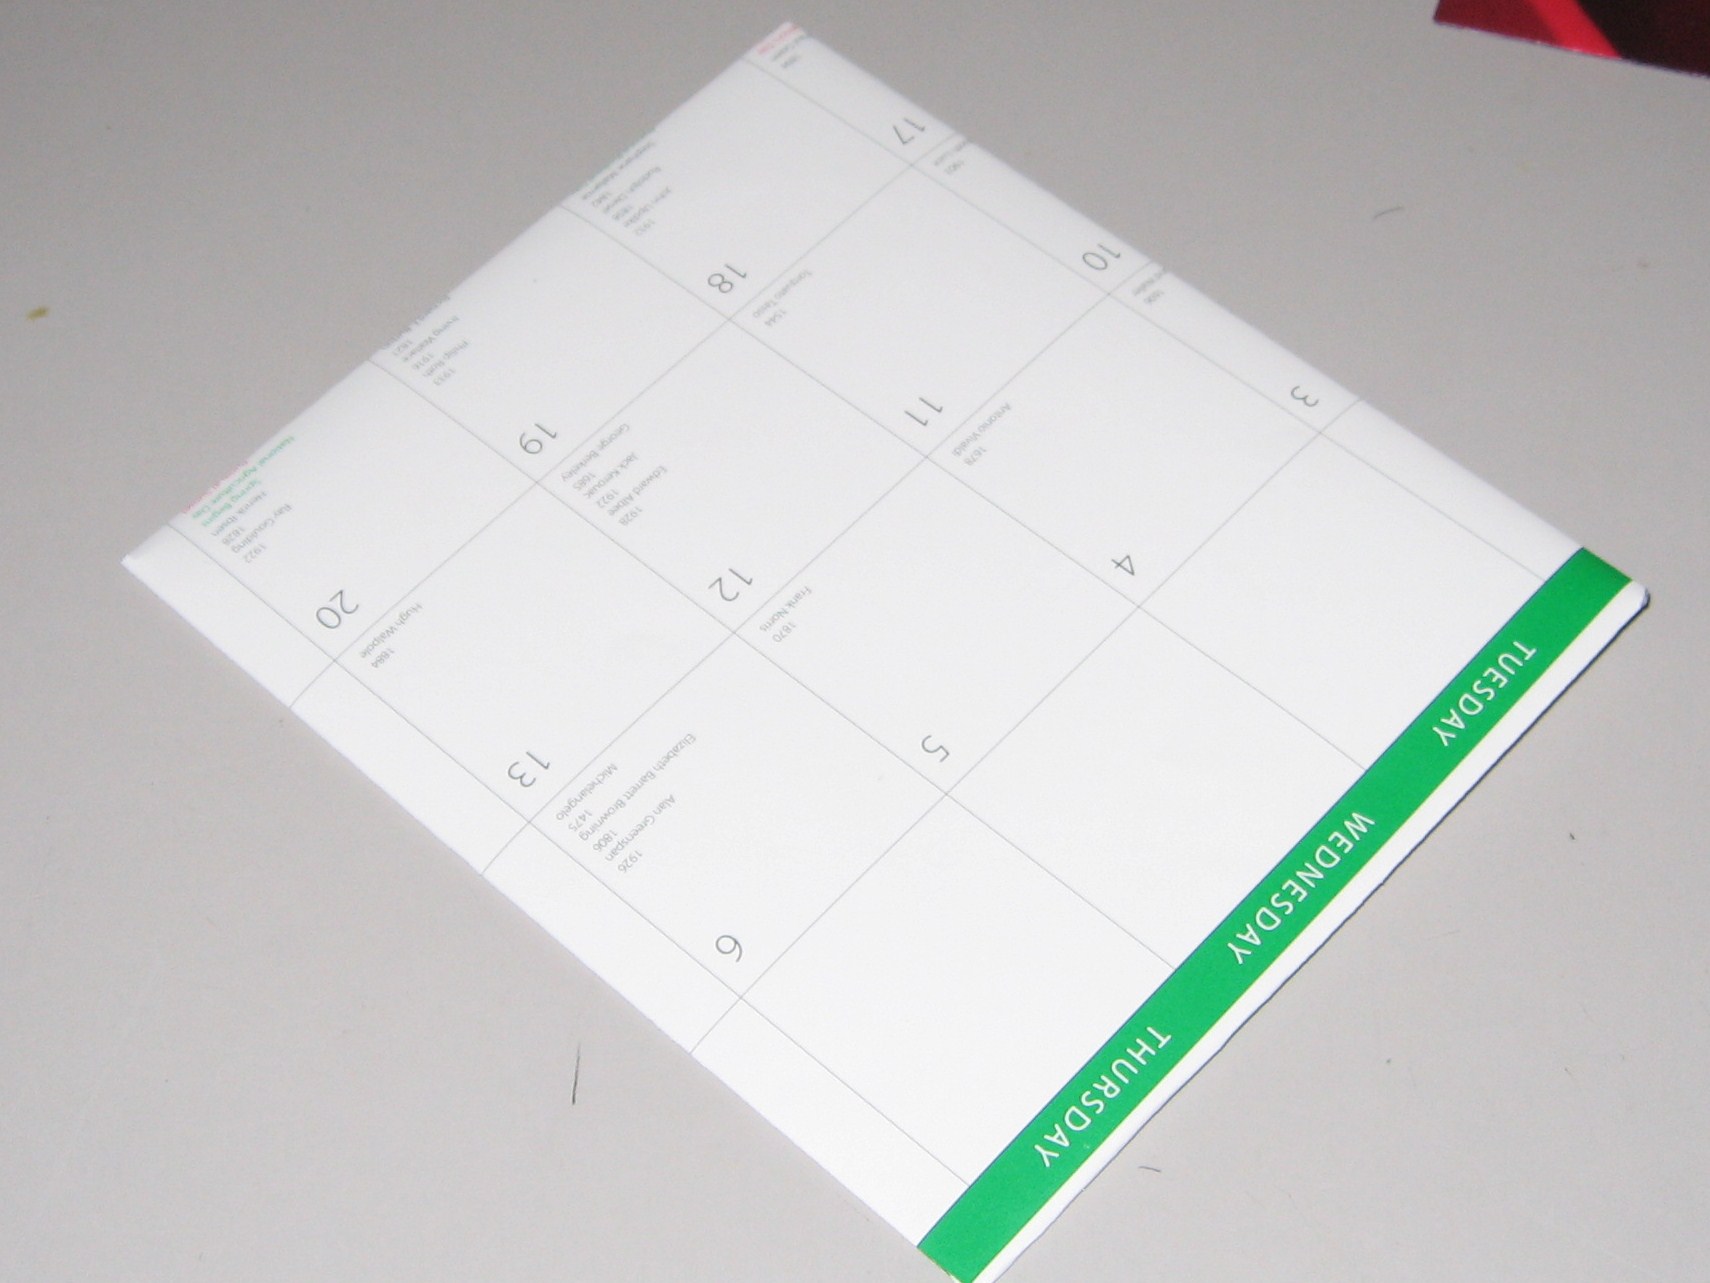
I’ve been recycling my paper calendars as long as I can remember. Each December, I start eyeballing the soon-to-be-obsolete model, wondering what it will be in a month or so.
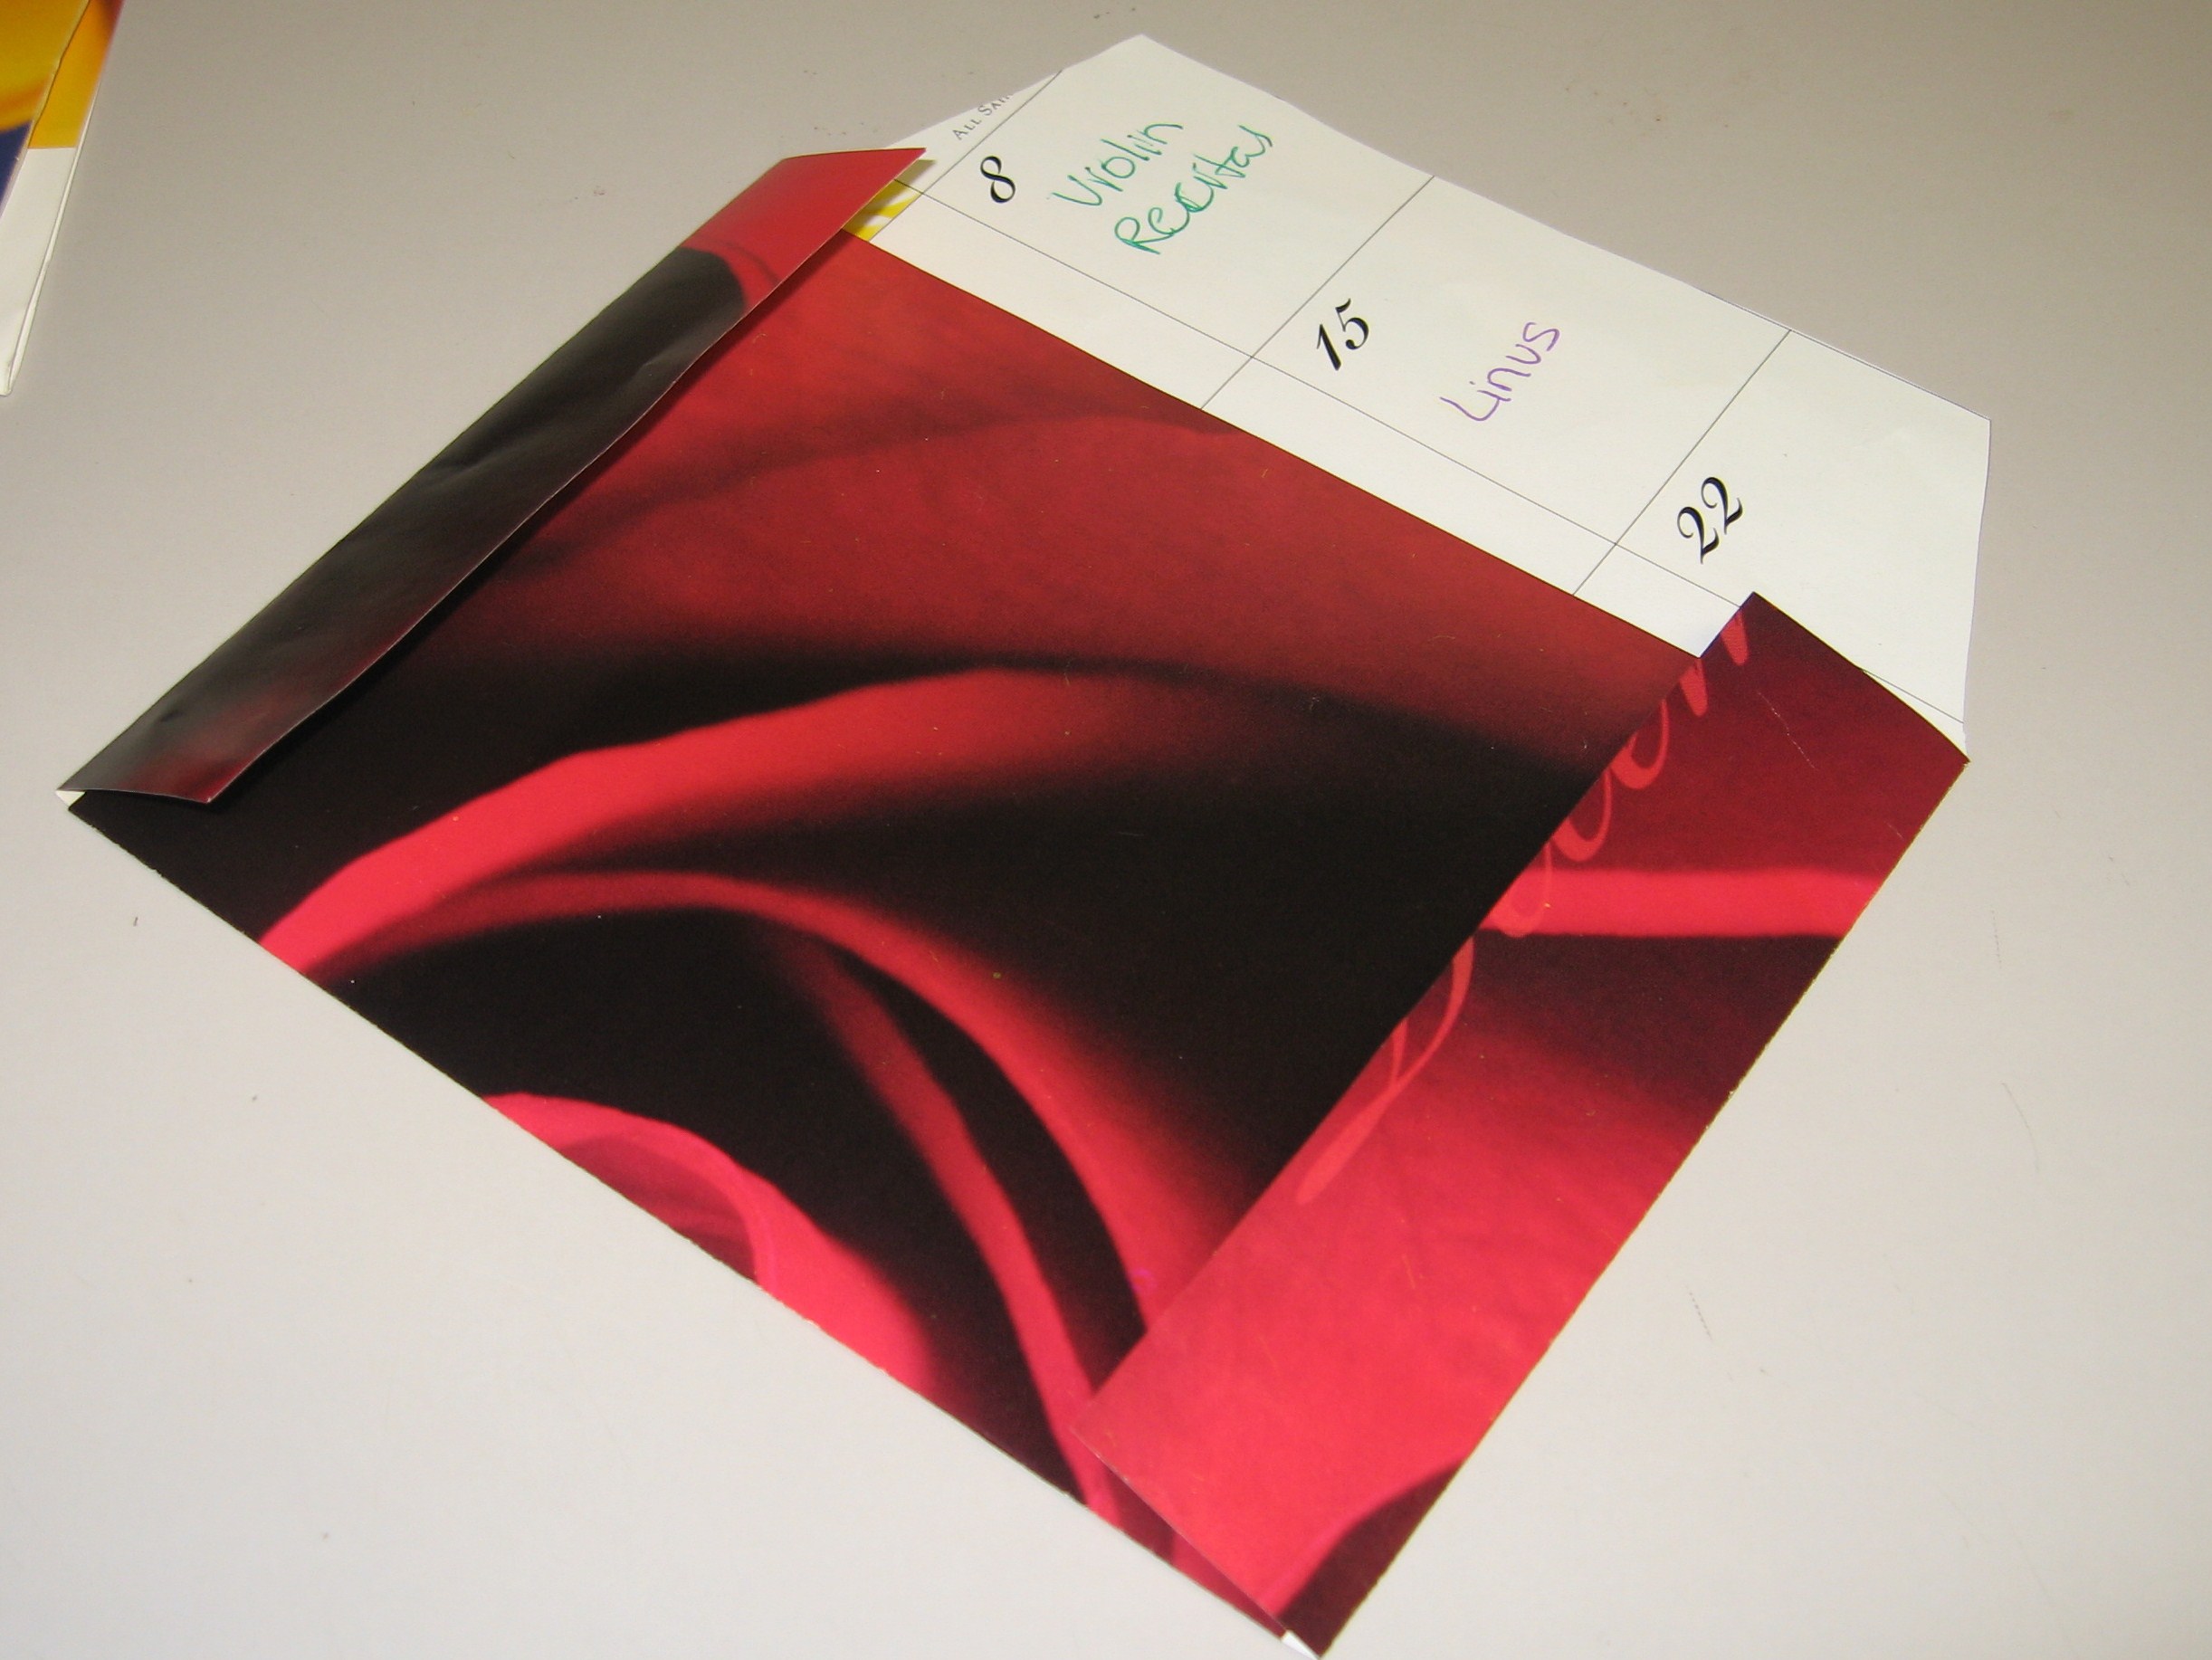
In the past, old calendars have become postcards and gift boxes. My favorite by far is envelopes. Calendar pages, especially really cool calendar pages, make great envelopes!
You’ll need:
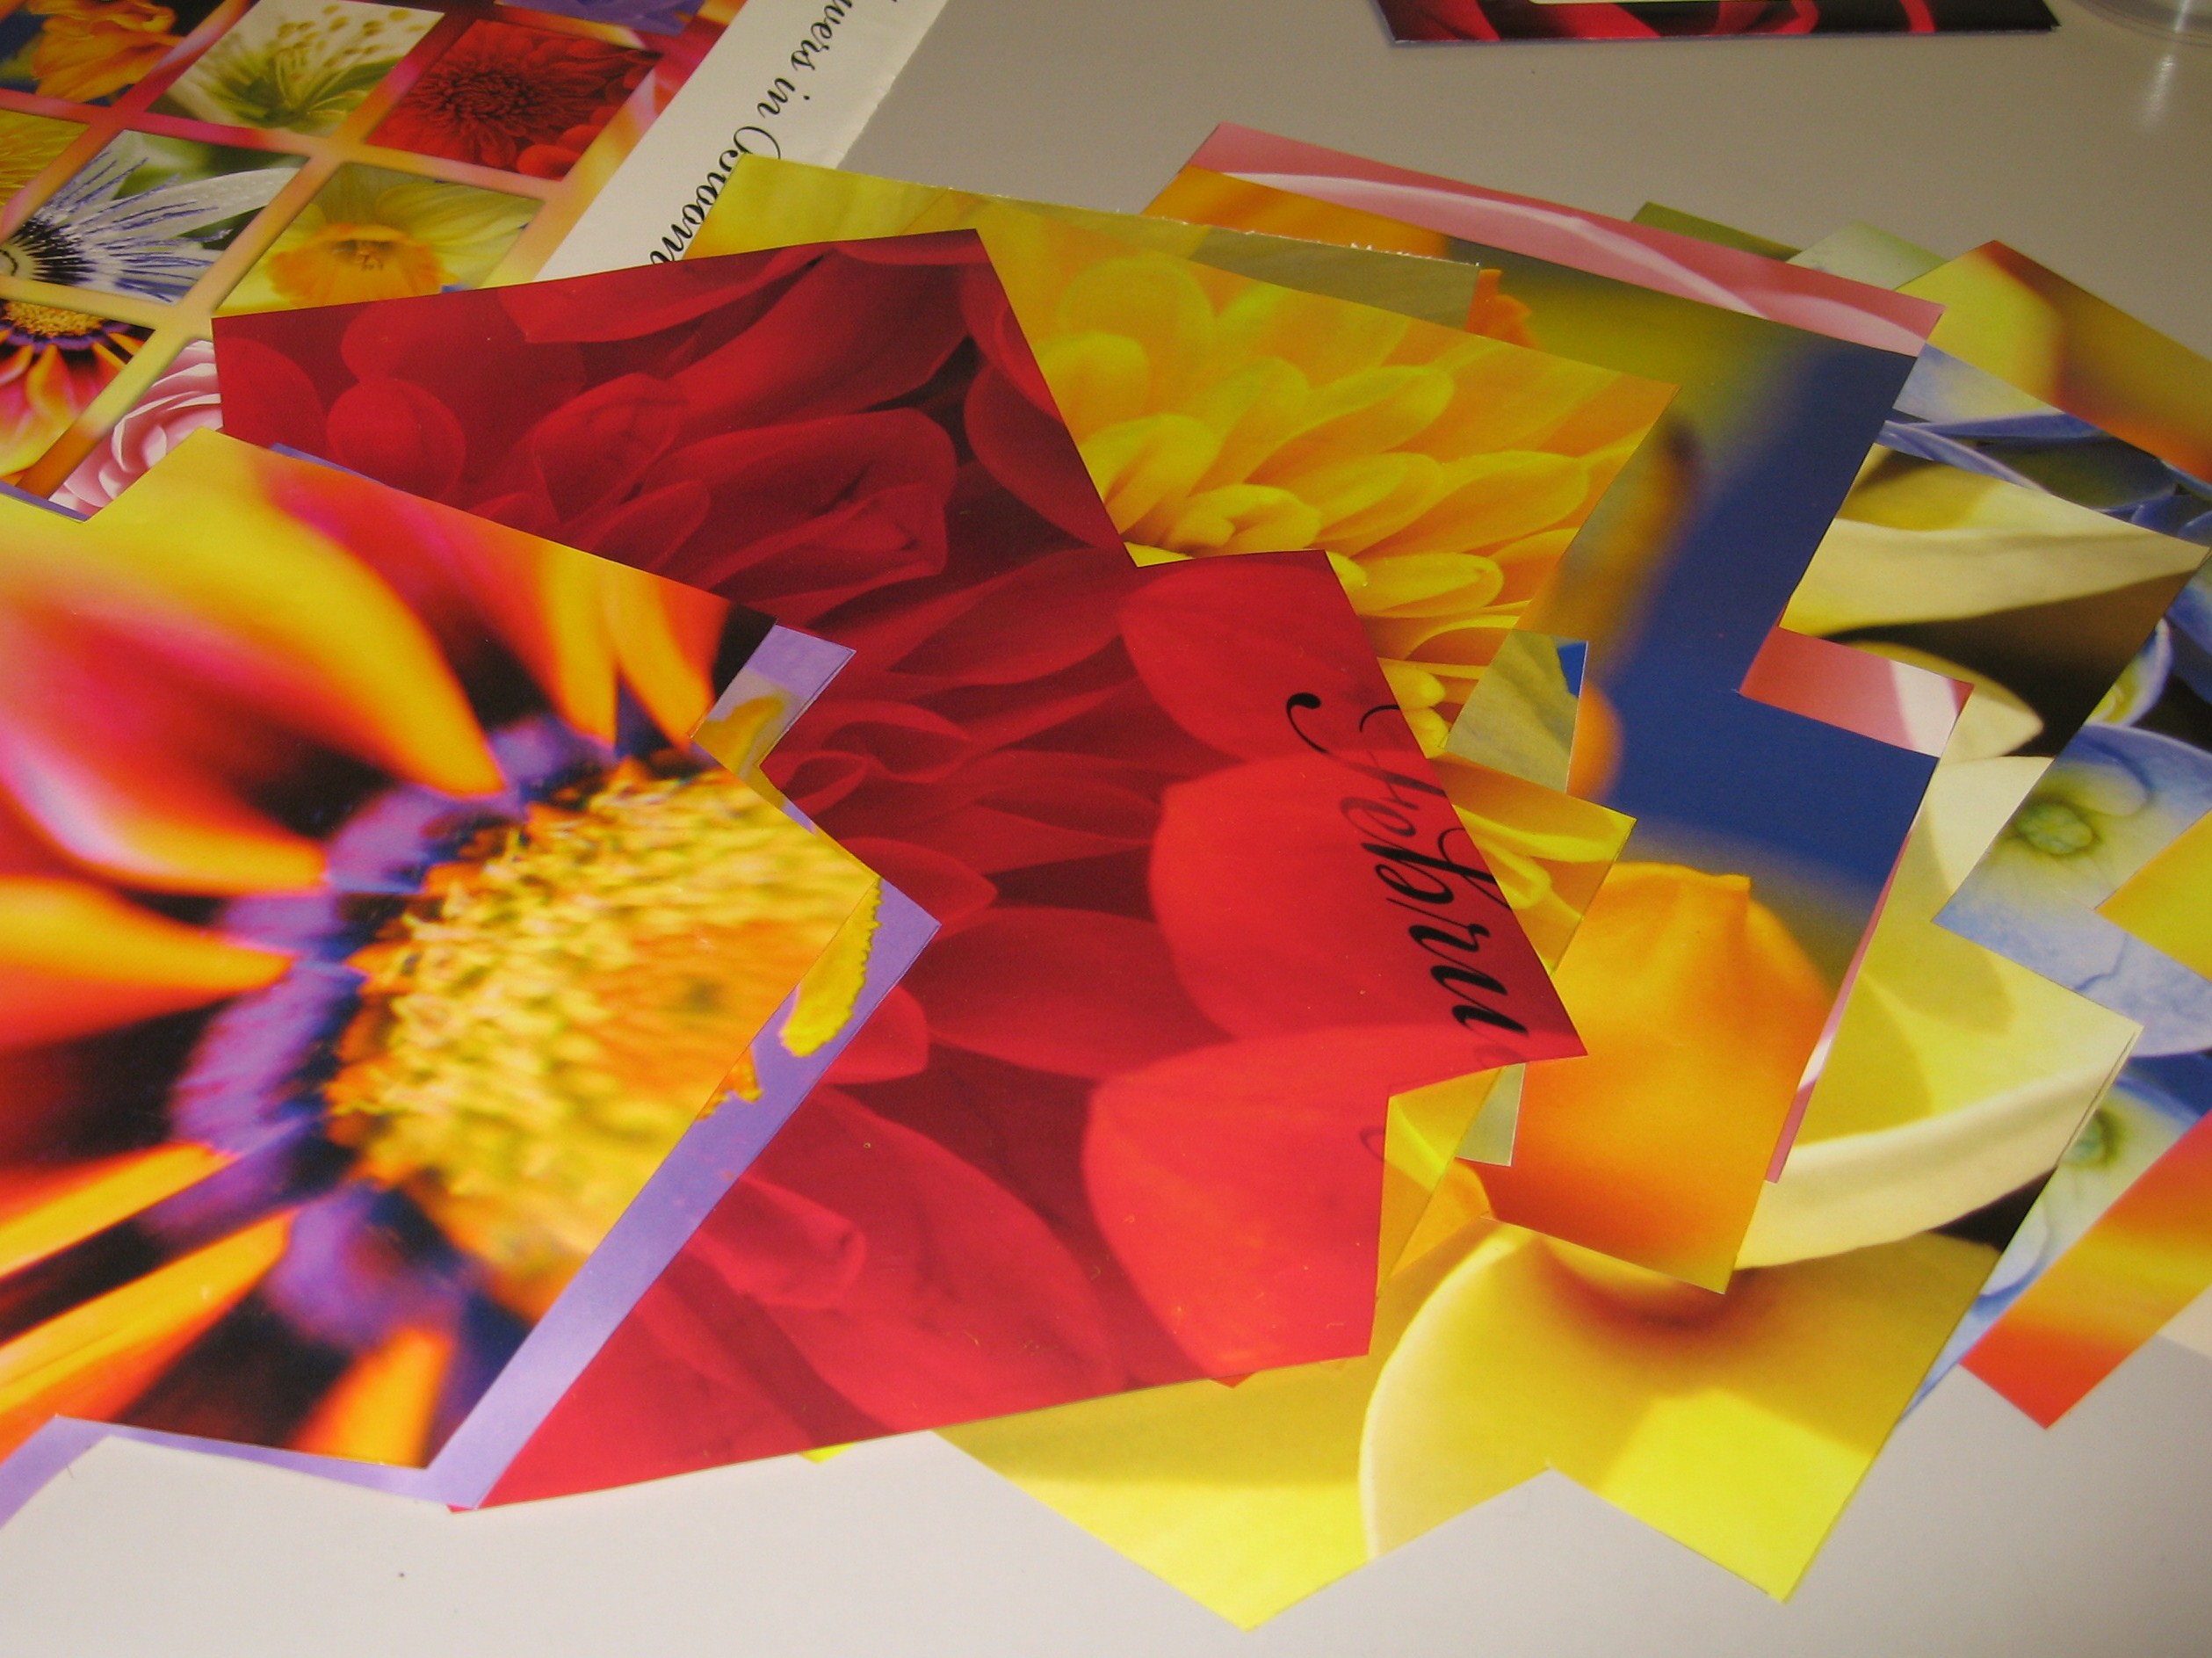
an old calendar, the bigger, the better!
envelope template – cut out, and transferred to a piece of lightweight card stock or cardboard
staple remover
scissors
pencil
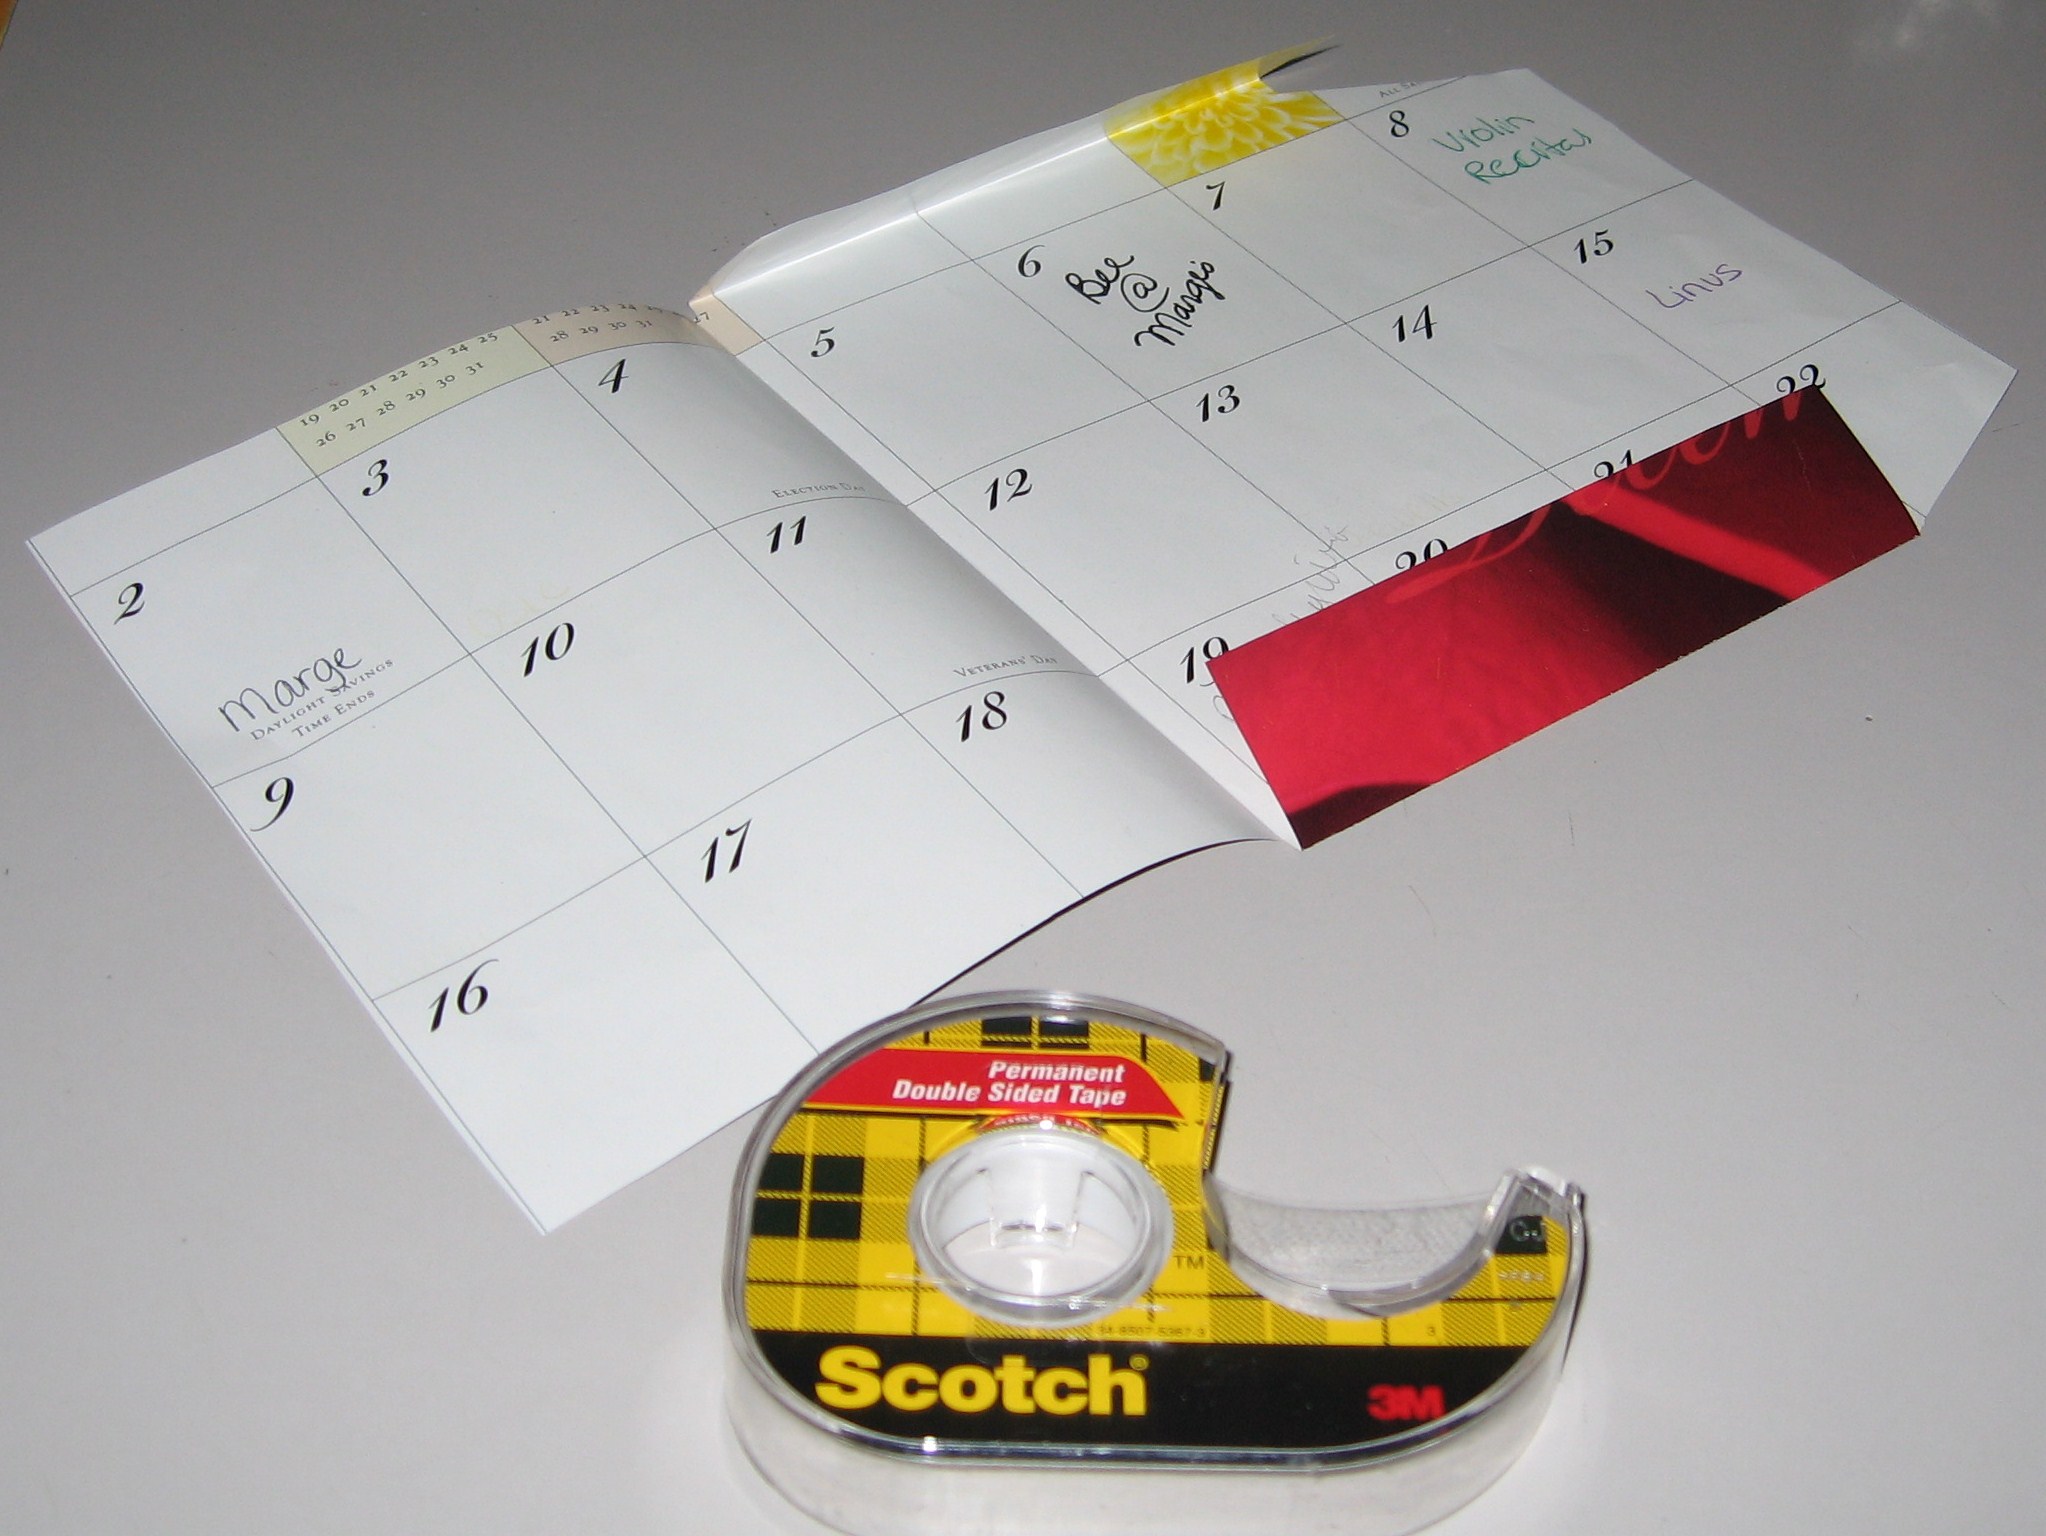
double stick tape OR a glue stick
Blanket mailing labels (optional)
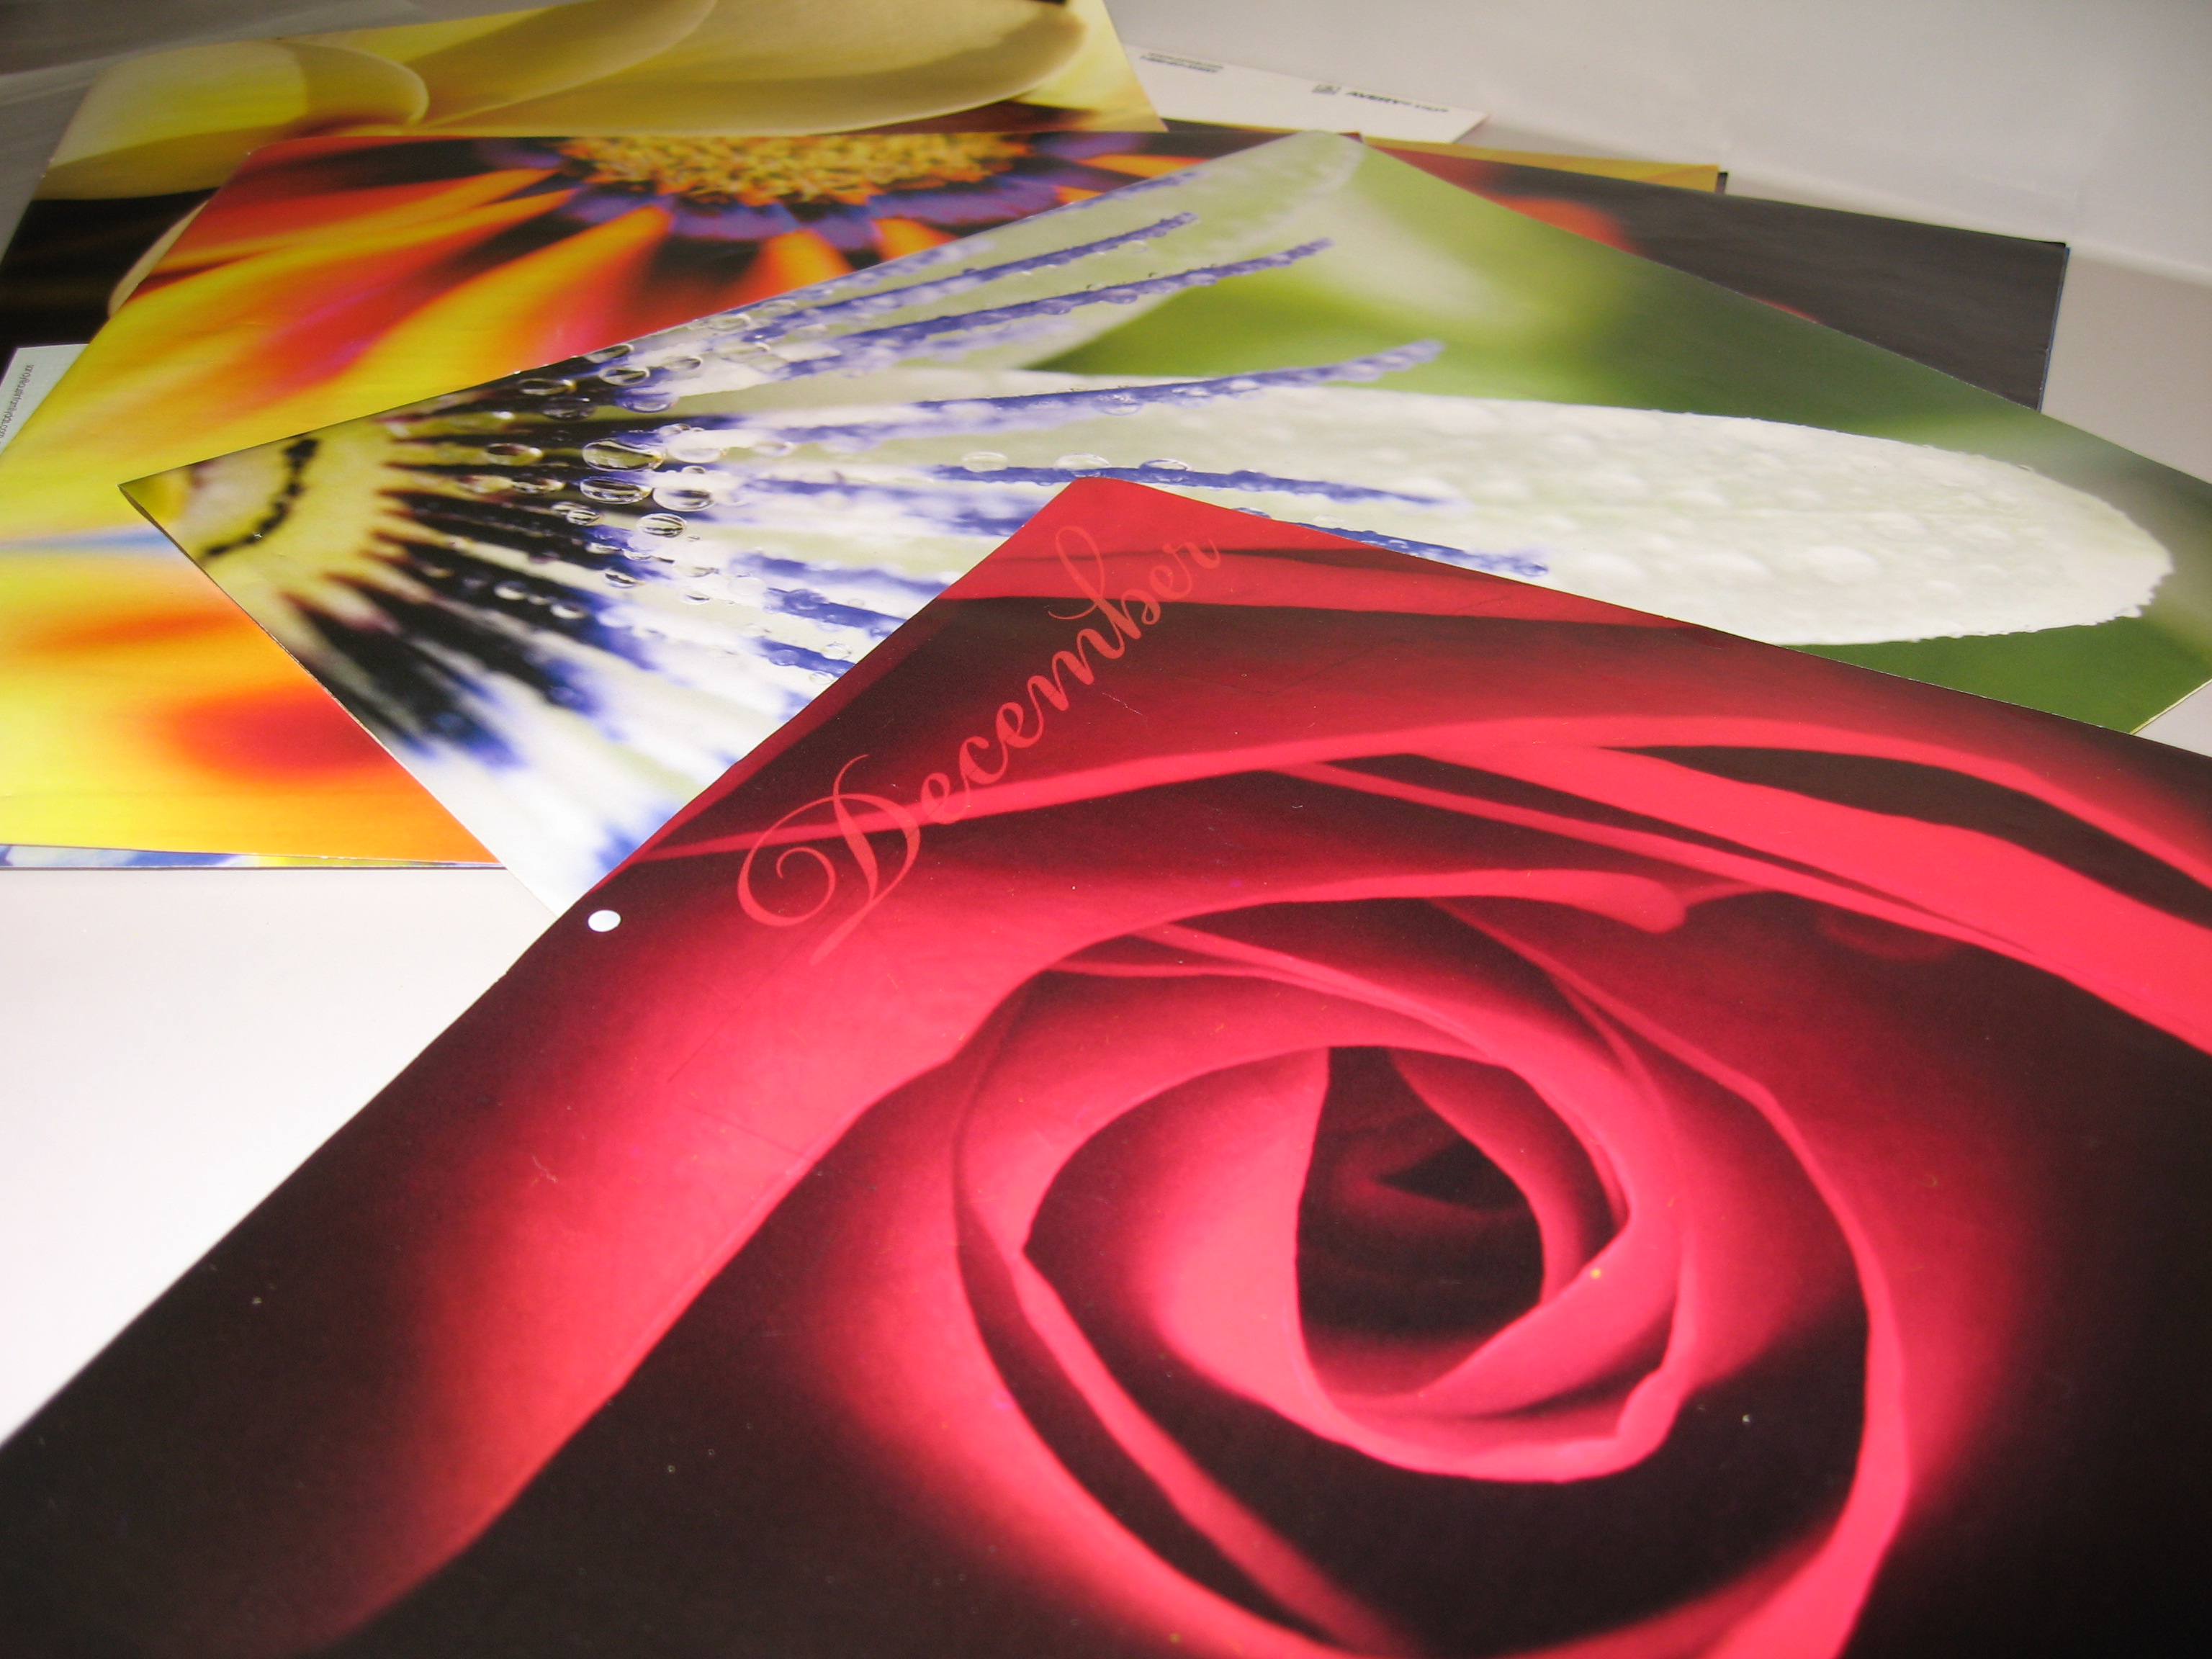
Remove staples from the calendar
Separate pages and tear apart along the crease line
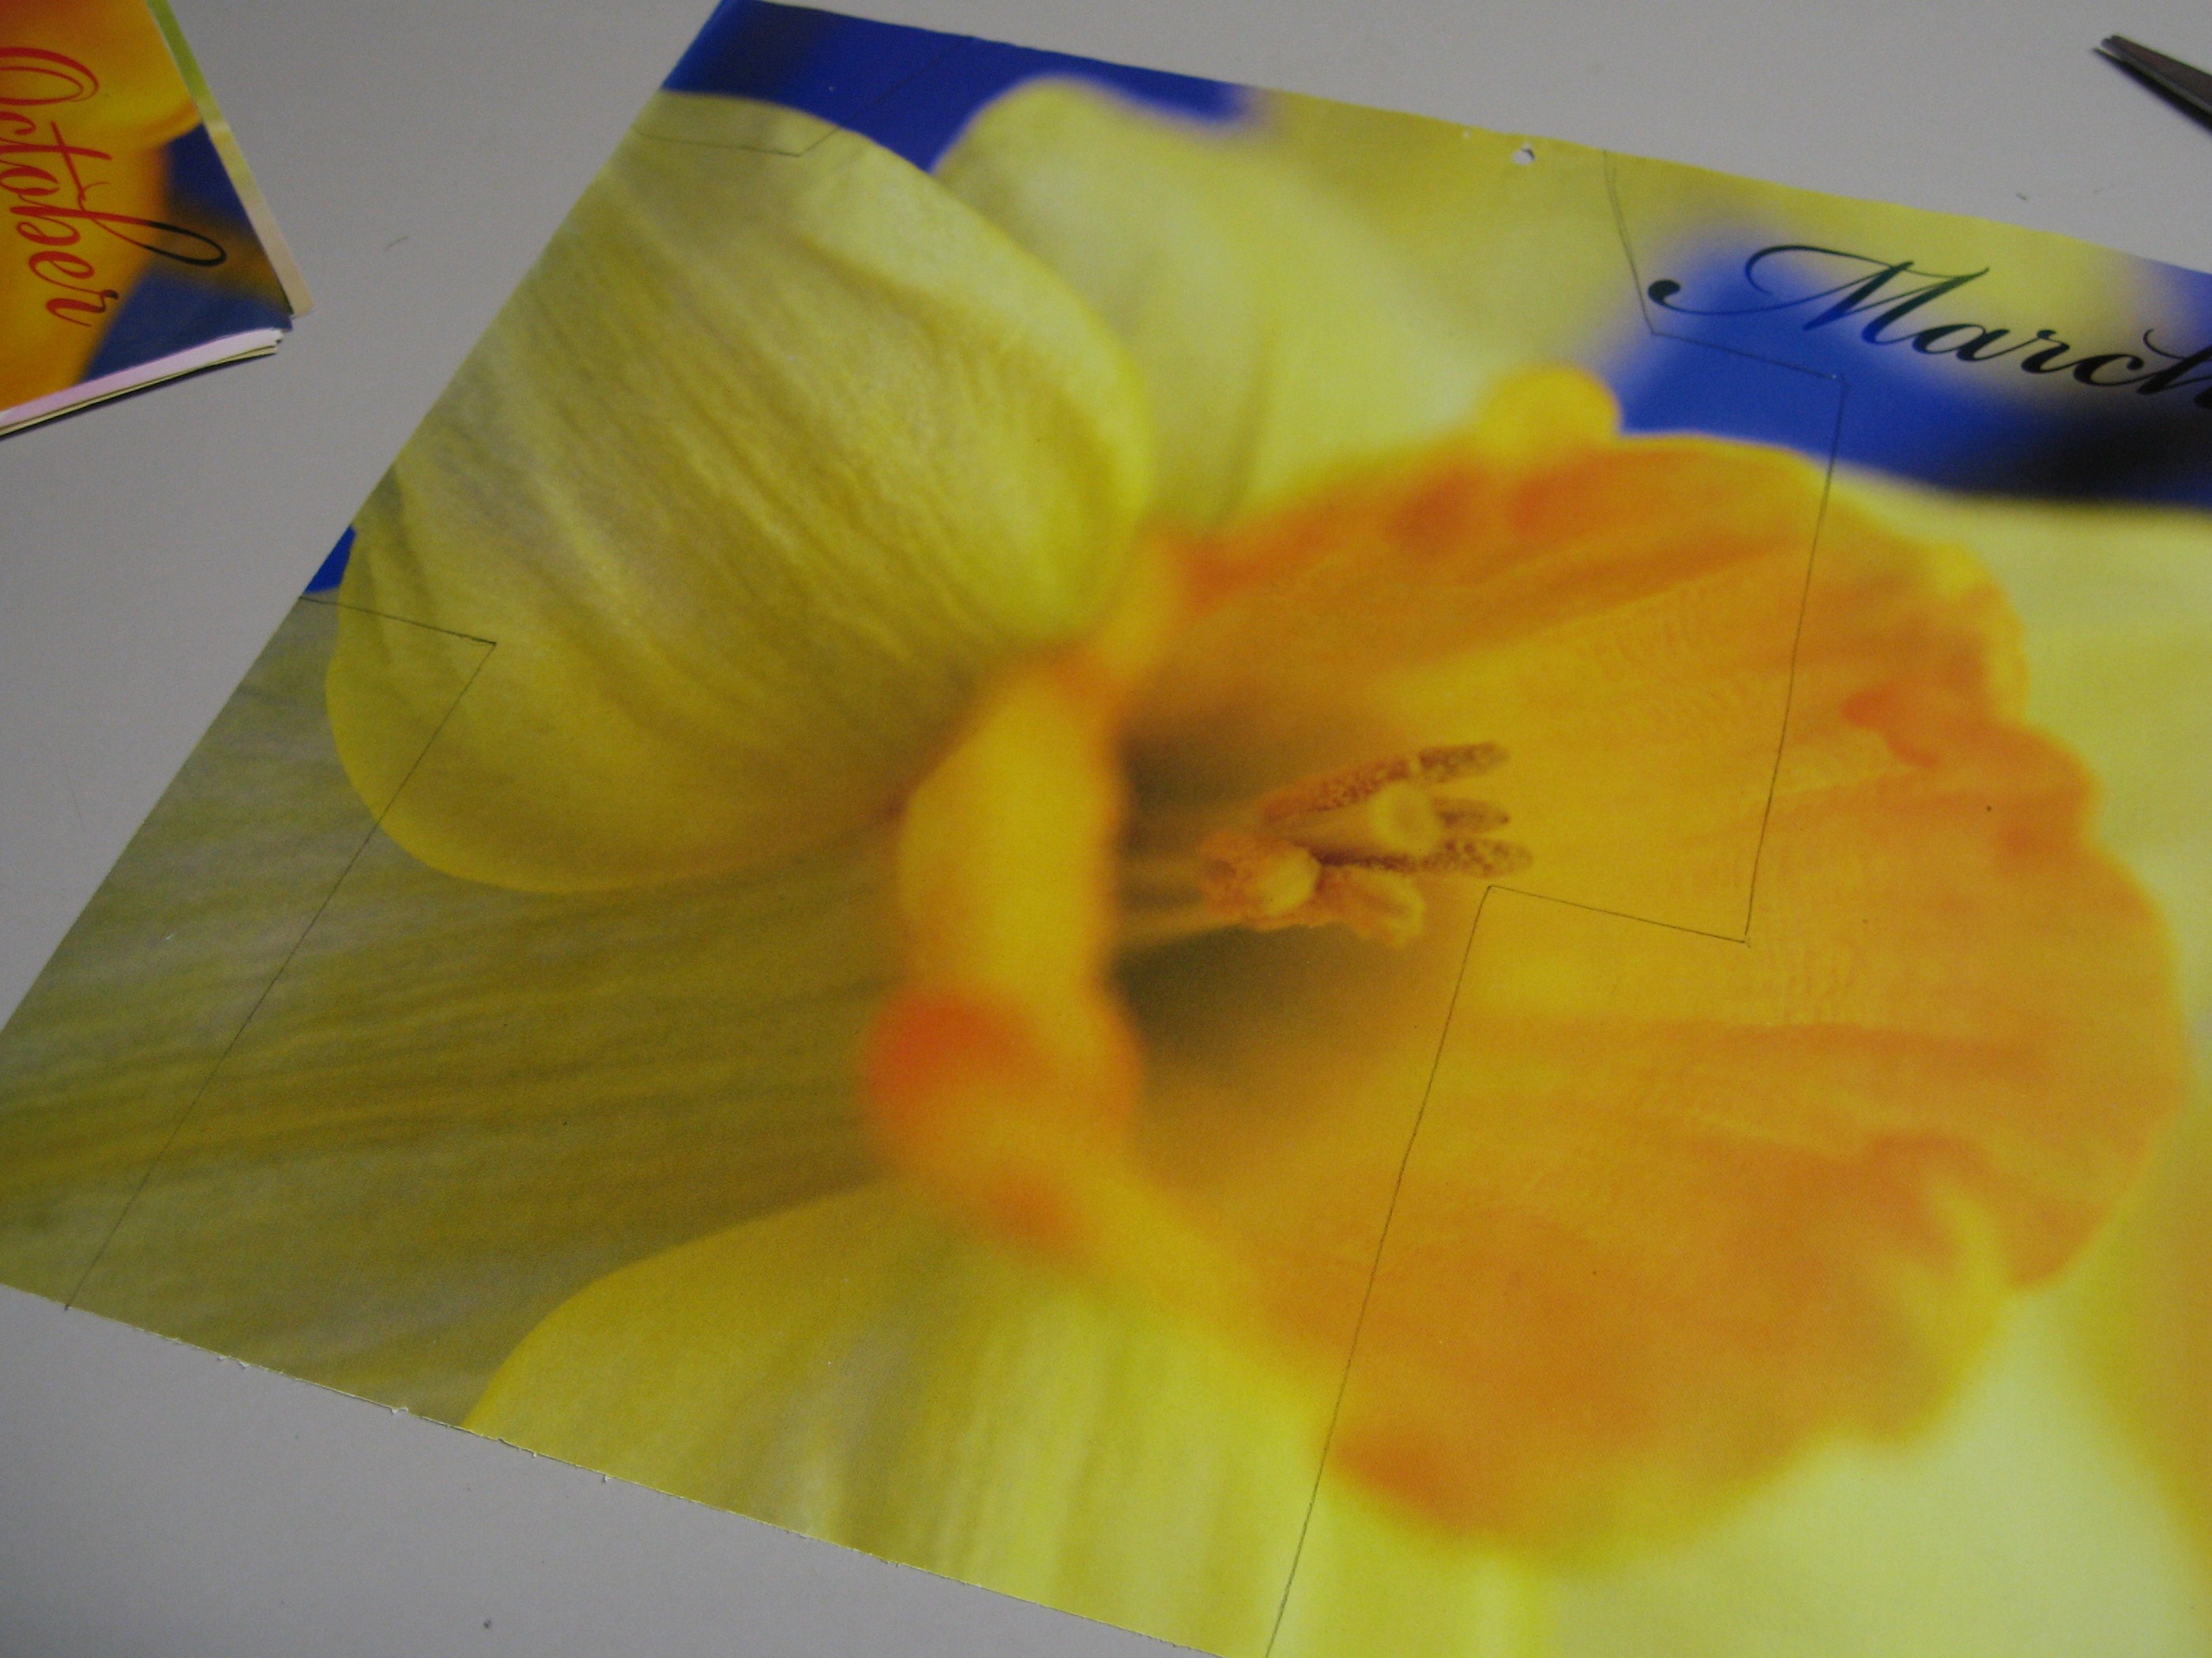
Position the template on a calendar page and trace with a pencil.
You might want to fussy cut here, if part of the page is more interesting than the rest.
Using scissors, cut along pencil lines.
Repeat for all pages.
Fold bottom of envelope up towards top, aligning with the bottoms of the side flaps.
For heavier paper, use your template or a ruler to crease. If you have paper-folding tools, this is a great time to use them!
Fold side flaps, making sure they’re even with the top and bottom.
Fold bottom flap out.
Place double stick tape, or use a glue stick, on the side flaps, leaving 1/2″ to 1″ at the top without adhesive.
Fold top flap down.
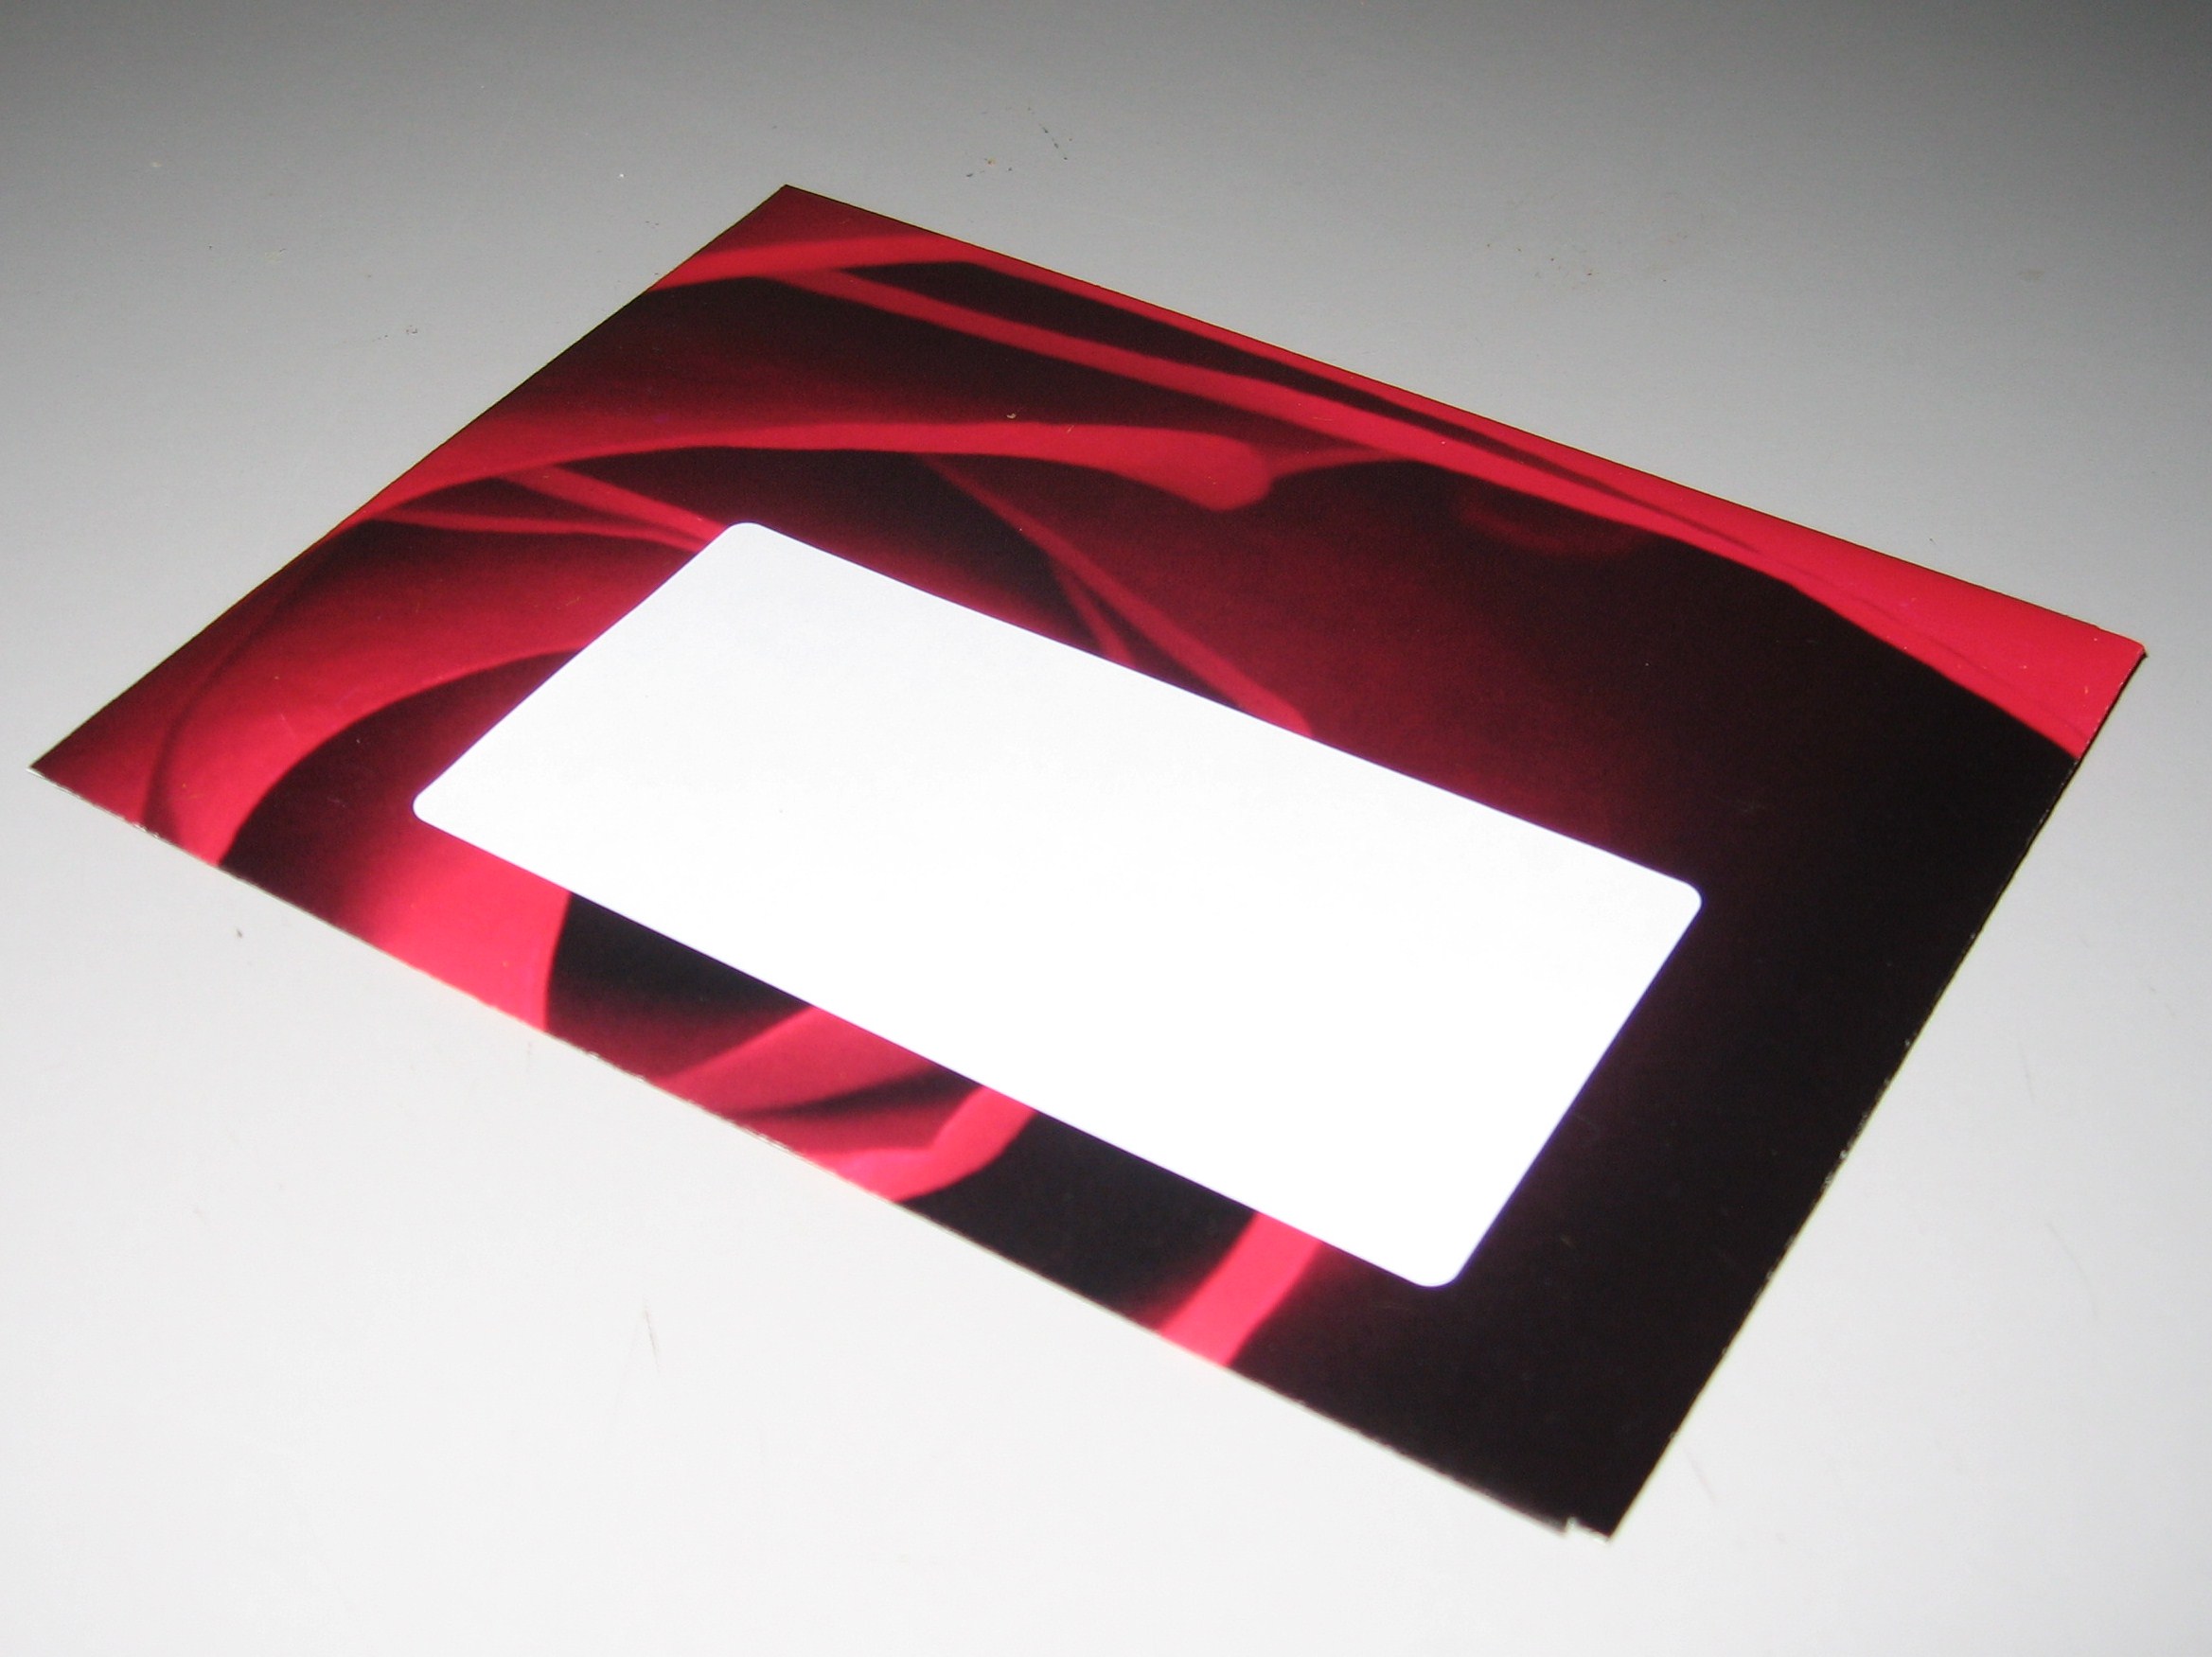
Finished envelope from the front.
Optional: for darker papers, add a self adhesive mailing label.
Repeat until you have a pile of gorgeous envelopes!
For sealing, use double stick tape, a glue stick or fun stickers.
The same template, different calendar.
Same envelope from the front.
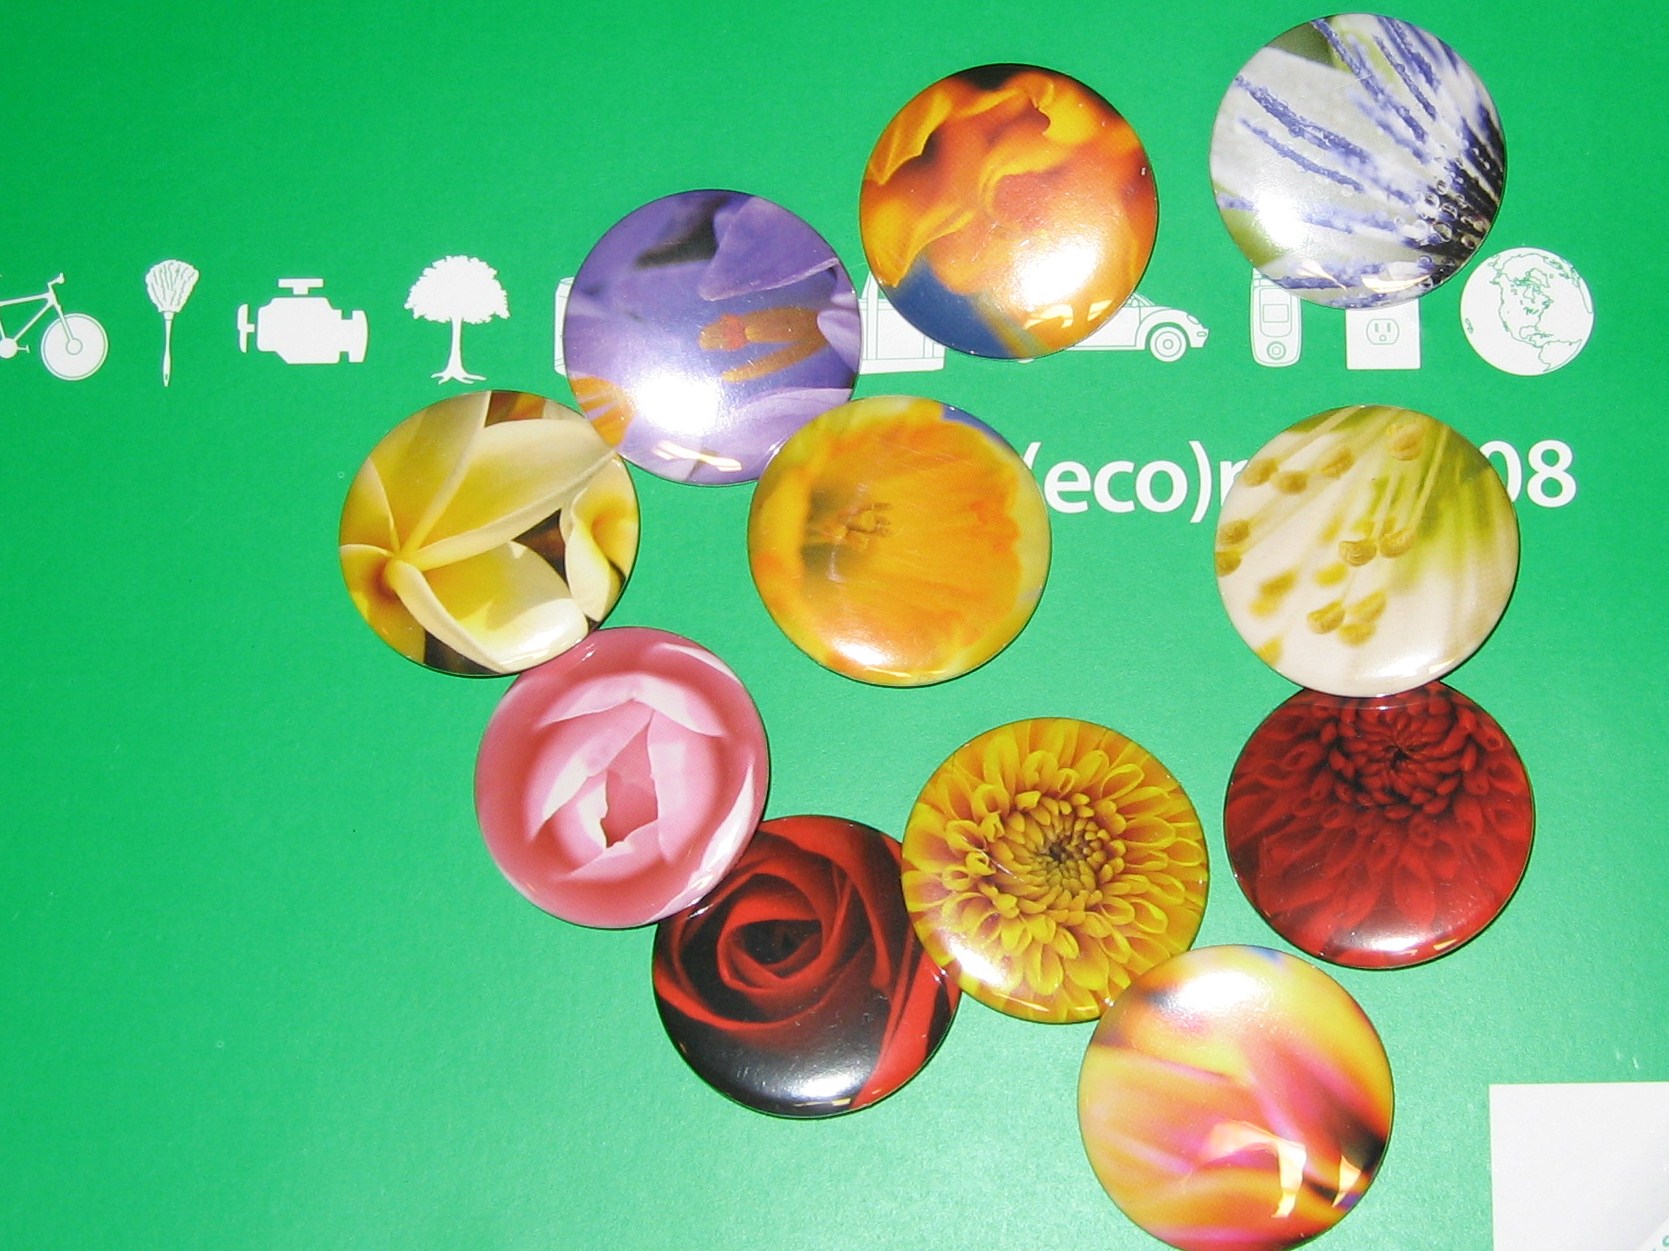
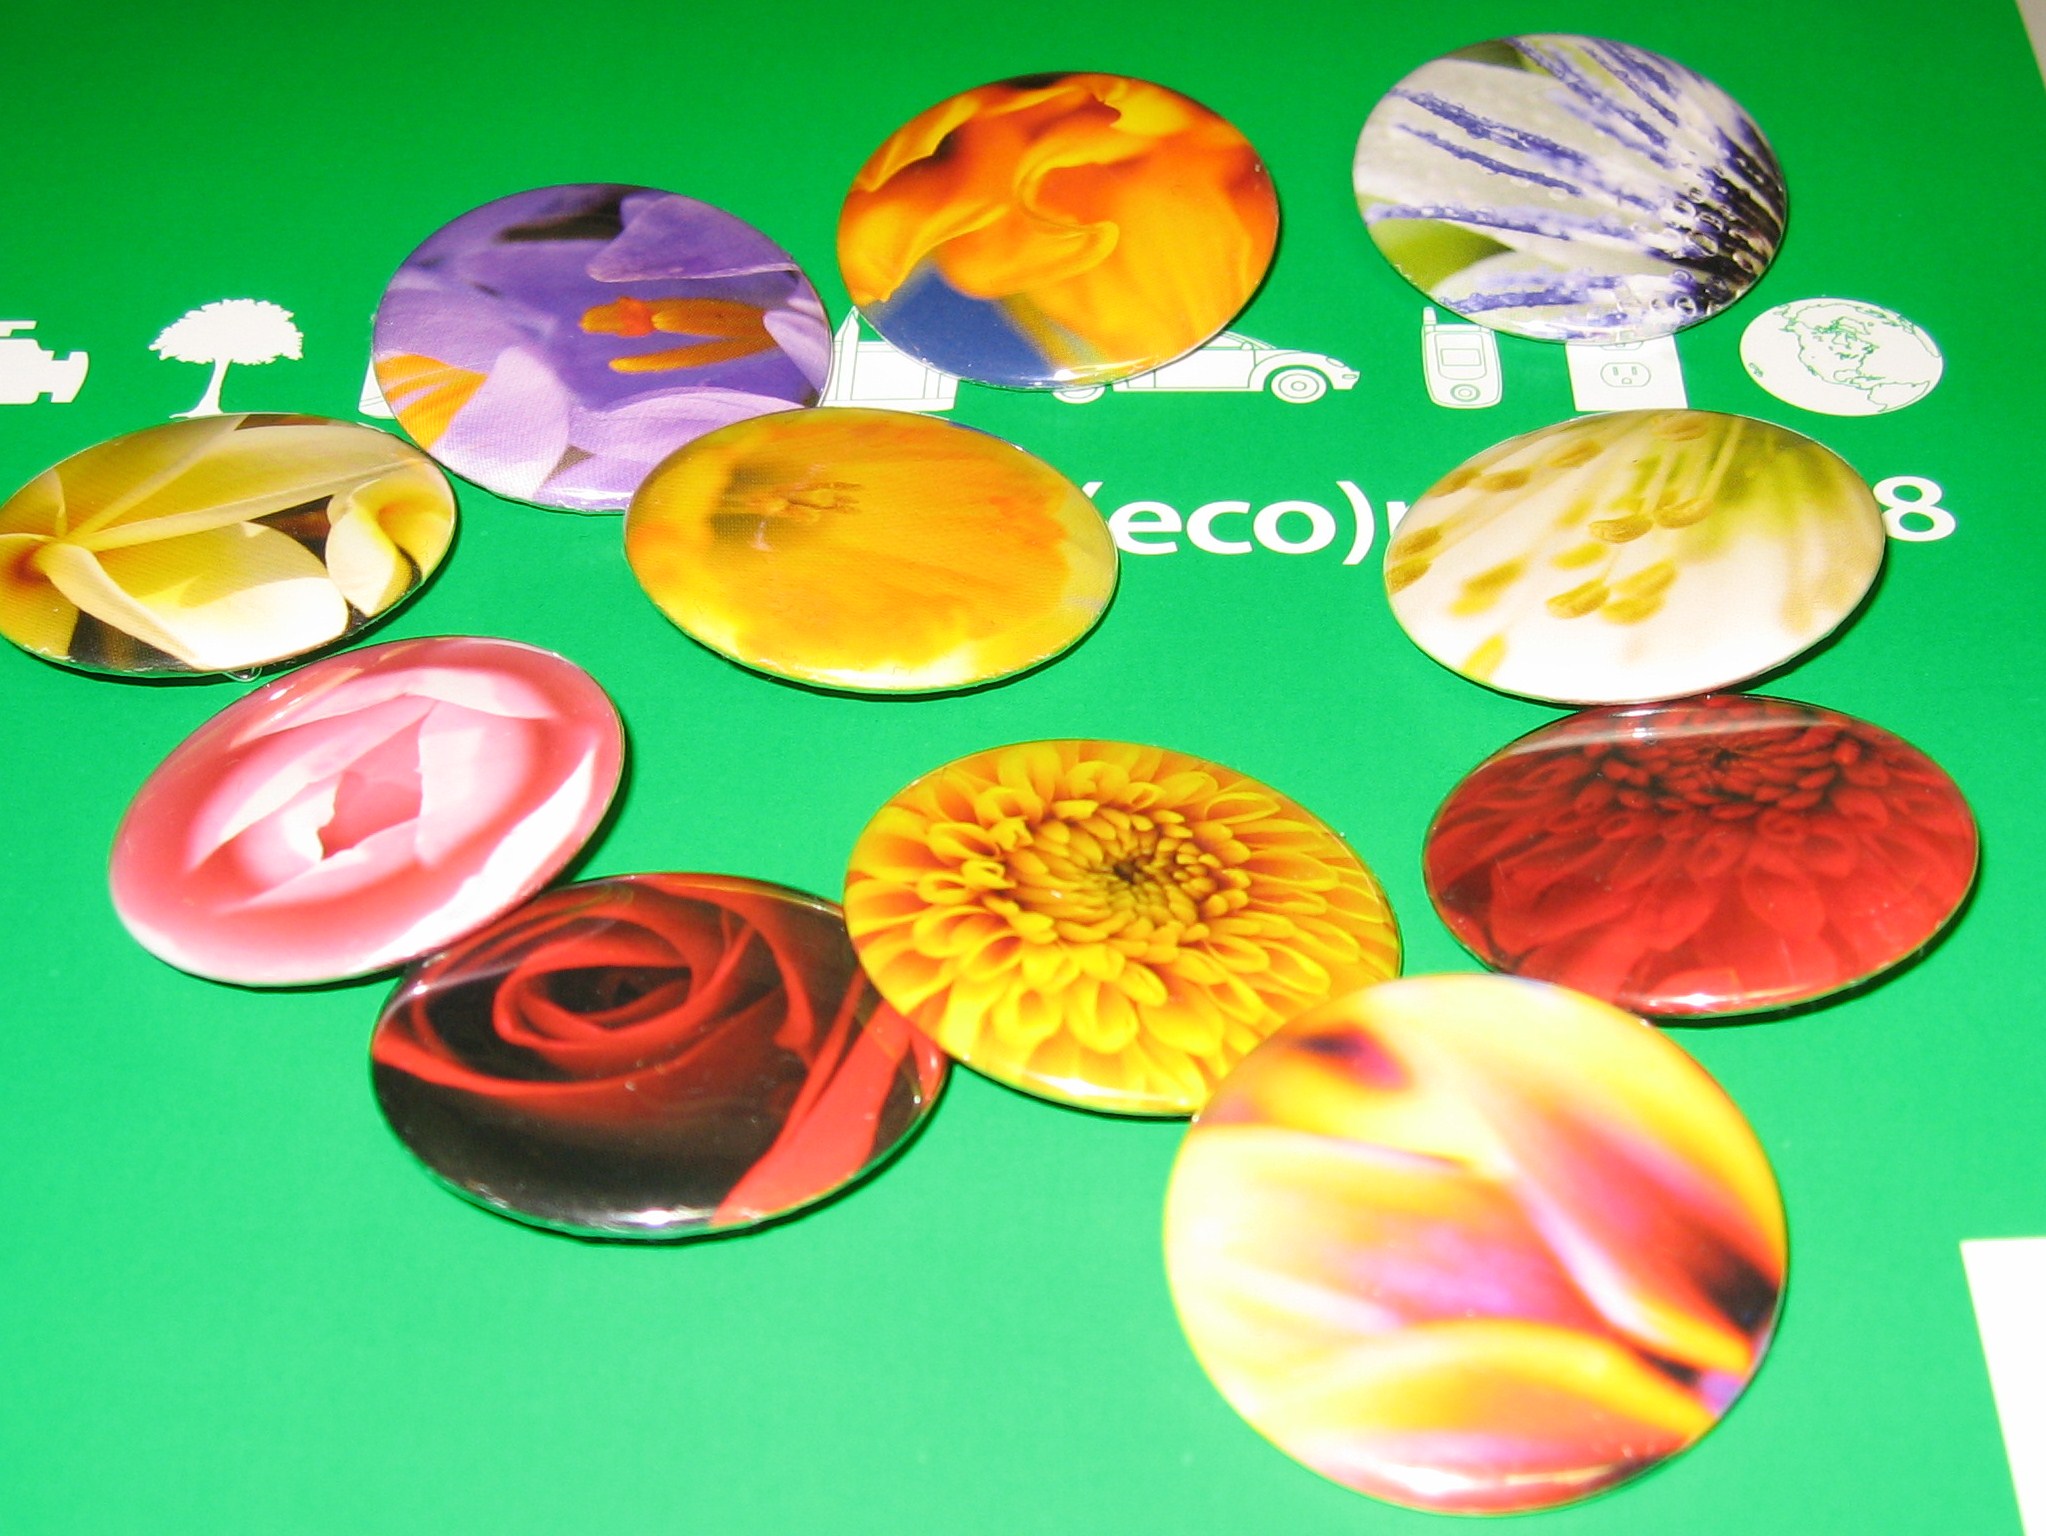
Now, what to do with the gorgeous thumbnails on the back of this calendar?
Monique is one of my favorite blanket patterns to make for The Linus Connection.
It’s easy, relatively fast, works well with just about any yarn and can be adapted to be a smaller or larger size. Make it with all one color or use up your leftovers!
I’m not including yarn amounts here because it really varies on what size you’d like to make and what kind of yarn you choose. The one shown is made with Caron Simply Soft.
You’ll need:
The yarn of your choice, I prefer a soft worsted, like Caron Simply Soft. Please note that the amount will vary
depending on your brand choice
I hook – this is my preference, but it works with any size hook from G up to about a J, depending on yarn weight.
Ch 122 (or any multiple of 3 + 2)
Row 1: 1 hdc into third ch from hook, skip 1 st *(1sc, ch 1, 1 dc) in next st, sk 2 sts*, rep *to*, end of row, 1 sc in last st, ch 2,
turn.
Row 2: 1 hdc in first st, (1 sc, ch 1, 1dc) in ch sp of the previous row. 1 sc in ch 2 space, ch 2, turn.
Rep until blanket is approximately square or slightly rectangular.
For edging, continue pattern in ch sp around remaining 3 sides. Join with sl stitch and finish off.
It’s hard to believe I’ve never blogged about this project!
Years ago, I had a website called Jen’s Crochet and Crafts. It eventually morphed into sewhooked. The Harry Potter Bookcase Mural was originally posted there, along with the story of how it came to be.
When my almost-14-year-old-daughter was about to turn 8, she asked for a Harry Potter-themed room for her birthday. Being a big HP fan myself, I was as excited as she was to take on the project. Among her requests were castle walls, an enchanted ceiling, The Fat Lady on her door, red and gold hangings for her bed and a magical bookcase. I managed all of those things, but the bookcase remains my absolute favorite part of the project.
The original bookcase was drawn freehand with chalk. I’ve since made a map for use on an overhead projector, or, if you have a steady hand and feel up to it, to use as a free-hand guide.
Permanent markers, various colors, fine & medium tips
optional: yardstick or long straight-edge
optional: egg cartons
You need a clean dry surface to start with. If painting on an older surface, you may want to paint with primer first.
Print the template on clear acetate and project the image onto the selected area. Position the bookcase where you’d like for it to appear. Use masking tape to outline the area that will become your bookcase.
Use semi-gloss paint and the paint roller to paint the taped-off area.
Paint a second coat if necessary. Allow to dry overnight.
Using a pencil or chalk, trace the bookcase (not the contents), adding a border if needed or desired. A ruler or yardstick comes in really handy for this step.
Paint bookcase shelves and allow to dry.
Starting with the top shelf, trace contents.
bottom left, close up
After tracing, paint contents using a variety of colors. An egg carton works great to have multiple colors available at once.
Repeat for all shelves, allow to dry overnight.
Using a variety of permanent markers, add book names using this list of books provided.
v bottom right, close up
Randomly place books where you like, except for The Standard Book of Spells. Look for these on the second shelf from the top, on the right side. The seven books are more or less together, each with a line across the top of the binding (only 6 books are listed in the HP series, but I’m assuming there would have been a seventh if Harry had returned for his final year of school).
top left, close up
Add embellishments; names on potions bottles, cat whiskers, etc. with permanent markers.
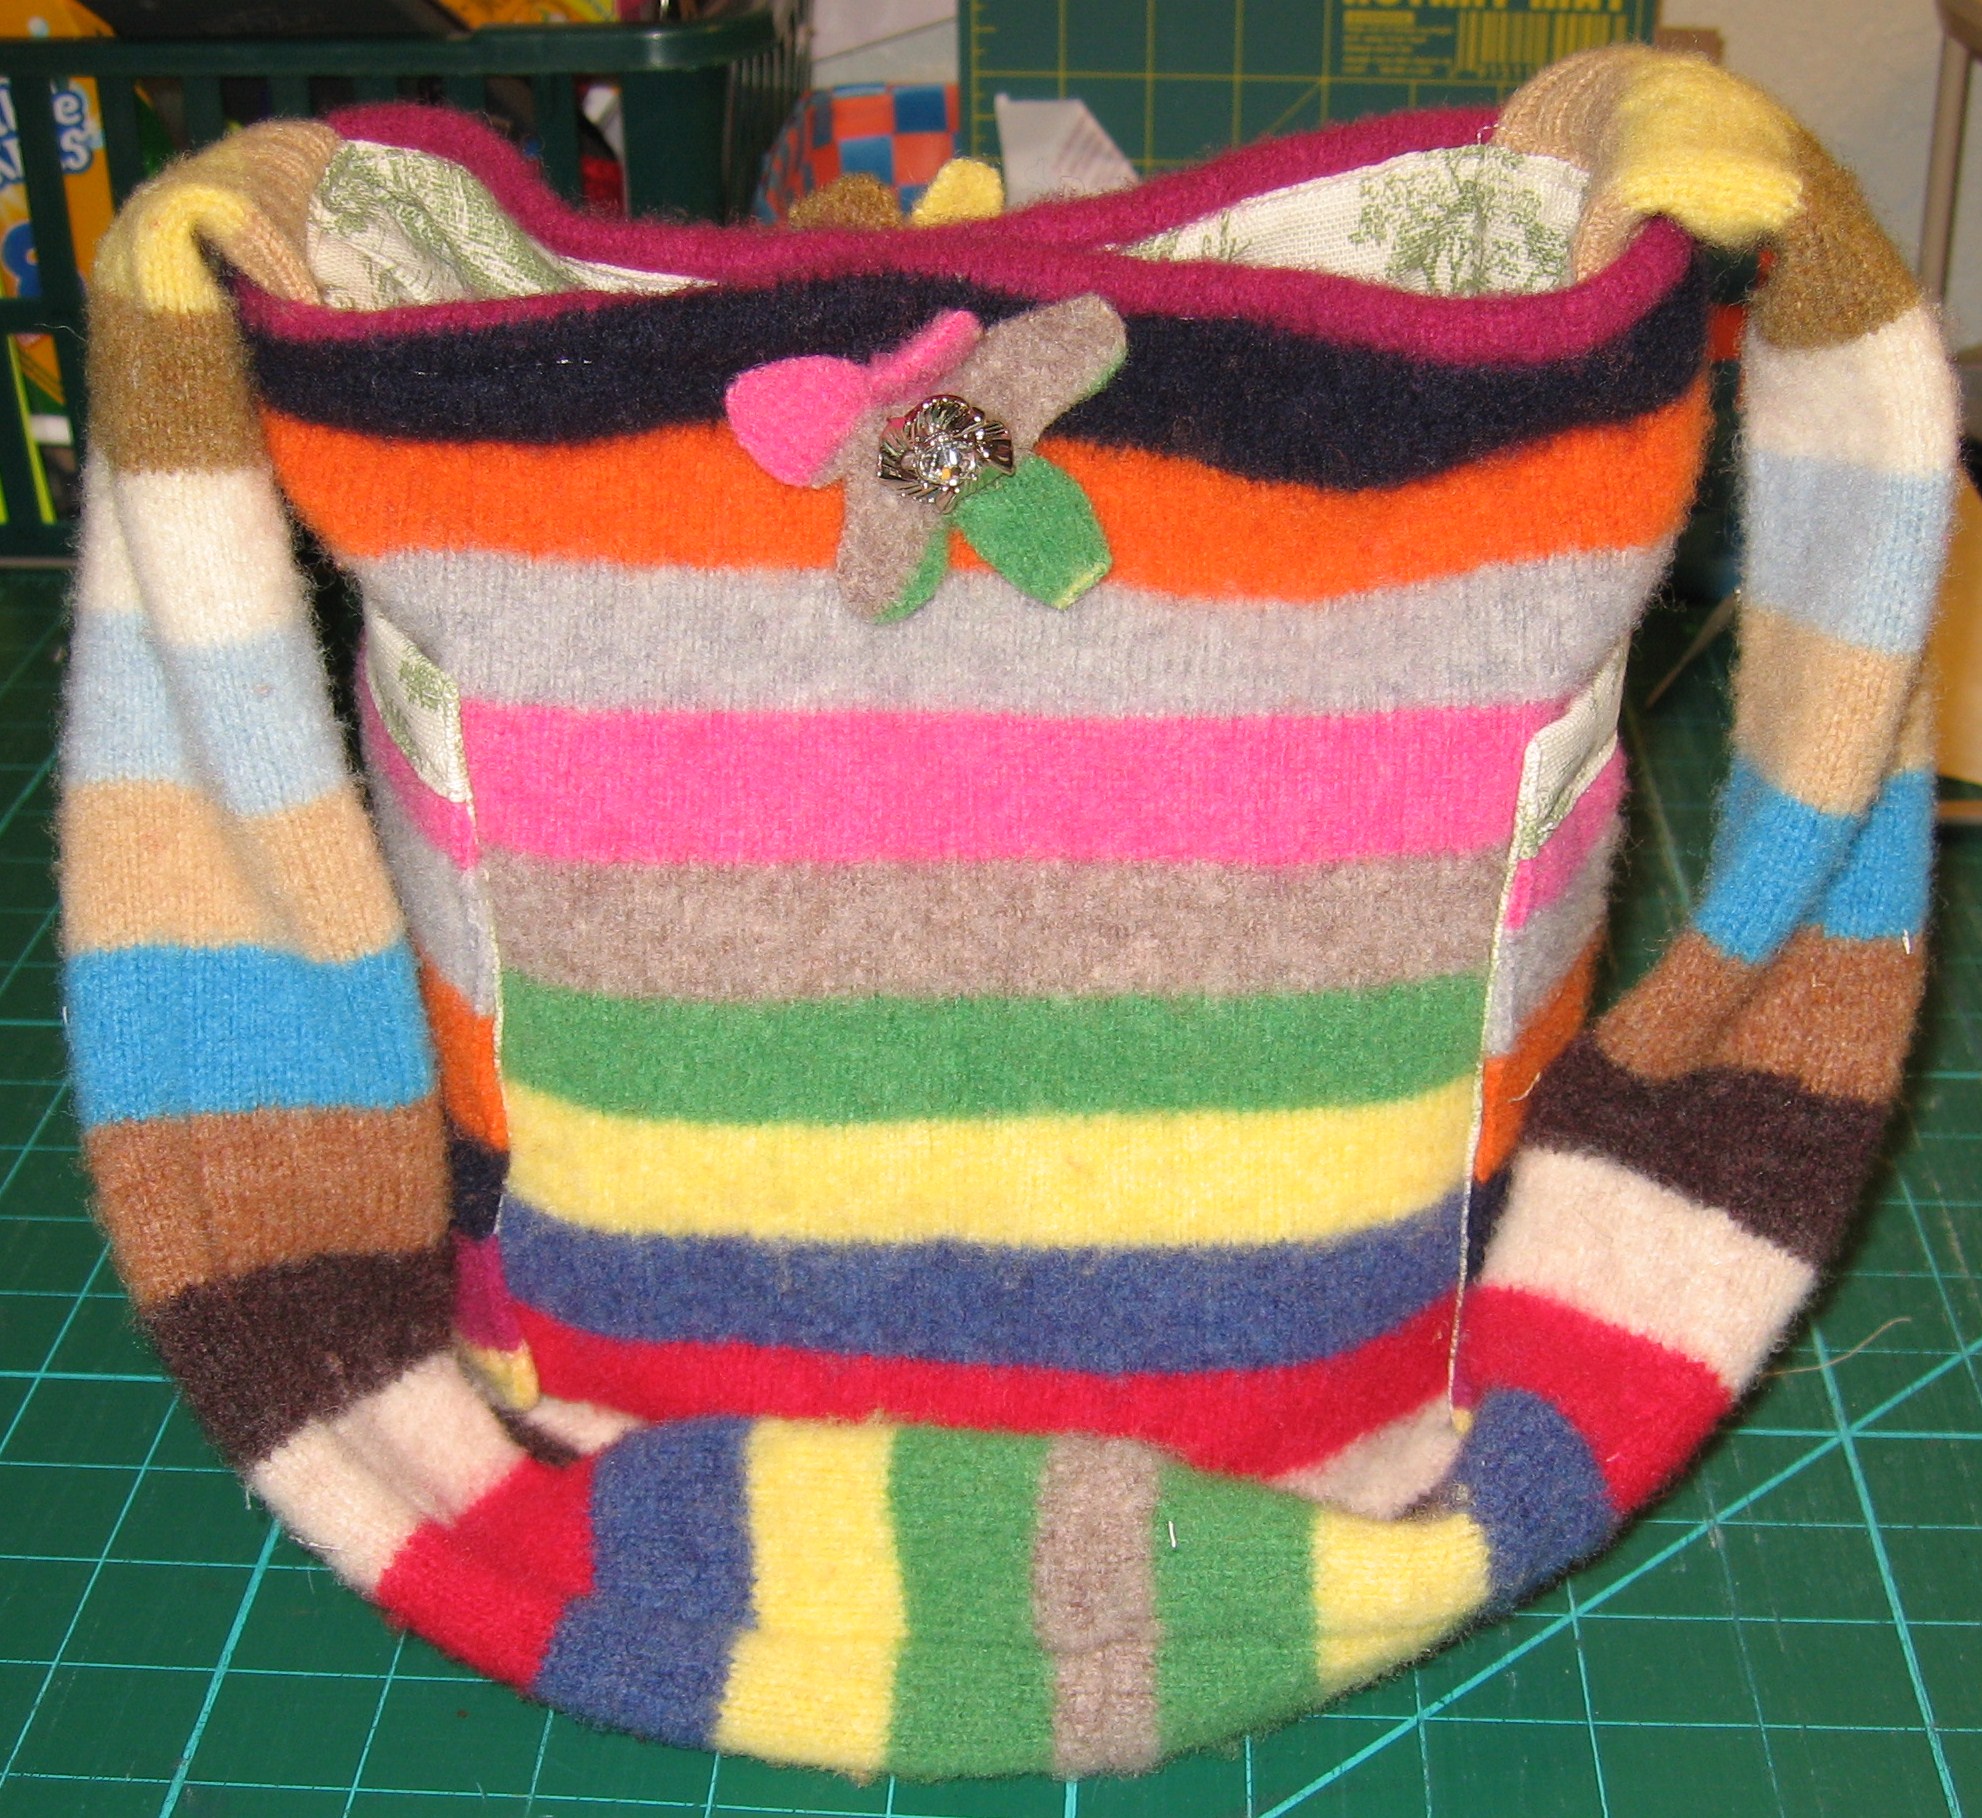
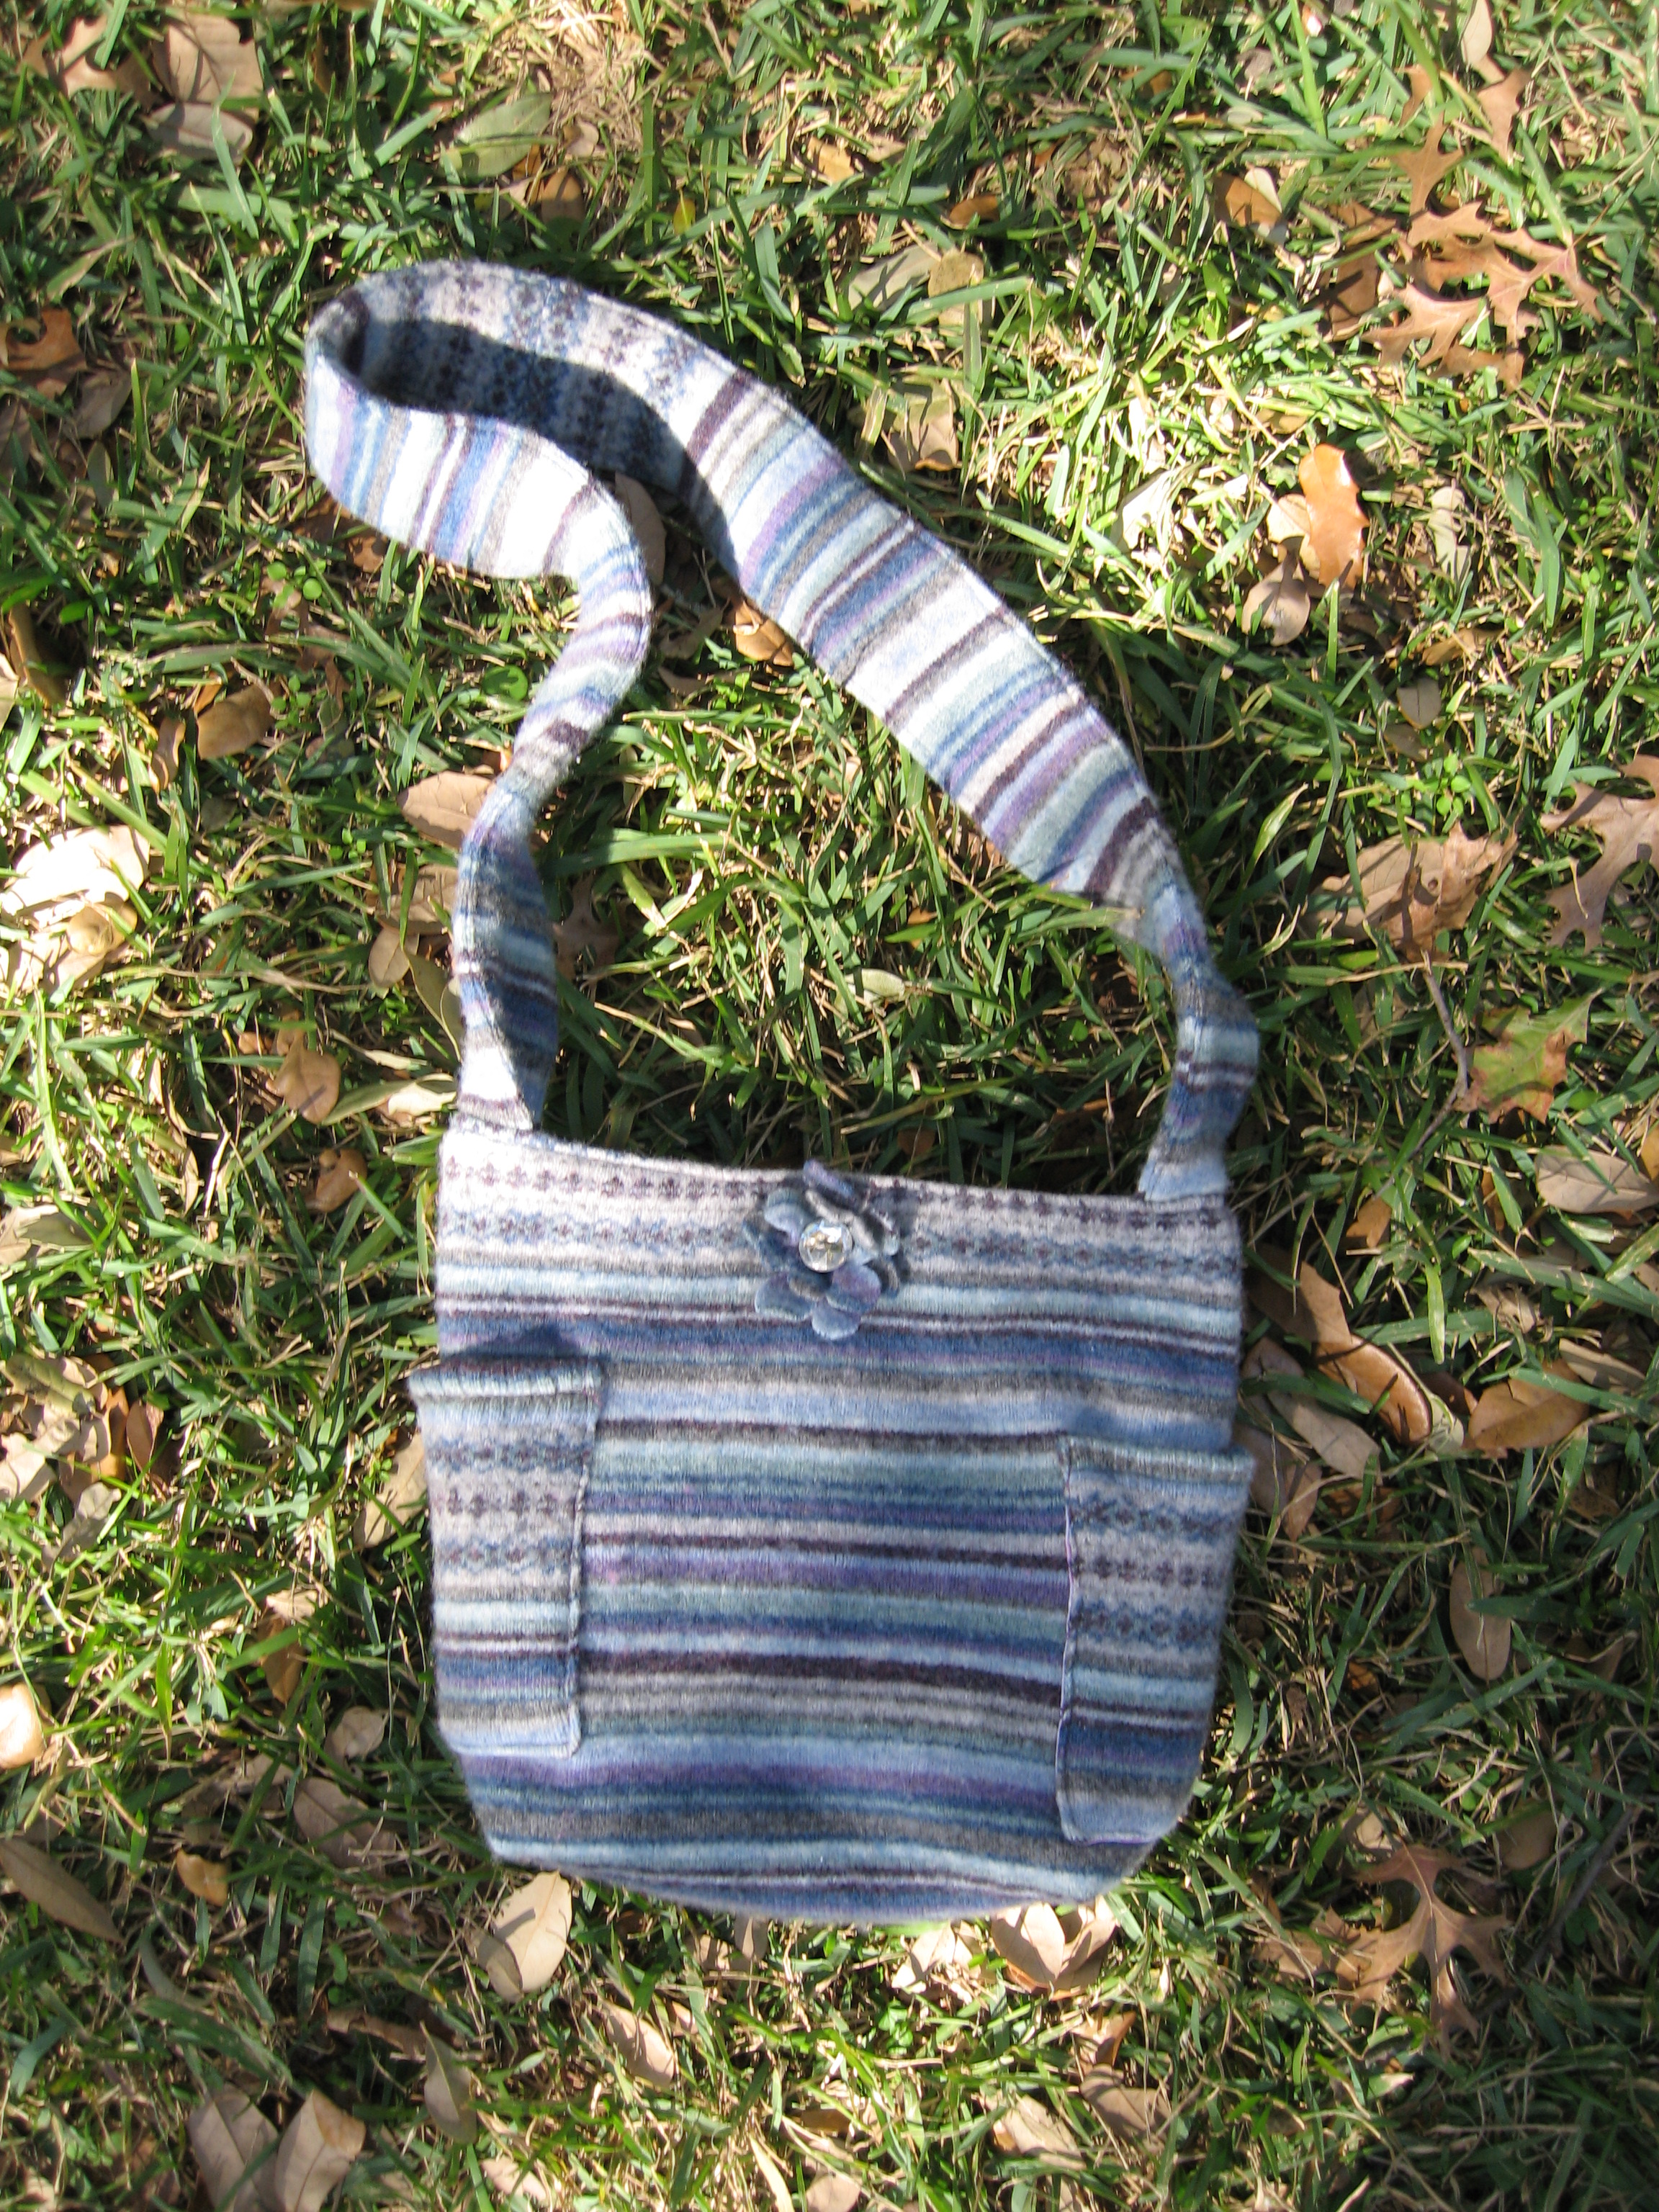
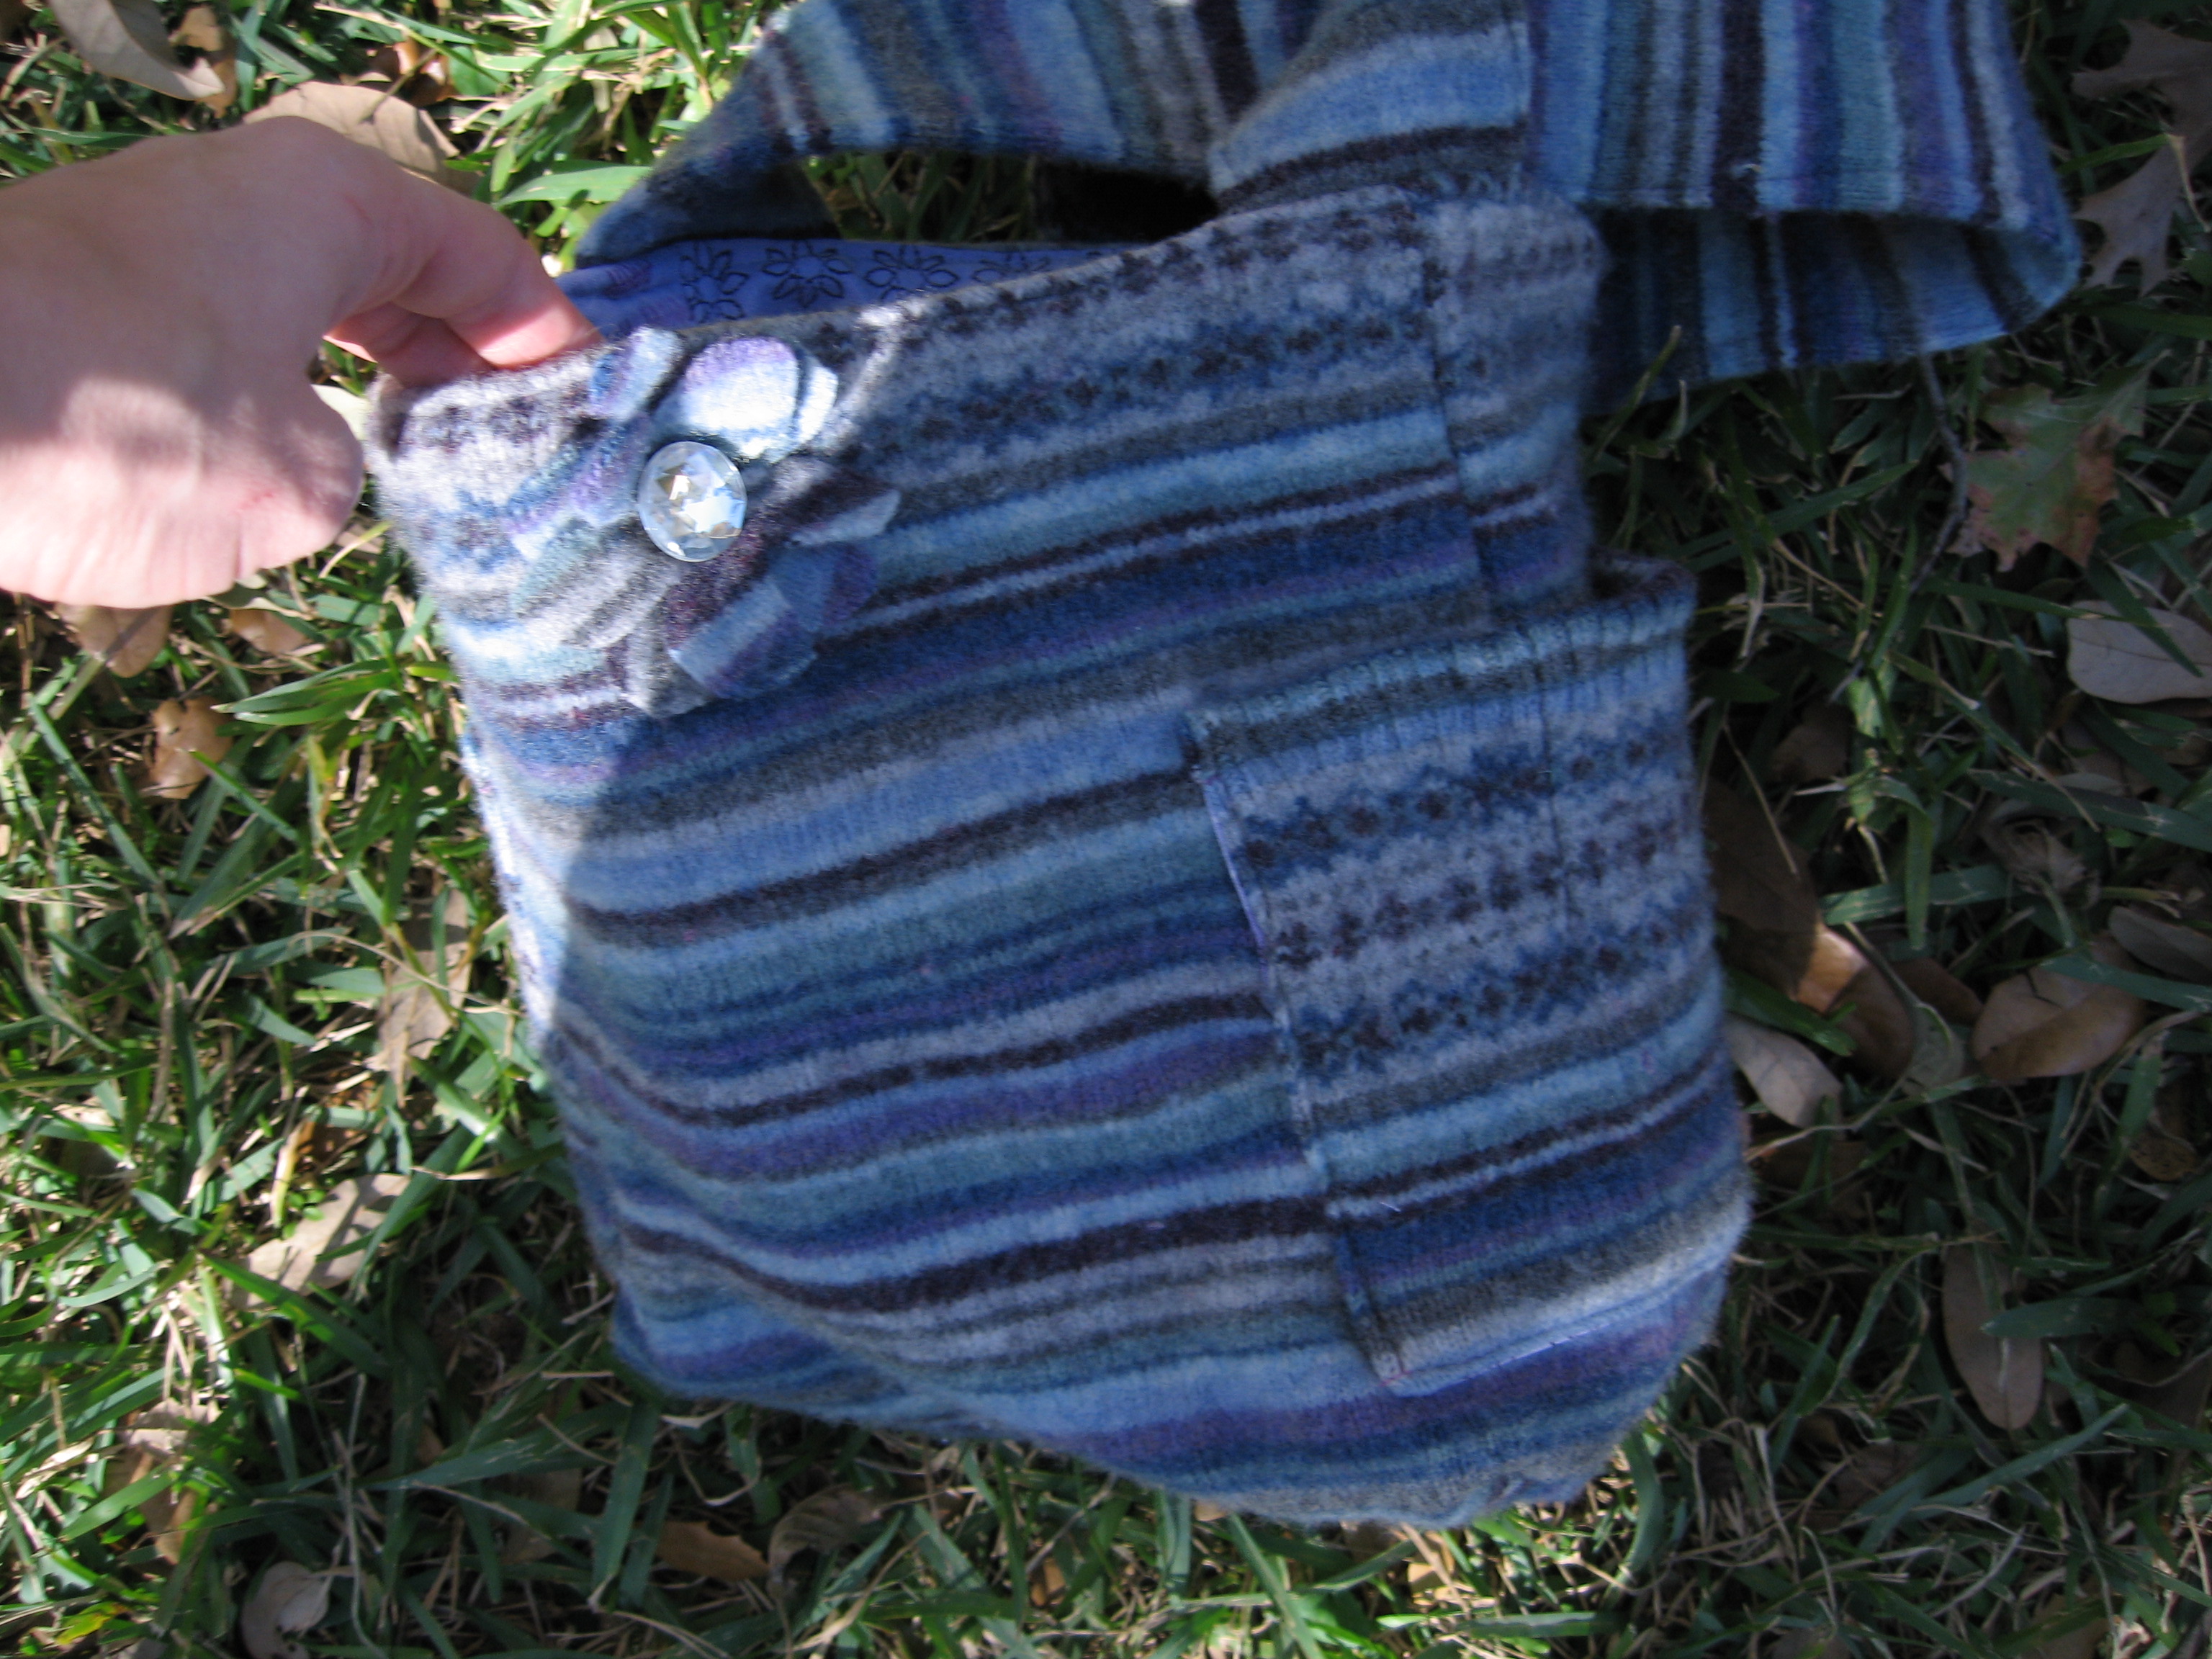
The Recycled Sweater Bag isn’t quite old enough to be considered a Way Back Craft. I first started making this bag last year. It works great with a felted thrift store sweater, but you can also make this bag out of denim, upholstery fabric, or just about any other heavy duty material.
The bag size will vary based on the size of your sweater.
Do I need a reason to make a new bag? Not really, but recycling is a darn good incentive!
Use the written instructions below or watch the video. (Please note this video tutorial was posted in 2008, and the quality reflects that).
You will need:
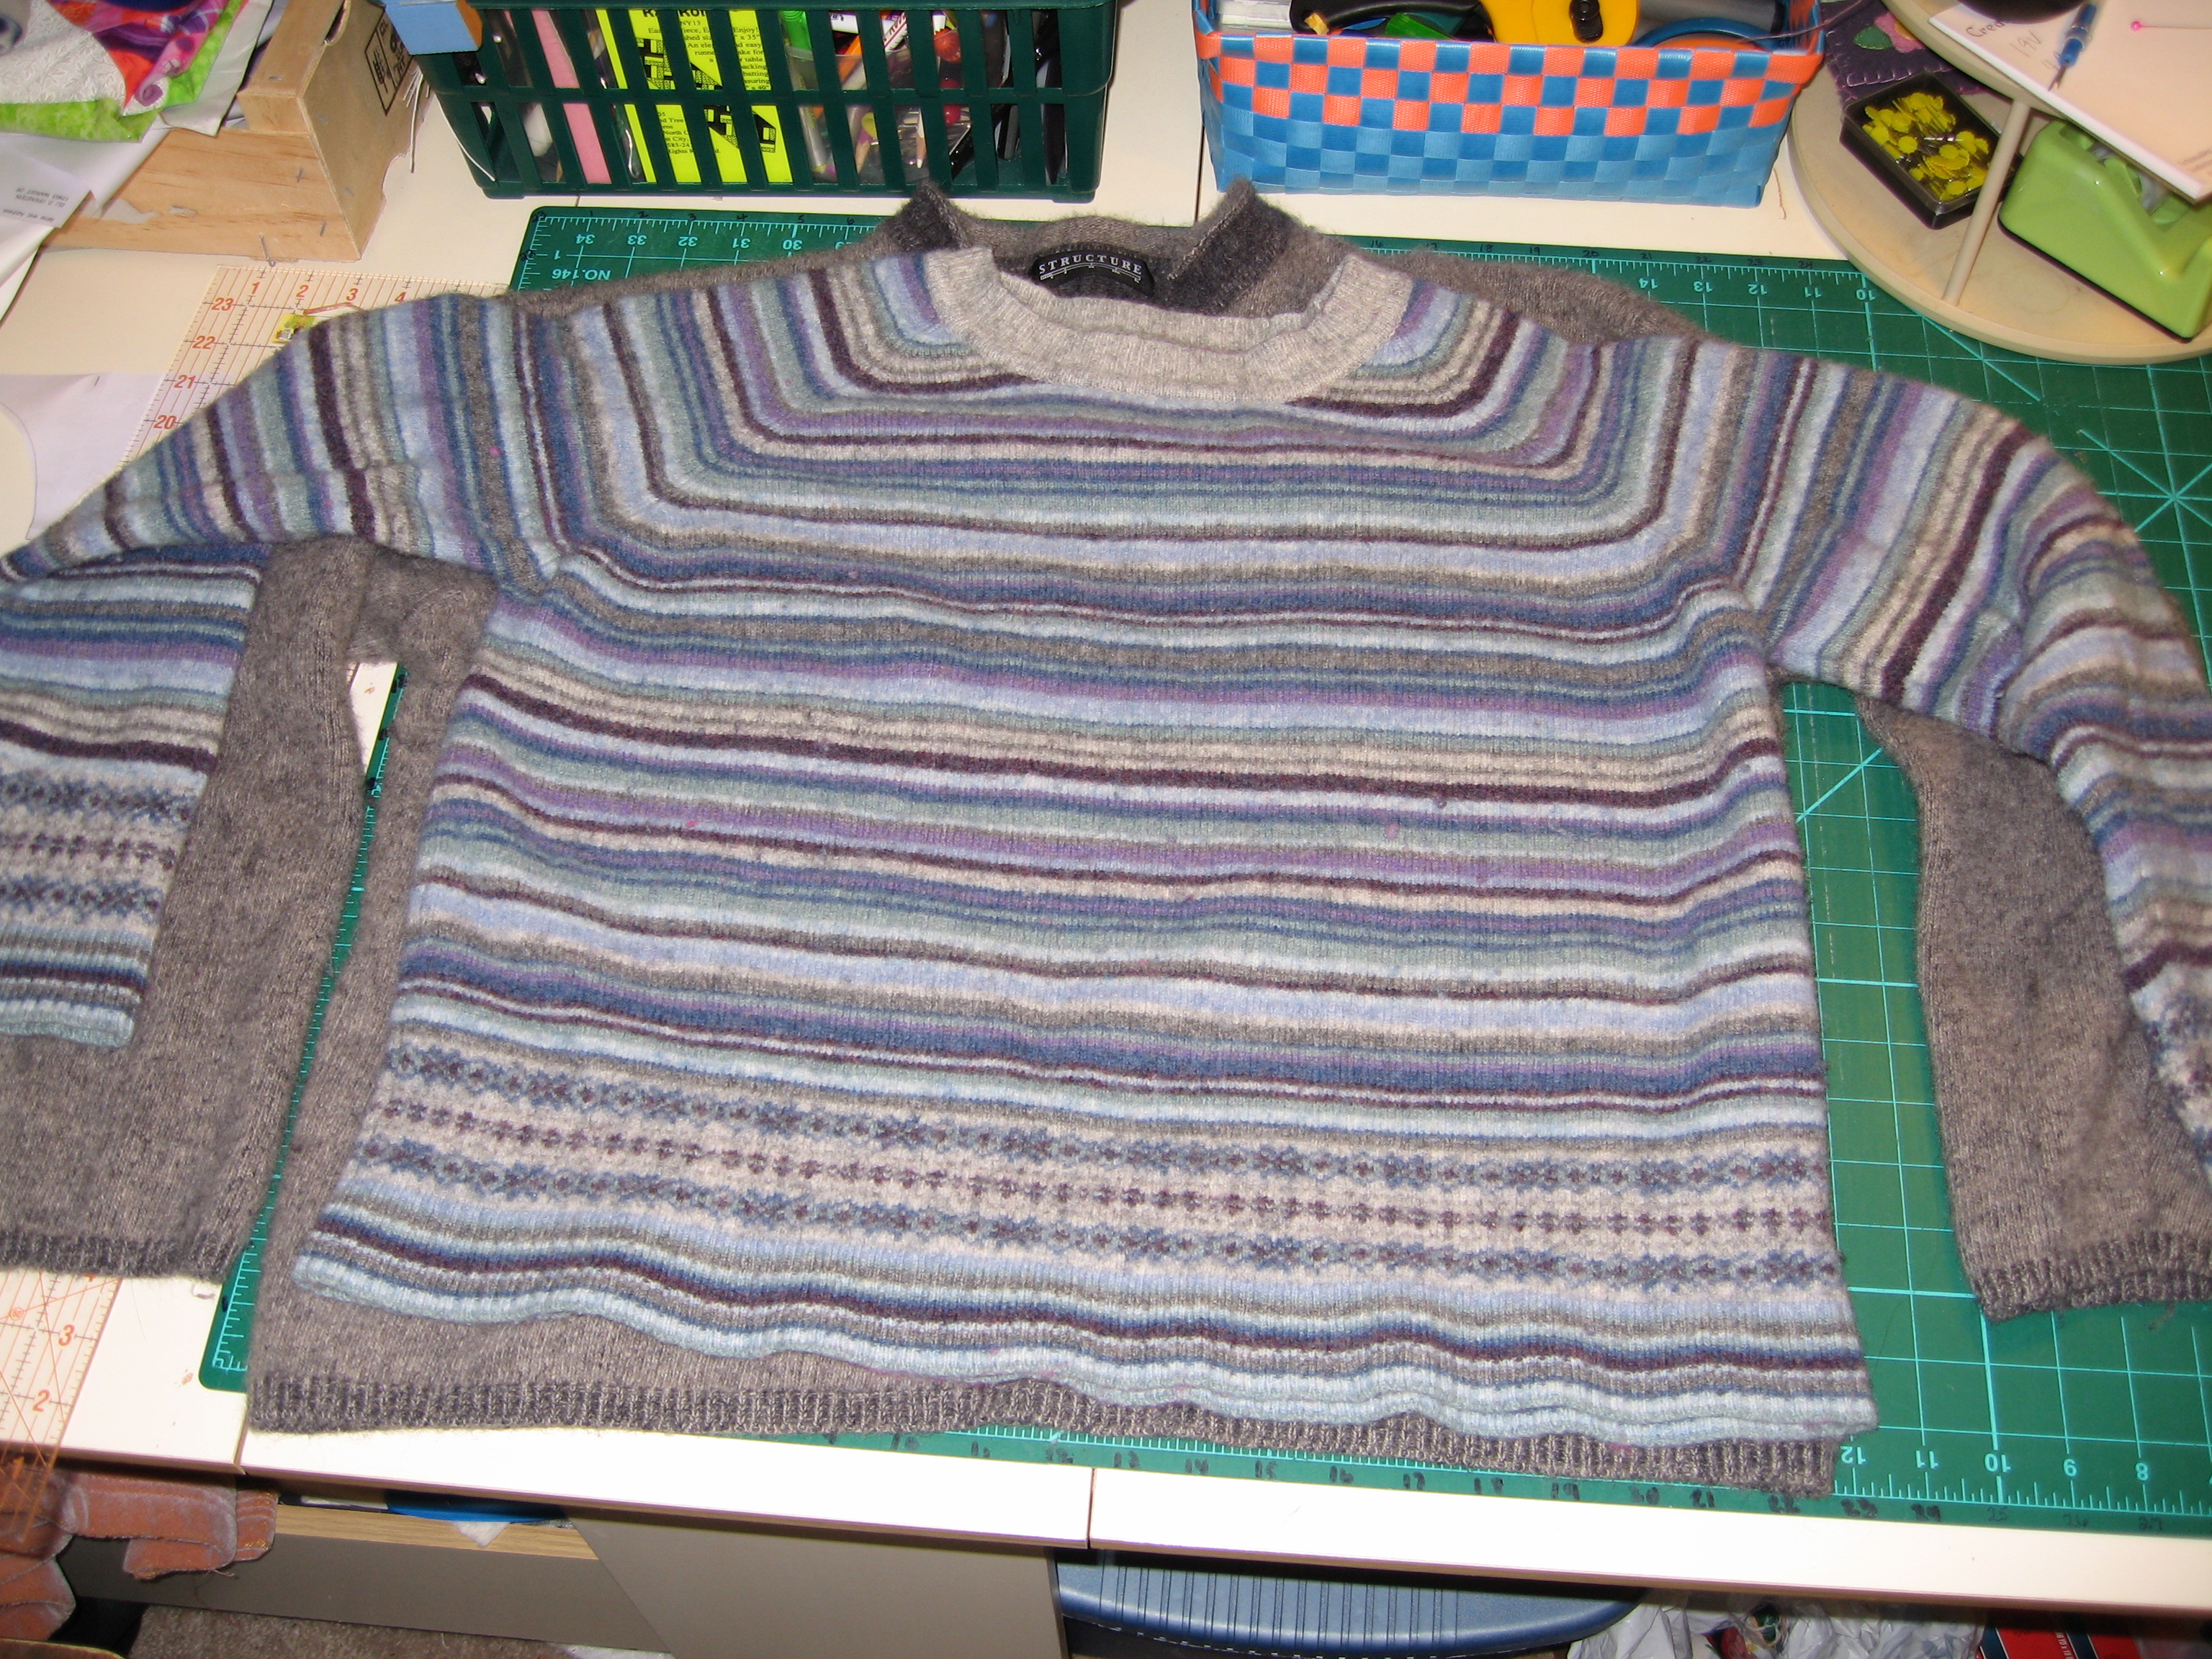
1 old (or thrift store) 100% wool sweater – felted
fabric for lining & pockets
magnet purse snap
2 buttons
sewing machine
thread
scissors
chalk
pins
rotary cutter (optional)
walking foot (optional)
I used a 1/2″ seam allowance throughout. If your sweater is bulkier, go a little wider or use what works for you.
First up – let’s prep our fabrics!
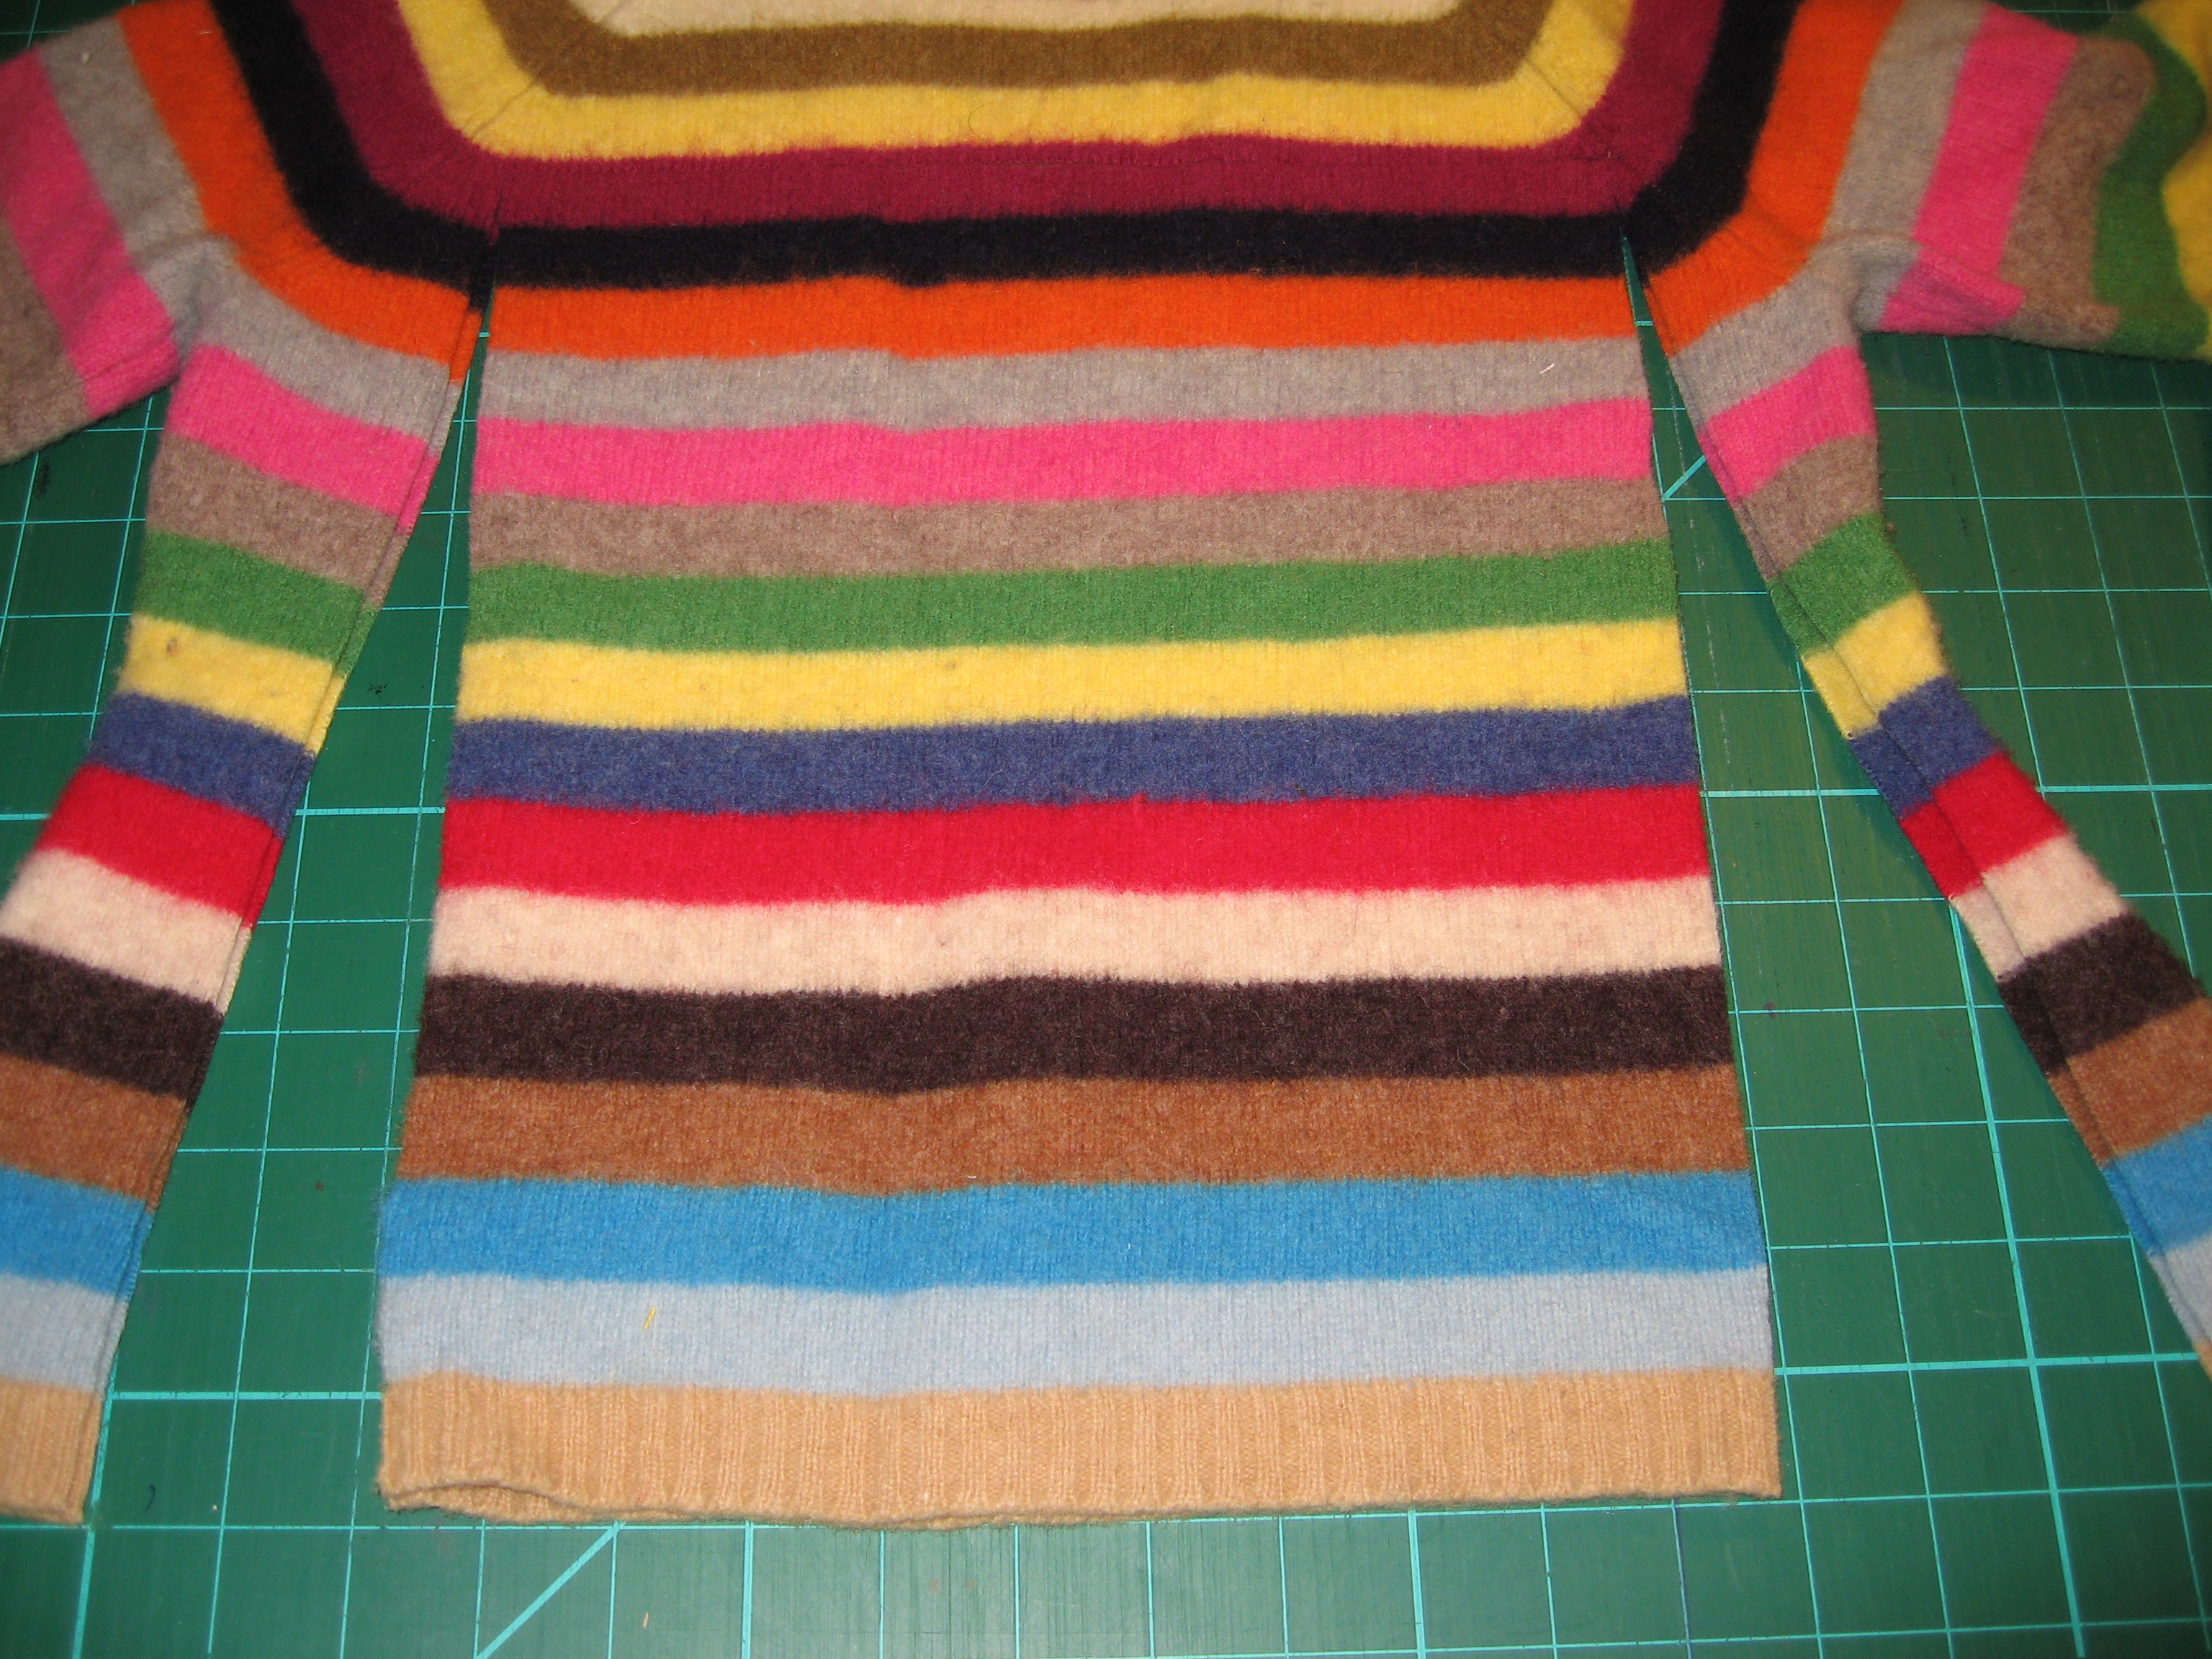
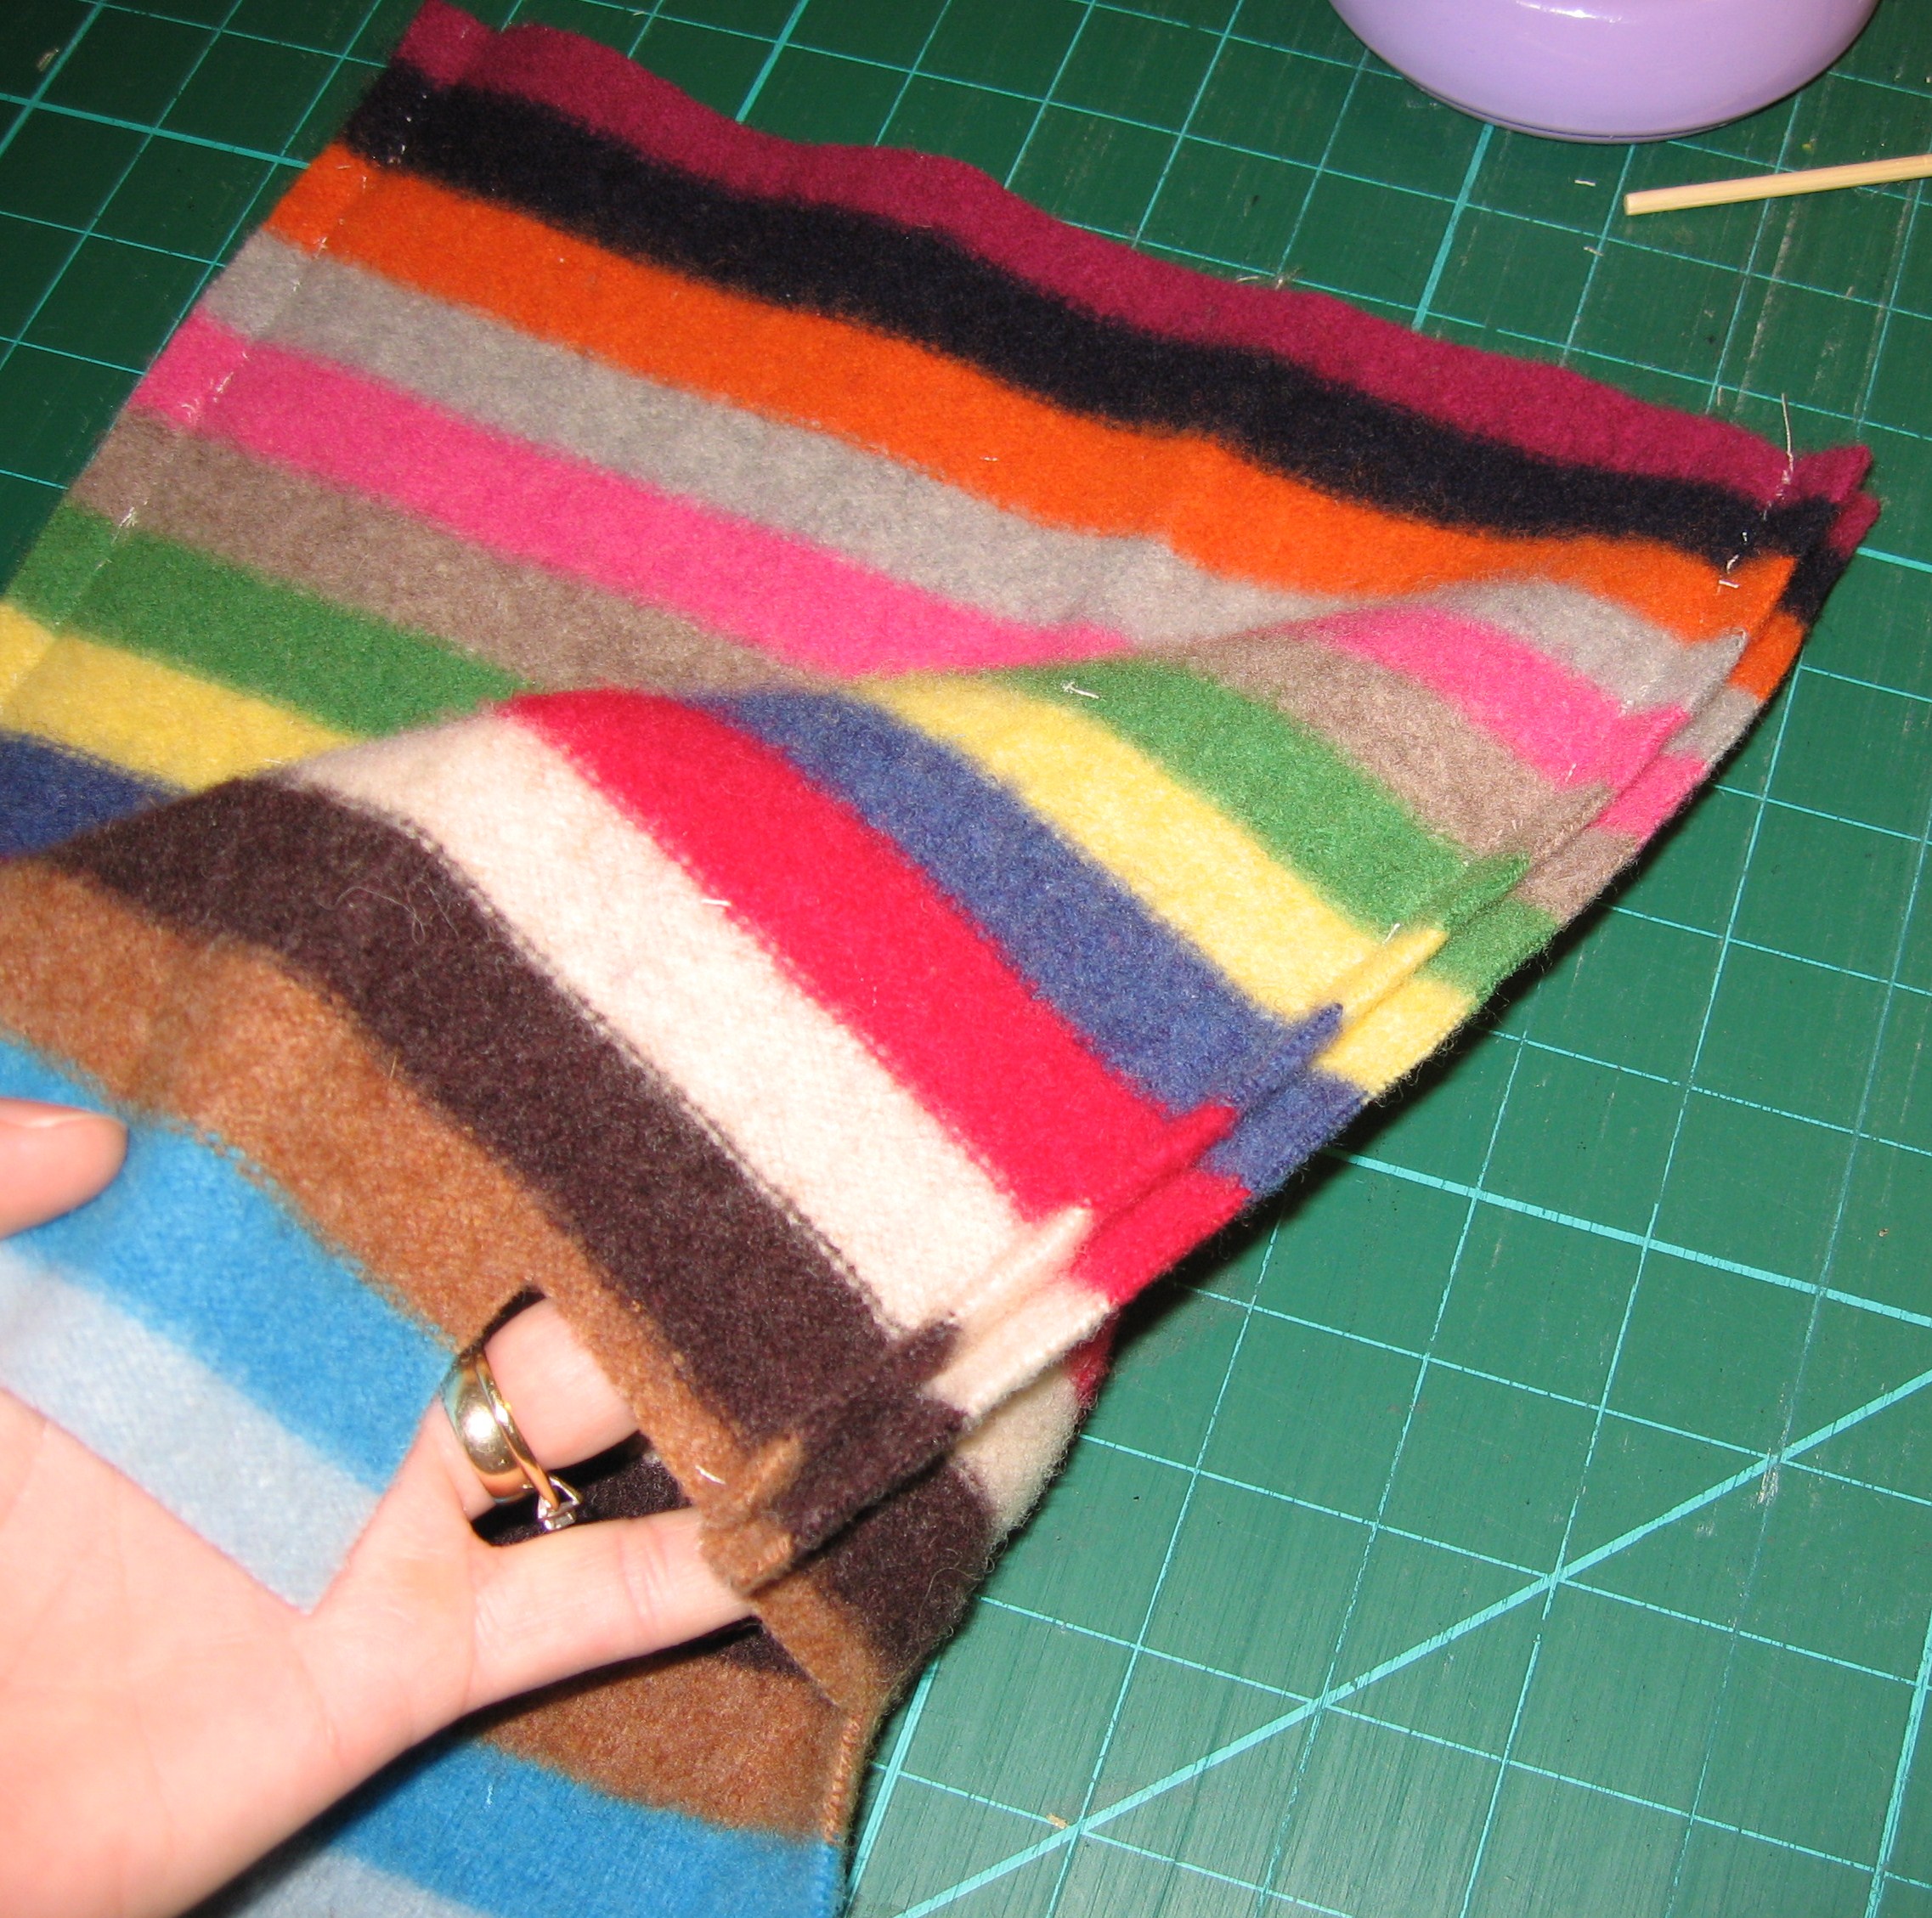
Cut a square or rectangle out of the body of the sweater, cut the same dimensions from lining fabric, remove sweater arms.
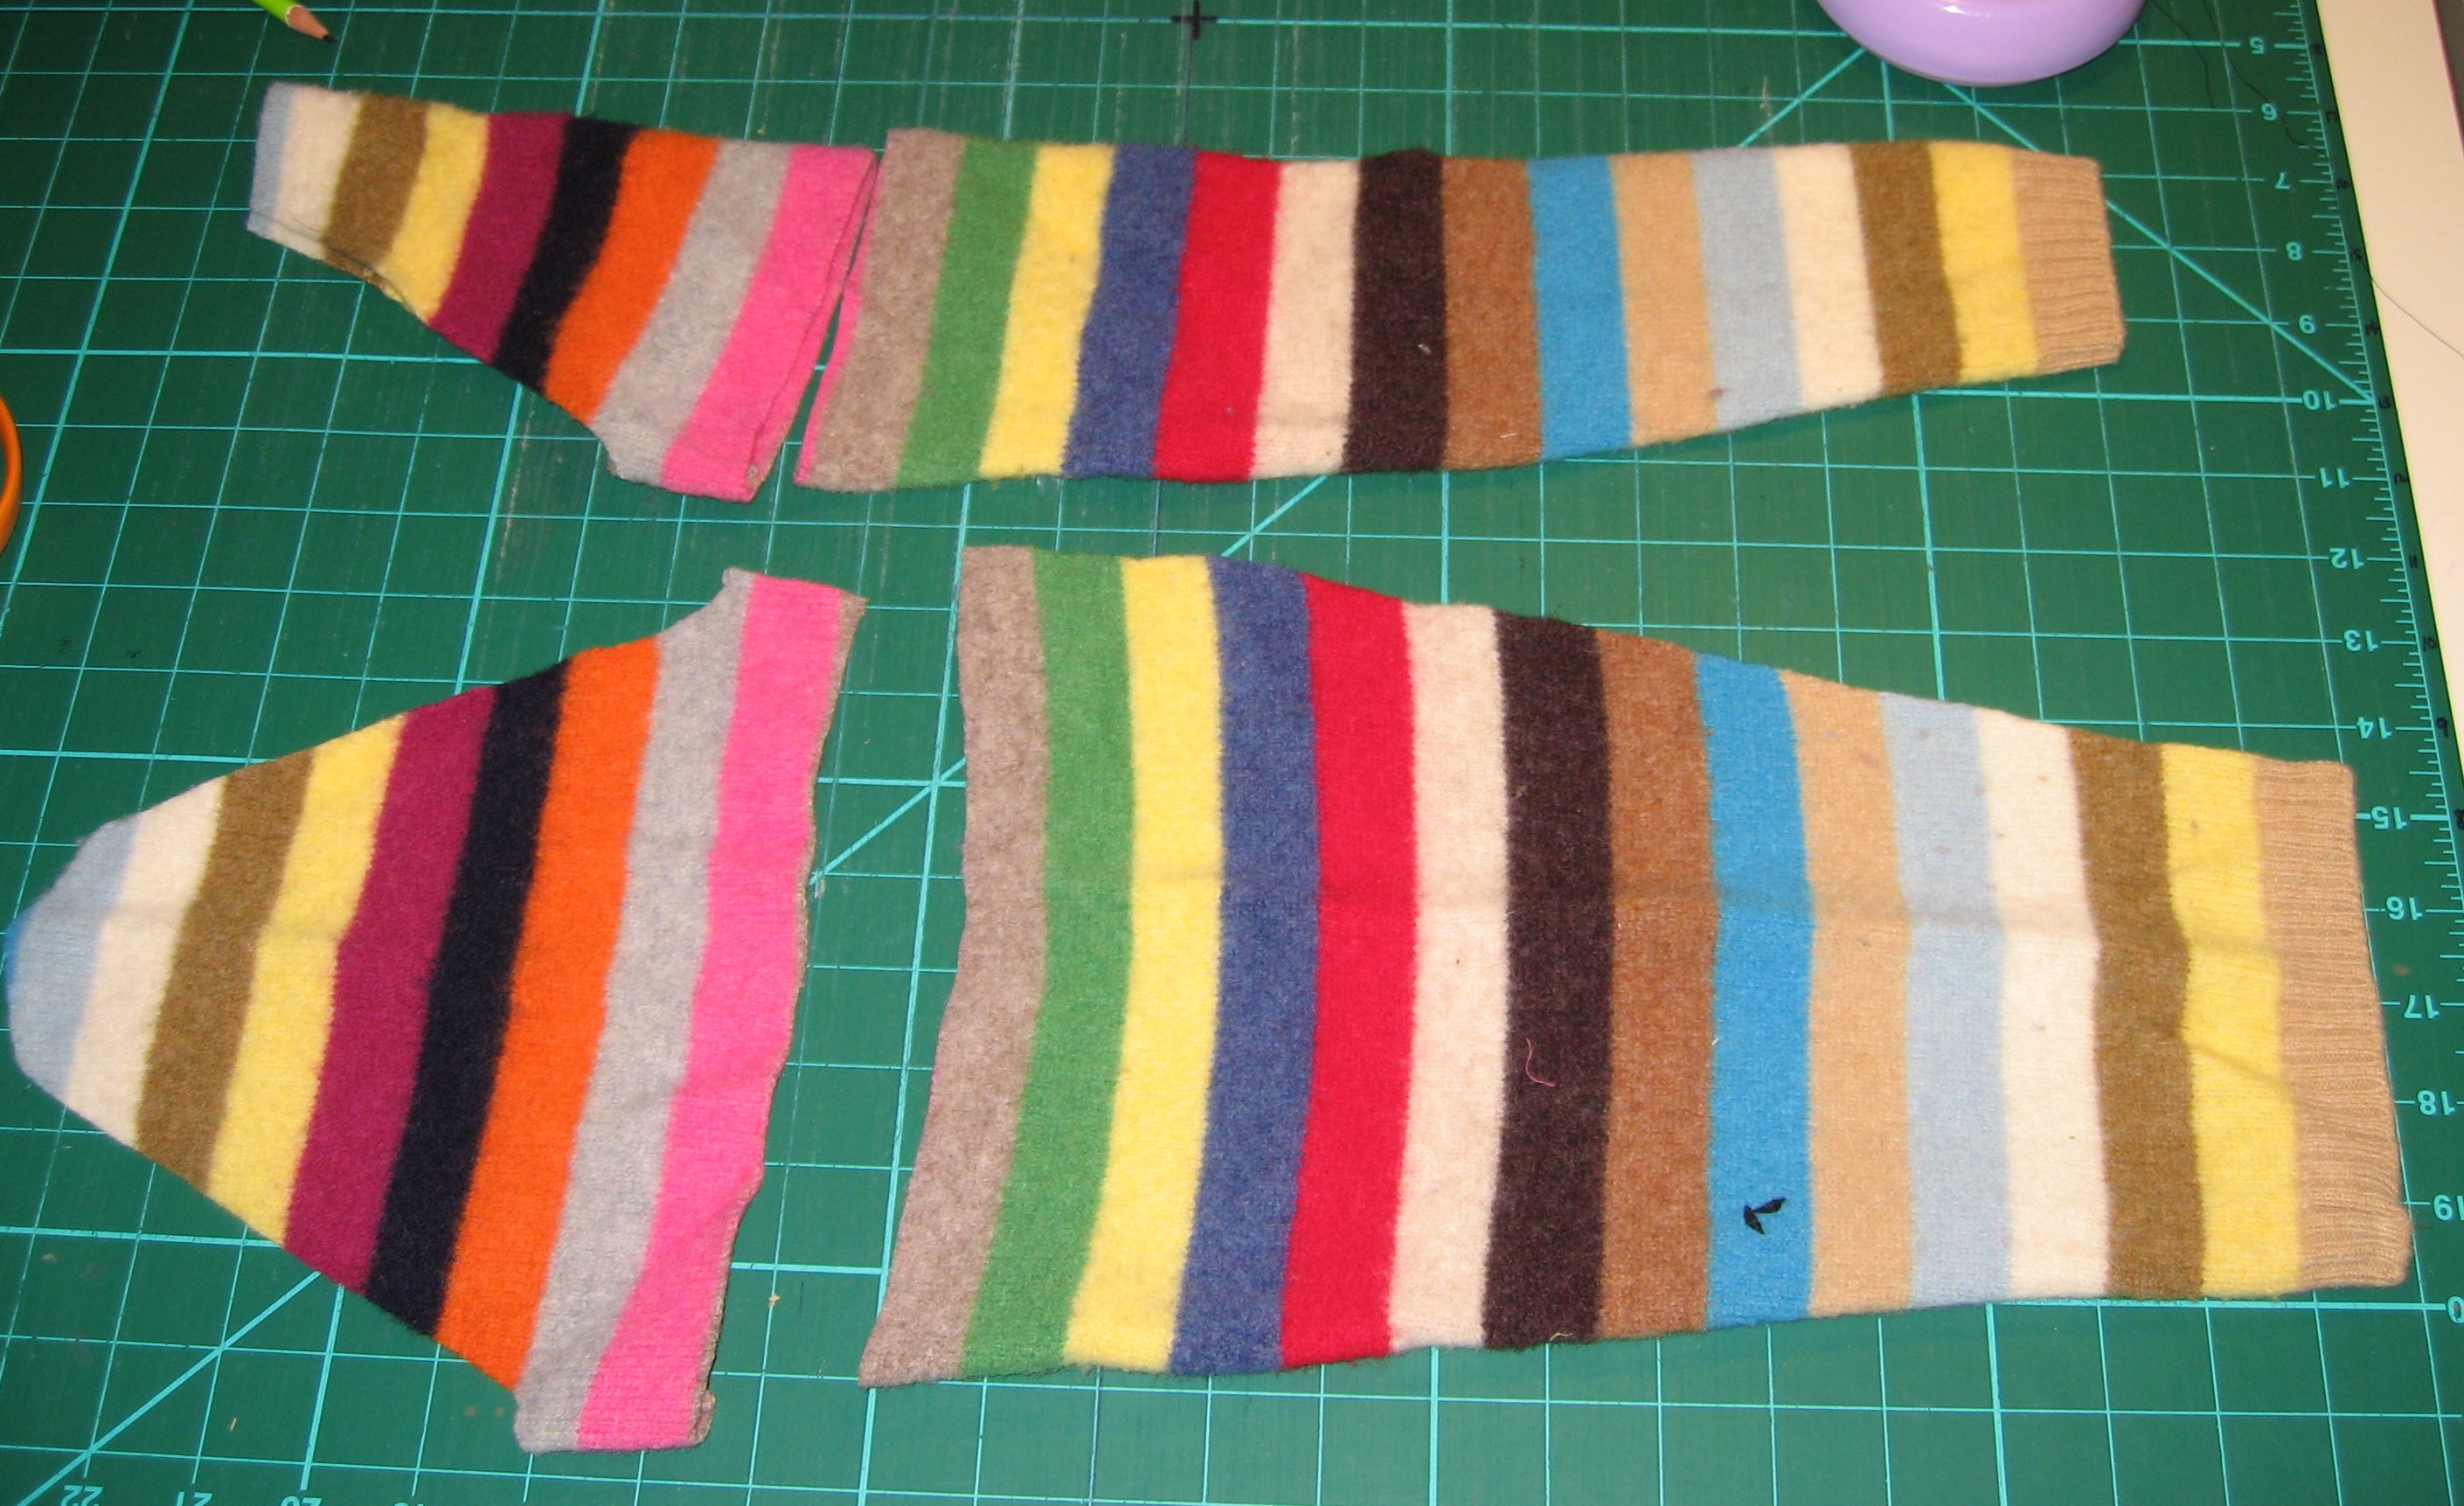
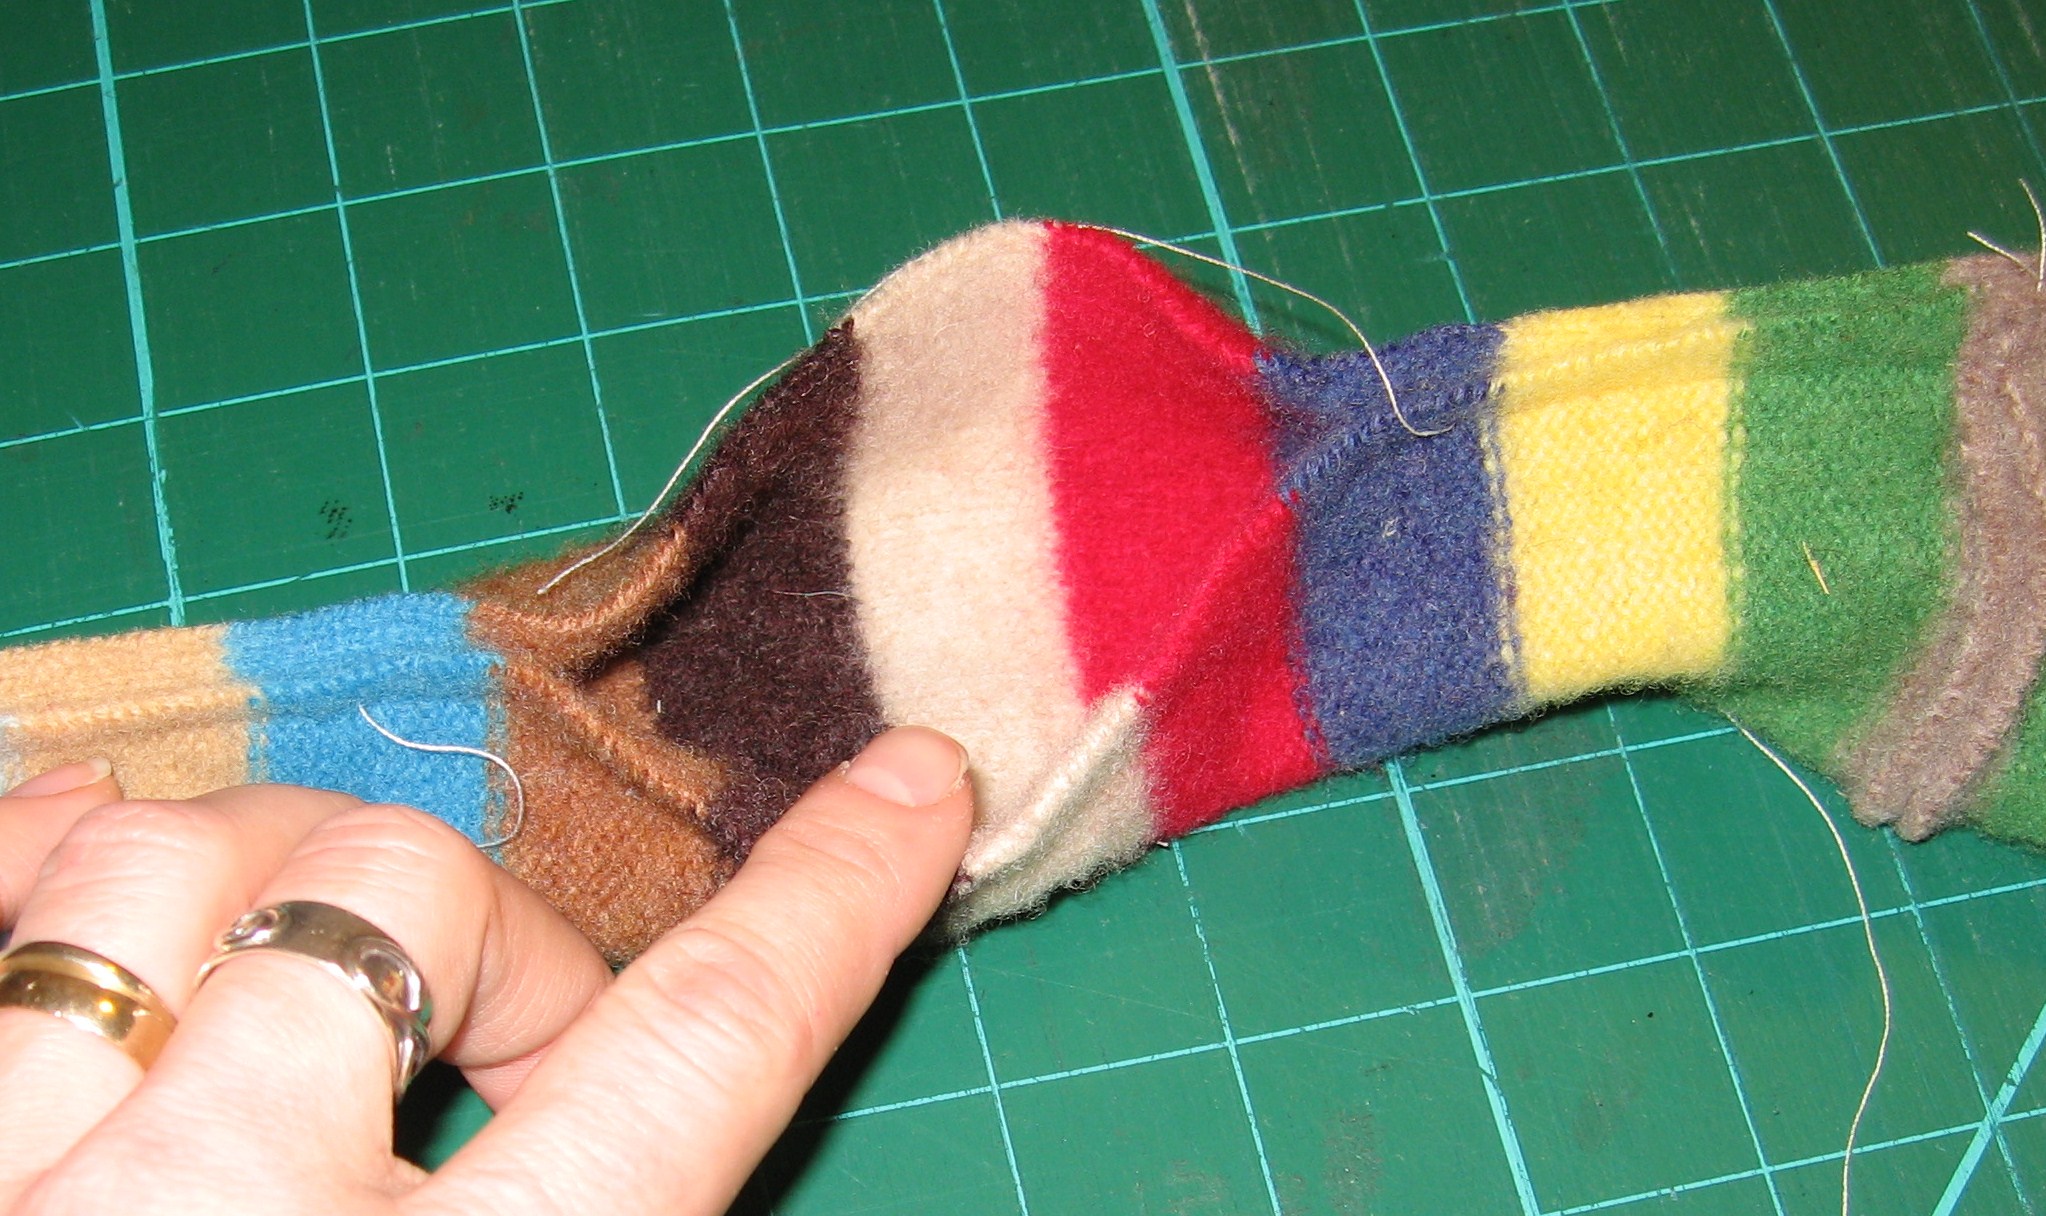
Split sleeves up seam and cut off the tops for pockets.
Cut rectangles out of the sleeve tops, cut same dimensions +1.5″ in length for lining.
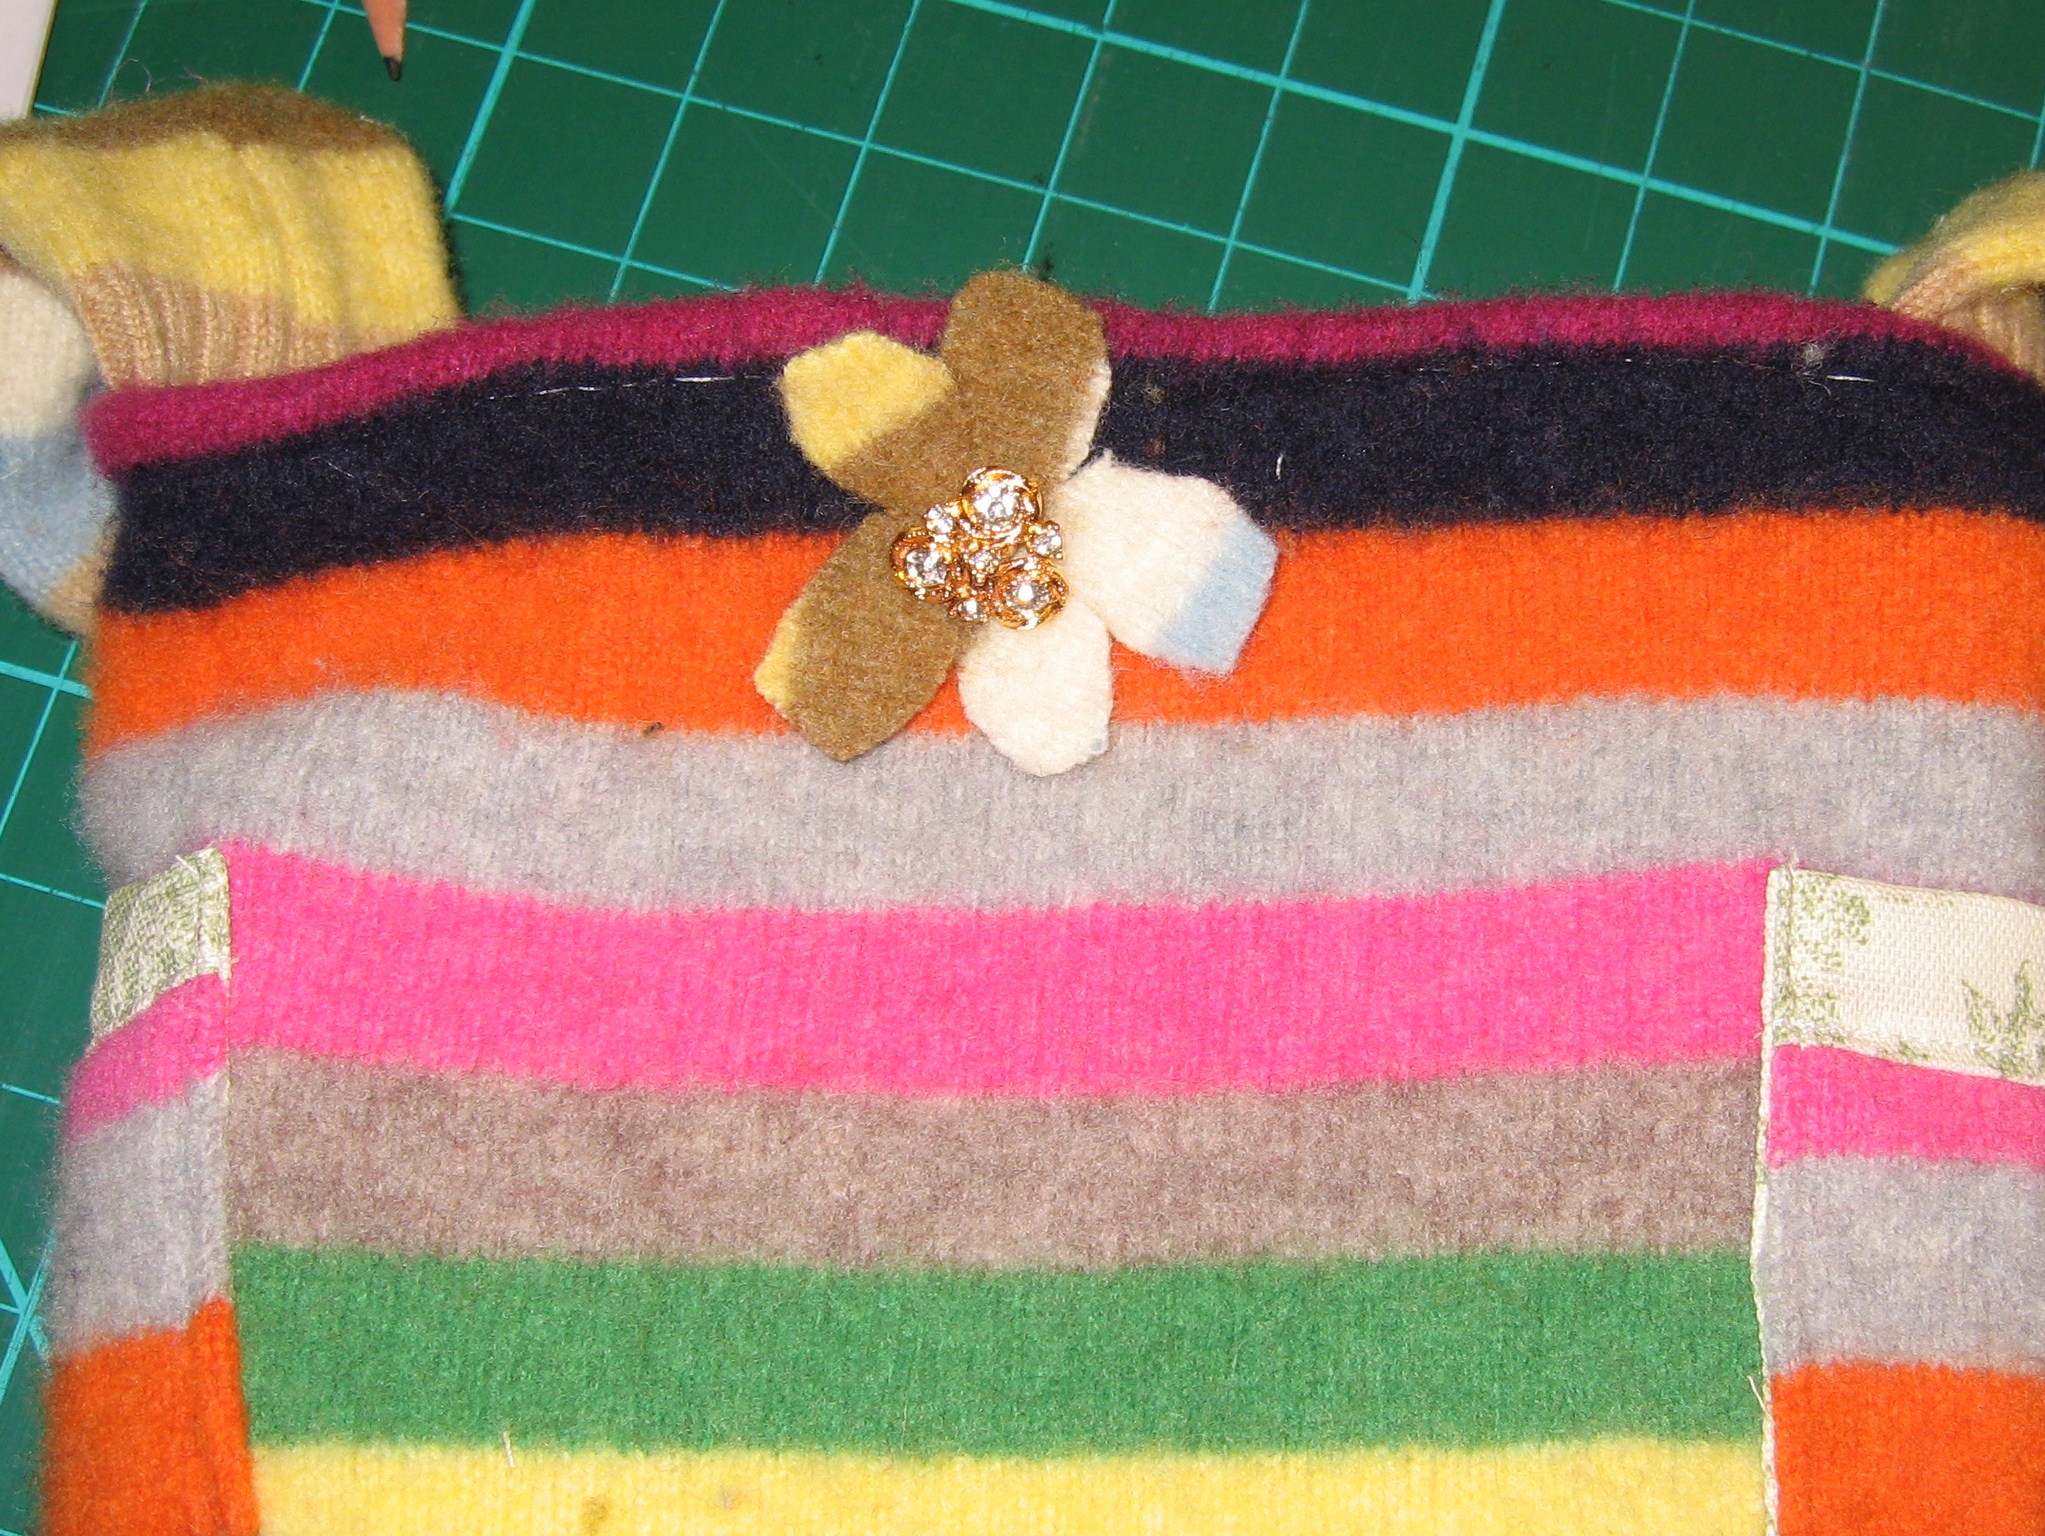
Using the remaining scraps, cut out 2 circles and trim the circles into free-form flowers.
Cut 2″ squares out of the bottom left and right, repeat for lining fabric.
Now, let’s make the lining!
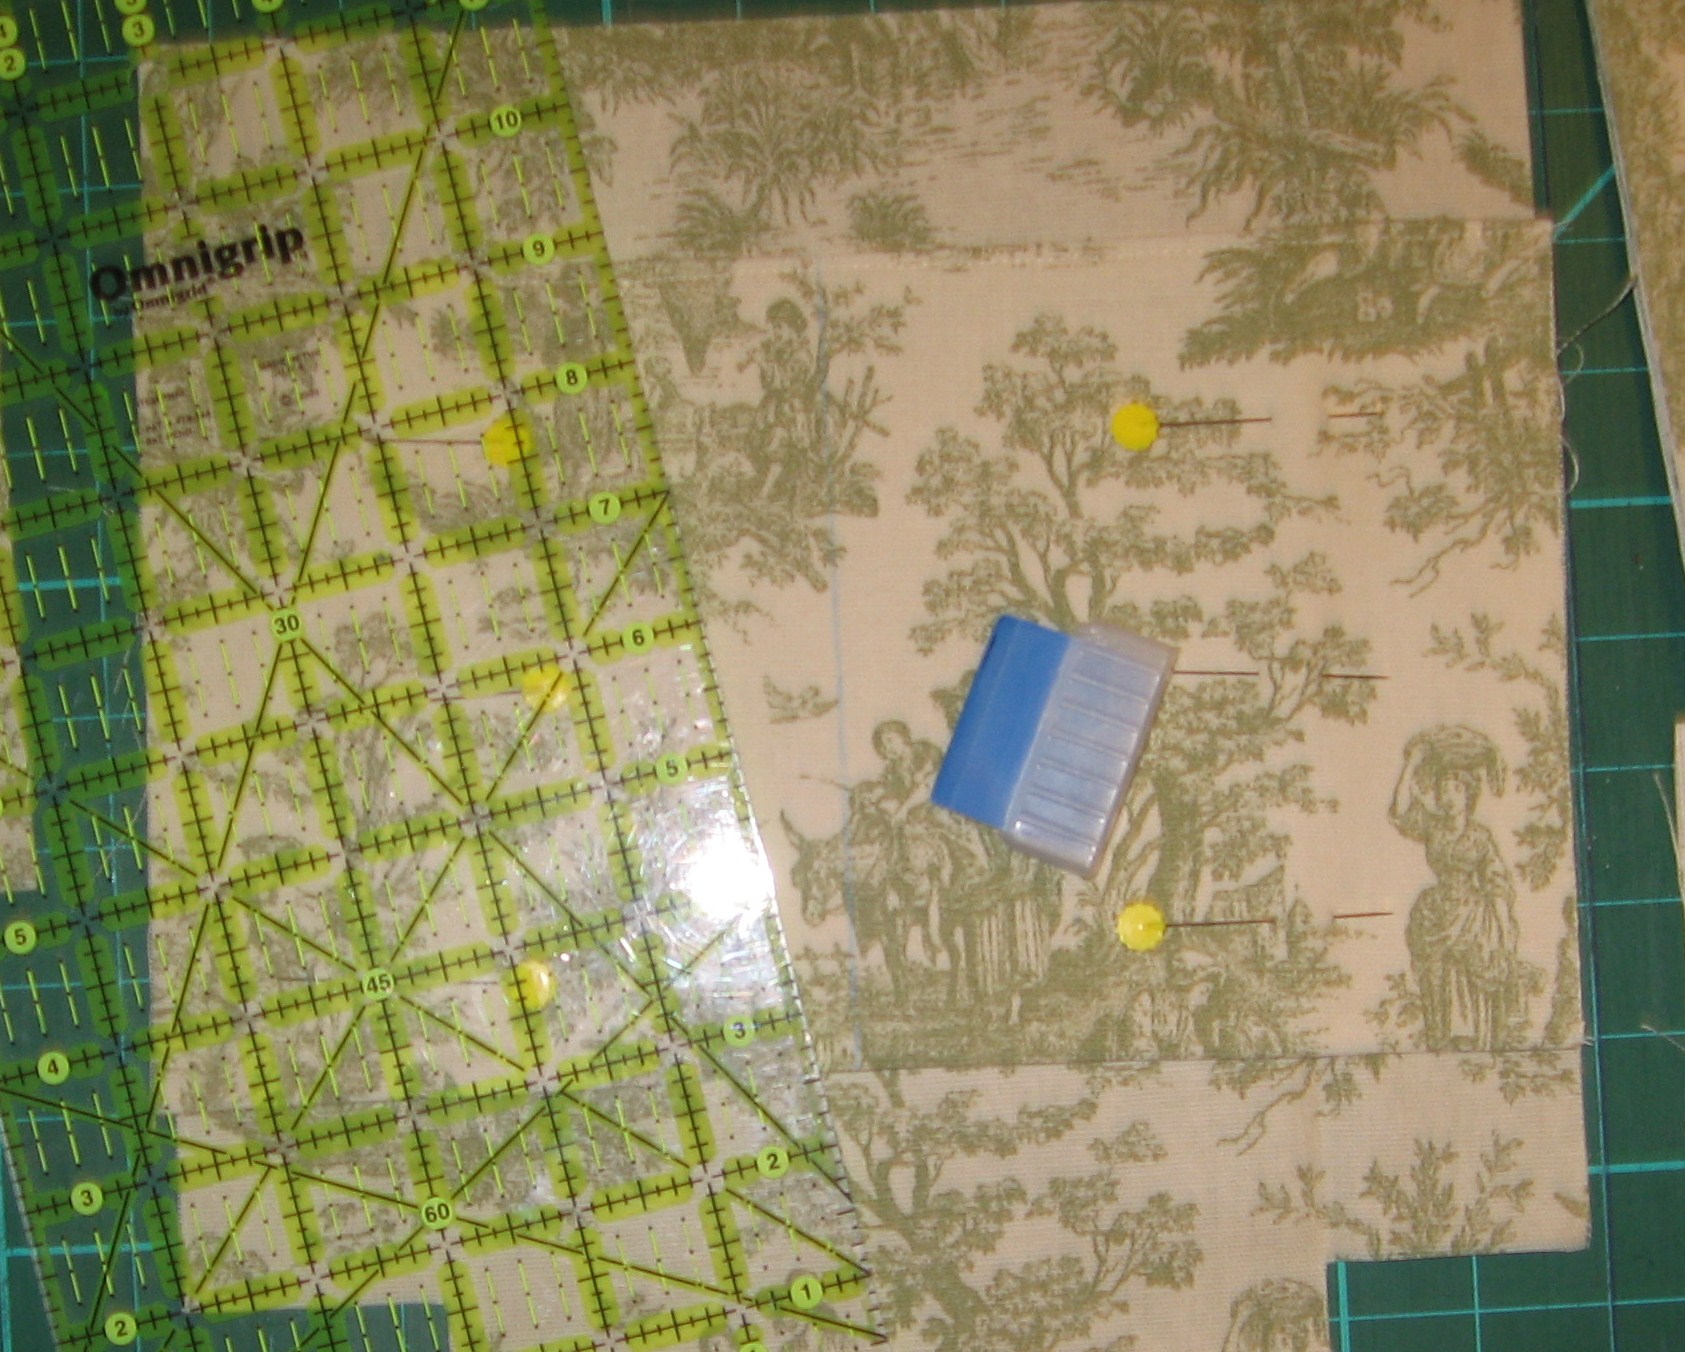
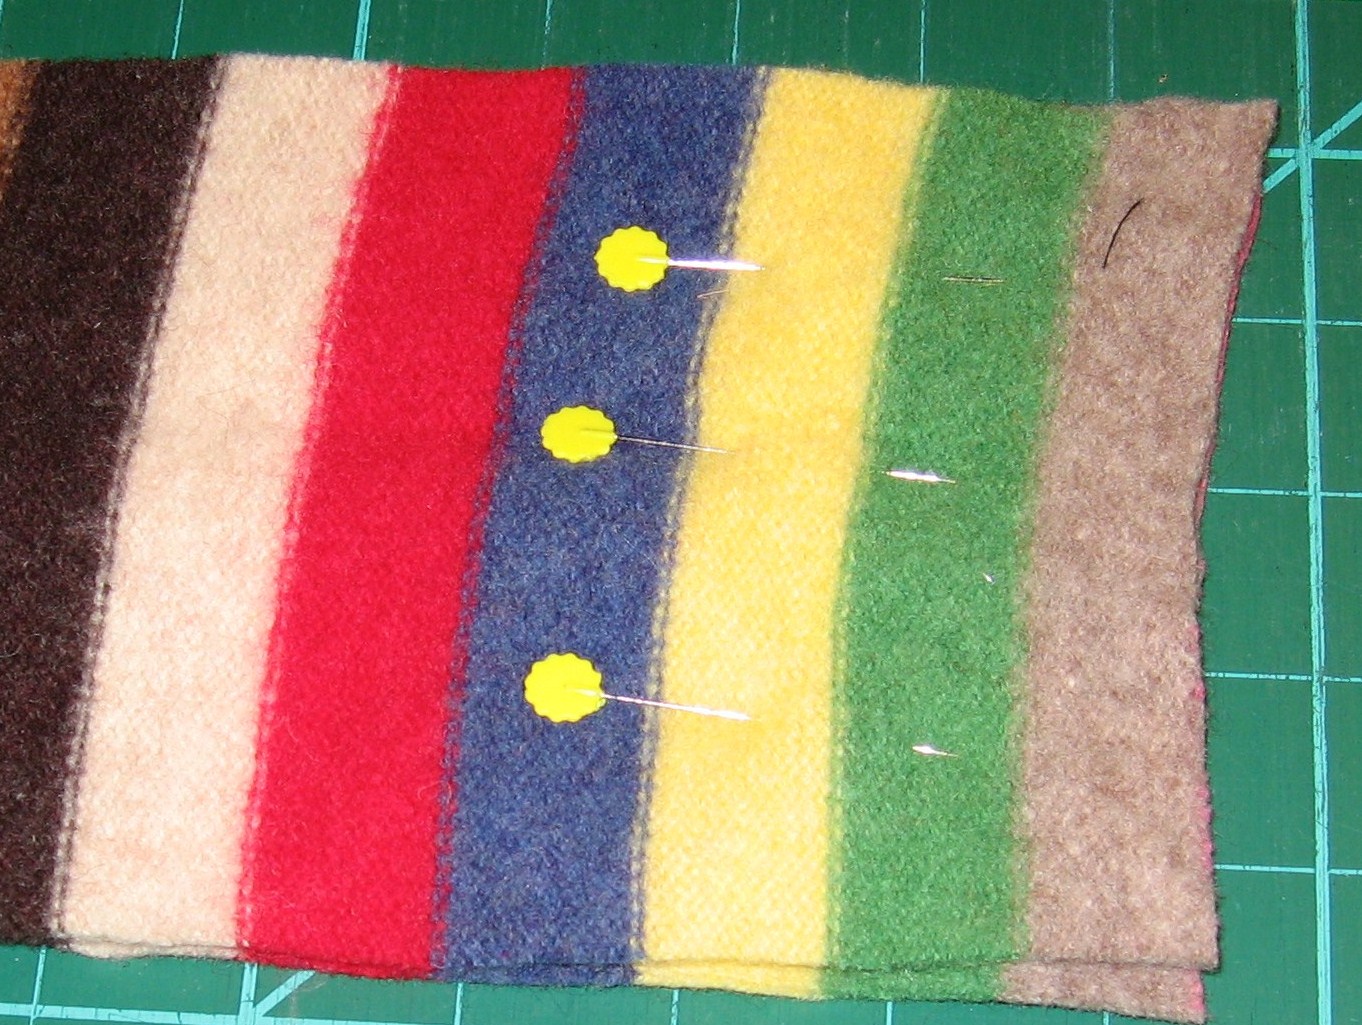
Cut a square the same width and length from lining fabric for inside pockets. Fold in half and stitch along the fold.
Pin pocket to inside and mark center with chalk for stitching line.
Pin sides and bottom of lining, stitch, leave 2″ corners open, leave opening in the side or bottom for turning.
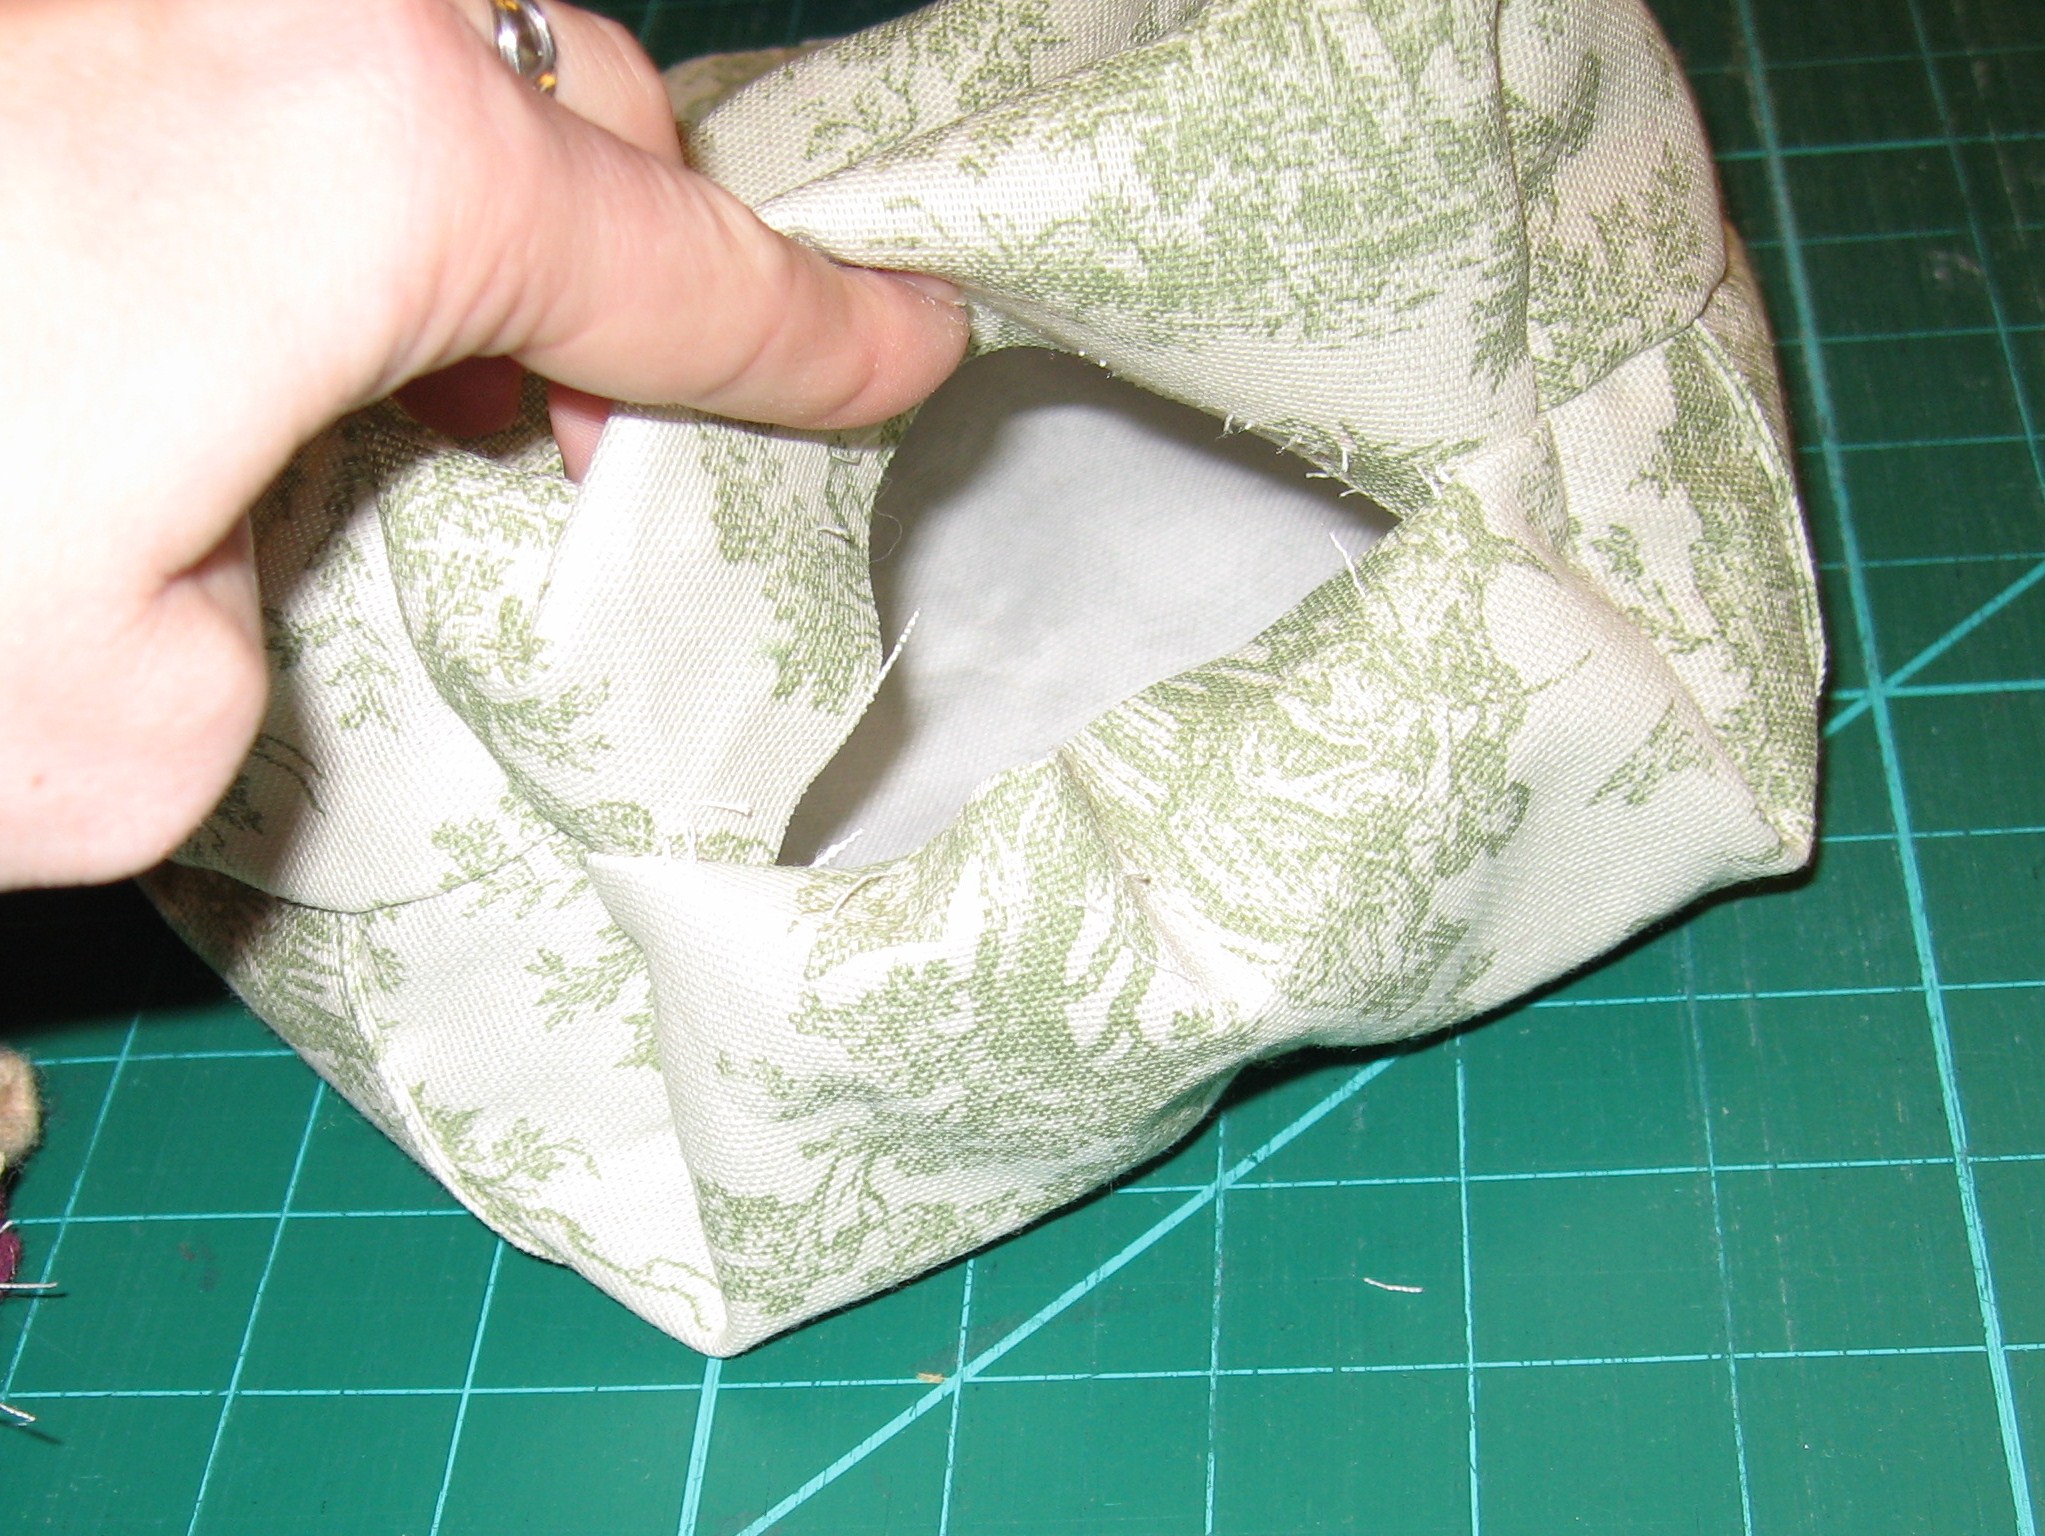
Match boxed corners (the notches in the bottom of the bag), pin & stitch.
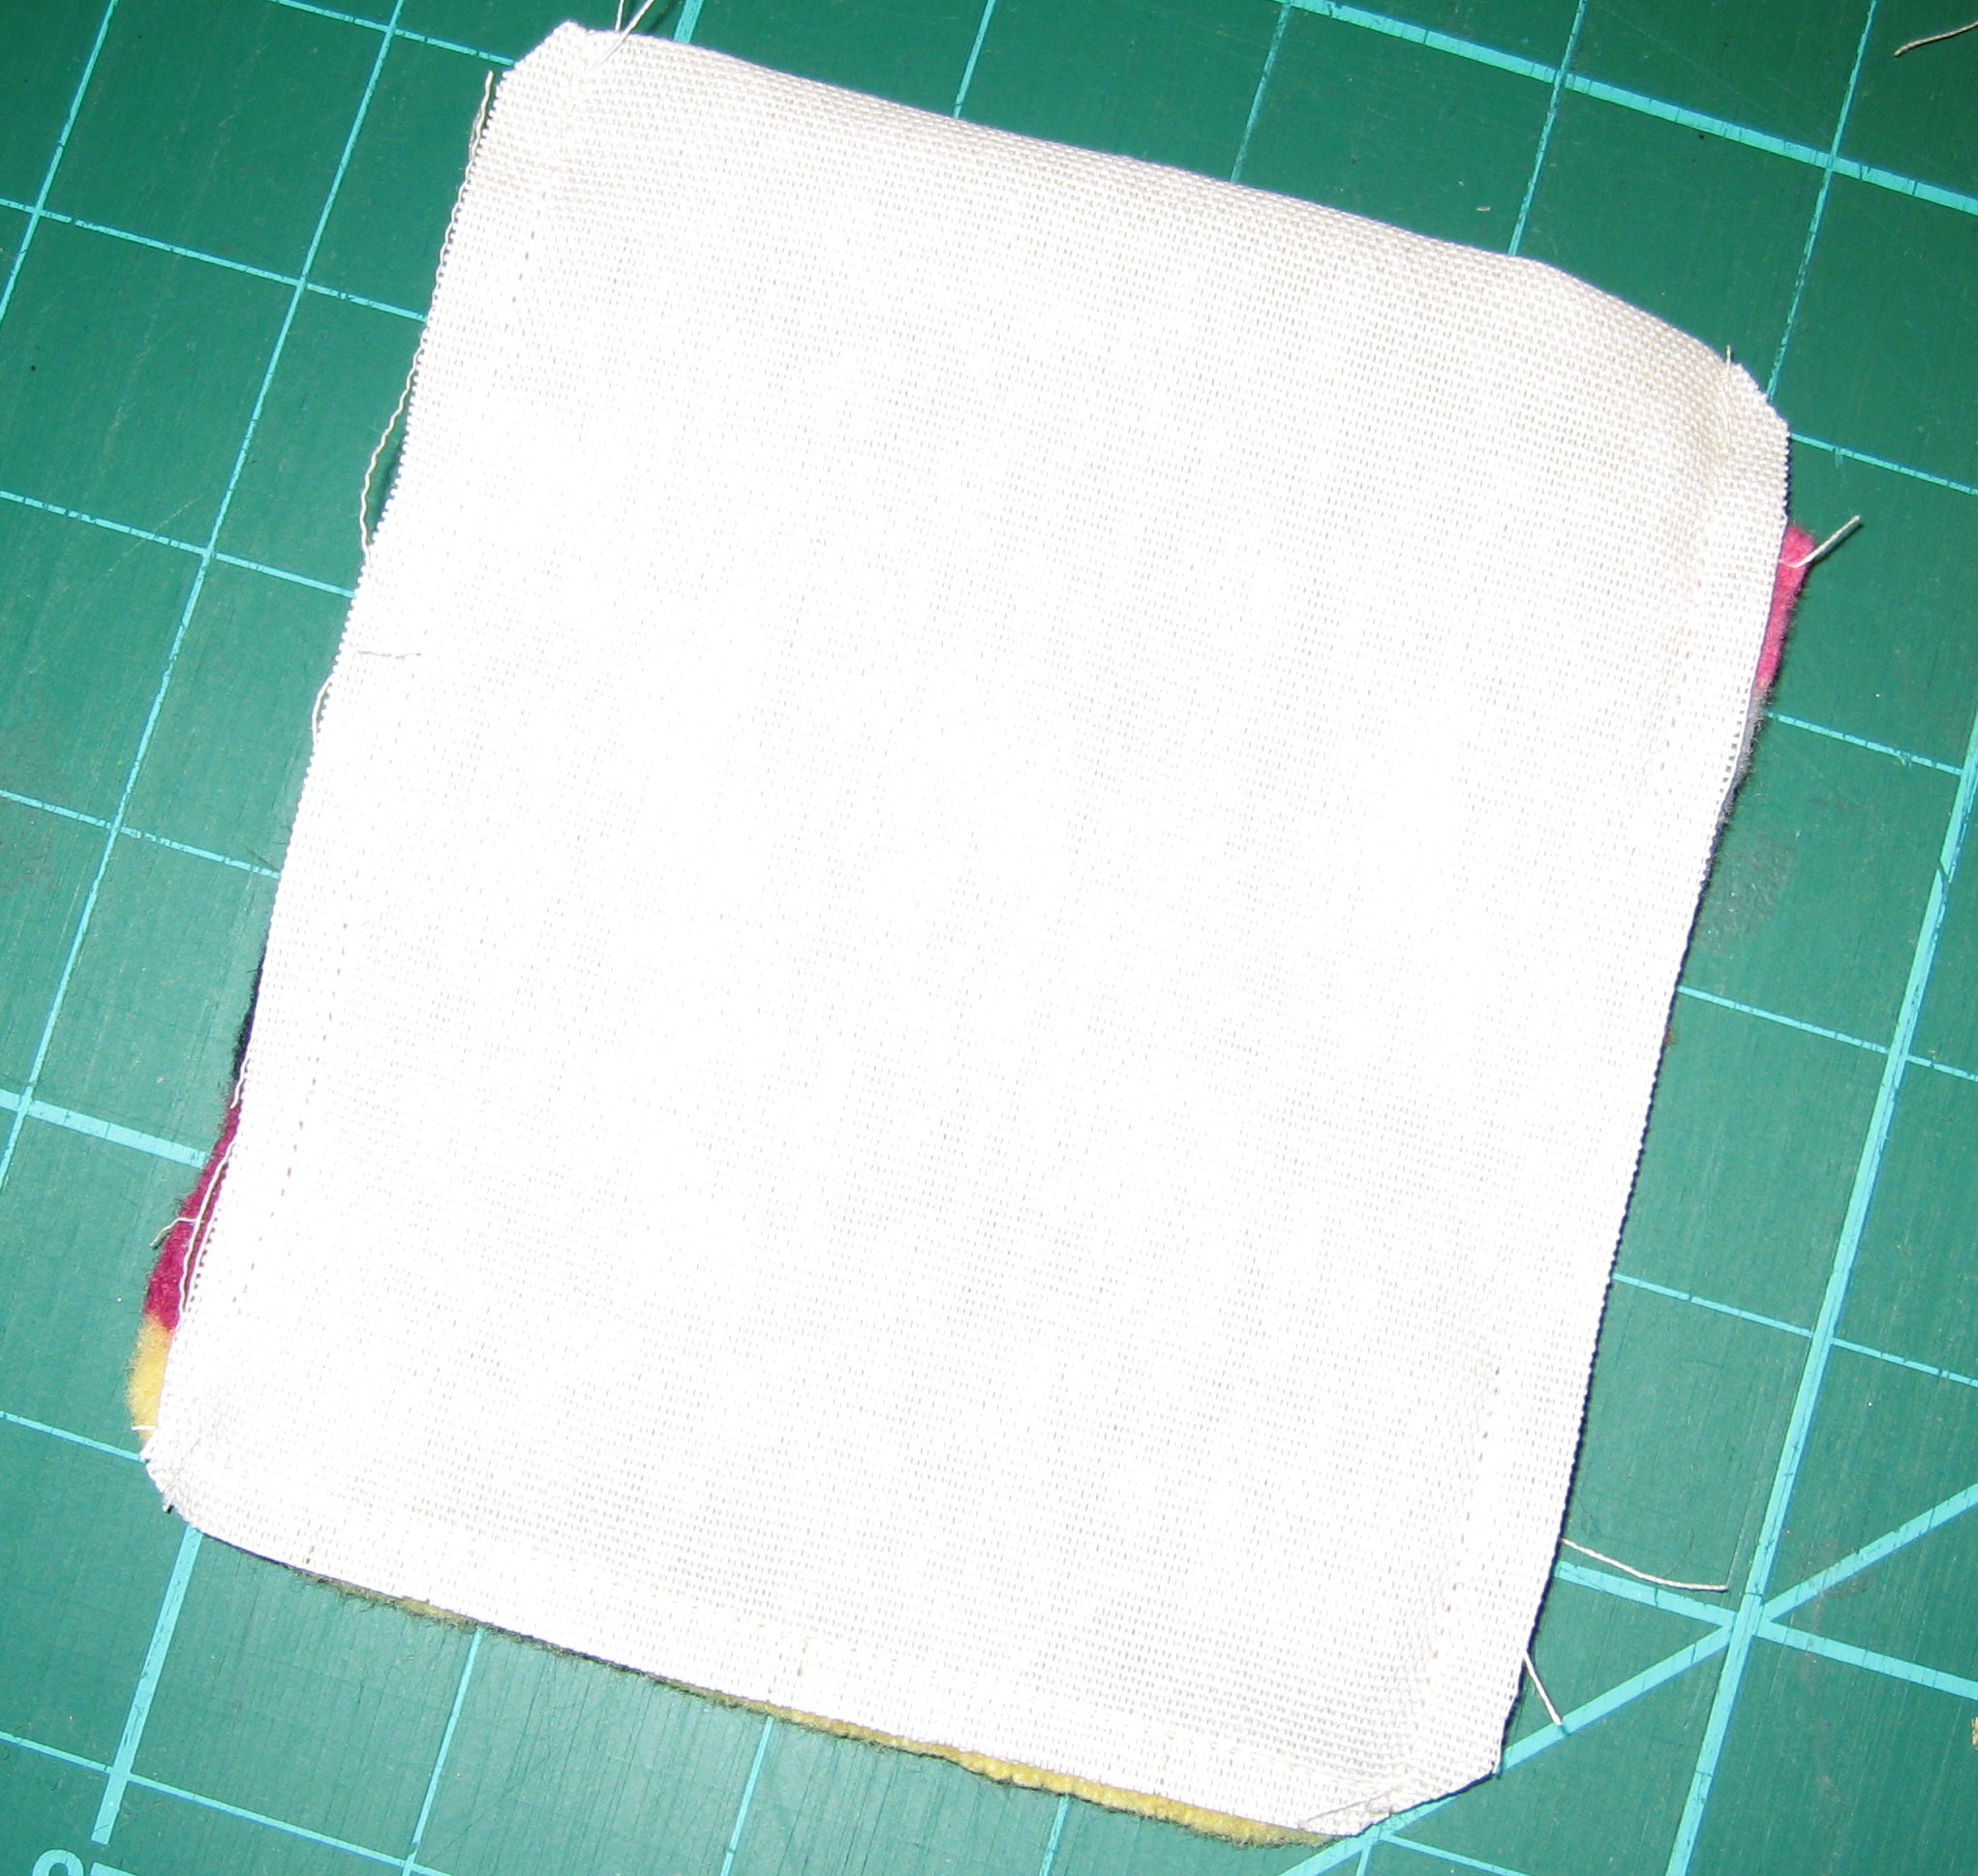
Press seams then turn right side out. The bottom and pockets of your lining should now look like this.
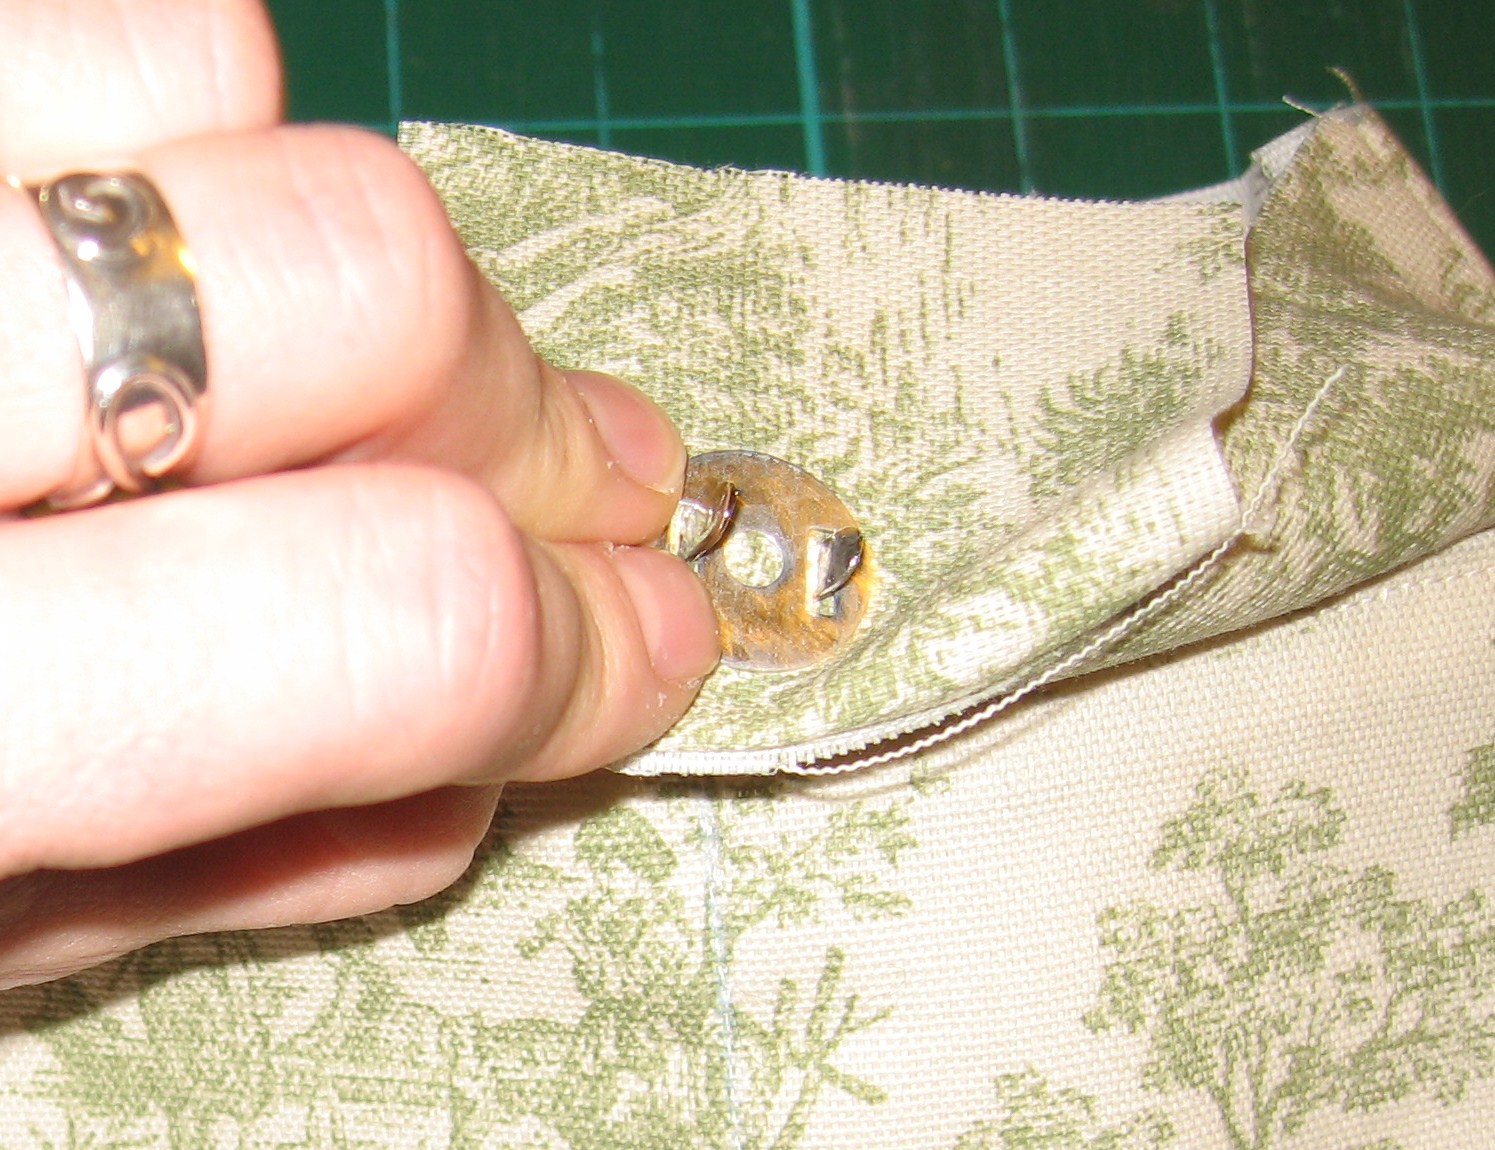
Add magnetic snaps to your lining following the manufacturer’s directions. Leave enough seam allowance at the top for stitching around. I recommend 1″ or more of space. Add a folded piece of scrap fabric to the back to reinforce the snap. Stitch around the snap to reinforce extra fabric.
Time to work on the outside sweater pieces!
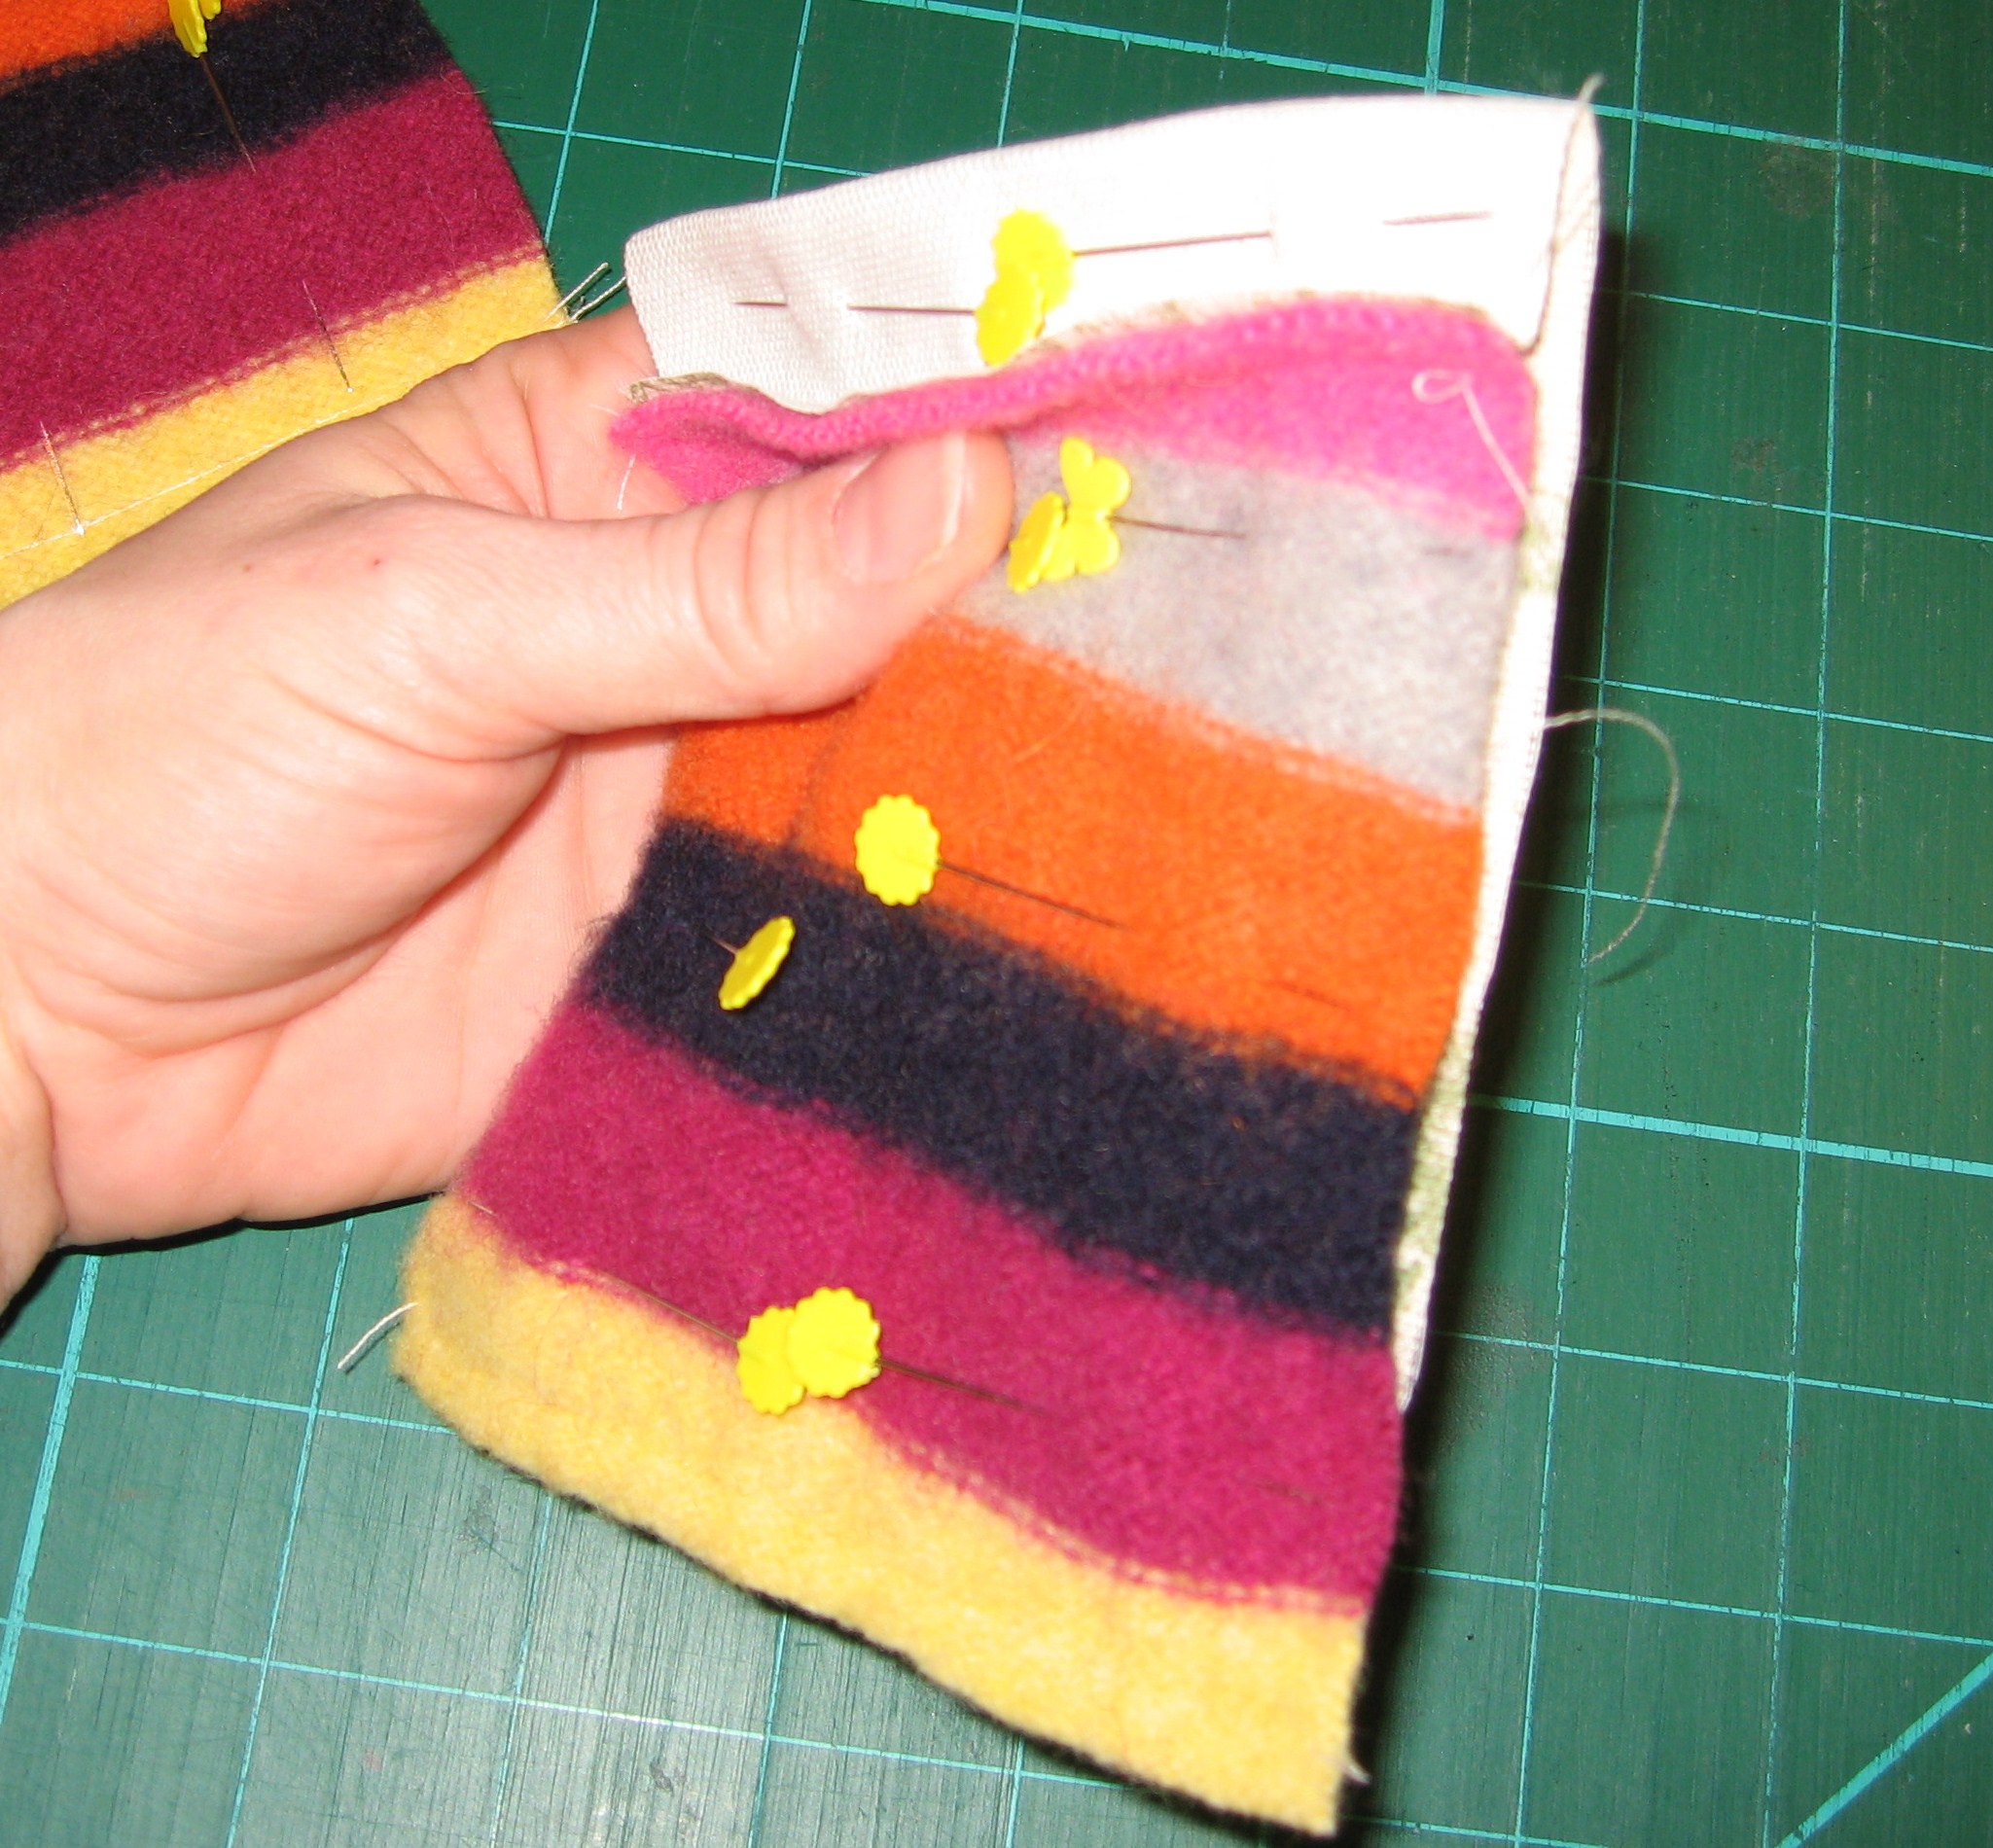
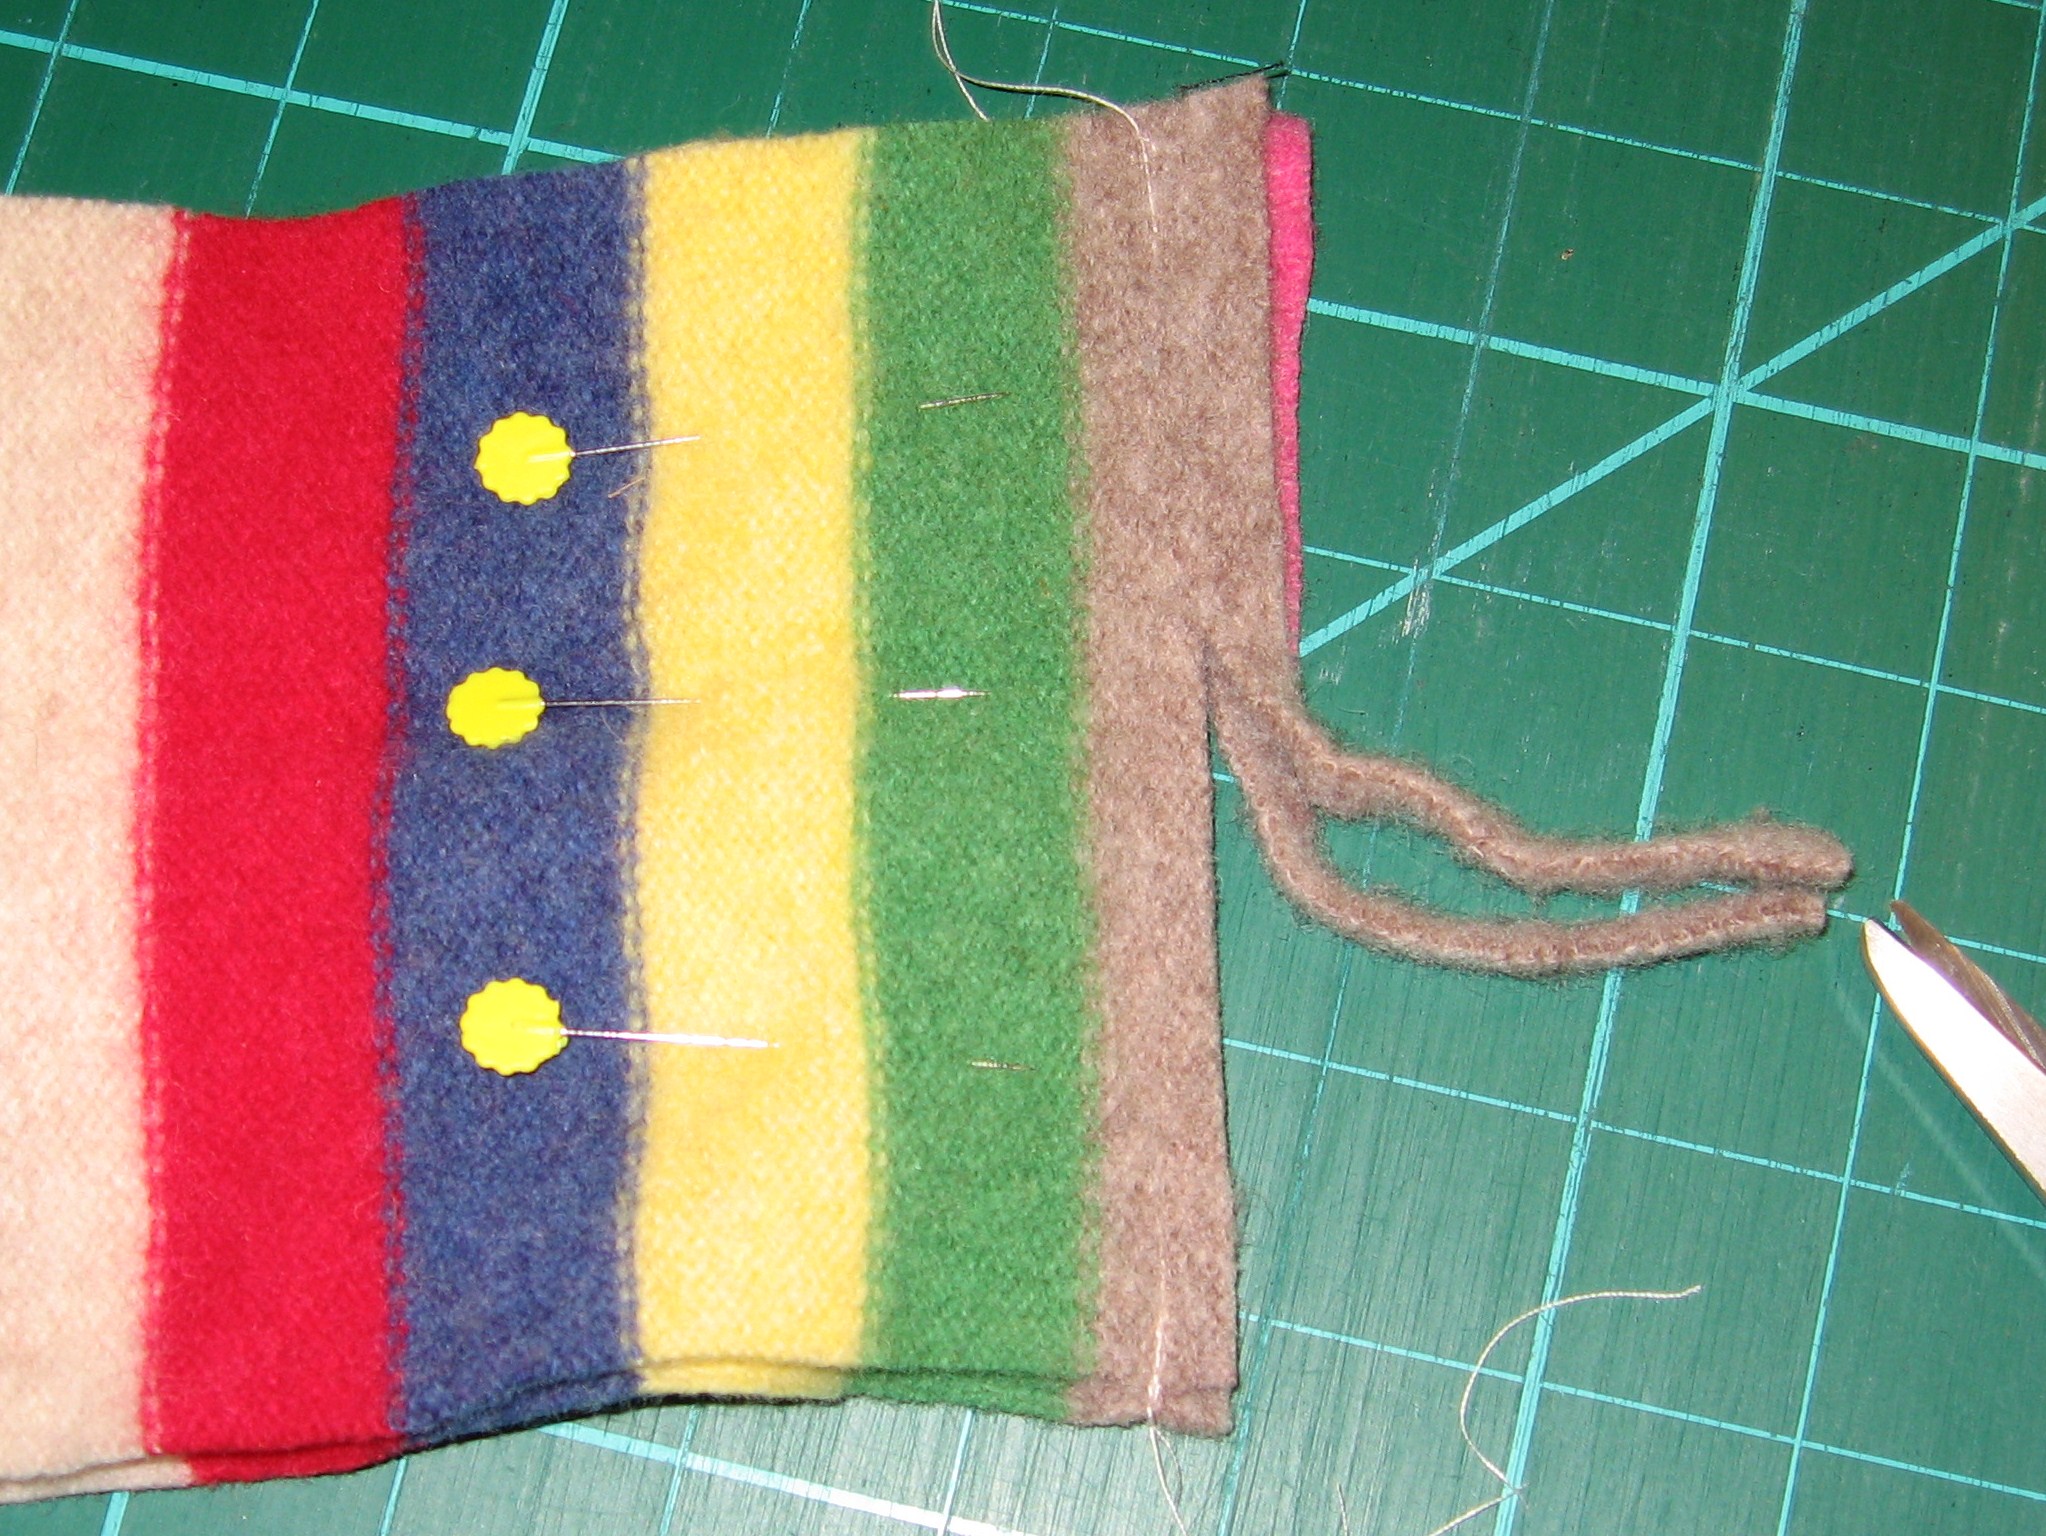
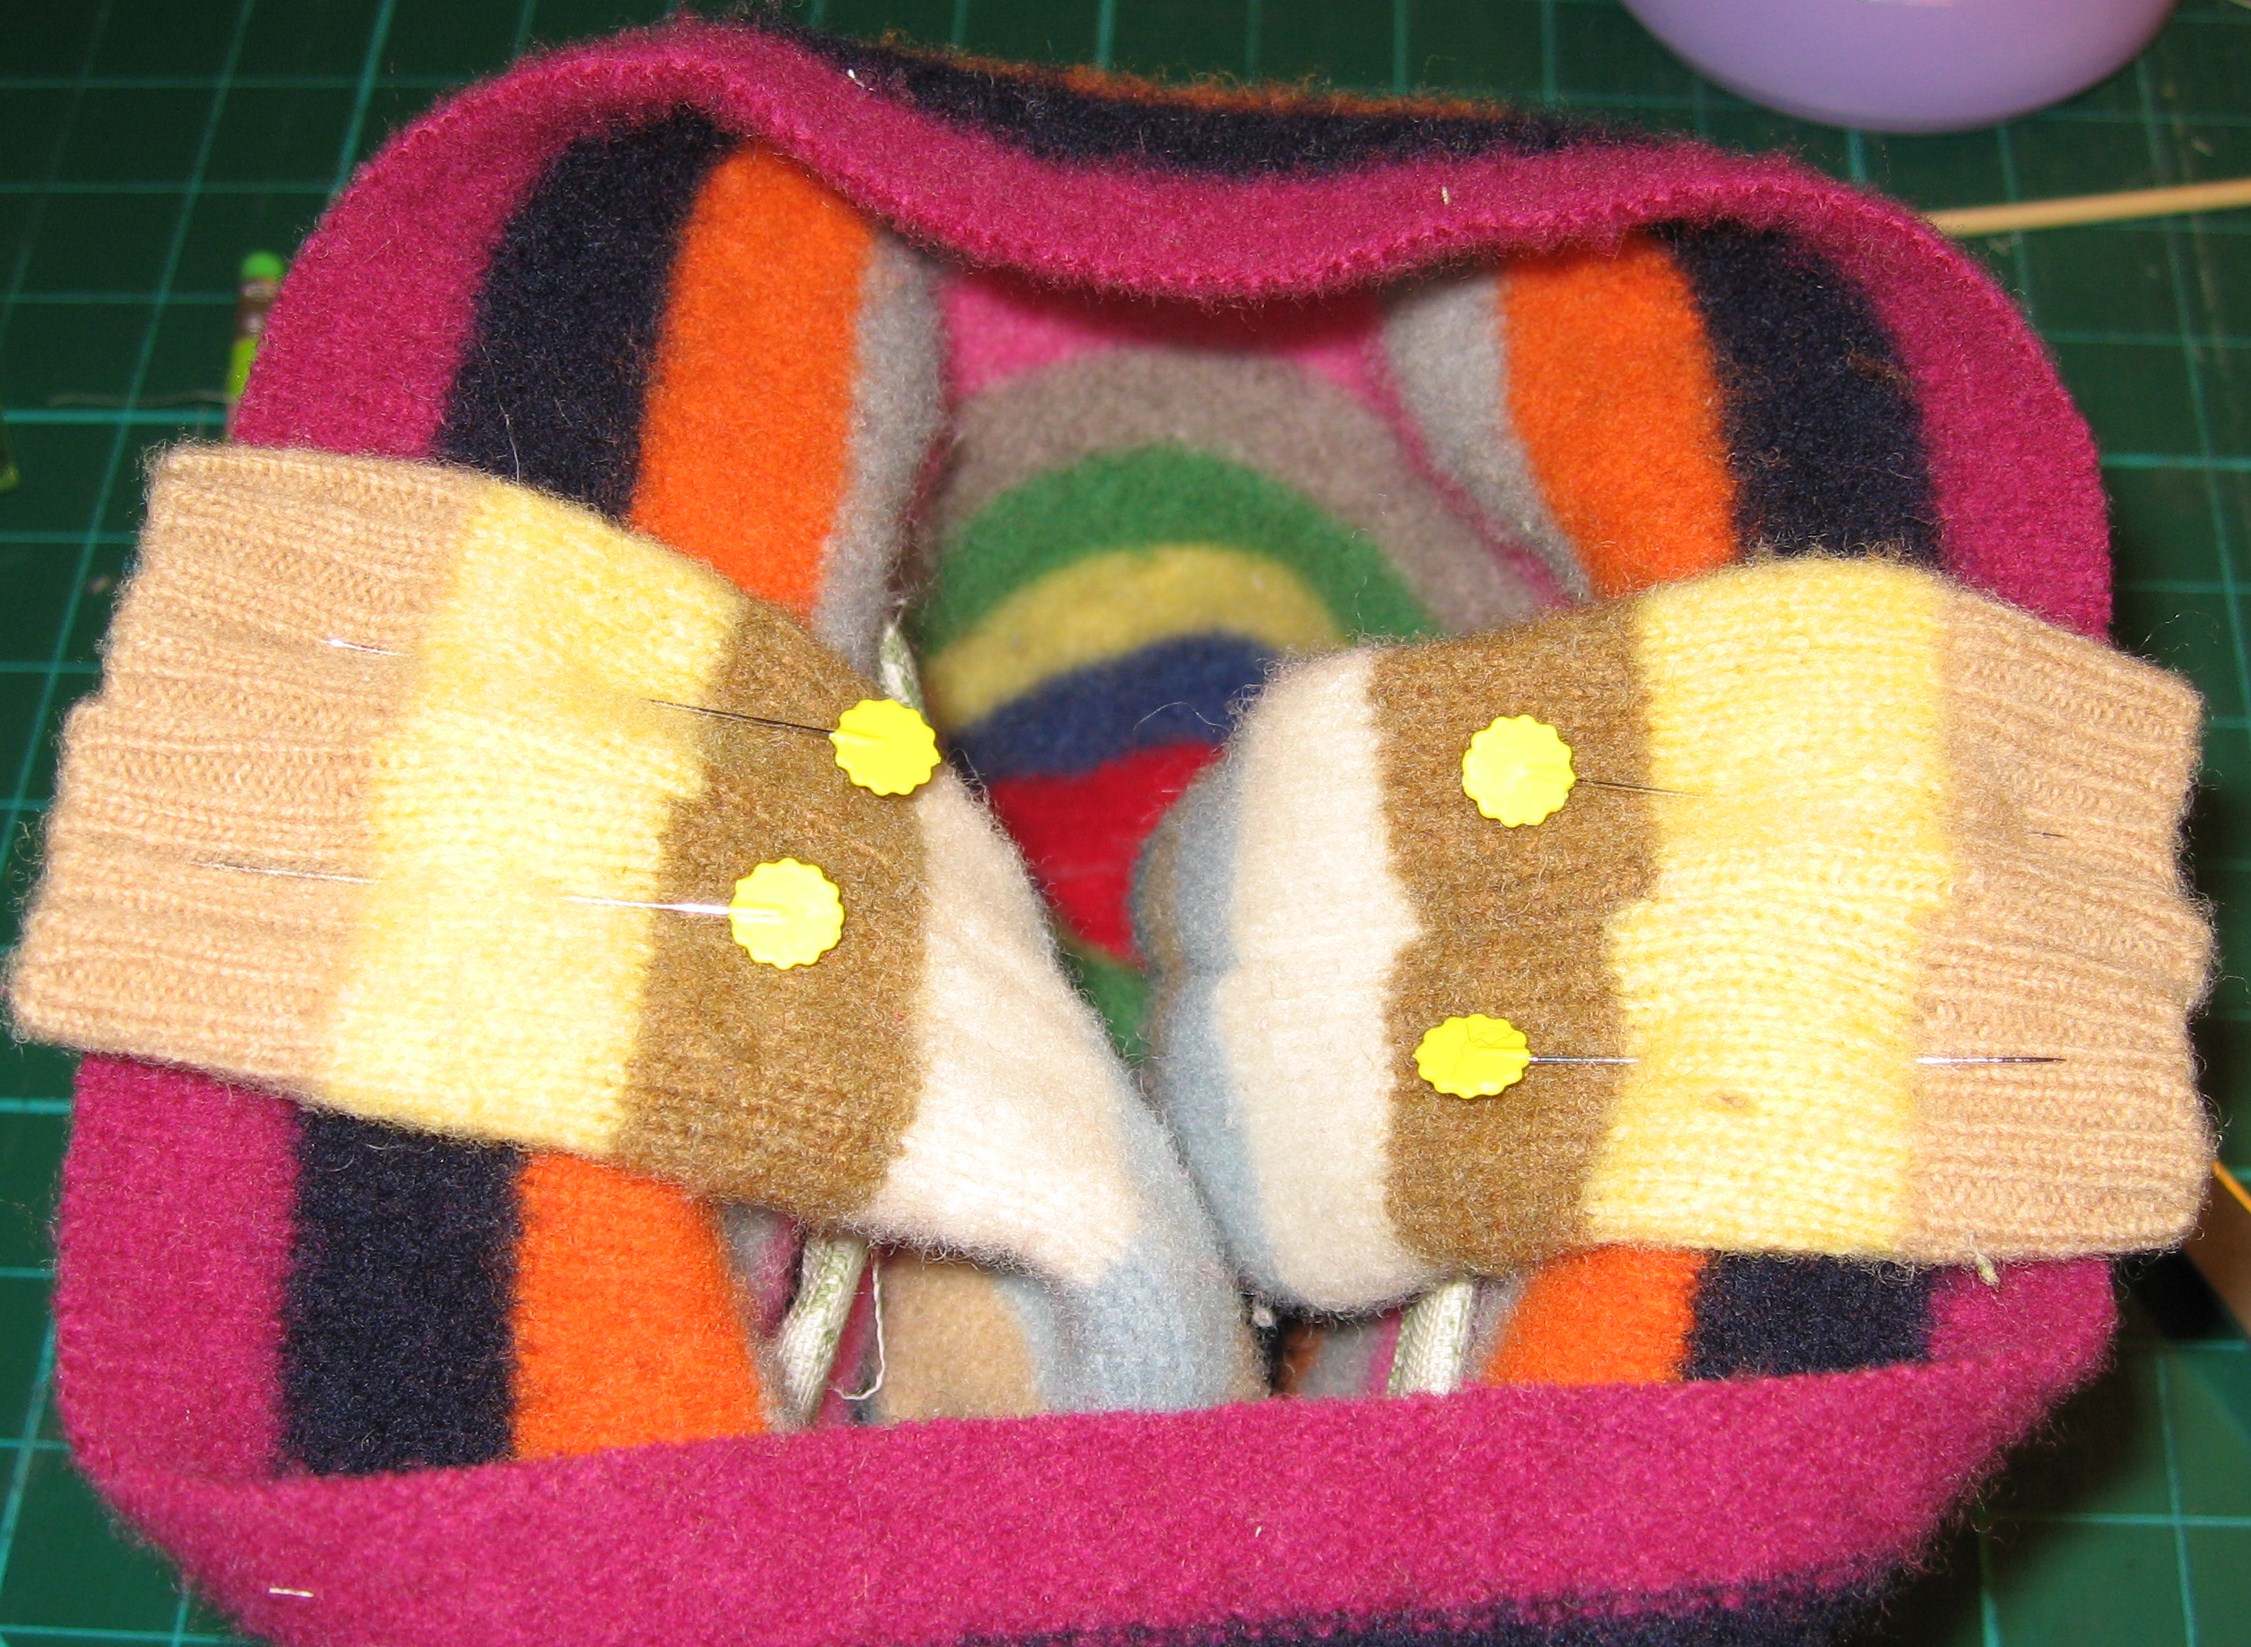
Pin sweater pocket piece to lining pocket piece, right sides together (lining should be 1.5″ longer), stitch ends.
Line up bottom of pocket, pin, then stitch sides. Leave an opening for turning.
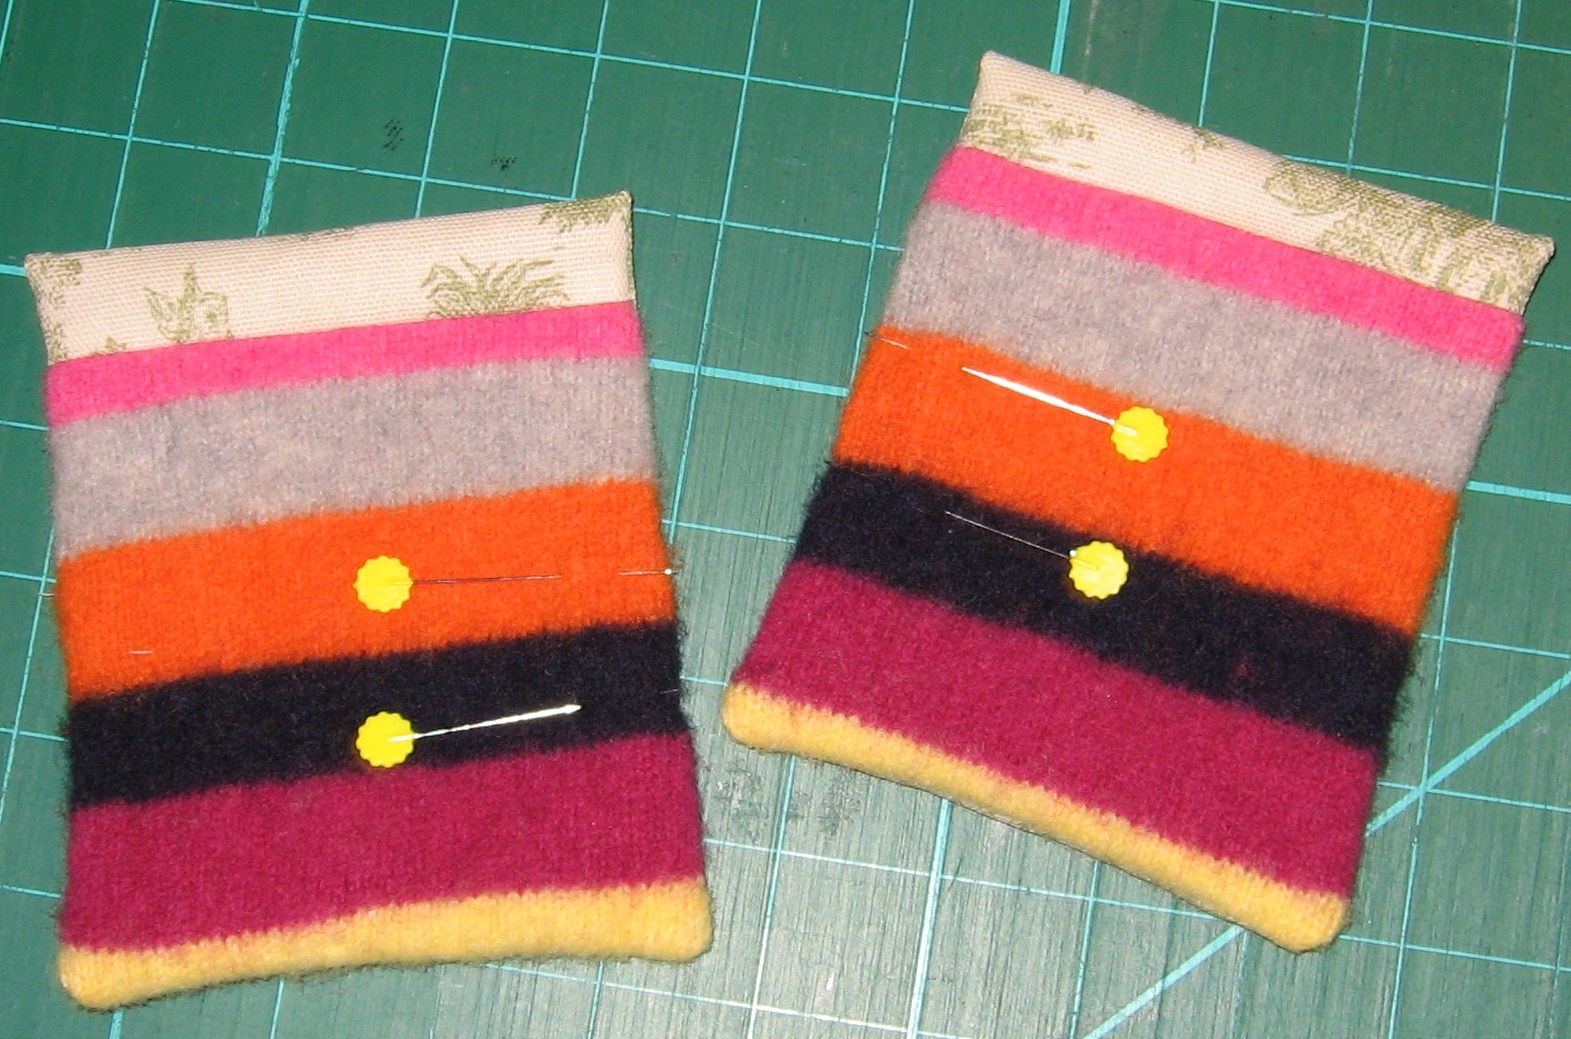
Trim corners, turn pocket and pin openings.
Stitch side seams of bag, leaving bottom open.
Turn the sweater bag body right side out, matching seams. Pin pockets over the side seams, then stitch to attach.
With right sides together, stitch across sweater bag bottom.
Fold in boxed corners, matching side & bottom seams, pin & stitch.
The inside bottom should look like this.
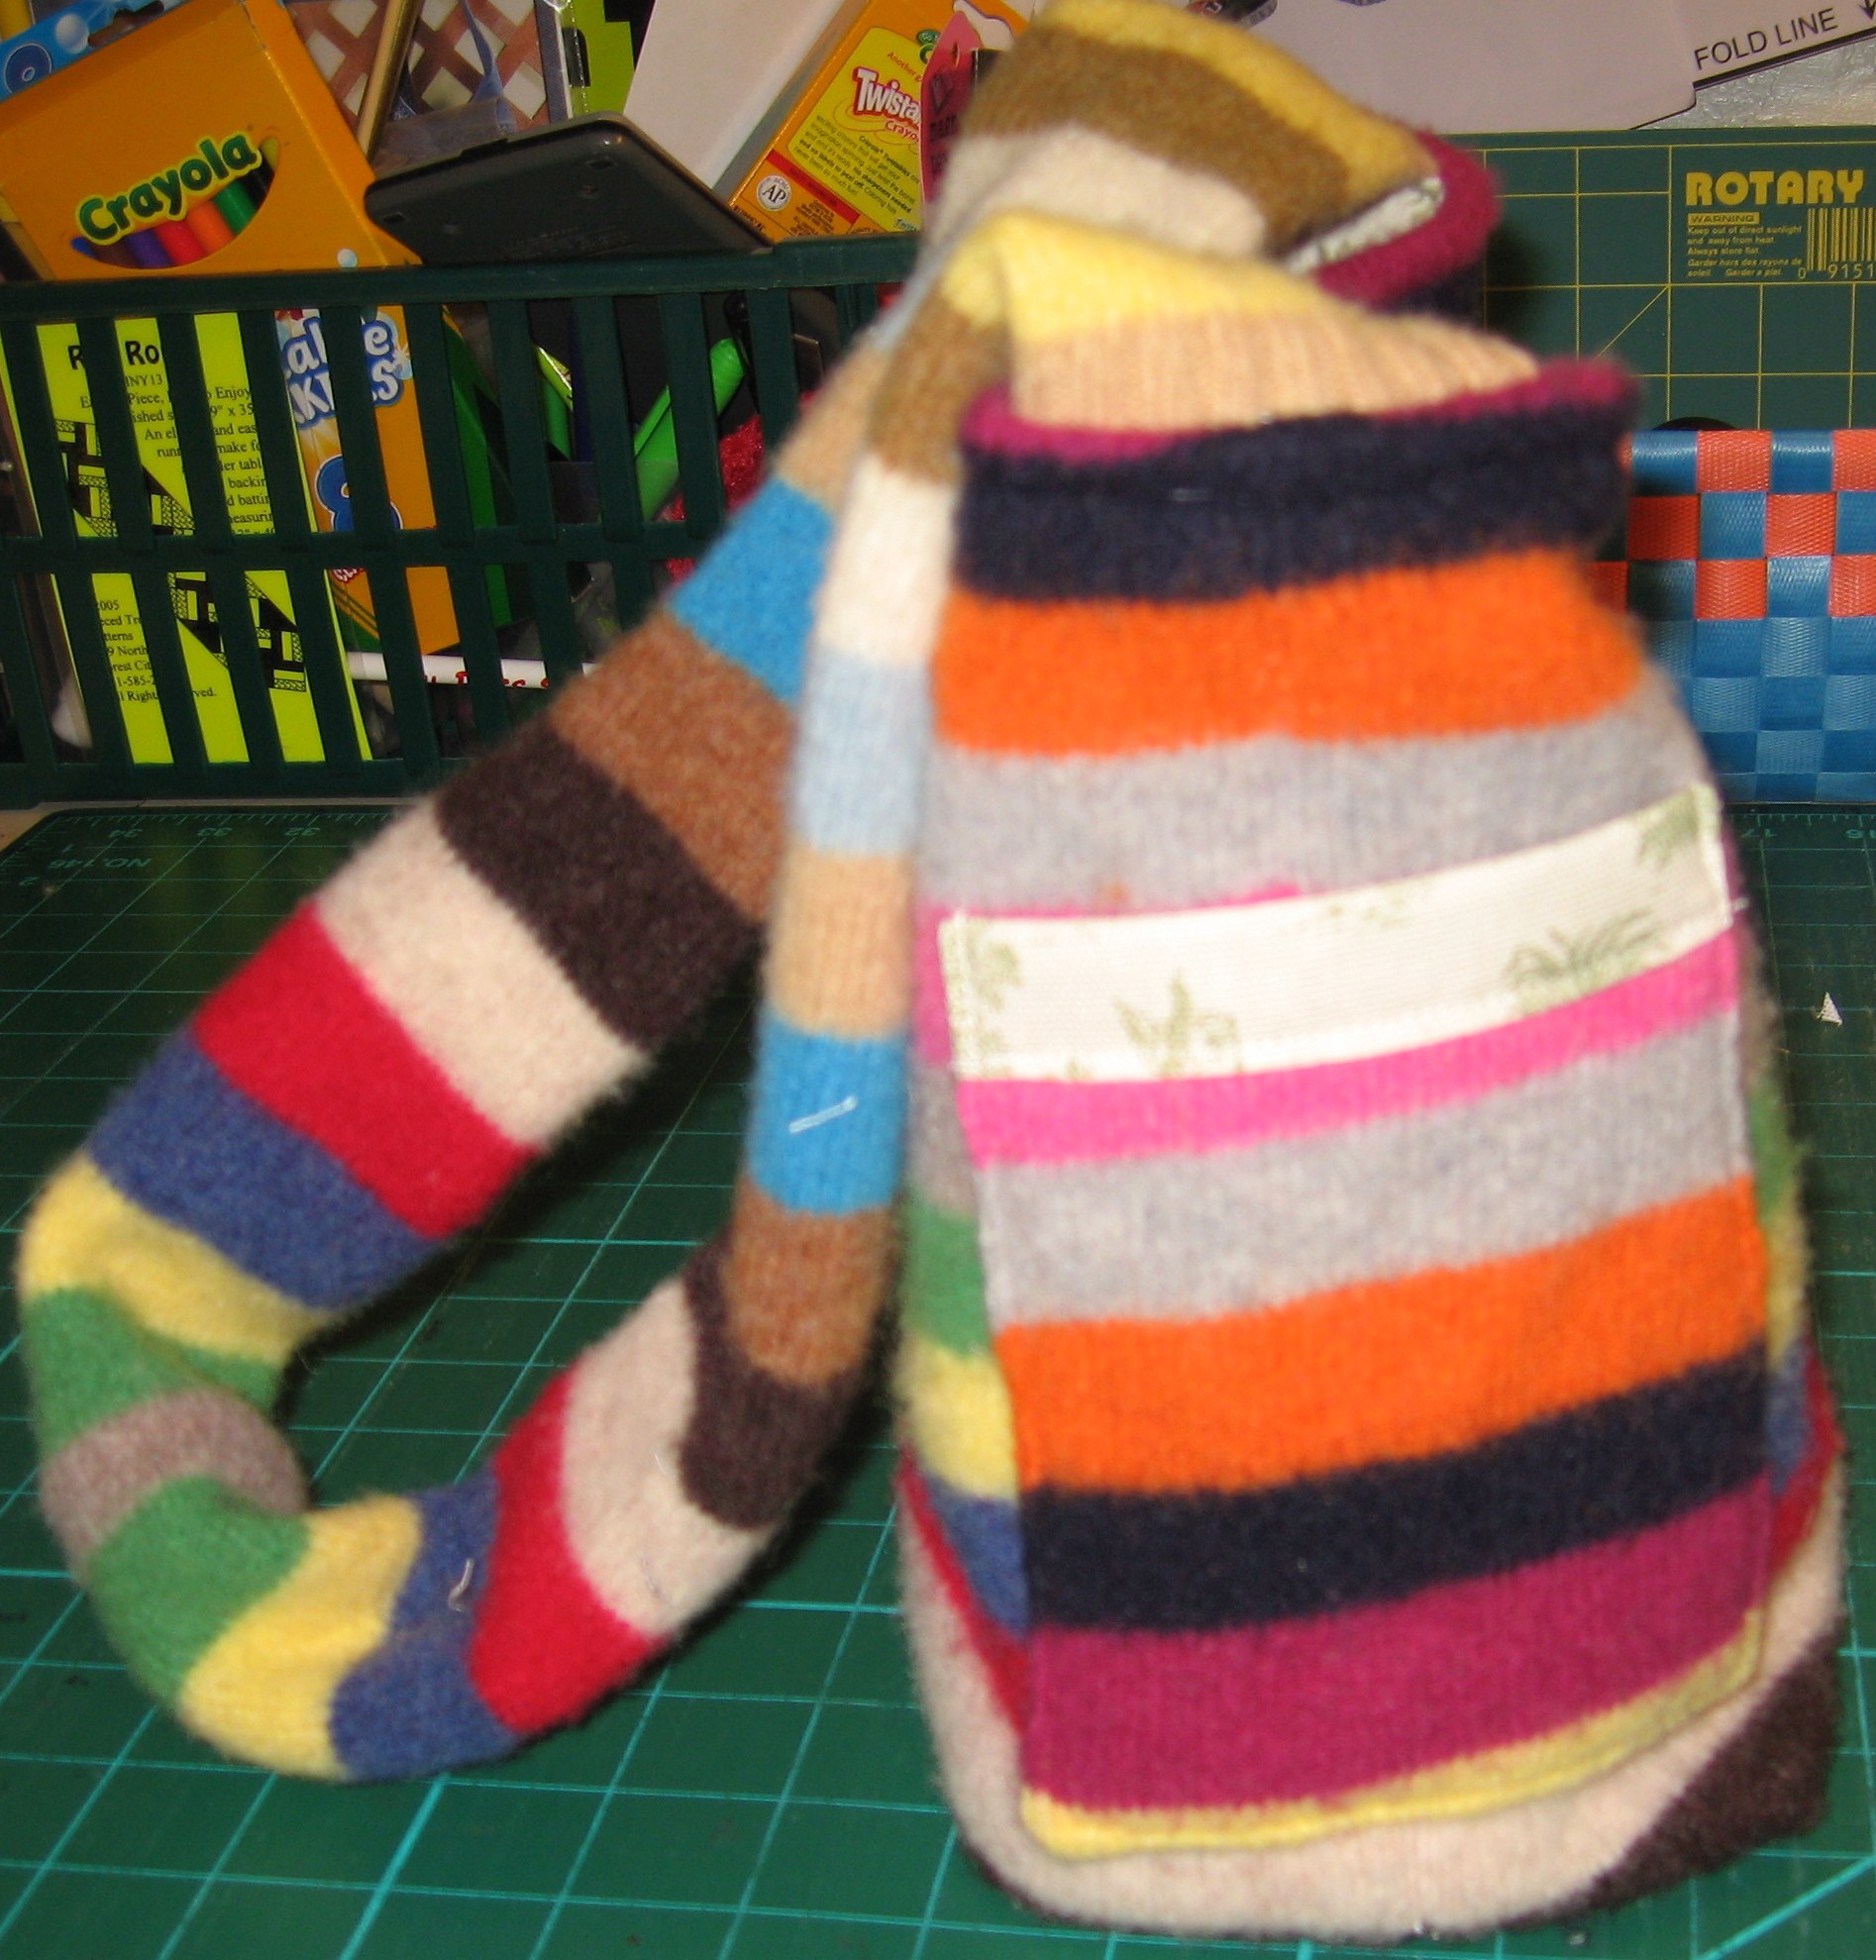
Time for Sleeves!
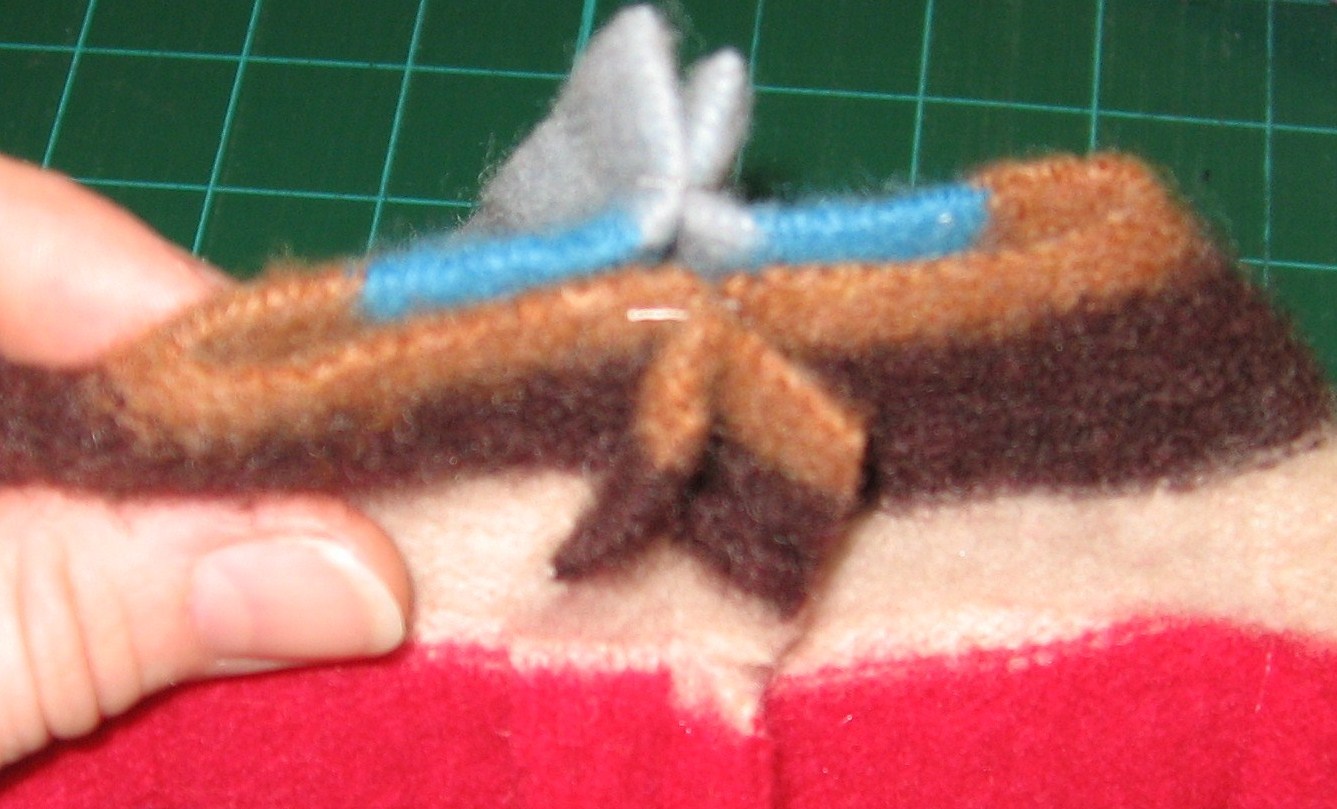
Trim sleeves to desired width for strap, I like a wider strip so tend to cut about 5″. This includes seam allowance. Remember, this is your bag, and this width will vary based on your sweater, so the dimensions are all yours!
Pin ends of two sleeves together, stitch and trim seam.
Fold lengthwise, stitch, leaving approx. 6″ open for turning
Turn right side out and smooth opening.
Stitch closed with a tight whip stitch.
Center and pin straps to side seams, being sure to match right sides. Stitch in place.
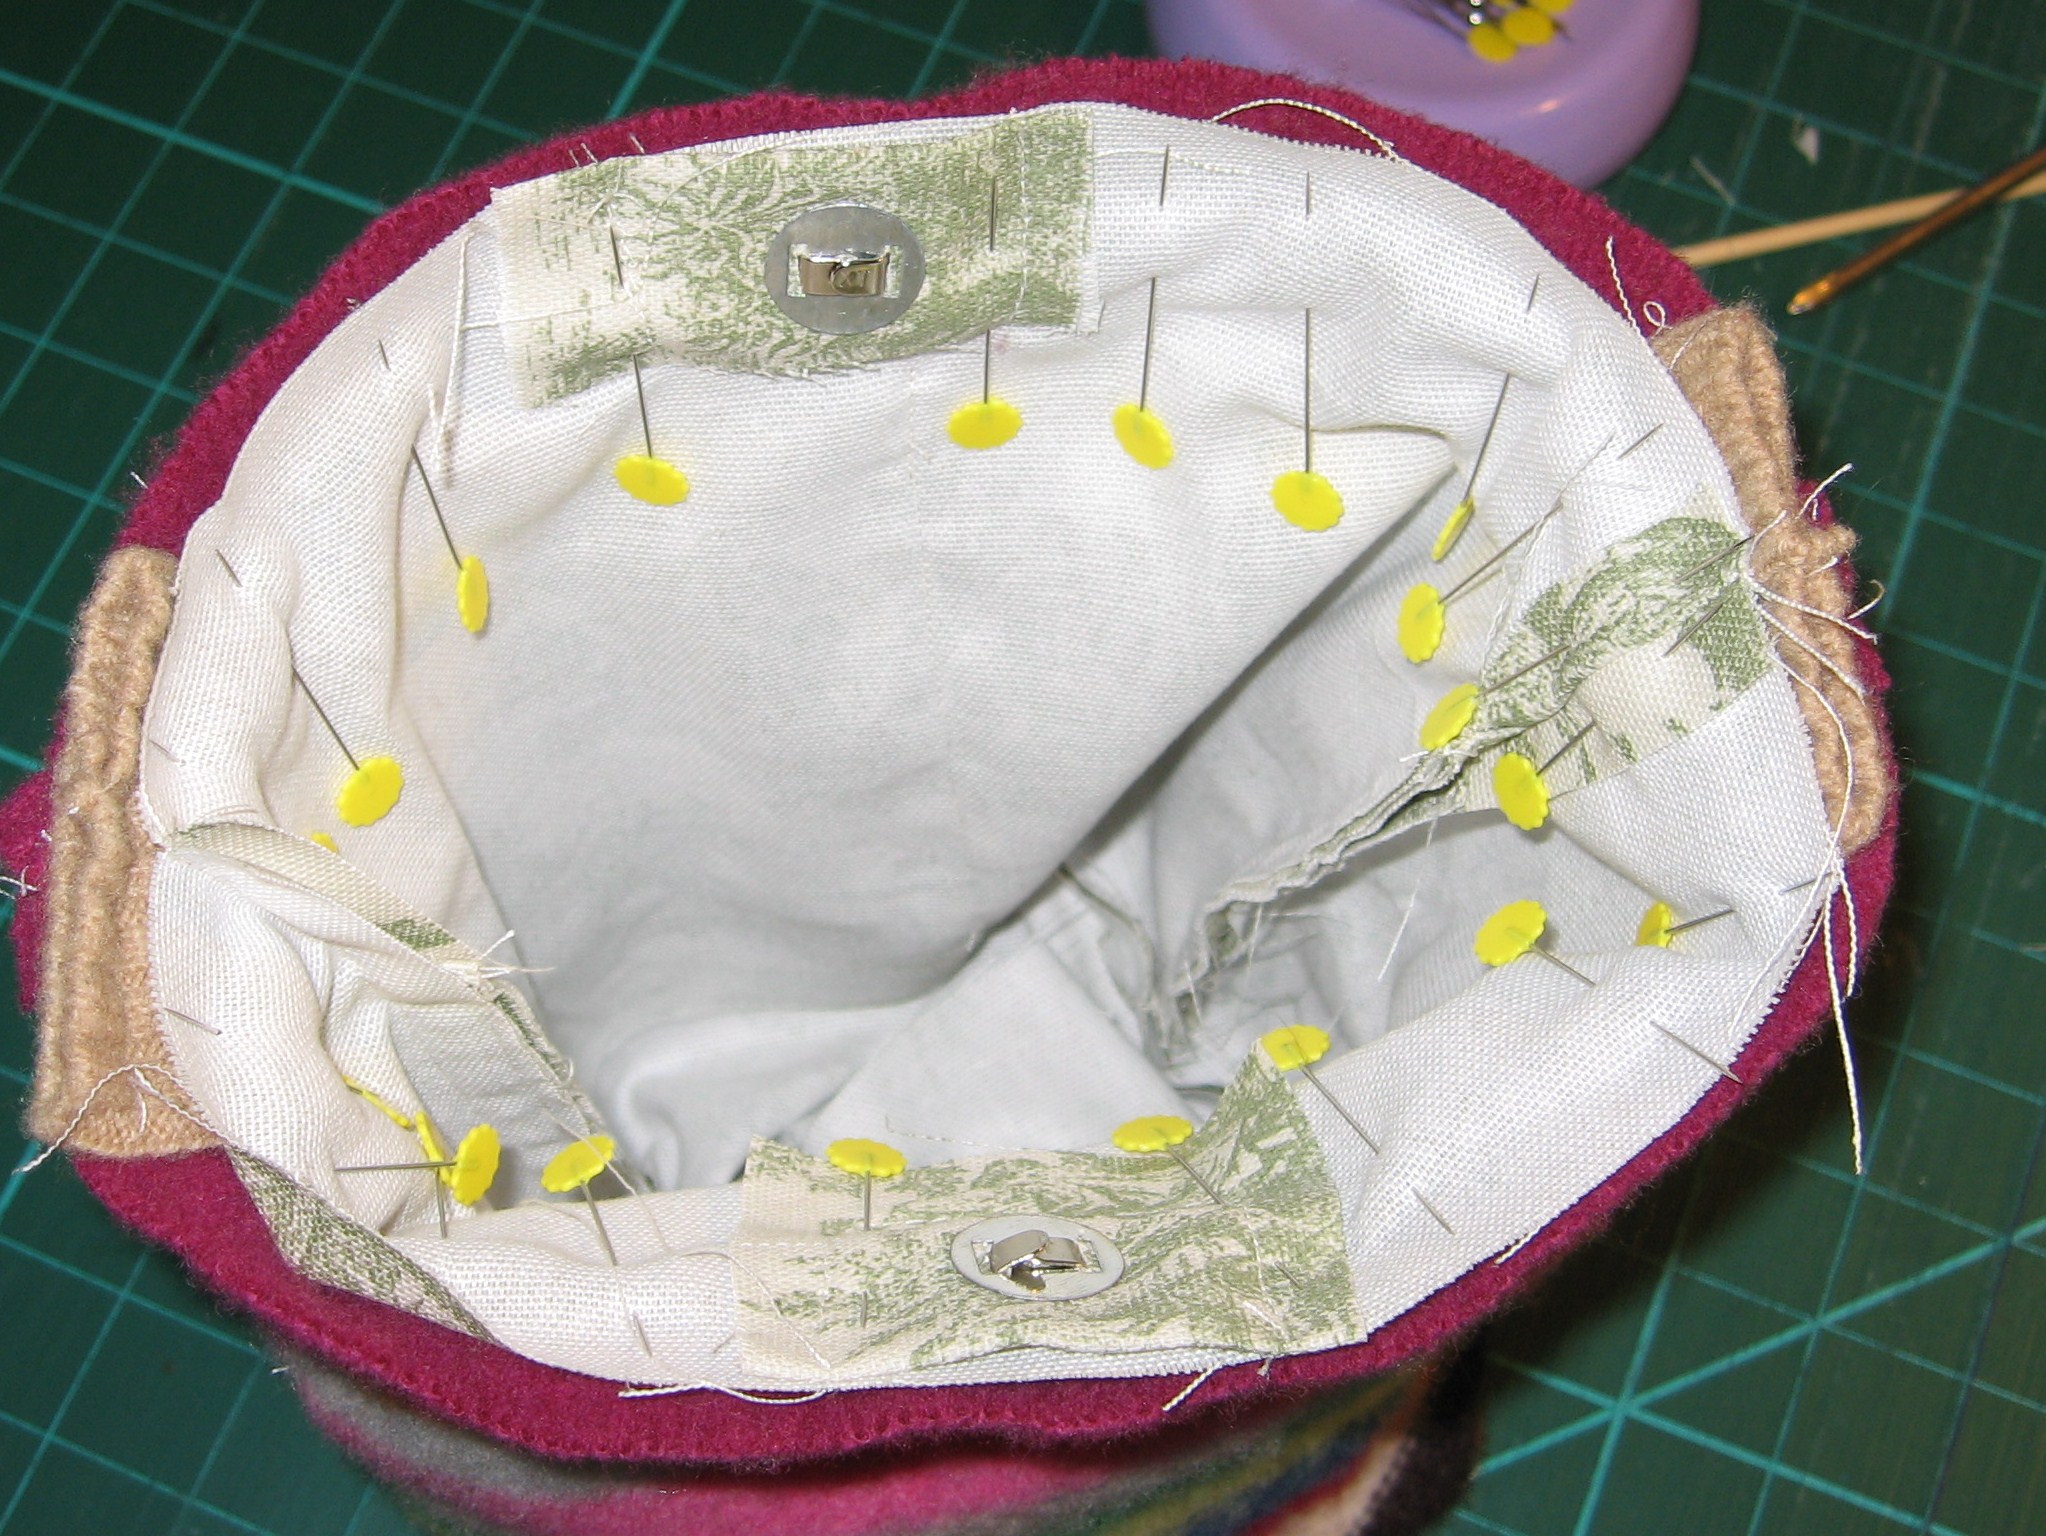
Ensure the straps are inside and pin the lining to the sweater (outside of the bag), right sides together. Stitch around the top.
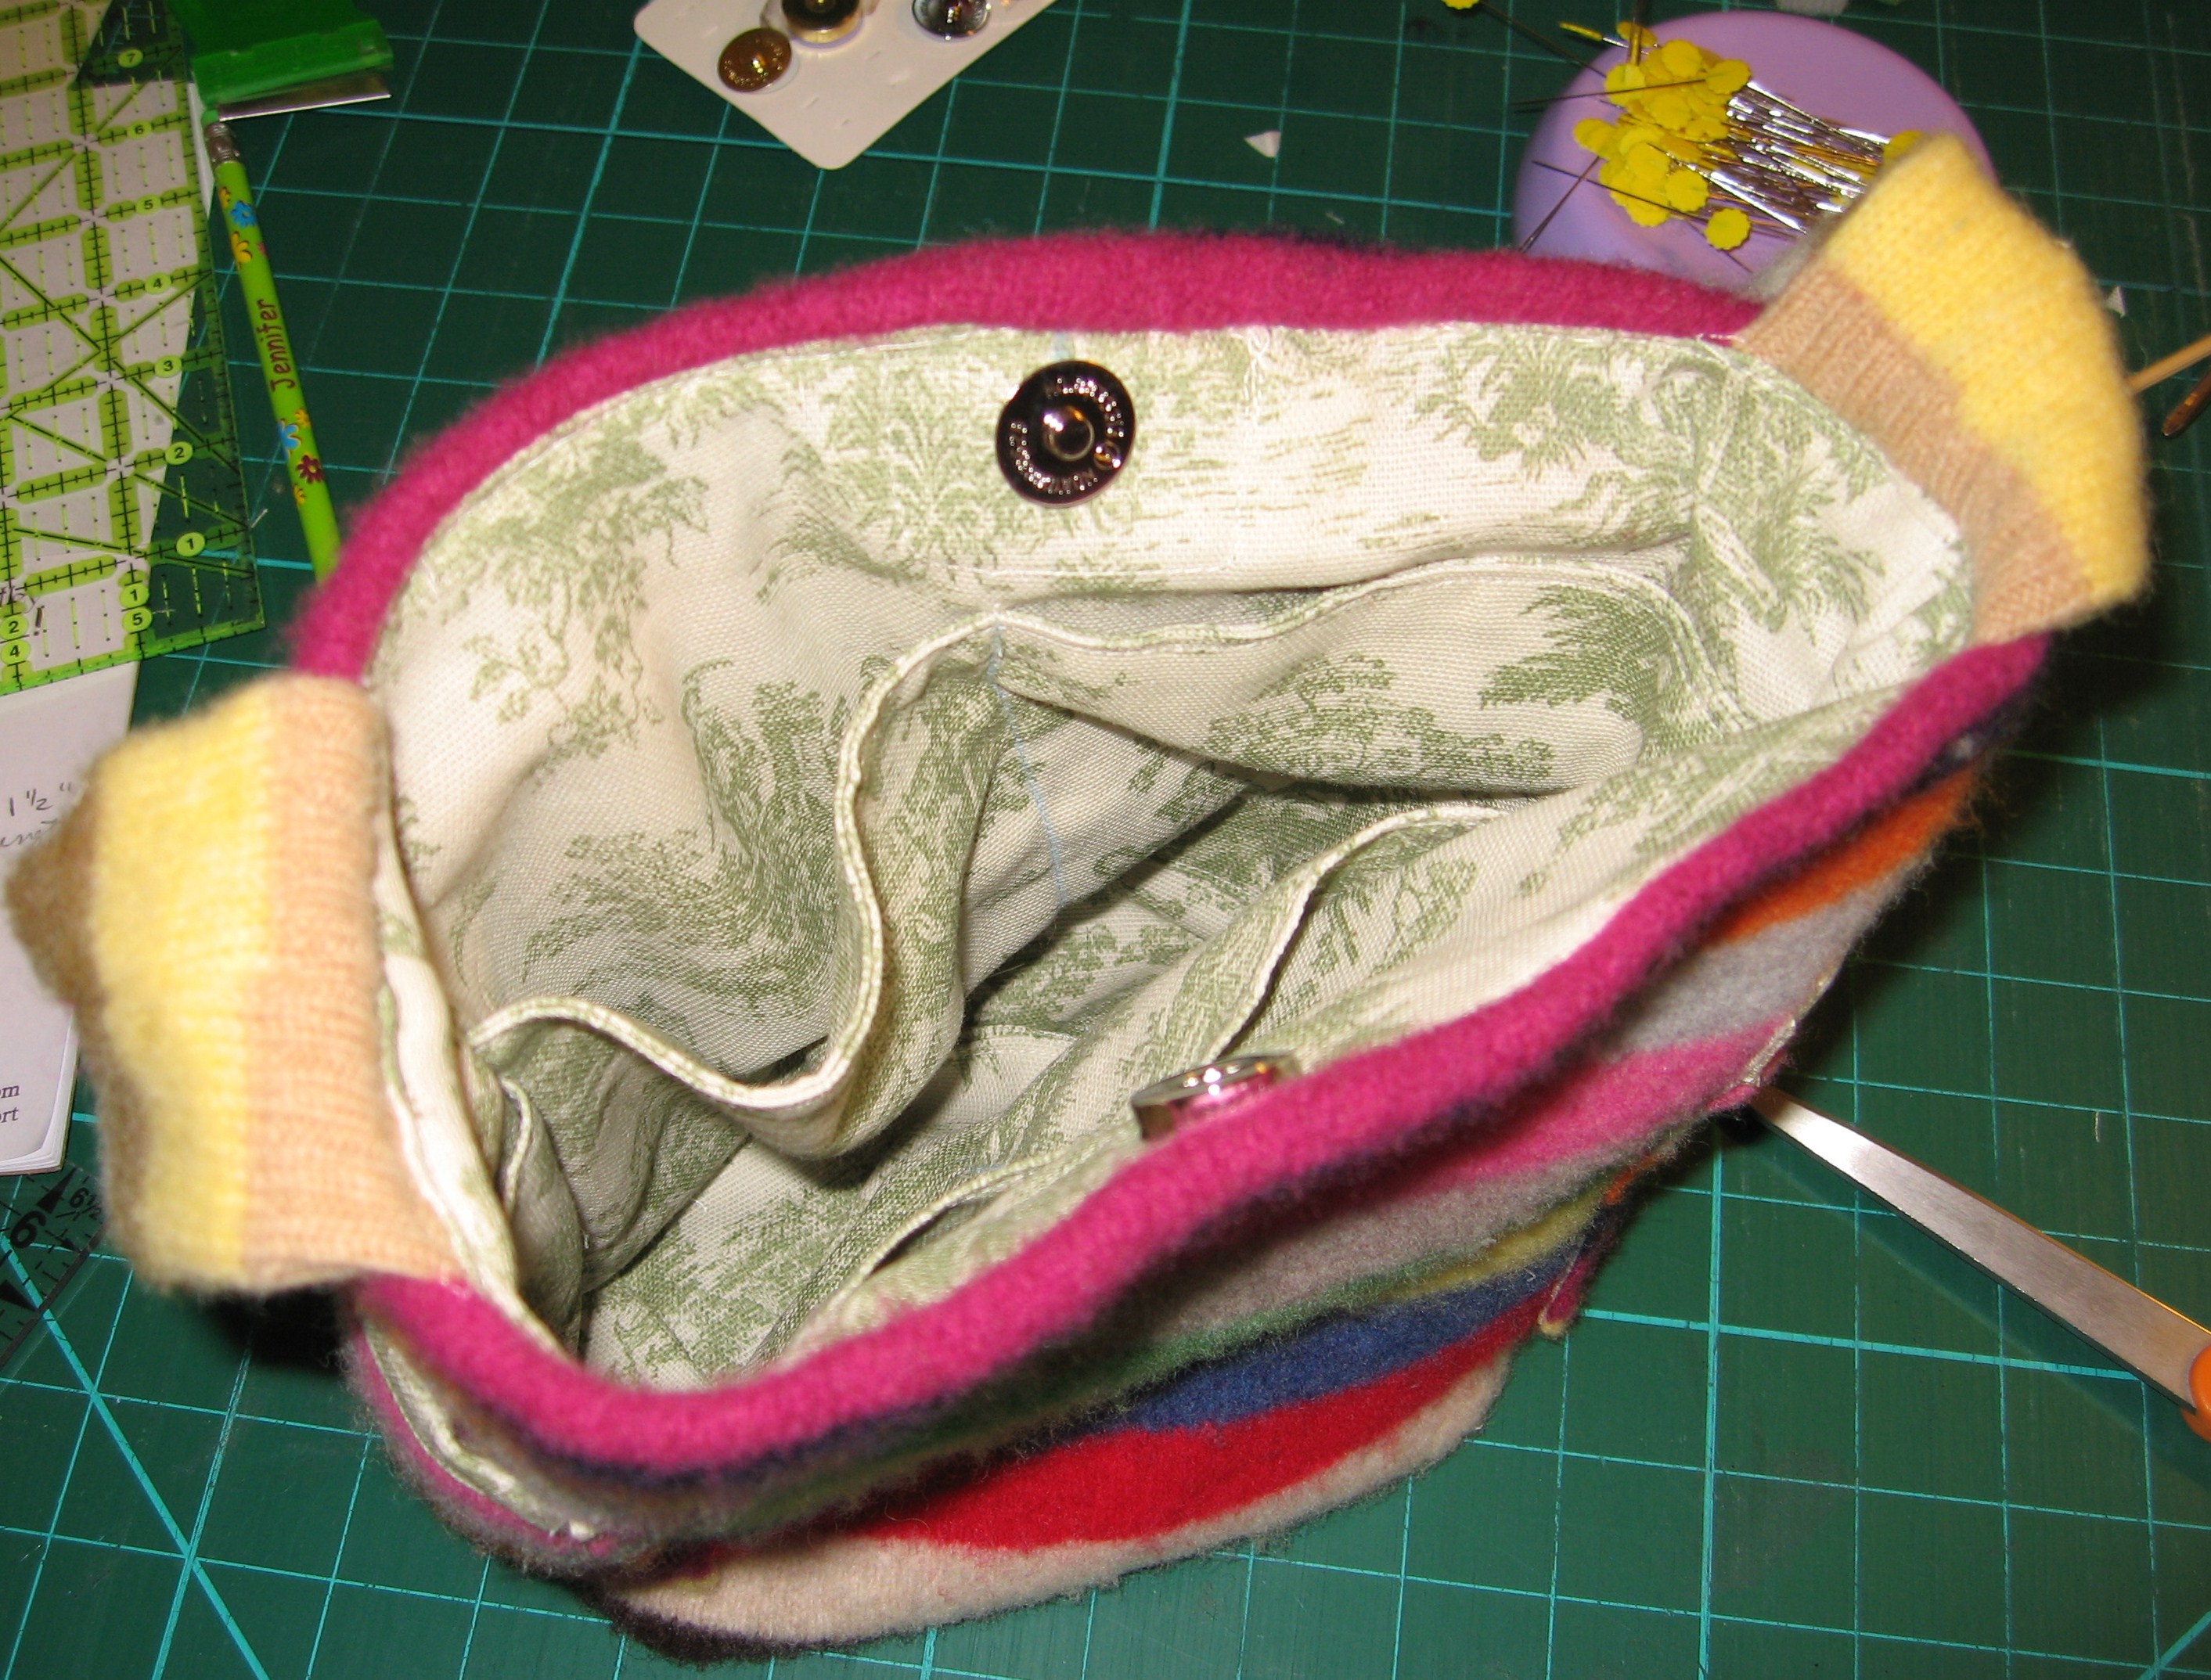
Turn the bag right side out through the opening in the lining.
Pin opening in lining. Stitch closed.
Turn lining inside, smooth and pin. Top stitch.
Stitch flower to center of each side over snap, stitch button on top. We are DONE!
What a fun way to recycle an old sweater!
Here’s a fun one I made with a cute purple sweater!
I don’t make many New Year’s Resolutions, but I do start each year trying to be more organized. I’m starting with my personal spaces this year; my jewelry, make-up, and the like.
I love big, swishy earrings, handmade, hand-beaded, felted, you name it. I have loads that were made by friends and a few made by myself, and those are definitely my favorites.
Storage has gotten a bit precarious, and I’m usually trying to disentangle the mess and find a missing earring.
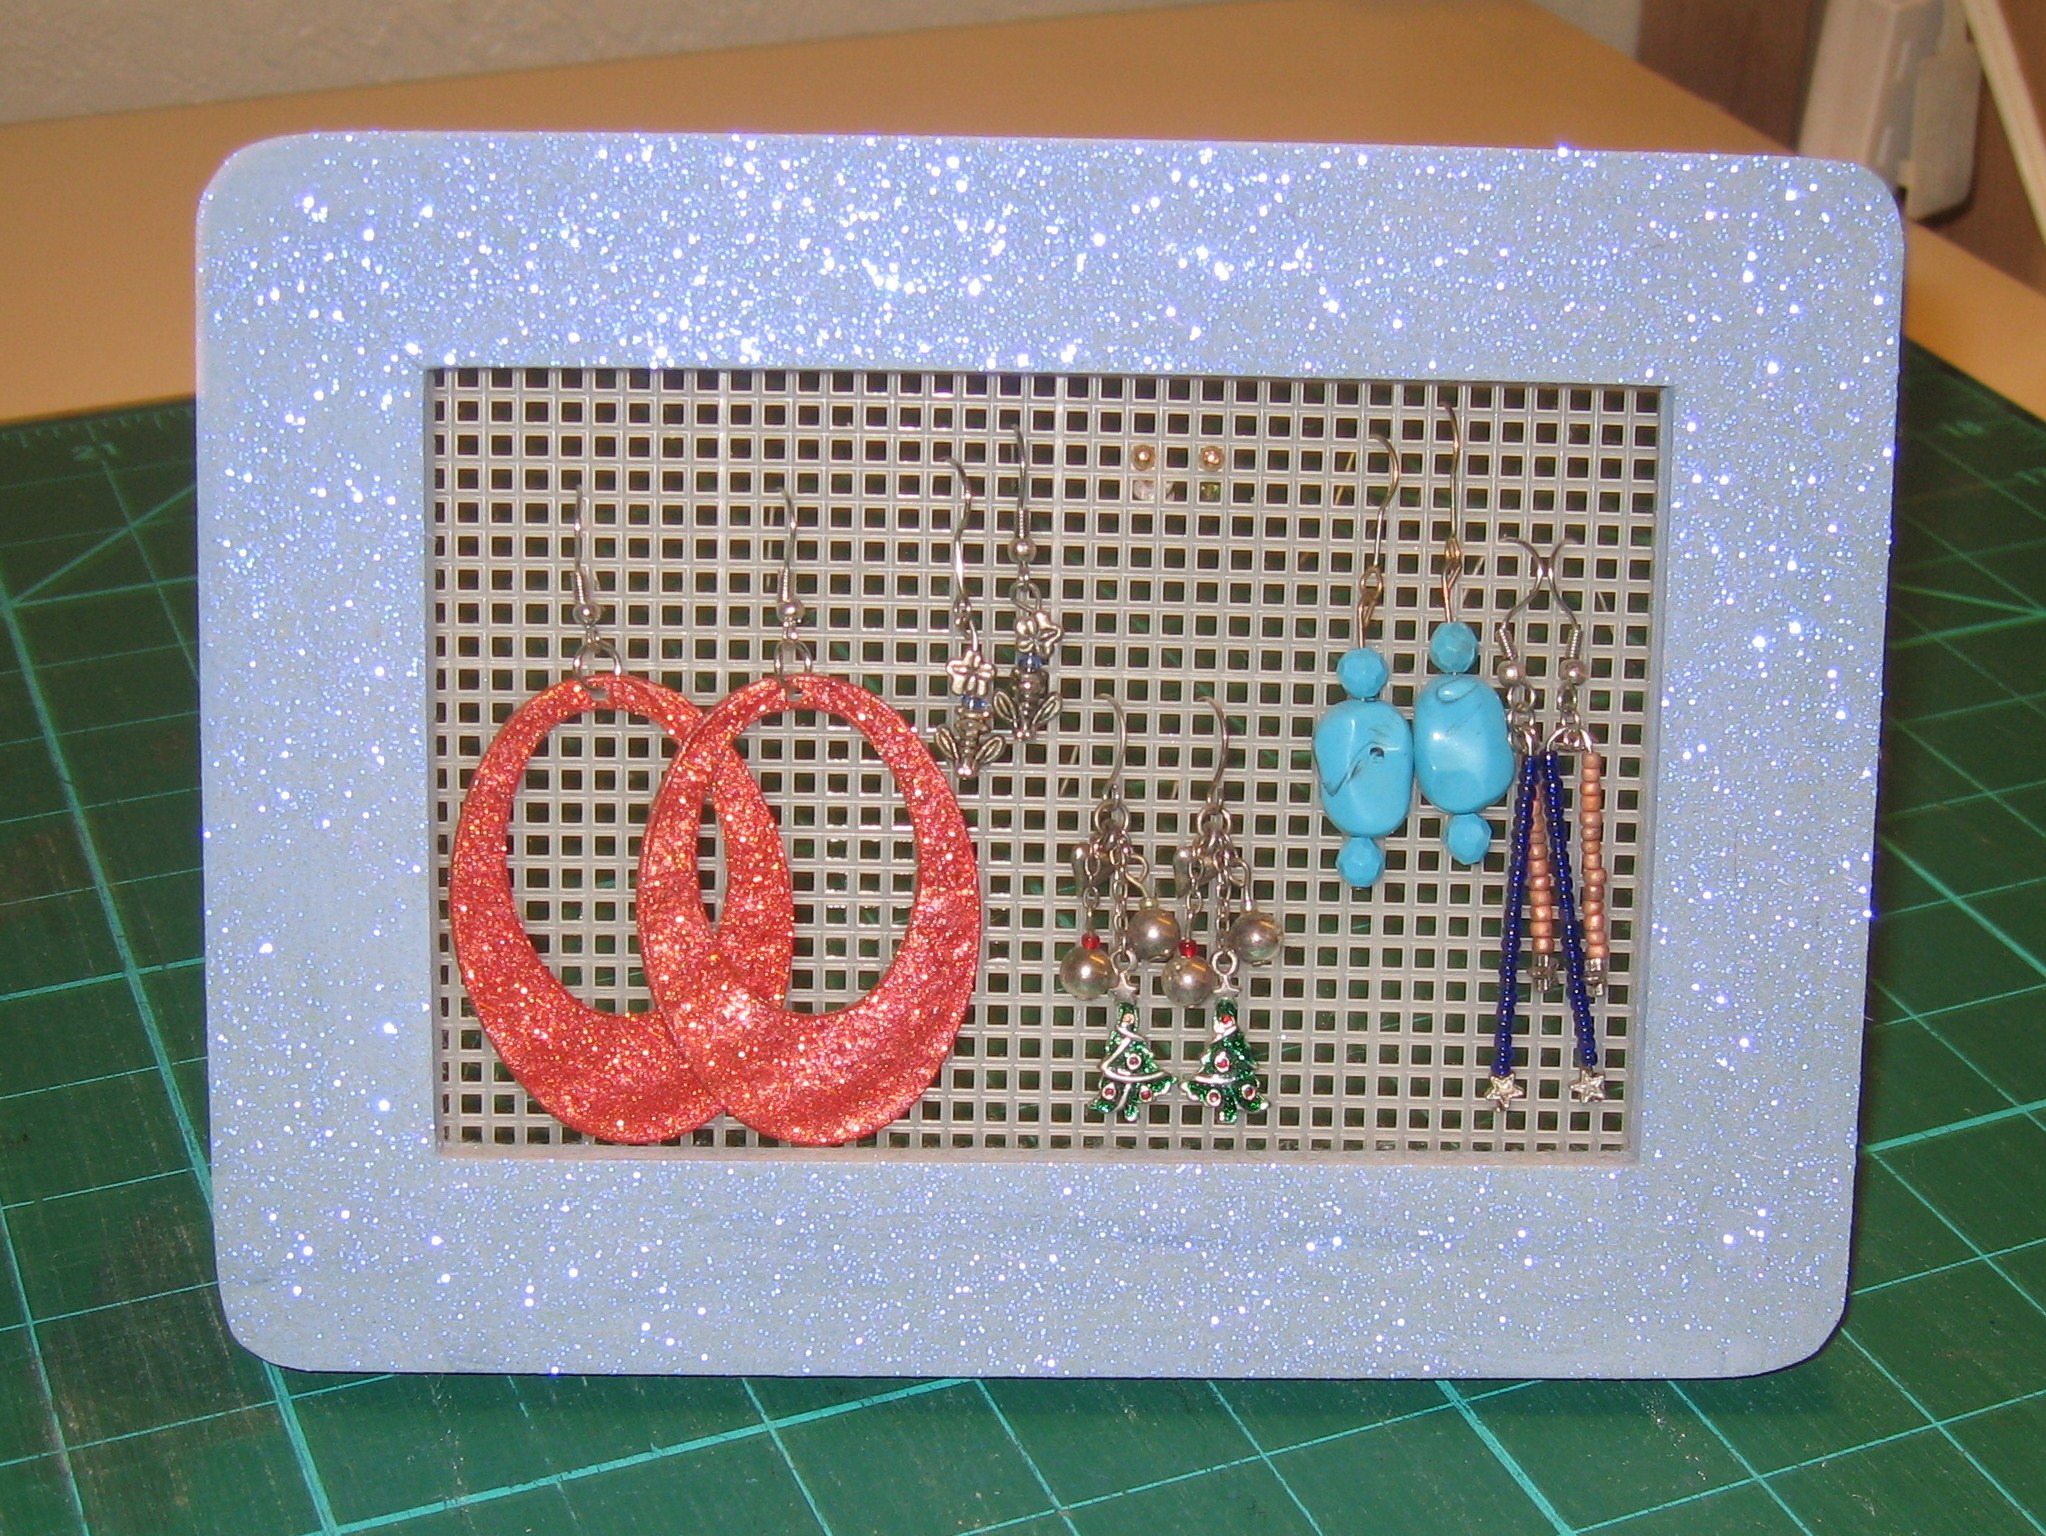
For quite a long time, I’ve used a small earring organizer to keep my studs and other small earrings that have a stem and a back. It was time for a new, bigger version so I could finally find all of my fabulous earrings!
You need:
a picture frame with no glass (recycled or raw wood)
plastic canvas
hot melt glue
scissors
ribbon
stapler (a staple gun works great if you have one) or thumb tacks
optional: paint & glitter
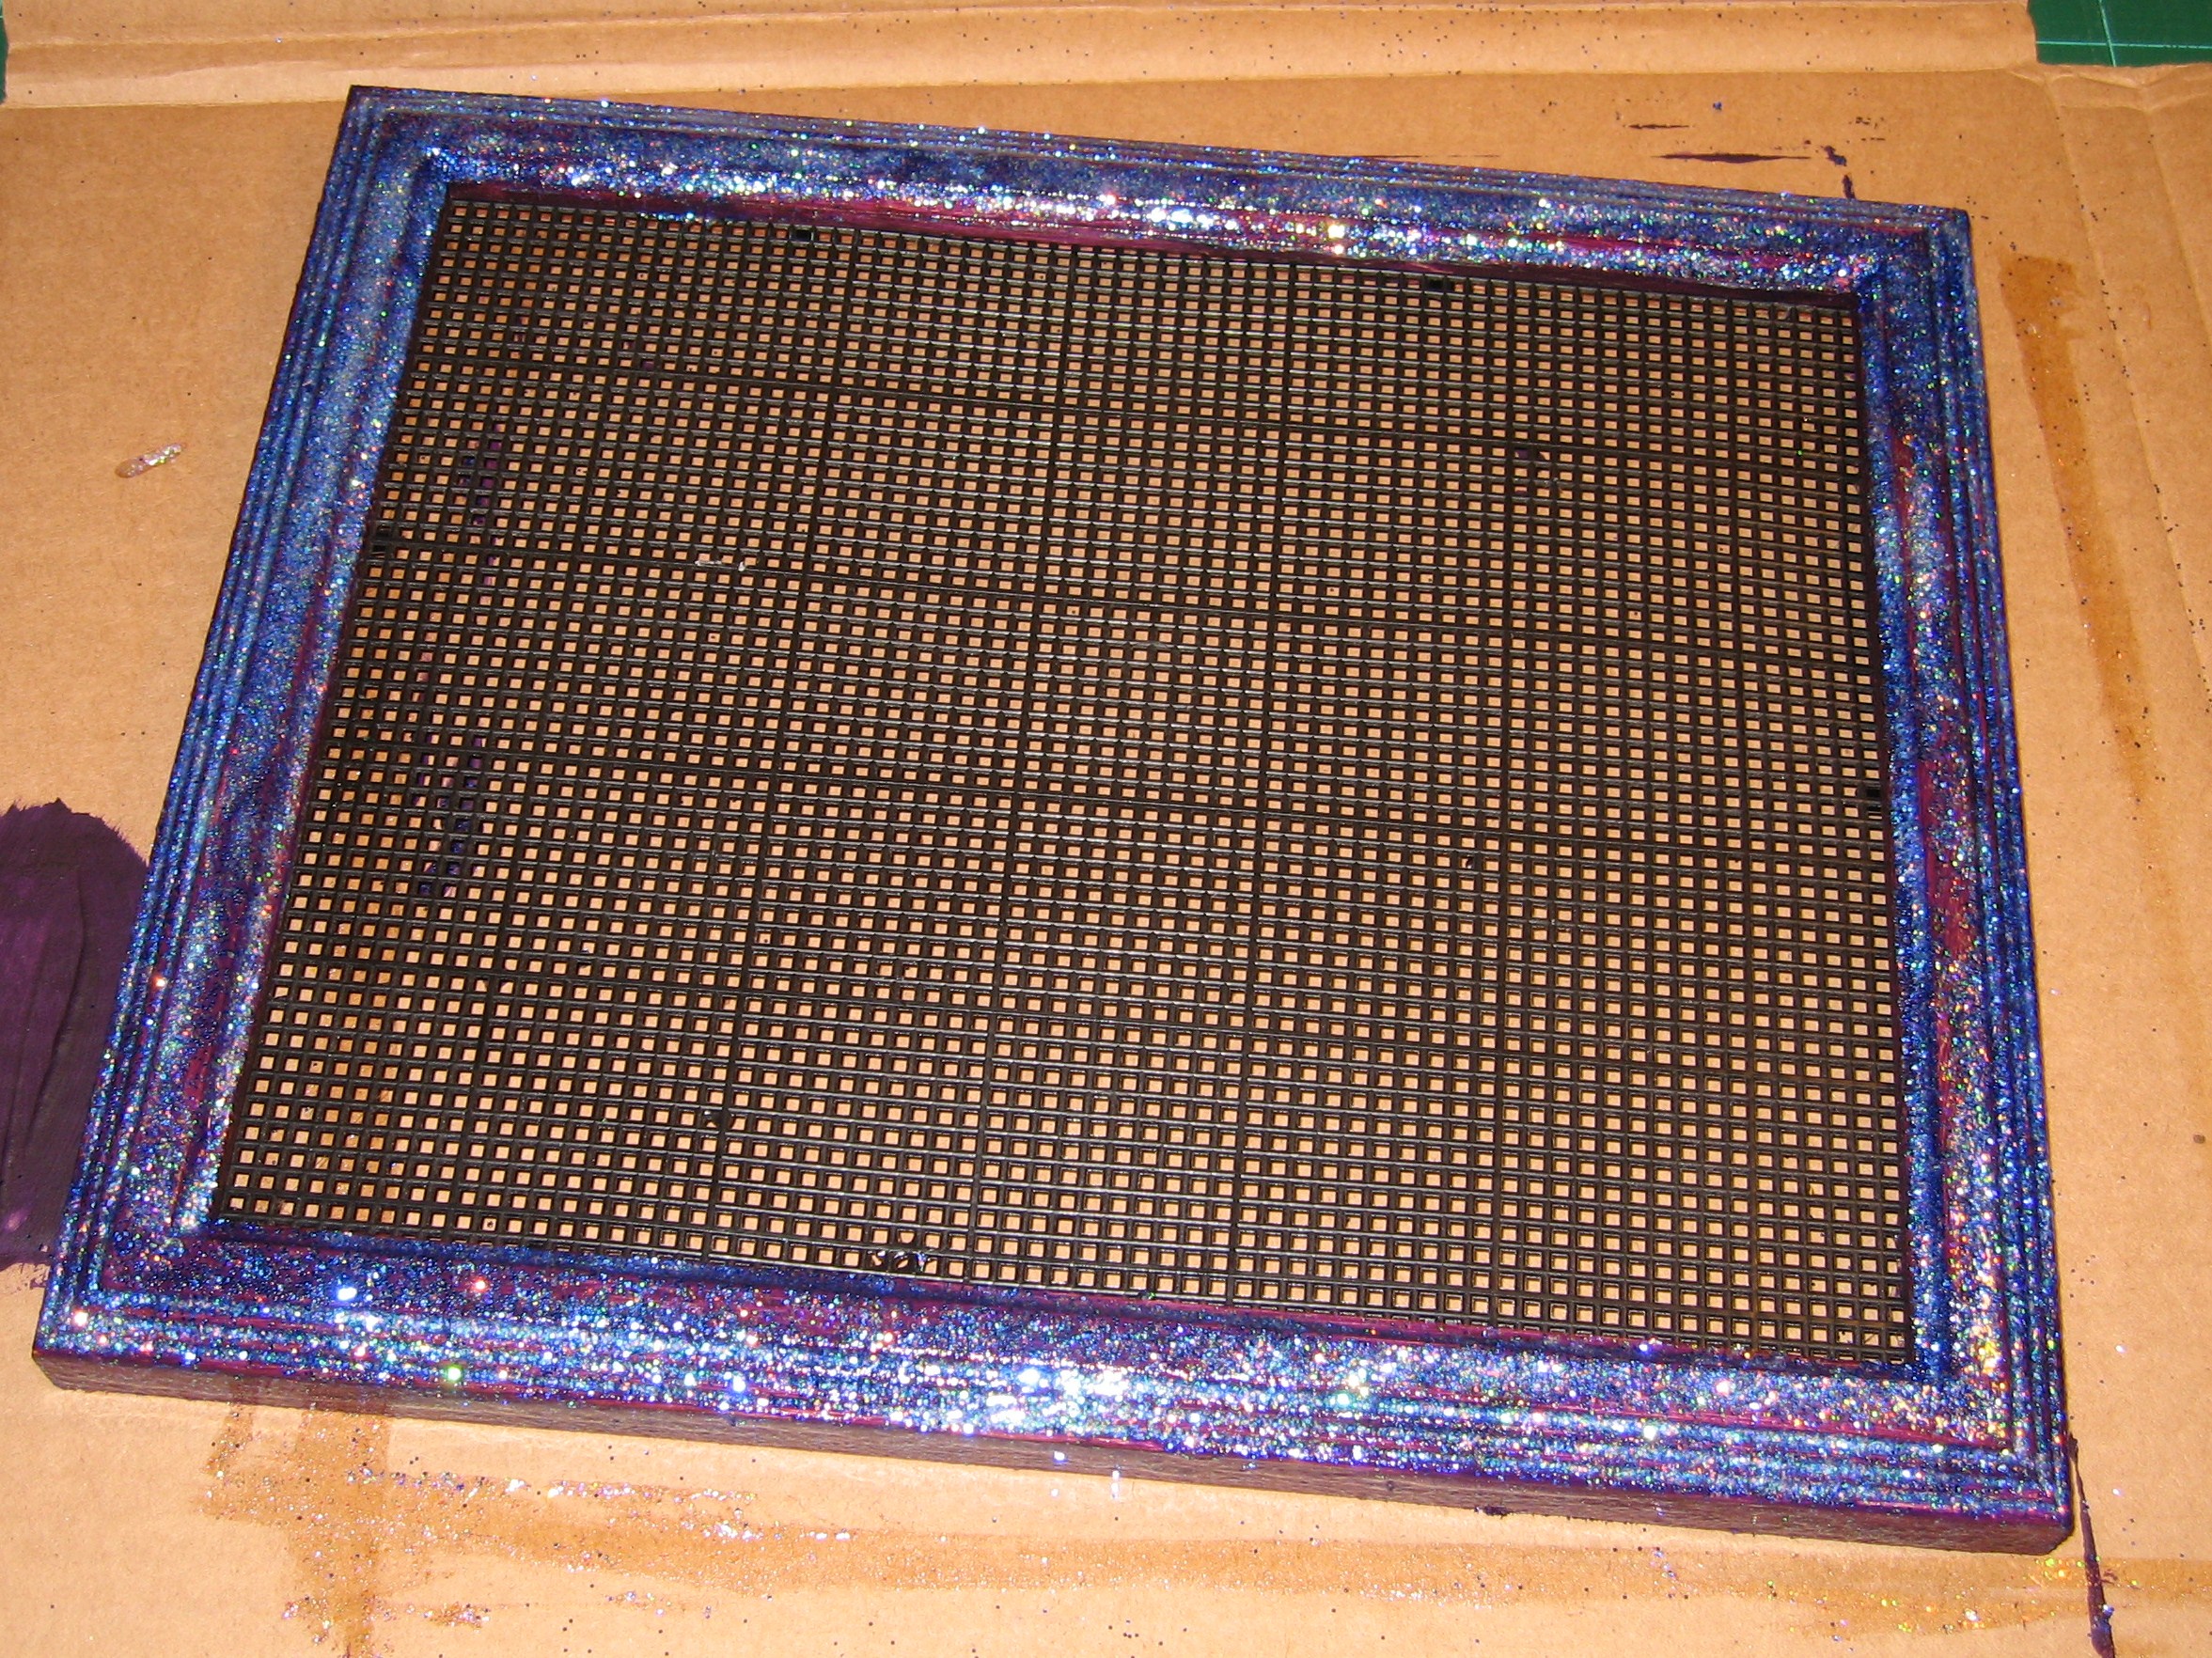
Cut the plastic canvas to fit inside your frame.
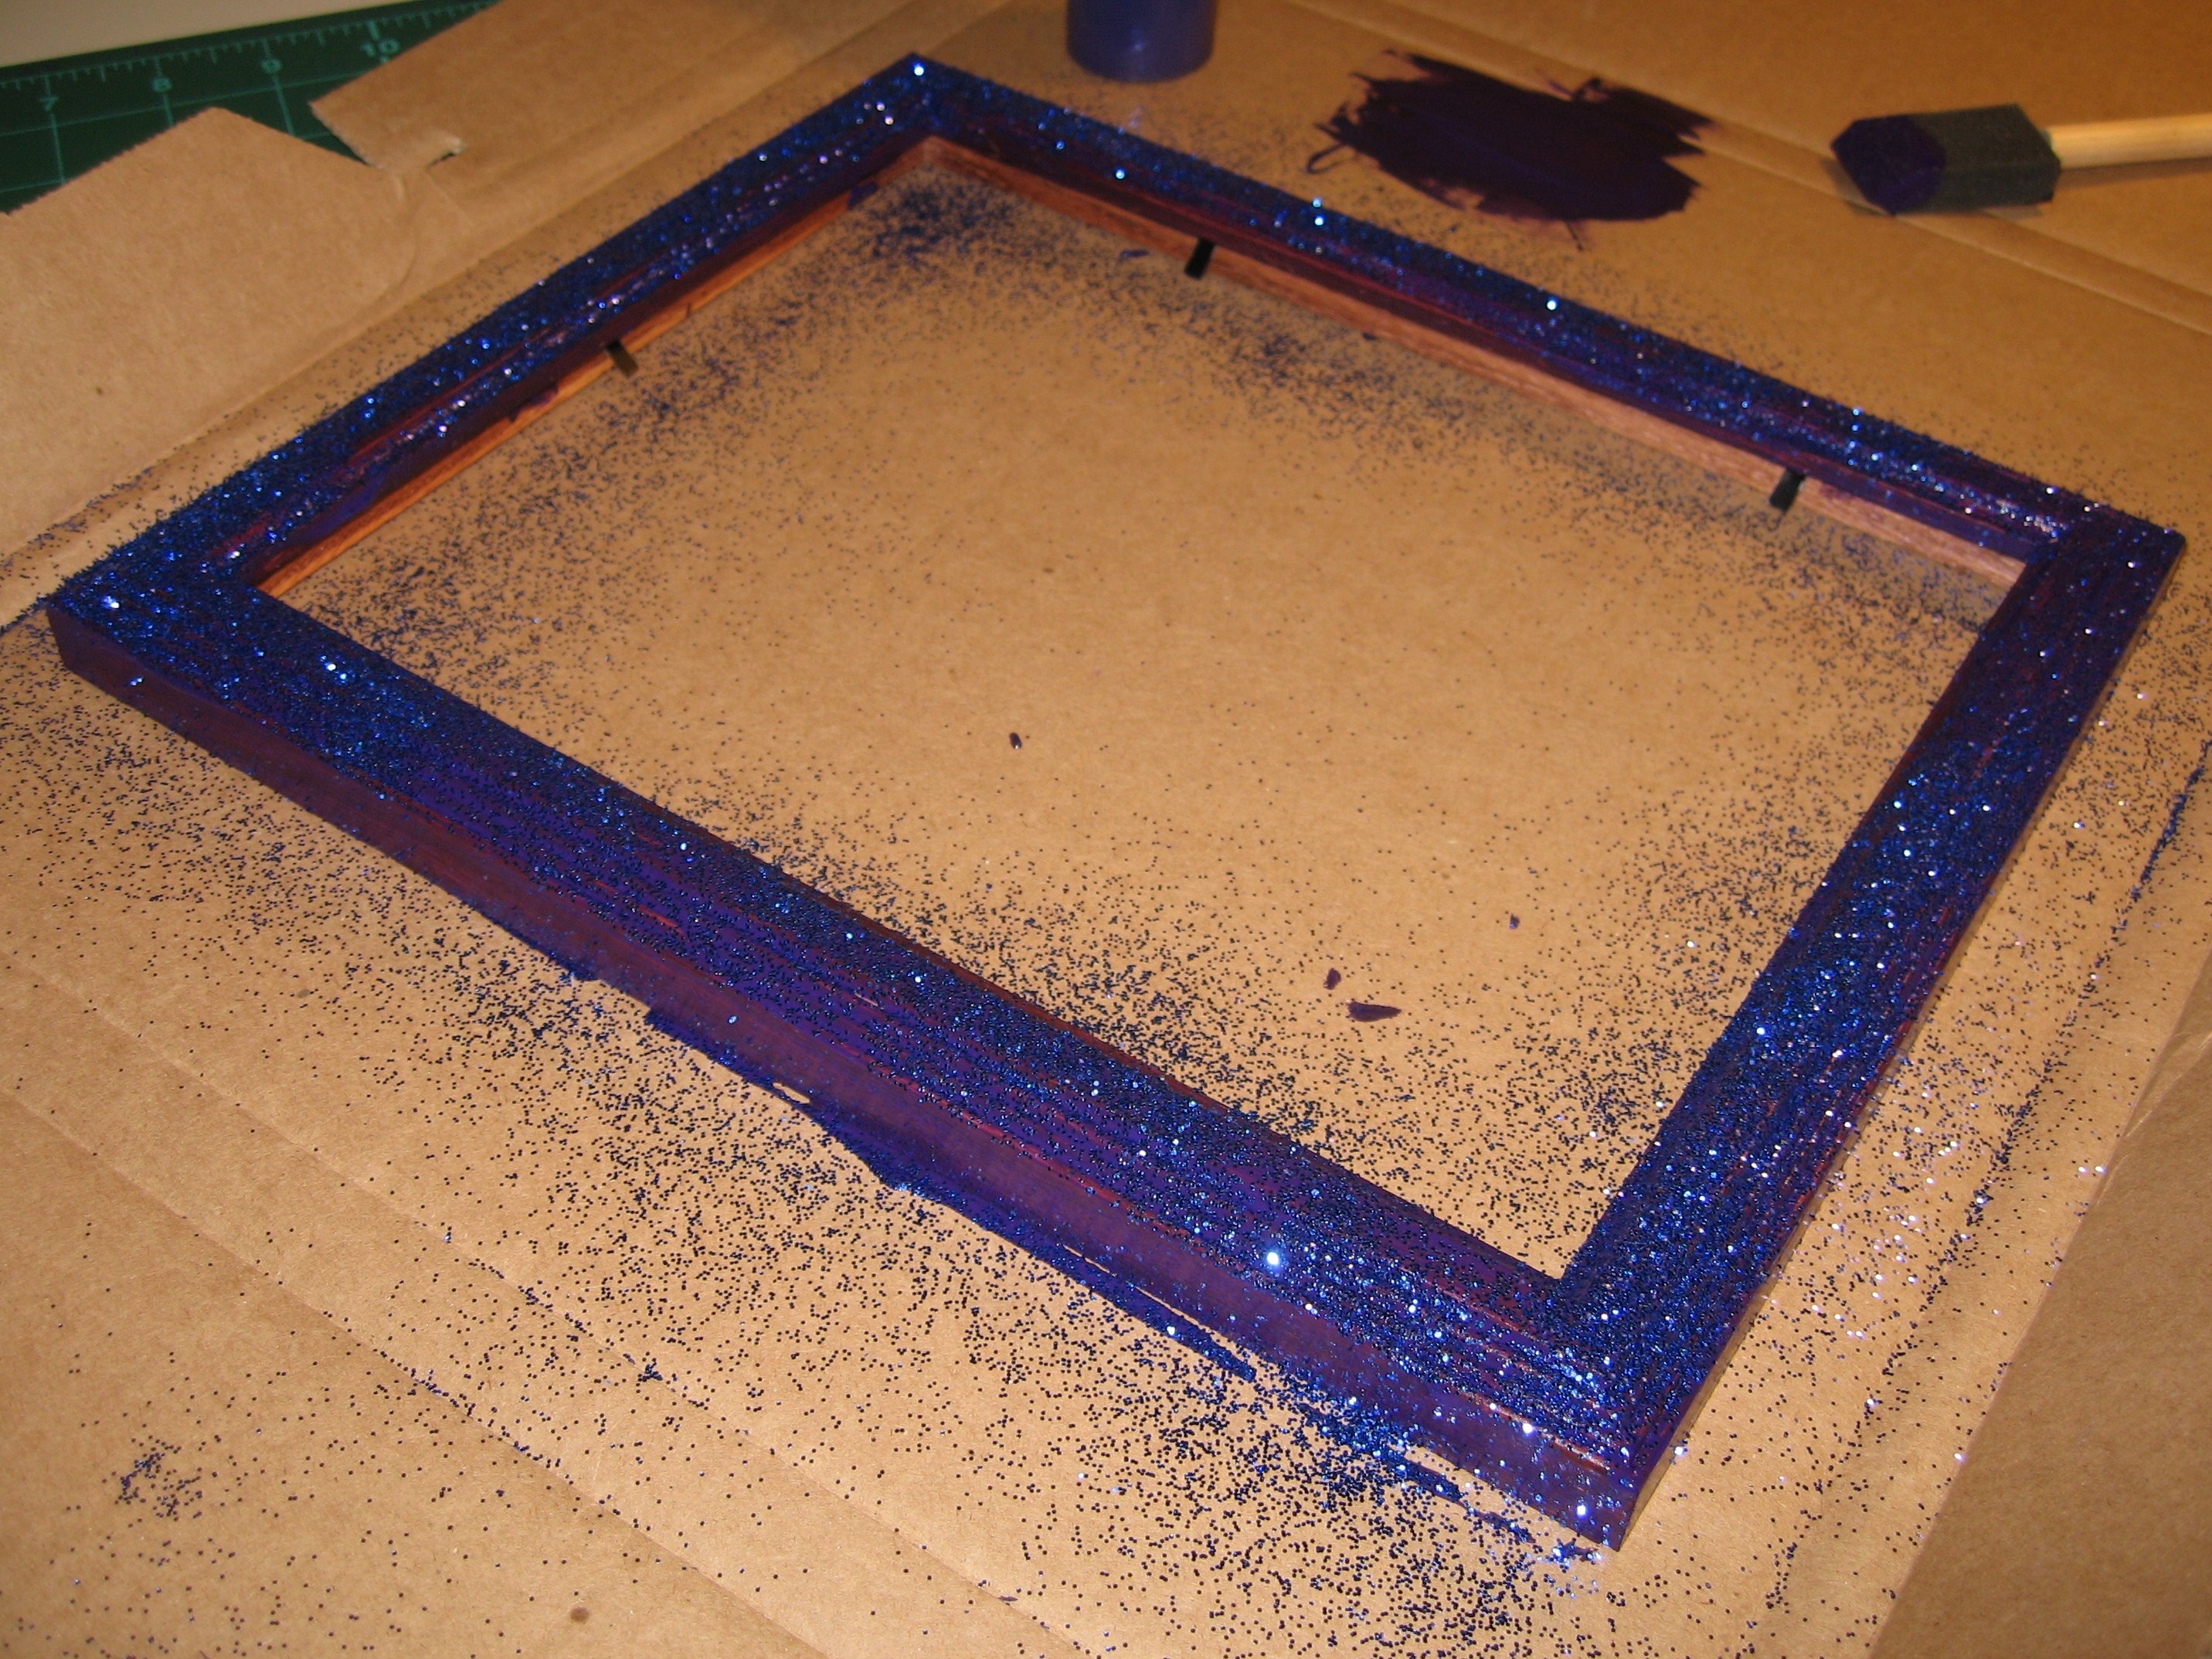
Optional: Paint the frame the color of your choice. If the frame is recycled and has a finish, you’ll need to give it a light sanding before painting.
I’m particularly fond of glitter…so I sprinkled some on my frame while it was still wet.
Once the paint and glitter are dry, place the plastic canvas inside the back of the frame. Go around all four sides with hot melt glue.
Cut a piece of ribbon long enough to reach from one corner of the frame to the other, plus a little for turning under on the ends. The length here depends on how you want your final product to look and how much of the ribbon you’d like to show. Turn the ends under and staple or tack in place.
Hang on the wall and add all of your lovely dangly earrings! Works best with French hook earrings.