Jennifer’s Best Peanut Brittle

Jennifer's Best Peanut Brittle

If I could make one candy to give away every year, it would be peanut brittle.

This is probably my most miraculous of recipes due to it’s ability to cause sheer happiness in it’s recipients.  I’ve actually made friends by sharing this at parties and functions.

Every year someone tells me that this is their favorite peanut brittle recipe, which of course gives me a reason to keep making it for them!

You’ll need a good, heavy saucepan and a candy thermometer for this.  If you’ve never owned a candy thermometer, it’s really worth having.   I recommend investing a few dollars (a very few, really!) in a good quality thermometer.  Glass thermometers are cheap, but they tend to break easily.  I have a professional metal candy thermometer that I picked up at a local restaurant supply store, but they’re easy to find online and at other stores with cooking supplies, too.

Peanut Brittle

  • 2 cups sugar
  • 1 cup light corn syrup (Golden Syrup works if you don’t have access to corn syrup)
  • 1/2 cup water
  • 2 cups raw peanuts (I like Spanish peanuts)
  • 1 teaspoon salt
  • 1 teaspoon vanilla
  • 1 tablespoon baking soda
  • real butter for greasing pan

Grease a 10″x15″ baking sheet thoroughly with butter.

Combine first five ingredients (sugar, corn syrup, water, peanuts and salt)  in heavy saucepan.  Stir using a long-handled wooden spoon.

Boil until candy thermometer reaches 293 degrees F.

Peanut Brittle in the pot

Remove from heat and cool for a couple of minutes.  Add vanilla and beat.   Sprinkle baking soda into the mixture and beat will.  It will foam and change colors, which is just what you want it to do!

Immediately pour into baking sheet.   Be very, very careful because liquid candy at high temperatures is like lava!   Make sure the baking sheet is on a towel or cooling rack because it will be extremely hot.

Allow to cool completely (time will vary, usually an hour or so)  then flip over and give it a whack!   Break the pieces up however you like, then store in an airtight container at room temperature.

Do not store peanut brittle with other candies because it will absorb moisture and become sticky, sticky, sticky.

For best results, share with friends!

more of my recipes

Photobucket

 
Sewhooked Shop | FB | SHFB | Flickr | Twitter | Bloglovin

Paper Piecing: Holly Jolly Christmas

Christmas Wall Hanging for Eric & Dominae

Last week, I shared three paper pieced patterns for Lil’ St. Nick, Mrs. Claus and Santa’s Elf.

ETA July 12, 2010 – These patterns will be available again November 2010 through the Sewhooked Shop.

Over the weekend, those three patterns were combined with a new pattern, Little Wonky Christmas Tree to give you the wall hanging shown, made for our friends, Eric & Dominae.

Little Wonky Christmas Tree

Little Wonky Christmas Tree

5″ paper pieced pattern
©Jennifer Ofenstein
http://www.sewhooked.org

Christmas Wall Hanging for Eric & Dominae

Christmas Wall Hanging for Eric & Dominae

The wall hanging was created by sewing the blocks two by two with a 1.5″ strip of fabric in between the two rows.

The border is also 1.5″, in the background fabric.

Echo quilted by machine.

The star on top of the tree (which was received as part of a craftster swap!) is attached with fabric glue.

Hand stamped label on the back and large jump rings for hanging.

find more paper pieced patterns on sewhooked

As always, if you make any pattern or craft from sewhooked,  I’d love to see a photo. Email me or add it to the Friends of sewhooked flickr group.

Happy crafting

also posted on craftster, cut out + keep and deviant art

Recipe: Bon Bon; Bon Bon


Coconut Bon Bons

O! Christmas Candy!  My house smells like chocolate…and peanut butter…and coconut…and sugar and and… Christmas!

I grew up with my mom making Coconut Bon Bons (which we called Bon Bons) every Christmas.  My mom still makes them and it’s one of the candies I make that my friends start asking about in mid-November.

Peanut Butter Bon Bons are a more recent family favorite.  My hubby calls them Peanut Butter Cups on Steroids.   It’s a fairly apt description of spherical pb and chocolate goodness!

Coconut Bon Bon Filling:

  • 2 pounds (or 7 1/2 cups) of powdered confectioner’s sugar
  • 3 cups coconut
  • 14 oz. sweetened condensed milk
  • 1/2 cup butter, room temperature
  • 2 cups of chopped pecans

Chocolate Coating:

12 oz of semi-sweet chocolate chips
1/4 pound of food grade paraffin (optional – but the chocolate will look nicer and hold together better if you use it)


Mix all ingredients thoroughly.   The mixture should be firm and hold together.  If not, add a little more powdered sugar.


Using a cookie dough scoop, scoop out balls.  Round them with your hands and place on a cookie sheet lined with parchment paper.  Refrigerate for about an hour.

Melt the chocolate chips and paraffin in a double boiler over low heat.  Using a toothpick or skewer, dip each of the coconut balls into the chocolate and place back on the parchment paper.  Let stand to room temperature and store in an airtight container (unless you eat them all first!).


Peanut Butter Bon Bons

PB Bon Bons Filling:

  • 2 cup creamy peanut butter
  • 1/2 cup butter, room temperature
  • 3 3/4 cup powdered confectioner’s sugar

Chocolate Coating:

  • 6 oz of semi-sweet chocolate chips
  • 1/8 pound of food grade paraffin
  • (if you make Coconut Bon Bons, too, you’ll have plenty of chocolate coating left for these, too)


Mix peanut butter, butter and sugar.  It will look crumbly, but it’ll hold together.


Roll into balls place on parchment paper.  Refrigerate until firm, about 1 hour.    Melt the chocolate chips and paraffin in a double boiler over low heat.  Using a toothpick or skewer, dip each of the coconut balls into the chocolate and place back on the parchment paper.  Let stand to room temperature and store in an airtight container.

Look for more holiday recipes later in the month!

Add your Sewhooked-related photos to my flickr group and you might be featured in a future post.

Photobucket


Sewhooked Shop | FB | SHFB | Flickr | Twitter | Bloglovin

Guest Designer Spotlight: Julie Pyka

Patterns designed by Julie Pyka

click on photo for pattern

This week in the Guest Designer Spotlight is Julie Pkya.  Julie is a quilting gem I met through hp_paperpiecing.  The first block Julie shared with me was her Dobby, which remains one of my favorites she’s designed.  Her wonderful Howler block was the winner of the hp_paperpiecing Design A Harry Potter Paper Pieced Block Challenge.

Photobucket

First name and where you’re from: Julie- San Diego, California

Website/blog/online store or other place where your patterns or photos of your work can be found? – patterns/pictures on sewhooked and just photos on yahoogroup, PCPiecers.

How long have you been paper piecing and/or quilting?  – I can’t remember when I first started quilting, but really the last two years I have become a more serious sewer. I started paper piecing this last summer. I made my first paper piece quilt called Crazy Birds.  (http://quiltmaker.com/currentissue/qatf13/project1/) and of course the Harry Potter blocks.

What do you use your own blocks for? – I make quilts that are usually lap size.

When did you start designing? – This past summer I started designing portraits of presidents.

Was there a particular inspiration to draw your first pattern? – I was making a quilt top with my mom and grandmother were you take fat quarters and stack them together and for the number of fabrics the number of cuts you make. Then you shuffle and piece them back together. That’s when it dawned on me that this is exactly how paper piecing works.

Do you remember what your first design was? – My first pattern I designed was President Benjamin Harrison. I am planning on designing all of the United States presidents, but it will be awhile before I get them all drawn out.

Photobucket

Do you have a favorite among your own designs? My favorite pattern is the Howler I designed for the September challenge.

How has the online community changed the way you craft/quilt/design, etc.? – A few Yahoo groups and Sewhooked is really helping me grow. It wasn’t before joining and being active within these online communities that I have tried new techniques and expanded the level of difficulity. Now instead of whiping together straight sewing that takes a weekend I am putting a lot of work and have a lot more pride in my finished pieces.

What do you use to design your patterns?  Paper and pencil, a specific software, etc. – I start with pencil in paper and scan them into Adobe Photoshop CS. The online tutorial that you created really helped me figure out how to make it clean and perfessional. THANX!

find more of Julie’s patterns on the sewhooked Guest Designer Page

Happy Crafting!

Easy Big Foot Slippers

Easy Big Feet Slippers

add this pattern to your Ravelry queue

Printable Pattern

My hubby is tall…very tall, almost six and a half feet tall.  I adoringly refer to him as The Big Guy.  I’m 5’5″, so I guess you can see what I’d call him that.

He has big feet, too.

He loves slippers and I spent years making slippers from traditional patterns for him, but they blew out on him like no one’s business.  You just can’t put a big man in a pair of slippers made with one strand of yarn.  They don’t last.

According to my original pattern, I designed the Big Foot Slippers back in 2000.  I’ve since made a dozen or so pairs, altering here and there for smaller feet.  These are easy to make and work up quickly because they’re made with three strands of yarn.  I use acrylic worsted because it’s easy to wash and holds up well to the wear and tear of a big man wearing slippers!

  • 3 colors of worsted weight acrylic yarn
  • “N” hook
  • yarn needle

Three yarns are held together throughout.

Round 1 – ch 6, join with sl st into ring, ch 3, 14 dc in ring

Round 2 – ch 3, 1 dc in join (1 dc, 2 dc around), join with sl st

Round 3 to 8 – ch 3, dc around, join with sl st

Round 9 to 14 – ch 3, dc around, don’t join, ch 3 turn (except last round). Note – You can add more or less rows here, depending on the size of the foot you’re crocheting for. To finish, whip stitch up the back using the outside loops only. Finish off.

Optional: Evenly sc around the slipper opening, join with a sl st, finish off.

Join the Sewhooked Facebook Group for community, support, & prizes!


signature-2016

Paper Piecing: A little more Christmas

Lil’ St. Nick was such a hit that I had to give him some friends!  I hope you like Mrs. Claus and Santa’s Elf just as much.

While I’m here, I’ll let you in on a little secret. I rarely design a pattern with a final project in mind.   I draw whatever makes me happy and it ends up being wherever it needs to be.

Today, it’s Christmas!

5″ paper pieced patterns
©Jennifer Ofenstein
http://www.sewhooked.com

Santa's Elf
Santa’s Elf

Mrs. Claus
Mrs. Claus

ETA July 12, 2010 – These patterns will be available through the Sewhooked Shop November 2010..

For more paper pieced patterns, be sure to visit sewhooked.

Just for fun, I created a Christmas Quilts group over on flickr.  Post yours and oogle, too!

As always, if you make any pattern or craft from sewhooked,  I’d love to see a photo. Email me or add it to the Friends of Sewhooked flickr group.

Happy crafting

also posted on craftster

Paper Piecing: Lil’ St. Nick

Lil' St. Nick

Lil’ St. Nick

5″ paper pieced pattern
©Jennifer Ofenstein
http://www.sewhooked.org

This adorable wee Santa jumped right out of my head today.  I carried him all through the supermarket, telling him to hush, we’d go home soon.  The moment the last grocery was put away, my laptop was out, Photoshop fired up, and Lil’ St. Nick was having his say.

I love the way he turned out and I hope he puts you in the holiday spirit!

As always, if you make any pattern or craft from sewhooked,  I’d love to see a photo. Email me or add it to the Friends of Sewhooked flickr group.

Happy crafting

also posted on craftster

Blanket Stitched Christmas Stocking Ornament

December is almost here and that means a couple of things for my family. 

We eat too much, get to see family we haven’t seen for ages, and we craft.  While crafting in itself is a daily thing for us, December crafting is different.  We make ornaments for friends, family and ourselves.  Just something about the cold weather, hot chocolate and waiting for Santa makes the crafting a little bit more special.

On that note, today’s craft is an old favorite of mine.  It was originally designed to be an easy ornament to make during my kiddos’ elementary school days.  I wanted something that was inexpensive, took few materials and would be easy to teach kids how to do.

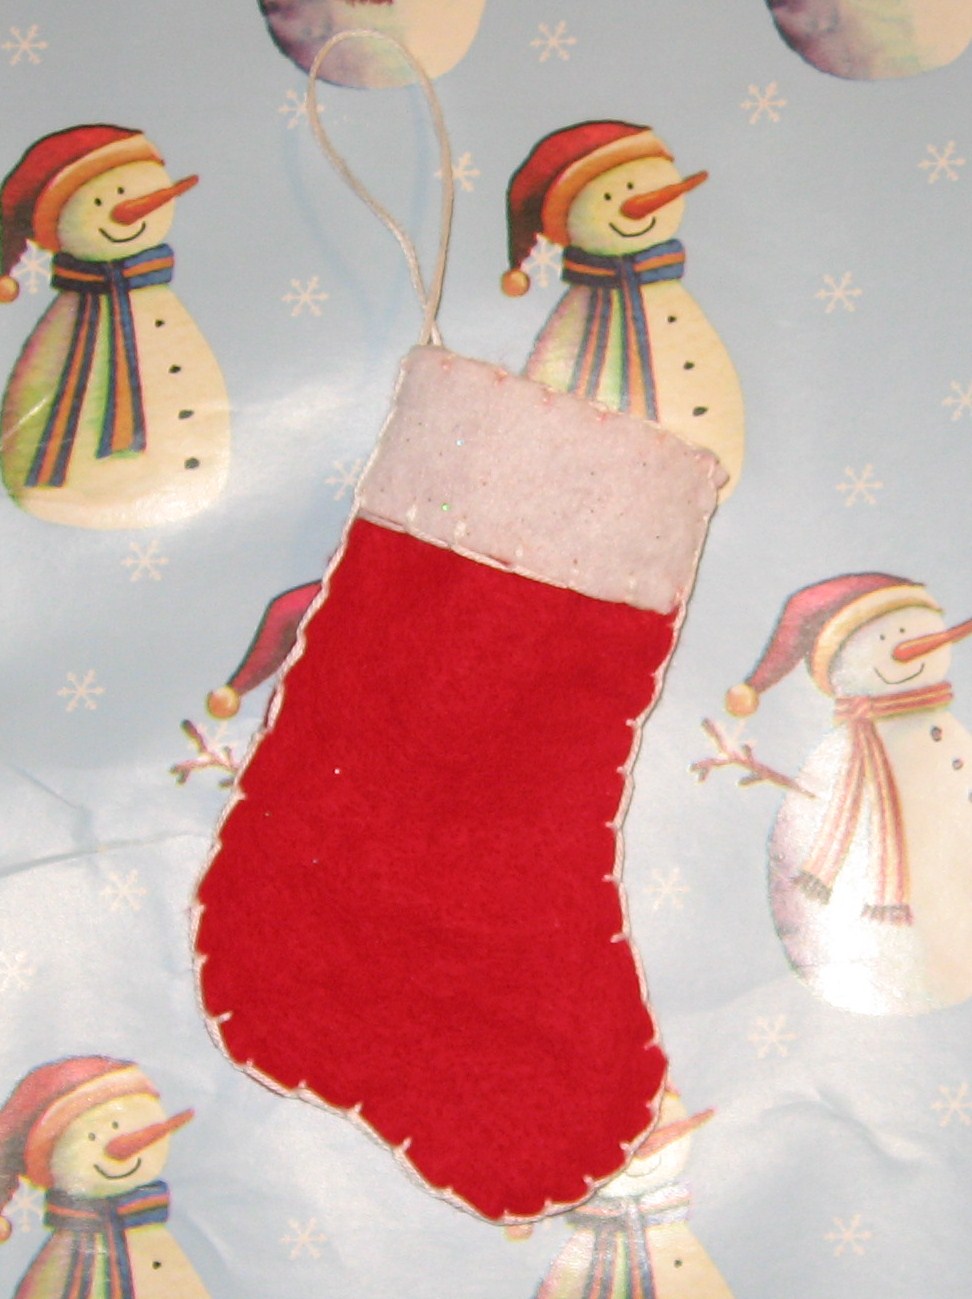
This simple blanket stitched Christmas Stocking is all of these things.  The knots might take a little adult assistance, but other than that, it’s a craft easy enough for anyone old enough to thread a needle!

Make it as is and you’ll have a 4″ stocking ornament.  Enlarge for a larger stocking; personalize, decorate or embellish!

Supplies:

  • felt stocking pattern (free to print or save)
  • felt in two colors (I used red and sparkly white)
  • scissors
  • pattern
  • embroidery floss
  • needle with a large eye
  • ruler or ruler and rotary cutter

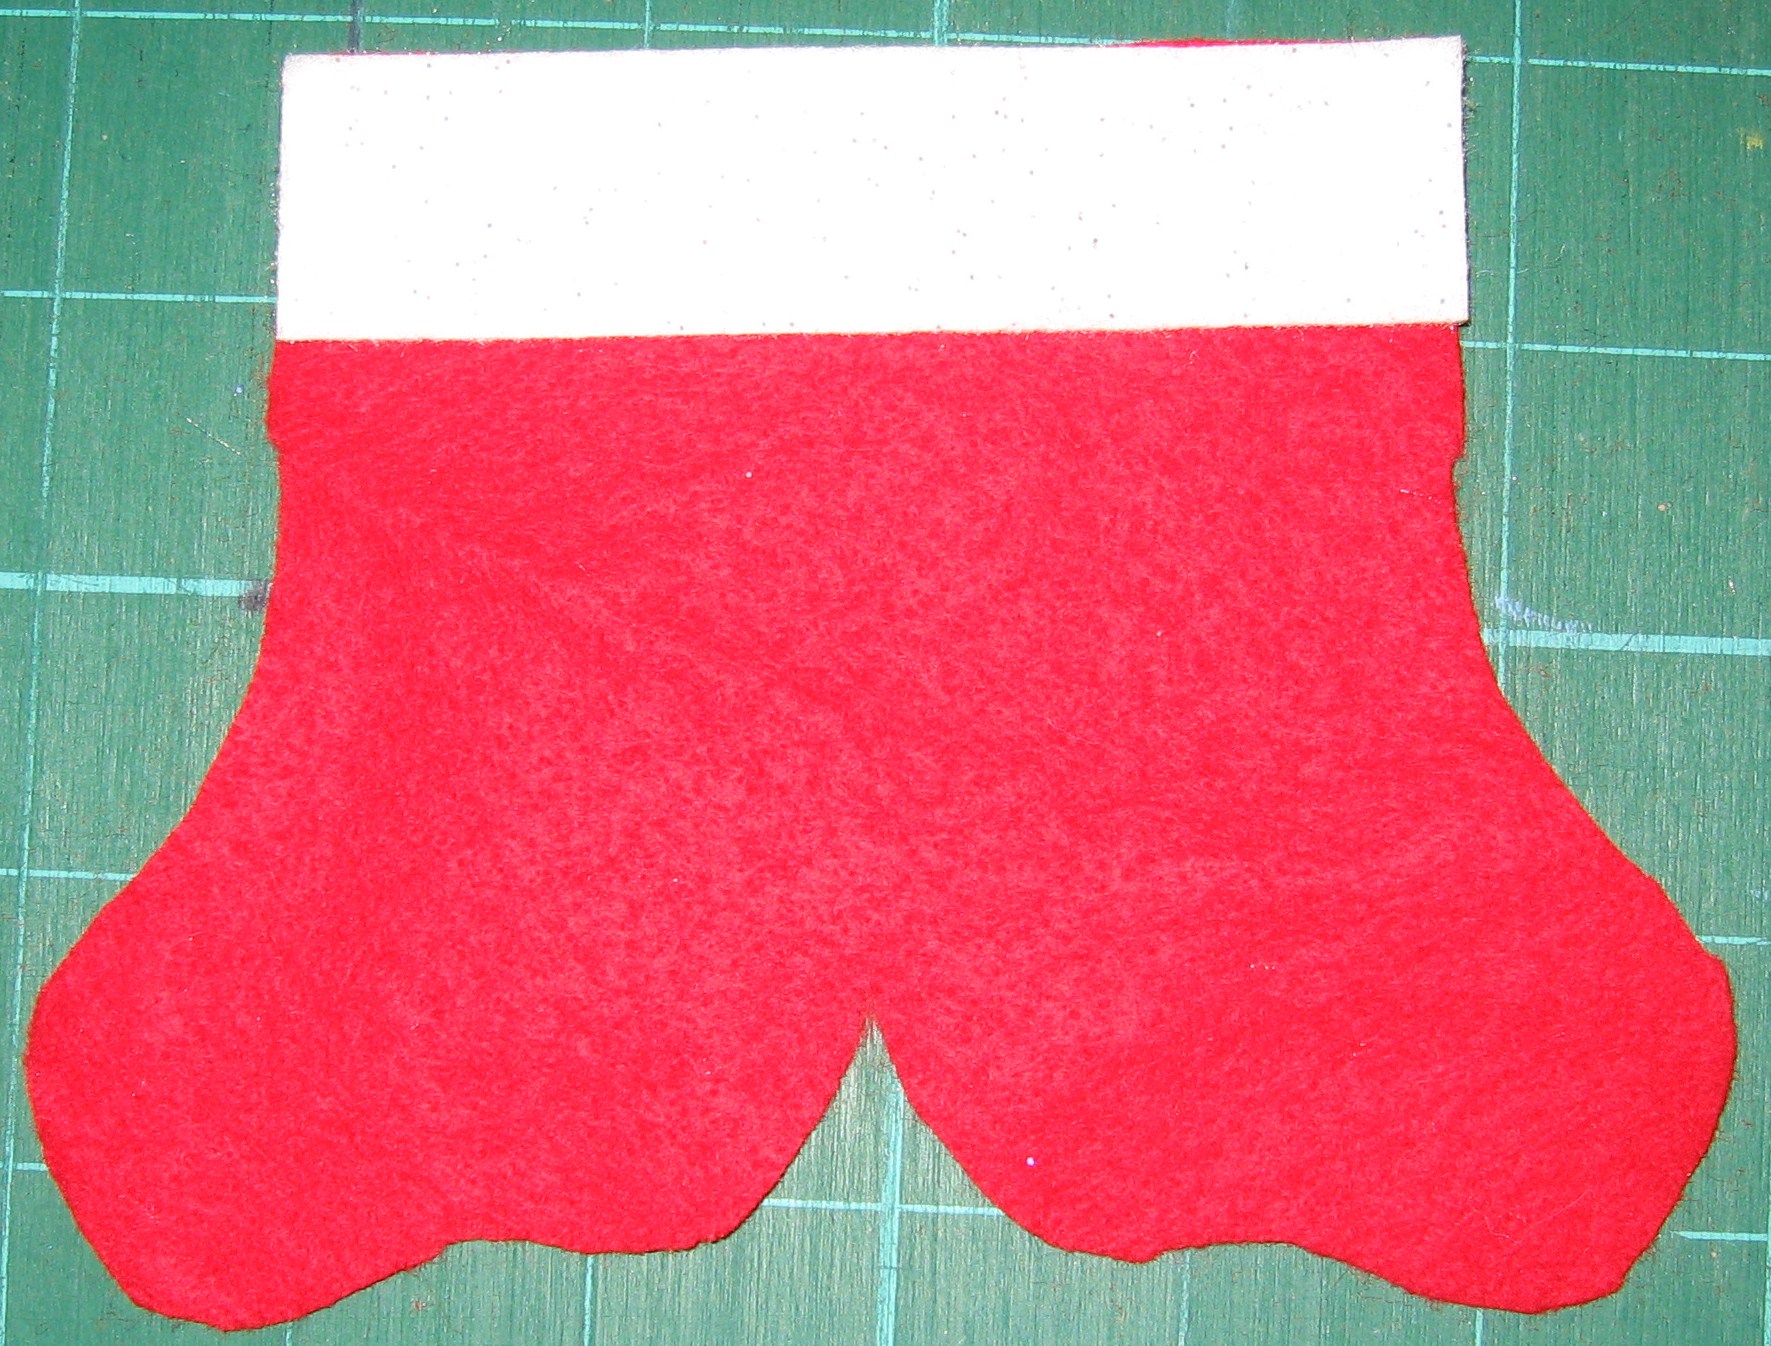
Cut pattern on the fold of red felt.
Cut a strip of white felt 1 ” wide by long enough to go across both sides of stocking (4″ shown).

Align white felt across top of red so that the tops are flush.

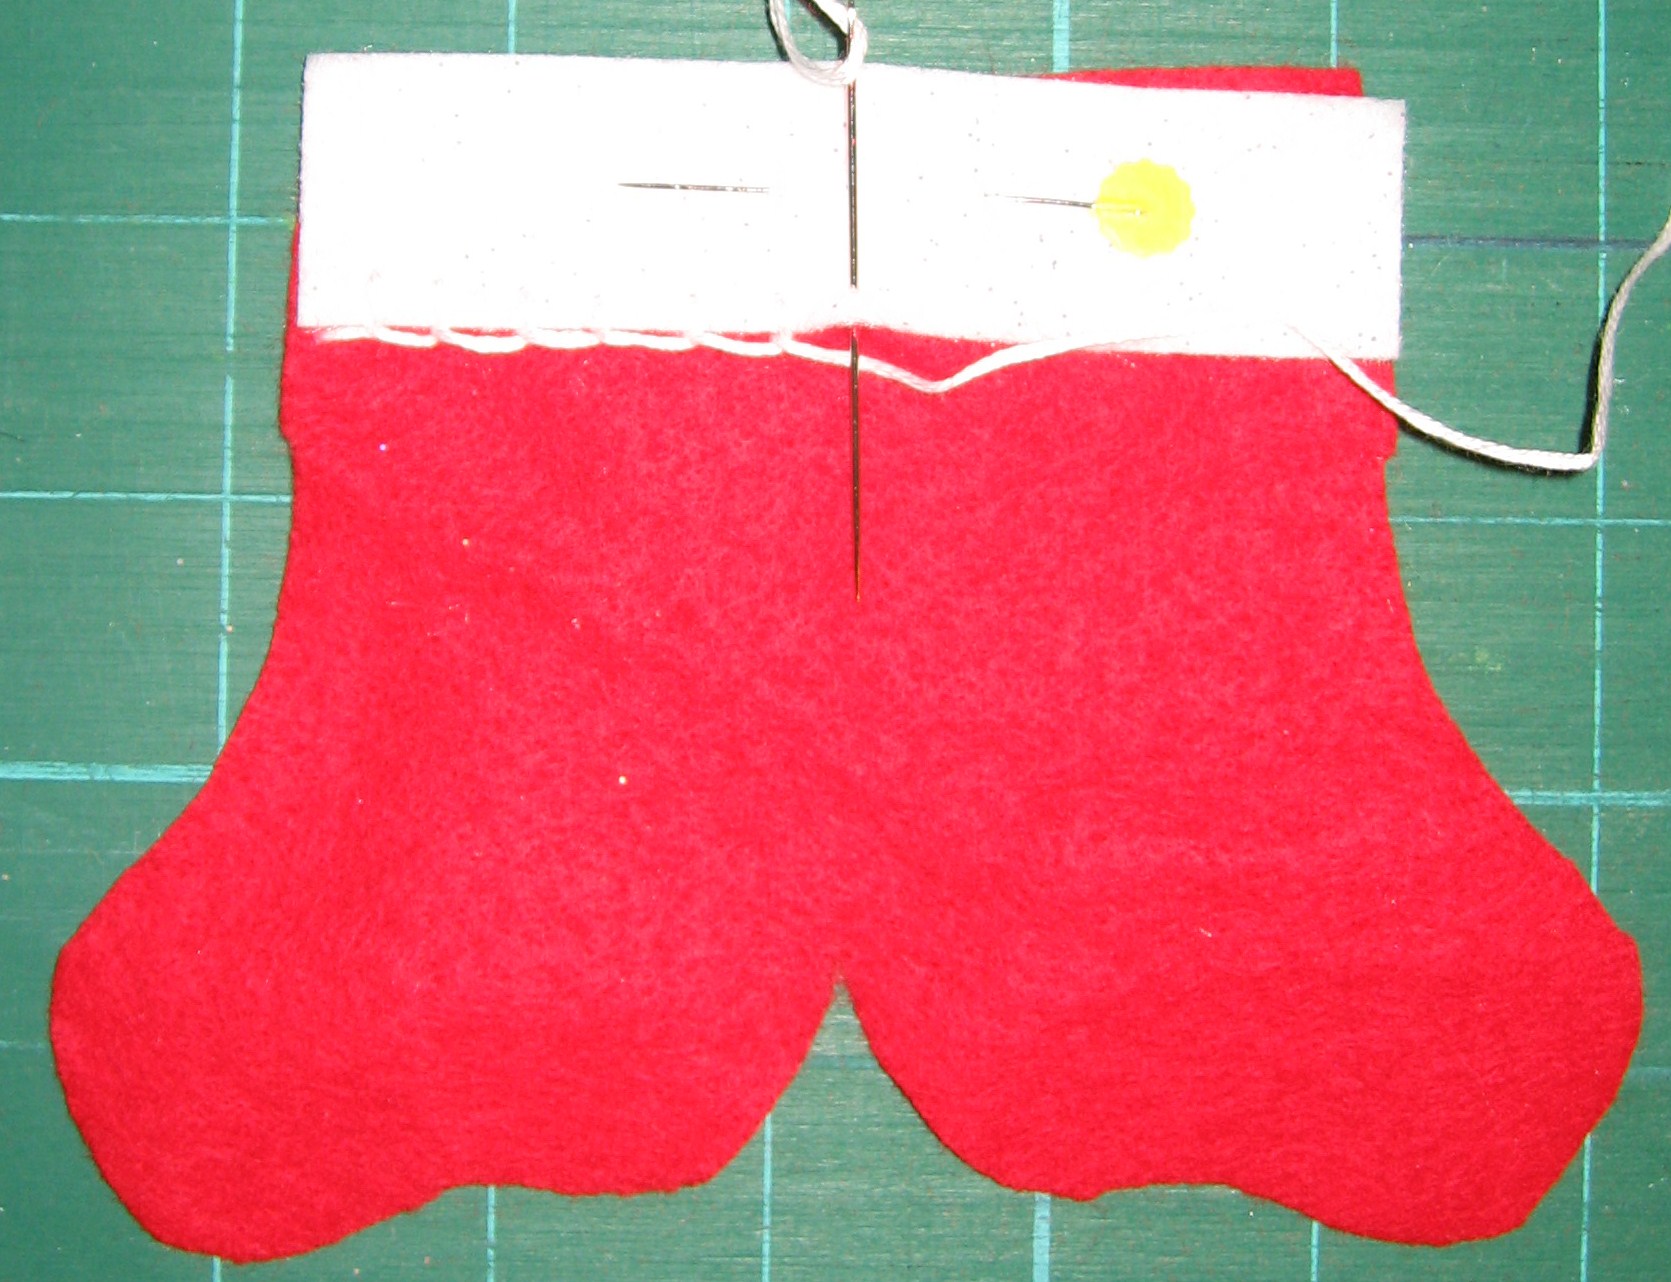
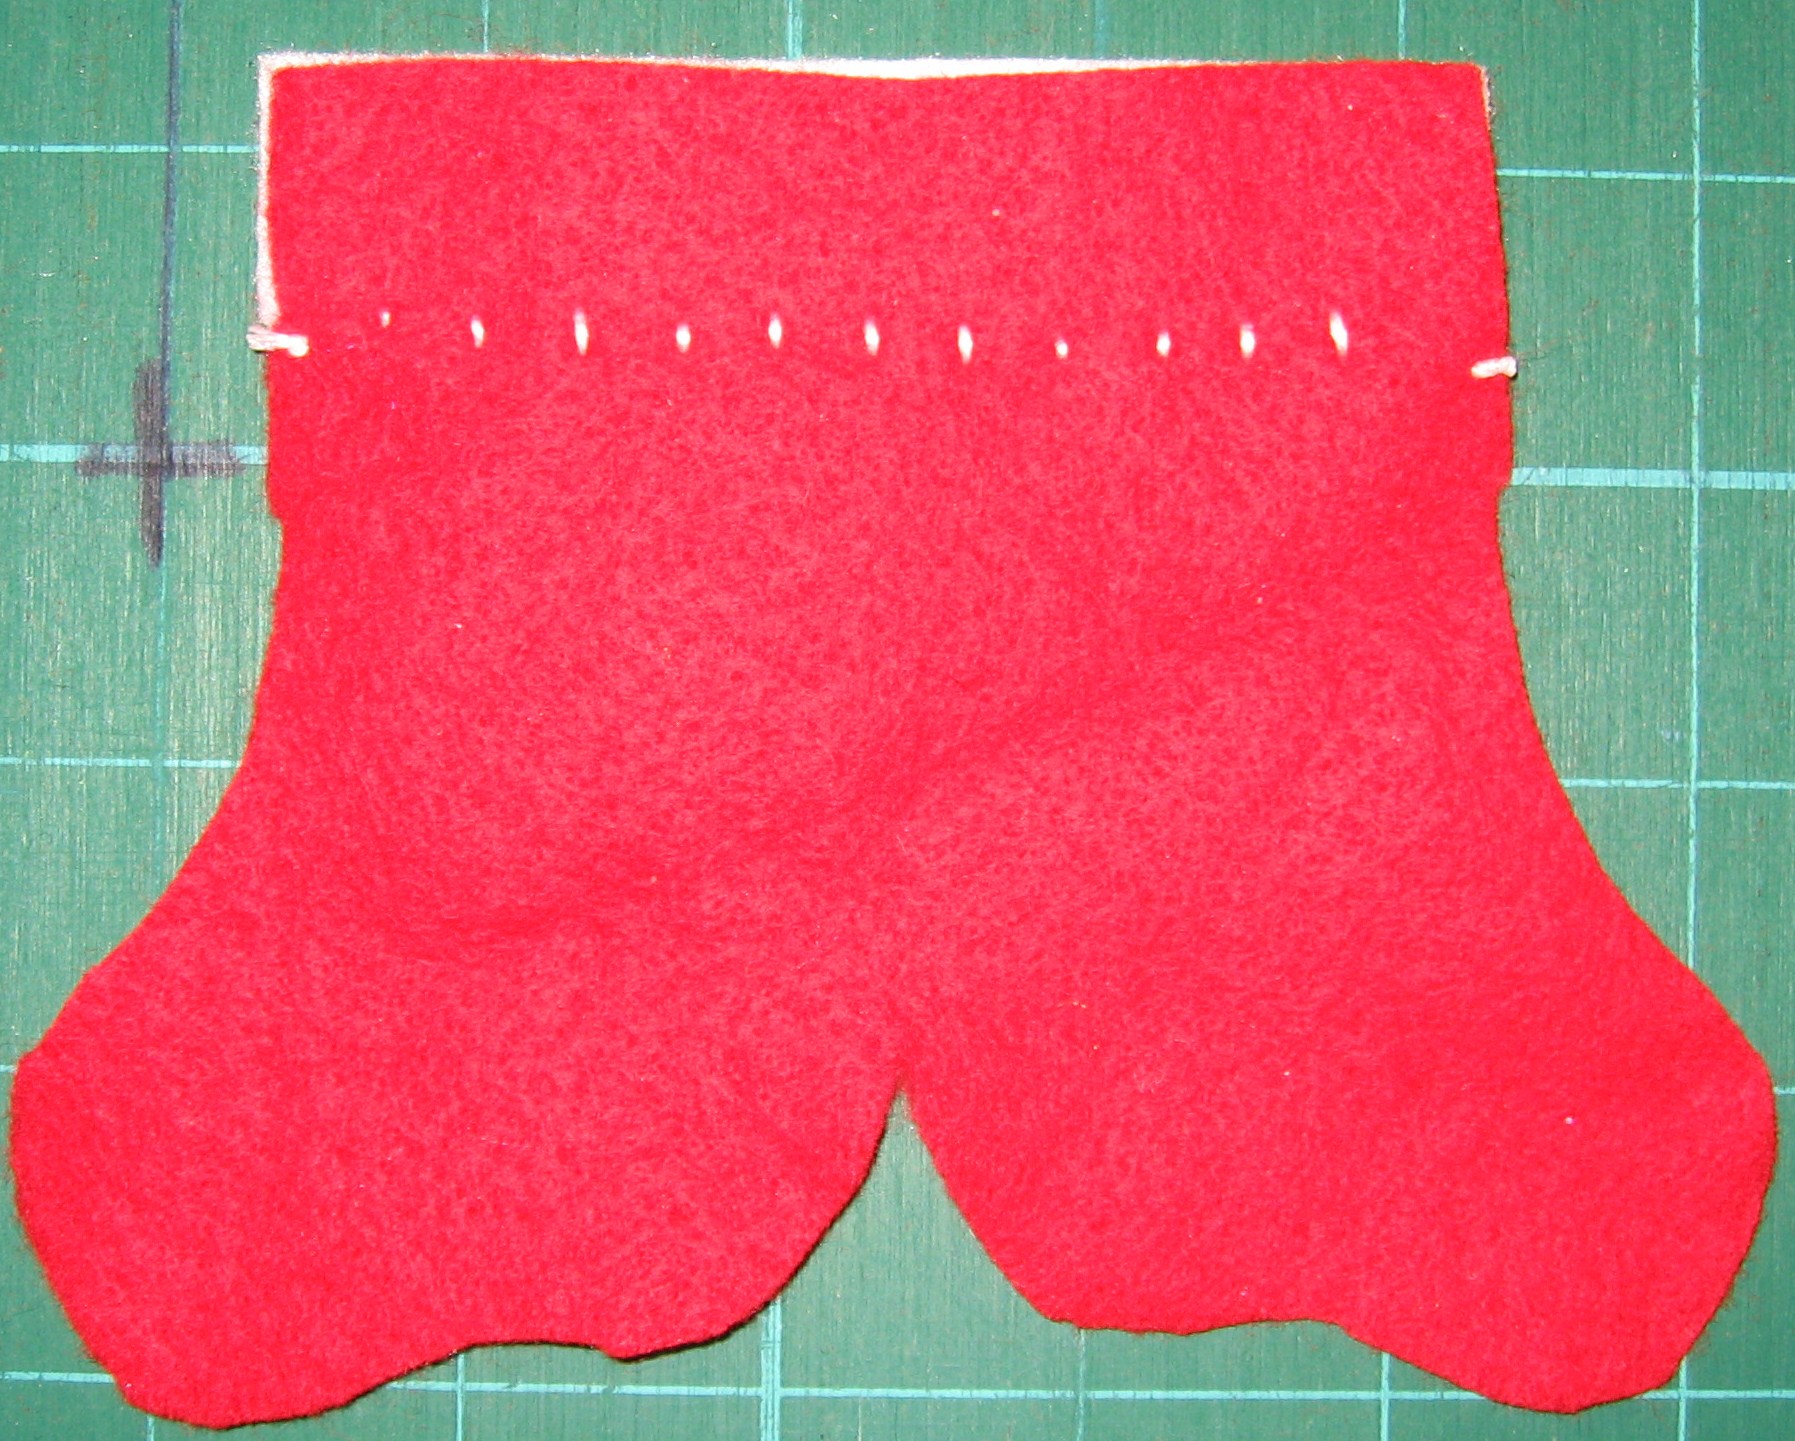
Attach the white felt by stitching across the bottom with a blanket stitch.
(How to blanket stitch from futuregirl.com)

Optional – personalize or decorate while the stocking is still open.  I’ve left this one plain.

The back should look like this.

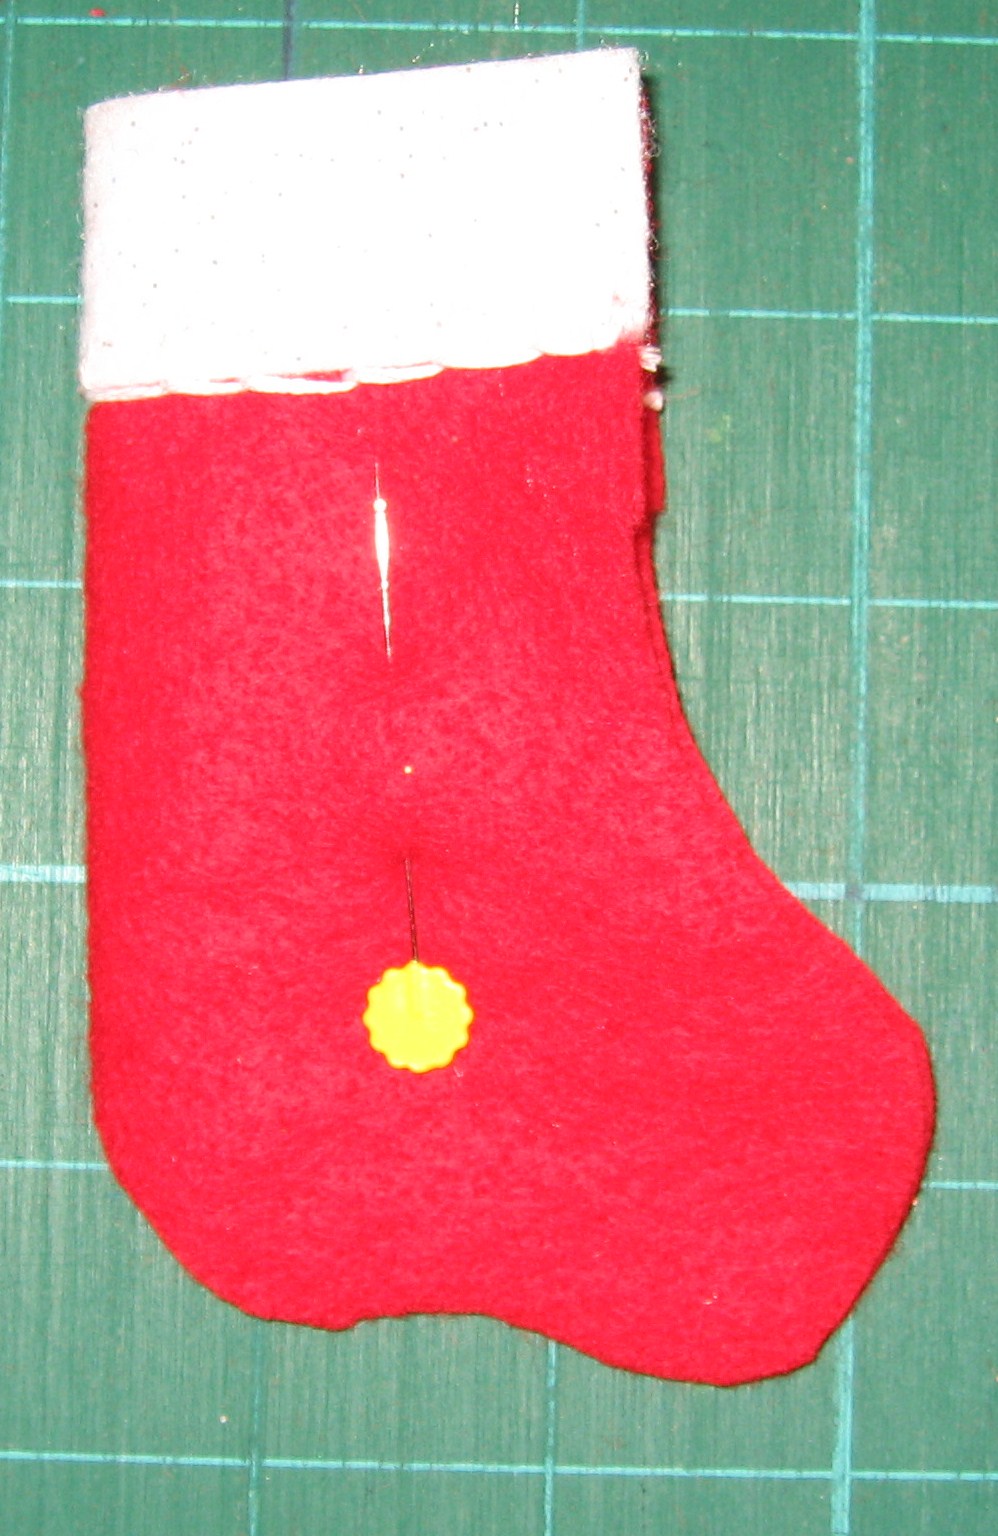
Fold stocking so white felt is outside.  Pin in place.

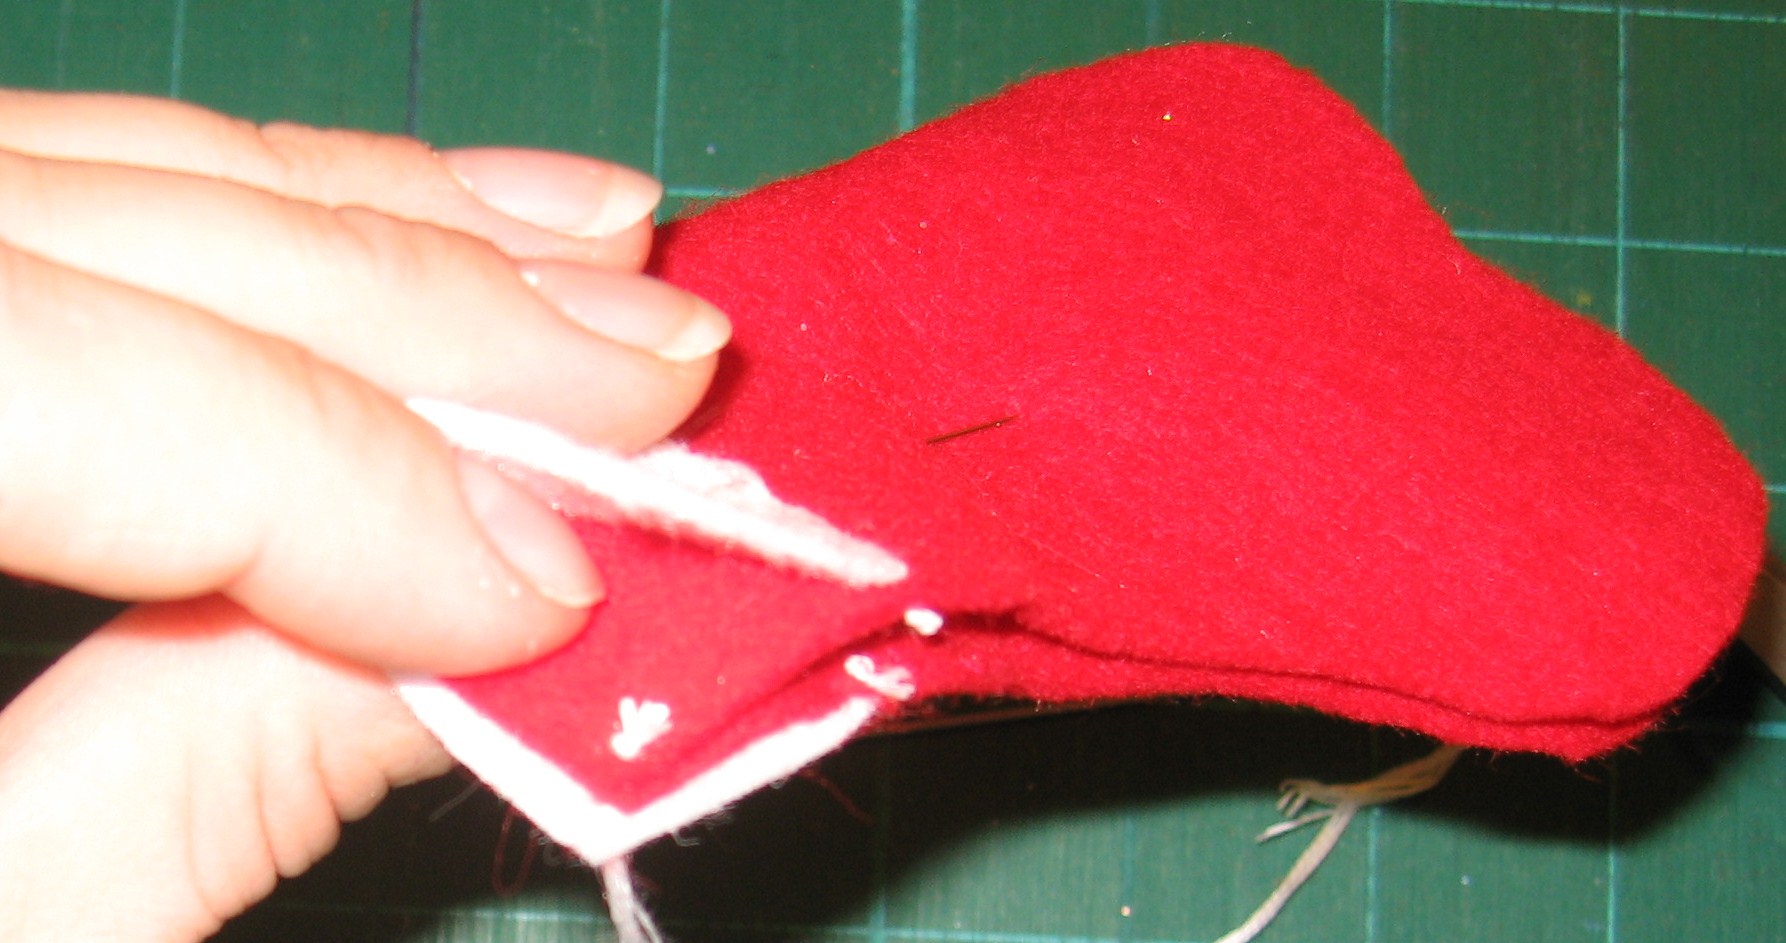
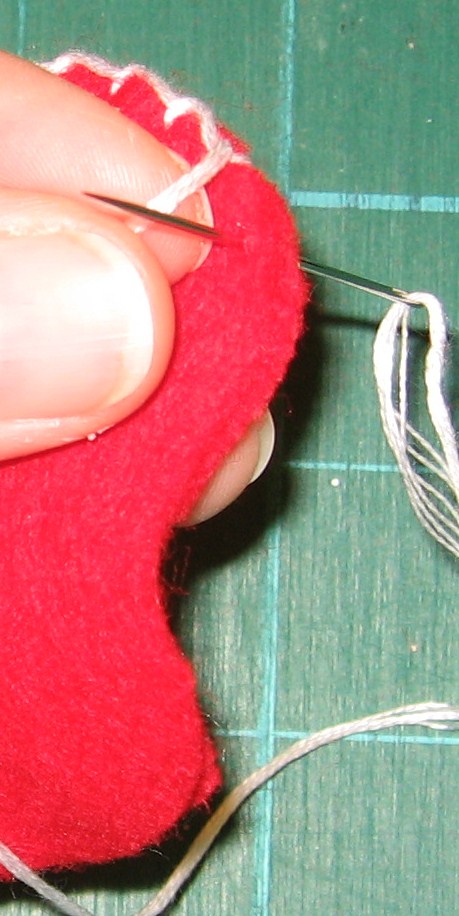
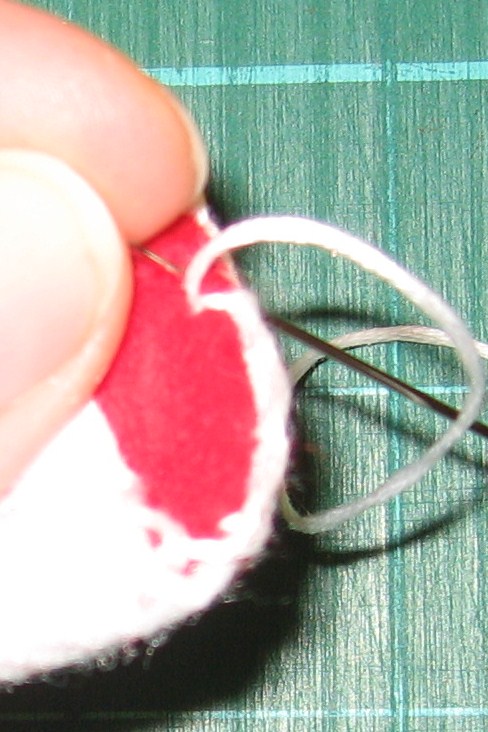
Starting on the open side of stocking, stitch using a blanket stitch.  You can hide the knot by starting under the white felt.  Push the needle through the three layers of felt and then take another stitch through all four layers before beginning the blanket stitch.

Continue around all the way around.

This is what we have so far!

Continue blanket stitching around the top of the stocking, catching both the inside and outside layer in the stitch.  Make sure to leave the stocking itself open.

Once you’ve made it all the way around, knot off the embroidery floss then make a loop about 1 1/2″ – 2″ long.   Make a knot inside the stocking.  Take a stitch and knot again.

The pattern is for a 3″ stocking, but it can easily be sized up or down depending on your needs.

Ta-Da!

Happy crafting!

Find my free patterns on Sewhooked & Fandom in Stitches.

♥ Jennifer O

Posts on this blog may contain affiliate links to help cover the cost of my website. I thank you for your generous support. ♥


Guest Designer Spotlight: Sonja Callahan

Patterns Designed by Sonja Callahan
click on image for pattern

This week in the Guest Designer Spotlight is Sonja Callahan.  I first became aware of Sonja’s work when we both participated in the  Tiny Quilt Challenge over on craftster.   Her entry, The Red Fairy, caught my attention immediately, because magic, fantasy and whimsy are my favorite subjects.   Neither of us won that challenge, but I never did forget that block!

Photobucket - Video and Image Hosting

First name and where you’re from: Sonja, British Columbia, Canada

Website/blog/online store or other place where your patterns or photos of your work can be found? Blog; Etsy store; Flickr

How long have you been paper piecing and/or quilting? Oh boy. The first quilt I made was for my daughter when I was pregnant with her back in 2001. I saw a simple pattern in a Martha Stewart magazine that got me thinking. I first tried paper piecing around 2003, I think the first block I tried was a little frog. Well no, that’s not exactly right. That was the first block that actually looked like it was supposed to. It took me literally 4 separate attempts at a beginners pattern to actually do it right!

What do you use own your blocks for? Oh all sorts of various projects from zippered bags, to coasters, pillows and of course quilts! One of my favorite pieces now adorns the outside pocket of my daughter’s backpack.

When did you start designing? In the summer of 2006.

Was there a particular inspiration to draw your first pattern? I wasn’t really finding the sort of patterns that I was looking for and really wanted to sew a detailed fairy.

Do you remember what your first design was? The Red Fairy

Do you have a favorite among your own designs? Can’t I choose them all? Ok ok, since I have to choose…. It would be a tie between Mister Gnome, The Red Fairy, and the little gnome offspring, Gnomeling and Gnomlette.

What do you use to design your patterns? Paper and pencil, a specific software, etc. I use Corel Draw 4x and Corel Photo Pro 2x.

How has the online community changed the way you craft/quilt/design, etc.? Oh wow, what an amazing source of inspiration! I tell you, there is no way I would have ever even tried paper piecing if it wasn’t for all the free patterns that can be found online. Back when I was first starting up, I found http://www.Craftster.org. while looking for a zippered pocket tutorial. Oh wow, I didn’t even know I wanted to sew purses until I saw that website. I’ve been inspired to sew, design, paint, knit, crochet, quilt, swap etc. from all the great websites and blogs that I’ve been finding over the years. I feel so lucky to have this incredible wealth of information and inspiration (don’t even get me started on http://www.art.com!), and all the support to be found right at my fingertips! I’m blown away sometimes by the friendships that form between people who have never met, but share a common creative pastime. Knowing just how isolating it can be when you’re a stay at home mom to a tiny little baby, I’ve found this to be a great comfort, and it has gotten me through many lonely, insomnia-filled nights, and blurry, exhausting days.

Anything else you’d like to add? What I find just so awe-inspiring and wonderful, is how a simple little blog of a talented crafty mother, can introduce opportunities into her life that would have never been possible without the internet. I’m seeing women being invited to display their work halfway around the world because a buyer from Japan happened across her blog. http://oneredrobin.com . Or how a young, and very talented knitter/designer who was simply posting about her hobby while she pursued other methods of creative employment, ended up suddenly being offered the editors job at Interweave press! http://www.eunnyjang.com/knit

I find this so amazing! I often think about how hard it must have been, before the internet, to get anywhere as an artist. Never mind a stay at home mom who longs do something with her seemingly hidden talent. It was only 15 or so years ago when women fought hard to get their music played as often as male musicians on the radio. *go Sarah Maclaughlan go* I feel like it’s free reign here on the internet. It really has opened the doors of opportunity wide open, especially for women and mothers. If you’re passionate about something, you’ll either find yourself a nice group of like-minded people, or you will attract them. It’s beautiful, and I’m so thankful!
Photobucket - Video and Image Hosting

find more of Sonja’s free patterns on the Guest Designer page at sewhooked

Happy Crafting!

Reconstruction: Pockety Hoody

sweatshirt update

I’m a big thrift store shopper.  Sometimes, I find great articles of clothing that are the perfect size for one of my kids, but I know they won’t wear it because of a design or picture that’s on it.   They’re both really into black at the moment and I found a great black hoodie sweatshirt the perfect size for my son.  The price?  $1.25.  Could I pass that by?  NO WAY.

The drawback?  It came with an embroidered image of The Grinch.  Cute, yes, his style, absolutely not!
After having the sweatshirt linger in my “to do something with” pile for a while, it occurred to me that I have all kinds of odds and ends leftover from other projects that might update the shirt and make it ready to wear.

One Levi’s pocket and about ten minutes of stitching later, and the update is complete and the hoody has gone from “Absolutely not!” to “Cool, Mom!”

It’s more of an update than reconstruction, but you get the idea!

To update a logo sweatshirt, you’ll need the sweatshirt and one jean’s pocket.  Use a heavy-duty seam ripper to remove the pocket, or, if you feel comfortable doing so, a razor blade.  Just be careful if you do!

A sewing machine is pretty much a must for this project, but if you want to try it by hand, you’ll need a heavy duty needle and a bit of patience to sew through all the layers!

sweatshirt update

Smooth out your sweatshirt.

sweatshirt update

Remove jeans pocket, being careful not to tear the fabric or cut yourself.

sweatshirt update

Pin the pocket in place.  You can go for a straight angle like I did here, or turn it a bit left or right for a more interesting look.

sweatshirt update

From the front, stitch carefully around the pocket using the existing stitching lines.  Reinforce at the corners and top of the seams.

sweatshirt update

And you’re done!  Super fast and easy update!

As always, if you make any pattern or craft from sewhooked,  I’d love to see a photo. Email me or add it to the Friends of Sewhooked flickr group.

Happy crafting