Tag Archives: recycle

Favorite Dish Towel Rescue Mission

Favorite Dish Towel Rescue Mission
Dish Towel Rescue Mission…commence!

Favorite Dish Towel Rescue Mission

This is one of my favorite dish towels. It’s horrible, frayed and falling apart. It’s stained from family pizza night and wiping up messes after my kids.

But it’s absorbent and rugged and I love it the waffle-y-ness of it.

Maybe I’ve loved this one a bit too much.

Finally, I decided to rescue this dish towel. The mission: patch the gnarly hole and make my dish towel fabulous again. Alright, okay, maybe not fabulous, but at least functional and not-so-scary.

Favorite Dish Towel Rescue Mission
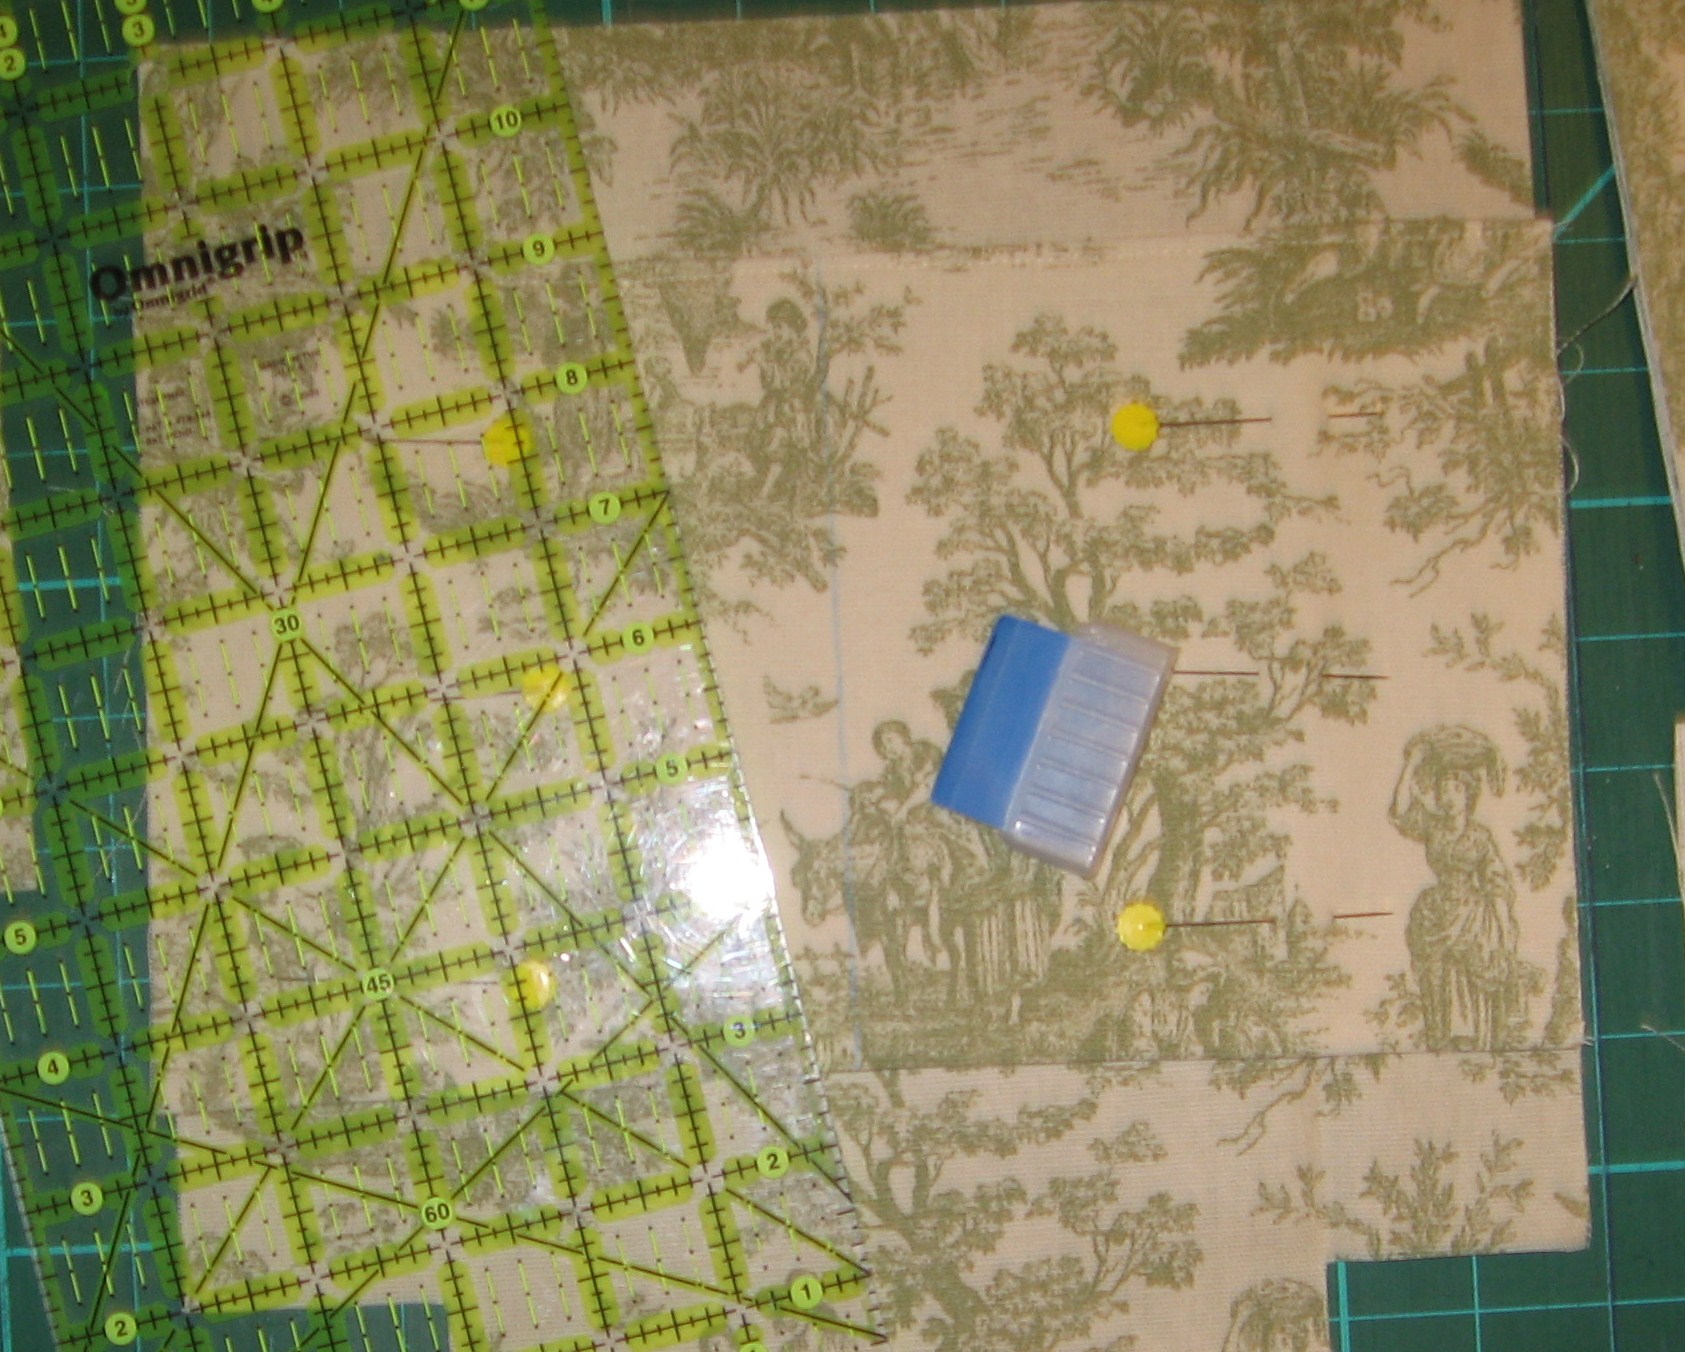
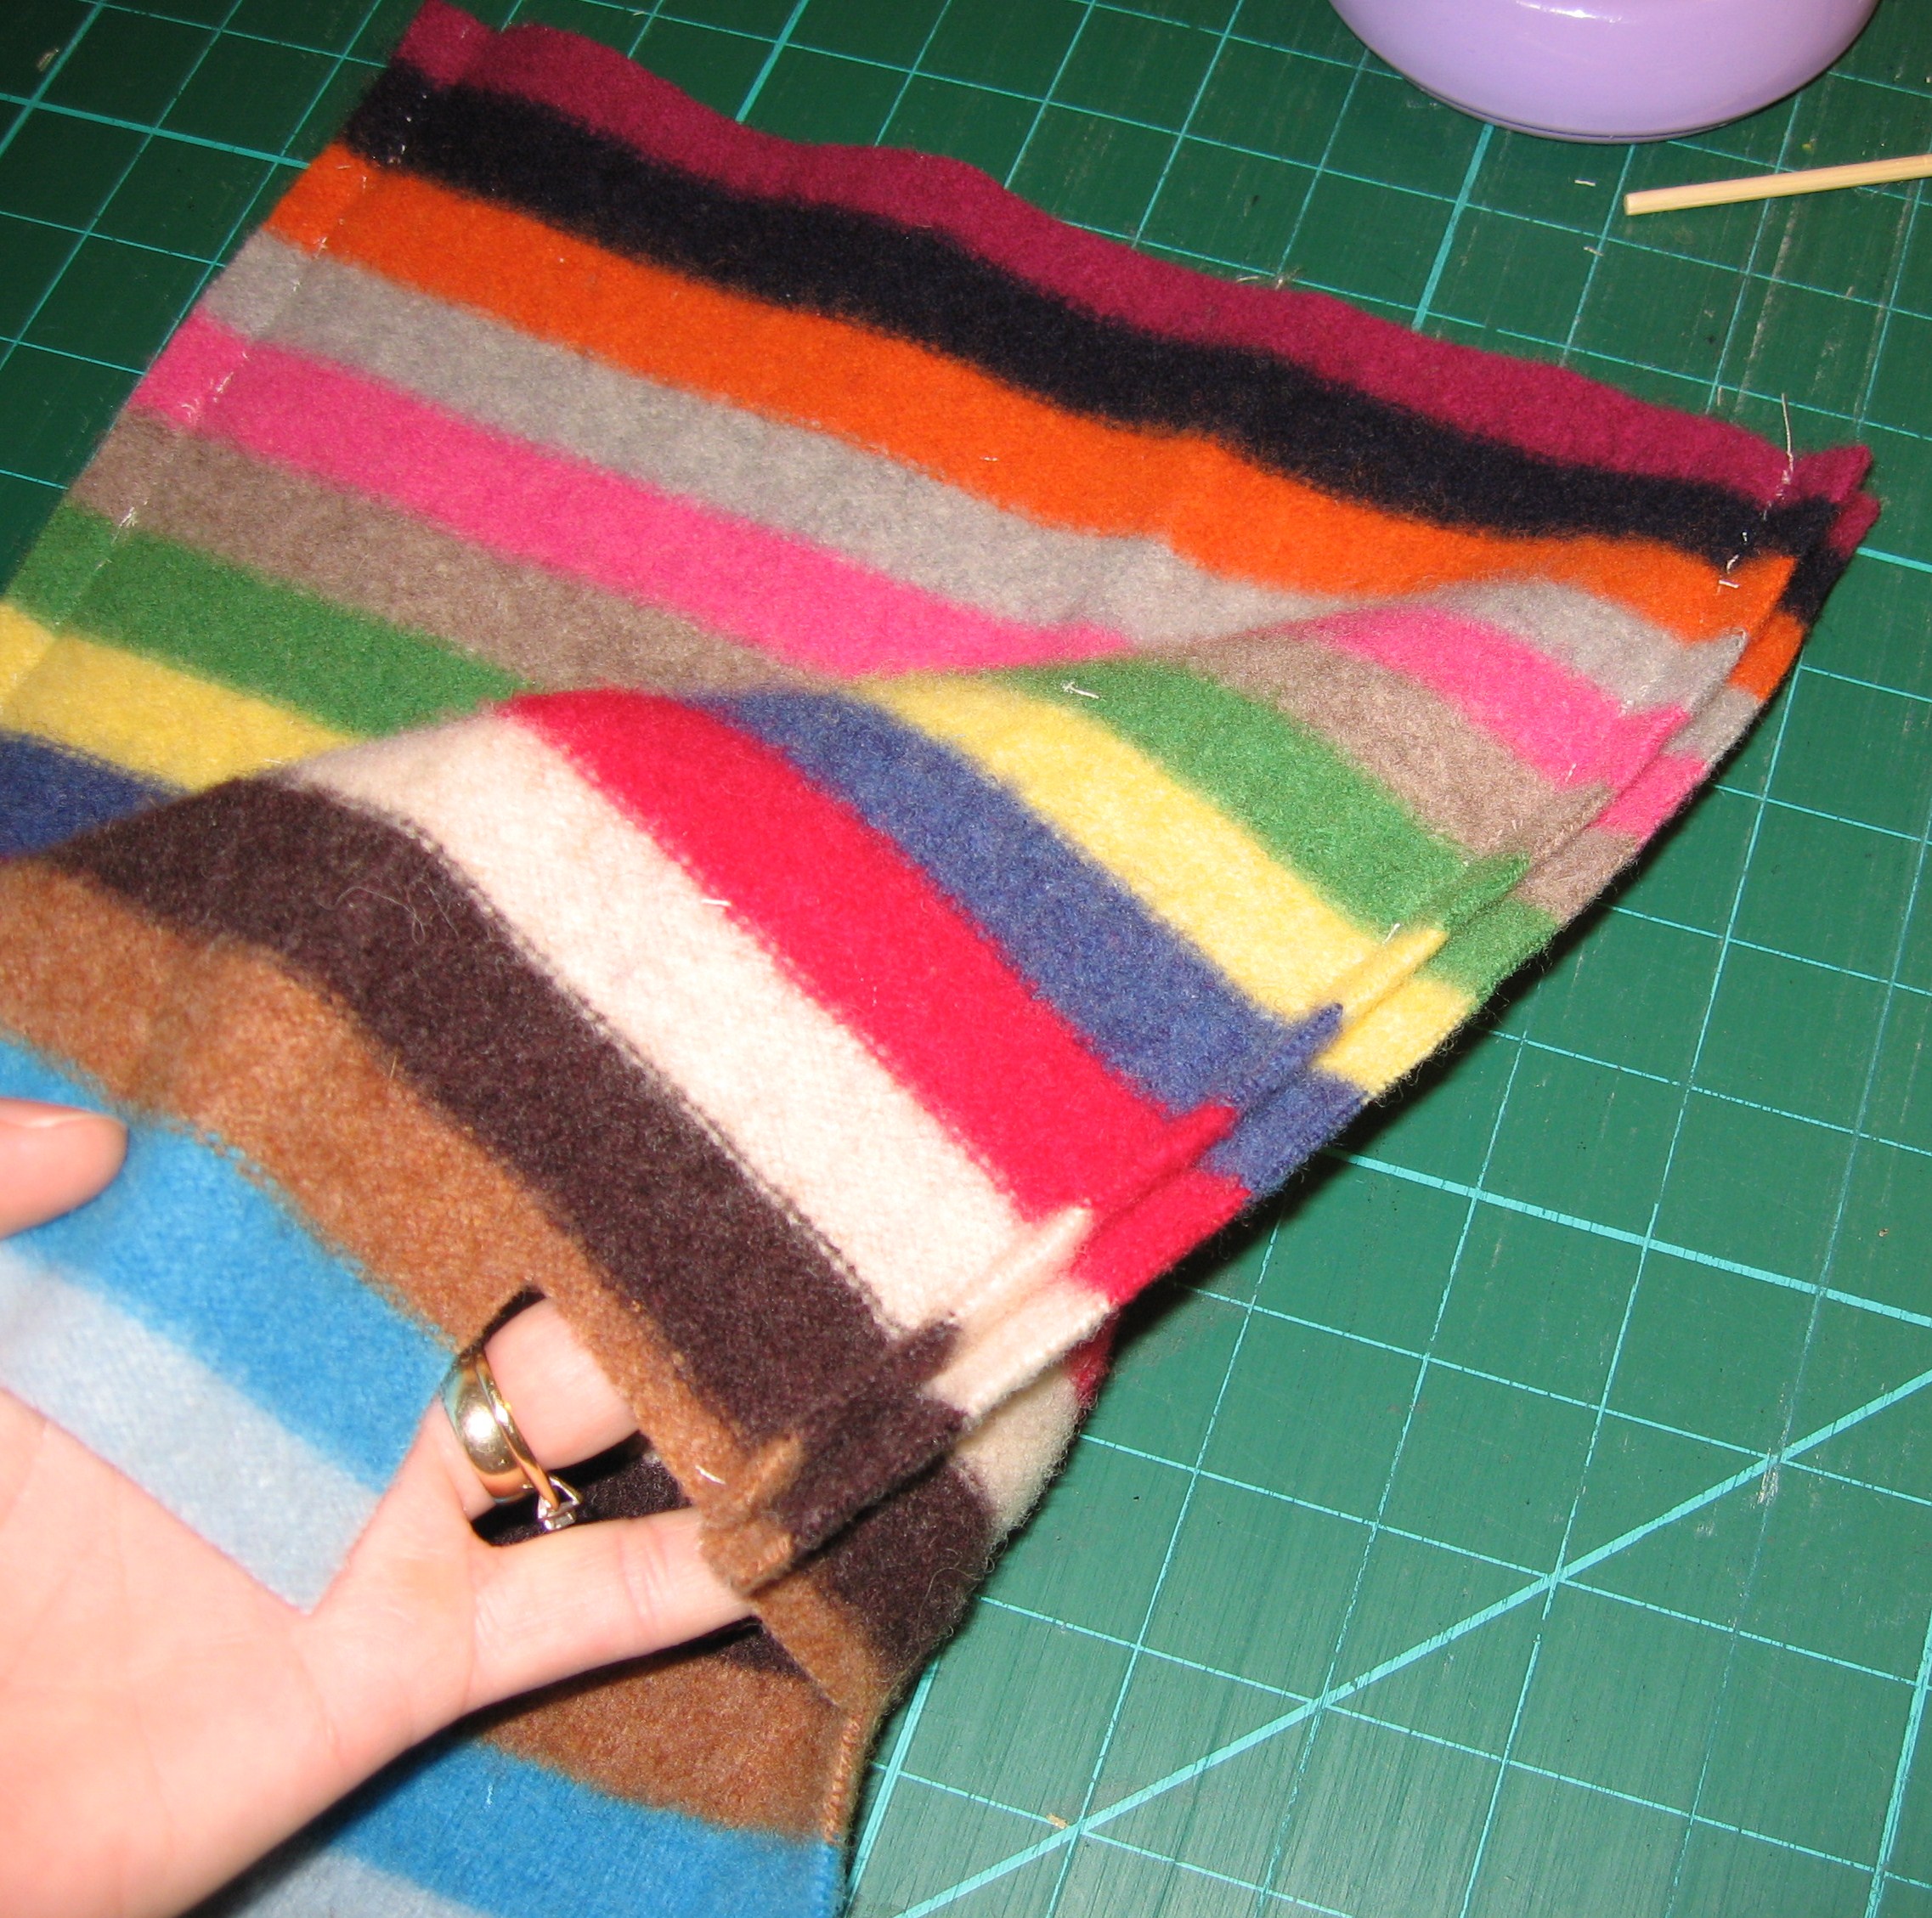
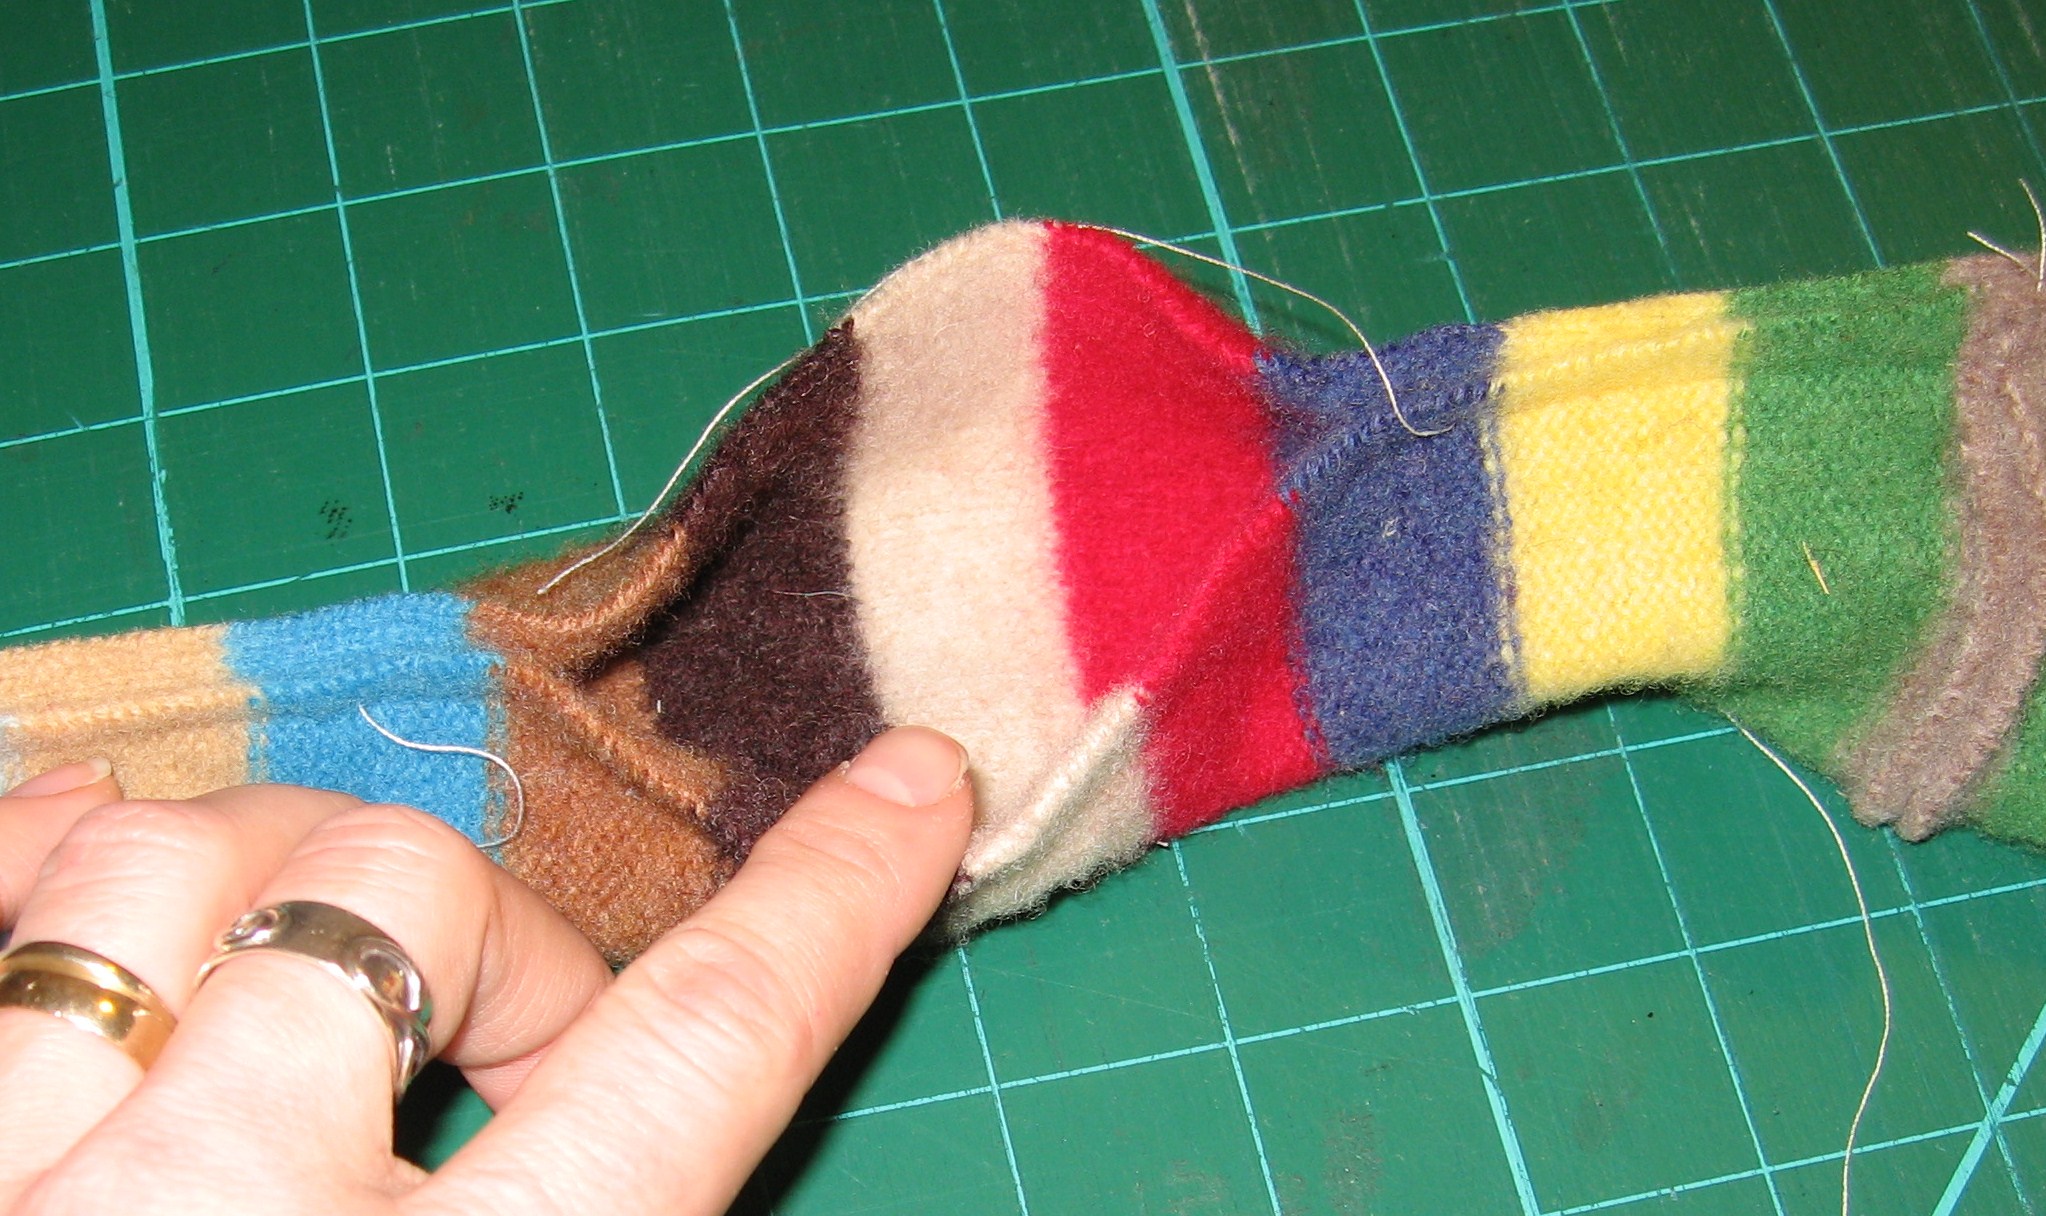
The first step was to find a scrap of fabric that would be wide enough to patch the hole, while being long enough to go across and around the towel plus a couple of inches for overlapping (see below). I also pulled out a couple of different threads to decide what color I’d like to use.

Favorite Dish Towel Rescue Mission

Hem along the length of the fabric trip, top and bottom.

Favorite Dish Towel Rescue Mission

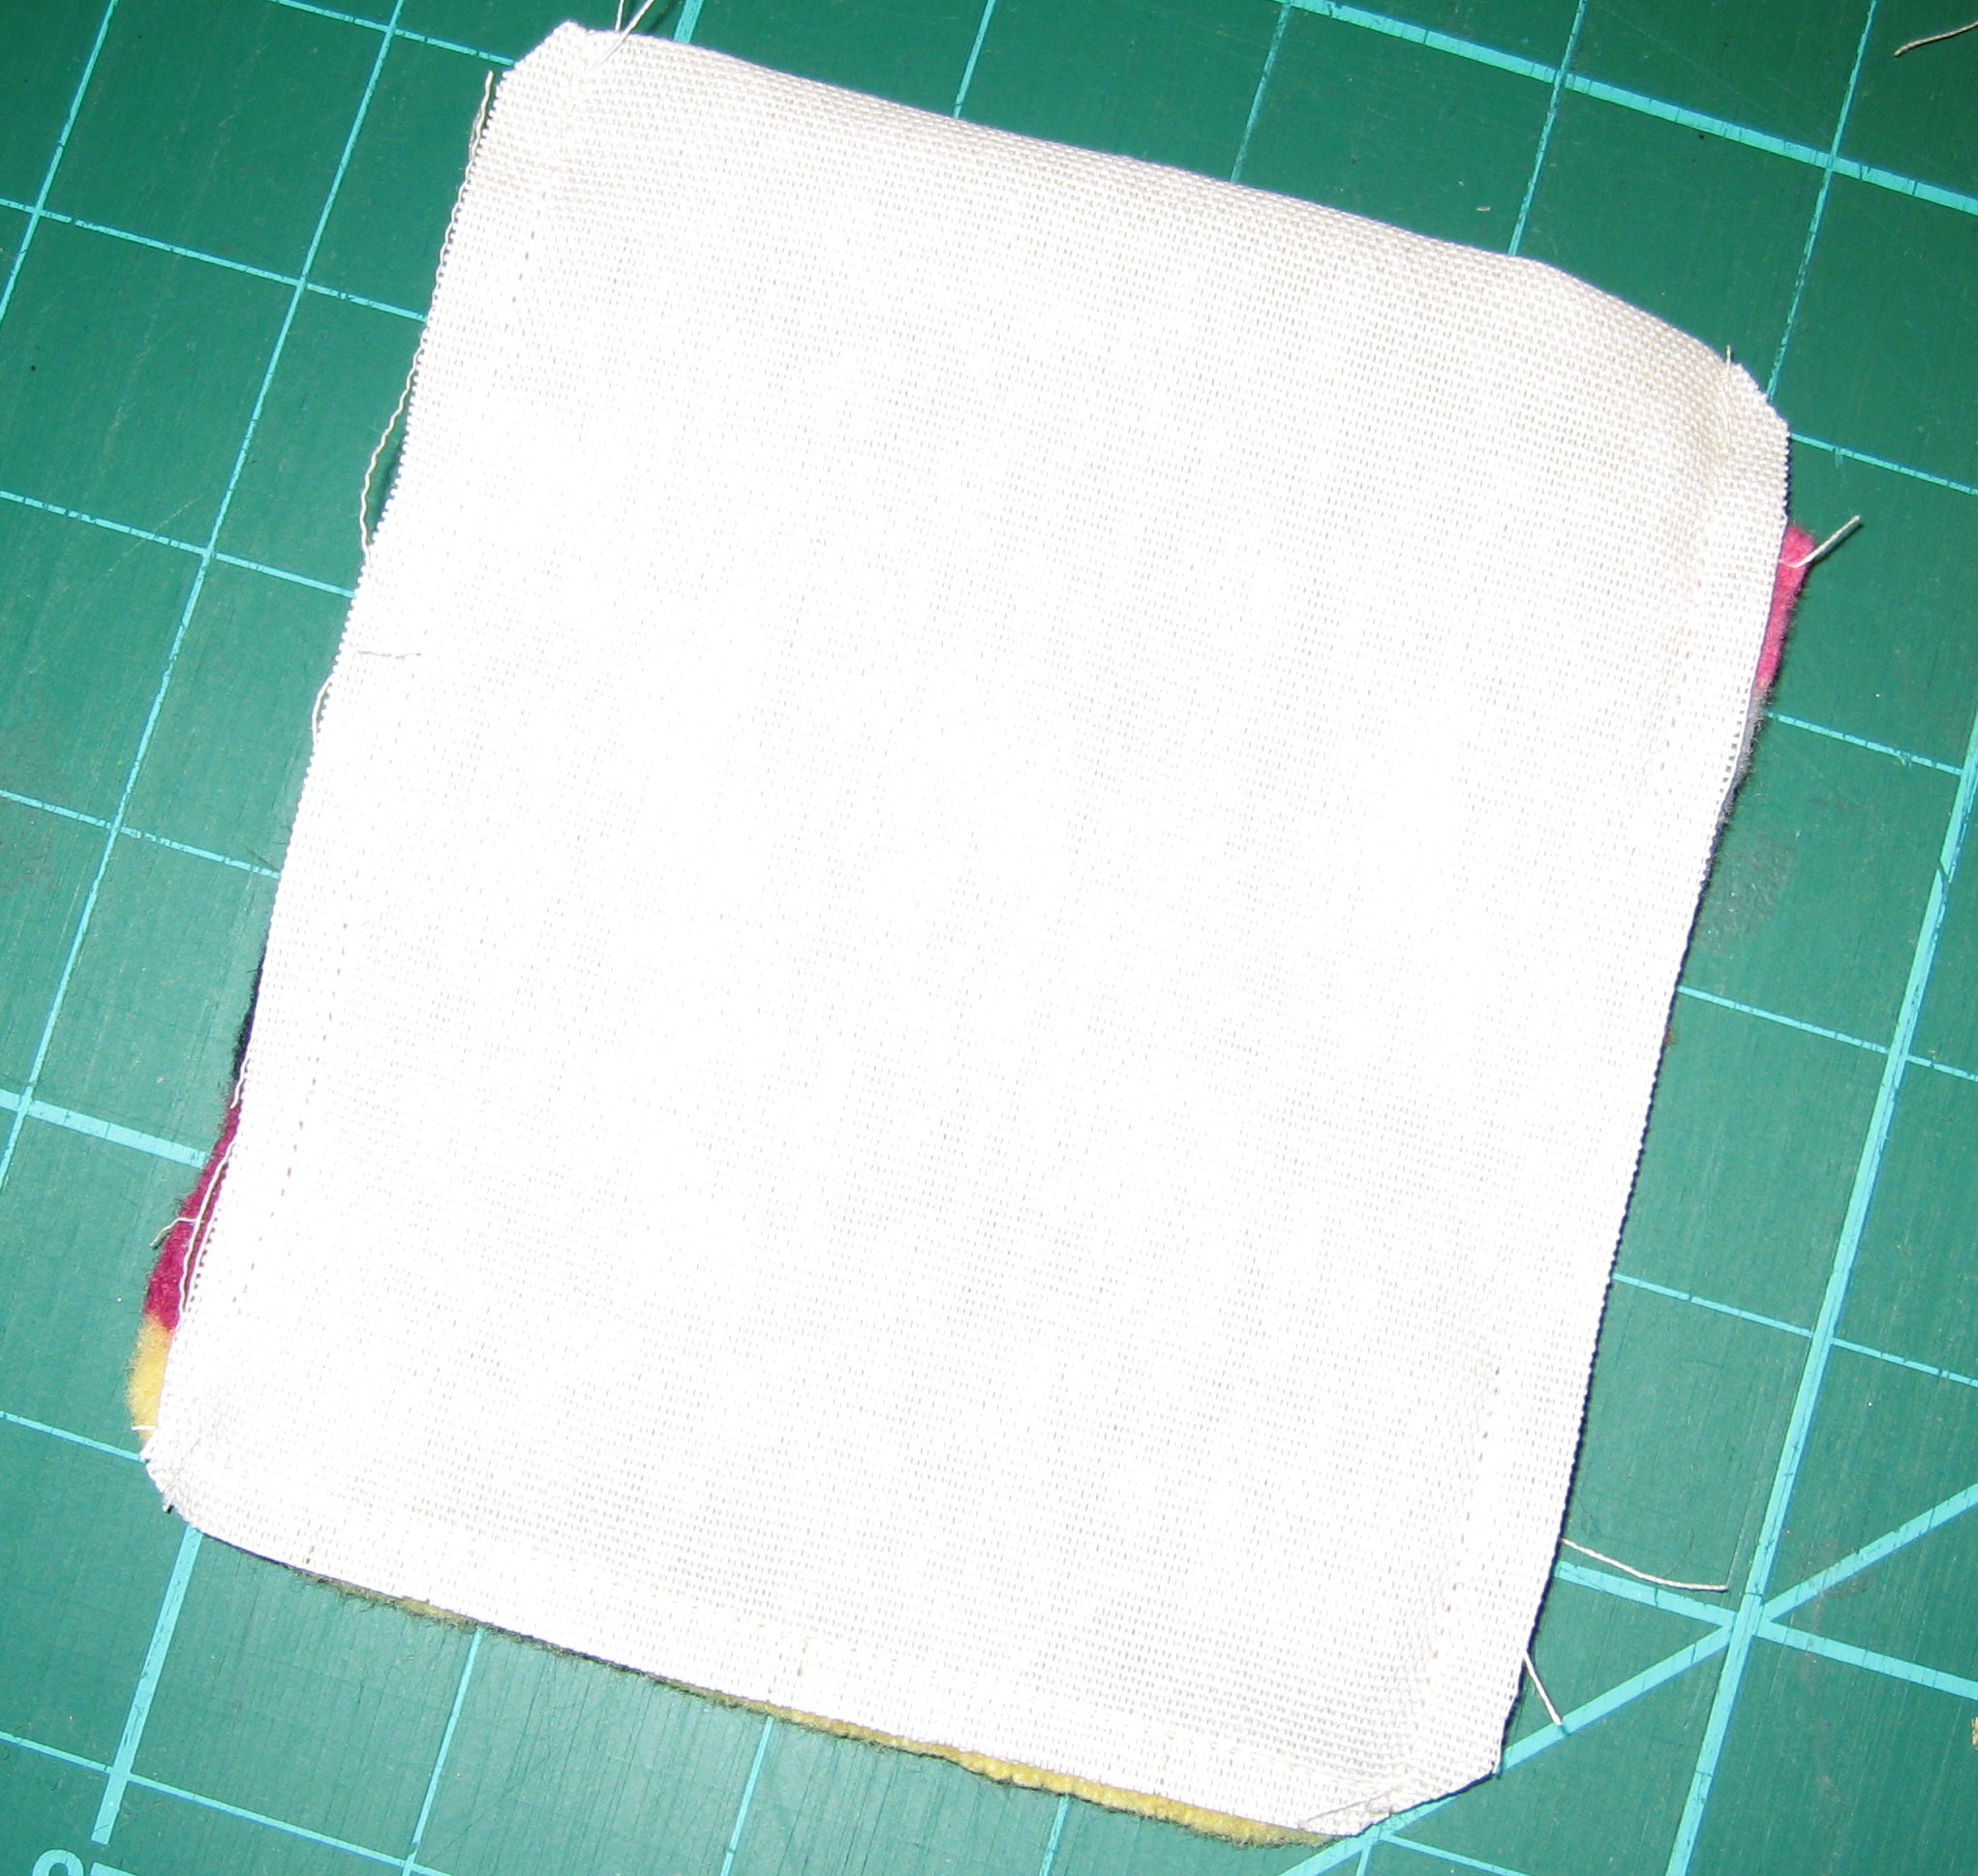
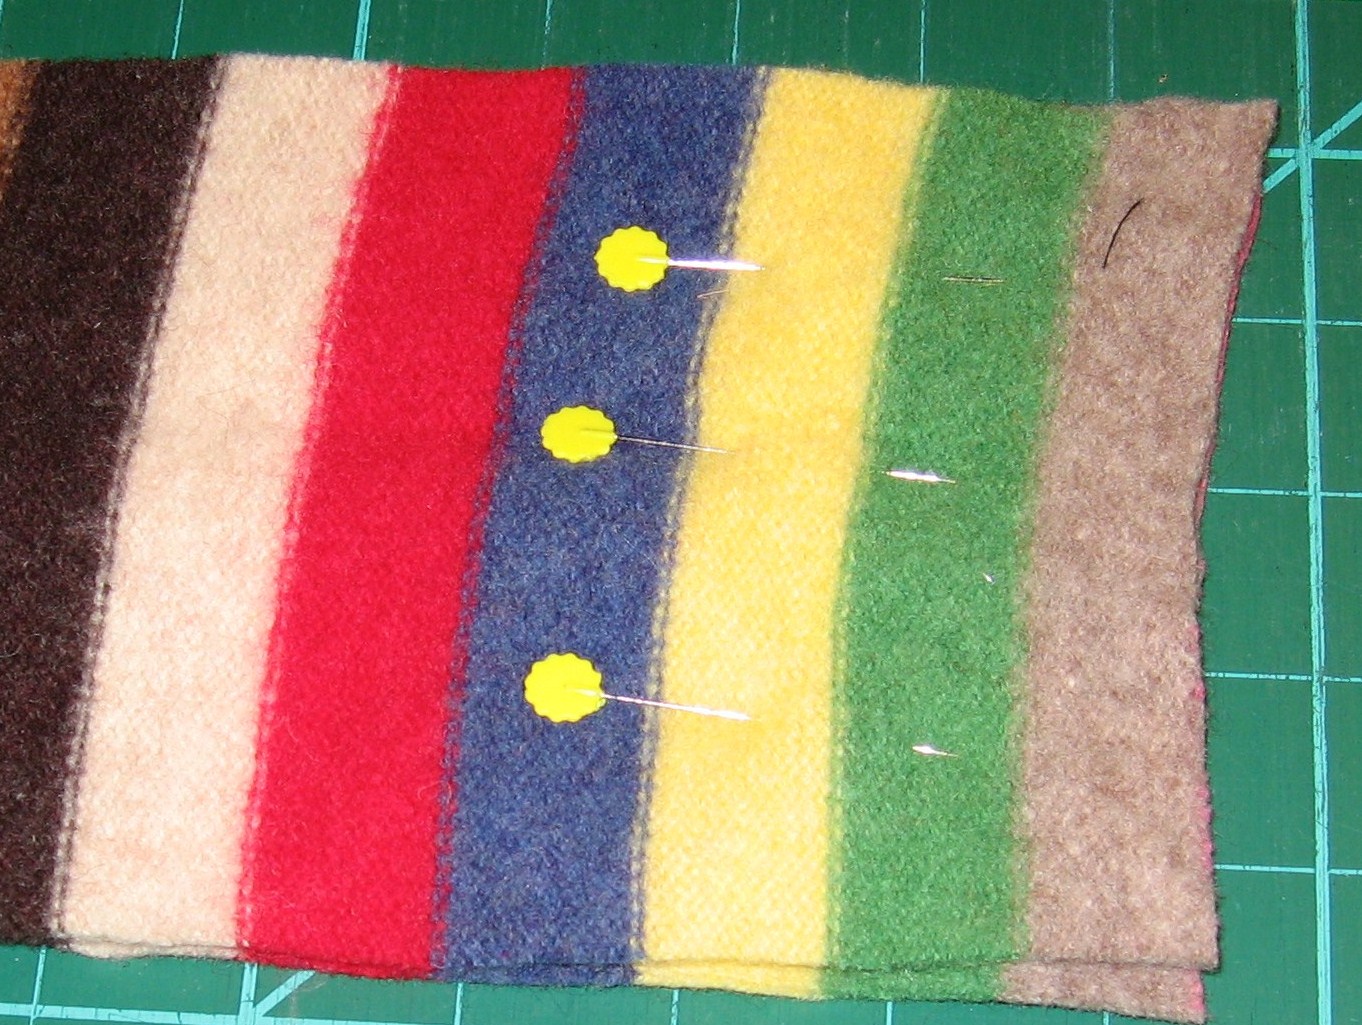
Lay the towel across the fabric strip, making sure the scary bit will be covered.

Favorite Dish Towel Rescue Mission
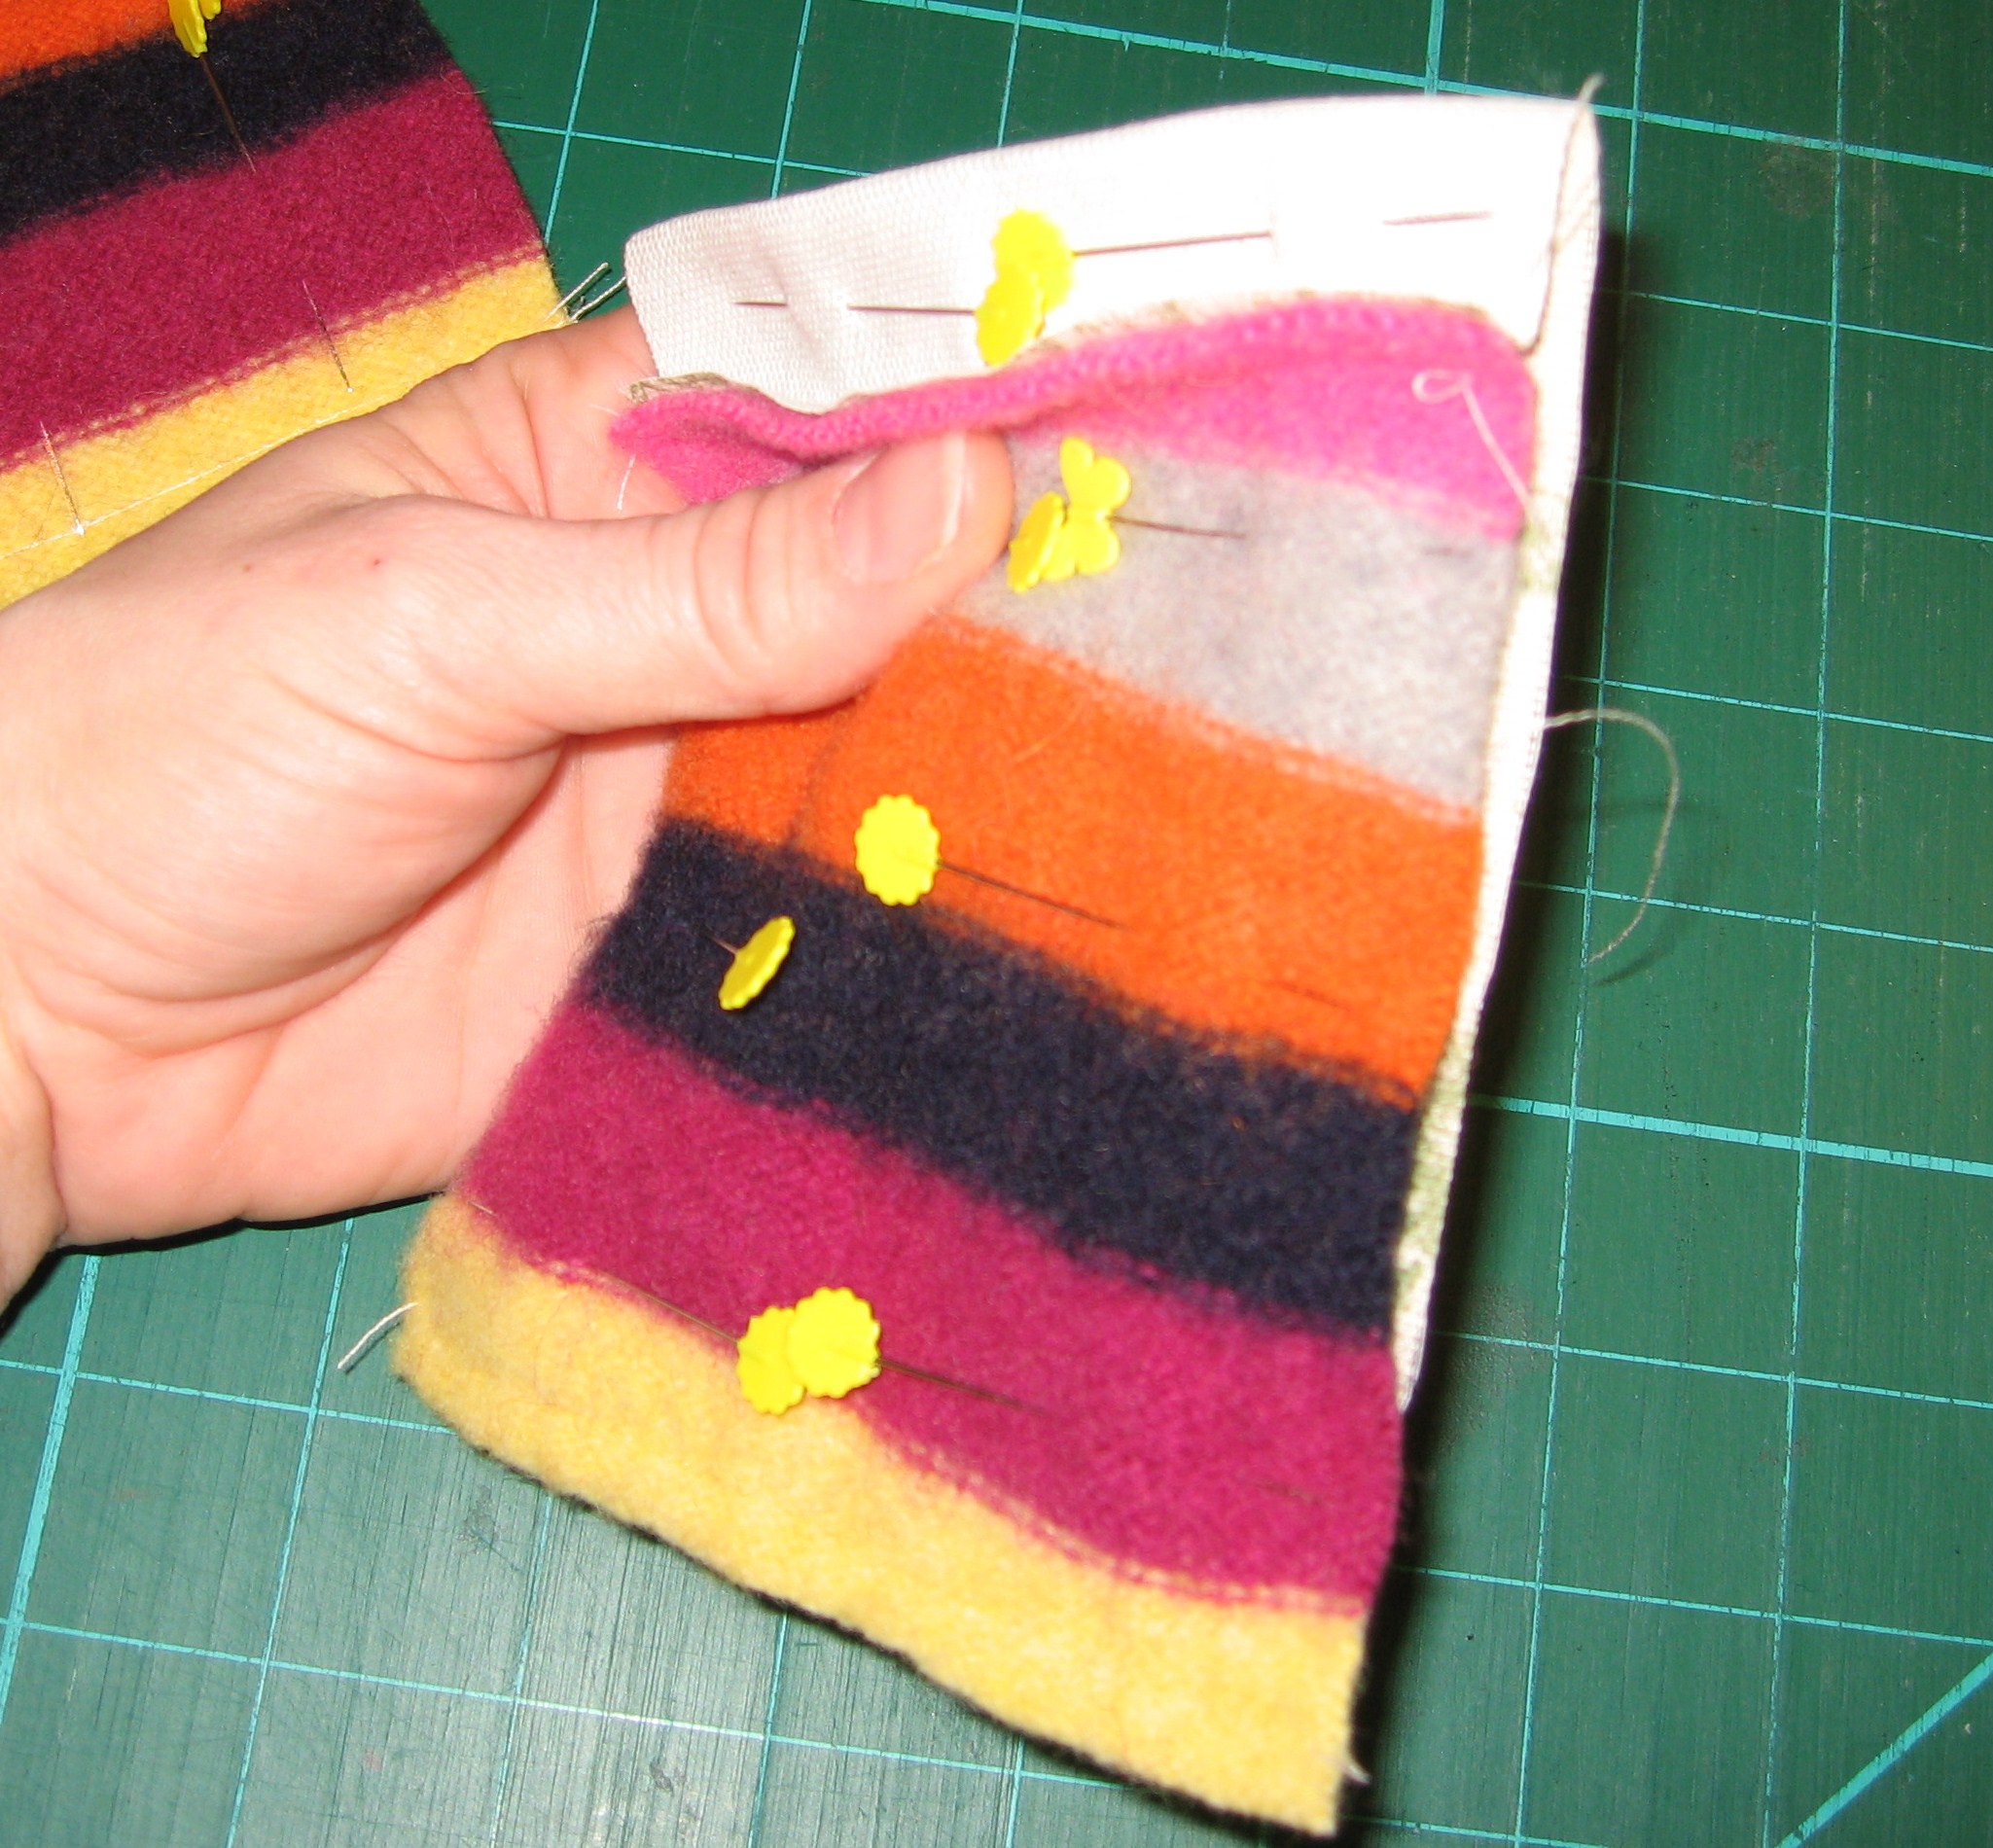
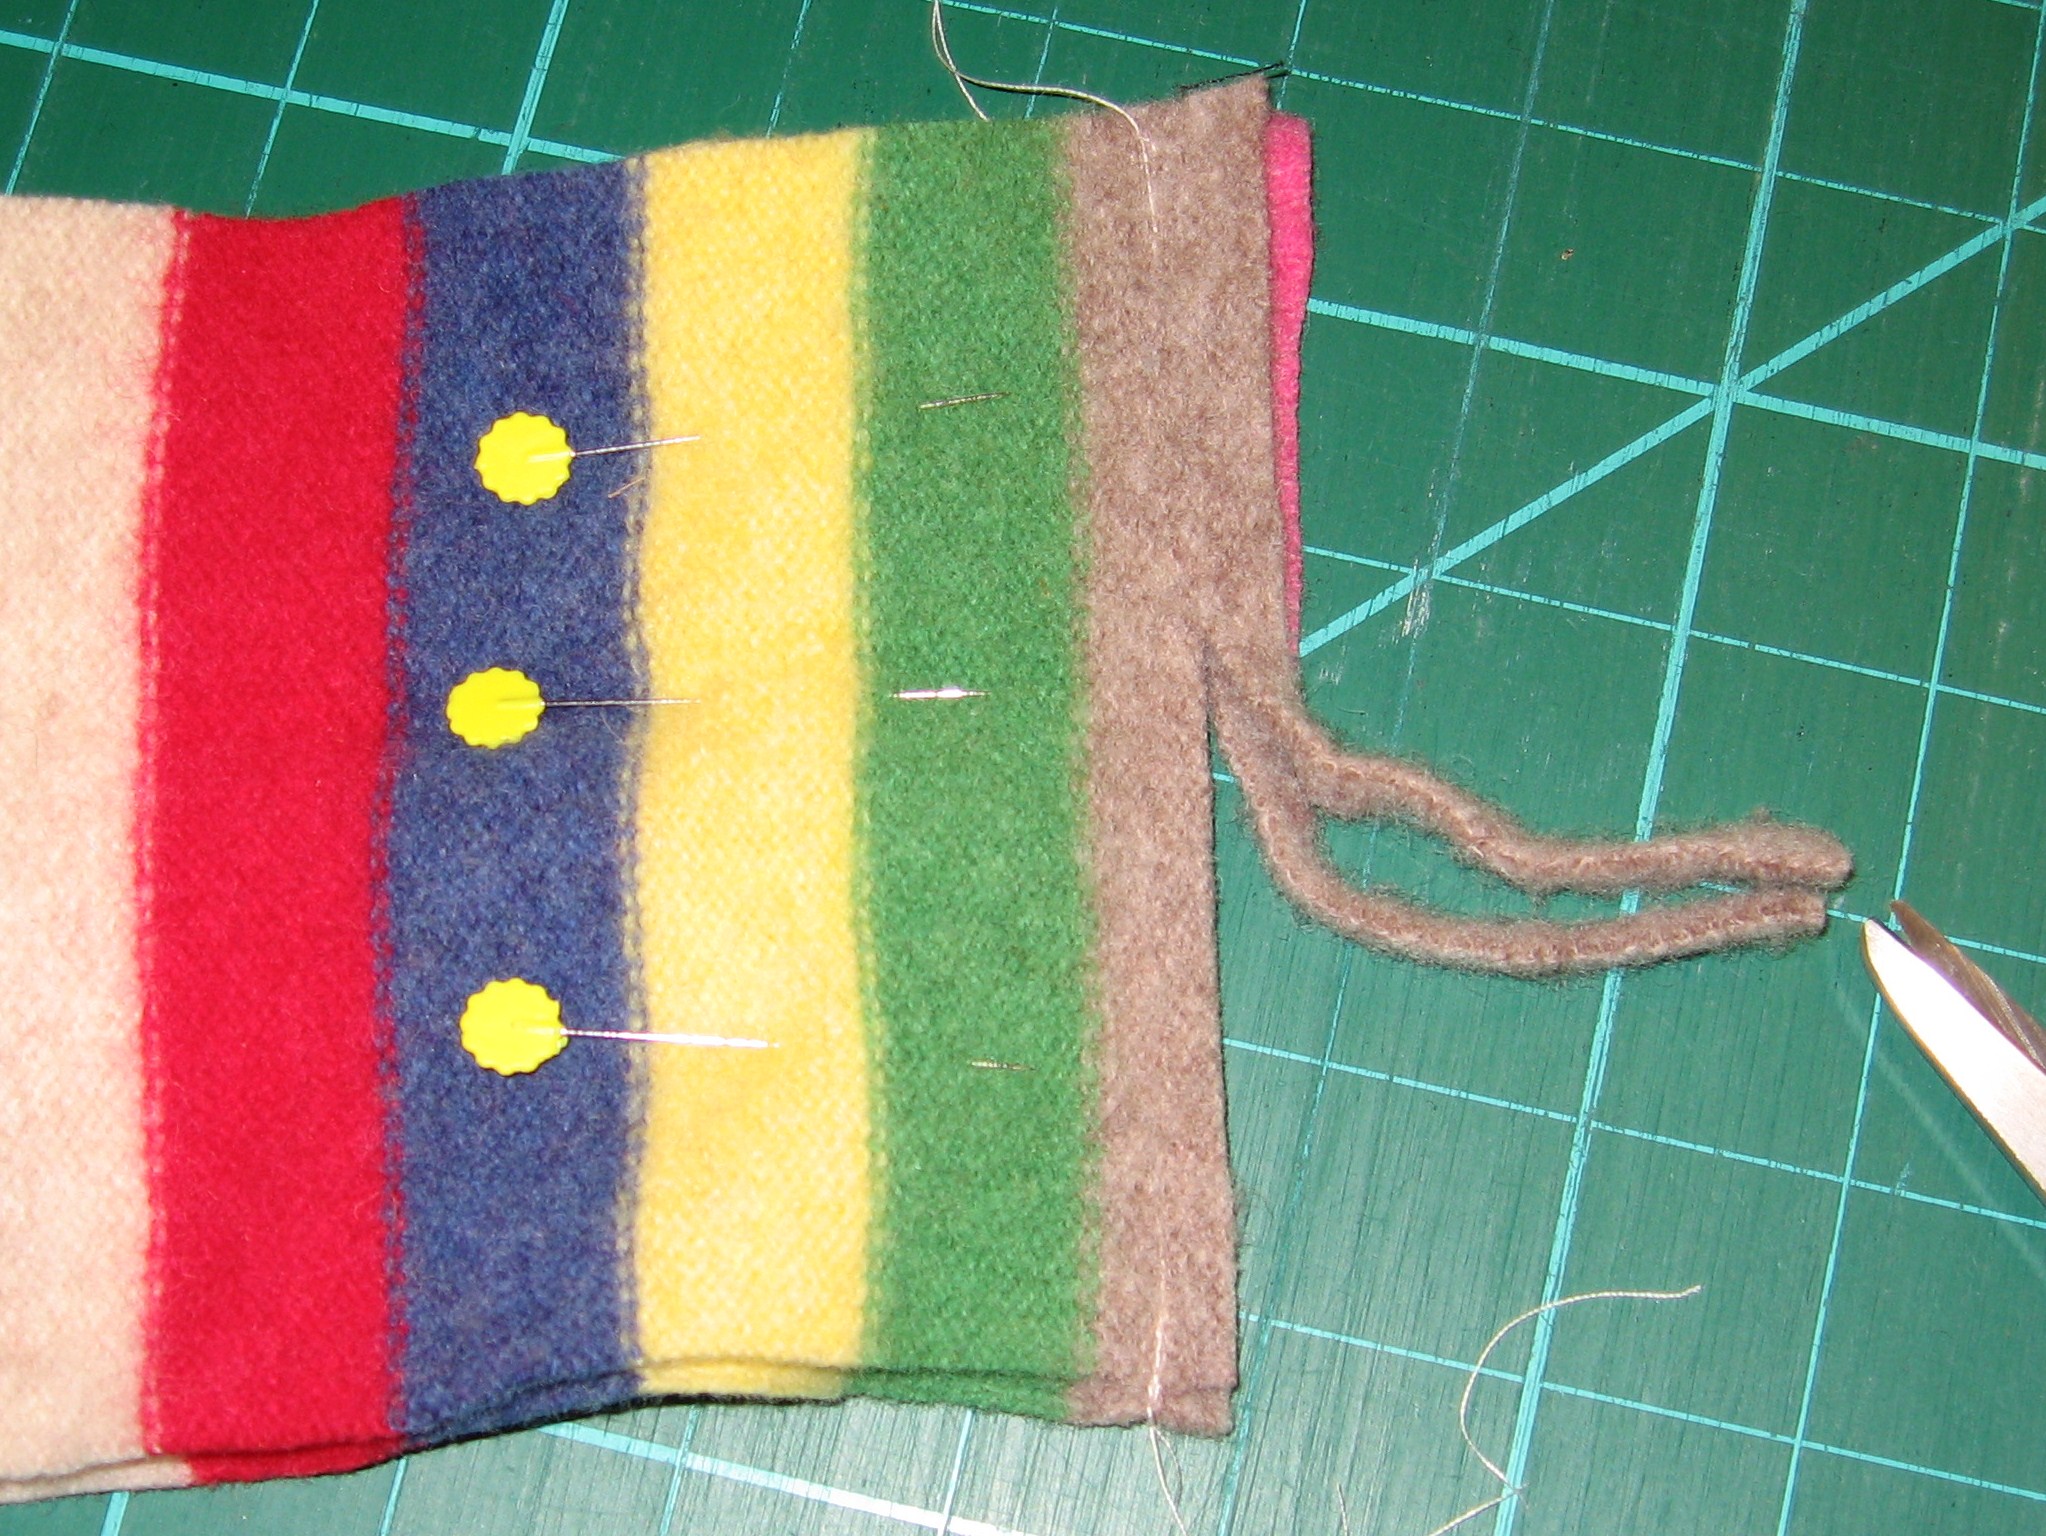
Fold fabric strip over, smoothing and pinning so the pieces are even.

Favorite Dish Towel Rescue Mission
Fold over end and pin in place.

Favorite Dish Towel Rescue Mission
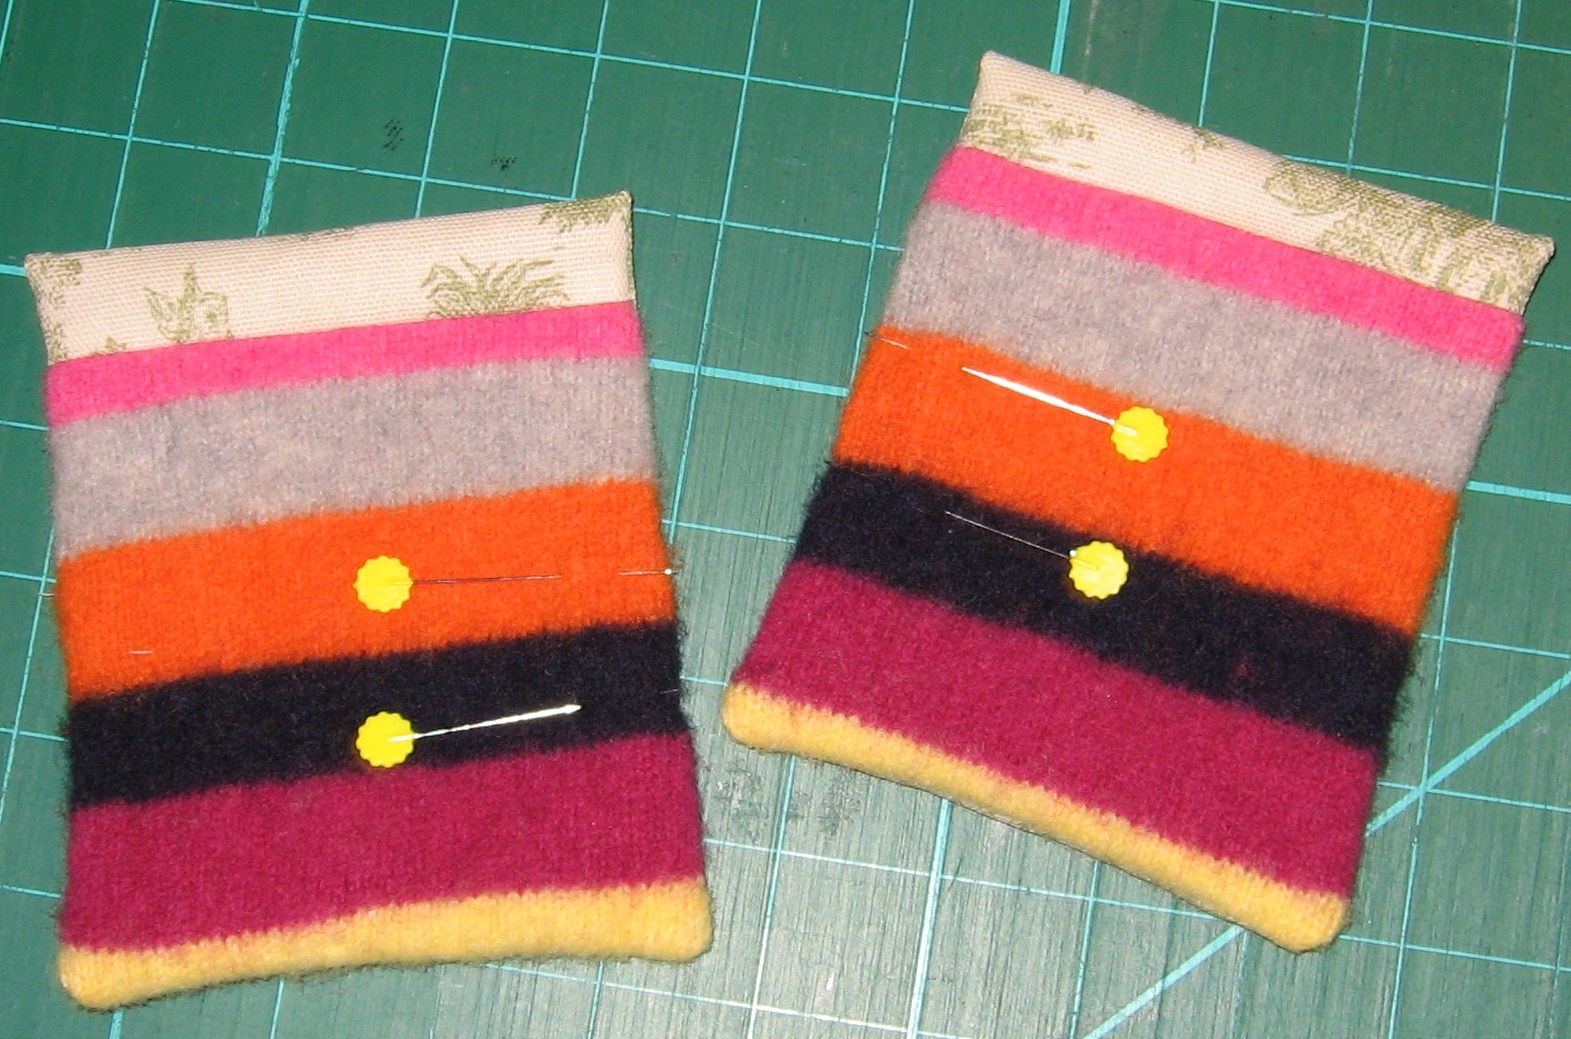
I wanted a distinct stitch, so I chose an extra wide one on my sewing machine, D50. This particular stitch goes back and forth three times.

Favorite Dish Towel Rescue Mission
Use the fun stitch of your choice and stitch all the way around the patch. See that pin? Pull it out. You definitely do not want to stitch across it!

Favorite Dish Towel Rescue Mission
If you have a walking foot, use it! You are sewing on a towel after all and a walking foot will help pull the thickness through. Hmm, need to dust my sewing machine…

Favorite Dish Towel Rescue Mission
Turn the corner and keep on stitching!

Favorite Dish Towel Rescue Mission
After the outside edges are stitched, I changed to white thread and stitched rows along the patch. Remember, the inside of this patch is scary, loose, falling-apart towel. Extra stitching will give the towel spiffy new stability.

Favorite Dish Towel Rescue Mission
Turn the patch and stitch the other way.

Favorite Dish Towel Rescue Mission
Rescue mission complete! It’s still not perfect, and it still has some funky pizza stains, but it’s usable and won’t go to the landfill.

Reduce, reuse, recycle!

I have a couple more towels like this and am thinking it would be fun to add some patchwork for a fun repair!

Add your Sewhooked photos to my flickr group and you might be featured in a future post!

Photobucket


Shop | FB | SHFB | Flickr | Twitter

Keeping It Green

I have oodles of those 99 cent green bags that the local grocery store sells.  It takes about 8 of them to carry groceries for our family of four home.  Most of the bags are three or so years old, and they’ve definitely seen some wear since I avoid plastic bags whenever possible.

Since it’s the start of a new year and it’s too darn cold to do much outside, I thought now would be a good time to give them a bit of an overhaul!

This is more mending than craft, but it’s easy and helps maintain my reusable bags.

Keeping It Green
First, I checked for broken or damaged inserts that help keep the bottom firm and the bag upright.  Several of them were completely trashed.  After fishing around in my recycling, I came up with a couple sturdy cereal boxes.

Keeping It Green
The boxes were the perfect size, so I just trimmed them up with scissors, rounded the corners and popped them into the bag.  Wallah, brand new bottom inserts!

Keeping It Green
Next, I checked for split or damaged seams.  Most of them were okay because I fairly regularly check for popped stitching caused by one too many cans!  There was one that had lost it’s stitching and was starting to lose the trim that holds the front and bottom together.  A quick zig zag stitch using whatever thread was on my machine, and it’s good to go!

If you make a Sew Awesome Craft or any pattern, craft or recipe from sewhooked,  I’d love to see a photo.  Email me or add it to the sewhooked flickr group.

Crafty Retrospective: Don’t Waste, Thrift-cycle

A good deal of my crafting is recycling, reconstructing and repurposing.  Thrift stores are gold mines of raw materials and I rarely walk away empty handed once I set my mind to treasure hunting!

Here are a few crafty make-overs from over the years.

tire swing close up

Recycled Tire Swing made from a thrift store tire and a few dollars of hardware.  A back yard necessity!

Potions Bottles

Recycled thrift store bottles with simple paper labels turn them into potion bottles.   Given as part of a Harry Potter Secret Santa Swap.

Crafty Cabinet Full of herbs and spices?  I don't think so!

Repurposed thrift store find – a spice rack that now holds my beads and other wee crafty paraphernalia.

Yarn Ball Cozy from a CD Canister Recycled 2-Liter Bottle into Yarn bag

Recycled CD canister and 2-liter bottle into Yarn Ball Cozies

kurt cobain wallhanging

Thrifted Kurt Cobain tee, recycled into a quilted wall hanging.  Made as a gift.

Gareth's "Punked Out" Shirt Elena's Gauntlets - handsewn by her!

Recycled tees made with and by my kids, inspired by Generation T by Megan Nicolay

Binder Recon - Back to School Recycling

Binder Rescue - Back to School Recycling

Back-To-School binder rescue, a complete revamp (top) and minor fabric additions (bottom)

"handmade by" labels

Recycled cereal box labels

potholder tutorial 038.JPG

Recycled Pot Holder

earring hanger

Picture Frame Earring Hanger

quilt hanger before

quilt rack makeover with friendship quilt

Upcycled thrift store quilt hanger, before (top) and after (bottom)

Recycled Calendar Tutorial

Recycled Calendar Envelopes

Mumu for recyling

Monk's Bag made from a thrifted mumu

Monk’s Bag made from a thrift store mumu (pattern from Purl Bee)

Reduce, Reuse, Recycle a Thrift Store Sweater!Recycled Sweater Bag Tutorial

Recycled Thrift Store Sweater bags

Recontructed leather shirt bag

Recycled, thrifted leather shirt.  I carried this purse for ages!

sweatshirt update

Easy Pockety Hoody hides an unwanted logo and adds a touch of thrift store chic.

Do you have a favorite crafty recycle project?  Post a link in the comments!

As always, if you make any pattern or craft from sewhooked,  I’d love to see a photo. Email me or add it to the Friends of sewhooked flickr group.

Happy crafting


Don’t forget about the Friends of sewhooked challenge!

Craft: Recycle Last Year’s Calendar

Recycled Envelopes from a Calendar

I admit it…  I keep everything that I might be able to use or recycle later on.

If it’s pretty, cool, or unique, it’s somewhere in a plastic bin or drawer waiting to be reimagined.

I’ve been recycling my paper calendars as long as I can remember.  Each December, I start eyeballing the soon-to-be-obsolete model, wondering what it will be in a month or so.

In the past, old calendars have become postcards and gift boxes.  My favorite by far is envelopes.  Calendar pages, especially really cool calendar pages, make great envelopes!

You’ll need:

  • an old calendar, the bigger, the better!
  • envelope template – cut out, and transferred to a piece of lightweight card stock or cardboard
  • staple remover
  • scissors
  • pencil
  • double stick tape OR a glue stick
  • Blanket mailing labels (optional)

Remove staples from the calendar

Separate pages and tear apart along the crease line

Position the template on a calendar page and trace with a pencil.

You might want to fussy cut here, if part of the page is more interesting than the rest.

Using scissors, cut along pencil lines.

Repeat for all pages.

Fold bottom of envelope up towards top, aligning with the bottoms of the side flaps.

For heavier paper, use your template or a ruler to crease. If you have paper-folding tools, this is a great time to use them!

Fold side flaps, making sure they’re even with the top and bottom.

Fold bottom flap out.

Place double stick tape, or use a glue stick, on the side flaps, leaving 1/2″ to 1″ at the top without adhesive.

Fold top flap down.

Finished envelope from the front.

Optional:  for darker papers, add a self adhesive mailing label.

Repeat until you have a pile of gorgeous envelopes!

For sealing, use double stick tape, a glue stick or fun stickers.

The same template, different calendar.

Same envelope from the front.

Now, what to do with the gorgeous thumbnails on the back of this calendar?

How about buttons?!

Have more pretty calendars? Keep recycling!

Recycled Envelopes to gift.

Happy crafting!

Find my free patterns on Sewhooked & Fandom in Stitches.

♥ Jennifer O

Posts on this blog may contain affiliate links to help cover the cost of my website. I thank you for your generous support. ♥

Sewing: Reduce, Reuse, Recycle a Thrift Store Sweater into a fun bag!

Recycled Sweater Bag 2008

The Recycled Sweater Bag isn’t quite old enough to be considered a Way Back Craft.  I first started making this bag last year.  It works great with a felted thrift store sweater, but you can also make this bag out of denim, upholstery fabric, or just about any other heavy duty material.

The bag size will vary based on the size of your sweater.

Do I need a reason to make a new bag?  Not really, but recycling is a darn good incentive!

Use the written instructions below or watch the video. (Please note this video tutorial was posted in 2008, and the quality reflects that).

You will need:

  • 1 old (or thrift store) 100% wool sweater – felted
  • fabric for lining & pockets
  • magnet purse snap
  • 2 buttons
  • sewing machine
  • thread
  • scissors
  • chalk
  • pins
  • rotary cutter (optional)
  • walking foot (optional)

I used a 1/2″ seam allowance throughout. If your sweater is bulkier, go a little wider or use what works for you.

First up – let’s prep our fabrics!

Cut a square or rectangle out of the body of the sweater, cut the same dimensions from lining fabric, remove sweater arms.

Split sleeves up seam and cut off the tops for pockets.

Cut rectangles out of the sleeve tops, cut same dimensions +1.5″ in length for lining.

Using the remaining scraps, cut out 2 circles and trim the circles into free-form flowers.

Cut 2″ squares out of the bottom left and right, repeat for lining fabric.

Now, let’s make the lining!

Cut a square the same width and length from lining fabric for inside pockets. Fold in half and stitch along the fold.

Pin pocket to inside and mark center with chalk for stitching line.

Pin sides and bottom of lining, stitch, leave 2″ corners open, leave opening in the side or bottom for turning.

Match boxed corners (the notches in the bottom of the bag), pin & stitch.

Press seams then turn right side out. The bottom and pockets of your lining should now look like this.

Add magnetic snaps to your lining following the manufacturer’s directions. Leave enough seam allowance at the top for stitching around. I recommend 1″ or more of space. Add a folded piece of scrap fabric to the back to reinforce the snap. Stitch around the snap to reinforce extra fabric.

Time to work on the outside sweater pieces!

Pin sweater pocket piece to lining pocket piece, right sides together (lining should be 1.5″ longer), stitch ends.

Line up bottom of pocket, pin, then stitch sides. Leave an opening for turning.

Trim corners, turn pocket and pin openings.

Stitch side seams of bag, leaving bottom open.

Turn the sweater bag body right side out, matching seams. Pin pockets over the side seams, then stitch to attach.

With right sides together, stitch across sweater bag bottom.

Fold in boxed corners, matching side & bottom seams, pin & stitch.

The inside bottom should look like this.

Time for Sleeves!

Trim sleeves to desired width for strap, I like a wider strip so tend to cut about 5″. This includes seam allowance. Remember, this is your bag, and this width will vary based on your sweater, so the dimensions are all yours!

Pin ends of two sleeves together, stitch and trim seam.

Fold lengthwise, stitch, leaving approx. 6″ open for turning

Turn right side out and smooth opening.


Stitch closed with a tight whip stitch.

Center and pin straps to side seams, being sure to match right sides. Stitch in place.

Ensure the straps are inside and pin the lining to the sweater (outside of the bag), right sides together. Stitch around the top.

Turn the bag right side out through the opening in the lining.

Pin opening in lining. Stitch closed.

Turn lining inside, smooth and pin. Top stitch.

Stitch flower to center of each side over snap, stitch button on top. We are DONE!

What a fun way to recycle an old sweater!

Here’s a fun one I made with a cute purple sweater!

Happy Crafting!

Find my free patterns on Sewhooked & Fandom in Stitches.

♥ Jennifer O

Posts on this blog may contain affiliate links to help cover the cost of my website. I thank you for your generous support. ♥

Reconstruction: Pockety Hoody

sweatshirt update

I’m a big thrift store shopper.  Sometimes, I find great articles of clothing that are the perfect size for one of my kids, but I know they won’t wear it because of a design or picture that’s on it.   They’re both really into black at the moment and I found a great black hoodie sweatshirt the perfect size for my son.  The price?  $1.25.  Could I pass that by?  NO WAY.

The drawback?  It came with an embroidered image of The Grinch.  Cute, yes, his style, absolutely not!

After having the sweatshirt linger in my “to do something with” pile for a while, it occurred to me that I have all kinds of odds and ends leftover from other projects that might update the shirt and make it ready to wear.

One Levi’s pocket and about ten minutes of stitching later, and the update is complete and the hoody has gone from “Absolutely not!” to “Cool, Mom!”

It’s more of an update than reconstruction, but you get the idea!

To update a logo sweatshirt, you’ll need the sweatshirt and one jean’s pocket.  Use a heavy-duty seam ripper to remove the pocket, or, if you feel comfortable doing so, a razor blade.  Just be careful if you do!

A sewing machine is pretty much a must for this project, but if you want to try it by hand, you’ll need a heavy duty needle and a bit of patience to sew through all the layers!

sweatshirt update

Smooth out your sweatshirt.

sweatshirt update

Remove jeans pocket, being careful not to tear the fabric or cut yourself.

sweatshirt update

Pin the pocket in place.  You can go for a straight angle like I did here, or turn it a bit left or right for a more interesting look.

sweatshirt update

From the front, stitch carefully around the pocket using the existing stitching lines.  Reinforce at the corners and top of the seams.

sweatshirt update

And you’re done!  Super fast and easy update!

As always, if you make any pattern or craft from sewhooked,  I’d love to see a photo. Email me or add it to the Friends of Sewhooked flickr group.

Happy crafting

Recycled Cereal Box Labels

Recycled Cereal Box Labels

I am not a scrapbooker, not even by the grandest stretch of the imagination. There are crafters in my life that are uber-talented scrapbookers and do amazing things with photos, ink and paper.

Even though I don’t scrapbook, I do love stamps. My stamp collection is tiny, but functional and I love to use it whenever I can.

Because I make so many hand crafts, I love to have handmade labels on hand. My new favorite stamp is a “handmade by” I found at Hobby Lobby during a recent sale.

Recycling + new stamps = Cereal Box Labels! One large cereal box makes about 18 3″ x 4″ labels.

  • cereal box
  • stamps
  • ink pads
  • ribbon
  • paper cutter OR ruler & scissors

Open the cereal box along the seam line. Trim off the flaps. Recycle or set aside for another project.

The next two steps can be done either with a paper cutter or with a ruler and scissors.Square up the end of the box. Cut in 4″ strips.


Cut strips into 3″ pieces, giving you 3″ x 4″ cards

Now the fun part! Stamp! Use whatever stamp, color, etc. you like. If you have alphabet stamps, add your name, too!

Punch holes in the side or corners of the labels.

Tie a ribbon or string through the hole in the label. Thread the two ends in first, then bring those through the loop. Pull tight.

Tie, tape, pin, or glue your new recycled labels onto crafty projects.

After originally uploading this tutorial, I was gifted my own custom stamp. How fun is that?!

Happy crafting!

Find my free patterns on Sewhooked & Fandom in Stitches.

♥ Jennifer O

Posts on this blog may contain affiliate links to help cover the cost of my website. I thank you for your generous support. ♥

Yarn Ball Cozy from a CD Canister

Yarn Ball Cozy from a CD Canister

queue this pattern on ravelry!

printable pattern

I had one of those “I could make that!” moments at the craft store this weekend. The culprit was a yarn cozy, big enough to hold one ball or small skein of yarn. My daughter and I were looking over the apparatus, which cost approximately $13. It had a clear plastic bottom with a drawstring top. The plastic bit reminded me strongly of a pile of recyclables I’ve been saving for just such a purpose! If you’ve ever bought a value-sized package of writable cds or dvds, you know just what I’m talking about. I’ve used the lid from one for ages to keep my balls of yarn from dancing around and enticing my cats. Take it a step further, and it’s a cozy caddy and cute, too!

You’ll need:

  • small amount of worsted weight yarn (I used cotton)
  • one cd or dvd value-sized container lid
  • F Hook
  • G or H Hook
  • Drill or dremel, with 1/4″ or slightly larger bit
  • Masking tape
  • scissors
snip off the tabs measure out tape around container
Snip off the tabs off the sides of the lid that would hold it in the base. Measure out masking tape around the container. Tear off enough to have a small overlap.

add 1/2" marks to tape yarncaddy 004.JPG
Add 1/2″ marks along the tape. Stick on the lid approximately 1/2″ from the top, being careful to keep it even.

yarncaddy 005.JPG yarncaddy 007.JPG
Drill holes along the 1/2″ marks on the tape. Just a quick warning here: I broke a hole punch in my enthusiasm to make this project. Use a drill if you have one, putting a piece of scrap wood behind the plastic to catch the drill bit when it pops through. And please be careful, power tools are, after all, power tools!

yarncaddy 010.JPG yarncaddy 012.JPG
Row 1: Using a hook that will fit through the hole (I used an F, but you can go larger or smaller depending on the holes), Sl st in any hole. sc loosely around. Sl st to join in beg sc.

yarncaddy 013.JPG
Row 2: Using the larger hook (I changed from F to G), Ch 1., sc in first st. *2 sc in next st, sc in next* around. Sl st in first sc to join.
Note: adapt this row in whatever way you need to in order to have even stitching around the perimeter of the circle.

yarncaddy 015.JPG

Row 3 – 7: Ch 1, hdc in same st, hdc around. Sl st in top of first hdc to join.

Row 8-9: Ch 1, dc in same st and in each st around. Sl st in top of first dc to join.

Row 10: Ch 1, sc around, sl st in first sc to join.

Yarn Ball Cozy from a CD Canister

Row 11: Ch 2, sl st in next sc, *ch 2, sl st in next sc* around. Finish off.

Drawstring:
Ch 75. Pull ends tight, trim to approximately 1″ or weave in ends. For some fun varation, use a ribbon or other trim as a drawstring.

Weave drawstring over and under through every two stitches of Row 8 (first row of dc).

Yarn Ball Cozy from a CD Canister
Your yarn caddy is ready to use!

also posted on craftster and cut out + keep

More Yarn Crafts from Sewhooked!

Add your Sewhooked-related photos to my flickr group and you might be featured in a future post!

Photobucket

Sewhooked Shop | FB | SHFB | Flickr | Twitter


Shop | FB | SHFB | Flickr | Twitter