My family and I spent last weekend in Alpine, Texas for the wedding of my husband’s youngest brother, Mark, to his lovely new bride, Allison. It was a genuinely wonderful weekend, with lots of food, family and happiness all around.
While visiting, I came across a recycled creation made by my father-in-law, Leo. He took an old wool sock that was in much need of darning, cut off the toe and hung it with a bit of wire hanger. This previous-sock is now the home to plastic bags for even more recycling. The bags go in the top and come out the bottom.
I’ve, of course, seen similar commercial creations as well as make-from-scratch patterns, but I am very much drawn to repurposing and am now on the lookout for my own long sock that is in need of recycling so I can make one for myself!
I do apologize for the confusion and having to shuffle the links about. I’ve left the Blogspot format in favor of WordPress and I think you’ll find the new format much friendlier and easier to navigate.
It’s no secret among my friends that I’m a big Eddie Izzard fan. My family and I were lucky enough to get to see a live performance in June. Eddie was amazing, funny & brilliant, just as you might expect!
Also available as a video tutorial:
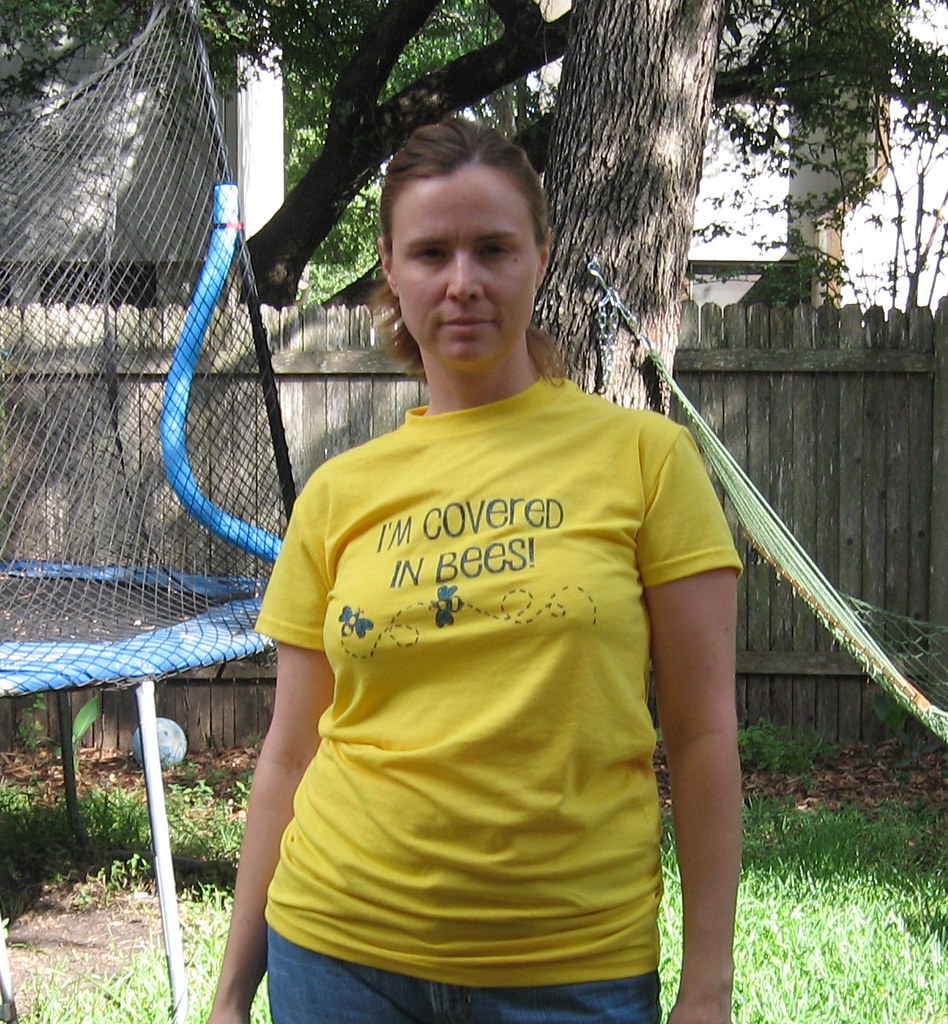
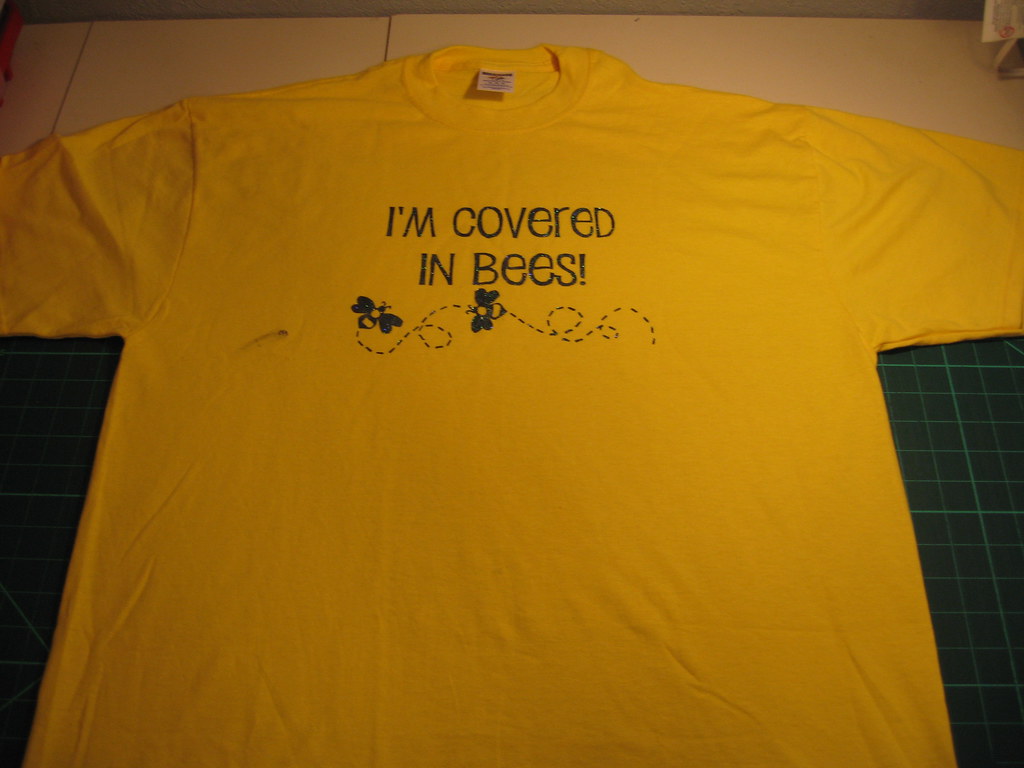
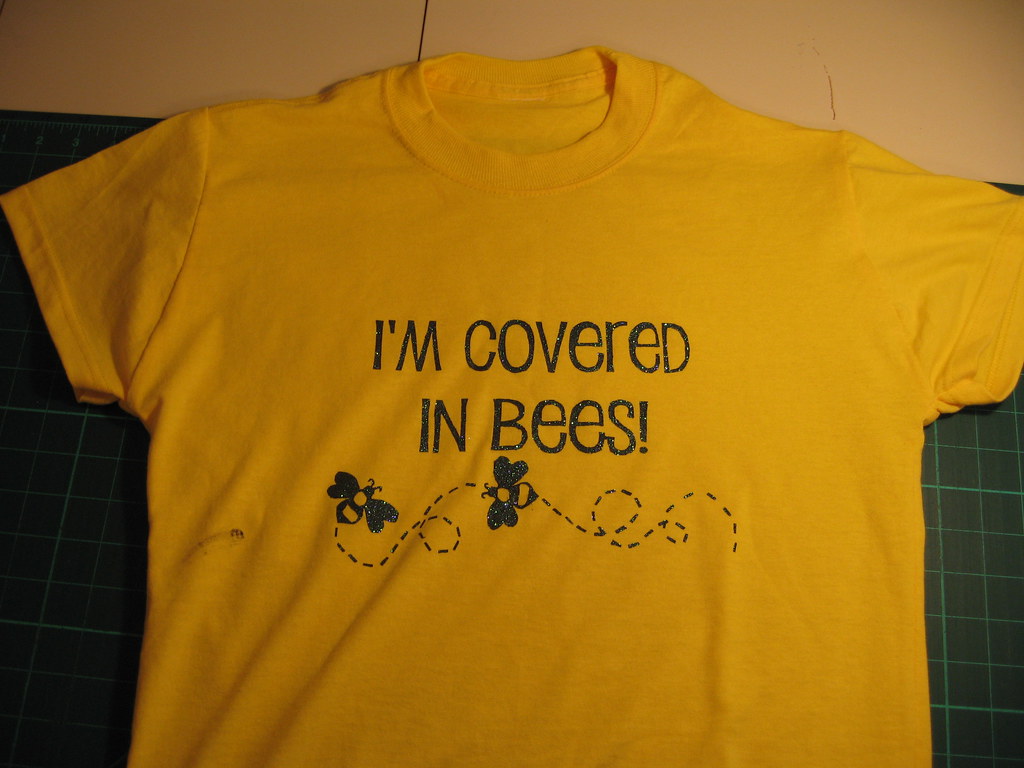
In honor of our shared Eddie-love, my good friend Shae stenciled this fantastic “Covered in Bees” t-shirt for me. She knew it would be too big and sent it with her crafty blessings to be reconstructed however I saw fit.
Resizing tees is the recon I do most often, making my shirts fit me better while still being long (and wide!) enough to go over my hips.
Use a favorite shirt that you already love the fit of and that has similar stretch to the fabric.
This is a fairly easy recon and usually takes about 30 minutes from start to finish.
Supplies:
Too Big t-shirt
smaller tee (guide)
pins
scissors
thread
sewing machine (optional)
ball point needle (for jersey fabrics)
The shirt, before resizing
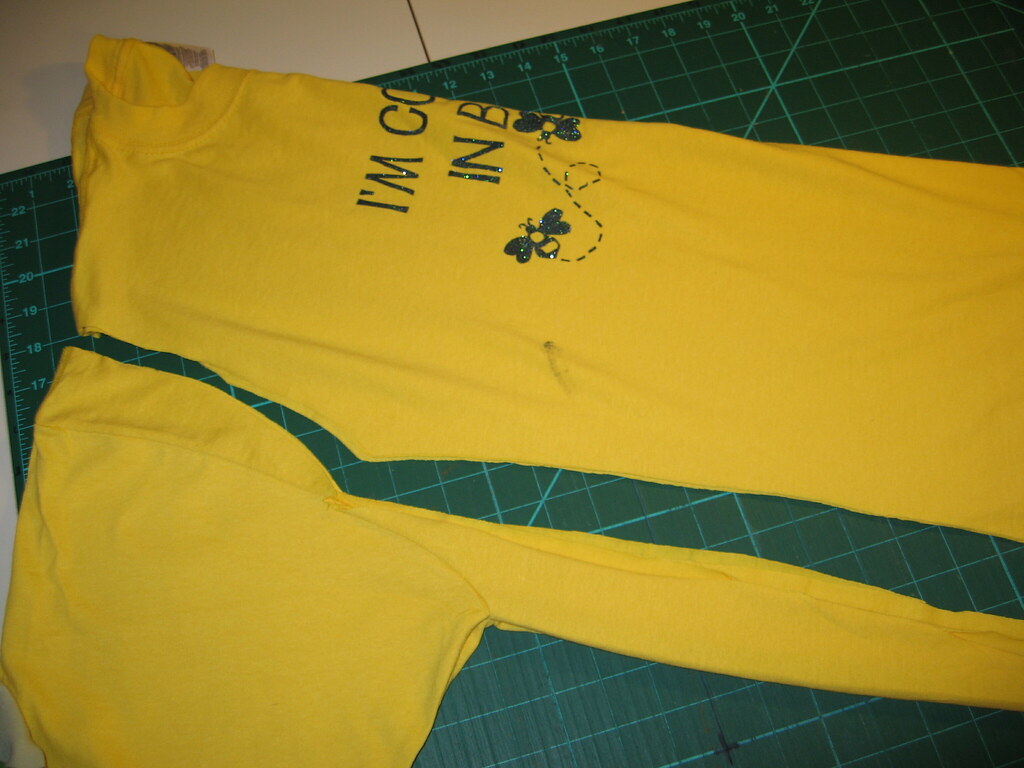
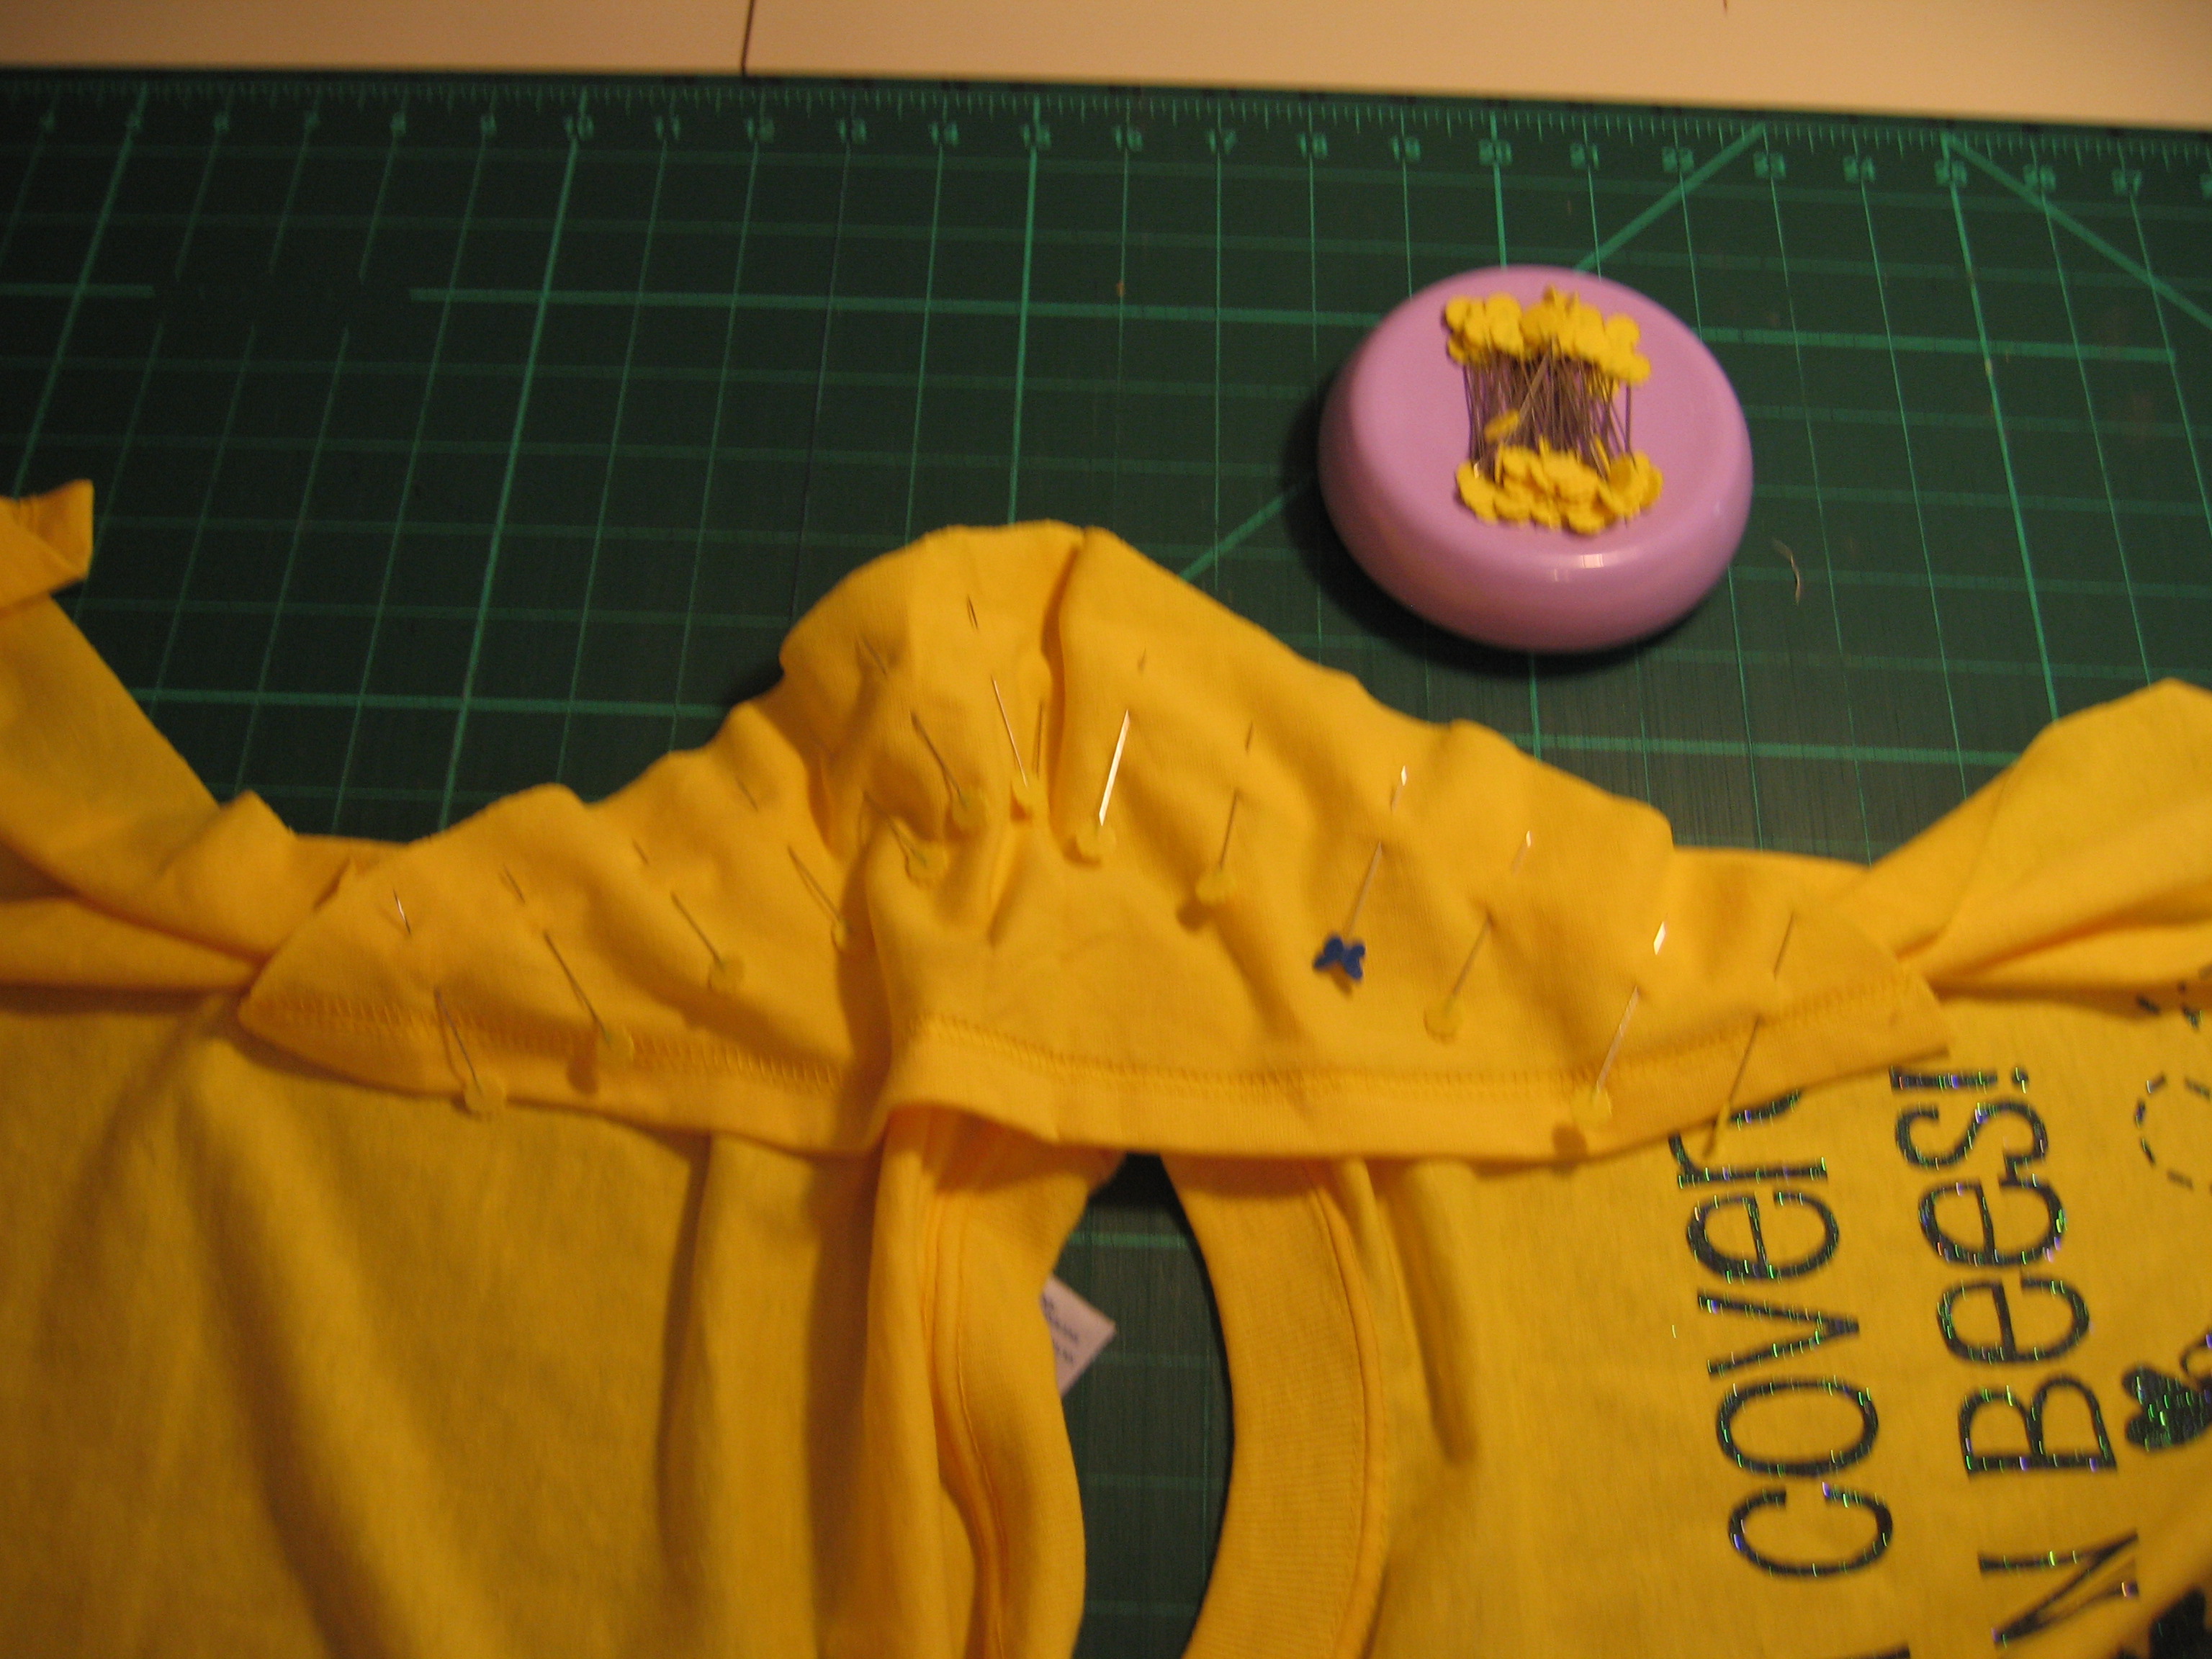
Resizing using a favorite shirt – cut about 1/2″ away from the original shirt so you have seam allowance. You’ll have to do a little guestimating on the sleeves, but if you take it slow and careful, it’ll work out fine.
Use my favorite recon technique and eyeball for the sleeve size, adjusting the sleeve under the body of the t-shirt until it’s the length and shape you want. Pencil a line on the existing sleeve using the cut on the t-shirt, and then added about 1/2″ for seam allowance.
Find the center on the sleeves, pin to the seam allowance on the shirt. Pin along the sleeve, being careful not to pull or tug the fabric. Stitch using a stretch stitch and 1/2″ seam allowance.
(Note from 2025 Jennifer – while updating this tutorial I realized this photo was missing. It appears to be long gone from my files and I do apologize for the inconvenience.)
After stitching the sleeves, fold shirt in half, right sides together, matching the bottom hem. Stitch a 1/2″ seam under the sleeve and all the way down the side. Trim seam allowance, if you wish.
Because you leave the original hems for the sleeves and the shirt in place, the reconstruction is now complete!
Add your Sewhooked-related photos to my flickr group and you might be featured in a future post!
Sue Upton, of PotterCast, receiving her Hufflepuff gift bag
during Lumos in Las Vegas, July 2006.
While I love all crafts, paper piecing is my One True Craft. (bold, capitalized, giant font ONE TRUE CRAFT). I love designing, making and sharing. The ideas come faster than I could ever possibly get them all down.
While paper piecing is definitely a quilting technique, quilting is definitely not just for quilts. I love using quilt elements in bags, pillows, clothing and art pieces.
I thought it would be fun to do a photo round up of some of the bags in which I’ve used paper piecing and other quilting elements.
All bags and block patterns were designed by me. Many of the patterns are available for free on sewhooked (see links below).
Hufflepuff Gift Bags (as seen above)
Gryffindor Gift Bag, made for Melissa Anelli of PotterCast (gifted at Lumos 2006).
Slytherin Gift Bag made for John Noe of PotterCast (gifted at Lumos 2006)
Gryffindor Messenger Bag, made for Hope, 2006
Ravenclaw Messenger Bag, this one is mine all mine! Made in 2006.
Ravenclaw mini-messenger, made for Josée, 2006. Gryffindor Pencil Bag made for E, 2006
Hufflepuff bag made for Delana, 2007.
Jolly Roger Computer Bag (this one is mine, too!), 2007.
Every year, my family and I break out our big orange and black box full of Halloween decorations, cauldrons and punched aluminum candle holders. Folded and tucked into the side of the box are these sweet bats we made years and years ago. They’ve adorned several front doors, including our current home of almost ten years.
Halloween Bat Door Decoration
Super easy and adorable to boot, these anything-but-scary Halloween bats take about five minutes to whip up.
Fold the acrylic felt lengthwise in half. Pin the Bat pattern on the fold.
Cut around the bat shaped pattern, leaving the fold intact. Fold fabric out. Use hot melt glue to attach google eyes, being careful to use only a dot of glue. Use pattern placement as a guide.
Use the same method to add the magnets to the back of the bat, using the placement shown on the pattern.
Two sizes of eyes.
Looking great!
Once the glue has dried, your batty friends are ready to display!
This is part of my “Way Back Craft” series’; patterns, crafts, tutorials and general crafty memories before the days of this craft blog.
This recipe was created by my son and I while trying to work out what we were going to do with half a bag of leftover marshmallows. We started with an existing cookie recipe, but altered this and tweaked that until we came up with what you see here.
I can definitely live with it. Yum!
1/2 c. shortening
1 c. sugar
1 egg
1/4 c. milk
1 3/4 c. flour
1/2 tsp. baking soda
1/2 cup cocoa
1/2 cup chopped pecans
1 tsp. vanilla
Miniature Marshmallows
Preheat oven to 350°.
Cream together shortening, sugar, milk and egg. In another bowl, combine dry ingredients. Combine with wet ingredients, add vanilla.
Using a tablespoon or cookie scoop, drop onto an ungreased cookie sheet or a cookie sheet covered with parchment paper. Bake 8 minutes. Remove from oven. Push three to four miniature marshmallows into each warm cookie. Place pan back in oven for up to two minutes. Allow cookies to rest on the cookie sheet for 2 minutes before removing to a rack for cooling.
Frosting:
2 c. powdered sugar
4 tbsp. cocoa
1/4 c. butter
2 tbs. half and half or milk
Place butter in microwave for 15 seconds. Add sugar, cocoa and half and half. Whip with a fork or whisk. Spoon onto cooled cookies.
Hint – Place cooling rack over a cookie sheet for this step to catch any drips.
Add your Sewhooked-related photos to my flickr group and you might be featured in a future post.
Sometimes, when the paper pieced designs aren’t coming easily, or my mind is filled with stress or other things that occupy my time, I find succumbing to another designer’s pattern a lovely way to unwind and unravel the tangled strands of my brain.
Lion Brand has been hosting a Crochet Along for a lovely Sampler Afghan. It grabbed my attention at once as being a project that would be fun and portable, which is how I usually like my crochet! Using their pattern, I created my own sampler, with Harry Potter-inspired colors! The actual idea I had was to make an afghan that resembled the four House scarves. The project, from beginning to end, took about two weeks. For lots more awesome variations, check out the Crochet Along Flickr Group. There’s a black, gray and white version by chooosy40 that I really like.
Hogwarts Scarf-ghan
Another great project that I just finished last night was for my dear hubby, who is currently running Call of Cthulhu with his gaming group. Inspired by his eagerness for props, what better than Cthulhu himself? Wee, evil Cthulhu made from this pattern. He’s my first animiguri and while it was a little hard on my hands, I’m quite please with the way he turned out.
Tiny Cthulhu
I regulary quilt and crochet for a local blanket making charity, The Linus Connection, but I’m always on the lookout for other ways that I contribute with my crafts. Coats & Clark’s Special Olympics Scarf Project caught my eye and I just had to make a scarf! Knitters and crocheters can use any pattern they choose, but I opted for their recommended pattern, which is the same as their Wizard Scarf pattern. I’ve made quite a few of those for my family and fellow Harry Potter lovers, so I knew the pattern was a fast and easy one. It worked up really quickly and I made sure to tie one of my “handmade by” labels to it with a note for good luck at the Games to whoever receives it!
Special Olympics Scarf
One of my Livejournal friends, caitirin, has turned me on to an excellent new yarn source! Angelicrafts Discount Yarn offers a variety of brands of yarn at discount prices. Just to give them a try, I ordered the Red Heart Mill Ends “Odds and Ends” box. The price of the UPS shipping was totally paid for by the sheer amount of yarn packed into the box. It’s all store-quality, without the sleeve and came with a personal note from the owner, which I thought was a very nice touch. I will definitely be ordering from them again, once I deplete my now ample supply of yarn!
Yarn from angelicrafts
Another fantastic Livejournal friend of mine, the multi-talented crochet goddess, hp5freak, shared a pattern recently for a Tiny Witches Hat . It’s an adaptation of another pattern that was written so that the hat was made in two parts. Her is easy-peasy and is made all in one piece. I had a brilliant time making this. It whips up in no time and is just the right size to put on a tiny pumkin. This pattern also introduced me to the Magic Adjustable Ring (also called Magic Loop), which I had never tried before but know I will now have a million and one uses for!
Wee Witch Hat
I’m currently hooking another Lion Brand Sampler Afghan, this one a smaller version and in baby colors for The Linus Connection. I’ll be keeping track of my progress on Ravelry. 🙂
I love t-shirts. I love them in a BIG way. I love to reconstruct, redo and, most of all, stencil my t-shirts!
Some time ago, I was asked by some friends for a stenciling tutorial. What I ended up posting was a video tutorial covering how to make a basic freezer paper stencil. The shirt shown was for my partner in a Twilight swap I participated in on craftster.
I hope you enjoy the video and give stenciling a try if you haven’t already!
This is one of my mom’s recipes. I can’t even guess how many times she made these chocolatey wonders for my brother, sister and I when we were growing up.
They are amazingly simple, yummy and cheap to make and I love making them for my own family.
One caution for those that like to change recipes and use what you have (as I do!) – you can’t substitute anything for the instant oats or the cookies won’t set properly and you’ll have a gooey mess.
Chocolate Saucepan Cookies better known as “Cow Patties” or “Mud Cookies”
by my mom, Leona
8 tbs (one stick) butter
1/2 cup milk
2 cups sugar
4 tbs bakers cocoa
3 cups quick-cooking oats (also called instant oats)
1 tsp vanilla extract
1/2 cup peanut butter (optional…extra yummy with crunchy!)
In a medium saucepan, bring butter, milk, sugar and coca to a boil. Boil for two minutes, stirring constantly.
Remove from heat and immediately add oats, vanilla and peanut butter. Stir well. Drop by 1/4 cup-fulls on to wax paper (an ice cream scoop works well).
Allow to cool completely. The cookies will get firm and lose their shine as they cool.
Store in an airtight container. Try not to eat too many…or you’ll get a tummy ache!
I’ve been crafting Harry Potter-themed items since my first reading of the Harry Potter and the Sorcerer’s Stone (Philospher’s Stone for those outside the U.S.).
When I turn back my brain to 1999, I’m quite sure one of the very first things I made was a Golden Snitch. That first Snitch was not an antennae ball, but a soft version with actual feathered wings that my kids played with during their enthusiastic quidditch matches!
***Please Note: When using spray paint work outside or in a well ventilated area***
Place the antenna ball on the skewer.
Poke the skewer into the box or Styrofoam. This will hold the ball in place for painting and give it a place to dry.
Prime the antenna ball. Follow the paint manufacturer’s instructions for drying.
Use gold paint to paint the ball. If using spray, follow manufacturer’s directions.
For brush on, if you have enough, dip the ball in the paint and allow most of the paint to drip back in the can before carefully placing it back in the drying area. Allow to dry overnight.
Cut two wing shapes out of the craft foam.
Using the Exacto knife, cut a small hole in the base of each wing and on either side of the ball where you want to place the wings. Do this by gently pushing the blade into the ball. It does not have to be very deep, just enough to poke the brad in.
Use the tip of the scissors to score the center of the wing (as shown on pattern). Do not cut, just create a gentle groove. This will help with the feathery shape of the wing.
Snip along the wing to create a feather shape (as shown on pattern). Stop 1/4″ from the scoring line.
Poke the brad through the hole in the wing. Place a dab of glue on the cut in the hole cut earlier in the ball and then push the brad into it, positioning the wing how you want it as you do so.
Repeat for the second wing.
Finishing touch – tack the wings together to keep them from drooping while they are on the antenna of your car.
This is part of my “Way Back Craft” series’; patterns, crafts, tutorials and general crafty memories before the days of this craft blog.