Good friends in a time of need indeed! That trip I’ve been talking about? It finally happened! There will be lots of photos and updates now that the proverbial cat is out of the bag.
Oh, and the fourth glass on the right is orange juice, just in case you were concerned. 😉
As you can probably see, I’m feeling much better today! I was sick most of the week and just started feeling like myself again yesterday. Thank you to everyone for the good wishes. Fortunately, it never got worse than a head cold.
Several people have asked for the size of the tote I used for the 2/12″ strips. It’s currently packed for my sewing adventure, so I will try to get that to you next week. I can tell you it’s a Sterlite container and it’s 9″ wide on the inside. That’s how wide I folded the strips. 😉
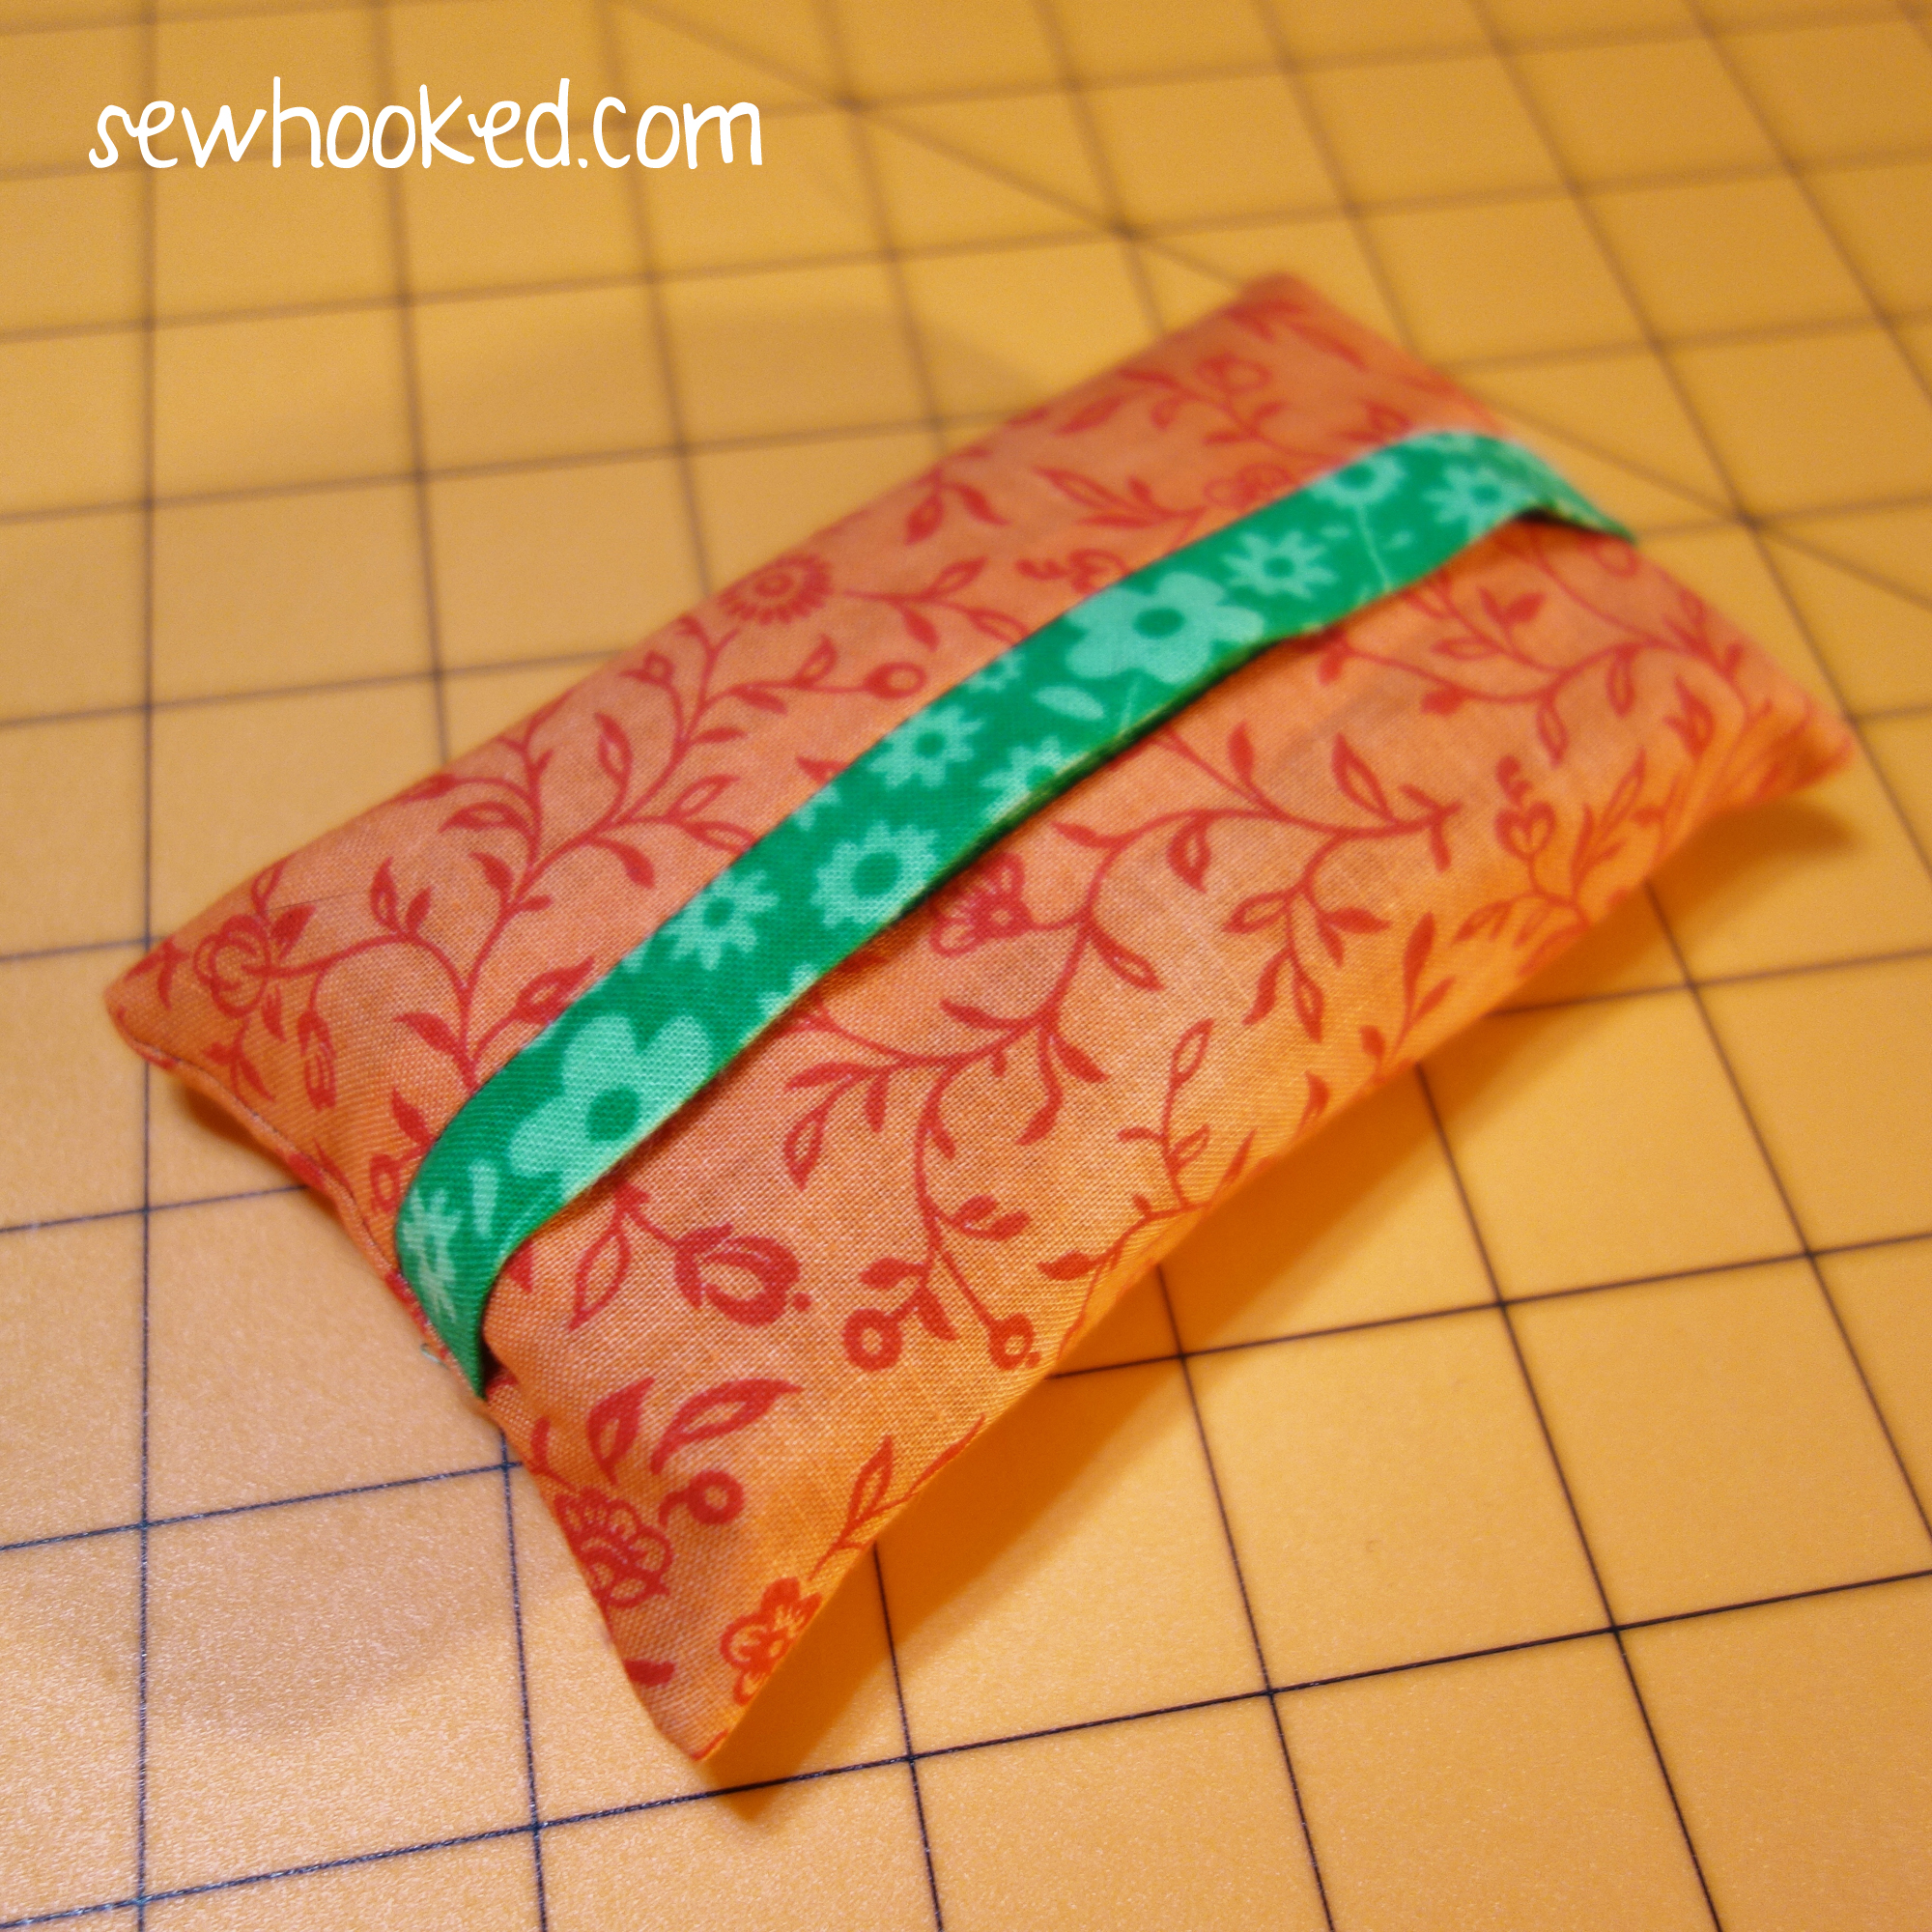
As promised several Talk to Me Tuesdays ago, we have a super simple tutorial to make a self-trimmed tissue packet cover.
Don’t want trim? I have instructions for that, too!
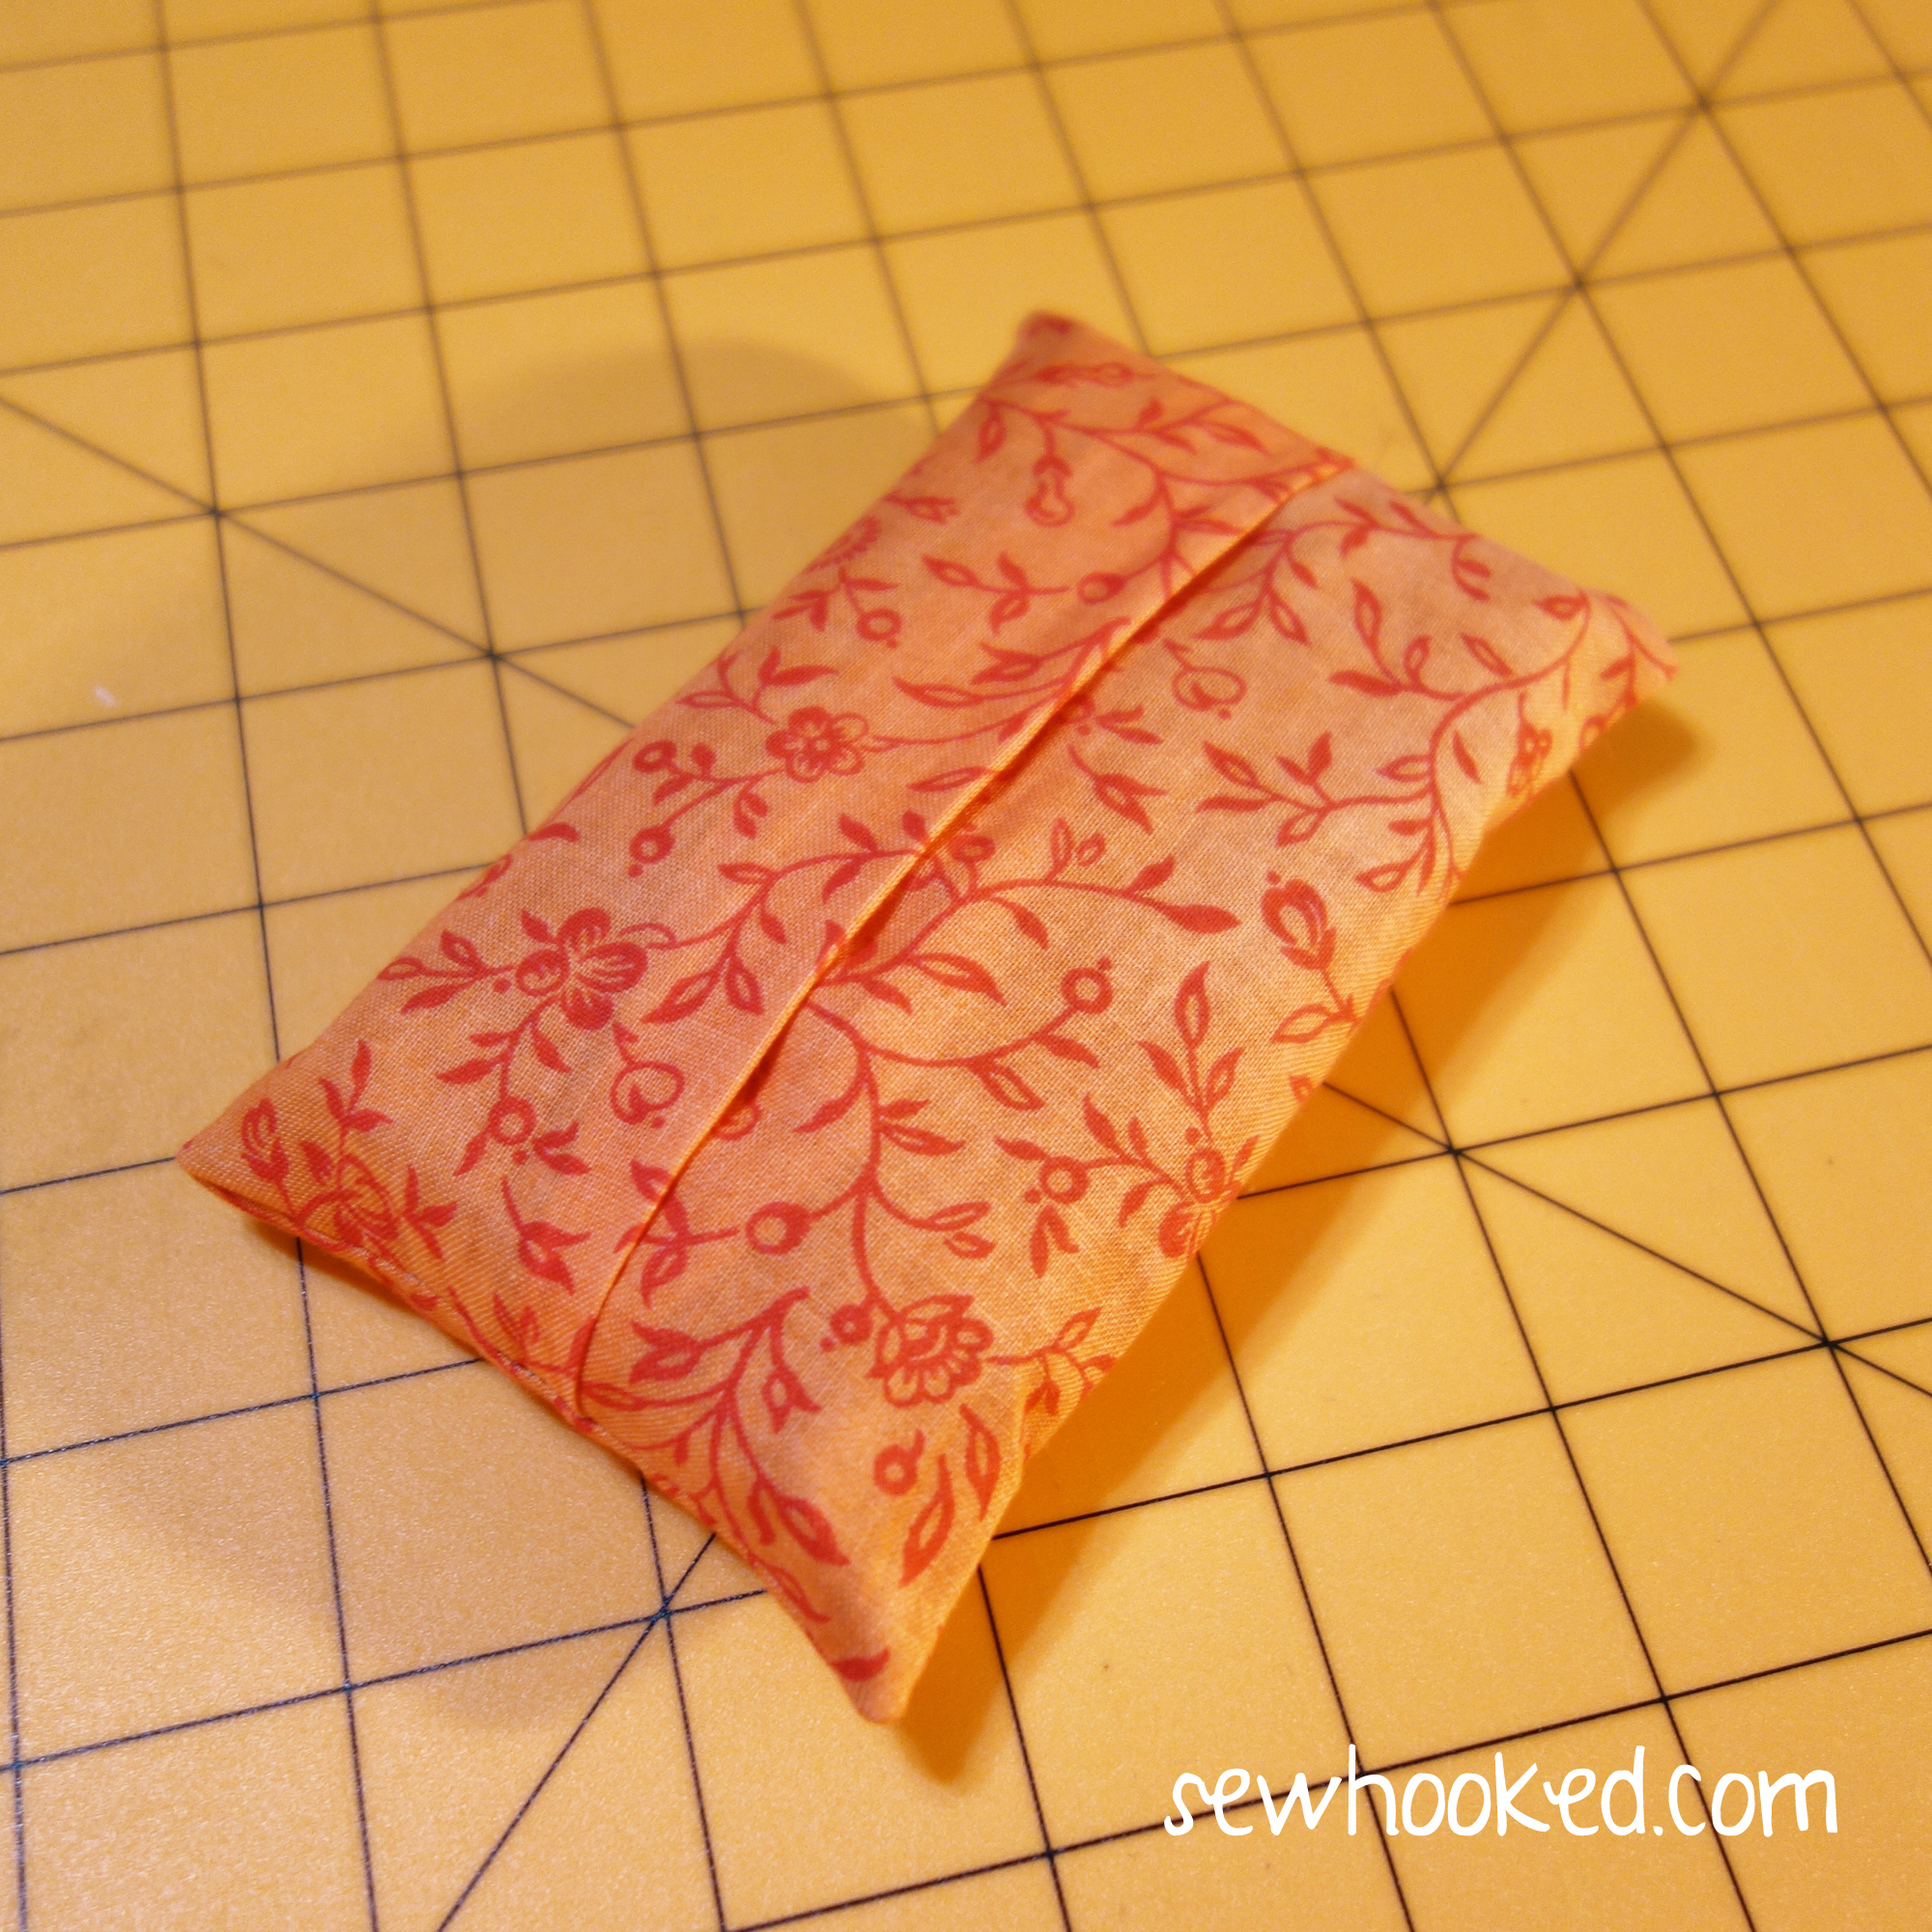
Please note that this tissue cover is sized to fit Kleenex Facial Tissues. Mine are a generic version but are the same size as the Kleenex. Use the brand works for you.
Adjust the dimensions if needed. You can also play with quilt blocks and directional fabric as desired.
These little packets make great gifts, swap additions, and are perfect for keeping your tissues clean and safe in your bag or purse.
First up! Self-Trimming Tissue Cover…
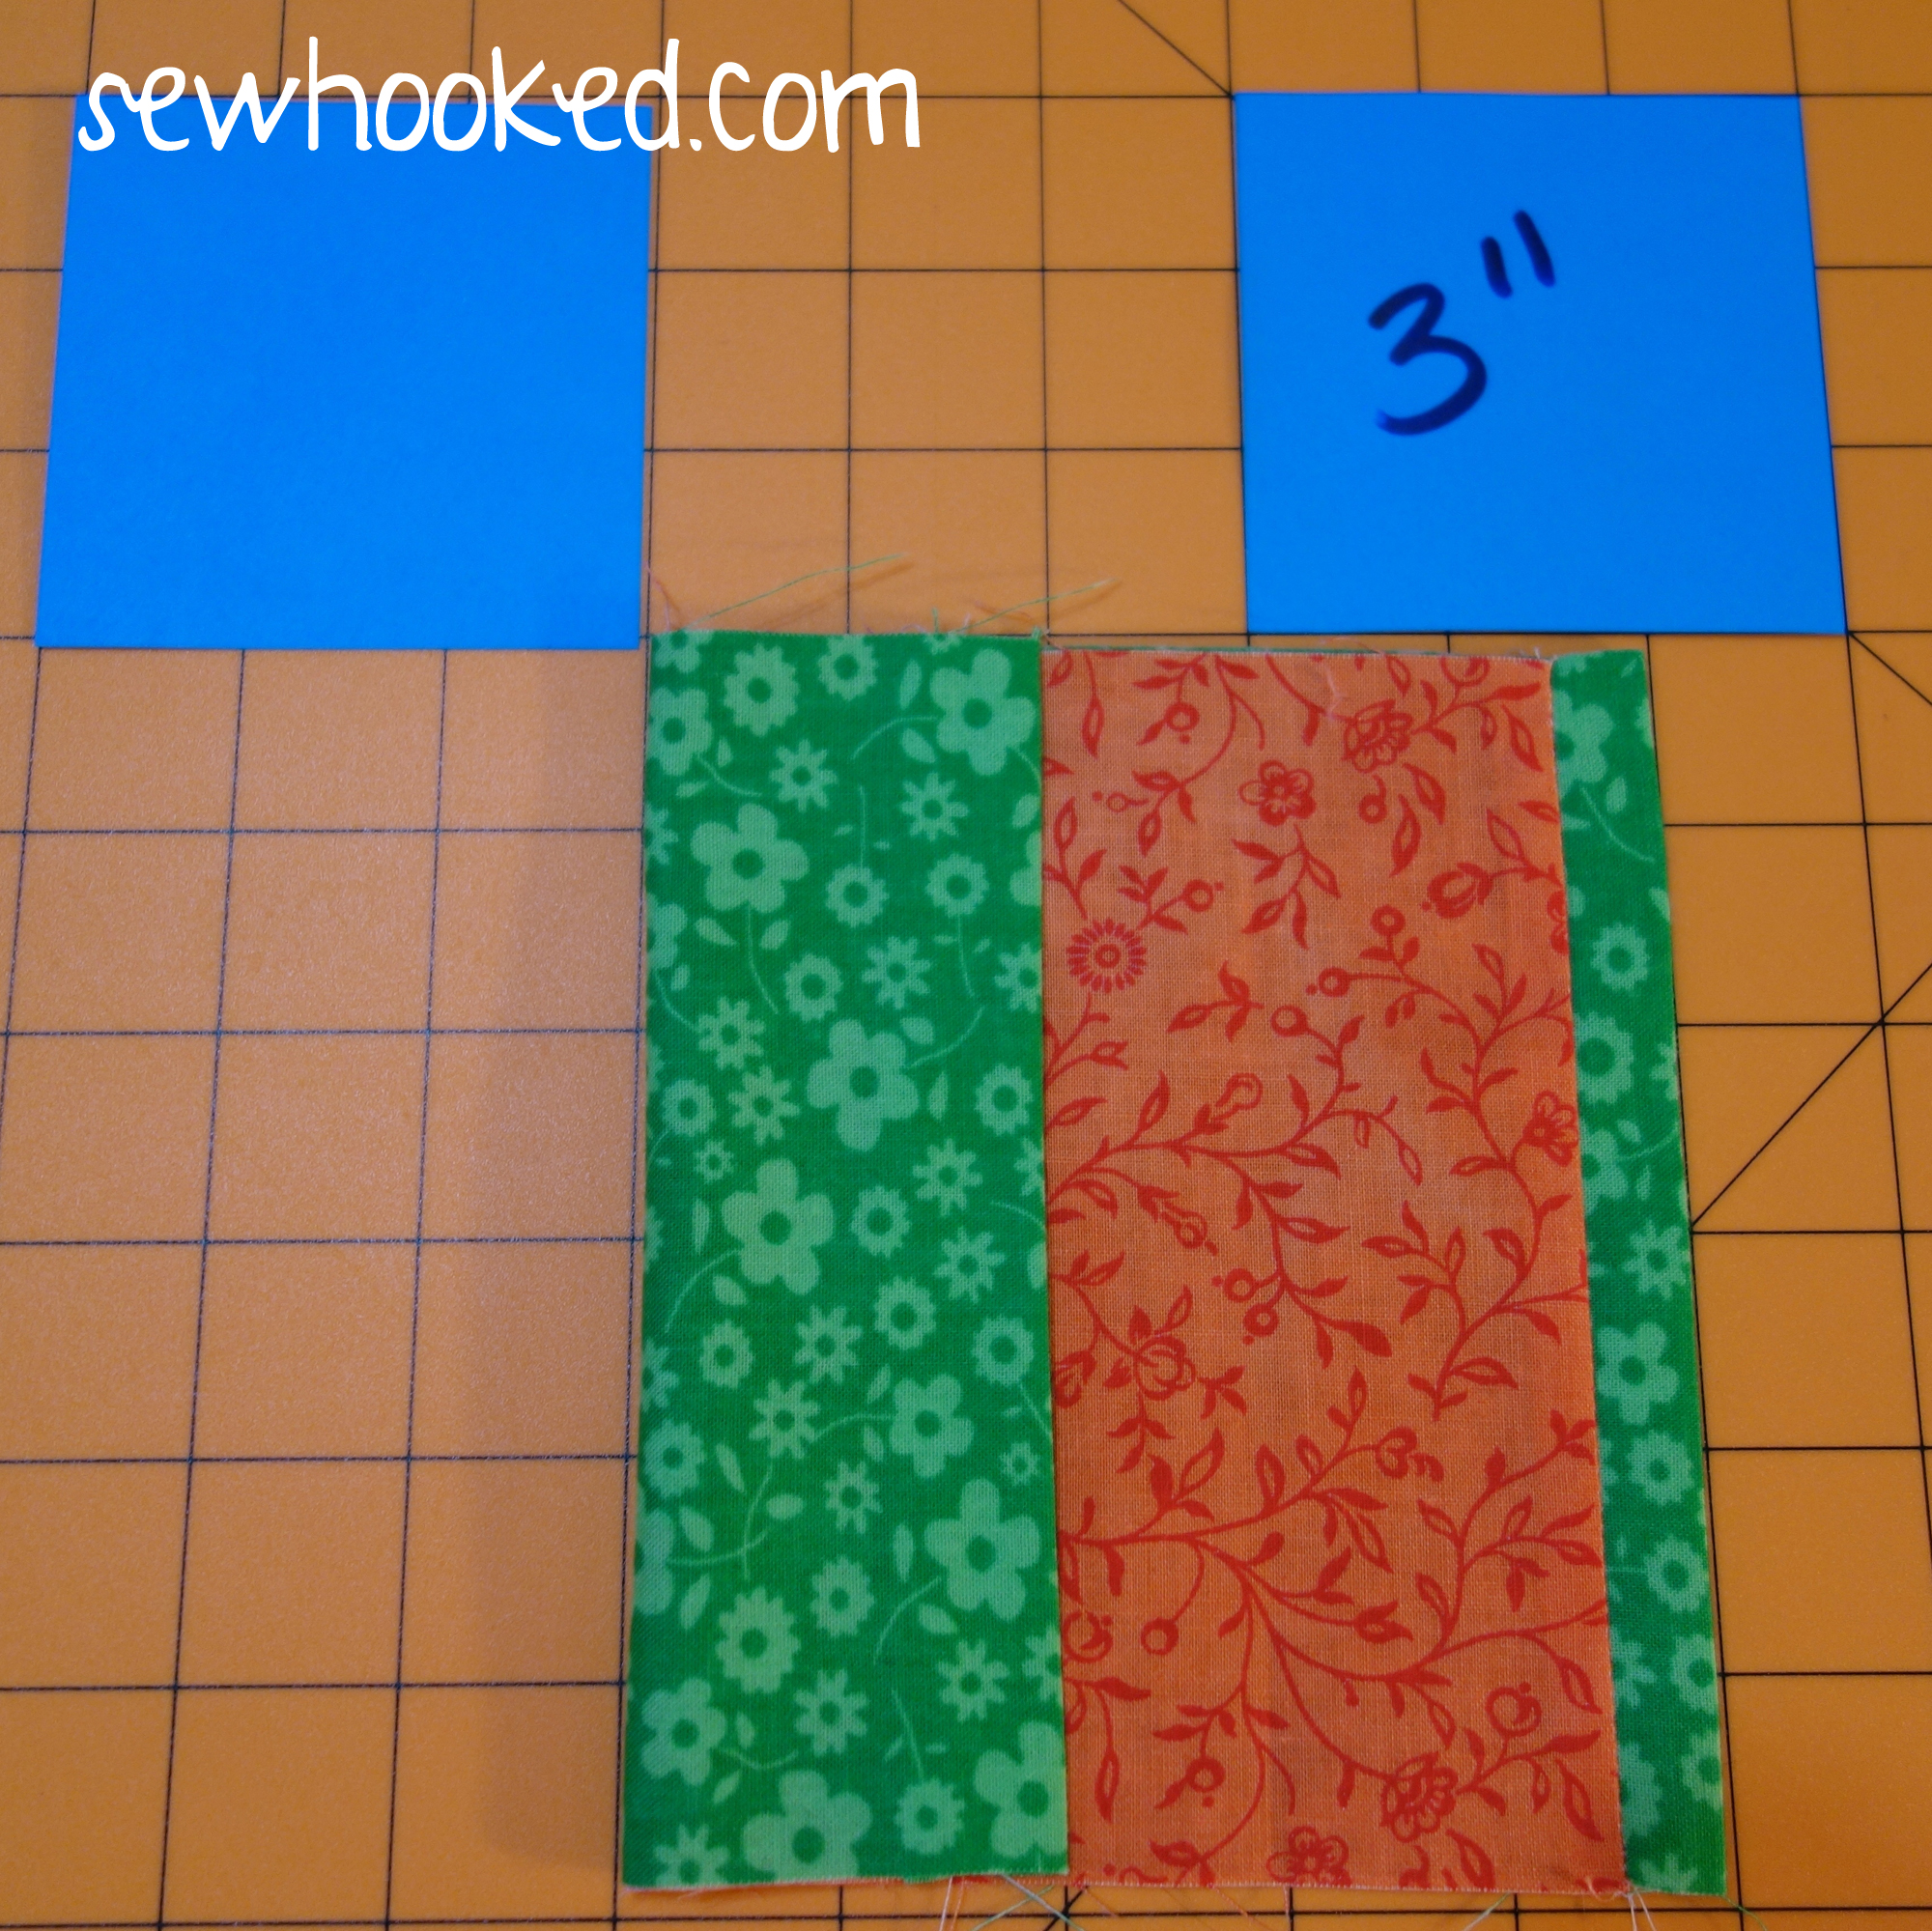
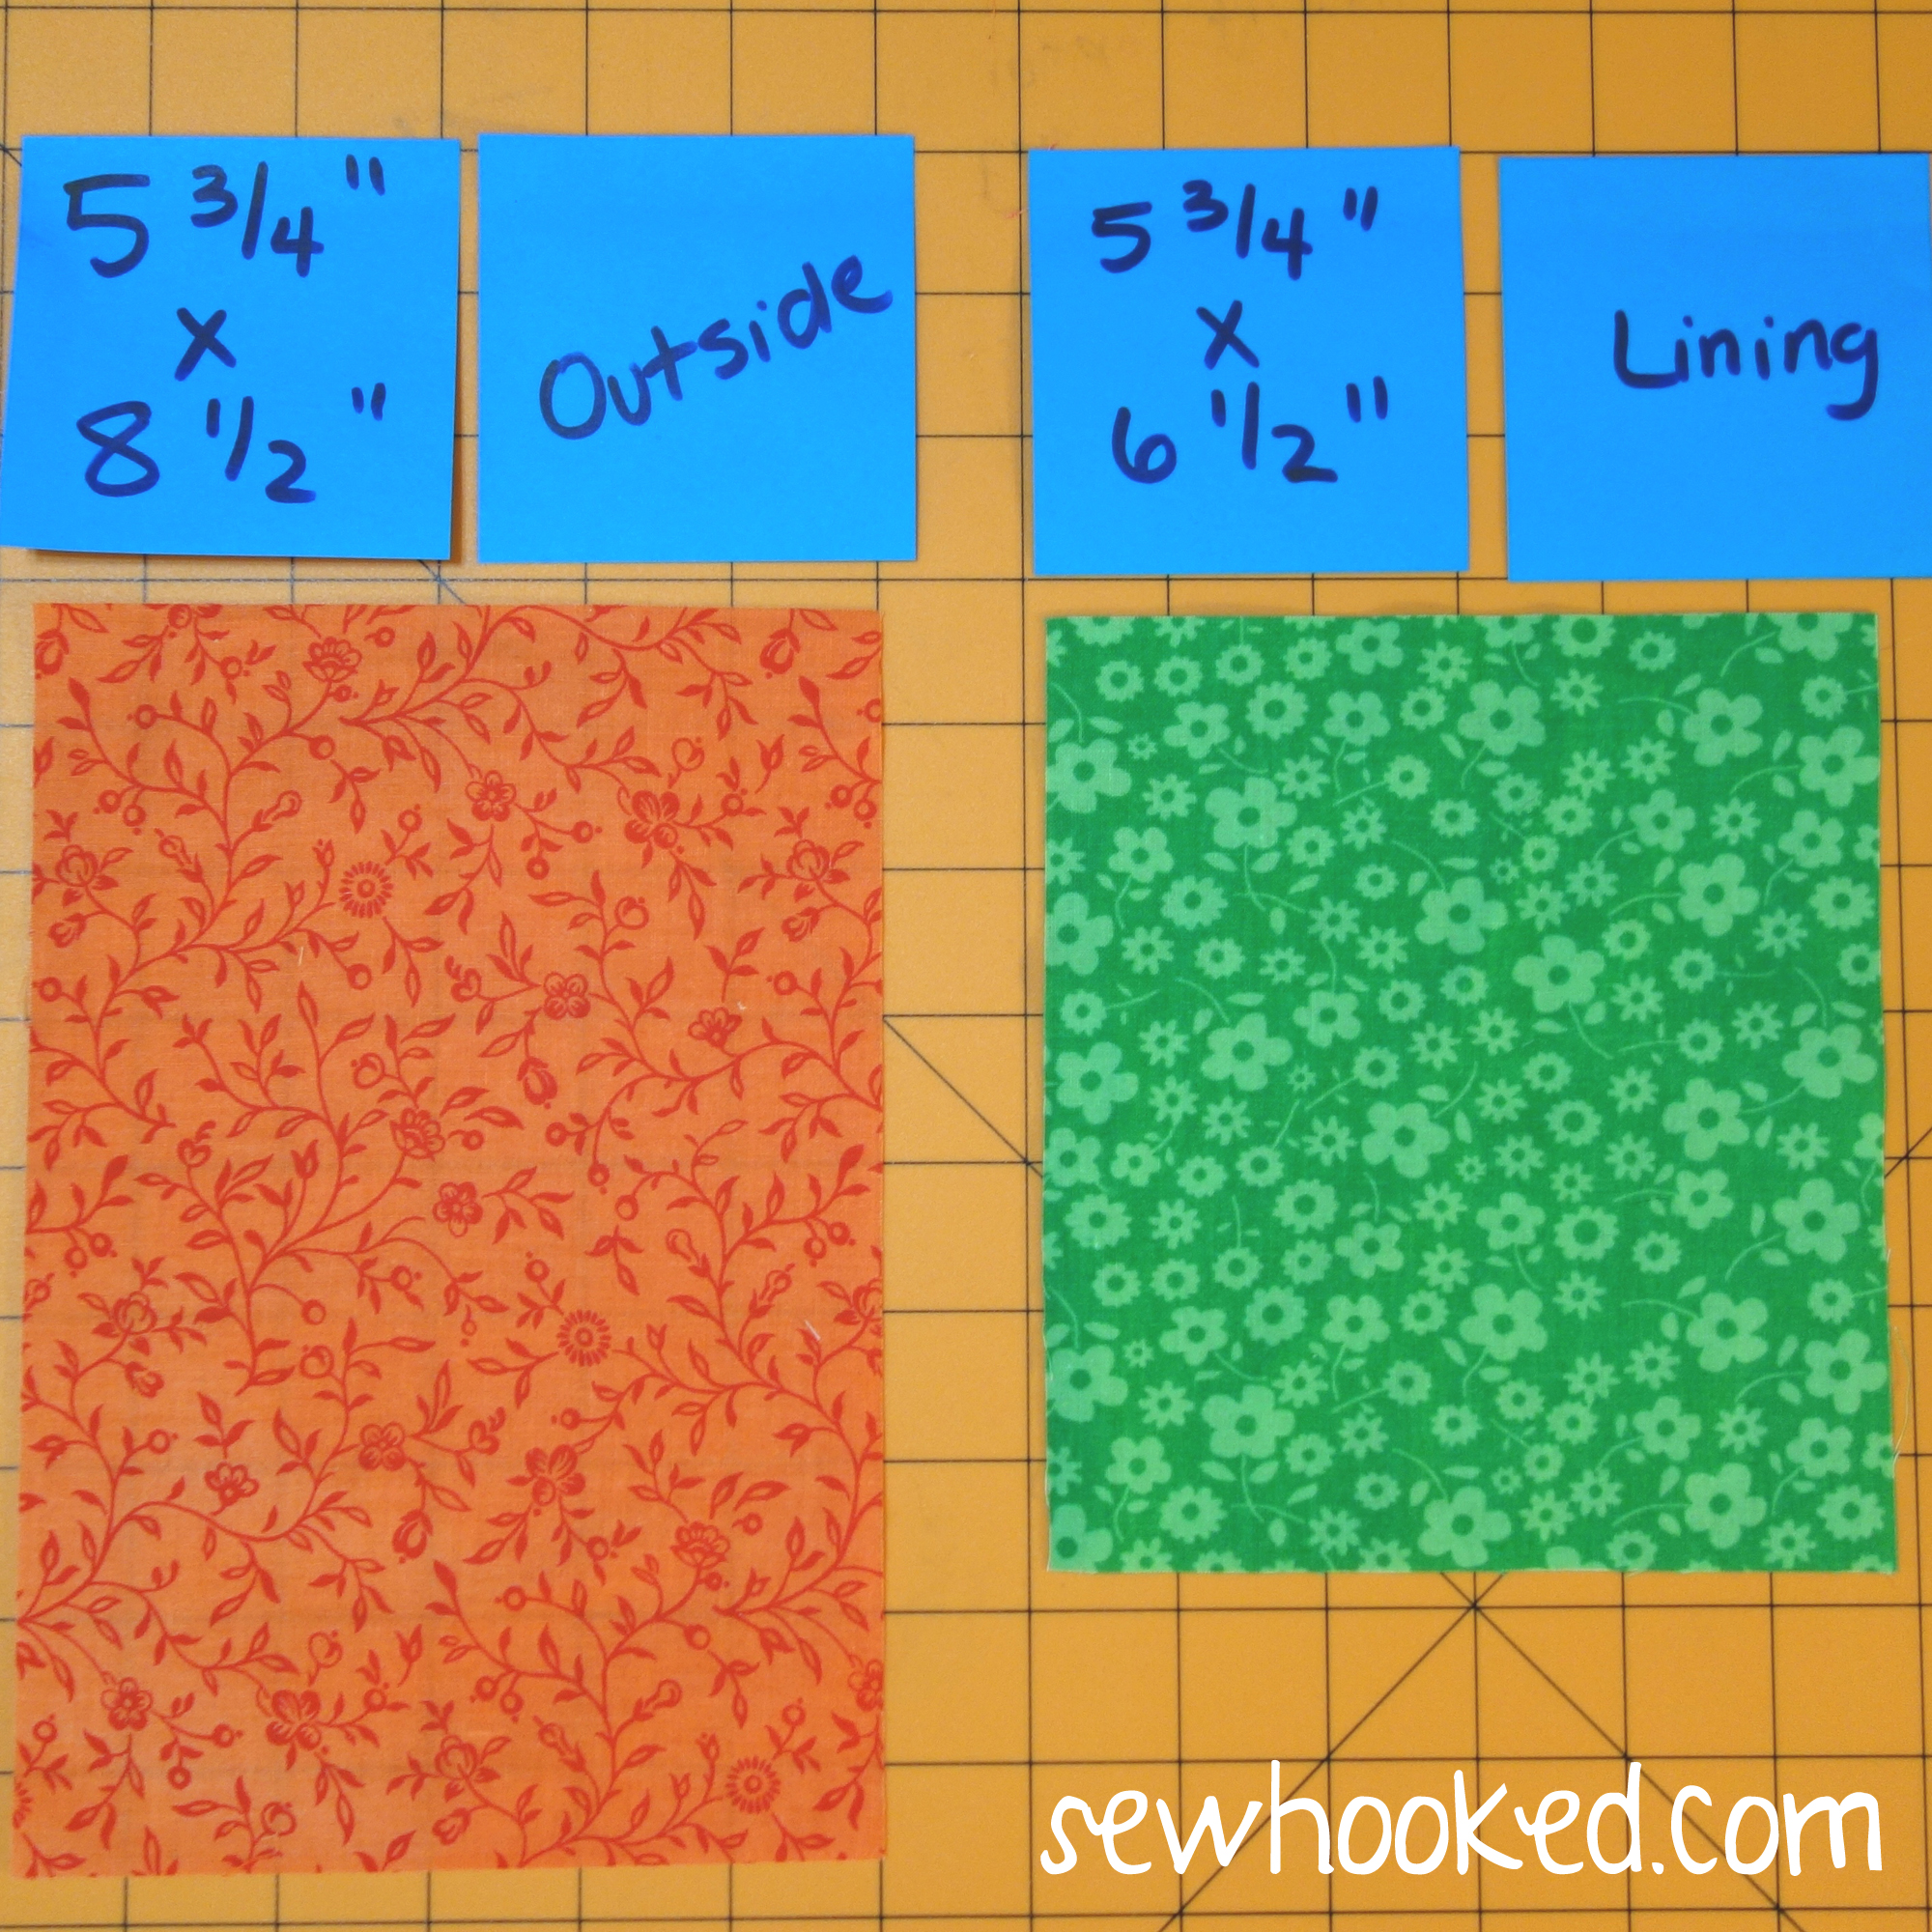
You’ll need fabric in two colors. I’m using contrasting colors to make the lining and outside very obvious. For both the trimmed and non-trimmed version, the outside will be orange.
For TRIMMED Cover:
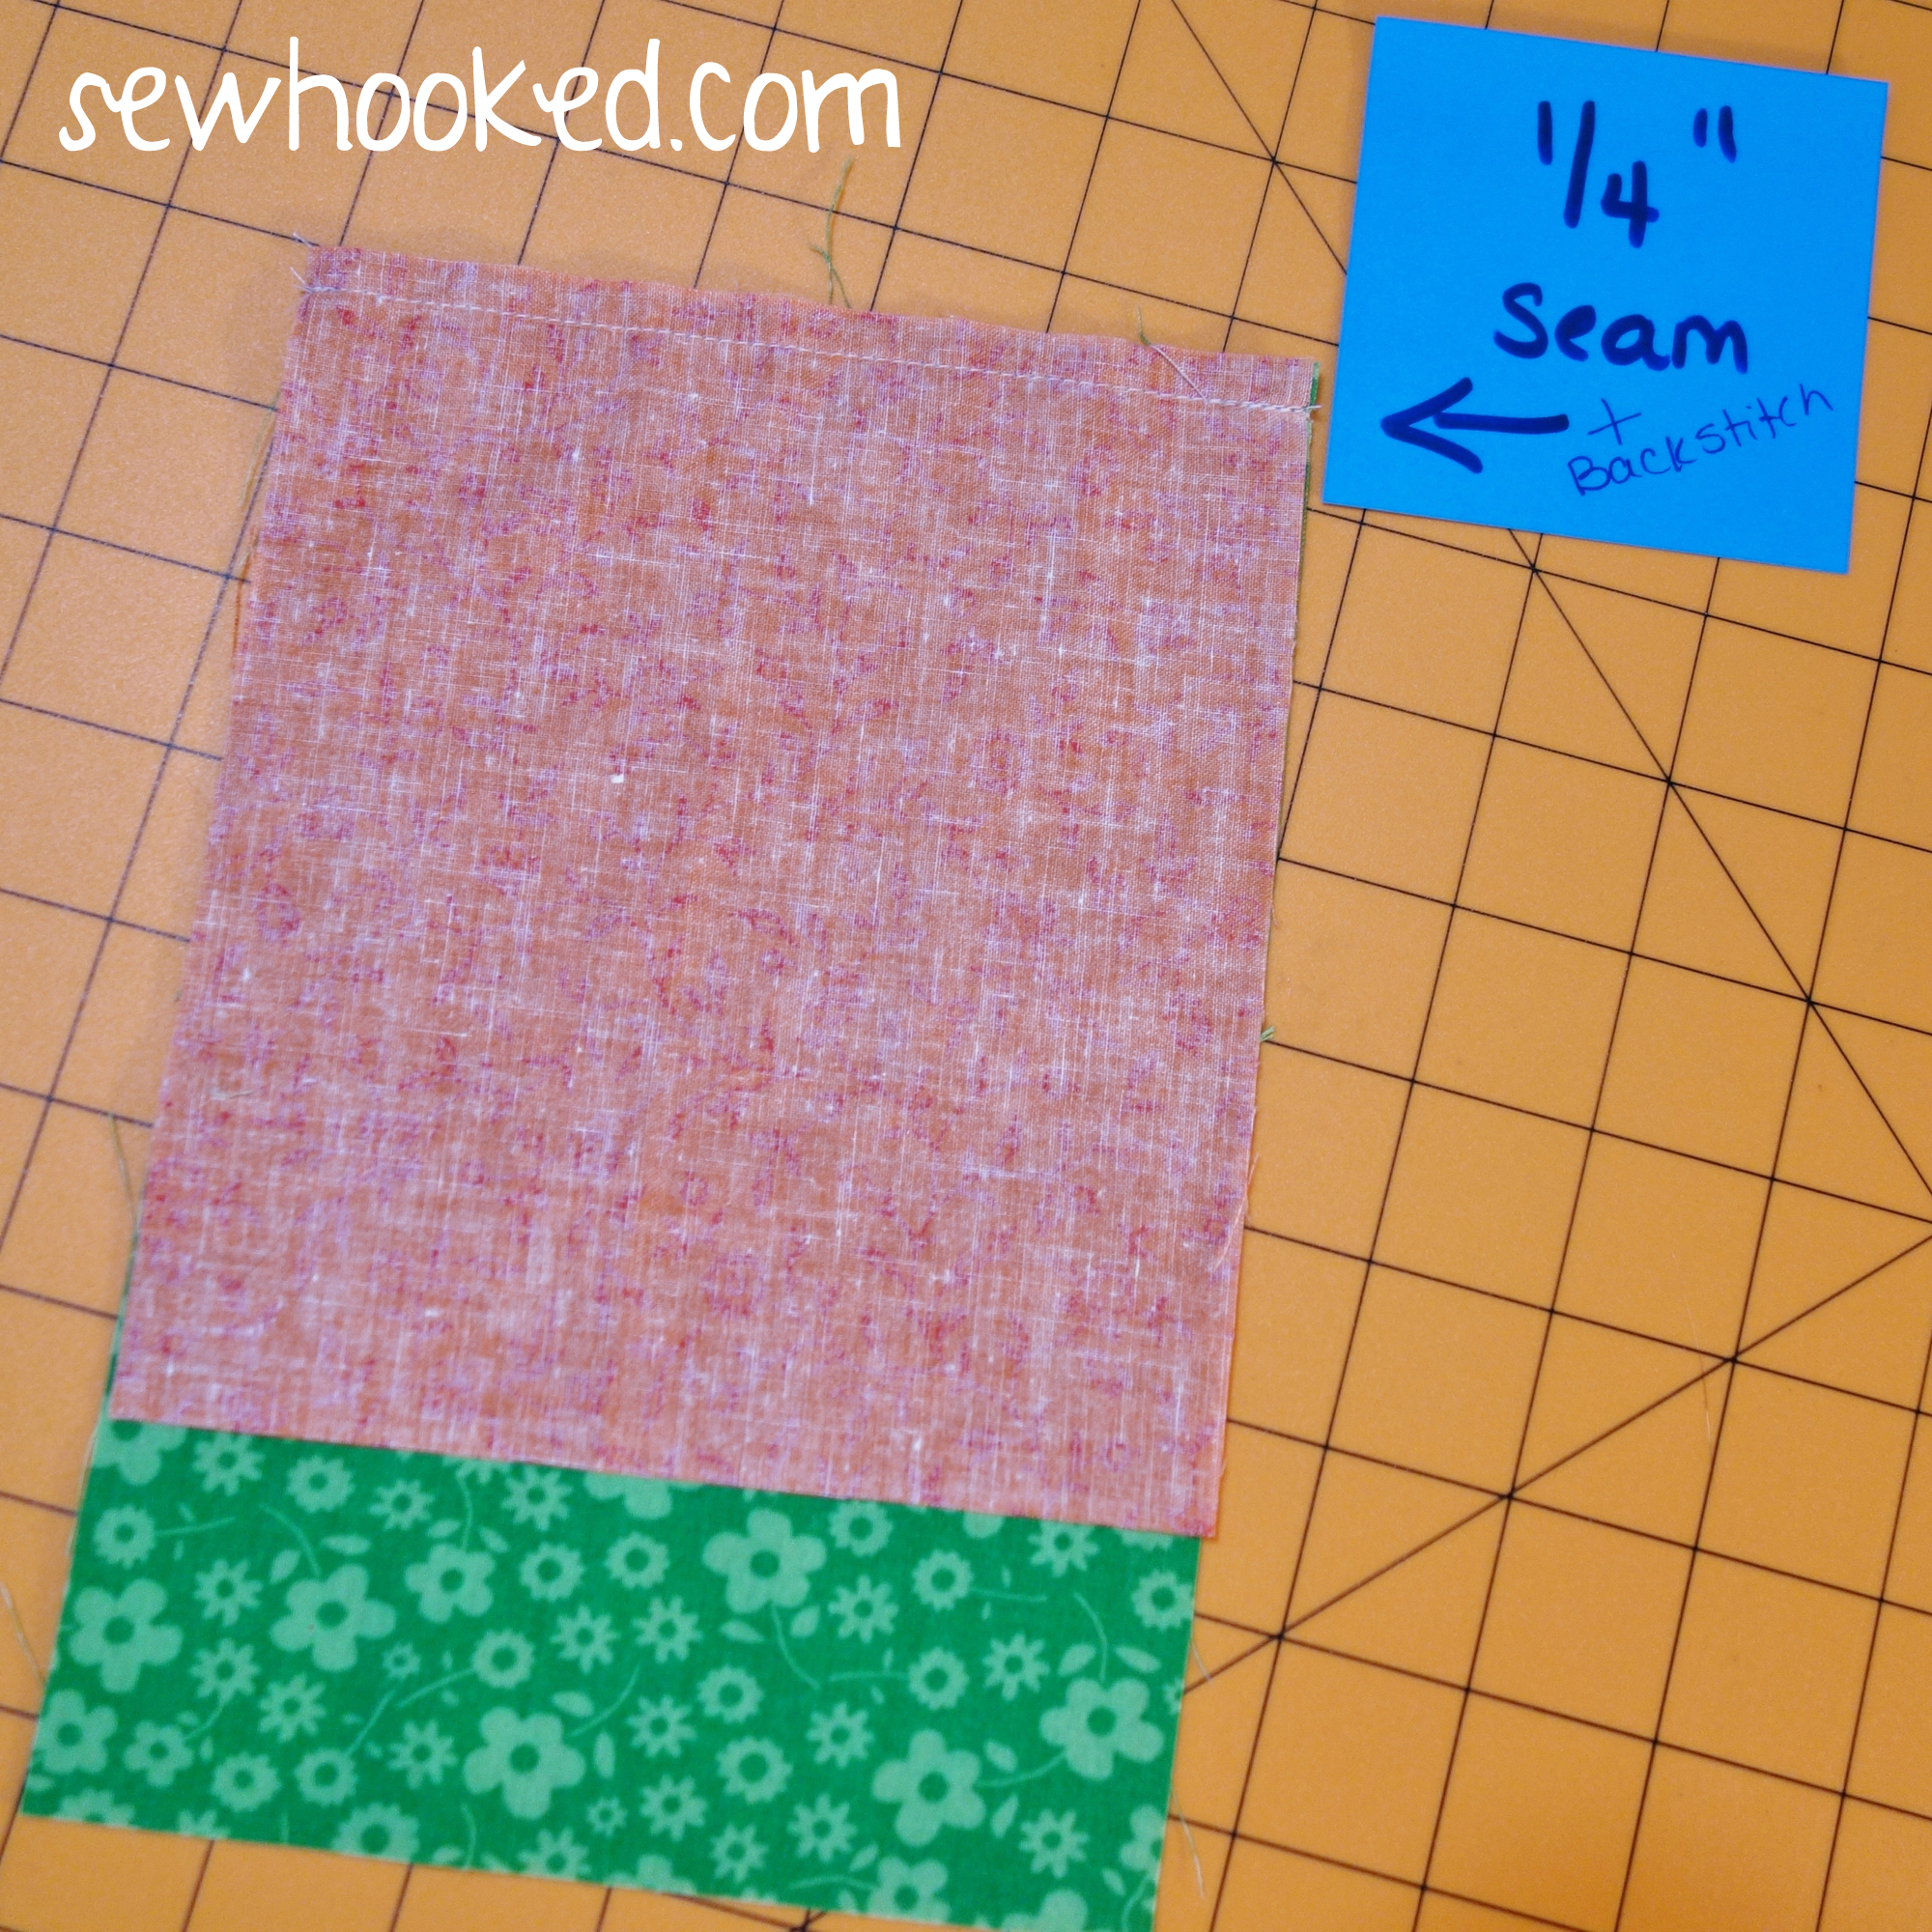
Lining/Trim – 5 3/4″ x 8 1/2″
Outside – 5 3/4″ x 6 1/2″
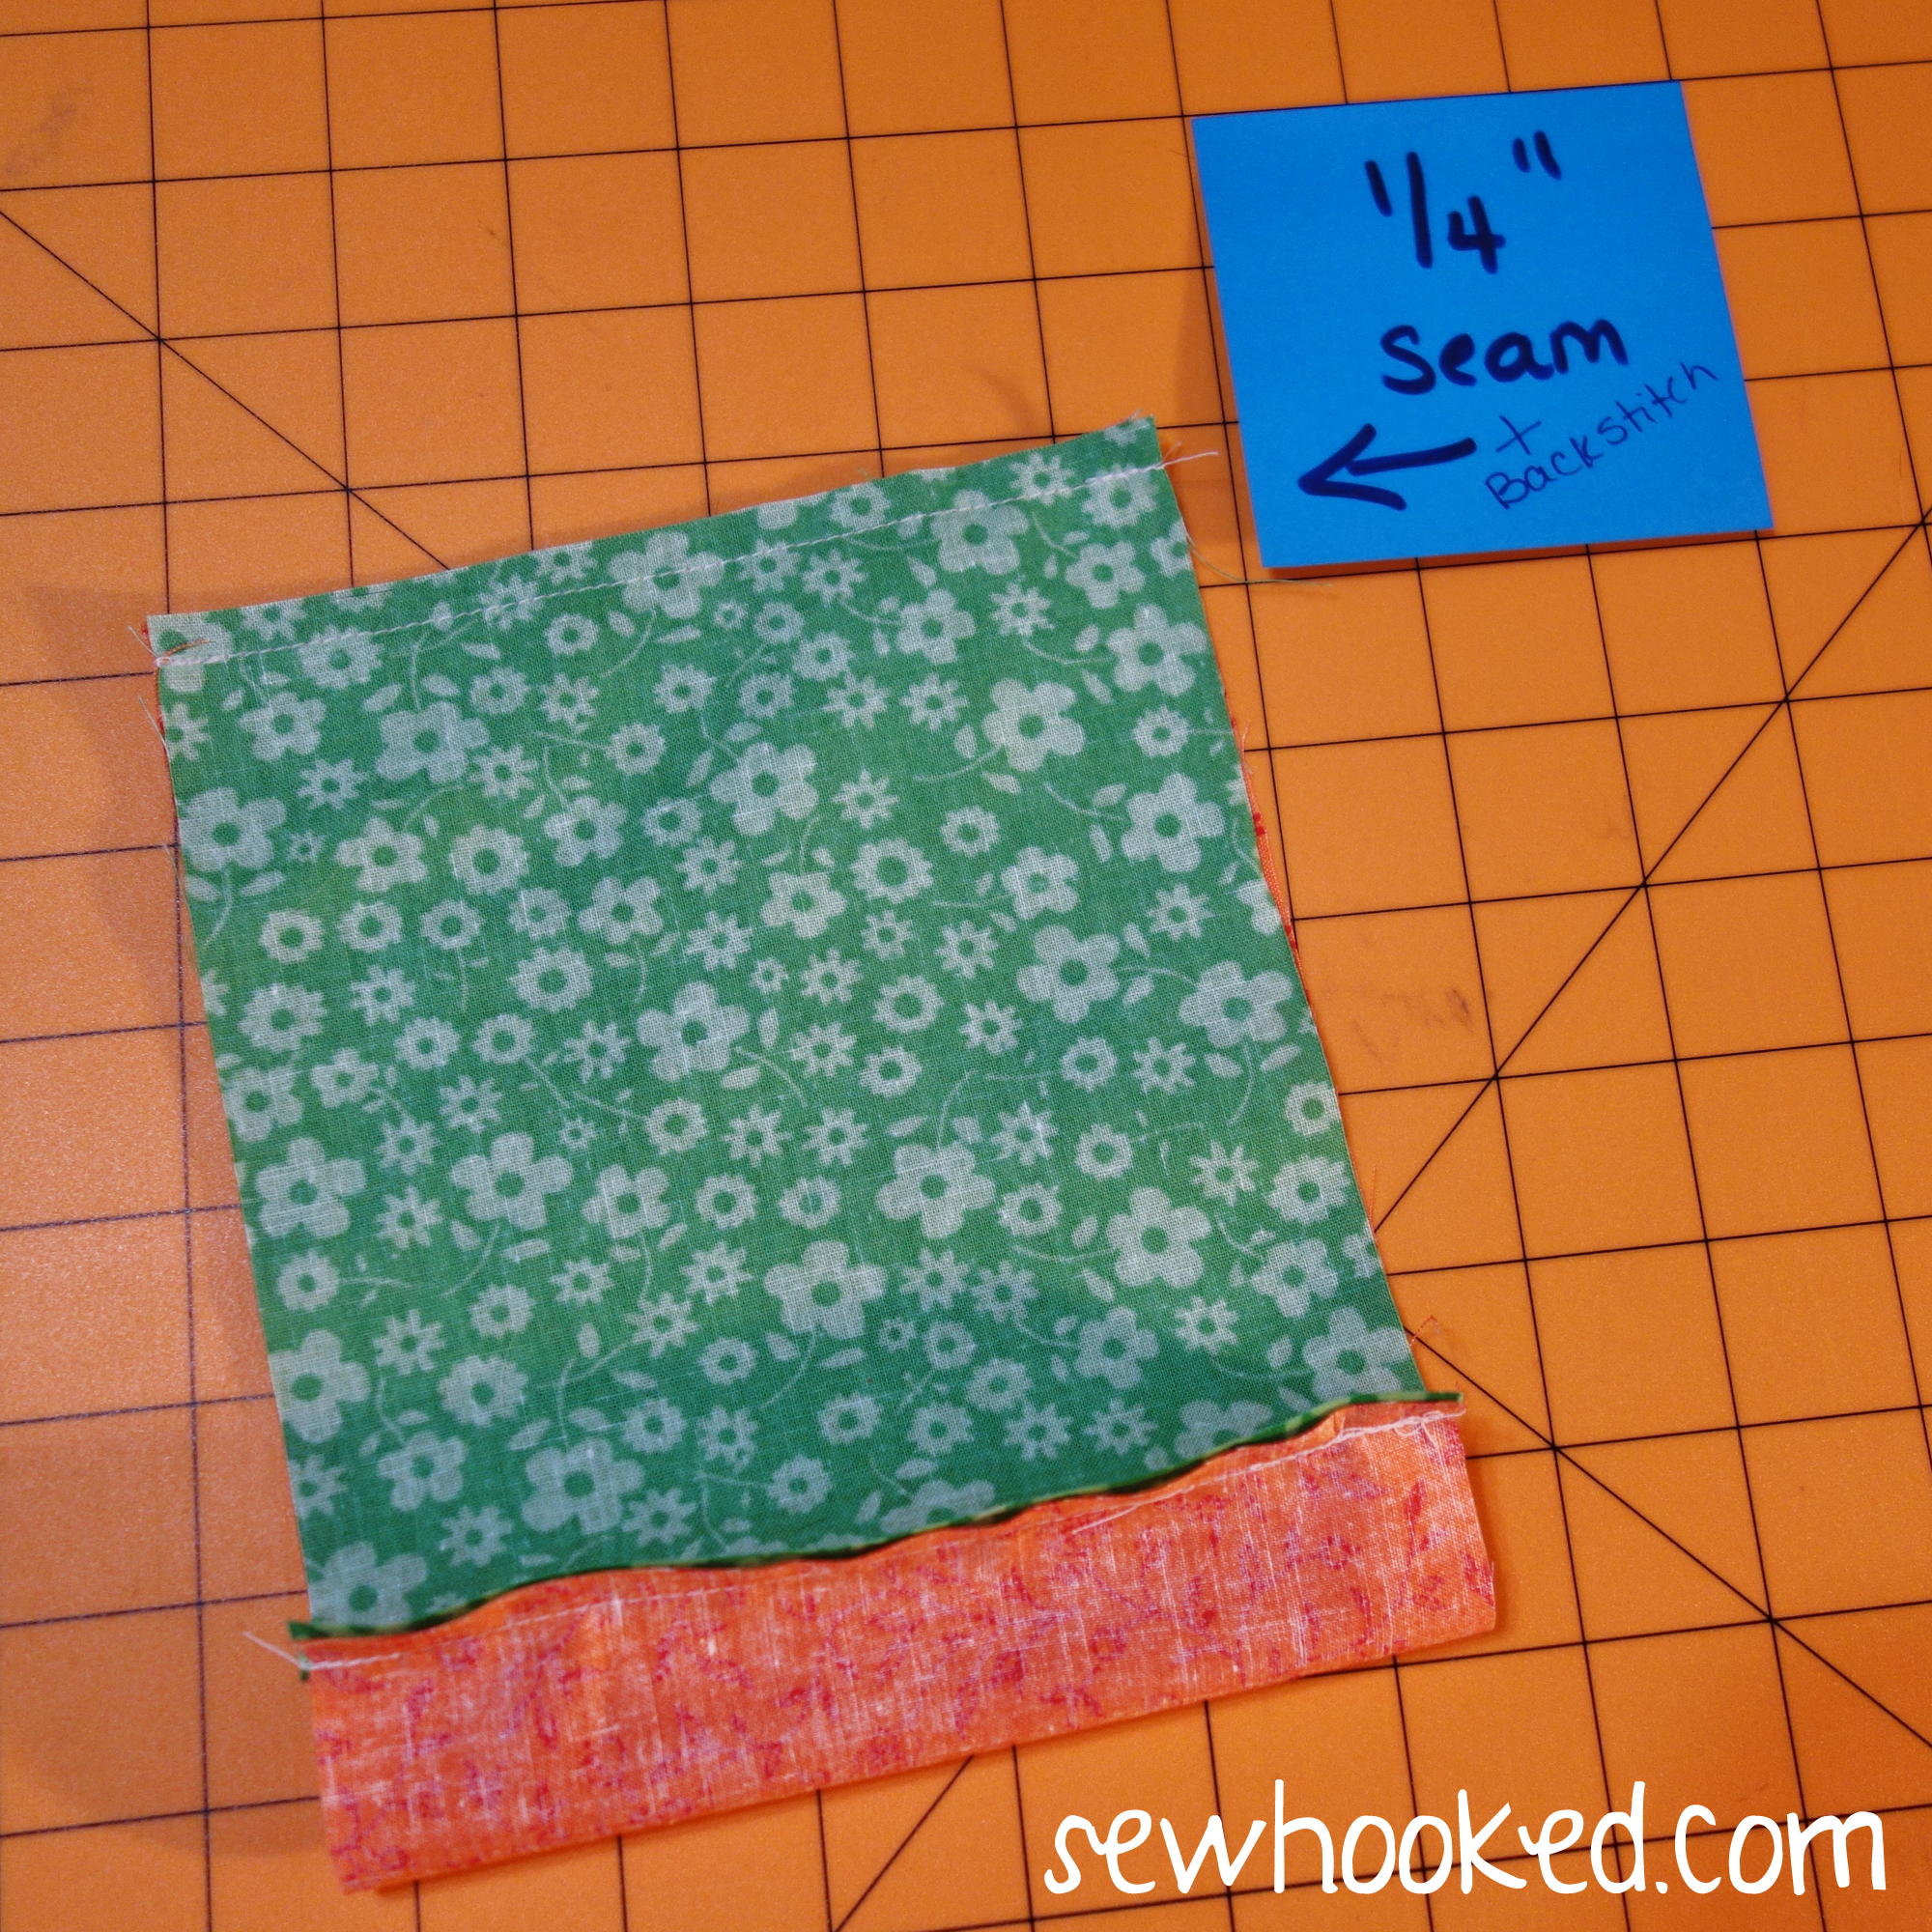
With right sides together, line one end of OUTSIDE to one end of LINING/TRIM on the side that measures 5 3/4″.
Stitch a 1/4″ seam with backstitching at both ends.
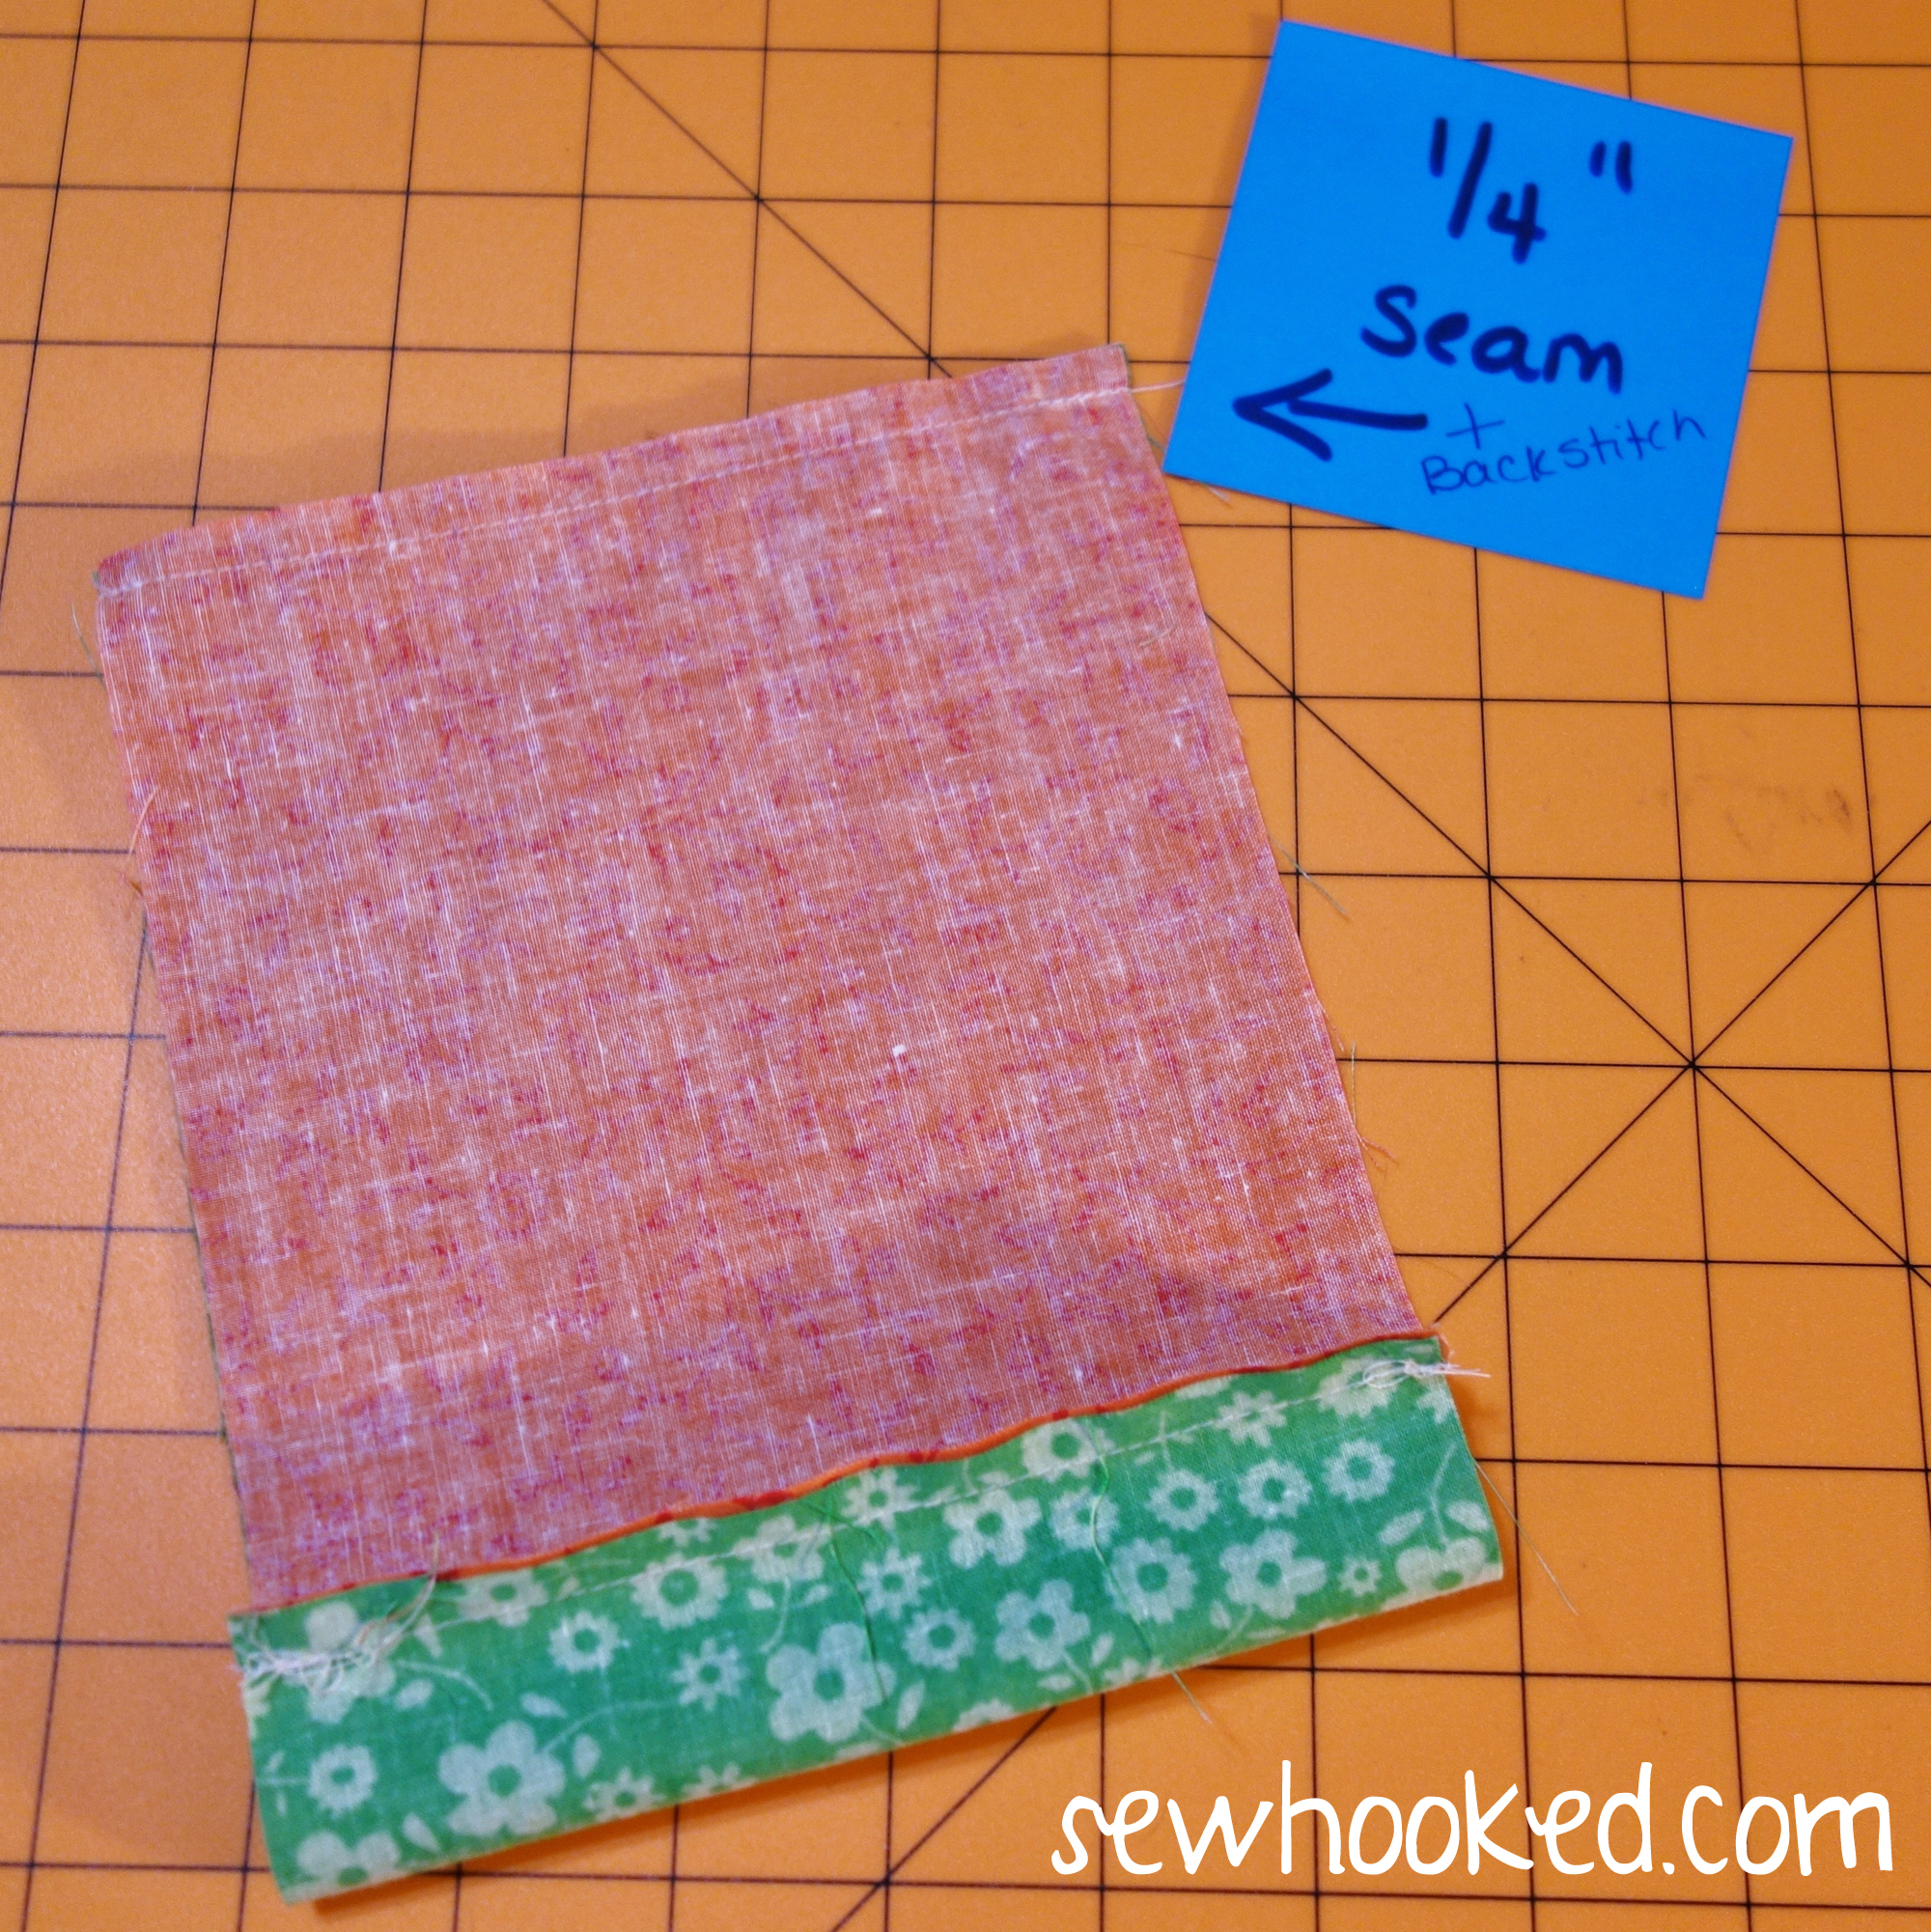
Line up opposite ends and repeat the 1/4″ seam with backstitching along the other 5 3/4″ side.
Turn so that wrong sides of the fabric are together. Adjust so that each end of TRIM is approximately the same size.
Press.
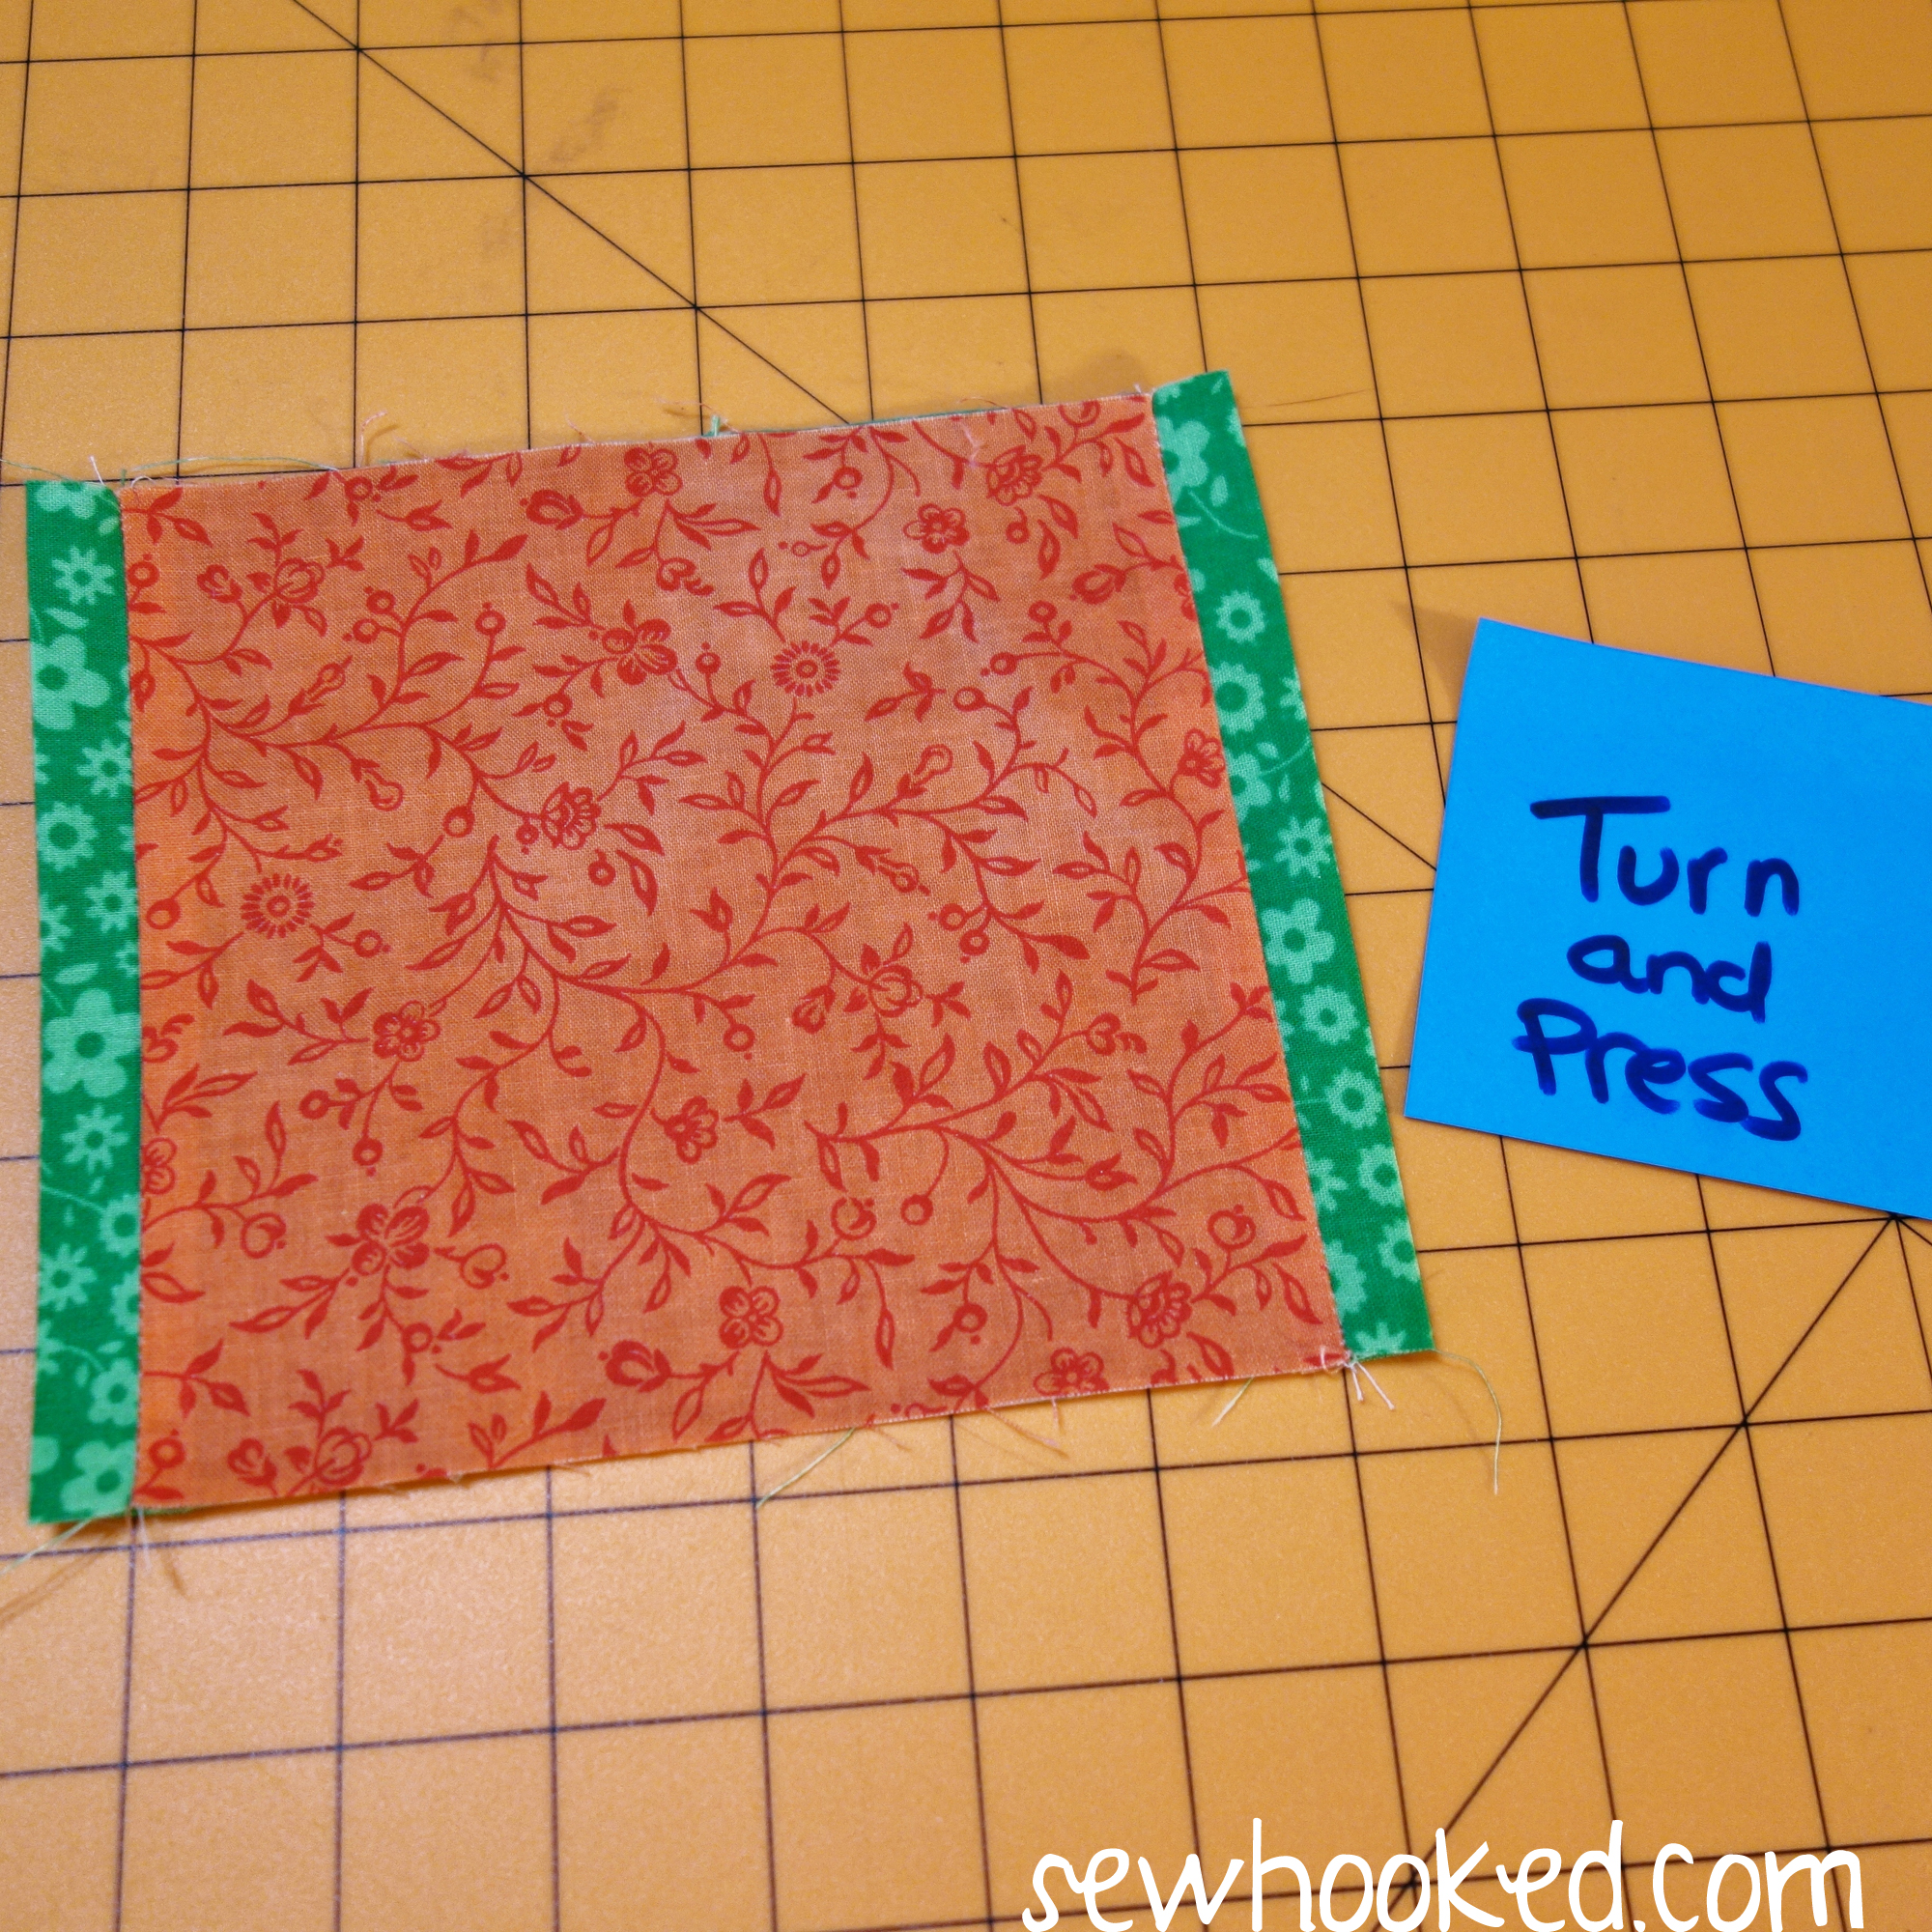
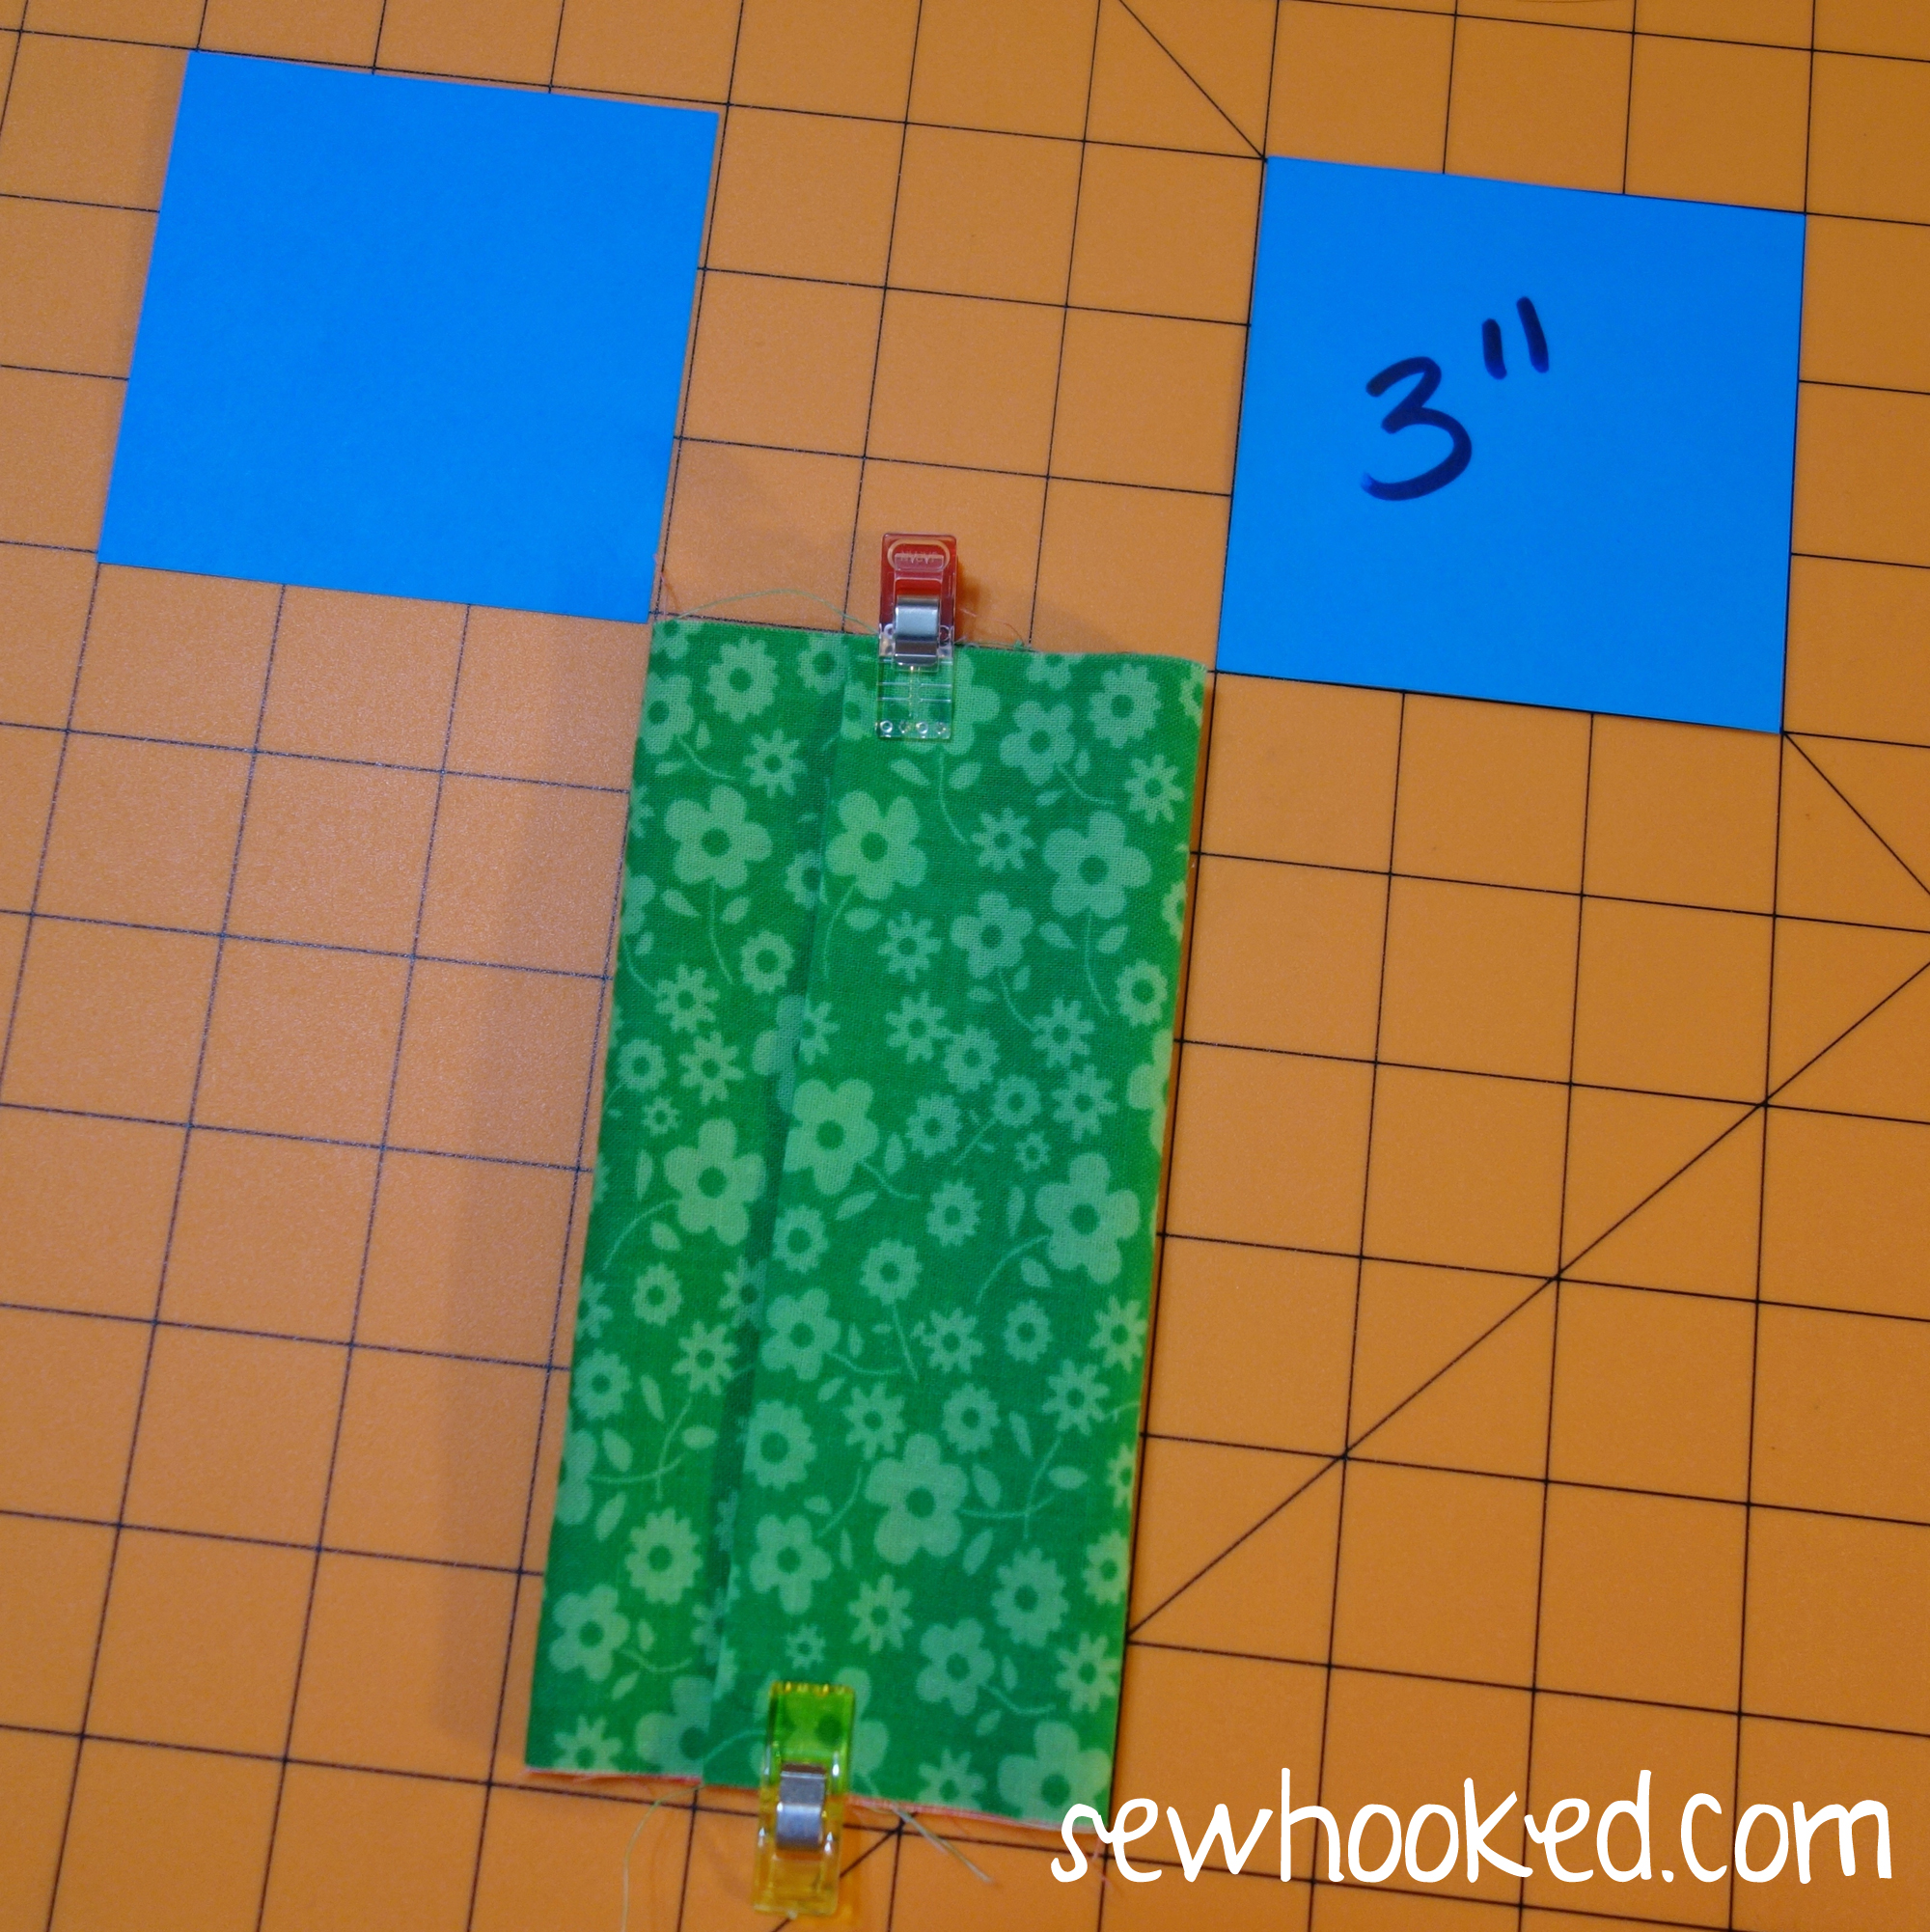
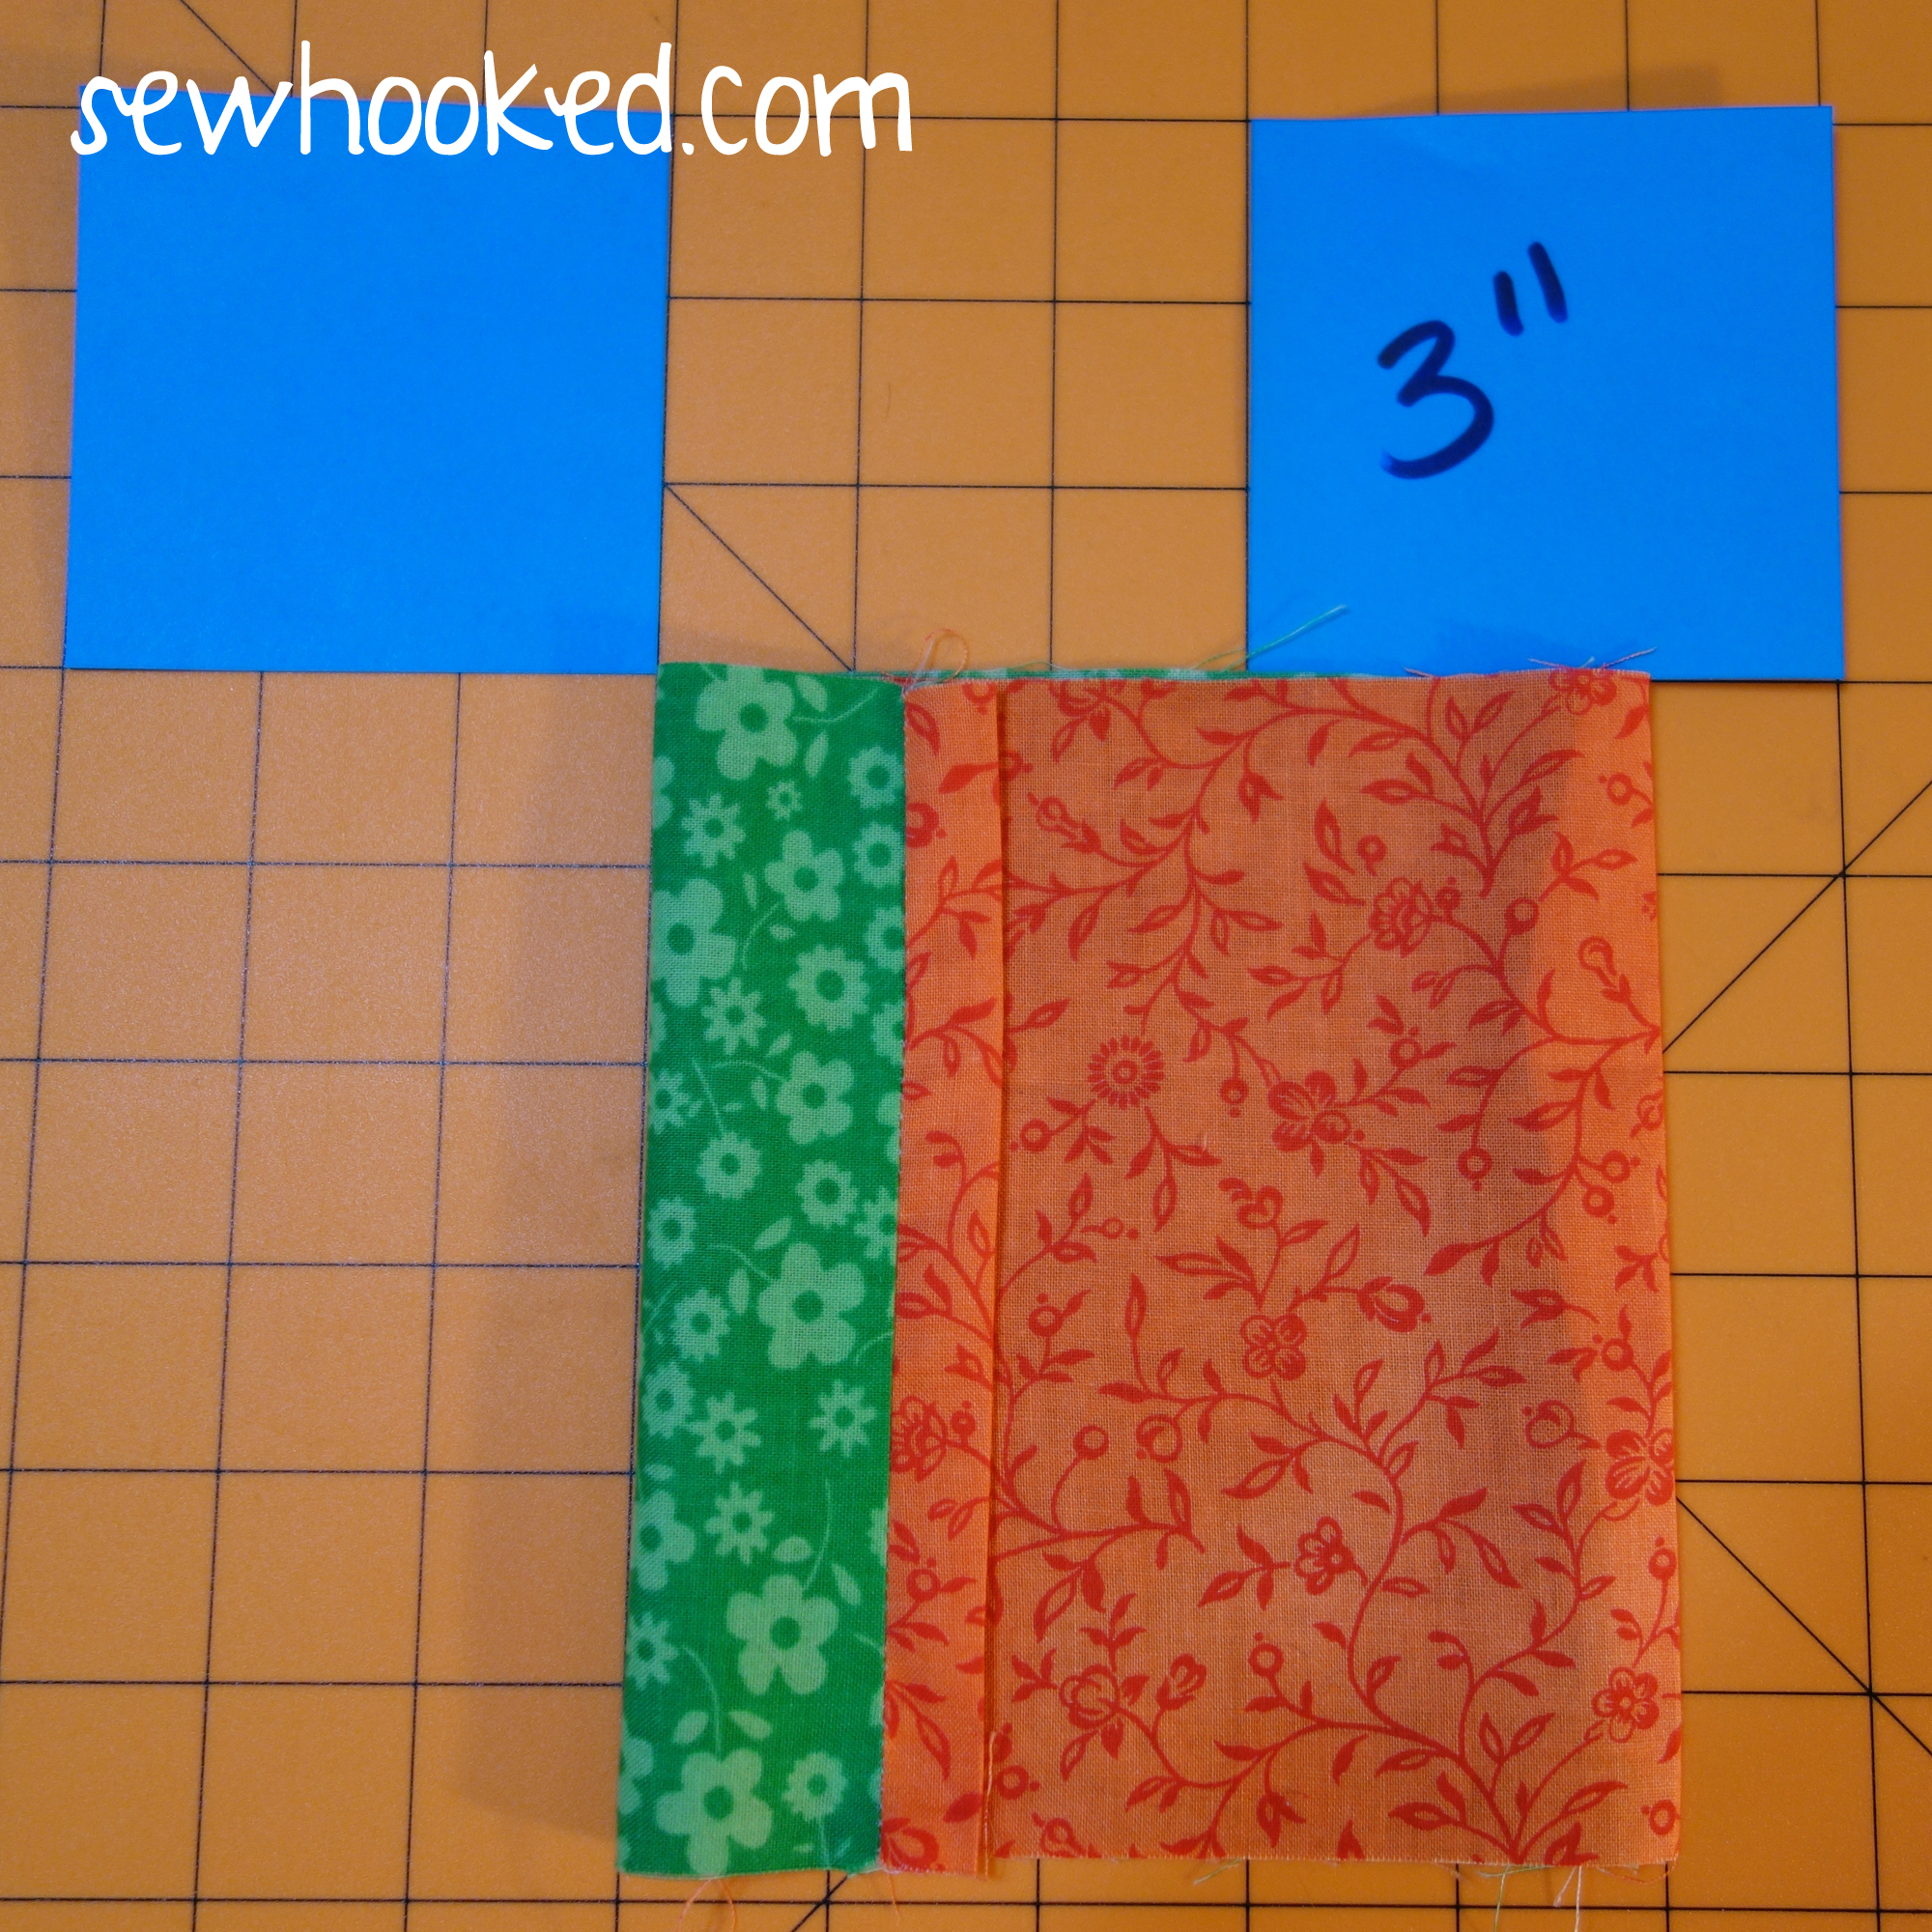
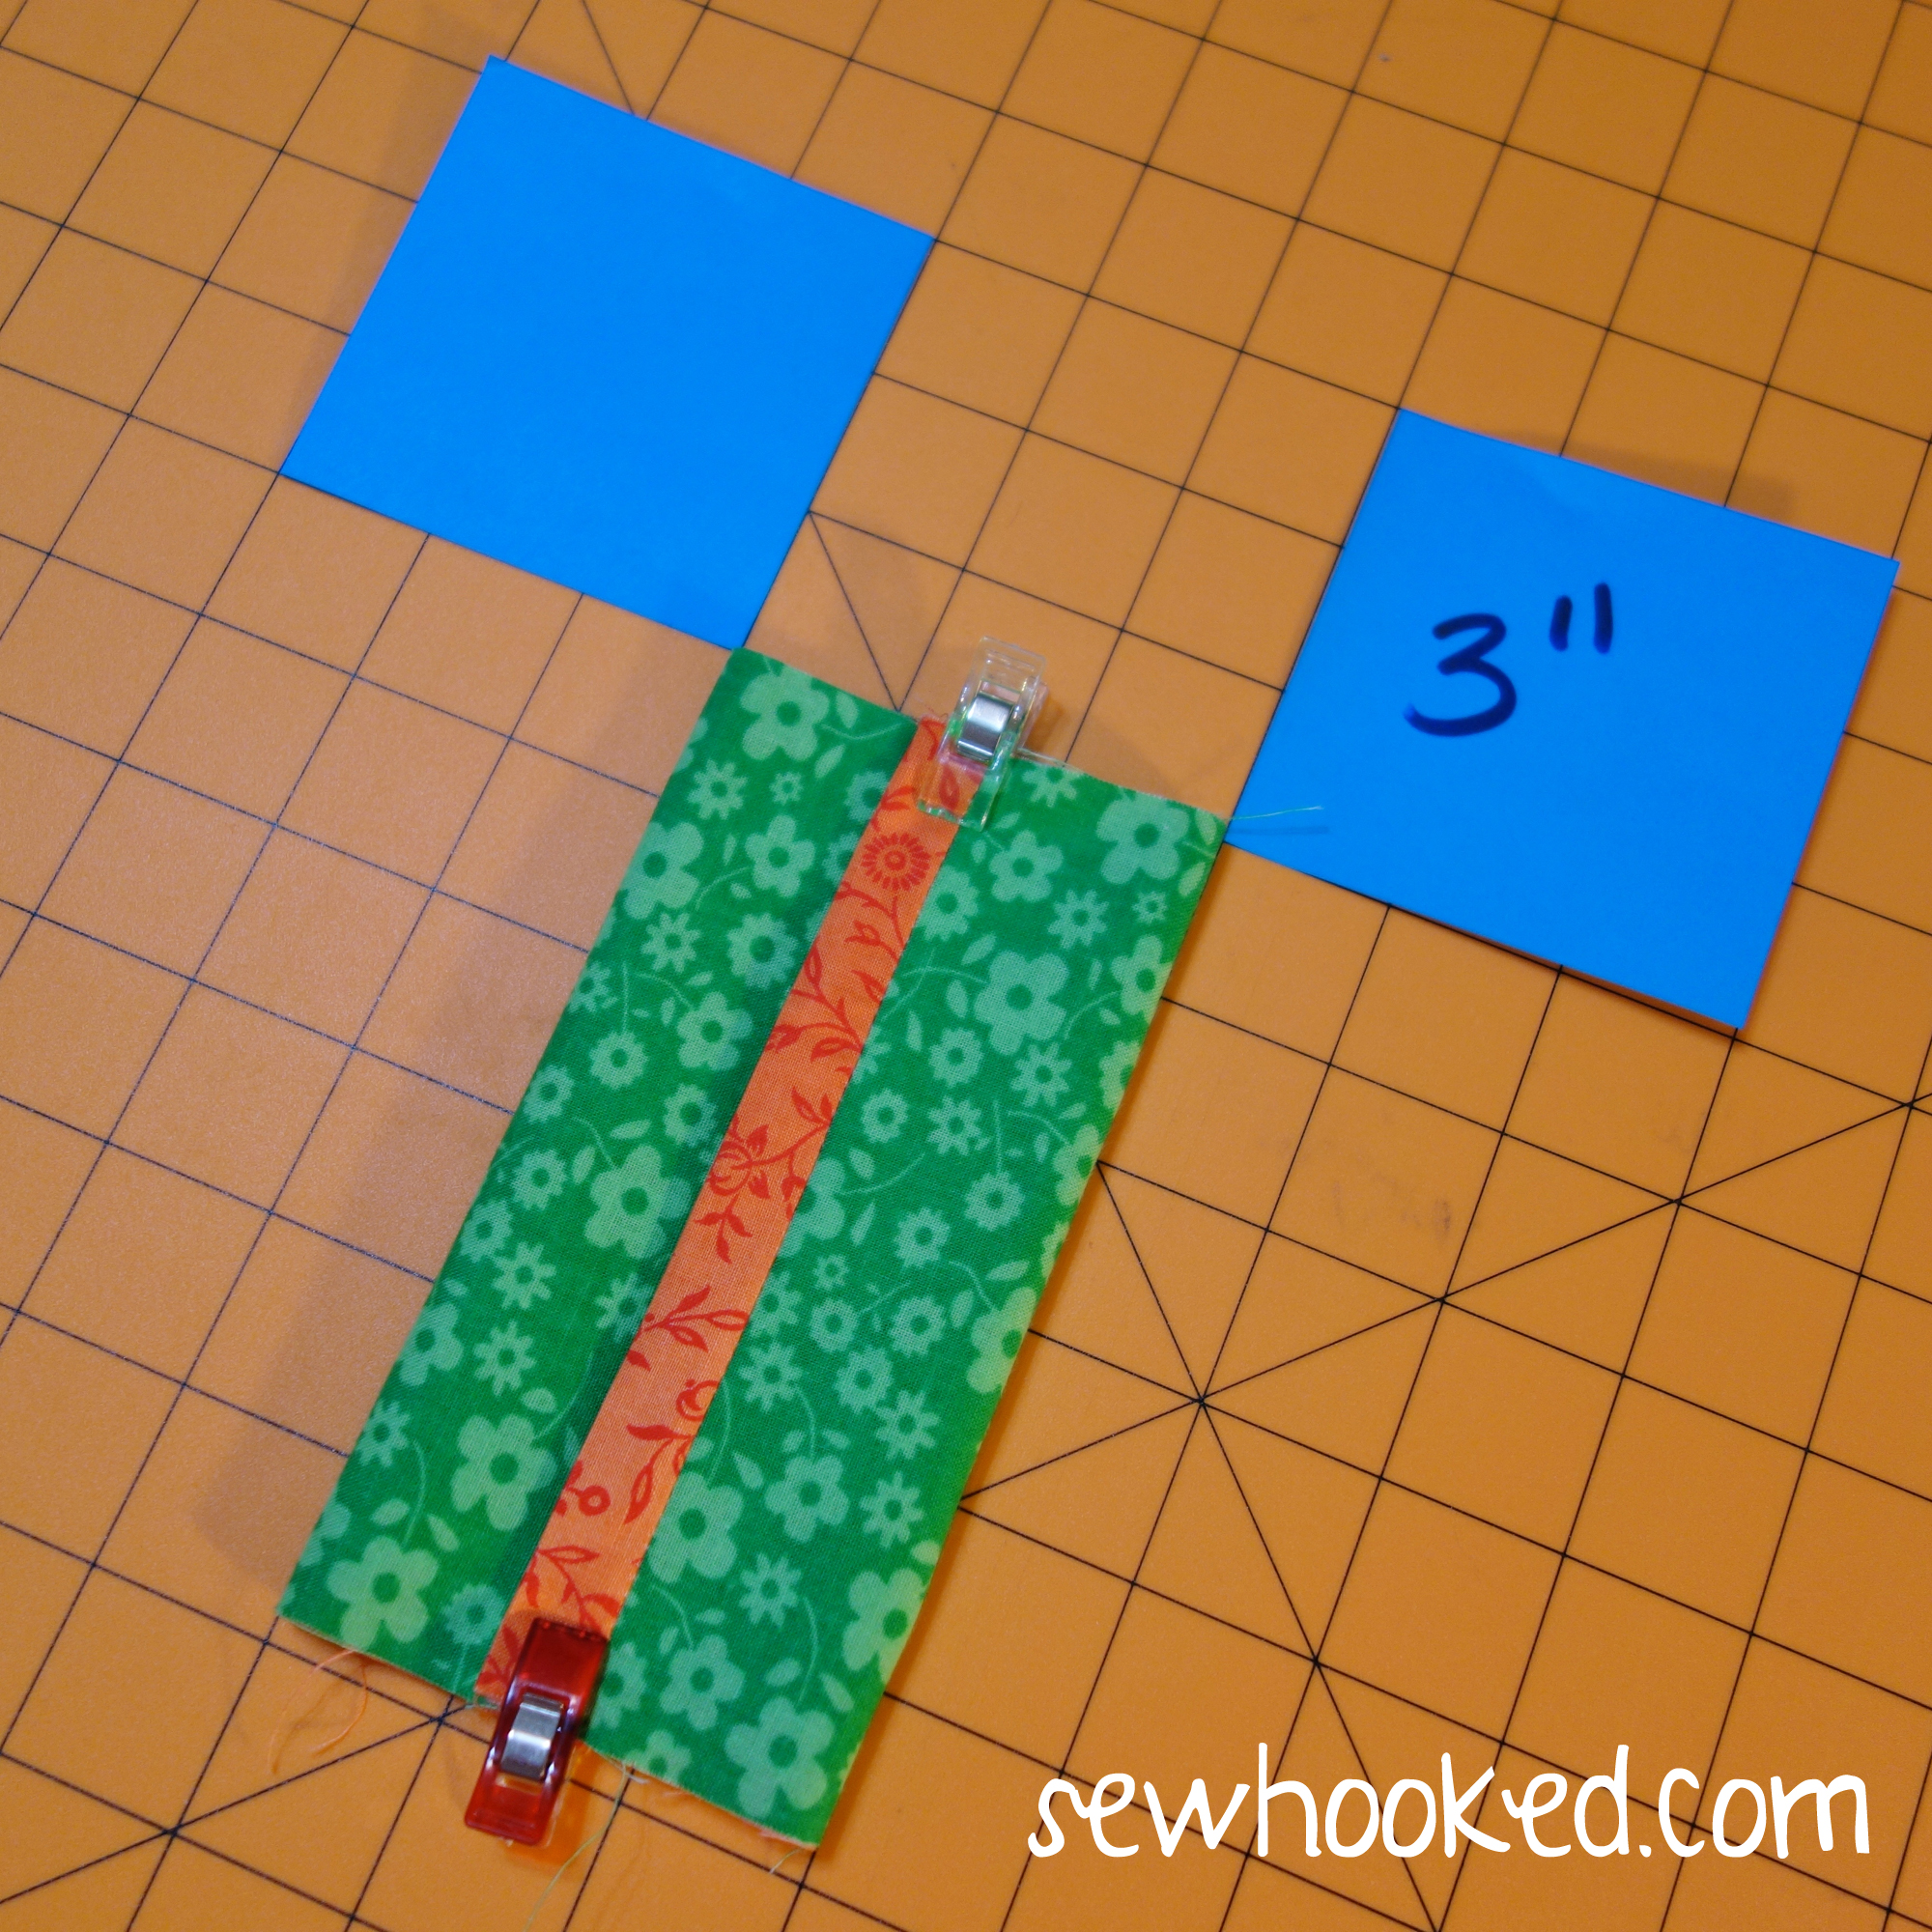
Using a ruler or rotary mat, fold right sides of the OUTSIDE together so that it is 3″ wide. If you’re using a rotary mat, you can align easily use the markings on your mat for this part. Edges should overlap in the approximate center.
Once adjustments have been made to your liking and the width is 3″, pin or clip with sewing clips. Wonder Clips or Magic Clips work great. (I have both.)
Because this version has TRIM, you will not see the overturned edge during this step.
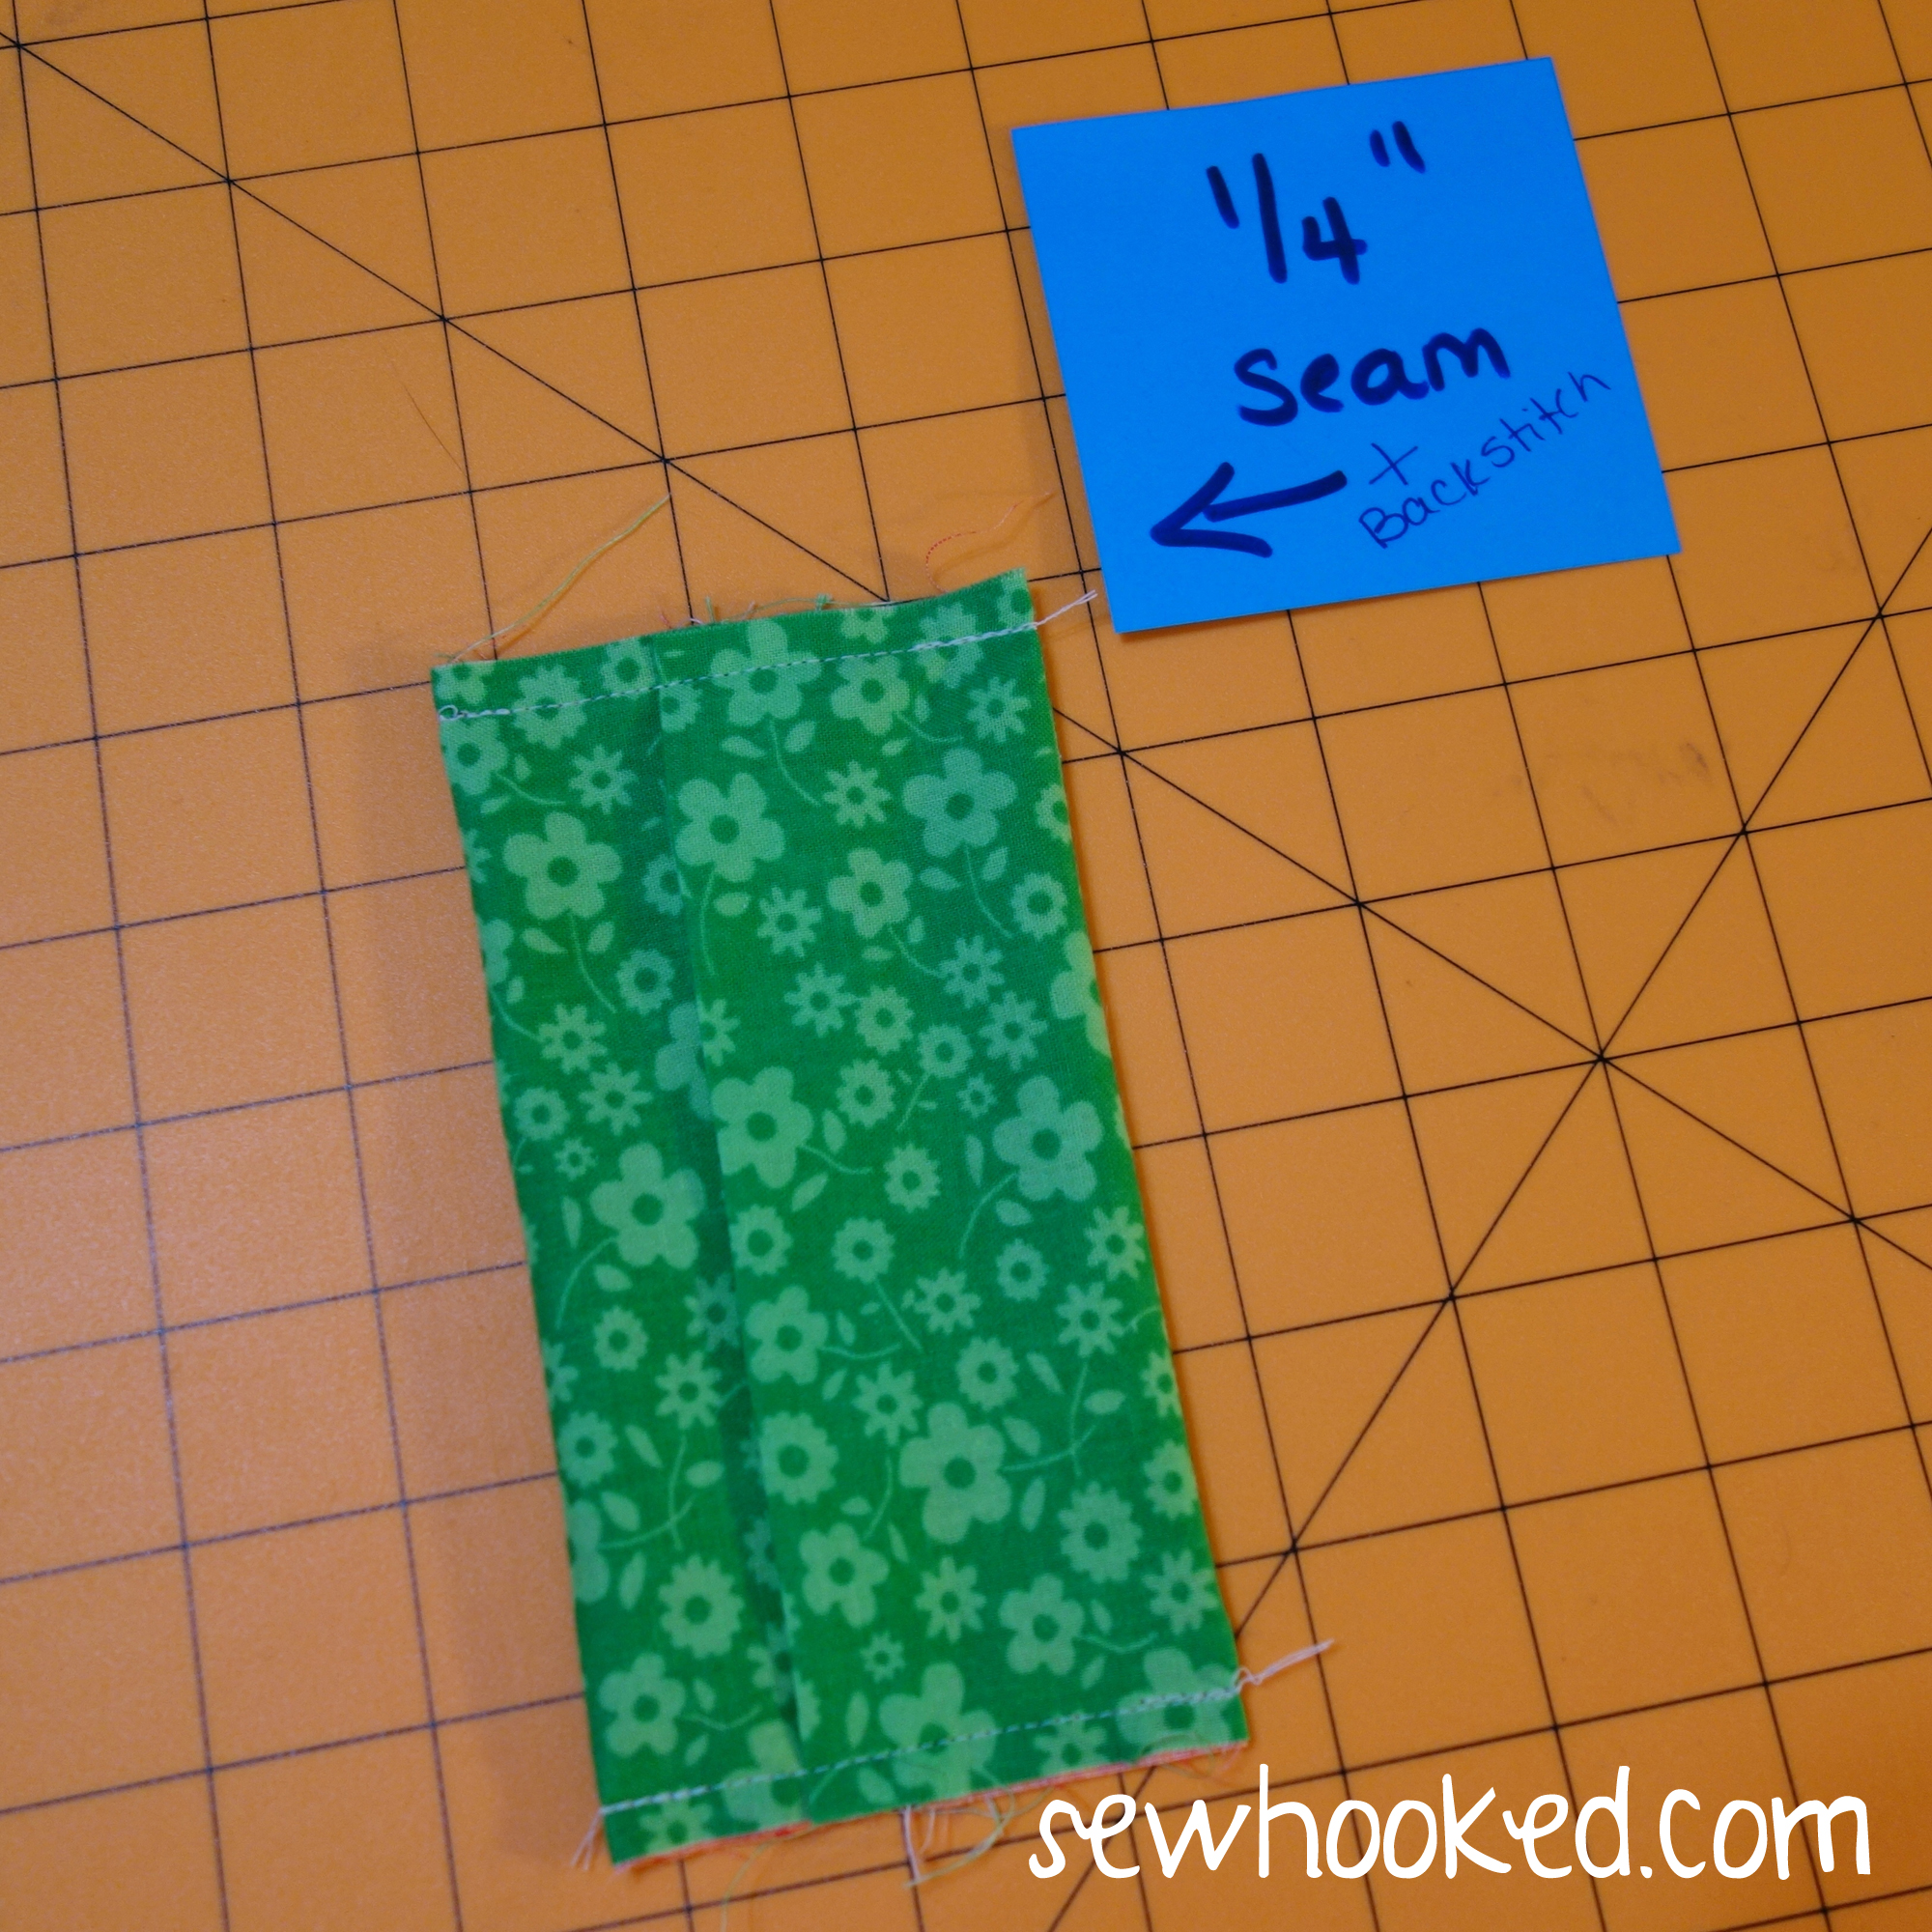
Sew each end with a 1/4″ seam allowance, backstitching at the beginning and end.
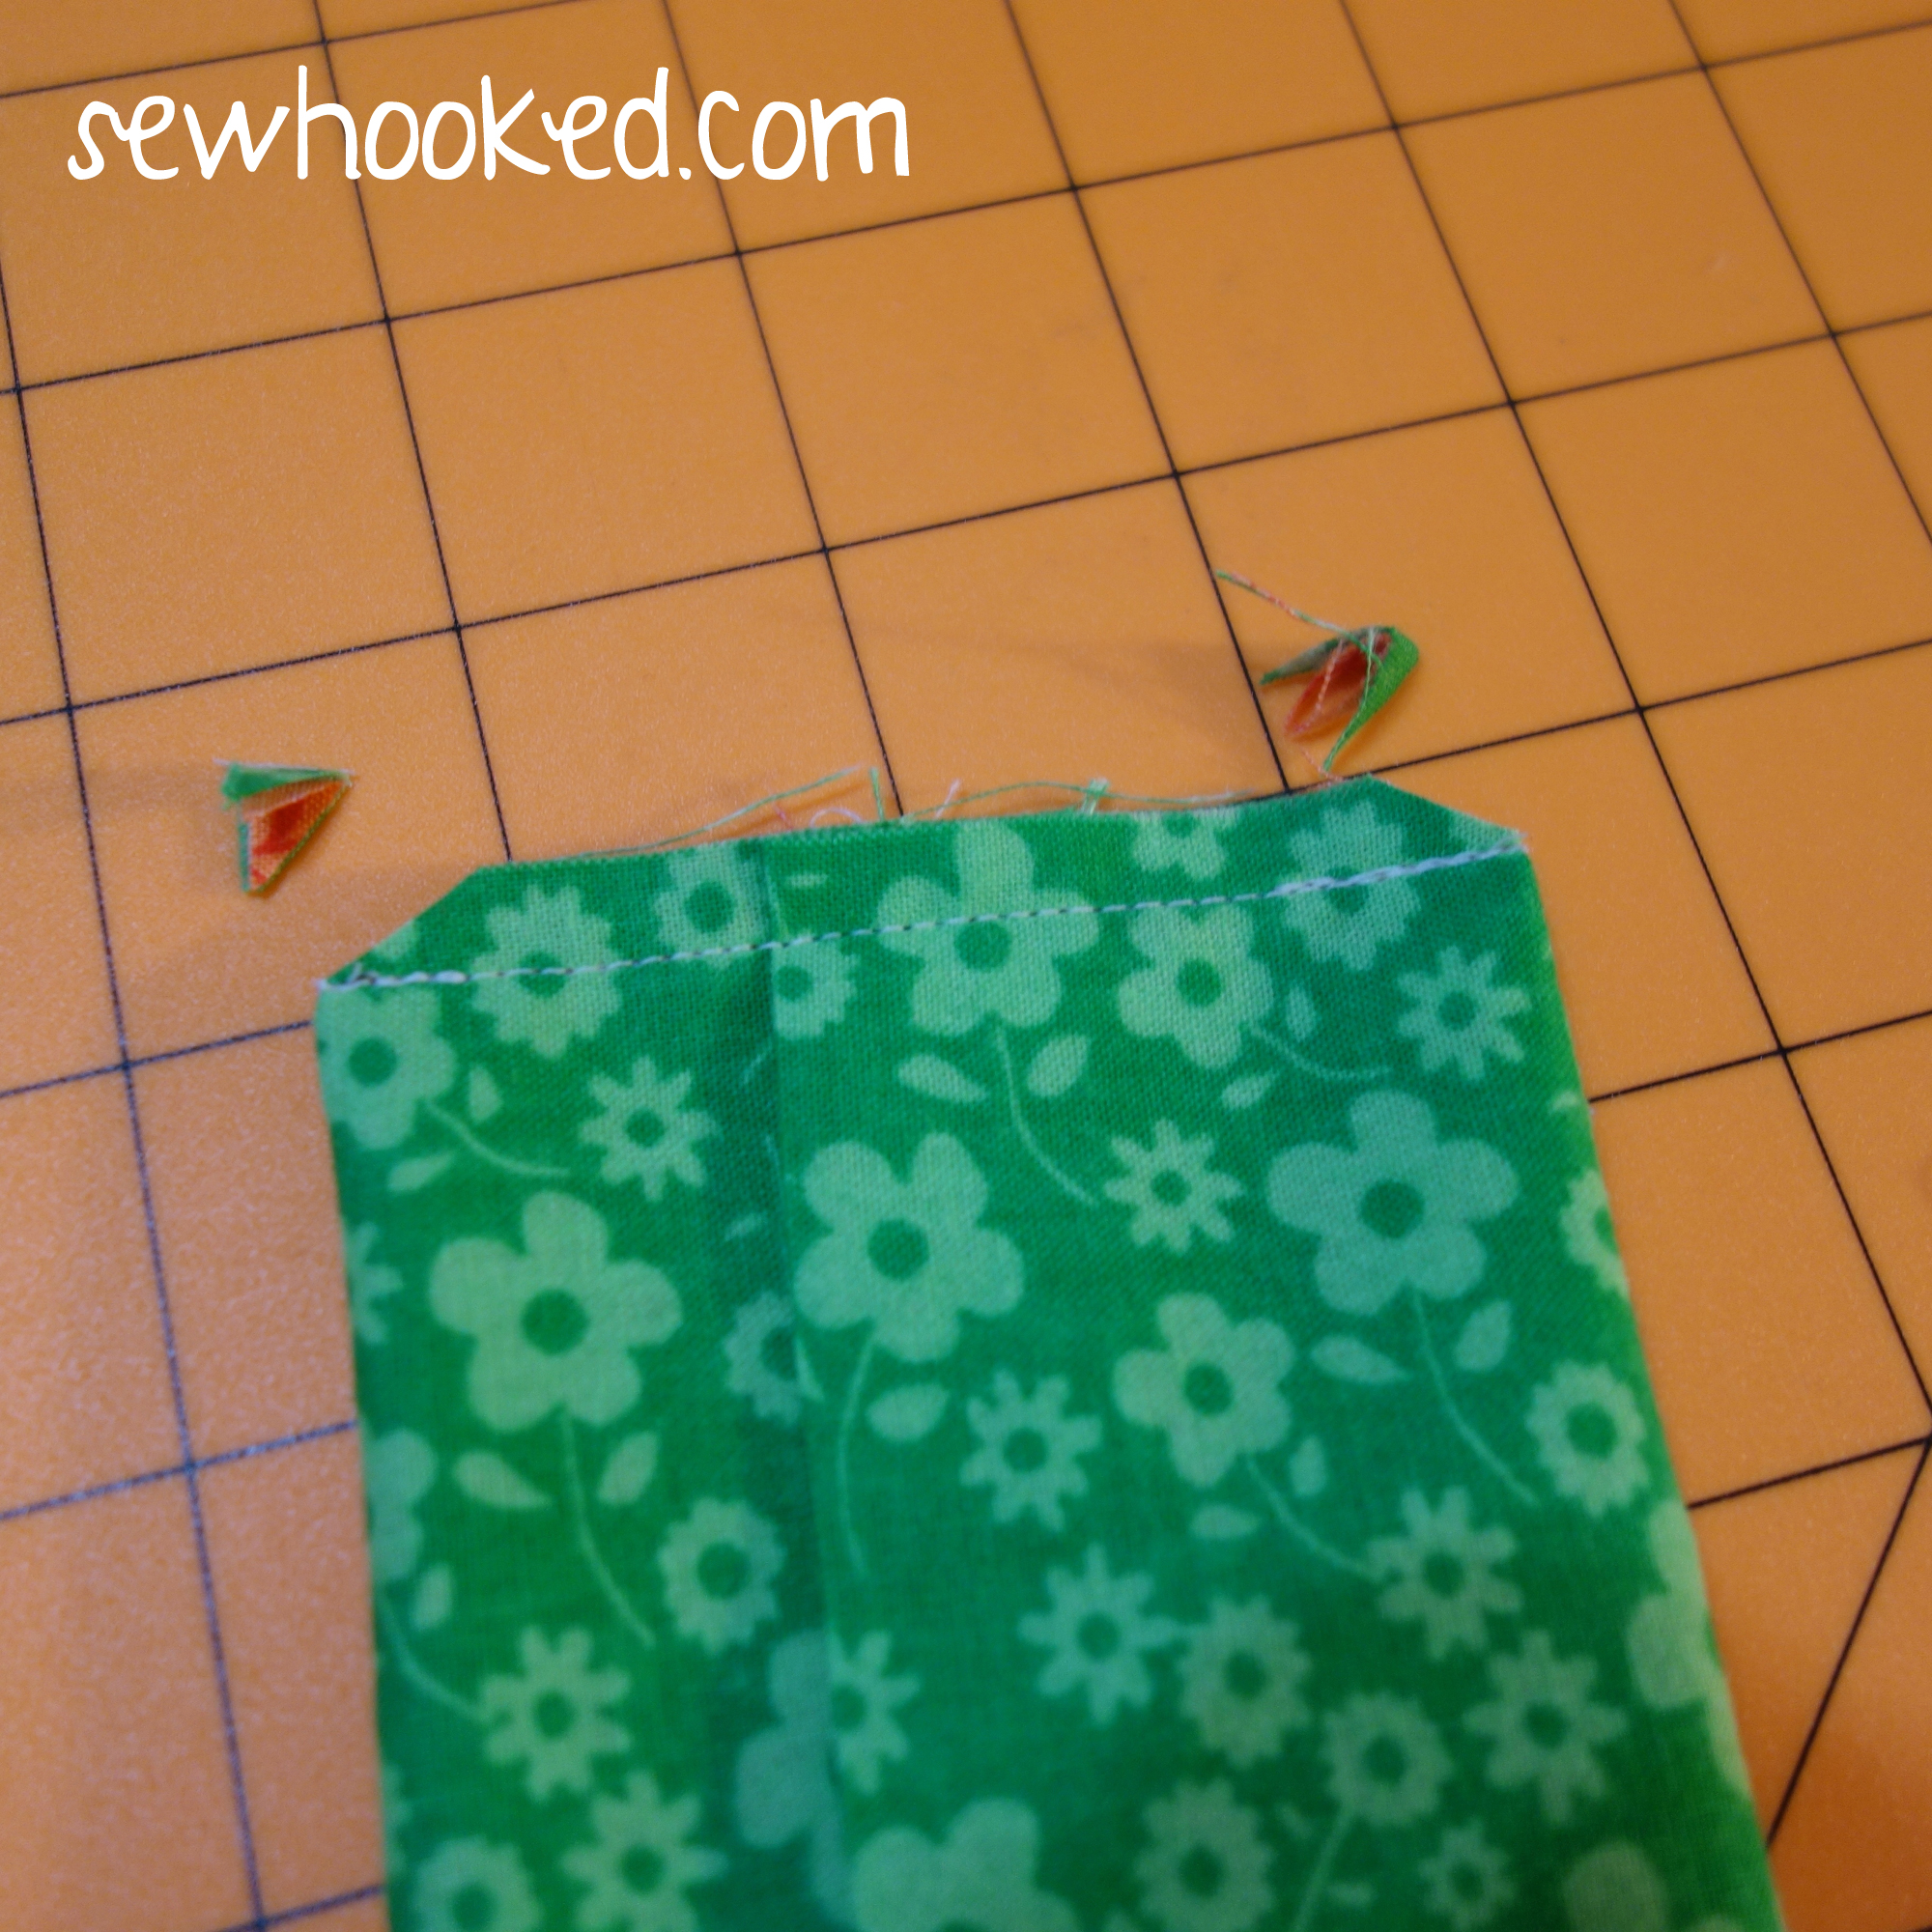
Clip corners & turn.
Done!
See how the Lining/Trim makes a lovely accent? You can have fun playing with stripes, dots or other fun fabrics.
Now, let’s make one that isn’t trimmed. We’ll use the same technique, but the fabric sizes will be reversed.
You’ll need fabric in two colors. Just as before, the orange fabric is the OUTSIDE.
For UN-TRIMMED Cover:
Outside – 5 3/4″ x 8 1/2″
Lining – 5 3/4″ x 6 1/2″
With right sides together, line one end of LINING to one end of OUTSIDE on the side that measures 5 3/4″.
Stitch a 1/4″ seam with backstitching at both ends.
Line up opposite ends and repeat the 1/4″ seam with backstitching along the other 5 3/4″ side.
Turn so that wrong sides of the fabric are together. Adjust so that each end is approximately the same width.
Press.
Using a ruler or rotary mat, fold right sides of the OUTSIDE together so that it is 3″ wide. If you’re using a rotary mat, you can align easily use the markings on your mat for this part. Edges should overlap in the approximate center
Once adjustments have been made to your liking and the width is 3″, pin or clip with sewing clips.
Because this version doesn’t have TRIM, you’ll see the overturned edge during this step.
Sew each end with a 1/4″ seam allowance, backstitching at the beginning and end.
Clip Corners & Turn.
Done!
Stop by tomorrow for Free Pattern Friday for my weekly featured FREE quilt pattern!
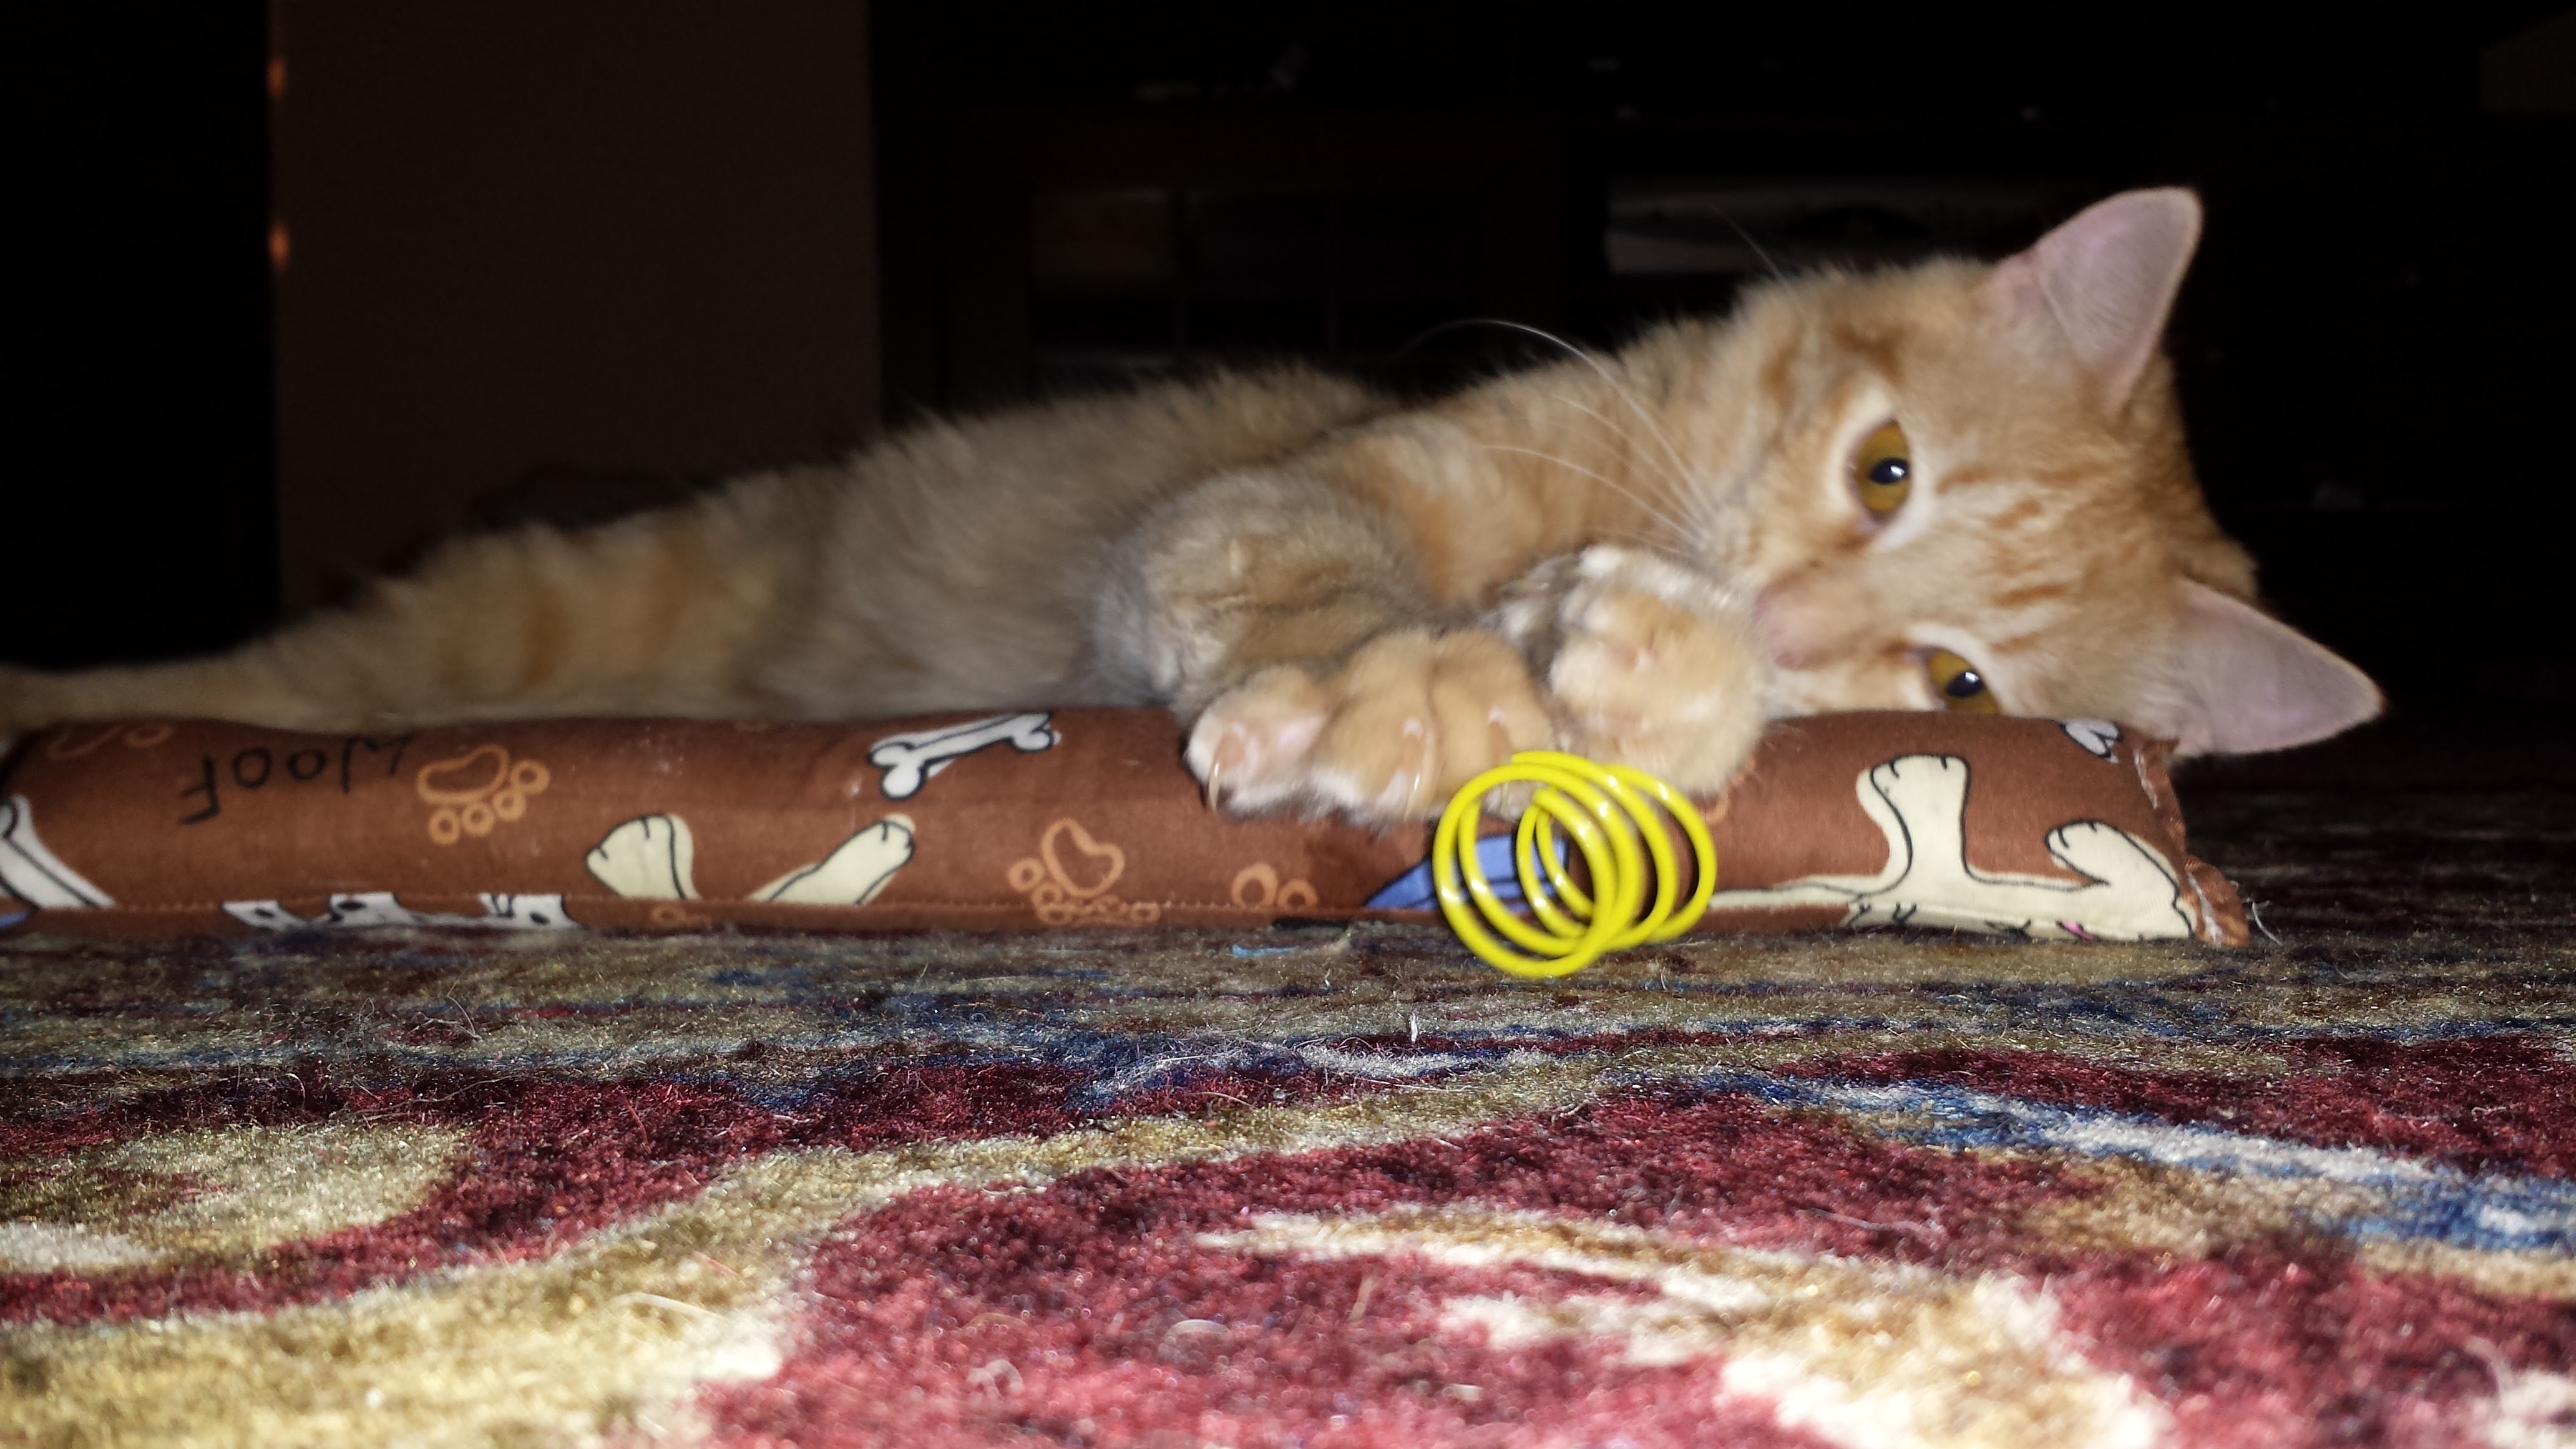
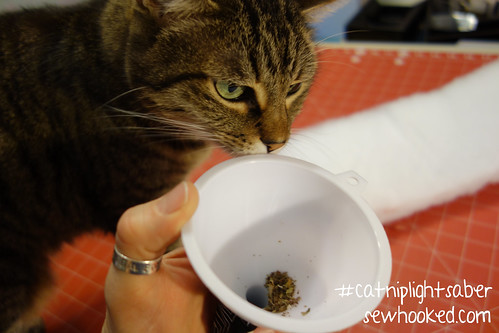
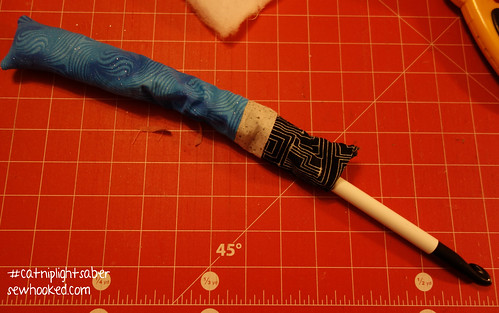
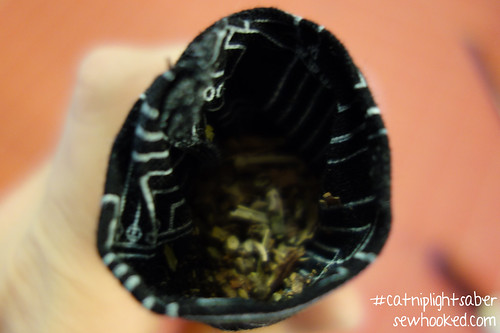
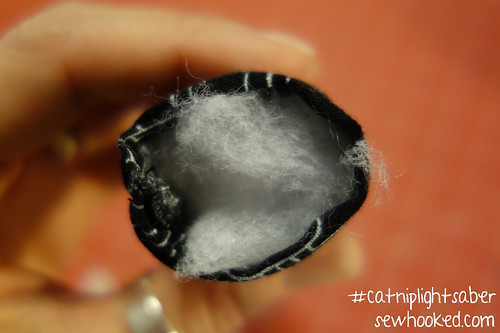
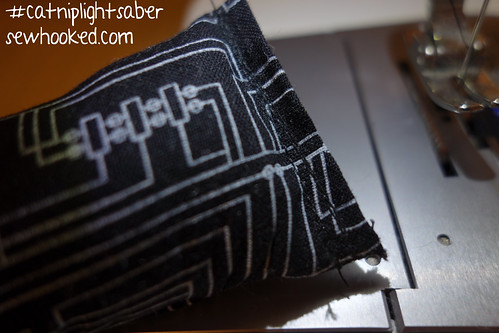
In between Much More Important Things, I’ve been making kitty toys here and there for our cat family members.
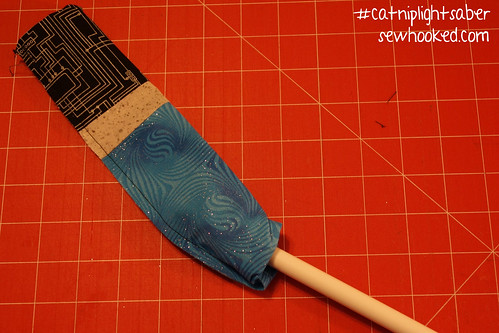
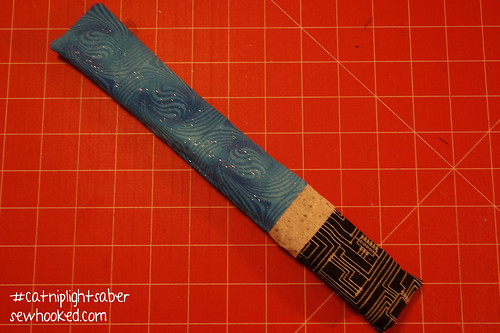
Last weekend, I made something new, tubes of fabric filled with Poly-fil & catnip. They were easy to make and the cats love them.
While watching 8 month old Iliad and his brother Ramses play with their catnip tubes, it occurred to me that they could be much, much more fun to watch!
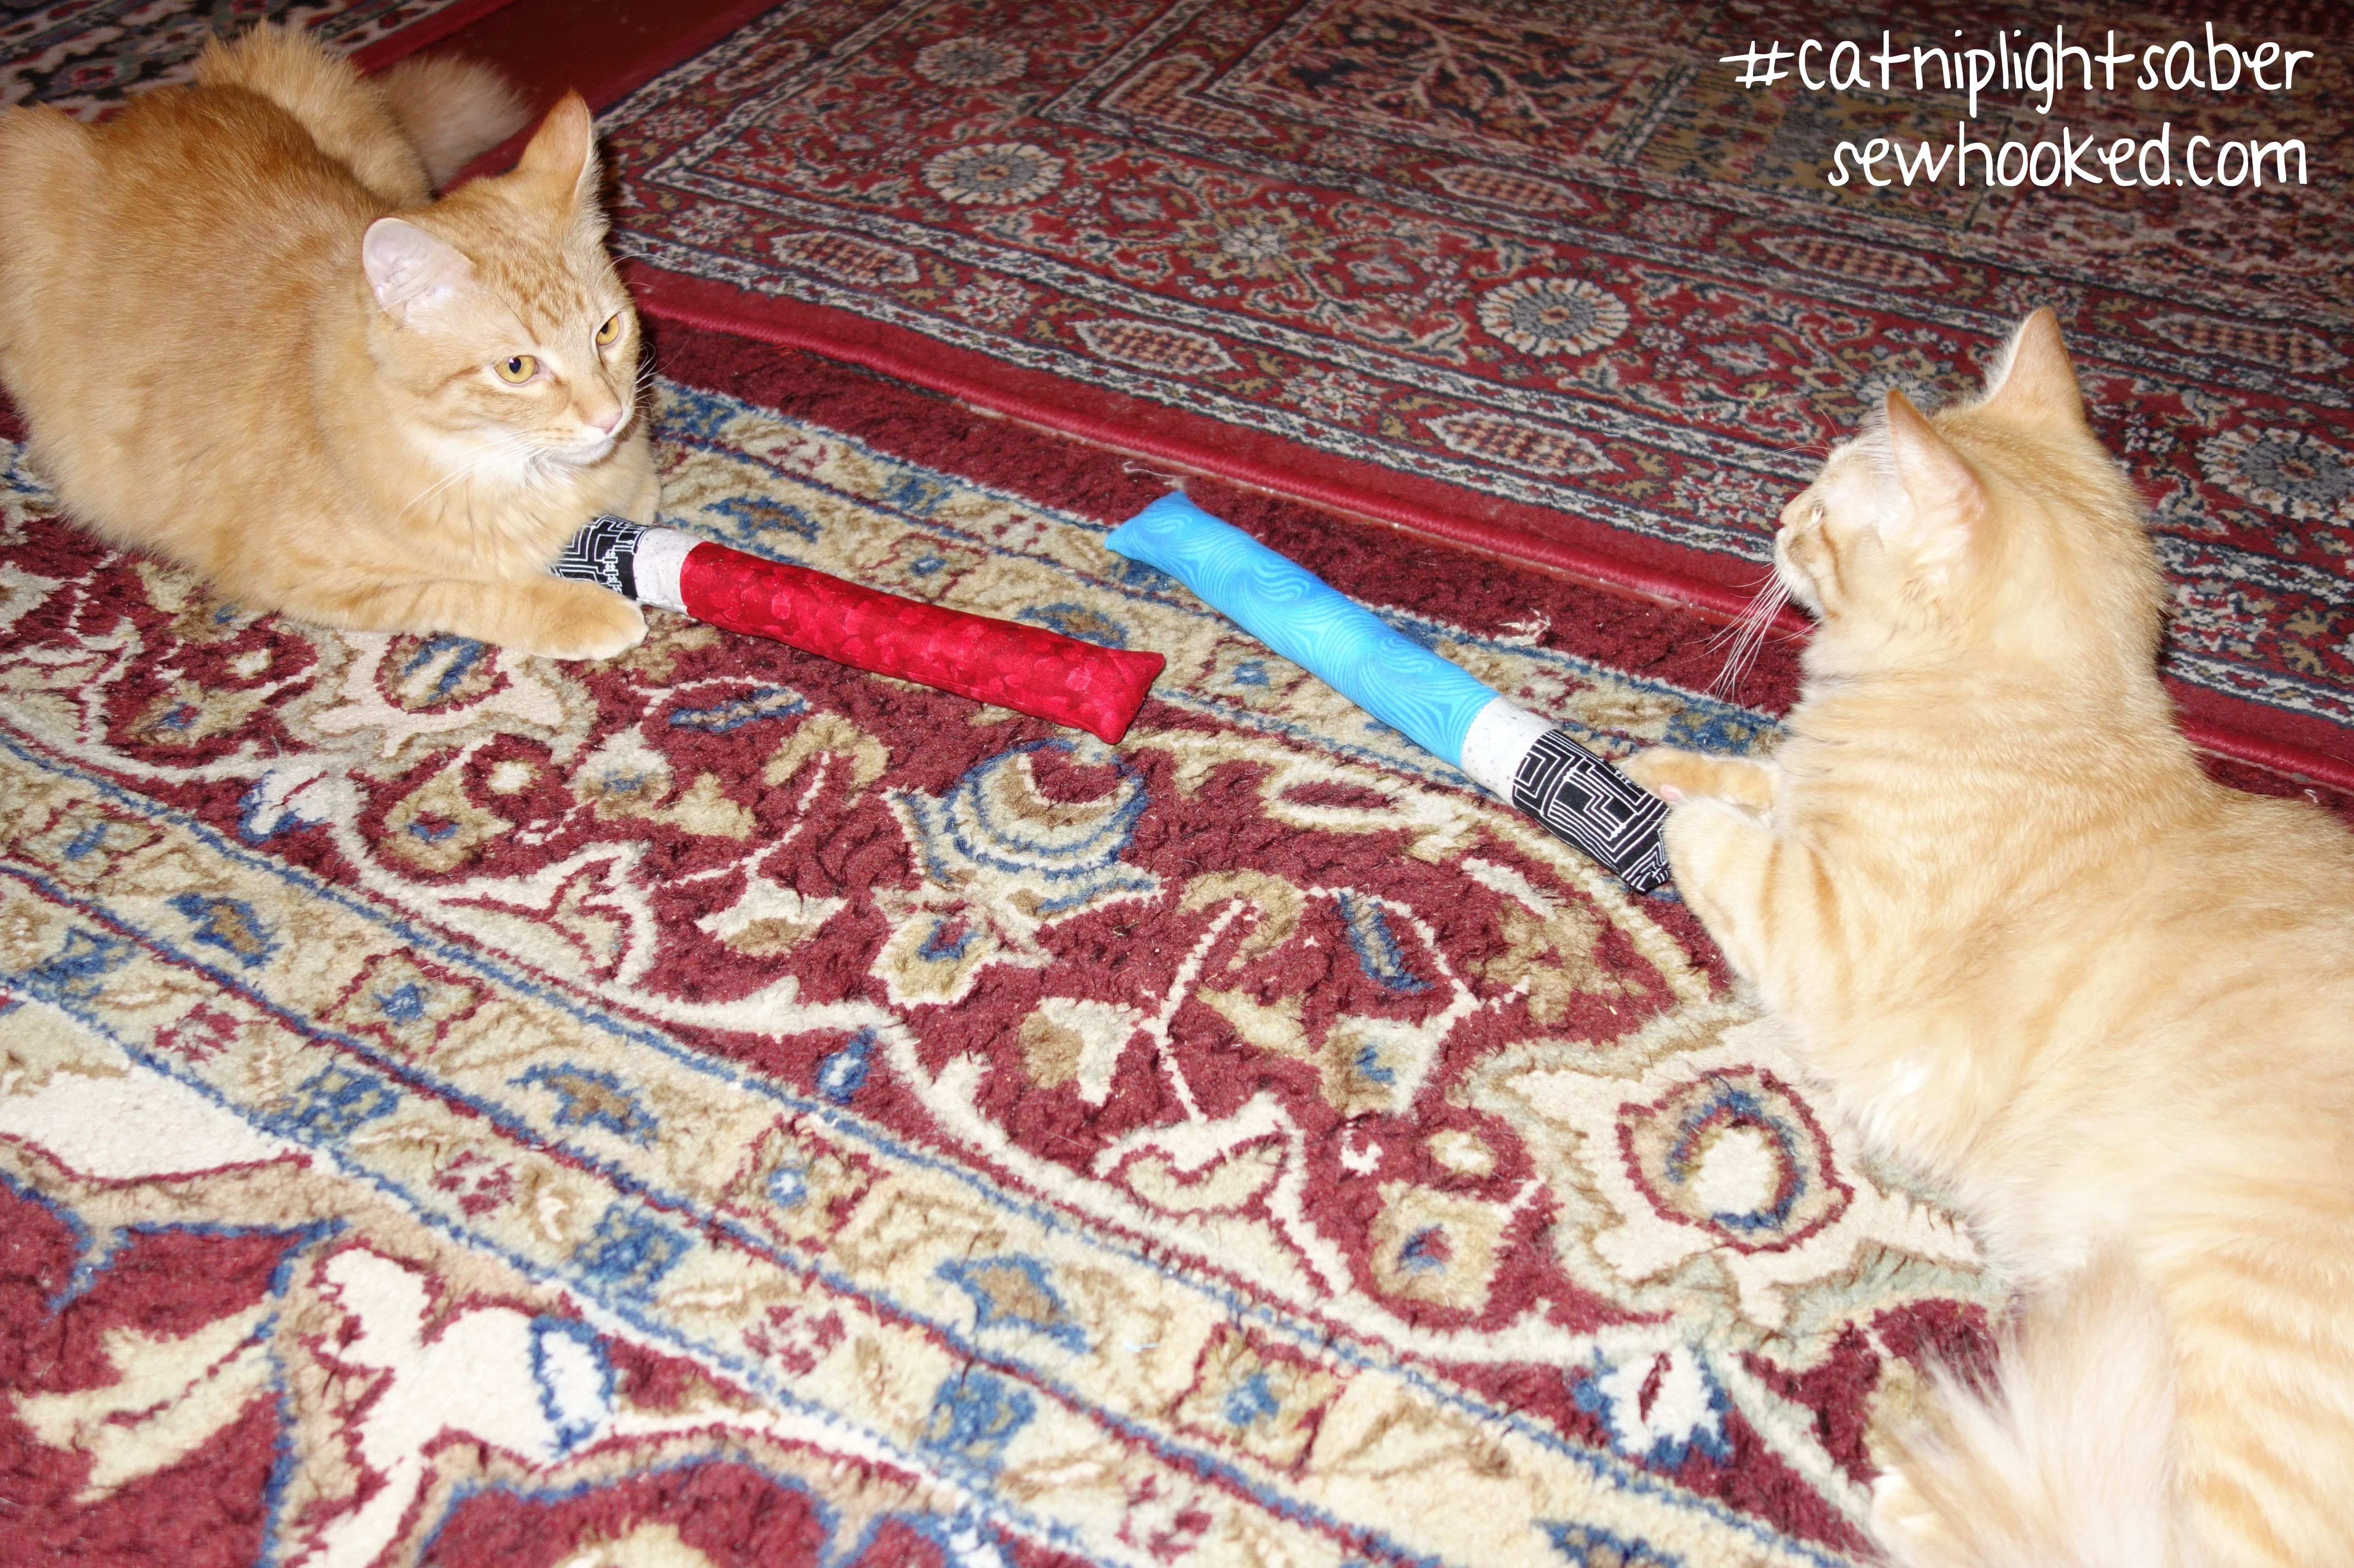
Enter, CATNIP LIGHTSABERS!
Have I seen The Force Awakens recently?
Yes, twice. Why do you ask? 😉
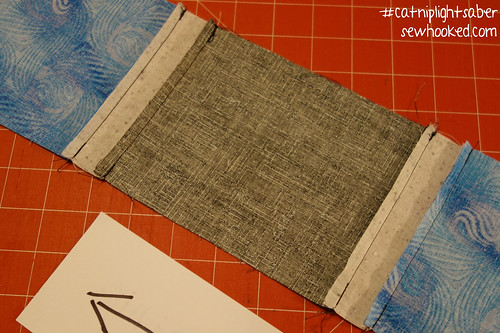
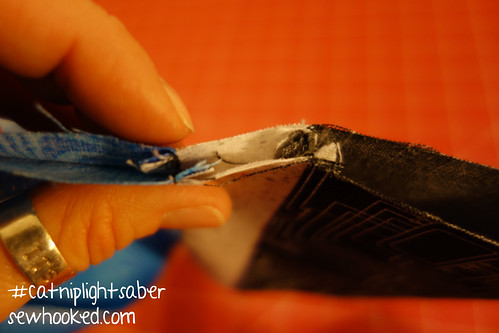
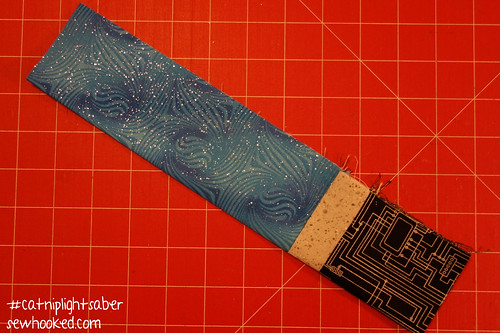
These aren’t much more complicated to make than the original single piece of fabric version. I made both shown here in about an hour, and that includes stopping to take pictures. Easy peasy!
As usual, this tutorial is for your personal & non-profit use. I would LOVE for you to make these both for your own kitties and your local shelter!
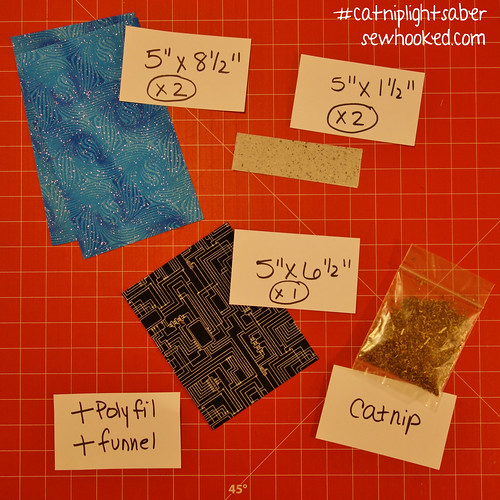
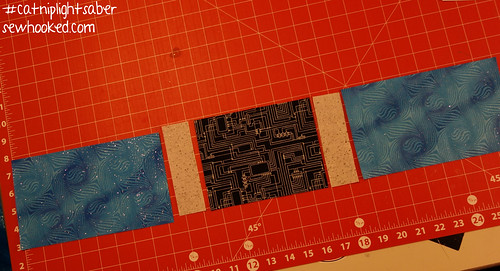
You’ll need:
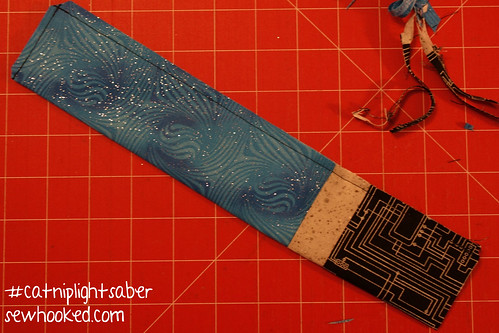
2 – 5″ x 8 1/2″ pieces of fabric in blue, red, or the lightsaber color of your choice
2 – 5″ x 1 1/2″ pieces of grey or silver fabric
1 – 5″ x 6 1/2″ piece of black or black printed fabric
I love October and everything the Halloween season has to offer and thought it would be fun to dust off some old favorite crafts and feature them during the course of this month.
I made this fun bag for my daughter back in her freshman year of high school. This year? She’s a freshman in college and the proud owner of the Doctor Who Stitch Along quilt I completed in August of this year.
To make reliving the Crafts of Halloween Past even more fun for you, I’m offering a challenge with a prize!
Make any of my Halloween projects or patterns posted during the course of the month and post a photo to the Sewhooked flickr group tagged “halloween.”
At the end of the month, I’ll draw a winner to receive a free copy of Quiltmaker’s Quilts from 100 Blocks, which includes my pattern Corn Maze! Heck, I’ll even sign it, if you like! 😉
Do you design paper pieced, embroidery, applique or other quilt patterns? Love John Green books? Join us for the #tfios Design Challenge, happening now on Fandom In Stitches!
Two weeks ago, I told you about Lily, the kitten my sister and her husband adopted after finding her abandoned near my parents’ home out in the country.
This is her story, and our thank you.
We now have all the money we need to pay for Lily’s medical expenses. We might even have a little left over to donate to our local Humane Society.
Here’s a little something I made for Lily. I was lucky enough to act as her post-surgery kitten sitter this week while my sister and brother-in-law were at work. She was a joy to be with every day and I will miss my mid-day kitten break!
Have you ever had one of those days where you just really, really needed to get things done? Not a “I have to get this done” day, but a “oh, no, I’m running out of time, I HAVE to get this done!” day?
I had one of those yesterday.
You see, The Linus Connection meets on Saturday, and until yesterday, I did not have one quilt completely finished.
Enter the next five quilts.
I free-motion quilted the two Stars For Linus quilts as well as the blendy floral quilt that I’ve dubbed “Oh no, not *that* quilt.”
I bound those three quilts as well as the other two shown below.
Today? I can barely raise my arms after all that free-motion quilting. Who says quilting isn’t exercise?
Stars For Linus Quilt #1
Stars For Linus Quilt #2
A close-up of my free-motion. I fought with my machine all day yesterday, changing needles, thread and changing my bobbin to get this done. I’m still not great at free-motion, but if I can find the right mix to make my sewing machine (and by default, me!) enjoy it, I think I could get better.
The label I put on each of the Stars For Linus quilts. After all, it was a group effort!
for best results when printing, set scaling to “none”
Remember, I’m also accepting Wonky Stars…if you’d rather! Please makes sure they are also 12″.
Oh no, not that quilt! I still can’t decide if I like this one or not… Experimentation with fabric samples and the 10 Minute Block.
Zeppelin Threads orphan block quilt. The two house blocks were donated by Cat and Pren. I pieced the rest and did the straight line quilting a couple of weeks ago.
I love how the quilting worked out on this, though you can’t quite see all of it. There’s a lot of stitching in the ditch. I tend to do a lot more straight line quilting because my sewing machine behaves better when I do.
Quilt top donated by JoAnn M. Quilted by my friend Marge, bound by me…yesterday. This was the last quilt I worked on last night before giving up for the day.
Close up of Marge’s quilting, done on a Handi-Quilter.
Today, I am giving myself the morning off to spend with my bee. I’ve worked extra hard every day this week and am in need of a respite!
Add your Sewhooked-related photos to my flickr group and you might be featured in a future post!